SINFONIA TECHNOLOGY DP-1045-5 Digital Photo Printer User Manual User s Manual
SINFONIA TECHNOLOGY CO., LTD. Digital Photo Printer User s Manual
UserManual.wiki
>
SINFONIA TECHNOLOGY
>
DP 1045 5 User Manual
User's Manual
Navigation menu
Upload a User Manual
Namespaces
Wiki Guide
HTML
PDF
Info
Views
User Manual
Discussion / Help
Navigation


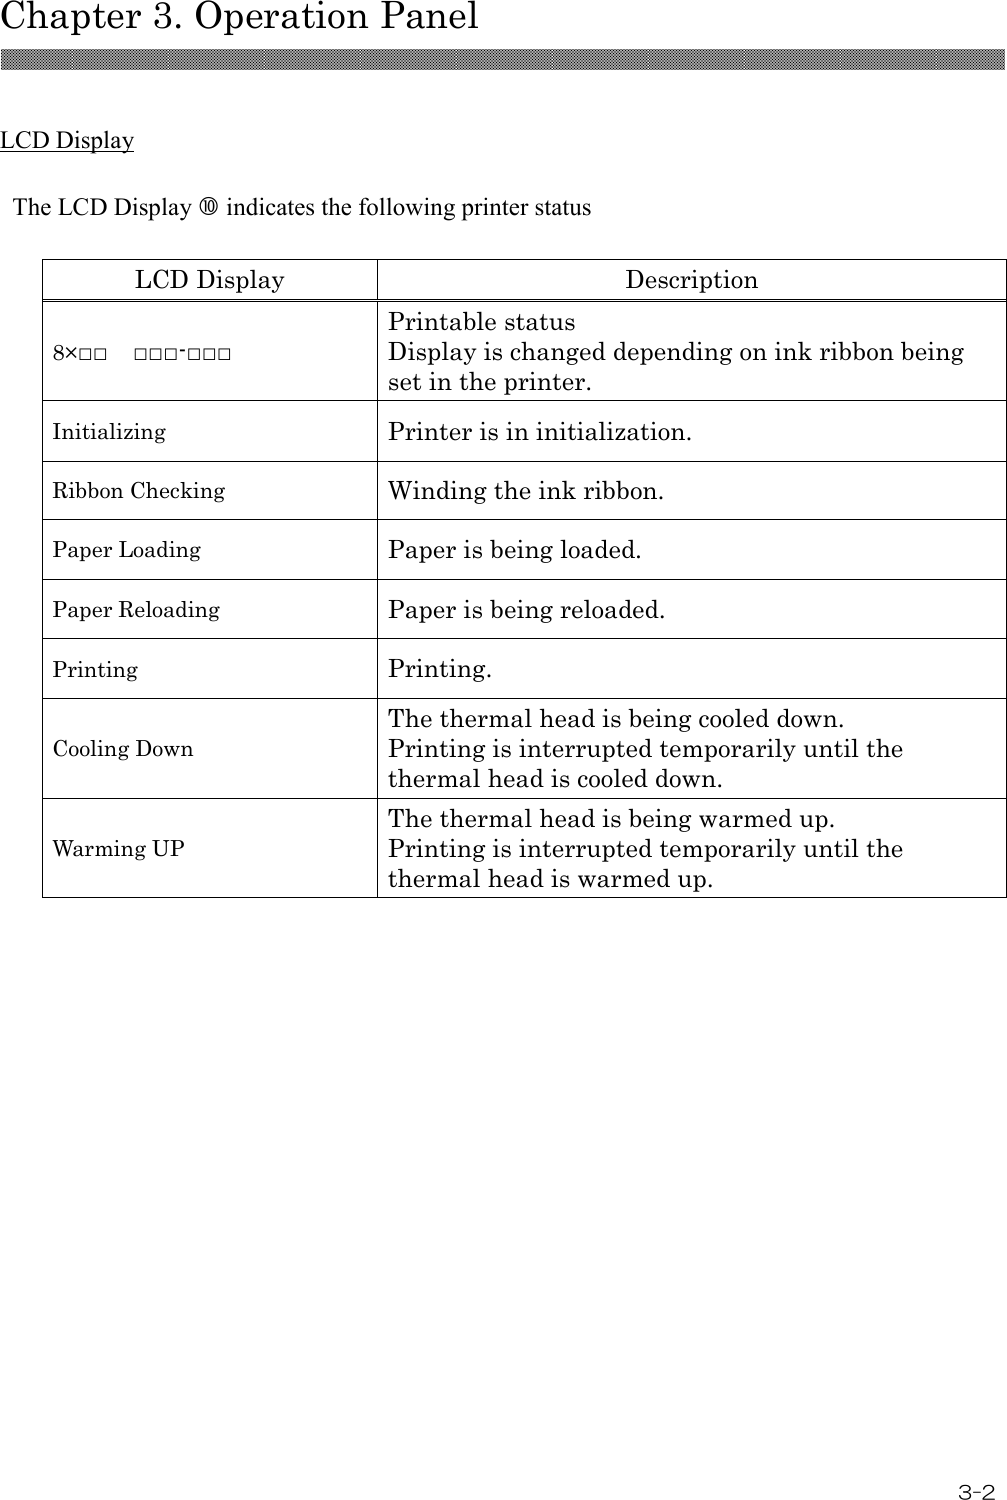
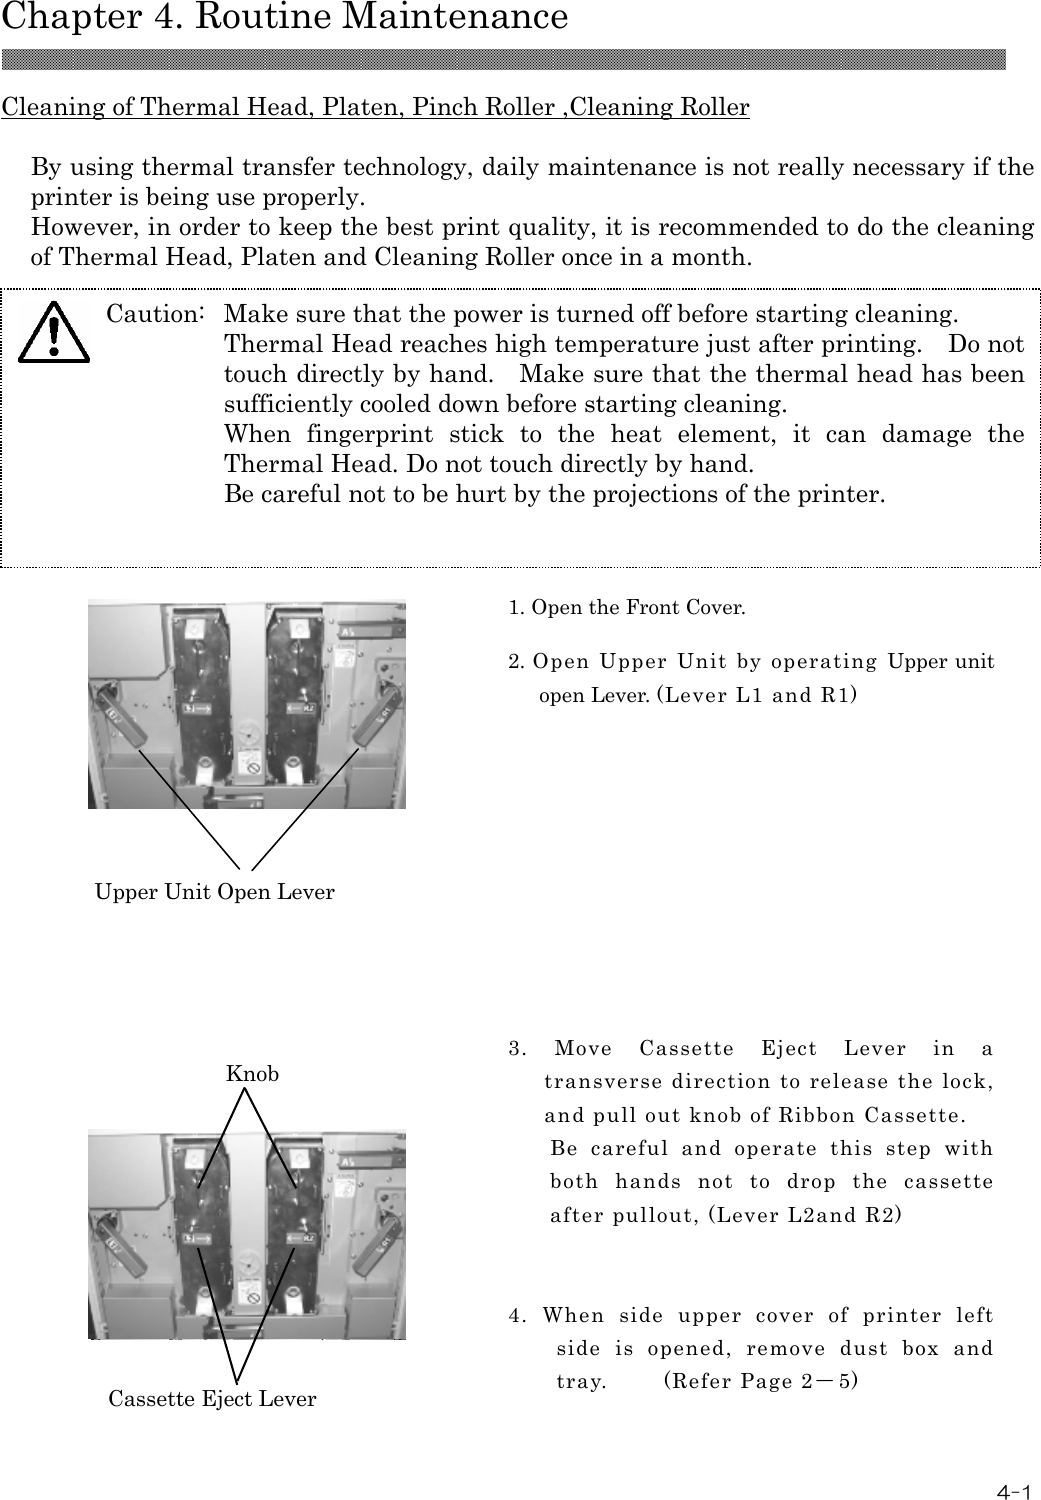
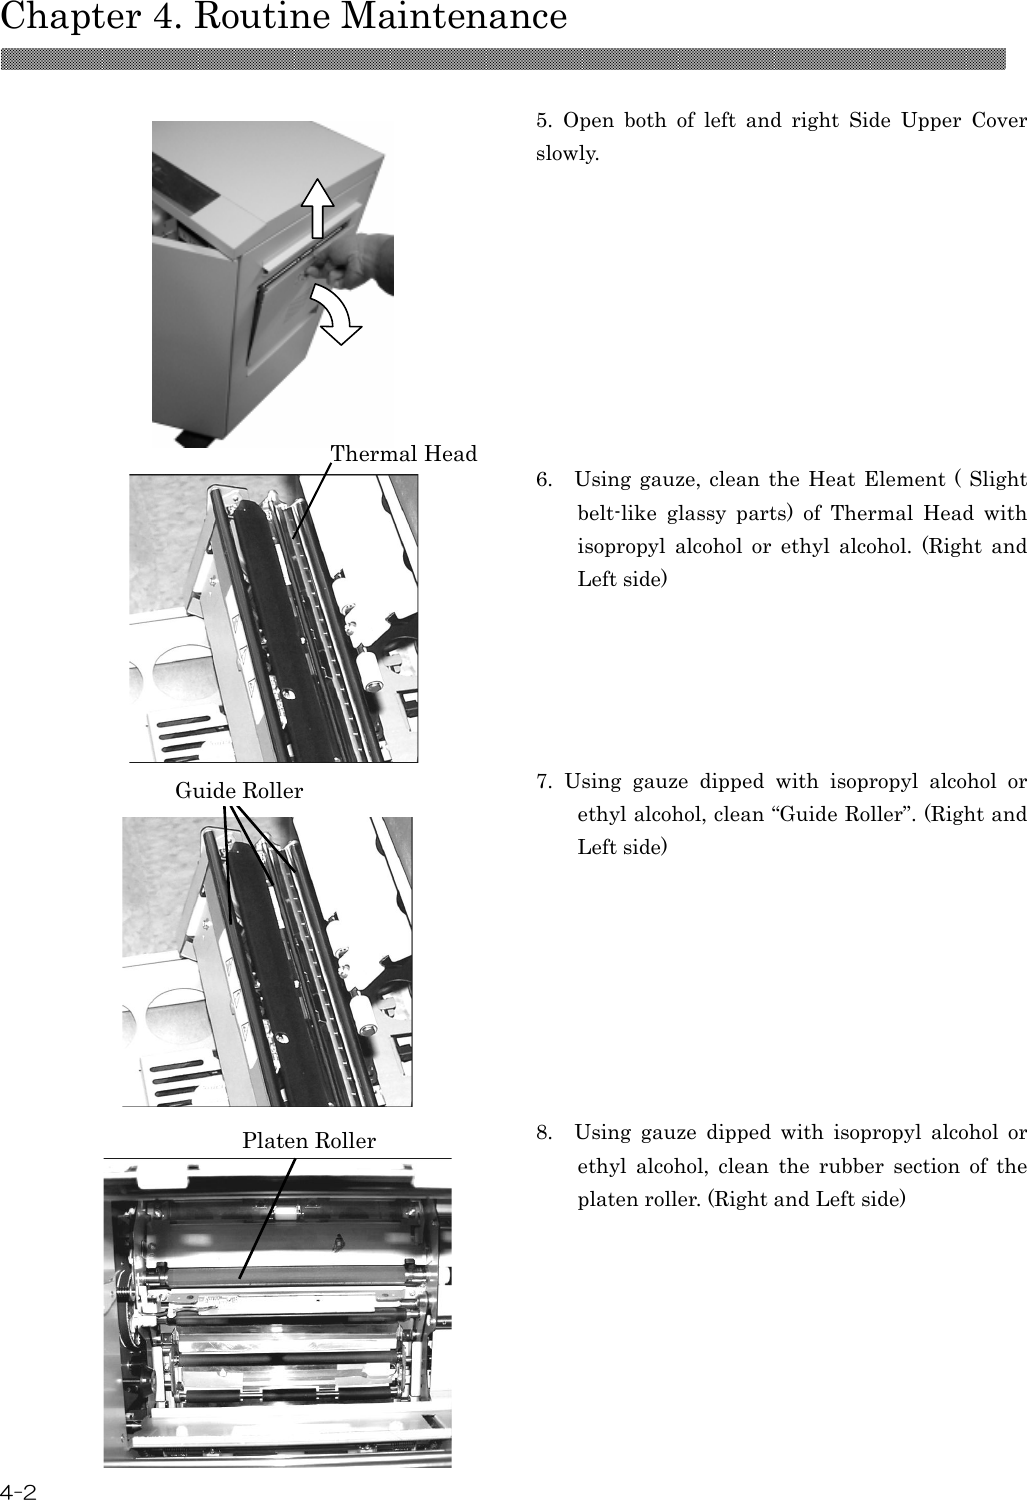
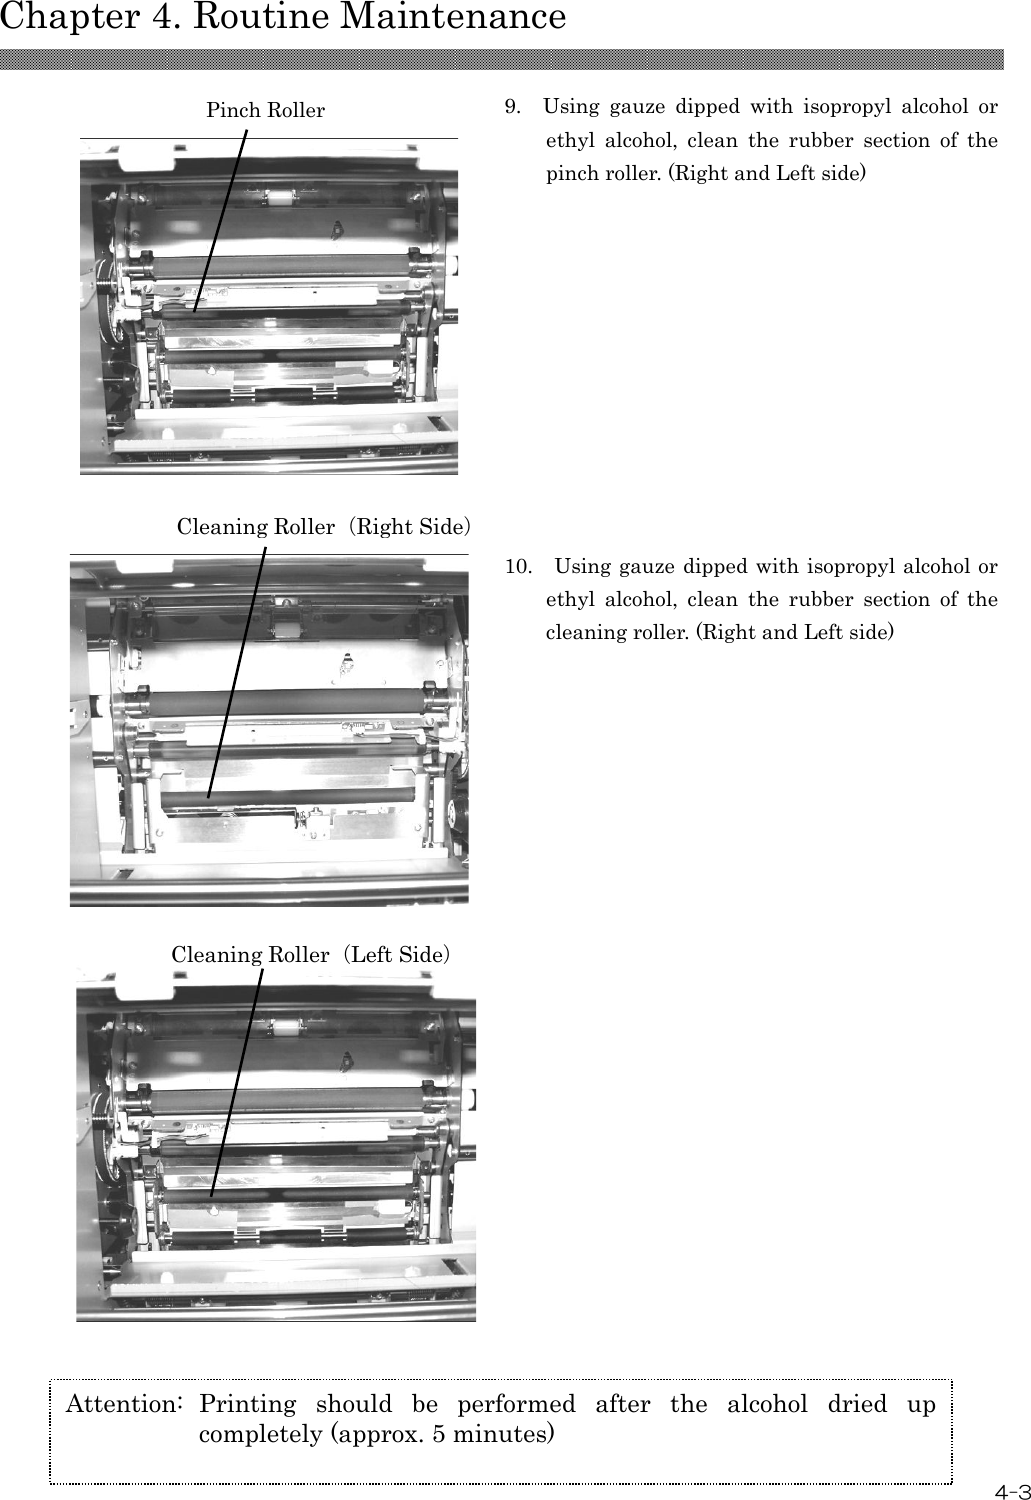
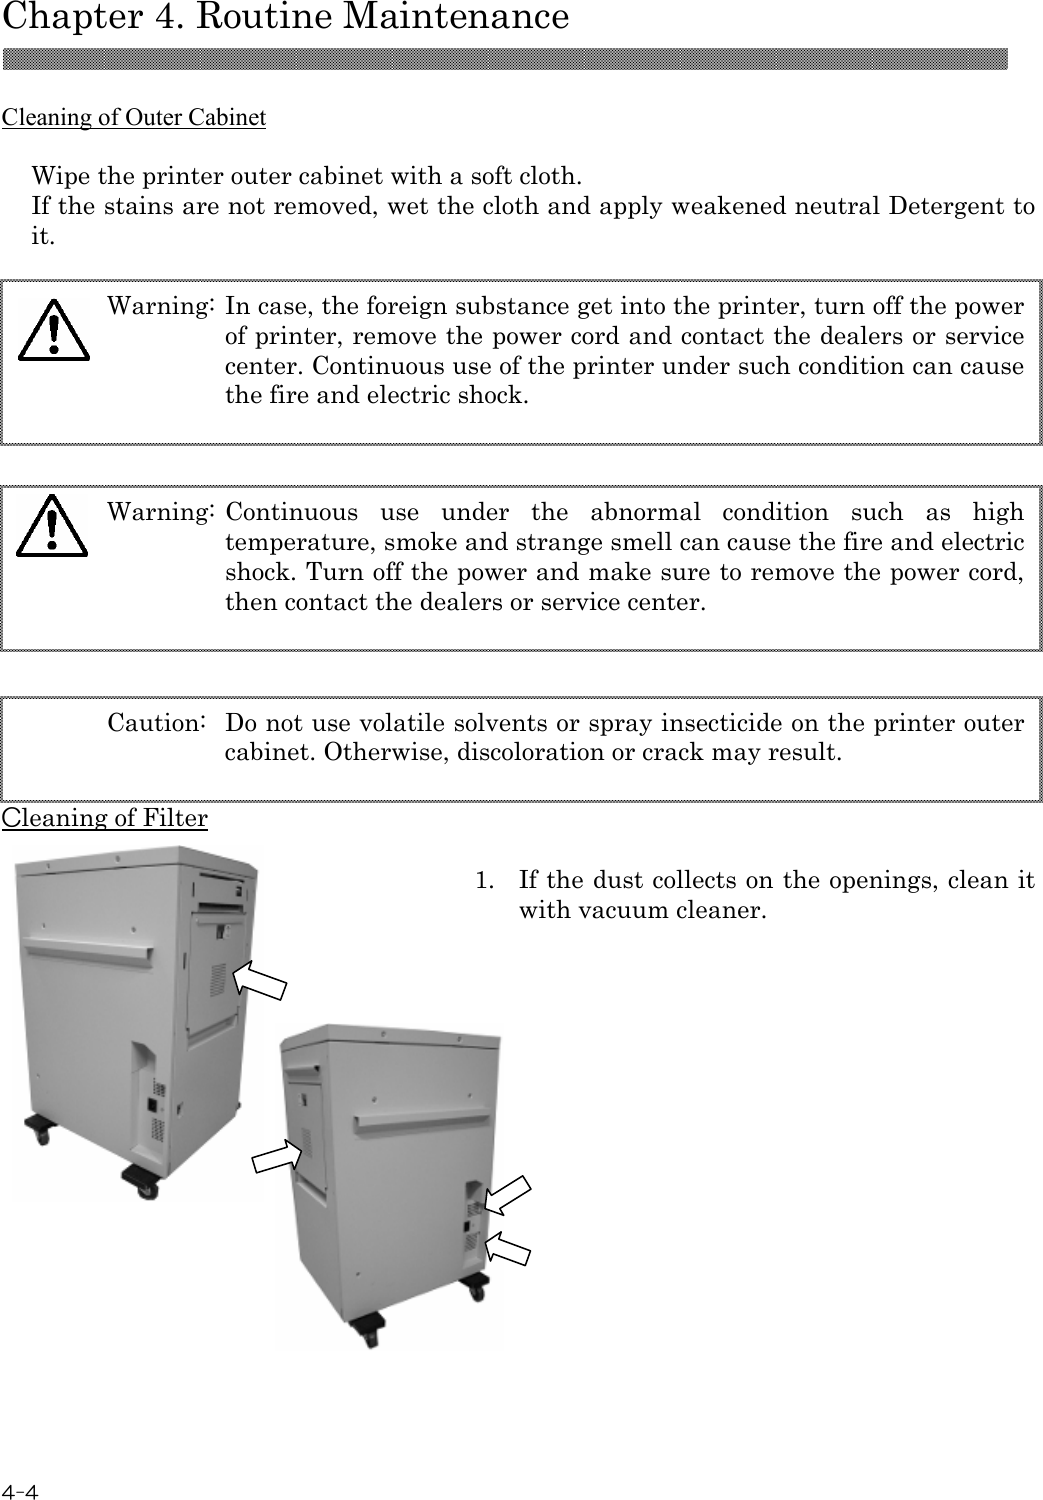
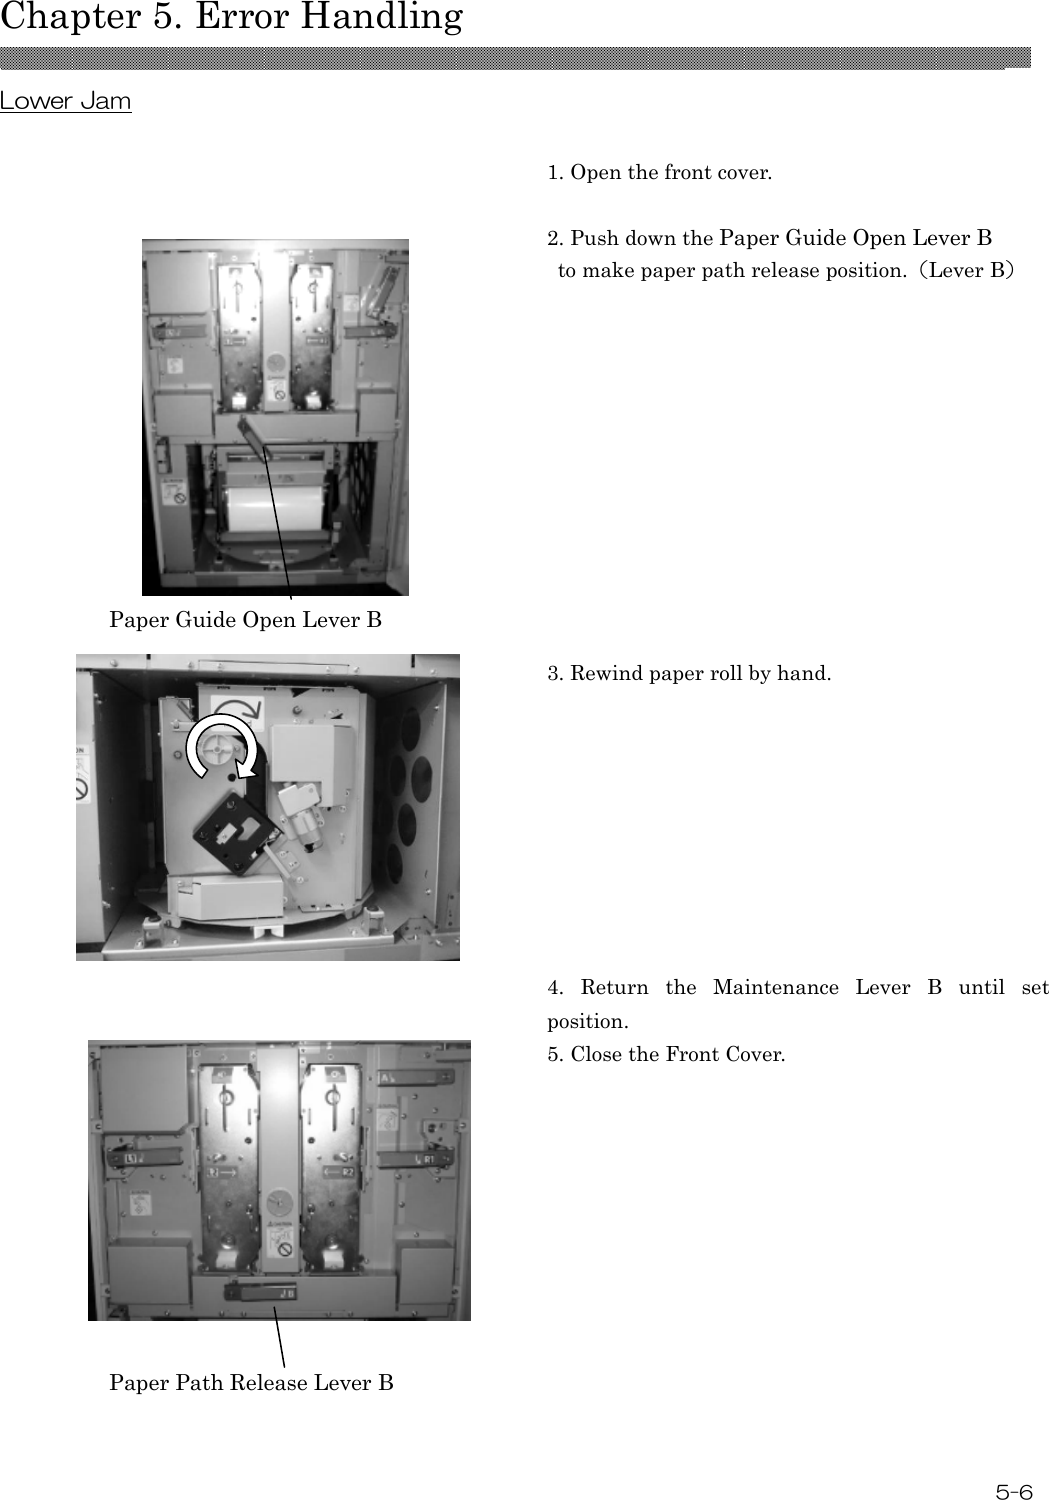
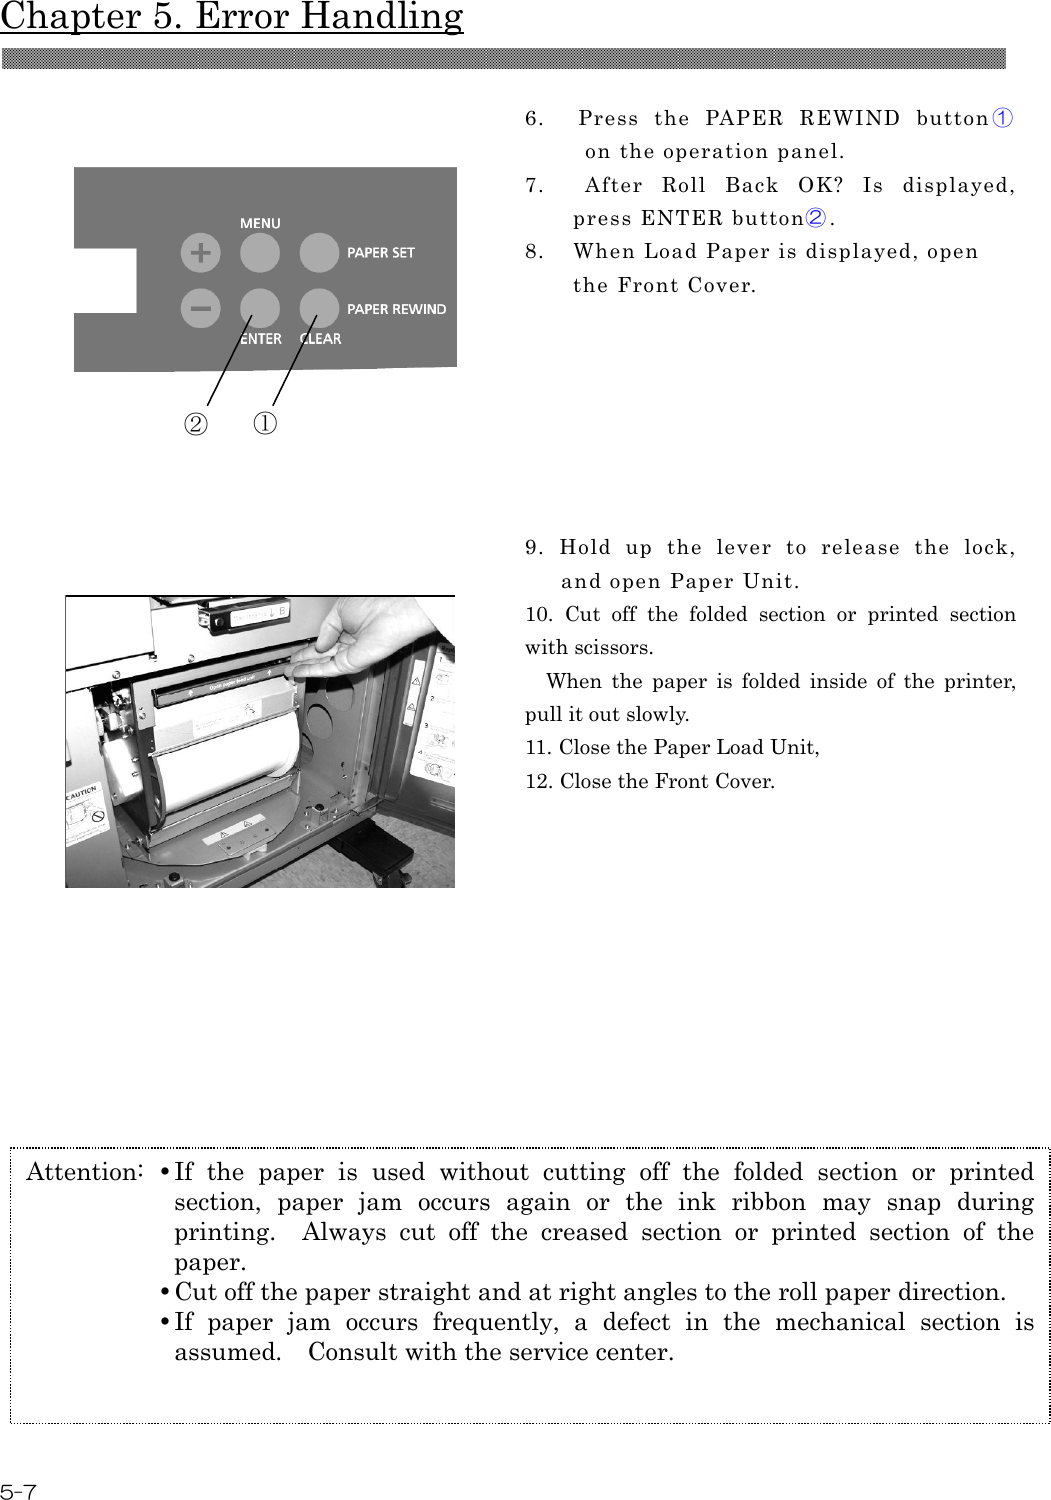
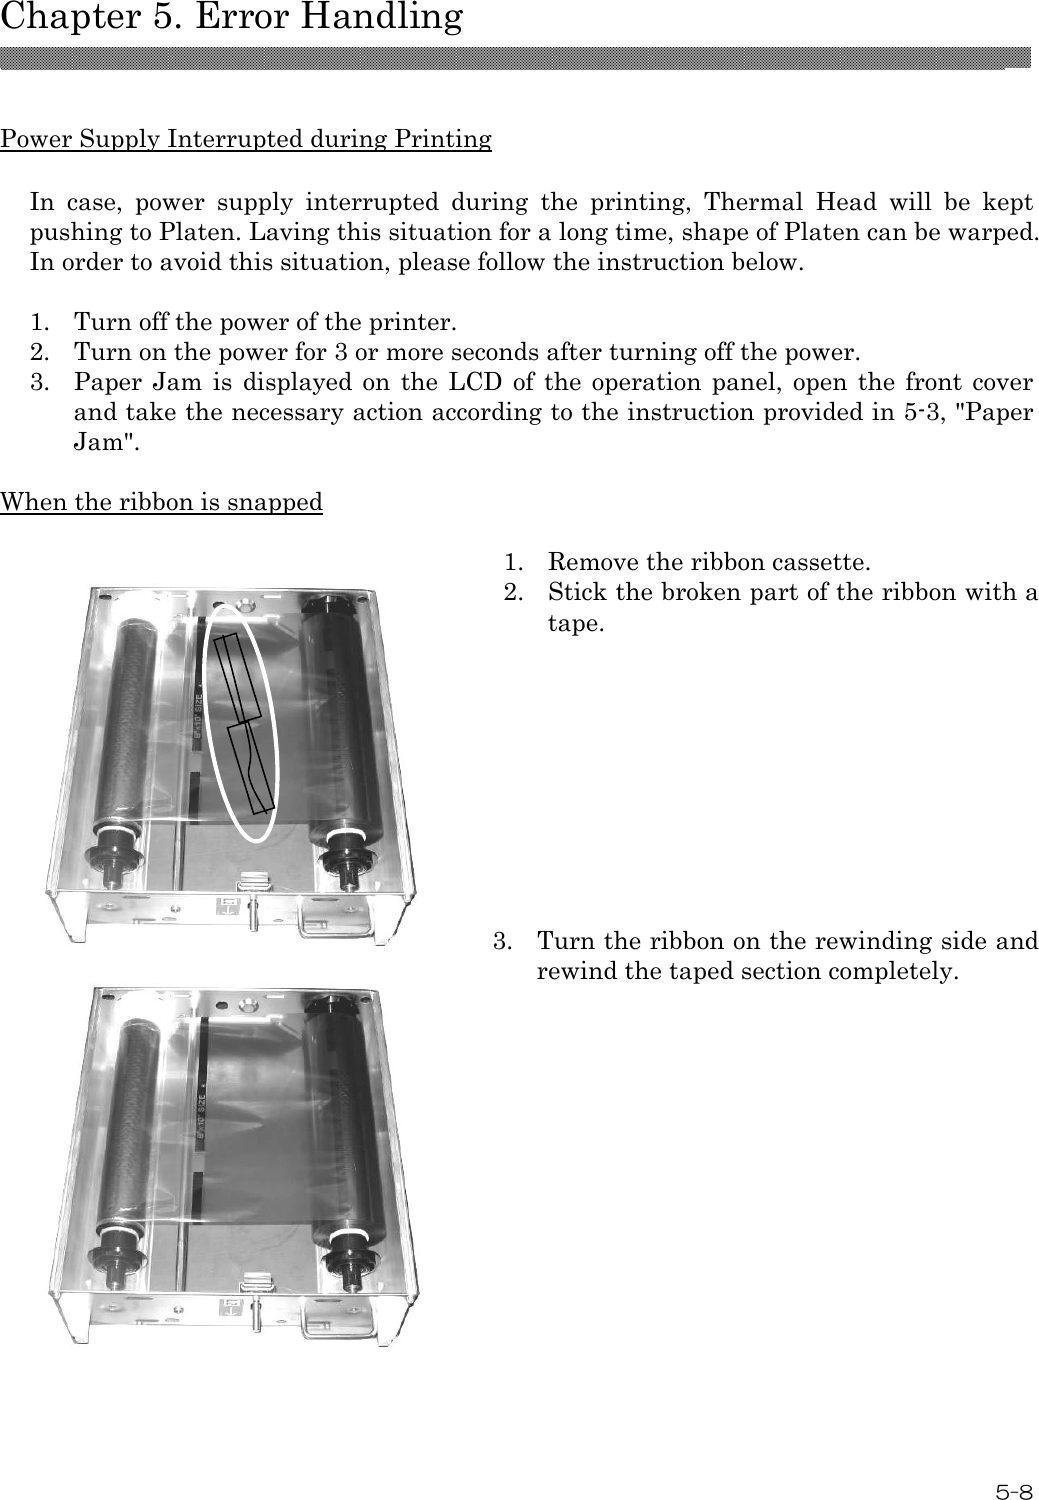
![Chapter 3. Operation Panel 3- 3 MENU MENU MENU MENU MENU MENU User Set Up Mode To set the User Set Up Mode, press the Menu button in standby mode. When the MENU button is pressed again, the display changes as follows. To change to the standby mode from each menu, press the CLEAR button. "XXX" indicates the number of copies that can be printed and "YYY" indicates the number of copies that can be printed by one ink ribbon. Displays "0/0" when the front cover is opened or a ribbon is not set. Test print can be performed. To execute test print, press the ENTER button. Displays the total number of copies printed since the factory shipment. Displays the version number of the MAN firmware. Displays the version number of the DSP firmware. Displays the version number of the print parameter table. The remaining amount of left side of ribbon is displayed. The remaining amount of right side of ribbon is displayed. Printed □□□□□□ Remain XXX/YYY MENU Test Print Mode MENU 8×□□ □□□-□□□ MENU Donor(L) □□□[%] MAIN Firm. =□□□□ MENU DSP Firm. =□□□□ TABLE =□□□□ Donor(L) □□□[%] TABLE =□□□□ PAPER SET PAPER SET PAPER SET PAPER SET PAPER SET PAPER SET PAPER SET PAPER SET PAPER SET](https://usermanual.wiki/SINFONIA-TECHNOLOGY/DP-1045-5/User-Guide-1520718-Page-26.png)