SIRIUS Conductor Installation And User Guide Manual
Sirius-Conductor-Installation-And-User-Guide Sirius-Conductor-Installation-and-User-Guide
2016-03-11
User Manual: SIRIUS Sirius-Conductor-Installation-And-User-Guide
Open the PDF directly: View PDF ![]() .
.
Page Count: 78

Installation & User Guide
Sirius Conductor
Satellite Radio Tuner and Wireless Controller

Congratulations on your purchase of the SIRIUS Conductor
Satellite Radio Tuner!
SIRIUS Satellite Radio: The Best Radio On Radio
With everything from 100% commercial-free music to in-depth sports coverage, plus news,
talk and the hottest entertainment – you can always hear exactly what you want.
The only home of 100% commercial-free music. Whether you’re discovering new music, or
rediscovering songs you haven’t heard in years – you’ll hear it all on SIRIUS.
Live play-by-play and expert talk from the biggest leagues. NFL, every game, every week,
everywhere. Plus NFL Radio 24/7 news and opinions from top NFL pros, 40 games a
week from NBA and College Sports from over 150 schools. Plus NASCAR moving exclu-
sively to SIRIUS in January 2007.
Entertainment, Comedy and Talk that can’t be found anywhere else. From 2 channels of
Howard Stern, Blue Collar Comedy with Jeff Foxworthy and Larry the Cable Guy to Maxim
and Playboy Radio.
Especially for Women. Martha Stewart and her team will inspire you 24/7 along with
Cosmo Radio, Deepak Chopra Wellness Radio, and other exclusive talk show hosts.
World Class News, traffic and weather. Fox, CNN, NPR and BBC. Local traffic and
weather for the top 20 cities.
Family & Kids: G-rated fun for everyone with Radio Disney, Discovery Kids Channel, Laugh
Comedy and more.
•
•
•
•
•
•

[ Table of Contents ]
2
Table of Contents
WARNING AND SAFETY INFORMATION . . . . . . . . . . . . . . . . . . . . . . 4
FCC Warning . . . . . . . . . . . . . . . . . . . . . . . . . . . . . . . . . . 4
Remote Control Certifications . . . . . . . . . . . . . . . . . . . . . . . . . . . . 4
Compliance with IC Rules and Regulations . . . . . . . . . . . . . . . . . . . . . . . 5
General Precautions . . . . . . . . . . . . . . . . . . . . . . . . . . . . . . . . 6
PACKAGE CONTENTS . . . . . . . . . . . . . . . . . . . . . . . . . . . . . . 8
CONTROLS . . . . . . . . . . . . . . . . . . . . . . . . . . . . . . . . . . 9
Sirius Conductor Tuner Buttons and Connectors . . . . . . . . . . . . . . . . . . . . 9
Wireless Controller Buttons . . . . . . . . . . . . . . . . . . . . . . . . . . . . . 11
INSTALLATION . . . . . . . . . . . . . . . . . . . . . . . . . . . . . . . . 16
Mounting the Sirius Conductor Tuner . . . . . . . . . . . . . . . . . . . . . . . . . 16
Installing the Indoor/Outdoor Antenna . . . . . . . . . . . . . . . . . . . . . . . . . 16
Connecting the Sirius Conductor Tuner . . . . . . . . . . . . . . . . . . . . . . . . 19
Pairing Your Wireless Controller With Your Sirius Conductor Tuner . . . . . . . . . . . . . 20
Activating Your SIRIUS Subscription . . . . . . . . . . . . . . . . . . . . . . . . . 21
QUICK START . . . . . . . . . . . . . . . . . . . . . . . . . . . . . . . . 22
Adding a Device to the Wireless Controller by Manufacturer Code . . . . . . . . . . . . . 22
Adding a Device to the Wireless Controller by Searching for the Manufacturer Code . . . . . . 23
Controlling Your Receiver’s Volume and Setting Its Audio Source Using the Wireless Controller . 23
Using the SIRIUS Key and the POWER Key to Turn Your Devices On or Off . . . . . . 25
SIRIUS CONDUCTOR TUNER OPERATION . . . . . . . . . . . . . . . . . . . . 26
Display Modes . . . . . . . . . . . . . . . . . . . . . . . . . . . . . . . . . . 26
Presets . . . . . . . . . . . . . . . . . . . . . . . . . . . . . . . . . . . . . 28
Multi-Radio Control . . . . . . . . . . . . . . . . . . . . . . . . . . . . . . . . 29
Menu Options . . . . . . . . . . . . . . . . . . . . . . . . . . . . . . . . . . 30
Special Display Messages . . . . . . . . . . . . . . . . . . . . . . . . . . . . . 33
WIRELESS CONTROLLER OPERATION . . . . . . . . . . . . . . . . . . . . . 34
Setting Up Your Wireless Controller . . . . . . . . . . . . . . . . . . . . . . . . . 34
Adding and Deleting Nodes, Network Reset . . . . . . . . . . . . . . . . . . . . . . 34
Adding, Deleting, and Replacing Devices . . . . . . . . . . . . . . . . . . . . . . . 36
Viewing and Changing a Device Code . . . . . . . . . . . . . . . . . . . . . . . . . 39
Choosing an Audio Source . . . . . . . . . . . . . . . . . . . . . . . . . . . . . 40
Learn Feature . . . . . . . . . . . . . . . . . . . . . . . . . . . . . . . . . . . 41
Lock Volume Feature . . . . . . . . . . . . . . . . . . . . . . . . . . . . . . . . 44
[ Table of Contents ] 3
Key Mover Feature . . . . . . . . . . . . . . . . . . . . . . . . . . . . . . . . . 46
Key Macros Feature . . . . . . . . . . . . . . . . . . . . . . . . . . . . . . . . 47
Adjusting the Contrast of the LCD Display . . . . . . . . . . . . . . . . . . . . . . . 49
LCD Timer Feature . . . . . . . . . . . . . . . . . . . . . . . . . . . . . . . . 49
About Feature . . . . . . . . . . . . . . . . . . . . . . . . . . . . . . . . . . 50
Reset Remote Feature . . . . . . . . . . . . . . . . . . . . . . . . . . . . . . . 50
Remote Copy Feature . . . . . . . . . . . . . . . . . . . . . . . . . . . . . . . 51
MANUFACTURER’S CODES . . . . . . . . . . . . . . . . . . . . . . . . . . 53
Setup Codes For Audio Amplifiers . . . . . . . . . . . . . . . . . . . . . . . . . . 53
Setup Codes For Audio Receivers . . . . . . . . . . . . . . . . . . . . . . . . . . 53
Setup Codes For Audio Accessories . . . . . . . . . . . . . . . . . . . . . . . . . 54
Setup Codes For Cable Set Top Box . . . . . . . . . . . . . . . . . . . . . . . . . 55
Setup Codes For CD Players . . . . . . . . . . . . . . . . . . . . . . . . . . . . 55
Setup Codes For Cassette Decks . . . . . . . . . . . . . . . . . . . . . . . . . . 56
Setup Codes For DBS/PVR Combination . . . . . . . . . . . . . . . . . . . . . . . 56
Setup Codes For DVD Players . . . . . . . . . . . . . . . . . . . . . . . . . . . . 57
Setup Codes For DVD/PVR Combination . . . . . . . . . . . . . . . . . . . . . . . 58
Setup Codes For DVD/VCR Combination . . . . . . . . . . . . . . . . . . . . . . . 58
Setup Codes For DVD Recorders . . . . . . . . . . . . . . . . . . . . . . . . . . 59
Setup Codes For HDTV Decoders . . . . . . . . . . . . . . . . . . . . . . . . . . 59
Setup Codes For Home Automation. . . . . . . . . . . . . . . . . . . . . . . . . . 59
Setup Codes For Video Laser Disk Players . . . . . . . . . . . . . . . . . . . . . . . 59
Setup Codes For Media Center Controllers . . . . . . . . . . . . . . . . . . . . . . . 60
Setup Codes For PVRs . . . . . . . . . . . . . . . . . . . . . . . . . . . . . . . 60
Setup Codes For Televisions . . . . . . . . . . . . . . . . . . . . . . . . . . . . 61
Setup Codes For Televisions (DLP) . . . . . . . . . . . . . . . . . . . . . . . . . . 64
Setup Codes For Televisions (LCD) . . . . . . . . . . . . . . . . . . . . . . . . . . 64
Setup Codes For Televisions (Plasma) . . . . . . . . . . . . . . . . . . . . . . . . . 64
Setup Codes For TV/DVD Combination . . . . . . . . . . . . . . . . . . . . . . . . 65
Setup Codes For TV/VCR Combination . . . . . . . . . . . . . . . . . . . . . . . . 65
Setup Codes For TV/VCR/DVD Combination . . . . . . . . . . . . . . . . . . . . . . 66
Setup Codes For Satellite Set Top Boxes . . . . . . . . . . . . . . . . . . . . . . . 66
Setup Codes For VCRs . . . . . . . . . . . . . . . . . . . . . . . . . . . . . . 67
Setup Codes For Video Accessories . . . . . . . . . . . . . . . . . . . . . . . . . 69
TROUBLESHOOTING . . . . . . . . . . . . . . . . . . . . . . . . . . . . . 70
SPECIFICATIONS. . . . . . . . . . . . . . . . . . . . . . . . . . . . . . . 72
COPYRIGHTS & TRADEMARKS . . . . . . . . . . . . . . . . . . . . . . . . 73
SIRIUS ID . . . . . . . . . . . . . . . . . . . . . . . . . . . . . . . . . . 74
[ Warning and Safety Information ]
4
Warning and Safety Information
FCC Warning
This equipment may generate or use radio frequency energy. Changes or modifications to this
equipment may cause harmful interference unless the modifications are expressly approved in
this User Guide. The user could lose the authority to operate this equipment if an unauthor-
ized change or modification is made.
Note: This equipment has been tested and found to comply with Part 15 of the FCC Rules.
These rules are designed to provide reasonable protection against harmful interference. This
equipment may cause harmful interference to radio communications if it is not installed and
used in accordance with these instructions. However, there is no guarantee that interference
will not occur in a particular installation. If this equipment does cause harmful interference to
radio or television reception, which can be determined by turning the equipment off and on,
try to correct the interference by one of more of the following measures:
Relocate the receiving antenna.
Consult the dealer or an experienced technician for help.
Remote Control Certifications
FCC ID:MG310000
This equipment has been tested and found to comply with the limits for a class B digital
device, pursuant to part 15 of the FCC Rules. These limits are designed to provide a reason-
able protection against harmful interference in a residential installation. This equipment
generates, uses, and can radiated radio frequency energy and if not installed and used in
accordance with the instructions, may cause harmful interference to radio communications.
However, there is no guarantee that interference will not occur in a particular installation. If
this equipment does cause harmful interference to radio or television reception, which can be
determined by turning the equipment off and on, the user is encouraged to try to correct the
•
•
[ Warning and Safety Information ] 5
interference by one or more of the following measures:
Reorient or relocate the receiving antenna.
Increase the separation between the equipment and receiver.
Connect the equipment into an outlet or a circuit different from that to which the receiver
is connected.
Consult the dealer or an experienced radio/TV technician for help.
Compliance with IC Rules and Regulations
IC: 2575A-URC10000
Model: URC-10000
Universal Electronics Inc.
This equipment has been tested and found to comply with the limits for a class B digital
device, pursuant to part 15 of the FCC Rules. These limits are designed to provide reasonable
protection against harmful interference in a residential installation. This equipment generates,
uses and radiates radio frequency energy and if not installed and used in accordance with
the instructions, may cause harmful interference to radio communications. However, there
is no guarantee that interference will not occur in a particular installation. If this equipment
does cause harmful interference to radio or television reception, which can be determined by
turning the equipment off and on, the user is encouraged to try and correct the interference by
one or more of the following measures:
Reorient or relocate the receiver antenna.
Increase the separation between the equipment and the receiver.
Connect the equipment into an outlet that is different from that to which the receiver is
connected.
Consult the dealer or an experienced radio/television technician for help.
The user is cautioned that changes and modifications made to the equipment without the ap-
proval of the manufacturer could void the user’s authority to operate his equipment.
•
•
•
•
•
•
•
•
[ Warning and Safety Information ]
6
General Precautions
SIRIUS disclaims all liability for hearing loss, bodily injury, or property damage as a result of
the use or misuse of this product.
General Safety Warnings
Be sure to observe the following warnings. Failure to follow these safety instructions and
warnings may result in a serious injury or death.
Do not open, disassemble, or alter the units in any way. Doing so may result in fire, electric
shock or product damage.
Do not insert any objects into the units. Doing so may result in fire, electric shock or
product damage.
Make the correct connections. Failure to make proper connections may result in fire or
product damage.
Do not splice into electrical cables. Never cut away cable insulation to supply power to
other equipment. Doing so will exceed the current carrying capacity of the wire and result
in fire or electric shock.
Do not install the units in areas where there are high levels of humidity, moisture, or dust.
Doing so can result in electric shock or product failure.
Do not drop the unit or subject it to strong shocks.
If the unit doesn’t seem to be working properly, turn the unit off, wait 10 seconds, and
then turn it on again.
General Safety Cautions
Be sure to observe the following cautions. Failure to follow these safety cautions may result in
injury or material property damage.
Halt use immediately if a problem appears. Failure to do so may cause personal injury
or damage to the product. Return the tuner to your authorized retailer or nearest service
center for repairing.
Install the wiring so that it is not crimped or pinched by screws or sharp metal edges.
Route the cables away from moving parts or sharp pointed edges. This will prevent crimp-
ing and damage to the wiring. If the wiring must pass through a metal hole, be sure to use
•
•
•
•
•
•
•
•
•
[ Warning and Safety Information ] 7
a rubber grommet to prevent the wire’s insulation from being cut by the metal edge of the
hole.
Use the specified accessory parts and install the product securely. Be sure to use only the
specified accessory parts. Use of non-specified parts may damage this unit internally or
may not securely install the unit in place. This may cause parts to become loose, resulting
in hazards or product failure.
Cleaning and Maintenance
If the tuner or wireless controller becomes dirty, turn the power off and wipe it clean with a
soft clean cloth. Do not use hard cloths, paint thinner, alcohol, or other volatile solvents to
clean. These may cause damage to the unit.
•

[ Package Contents ]
8
Package Contents
The following items are included with your purchase of the Sirius Conductor:
5V DCANT
RESET
SECOND
TUNER
Sirius Conductor TunerSirius Conductor Tuner AC Power Adapter AC Power Adapter Indoor/Outdoor AntennaIndoor/Outdoor Antenna
RCA Audio CableRCA Audio Cable
Wireless ControllerWireless Controller IR Blaster CableIR Blaster Cable
[ Controls ] 9
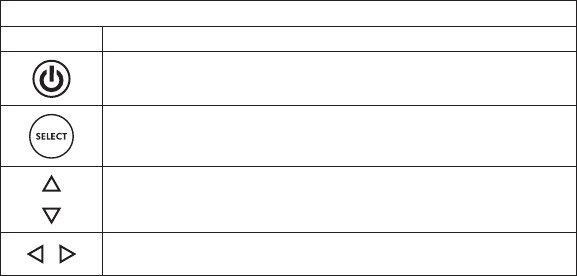
Controls
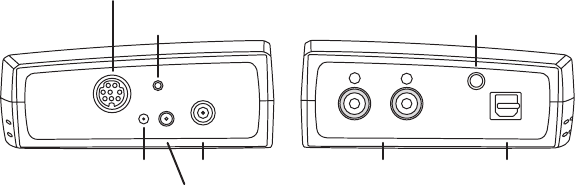
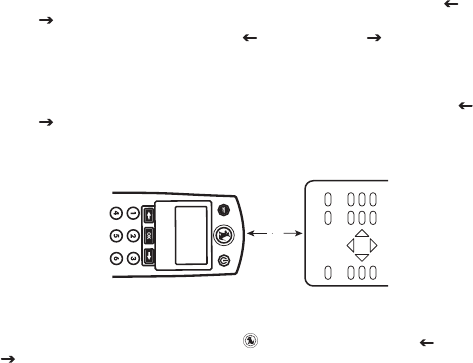
Sirius Conductor Tuner Buttons and Connectors
Figure 1 and the table following identify and describe the buttons and connectors of the Sirius
Conductor Tuner.
RESET
5V DC ANT
SECOND
TUNER AUDIO OUT
LR
OPTICAL
IR CONNECT
DIN CONNECTOR
RESET
BUTTON IR CONNECT
5V DC
ANTPOWER
LED
L/R AUDIO OUT
RCA-TYPE
CONNECTION
AUDIO OUT
OPTICAL
CONNECTION
Figure 1Figure 1

[ Controls ]
10
The following table describes the functions of the buttons and connectors on the Sirius Conductor
Tuner.
Sirius Conductor Tuner Button and Connector Descriptions
Button/
Connector Description
DIN
CONNECTOR Connection for a second SIRIUS radio
RESET Resets the Sirius Conductor Tuner
POWER LED
When the tuner is powered on, this light is red to indicate the tuner is
receiving power
When off, the tuner is standby mode or is not receiving power
5V DC Connection for the AC Power Adapter
ANT Connection for the Indoor/Outdoor Antenna
IR CONNECT Connection for the IR Blaster cable
RCA-TYPE
L/R AUDIO
OUT
L/R RCA-Type (analog) audio out connectors for connecting to audio
receiver
OPTICAL
AUDIO OUT
Optical (digital) audio out connector for connecting to audio receiver
(cable must be purchased separately)
[ Controls ] 11
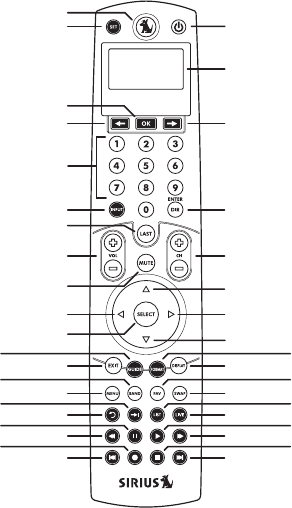
Wireless Controller Buttons
Figure 2 and the table following identify and describe the buttons of the wireless controller.
SET
SCROLL LEFT
INPUT
VOLUME UP/DOWN
EXIT
MENU
SKIP BACK
REWIND
PREVIOUS
CURSOR LEFT/CATEGORY PREVIOUS
NUMERIC KEYS
SIRIUS
OK
SELECT
MUTE
GUIDE
BAND
QUICK SKIP
PAUSE
RECORD
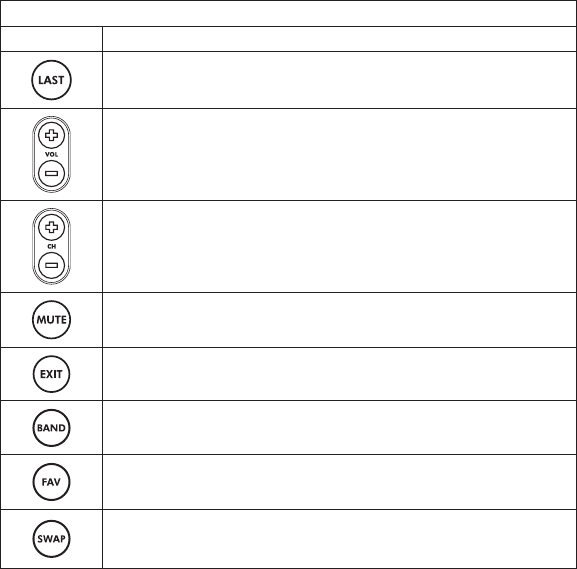
LAST
POWER
LCD DISPLAY SCREEN
SCROLL RIGHT
ENTER/DIR
CHANNEL UP/DOWN
DISPLAY
SWAP
LIVE
FAST FWD
NEXT
CURSOR RIGHT/CATEGORY PREVIOUS
CURSOR UP/CHANNEL PREVIOUS
CURSOR DOWN/CHANNEL NEXT
FORMAT
FAV
LIST
PLAY
STOP
Figure 2Figure 2

[ Controls ]
12
The following table describes the functions of the buttons on the wireless controller.
Wireless Controller Button Descriptions
Button Description
Press and hold SET to enter the wireless controller’s setup menus.
Pressing SIRIUS enters the SIRIUS mode and transmits an ON com-
mand to your SIRIUS Conductor Tuner.
Use Scroll Left ( ) or Scroll Right ( ) through the devices in your wire-
less controller’s LCD menu. When you press Scroll Left ( ) or Scroll
Right ( ) in the SIRIUS mode, the wireless controller exits the SIRIUS
mode and returns to the last active device mode.
Use OK to select menu options displayed on the LCD. When you press
OK in the SIRIUS mode, the wireless controller exits the SIRIUS mode and
returns to the last active device mode.
Use the keypad numbers (0–9) to directly tune SIRIUS channels, tune to
presets, and enter manufacturer’s codes.
Use INPUT to select alternate audio inputs on your audio device.
Use DIR to directly select a channel number using the number keys when
in the SIRIUS mode.
[ Controls ] 13
SIRIUS Wireless Controller Button Descriptions Continued
Button Action
Use LAST to recall the last channel when in the SIRIUS mode.
Use Vol+ and Vol– to increase or decrease the audio device’s volume
when in the SIRIUS mode.
Use CH+ or CH– to tune the next or previous channel when in the SIRIUS
mode.
Press MUTE once to turn your audio receiver’s sound off or on.
Use EXIT to exit the SIRIUS mode and return to the device control display.
Use BAND to change the preset band on your Sirius Conductor Tuner
when in the SIRIUS mode.
Use FAV to access your Favorite Channels list. In the SIRIUS mode, use
FAV to browse through your preset channels.
Use SWAP to swap the active SIRIUS radio displayed on the LCD display.
This key is only valid when two SIRIUS radios are paired with the wireless
controller.
[ Controls ]
14
SIRIUS Wireless Controller Button Descriptions Continued
Button Action
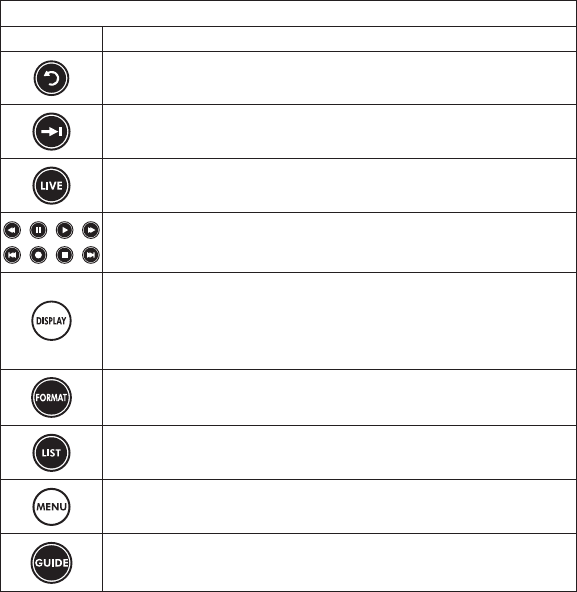
Use SKIP BACK to command your PVR to instantly replay the last 7 sec-
onds of a program you are watching.
Use QUICK SKIP to command your PVR to SKIP FORWARD in the pro-
gram you are watching.
Use LIVE to return to watching live TV if you are using a PVR or other
similar device.
Use REWIND, PAUSE, PLAY, FAST-FORWARD, PREVIOUS, RECORD,
STOP, and NEXT to control a VCR, DVD player, or a PVR (after selecting
the desired device).
Press DISPLAY to switch between Category Name and Channel Name, as
well as time and date information, on the wireless controller’s LCD display
when in the SIRIUS mode.
Press and hold DISPLAY for 1.5 seconds to change to the Channel List
Mode when in the SIRIUS mode.
Use FORMAT to change the aspect ratio on your HDTV.
Use LIST to display your list of recorded content on your PVR.
Use MENU to enter the Menu Options.
Use GUIDE to display the program guide.
[ Controls ] 15
SIRIUS Wireless Controller Button Descriptions Continued
Button Action
Use POWER to turn off the Sirius Conductor Tuner.
Use Select to choose a highlighted item in a menu.
Use Cursor Up and Cursor Down to navigate through menus.
Use Cursor Left and Cursor Right to change categories when in the
SIRIUS Mode, or to navigate menus in your devices.
[ Installation ]
16
Installation
Before you begin installation, read this installation section completely and follow the instruc-
tions. In addition, consult the manual of the audio device to which you will connect the Sirius
Conductor Tuner to determine the required installation configuration.
Note the following when installing:
Use the provided AC Power Adapter to provide power for the Sirius Conductor Tuner.
You can connect the audio output of the Sirius Conductor Tuner to your audio system via
the RCA-type or Optical audio output connectors of the tuner.
Mounting the Sirius Conductor Tuner
Install the Sirius Conductor Tuner in a location which avoids moisture and extreme heat. You
may place the tuner on any flat surface.
Installing the Indoor/Outdoor Antenna
Before installing the indoor/outdoor antenna, read this entire section.
To ensure consistent reception of the SIRIUS signal in your home, it is important that the
antenna be oriented correctly. Note the following considerations for antenna placement:
BEST reception can be achieved by placing the antenna outside on the roof, with a clear
360 degree view of the sky. This position will afford the best view of the sky for best
reception. When placed in this location, an antenna extension cable may be required.
BETTER reception can be achieved by placing the antenna outside a window, or by
mounting it to the side of the house. In either case, try to achieve the best possible clear
view of the sky.
GOOD reception can be achieved by placing your antenna in a window. Try to achieve
•
•
[ Installation ] 17
a clear unobstructed view of the sky. If your location is in major metropolitan area, the
antenna may be located inside the home because terrestrial transmitters are used to boost
signal strength.
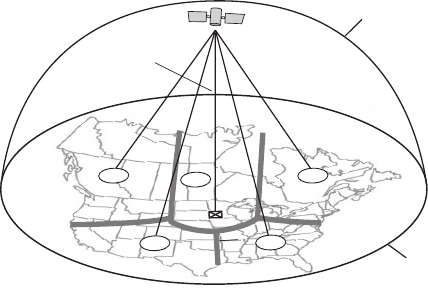
If you cannot obtain a clear 360 degree view of the sky (Best), then for the Better and Good
installations you must at least have a clear view of the sky in the direction of the SIRIUS satel-
lites, as shown in the following map diagram. (Figure 1)
1
23
4
5
HORIZON
SKY
SOUTH
WEST EAST
NORTH
Use the map to find the area you are located in (1 to 5). Then find the direction in which you
need to have a clear view of the sky:
Area 1: You will need a location with a clear view of the sky facing EAST or NORTHEAST
or SOUTHEAST
Area 2: You will need a location with a clear view of the sky facing NORTH or NORTH-
EAST
Area 3: You will need a location with a clear view of the sky facing NORTH or NORTH-
WEST
Figure 1Figure 1
[ Installation ]
18
Area 4: You will need a location with a clear view of the sky facing WEST or
NORTHWEST or SOUTHWEST
Area 5: You will need a clear view of the sky facing STRAIGHT UP (Outdoors only)
Choose a mounting location for the antenna which has an unobstructed view of the sky in the
direction for your area.
For example, suppose you live in Area 2. You determined that your antenna will need to have
a clear view of the sky facing North or Northeast. The exact direction is determined by your
specific location in Area 2 relative to the X on the map: If you live in Texas, you will need a
more North facing clear view of the sky whereas if you live in southern California, you will
need a more Northeast facing clear view of the sky. (In major US cities, you may be able to
receive the SIRIUS signal from the SIRIUS ground repeaters, which allow you to place the
antenna away from a window if the signal is strong enough.)
Once you have found a suitable location for the antenna, route the antenna cable to the Sirius
Conductor Tuner. Be sure you avoid any obstructions that could crimp, kink, or twist the
cable. Use protective grommets wherever rough openings are encountered. If the antenna is
installed outdoors, route the cable from the antenna location to the interior of the home, work-
ing the cable through the basement, under a window sill, etc., and make adjustments to take
up cable slack as necessary. Connect the antenna cable to the ANT connection on the rear of
the Sirius Conductor Tuner.
Testing and Optimizing the Antenna Signal Strength
The stronger the SIRIUS signal strength, the less likely it is that you will experience an inter-
ruption of the audio when listening to a broadcast. To assist you in adjusting the antenna
aiming for optimal reception, the Sirius Conductor Tuner can display a screen showing the
strength of the SIRIUS signal being received.
Refer to the Signal Indicator Display section on page 30 and check the strength of the sig-
nal being received. The S portion of the display screen shows the strength of the signal being
received from the satellite, while the T portion of the display screen shows the strength of the
signal being received from terrestrial based transmitters, if available. Make small adjustments
to the aiming of the antenna until you achieve the strongest possible signal.
If the Sirius Conductor Tuner loses reception at times, this is indication that the antenna is not
aimed in the optimal direction. Adjust the antenna by changing the aiming in small increments
to see if you can obtain consistent signal reception.
If you are having trouble locating your antenna in a place for optimal signal reception, please
[ Installation ] 19
visit your retailer or our website at http://sirius.com for information on signal distribu-
tion accessories that let you use RG-6 coax cable, your existing in-home wiring, and other
technologies to connect your Sirius Conductor Tuner to the antenna. These other options
allow placement of the antenna with the best view of the sky regardless of the location of your
Sirius Conductor Tuner.
Connecting the Sirius Conductor Tuner
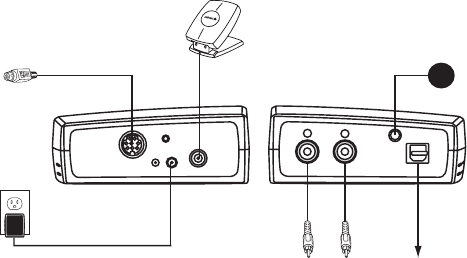
Refer to Figure 2 and follow these steps to connect the Sirius Conductor Tuner:
The indoor/outdoor antenna should be connected to the ANT connector. Refer to the
previous section for the antenna installation procedure.
ANALOG OUTPUT
(L/R)
DIGITAL OPTICAL
LINK
INDOOR/OUTDOOR
ANTENNA
AC ADAPTER
OPTIONAL
DIN CABLE
TO SIRIUS CONNECT
HOME TUNER
IR BLASTER
Peripheral components not to scale
TO RECEIVER
(USE EITHER ANALOG OR OPTICAL)
ATTACH BLASTER
DIRECTLY
TO RECEIVER’S
IR WINDOW
}
RESET
5V DC ANT
SECOND
TUNER AUDIO OUT
LR
OPTICAL
IR CONNECT
Consult your audio equipment manuals for the audio connections needed for the Sirius
1.
2.
Figure 2Figure 2

[ Installation ]
20
Conductor Tuner to operate with your particular equipment. You may use the provided
audio cable with RCA-type connectors, or purchase an optical cable if an optical con-
nection is desired.
Connect the provided IR blaster cable to the IR Connect connector. The other end of
the IR blaster cable should be adhered to your receiver’s infrared remote control win-
dow. To make this connection, peel the backing from the adhesive and adhere the end
of the cable onto your receiver’s infrared remote control window. NOTE: If you cannot
find your receiver’s infrared window, try shining a flashlight at your receiver to locate the
infrared “eye.”
Connect the AC Power Adapter to the 5V DC connector. Plug the AC Power adapter
into a working AC outlet. The red light on the tuner should be lit indicating that the Sirius
Conductor Tuner is on.
Pairing Your Wireless Controller With Your Sirius
Conductor Tuner
The first time you power up your wireless controller, you need to pair it with the Sirius Con-
ductor Tuner. To pair the wireless controller with the tuner:
Be sure the red light on the Sirius Conductor Tuner is lit, indicating it is powered on.
The wireless controller’s LCD displays sirius radio has not been setup.... push ok to set
up...
Press OK. The LCD displays Push button on Sirius radio to begin setup.
Use a pen (or other pointed object) to press the RESET button on the Sirius Conductor
Tuner. The LCD displays Push Button again on Sirius Radio to finish.
Press the RESET button again on the Sirius Conductor Tuner. The LCD displays Suc�
cess! Radio and Remote are now paired. Then the LCD displays Press SIRIUS to listen to
music. Press OK to setup other devices.
Press SIRIUS.
You can now use the wireless controller to control your Sirius Conductor Tuner.
3.
4.
1.
2.
3.
4.
5.
6.

[ Installation ] 21
Activating Your SIRIUS Subscription
Before you can listen to the your Sirius Conductor Tuner, you must subscribe to Sirius Satel-
lite Radio service.
Make sure that you have properly connected the Sirius Conductor Tuner and that its
antenna is oriented to receive the SIRIUS satellite signal, as described previously.
Press to turn the Sirius Conductor Tuner on. The tuner must remain on during the
entire activation process.
If the tuner is receiving the satellite signal, the SIRIUS channel lineup will be updated.
The LCD display reads UPDATING CHANNELS on the top line and X% Completed (0%–100%)
on the bottom line until the update finishes. Caution: Don’t push any buttons or per-
form any operations until updating has been completed.
When completed, you can view the SIRIUS preview channel 184, and channel 000
without subscribing to SIRIUS. You cannot listen to any other channels until you activate
your SIRIUS subscription.
Press CH+ or CH– to tune to channel 000 to view your SIRIUS ID (SID). You will need
the SID to activate your SIRIUS subscription. The SID number is also available on the
Sirius Conductor Tuner packaging. Write the SID number down in the space provided
on page 75.
Have your credit card and SID number handy and contact SIRIUS on the Internet at
https://activate.siriusradio.com
Follow the prompts to activate your subscription. You can also call SIRIUS toll-free at
1-888-539- SIRIUS (1-888-539-7474).
Once the Sirius Conductor Tuner has received your subscription information, the display
changes to Subscription Updated.
You can now listen to all the channels and begin enjoying Sirius Satellite Radio!
1.
2.
3.
4.
5.
6.
7.

[ Quick Start ]
22
Quick Start
Adding a Device to the Wireless Controller by
Manufacturer Code
You can add a device to the wireless controller by manually entering its manufacturer’s code.
For a list of manufacturer’s codes, refer to the Manufacturer’s Codes section beginning on
page 53.
To add a device by entering its code:
Turn on the device (receiver, TV, etc.) that you want to add to the wireless controller by
pressing the power button on the device.
On the wireless controller, press OK to exit the SIRIUS mode. If you have not yet setup
any devices the LCD display scrolls, Press sirius to listen to music - Press OK to
setup other devices, otherwise the available devices are displayed.
Press and hold SET until the LCD displays INITIAL SETUP. Press OK.
The LCD displays Add Device. The bottom line of the LCD display lists Receiver as the
first device you can add. Press OK to add your receiver, or press Scroll Left ( ) or
Scroll Right ( ) to select the device you want add and then press OK.
The LCD displays the device name, Code Setup, and a 4-digit code. Enter the four-digit
code for your device, for example, 1957. (You can find the code list for your device in
the Manufacturer’s Codes section beginning on page 53.) The SIRIUS button blinks
once for each digit entry. It blinks twice after the you have entered the final digit.
Your device turns off if the correct code for your device was successfully entered.
Press OK to save the code.
Repeat the steps above for each device you want to add, or press and hold SET until the
wireless controller exits the menu.
1.
2.
3.
4.
5.
6.
7.

[ Quick Start ] 23
Adding a Device to the Wireless Controller by Searching
for the Manufacturer Code
To add a device to the wireless controller by scrolling through a list of manufacturer codes,
perform the following steps:
Turn on the device (receiver, TV, etc.) that you want to add to the wireless controller by
pressing the power button on the device.
On the wireless controller, press OK to exit the SIRIUS mode. If you have not yet setup
any devices the LCD display scrolls, Press sirius to listen to music - Press OK to
setup other devices, otherwise the available devices are displayed.
Press and hold SET until the LCD displays Initial Setup. Press OK.
The LCD displays Add Device. The bottom line of the display lists Receiver as the first
device you can add. Press OK to add your receiver, or press Scroll Left ( ) or Scroll
Right ( ) to select the device you want add and then press OK.
The wireless controller displays the device name on the top line and Code Setup on the
next line. Press Scroll Left ( ) or Scroll Right ( ) to scroll through the manufacturer’s
codes for the selected device. When you have selected the correct code, the wireless
controller turns off the device.
Press OK to save the code.
Repeat the steps above for each device you want to add, or press and hold SET until the
wireless controller exits the menu.
Controlling Your Receiver’s Volume and Setting Its Audio
Source Using the Wireless Controller
You must first add your receiver to the wireless controller before setting it to control the
receiver’s volume. (Refer to the previous sections for adding a device.) Also verify that it is
possible to control the volume of your receiver using the wireless controller before perma-
nently adhering the IR Blaster to your receiver.
If you cannot add a device using its manufacturer’s code, try having the wireless controller
learn the setup from the remote control of the device. (Refer to the section Learn Feature on
page 41.)
1.
2.
3.
4.
5.
6.
[ Quick Start ]
24
To set up your wireless controller to control your receiver’s volume:
Temporarily connect the IR blaster cable to your receiver’s infrared remote control
window. Note: If you cannot find your receiver’s infrared window, try shining a flashlight
at your receiver to locate the infrared “eye”.
Press OK to exit the SIRIUS mode. Then press and hold SET until the LCD displays
Initial Setup.
Press Scroll Left ( ) or Scroll Right ( ) until the LCD displays Advanced Setup. Press
OK.
The LCD displays SEt Volume control. Press Scroll Left ( ) or Scroll Right ( ) to find
Set Audio Source For SIRIUS and press OK.
The LCD displays Select Audio Device AND Push OK. Press Scroll Left ( ) or Scroll
Right ( ) to find the audio device that the Sirius Conductor Tuner is connected to. The
wireless controller displays the name of the device (for example, Receiver). Press OK.
The LCD displays NOW PUSH OK TO FIND INPUT. Press OK.
The LCD displays PUSH OK WHEN YOU FIND YOUR INPUT. The current input is displayed on
the bottom line (for example Input1). Press Scroll Left ( ) or Scroll Right ( ) to find
the input you want to choose. Each time you press Scroll Left ( ) or Scroll Right ( ),
the wireless controller transmits a signal to your receiver. When your receiver selects the
correct input for the Sirius Conductor Tuner, press OK. For example, if you connected
the Sirius Conductor Tuner to the SAT input on your receiver, press Scroll Left ( ) or
Scroll Right ( ) until the receiver changes to the SAT input.
The LCD displays Your input is now programmed push OK. Press OK to save the input.
NOTE: Some receivers do not have discrete input selections but instead use a single
input select to cycle through all available inputs. If your receiver operates in this way,
simply use the INPUT key (below the 7 button on the wireless controller) to cycle to the
appropriate audio input for the Sirius Conductor Tuner.
The LCD displays SIRIUS Key Now Automatically Changes Input and exits the menu
Permanently adhere the IR blaster cable to your receiver’s infrared remote control win-
dow by peeling the backing from the adhesive on the end of the cable and sticking the
end of the cable onto your stereo’s infrared remote control window.
You can now use your wireless controller to control your receiver’s volume whenever you
press Vol+, Vol–, or MUTE on the wireless controller when you’re in the SIRIUS mode.
1.
2.
3.
4.
5.
6.
7.
8.
9.
10.

[ Quick Start ] 25
Using the SIRIUS Key and the POWER Key to Turn
Your Devices On or Off
You can use the SIRIUS key on your wireless controller to turn on your Sirius Conductor
Tuner, and the POWER key to turn it off.
When you press SIRIUS, the wireless controller enters the SIRIUS mode and turns on
your the Sirius Conductor Tuner. Once you have programmed the audio source as described
previously, the SIRIUS key also turns on your audio device and controls its volume. By
pressing one key, you can turn on or off your Sirius Conductor Tuner and your receiver or
other audio device while remaining in SIRIUS mode, so you can access all the features of your
SIRIUS radio.
When you are not in the SIRIUS mode, you can turn on or off other devices you have added to
the wireless controller. Use Scroll Left ( ) or Scroll Right ( ) to find the device you want to
power on or off and press the POWER key.
NOTE: If you change any settings for your audio device, you must follow the steps for audio
source programming again to save the changes. Refer to the section Controlling Your
Receiver’s Volume and Setting Its Audio Source Using the Wireless Controller on page 23.

[ Sirius Conductor Tuner Operation ]
26
Sirius Conductor Tuner Operation
This section provides operation information for the Sirius Conductor Tuner. For operation
information regarding your connected audio equipment, consult the owners manual which
accompanied that equipment.
Display Modes
This section provides information about the screens displayed on the wireless controller. Note
that before the wireless controller will display any information about the Sirius Conductor
Tuner, it must be paired with the tuner as described in the section Pairing Your Wireless
Controller With Your Sirius Conductor Tuner on page 20.
Normal Mode
When you first turn on your Sirius Conductor Tuner, the wireless controller displays the nor-
mal operation (default) screen. The default screen displays the last channel selected before
shutdown, the artist’s name, the channel number, and the preset bank information. (Figure 1)
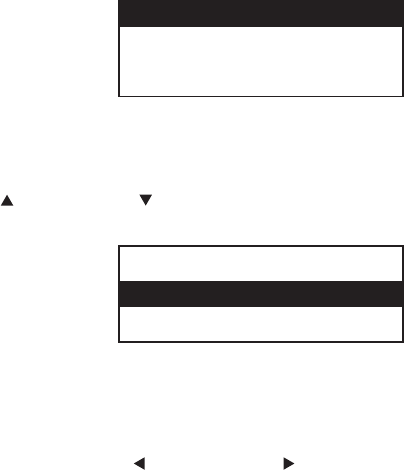
001 CH NAME A
Artist Name
Song Title
NOTE: If the artist name or song title is too long to fit the screen, it scrolls across the screen
from right to left.
Figure 1Figure 1
[ Sirius Conductor Tuner Operation ] 27
Display Button
Pressing DISPLAY from the default screen switches between the channel name and category
on the top line of the display. (Figure 2)
001 CAT A
Artist Name
Song Title
Channel List Mode
Pressing and holding DISPLAY for three seconds enters Channel List mode. Use CURSOR
UP ( ), CURSOR DOWN ( ), CH +, or CH – to scroll through the channel list. (Figure 3)
Press SELECT to tune the highlighted channel and return to the default display screen.
001 CH Name
002 CH Name
003 CH Name
Note: To preview what is playing on other channels before selecting a channel, press DIS-
PLAY while in the Channel List Mode to change between channel name, artist name and song
title.
Category List Mode
Pressing CURSOR LEFT ( ) or CURSOR RIGHT ( ) changes the display to show the
currently listed category. (Figure 4) Press the cursor buttons again to scroll through the
categories.
Figure 2Figure 2
Figure 3Figure 3

[ Sirius Conductor Tuner Operation ]
28
CATEGORY
001 CH Name
002 CH Name
The currently selected channel is highlighted on the second row. Pressing CH + or
CH – browses the channels while remaining in Category List mode. Pressing CURSOR UP
( ) or CURSOR DOWN ( ) browses through the channels while keeping the second line
highlighted. Press SELECT to tune the highlighted channel.
Presets
You can store up to 30 of your favorite channels as presets for easy tuning. There are 10
presets per band, A, B, and C, and channels are assigned preset numbers 0–9, for example,
A1, A2, B1, C1, etc. The current band is displayed in the upper right corner of the default
screen (Figure 1), and if the current channel is saved as a preset, the preset number will also
be displayed, for example, C6.
Storing a Preset
To store a favorite channel as a preset:
Tune to the channel you want to store.
Select the band by pressing and releasing BAND until the desired band is displayed in
the upper right hand corner of the display (A, B, or C).
Press and hold the numeric key (0–9) in which you want to store the until the preset
number appears with the band in the upper right hand corner of display.
The channel is now stored as a preset. Note: You can replace previously stored presets by
saving over them.
1.
2.
3.
Figure 4Figure 4

[ Sirius Conductor Tuner Operation ] 29
Selecting a Preset
To select a channel you have saved as a preset:
Select the band by pressing and releasing BAND until the desired band is displayed in
the upper right hand corner of the display (A, B, or C).
Press and release the numeric key in which the preset is stored, for example, 1.
After 1.5 seconds the preset channel is tuned.
You can also use the FAV key to browse though the saved presets.
Multi-Radio Control
You can control up to two SIRIUS radios with your wireless controller, the Sirius Conductor
Tuner (model SC-H1W) and the SiriusConnect Home (model SC-H1). To add a second radio,
connect it to your Sirius Conductor Tuner radio using the DIN cable which was included with
the SiriusConnect Home.
Note: After you connect the SiriusConnect Home, make sure to press the RESET button
on the Sirius Conductor Tuner. This enables the second radio. Then follow the installation
instructions for the SiriusConnect Home to activate the radio.
Note: The SiriusConnect Home must use the AC Power Adapter which was provided
with the radio.
To select the second SIRIUS radio, press and hold SIRIUS for 1.5 seconds, or press
SWAP.
To highlight a radio (either 1 or 2), press CH +, CH –, CURSOR UP ( ), or CURSOR
DOWN ( ).
Press SELECT or DIRECT to select the highlighted SIRIUS radio.
When both SIRIUS radios have been correctly set up, the default display shows a superscript-
ed number to indicate which radio is currently being displayed. Figure 5 shows information
from SIRIUS radio 1 being displayed.
1.
2.
3.
1.
2.
3.

[ Sirius Conductor Tuner Operation ]
30
1001 CH NAME A
1Artist Name
1Song Title
Press SWAP to switch the display between the SIRIUS radios.
Menu Options
To display the Menu Options, press MENU. A list of the Menu Options will be displayed.
(Figure 6)
MENU OPTIONS
Signal Indicator
Factory Reset
Use CH +, CH –, CURSOR UP ( ), or CURSOR DOWN ( ) to highlight the option you wish
to adjust and press SELECT. The following options are available:
Signal Indicator
Factory Reset
Sirius ID
These menu options are explained in the following sub-sections.
Signal Indicator
For the best possible sound quality from the Sirius Conductor Tuner, it is important to locate
—
—
—
Figure 5Figure 5
Figure 6Figure 6
[ Sirius Conductor Tuner Operation ] 31
the indoor/outdoor antenna in a location which receives a consistent signal from the SIRIUS
satellites. The signal indicator screen provides a visual display of the signal strength being
received from the satellites (S) and terrestrial transmitters (T). A consistent signal of three
bars or greater is required for good reception.
To display the signal indicator screen:
Press CH +, CH –, CURSOR UP ( ), or CURSOR DOWN ( ) to highlight Signal
indicator and press SELECT.
The LCD displays two 10-segment horizontal bar graphs (S and T) with a “–“sign to
the left and a “+” sign to the right. The S indicates satellite signal strength and the T
indicates terrestrial signal strength (if available). (Figure 7)
Adjust the indoor/outdoor antenna for the strongest signal reception. To exit press SELECT
or MENU.
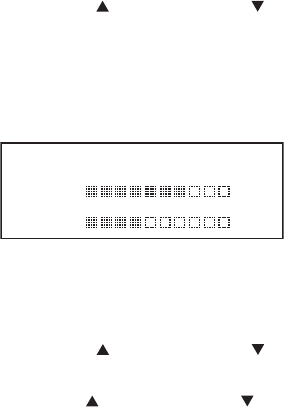
Signal Indicator
S - +
T - +
Factory Reset
Factory reset will restore the Sirius Conductor Tuner to the defaults as shipped from the fac-
tory. A factory reset will clear all channel presets.
To perform a factory reset:
Press CH +, CH –, CURSOR UP ( ), or CURSOR DOWN ( ) to highlight Factory
reset. and press SELECT.
The LCD displays Factory restore?. (Figure 8)
Use CH +, CH –, CURSOR UP ( ), or CURSOR DOWN ( ) to highlight YES. Press
SELECT to perform the factory reset. Select NO to leave the settings as they are and
return to the menu options.
1.
2.
1.
2.
3.
Figure 7Figure 7

[ Sirius Conductor Tuner Operation ]
32
Factory Restore?
Yes
No
Sirius ID
The Sirius ID menu option displays the SIRIUS ID number (SID) of your SIRIUS Conductor
Tuner. This 12-digit number is unique to your tuner and is needed when activating the tuner to
receive the Sirius Satellite Radio service.
To display the Sirius ID:
Press CH + , CH –, CURSOR UP ( ), or CURSOR DOWN ( ) to highlight SIRIUS ID and
press SELECT.
The LCD displays the tuner’s SIRIUS ID. (Figure 9)
To exit press SELECT or MENU.
Sirius ID
ESN
123456789012
1.
2.
Figure 8Figure 8
Figure 9Figure 9

[ Wireless Controller Operation ] 33
Special Display Messages
The wireless controller may also display status information about the Sirius Conductor Tuner.
These messages are described in the following table.
Message Explanation
Out of Range The LCD displays Out of Range whenever the wireless controller and the
Sirius Conductor Tuner cannot communicate because they are too far apart
or out of range because of some other interference. The display returns to
normal when the wireless controller is again within range of the tuner.
Acquiring
Signal
The LCD displays Acquiring Signal whenever the satellite signal is lost.
This message pops up when the wireless controller is out of range, and
returns to the normal display automatically when the Sirius Conductor
Tuner regains the satellite signal.
Updating
Channels
The LCD displays Updating Channels whenever a channel update from
SIRIUS is detected. While the channels update, the percentage of update
progress is displayed on the screen.
Subscription
Updated
The LCD displays Subscription Updated whenever SIRIUS broadcasts a
subscription update. Press any SIRIUS-related key to complete the update.
Antenna Not
Detected
The LCD displays Antenna Not Detected whenever there is no antenna
detected. If this message appears, check that the antenna is securely
connected to the Sirius Conductor Tuner. The normal display returns
automatically when the antenna is detected again.
Invalid
Channel
The LCD displays Invalid Channel whenever you enter a channel number
that does not exist. After two seconds, the current, active channel informa-
tion, is re-displayed.
SIRIUS ID
Number (SID)
To display your SIRIUS ID (SID) number, tune to channel 000. You can
also display the SID by selecting Sirius ID from the Menu Options screen.

[ Wireless Controller Operation ]
34
Wireless Controller Operation
The SIRIUS Conductor includes a wireless controller which allows you to operate up to 12
home entertainment devices as well as your Sirius Conductor Tuner. Read this section to
familiarize yourself with using the wireless controller.
Setting Up Your Wireless Controller
The first time you power up your wireless controller, you will need to pair it with the Sirius
Conductor Tuner.
To pair the wireless controller with the Sirius Conductor Tuner for the first time:
Be sure the red light on the Sirius Conductor Tuner is lit, indicating it is powered on.
The wireless controller’s LCD displays sirius radio has not been setup.... push ok to set
up....
Press OK. The LCD displays Push button on Sirius radio to begin setup.
Press RESET on the Sirius Conductor Tuner. The LCD displays Push Button again on
Sirius Radio to finish.
Press RESET again on the Sirius Conductor Tuner. The LCD displays Success! Radio and
Remote are now paired. Then the LCD displays Press SIRIUS to listen to music. Press OK
to setup other devices.
Press SIRIUS.
You can now use the wireless controller to control your Sirius Conductor Tuner.
Adding and Deleting Nodes, Network Reset
A node is any product which is compatible with a Z-Wave® network. Your Sirius Conductor
Tuner and wireless controller are Z-Wave compatible products and are nodes. Your Sirius
Conductor Tuner and any other nodes added to your wireless controller become part of your
network.
1.
2.
3.
4.
5.
6.

[ Wireless Controller Operation ] 35
Additional nodes in your network could be other Z-Wave compatible products such as an RF
signal repeater to extend the range of operation of your wireless controller, lighting products,
HVAC controls, or other remote controls, etc. Once a node has been added to your network,
it will act as a range extender for your wireless controller. You can learn more about Z-Wave
and the types of products which are Z-Wave compatible on the Internet at
http://www.z-wavealliance.org.
Adding a Node
Any Z-Wave compatible product (such as your Sirius Conductor Tuner) can be added as
node to your wireless controller. You need to be within two feet of the node which you will be
adding.
To add a node to your network:
Press and hold SET until the LCD displays Initial Setup.
Press Scroll Left ( ) or Scroll Right ( ) until the LCD displays SIRIUS Setup. Press OK.
The LCD displays Nodes. Press OK.
The LCD displays Add Radio to Network. Press OK.
The LCD displays Push Button on Radio. Press RESET on the Sirius Conductor Tuner (if
you are adding the tuner) or the appropriate button on the other manufacturer’s node.
The LCD displays Successful and then returns to the Nodes screen.
Press and hold SET to exit the menu.
Deleting a Node
You can delete any node which you had previously added to your wireless controller. You will
need to be within two feet of the which node you will be deleting.
To delete a node from your network:
Press and hold SETUP until the LCD displays Initial Setup.
Press Scroll Left ( ) or Scroll Right ( ) until the LCD displays SIRIUS Setup. Press OK.
The LCD displays Nodes. Press OK.
The LCD displays Add Radio to Network. Press Scroll Left ( ) or Scroll Right ( ) until
the LCD displays Delete Radio From Network.
The LCD displays Push Button on Radio. Press RESET on the Sirius Conductor Tuner (if
you are deleting the tuner) or the appropriate button on the other manufacturer’s node.
The LCD displays Successful and then returns to the Nodes screen.
Press and hold SET to exit the menu.
1.
2.
3.
4.
5.
6.
7.
1.
2.
3.
4.
5.
6.
7.

[ Wireless Controller Operation ]
36
Network Reset
Performing a network reset will delete all nodes which had been added to the wireless con-
troller, including your Sirius Conductor Tuner. If you only want to remove a specific node from
your network, refer to the previous section Deleting a Node.
To perform a network reset:
Press and hold SET until the LCD displays Initial Setup.
Press Scroll Left ( ) or Scroll Right ( ) to go to SIRIUS SETUP. Press OK.
The LCD displays NODES. Press Scroll Left ( ) or Scroll Right ( ) to go to NETWORK.
Press OK.
The LCD displays NETWORK RESET. Press OK.
The LCD displays WAITING, indicating that a network reset is in progress.
The LCD displays Successful when the network has been reset.
Press and hold SET to exit the menu.
Note: Nodes which have been removed from your network by performing a network reset still
retain the Home ID information from the wireless controller. If you need to remove the Home
ID information from a node, delete the node as described in the previous section, Deleting a
Node on page 35, rather than performing a network reset.
Adding, Deleting, and Replacing Devices
You can control up to 12 devices with your wireless controller. These would be devices which
are not Z-Wave compatible (as described in the previous section) but are commonly found
in home entertainment systems, such as receivers, TVs, satellite boxes, etc., and which have
their own remote controls.
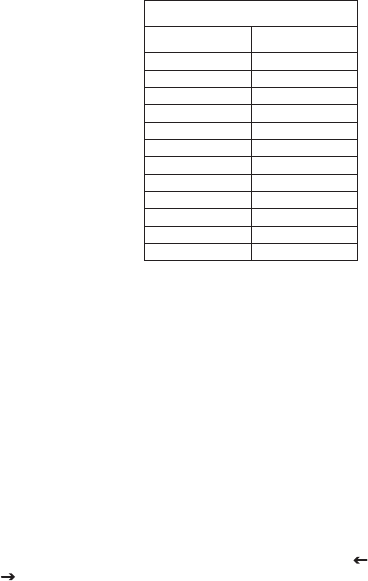
The following table lists the types of devices you can control with your wireless controller.
While adding, deleting, or replacing a device, the long name for the device is shown on the
LCD screen. At all other times, the LCD displays the short name for the device.
Device Types
Long Name Short Name
RECEIVER RCV
1.
2.
3.
4.
5.
6.
7.
[ Wireless Controller Operation ] 37
Device Types
Long Name Short Name
TV TV
CABLE BOX CBL
SATELLITE SAT
DVD DVD
VCR VCR
MISC AUDIO MIS
CD CD
HOME CTRL HOM
LASER DISC LDP
CASSETTE CA
MEDIA MC
AMPLIFIER AMP
Note: You must set up your audio device so that your wireless controller controls the volume
and mute functions in order for these features to work properly. Refer to the section Control-
ling Your Receiver’s Volume and Setting Its Audio Source Using Your Wireless Controller
on page 23.
Adding a Device by Entering Its Manufacturers Code
Each device has a 4-digit code which is assigned by the manufacturer, and devices are added
to the wireless controller by entering or searching for this code. If no code can be found
for the device, the wireless controller can also learn the various functions from the device’s
remote control. (Refer to the section Learn Feature on page 41.)
Before adding a device, refer to the Manufacturer’s Codes section beginning on page 53
and find the code for the device.
To add a device by entering its code:
Power on the device you want to add.
Press and hold SET until the LCD displays Initial Setup. Press OK.
The LCD displays Add Device. The bottom line of the display lists Receiver as the first
device you can add. Either press OK or press Scroll Left ( ) or Scroll Right
( ) to select another device to add and press OK.
1.
2.
3.

[ Wireless Controller Operation ]
38
Enter the four-digit code for your device using the 0—9 buttons. The SIRIUS button
blinks once for each digit entry. It blinks twice after the you have entered the final digit.
If an invalid code is entered, the SIRIUS button emits one long blink and the LCD
displays Invalid. If the correct code is successfully entered the selected device turns off.
Press OK to save the code. Press and hold SET to exit the menu..
Adding a Device by Searching for the Manufacturer’s Code
If you cannot locate or do not know the manufacturer’s code for the device you want to add,
you can use the wireless controller to search for the correct code. When the correct code is
found, the device will power off.
To add a device by searching for its code:
Power on the device you want to add.
Press and hold SET until the LCD displays Initial Setup. Press OK.
The LCD displays Add Device. The bottom line of the display lists Receiver as the first
device you can add. Either press OK or use Scroll Left ( ) or Scroll Right
( ) to select another device to add and press OK.
The LCD displays the device name on the top line and Code Setup on the next line.
Press Scroll Left ( ) or Scroll Right ( ) to scroll through the manufacturer’s codes.
When the correct code is selected, the wireless controller will turn off the device.
Press OK to save the code. Press and hold SET to exit the menu.
Note: If the wireless controller cannot find the manufacturer’s code for your receiver, try add-
ing it as an Amplifier and also Misc. Audio and searching for a code for these device types.
Replacing a Device
This feature allows you to replace an existing device saved in the wireless controller’s pro-
gramming with a new device. This is useful if you replace an existing device with a new one.
Replacing a device overwrites all settings of the device being replaced, such as learned keys
and all other user-programmed features.
To replace an existing device:
Power on the replacement device.
Press and hold SET until the LCD displays Initial Setup. Press OK.
The LCD displays ADD DEVICE. Use Scroll Left ( ) or Scroll Right ( ) to go to REPLACE
DEVICE. Press OK.
4.
5.
6.
1.
2.
3.
4.
5.
6.
1.
2.
3.
[ Wireless Controller Operation ] 39
The LCD displays REPLACE WHAT? Press Scroll Left ( ) or Scroll Right ( ) to select
the device you want to replace. Press OK.
The LCD displays With What Device. Press Scroll Left ( ) or Scroll Right ( ) to go to
a replacement device. Press OK.
The LCD displays the code setup and default manufacturer’s code for the replacement
device. Press OK to select the default code or enter the four-digit code for the new
device using the 0—9 buttons. The SIRIUS button blinks once for each digit entry. It
blinks twice after the you have entered the final digit. Press OK.
If an invalid code is entered, the SIRIUS button emits one long blink and the LCD
displays Invalid. If the correct code is successfully entered, the selected device turns off.
The LCD returns to the Replace Device screen. Press and hold SET to exit the menu.
Deleting a Device
This feature allows you to delete a device which had been added to the wireless controller. To
delete a device:
Press and hold SET until the LCD displays Initial Setup. Press OK.
The LCD displays ADD DEVICE. Press Scroll Left ( ) or Scroll Right ( ) to go to DELETE
DEVICE. Press OK.
The LCD displays the device name and the code (for example, Cable Box 1376). Press
Scroll Left ( ) or Scroll Right ( ) to find the device you want to delete and press OK.
The LCD displays ARE YOU SURE? IF SO PUSH OK. Press OK.
The LCD displays the name of the deleted device (for example, Cable Box 1376 Has Been
Deleted).
Press OK to return to the Delete Device screen, or SET to exit the menu.
Viewing and Changing a Device Code
You can use view and change the manufacturer’s code of a device which you have added to
your wireless controller. The LCD will display the code information for each device.
Viewing a Device Code
To view the manufacturer’s code for a device which had been added to the wireless control-
ler:
4.
5.
6.
7.
8.
1.
2.
3.
4.
5.
6.

[ Wireless Controller Operation ]
40
Press and hold SET until the LCD displays Initial Setup. Press OK.
The LCD displays ADD DEVICE. Press Scroll Left ( ) or Scroll Right ( ) to go to VIEW
CODE. Press OK.
The first line of the LCD displays the long name of the current device and the third line
displays the 4-digit code number for the device.
Press Scroll Left ( ) or Scroll Right ( ) to view the manufacturer’s codes of other
devices in the wireless controller.
After viewing the codes, press OK or SET to exit the menu.
Changing a Device Code
To change the manufacturer’s code for a device which had been added to the wireless
controller:
Power on the device for which you are changing the manufacturer’s code.
Press and hold SET until the LCD displays Initial Setup. Press OK.
The wireless controller displays ADD DEVICE. Press Scroll Left ( ) or Scroll Right ( ) to
go to Change Device CODE. Press OK.
The LCD displays Change Dev Code on the first line. The second line of the LCD displays
the current device in the middle and any other devices on either side of the current de-
vice. Press Scroll Left ( ) or Scroll Right ( ) to select the device you want to change
and then press OK.
The LCD displays the name of the device and the current code (for example, Cable Box
Code Setup 0877). Enter the new four-digit code for the new device using the 0–9 keys.
The SIRIUS button blinks once for each digit entry. It blinks twice after the you have
entered the final digit.
If an invalid code is entered, the SIRIUS button emits one long blink, and the LCD
displays Invalid. If the correct code is successfully entered, the selected device turns off.
Press OK to save the code. Press and hold SET to exit the menu.
Choosing an Audio Source
If you have an audio receiver or amplifier with multiple inputs, you can program the wireless
controller to automatically select one of its inputs as the audio source for your Sirius Conduc-
tor Tuner when the SIRIUS button is pressed on the wireless controller. Then when you
1.
2.
3.
4.
5.
1.
2.
3.
4.
5.
6.
7.

[ Wireless Controller Operation ] 41
press the SIRIUS button, the wireless controller will automatically select the correct audio
source input.
Note: Any learning of key functions for your audio device must be performed before you
choose the audio source input. Refer to the section Learn Feature on page 41 for more
information.
To choose the audio source input for the Sirius Conductor Tuner:
Press and hold SET until the LCD displays Initial Setup. Use Scroll Left ( ) or Scroll
Right ( ) to go to Advanced Setup and press OK.
From ADVANCED SETUP use Scroll Left ( ) or Scroll Right ( ) to go to SET AUDIO SOURCE
FOR SIRIUS. Press OK.
Note: If you only have one SIRIUS radio, i.e., the Sirius Conductor Tuner, skip this step
and proceed to step 4. If two SIRIUS radios are programmed, then LCD displays OK FOR
RADIO 1 < > FOR RADIO 2. Use Scroll Left ( ) or Scroll Right ( ) to select the radio.
Press OK. The LCD displays SELECT AUDIO DEVICE AND PUSH OK. Press Scroll Left ( ) or
Scroll Right ( ) to find the audio device that your SIRIUS radio/tuner is plugged into.
The name of the device is displayed (for example, Receiver).
The LCD displays NOW PUSH OK TO FIND INPUT. Press OK.
The LCD displays PUSH OK WHEN YOU FIND YOUR INPUT. The current input label is displayed
in the bottom line (for example, Input1). Press Scroll Left ( ) or Scroll Right ( ) to find
the input you want to choose (Input1–Input15). Press OK to select the displayed input.
The LCD displays YOUR INPUT IS NOW PROGRAMMED PUSH OK. Press OK.
The LCD displays SIRIUS Key Now Automatically Changes Input and exits the menu.
Learn Feature
If you cannot find a manufacturer’s code for a device you want to add, the wireless control-
ler can learn key functions from the device’s remote control. You’ll need to have the original
remote control from the device in order to learn key functions. You can also use the learn
feature to delete key functions which had been previously learned by the wireless controller.
Before you can learn the key functions of the device’s remote control you need to add the de-
vice to the wireless controller. Follow the Adding a Device by Entering the Manufacturer’s
Code procedure on page 37 to add the device. When asked to enter the code for the device,
just enter any valid manufacturer’s code for the type of device from the Manufacturer’s
1.
2.
3.
4.
5.
6.
7.
8.
[ Wireless Controller Operation ]
42
Codes section beginning on page 53. (For example, for a CD player you could enter code
0180.)
Learning Key Functions
To have the wireless controller learn a key function from a device’s remote control:
Press and hold SET until the LCD displays Initial Setup. Use Scroll Left ( ) or Scroll
Right ( ) to go to Advanced Setup and press OK.
From ADVANCED SETUP press Scroll Left ( ) or Scroll Right ( ) to go to LEARN FUNCTION.
Press OK.
The LCD displays Add Learn Key. Press OK.
The LCD displays FIND mODE TO LEARN. AND PUSH OK. The bottom line of the LCD displays
the device type (for example, DVD). Press OK to select or press Scroll Left ( ) or Scroll
Right ( ) to select another device and press OK.
The LCD displays Align Remotes PUSH OK. Place the wireless controller and the remote
within two inches of each other as shown in Figure 1 and press OK.
2"
The remote displays SELECT THE KEY TO LEARN. Press the key you want to learn on the
wireless controller, any key except SET, SIRIUS, OK, Scroll Left ( ), or Scroll Right
( ).
The LCD displays WHEN BACKLIGHT TURNS OFF PUSH TEACHING KEY. The backlight then turns
off and the LCD display reads LEARNING NOW! PRESS TEACHING KEY. Press the teaching key
on the device’s remote control.
If the learning is successful, the backlight turns back on and the LCD displays
SUCCESS! PUSH OK TO LEARN PUSH SET TO EXIT.
Press OK to learn another key or press SET to exit the learning mode. If you press OK,
the LCD display returns to step 5 to learn another key.
1.
2.
3.
4.
5.
6.
7.
8.
9.
Figure 1Figure 1

[ Wireless Controller Operation ] 43
Note: If learning fails, the LCD display reads LEARNING FAILED PUSH OK TO LEARN PUSH SET TO
EXIT. Possible causes for learning failure might be:
Attempting the learning procedure too close to a UV source (i.e., sunlight or fluorescent
lighting).
The wireless controller and the device’s remote control are more than two inches apart.
The device’s remote control type is an RF-type remote control rather than an infrared (IR)
type. Only IR-type remote controls can be used for learning.
The IR LEDs on the wireless controller and the device’s remote control are not aligned.
The IR LED on the device’s remote control is usually located on the front tip of the remote
behind a lens.
Deleting All Learned Keys
You can delete all the learned keys for a specific device from the wireless controller. To delete
all the learned keys:
Press and hold SET until the LCD displays Initial Setup. Use Scroll Left ( ) or Scroll
Right ( ) to go to Advanced Setup and press OK.
From ADVANCED SETUP press Scroll Left ( ) or Scroll Right ( ) to go to LEARN FUNCTION.
Press OK.
The LCD displays ADD LEARN KEY . Press Scroll Left ( ) or Scroll Right ( ) to go to
DELETE LEARN KEY. Press OK.
The LCD displays SELECT MODE THEN PUSH OK. The device name is displayed on the bot-
tom line (for example, DVD). Press OK to select or press Scroll Left ( ) or Scroll Right
( ) to select another device and press OK.
The LCD displays Select Key to Delete or Push OK to Delete All. Press OK.
The LCD displays DELETING ALL PUSH OK TO CONFIRM. Press OK. The LCD displays All
Learned Keys Deleted. Push OK to Delete More.
Press OK to delete learned keys for other devices or SET to exit the menu.
Deleting a Single Learned Key
You can delete a single learned key for a specific device from the wireless controller. To
delete a single learned key:
Press and hold SET until the LCD displays Initial Setup. Use Scroll Left ( ) or Scroll
Right ( ) to go to Advanced Setup and press OK.
From ADVANCED SETUP press Scroll Left ( ) or Scroll Right ( ) to go to LEARN FUNCTION.
Press OK.
•
•
•
•
1.
2.
3.
4.
5.
6.
7.
1.
2.

[ Wireless Controller Operation ]
44
The LCD displays ADD LEARN KEY . Press Scroll Left ( ) or Scroll Right ( ) to go to
DELETE LEARN KEY. Press OK.
The LCD displays SELECT MODE THEN PUSH OK. The device name is displayed on the bot-
tom line (for example, DVD). Press OK to select or press Scroll Left ( ) or Scroll Right
( ) to select another device and press OK.
The LCD displays Select Key to Delete or Push OK to Delete All. Press the key contain-
ing the learned function to be deleted.
The LCD displays KEY DELETED PUSH OK TO DELETE ANOTHER. Press OK to delete another
learned key function or press and hold SET to exit the menu.
Lock Volume Feature
The lock volume feature allows you to control the audio volume of a device which has been
added to your wireless controller with another device. For example, if have added your DVD
player to the wireless controller, and your DVD audio is connected through your receiver, you
can lock the volume of the DVD player to the receiver so that the volume is controlled by the
receiver. If you have other devices such as a TV, VCR, etc., all these devices can have their
volumes locked to a single device which will then control the volume for all devices.
In order to use the lock volume feature, you first need to select the source device which will
control the volume for the other devices. After you have selected a source device for volume
control, you can then lock the volume control of other devices to the selected source.
Selecting a Source Device for Volume Lock Control
To designate a device as the source device to control the volume of other devices:
Press and hold SET until the LCD displays INITIAL SETUP. Press Scroll Left ( ) or Scroll
Right ( ) to go to ADVANCED SETUP. Press OK.
The LCD displays Set Volume control. Press OK.
The LCD displays Lock Volume. Press OK.
The LCD displays USE < > TO SELECT VOLUME SOURCE THEN PRESS OK. This is the device
which will control the volume of other devices (for example, a receiver). Press Scroll Left
( ) or Scroll Right ( ) to select the device and press OK.
The wireless controller displays the name of the device that you have designated for
volume control (for example, Volume Control is now Set to Receiver) and exits the menu.
3.
4.
5.
6.
1.
2.
3.
4.
5.

[ Wireless Controller Operation ] 45
You can now proceed to add other devices so that their volume is locked to the source device
you have just selected.
Adding a Device for Volume Lock
You can add devices for volume lock so that their audio volume will be controlled by the
device you have designated to control volumes. To add a device for volume lock:
Press and hold SET until the LCD displays Initial Setup. Press Scroll Left ( ) or Scroll
Right ( ) to go to Advanced Setup and press OK.
The LCD displays Set Volume control. Press OK.
The LCD displays Lock Volume. Press Scroll Left ( ) or Scroll Right ( ) to go to ADD
DEVICE TO VOLUME LOCK. Press OK.
The LCD displays USE < > TO SELECT VOLUME SOURCE THEN PUSH OK. Press Scroll Left
( ) or Scroll Right ( ) to go to the device you want to add to volume lock. The LCD
displays the name of the device having its volume locked and the name of the device to
which it is locked. For example, if you select TV2, and the device you have designated to
control the volume is a receiver, the LCD displays LOCK TV2 TO RECEIVER.
When the desired device is displayed press OK. The LCD displays the name of the
device you added for volume lock (for example, TV2 has been added to Volume Lock).
The LCD displays Push OK to add another device or push Set to Exit. Press OK to add
another device or press and hold SET to exit the menu.
Removing a Device from Volume Lock
You can remove devices that you had previously designated for volume lock. Once a device
has been removed from volume lock, it’s volume will no longer be controlled by the source
device. To remove a device from volume lock:
Press and hold SET until the LCD displays Initial Setup. Press Scroll Left ( ) or Scroll
Right ( ) to go to Advanced Setup and press OK.
The LCD displays Set Volume control. Press OK.
The LCD displays Lock Volume. Press Scroll Left ( ) or Scroll Right ( ) to go to
REMOVE DEVICE FROM VOLUME LOCK. Press OK.
The LCD displays USE < > TO find device to remove THEN PUSH OK. Press Scroll Left ( )
or Scroll Right ( ) to go to the device you want to remove from volume lock. The LCD
displays the name of the device you are removing from volume lock. For example, if you
select TV2, the LCD displays REMOVE FROM VOLUME LOCK TV2.
When the desired device is displayed press OK. The LCD displays the name of the
1.
2.
3.
4.
5.
6.
1.
2.
3.
4.
5.
[ Wireless Controller Operation ]
46
device you removed from volume lock (for example, TV2 has been removed from Volume
Lock).
The LCD displays Push OK to remove another or push Set to Exit. Press OK to add
remove another device from volume lock or press and hold SET to exit the menu.
Key Mover Feature
The key mover feature allows you to move key functions for a device from one key to another
key, and from one device to another device. For example, if you have added a DVD player and
a receiver to your wireless controller, you could move the mute key function of the DVD player
to the mute key of the receiver. The key mover feature also provides for deleting a key which
has been moved, or to delete all moved keys.
Moving Key Functions
The add key mover moves key functions from one device to another, or moves the key func-
tions within a single device. To move keys:
Press and hold SET until the LCD displays Initial Setup. Press Scroll Left ( ) or Scroll
Right ( ) to go to Advanced Setup and press OK.
Press Scroll Left ( ) or Scroll Right ( ) to go to Key Mover. Press OK.
The LCD displays ADD KEY MOVER. Press OK.
The LCD displays FIND SOURCE Device and PUSH OK. On the bottom line, the wireless con-
troller displays the source mode (for example, TV). Press Scroll Left ( ) or Scroll Right
( ) to find the source device for the key you want to move. Press OK.
The LCD displays Select Source Key to Copy. Press the key you wish to copy. All keys
except SET, Scroll Left ( ), Scroll Right ( ), or SIRIUS are available to move
The LCD displays Find Destination DEVICE AND Push OK. Press Scroll Left ( ) or Scroll
Right ( ) to go to the destination device for the key you are moving and press OK. The
destination may be the same device or another device.
The LCD displays Find Destination Key and Push OK. Press any key except SET, Scroll
Left ( ), Scroll Right ( ), or SIRIUS and press OK.
The LCD displays Key Mover Saved.
The LCD displays Push OK to add another Push Set to exit. If you press OK, the LCD
returns to step 3. Press and hold SET to exit the menu.
6.
1.
2.
3.
4.
5.
6.
7.
8.
9.

[ Wireless Controller Operation ] 47
Deleting Moved Keys
You can delete all moved keys from a device or delete a single moved key from a device. To
delete moved keys:
Press and hold SET until the LCD displays Initial Setup. Press Scroll Left ( ) or Scroll
Right ( ) to go to Advanced Setup and press OK.
Press Scroll Left ( ) or Scroll Right ( ) to go to Key Mover. Press OK.
The LCD displays ADD KEY MOVER. Press Scroll Left ( ) or Scroll Right ( ) to go to
DELETE KEY MOVER. Press OK.
The LCD displays FIND DEVICE and PUSH OK. The device name is displayed on the bottom
line. Press Scroll Left ( ) or Scroll Right ( ) to go to the device with the moved keys
which you want to delete. Press OK.
The LCD displays Select Key to Delete or Push OK to Delete All.
a. If you wish to delete a single key, press the key to be deleted. The LCD displays KEY
DELETED PUSH OK TO DELETE ANOTHER.
OR
b. If you wish to delete all moved keys from the device press OK. The LCD displays
Deleting All Push OK to Confirm. Press OK. The LCD displays All Moved Keys Deleted
Push OK to Delete More.
Press OK to delete more keys or press and hold SET to exit the menu..
Key Macros Feature
The key macro feature allows you to program a series of keystrokes into a single key. For
example, you can program a key macro for the POWER button that turns on/off all of your
home entertainment equipment with a single press of the POWER button. Key macros are not
available in when in the SIRIUS mode.
NOTE: Macro programming overrides the key’s original function in all modes. However, you
can access the key’s original function by pressing and releasing SET, then pressing the key to
which the macro is assigned. The key then sends its original function and not the macro.
Adding a Key Macro
To add a new key macro to the wireless controller:
Press and hold SET until the LCD displays Initial Setup. Use Scroll Left ( ) or Scroll
1.
2.
3.
4.
5.
6.
1.

[ Wireless Controller Operation ]
48
Right ( ) to go to Advanced Setup and press OK.
From ADVANCED SETUP, press Scroll Left ( ) or Scroll Right ( ) to go to KEY MACRO.
Press OK.
The LCD displays ADD KEY MACRO. Press OK.
The LCD displays SELECT MACRO KEY. Press any key except SET, Scroll Left ( ), Scroll
Right ( )or SIRIUS and press OK.
The LCD displays ENTER THE MACRO SEQUENCE. You can now enter up to 30 keystrokes
for the macro. After you press a key to be added to the macro, the LCD displays PUSH
OK FOR 3 SECONDS TO SAVE. Continue to press each key you want in your macro until you
are finished. Press Scroll Left ( ) or Scroll Right ( ) to go to the device which will be
sending the keystroke (such as TV, DVD, etc.) and then press the desired key which will
be added to the macro.
If you want the macro to end with a specific device selected, press Scroll Left ( ) or
Scroll Right ( ) to go to the device before saving your macro in the next step. Note: If
you enter more than 30 keystrokes into the macro, the LCD displays Memory Full.
When you are finished, press and hold OK for three seconds to save your macro.
The LCD displays Macro Saved and then Key Macro. Press OK to create another macro
or press and hold SET to exit the menu.
Deleting a Key Macro
You can delete a key macro from the wireless controller. To delete a key macro:
Press and hold SET until the LCD displays Initial Setup. Use Scroll Left ( ) or Scroll
Right ( ) to go to Advanced Setup and press OK.
From ADVANCED SETUP press Scroll Left ( ) or Scroll Right ( ) to go to KEY MACRO.
Press OK.
The LCD displays ADD KEY MACRO. Press Scroll Left ( ) or Scroll Right ( ) to go to
DELETE MACRO. Press OK.
The LCD displays SELECT MACRO KEY TO DELETE AND PUSH OK. Press the key containing the
macro to be deleted and press OK.
The LCD displays MACRO DELETED CHOOSE ANOTHER OR SET TO EXIT. If you want to delete
another macro key press OK or press and hold SET to exit the menu.
2.
3.
4.
5.
6.
7.
8.
1.
2.
3.
4.
5.

[ Wireless Controller Operation ] 49
Adjusting the Contrast of the LCD Display
You can adjust the contrast setting of the LCD display on the wireless controller. To change
the contrast setting:
Press and hold SET until the LCD displays Initial Setup. Use Scroll Left ( ) or Scroll
Right ( ) to go to Advanced Setup and press OK.
From ADVANCED SETUP, press Scroll Left ( ) or Scroll Right ( ) to go to CONTRAST.
Press OK.
The LCD displays CONTRAST SETUP, with 10 blocks to show the current contrast setting.
Press Scroll Left ( ) or Scroll Right ( ) to adjust the contrast setting.
When you are finished adjusting the contrast press OK.
The LCD displays Contrast. Press and hold SET to exit the menu.
LCD Timer Feature
The LCD Timer feature allows you to adjust how long the text is displayed after each key-
press. You can set the time to 10, 20, or 30 seconds.
To adjust the LCD Timer:
Press and hold SET until the LCD displays Initial Setup. Use Scroll Left ( ) or Scroll
Right ( ) to go to Advanced Setup. Press OK.
From ADVANCED SETUP, press Scroll Left ( ) or Scroll Right ( ) to go to LCD Timer.
Press OK.
The LCD displays SET TO 20 SECONDS (or the current setting). Press Scroll Left ( ) or
Scroll Right ( ) to adjust the LCD timer to 10, 20, or 30 seconds and press OK
The LCD displays LCD TIMER. Press and hold SET to exit the menu.
Note: This adjustment does not affect the backlight. The backlight for the LCD display and
keys turns off after 10 seconds of no activity.
1.
2.
3.
4.
5.
1.
2.
3.
4.

[ Wireless Controller Operation ]
50
About Feature
The About screen displays information about the wireless controller and the Sirius Conductor
Tuner. You can find software version information about the wireless controller and the Sirius
Conductor Tuner using this feature.
To view the About information:
Press and hold SET until the LCD displays Initial Setup. Use Scroll Left ( ) or Scroll
Right ( ) to go to Advanced Setup and press OK.
From ADVANCED SETUP, press Scroll Left ( ) or Scroll Right ( ) to go to About. Press
OK.
The LCD displays the About information. To view more information press Scroll Left
( ) or Scroll Right ( ).
Press and hold SET to exit the menu.
Reset Remote Feature
The reset remote feature allows you to either reset the features you have programmed into the
wireless controller, or to reset the wireless controller to the factory settings.
Resetting Features
Resetting features deletes any features which have been programmed in the wireless control-
ler such as moved keys, macros, learned keys, and volume lock. This reset will not delete any
devices which have been added to the wireless controller.
To reset features:
Press and hold SET until the LCD displays Initial Setup. Use Scroll Left ( ) or Scroll
Right ( ) to go to Advanced Setup and press OK.
From ADVANCED SETUP press Scroll Left ( ) or Scroll Right ( ) to go to RESET REMOTE.
Press OK.
The LCD displays TO RESET ALL FEATURES PUSH OK. Press OK.
The LCD displays PUSH OK TO CONFIRM OR SET TO CANCEL. Press OK.
The LCD displays Reset Confirmed and exits the menu.
1.
2.
3.
4.
1.
2.
3.
4.
5.

[ Wireless Controller Operation ] 51
Resetting to Factory Settings
Resetting the wireless controller to its factory settings will delete everything that has been
programmed in the wireless controller, including all devices which have been added to the
wireless controller. Use caution when restoring to the factory settings.
To perform a factory reset:
Press and hold SET until the LCD displays Initial Setup. Use Scroll Left ( ) or Scroll
Right ( ) to go to Advanced Setup and press OK.
From ADVANCED SETUP press Scroll Left ( ) or Scroll Right ( ) to go to RESET REMOTE.
Press OK.
The LCD displays TO RESET ALL FEATURES PUSH OK. Use Scroll Left ( ) or Scroll Right
( ) to go to To RESET TO FACTORY SETTING PUSH OK. Press OK.
The LCD displays PUSH OK TO CONFIRM OR SET TO CANCEL. Press OK.
The LCD displays THIS CLEARS ALL EVEN CODE SETUP ARE YOU SURE? Press OK.
The LCD displays Reset Confirmed. The wireless controller is now reset to its original
factory programming and exits the menu.
Remote Copy Feature
The remote copy feature allows you to send all the programming from the wireless controller
to another remote control creating a second remote for your network. It also allows you to
receive all the programming from another remote control to your wireless controller.
Note: Using the wireless controller to replicate a third-party manufacturer’s remote causes
the wireless controller to be part of the network which slows down performance if it’s part of
a greater network of nodes. For best performance, the wireless controller should only use one
third-party node as a router (range extender) that is not part of a greater network. The more
nodes in a network, the slower the communication will be with the Sirius Conductor Tuner.
Transmitting Programming to Another Remote Control
Transmitting the programming from your wireless controller to another remote control will
create a secondary remote control. You will need to follow the instructions of the other remote
control to prepare it to receive the programming from the wireless controller.
To transmit the programming of the wireless controller to another remote control:
Press and hold SET until the LCD displays Initial Setup. Use Scroll Left ( ) or Scroll
1.
2.
3.
4.
5.
6.
1.

[ Wireless Controller Operation ]
52
Right ( ) to go to SIRIUS Setup and press OK.
From SIRIUS SETUP press Scroll Left ( ) or Scroll Right ( ) to go to REMOTE COPY. Press
OK.
The LCD displays TRANSMIT NETWORK INFORMATION. Press OK.
The LCD displays Sending until the wireless controller completes the replication process.
The LCD displays Successful if the programming was successfully sent, or TIME OUT if
the programming was not successfully sent. Press and hold SET to exit the menu..
Receiving Programming from Another Remote Control
If you have a remote control in your network, you can have it send its programming information
to the wireless controller. You will need to follow the instructions of the other remote control
to prepare it to send the programming information to the wireless controller.
To have the wireless controller receive the programming from another remote control:
Press and hold SET until the LCD displays Initial Setup. Use Scroll Left ( ) or Scroll
Right ( ) to go to SIRIUS Setup and press OK.
From SIRIUS SETUP press Scroll Left ( ) or Scroll Right ( ) to go to REMOTE COPY. Press
OK.
The LCD displays TRANSMIT NETWORK INFORMATION. Press Scroll Left ( ) or Scroll Right
( ) to go to RECEIVE A COPY and press OK.
The LCD displays RECEIVING until the wireless controller completes the replication pro-
cess.
The LCD displays Successful if the programming was successfully received, or TIME OUT
if the programming was not successfully received. Press and hold SET to exit the menu.
2.
3.
4.
5.
1.
2.
3.
4.
5.
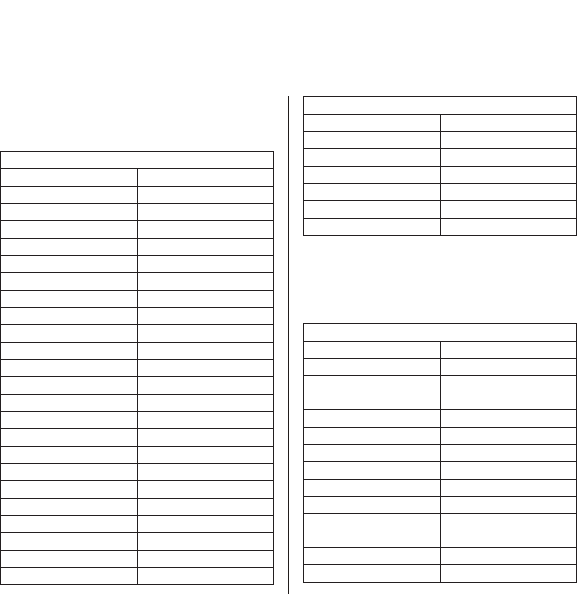
[ Manufacturer’s Codes ] 53
Manufacturer’s Codes
Setup Codes For
Audio Amplifiers
Setup Codes For Audio Amplifiers
Acurus 0765
Adcom 0577, 1100
Bel Canto Design 1583
Bose 0674
Classe 1461, 1462
Elan 0647
Halcro 1934
Harman/Kardon 0892
JVC 0331
Krell 1837
Left Coast 0892
Lexicon 1145, 1802
Logitech 1408
Luxman 0165
Marantz 0892
Mark Levinson 1483
McIntosh 0251
NEC 0264
Optimus 0823
Parasound 0246, 1934
Philips 0892
Pioneer 0823
Polk Audio 0892
Primare 1395
Setup Codes For Audio Amplifiers
RCA 0823
Redstar 1381
Sansui 1381
Shure 0264
Sony 0689, 0815, 1126
Victor 0331
Yamaha 0354, 0133
Setup Codes For
Audio Receivers
Setup Codes For Audio Receivers
ADC 0531
Adcom 0616
Aiwa 1405, 0121, 1388,
1641
Alco 1390
Anam 1609, 1074
Apex Digital 1774
Audiotronic 1189
Audiovox 1390
B & K 0701, 0820, 0840
Bose 1229, 0639, 1253,
1933
Capetronic 0531
Carver 1189
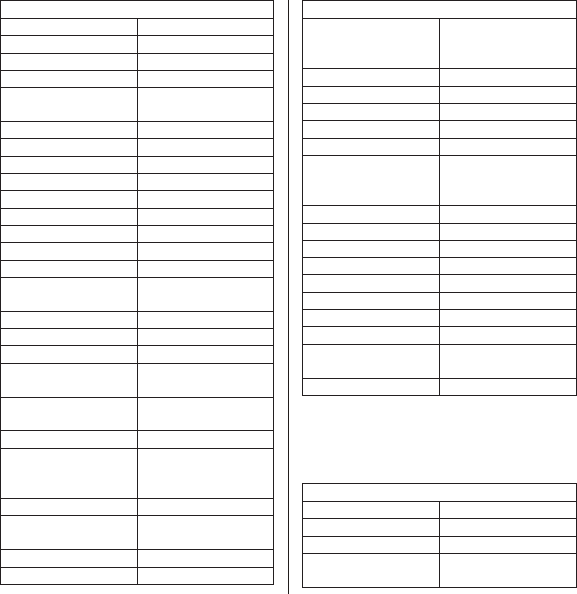
[ Manufacturer’s Codes ]
54
Setup Codes For Audio Receivers
Coby 1389
Daewoo 1250
Denon 1360, 1142
Fisher 1801
Harman/Kardon 0110, 0891, 1304,
1306
Hitachi 1801
Integra 0135, 1298, 1320
JBL 0110, 1306
JVC 1282, 1374, 1495
Kenwood 1313, 1570, 1569
KLH 1390, 1412, 1428
Koss 1366, 1497
LG 1293
Liquid Video 1497
Magnavox 1189, 1269, 0531,
1514
Marantz 1189, 1269, 1289
Norcent 1389
Nova 1389
Onkyo 0135, 0842, 1298,
1320, 1531
Optimus 1023, 0531, 0670,
1074
Oritron 1366, 1497
Panasonic 1308, 1518, 1288,
1316, 1548, 1633,
1763, 1764
Philips 1189, 1269, 1266
Pioneer 1023, 0014, 0150,
0531, 0630, 1384
Polk Audio 1289
Proscan 1254
Setup Codes For Audio Receivers
RCA 1023, 1609, 1254,
0531, 1074, 1390,
1511
Rio 1869
Samsung 1295, 1500
Sanyo 1469, 1801
Sherwood 1077, 1653
Sonic Blue 1869
Sony 1058, 1441, 1258,
1759, 1622, 1558,
1658, 1758, 1858
Soundesign 0670
Stereophonics 1023
Sunfire 1313
Teac 1074, 1390, 1528
Technics 1308, 1518
Thorens 1189
Venturer 1390
Wards 0014
Yamaha 0176, 1176, 1276,
1331, 1375
Zenith 1293
Setup Codes For
Audio Accessories
Setup Codes For Audio Accessories
Aiwa 0159
Altec Lansing 0607, 1056, 1485
Apple 1115, 1644
Cambridge Sound-
works
1530

[ Manufacturer’s Codes ] 55
Setup Codes For Audio Accessories
Creative 0872
D-Link 1522
DLO 1155
Integra 1789
iPort 2042
Marantz 1491
Motorola 1464
NaviPod 1644
Netgear 1785
Omnifi 1605
Onkyo 1789
Roku 1828
Slim Devices 1844
Sonance 2042
Sony 0159
SSI 1522
Yamaha 1809, 1810
Setup Codes For
Cable Set Top Box
Setup Codes For Cable Set Top Box
ABC 0003, 0008
Americast 0899
Bell South 0899
Digeo 1187
Director 0476
General Instrument 0476, 0810, 0276,
0003
GoldStar 0144
Hamlin 0273
Setup Codes For Cable Set Top Box
Jerrold 0476, 0810, 0276,
0003
Memorex 0000
Motorola 1376, 0476, 0810,
0276, 1187
Pace 1877, 0237, 0008
Panasonic 0000, 0107
Paragon 0000
Philips 1305, 0317
Pioneer 1877, 0877, 0144,
0533
Pulsar 0000
Quasar 0000
Regal 0273
Runco 0000
Samsung 0144
Scientific Atlanta 1877, 0877, 0477,
0008
Sony 1006
Starcom 0003
Supercable 0276
Torx 0003
Toshiba 0000
Zenith 0000, 0525, 0899
Setup Codes For
CD Players
Setup Codes For CD Players
DKK 0000
Integra 0101
JVC 0072, 1294
[ Manufacturer’s Codes ]
56
Setup Codes For CD Players
Magnavox 0038
Marantz 0038, 0180, 0435
Miro 0000
Onkyo 1327, 0101
Optimus 0000
Panasonic 0388, 0752
Philips 0274
Pioneer 1062, 1087
RCA 1062
Realistic 0180
Sharp 0180
Sherwood 0180
Sony 0490, 0000, 0100,
1364, 0185
Teac 0180
Victor 0072
Yamaha 0490, 0036, 1292
Setup Codes For
Cassette Decks
Setup Codes For Cassette Decks
Aiwa 0029
Carver 0029
Denon 0076
Harman/Kardon 0182, 0029
JVC 0244
Magnavox 0029
Marantz 0029
Optimus 0027
Philips 0029
Pioneer 0027
Setup Codes For Cassette Decks
Polk Audio 0029
RCA 0027
Sansui 0029
Sony 0243, 0170, 0291
Wards 0027
Yamaha 0097
Setup Codes For
DBS/PVR Combination
Setup Codes For
DBS/PVR Combination
Controlled by the Satellite
DirecTV 1377, 0392, 0639,
1142, 1076, 0099,
1392, 1442, 1640
Dish Network
System
1505, 0775
Dishpro 1505, 0775
Echostar 1505, 0775
Expressvu 0775
Hughes Network
Systems
1142, 1442
Philips 1142, 1442
Proscan 0392
RCA 1392
Samsung 1442
Sony 0639, 1640
Controlled by the VCR
Hughes Network
Systems
0739
Philips 0739

[ Manufacturer’s Codes ] 57
Setup Codes For
DBS/PVR Combination
Samsung 0739
Setup Codes For
DVD Players
Setup Codes For DVD Players
Akai 0695, 0899
Alco 0790
Apex Digital 0672, 0717, 0830
Audiovox 0790
Blaupunkt 0717
Blue Parade 0571
Broksonic 0695
CyberHome 0816
Denon 0490, 0634
Disney 0675
DVD2000 0521
Emerson 0591, 0675
Enterprise 0591
Funai 0675
GE 0522, 0717
Go Video 1075
Greenhill 0717
Hitachi 0573, 0664
Hiteker 0672
Initial 0717
Integra 0627
JVC 0558, 0623, 0867,
1164
Kawasaki 0790
Kenwood 0490, 0534
Setup Codes For DVD Players
KLH 0717, 0790
LG 0591
Magnavox 0503, 0539, 0646,
0675
Marantz 0539
Memorex 0695
Microsoft 0522
Mintek 0717
Mitsubishi 1521, 0521
Nesa 0717
Onkyo 0503, 0627
Panasonic 0490, 0703, 1362,
1462, 1490, 1762
Philips 0503, 0539, 0646,
0675, 0854, 1260,
1267, 1354
Pioneer 0525, 0571, 0631
Polk Audio 0539
Presidian 0675
Proscan 0522
RCA 0522, 0571, 0717,
0790, 0822, 1022,
1132
Rotel 0623
Sampo 0752
Samsung 0490, 0573, 0820,
0899, 1075
Sansui 0695
Sanyo 0695
Sharp 0630, 0675, 0752,
1256
Shinsonic 0533
[ Manufacturer’s Codes ]
58
Setup Codes For DVD Players
Sony 0533, 1533, ,
1033, 1431
Sylvania 0675
Symphonic 0675
Teac 0790, 0809
Technics 0490, 0703
Theta Digital 0571
Toshiba 0503, 0695, 1045,
1154
Urban Concepts 0503
Venturer 0790
Xbox 0522
Yamaha 0490, 0539, 0545
Zenith 0503, 0591
Setup Codes For
DVD/PVR Combination
Setup Codes For
DVD/PVR Combination
Controlled by the DVD
Panasonic 0490
Pioneer 0631
RCA 0522
Sharp 1256
Sylvania 0675
Controlled by the VCR
RCA 0880
Sylvania 0000
Toshiba 1996
Setup Codes For
DVD/VCR Combination
Setup Codes For
DVD/VCR Combination
Controlled by the DVD
Broksonic 0695
Emerson 0675
Funai 0675
Go Video 1075
Hitachi 0664
JVC 0867, 1164
Magnavox 0675
Memorex 0695
Panasonic 1762
Philips 0675, 1267
Presidian 0675
RCA 0522, 0822
Samsung 0820, 1075
Sansui 0695
Sharp 0630
Sony 0864, 1033, 1431
Sylvania 0675
Symphonic 0675
Toshiba 0503
Controlled by the VCR
Hitachi 0000
RCA 0060
Sylvania 0000
Symphonic 0000
[ Manufacturer’s Codes ] 59
Setup Codes For
DVD Recorders
Setup Codes For DVD Recorders
Funai 0675
JVC 1164
Magnavox 0646, 0675
Panasonic 0490
Philips 0646
Pioneer 0631
RCA 0522
Samsung 0490
Sharp 0675
Sony 1033, 1431
Sylvania 0675
Setup Codes For
HDTV Decoders
Setup Codes For HDTV Decoders
DirecTV 0392
LG 1414
Samsung 1276
Zenith 1856
Setup Codes For
Home Automation
Setup Codes For Home Automation
Amana 1716
Frigidaire 1333
Setup Codes For Home Automation
GE 0240
GoldStar 1537
Kenmore 1537
LG 1537
One For All 0167
Radio Shack 0240
Russound 1232, 1233
Security System 0167
Universal X10 0167
Whirlpool 1332
X10 0167
Setup Codes For
Video Laser Disk Players
Setup Codes For
Video Laser Disk Players
Aiwa 0203
Carver 0064, 0194
Denon 0059, 0172
Funai 0203
Harman/Kardon 0194
Magnavox 0194, 0217
Marantz 0064, 0194
Mitsubishi 0059
NAD 0059
Optimus 0059
Panasonic 0204
Philips 0064, 0194
Pioneer 0059
Polk Audio 0194
Quasar 0204

[ Manufacturer’s Codes ]
60
Setup Codes For
Video Laser Disk Players
Realistic 0203
Sony 0193, 0201
Technics 0204
Theta Digital 0194
Yamaha 0217
Setup Codes For
Media Center Controllers
Setup Codes For
Media Center Controllers
ABS 1272
Alienware 1272
CyberPower 1272
Gateway 1272
Hewlett Packard 1272
Howard Computers 1272
HP 1272
Hush 1272
iBUYPOWER 1272
Linksys 1272
Media Center PC 1272
Microsoft 1272
Mind 1272
Niveus Media 1272
Northgate 1272
Ricavision 1272
Sony 1272, 1324
Stack 9 1272
Systemax 1272
Setup Codes For
Media Center Controllers
Tagar Systems 1272
Toshiba 1272
Touch 1272
Viewsonic 1272
Voodoo 1272
ZT Group 127
Controlled by the VCR
CyberPower 1972
Gateway 1972
Hewlett Packard 1972
iBUYPOWER 1972
Microsoft 1972
Northgate 1972
Northgate 1972
Setup Codes For PVRs
Setup Codes For PVRs
Controlled by the VCR
ABS 1972
Alienware 1972
CyberPower 1972
Dell 1972
DirecTV 0739
Gateway 1972
Hewlett Packard 1972
Howard Computers 1972
HP 1972
Hughes Network
Systems
0739
Humax 0739
[ Manufacturer’s Codes ] 61
Setup Codes For PVRs
Hush 1972
iBUYPOWER 1972
Linksys 1972
Media Center PC 1972
Microsoft 1972
Mind 1972
Niveus Media 1972
Northgate 1972
Panasonic 0616
Philips 0618, 0739
RCA 0880
ReplayTV 0614, 0616
Samsung 0739
Sonic Blue 0614, 0616
Sony 0636, 1972
Stack 9 1972
Systemax 1972
Tagar Systems 1972
Tivo 0618, 0636, 0739
Toshiba 1972, 1996
Touch 1972
Viewsonic 1972
Voodoo 1972
ZT Group 1972
Setup Codes For
Televisions
Setup Codes For Televisions
Admiral 0093, 0463
Advent 0761
Aiko 0092
Setup Codes For Televisions
Akai 0812, 0702, 0030,
0672
America Action 0180
Anam 0180
AOC 0030
Apex Digital 0748, 0879, 0765
Audiovox 0451, 0180, 0092
Aventura 0171
Bell & Howell 0154
Bradford 0180
Broksonic 0236, 0463
Candle 0030
Carnivale 0030
Carver 0054
Celebrity 0000
Celera 0765
Changhong 0765
Citizen 0060, 0030, 0092
Clarion 0180
Commercial Solu-
tions
1447, 0047
Contec 0180
Craig 0180
Crosley 0054
Crown 0180
Curtis Mathes 0047, 0054, 0154,
0451, 0093, 0060,
0702, 0030, 0145,
0166, 1347
CXC 0180
Daewoo 0451, 0092, 1661,
0672
Dell 1178

[ Manufacturer’s Codes ]
62
Setup Codes For Televisions
Denon 0145
Dumont 0017
Durabrand 0463, 0180, 0178,
0171
Electroband 0000
Electrograph 1755
Emerson 0154, 0236, 0463,
0180, 0178, 0171
Envision 0030
ESA 0812, 0171
Fisher 0154
Fujitsu 0683, 0809
Funai 0180, 0171
Futuretech 0180
Gateway 1755, 1756
GE 1447, 0047, 0051,
0451, 0178, 1347
Gibralter 0017, 0030
GoldStar 0178, 0030
Grunpy 0180
Hallmark 0178
Harman/Kardon 0054
Harvard 0180
Havermy 0093
Hello Kitty 0451
Hisense 0748
Hitachi 1145, 0145
Infinity 0054
Insignia 0171
Inteq 0017
JBL 0054
JCB 0000
Jensen 0761
Setup Codes For Televisions
JVC 0053, 0731, 1253
KEC 0180
Kenwood 0030
KLH 0765
KTV 0180, 0030
LG 1265, 0178, 0856,
1178
LXI 0047, 0054, 0154,
0156, 0178
Magnavox 1454, 0054, 0030,
0706, 1254
Marantz 0054, 0030
Matsushita 0250, 0650
Maxent 1755
Megatron 0178, 0145
Memorex 0154, 0463, 0150,
0178
MGA 0150, 0178, 0030
Midland 0047, 0017, 0051
Mitsubishi 0093, 1250, 0150,
0178, 0836
Motorola 0093
MTC 0060, 0030
Multitech 0180
NAD 0156, 0178, 0866
NEC 0030, 1704
NetTV 1755
Nikko 0178, 0030, 0092
Norcent 0748
NTC 0092
Onwa 0180
Optimus 0154, 0250, 0166,
0650

[ Manufacturer’s Codes ] 63
Setup Codes For Televisions
Optonica 0093
Orion 0236, 0463, 1463
Panasonic 0250, 0051, 0650
Penney 0047, 0156, 0051,
0060, 0178, 0030,
1347
Philco 0054, 0030
Philips 1454, 0054, 0690
Pilot 0030
Pioneer 0166, 0679, 0866
Polaroid 0765
Portland 0092
Prima 0761
Prism 0051
Proscan 1447, 0047, 1347
Proton 0178
Pulsar 0017
Quasar 0250, 0051, 0650
RadioShack 0047, 0154, 0180,
0178, 0030
RCA 1447, 0047, 0090,
0679, 1047, 1347,
1547
Realistic 0154, 0180, 0178,
0030
Runco 0017, 0030
Sampo 0030, 1755
Samsung 0060, 0812, 0702,
0178, 0030, 0766,
0814, 1060
Sansui 0463
Sanyo 0154
Scotch 0178
Setup Codes For Televisions
Scott 0236, 0180, 0178
Sears 0047, 0054, 0154,
0156, 0178, 0171
Sharp 0093
Sheng Chia 0093
Sony 1100, 0000
Soundesign 0180, 0178
Squareview 0171
SSS 0180
Starlite 0180
Superscan 0093
Supreme 0000
SVA 0748
Sylvania 0054, 0030, 0171
Symphonic 0180, 0171
Tandy 0093
Tatung 1756
Technics 0250, 0051
Techwood 0051
Teknika 0054, 0180, 0150,
0060, 0092
Telefunken 0702
TMK 0178
TNCi 0017
Toshiba 0154, 1256, 0156,
1265, 0060, 0650,
0845, 1156, 1656,
1704
TVS 0463
Vector Research 0030
Victor 0053
Vidikron 0054
Vidtech 0178

[ Manufacturer’s Codes ]
64
Setup Codes For Televisions
Viewsonic 0885, 1755
Vizio 0885, 1756
Wards 0054, 0178, 0030,
0866, 1156
Waycon 0156
Westinghouse 0885
White Westing-
house
0463
Yamaha 0030
Zenith 0017, 0463, 1265,
0178, 0092
Setup Codes For
Televisions (DLP)
Setup Codes For Televisions (DLP)
LG 1265
Mitsubishi 1250
RCA 1447
Samsung 0812, 1060
Toshiba 1265
Setup Codes For
Televisions (LCD)
Setup Codes For Televisions (LCD)
Audiovox 0180
Dell 1178
Funai 0171
LG 0856, 1178
Magnavox 1454
Setup Codes For Televisions (LCD)
Mitsubishi 1250
Panasonic 0650
Philips 1454
RCA 0047
Samsung 0812, 0766, 0814
Sharp 0093
Sylvania 0171
Symphonic 0171
Toshiba 0845, 1656
Viewsonic 0885
Vizio 0885, 1756
Westinghouse 0885
Zenith 1265
Setup Codes For
Televisions (Plasma)
Setup Codes for Televisions (Plasma)
Akai 0812
Electrograph 1755
ESA 0812
Fujitsu 0683, 0809
Gateway 1755, 1756
JVC 0731
LG 0178, 0856
Maxent 1755
Mitsubishi 0836
NEC 1704
NetTV 1755
Panasonic 0250, 0650
Philips 0690
Pioneer 0679
[ Manufacturer’s Codes ] 65
Setup Codes for Televisions (Plasma)
Sampo 1755
Samsung 0812
Sony 0000
Tatung 1756
Toshiba 0650, 1704
Viewsonic 1755
Vizio 1756
Zenith 0178
Setup Codes For
TV/DVD Combination
Setup Codes For TV/DVD Combination
Controlled by the DVD
Akai 0695
Apex Digital 0830
Broksonic 0695
Emerson 0675
Panasonic 1490
Philips 0854, 1260
RCA 1022
Samsung 0899
Sansui 0695
Sylvania 0675
Toshiba 0695
Setup Codes For
TV/VCR Combination
Setup Codes For TV/VCR Combination
Controlled by the TV
America Action 0180
Audiovox 0180
Emerson 0236
Controlled by the VCR
Broksonic 1479
Citizen 1278
Curtis Mathes 1035
Daewoo 1278
Emerson 1278, 1479
Funai 0000
GE 0807, 1035, 1060
GoldStar 1237
Harley Davidson 0000
Hitachi 0000
Lloyd’s 0000
Magnasonic 1278
Magnavox 0000, 1781
Memorex 1237
Mitsubishi 0807
Orion 1479
Panasonic 1035
Penney 1035, 1237
Quasar 1035
RadioShack 0000
RCA 0807, 1035, 1060
Samsung 1014
Sansui 0000, 1479
Sears 0000, 1237
[ Manufacturer’s Codes ]
66
Setup Codes For TV/VCR Combination
Sony 0000, 1232
Sylvania 1781
Symphonic 0000
Thomas 0000
Toshiba 0845, 1145
Zenith 0000, 1479
Setup Codes For
TV/VCR/DVD Combination
Setup Codes For TV/VCR/DVD Com-
bination
Controlled by the DVD
Akai 0899
Panasonic 1362, 1462
RCA 1132
Sharp 0630
Toshiba 1045
Controlled by the VCR
Sharp 0807
Setup Codes For
Satellite Set Top Boxes
Setup Codes For Satellite Set Top
Boxes
Chaparral 0216
Crossdigital 1109
Setup Codes For Satellite Set Top
Boxes
DirecTV 1377, 0392, 0566,
0639, 1639, 1142,
0247, 0749, 1749,
0724, 0819, 1856,
1076, 1108, 0099,
1109, 1414, 1442,
1609, 1392, 1640
Dish Network
System
1505, 1005, 0775,
1775
Dishpro 1505, 1005, 0775,
1775
Echostar 1505, 1005, 0775,
1775
Expressvu 0775, 1775
GE 0566
GOI 0775, 1775
Hitachi 0819
HTS 0775, 1775
Hughes Network
Systems
1142, 0749, 1749,
1442
JVC 0775, 1775
LG 1414
Magnavox 0724, 0722
Memorex 0724
Mitsubishi 0749
Motorola 0856
Panasonic 0247, 0701
Paysat 0724
Philips 1142, 0749, 1749,
0724, 1076, 0722,
0099, 1442
Proscan 0392, 0566
[ Manufacturer’s Codes ] 67
Setup Codes For Satellite Set Top
Boxes
RCA 0566, 0855, 0143,
1392
Samsung 1377, 1276, 1108,
1109, 1442, 1609
Sony 0639, 1639, 1640
Tivo 1142, 1442
Toshiba 0749, 1749, 0790,
1285
UltimateTV 1392, 1640
Uniden 0724, 0722
Zenith 1856, 0856
Setup Codes For VCRs
Setup Codes For VCRs
BS 1972
Adventura 0000
Aiwa 0000
Alienware 1972
American High 0035
Broksonic 0184, 1479
Canon 0035
Carver 0081
Citizen 1278
Curtis Mathes 0060, 0035, 1035
CyberPower 1972
Daewoo 0045, 1278
Dell 1972
Denon 0042
DirecTV 0739
Durabrand 0039
Setup Codes For VCRs
Dynatech 0000
Emerex 0032
Emerson 0184, 0000, 1278,
1479
Fuji 0035, 0033
Funai 0000
Garrard 0000
Gateway 1972
GE 0060, 0035, 0807,
1035, 1060
GoldStar 1237
Gradiente 0000
Harley Davidson 0000
Harman/Kardon 0081
Hewlett Packard 1972
Hitachi 0000, 0042
Howard Computers 1972
HP 1972
Hughes Network
Systems
0042, 0739
Humax 0739
Hush 1972
iBUYPOWER 1972
JVC 0067
Kenwood 0067
Kodak 0035
Linksys 1972
Lloyd’s 0000
Magnasonic 1278
Magnavox 0035, 0039, 0081,
0000, 1781
Marantz 0035, 0081
Matsushita 0035

[ Manufacturer’s Codes ]
68
Setup Codes For VCRs
Media Center PC 1972
MEI 0035
Memorex 0035, 0039, 0000,
1237
Microsoft 1972
Mind 1972
Minolta 0042
Mitsubishi 0067, 0807
Motorola 0035
MTC 0000
Multitech 0000
NEC 0067
Niveus Media 1972
Northgate 1972
Olympus 0035
Optimus 1062
Orion 0184, 1479
Panasonic 1062, 0035, 0225,
0616, 1035
Penney 0035, 0042, 1035,
1237
Pentax 0042
Philco 0035
Philips 0035, 0081, 0618,
0739
Pioneer 0067
Polk Audio 0081
Proscan 0060, 1060
Pulsar 0039
Quasar 0035, 1035
RadioShack 0000
RCA 0060, 0042, 0807,
0880, 1035, 1060
Setup Codes For VCRs
Realistic 0035, 0000
ReplayTV 0614, 0616
Ricavision 1972
Runco 0039
Samsung 0045, 0739, 1014
Sanky 0039
Sansui 0000, 0067, 1479
Scott 0184, 0045
Sears 0035, 0000, 0042,
1237
Sharp 0807
Sonic Blue 0614, 0616
Sony 0035, 0032, 0033,
0000, 0636, 1232,
1972
Stack 9 1972
STS 0042
Sylvania 0035, 0081, 0000,
1781
Symphonic 0000
Systemax 1972
Tagar Systems 1972
Teac 0000
Technics 0035
Teknika 0035, 0000
Thomas 0000
Tivo 0618, 0636, 0739,
1996
Toshiba 0045, 0845, 1145,
1972, 1996
Touch 1972
Vector 0045
Video Concepts 0045

[ Manufacturer’s Codes ] 69
Setup Codes For VCRs
Viewsonic 1972
Villain 0000
Voodoo 1972
Wards 0060, 0035, 0081,
0000, 0042
XR-1000 0035, 0000
Zenith 0039, 0033, 0000,
1479
ZT Group 1972
Setup Codes For
Video Accessories
Setup Codes For Video Accessories
ABS 1272
Alienware 1272
CyberPower 1272
D-Link 1554
Gateway 1272
Hewlett Packard 1272, 1267
Howard Computers 1272
HP 1272
Hush 1272
iBUYPOWER 1272
Linksys 1272, 1365
Media Center PC 1272
Microsoft 1272
Mind 1272
Niveus Media 1272
Northgate 1272
Ricavision 1272
Roku 1486
Setup Codes For Video Accessories
Sony 1272, 1324, 1364
Stack 9 1272
Systemax 1272
Tagar Systems 1272
Toshiba 1272
Touch 1272
Viewsonic 1272
Voodoo 1272
ZT Group 1272

[ Troubleshooting ]
70
Troubleshooting
Symptom Solution
I’m only receiving channels 000
and 184
Call 1-888-539-7474 to activate your subscription.
The wireless controller
continues to display “Antenna
Not Detected”
Make sure your antenna is securely connected to the
Sirius Conductor Tuner.
The wireless controller doesn’t
show any information after
pressing the SIRIUS button
Press the Reset button on the Sirius Conductor Tuner.
I‘ve added a second SIRIUS
radio but the wireless controller
can’t find it after pressing
SWAP
Press the Reset button on the Sirius Conductor Tuner.
My audio receiver doesn’t
respond to any of the
manufacturer’s codes
Program your wireless controller by learning the func-
tions from your original remote. (Refer to the Learn
Feature section on page 41.)
I cannot get the audio source
input function to switch
automatically when I press the
SIRIUS button
Use your wireless controller’s learning feature to learn
the audio receiver’s input function to a numeric button
(0-9) in the receiver mode. Then go through the audio
source programming again. Refer to the section Con-
trolling Your Receiver’s Volume and Setting Its Audio
Source Using the Wireless Controller on page 23.

[ Troubleshooting ] 71
Troubleshooting Continued
Symptom Solution
I get an Out of Range message
even when I’m close to the
Sirius Conductor Tuner
Go through SIRIUS setup and delete the Sirius Conduc-
tor Tuner. Then pair the Sirius Conductor Tuner to the
wireless controller again. Refer to the section Pairing
Your Wireless Controller With Your Sirius Conductor
Tuner on page 20.
I can’t get all the remote control
functions working properly
for my device (TV, Receiver,
Cable Box, etc.) when using the
wireless controller
Some manufacturer’s codes enable only partial func-
tions. Try going through the remaining manufacturer’s
codes in the list to find one that works better. If you
can’t find any, then use the learning function to learn
the missing functions from the device’s remote control.
(Refer to the Learn Feature section on page 41.)
No display at all times Replace batteries with four new AAA alkaline batteries.
No display when programming Display has turned off due to inactivity. Start program-
ming again and do not pause while performing instruc-
tions.
During programming, the LED
displays a long flash.
An invalid entry has occurred. Check the keys to be
pressed and start programming again.
How do I stop programming? Press SET once to back up one step in programming.
Press and hold SET to exit programming completely.
Changing channels does not
work properly
If the original remote control required pressing ENTER
to change channels, then press ENTER on the wireless
controller after entering channel numbers.
No remote control of volume Refer to the section Lock Volume Feature on page 44
to lock and unlock volume control.
Cannot program my combo
device code
Make sure have selected the correct device key for your
combo code.
[ Specifications ]
72
Specifications
Satellite Frequencies . . . . . . . . . . . . . . . . . . . . . . . . . . . . . . . . . . . . . .2322.293/2330.207 MHz
Terrestrial Frequencies ............................................ 2326.250 MHz
Power Requirements ..................................................5 Volts DC
Dimensions...............................................1” x 2.6” x 3.6” (WxHxD)
26mm x 66mm x 92mm (WxHxD)
Antenna Type....................................................Indoor/Outdoor
Antenna Cable Length . . . . . . . . . . . . . . . . . . . . . . . . . . . . . . . . . . . . . . .21’ (single micro-cable)
Connector Type ...........................................................SMB
Audio Interface . . . . . . . . . . . . . . . . . . . . . . . . . . . . . . . . . . . . .RCA-type Stereo L/R Connectors
Digital Optical Connector
RF Communication.....................................................908 MHz
RF Frequency Range . . . . . . . . . . . . . . . . . . . . . . . . . . . . . . . . . . . . . . . . . . . . . . 100’ open field
Signal to Noise Ratio......................................................80dB
Weight ...........................................................1 kg. (3.5 oz.)
Included Cable................................................IR Blaster (6’ cable)
NOTE: Design and specifications are subject to change without notice.

[ Copyrights & Trademarks ] 73
Copyrights & Trademarks
© 2006 Sirius Satellite Radio Inc. All Rights Reserved.
® “SIRIUS” and related marks, the SIRIUS dog logo, channel names and logos are registered
trademarks of Sirius Satellite Radio Inc. All Rights Reserved. Z-Wave is a registered trade-
mark of the Z-Wave Alliance.
Hardware, subscription, and activation fee required. For full Terms & Conditions, visit
http://sirius.com. Prices and programming are subject to change. Not available in HI and AK.
Equipment and subscription sold separately. Installation required with some equipment.

[ SIRIUS ID ]
74
SIRIUS ID
Write down the SIRIUS ID (SID) of your Sirius Conductor Tuner in the space provided below.
SID: _______________________________________

SIRIUS Product Support: 1-800-869-5364
customercare@sirius-radio.com
SIRIUS Satellite Radio Inc.
1221 Avenue of the Americas
New York, NY 10020
1-888-539-7474
http://www.sirius.com

SIRIUS Satellite Radio Inc.
1221 Avenue of the Americas
New York, NY 10020
(800) 869-5590
http://sirius.com
Sirius Conductor Installation & User Guide (091807)
