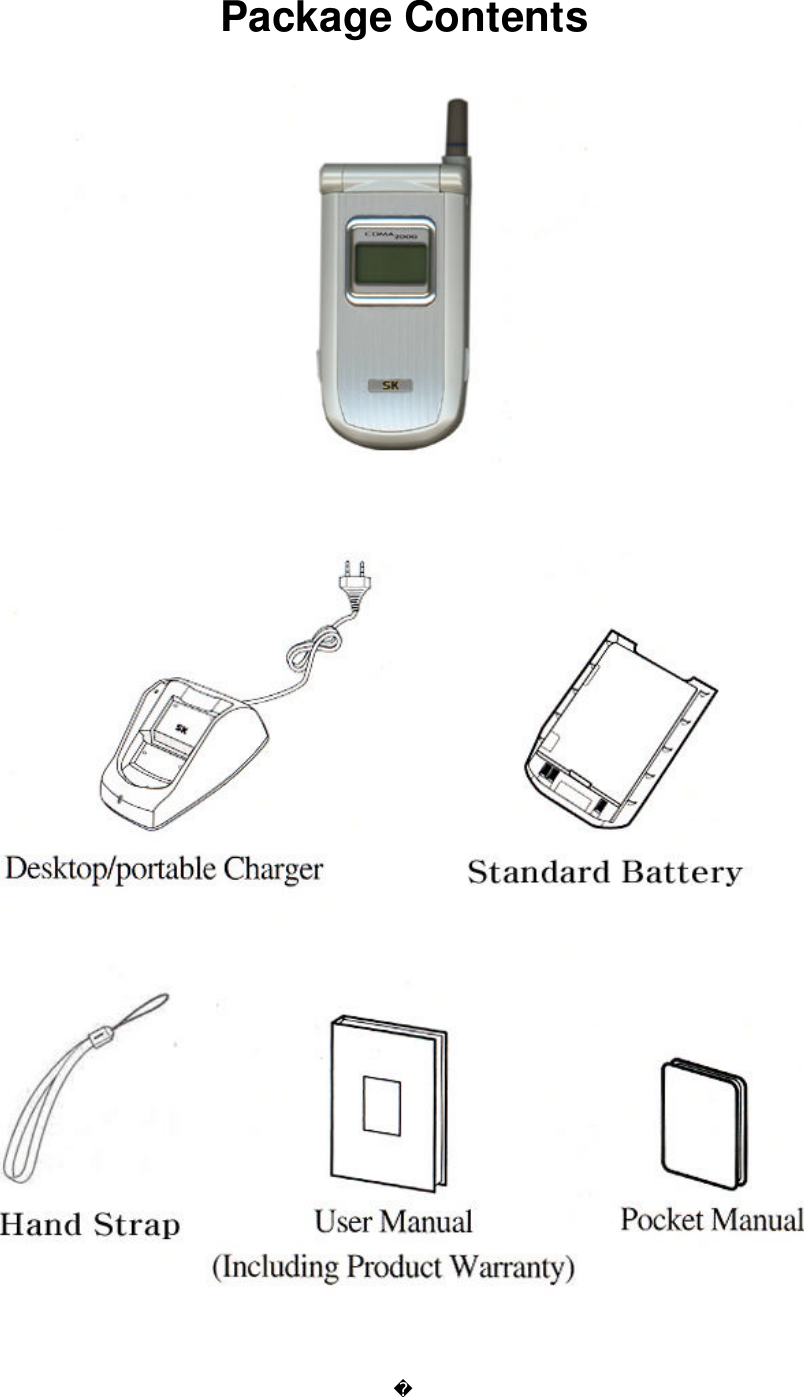
SK Teletech SK-5000ADVANCE Single-Mode Cellular Phone (CDMA) User Manual RF Exposure Warning Spacing No belt clip
SK Teletech Company Limited Single-Mode Cellular Phone (CDMA) RF Exposure Warning Spacing No belt clip
UserManual.wiki
>
SK Teletech
>
SK 5000ADVANCE User Manual
Users Manual
Navigation menu
Upload a User Manual
Namespaces
Wiki Guide
HTML
PDF
Info
Views
User Manual
Discussion / Help
Navigation


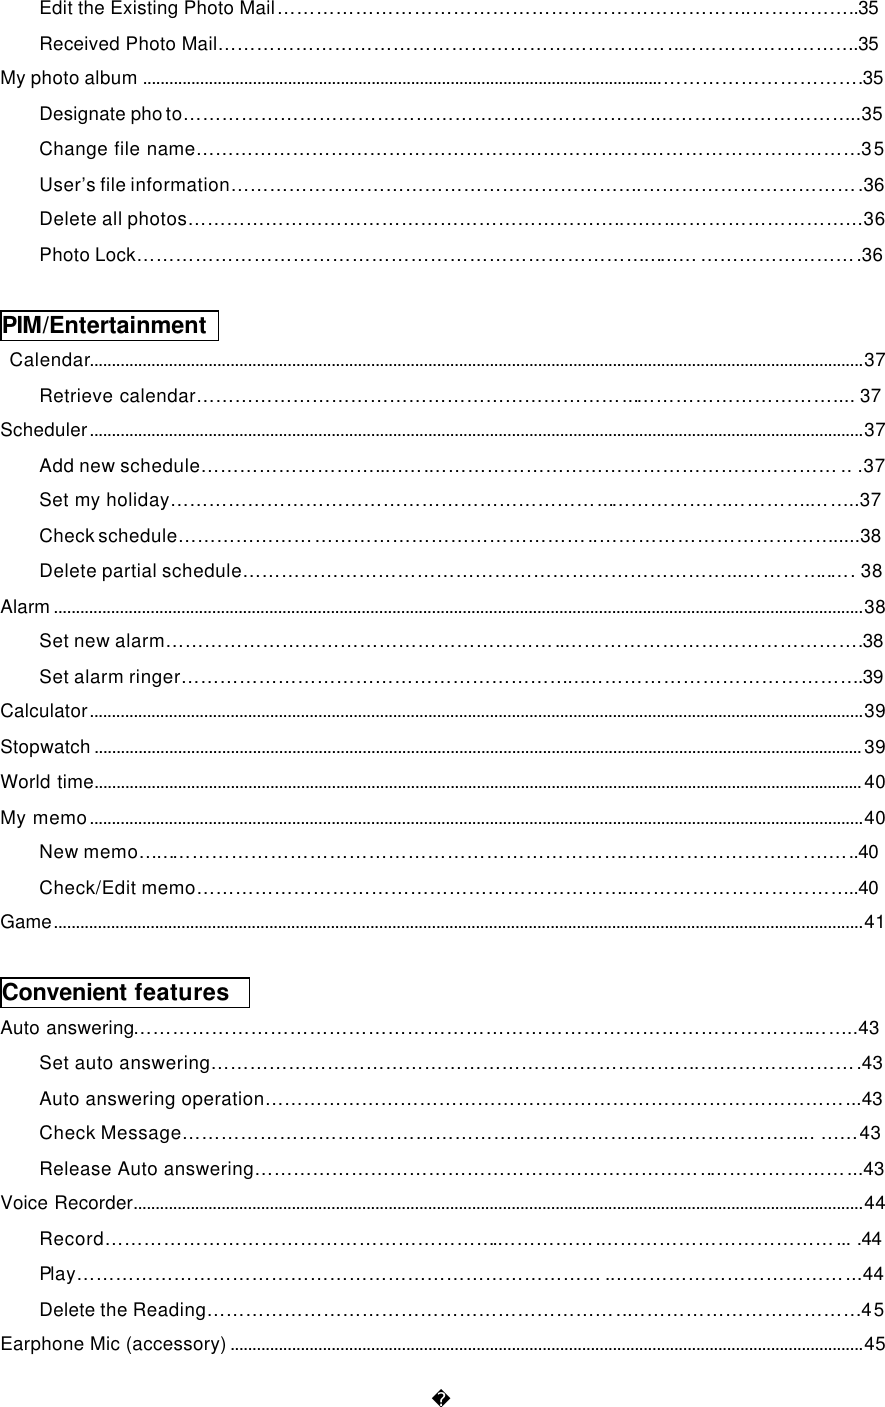

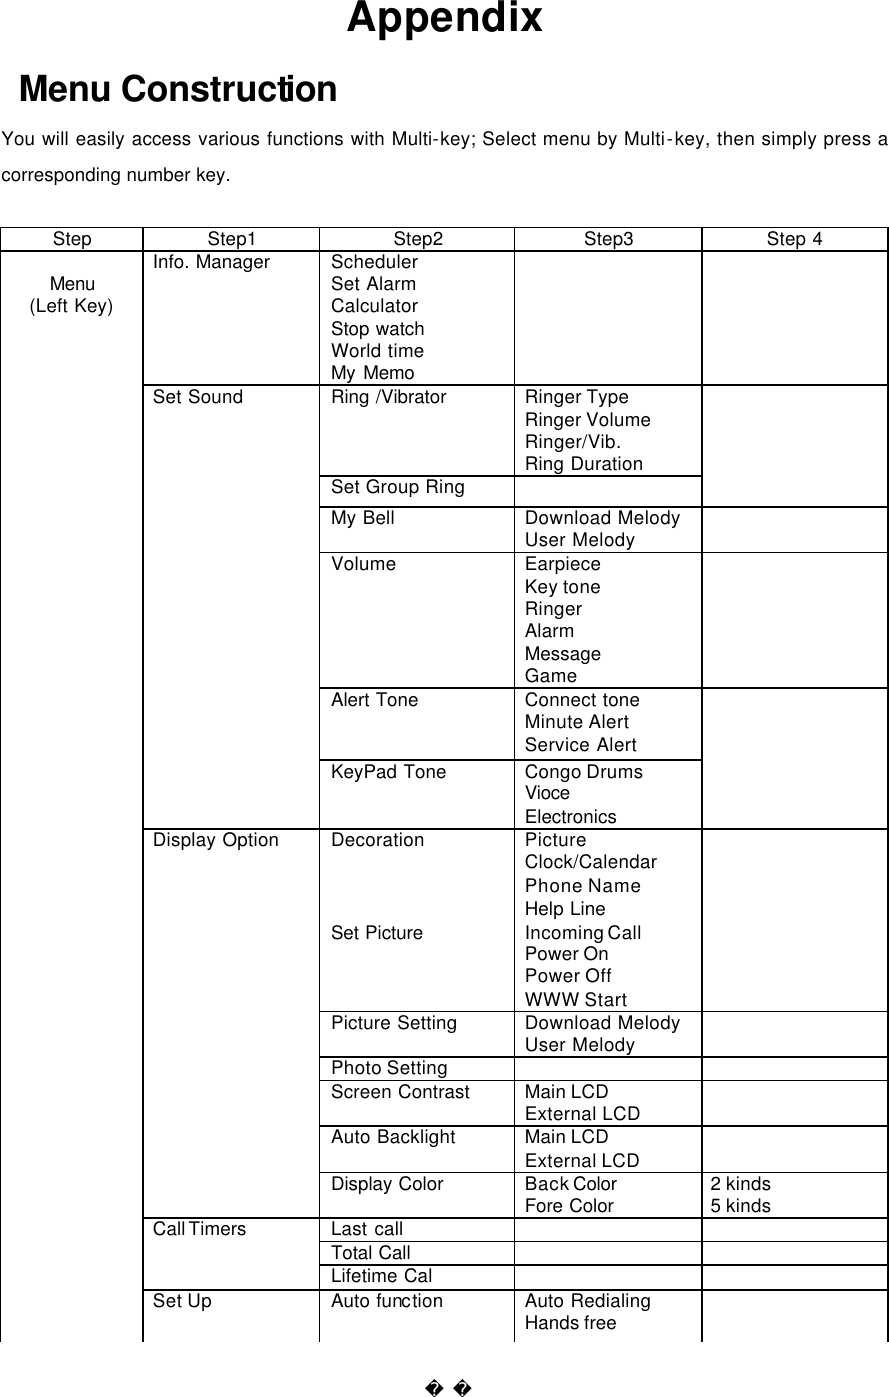
![How to activate and select menu Ex) Enter a phonebook: James, friend, Home number 123-4567, and memo. 1. Press (Right)[Book] and (4)[New Entry]. 2. Press (OK)[Sel]. 3. Enter Name, and press (OK)[Done]. - Press (OK)[Done] to automatically move to the next item. 4. Press (OK)[Sel] and (Up/down). - After moving to the required group, press (OK)[Sel]. 6. Press (OK)[Sel] and (Up/do wn). - The cursor is moved automatically to the next item. - After moving to the required icon, press (OK)[Sel]. 7. Press (OK)[Sel], enter the number and press (OK). - The cursor is moved automatically to the next item. 8. Press (OK)[Sel]. - After moving to the required icon, press (OK)[Sel]. 9. Press (OK)[Sel], enter the memo and press (OK)[Done]. 10. Press (SMS)[Save]. How to use the linked menu If Menu is displayed on the low screen, you can open the linked menu. - Press (Left)[Menu] to display executable functions on the screen. Ex: In case of selecting the connect menu of calendar/scheduler 1. Press (Left)[Menu], (1)[Info. Manager] and (1)[Scheduler] 2. Press (www)[Menu]. Using the battery Cautions Always use the authorized, dedicated charger and batteries. - Unauthorized product may damage or explode the battery. Keep the charger and battery clean. - Dust or dirt on the metal part of the con nector terminal may obstruct battery charging. Do not disassemble the battery and charger, and keep them away from fire. - Battery may explode.](https://usermanual.wiki/SK-Teletech/SK-5000ADVANCE/User-Guide-409203-Page-14.png)

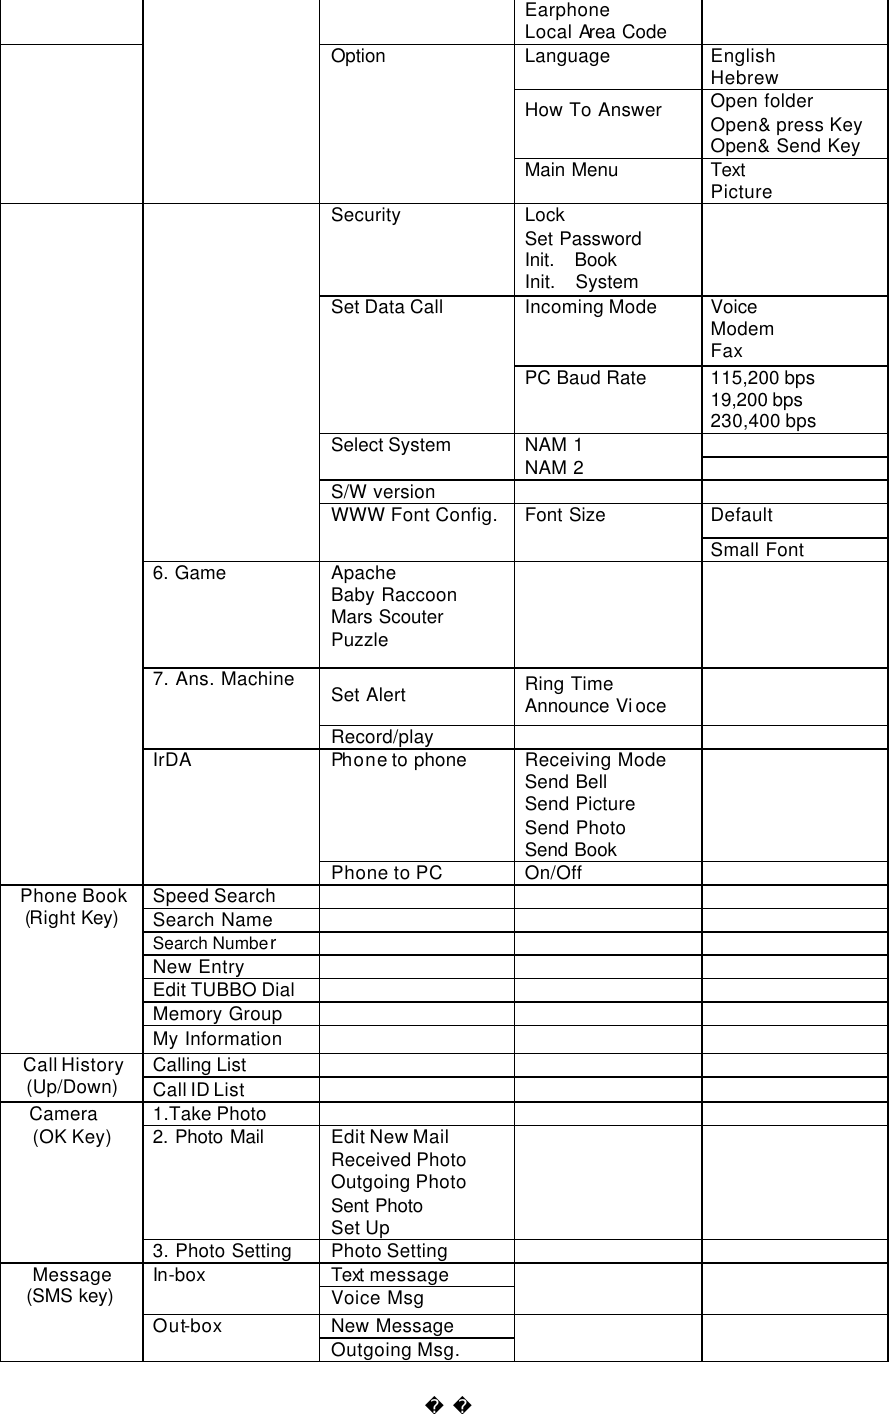
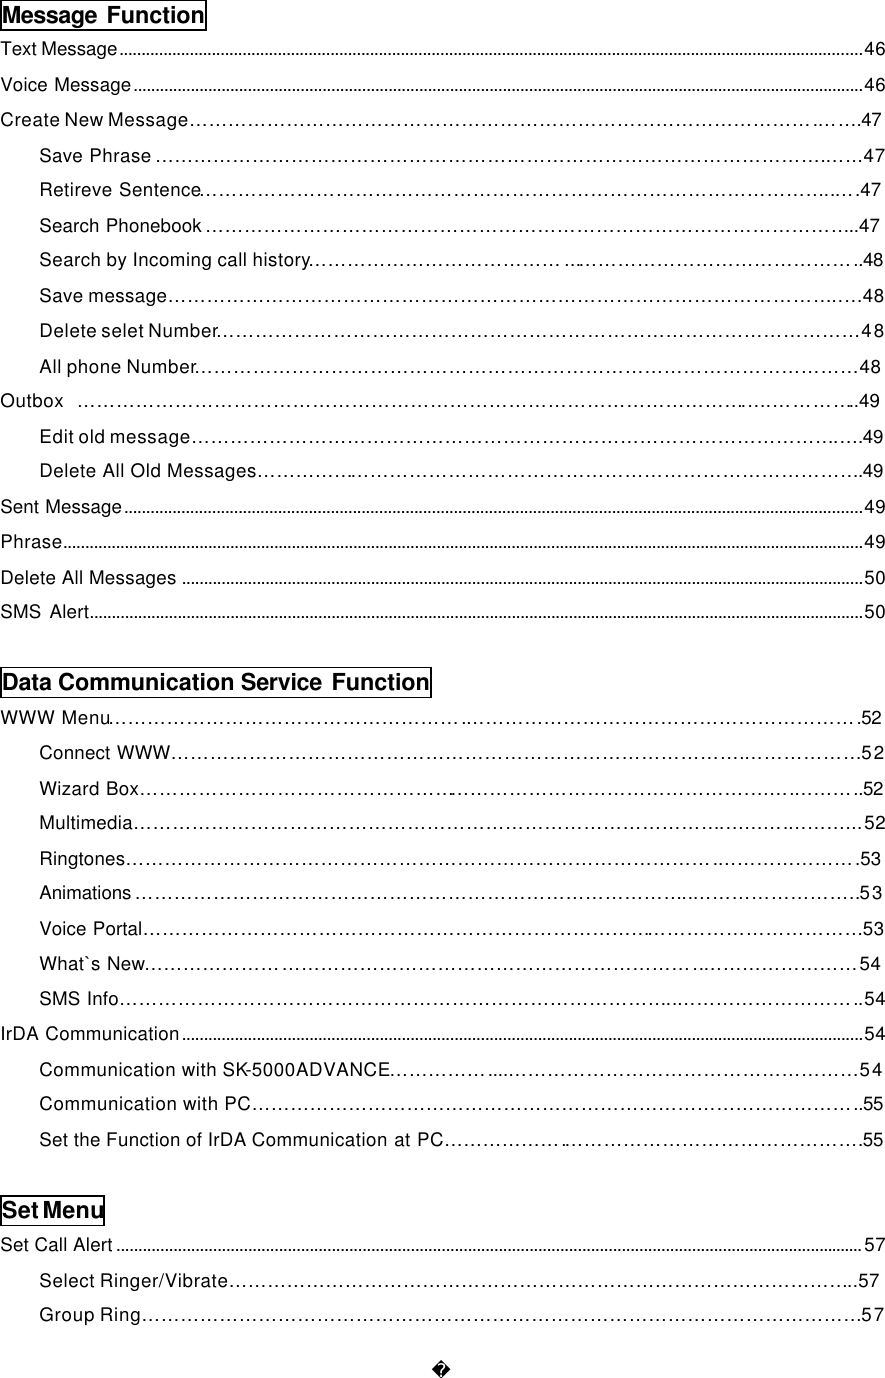
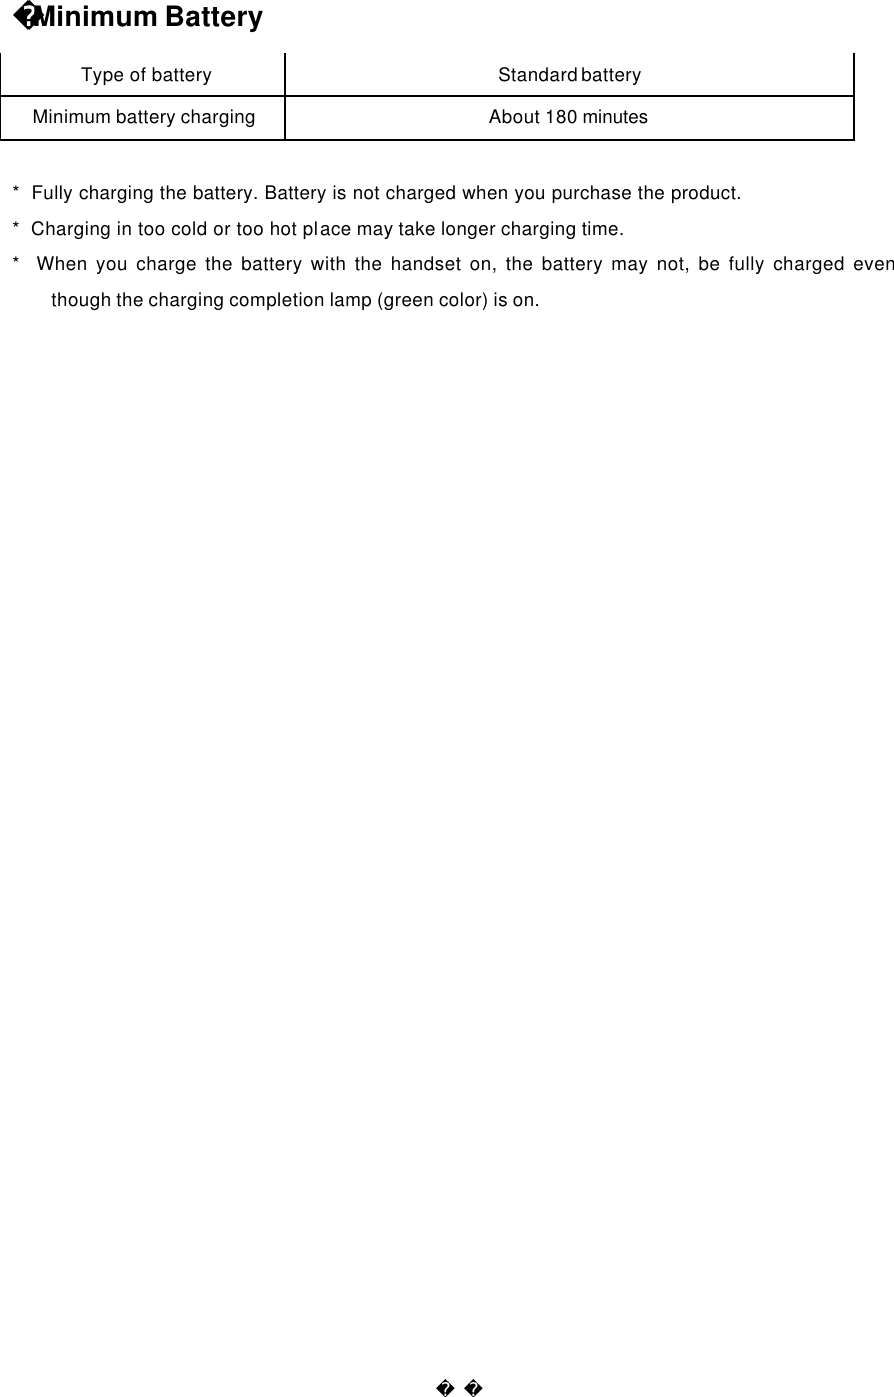
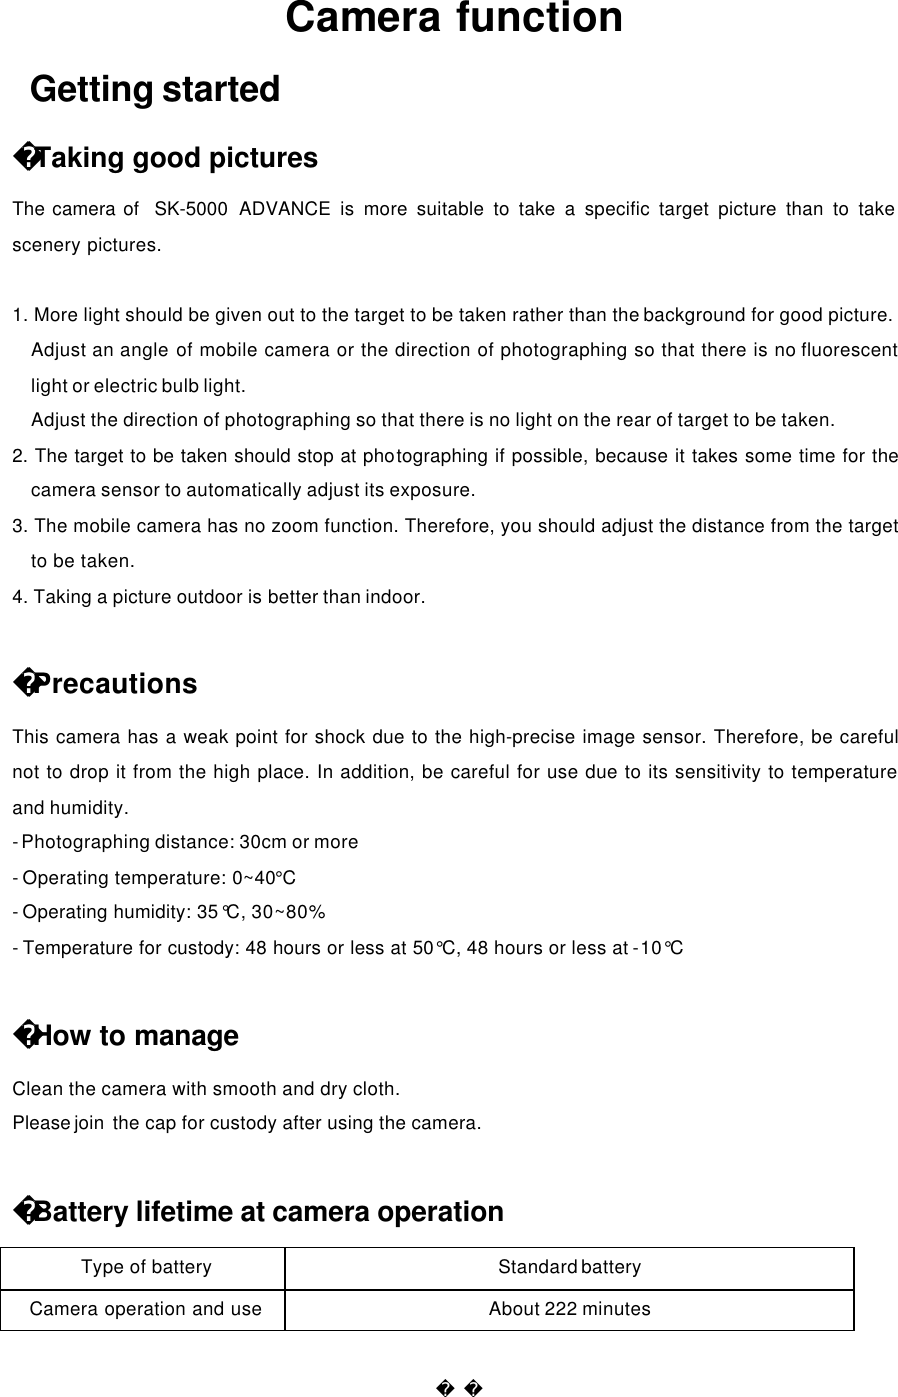
![<By function> Type of battery Function Standard battery Camera operation and use About 222 minutes * The game current consumption is an average value of Apache, Baby raccoon, Mars Scouter, and Puzzle. * The backlighting is on when the folder is open. - When you are on the move by car or on foot, your mobile phone sends/receives signals with the base stations adjacent to maintain the optimum call status. In this case, more power consumes, and the battery life may be reduced. - Using a motion picture [animation] of “Set Picture ” in Logo may consume more power than not using it. Therefore, battery life can be reduced by 20-30% than those described in this manual. Low battery alarm Appears with alarm when battery requires charging. The phone would be switched off with a message “The phone is switched off due to low power ” if you fail to charge the battery. Charging the battery Connect the power plug of battery charger to the outlet.(110V or 220V) - To charge the battery with handset or to charge the battery only. (The charging front lamp turns red when the charging starts) -The lamp turns green when charging is completed. - Push the battery into the charger fitting in correctly to the guide hop. * When you fast- charge the standard battery fully discharged , its temperature may be increased a Little. However, this does not affect the battery performance. * Dust or dirt on the connecting terminal of the battery charger may cause malfunction. Keep the battery charger out of reach of the children or animals. Battery charging Lamp](https://usermanual.wiki/SK-Teletech/SK-5000ADVANCE/User-Guide-409203-Page-16.png)
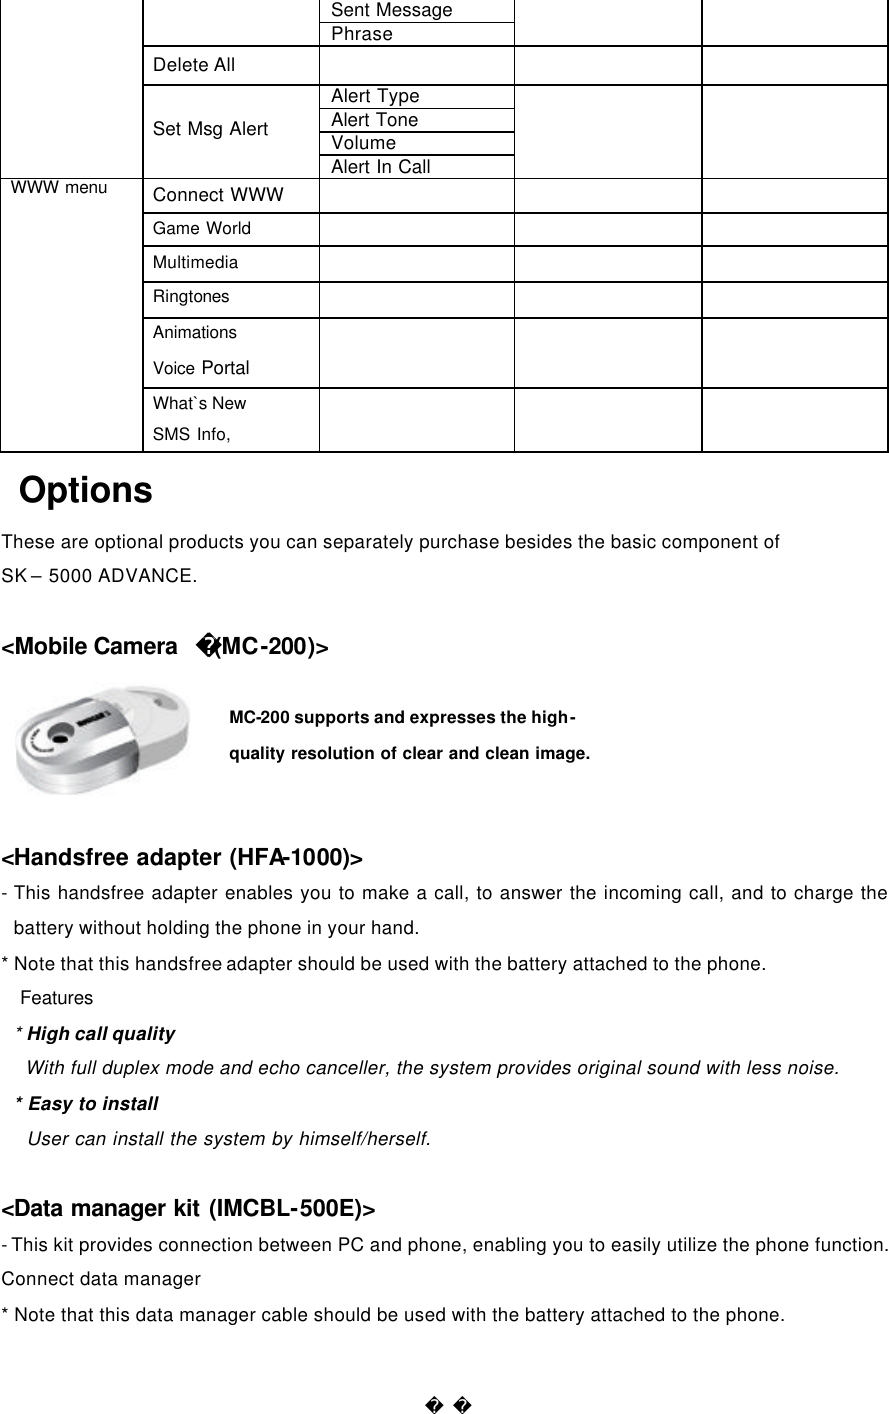
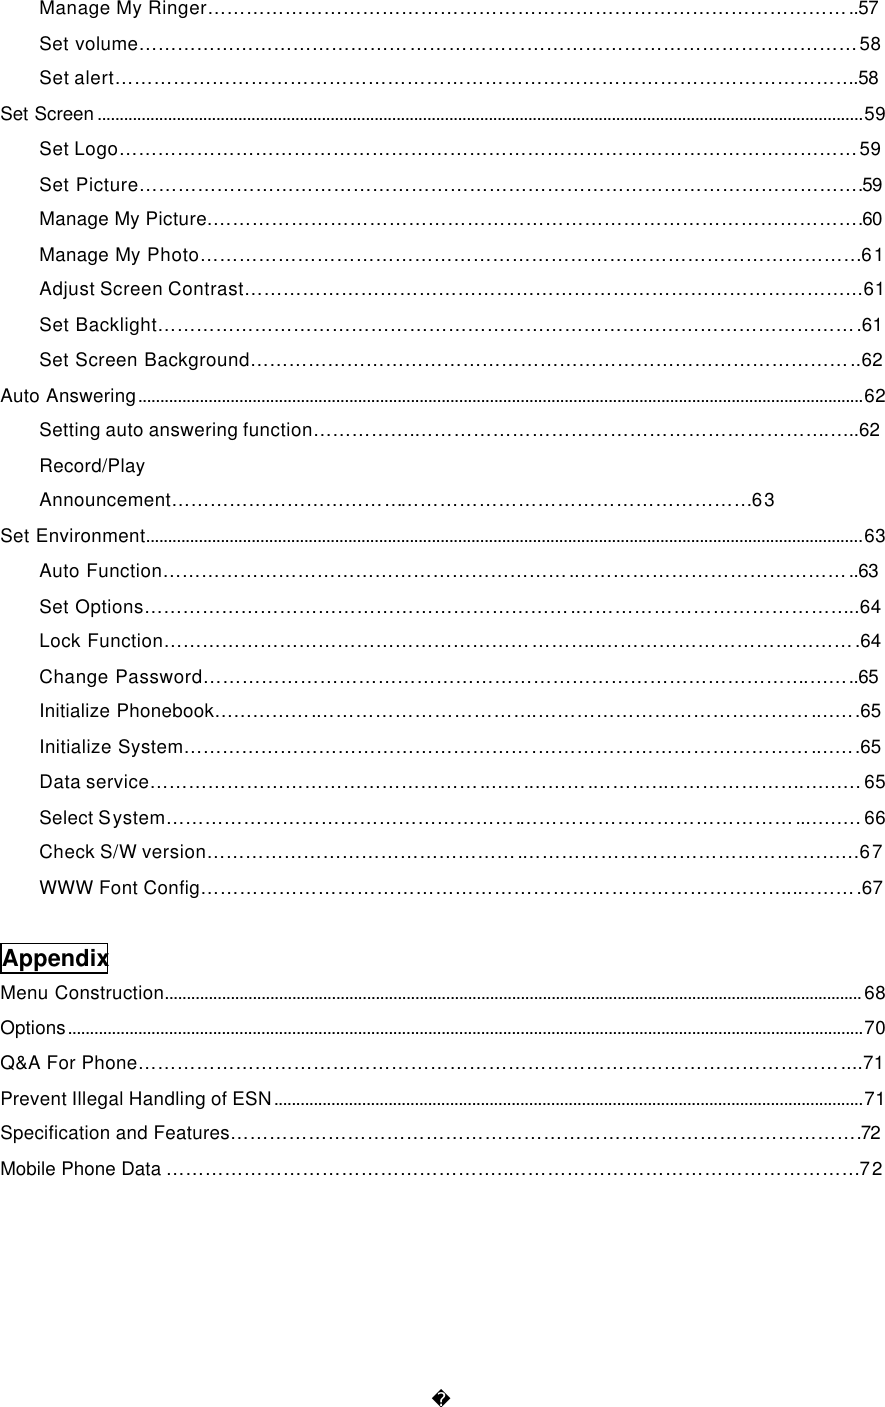
![Basic Operation Switching the phone on 1. Press and hold the (End) key. * When vibration or Etiquette mode is selected, the vibration indicator (etiquette indicator ) is displayed and the phone vibrates. * Various animations can be displayed. * The start screen varies by the setting. Switching the phone off 1. Press and hold (End) key. - Animation is displayed for several seconds before power is off. Making a call 1. Press local area code and phone number, and then press (SEND). - If you make a mistake while entering a phone number, just press (CLR) to delete the last digit. 2. Start talking with the other side. - To adjust the volume during a call, press (Up/Down)[Vol]. 3. To finish the call, close the folder or press ( END). * Camera does not work during the call. * To make the call in the Phonebook, see Personal Information Manager Phonebook. * Set automatic local area code of the features to make a call by dialing a phone number without local area code. Redialing calls You can redial the last number called without dialing the digits separately. Last number redialing You can redial the last number called. 1. Press (SEND ).](https://usermanual.wiki/SK-Teletech/SK-5000ADVANCE/User-Guide-409203-Page-18.png)
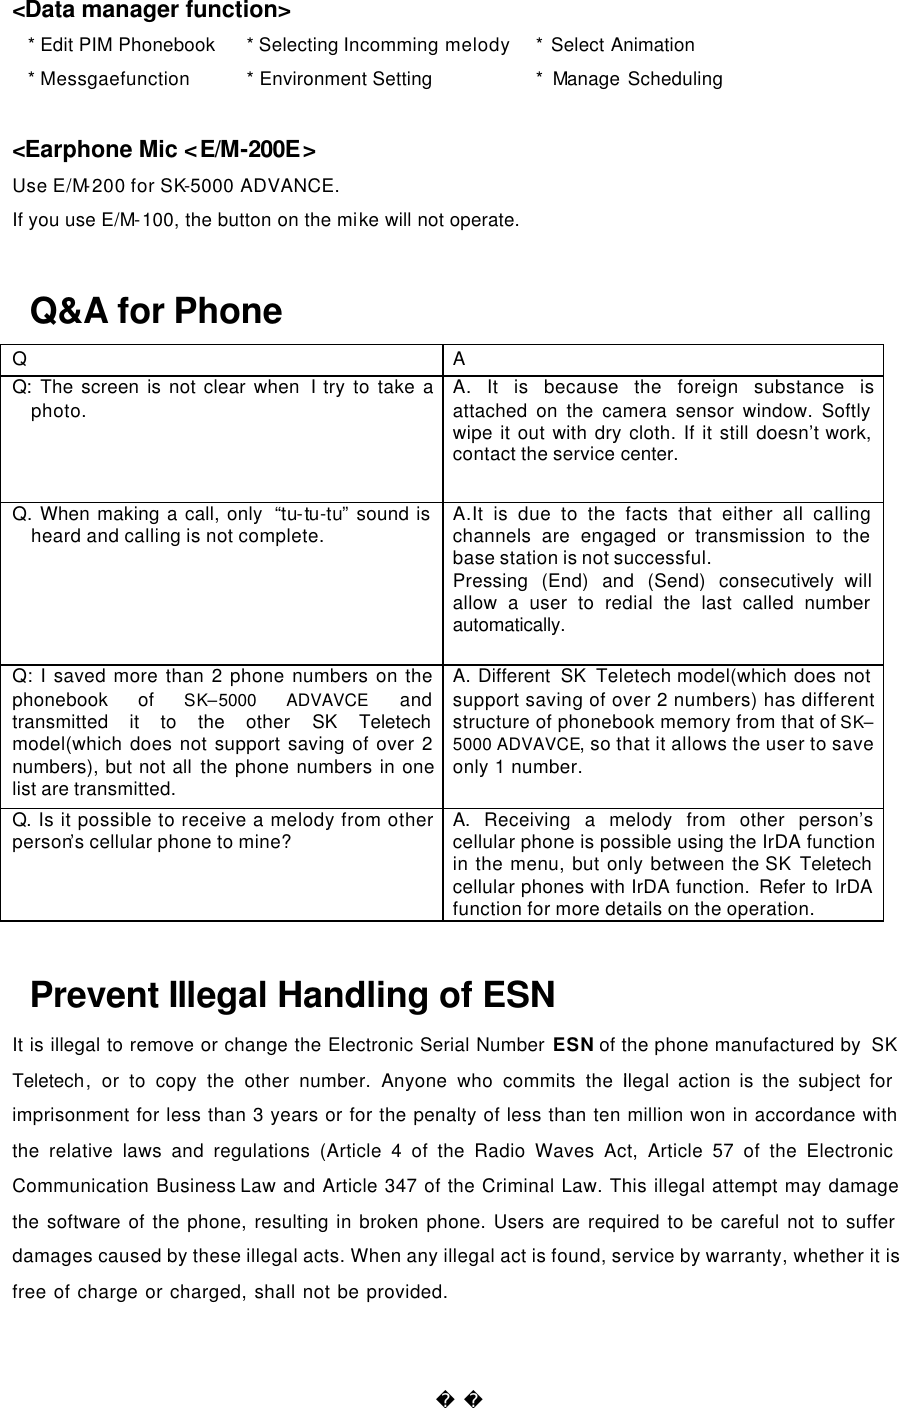
![Search call history and redial Up to 30 recently called/answered numbers are displayed. Press (SEND) to redial. <For incoming calls> 1. Press (Down)[Call ID List]. - Press (UP/Down) to find the required number. - The number entered in phonebook displays name and icon of the other side. 2. Press (OK)[Sel]. -You can verify the time received and phone number. 3. Press (Send). <For outgoing calls> 1. Press (Up)[Calling List]. - Press (Up/Down) to find the required number. - The number entered in phonebook displays name and icon of the other side. 2. Press (OK)[Sel]. 3. Press (Send) * If (UP)[Calling List] is selected, you cannot call the last called number with pressing (Send). * For an incoming call, the received call number is displayed when Calling Line Identification Presentation service is subscribed. * For the consecutive incoming/outgoing of the same number, the number is displayed on the call history screen only once. At this time, the last received/sent time is displayed. To verify how many times the number is received/sent, press (www)[Menu] and (6)[Called/Calling Time]. Speed dial You can make a call by just pressing one or two digits speed dial address. One digit speed dial (Address 1~9) 1. Press and hold the address. - Or enter the address then press (SEND). - Call is made to the phone number in the address. Two digit speed dial (Address 10~99) 1. Enter the first digit of the address then Press and hold the second digit.](https://usermanual.wiki/SK-Teletech/SK-5000ADVANCE/User-Guide-409203-Page-19.png)
![- Or enter the address then press (SEND). - Call is made to the phone number in the address. * Refer to Speed dial to save a new number or to edit the existing number (Refer to page 29 ). Answering calls 1. Open the folder when the phone rings or vibrates. - Press any key if the folder has already opened. 2. Close the folder or press (END) to finish the call. - Call time blinks on the screen before it returns to standby mode. * Answer options are divided into <Folder Open>, <Open & Press Key>, <Open & Send Key>. * If answer options with hands free or earphone is set as on and the phone is connected to them, the phone automatically answers after ten seconds of rings. * If you cannot answer a call and the auto -answering function is set, you can record the received message according to the announcement. * When subscribing calling line identification presentation service, the phone number of the third party will appear on the Sub LCD screen. If the number has already saved in phonebook, the name of the other party will appear. Hot menu The most frequently used functions during the call are collected in hot menu so that user can activate the functions with multi-function keys. Adjusting the earpiece volume You can adjust call volume in 5 steps during the call and during the standby mode. During the call 1. Make or receive a call. 2. Press (Up/Down)[Vol]. - Adjust the earpiece volume using (Up/Down)[Vol] keys during the call. Check received messages You can check the text message during the call.](https://usermanual.wiki/SK-Teletech/SK-5000ADVANCE/User-Guide-409203-Page-20.png)
![1. During the call, press (www)[Menu]. 2. Press (1)[Read message]. * When a new message is received during a call, you can verify it by pressing (OK). * After you verify the received text message during a call and press (CLR) to go back to the previous screen. Mute You can prevent your voice from being transmitted to the other side. 1. Press (www)[Menu] during the call. 2. Press (2)[Mute]. - You can release the Mute function by pressing (SMS)[Rel]. Then the Mute function is released, and LCD displays call status screen. Etiquette mode In Etiquette mode, which is useful in public place such as auditorium, you can activate vibration alert, silent keypad or whisper mode by just pressing a single key. Enabling Etiquette mode at standby mode 1. Open the folder, and press and hold ( * ) key. - Etiquette mode indicator ( ) is displayed on the screen, and vibration alert and silent keypad mode are activated. - Once selected, Etiquette mode is maintained even when power OFF->ON unless you release the mode by pressing and holding ( * ) again. 2. Press and hold ( * ) to release the Etiquette mode. - Etiquette mode indicator disappears from the screen and the phone returns to the previous status. Enabling Etiquette mode during the call 1. Press and hold ( * ) key. - Whisper blinks on the screen, and silent keypad and whisper mode are activated. 2. Press and hold ( * ) key again to release the Etiquette mode. - Whisper disappears from the screen, and the phone returns to the previous status.](https://usermanual.wiki/SK-Teletech/SK-5000ADVANCE/User-Guide-409203-Page-21.png)
![ * You can use the following two features of the Etiquette mode during the call by pressing a single key. - Silent keypad: Key entering tone becomes silent. - Whisper mode: Mic volume is automatically increased when you whisper in a silent place. Search call history (list) You can check the missed/called/answered number. <When receiving> 1. Press (Down)[Call ID List]. - 30 numbers are displayed in consecutive order from the latest number received. 2. Press (OK)[Sel]. - You can verify the received time and the phone number of caller. - Press (www)[Menu] to Write a Message, Delete, Called Time and verify the received time. 3. Press (Send). <When calling> 1. Press (Up)[Calling List] and press (Up/Down)[ Up/Down] to search the phone number. is displayed when text message is called. - 30 numbers are displayed in consecutive order from the latest number called. - Press (www)[Menu] to Write Message, Delete, Calling Time and verify the received time 2. Press (Send). * Press (www)[Menu] in the Phonebook to save the phone number, verify the information on the phone number found, make a message, delete all or verify the time received/called. * For the consecutive incoming/outgoing of the same number, the number is displayed on the call history screen only once. At this time, the last received/sent time is displayed. To verify how many times the number is received/sent, press (www)[Menu] and ‘Calling/called time’. My Information You can enter your own information. 1. Press (Right)[Book] and (7)[My information]. - For entering the information, refer to how to set the menu. -To add a photo, press (www)[Menu].](https://usermanual.wiki/SK-Teletech/SK-5000ADVANCE/User-Guide-409203-Page-22.png)
![* Edit photo: Change the existing picture into another one from the picture List. * Resize photo: Set the information to be open on the self number screen. * Delete photo: Remove the picture on the self number screen. * Adding and Editing a photo are not available with the phone function of (www)[Menu] during WWW operation. Timers You can check various call timers such as Last call/Total call/lifetime call of Voice call time, Voice received time, Data send time and data receive time. <Last call> 1. Press (Left)[Menu], then press (4) [Call Timers] and then press (1) [Last call] to check the Last call. <Total call> 1. Press (Left)[Menu], then press (4) [Call Timers] and (2) [Total Call] to check the Total call. <Lifetime call> 1. Press (Left)[Menu], then press (4) [Call Timers] and (3) [Lifetime Call] to check the Lifetime call. * calling Voice time – means the time when the call is made. * called Voice time - means the time when the call is received. * WWW Conn. time - means the time when the WWW service is accessed. * Data send time – means the time when the call is made for using the wireless data service. * Data receive time – means the time when the call is received for using the wireless data service.](https://usermanual.wiki/SK-Teletech/SK-5000ADVANCE/User-Guide-409203-Page-23.png)
![PIM Phone Book Adding an Entry E.g.) Hi~! 1. Press (SMS)[SMS], and press (2)[Out-box] and (1)[New message]. 2. Press (OK)[Input] to enter letters. 3. Press (4) twice to enter [H] then press (SMS) key to move to [eng]. - You can change the entry mode in the order of English Upper -> English Lower -> English Word -> Symbol -> Number whenever you press (SMS). <Language is set in Hebrew> * You can change the entry mode in the order of Hebrew Upper -> Hebrew Lower -> Hebrew Word -> English Upper -> English Lower -> Symbol -> Number whenever you press (SMS). 4. Press (4) three times to enter [ I ] then press (SMS) key to move to (SMS)[Symbol]. 5. Press (Down), (1)[~] and (Up),(3)[!]. - Press (Up/Down) to select various symbols. Electronic dialing using Pause You can use this function when you have to enter digits by the voice announcement for Automatic Response System (ARS). i.e.) Telebanking, pager, etc. 1. Press phone number and then press and hold (7) and phone number to be electronically dialed. - ‘P’ appears on LCD screen when pressing and holding (7). - To enter Pause again (several times), enter the number and then press and hold digit key (7) for over one second. 2. Press (Send). - You can save the number in the phonebook by pressing (OK)[Save]. - When the call is connected, press (SMS)[Next] for the ARS announcement prompting you to enter number. * Pause is available only when 3 or more digits are entered. * If you press “T” (Digit key (8)) instead of "P", entered numbers are transmitted at the interval of 5 seconds. * Up to 32 digits including “P” (or “T”) are available to enter for Pause.](https://usermanual.wiki/SK-Teletech/SK-5000ADVANCE/User-Guide-409203-Page-24.png)
![Speed Search You can search the names in the Phonebook in by group. 1. Press (Right)[Book] and then press (1)[Speed Search] and (OK)[Select]. - Press (UP/DOWN) to search the name. - You can make a call by entering a figure (1,2,3,4) on the above screen. 2. Press (OK)[Select]. - Press (UP/DOWN) to move to the number required. - Press (www)[Menu] and (1)[Enter Message], (2)[Set TURBO Dial] and (3)[Delete Name] on the above screen, 3. Press (Send). * To modify the number, press (SMS)[Edit] at the above step 2. * PIM Phonebook main window configuration * PIM phonebook main window is configured with the following items. * You can enter or edit anniversary, memo, e -Mail address and photos as well as phone numbers with (SMS)[Edit] key. Search by Name You can search the phone number by entering the name. 1. Press (Right)[Book] and select (2) [Search Name]. - Text edit mode window is displayed. 2. Enter the full or partial name to search. 3. Press (OK)[Done]. - Press (OK)[Sel] on the name required to move to the phone number field using (UP/DOWN) keys. 4. Press (Send ) * To search the name in the secret group, you should release the secret group. Search by Number Enter phone number (whole or part) to search the phone number and Phonebook. 1. Press (Right)[Book] and select (3) [Search Number]. 2. Enter a part or whole phone number to search using numeric keys. In case of doing search by part of the phone number, enter the number in order. 3. Press (OK)[Done].](https://usermanual.wiki/SK-Teletech/SK-5000ADVANCE/User-Guide-409203-Page-25.png)
![- The name that includes the number is displayed. Press (UP/DOWN) keys to move to the required name. - You can make a call by pressing figure (1,2,3) on the above screen. 4. Press (OK)[Sel]. - Press ( UP/DOWN) keys to move to the required phone number field. - Press (www)[Menu] to (1)[Enter Message], (2)[Set TURBO Dial] and (3)[Delete Number]. 5. Press (Send) * To search the name in the secret group, you should release the secret group. Add phonebook You can enter and save new information. Add a phone number to the new name Add a phone number to a new name using [4][New Entry] function of (Right)[Book]. 1. Press (Right)[Book] and (4) [New Entry] menu. - For input method, refer to how to activate/select the menu. 2. Press (SMS)[Save]. * In addition to the default groups, Family, Work, Friends, Relative, and Unclassified, you can add 21 groups including < Unclassified > using <new> in <Memory Group>. * If the name you entered already exists in the Phonebook, a message, "Save it here?" appears. Press (OK)[YES] to overwrite the existing name or press [No] to go back to the Edit window. Add a photo 1. Search the required name using the Search function of <Book> and then press (SMS)[Edit]. 2. Press (www) [Menu] and then select (5)[Add Photo]. 3. Press (OK)[Select]. 4. Press (SMS)[Save]. E-mail address add/edit 1. Search the required name using the Search function of (Right)[Book] and then press (SMS)[Edit]. 2. Press (www) [Menu] and (2) [Add e-Mail] and then enter the e-Mail address. - Press (CLR) key to amend the existing address and enter new e-Mail address.](https://usermanual.wiki/SK-Teletech/SK-5000ADVANCE/User-Guide-409203-Page-26.png)
![- Enter numeric key (0) to enter [@]. 3. Press (OK)[Done] and (SMS) [Save]. * Up to 32 English letters including ‘@’ and ‘.’ are available for text entry of user ID and mail server. Adding an entry in Logo Add a number to the new Name Add a phone number entered in the Logo to the new name. 1. Enter a phone number. - Press (SMS)[Find] then you can search the phone number and Phonebook the same as by phone number. 2. Press (OK)[Save]. - The phone number storing window is displayed. 3. Press (1) [New Name]. - For input method, refer to how to activate/select the menu. - Up to 1200 (Maximum 1200 people) phone numbers can be added. Add a number to the existing Name Add a phone number entered in the Logo to the existing name. . 1. Enter phone number. 2. Press (OK)[Save]. - The phone number storing window is displayed. 3. Press (2) [Existing Name]. - Move to the names in the group using (UP/DOWN) keys. - Press (www)[Menu] to delete the group name or check the phonebook information. 4. Press (OK)[Sel]. - Names in the group is displayed. - Move to the name to search using (UP/DOWN) keys. 5. Press (OK)[Sel]. - Press (UP) to find out Home using (Left/Right) on the screen that includes the phone number. 6. Press (SMS) [Save].](https://usermanual.wiki/SK-Teletech/SK-5000ADVANCE/User-Guide-409203-Page-27.png)
![Edit Phonebook You can enter or edit a phone number using search function. 1. Search the name required using search function in <Book>. 2. Press (SMS)[Edit]. - Phonebook edit window for the searched name is displayed on the screen. - Press (UP/DOWN) to move to the item to enter/edit. Refer to how to activate and select the menu (Refer to page 14). - Press `Add Data` to add more information. - You can also add the information in Add Item by pressing (www)[Menu] Key. 3. Press (SMS)[Save]. Anniversary You can add anniversary, special appointment on the selected name. 1. Select a name to amend using the Search function of <Book> and press (SMS) [Edit]. 2. Press (www) [Menu]. - The anniversary can be added even through ‘Add data’. 3. Press (4) [Add Anniv.]. - Move to the content of anniversary using (Left/Right) keys. 4. Press (Left/Right) [Next] and enter the date. 5. Press (SMS) [Save]. * Anniversary is classified into Birthday, Marriage, and Meeting as default. You may enter a specific anniversary pressing ‘Anniv.’. * To delete the anniversary, press (www)[Menu] and then press (6) [Delete Anniv.] while placing the cursor on the date of anniversary. Phonebook Memo You can enter memo by adding item in the same method of anniversary on the Edit Phonebook window of Search Phonebook . * You can save up to 64 English (64 Hebrew Languge) letters in phonebook memo.](https://usermanual.wiki/SK-Teletech/SK-5000ADVANCE/User-Guide-409203-Page-28.png)
![Delete Names Delete the name from the Phonebook using search function. 1. Press<Book> and (OK)[Sel]. - Press (UP/DOWN) to search the required name. 2. Press (www)[Menu]. - You can choose (1) [Enter Message] or (2) [Set TURBO Dial]. 3. Press (3)[Delete name]. - Press (OK)[Yes] to delete the name. Edit Speed dial You can edit frequently used phone numbers with speed dial. Add new speed dial You can add frequently used phone number as speed dial. 1. Press (Right)[Book] and select (5) [Edit TURBO Dial]. - Press (UP/DOWN) keys to move to the address to add new speed dial. 2. Press (OK)[Sel]. - Press (UP/DOWN) keys to move to the group that includes the name to designate. 3. Press (OK)[Sel]. - Press (UP/DOWN) keys to move to the name to designate. 4. Press (OK)[Sel]. - Press (UP/DOWN) keys to move to the phone number to designate, and press (OK)[Sel]. * The function is not available without any phone number saved in phonebook. * You cannot make a call with speed dial without password when Phonebook is locked. Change the existing speed dial You can change the existing speed dial. 1. Press (Right)[Book] and select (5) [Edit TURBO Dial]. - Press (UP/DOWN) keys to move to the address to designate. 2. Press (www)[Modify]. - Press (UP/DOWN) keys to move to the group that includes the name to change. 3. Press (OK)[Sel].](https://usermanual.wiki/SK-Teletech/SK-5000ADVANCE/User-Guide-409203-Page-29.png)
![- Press (UP/DOWN) keys to move to the name to change. 4. Press (OK)[Sel]. - Press (UP/DOWN) keys to move to the phone number to designate, and press (OK)[Sel]. * If there are lots of phone numbers designated as speed dial and you want to find out the required number quickly, press numeric keys 1, 2, 3, 4, and 5 in turns. Then, the Speed dial screen moves to No.10, 20, 30, 40 and 50 in turns. Press the numeric key 0 to go back to No.1. Delete the existing speed dial You can delete the speed dial. 1. Press (Right)[Book] and select (5) [Edit TURBO Dial]. - Press (UP/DOWN) keys to m ove to the address to delete. 2. Press (OK)[Sel]. 3. Press (SMS)[Delet]. - Select (Left/Right) keys to delete or cancel and press (OK)[Sel]. * Even when the memory location number is deleted, the phone number in the Phonebook is not deleted. However, when the phone number is deleted from the Phonebook, the related speed dial is also deleted. Edit group You can add, amend or delete groups, or designate melody of each group. Add new group You can add new group for phone number. 1. Press (Right)[Book] and select (6) [Memory Group]. 2. Select (SMS)[New] and enter the new group name. 3. Press (OK)[Done]. - Move to the required answer using (Left/Right) keys and press (OK)[Done]. - To release secret group, amend the Secret into ‘No’ from (6)[Memory Group] and save. * If the number of existing groups reaches the number allowed (21), you cannot add new group any more.](https://usermanual.wiki/SK-Teletech/SK-5000ADVANCE/User-Guide-409203-Page-30.png)
![* If the same group name already exists, there appears a message "The same group exists." * You should enter a password to retrieve the phone number of the secret group. If you make a call using Phonebook or numeric key, the number appears in Call history without name. You cannot retrieve the number with Search by name or Search by number. * When a caller subscribes the Calling Line Identification Presentation service and is saved as the secret group, the number appears in Call history without name. Change group You can change the existing group name to the other. 1. Press (Right)[Book], and select (6)[Memory Group]. - Press ( Up/Down) keys to move to the group to change. 2. Press (OK)[Sel]. - Amend the group information to change. - To make the group secret, change the group attribute from ‘General’ to ‘Secret’ using (Left/Right) keys. 3. Press (OK)[Save]. Delete group You can delete the existing group or group name. 1. Press (Right)[Book], and select (6)[Memory Group]. - Press ( Up/Down) keys to move to the group to delete. 2. Press (www) [Menu]. 3. Press (1)[Delete group]. - Select (Left/Right) keys to delete or cancel and press (OK)[Sel]. * ‘Del. Group name’ only deletes the name of the group. Phone numbers (names and phone numbers) of the group remain in `Unclassified` and in the `All Name List`. * You should enter a password to delete the secret group name. * To change the order of groups on the screen, press “Edit order ” or “Sort group” from the (www)[Menu].](https://usermanual.wiki/SK-Teletech/SK-5000ADVANCE/User-Guide-409203-Page-31.png)
![Taking Pictures You can take a picture of desirable target with the mobile camera. 1. Connect a camera to the upper side of mobile phone. 2. Press (OK)[Camera]. 3. Press (1)[Take photo]. - Press (www)[View] to display the list of saved pictures. - Press (SMS)[Rotate] to turn the target on LCD over. 4. Press (OK)[Save] and enter the name of photo . - The picture is taken with ‘Click’ sound. - Refer to pages 24, for ‘Add an entry’. - The taken picture is saved in My Photo Album. ( Refer to page 35-36) 5. Press (OK)[Done]. * Camera does not work during the call. * Connect tightly the camera until it is not entered to the jack. * When you press (1)[Take photo] without connecting a camera correctly, the message ‘Camera is not connected’ is displayed. * To finish photographing underway, press (CLR)[Delete/cancel] or (END). * When an incoming call is received during photographing, the screen returns to the call mode. * At this time, if you have not save the photo after taking it, it is not saved. * The lighting is always on at photographing. Photo Mail You can send photo with text message or in E-mail. New Photo Mail 1. Press (OK)[Camera], and select (2) [Photo Mail]. 2. In case of sending mail with new photo, press (1)[Edit New Mail]. - In case of sending mail with (1)[New Photo], you should connect the camera to take a new picture. - In case of sending mail with the existing photo, press (2)[My Photo] and move to the required photo. Press (SMS)[View] to view saved photos. 3. Press (OK ) [Sel] and enter a message . -Press (OK)[Input] to enter a message, and press (OK)[Done]. -Refer to page 24, for ‘Adding an entry’. -Enter the phone number or E-mail addresses of other side.](https://usermanual.wiki/SK-Teletech/SK-5000ADVANCE/User-Guide-409203-Page-33.png)
![ -You can enter up to 5 phone number or E-mail by pressing (OK)[Input]. 4. Press (SMS)[Send]. - Select the transmission using (Left/Right) keys and press (up/Down). 5. Press (OK)[Yes]. <Save Photo Mail> You can save the photo mail in <My Photo Album> for photo and in Photo mail for message. 1. Select Photo mail, Add new Mail, (1)[New Photo] or (2)[My Photo] to Move to the Photo mail window. 2. Press (www)[Menu] and select (1)[Save]. - Press (www)[Menu] when a cursor is on the message content. Then, only Save photo mail is active. <Decorate Photo> 1. Select Photo mail, Add new Mail, (1)[New Photo] or (2)[My Photo] to move to the photo mail window. - Press (www)[Menu] and select (2)[Decorate]. - Designate the required photo using (Left/Right). <Change Photo> 1. Select Photo Mail, Add New Mail, (1)[New Photo] to move to the photo mail window. - Press (www)[Menu] and select (3)[Change]. - Press (Up/Down) keys to move to New photo or My photo album and then. Press (OK). - Refer to page 33, for <New Photo Mail. <Desingnate Photo Name> 1. Select Photo mail, Add new Mail, or (1)[New Photo] to move to the photo mail - Press (www)[Menu] and select (OK)[Input title]. - This menu is active in case dg selecting (1)[New Photo]. <Search Phonebook> 1. Select Photo mail, Add new Mail, (1) [New Photo] or (2)[My Photo] to move to the photo mail window. - Press (www )[Menu] and select (4)[Search book]. - Press (www )[Menu] when a cursor is on the called party on the photo mail window. <Search E-mail Address> 1. Select Photo mail, Add new mail, (1)[New Photo] or (2)[My Photo] to move to the photo mail window. - Press (www)[Menu] and select (5 )[Search E-mail]. - Press ( www)[Menu] when a cursor on in the called party on the photo mail window. - Press (Up/Down) keys to move to the required item, and press (OK)[Sel].](https://usermanual.wiki/SK-Teletech/SK-5000ADVANCE/User-Guide-409203-Page-34.png)
![Edit the Existing Photo Mail 1. Press (OK)[Camera] and select (2)[Photo Mail]. - The photo mail is arranged in the order of latest sent/saved time. 2. Select photo mail out of list and press (OK)[Sel] and (SMS)[Edit]. - You can amend the photo mail in the same method of Add an entry using (CRL). 3. Change the content and then press (SMS)[Send]. - Select the transmission using (Left/Right) keys and press (OK). Received Photo Mails !. Press (SMS)[Message] and select (1)[In-box] and (1)[Text msg]. - Press (www )[Menu] to Delete all/Lock on the above screen. For more information, refer to page 47, Message Function. 2. Press (OK)[Sel]. 3. Press (Send). - If the message ‘Successful storing’ is displayed My Photo Album You can manage all items related to saved pictures such as Designation to phone screen, Name change, File information , File deletion, and Photo Lock. 1. Press (OK)[Camera] and select (3)[Photo Setting.]. - Press (OK)[Preview] to view the photos saved in file, and press (SMS)[Del] to remove selected photo. Designate photo You can designate the required photo on the phone screen. 1. Press (OK)[Camera], and select (3)[Photo Setting.] and (www)[Menu]. Then press (1)[Select Photo]. - You can also set the photo in Set picture. 2. Press (1)[To My logo]. - The selected photo is displayed on the Logo. Change file name 1. Press (OK)[Camera] and select (3)[Photo Setting.] and (www)[Menu].](https://usermanual.wiki/SK-Teletech/SK-5000ADVANCE/User-Guide-409203-Page-35.png)
![Then press (2)[Rename file]. Enter the file name to change. 2. Press (OK)[Done]. User`s file information You can view all file information of figure, melody, photo, multimedia, and photo mail saved in the phone. 1. Press (OK)[Camera], and select (3)[Photo Setting.] and (www)[Menu]. Then press (3)[User files]. Delete all photos 1. Press (OK)[Camera], and select (3)[Photo Setting] and (www)[Menu]. 2. Press (4)[Del All Photos]. - Press (OK)[Yes] to delete all saved photos. Photo Lock 1. Press (OK)[Camera], and select (3)[Photo Setting] and (www)[Menu]. 2. Press (5)[Photo Lock]. - Set by entering password. The password is set as “0000” by default. * When a call arrives or in standby screen, switching off/on or connecting to www, the lock image shows the lock status. * When using "add photo" in the phonebook, the lock photo is available with entry of password. For confirmation of phone book, the password entry is needed. * When using "Slide Show" in standby screen, the locked photo is displayed as locked image in slide. * With lock function in Photo Setting, you can view the photo by entering password. * With lock function in Photo Setting, the locked photos are not deleted even in all delete case. * For deactivating the lock function, you select the relevant photo and release it by entering password.](https://usermanual.wiki/SK-Teletech/SK-5000ADVANCE/User-Guide-409203-Page-36.png)
![Info. Manage/Entertainment Calendar This displays calendar from Jan, 1996 to Dec, 2015 in both solar and lunar system. 1. Press (Left)[Menu], and select (1)[Info. Manager]. 2. Press (1)[scheduler]. - The current month is displayed on the screen. Retrieve calendar 1. Press (Left)[Menu], and select (1)[Info.Manager] and (1)[scheduler]. 2. Press (www)[Menu] and (1)[Search]. - Enter the year and month to retrieve. 3. Press (OK). Scheduler You can conveniently manage the schedule by storing anniversary, special appointment, and schedule. Add new schedule 1. Press (Left)[Menu], and select (1)[Info.Manager] and (1)[scheduler]. 2. Press (SMS)[New schedule]. 3. Press (1)[Specific time]. - For input method, refer to how to activate/select the menu. 4. Press (SMS)[Save]. * You can save up to ten schedules per day. Set my holiday 1. Press (Left)[Menu] and select (1)[Info.Manager] and (1)[scheduler]. Then, press (www)[Menu] and (2)[My Holiday]. 2. Press (SMS)[New] and enter the contents. 3. Press (OK). 4. Press (SMS)[Save].](https://usermanual.wiki/SK-Teletech/SK-5000ADVANCE/User-Guide-409203-Page-37.png)
![Check schedule 1. Press (Left)[Menu] and select (1)[Info.Manager] and (1)[scheduler]. Then press (www)[Menu] and (3)[Schedule List]. - Move to the month containing the specific schedule by pressing (Left/Right) keys. - Move to the required date using (Up/Down) keys. 2. Press (OK) - Press (SMS)[New] to prepare new schedule. 3. Press (OK). Delete partial schedule 1. Press (Left)[Menu] and select (1)[Info.Manager] and (1)[scheduler]. Then press (www)[Menu] and (4)[Delete]. - Enter the period and press (OK). 2. Press (SMS)[Delete]. - Use (Left/Right) keys to select Yes or No and press (OK). - The schedule corresponding to the specified period is deleted. Alarm You can set alarm at any time. Set New alarm 1. Press (Left)[ Menu], and select (1)[Info.Manager] and (2)[Set Alarm]. 2. Press (SMS)[New]. - Press (Up/Down) to move to the required alarm period. 3. Press (OK) and enter the time for alarm. - For input method, refer to how to activate/select the menu. - Enter alarm memo and press (OK). 4. Press (SMS)[Save]. - You can save up to 20 English (20 Hebrew) letters for alarm memo. * Alarm period is divided into After Specific time, Every Day, Every Week, Every Month. In case of an alarm only once ringing, it is automatically deleted after once ringing. Press (www)[Menu] on the alarm list to release the alarm, or change the alarm using the edit function. * Up to ten designations are available for alarm.](https://usermanual.wiki/SK-Teletech/SK-5000ADVANCE/User-Guide-409203-Page-38.png)
![* If the phone is off at the designated time, alarm goes off at switching it on. * If the phone is busy at the designated time, alarm goes off after the call is disconnected. Set alarm ringer You can set the type and volume of alarm ringer. 1. Press (Left)[Menu], and select (1) [Info.Manager] and (2)[Set Alarm]. 2. Then press (www)[Menu] and (2)[Alarm Bell]. - Press (OK) and then select the type of alarm ringer or adjust the alarm volume using (Up/Down) or (Left/Right) keys. 3. Press (SMS)[Save]. Calculator This processes addition, subtraction, multiplication and division. 1. Press (Left)[Menu] and select (1) [Info.Manager ] and (3) [Calculator]. - Use the numeric and calculation code keys to calculate. 2. EX) in case of 9 x 7, enter figure (9), select [X] , enter figure (7), and then press (OK). - You may use calculation codes many times. The result should not exceed 12 digits. If it exceeds 12 digits, <Error> message appears and the screen returns to the initial calculator screen. * Application keys for calculation are as follows. (Left) [+] to add, (Up) [X] to multiply, (Down) [] to divide, (Right) [-] to subtract , (SMS) [.] to enter decimal point, and (www) (AC) clears the screen.(ALL CLEAR). (OK) [=] to get the answer and (CLR) press it to delete a letter, and press and hold it to delete all. Stopwatch You can use stopwatch with your phone. 1. Select (Left)[Menu], (1) [Info.Manager] and (4)[Stop Watch].](https://usermanual.wiki/SK-Teletech/SK-5000ADVANCE/User-Guide-409203-Page-39.png)
![2. Press (OK)[Start]. - The stopwatch begins to operate. - Screen in measuring 3. Press (SMS)[Stop]. - Press (SMS)[Reset] to go back to the initial mode. * Press (OK)[Save] to record the interim result during operating the stopwatch, and check the records using (www)[View] in the still screen. * Press (SMS)[Stop] to suspend and press (OK)[Continue] to measure again. * Stopwatch is cancelled when a call is incoming. * You can save up to 20 stopwatch records. World time You can know the present time of various countries in the world. 1. Press (Left)[Menu], and select (1)[Info.Manager ], and (5)[World Time]. - Press (Up/Down) keys to move to the required city in alphabetic order. - If (Left/Right) is pressed, the cursor moves to the near of city that is indicated by the world map. The world 40 city names are displayed excluding Seoul. * A user sets DST (Daylight Saving Time) period for each different city. After it is set, the time displayed will reflect the summer time. * The time gap is one between Seoul and other cities. * 41 city names recorded on the World time are as follows. My memo You can make / save up to 10 memos anytime and anywhere using my memo. New memo 1. Press (Left)[Menu], and select (1)[Info.Manager ], and (6)[My Memo]. 2. Press (SMS)[New] and enter required memo. - For input method, refer to ‘Adding an Entry’(Refer to page 24) 3. Press (OK).](https://usermanual.wiki/SK-Teletech/SK-5000ADVANCE/User-Guide-409203-Page-40.png)
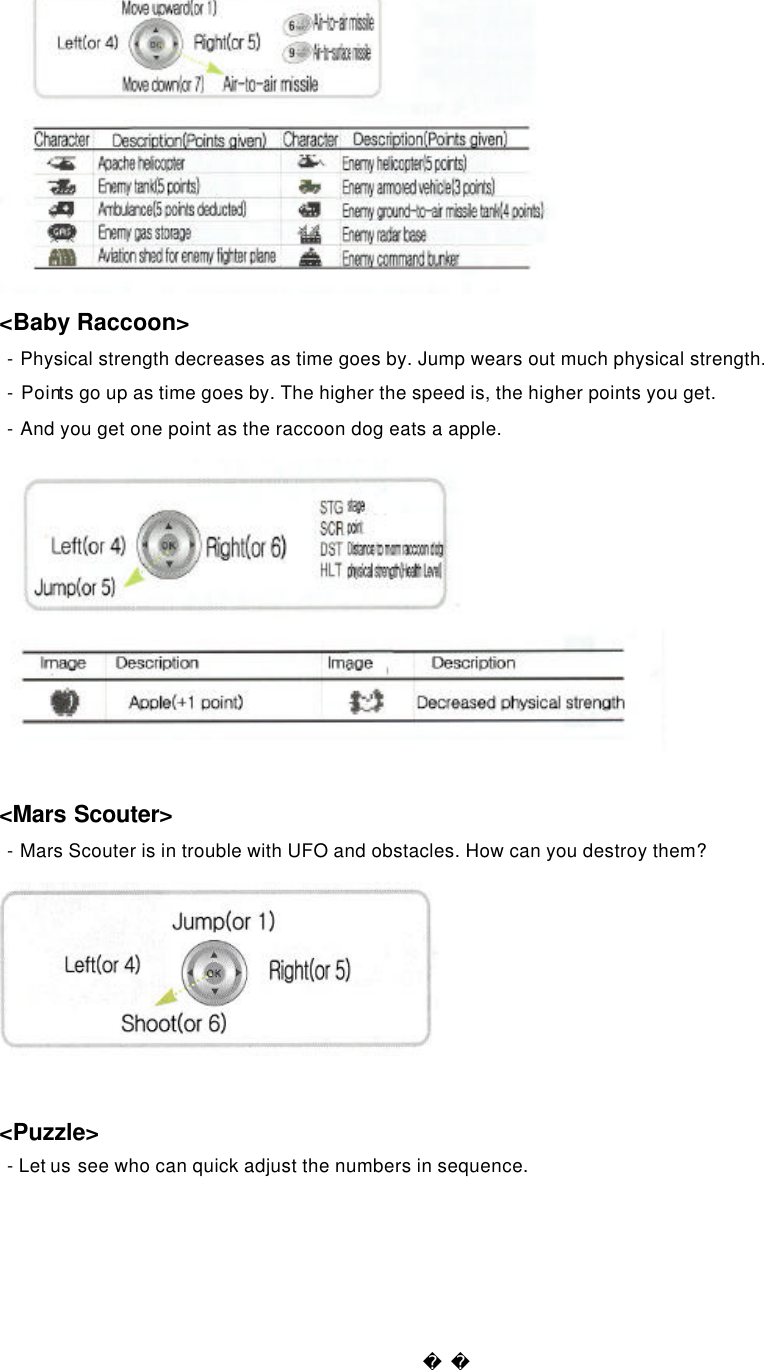
![Check/Edit memo 1. Press (Left)[Menu], and select (1)[Info. Manager] and, (6)[My Memo].. - Move to the memo to edit using (Up/Down) keys. - To delete memo, press (www)[Delete] on the above screen, and press (OK). 2. Press (OK). 3. Press (SMS)[Edit]. - If the entry mode is activated, delete contents with (CLR) key, and enter memo. Game You can enjoy various games in your mobile phone screen. 1. Press (Left)[Menu] and select (6) [Game]. - Press (Up/Down) keys to select a game. 2. Press (OK)[Sel]. <Game operation method> 1. Press [New game]. 2. Press [High Score] view score to verify the record for each game. 3. Press [Key Info.] help to display the operational method for game key. 4. When paused during the game, press [continue] to continue the previous game. 5. Press (Up/Down) to select stage. (The stage is different for each game.) 6. Press (OK)[OK! START] to start the game. 7. If (CLR) key is pressed, whether the game exits is asked. - Press (CLR) key to cancel the game previously set, or press any other key to continue the game. <Apache> - Apache helicopter can bear 5 missiles or the clashes against enemy helicopters. It crashes at the sixth shot or crash.](https://usermanual.wiki/SK-Teletech/SK-5000ADVANCE/User-Guide-409203-Page-41.png)
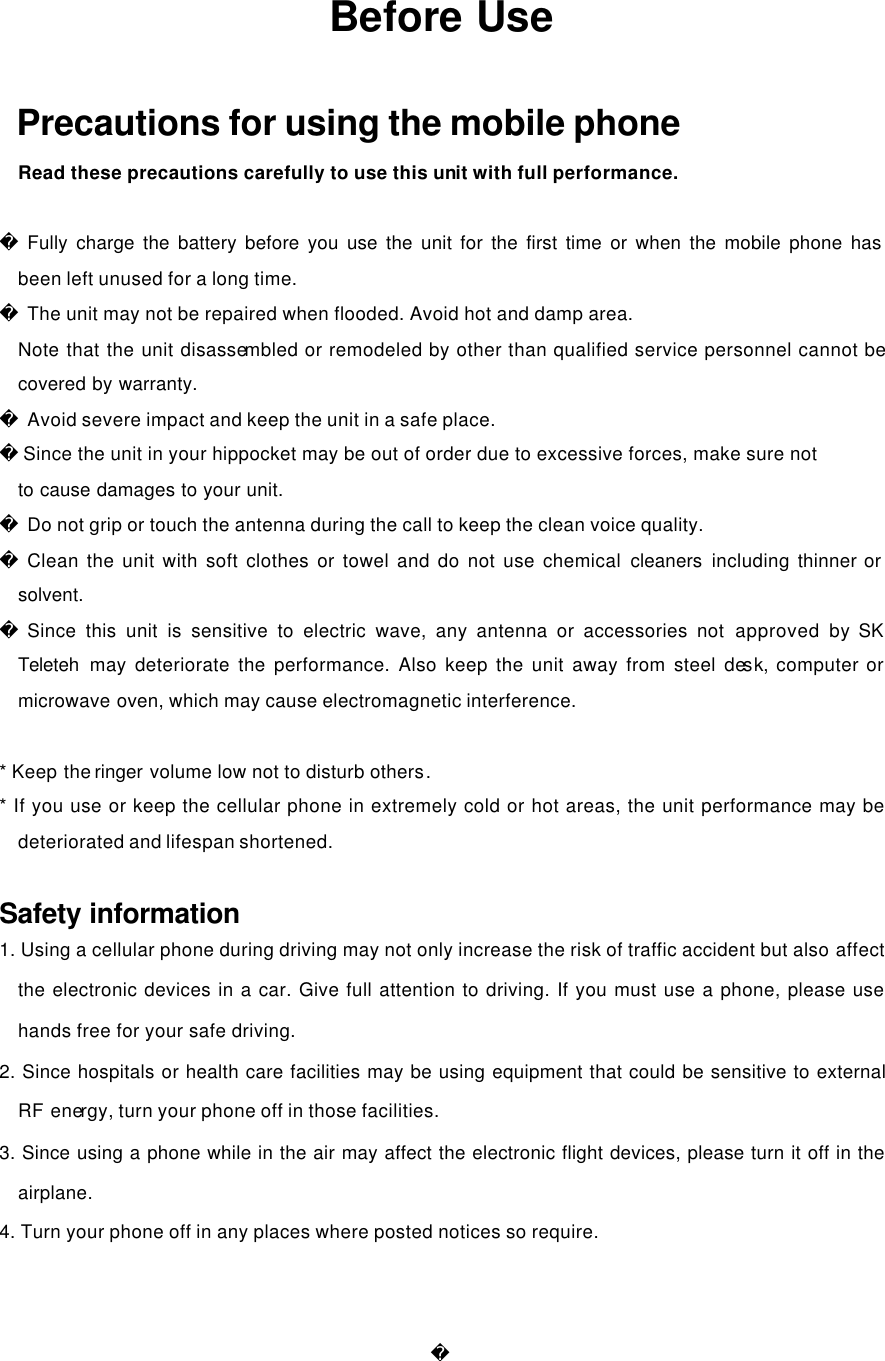
![- Open and close the folder to display the auto answering mode. Check Message 1. Open the folder, and press and hold ( 0 )[Record] button on the lower part of phone . 2. Press (OK)[Play] to check the recorded message. * Refer to how to use Play Function of Recording for more details. (Refer to page 43) Release Auto answering 1. Press and hold < A > button while Auto answering is set. - Auto answering is released and the phone returns to standby mode * You can answer the call during the recording by opening the folder or entering any key. The message recorded before you answer is automatically saved. * You can switch the phone to auto answering mode by pressing and holding (A)[Auto Answer] key when a call is incomming at normal standby mode. Voice Recorder You can record/play/delete contents of the call or other contents in standby mode or during the call. Record 1. Open the folder, and press and hold (0)[Record/ Play] on the lower part of the phone. 2. Press (SMS)[REC] to start recording. - You can also press (SMS)[Save]. * When the call is disconnected during recording the contents of the call, the recording automatically stops and the recorded contents are saved. At this time, the alert type changes into vibration. * You can record up to 20 messages. (When 20 messages are recorded, you can record no more messages regardless of remaine d recording time.) Play 1. Open the folder, and press and hold (0)[Record/ Play] on the lower part of the phone. - Press (www)[Menu] to delete a message, delete all messages, or continue Play the recorded messages. - Press (www)[Menu] and (2)[Delete All] to delete all recordings, and (3)[Continue Play] to play the](https://usermanual.wiki/SK-Teletech/SK-5000ADVANCE/User-Guide-409203-Page-44.png)
![recorded messages of the list from the message where the cursor is currently located. 2. Press (OK)[Play]. - Press (Up/Down) to select the recorded message you want, and press (OK)[Play] to play it. * Press [Up/Down] on the Record/Play Screen to select and play the recordings. * When you receive a call during playing, the Play mode ends. Press any key to receive a call. At this time, alert type is changed into vibration mode. Delete the Reading 1. Open the folder, and press and hold (0)[Record/ Play] on the lower part of phone. 2. Press (www)[Menu]. - Press (2) [Delete All] to delete all the saved recording lists. 3. Press (1)[Delete]. - Press (Left/Right) to select Yes or No depending on whether to delete or not, and press (OK)[Sel]. Earphone Mic (accessory) Earphone Mic is an optional item, which is not included to the basic supply. You should purchase it separately. * Use E/M-200 for SK-5000 ADVANCE. If you use E/M-100, the button on the mike will not operate. 1. Insert earphone Mic to the Earphone Mic jack ( )from the top of the mobile phone. 2. Put the earphone into your ear. Mic is then automatically placed to your mouth. 3. You can hear and talk with earphone Mic instead o f mobile phone speaker and Mic. 4. Press and hold the Mic switch. The switch is operated (SEND) function when a call is received , as (SEND) function to make a call at the standby mode, as (End) function during the call. * If you insert the earphone mike, the call is not disconnected even if you close the folder while answering the call. * Press and hold the button on the mike at standby mode to make a call to the last called number. * Press and hold the button on the mike to end the call.](https://usermanual.wiki/SK-Teletech/SK-5000ADVANCE/User-Guide-409203-Page-45.png)
![ Message Function Text Message You can check the received text message and the call back number. 1. Press (SMS), and select (1)[In-Box] and (1)[Text Msg] in turn. - Press (Up/Down) to the message you want. - Indicates the text message already read and indicates new message not read. - Press (SMS)[Delete] to delete the selected message. <Delete/Protect all text messages> 1. Press (www)[Menu] on the above screen. 2. To delete all received message, select (1)[Delete All].. 3. Shift to the item to delete using (Left/Right) Key and press (OK).](https://usermanual.wiki/SK-Teletech/SK-5000ADVANCE/User-Guide-409203-Page-46.png)
![4. Press (2)[Lock] and protect the selected message. You can continue to save these message protection mode. 2. (OK)[Select] - Press (OK)[Reply] to check the message and immediately reply to it, or (SMS)[Forward] to deliver the received message to the 3rd party. * If you select (1)[Text Msg] when there is no incoming text message, a message “No Text Message” will be displayed and returns to Inbox screen. * Up to 30 text messages can be received and for more than 30, the new one is saved by deleting the oldest one. * SMS Alert depends on whether you set alarm for incoming message or not. Voice Message You can check the voice message of the caller via voice Voice mail center. 1. Press (SMS), and select (1) [In-Box] and (2)[Voice Msg] in turn. - If the call back number is not left, Voice mail center number (* 89) is automatically displayed. -Press (SMS)[Delete] to delete the selected messages. * <Delete All Voice Messages> - Press (www)[Menu] on above screen. - Select (1)[Delete All] using (Left/Right) Keys to select whether to delete or not, and press (OK). * Press (SMS)[Send] to automatically connect to the call back number. 2. Press (OK)[Conn]. - You can check the voice mail at Voice mail center. - Press (SMS)[Send] to call back to the caller, if the caller has left his/her phone number. * If you select 2 Voice Message when there is no incoming voice message, a message “No Voice Message” will be displayed and returns to Inbox screen. * You can save up to 20 text messages, and for more than 20, the new message is received by deleting the oldest one . Create New Message You can create a new message. 1. Press (SMS), (1)[New Message] in turn.](https://usermanual.wiki/SK-Teletech/SK-5000ADVANCE/User-Guide-409203-Page-47.png)
![- Press (OK)[Input] to enter message and press (OK). 2. Enter the phone number for return call, and the phone number to send message to. - You can send the message up to 20 users simultaneously. 3. Press (SMS)[Send]. Save Phrase You can save the frequently used sentences in the Sentences. You can save or open the message in the message input screen. 1. Press (SMS), and select (2) [Out -Box] and (1)[New Message] in turn. 2. Press (www)[Menu] In Message Input Screen. 3. Press (1)[Save Phrase]. Retrieve Sentence You can open the sentence saved n the Sentences. 1. Press (SMS), and select (2) [Out -Box] and [New Message] in turn. , 2. Press (www)[Menu] and (2)[Retrieve] In Message Input Screen. 3. Press (SMS)[Paste]. Search Phonebook You can easily enter the phone number using Search if the phone number of the receive is saved in the phonebook 1. Press (SMS) and select (2) [Out -Box], (1)[New Message]. - Press (www)[Menu] with the cursor positioned on the phone number of the other party. 2. Press (3)[Search Book] and (OK)[Sel]. (Ex. When selecting “family”) - Press (Up/down) to select the phone number of the other party, and press (OK)[Sel]. - Press (SMS)[Add] to promptly add the mobile phone number among the numbers saved in the numeric icon (1/2/3/4). Search by Incoming call history 1. Press (SMS), and select (2) [Out-Box], (1)[New Message], 2. (www)[Menu] and (4)[Call ID List] in turn. - Press (www)[Menu] with the cursor positioned on the phone number of the other party, and press](https://usermanual.wiki/SK-Teletech/SK-5000ADVANCE/User-Guide-409203-Page-48.png)
![(Up/Down) to select the related item and press (OK)[Sel]. 2. Press (SMS)[To ] - Search by outgoing call history is the same. Save Message You can save the composed message in Out-box. 1. Press (SMS), and select (2) [Out-Box], (1)[New Message], 2. Press (www)[Menu] and (6)[Save Message] in turn. - If you save the message without any text entered, it is saved as [No Text] in Send Massage Box Delete Selected Number You can delete the selected number only when you add the group for broadcast. 1. Press (SMS), and select (2)[Out-Box], (1)[New Message]. 2. Press (www)[Menu] and (7)[Delete One No.] in turn. * Press (www)[Menu] with the cursor positioned on the phone number of the other party. All Phone Numbers You can delete all phone numbers in the message input screen. 1. Press (SMS), and select (2)[Out-Box], (1)[New Message], 2. Press (www)[Menu] and (8)[Delete all No.] in turn. * All the phone numbers you entered in the number of the other party in the phonebook will be deleted. * The (www) [Menu] is activated depending on the position of cursor. Outbox You can save the messages you saved before sending or if you failed to send. Message that cannot be sent during broadcasting will be separately saved. Edit old message 1. Press (SMS), and select (2)[Out-Box], (2)[Outgoing Msg] in turn.](https://usermanual.wiki/SK-Teletech/SK-5000ADVANCE/User-Guide-409203-Page-49.png)
![- Press (Up/Down) to move to the message you want to edit. 2. Press (OK)[Select] and edit the contents. - Edit the contents using the numeric key and Enter key, and press (OK). Delete All Old Messages 1. Press (SMS), and select (2)[Out-Box], (2)[Outgoing Msg] in turn. - Press (SMS)[Delete] to delete the selected message. 2. Press (www)[Menu] and (1)[Delete All]. - Press (OK)[YES] to delete all the messages to be sent. Sent Message You can automatically save up to 30 messages you have successfully sent. 1. Press (SMS), and select (2)[Out-Box], (3)[Sent Message] in turn - Press (Up/Down) to move to the message you want. 2. Press (OK)[Select]. - If you want to edit and send the sent messages again, edit the message pressing New Message and enter your phone number and the phone number of the other party. Then, press (SMS) [Send]. Phrase You can save the frequently used sentence in the Sentences and open the message later. 1. Press (SMS), and select (2) [Out-Box], and (4)[Phrase] in turn. - Press (SMS)[New] to make/save new message. - Press (www)[Menu] on the above screen to delete the saved sentence. - Press (1)[Delete] to Delete the selected Phrase only, and (2)[Delete All] to Delete the Phrase saved. - Press (www)[Menu] on the above screen to delete the saved sentence - Press (Left/Right) to select whether to delete the message, and press (OK)[Sel]. 2. Press (OK)[Sel]. - Press (OK)[Enter] to edit and send the message. Delete All Messages You can delete all messages.](https://usermanual.wiki/SK-Teletech/SK-5000ADVANCE/User-Guide-409203-Page-50.png)
![1. Press (SMS) and (3) [Delete All]. - The password is set as “0000“ by default 2. Enter password. - Press (Up/Down) to move to the message to delete. 3. Press (OK)[Select]. - Press (Left/Right) to select whether to delete and press (OK). SMS Alert You can select bell or lamp that indicates the message is received. 1. Press (SMS) and (4) [Set Msg Alert], and set the Alert. - Press (OK)[Select] to select the message you want using (Up/Down). 2. Type of Alerts - 5 types of alerts are available including bell, woman’s voice and bell 1~ 4. 3. Size of Alerts - Adjust the size of alert pressing (Left/Right) - You can set it also in Volume of Set Call Alert. 4. Alert during Call - Select whether to alert when you receive a message during call. - Press (OK)[Set Up/Release] to set or release the alarm during call. 5. Press (SMS)[Save]. *SMS alert - No alert : Sub LCD blinks once when the message is received. - Alert once : Sub LCD blinks once and the bell rings when the message is received. - Alert every 2 minutes : Sub LCD blinks once and the bell rings when the message is received. - If it is not checked (when Main LCD is the screen of SMS Alert, Sub LCD is on and the bell rings once every 2 minutes.](https://usermanual.wiki/SK-Teletech/SK-5000ADVANCE/User-Guide-409203-Page-51.png)
![Data Communication Service Function WWW menu Connect WWW You can use this menu while searching information in WWW. 1. Press (www)[WWW Menu]. 2. Press (1)[Connect WWW]. * Press and hold (www) at any screen while searching website to move to the WWW initial screen. * Initial screen and service are subject to change due to development of better service and technology by business operator. * The site providing PCL configures the relevant (www)[menu] and provides you (www)[WWW] services. * For releasing the connection to www, press (END). Wizard Box You can download the various multimedia contents from the WWW to enjoy fully the service of (www)[WWW] at anytime in anywhere. 1. Press (www)[WWW Menu]. 2. Press (2)[Wizard Box]. 3. Press (OK)[Sel]. * Move to the con * The menu or display of WWW service may be altered without notice according to the operators` circumstances . Multimedia Box You can save the multimedia contents you downloaded form WWW. 1. Press (www)[WWW Menu]. 2. Press (3)[Multimedia].](https://usermanual.wiki/SK-Teletech/SK-5000ADVANCE/User-Guide-409203-Page-52.png)
![ * The contents of WWW service are subject to change due to development of better service and technology by business operator. * You can flexibly save various contents including Multimedia, WWW, picture, photo, Melody and Photo Mail within the maximum memory size. Ringtones You can execute the designated bell sound if you receive a call from the designated caller by download the Ringstones from WWW. 1. Press (www)[WWW Menu]. 2. Press (4)[Ringtones] 3. Press the Bell moving to the contents you want to download it. * The contents of WWW service are subject to change due to development of better service and technology by business operator. * Downloaded Ringtones contents will be saved in (4)[Ringtones] of (www)[WWW]. Animations You can execute the designated animation if you receive a call from the designated caller by download the Animation from WWW. 1. Press (www)[WWW Menu]. 2. Press (5)[ Animations]. 3. Press the Animations moving to the contents you want to download it. Voice Portal You can connect to the voice guide service portal provided by PCL. 1. Press (www)[WWW Menu]. 2. Press (6)[Voice Portal]. * The contents of WWW service are subject to change due to development of better service and technology by business operator.](https://usermanual.wiki/SK-Teletech/SK-5000ADVANCE/User-Guide-409203-Page-53.png)
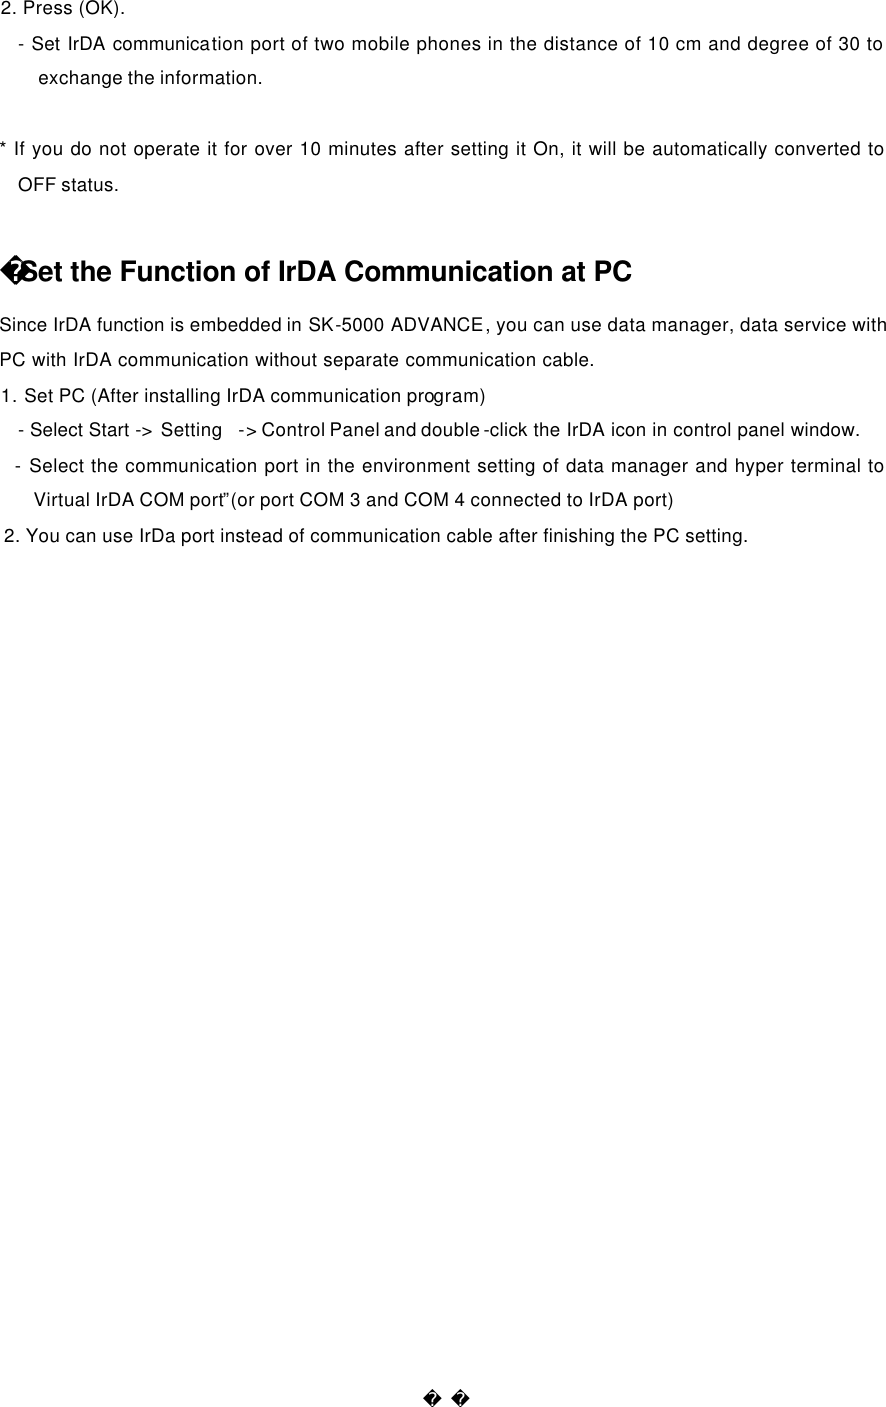
![What`s New 1. Press (www)[WWW Menu]. 2. Press (7)[What`s New]. SMS Info. You can select the relevant Sub Menu to request the desired information. 1. Press (www)[WWW Menu]. 2. Press (8)[SMS Info.]. IrDA Communication You can perform wireless data communication with PC using IrDA function or use data manager. Communication with SK-5000 ADVANCE The maximum communication speed with PC is up to 64 Kbps when using IrDA. <Receiving mode> You can set the Receiving mode to receive the data of the other party’s phone (My Bell/My Picture/My photo /Phonebook) 1. Press (Left)[Menu], and select (8)[IrDA], (1)[Phone on phone] and (1) [Receiving mode] in turn. - Press (CRL) to cancel the receiving. * A message indicating ‘Memory is not suffici ent’ will be displayed when the memory of phone is full during receiving. * You can use this function only with SK-5000 ADVANCE phones with IrDA functions. * Set IrDA communication port of two mobile phones in the distance of 10 cm and degree of 30 to exchange the information. <Send My Bell> You can send the melody information you have saved as my bell to the phone of the other party. 1. Press (Left)[Menu], and select (8)[IrDA], (1)[Phone on phone], and [Send Bell] in turn. - Move to the item you want using (Up/Down) and press (OK)[Send] to send it to the phone of the](https://usermanual.wiki/SK-Teletech/SK-5000ADVANCE/User-Guide-409203-Page-54.png)
![other party. <Send My Picture> You can send the animation information you have saved to display when the folder is open, when you receive a call, when you turn on or off the power and when you start WWW to the phone of the other party. 1. Press (Left)[Menu], and select (8)[IrDA], (1)[Phone on phone], and [Send Picture]. - Move to the item you want using (Up/Down) and press (OK)[Send] to send it to the phone of the other party. <Send My Photo> You can send the photo information you have taken with camera. 1. Press (Left)[Menu], and select (8) [IrDA], (1)[Phone on phone] and [Send My Photo]. - Move to the item you want using (Up/Down) and press (OK)[Send] to send it to the phone of the other party. <Send My Phonebook> You can send the phonebook information to the phone of the other party. 1.Press (Left)[Menu], and select (8)[IrDA], (1)[Phone on phone], and [Send Book]. - Move to the item you want using (Up/Down) and press (OK)[Send] to send it to the phone of the other party. * If there is the same name in the phonebook, a screen will be displayed to a SK Teletech you whether to overwrite. At this time, press (3)[Yes to All] to overwrite all information without displaying prompt again. *When you send the phonebook to the other SK Teletech model (where more than 2 phone numbers cannot be saved in one type) from SK -5000 ADVANCE, if there are more than 2 phonebook in the same address, one of them will be received. Communication with PC You can perform wireless data communication with PC or use data manager using IrDA function. 1. Press (Left)[Menu], and select (8)[IrDA] and (2)[Phone to PC] in turn. - Press (Up/Down) to m ove to the item you want.](https://usermanual.wiki/SK-Teletech/SK-5000ADVANCE/User-Guide-409203-Page-55.png)
![ Set Menu Set Call Alert You can set/release bells, volumes and alarms related to phone. Select Ringer/Vibrate You can set various types of ringer or vibration whatever you want. 1. Press (Left)[Menu] and press (2) [Sound Option]. 2. Press (1) [Ringer/Vibrate], and set the type of bell. - Press (OK)[Sel], and press (UP/DOWN) keys or (Left/Right) keys to select the ringer type. * Press (Left/Right) Keys to adjust the volume and then, press (OK)[Sel]. * Press (OK)[Sel], and then press (UP/DOWN) to select Ringer/Vibrate. * Press (OK)[Sel], and then press (UP/DOWN) to select Ring Duration.. 3. Press (SMS)[Save]. Group Ring You can designate a specific melody for the call from a specific group. 1. Press (Left)[Menu], and select (2) [Sound Option] and (2) [Set Group Ring] in turn.](https://usermanual.wiki/SK-Teletech/SK-5000ADVANCE/User-Guide-409203-Page-57.png)
![2. Press (OK)[Select]. 3. Press (Up/Down) keys and (Left/Right) keys. - Press (OK)[Sel] on the group ring you want to move to the (UP/DOWN) keys and press (OK). Select it in the same way. 4. Press (SMS)[Save]. * If you select [No Set], it will ring the existing melody selected in Set Ring Type. Manage My Ringer You can designate the designated ring as your ring and manage the ring including change of designated ring, file information and delete <Set to My Ring> 1. Press (Left)[Menu], and select (2) [Sound Option] and (3) [My Bell] in turn. - The file size of the selected ring will be displayed. 2. Press (www)[Menu] and select (1)[Set as Ringer]. <Rename File> 1. Press (Left) [Menu], and select (2) [Sound Option ] and (3) [My Bell], and (www)[Menu ] and (2)[Rename File] in turn. - Enter the name of file to change. Refer to pages 46~ 49 for Adding an entry. 2. Press (OK)[Done]. <User File Information> 1. Press (Left)[Menu], and select (2) [Sound Option ] and (3) [My Bell], (www) [Menu ] and (3)[User Files] in turn. - You can check the user file information <Delete Ring/All Rings> You can delete the selected ring or all rings set as my ring. 1. Press (Left)[Menu], and select (2) [Sound Option] and (3) [My Bell] in turn. - The file size of the selected ring will be displayed. 2. Press (www)[Menu] and (4)[Delete All]. - Press (SMS)[Delete] to delete the selected bell. - Select (OK)[YES] to delete all my rings.](https://usermanual.wiki/SK-Teletech/SK-5000ADVANCE/User-Guide-409203-Page-58.png)
![Set volume You can adjust various kinds of volume, or set/release alert. 1. Press (Left )[Menu], and select (2) [Sound Option] and(4) [Vol ume] in turn. - Press (Left/Right) to adjust the volume. - Press (Up/Down ) to move to the next item. 2. Press (SMS)[Save]. Set Alert You can set/release various alarm alerts. 1. Press (Left )[Menu], and select select ( 2) [Sound Option] and (5) [Alert Tone] in turn. - Press (OK)[On/Off] to set/release alarm. 2. Press (SMS)[Save]. Set Screen Set Logo 1. Press (Left)[Menu], and select (3)[Display Option] and (1)[Decoration] in turn. - Press (www)[Preview] to check the picture to be displayed in advance. 2. Set Picture - Press (OK)[Select], and then press (Up/Down) to select the item. 3. Select Clock/Calendar - Press (OK)[Select], and then select the clock/calendar. - If you select No Clock/Calendar, date and time are not displayed in the Logo. 4. Name of Phone - Press (OK)[Sel],and enter the name of Phone using (CLR) and numeric key. - Display: Press (OK)[Set/Rel] to display the name of phone in the screen. 5. Help Line 6. Press (SMS)[Save]. * If you set the moving animation to be displayed when the folder is open, the battery standby time is shortened. * The `Slide Show` in My Photo will simultaneously display the saved photo.](https://usermanual.wiki/SK-Teletech/SK-5000ADVANCE/User-Guide-409203-Page-59.png)
![Set Picture You can set/release the animation to be displayed when you receive a call, turn on and off power . 1. Press (Left)[Menu], and select (3)[Display Option] and (2)[Set Picture ] in turn. 2. Press (OK)[Select]. 3. Press (Up/Down) keys and (Left/Right) keys. * Press (OK)[Sel] on the picture you want to move to the next item. After this, you can choose the items in the same way. 4. Press (SMS)[Save]. Manage My Picture You can manage the designated picture including rename File, user file information and delete photo. <Set Picture> 1. Press (Left)[Menu], and select (3)[Display Option] and (3)[Picture Setting] in turn. - The file size of the selected picture will be displayed. - Press (OK)[Preview] to view the picture saved in the file. 2. Press (www)[Menu] and select (1)[Set Picture]. - You can set it also in Set Picture. 3. Press (1)[To My Logo].. <Rename File> 1. Press (Left)[Menu], and select (3) [Display Option], (3)[Picture Setting], (www)[Menu ] and (2)[Rename File] in turn. 2. Press (OK). <User File Information> 1. Press (Left)[Menu], and select (3) [Display Option], (3)[Picture Setting], (www)[Menu ] and (3)[User Files] in turn. - You can check the user file information. <Delete Picture/Delete All> You can delete the selected pictures or all pictures set as my picture. 1. Press (Left) [Menu], and select (( 3) [Display Option ], (3)[Picture Setting] in turn. - The file size of the selected bell will be displayed. - Press (SMS)[Delete] to delete the selected picture. 2. Press (www)[Menu] and (4)[Delete All].](https://usermanual.wiki/SK-Teletech/SK-5000ADVANCE/User-Guide-409203-Page-60.png)
![- Select (OK)[Yes] to delete all my pictures. Manage My Photo You can manage the designated picture including Rename File, user file information and delete photo. <Set Photo> 1. Press (Left)[Menu], and select (3)[Display Option] and (4)[Photo Setting] in turn. - The file size of the selected picture will be displayed. - Press (OK)[Preview] to view the picture saved in the file. 2. Press (www)[Menu] and select (1)[Select Photo]. - You can set it also in Set Picture. 3. Press (1)[To My Logo]. <Rename File> 1. Press (Left)[Menu], and select (3) [Display Option], (4)[Photo Setting], (www)[Menu] and (2)[Rename File] in turn. 2. Press (OK). <User File Information> 1. Press (Left) [Menu], and select (3) [Display Option], (4)[Photo Setting], (www)[Menu ] and (3)[User Files] in turn. - You can check the user file information. <Delete Picture/Delete All> You can delete the selected pictures or all pictures set as my picture. 1. Press (Left)[Menu], and select ((3) [Display Option], (4)[Photo Setting] in turn. - The file size of the selected bell will be displayed. - Press (SMS)[Delete] to delete the selected picture. 2. Press (www)[Menu] and (4)[Delete All Photos]. - Select (OK)[Yes] to delete all my pictures. <Photo Lock> You can protect your photo by setting Photo Lock. 1. Press (Left)[Menu], and select (3) [Display Option], ( 4)[Photo Setting] in turn. - Press (www) [Menu], (5)[Photo Lock] in turn. - Set by entering password. The password is set as “0000” by default. - Refer to pages 36 for “Photo Lock ”](https://usermanual.wiki/SK-Teletech/SK-5000ADVANCE/User-Guide-409203-Page-61.png)
![Adjust Screen Contrast 1. Press (Left)[Menu], and select (3) [Display Option] and (5) [Screen Contrast] in turn. - Press (Left/Right) keys to adjust the screen contrast. - Press (Up/Down) keys to move to the next item. 2. Press(SMS) [Save]. Set Backlight 1. Press (Left)[Menu], and select (3) [Display Option] and (6) [Auto Backlight] in turn. 2. Press (OK) [Select]. 3. Press (OK) [Select]. - Enter the time of auto backlight using [Up/Down] keys, (Left/Right) keys, [AM/PM] and numeric key. 4. Press (SMS)[Save]. -The setting of sub LCD backlight is same as the setting of LCD. * Main LCD Backlight - Auto LCD on : activates backlight for 10 seconds when the folder is open, key is pressed or you receive call. - Always on : activate the backlight at all times , whenever the folder is open. - Set time : activate the backlight for 10 seconds when the key is operated at the designated time. Backlight is not activated except the designated time. - Always Off : deactivate the backlight. *Sub LCD Backlight - Auto LCD on : activates backlight when the key is pressed or you receive a call. - Set time : activate the backlight for the designated time even if you close the folder. - Always Off : deactivate the backlight. * When ICC plug is connected and mounted in hands free stand with the folder closed, sub LCD backlight is always on, regardless of backlight setting. * When the sub LCD backlight is set as “Always on”, the power consumption will increase and may result in shortening of battery usage time. Set Screen Background 1. Press (Left)[Menu], and select (3) [Display Option] and (7) [Display color] in turn. - Press (OK)[Sel], and then press (UP/Down) to select the background color you want. 2. Set the color of contents.](https://usermanual.wiki/SK-Teletech/SK-5000ADVANCE/User-Guide-409203-Page-62.png)
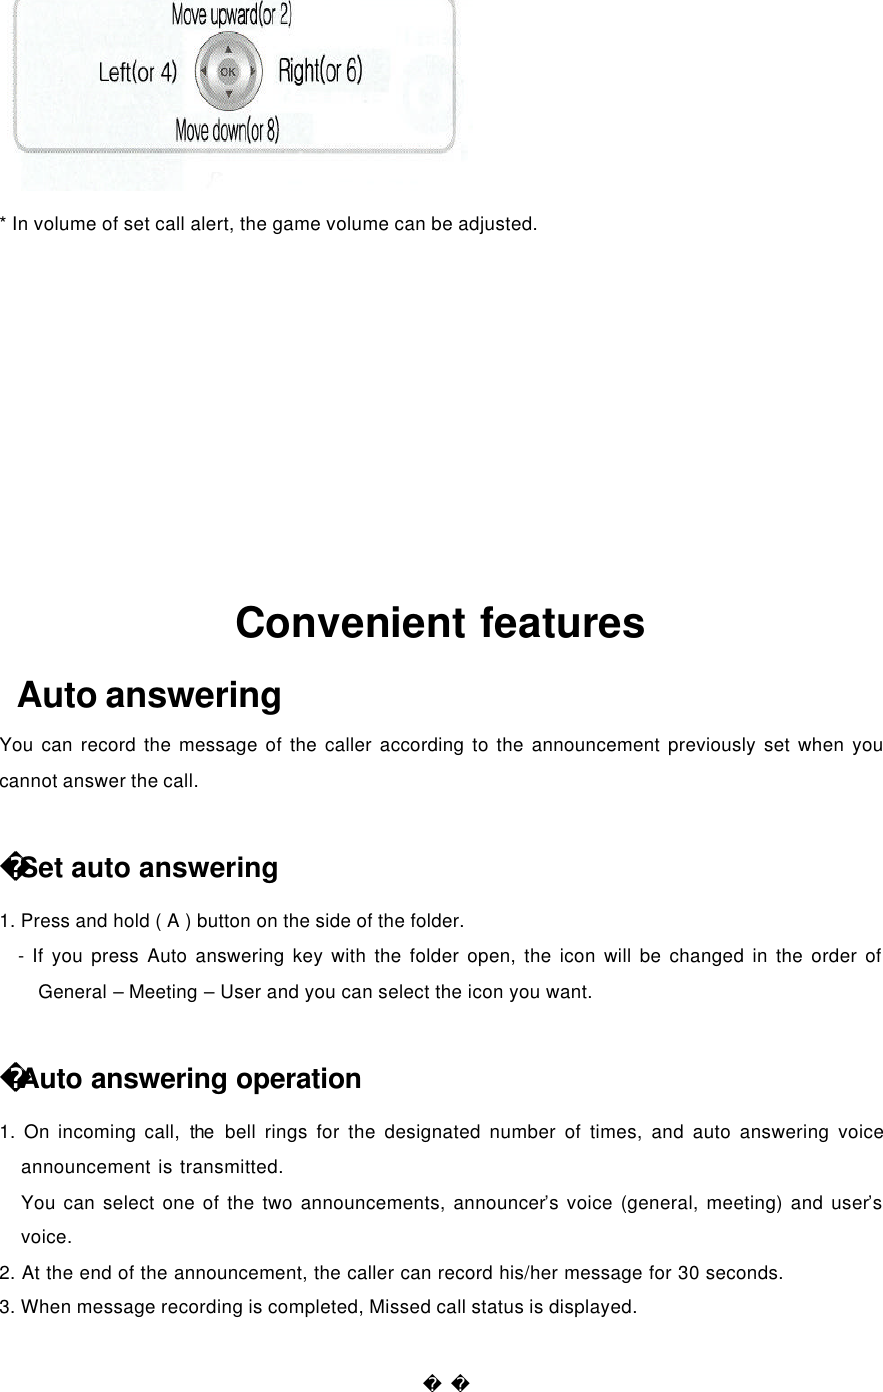
![- Press (OK)[Sel], and then press (UP/.Down) keys or (Left/Right) keys to select the color of contents you want. 2. Press (SMS) [Save]. Auto Answering You can record the message of the caller, by simply recording and selecting the announcement with one touch. Setting auto answering function 1. Press (Left)[Menu] and (7)[Ans.Machine]. 2. Press (1)[Set Alert] and Adjust Ring Time. - Press (OK) [Select] to select the ringer duration time. 3. Select Announcement - Press (OK)[Select] and then press (UP/Down) keys or (Left/Right) keys to select the announcement. - Announcement is set as ‘General’ by default. 4. Press (SMS)[Save]. - Press and hold (A) button on the left side of the folder in standby mode, to set/release the auto answering. On incoming call, the bell rings for the designated number of times, and auto answering voice announcement is transmitted. - You may press and hold (A) button to convert to Auto Answering mode. - You can select one of the announcements, announcer’s voice (general and meeting) and user’s voice. - If you press Auto answering key with the folder open, the icon will be changed in the order of General –Meeting – User’s Voice, and you can select the icon you want. Record/Play Announcement You can record and check the auto answering announcement. 1. Press (Left)[Menu], and select (7) [ Ans.Machine] and (2)[Record/Play] in turn. - Press (OK)[Record] to record the message you want, and then press (SMS)[Save]. - Press (SMS)[Play] to play the recorded contents. * If it already recorded, press (SMS)[Play] to check the recorded user’s voice. *- Maximum recording time is 30 seconds.](https://usermanual.wiki/SK-Teletech/SK-5000ADVANCE/User-Guide-409203-Page-63.png)
![Set Environment Auto Function You can set/release various auto functions. 1. Press (Left)[Menu], (5)[Set Up] and (1)[Auto Function] in turn. - Press (Up/Down) keys to move to the item you want. - Select (OK)[Set/Release]. - If you select auto local code, it automatically enters auto local code. 2. Press (SMS)[Save]. * Auto Redial : When there is heavy traffic, you can activate/deactivate auto redial to the number you called. * (Auto receiving) Handsfree : You can set/release the function to automatically receive after the rings when you connect to handsfree. * (Auto receiving) Earphone Mike : You can set/release the function to automatically receive after bell rings for 10 seconds when you connect to the earphone. * Auto receiving function operates only when you connect to handsfree and earphone mike. Handsfree receiving and earphone mike receiving are set OFF by default. *Auto local area code: You can set the frequently used local area code so that you don’t have to press it whenever you make a call. *Enter auto local area code : Enter the local area code you want using numeric keys when you select auto local area code. Set Options 1. Press (Left)[Menu], and select (5)[Set Up], (2) [Option] and (OK)[Select] in turn, and set the method of receiving call. - Press [Scroll] and (OK). - It is set as “Folder Open” by default. 2. Set Main Menu - Character: shows the main menu in character type. - Picture: shows the main menu in picture type. - It is set as “Picture” by default. 3. Press (SMS) [Save]. Lock Function You can set/release the lock function not to use the specific function of phone or not to make a call](https://usermanual.wiki/SK-Teletech/SK-5000ADVANCE/User-Guide-409203-Page-64.png)
![without entering password. 1. Press (Left)[Menu], select (5)[Set Up], (3) [Security] in turn, and enter password. -The password is set as “0000” by default. - (1/2) means that it displays the 1st page between 2 pages. - Move to the item you want using (Up/Down) key. - Select the (OK)[Set/Release] 2. Press (SMS)[save]. <Lock All> You can set Lock All function. 1. Press (Left)[Menu], and select (5)[Set Up], (3) [Security] in turn, and enter password. - The password is set as “0000” by default. 2. Press (www)[Menu] and select (1)[All Lock]. - Press (2)[All Unlock] to release lock. Change Password You can change the old password to new one. 1. Press (Left)[Menu], and select (5)[Set Up] and (3) [Security] and (2)[Set Password] in turn. - Enter your password. - Password is set as “0000” by default. 2. Enter new password. - Enter new password to change. 3. Confirm new password. - Enter new password again to confirm. Initialize Phonebook Initialize phonebook to the default status. 1. Press (Left)[Menu], and select (5)[Set Up] and (3) [Security] in turn. - Password is “0000” by default. - Press (Left/Right) to select whether to initialize, and press (OK)[Sel]. 2. Enter password. - All phone numbers will be deleted during initialization.](https://usermanual.wiki/SK-Teletech/SK-5000ADVANCE/User-Guide-409203-Page-65.png)
![Initialize System Initialize all functions of system to the default functions. 1. Press (Left)[Menu], and select (5)[Set Up] and [Initialize System] in turn. - Password is “0000” by default. 1. Enter password. - Press (Left/Right) keys to select whether to initialize, and press (OK)[Sel]. Data service You can set environment for data service including Internet / PC communication / FAX. 1. Press (Left)[Menu], and select (5)[Set Up], (4)[Set Data Call] and (OK)[Select] in turn, and select receiving mode. - Press (Up/Down) keys to move to the item and Press (OK) [conf]. 2 Set Internet speed : Press [Scroll], and press (OK) after moving to the item you want using (Up/Down) keys. 3. Baud rate with PC : Set interface rate between PC and mobile phone. - Press (Up/Down) to s elect the item, and press (OK) [conf]. 4. Press (SMS) [Save]. <Set receiving mode> For Modem and FAX, you should select Modem Mode or FAX Mode . However, you do not need to set receiving mode for Modem or FAX origination. <Set Internet speed> - You can use high speed wireless data communication of up to 153 Kbps with CDMA 2000 1X support. - Internet service rate is divided into 9.6 Kbps, 14.4 Kbps and 64Kbps. - You can use Internet service in the maximum rate of 64 Kbps. - In normal rate, you can use Internet service in the rate of 9.6 Kbps or 14.4 Kbps. 9.6 Kbps is provided when 14.4 Kbps is unavailable. - It is much stable to use data cable than to use IrDA when you use the Internet service in maximum rate. You need to set “Communication with PC” in IrDA menu and is disconnected if you do not use PC and phone for more than 10 minutes. - If there is no data receiving and transmitting for 4 minutes and 15 seconds during high-speed packet](https://usermanual.wiki/SK-Teletech/SK-5000ADVANCE/User-Guide-409203-Page-66.png)
![data service, using data cable, (dormant) will be displayed on the upper part of LCD. Fee is not charged while the is displayed. <Baud rate with PC> - The maximum speed in desktop/notebook is 115,200bps and you should insert I/D card or PCMCIA Card in the desktop/notebook that supports high speed communication in order to set the communication speed with PC as 230, 400 bps. - It supports up to 64 kbps for communication speed with PC when using IrDA. - The recommended speed for using fax data service is 19,2000 bps. . Select System This function is to select one number if the user uses mobile phone with more than 2 service operators. 1. Press (Left)[Menu], and select (5)[Set Up] and (5) [Select System] in turn, and enter password. - Password is “0000” by default. * If the phone is set again to the selected system, it will be turned off and on again. * Password is “0000” by default. Do not change it as much as possible. If you still need to change it, contact the service center first. Check S/W version 1. Press (Left)[Menu], and select (5)[Set Up], and (6) [S/W version] in turn. - The version number of the software will be displayed when you purchase the phone WWW Font Config. 1. Press (Left)[Menu], and select (5)[Set Up] and (7) [WWW Font Config.] - The Password is set as “0000” by default. 2. Press (SMS)[Save]. - Press (www)[Init] to return the font size, proxy address and initial URL to default setting. - Press (OK)[YES]or (Right)[NO] to select whether to initial. * Font size : Set the letter as basic letter or small letter when using WWW.](https://usermanual.wiki/SK-Teletech/SK-5000ADVANCE/User-Guide-409203-Page-67.png)