SKYPINE ELECTRONICS CNE8415BSMART Smart High Line User Manual 1 of 2
SKYPINE ELECTRONICS (SHEN ZHEN) CO., LTD. Smart High Line Users Manual 1 of 2
UserManual.wiki
>
SKYPINE ELECTRONICS
>
CNE8415BSMART User Manual
>
Users Manual 1 of 2
Contents
1.
Users Manual 1 of 2
2.
Users Manual 2 of 2
Users Manual 1 of 2
Navigation menu
Upload a User Manual
Namespaces
Wiki Guide
HTML
PDF
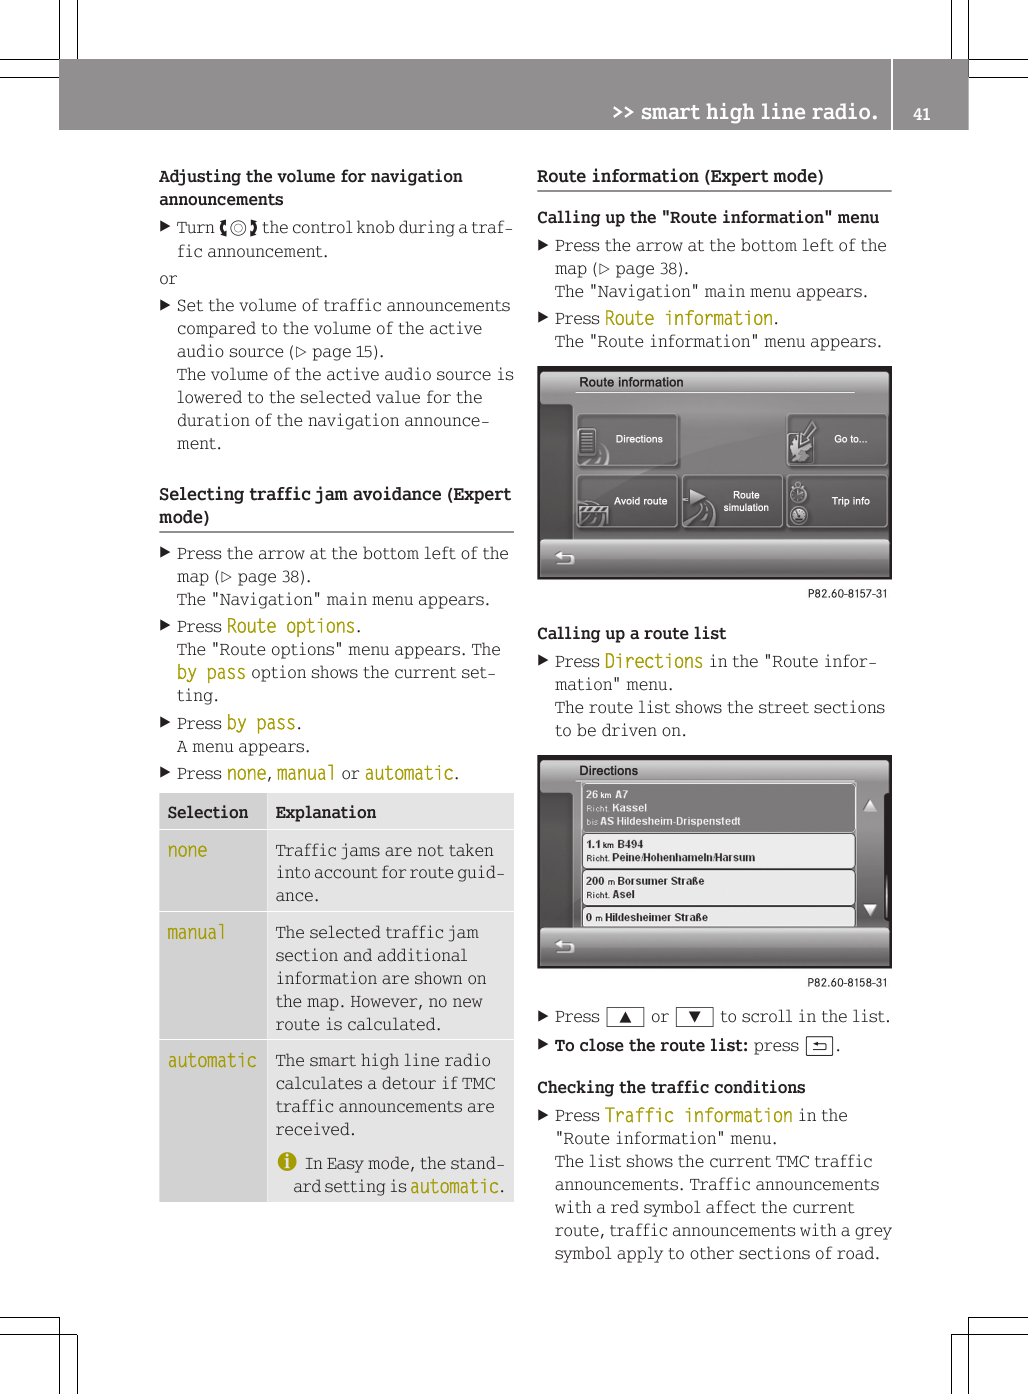
Info
Views
User Manual
Discussion / Help
Navigation