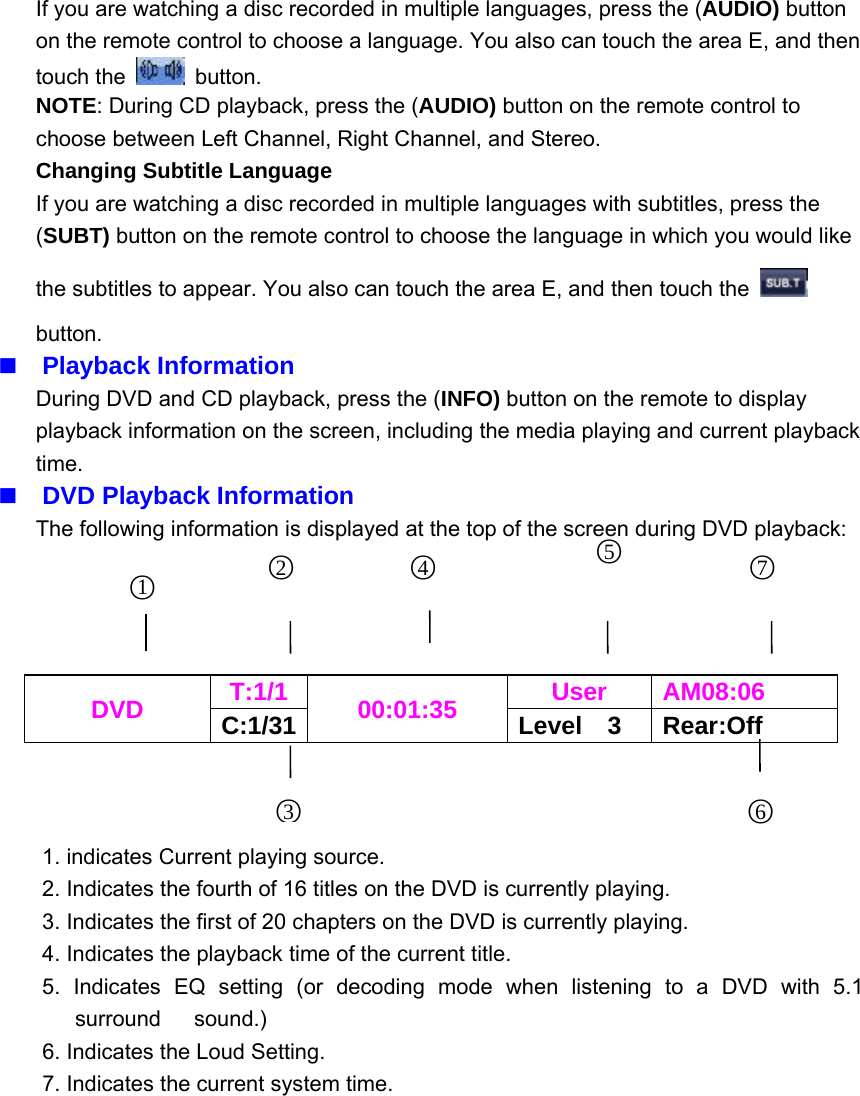
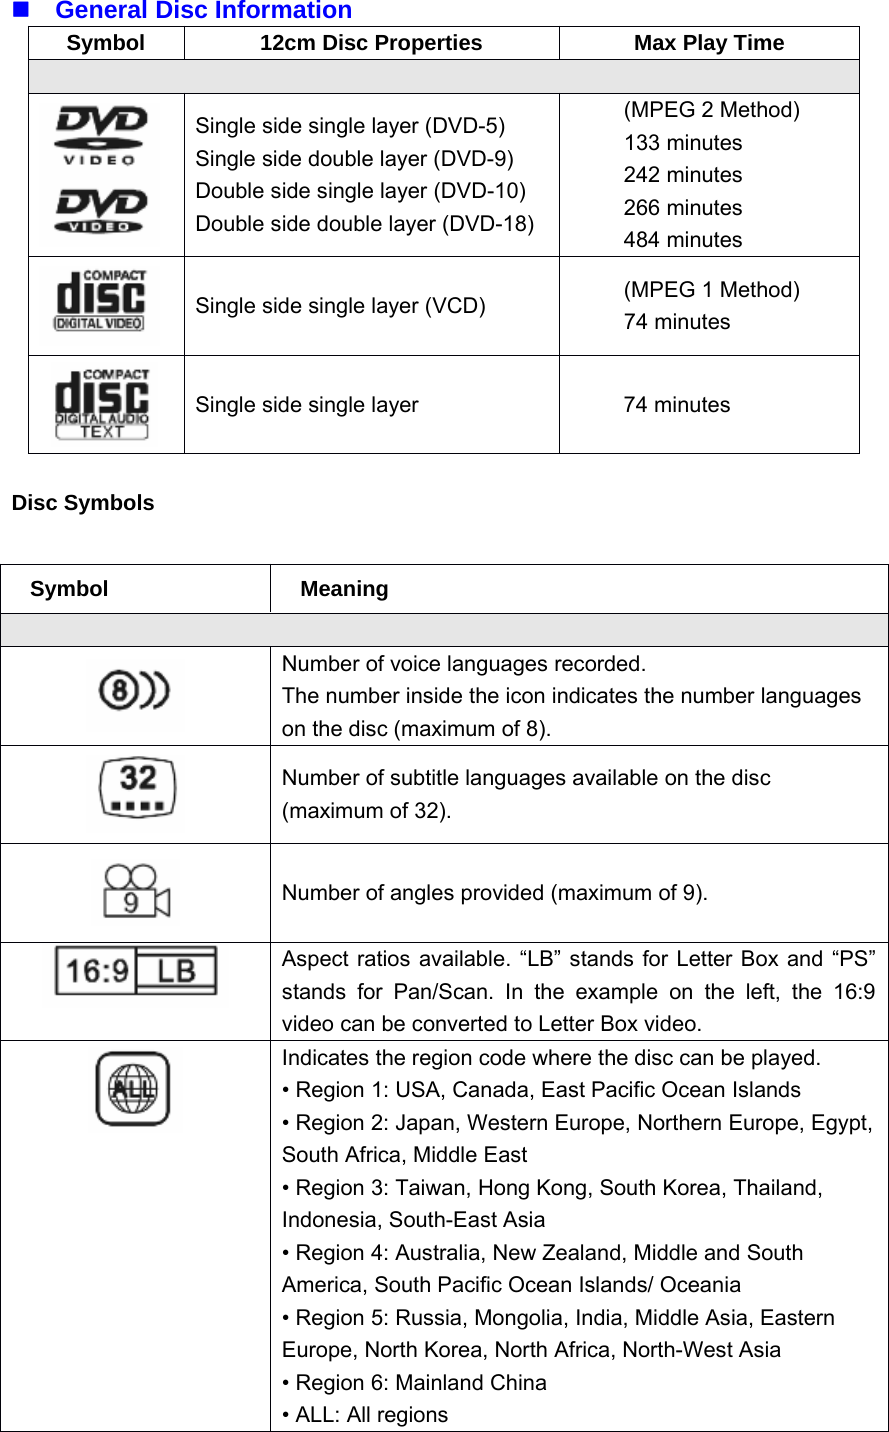
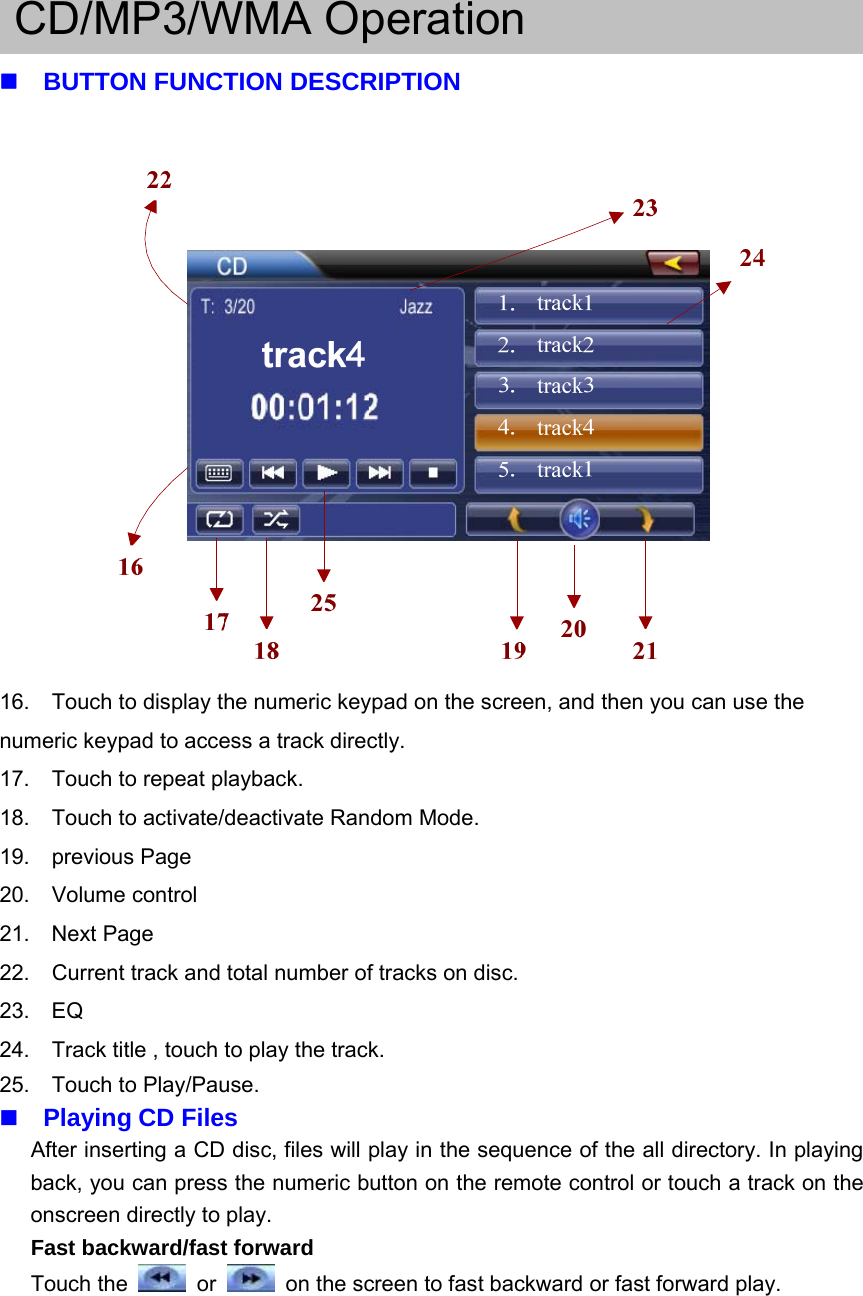
SKYPINE ELECTRONICS SN6104AC Car DVD Entertainment Center- Bluetooth Portion User Manual
SKYPINE ELECTRONICS (SHEN ZHEN) CO., LTD. Car DVD Entertainment Center- Bluetooth Portion Users Manual
UserManual.wiki
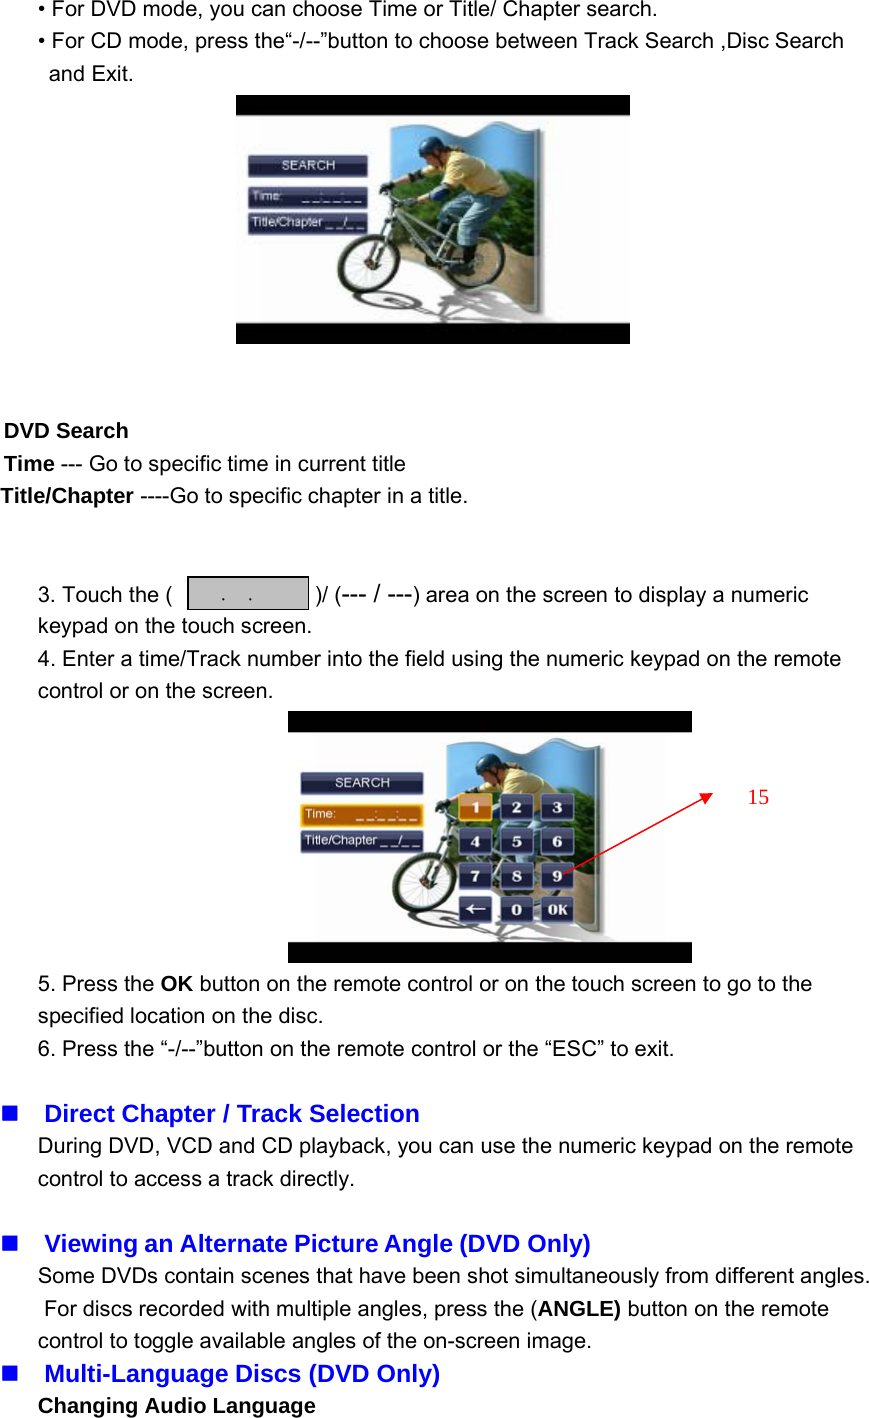
>
SKYPINE ELECTRONICS
>
SN6104AC User Manual
Users Manual
Navigation menu
Upload a User Manual
Namespaces
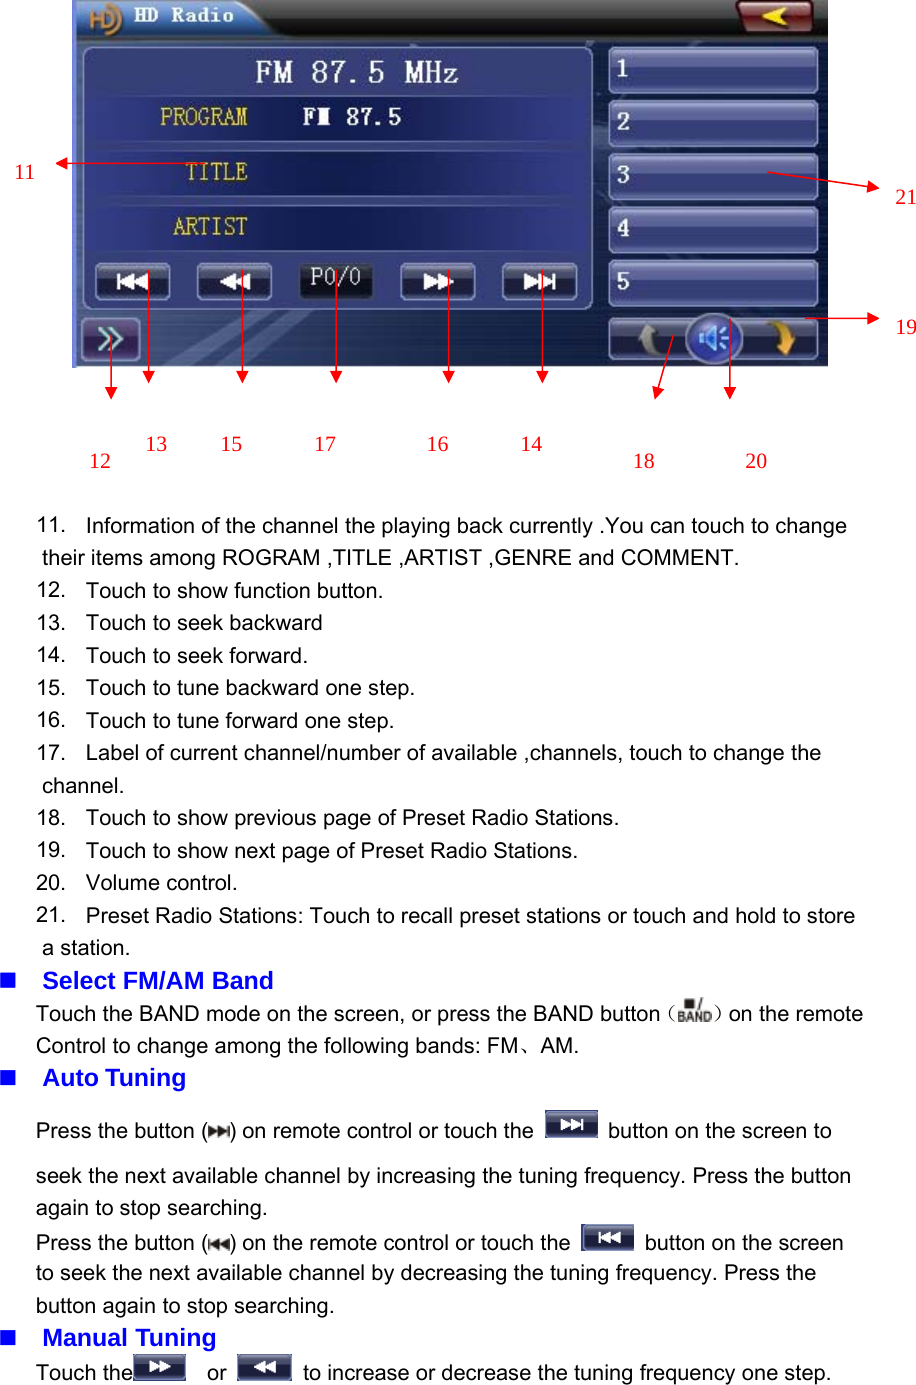
Wiki Guide
HTML
PDF
Info
Views
User Manual
Discussion / Help
Navigation