SNAKEBYTE ASIA SB909733T Pad Pro Wireless User Manual
SNAKEBYTE ASIA Ltd. Pad Pro Wireless Users Manual
User Manual

Page 1 of 6
LITE
STAR
Wireless Rumble Gamepad Instruction
1 General Information
A-08-G90842-1100-F wireless rumble gamepad is designed for play games on PC, it
is compatible to most PC games and PC simulated Xbox360 games, with unique
design and attractive looking.
2 Features
2.1 Support Windows VISTA/7/8/10;
2.2 Compatible with PC X-Input and D-Input;
2.3 Power saving after activated sleep mode;
2.4 Frequency: 2.4GHz;
2.5 7m minimum direct transmission range;
2.6 3.7v operation voltage, build-in 750mAh Lithium battery.
Page 2 of 6
LITE
STAR
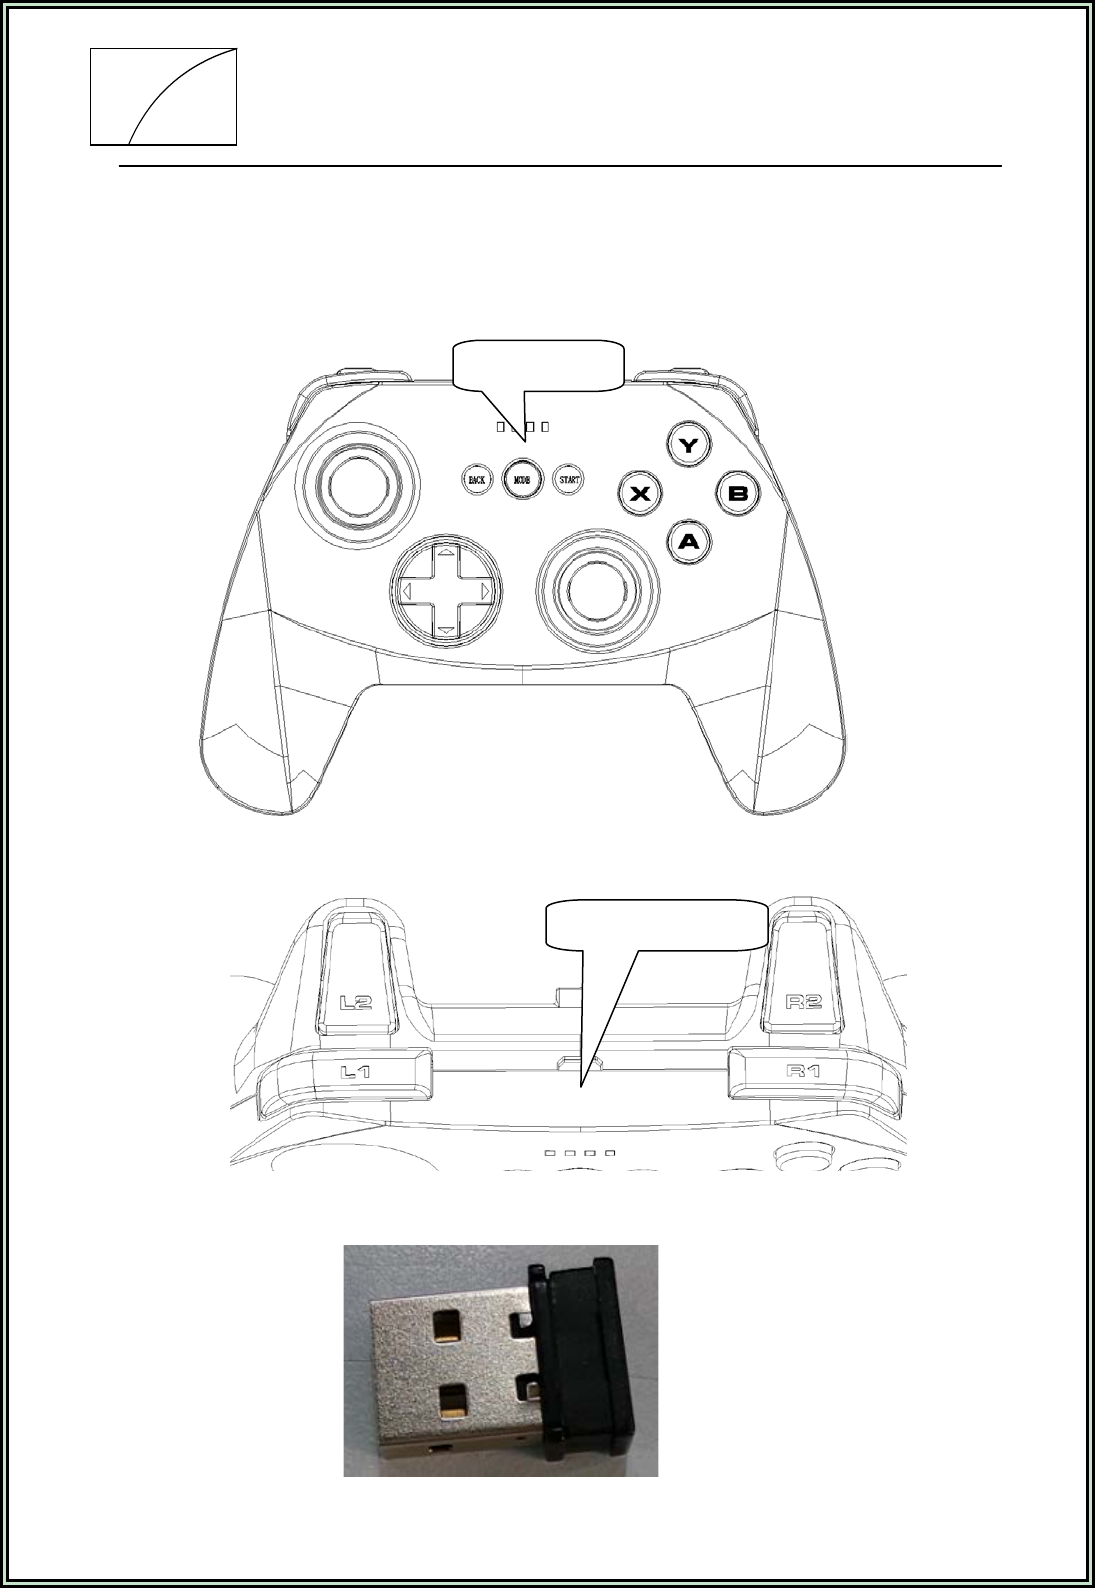
3 Drawing
3.1 Front View
3.2 Side View
3.3 Dongle
Mode indicator
USB recharging port
Page 3 of 6
LITE
STAR
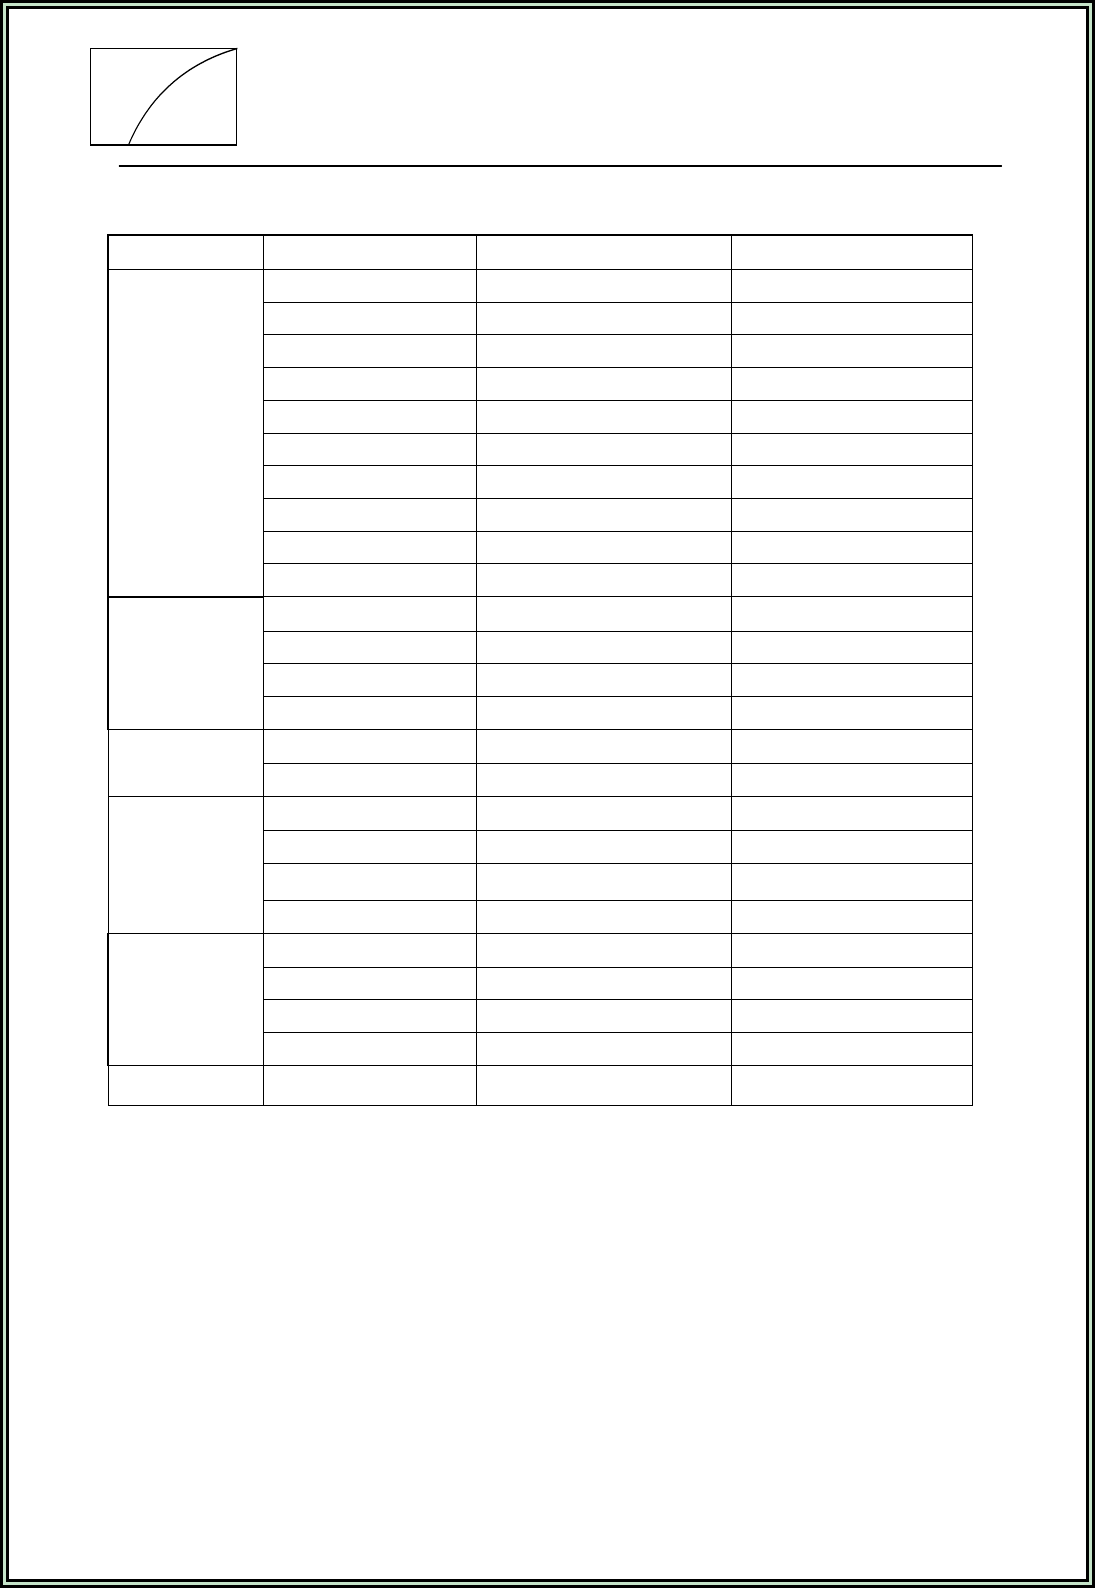
3.4 Key mapping
类型
PC(X-INPUT) PC(D-INPUT Analog) PC(D-INPUTDigital)
A
3
3
B 2 2
X
4
4
Button
Y
1
1
R1 6 6
L1
5
5
R2 8 8
L2 7 7
R3
12
12
L3 11 11
D-pad
UP UP LY+
DOWN
DOWN
LY-
LEFT LEFT LX-
RIGHT RIGHT LX+
Function key START 10 10
BACK 9 9
Left
LY+ LY+ LY+
Joystick
LY- LY- LY-
LX- LX- LX-
LX+ LX+ LX+
Right
RY+ RZ+ 1
Joystick
RY-
RZ-
3
RX- Z- 4
RX+ Z+ 2
Mode key X-Guide Mode switch Mode switch
4 Instructions
4.1 Power On/Off
4.1.1 Press “MODE” to power on;
4.1.2 Press and hold “MODE” for 3sec. to power off
4.2 Connect
4.2.1 Plug in dongle to PC USB port, press “Mode” to power on and connect will be
automatically
4.2.2 Default connection mode is X-input, first LED indicator lights up.

Page 4 of 6
LITE
STAR
4.3 Sleep mode
4.3.1 When stand-by: activated after 30sec. idled;
4.3.2 When connected: activated after 5 min. idled;
4.3.3 Press “MODE” to deactivated.
4.4 Low battery notification
LED indicator fast blinking when battery running low, please recharging in time.
4.5 Recharging
4.5.1 When connected: LED of current mode steady blinking when charging, solid
lighting when fully charged;
4.5.2 When disconnected: All 4 LED steady blinking when charging, off when fully
charged.
4.6 Reset and calibration
4.6.1 In case Joystick or analog trigger gets deviating, use needle-like object to
press the button hidden in the hole at the back side of gamepad to power off
and reset to factory settings;
4.6.2 Reset gamepad when system lockdown to reboot.
5 Connection
5.1 Connect
5.1.1 Plug dongle into PC USB port;
5.1.2 Press “MODE” to power on, gamepad automatically searching for connection,
all 4 LED indicator fast blinking in during and first LED solid light when
connected.
5.2 Mode switch
5.2.1 Default mode is X-Input, Press and hold “BACK” +“START”for 3sec. to switch
between X-Input and D-Input. Second LED indicator solid light when D-Input
mode.
5.2.2 In D-Input mode, press “MODE” to switch between analog and digital mode,

Page 5 of 6
LITE
STAR
second LED indicator solid light when digital mode, both first and second
mode solid light when analog mode.
5.3 Install driver
5.3.1 Insert driver CD to PC, click to run SETUP, follow installation instructions;
5.3.2 Plug dongle to PC USB slot, right click on “Device and Printer” icon in
Windows’ “Control panel” menu, select Properties in Game Device setting.
5.4 Testing and Setting
5.4.1 Test buttons and axis input in Setting menu;
5.4.2 Adjust axis input in adjust label;
5.4.3 Test vibration feedback with axis.
5.5 Uninstall driver
5.5.1 Select “All Program” in Windows control panel;
5.5.2 Select gamepad driver, click Uninstall and follow instructions.
6 AFQ
6.1 Can’t power on may caused by empty battery, please try to recharge the gamepad,
LED will blinking in during;
6.2 Please keep in short distance with you PC when gamepad no response or
disconnected, it may automatically reconnect;
6.3 Use needle-like object to press the button hidden in the hole at the back side of
gamepad to reset the gamepad to factory settings.
7 Notifications and Warnings
7.1 Please read instruction before using;
7.2 Do not violent shaking, open, modify or fixing gamepad unauthorized;
7.3 Avoiding to store the gamepad in extreme wet, hot, oily or dust place;
7.4 Avoid any liquid get into, this may damage the gamepad;

Page 6 of 6
LITE
STAR
7.5 Battery may explode in fire, do not put the gamepad into;
7.6 Use DC 5v for recharging output, or else gamepad maybe damaged;
7.7 Use by children must be under tutelage of adult;
7.8 Please contact your retailer or distributor for suggestion and consulting.
FCC Statement
This equipment has been tested and found to comply with the limits for a Class B digital device, pursuant to
Part 15 of the FCC Rules. These limits are designed to provide reasonable protection against harmful
interference in a residential installation. This equipment generates uses and can radiate radio frequency
energy and, if not installed and used in accordance with the instructions, may cause harmful interference to
radio communications. However, there is no guarantee that interference will not occur in a particular
installation. If this equipment does cause harmful interference to radio or television reception, which can be
determined by turning the equipment off and on, the user is encouraged to try to correct the interference by
one or more of the following measures:
-- Reorient or relocate the receiving antenna.
-- Increase the separation between the equipment and receiver.
-- Connect the equipment into an outlet on a circuit different from that to which the receiver is connected.
-- Consult the dealer or an experienced radio/TV technician for help.
This device complies with part 15 of the FCC Rules. Operation is subject to the following two conditions:
(1) This device may not cause harmful interference, and (2) this device must accept any interference received,
including interference that may cause undesired operation.
Changes or modifications not expressly approved by the party responsible for compliance could void the
user's authority to operate the equipment.