STEELMATE BT1011 SINGLE-WAY TRANSMITTER User Manual RS1 G3 ops rev 08 15 2011
STEELMATE CO., LTD. SINGLE-WAY TRANSMITTER RS1 G3 ops rev 08 15 2011
UserManual.wiki
>
STEELMATE
>
BT1011 User Manual
Users Manual
Navigation menu
Upload a User Manual
Namespaces
Wiki Guide
HTML
PDF
Info
Views
User Manual
Discussion / Help
Navigation

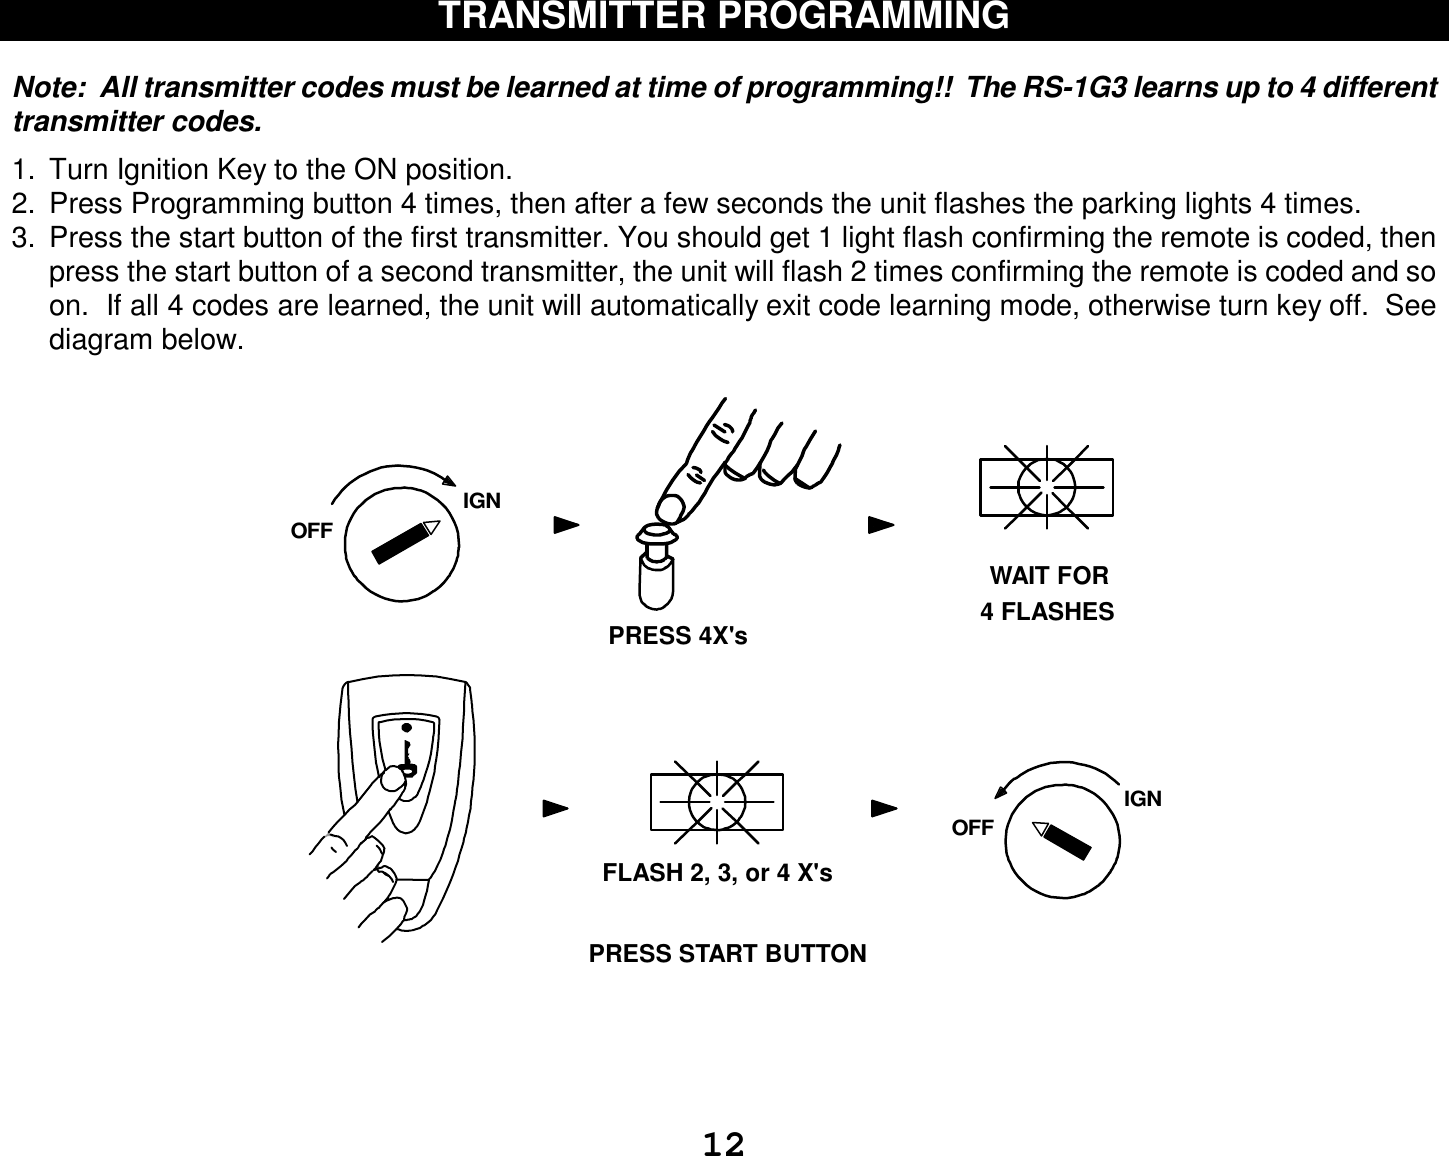
![8 TURBO TIMER MODE (OPTION #22) The optional Turbo Timer mode allows the CoolStart system to keep a Turbo or Turbo Diesel vehicle running for 1, 3 or 5 minutes [selectively] after you remove the key and exit the vehicle. This is handy for turbo cool-down without the need for expensive turbo timers. The Default = OFF. To Activate Turbo Timer: With the engine running by key, press Remote Start Button with brake pedal depressed. As you release the brake pedal, the Parking Lights and Status LED will blink the number of minutes for the Turbo Timer setting. The doors unlock after confirmation. REMOVE KEYFLASH 1-5XEXIT VEH.PRESSAND HOLDBRAKERUNNING RELEASEBRAKELIGHTSRUNNINGREMAIN1-5 MIN.](https://usermanual.wiki/STEELMATE/BT1011/User-Guide-1575915-Page-8.png)