STL SC-UL-001 Digital Video Camera User Manual Socam users manual
STL International Ltd. Digital Video Camera Socam users manual
STL >
User Manual
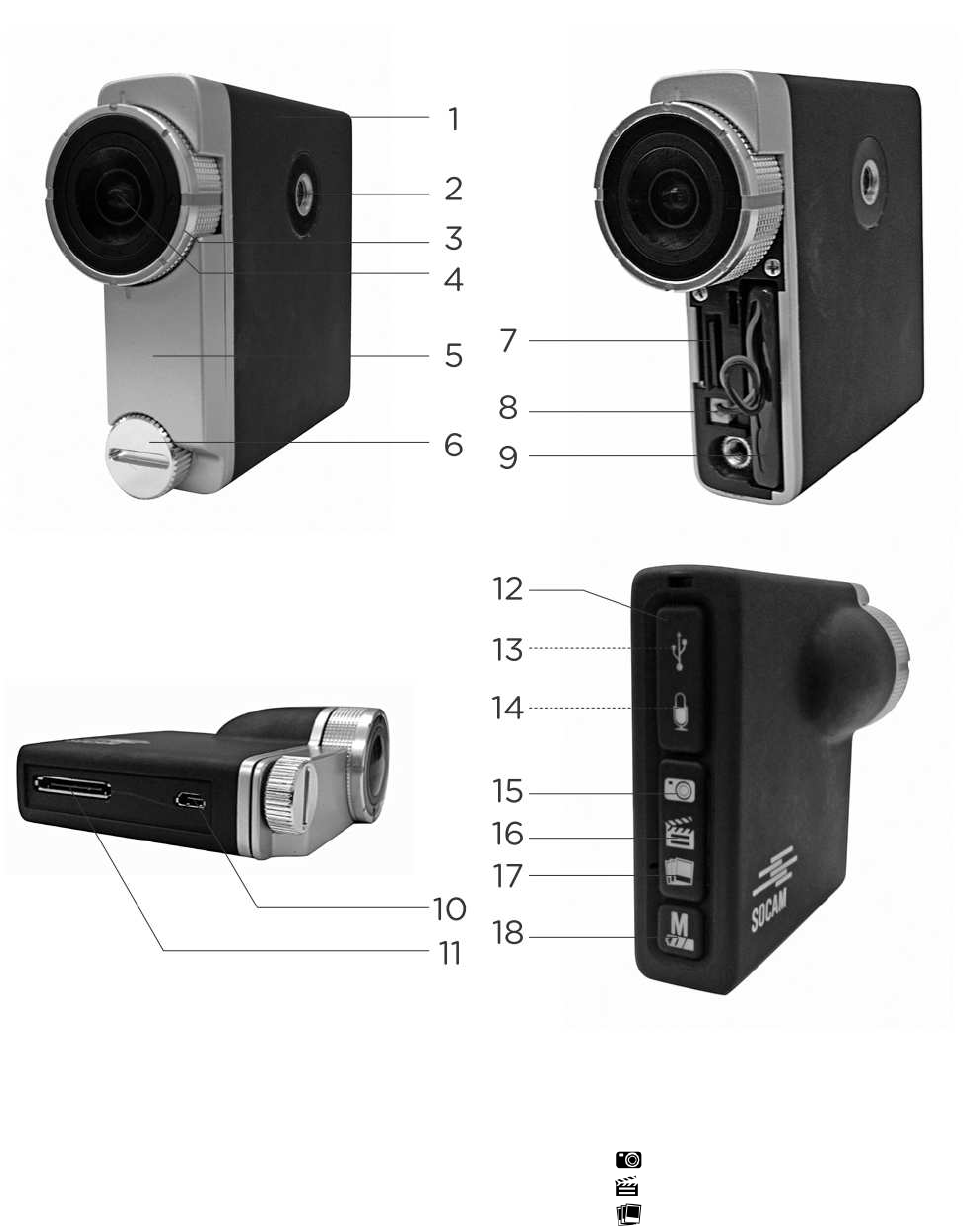
Operating elements
1 Camera body 11 SOCAM interface port
2 Clip attachment 12 Protective cover
3 Camera lens 13 MicroUSB socket
4 Lens adjustment ring 14 Phone jack plug
5 Front cover 15 Image button
6 Screw 16 Video button
7 MicroSD card slot 17 Burst button
8 Battery plug 18 M button
9 Battery
10Micro HDMI socket
Battery
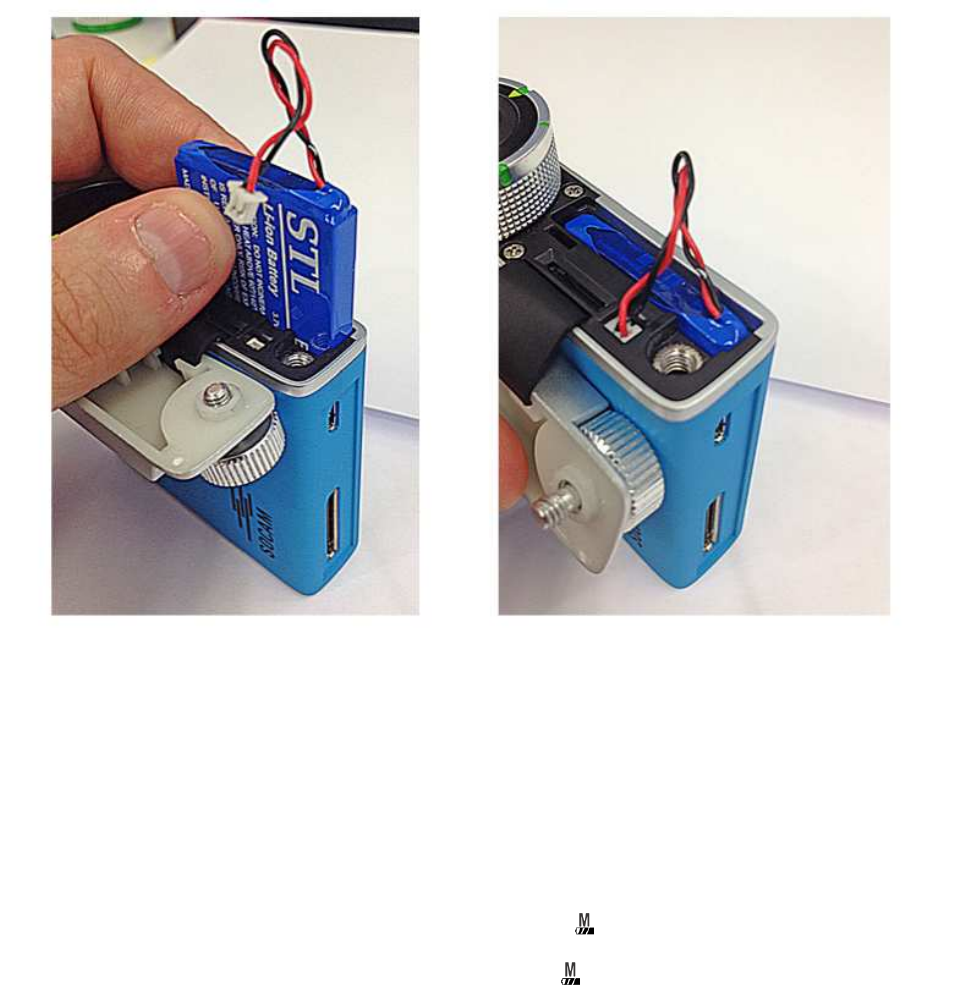
Inserting/Removing battery
1. Loosen the screw and remove the front cover.
2. If you install a battery for the first time remove any protective foils before inserting.
3. With the cable facing up slide the battery into the battery slot. There is no fixed
direction.
4. Connect the battery plug to the corresponding socket. Connection is only possible in
one direction.
5. Lay the cable flat across the battery and put the front cover in place again. Make sure
the cable is not pinched. Tighten the screw.
6. To remove the battery follow the steps in reverse order.
Battery status
A depleted battery has the consequence of the device shutting down automatically.
The Socam will notify you of a depleted battery in two different ways:
• 10 minutes before shutdown: The LED of button flashes with a 1 second interval
(slow).
•5 minutes before shutdown: The LED of button flashes with a 0.5 second interval
(fast).

Charging battery
Turn the Socam off before connecting it to a computer.
The battery is charged via the supplied USB cable.
Remove the protective cover (12) at the back to the Socam. Plug the microUSB plug into
the microUSB socket. Plug the other end into a 5V USB power source (e.g. USB charger,
Computer). Ensure that the supplied power is no smaller than 500 mA.
During charging the LED of button lights up red.
SD storage
MicroSD card
The Socam does not offer built-in storage. A microSD storage card is needed instead.
The memory size of the microSD card is very much dependent on the recording
duration. We recommend a memory size of at least 32 GB and Class 4 or higher.
To insert the microSD card proceed as follows:
1. Format your SD card in FAT32 format.
2. Loosen the screw (6) and remove the front cover.
3. Locate the microSD card slot.
4. Slide your microSD in until it locks in place.
5. To later remove it, push it in until it unlocks and carefully pull it out.
The navigation interface
Turning on and off
Press and hold the button until all LED lights start flashing in the following sequence for
3 cycles with a 1 second interval (slow): Red > Off > Blue > Off > Purple > Off .
The Socam is ready to use.
To turn the Socam off, press and hold the button until all LED lights start flashing in the
following sequence for 3 cycles with a 0.5 second interval (fast): Red > Off > Blue >
Off > Purple > Off
While recording or adjusting settings in the settings menu you cannot turn off the Socam.
It is necessary to stop recording or leave the settings menu respectively.
Sleep mode
If the Socam is idle (without user input) for min. 3 minutes it switches automatically into
sleep mode.
Any button press can wake the Socam up again. Depending on which button you press,
processes are started immediately (e.g. when pressing the button a photo is taken
immediately).
Microphone
The Socam features a built-in microphone, which may suffice for regular use . If you
require more precision and quality you can connect an external microphone. Remove
the protective cover and connect the microphone jack to the stereo phone jack plug (14).
Recording
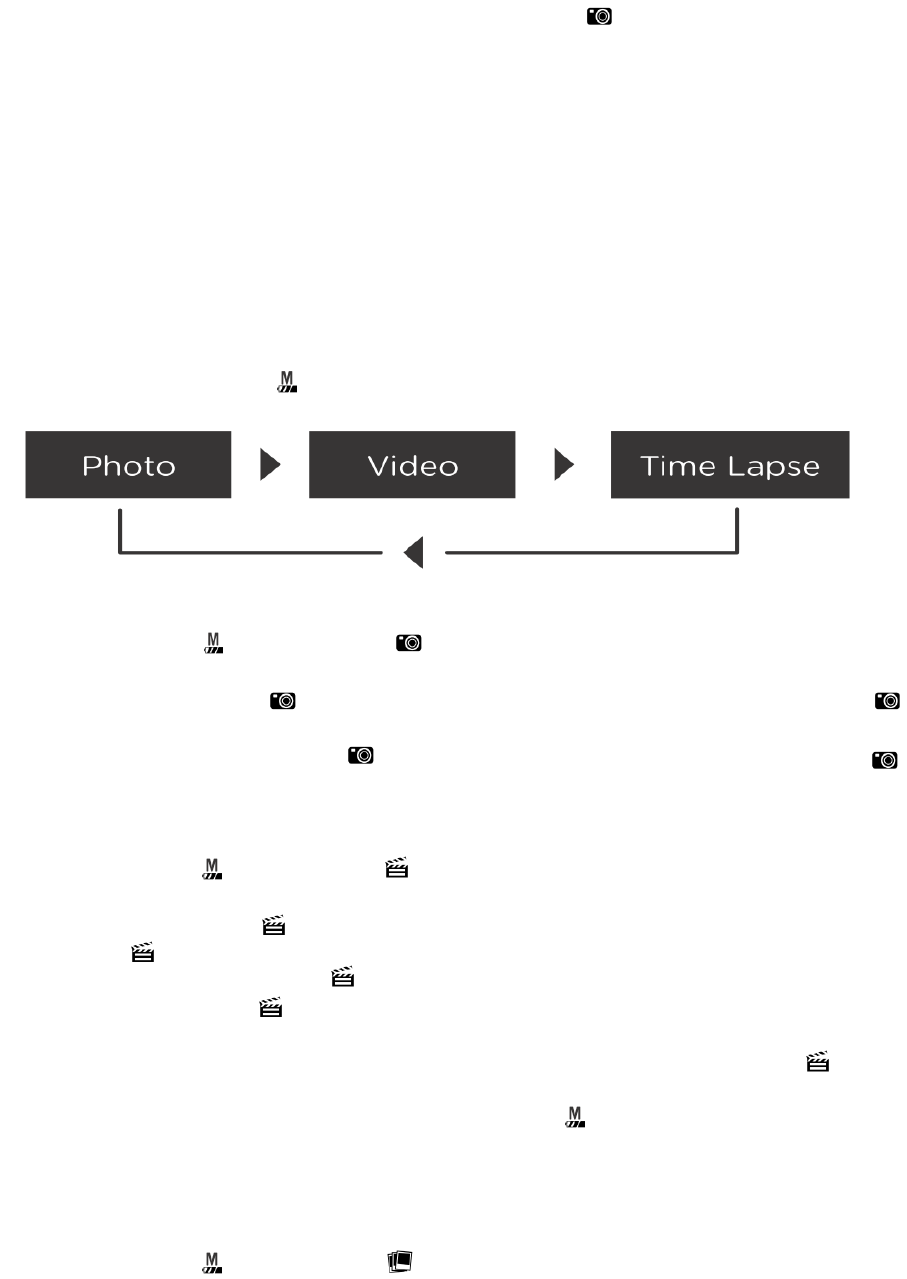
Switching modes
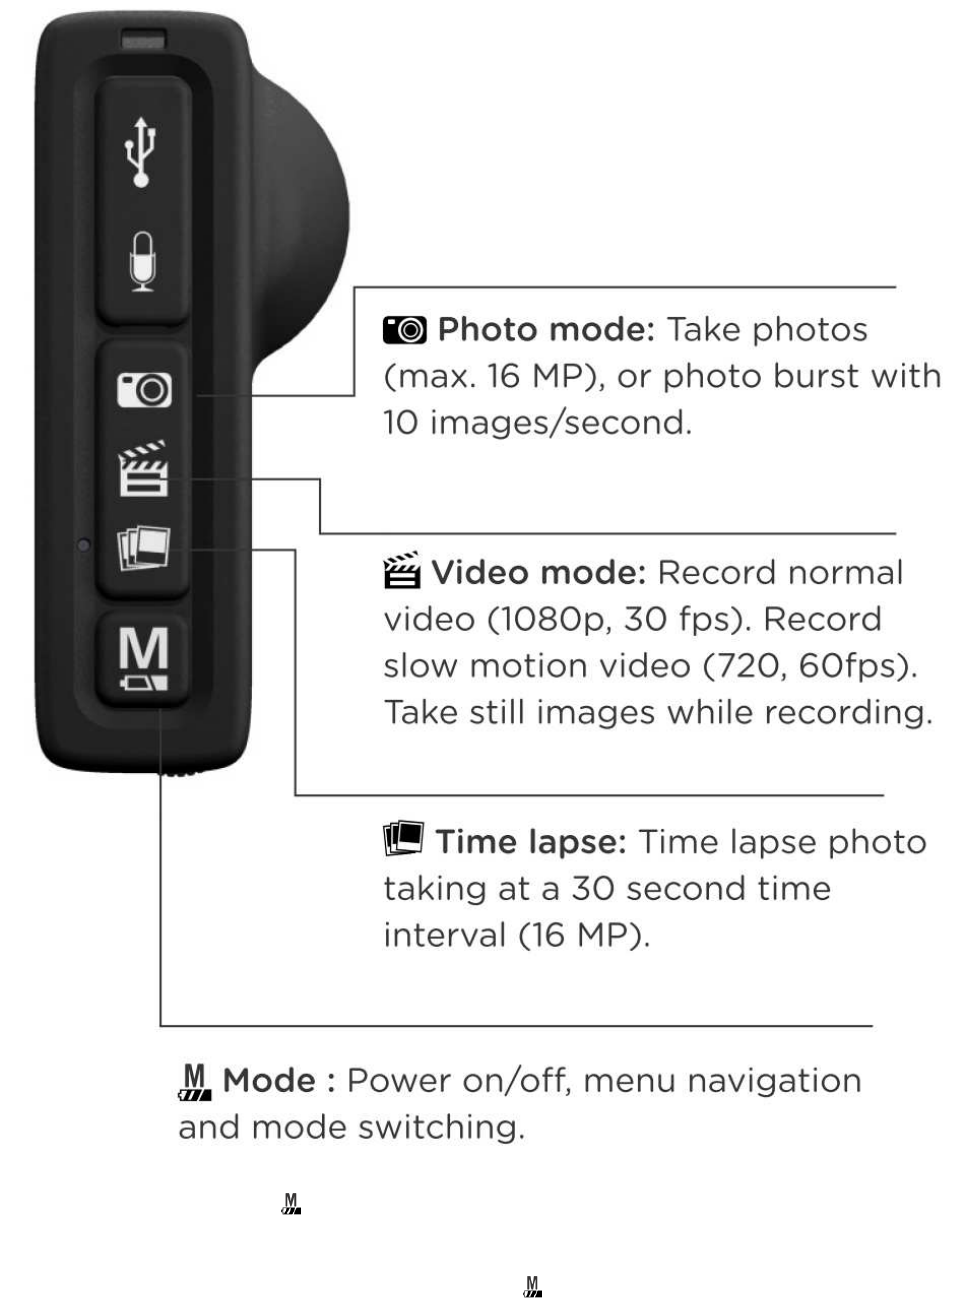
Continuously press the button to switch between the recording modes:
Photo mode
Continuously press the button until the LED lights up blue. The Socam has switched
to photo mode.
• Single photo: Press the button to shoot a photo at standard size 16MP. The
LED blinks once in blue.
• Photo burst: Press and hold the button to shoot 10 images in 1 second. The
LED blinks in red for every image taken.
Video mode
Continuously press the button until the LED lights up blue. The Socam has switched
to video mode.
• Normal video: Press the button to start video recording (1080p, 30 frames per
second). The LED blinks slowly in blue.
• Slow motion video: Press the button to start slow motion video recording (720, 60
frames per second). The LED blinks slowly in red.
• Photo: During video recording you can shoot still images at the same resolution as
the currently running video mode (Normal video, slow motion video). The LED
blinks once in blue.
Video recording can be stopped any time by pressing the button. The recorded video is
saved automatically.
Time Lapse mode
The time lapse mode lets you automatically take images at pre-defined intervals.
Continuously press the button until the LED lights up blue. The Socam has switched
to time lapse mode.
• 30 second interval: Press the button to start shooting 1 image every 30 seconds at
16MP. The LED blinks in blue every time a photo is taken.
• 60 second interval: Press and hold the button to start shooting 1 image every 60
seconds at 16MP. The LED blinks in red every time a photo is taken.
Use Wi-Fi
To turn on Wi-Fi do the following:
1. Press and hold the buttons and until all LED lights start flashing in purple at a 1
second interval (slow).
2. Once the network is established, the LED is lit in purple.
3. Connect your end device to the established network (see below for default SSID and
default password).
SSID: xxx, Default password: xxx
4. Once the Socam and the end device are connected the LED blinks in purple at a 1
second interval.
5. To turn the Socam off, press and hold the buttons and until all LED lights flash once
and return to normal.
You cannot establish turn Wi-Fi on while you are recording.