SZ DJI TECHNOLOGY FM071509 DJI FOCUS MOTOR 2007 User Manual
SZ DJI TECHNOLOGY CO., LTD DJI FOCUS MOTOR 2007 Users Manual
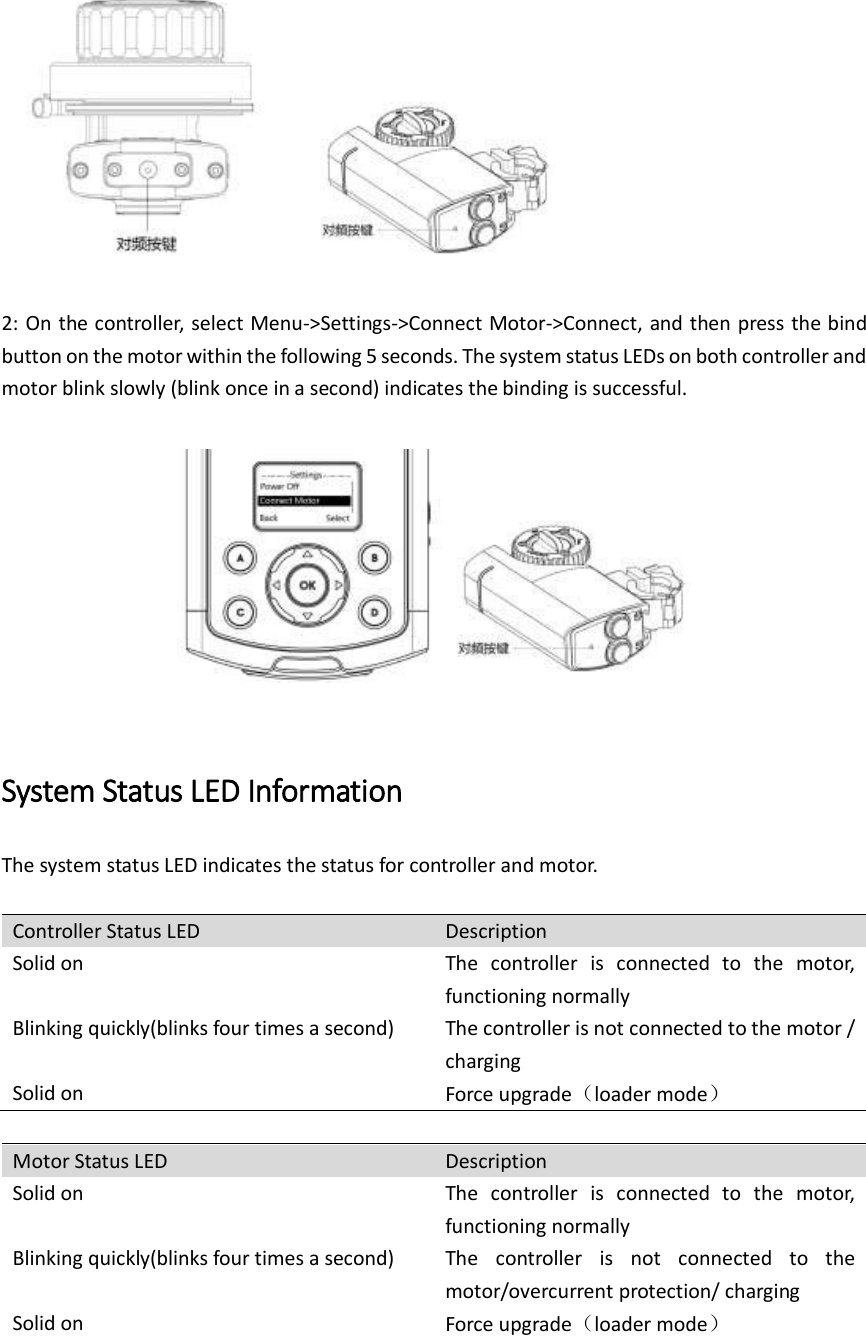
UserManual.wiki
>
SZ DJI TECHNOLOGY
>
FM071509 User Manual
Users Manual
Navigation menu
Upload a User Manual
Namespaces
Wiki Guide
HTML
PDF
Info
Views
User Manual
Discussion / Help
Navigation


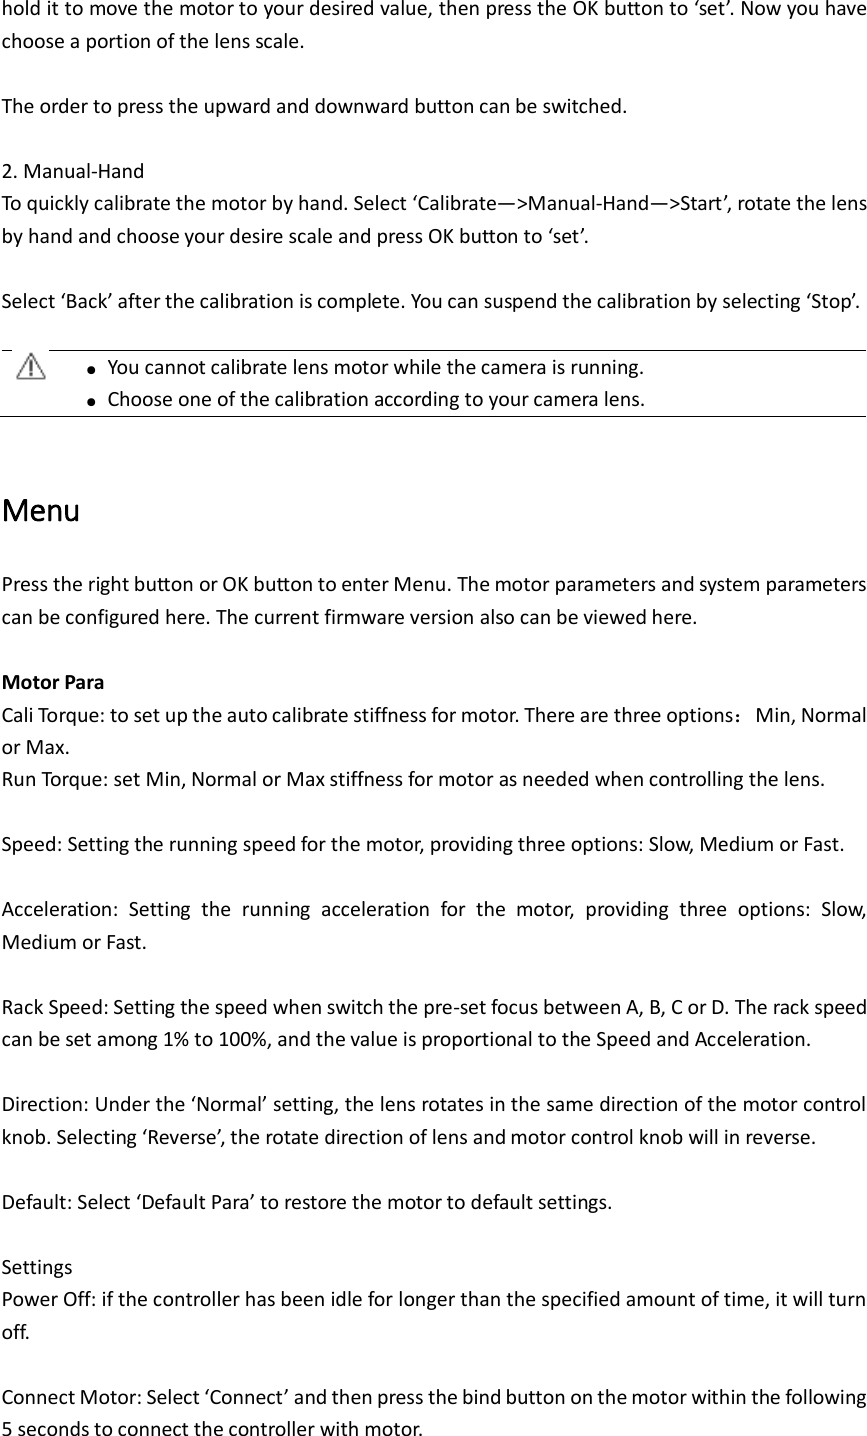
![Settings Turn on the controller and power on the motor. The OLED of controller will display the following information: [1] Battery Level [2] Scale Percentage [3] Scale Bar [4] Menu [5] Calibrate [6] Signal Strength Calibrate To control the lens accurately, you need to know the lens scale by calibrating the motor. The motor must be calibrated once restart it. Auto It is recommended to calibrate the motor through the auto calibration if the lens has mechanical limit. Auto calibration use the whole scale of the lens. On the controller, select ‘Calibrate—>Auto’, the motor will control the lens to rotate until it reaches the limit. When calibration is complete, select ‘Back’ to apply. You can suspend the calibration by selecting ‘Stop’. Manual Manual calibration enables calibration of devices with no mechanical scale stops. To manually calibrate: 1. Manual-Remote Select ‘Calibrate—>Manual-Remote—>Start’, press the upward button and hold it to move the motor to your desired value. Press the OK button to ‘set’. Then press the downward button and](https://usermanual.wiki/SZ-DJI-TECHNOLOGY/FM071509/User-Guide-2769017-Page-13.png)