SZ DJI TECHNOLOGY GL3001510 C1 User Manual Part One
SZ DJI TECHNOLOGY CO., LTD C1 Users Manual Part One
UserManual.wiki
>
SZ DJI TECHNOLOGY
>
GL3001510 User Manual
>
Users Manual Part One
Contents
1.
Users Manual Part One
2.
Users Manual Part Two
3.
Users Manual Part Three
Users Manual Part One
Navigation menu
Upload a User Manual
Namespaces
Wiki Guide
HTML
PDF
Info
Views
User Manual
Discussion / Help
Navigation

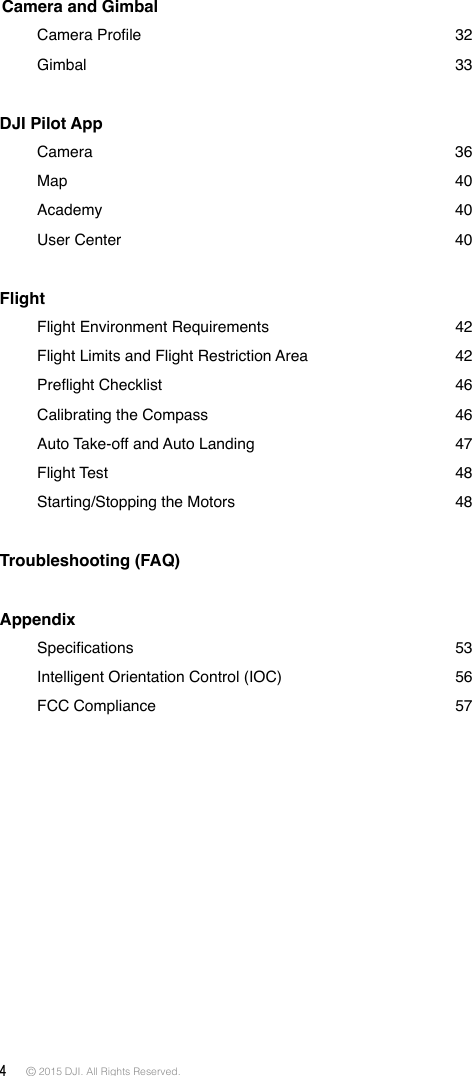

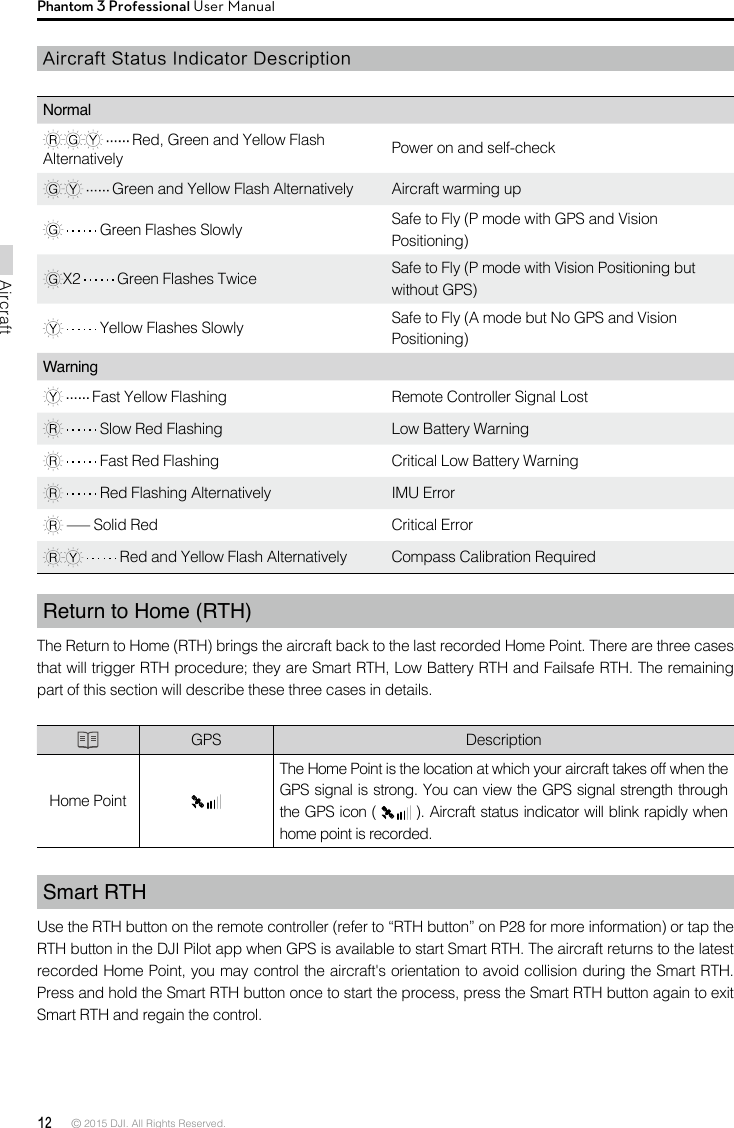
![8 © 2015 DJI. All Rights Reserved. Product ProfilePhantom 3 Professional User ManualAircraft Diagram[1] GPS[2] Propeller [3] Motor[4] Front LED[5] Landing gear[6] Gimbal and Camera[7] Aircraft Micro-USB Port[8] Aircraft Status Indicator[9] Intelligent Flight Battery[10] Vision Positioning Sensors[11] Antennas[12] Camera Micro-SD Card Slot[13] Camera Micro-USB PortRemote Controller Diagram[1] AntennasRelays aircraft control and video signal. [2] Mobile Device HolderMounting place for your mobile device. [3] Control StickControls aircraft orientation.[4] Return Home (RTH) ButtonPress and hold the button to initiate Return to Home (RTH).[1][2][3][4][5][6][7][8][11][9][10][12][13][1][2][4][5][6][7][8][3]](https://usermanual.wiki/SZ-DJI-TECHNOLOGY/GL3001510.Users-Manual-Part-One/User-Guide-2805126-Page-8.png)
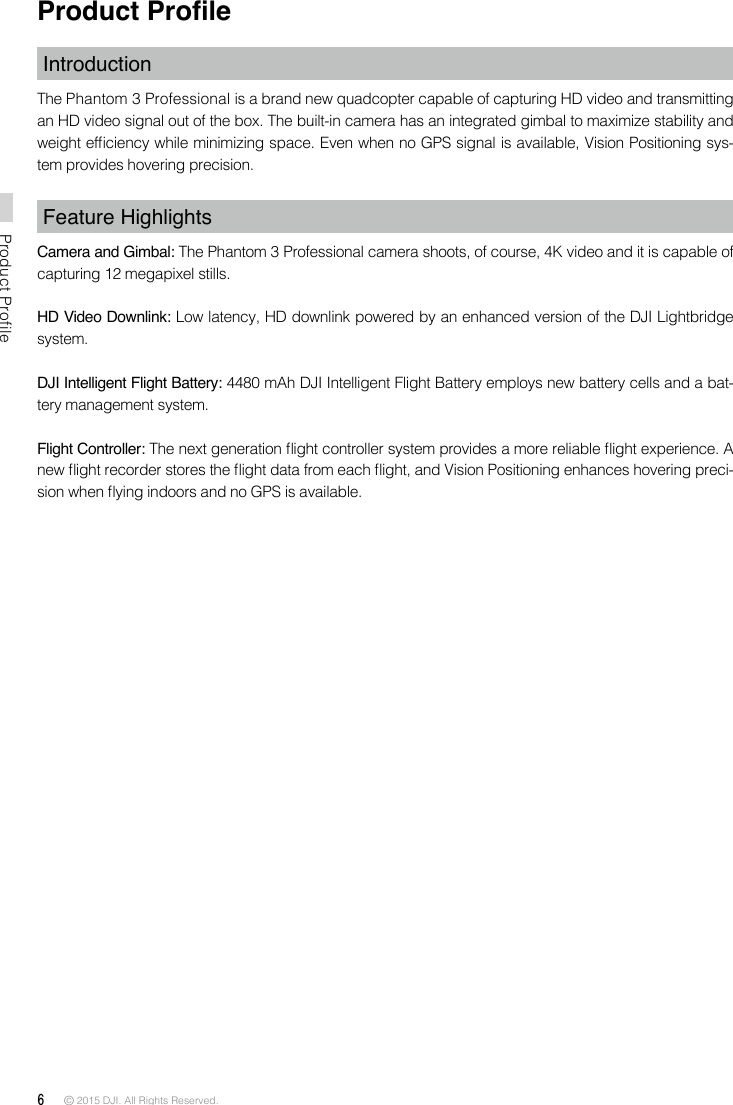
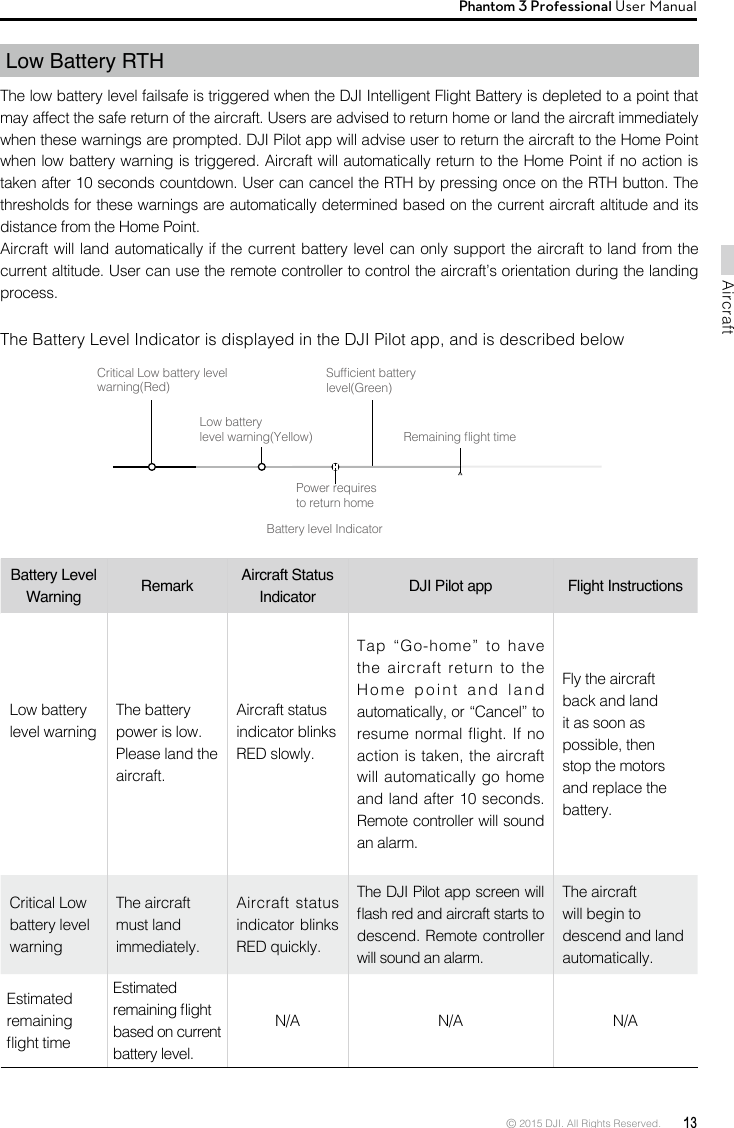
![© 2015 DJI. All Rights Reserved. 9Product ProfilePhantom 3 Professional User Manual [5] Battery Level LEDsDisplays the battery level of the remote controller. [6] Status LEDDisplays the remote controller's system status. [7] Power ButtonUsed to power on or power off the remote controller. [8] RTH LED Circular LED around the RTH button displays RTH status. [17][19][18][9] Camera Settings Dial Turn the dial to adjust camera settings. Only functions when the remote controller is connected to a mobile device running the DJI Pilot app. [10] Playback Button Playback the captured images or videos.[11] Shutter Button Press to take a photo. If in burst mode, the set number of photos will be taken with one press.[12] Flight Mode SwitchSwitch between P, A and F mode.[13] Video Recording ButtonPress to start recording video. Press again to stop recording.[14] Gimbal DialUse this dial to control the tilt of the gimbal. [15] Mircro-USB PortConnect to a SD card reader to upgrade the rmware.[16] USB PortConnect to mobile device or to a USB thumb drive for rmware upgrdae. [17] Back Right Button Customizable button in DJI Pilot app.[18] Back Left Button Customizable button in DJI Pilot app.[19] Power PortConnect to a power source to charge the bat-tery of the remote controller.[10][11][15] [16][9][12][13][14]](https://usermanual.wiki/SZ-DJI-TECHNOLOGY/GL3001510.Users-Manual-Part-One/User-Guide-2805126-Page-9.png)

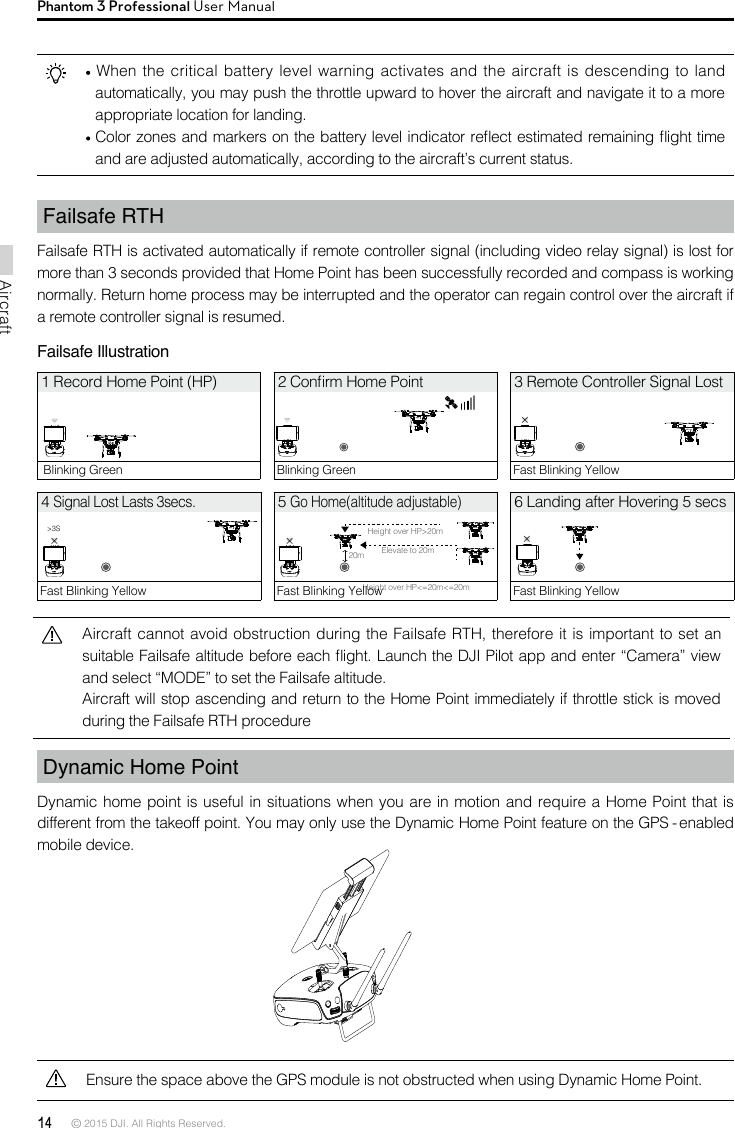
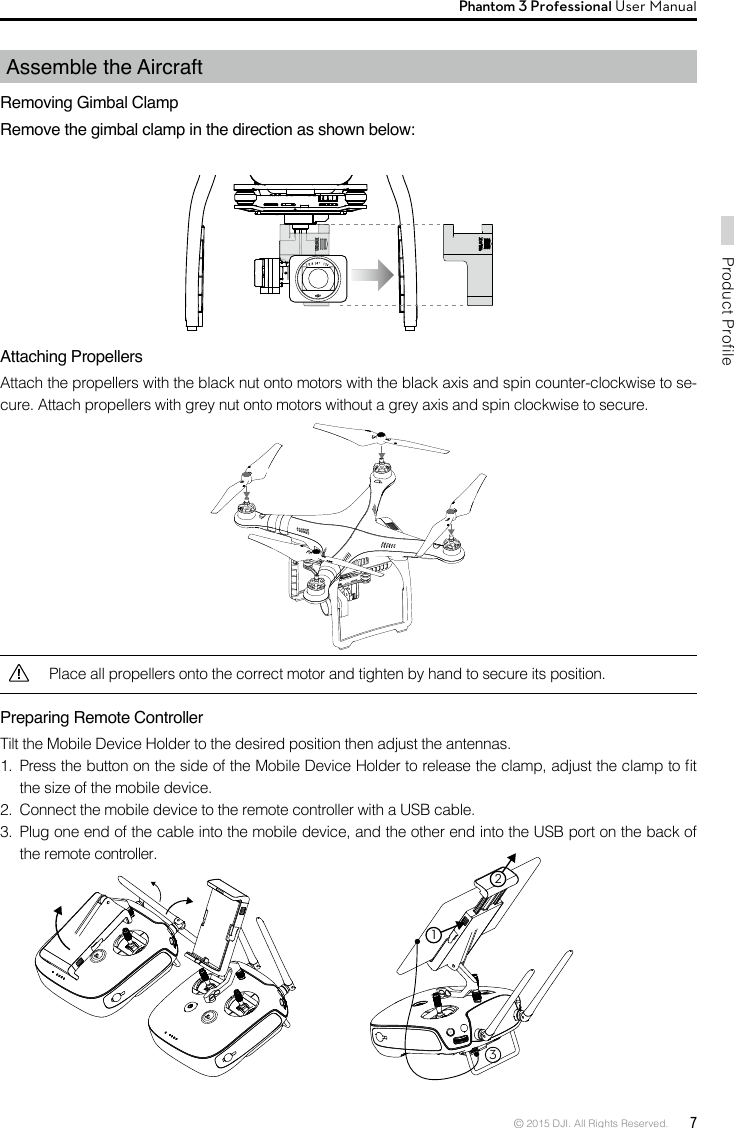
![© 2015 DJI. All Rights Reserved. 15AircraftPhantom 3 Professional User Manual There are two options for Dynamic Home Point.1. Set the aircraft current coordinate as the new Home Point. 2. Set the mobile device's coordinate as the new Home Point. Setting Up Dynamic Home PointFollow the steps below to setup Dynamic Home Point:1. Connect to the mobile device and launch the DJI Pilot app and go to the “Camera” page.2. Tap“ ”and select“ ”, to set the mobile device’s coordinates as the new Home Point.3. Tap“ ”and select“ ”, to set the aircraft’s coordinates as the new Home Point.4. The aircraft status indicator blinks green to show Home Point is set successfully.Vision Positioning SystemDJI Vision Positioning is a positioning system that uses ultrasonic and image data to help the aircraft identify its current position. With the help of Vision Positioning, your Phantom 3 Professional can hover in place more precisely and y indoors or in other environments where there is no GPS signal available. The main components of DJI Vision Positioning are located on the bottom of your Phantom 3 Professional, including [1] one monocular camera and [2]two sonar sensors. Using Vision Positioning Vision Positioning is activated automatically when the Phantom 3 Professional is powered on. No manual action is required. Vision Positioning is typically used in the indoor environment where no GPS is available. By using the sensors on the Vision Positioning system, Phantom 3 Professional can perform precision hovering even when no GPS is available. [1][2]](https://usermanual.wiki/SZ-DJI-TECHNOLOGY/GL3001510.Users-Manual-Part-One/User-Guide-2805126-Page-15.png)