SZ DJI TECHNOLOGY RM101604 RONIN-MX User Manual Ronin MX V1 0
SZ DJI TECHNOLOGY CO., LTD RONIN-MX Ronin MX V1 0
UserManual.wiki
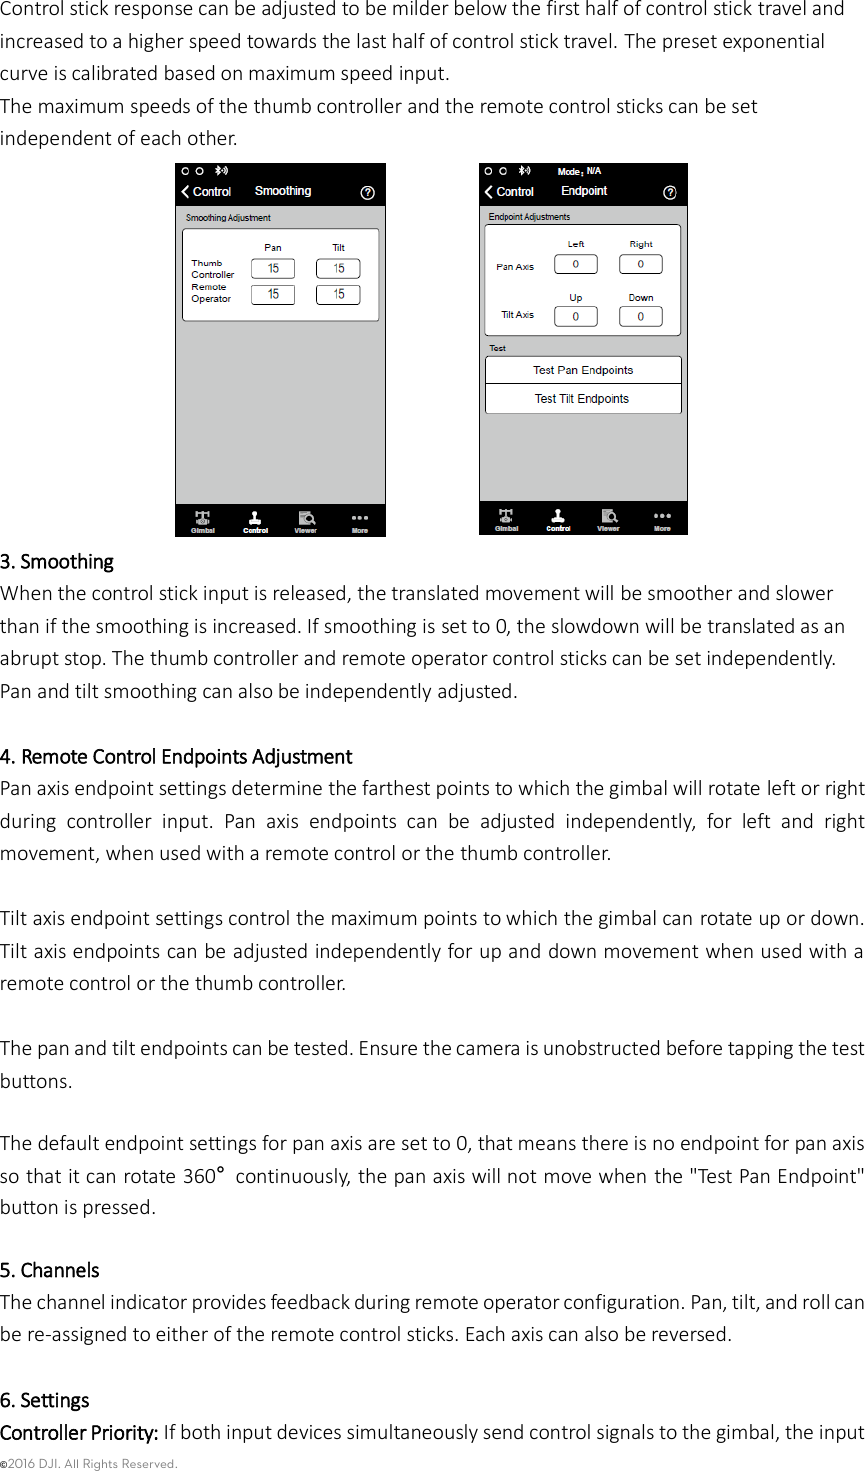
>
SZ DJI TECHNOLOGY
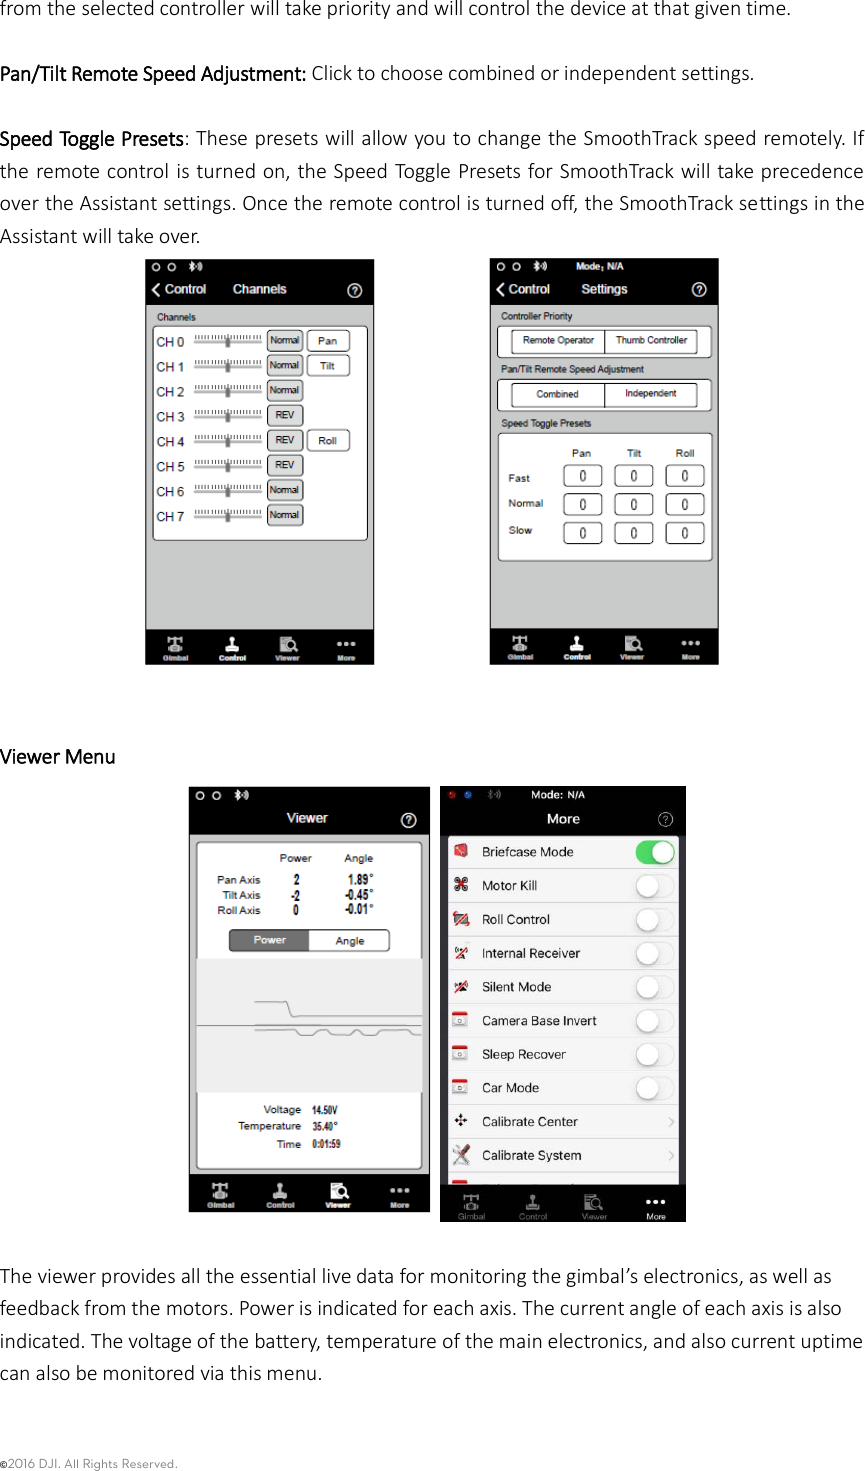
>
RM101604 User Manual
User Manual
Navigation menu
Upload a User Manual
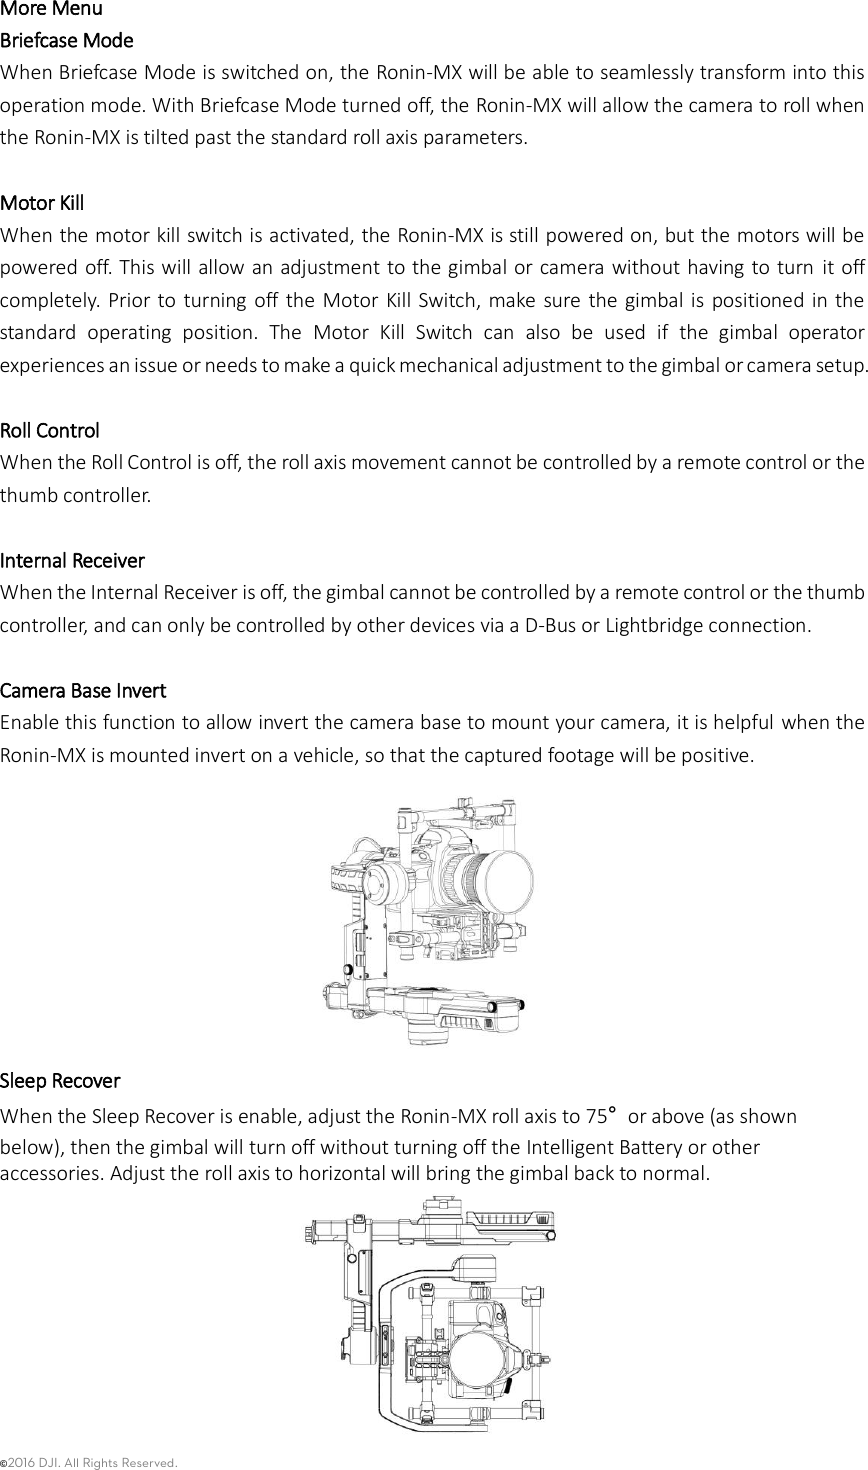
Namespaces
Wiki Guide
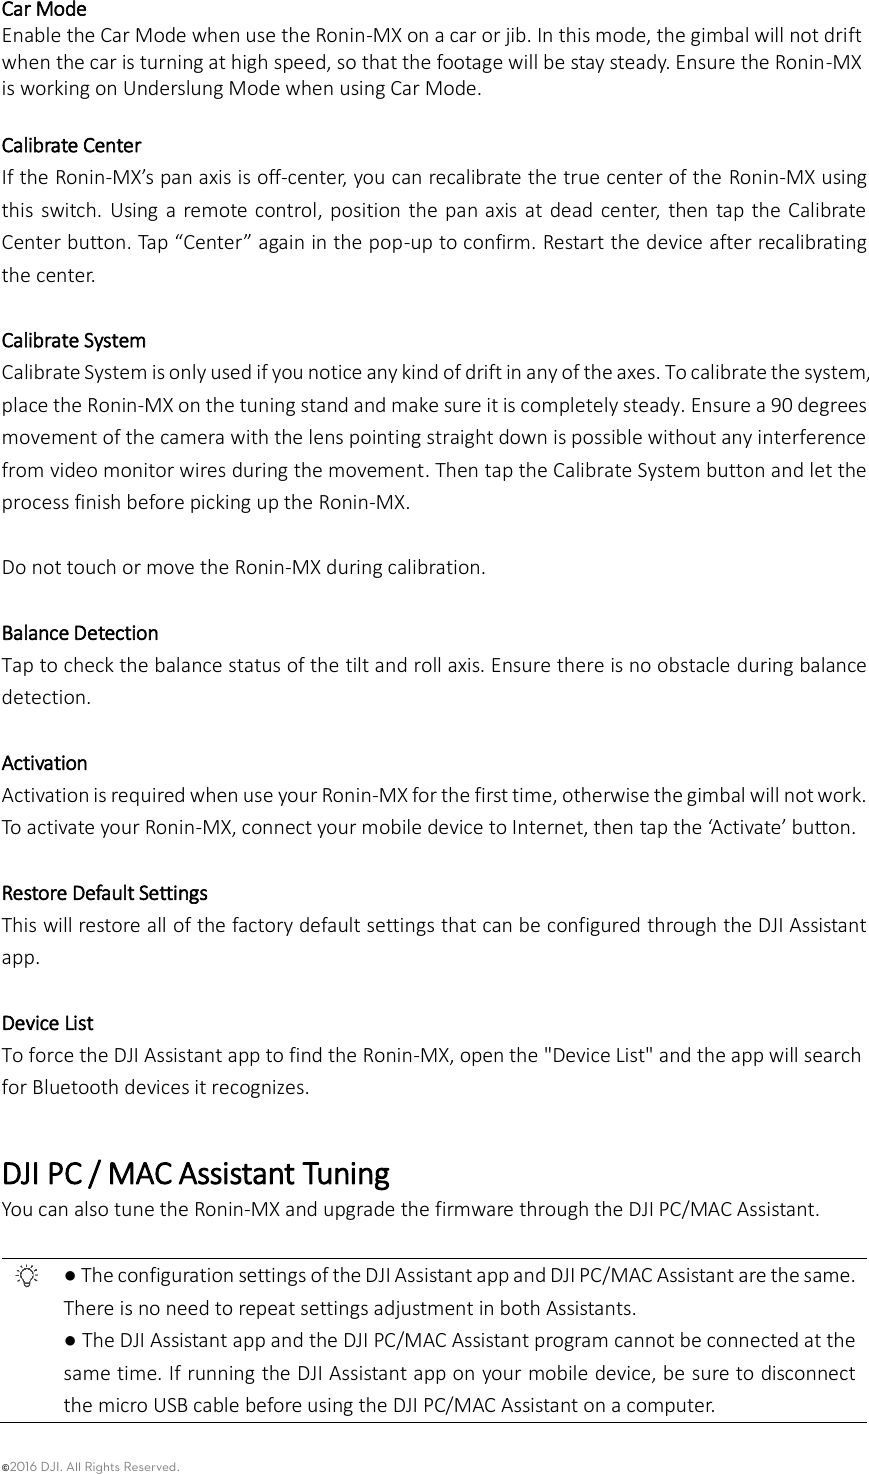
HTML
PDF
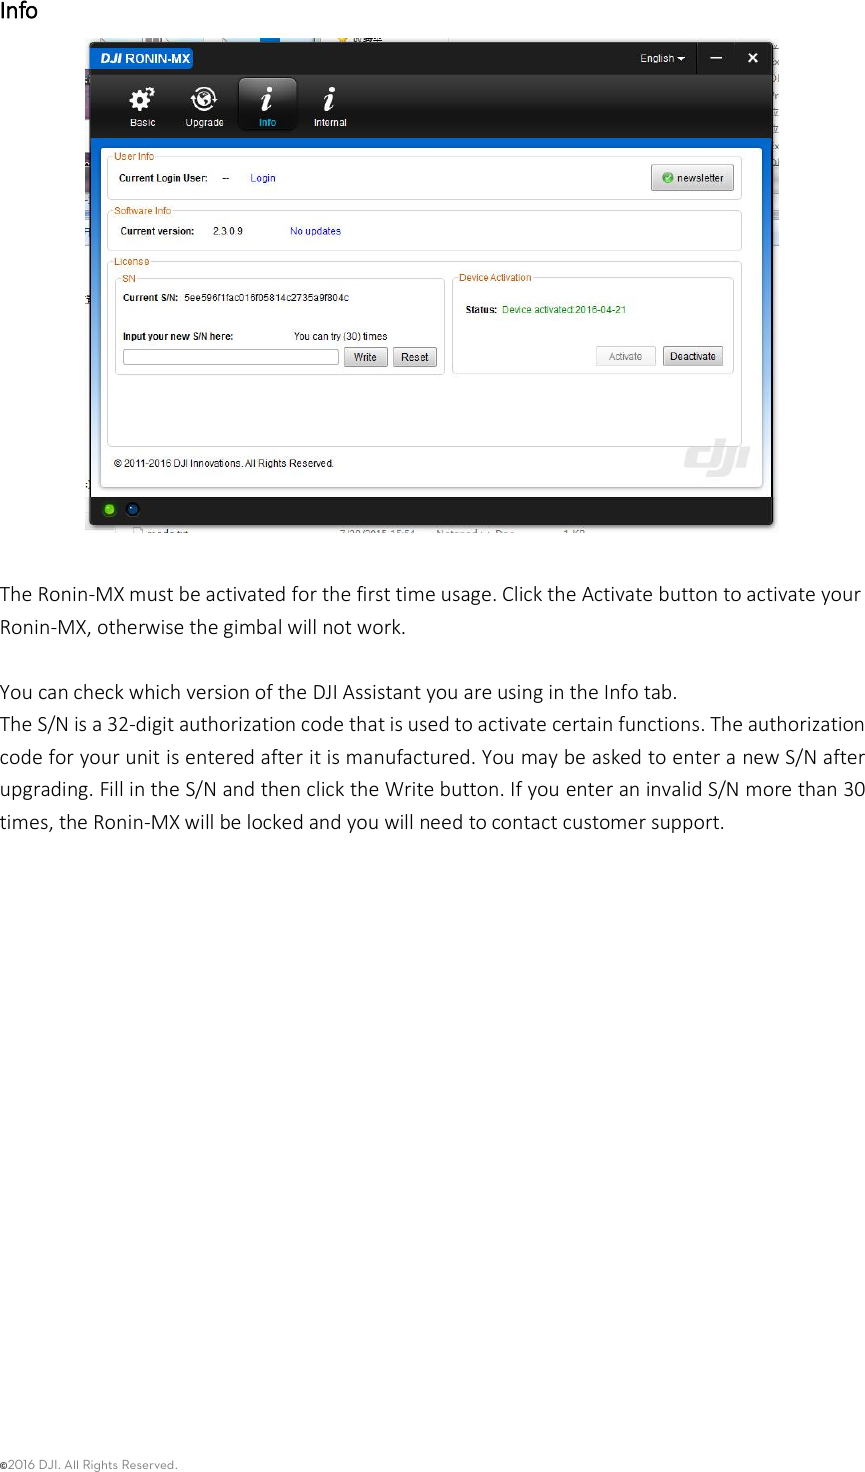
Info
Views
User Manual
Discussion / Help
Navigation

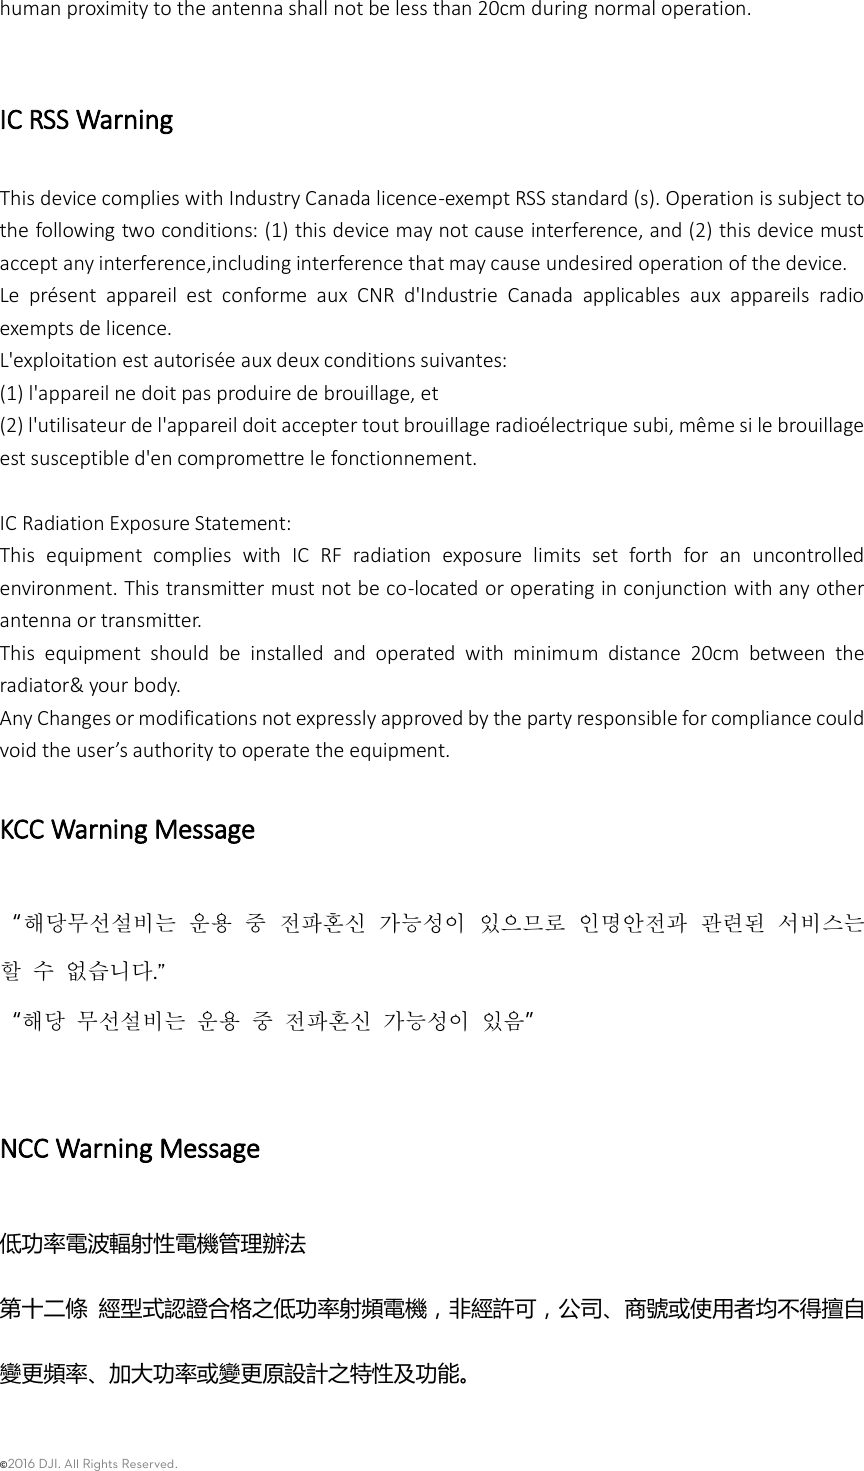
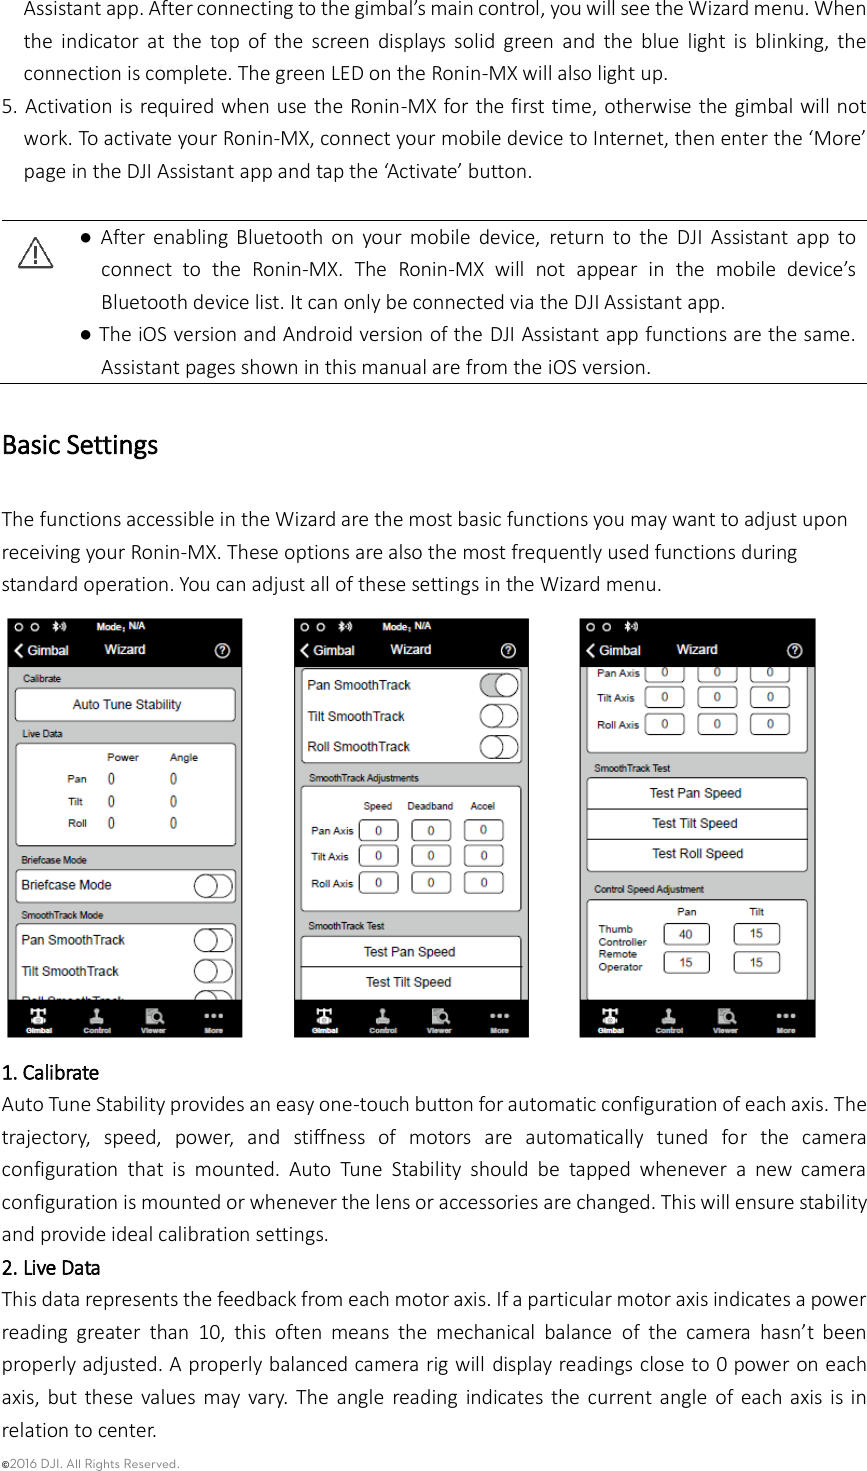
![©2016 DJI. All Rights Reserved. Ronin-MX Diagram [1] Top Handle Bar [2] Side Handle [3] Gimbal Connector [4] CAN2 Bus Port [5] Pan Motor [6] DJI Intelligent Battery [7] Pan Adjustment Slider [8] Intelligent Battery Power Distributor Mounting Plate (optional) [9] D-BUS Receiver Port [10] USB Port & CAN1 Bus Port [11] Bind Button [12] Gimbal LED Indicator Light [13] Camera Upper Mounting Plate [14] Roll Motor [15] Tilt Motor [16] Fore and Aft Adjustment [17] Tilt Vertical Adjustment](https://usermanual.wiki/SZ-DJI-TECHNOLOGY/RM101604/User-Guide-2982266-Page-7.png)
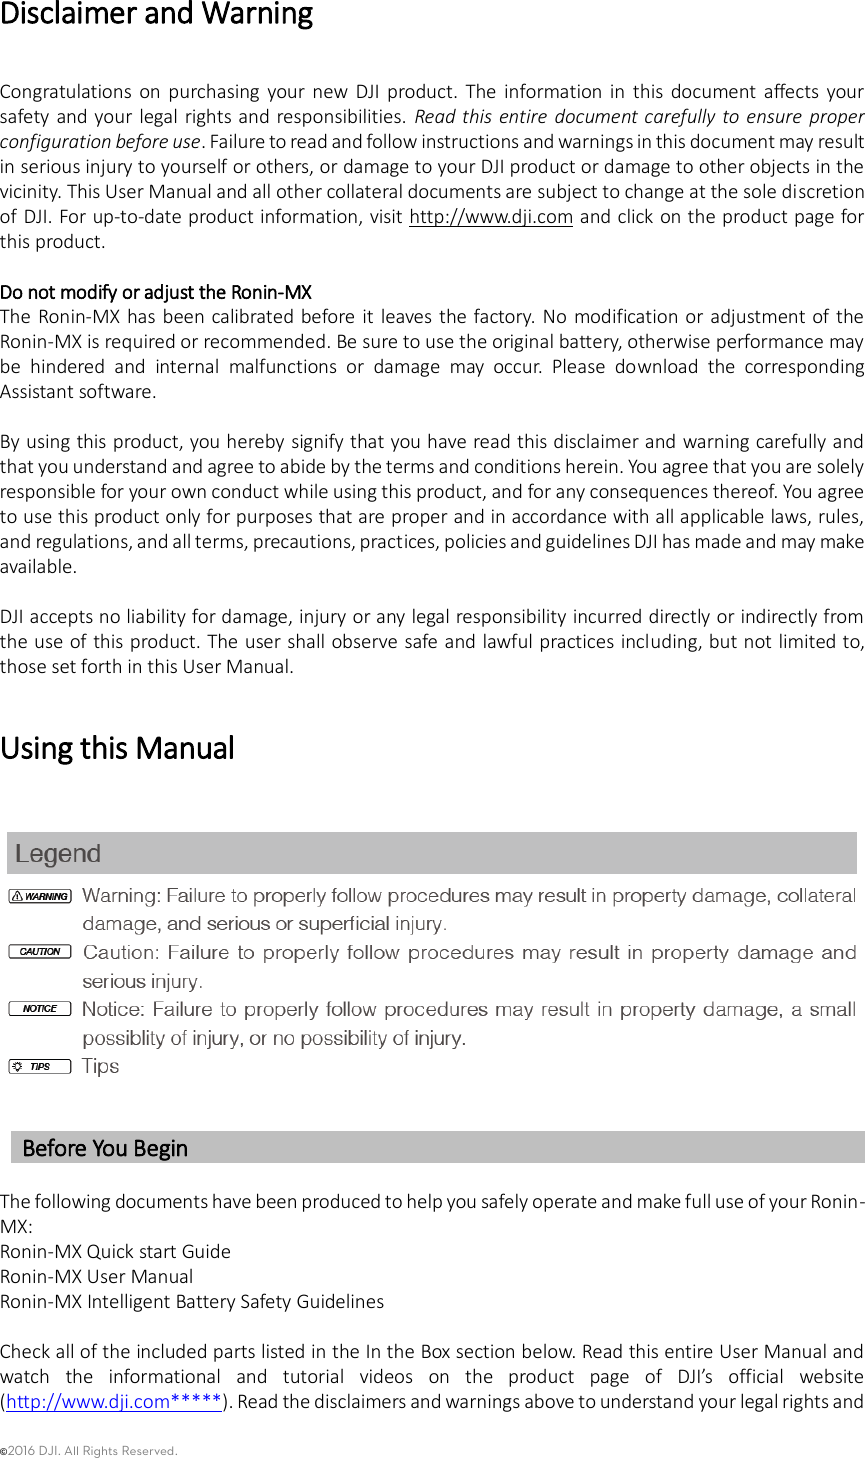
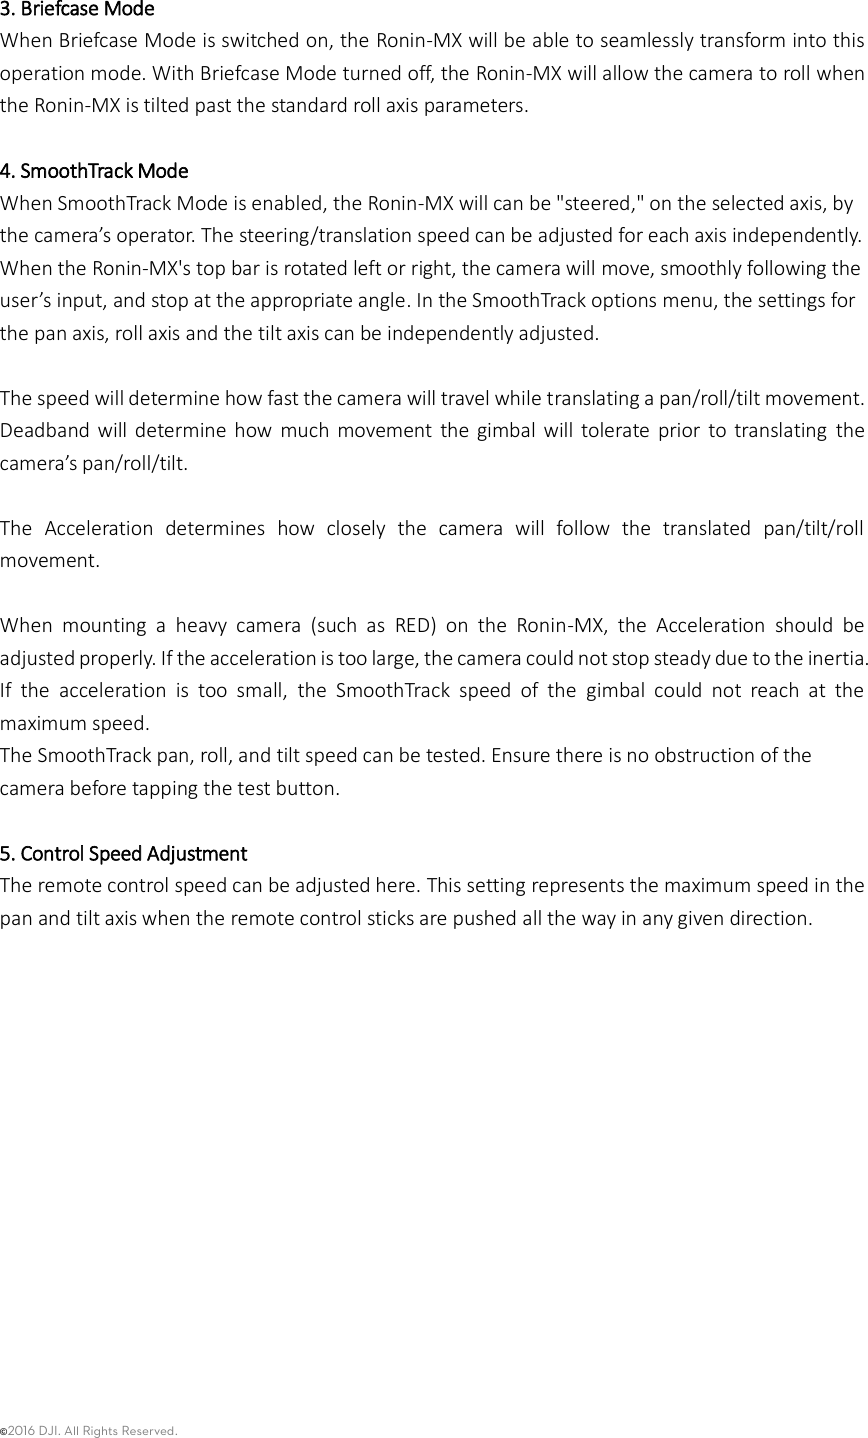
![©2016 DJI. All Rights Reserved. [18] Roll Adjustment [19] IMU Port [20] P-TAP Accessory Power Port [21] USB Accessory Power Port [22] P-TAP Port (rear side) [23] DJI Lightbridge Port (rear side) [24] GCU Port (rear side) Getting Started Tuning Stand You can use the tuning stand to hold the Ronin-MX during setup or for storage. To unfold the tuning stand, follow the steps below. 1. Hold the stand in the upright position as shown in the picture below. 2. Press the buttons [1] on the outsides of the lower legs and rotate the legs downwards, away from the stand. Then press the buttons [2] on the outsides of the upper support arms and pull them upwards, away from the stand. Press the button [3] on the vertical support and slide it up to extend the stand, as shown. 3 The upper half of this tuning stand can be removed by loosening the knob on the rear of the stand. You can use it with any C-stand style stud that fits into the hole where the support arms converge. When mounting this section to a C-stand, always be sure to check the balance of the stand so that the Ronin-MX, if it is fitted with a camera, does not tip over. When setting on a table, make sure the table is flat and level. Assembling the Handle Bar 1. Attach the handle bars to both sides of the top handle by tightening the grip screws.](https://usermanual.wiki/SZ-DJI-TECHNOLOGY/RM101604/User-Guide-2982266-Page-8.png)
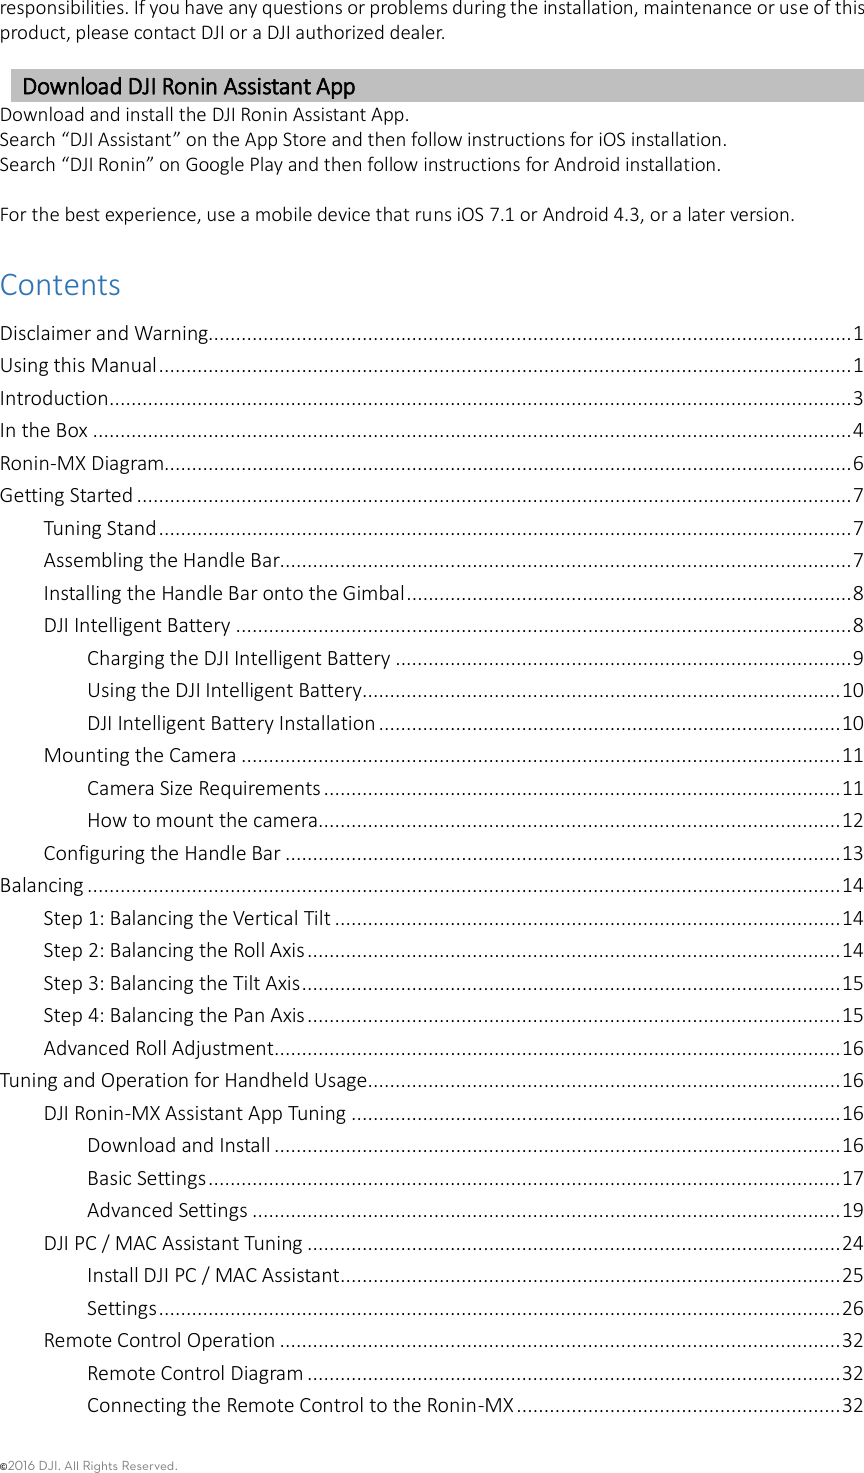
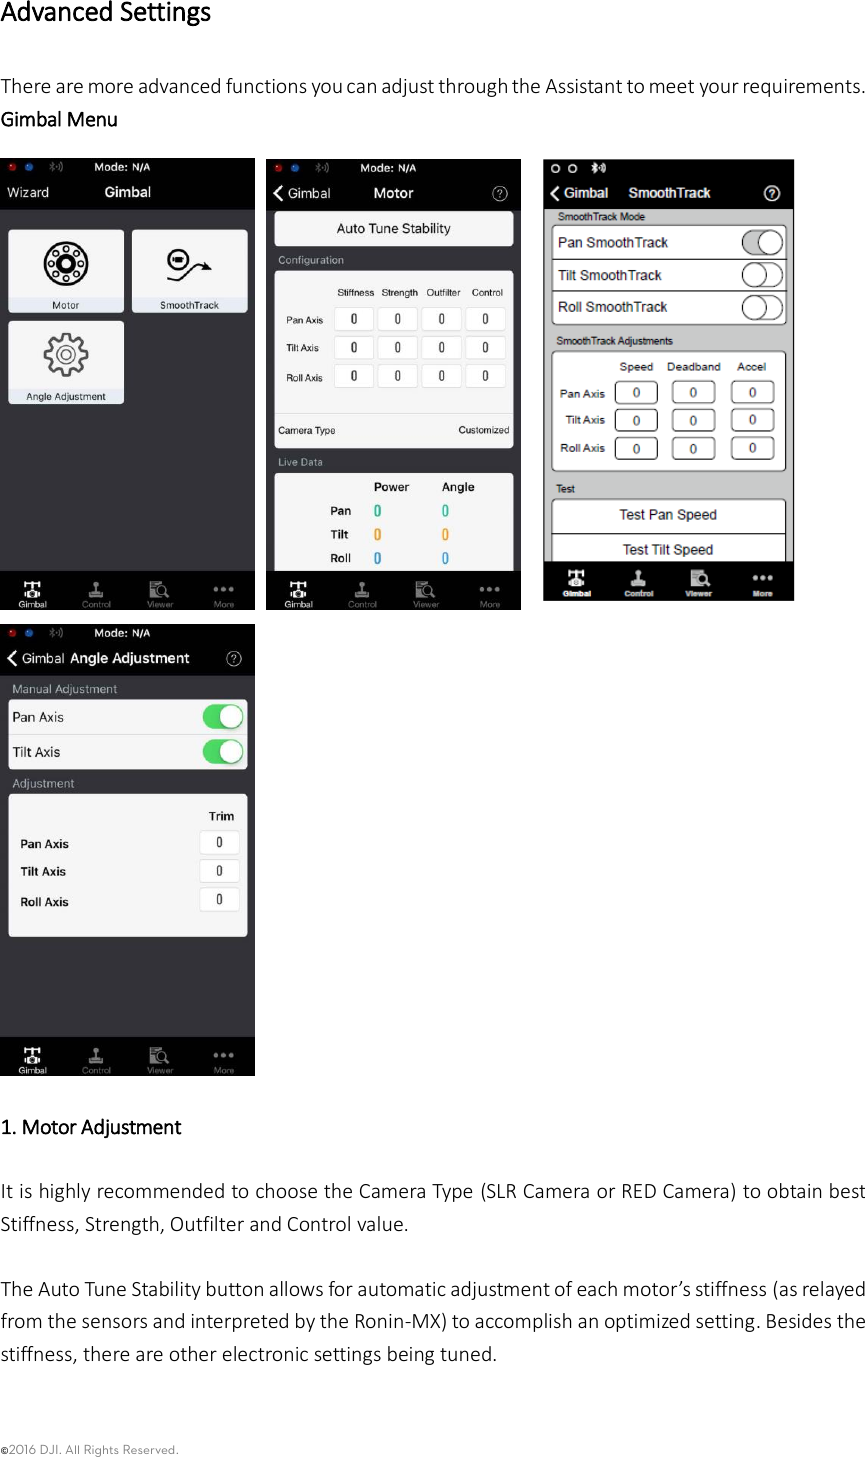
![©2016 DJI. All Rights Reserved. Using the DJI Intelligent Battery [1] Battery Level Indicators [2] Power Button (with LED indicator) [3] Thumb Screws Checking the Battery Level When the DJI Intelligent Battery is turned off, pressing the battery power button once will display the current battery level. Powering On When the DJI Intelligent Battery is turned off, press and hold the power button for 1 second to turn on the DJI Intelligent Battery. Powering Off When the DJI Intelligent Battery is turned on, press and hold the power button for 1 second to turn off the DJI Intelligent Battery. DJI Intelligent Battery Installation 1. Loosen the screws on either side of the DJI Intelligent Battery. Slide the DJI Intelligent Battery directly into the gimbal and then slide it down. Be sure the battery’s thumb screws go fit into their locating slots, so that the DJI Intelligent Battery makes full contact with the gimbal’s electrical leads. 2. Tighten the screws on the DJI Intelligent Battery to lock it in place. ● Make sure the DJI Intelligent Battery is turned off during installation.](https://usermanual.wiki/SZ-DJI-TECHNOLOGY/RM101604/User-Guide-2982266-Page-11.png)

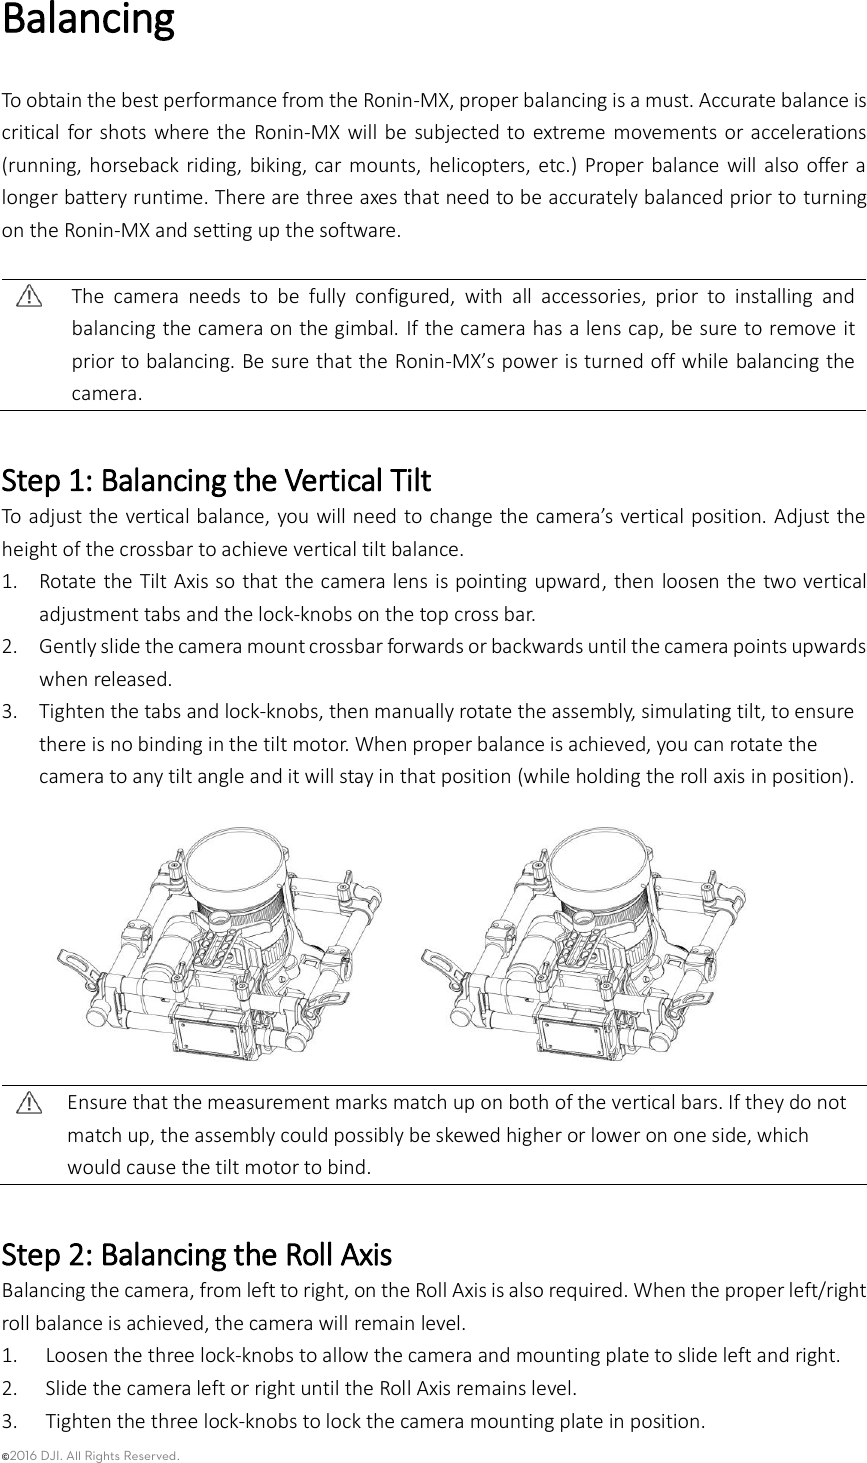
![©2016 DJI. All Rights Reserved. When adjusting the roll balance position of the camera, only loosen the two lock-knobs a few turns to allow the camera base to slide. Do not loosen the lock-knobs excessively. Step 3: Balancing the Tilt Axis 1. Loosen the camera base's side clamp and the lock-knob on the cross bar to allow the camera and mounting plate to slide forwards and backwards. 2. Slide the camera forwards or backwards until the tilt axis remains level. Only very small adjustments are required to achieve the proper balance. 3. Tighten the side clamp to lock the camera and mounting plate in position. When the proper fore and aft tilt balance is achieved, the camera will stay level when you remove your hand (while holding the roll axis in position). Step 4: Balancing the Pan Axis To achieve the pan axis balance, you must adjust the pan axis slide. 1. Open the clamp [1] on the pan axis and turn the knob [2] to slide the assembly. Identify if the Ronin-MX is front heavy or rear heavy. Rotate the Ronin-MX on the stand so one side is higher than the other, if the front end rotates from the higher position to the lower position and that means the Ronin-MX is currently front heavy, then you will need to slide the gimbal backward, otherwise you need to slide the gimbal forward. 2. Tighten the clamp after balancing is completed. While the Ronin-MX is resting on the tuning stand, try rotating the Ronin-MX. If the camera does not swing, the pan axis is properly balanced.](https://usermanual.wiki/SZ-DJI-TECHNOLOGY/RM101604/User-Guide-2982266-Page-16.png)
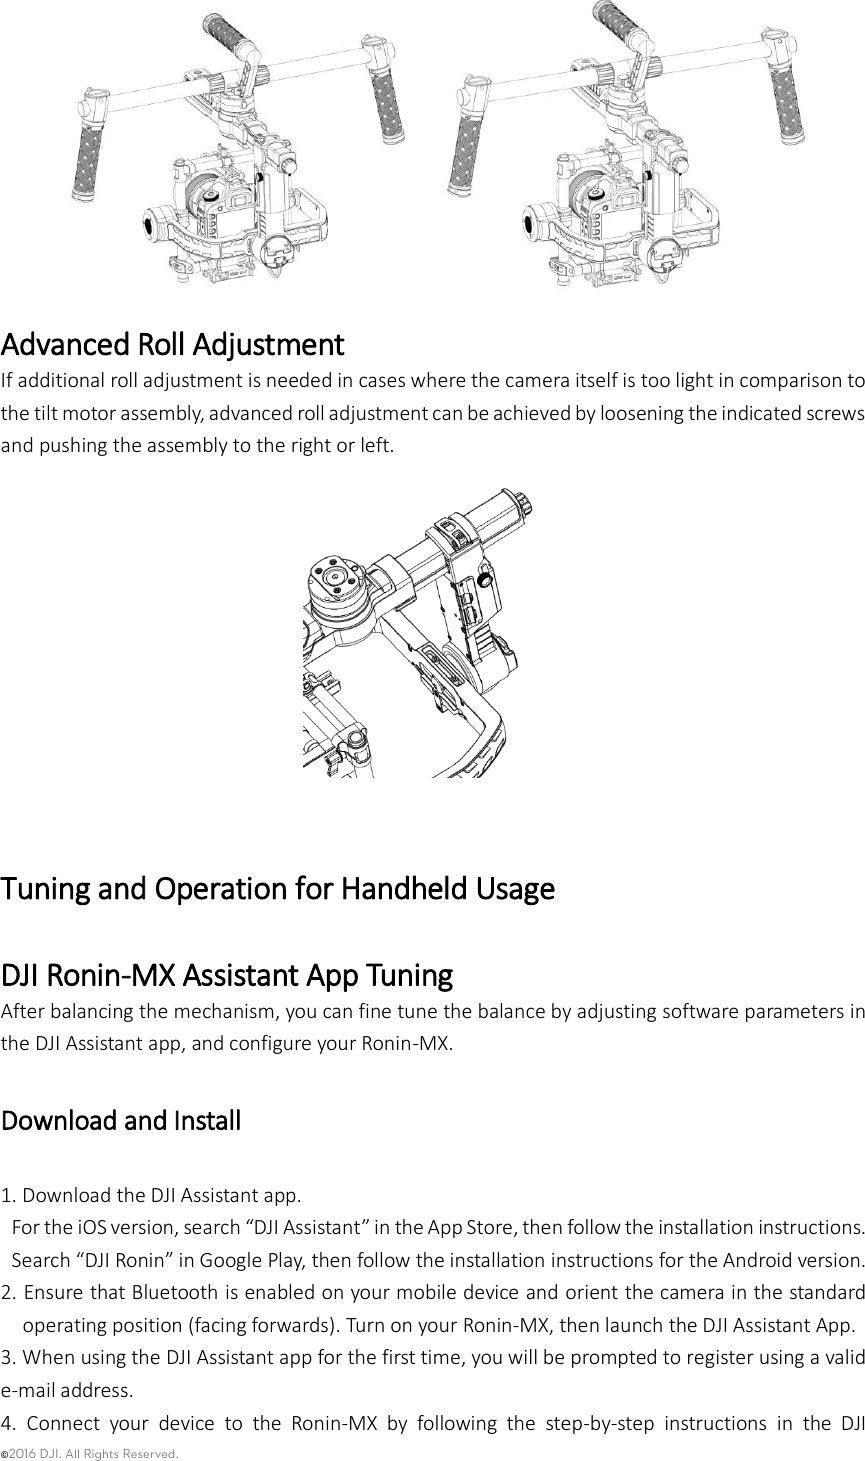
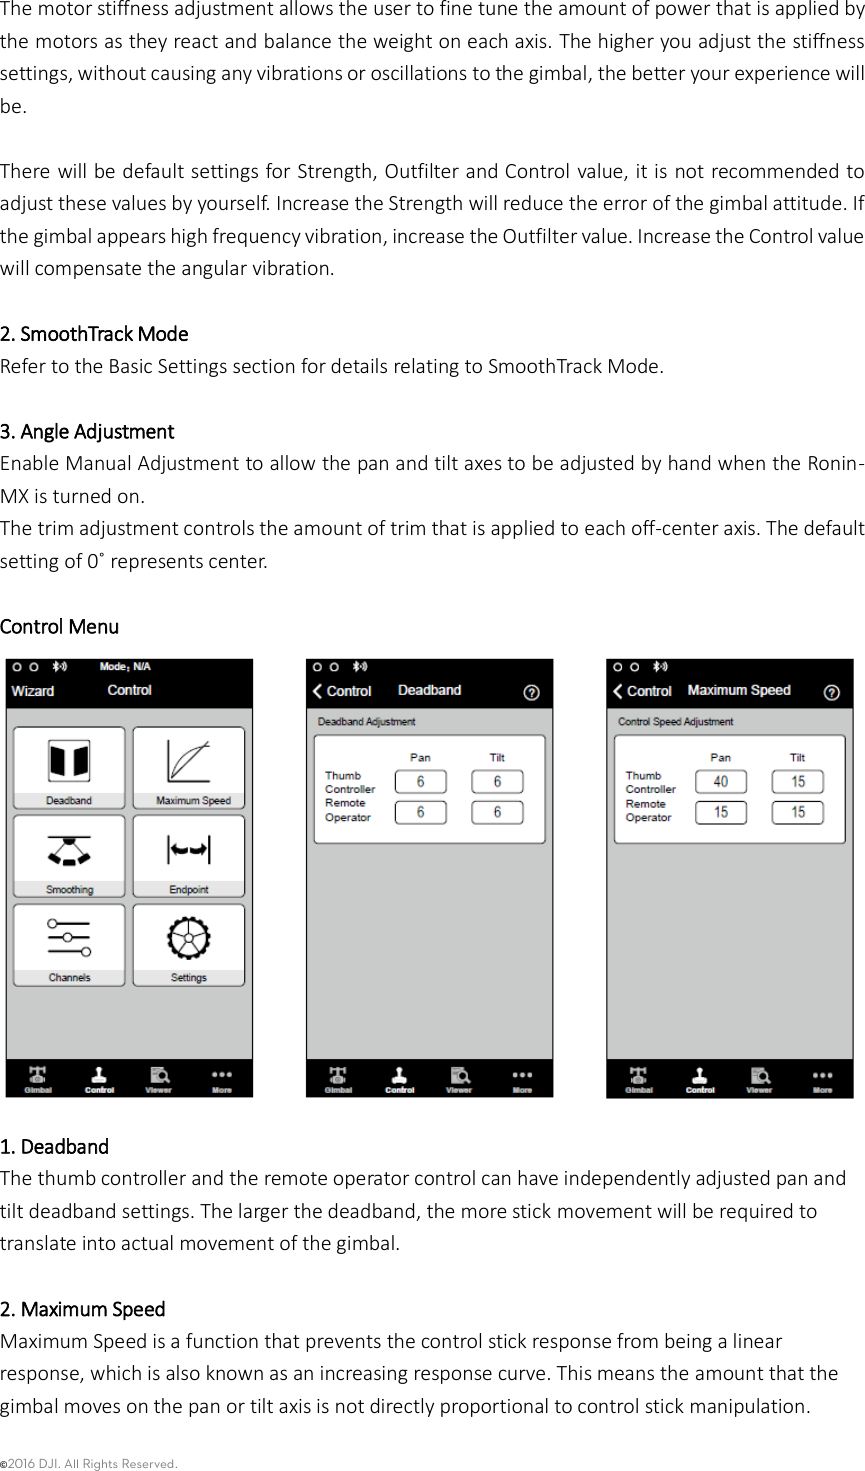


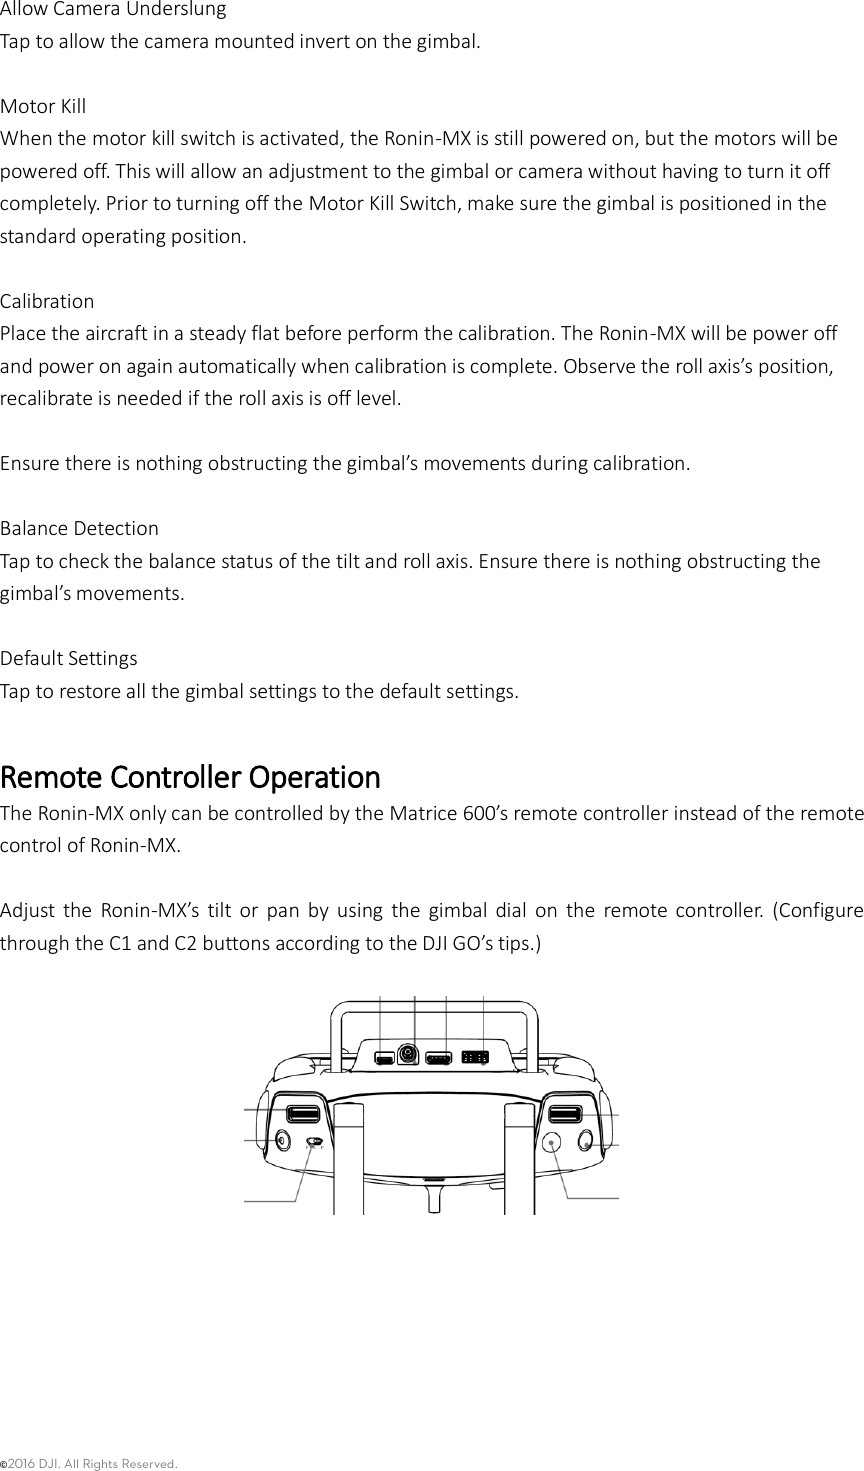
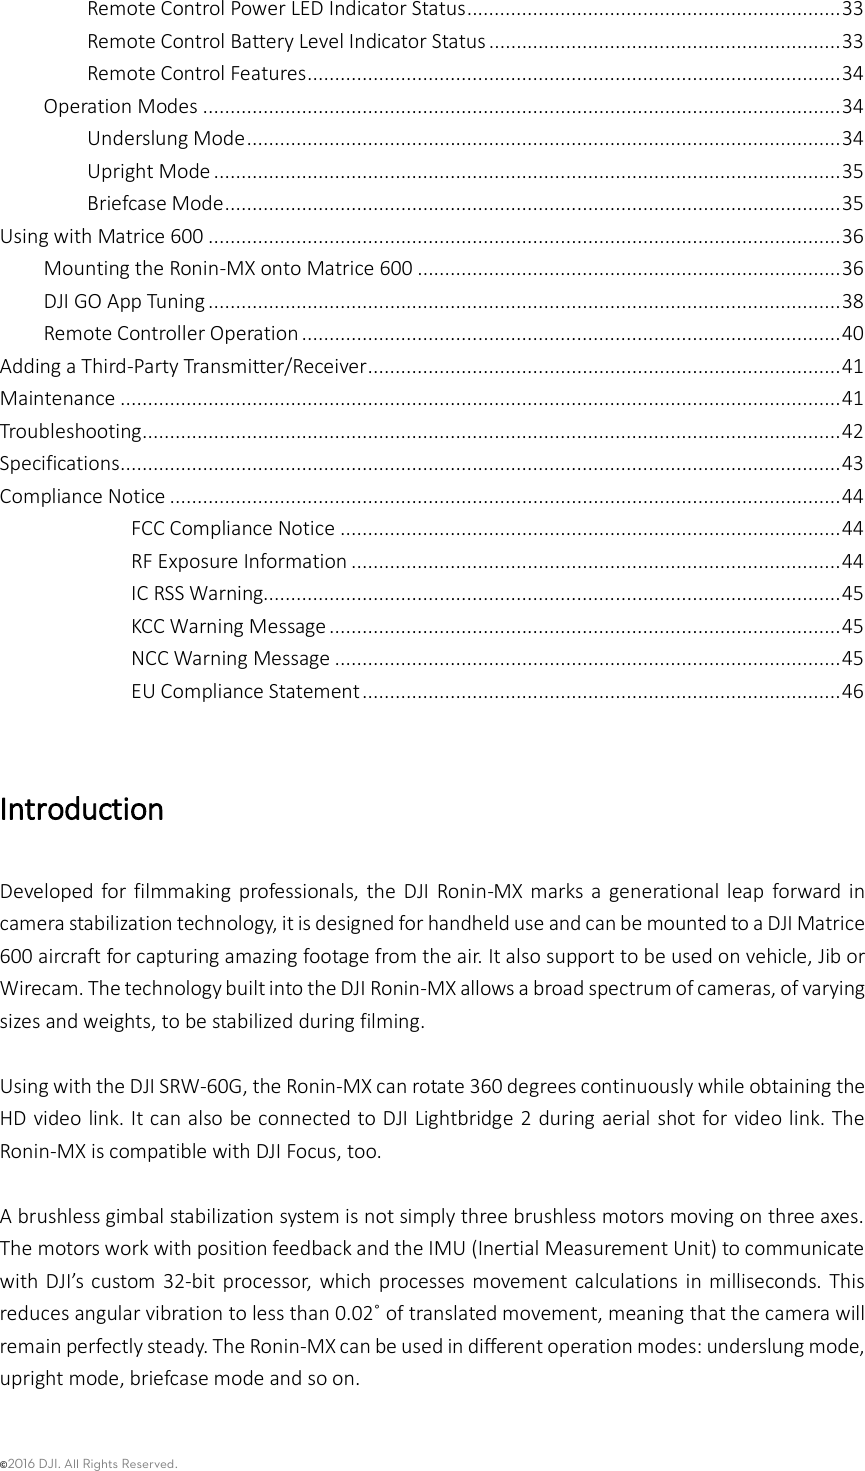
![©2016 DJI. All Rights Reserved. Remote Control Operation Remote Control Diagram [1] Antenna [2] Carrying Handle [3] Left Dial (reserved) [4] 3-Position Switch (MODE) [5] 3-Position Switch (FUNCTION) [6] Joystick 1 [7] Joystick 2 [8] Neck Strap Attachment [9] Power Switch [10] Power Indicator [11] Battery Level Indicator [12] Battery Charging & RC Assistant Port (Micro USB port) [13] Reserved Port Connecting the Remote Control to the Ronin-MX 1. Turn on the Ronin-MX. 2. Press the Bind Button (shown below) of the Ronin-MX once. The Ronin-MX’s LED indicator will blink green quickly at that time. 3. Slide the power switch to the right to power on the remote control. If the LED of gimbal turns solid green light, the remote control and the Ronin-MX have been successfully bound. The binding process only needs to be done once, unless the bind button is pressed or if the Ronin-MX needs to be bound to another remote control.](https://usermanual.wiki/SZ-DJI-TECHNOLOGY/RM101604/User-Guide-2982266-Page-33.png)