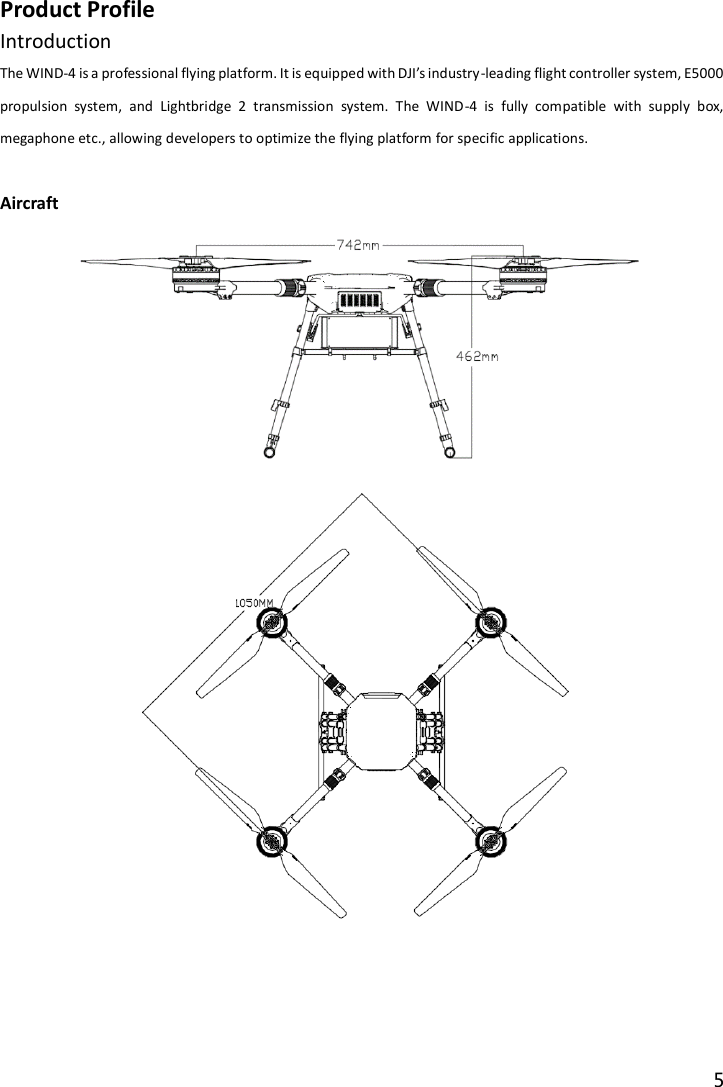
SZ DJI TECHNOLOGY WIN81803 WIND-4 User Manual
SZ DJI TECHNOLOGY CO., LTD WIND-4 Users Manual
UserManual.wiki
>
SZ DJI TECHNOLOGY
>
WIN81803 User Manual
Users Manual
Navigation menu
Upload a User Manual
Namespaces
Wiki Guide
HTML
PDF
Info
Views
User Manual
Discussion / Help
Navigation


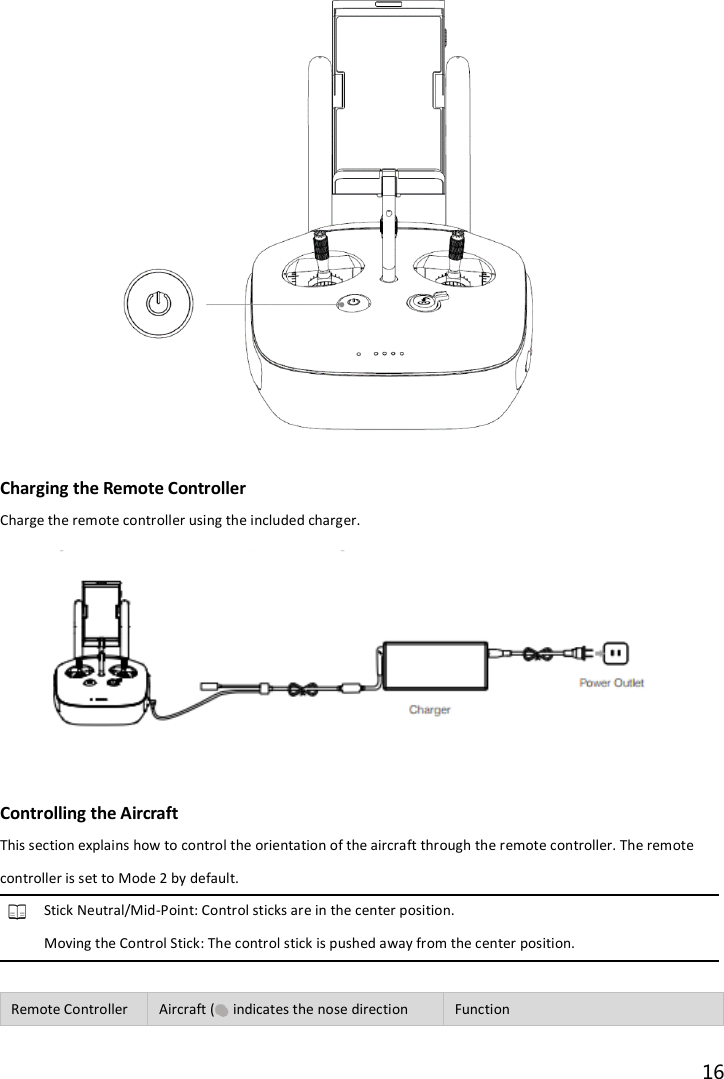
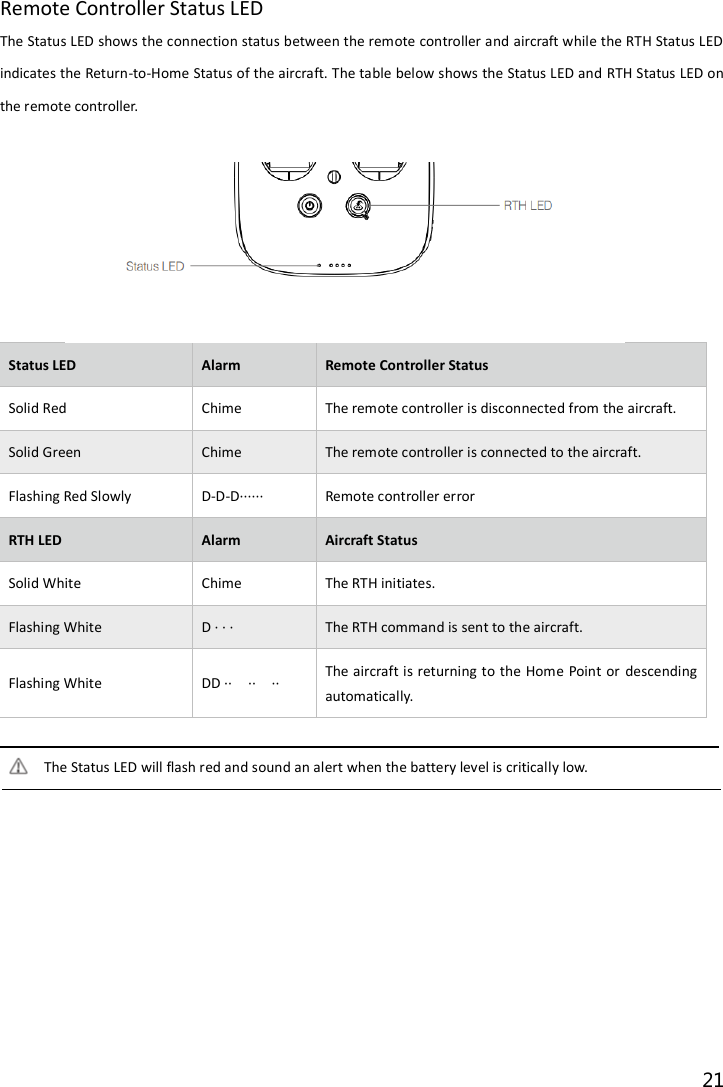
![14 Remote Controller [1] Antenna Relays aircraft control and video signal. [2] Mobile Device Holder Securely mounts your mobile device to the remote controller [3] Control Stick Controls the aircraft’s orientation. [4] Return-to-Home (RTH) Button Press and hold the button to initiate Return-to-Home (RTH). [5] RTH LED A circular LED around the RTH button that displays RTH status. [6] Battery Level LEDs Displays the battery level of the Remote Controller. [7] Status LED Displays the Remote Controller’s system status. [8] Power Button Used to turn the Remote Controller on and off.[9] Camera Settings Dial Turn the dial to adjust camera settings. (Only functions when the remote controller is connected to a mobile device running the DJI GO app.) [10] Playback Button Plays the captured images or videos again. [11] Shutter Button Press it to take a photo. In burst mode, a set number of photos will be taken with one press. [12] Flight Mode Switch Used to switch between P-mode, A-mode and F-mode. [13] Video Recording Button Press to start recording a video. Press again to stop recording. [14] Gimbal Dial Use this dial to control the tilt or pan of the gimbal. [15] Mini-HDMI Mini HDMI Port](https://usermanual.wiki/SZ-DJI-TECHNOLOGY/WIN81803/User-Guide-3826908-Page-16.png)
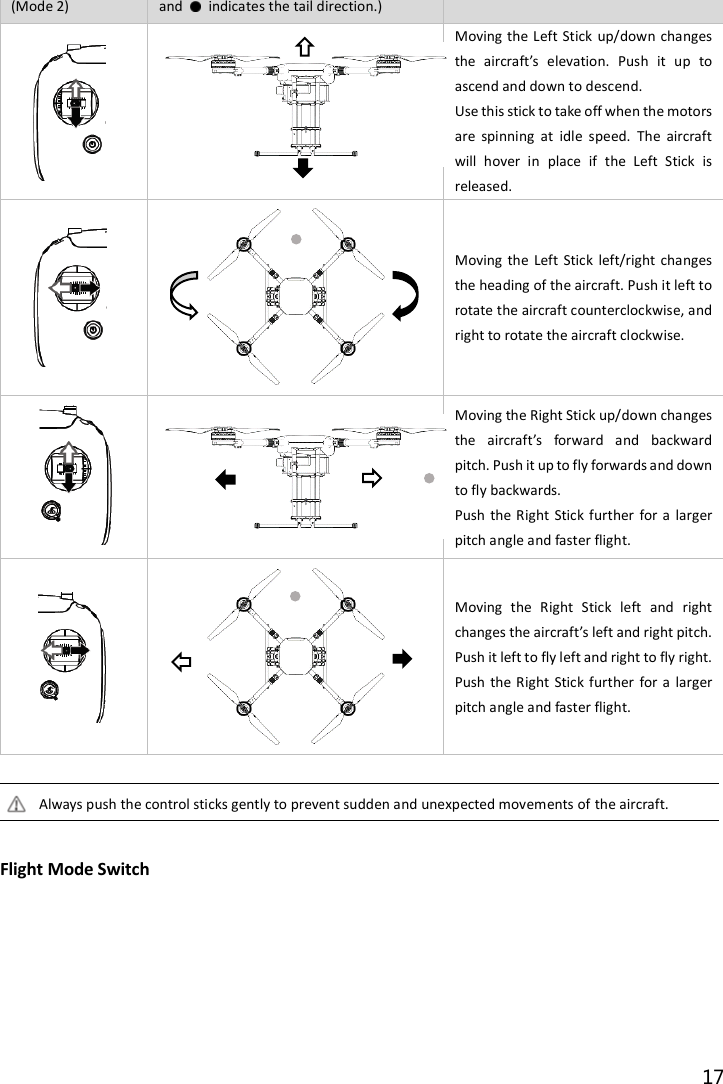
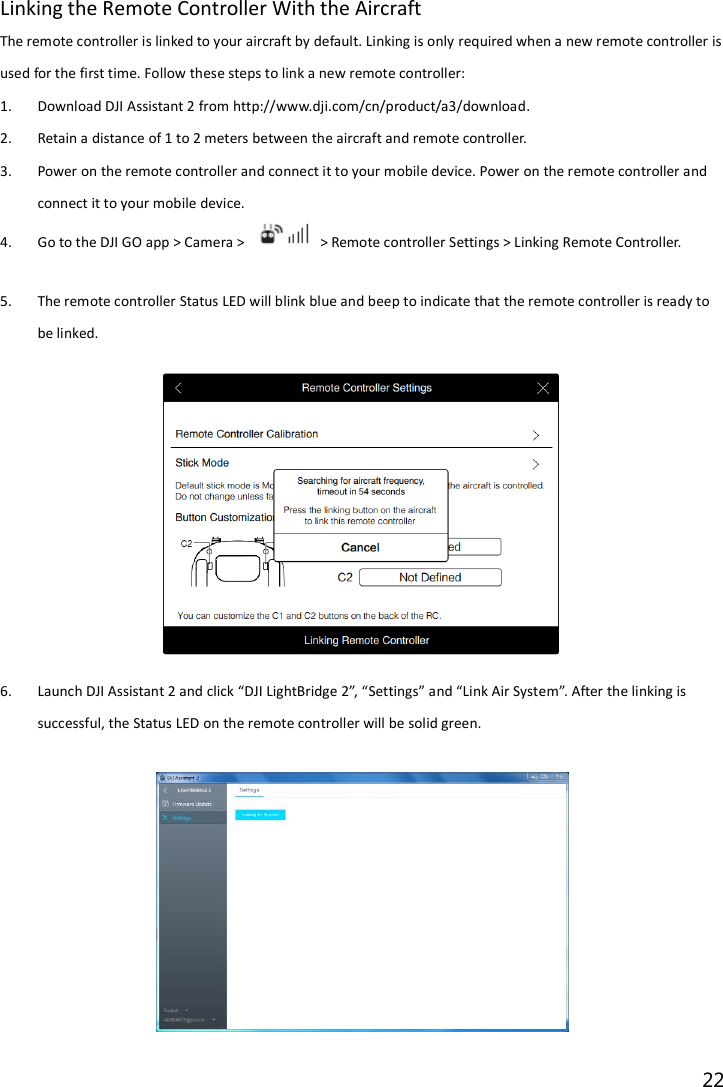
![15 Connects to an HDMI monitor. [16] Micro USB Port Reserved [17] CAN Port Reserved [18] USB Port Connects to your mobile device to run the DJI GO app. [19] GPS Module Used to pinpoint the location of the remote controller. [20] Button C1 [21] Power Port Connects to a power source to charge the remote controller’s internal battery. [22] Button C2 Remote Controller Operations Powering On and Off the Remote Controller The Wind-4 remote controller is powered by a 2S rechargeable battery with a capacity of 6000 mAh. The battery level is indicated by the Battery Level LEDs on the front panel. When the remote controller is turned off, press the Power Button once and the Battery Level LEDs will display the current battery level. If the battery level is low, charge the remote controller. Follow the steps below to power on your remote controller: 1. Press and hold the Power Button for two seconds to power on the remote controller. 2. The remote controller will beep when it is turned on. The Status LED will rapidly flash green, indicating that the remote controller is linking to the aircraft. The Status LED will be solid green when the linking is complete. 3. Repeat step 1 to turn off the remote controller.](https://usermanual.wiki/SZ-DJI-TECHNOLOGY/WIN81803/User-Guide-3826908-Page-17.png)

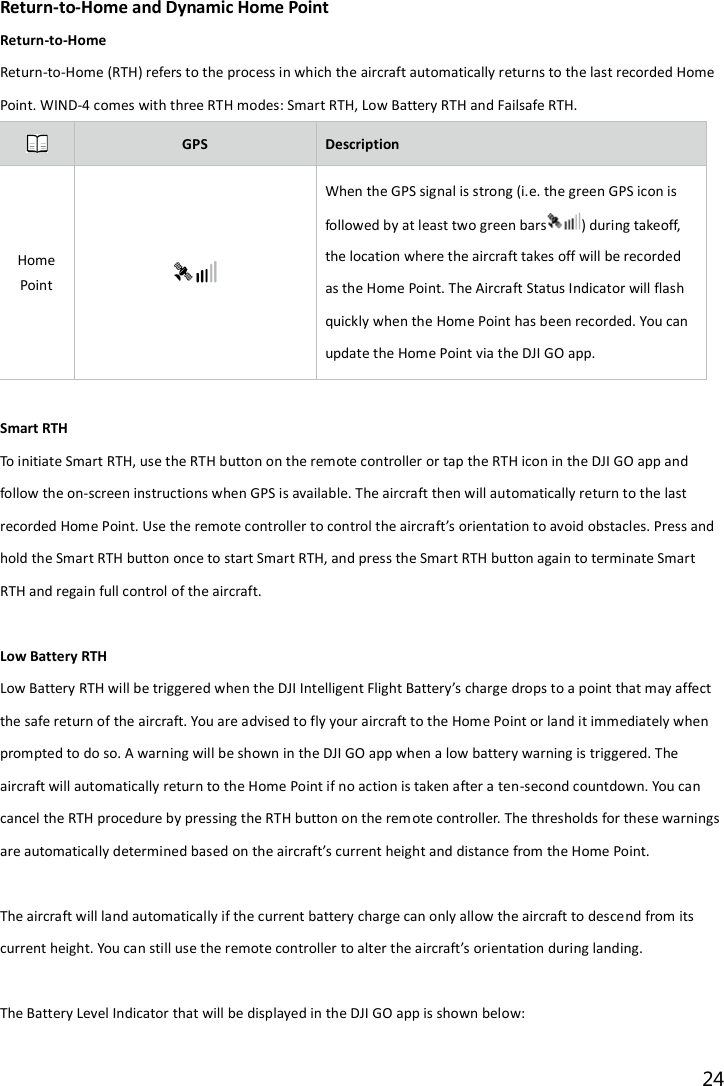


![31 No Fly Zones No Fly Zones are divided into Airports and Restricted Areas. All No Fly Zones are listed on the DJI official website at http://www.dji.com/flysafe/no-fly. Airport (With GPS) [1] Airport No Fly Zones include No Fly Zones and Restricted Altitude Zones. Flight is prevented in No Fly Zones but is allowed with height restrictions in the Restricted Altitude Zones. [2] R1 meters (the value of the R1 depends on the size and shape of the airport) around the airport is a No Fly Zone, inside of which takeoff is prohibited. [3] From R1 meters to R1+1 meters around the airport the flight altitude is limited to a 15 degree inclination. Starting at 20 meters (65 feet) from the edge of airport and radiating outward. Flight altitude is limited to 500 meters (1640 feet) at R1+1 meters. [4] When the aircraft comes within 320 feet (100 meters) of a No Fly Zone, a warning will be shown in the DJI GO app. Restricted Areas (With GPS) [1] Restricted Areas do not have flight altitude restrictions. [2] R meters around the designated restriction area is a Take-off Restricted Area. Aircraft cannot take off within this zone. The value of R varies based on the definition of the restricted areas. [3] A Warning Zone has been set around the Restricted Area. When the aircraft approaches within 100 meters (320 feet) of this zone, a warning will be shown in the DJI GO app.](https://usermanual.wiki/SZ-DJI-TECHNOLOGY/WIN81803/User-Guide-3826908-Page-33.png)