Saitek Electronics PS30-1 PS30 Cyborg Evo wireless joystick for PC User Manual 521164
Saitek Electronics (SHENZHEN) Ltd PS30 Cyborg Evo wireless joystick for PC 521164
UserManual.wiki
>
Saitek Electronics
>
PS30 1 User Manual
User manual
Navigation menu
Upload a User Manual
Namespaces
Wiki Guide
HTML
PDF
Info
Views
User Manual
Discussion / Help
Navigation
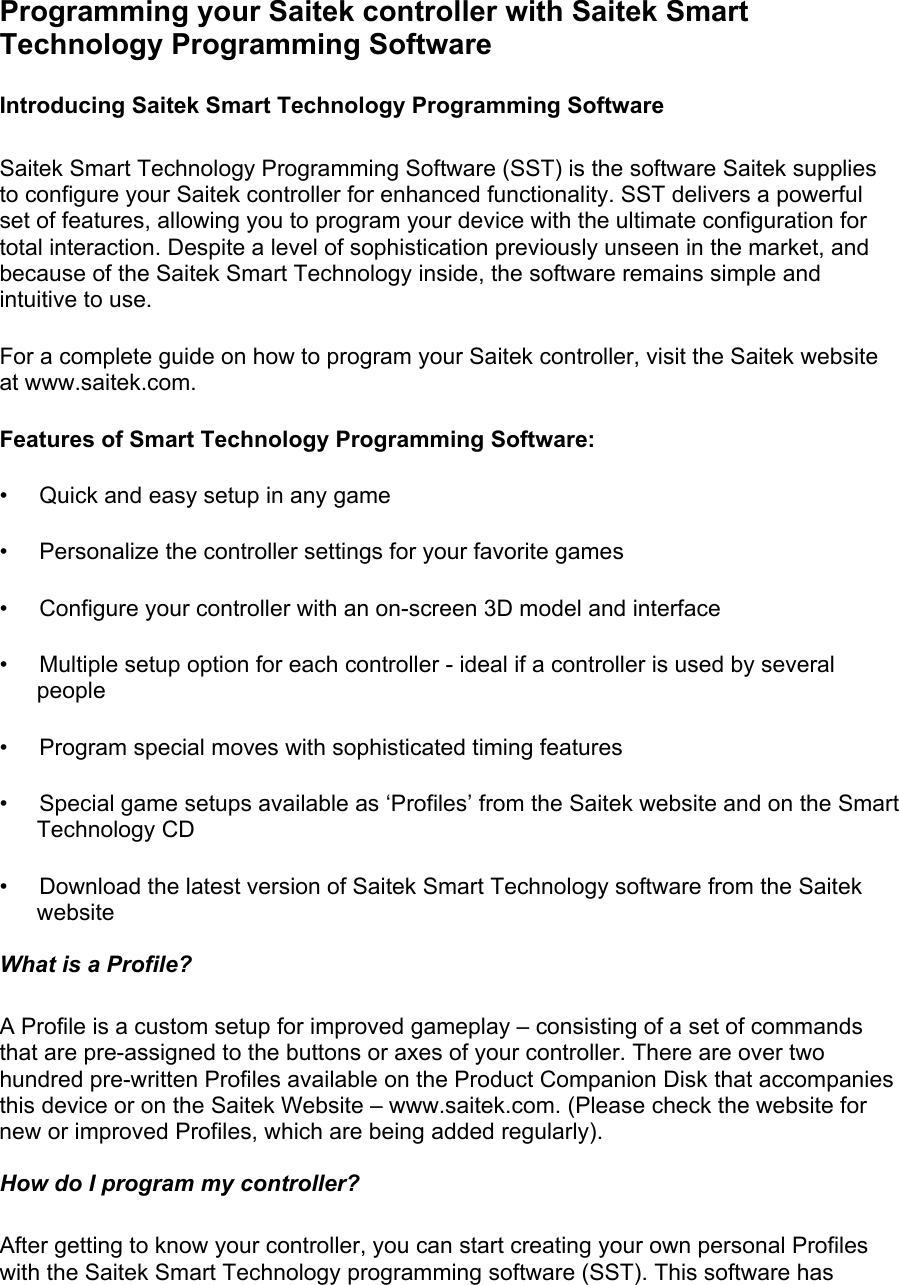
![5. Upon completion of the installation, you have the option to Run Profile Editor, which will give you a view of the 3D programming environment. If you do not wish to see the Profile Editor at this point, just uncheck the box and click on Finish to complete the installation. Note: Driver updates From time to time there may be updates to the driver and programming software for this product. You can check for the latest software updates by visiting the Saitek website and clicking on Downloads. A drop down menu will appear - Select Drivers and Software. For Windows® XP users; Dynamic updates You can check for Driver updates using Windows update. Click on Start on the bottom left hand corner of your monitor and then select Windows Update from the menu. Click on Driver Updates then select from any of the update options that appear in the centre of the window. When you have selected the relevant file to download go to the left hand side of the window and select Review and Install Updates. Finally click on Install Now from the centre section. Testing your joystick • You can do test your stick at any time by Clicking on Start, then Settings and selecting Control Panel in Windows (XP users may only need to click on Start and then Control Panel) • Look for an icon called either Game Controllers or Gaming Options (XP users may have to click Printers and Other Hardware first). • Open the Game Controllers/Gaming Options window then the name of your controller should show up. • Click on Properties and this will bring up the test screen. • Moving your controller and pressing the buttons should result in a response in this screen; if it's responding in there then you know that the controller is okay. Enabling your controller in game Most games support game controllers, which you can enable by using a [control] options menu within the Main Menu of the game itself. If you are having trouble working out how to do this or if you're unsure whether the game being used supports game controllers, please refer to the user manual for that game for more help.](https://usermanual.wiki/Saitek-Electronics/PS30-1/User-Guide-521164-Page-6.png)
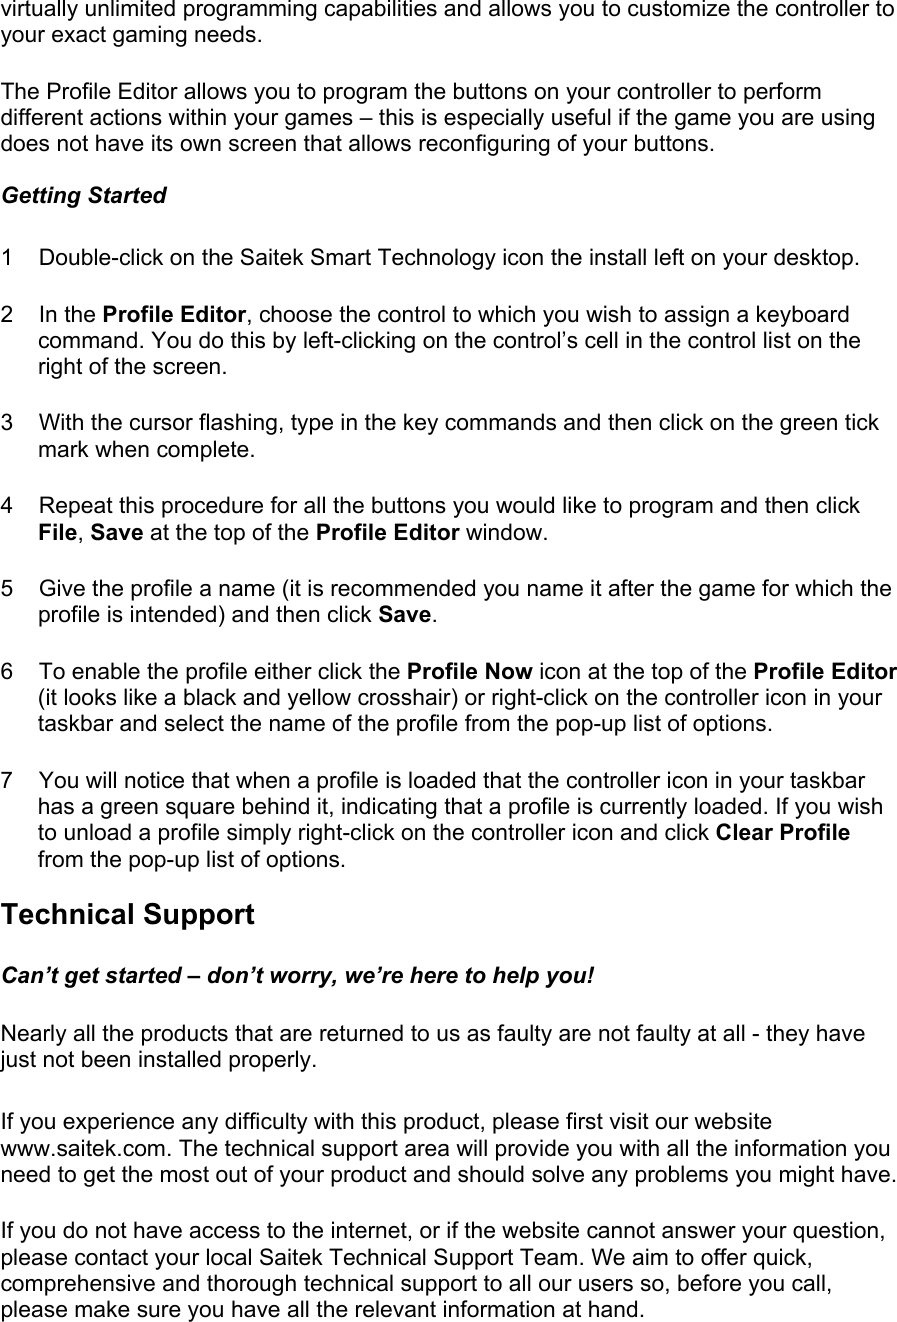
![Note: Even if the game you are using does not support game controllers, it is possible to make the controller work in that game using the Saitek Smart Technology programming software (only installed if you chose to be an Advanced User when installing). Using the programming software allows you to program your controller with keyboard and mouse commands, enabling it to work in those games that only have support for keyboards and mice. For help using this powerful programming software, consult the Programming Your Saitek Controller with Saitek Smart Technology Programming Software section in this manual. Troubleshooting Q: I haven’t used my Cyborg evo Wireless joystick for some time, there are no LEDs illuminated and the joystick doesn’t work. A: Replace the battery on the underside of the joystick. Q: My computer is not recognizing my Saitek joystick – what’s wrong? A: 1. Have you installed the drivers on the CD supplied with this product? 2. Check the connections. Unplug the wireless receiver dongle controller and plug it back in, making certain that it is securely attached. 3. Have you tested your controller? Please refer to the "How to Test Your Controller" section in this manual for further information Q: The game I am playing does not recognize my controller - what's wrong? A: 1. Ensure that you have conducted the checks in Q1 [above] 2. Does the game you are playing offer support for game controllers? Please refer to the "Enabling Your Controller in Game" section in this manual for further information. Q: Some of the movements make on my wireless joystick are not being picked up in the game I’m playing. A: There is interference on the wireless channel your stick is using to communicate with the receiver. Press the scan button on the underside of your stick once to switch to an interference-free channel.](https://usermanual.wiki/Saitek-Electronics/PS30-1/User-Guide-521164-Page-7.png)