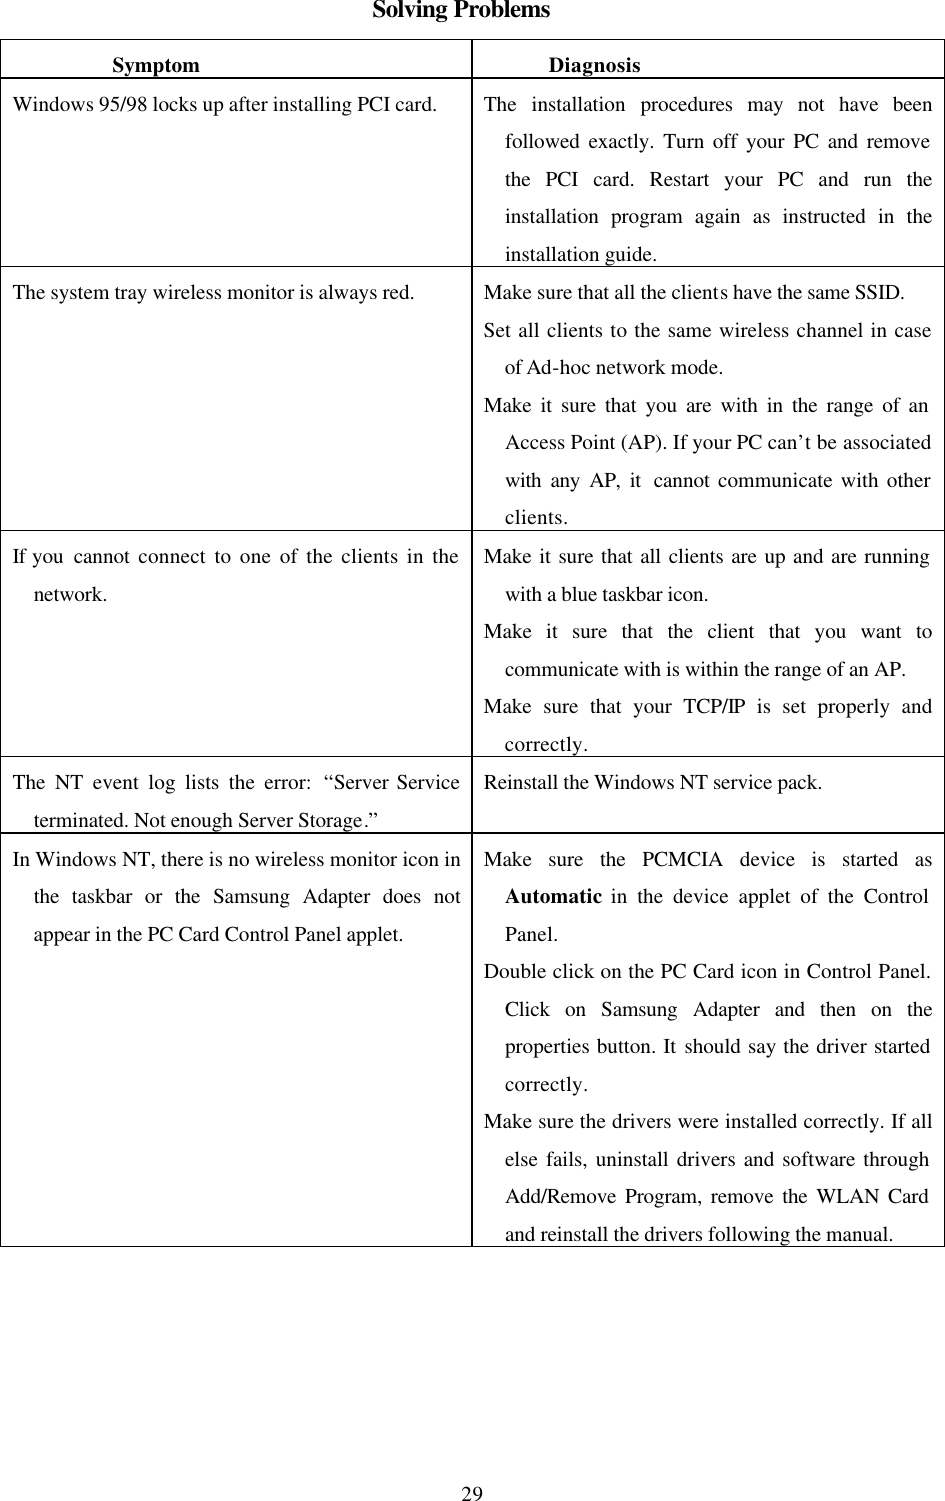
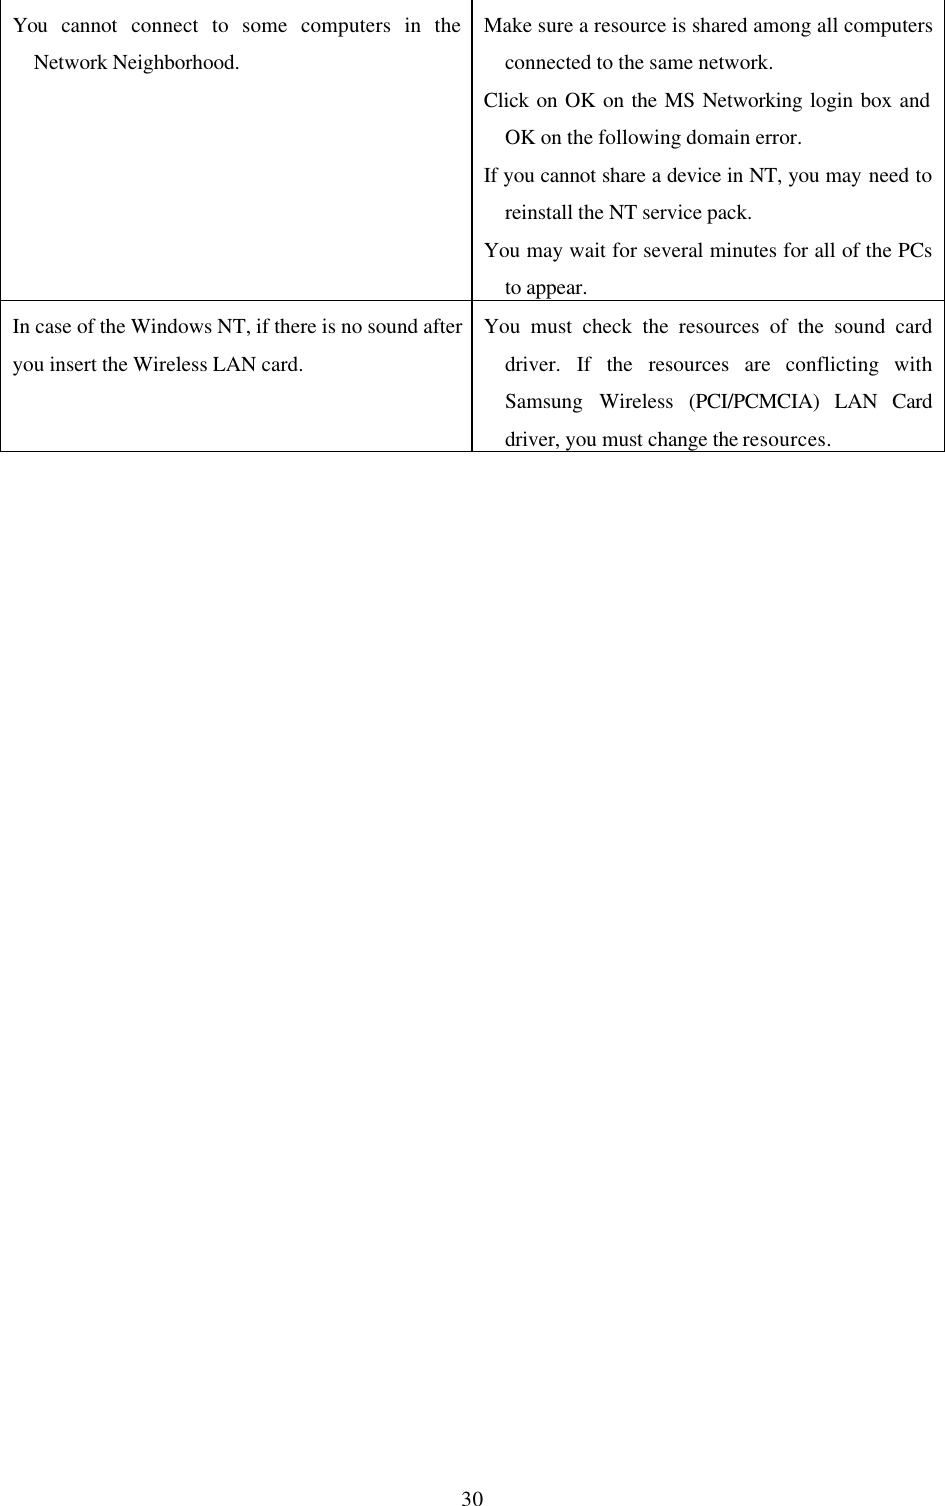
Samsung Electro Mechanics SWL-2100P PCI Card Spread Spectrum Transceiver User Manual 2000486 2100P PCI Report
Samsung Electro Mechanics PCI Card Spread Spectrum Transceiver 2000486 2100P PCI Report
Contents
- 1. Users Manual
- 2. Antenna and User Install Manual
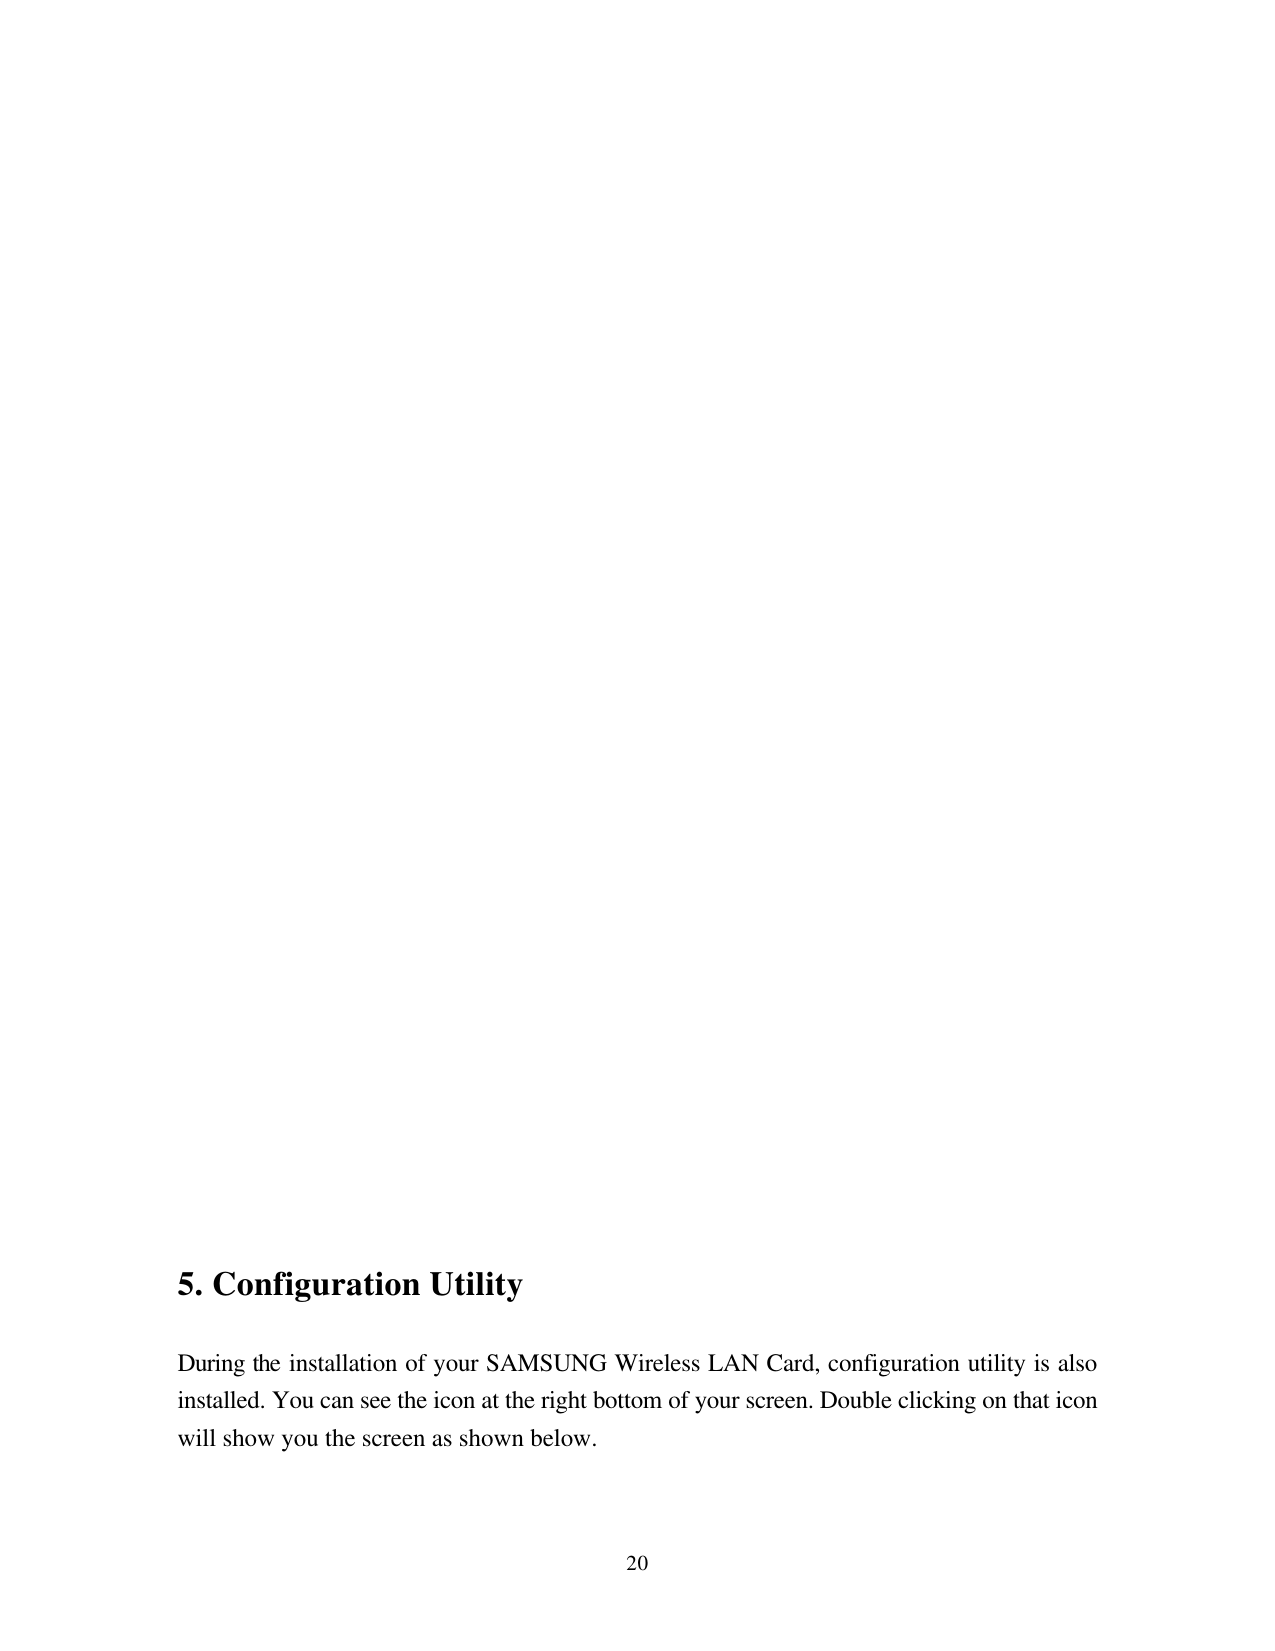
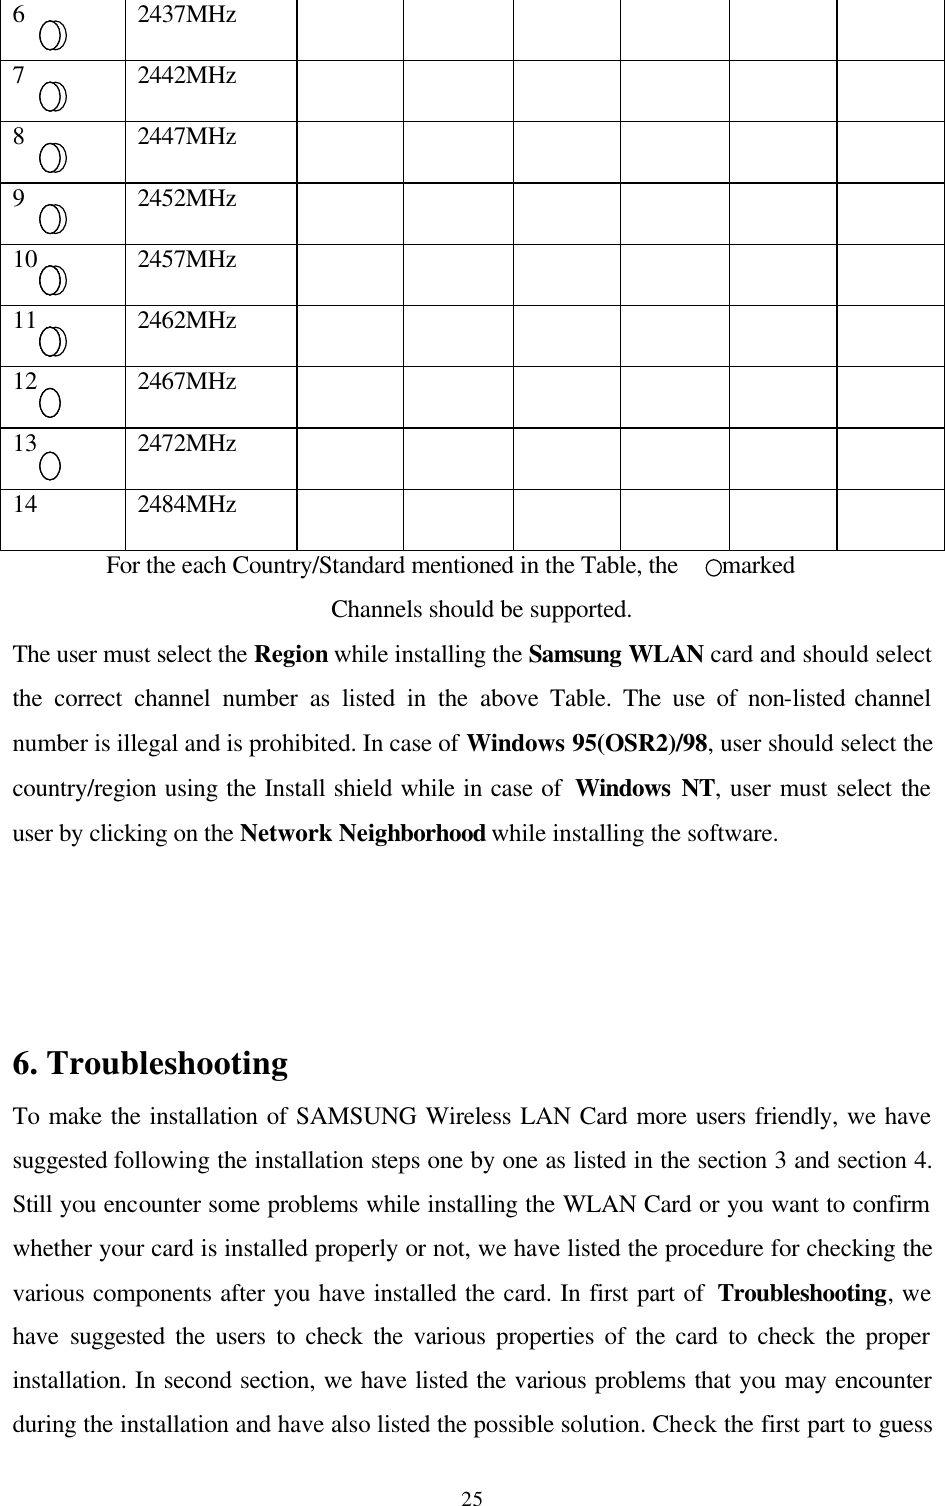
Users Manual