Samsung Electro Mechanics SWL-2200P Wireless LAN PCI Card User Manual CERTIFICATE OF COMPLIANCE
Samsung Electro Mechanics Wireless LAN PCI Card CERTIFICATE OF COMPLIANCE
UserManual.wiki
>
Samsung Electro Mechanics
>
SWL 2200P User Manual
Users manual
Navigation menu
Upload a User Manual
Namespaces
Wiki Guide
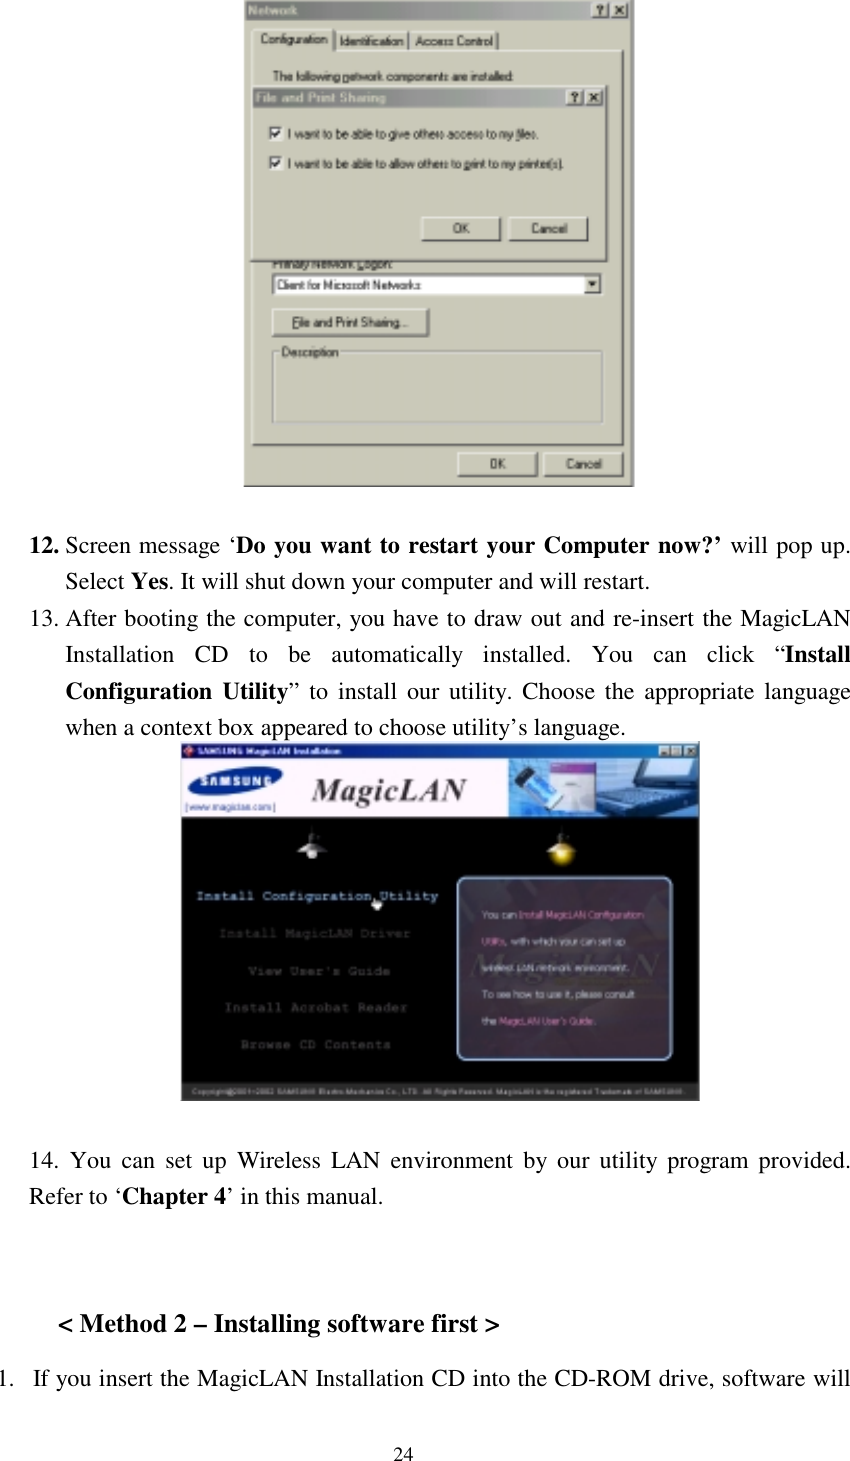
HTML
PDF
Info
Views
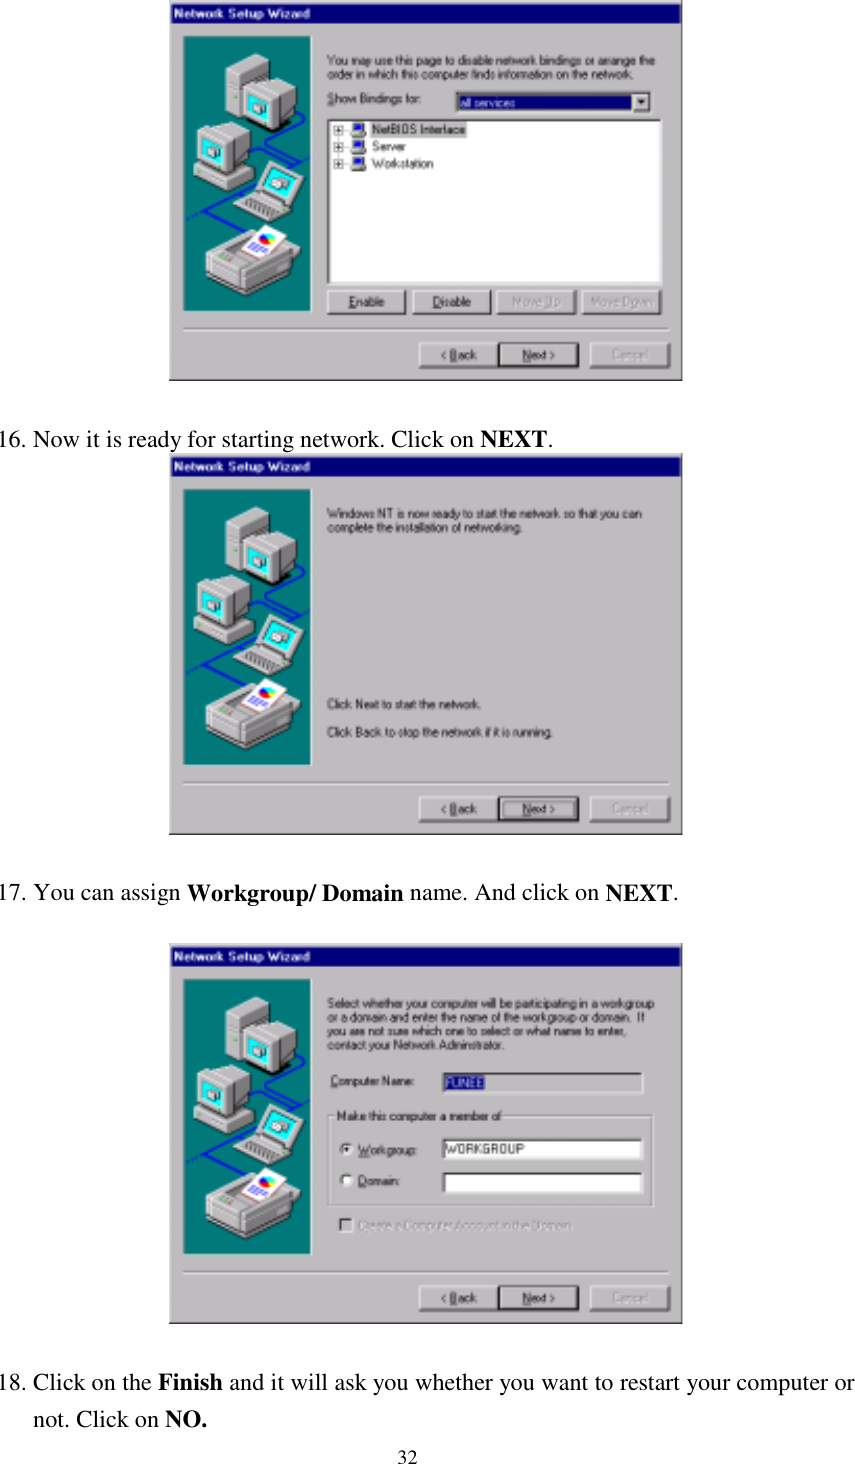
User Manual
Discussion / Help
Navigation

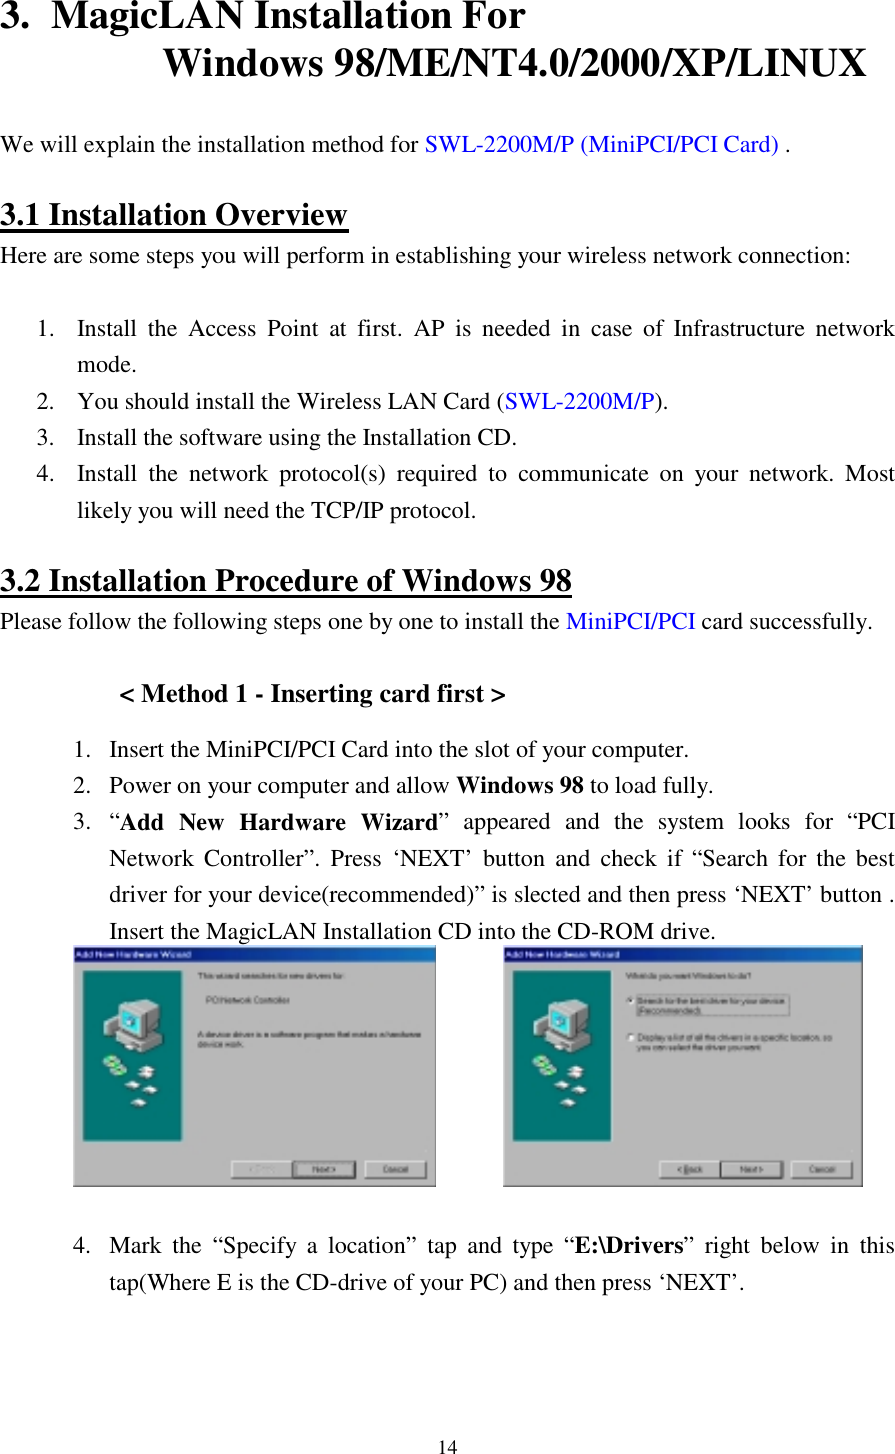

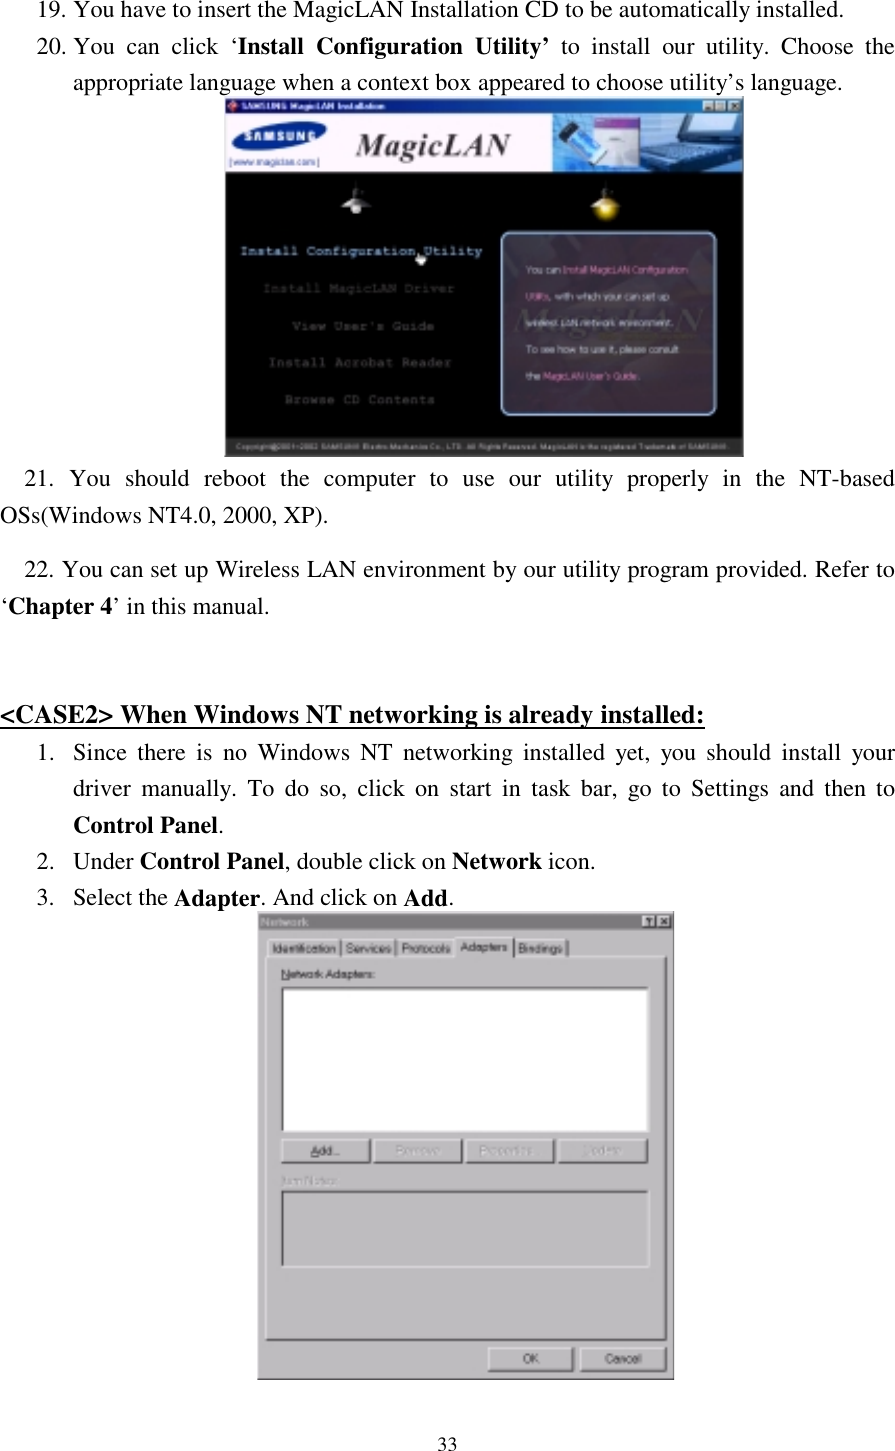


![48 “Refresh” in ther Device Manager. [ Use of Our company’s Utility in Windows XP ] You can also set up the Wireless LAN by the our company’s utility program instead of Windows XP’ utility program. After booting the computer, you have to draw out and re-insert the MagicLAN Installation CD to be automatically installed. You can click “Install Configuration Utility” to install our utility. Choose the appropriate language when a context box appeared to choose utility’s language. You should reboot the computer to use our utility properly in the NT-based OSs(Win NT, Win 2000, Win XP). - If you click the icon on the right bottom of the desktop, you can see the current state of the Wireless LAN. - Click on Option of the General settings on the bottom of the Utility and mark “Manage the Wireless Control by this utility under WinXP”. For more details, refer to ‘Chapter 4’ in this manual. - If you want to use Wireless LAN Utility in the system of Windows XP , be sure that the mark of “Manage the Wireless Control by this utility under WinXP” of the our company’s utility program is removed.](https://usermanual.wiki/Samsung-Electro-Mechanics/SWL-2200P/User-Guide-245429-Page-49.png)


![54 - The network name for connection with AP. In Ad-hoc mode, it is the network name for connection with other wireless clients. mode mode mode mode -"Ad-Hoc"," Managed"(infrastructure mode). Using AP, the connection to the outside network is possible in managed moded channel channel channel channel Channel(ad-hoc networking)(1~14). rtsrtsrtsrts The standard value for transmitting RTS/CTS. frag frag frag frag The standard value for fragmentation. rate rate rate rate Setting Tx rate. enc enc enc enc Setting encryption key. (40 bit WEP -> XXXX-XXXX-XX. 128 bit WEP -> XXXX-XXXX-XXXX-XXXX-XXXX-XXXX-XX). power power power power Setting power saving mode(on/off). (example): # Here are a few examples with a few Wireless LANs supported... # SAMSUNG 11Mbps Wireless LAN Card *,*,*,*) INFO="SAMSUNG 11Mbps WLAN" # ESSID (extended network name) : My Network, any ESSID="test3" # Operation mode : Ad-Hoc, Managed MODE="Managed" # Frequency or channel : 1, 2, 3 (channel) ; 2.422G, 2.46G (frequency) CHANNEL="4" # Bit rate : auto, 1M, 11M RATE="auto" # Encryption key : 4567-89AB-CD, s:password KEY="883e-aa67-21 [1] key 5501-d0da-87 [2] key 91f5-3368-6b [3] key 2d73-31b7-96 [4]" # Other iwconfig parameters : power off, ap 01:23:45:67:89:AB](https://usermanual.wiki/Samsung-Electro-Mechanics/SWL-2200P/User-Guide-245429-Page-55.png)