Samsung Electronics Co 04THETA2 DIGITAL CAMCORDER User Manual 00000 SCD303 SEA 01 27
Samsung Electronics Co Ltd DIGITAL CAMCORDER 00000 SCD303 SEA 01 27
UserManual.wiki
>
Samsung Electronics Co
>
04THETA2 User Manual
>
User Manual Part 2
Contents
1.
User Manual Part 1
2.
User Manual Part 2
User Manual Part 2
Navigation menu
Upload a User Manual
Namespaces
Wiki Guide
HTML
PDF
Info
Views
User Manual
Discussion / Help
Navigation
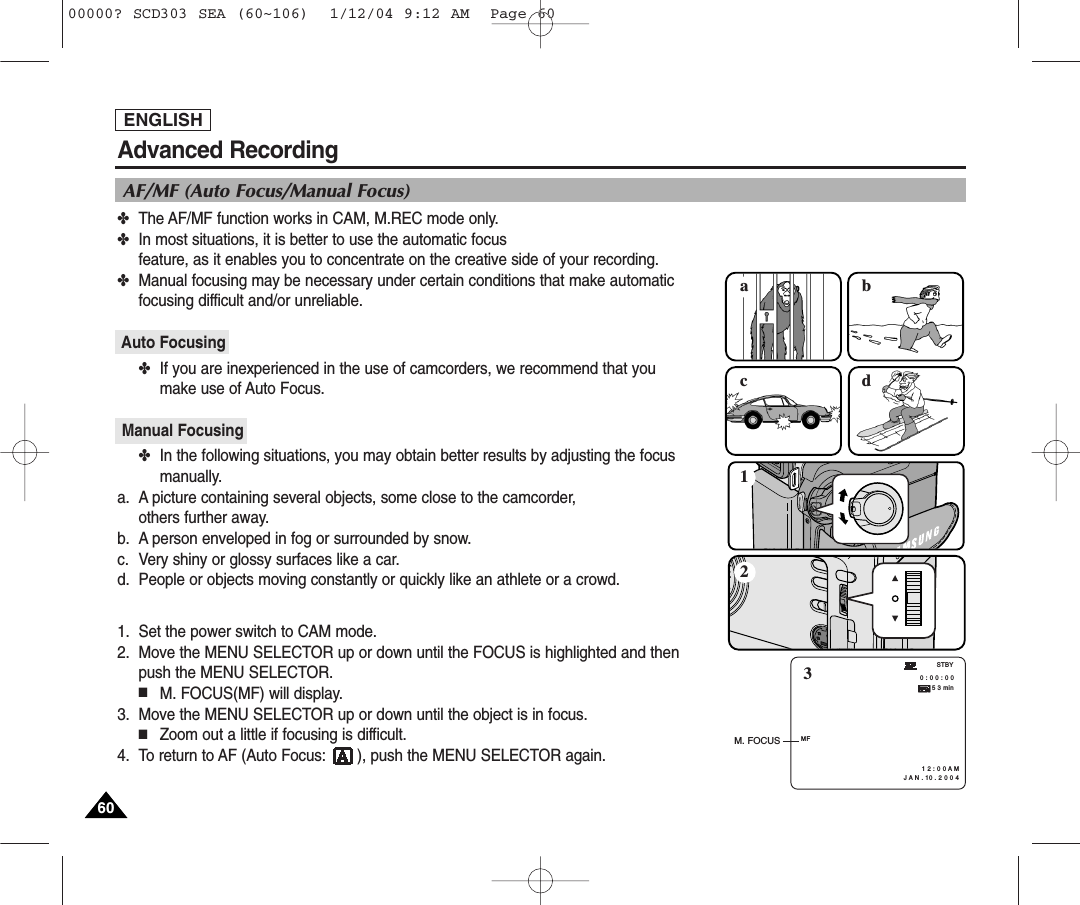
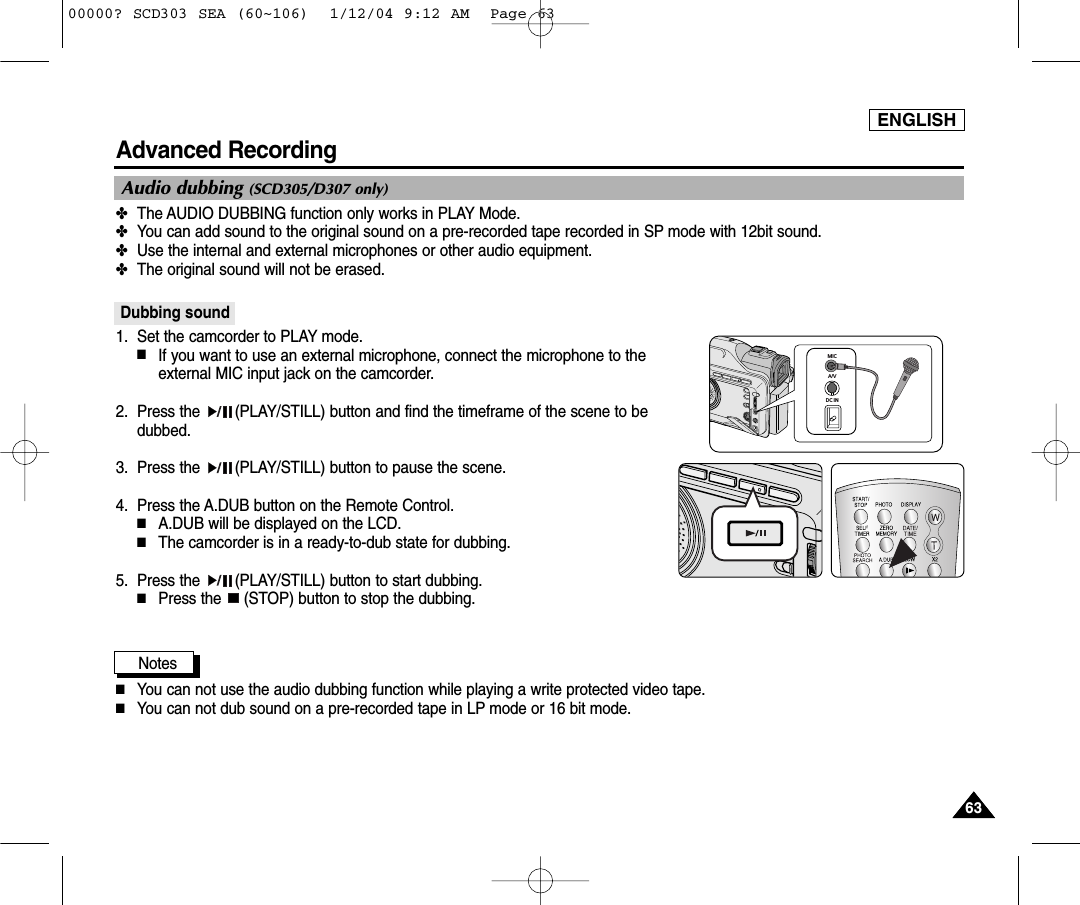
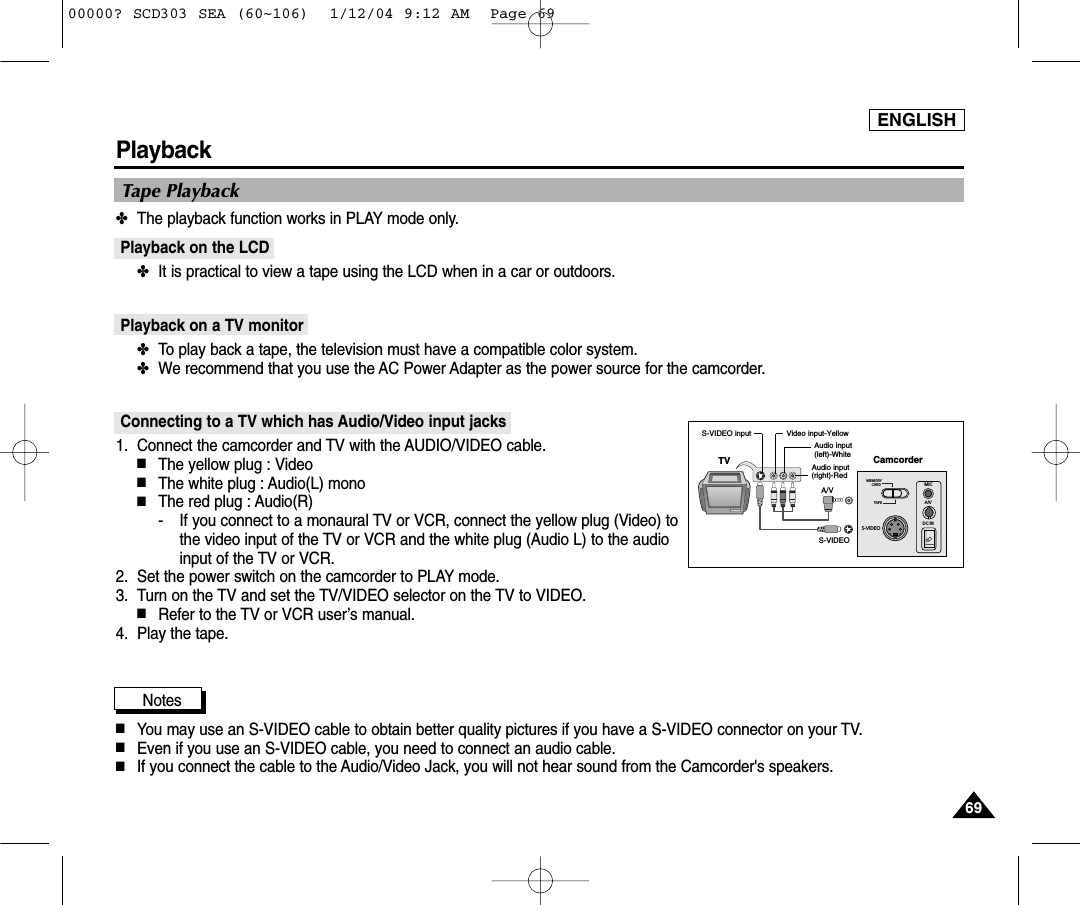
![ENGLISH6464Advanced RecordingDubbed Audio Playback1. Insert the dubbed tape and press MENU button.2. Move the MENU SELECTOR to highlight A/V.3. Push the MENU SELECTOR to enter the sub-menu.4. Use the MENU SELECTOR to select AUDIO SELECT from the submenu. 5. Push the MENU SELECTOR to enter the sub-menu.6. Using the MENU SELECTOR, select the AUDIO playback channel. ■Push the MENU SELECTOR to confirm the audio playback channel.- SOUND1 : play the original sound.- SOUND2 : play the dubbed sound.- MIX(1+2) : play back SOUND1 and 2 equally mixed.7. To exit, press the MENU button.8. Press the (PLAY/STILL) button to playback the dubbed tape.NoteWhen you playback added sound (SOUND2 or MIX mode), you may experience loss of sound quality.PLAYER MODEA / V SETAUDIO SELECTSOUND [ 1 ]SOUND [ 2 ]MIX [ 1 + 2 ]PLAYER MODEREC MODEPHOTO SEARCHPHOTO COPYAUDIO MODE 12SOUND1AUDIO SELECTWIND CUTA / V SETPB DSE00000? SCD303 SEA (60~106) 1/12/04 9:12 AM Page 64](https://usermanual.wiki/Samsung-Electronics-Co/04THETA2.User-Manual-Part-2/User-Guide-390542-Page-5.png)

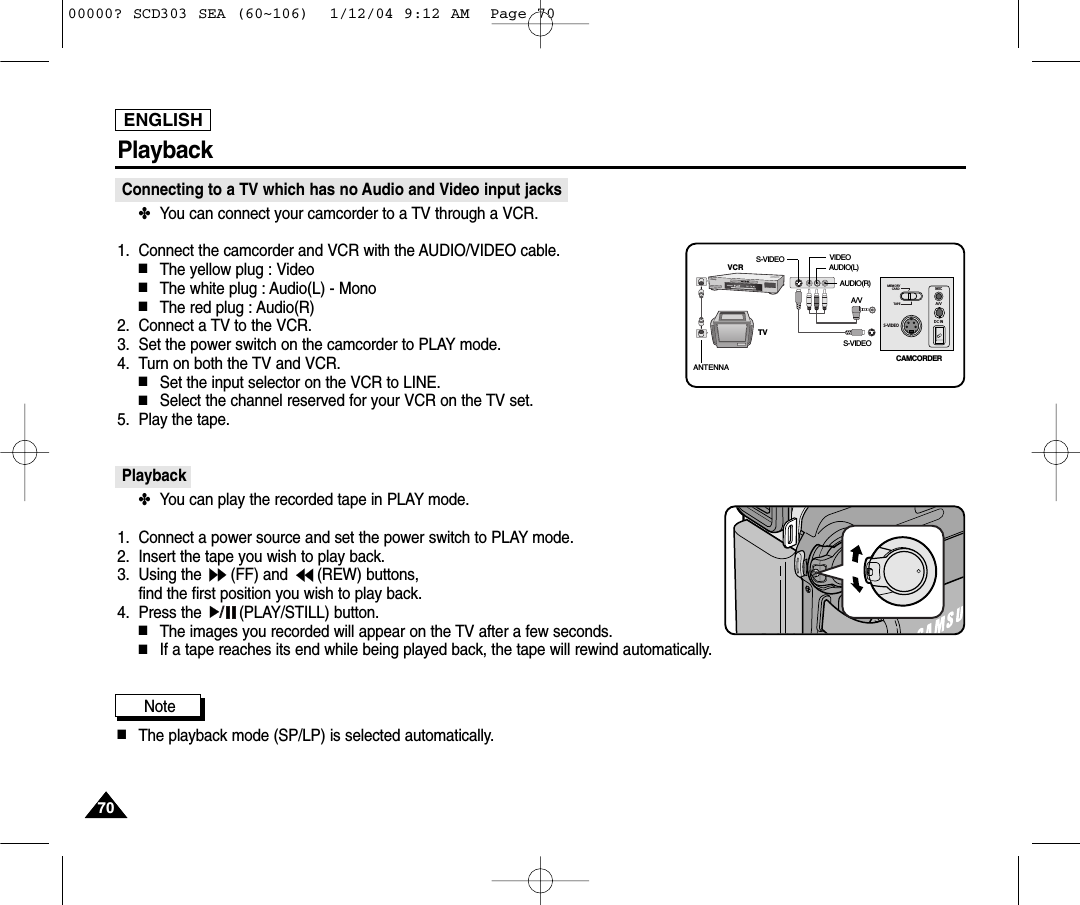

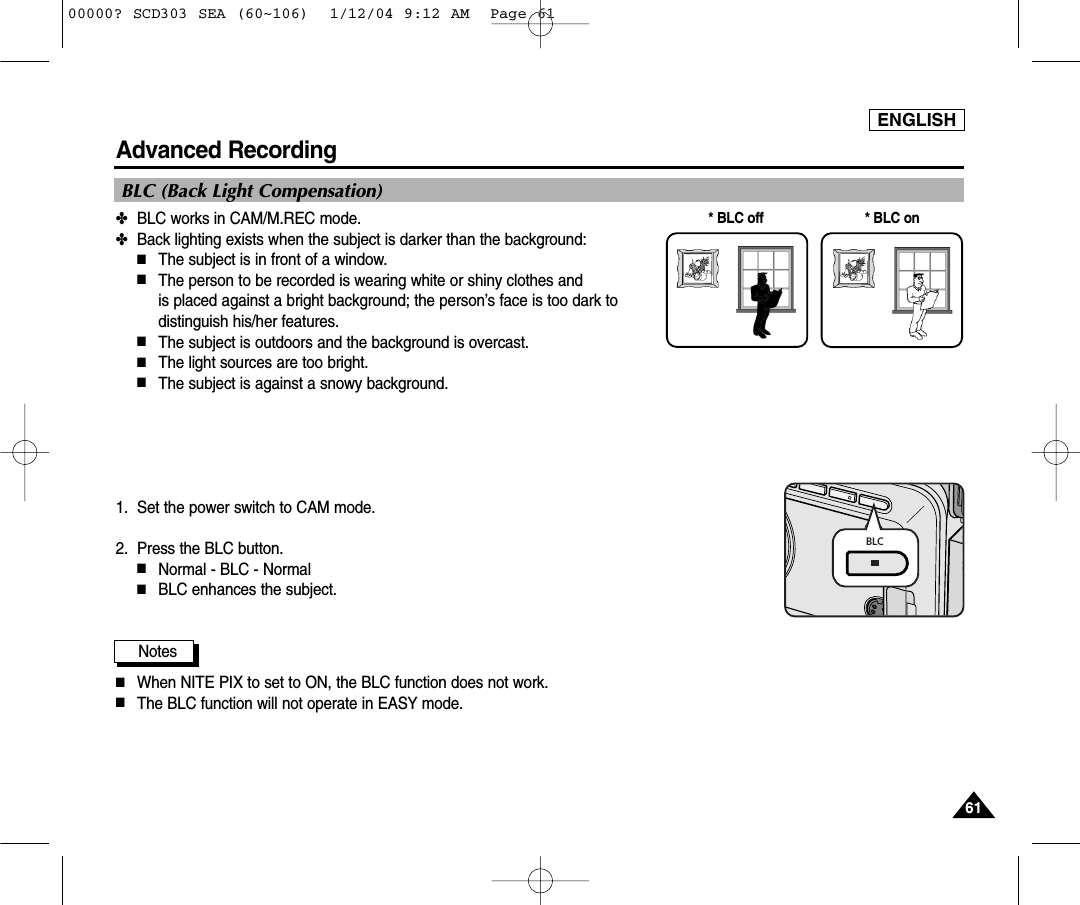
![ENGLISH8080USB interface Using the “Removable Disk” function ✤You can easily transfer data from a Memory Card to a PC without additional add-on cards via a USB connection.1. Set the mode switch to memory, set the power switch to CAM or PLAY.2. Connect one end of the USB cable to the USB jack on the camcorder and the other end to the USB port on your computer.Using the “USB streaming” function✤USB streaming data type is MPEG4.✤To use USB STREAMING, the DVC Media 5.1, DirectX 9.0a and Windows Media Player 9.0(included in the CD)programs must be installed in the PC. ✤You can view CAMCORDER video from the PC using USB STREAMING.You can also store it as a moving picture in the "asf" file format, or as a still image in the "jpg" file format on a PC.1. Set the mode switch to TAPE, set the power switch to CAM or PLAY.2. Connect one end of the USB cable to the USB jack on the camcorder and the other end to the USB port on your computer.3. Execute the DVC Media 5.1 program.If you want the detailed description of USB streaming, refer to the DVC Media 5.1 User's Manual.Connecting to a PC1. Connect a USB cable to the USB port on the PC.2. Connect the other end of the USB cable into the proper terminal on the camcorder. (USB jack)- If a PC is connected to the camcorder with a USB cable only, the Power Switch, Zoom Switch, mode switch and NITEPIX operate.Disconnecting the USB cable✤After completing the data transmission, you must disconnect the cable in the following way:1. Select the removable disc icon and click the right mouse button to select [Eject].2. Select [Confirm] and disconnect the USB cable when the Windows Splash screen appears.Notes ■If you disconnect the USB cable from the PC or the camcorder while transferring,the data transmission will stop and the data may be damaged. ■If you connect the USB cable to a PC via a USB HUB or simultaneously connectthe USB cable along with other USB devices, the camcorder may not work properly.- If this occurs, remove all USB devices from the PC and reconnect thecamcorder. DVUSBUSB Cable00000? SCD303 SEA (60~106) 1/12/04 9:12 AM Page 80](https://usermanual.wiki/Samsung-Electronics-Co/04THETA2.User-Manual-Part-2/User-Guide-390542-Page-21.png)
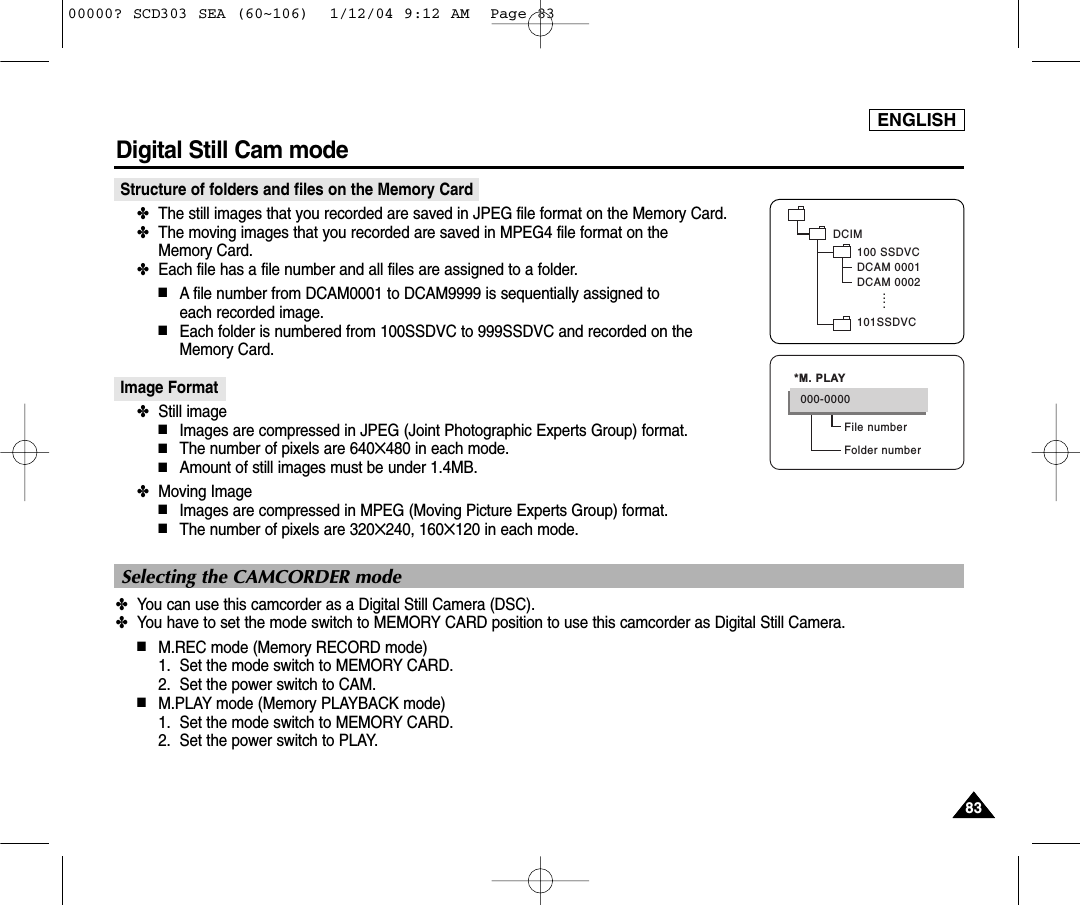

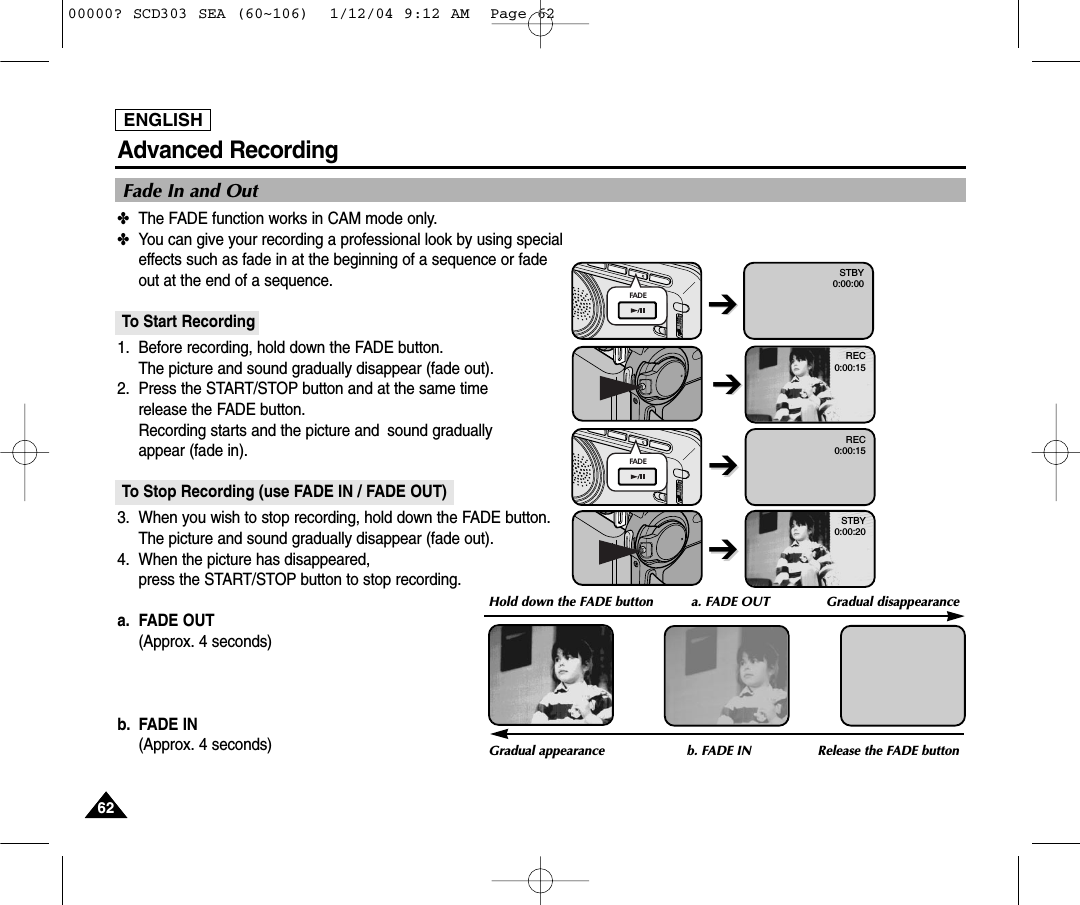
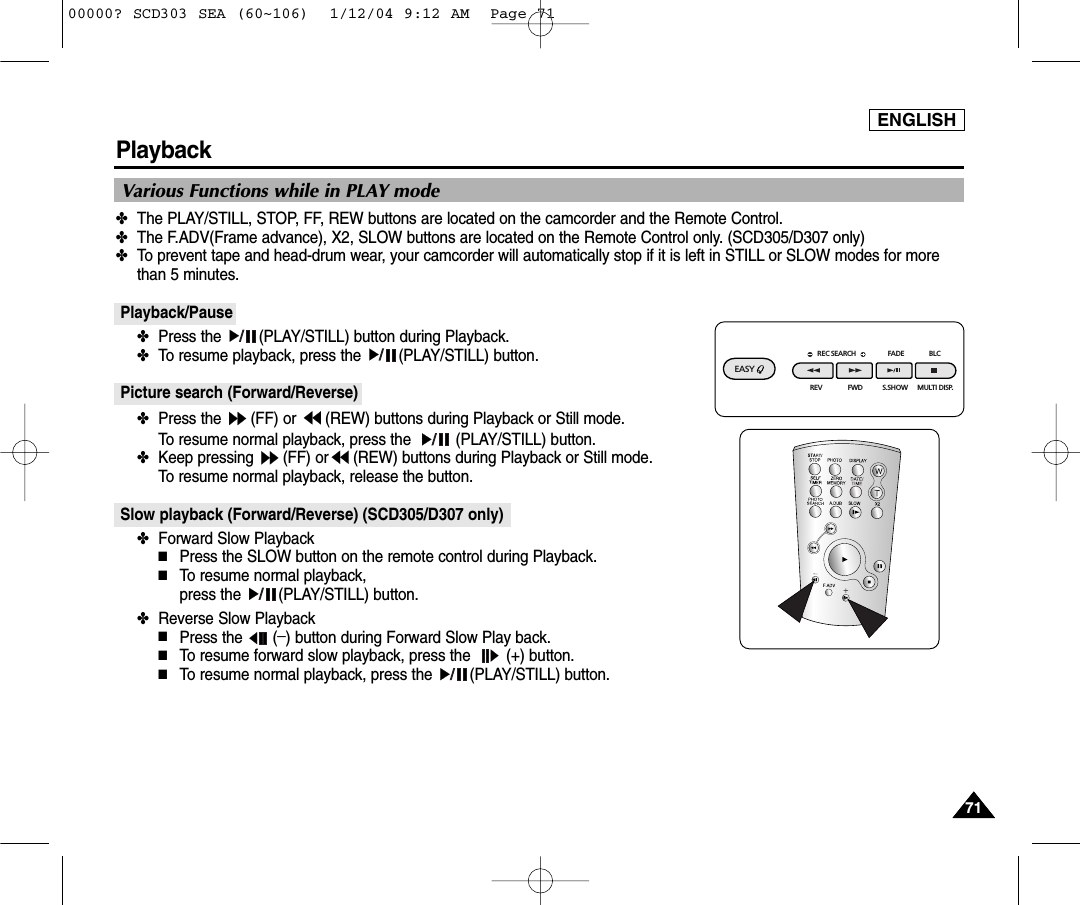
![ENGLISH8989Digital Still Camera mode To view the Multi Display1. Set the mode switch to MEMORY CARD.2. Set the power switch to PLAY mode.■The last recorded image appears.3. To view six stored images on single screen, press the MULTI button.■A selection mark ( ) appears under the image.■Move the MENU SELECTOR to select a image.4. To return to single playback mode, press the MULTI button again.Notes■To display the previous six images, press the (REV).■To display the next six images, press the (FWD).19 20 2122 23 24[22/24]100-0025REC SEARCH FADE BLCREV FWD S.SHOWEASY MULTI DISP.00000? SCD303 SEA (60~106) 1/12/04 9:12 AM Page 89](https://usermanual.wiki/Samsung-Electronics-Co/04THETA2.User-Manual-Part-2/User-Guide-390542-Page-30.png)