Samsung Electronics Co CLP620ND Color Laser Printer User Manual minus toc Dali R guide english
Samsung Electronics Co Ltd Color Laser Printer minus toc Dali R guide english
UserManual.wiki
>
Samsung Electronics Co
>
CLP620ND User Manual
>
Users Manual 1
Contents
1.
Users Manual 1
2.
Users Manual 2
Users Manual 1
Navigation menu
Upload a User Manual
Namespaces
Wiki Guide
HTML
PDF
Info
Views
User Manual
Discussion / Help
Navigation
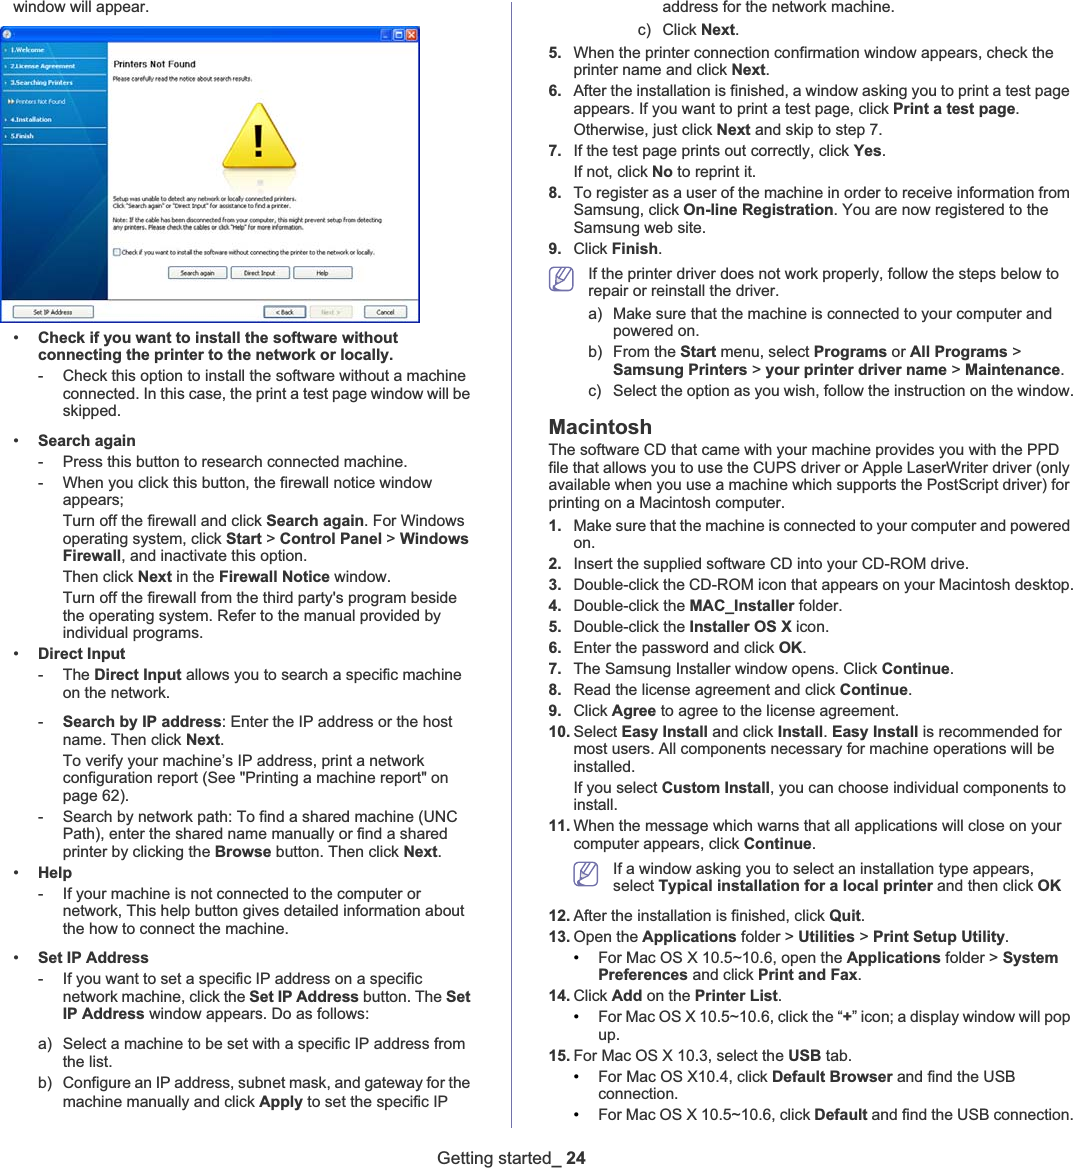
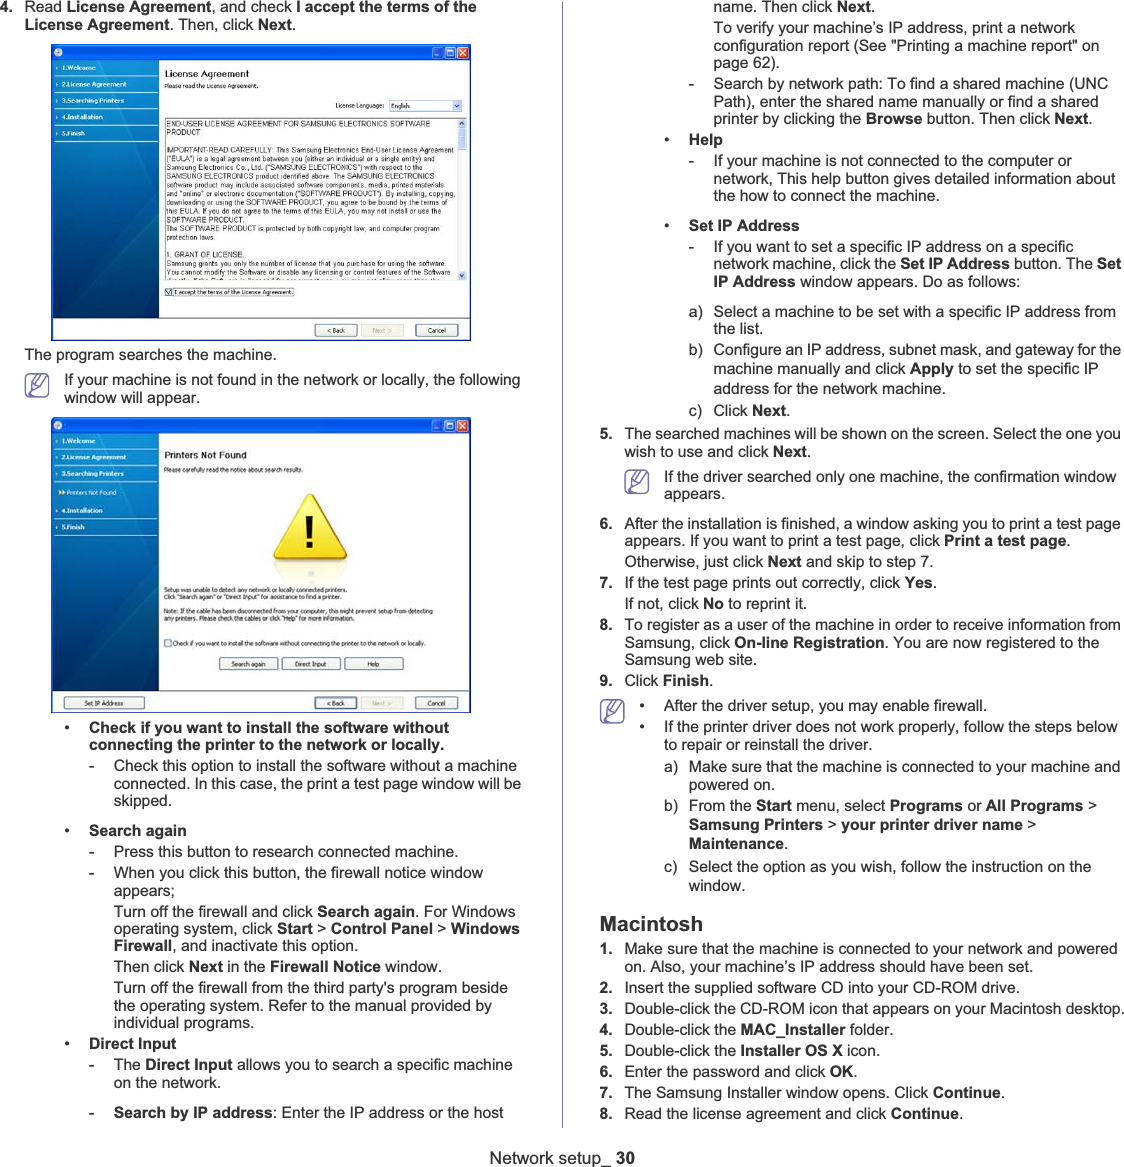
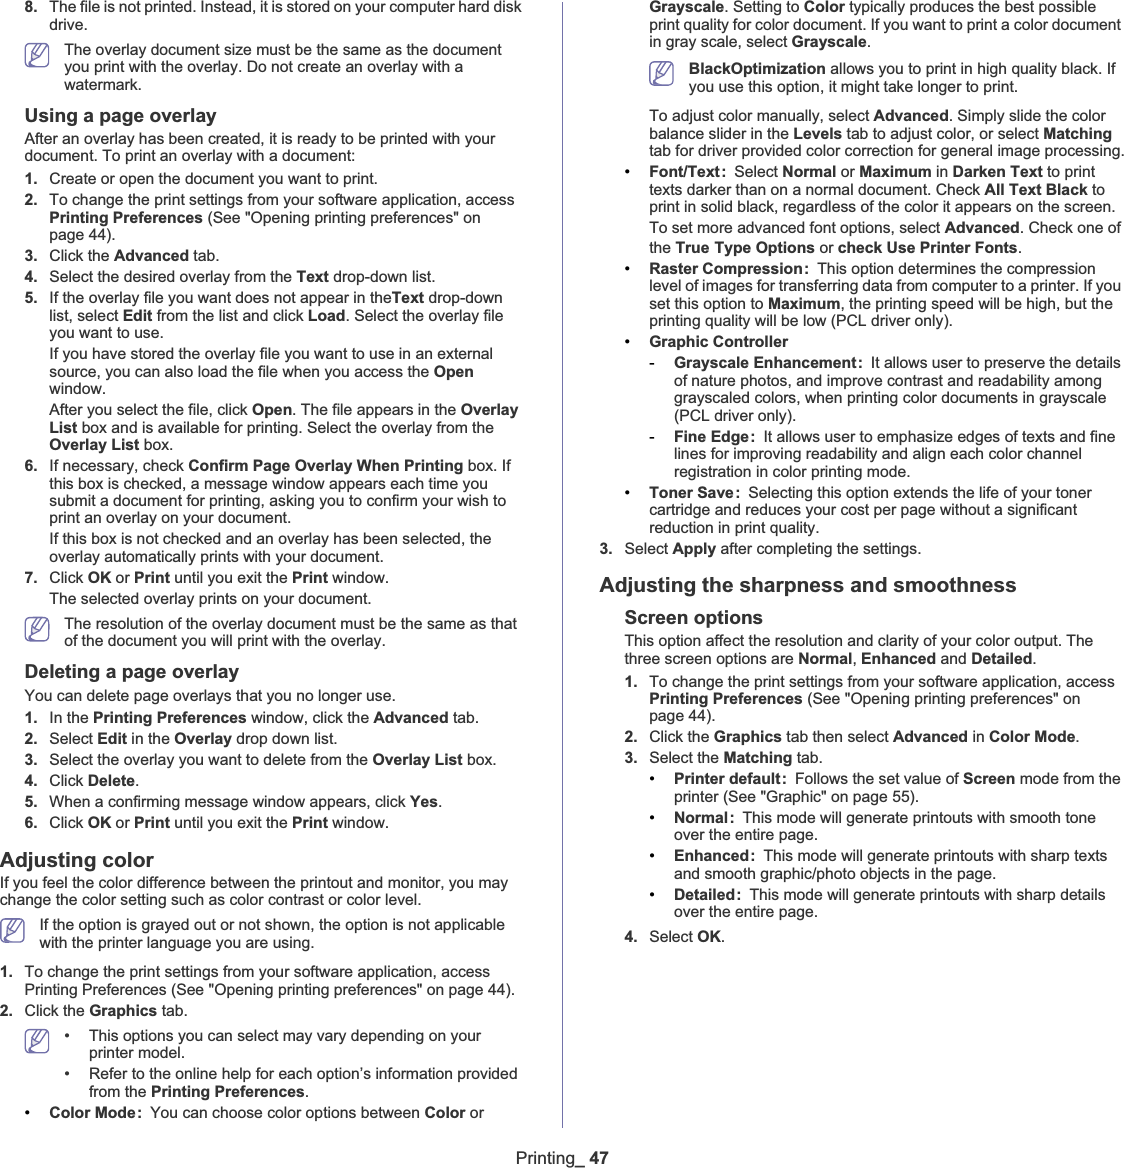
![Getting started_ 2516. For Mac OS X 10.3, if Auto Select does not work properly, select Samsung in Printer Model and your machine name in Model Name.•For Mac OS X 10.4, if Auto Select does not work properly, select Samsung in Print Using and your machine name in Model.•For Mac OS X 10.5~10.6, if Auto Select does not work properly, select Select a driver to use... and your machine name in PrintUsing.Your machine appears on the Printer List,and is set as the default machine.17. Click Add.If the printer driver does not work properly, uninstall the driver and reinstall it. Follow steps below to uninstall the driver for Macintosh.a) Make sure that the machine is connected to your computer and powered on.b) Insert the supplied software CD into your CD-ROM drive.c) Double-click CD-ROM icon that appears on your Macintosh desktop.d) Double-click the MAC_Installer folder.e) Double-click the Installer OS X icon.f) Enter the password and click OK.g) The Samsung Installer window opens. Click Continue.h) Select Uninstall and click Uninstall.i) When the message which warns that all applications will close on your computer appears, Click Continue.j) When the uninstall is done, click Quit.LinuxYou need to download Linux software packages from the Samsung website to install the printer software. Follow the steps below to install the software.Installing the Unified Linux Driver1. Make sure that the machine is connected to your computer and powered on.2. When the Administrator Login window appears, type in root in the Login field and enter the system password.You must log in as a super user (root) to install the machine software. If you are not a super user, ask your system administrator.3. From the Samsung website, download and unpack the Unified Linux Driver package to your computer.4. Click at the bottom of the desktop. When the Terminal screen appears, type in the following:[root@localhost root]#tar zxf [FilePath]/UnifiedLinuxDriver.tar.gz[root@localhost root]#cd [FilePath]/cdroot/Linux[root@localhost Linux]#./install.shIf you do not use the graphical interface and failed to install the software, you have to use the driver in the text mode. Follow the steps 3 to 4, and then follow the instructions on the terminal screen.5. When the welcome screen appears, click Next.6. When the installation is complete, click Finish.The installation program has added the Unified Driver Configurator desktop icon and the Unified Driver group to the system menu for your convenience. If you have any difficulties, consult the on screen help that is available through your system menu or can otherwise be called from the driver package Windows applications, such as Unified Driver Configurator or Image Manager.Installing the SmartPanel1. Make sure that the machine is connected to your computer and powered on.2. When the Administrator Login window appears, type in root in the Login field and enter the system password.You must log in as a super user (root) to install the machine software. If you are not a super user, ask your system administrator.3. From the Samsung website, download and unpack the Smart Panel package to your computer.4. Click at the bottom of the desktop. When the Terminal screen appears, type in the following:[root@localhost root]#tar zxf [FilePath]/SmartPanel.tar.gz[root@localhost root]#cd [FilePath]/cdroot/Linux/smartpanel[root@localhost smartpanel]#./install.shIf you do not use the graphical interface and failed to install the software, you have to use the driver in the text mode. Follow the steps 3 to 4, and then follow the instructions on the terminal screen.Installing the Printer Setting Utility1. Make sure that the machine is connected to your computer and powered on.2. When the Administrator Login window appears, type in root in the Login field and enter the system password.You must log in as a super user (root) to install the machine software. If you are not a super user, ask your system administrator.3. From the Samsung website, download and unpack the Printer Setting Utility package to your computer.4. Click at the bottom of the desktop. When the Terminal screen appears, type in the following:[root@localhost root]#tar zxf [FilePath]/PSU.tar.gz[root@localhost root]#cd [FilePath]/cdroot/Linux/psu](https://usermanual.wiki/Samsung-Electronics-Co/CLP620ND.Users-Manual-1/User-Guide-1156084-Page-25.png)
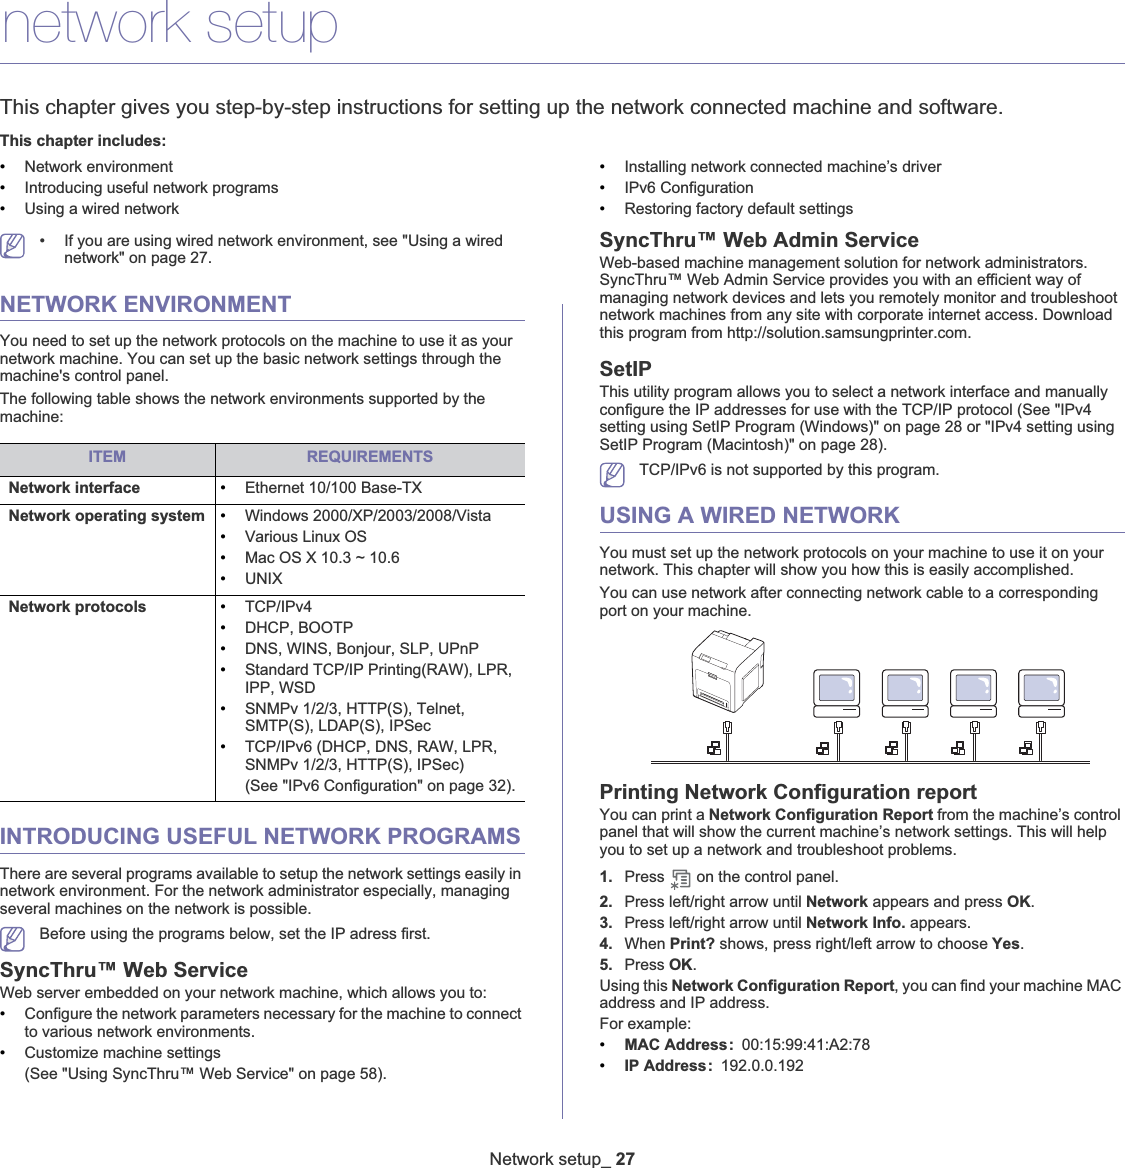
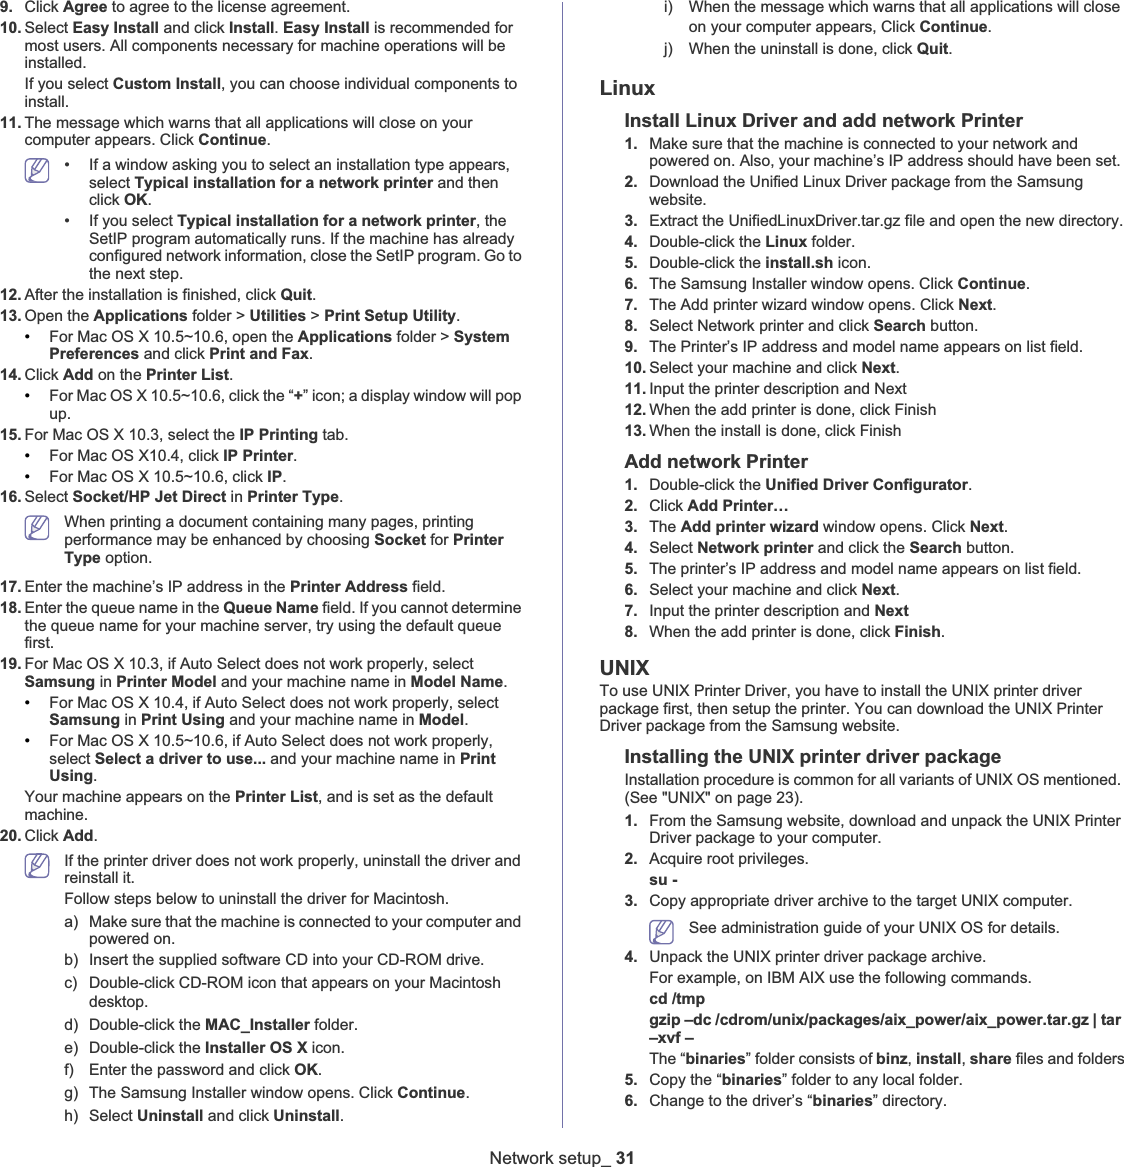
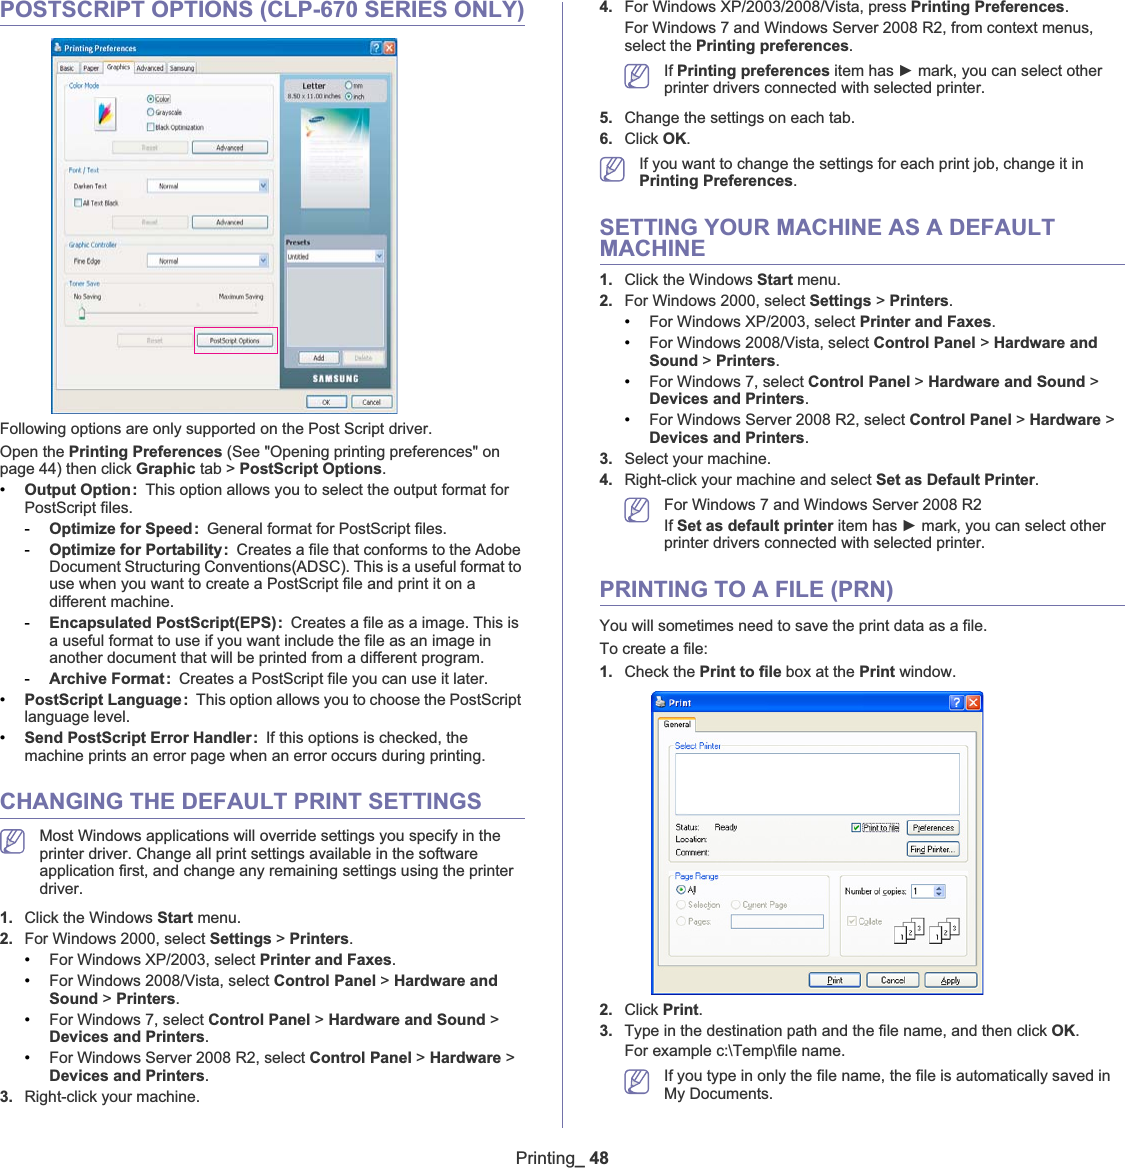
![Getting started_ 26[root@localhost psu]#./install.shIf you do not use the graphical interface and failed to install the software, you have to use the driver in the text mode. Follow steps 3 to 4, and then follow the instructions on the terminal screen.If the printer driver does not work properly, uninstall the driver and reinstall it. Follow the steps below steps to uninstall the driver for Linux.a) Make sure that the machine is connected to your computer and powered on.b) When the Administrator Login window appears, type in “root” in the Login field and enter the system password.You must log in as a super user (root) to uninstall the printer driver. If you are not a super user, ask your system administrator.c) Click the icon at the bottom of the desktop. When the Terminal screen appears, type in:[root@localhost root]#cd /opt/Samsung/mfp/uninstall/[root@localhost uninstall]#./uninstall.shd) Click Uninstall.e) Click Next.f) Click Finish.SHARING YOUR MACHINE LOCALLYFollow the steps below to set up the computers to share your machine locally.If the Host computer is directly connected to the machine with a USB cable and is also connected to the local network environment, the client computer connected to the local network can use the shared machine through the host computer to print. 1Host computer A computer which is directly connected to the machine by USB cable.2Client computers Computers which use the machine shared through the host computer. WindowsSetting up a host computer1. Install your printer driver. (See "Installing USB connected machine’s driver" on page 23, "Installing network connected machine’s driver" on page 29.)2. Click the Windows Start menu. 3. For Windows 2000, select Settings >Printers.•For Windows XP/2003, select Printer and Faxes.•For Windows 2008/Vista, select Control Panel > Hardware and Sound >Printers.•For Windows 7, select Control Panel > Hardware and Sound >Devices and Printers.•For Windows Server 2008 R2, select Control Panel > Hardware >Devices and Printers.4. Right click your printer icon. 5. For Windows XP/2003/2008/Vista, press Properties.For Windows 7 and Windows Server 2008 R2, from context menus, select the Printer properties.If Printer properties item has Ź mark, you can select other printer drivers connected with selected printer.6. Select the Sharing tab.7. Check theChange Sharing Options.8. Check theShare this printer.9. Fill in the Share Name field. Click OK.Setting up a client computer1. Install your printer driver (See "Installing USB connected machine’s driver" on page 23, "Installing network connected machine’s driver" on page 29).2. Click the Windows Start menu. 3. Select All programs > Accessories >Windows Explorer.4. Enter the IP address of the host computer in the address bar and press Enter in your keyboard. In case host computer requires User name and Password, fill in User ID and password of the host computer account.5. Right click the printer icon you want to share and select Connect.6. If a set up complete message appears, click OK.7. Open the file you want to print and start printing. MacintoshThe following steps are for Mac OS X 10.5~10.6. Refer to Mac Help for other OS versions. Setting up a host computer1. Install your printer driver. (See "Macintosh" on page 24.)2. Open the Applications folder > System Preferences and click Print & Fax.3. Select the printer to share in the Printers list.4. Select Share this printer.Setting up a client computer1. Install your printer driver (See "Macintosh" on page 24).2. Open the Applications folder > System Preferences and click Print and Fax.3. Click the “+” icon. A display window showing the name of your shared printer appears.4. Select your machine and click Add.](https://usermanual.wiki/Samsung-Electronics-Co/CLP620ND.Users-Manual-1/User-Guide-1156084-Page-26.png)
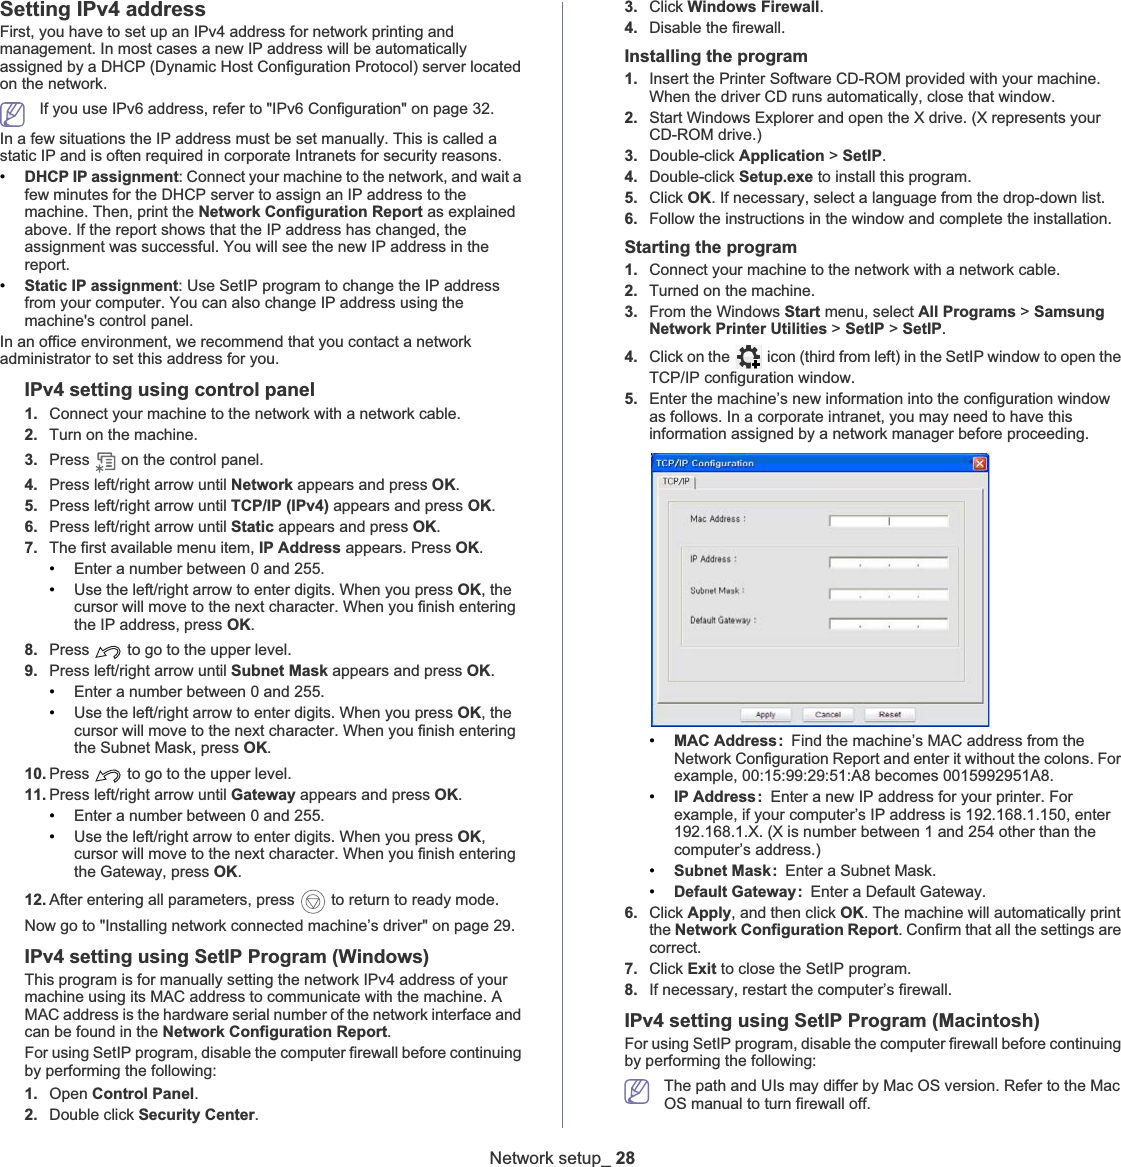
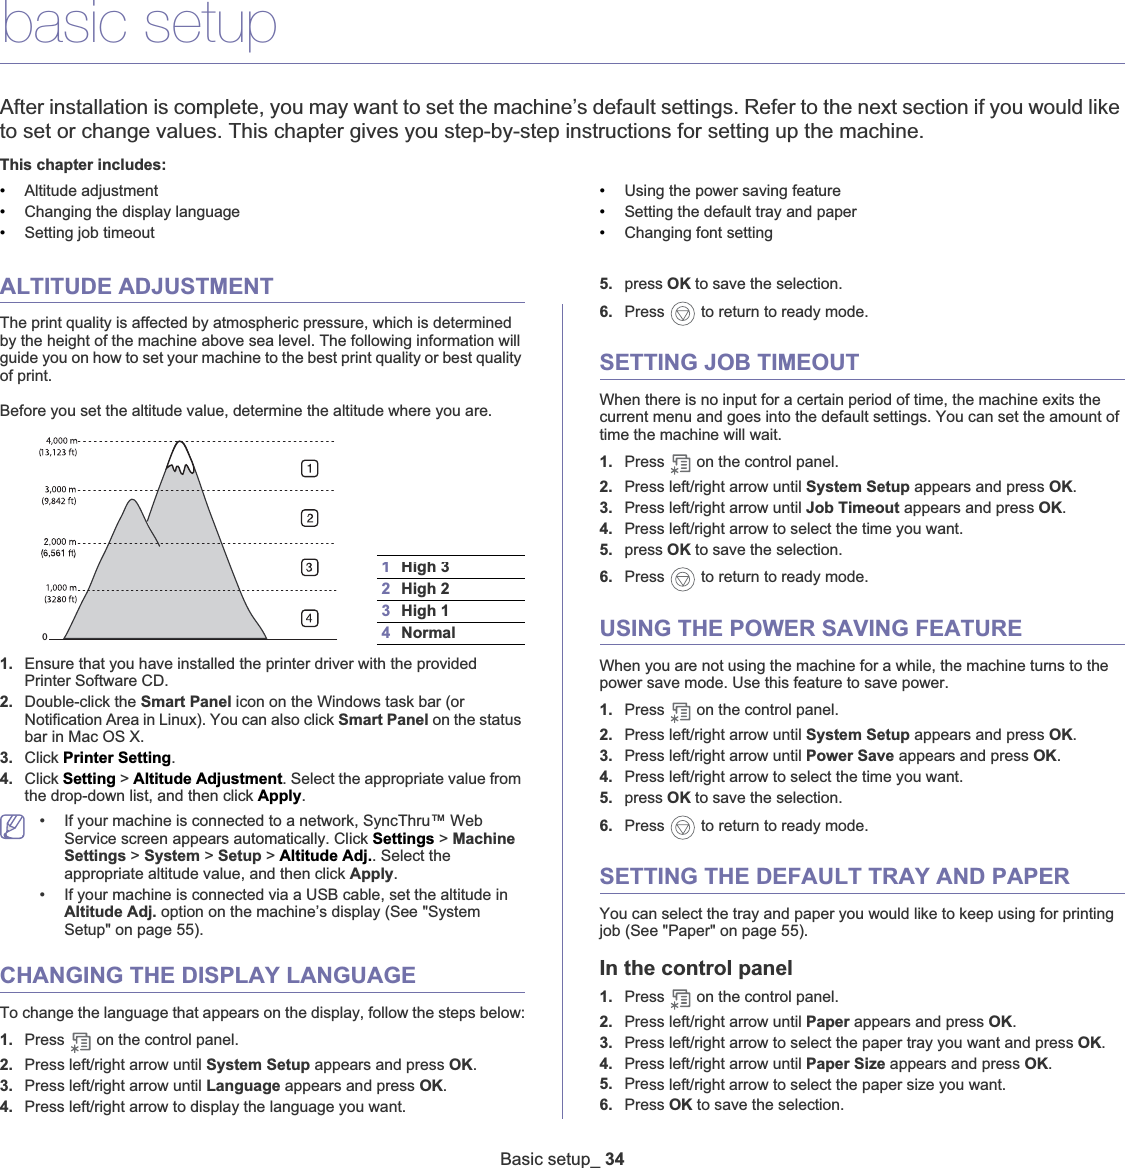
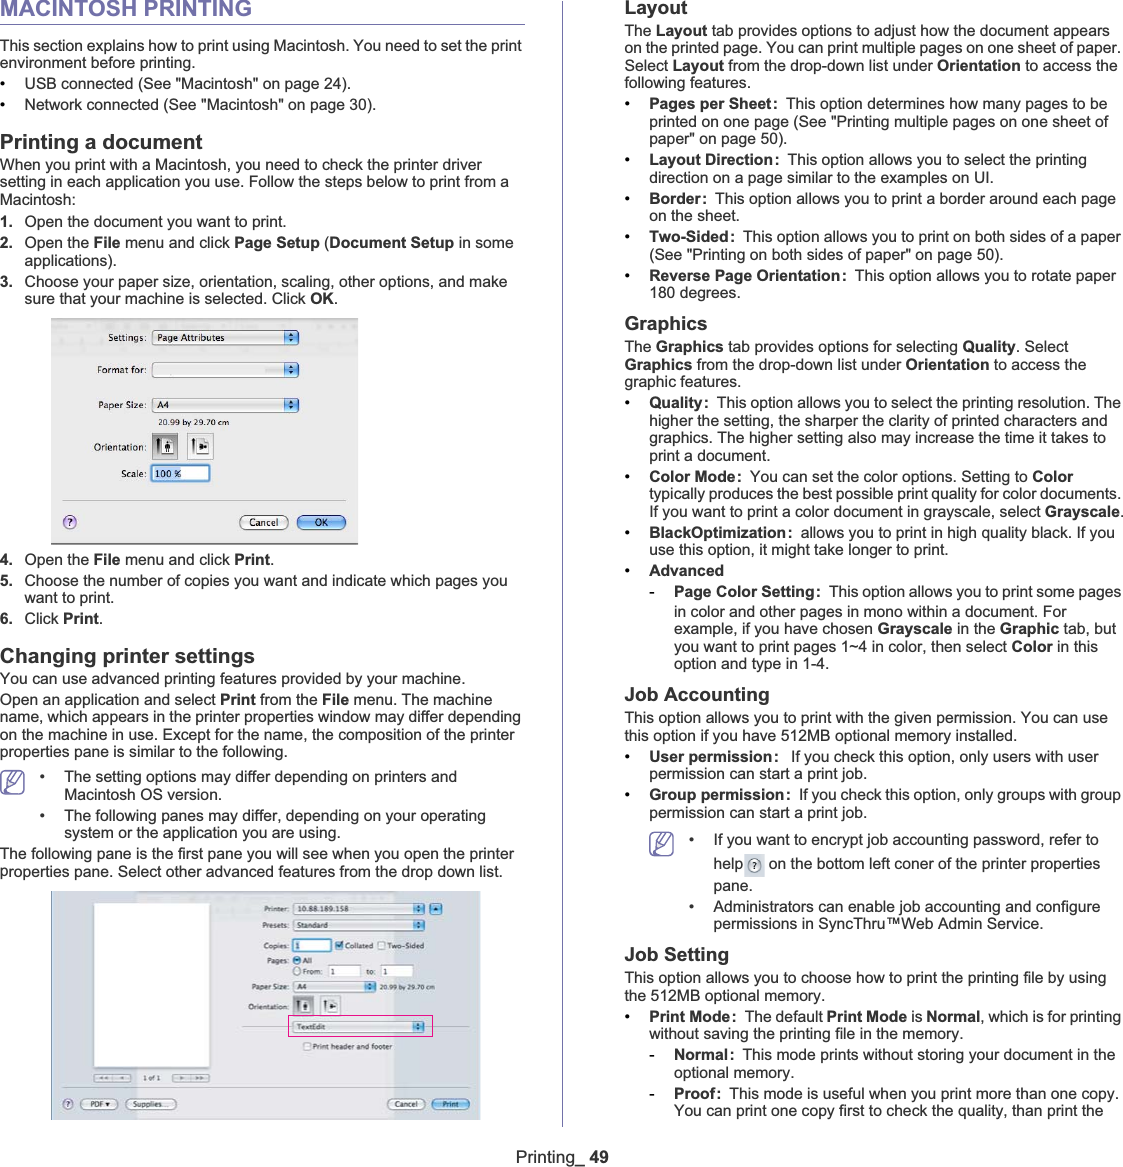
![Network setup_ 32cd aix_power/binaries7. Run the install script../installinstall is the installer script file which is used to install or uninstall the UNIX Printer Driver package.Use “chmod 755 install” command to give the permission to the installer script.8. Execute the “. /install –c” command to verify install results.9. Run ‘installprinter’ from the command line. This will bring up the Add Printer Wizard window. Setup the printer in this window referring the procedure next.On some UNIX OS, for example on Solaris 10 just added printer may not be enabled and/or may not accept jobs. In this case run the following two commands on the root terminal:accept <printer_name>enable <printer_name>Uninstalling the printer driver packageThe uninstalling printer utility should be used to delete the printer installed in the system.a) Run “uninstallprinter” command from the terminal.It will open the Uninstall Printer WizardThe installed printers are listed in the drop-down listb) Select the printer to be deleted.c) Click Delete to delete the printer from the system.d) Execute the “. /install –d” command to uninstall the whole package.e) To verify uninstall results, execute the “. /install –c” command.To reinstall it again, use the command “. /install” to reinstall the binaries.Setting up the printerTo add the printer to your UNIX system, run ‘installprinter’ from the command line. This will bring up the Add Printer Wizard window. Setup the printer in this window according to the following steps:1. Type the name of the printer.2. Select appropriate printer model from model list.3. Enter any description corresponding to the type of the printer in the Type field. This is optional.4. Specify any printer description in the Description field. This is optional.5. Specify printer location in the Location field.6. Type the IP address or DNS name of the printer in the Devicetextbox for network-connected printers. On IBM AIX with jetdirectQueue type only DNS name is possible, numeric IP address is not allowed.7. Queue type shows the connection as lpd or jetdirect in the corresponding list box. Additionally usb type is available on Sun Solaris OS.8. Select Copies to set the number of copies.9. Check the Collate option to receive copies already sorted.10. Check the Reverse Order option to receive copies in the reverse order.11. Check the Make Default option to set this printer as default.12. Click OK to add the printer.IPV6 CONFIGURATIONTo use the IPv6 network environment, follow the next procedure to use the IPv6 address:The machine is provided with IPv6 feature on.TCP/IPv6 is supported properly only in Windows Vista or higher.1. Connect your machine to the network with a network cable.2. Turned on the machine.3. Print a Network Configuration Report from the machine’s control panel where you can check MAC address or IPv6 addresses.For example:•MAC Address: 00:15:99:41:A2:78•IPv6 Address: [FE80::215:99FF:FE66:7701]a) Press on the control panel.b) Press left/right arrow until Network appears and press OK.c) Press left/right arrow until Network Info. appears.d) When Print? shows, press right/left arrow to choose Yes.e) Press OK.4. Select Start > Control Panel > Hardware and Sound >Printers > AddPrinter from your computer.5. Click Add a local printer on the Add Printer windows.6. Follow the instruction on the window.• If the machine does not work in the network environment, activate IPv6. Refer to the next section followed by.• If the IPv6 network seems to be not working, set all the network setting to the factory defaults and try again (See "Restoring factory default settings" on page 33).Activating IPv61. Connect your machine to the network with a network cable.2. Turned on the machine.3. Press on the control panel.4. Press left/right arrow until Network appears and press OK.5. Press left/right arrow until TCP/IP (IPv6) appears and press OK.6. Press left/right arrow until IPv6 Activate appears and press OK.7. Press left/right arrow until On appears and press OK.On is set as a default.8. Turn the machine off and turn it on again.Setting IPv6 addressesMachine supports following IPv6 addresses for network printing and managements.•Link-local Address: Self-configured local IPv6 address. (Address starts with FE80.)•Stateless Address: Automatically configured IPv6 address by a network router.•Stateful Address: IPv6 address configured by a DHCPv6 server.•Manual Address: Manually configured IPv6 address by a user.DHCPv6 address configuration (Stateful)If you have a DHCPv6 server on your network, you can set one of the following option for default dynamic host configuration:](https://usermanual.wiki/Samsung-Electronics-Co/CLP620ND.Users-Manual-1/User-Guide-1156084-Page-32.png)
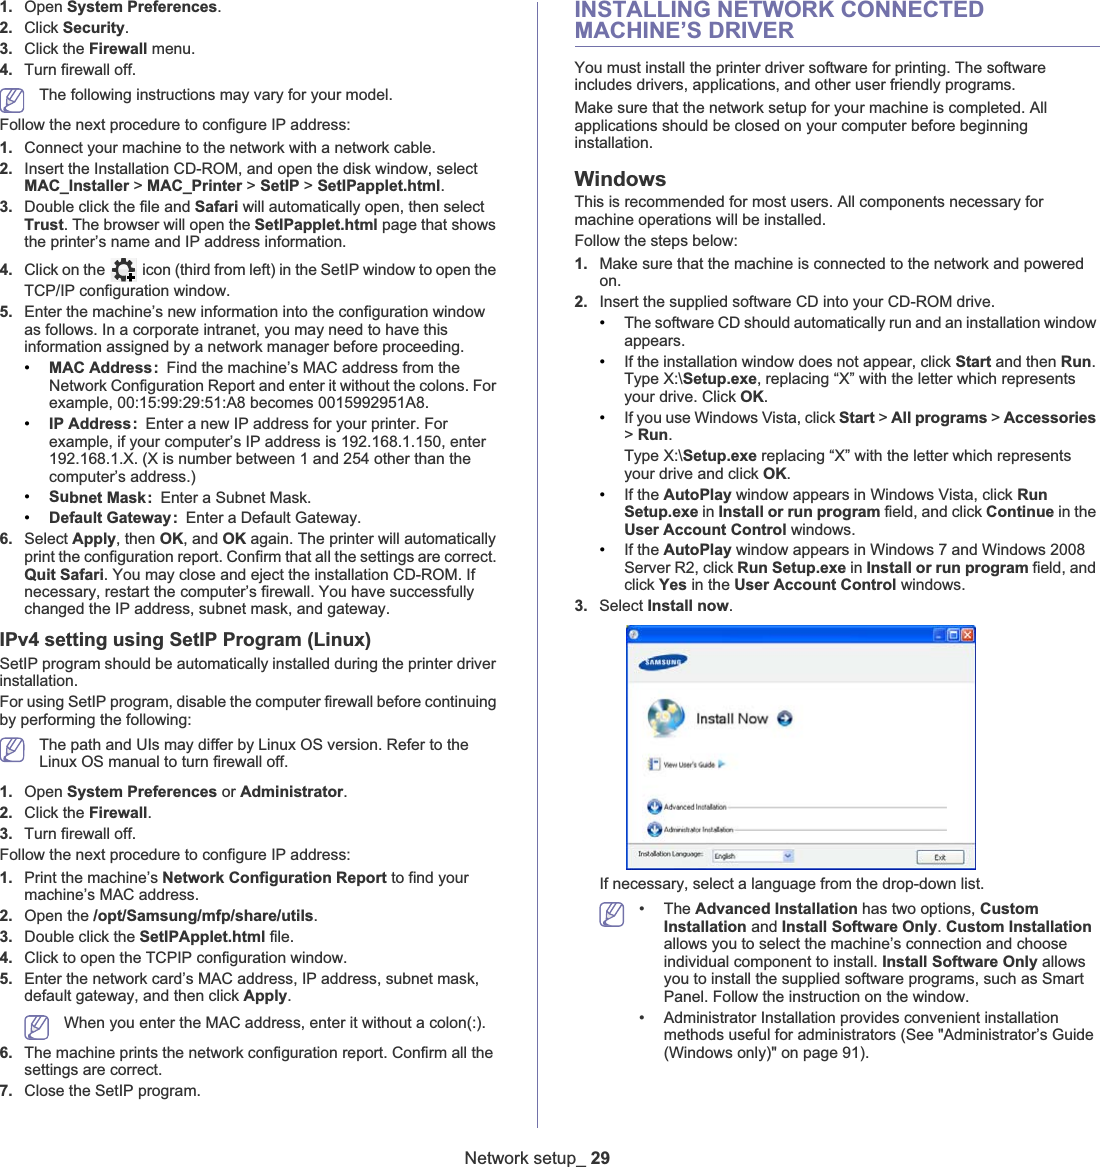
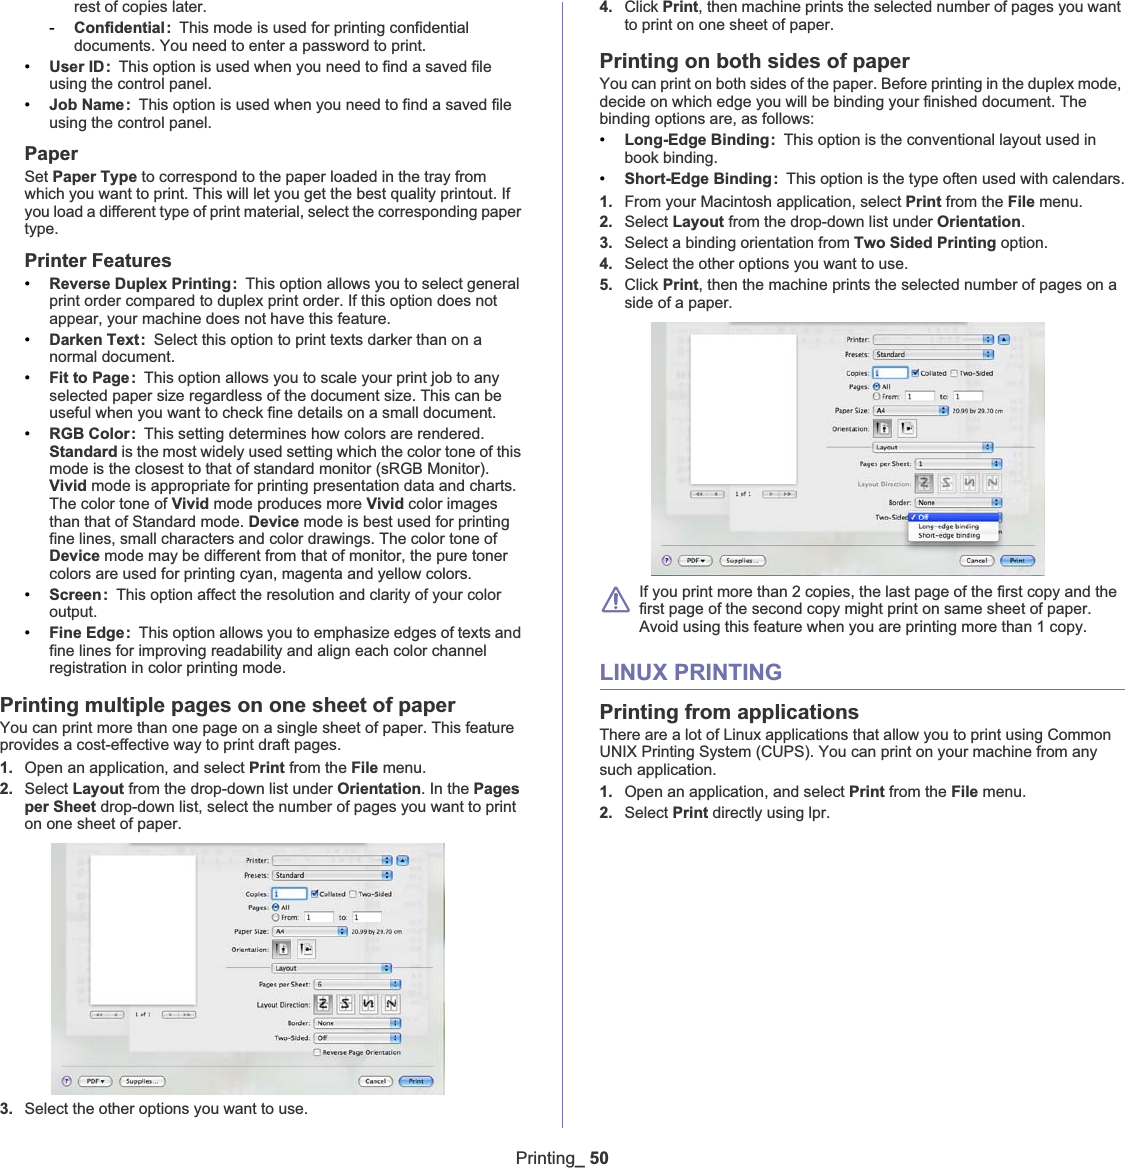
![Network setup_ 331. Press on the control panel.2. Press left/right arrow until Network and press OK.3. Press left/right arrow until TCP/IP (IPv6) and press OK.4. Press left/right arrow until DHCPv6 Config and press OK.5. Press left/right arrow to access the required value.•Routers: Use DHCPv6 only when requested by a router.•DHCPv6 Addresses: Always use DHCPv6 regardless of router request.•DHCPv6 Off: Never use DHCPv6 regardless of router request.6. Press OK.Manual address configuration1. Start a web browser such as Internet Explorer that supports IPv6 addressing as a URL (See "Connecting SyncThru™ Web Service" on page 33).For IPv4, enter the IPv4 address (http://xxx.xxx.xxx.xxx) in the address field and press the Enter key or click Go.2. When the SyncThru™ Web Service window opens, click Settings > Network Settings > Network Settings > TCP/IPv6.3. Enable the Manual Address.If IPv6 Protocol should be enabled. 4. Select the Router Prefix and click the Add button, then the router prefix will automatically be entered into the address field. Enter the rest of address. (ex: 3FFE:10:88:194::AAAA. “A” is the hexadecimal 0 through 9, A through F.)5. Click the Apply button.Installing printer driverDriver installation for network printer in IPv6 network environment is same as TCP/IPv4 (See "Installing network connected machine’s driver" on page 29).Select TCP/IP Port and when the list of machines are displayed, simply select your machine's IPv6 address.Connecting SyncThru™ Web Service1. Start a web browser such as Internet Explorer that supports IPv6 addressing as a URL.2. Select one of the IPv6 addresses (Link-local Address,Stateless Address,Stateful Address,Manual Address) from Network Configuration Report.3. Enter the IPv6 addresses. (ex: http://[FE80::215:99FF:FE66:7701]) Address must be enclosed in '[]' brackets.RESTORING FACTORY DEFAULT SETTINGSYou may need to reset the machine to the factory default settings when machine that you are using is connected to new network environment.Restoring factory default settings using control panel1. Press on the control panel.2. Press left/right arrow until Network appears and press OK.3. Press left/right arrow until Clear Setting appears and press OK.4. When Clear? shows, press right/left arrow to choose Yes.5. Turn off and restart machine to apply settings.Restoring factory default settings using SyncThru™ Web Service1. Start a web browser such as Internet Explorer, Safari or Firefox and enter your machine’s new IP address in the browser window.For example,2. When the SyncThru™ Web Service window opens, click Settings > Network Settings > Restore Default.3. Click Clear for Network Settings.4. Turn off and restart machine to apply settings.](https://usermanual.wiki/Samsung-Electronics-Co/CLP620ND.Users-Manual-1/User-Guide-1156084-Page-33.png)
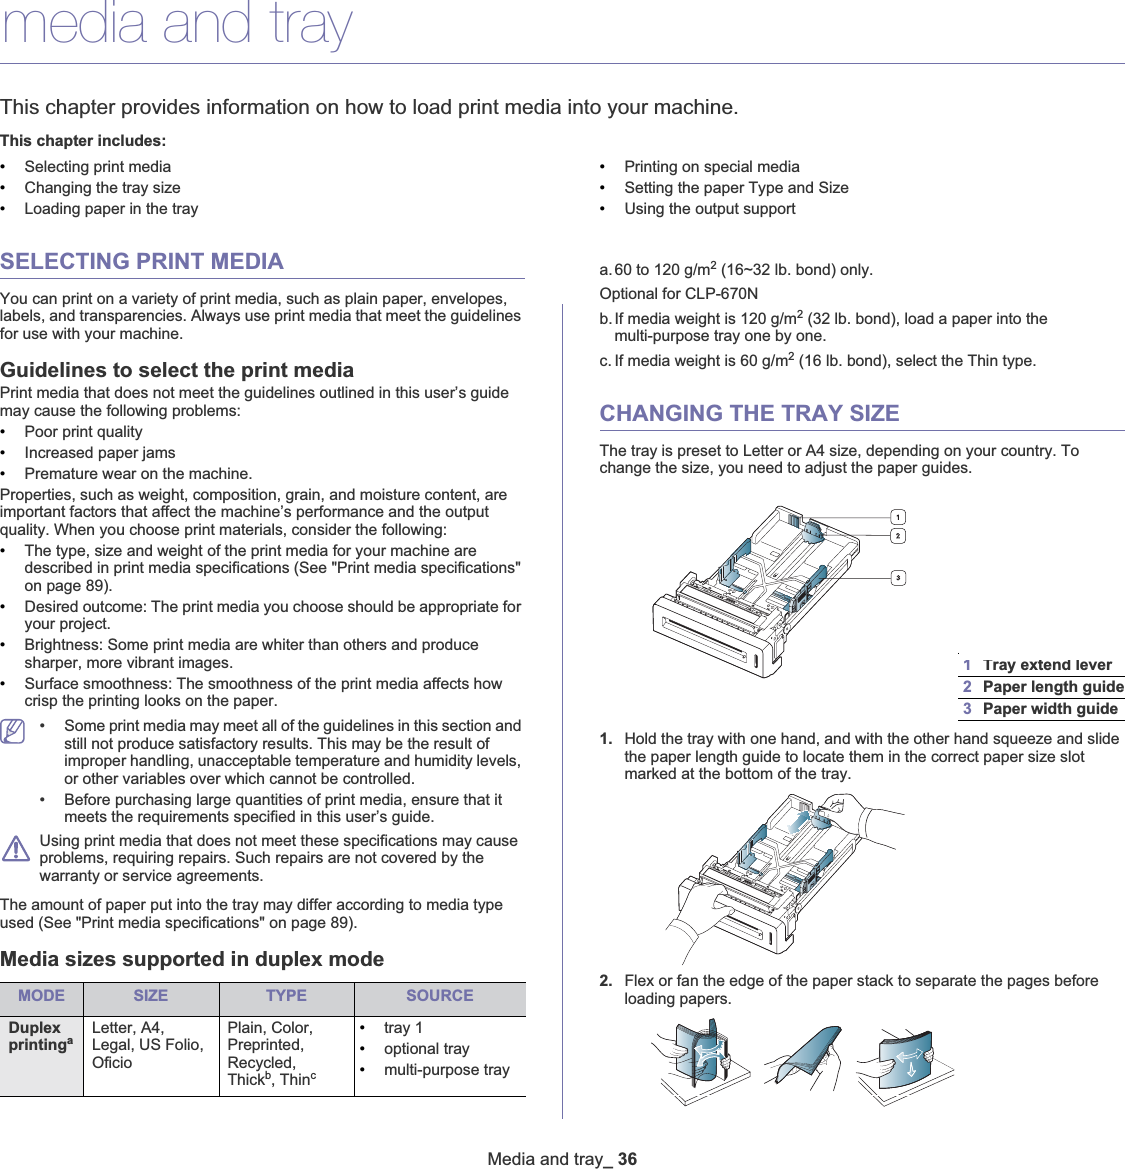
![Basic setup_ 357. Press left/right arrow until Paper Type appears and press OK.8. Press left/right arrow to select the paper type you want.9. Press OK to save the selection.10. Press .11. Press left/right arrow until Paper Source appears and press OK.12. Press left/right arrow to select the paper tray you want.13. press OK to save the selection.14. Press to return to ready mode.In the computerWindows1. Click the Windows Start menu. 2. For Windows 2000, select Settings >Printers.•For Windows XP/2003, select Printer and Faxes.•For Windows 2008/Vista, select Control Panel > Hardware and Sound >Printers.•For Windows 7, select Control Panel > Hardware and Sound >Devices and Printers.•For Windows Server 2008 R2, select Control Panel > Hardware >Devices and Printers.3. Right-click your machine.4. For Windows XP/2003/2008/Vista, press Printing Preferences.For Windows 7 and Windows Server 2008 R2, from context menus, select the Printing Preferences.If Printing Preferences item has Ź mark, you can select other printer drivers connected with selected printer.5. Click Paper tab. 6. Select tray and its options, such as paper size and type.7. Press OK.If you want to use special-sized paper such as a billing paper, select Paper tab > Size >Edit... in the Printing Preferences (See "Opening printing preferences" on page 44).MacintoshMacintosh does not support this function. Macintosh users need to change the default setting manually each time they want to print using other settings. 1. Open a Macintosh application and select the file you want to print.2. Open the File menu and click Print.3. Go to Paper Feed Pane.4. Set appropriate tray from which you want to print.5. Go to Paper Pane.6. Set paper type to correspond to the paper loaded in the tray from which you want to print.7. Click Print to print. Linux1. Open Terminal Program2. When the Terminal screen appears, type in the following: [root@localhost root]# lpr <FileName>3. Select Printer and click Properties…4. Click Advanced tab.5. Select tray(source) and its options, such as paper size and type.6. Press OK.CHANGING FONT SETTING Your machine has preset font setting depending on your region or country.If you want to change the font or set the font for special condition, such as the DOS environment, you can change the font setting as follows:1. Turn your networked computer on and open the web browser. 2. Enter your machine's IP address as the URL in a browser.3. Click Go to access the SyncThru™ Web Service.4. Click Settings > Machine Settings > Printer > PCL.5. Select your preferred font in the Symbol Set list.6. Click Apply.Following information shows the proper font list for corresponding languages.•Russian: CP866, ISO 8859/5 Latin Cyrillic•Hebrew: Hebrew 15Q, Hebrew-8, Hebrew-7 (Israel only)•Greek: ISO 8859/7 Latin Greek, PC-8 Latin/Greek•Arabic & Farsi: HP Arabic-8, Windows Arabic, Code Page 864, Farsi, ISO 8859/6 Latin Arabic•OCR: OCR-A, OCR-B](https://usermanual.wiki/Samsung-Electronics-Co/CLP620ND.Users-Manual-1/User-Guide-1156084-Page-35.png)


![Machine status and advanced features_ 55PAPEROPTION DESCRIPTIONCopies You can select the maximum amount of copies.MP Tray [Tray<x>] •Paper Size: You can select the default paper size. •Paper Type: You can select the default paper type for the print media.Paper Source You can select the tray to process the print job. If you select Auto, your machine supplies the paper from the multi-purpose tray first, than the tray 1, and tray 2 for the last. So if any tray is empty, then the machine try to search the paper from the next available tray.GRAPHICOPTION DESCRIPTIONResolution You can select the default resolution. If the resolution is high, the clarity of the printouts is sharper, but the print time may take longer.•Draft: If the printer language is PCL and your print jobs are text, select this option for the best speed and printing quality. this option is available only with PCL driver. •Normal: If your print jobs are mostly text, select this option for the highest quality output.•Best: Select this option when your job contains bit mapped images, such as scanned photos or certain business graphics, that will benefit from enhanced line screening.Fine Edge It allows user to emphasize edges of texts and fine lines for improving readability and align each color channel registration in color printing mode.Darken Text Select this option to print texts darker than on a normal document.Screen This option affect the resolution and clarity of your color output.•Normal: This mode will generate printouts with smooth tone over the entire page. •Enhanced: This mode will generate printouts with sharp texts and smooth graphic/photo objects in the page.•Detailed: This mode will generate printouts with sharp details over the entire page.SYSTEM SETUPDuplex Margin In this menu, you can set the margins for double-sided printing. You can increase or decrease the value in 0.1mm increments.•Top Margin: Set the top margin, from 0.0 to 10mm.•Left Margin: Set the left margin, from 0.0 to 10mm.•Short Binding: Set the left margin, from 0.0 to 22mm. •Long Binding : Set the left margin, from 0.0 to 22mm. a.This menu appears when duplex kit is installed.ITEM DESCRIPTIONOPTION DESCRIPTIONLanguage Allows you to change the language that appears on the display (See "Changing the display language" on page 34).Power Save Reduce energy consumption by setting power saving features (See "Using the power saving feature" on page 34).Auto Continue This item determines whether or not the machine continues printing when it detects paper that is not matched to your paper setting.•Off: If a paper mismatch occurs, the message remains on the display and the machine remains off-line until you insert the correct paper. •On: If the paper is mismatched, an error message appears. The machine goes off-line for 30 seconds then automatically clears the message and continues printing.](https://usermanual.wiki/Samsung-Electronics-Co/CLP620ND.Users-Manual-1/User-Guide-1156084-Page-55.png)