Samsung Electronics Co GTP3100B Tablet with GSM/GPRS/EDGE/WCDMA,802.11bgn,BT3.0 User Manual revised GT P3100B 120412 Final
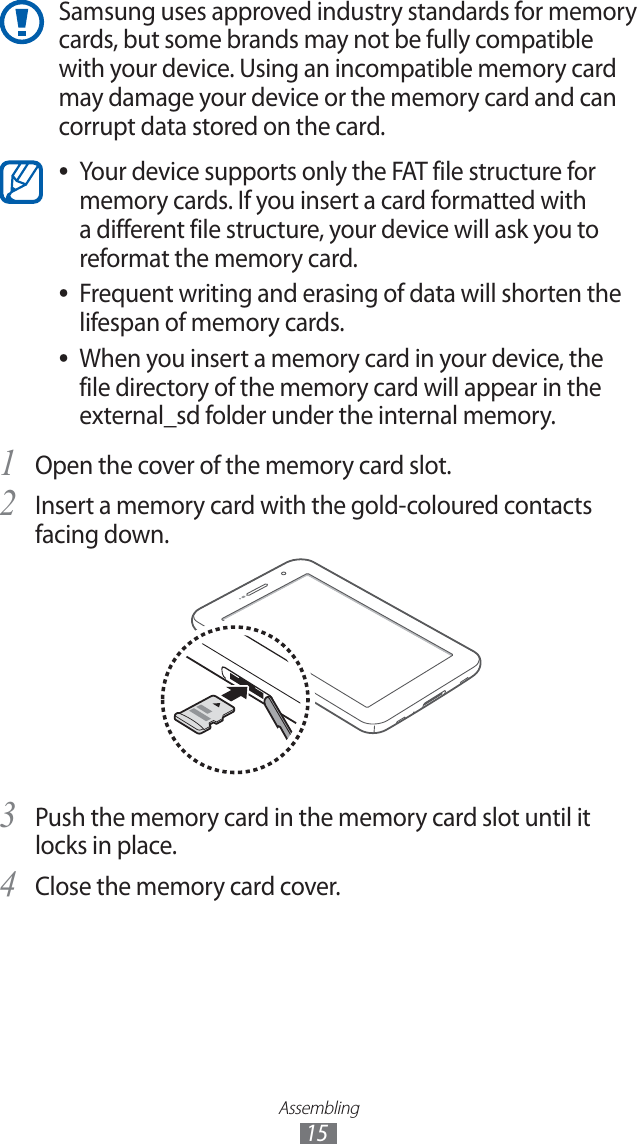
Samsung Electronics Co Ltd Tablet with GSM/GPRS/EDGE/WCDMA,802.11bgn,BT3.0 revised GT P3100B 120412 Final
UserManual.wiki
>
Samsung Electronics Co
>
GTP3100B User Manual
User Manual
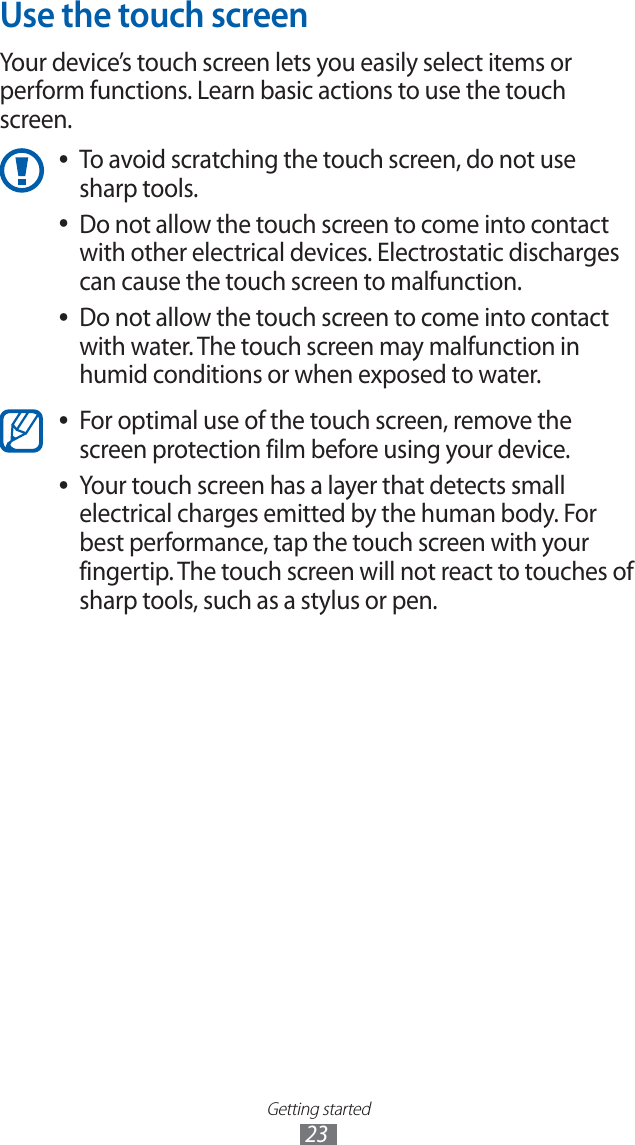
Navigation menu
Upload a User Manual
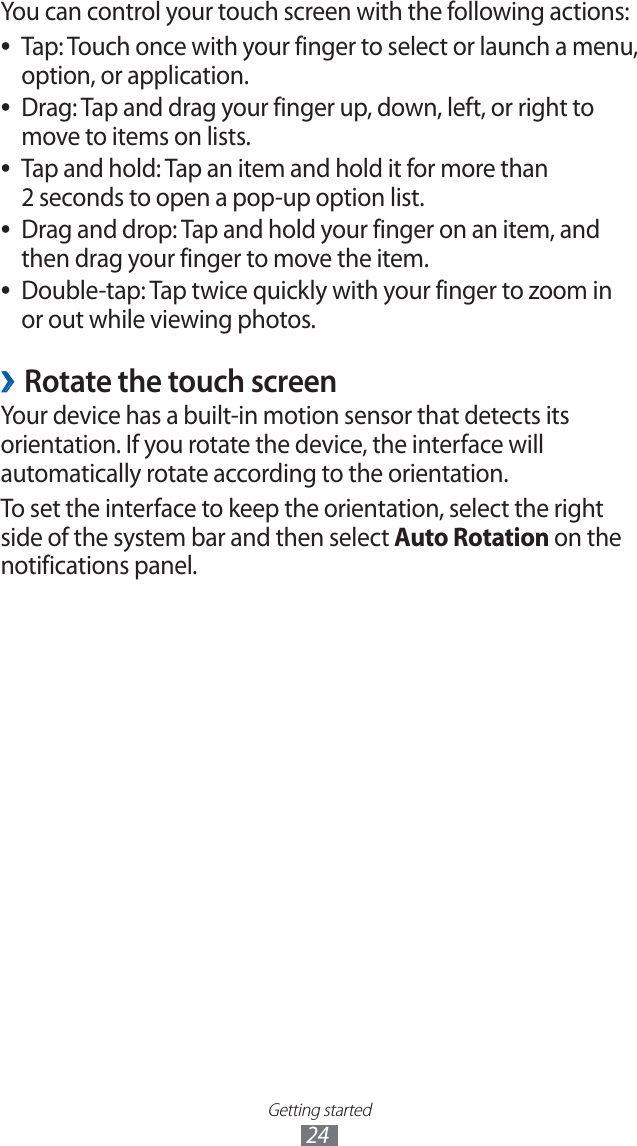
Namespaces
Wiki Guide
HTML
PDF
Info
Views
User Manual
Discussion / Help
Navigation
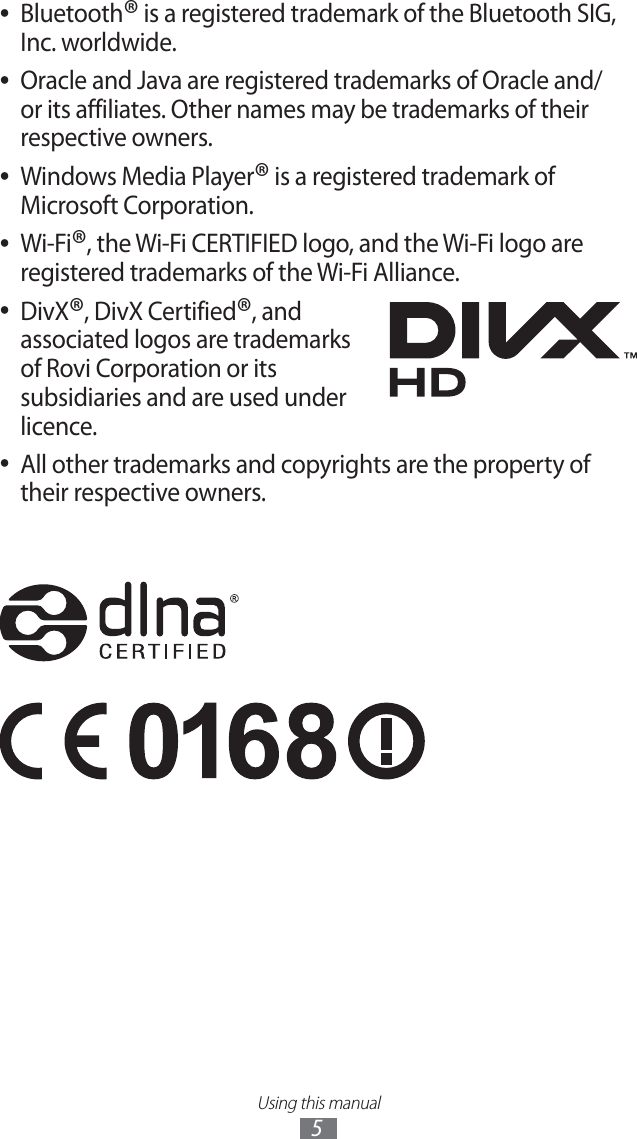
![Using this manual4►Refer to—pages with related information; for example: ► p. 12 (represents “see page 12”)→Followed by—the order of options or menus you must select to perform a step; for example: Open the application list and select Settings → Wireless and networks (represents Settings, followed by Wireless and networks)[] Square brackets—device keys; for example: [ ] (represents the Power/Reset/Lock key)CopyrightCopyright © 2011 Samsung ElectronicsThis user manual is protected under international copyright laws.No part of this user manual may be reproduced, distributed, translated, or transmitted in any form or by any means, electronic or mechanical, including photocopying, recording, or storing in any information storage and retrieval system, without the prior written permission of Samsung Electronics.TrademarksSAMSUNG and the SAMSUNG logo are registered ●trademarks of Samsung Electronics.The Android logo, Google Search ●™, Google Maps™, Google Mail™, YouTube™, Android Market™, and Google Talk™ are trademarks of Google, Inc.](https://usermanual.wiki/Samsung-Electronics-Co/GTP3100B/User-Guide-1681637-Page-5.png)


![Getting started17Getting startedTurn your device on and offTo turn on your device, press and hold [ ]. If you turn on your device for the first time, follow the on-screen instructions to set up your device.To turn off your device, press and hold [ ] and select Power off → OK.Follow all posted warnings and directions from ●authorised personnel in areas where the use of wireless devices is restricted, such as aeroplanes and hospitals.To use your device’s non-network services only, switch ●to Flight mode.](https://usermanual.wiki/Samsung-Electronics-Co/GTP3100B/User-Guide-1681637-Page-18.png)
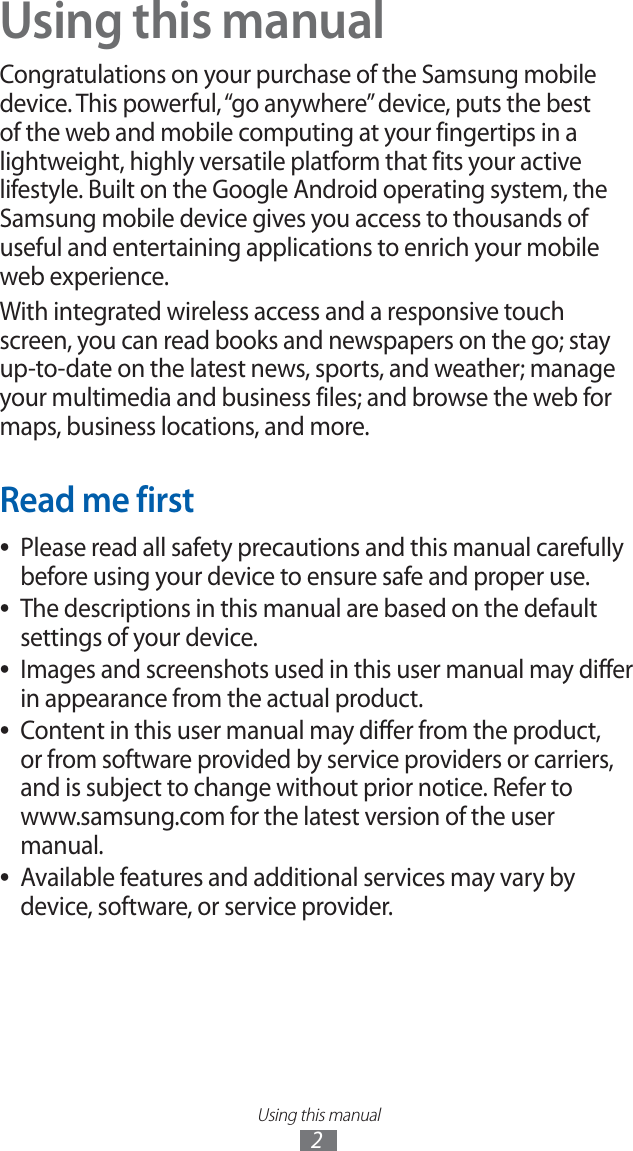
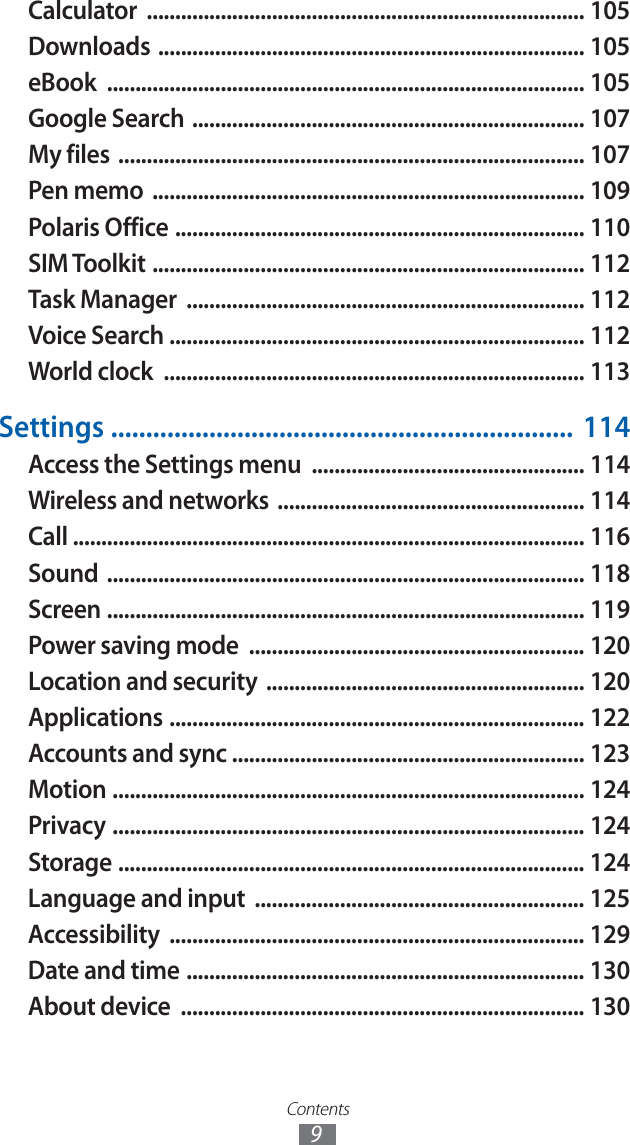
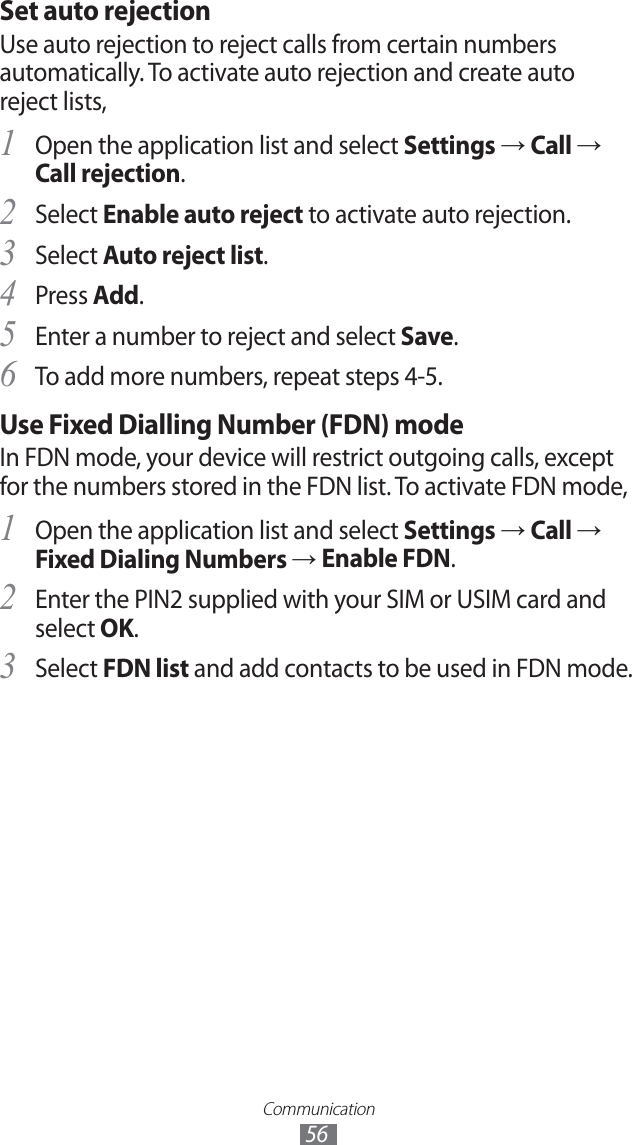
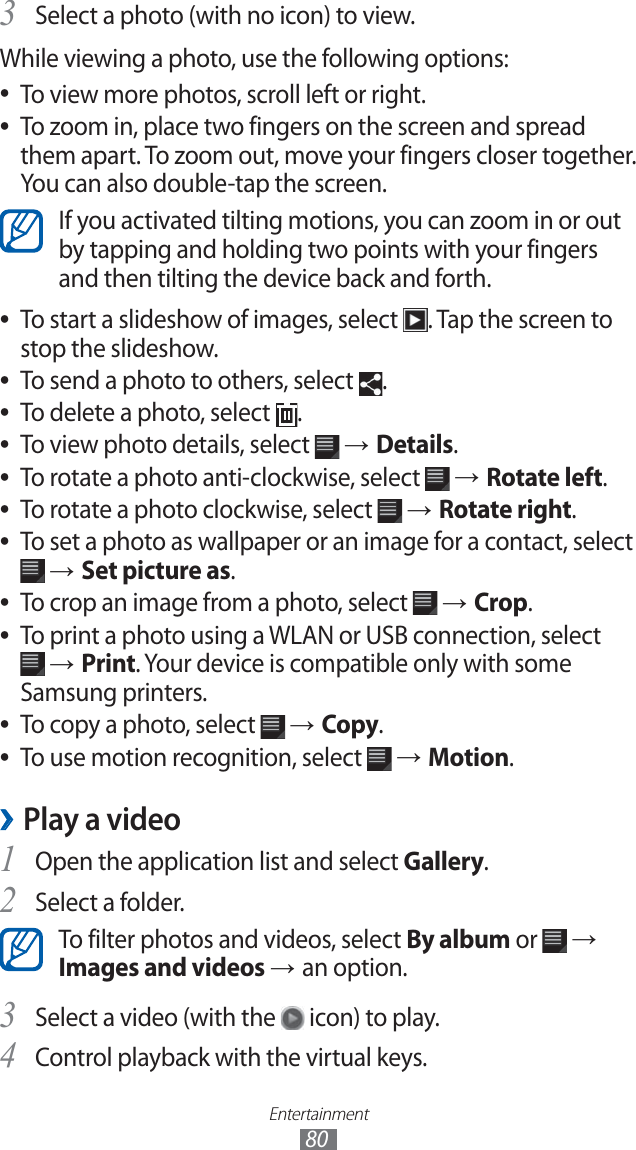
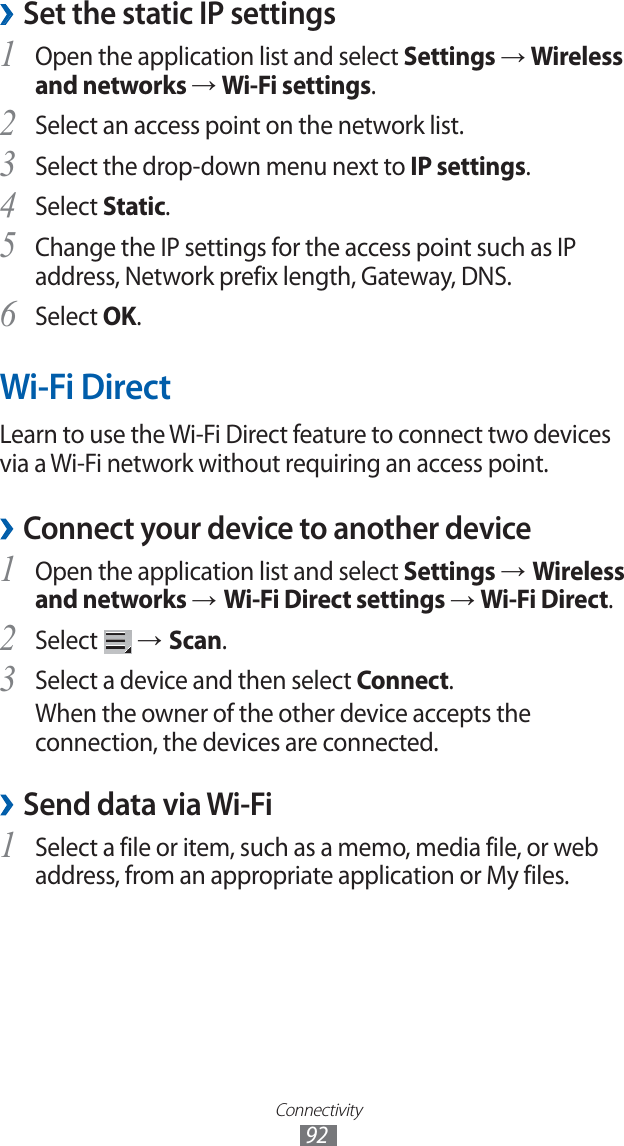
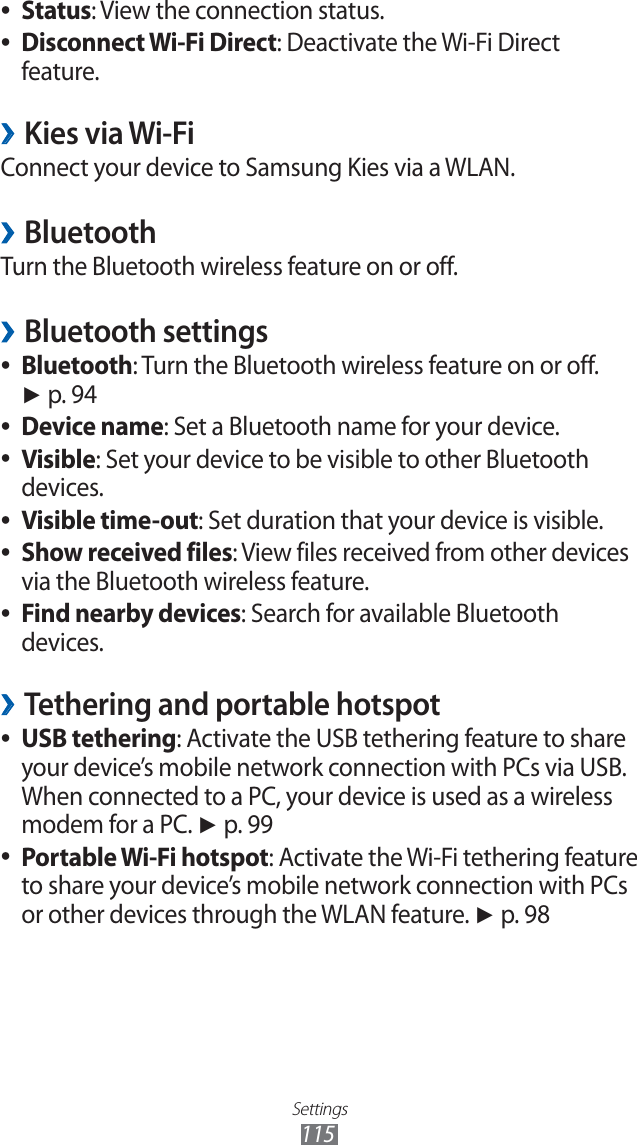
![Getting started25Lock or unlock the touch screen ›When you do not use the device for a specified period, your device turns off the touch screen and automatically locks the touch screen to prevent any unwanted device operations. To manually lock the touch screen, press [ ].To unlock, turn on the screen by pressing [ ], and drag in any direction until it reaches the border of the circle.You can activate the screen lock feature to prevent others from using or accessing your personal data and information saved in your device. ► p. 32Get to know the Home screenWhen the device is in Idle mode, you will see the Home screen. From the Home screen, you can view indicator icons, widgets, shortcuts to applications, and other items. Scroll left or right to a panel of the Home screen. 3 1 4 5 2 The above screen may differ depending on your region or service provider.](https://usermanual.wiki/Samsung-Electronics-Co/GTP3100B/User-Guide-1681637-Page-23.png)


![Settings117Call answering/ending ●The power key ends calls -: Set the device to end a call when you press [ ].Automatic answering -: Set whether or not the device automatically answers calls after a specified period.Automatic answering -: Set to answer automatically after a specified period (available only when a headset is connected).Turn on proximity sensor ●: Set to turn on the proximity sensor during a call.Call forwarding ●: Divert incoming calls to another number.Fixed Dialing Numbers ●: Activate or deactivate FDN mode to restrict calls to numbers in the FDN list. You must enter the PIN2 supplied with your SIM or USIM card and reboot the device.Voicemail ●:Voice mail service -: Select or set your service provider.Voice mail numbe -r: Enter the number to access the voice mail service. You can obtain this number from your service provider.Additional settings ●:Caller ID -: Display your caller ID to other parties for outgoing calls.Call waiting -: Allow incoming call alerts when a call is in progress.Video call image ●: Select an image to be shown to the other party.Own video in received call ●: Set whether to show your live image or preset image to the other party.Use call fail options ●: Select whether or not to retry a voice call when a video call fails to connect.](https://usermanual.wiki/Samsung-Electronics-Co/GTP3100B/User-Guide-1681637-Page-115.png)
![Settings129AccessibilityChange the settings for accessibility features.Accessibility ●: Activate an accessibility application you have downloaded, such as Talkback or Kickback, which provide voice, melody, or vibration feedback.Accessibility applications ●: Select an accessibility application to use.Accessibility scripts ●: Set to allow downloading of accessibility scripts from Google.The power key ends calls ●: Set the device to end a call when you press [ ].Tap and hold delay ●: Set the recognition time for tapping and holding the screen.Torch light ●: Turn the torch light on or off.Mono audio ●: Enable mono sound when you listen to audio with one earbud.Call answering/ending ●:The power key ends call -: Set the device to end a call when you press [ ].Automatic answering -: Set the device to answer an incoming call when you press the Home key.Automatic answering -: Set the length of time the device waits before answer an incoming call.Accessibility shortcut ●: Add a shortcut to Accessibility settings on the quick menu that appears when you press and hold [ ].](https://usermanual.wiki/Samsung-Electronics-Co/GTP3100B/User-Guide-1681637-Page-127.png)
![Troubleshooting132The touch screen responds slowly or improperlyIf your device has a touch screen and the touch screen is not responding properly, try the following:Remove any protective covers from the touch screen. ●Protective covers may prevent the device from recognising your inputs and are not recommended for touch screen devices.Ensure that your hands are clean and dry when tapping the ●touch screen.Restart your device to clear any temporary software bugs. ●Ensure that your device software is upgraded to the latest ●version.If the touch screen is scratched or damaged, take it to your ●local Samsung Service Centre.Your device freezes or has fatal errorsIf your device freezes or hangs, you may need to close programs or reset the device to regain functionality. If your device is frozen and unresponsive, press and hold [ ] for10-15 seconds. The device will reboot automatically.If this does not solve the problem, perform a factory data reset. Open the application list and select Settings → Privacy → Factory data reset → Reset device → Erase everything.Calls are being droppedWhen you are in areas with weak signals or poor reception, you may lose your connection to the network. Move to another area and try again.](https://usermanual.wiki/Samsung-Electronics-Co/GTP3100B/User-Guide-1681637-Page-130.png)

![Health and safety informationExposure to Radio Frequency (RF) SignalsCertification Information (SAR) <RXUZLUHOHVVSKRQHLVDUDGLRWUDQVPLWWHUDQGUHFHLYHU,WLVGHVLJQHGDQGPDQXIDFWXUHGQRWWRH[FHHGWKHH[SRVXUHOLPLWVIRUUDGLRIUHTXHQF\5)HQHUJ\VHWE\WKH)HGHUDO&RPPXQLFDWLRQV&RPPLVVLRQ)&&RIWKH86JRYHUQPHQW7KHVH)&&H[SRVXUHOLPLWVDUHGHULYHGIURPWKHUHFRPPHQGDWLRQVRIWZRH[SHUWRUJDQL]DWLRQVWKH1DWLRQDO&RXQVHORQ5DGLDWLRQ3URWHFWLRQDQG0HDVXUHPHQW1&53DQGWKH,QVWLWXWHRI(OHFWULFDODQG(OHFWURQLFV(QJLQHHUV,(((,QERWKFDVHVWKHUHFRPPHQGDWLRQVZHUHGHYHORSHGE\VFLHQWLILFDQGHQJLQHHULQJH[SHUWVGUDZQIURPLQGXVWU\JRYHUQPHQWDQGDFDGHPLDDIWHUH[WHQVLYHUHYLHZVRIWKHVFLHQWLILFOLWHUDWXUHUHODWHGWRWKHELRORJLFDOHIIHFWVRI5)HQHUJ\7KHH[SRVXUHOLPLWVHWE\WKH)&&IRUZLUHOHVVPRELOHSKRQHVHPSOR\VDXQLWRIPHDVXUHPHQWNQRZQDVWKH6SHFLILF$EVRUSWLRQ5DWH6$57KH6$5LVDPHDVXUHRIWKHUDWHRIDEVRUSWLRQRI5)HQHUJ\E\WKHKXPDQERG\H[SUHVVHGLQXQLWVRIZDWWVSHUNLORJUDP:NJ7KH)&&UHTXLUHVZLUHOHVVSKRQHVWRFRPSO\ZLWKDVDIHW\OLPLWRIZDWWVSHUNLORJUDP:NJ7KH)&&H[SRVXUHOLPLWLQFRUSRUDWHVDVXEVWDQWLDOPDUJLQRIVDIHW\WRJLYHDGGLWLRQDOSURWHFWLRQWRWKHSXEOLFDQGWRDFFRXQWIRUDQ\YDULDWLRQVLQPHDVXUHPHQWV6$5WHVWVDUHFRQGXFWHGXVLQJVWDQGDUGRSHUDWLQJSRVLWLRQVDFFHSWHGE\WKH)&&ZLWKWKHSKRQHWUDQVPLWWLQJDWLWVKLJKHVWFHUWLILHGSRZHUOHYHOLQDOOWHVWHGIUHTXHQF\EDQGV$OWKRXJKWKH6$5LVGHWHUPLQHGDWWKHKLJKHVWFHUWLILHGSRZHUOHYHOWKHDFWXDO6$5OHYHORIWKHSKRQHZKLOHRSHUDWLQJFDQEHZHOOEHORZWKHPD[LPXPYDOXH7KLVLVEHFDXVHWKHSKRQHLVGHVLJQHGWRRSHUDWHDWPXOWLSOHSRZHUOHYHOVVRDVWRXVHRQO\WKHSRZHUUHTXLUHGWRUHDFKWKHQHWZRUN,QJHQHUDOWKHFORVHU\RXDUHWRDZLUHOHVVEDVHVWDWLRQDQWHQQDWKHORZHUWKHSRZHURXWSXW%HIRUHDQHZPRGHOSKRQHLVDYDLODEOHIRUVDOHWRWKHSXEOLFLWPXVWEHWHVWHGDQGFHUWLILHGWRWKH)&&WKDWLWGRHVQRWH[FHHGWKHH[SRVXUHOLPLWHVWDEOLVKHGE\WKH)&&7HVWVIRUHDFKPRGHOSKRQHDUHSHUIRUPHGLQSRVLWLRQVDQGORFDWLRQVHJDWWKHHDUDQGZRUQRQWKHERG\DVUHTXLUHGE\WKH)&& )RUERG\ZRUQRSHUDWLRQWKLVPRGHOSKRQHKDVEHHQWHVWHGDQGPHHWVWKH)&&5)H[SRVXUHJXLGHOLQHVZKHQXVHGZLWKD6DPVXQJDFFHVVRU\GHVLJQDWHGIRUWKLVSURGXFWRUZKHQXVHGZLWKDQDFFHVVRU\WKDWFRQWDLQVQRPHWDODQGWKDWSRVLWLRQVWKHKDQGVHWDPLQLPXPRIFPIURPWKHERG\1RQFRPSOLDQFHZLWKWKHDERYHUHVWULFWLRQVPD\UHVXOWLQYLRODWLRQRI)&&5)H[SRVXUHJXLGHOLQHV6$5LQIRUPDWLRQRQWKLVDQGRWKHUPRGHOSKRQHVFDQEHYLHZHGRQOLQHDWKWWSZZZIFFJRYRHWHDIFFLG3OHDVHXVHWKHSKRQH)&&,'QXPEHUIRU](https://usermanual.wiki/Samsung-Electronics-Co/GTP3100B/User-Guide-1681637-Page-147.png)
![7KHXVHRIDQ\XQDXWKRUL]HGDFFHVVRULHVPD\EHGDQJHURXVDQGYRLGWKHSKRQHZDUUDQW\LIVDLGDFFHVVRULHVFDXVHGDPDJHRUDGHIHFWWRWKHSKRQH$OWKRXJK\RXUSKRQHLVTXLWHVWXUG\LWLVDFRPSOH[SLHFHRIHTXLSPHQWDQGFDQEHEURNHQ$YRLGGURSSLQJKLWWLQJEHQGLQJRUVLWWLQJRQLW](https://usermanual.wiki/Samsung-Electronics-Co/GTP3100B/User-Guide-1681637-Page-149.png)
![Declaration of Conformity (R&TTE)We, Samsung Electronicsdeclare under our sole responsibility that the productPortable GSM WCDMA Wi-Fi Device : GT-P00#to which this declaration relates, is in conformity with the following standards and/or other normative documents.SAFETY SAR EMC RADIO We hereby declare that [all essential radio test suites have been carried out and that] the above named product is in conformity to all the essential requirements of Directive 1999/5/EC.The conformity assessment procedure referred to in Article 10 and detailed in Annex[IV] of Directive 1999/5/EC has been followed with the involvement of the following Notified Body(ies):BABT, Forsyth House, Churchfield Road, Walton-on-Thames, Surrey, KT12 2TD, UK* Identification mark: 0168The technical documentation kept at :Samsung Electronics QA Lab.which will be made available upon request. (Representative in the EU)Samsung Electronics Euro QA Lab. Blackbushe Business Park, Saxony Way, Yateley, Hampshire, GU46 6GG, UK*2011. 10.11 Joong-Hoon Choi / Lab Manager(place and date of issue) (name and signature of authorised person)* It is not the address of Samsung Service Centre. For the address or the phone number of Samsung Service Centre, see the warranty card or contact the retailer where you purchased your product.](https://usermanual.wiki/Samsung-Electronics-Co/GTP3100B/User-Guide-1681637-Page-150.png)