Samsung Electronics Co GTS7500W Cellular/PCS GSM Phone with WLAN and Bluetooth User Manual 0503
Samsung Electronics Co Ltd Cellular/PCS GSM Phone with WLAN and Bluetooth User Manual 0503
UserManual.wiki
>
Samsung Electronics Co
>
GTS7500W User Manual
Users Manual
Navigation menu
Upload a User Manual
Namespaces
Wiki Guide
HTML
PDF
Info
Views
User Manual
Discussion / Help
Navigation
![Using this manual3You may upgrade your mobile device’s software by ●accessing www.samsung.com.Software, sound sources, wallpapers, images, and other ●contents provided in this device are licenced for limited use between Samsung and their respective owners. Extracting and using these materials for commercial or other purposes is an infringement of copyright laws. Samsung is not liable for such copyright infringement by the user.Please keep this manual for future reference. ●Instructional iconsBefore you start, familiarise yourself with the icons you will see in this manual:Warning—situations that could cause injury to yourself or othersCaution—situations that could cause damage to your device or other equipmentNote—notes, usage tips, or additional information ►Refer to—pages with related information; for example: ► p. 12 (represents “see page 12”)→Followed by—the order of options or menus you must select to perform a step; for example: In Idle mode, open the application list and select Settings → About phone (represents Settings, followed by About phone)[] Square brackets—device keys; for example: [ ] (represents the Menu key)](https://usermanual.wiki/Samsung-Electronics-Co/GTS7500W/User-Guide-1689820-Page-6.png)


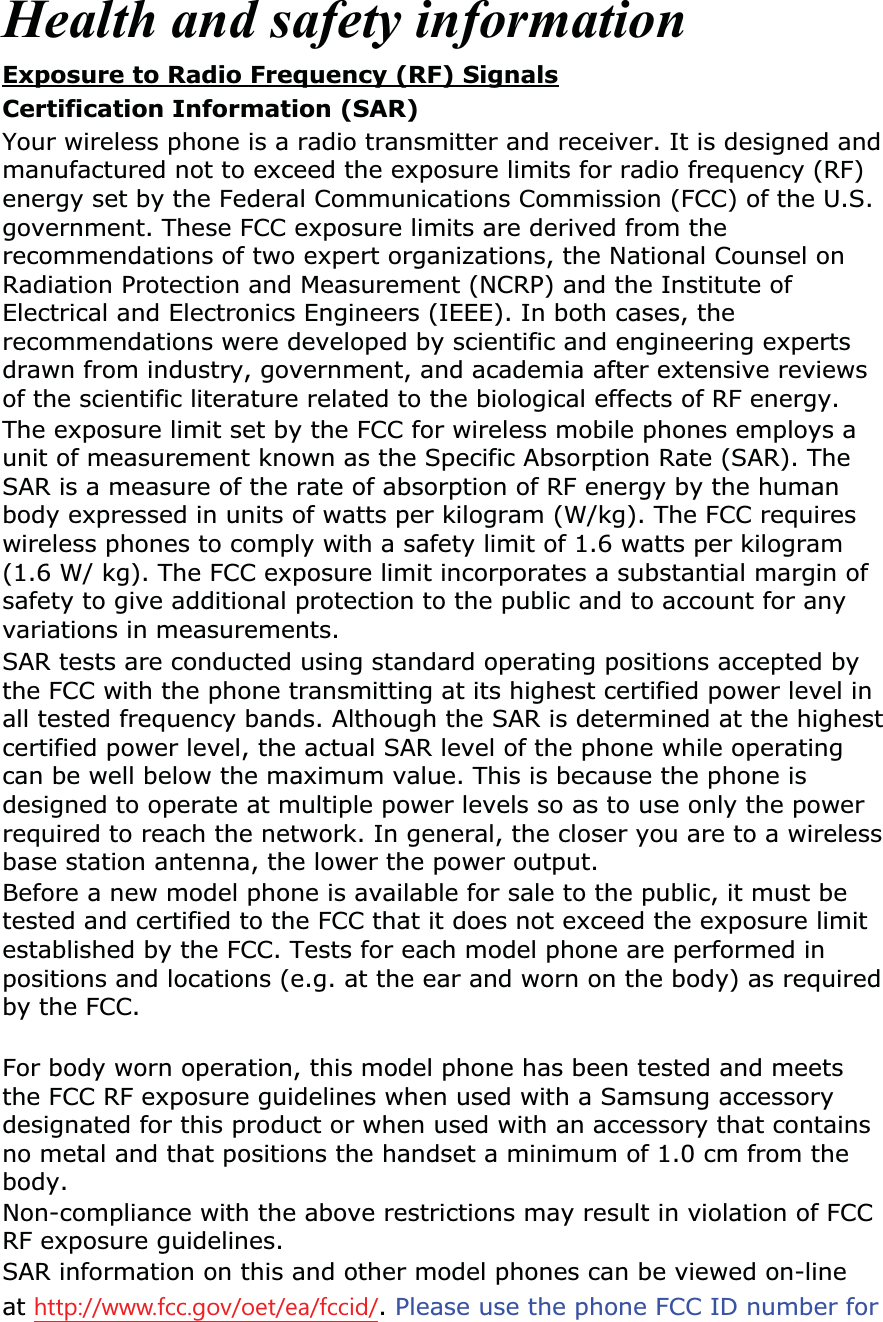
![Getting started25Get to know the idle screenWhen the device is in Idle mode, you will see the idle screen. From the idle screen, you can view indicator icons, widgets, shortcuts to applications, and other items.The idle screen has multiple panels. Scroll left or right to a panel of the idle screen. ›Add items to the idle screenYou can customise the idle screen by adding shortcuts to applications or items in applications, widgets, or folders. To add items to the idle screen,Press [1 ] → Add or tap and hold the empty area on the idle screen.Select the item category 2 → an item:Widgets ●: Add widgets to the idle screen.Shortcuts ●: Add shortcuts to items, such as applications, bookmarks, and contacts.Folders ●: Create a new folder or add folders for your contacts.Wallpapers ●: Set a background image.Move items on the idle screen ›Tap and hold an item to move.1 Drag the item to the location you want.2](https://usermanual.wiki/Samsung-Electronics-Co/GTS7500W/User-Guide-1689820-Page-28.png)
![Getting started27 ›Add or remove panels to the idle screenYou can add or remove panels of the idle screen to organise widgets according to your preferences and needs.In Idle mode, press [1 ] → Edit.You can also place your two fingers on the screen and pinch to switch to Edit mode.Add or remove panels by using the following features:2 To remove a panel, tap and hold the thumbnail of a ●panel and drag it to the trash bin at the bottom of the screen.To add a new panel, select ●.To change the order of the panels, tap and hold the ●thumbnail of a panel and drag it to the location you want.When you are finished, press [3 ].Access applicationsTo access your device’s applications,In Idle mode, select 1 to access the application list.Scroll left or right to another screen.2](https://usermanual.wiki/Samsung-Electronics-Co/GTS7500W/User-Guide-1689820-Page-30.png)
![Getting started28Select an application.3 When you use applications provided by Google, you ●must have a Google account. If you do not have a Google account, sign up for a Google account.You can add a shortcut to an application by tapping ●and holding the application icon from the application list. You can move the icon to the location you want on the idle screen.Press [4 ] to return to the previous screen; Press the Home key to return to the idle screen.If you rotate the device while using some features, the interface will automatically rotate as well. To prevent the interface from rotating, open the notifications panel and select Auto rotation.Organise applications ›You can reorganise the applications in the application list by changing their order or grouping them into categories to suit your preferences and needs.In the application list, press [1 ] → Edit → OK.Tap and hold an application.2 Drag the application icon to the location you want.3 You can move an application icon to another screen. You can also move most-used applications next to .Press [4 ] → Save.](https://usermanual.wiki/Samsung-Electronics-Co/GTS7500W/User-Guide-1689820-Page-31.png)
![Getting started29To add a folder or panel to the screen,In the application list, press [1 ] → Edit.Tap and hold an application.2 Drag the application icon to 3 Add Folder or Add Page at the bottom of the screen.Repeat steps 2-3 to add more applications.4 Drag 5 Add Folder or Add Page to the screen.A new folder or panel containing the applications is added to the screen.If you added a folder, enter a name and select 6 OK.Press [7 ] → Save.To change the order of the screens,In the application list, place your two fingers on the screen 1 and pinch.Tap and hold the thumbnail of a screen and drag it to the 2 location you want.Access recent applications ›Press and hold the Home key to view the applications you 1 have accessed recently.Select an application to access.2](https://usermanual.wiki/Samsung-Electronics-Co/GTS7500W/User-Guide-1689820-Page-32.png)
![Getting started32Activate animation for switching windows ›In Idle mode, open the application list and select Settings → Display → Animation → Some animations or All animations.Select a wallpaper for the idle screen ›In Idle mode, press [1 ] → Wallpaper → an option.Select an image.2 If you selected an image from Gallery, select 3 Save.If you selected a live wallpaper, select Set wallpaper.If you selected a wallpaper image, select Set wallpaper → Save.Samsung is not responsible for any use of default images or wallpapers provided on your device.Adjust the brightness of the display ›In Idle mode, open the application list and select 1 Settings → Display → Brightness.Drag the slider to adjust the level of brightness.2 Select 3 OK.The brightness level of the display will affect how quickly the device consumes battery power.](https://usermanual.wiki/Samsung-Electronics-Co/GTS7500W/User-Guide-1689820-Page-35.png)

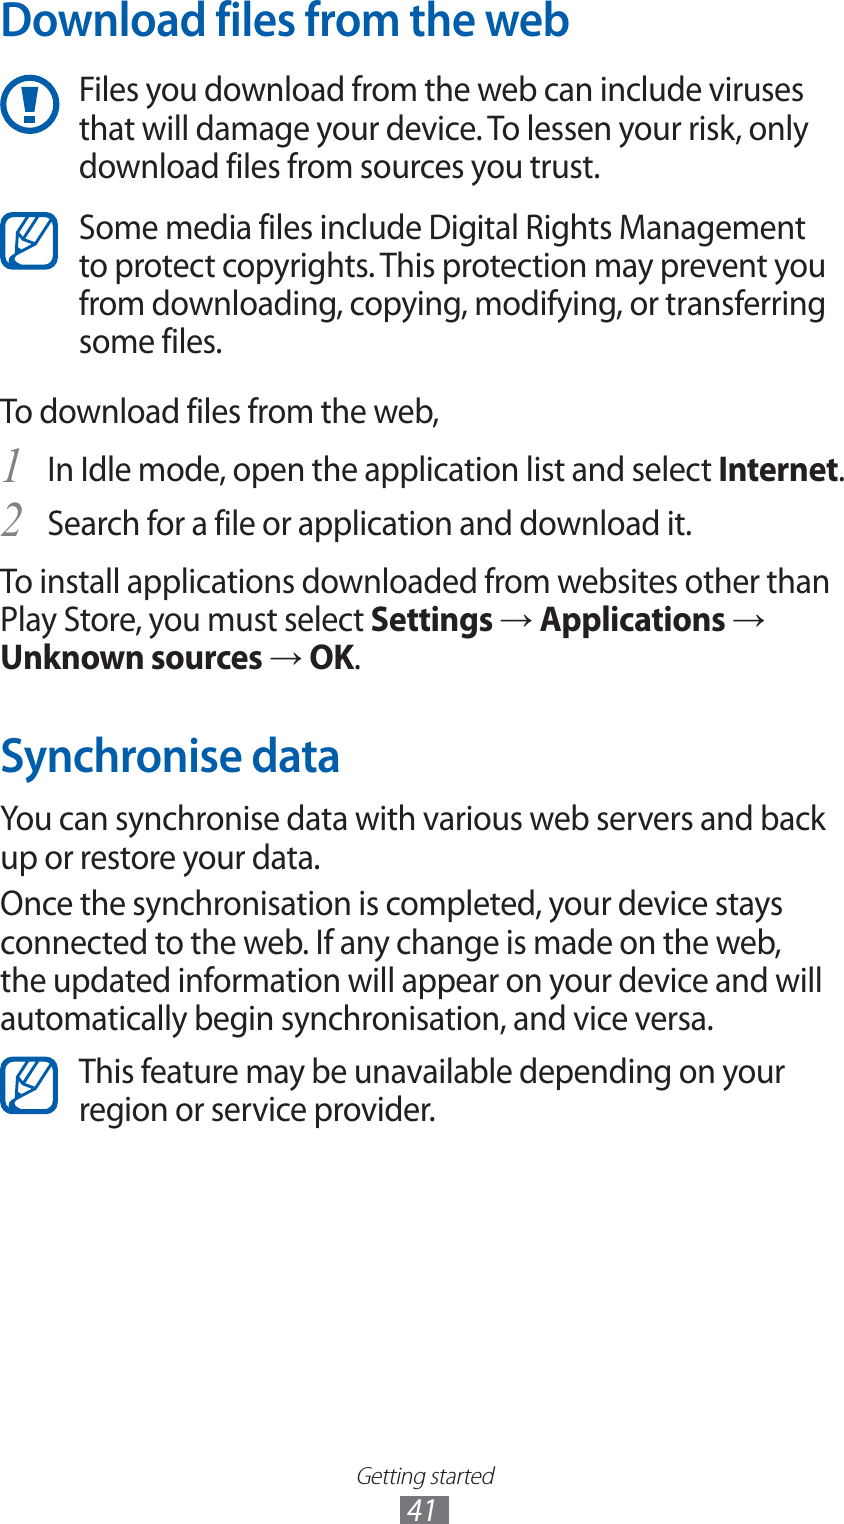
![Getting started40Download applications from Play StoreBased on the Android platform, your device’s functionality can be extended by installing additional applications.Play Store provides you an easy and quick way to shop for games and mobile applications.This feature may be unavailable depending on your ●region or service provider.Your device will save user files from downloaded ●applications to the internal memory. To save the files to the memory card, connect your device to a PC and copy them from the internal memory to the memory card.Install an application ›In Idle mode, open the application list and select 1 Play Store.Select 2 Accept when the terms and conditions appear.Search for a file or application and download it.3 Uninstall an application ›From Play Store home screen, press [1 ] → My Apps.Select the item you want to delete.2 Select 3 Uninstall → OK.](https://usermanual.wiki/Samsung-Electronics-Co/GTS7500W/User-Guide-1689820-Page-43.png)
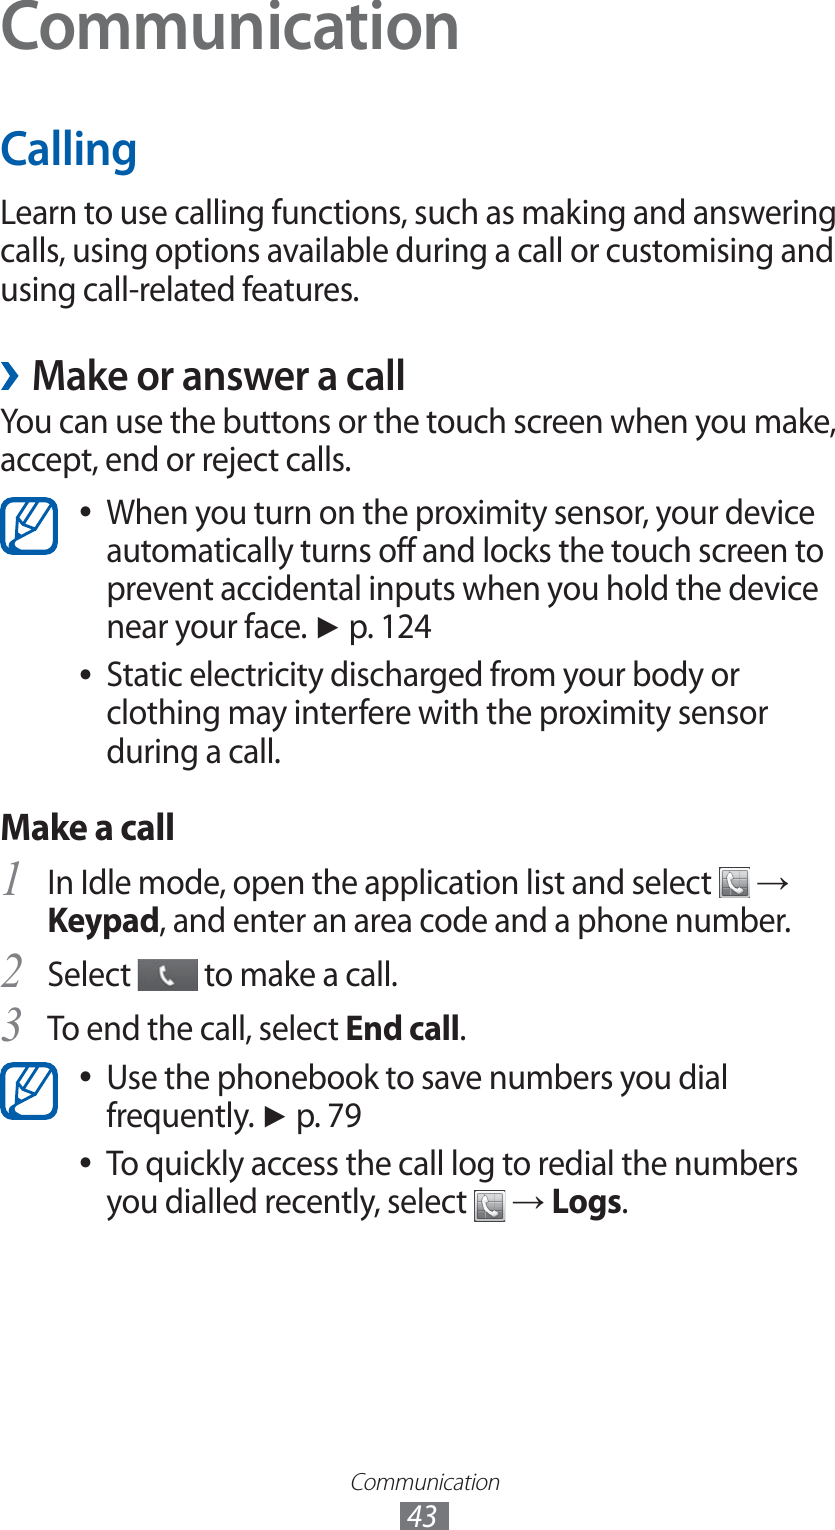
![Communication45Use options during a call ›You can use the following options while a call is in progress:To adjust the voice volume, press the Volume key up or ●down.To place a call on hold, select ●. To retrieve a held call, select .To dial a second call, select ●Add call and then dial a new number.To answer a second call, drag ● in any direction until it reaches the border of the circle. when a call waiting tone sounds. The device asks whether to end or hold the first call. You must subscribe to the call waiting service to use this feature.To open the dialling screen, select ●Keypad.To activate the speakerphone feature, select ●Speaker.In noisy environments, you may have difficulty hearing some calls while using the speakerphone feature. For better audio performance, use the normal phone mode.To turn off the microphone so that the other party cannot ●hear you, select Mute.To listen and talk to the other party via a Bluetooth headset, ●select Headset.To open the phonebook, press [ ●] → Contacts.To add a memo, press [ ●] → Memo.To switch between the two calls, select ●Swap.To make a multiparty call (conference call), make or ●answer a second call and select Merge when connected to the second party. Repeat to add more parties. You must subscribe to the multiparty call service to use this feature.](https://usermanual.wiki/Samsung-Electronics-Co/GTS7500W/User-Guide-1689820-Page-48.png)
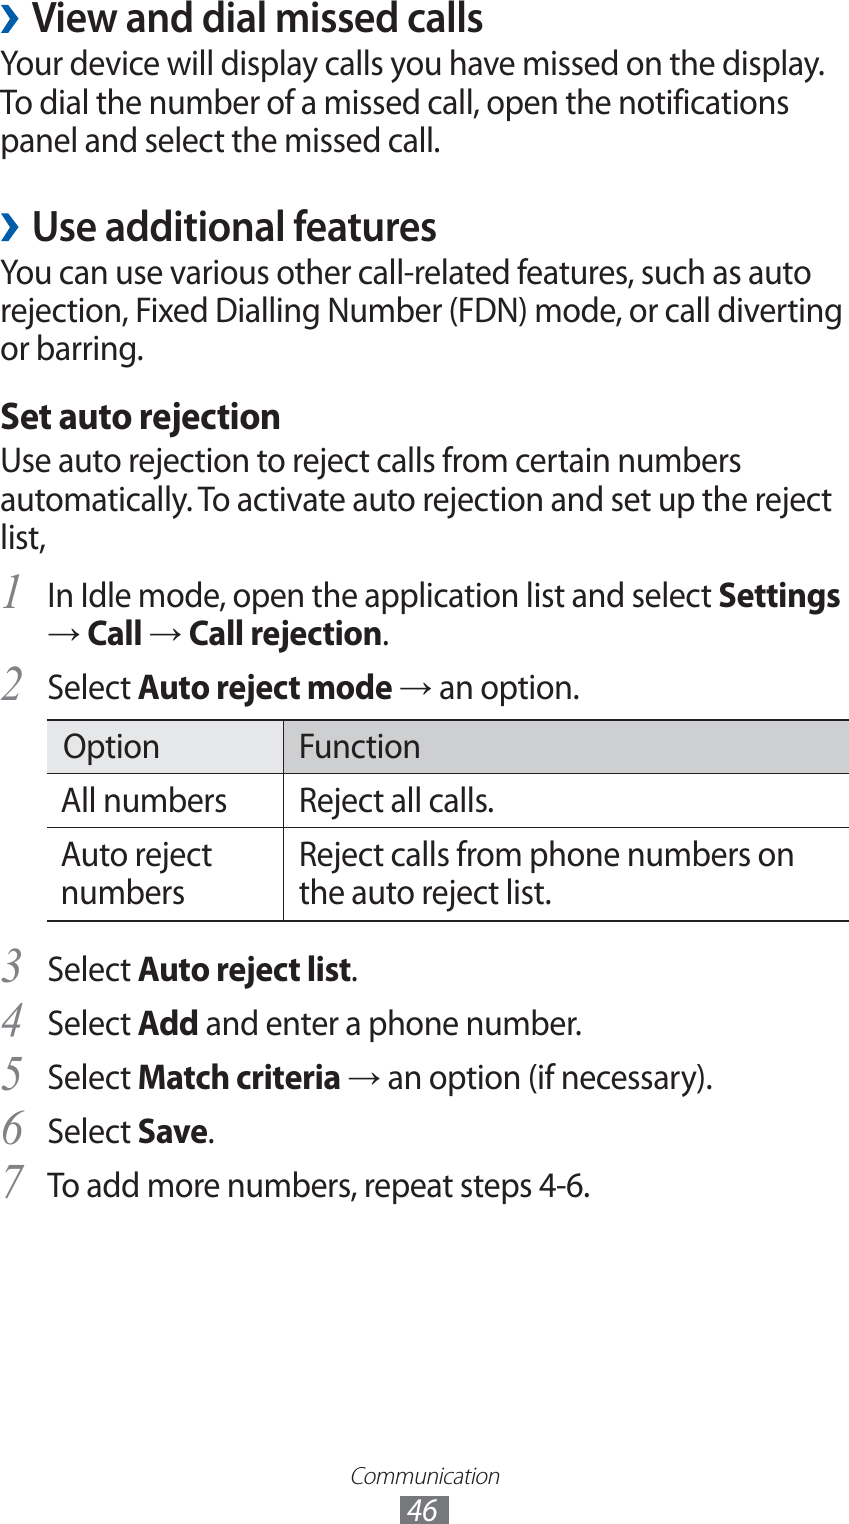
![Communication48Select a call barring option.2 Enter a call barring password and select 3 OK.Your setting will be sent to the network.Set call waitingCall waiting is a network feature to alert you of an incoming call while you are on a previous call.In Idle mode, open the application list and select Settings → Call → Additional settings → Call waiting. Your setting will be sent to the network.View call logs ›You can view logs of your calls filtered by their types.In Idle mode, open the application list and select 1 → Logs.Press [2 ] → View by → an option to sort the call logs.From the call logs, you can make a call or send a message directly to a contact by quickly flicking the contact to the left or right.Select a log to view its details.3 From the detail view, you can dial the number, send a message to the number or add the number to the phonebook.](https://usermanual.wiki/Samsung-Electronics-Co/GTS7500W/User-Guide-1689820-Page-51.png)
![Communication49MessagingLearn to create and send text (SMS) or multimedia (MMS) messages, and view or manage messages you have sent or received.You may incur additional charges for sending or receiving messages while outside your home service area. For details, contact your service provider.Send a text message ›1 In Idle mode, open the application list and select .Select 2 New message.Add recipients of your message.3 Enter phone numbers manually, separating them with a ●semicolon or a comma.Select phone numbers from the lists by selecting ●.Select 4 Tap to enter message and enter your message text.To insert emoticons, press [ ] → Insert smiley.Select 5 Send to send the message.Send a multimedia message ›1 In Idle mode, open the application list and select .Select 2 New message.](https://usermanual.wiki/Samsung-Electronics-Co/GTS7500W/User-Guide-1689820-Page-52.png)
![Communication50Add recipients of your message.3 Enter phone numbers or email addresses manually, ●separating them with a semicolon or a comma.Select phone numbers or email addresses from the lists ●by selecting .When you enter an email address, the device will convert the message as a multimedia message.Press [4 ] → Add subject and enter a subject for the message.Select 5 Tap to enter message and enter your message text.To insert emoticons, press [ ] → Insert smiley.Select 6 and add an item.You can select a file from the file list or create a new photo, video, or sound.Select 7 Send to send the message.View a text or multimedia message ›1 In Idle mode, open the application list and select .Your messages are grouped into message threads by contact, like a messenger.Select a contact.2 For a multimedia message, select a message to view the 3 details.](https://usermanual.wiki/Samsung-Electronics-Co/GTS7500W/User-Guide-1689820-Page-53.png)
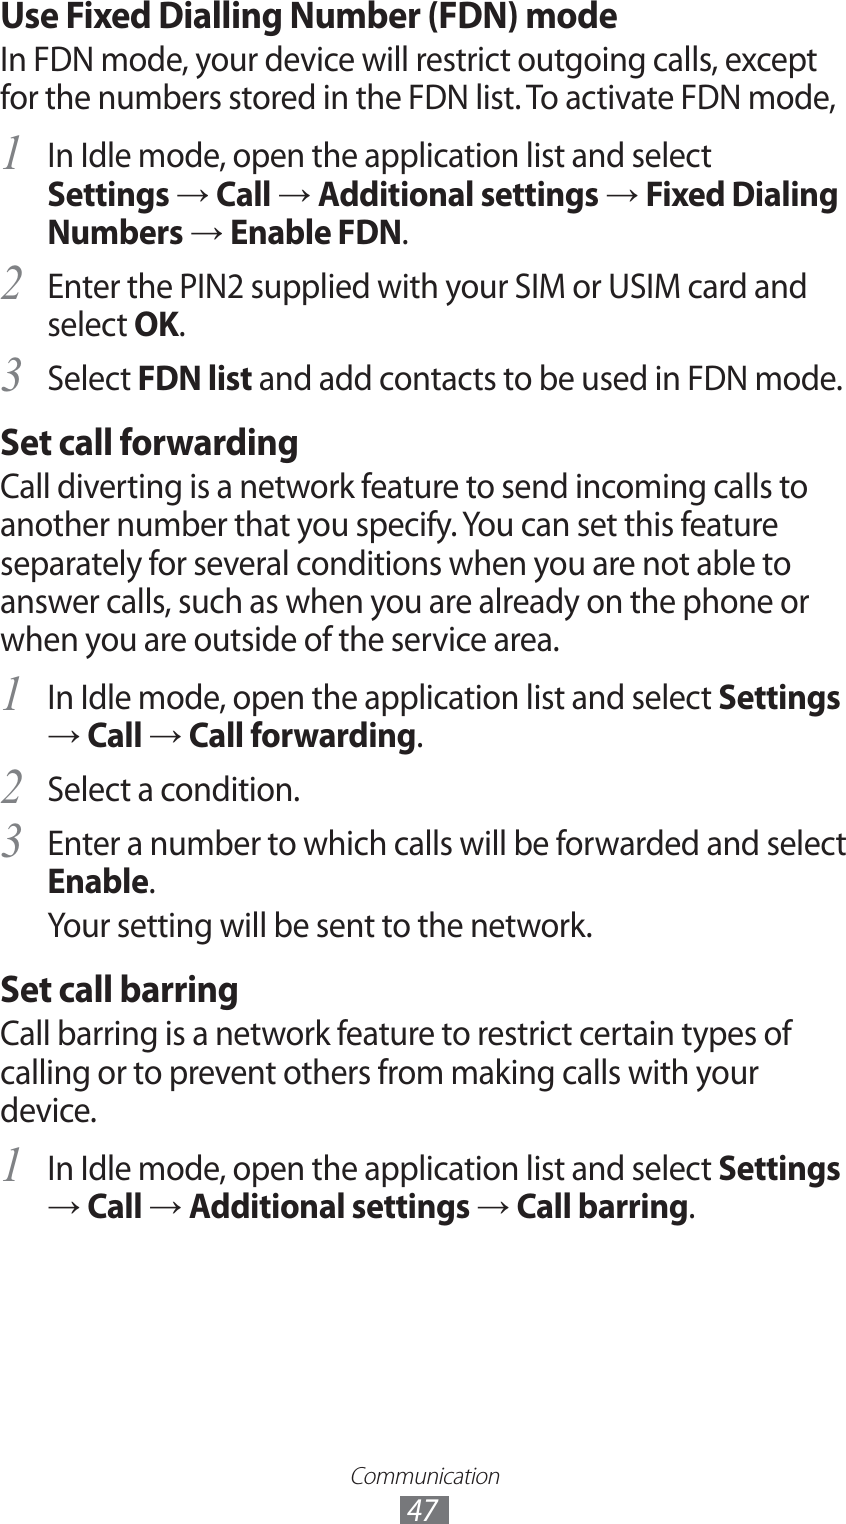
![Communication51Listen to voice mail messages ›If you have set missed calls to be diverted to the voice mail server, callers may leave voice messages when you do not answer incoming calls. To access your voice mail inbox and listen to voice mail messages,In Idle mode, open the application list and select 1 → Keypad and then tap and hold 1.Follow the instructions from the voice mail server.2 You must save the voice mail server number before accessing the server. Your service provider can give you the number.Google MailYou can retrieve new email messages from Google Mail™ to your Inbox. When you access this application, the Inbox screen appears. The total number of unread messages displays in the title bar and unread messages display in bold.This feature may be unavailable depending on your ●region or service provider.This Google Mail menu may be labelled differently ●depending on your service provider.Send an email message ›In Idle mode, open the application list and select 1 Google Mail.If you are launching this application for the first time, 2 select OK.Press [3 ] → Compose.](https://usermanual.wiki/Samsung-Electronics-Co/GTS7500W/User-Guide-1689820-Page-54.png)
![Communication52Enter a name or address in the recipient field.4 Enter a subject and message.5 To attach an image file, press [6 ] → Attach → a file.Select 7 to send the message.View email messages ›In Idle mode, open the application list and select 1 Google Mail.Select an email message.2 From the message view, use the following options:To reply to the message, select ●.To reply to the message including all recipients, select ● → Reply all.To forward the message to other people, select ● → Forward.To add a star to the message, select ●.To view an attachment, select ●Preview. To save it to your memory card, select Download.To archive the message, select ●Archive.To delete the message, select ●Delete.To move to the next or previous message, select ● or .Organise email by labels ›You can organise your email by labelling your messages. You can sort messages by label filter.](https://usermanual.wiki/Samsung-Electronics-Co/GTS7500W/User-Guide-1689820-Page-55.png)
![Communication53Add a label to a messageFrom the Inbox screen, tap and hold a message.1 Select 2 Change labels.Select a label to add and select 3 OK.Filter messagesFrom the Inbox screen, press [1 ] → Go to labels.Select the label of the messages you want to view.2 EmailLearn to send or view email messages via your personal or company email account.Set up an email account ›1 In Idle mode, open the application list and select Email.Enter your email address and password.2 Select 3 Next (for general email accounts, such as Google Mail and Yahoo) or Manual setup (for other company email accounts).Follow the on-screen instructions.4 When you are finished setting up the email account, the email messages are downloaded to your device. If you have created more than two accounts, you can switch between email accounts; Select an account name at the top left of the screen and select one you want to retrieve messages from.](https://usermanual.wiki/Samsung-Electronics-Co/GTS7500W/User-Guide-1689820-Page-56.png)
![Communication54Send an email message ›1 In Idle mode, open the application list and select Email → an email account.Select 2 .Add recipients of your message.3 Enter email addresses manually, separating them with a ●semicolon or by selecting the Enter key.Select email addresses from the lists by selecting ●.To add more recipients, press [ ●] → Add Cc/Bcc.Select the subject field to enter a subject.4 Select the text input field to enter your email text.5 Select 6 Attach and attach a file.You can select a file from the file list or create a new photo, video, or sound.You cannot attach Digital Rights Management (DRM)-protected files.Select 7 Send to send the message.If you are offline or outside your service area, the message will be held in the message thread list until you are online and in your service area.View an email message ›When you open an email account, you can view previously retrieved emails offline or connect to the email server to view new messages. After retrieving email messages, you can view them offline.In Idle mode, open the application list and select 1 Email → an email account.](https://usermanual.wiki/Samsung-Electronics-Co/GTS7500W/User-Guide-1689820-Page-57.png)
![Communication55Press [2 ] → Refresh to update the message list.Select an email message.3 From the message view, use the following options:To move to the next or previous message, select ● or .To move the message to another folder, select ●.To delete the message, select ●.To reply to the message, select ● → Reply.To forward the message to other people, select ● → Forward.To view an attachment, select ● → the attachment. To save it to your device, select .TalkLearn to chat with friends and family via Google Talk™.This feature may be unavailable depending on your region or service provider.Add friends to your friend list ›In Idle mode, open the application list and select 1 Talk.The friend list shows all of your Google Talk contacts at a glance.Press [2 ] → Add friend.Enter an email address of the friend and select 3 Send invitation.When your friend accepts the invitation, the friend is added to your friend list.](https://usermanual.wiki/Samsung-Electronics-Co/GTS7500W/User-Guide-1689820-Page-58.png)
![Communication56Start a chat ›In Idle mode, open the application list and select 1 Talk.Select a friend from the friend list. The chat screen opens.2 Enter your message and select 3 Send.To insert emoticons, press [ ] → More → Insert smiley.To switch between active chats, press [4 ] → Switch chats.To end the chat, press [5 ] → End chat.ChatONLearn to chat with your friends and family in ChatON. This is an instant messenger based on mobile phone numbers, regardless device type or operating system. While having a conversation with your contacts, you can send various multimedia files and data, such as photos, videos, and contact numbers, animated messages.In Idle mode, open the application list and select 1 ChatON.If you are launching this application for the first time, 2 select OK → a region → Next.If you are launching this application for the first time, read 3 the terms and conditions and select Accept.Follow the on-screen instructions to complete the account 4 setup.Chat with friends and family instantly.5](https://usermanual.wiki/Samsung-Electronics-Co/GTS7500W/User-Guide-1689820-Page-59.png)

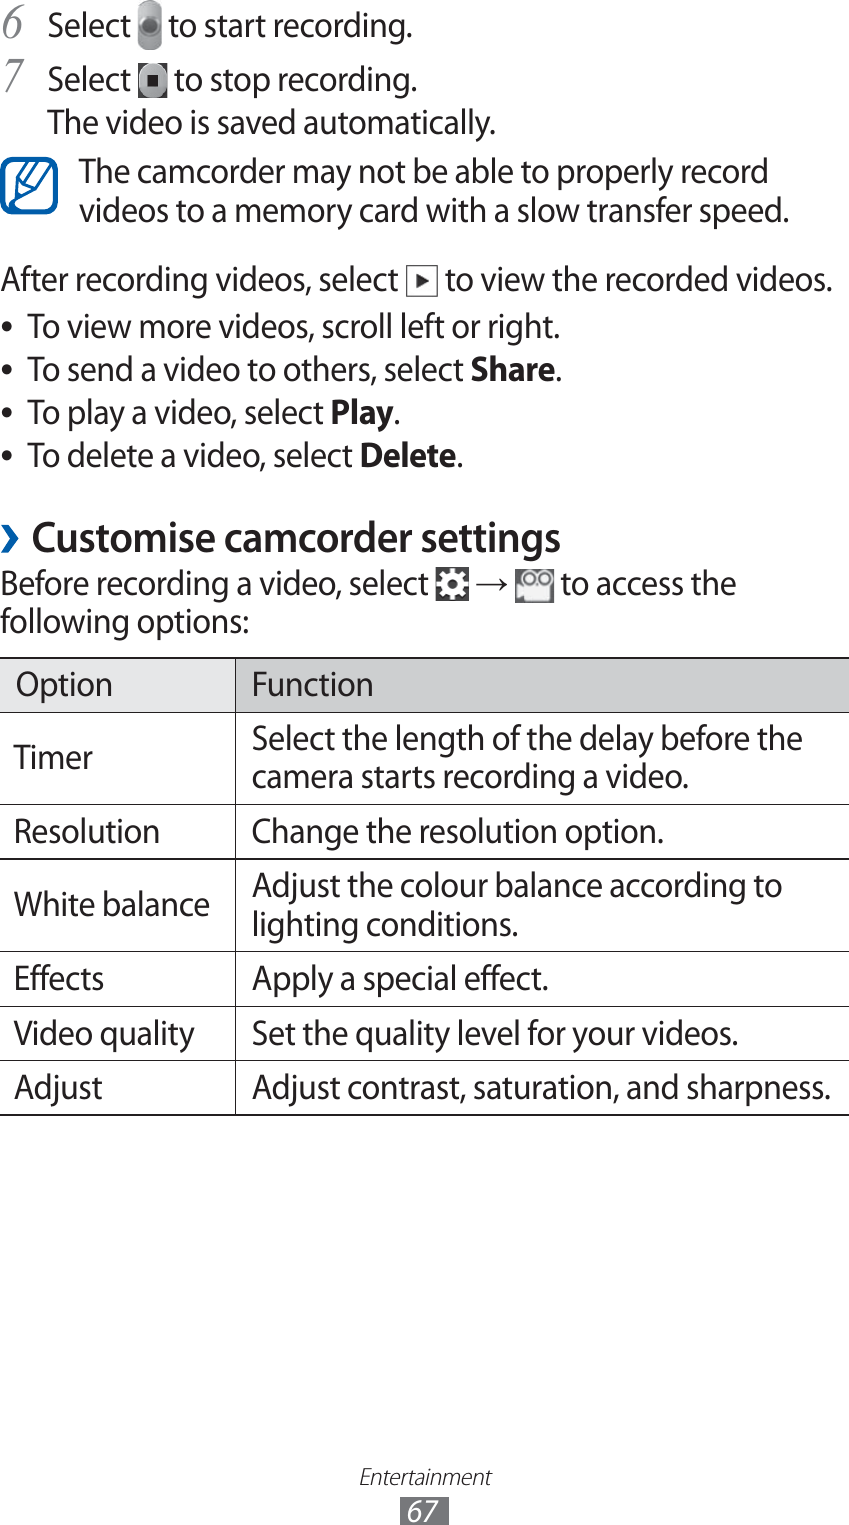
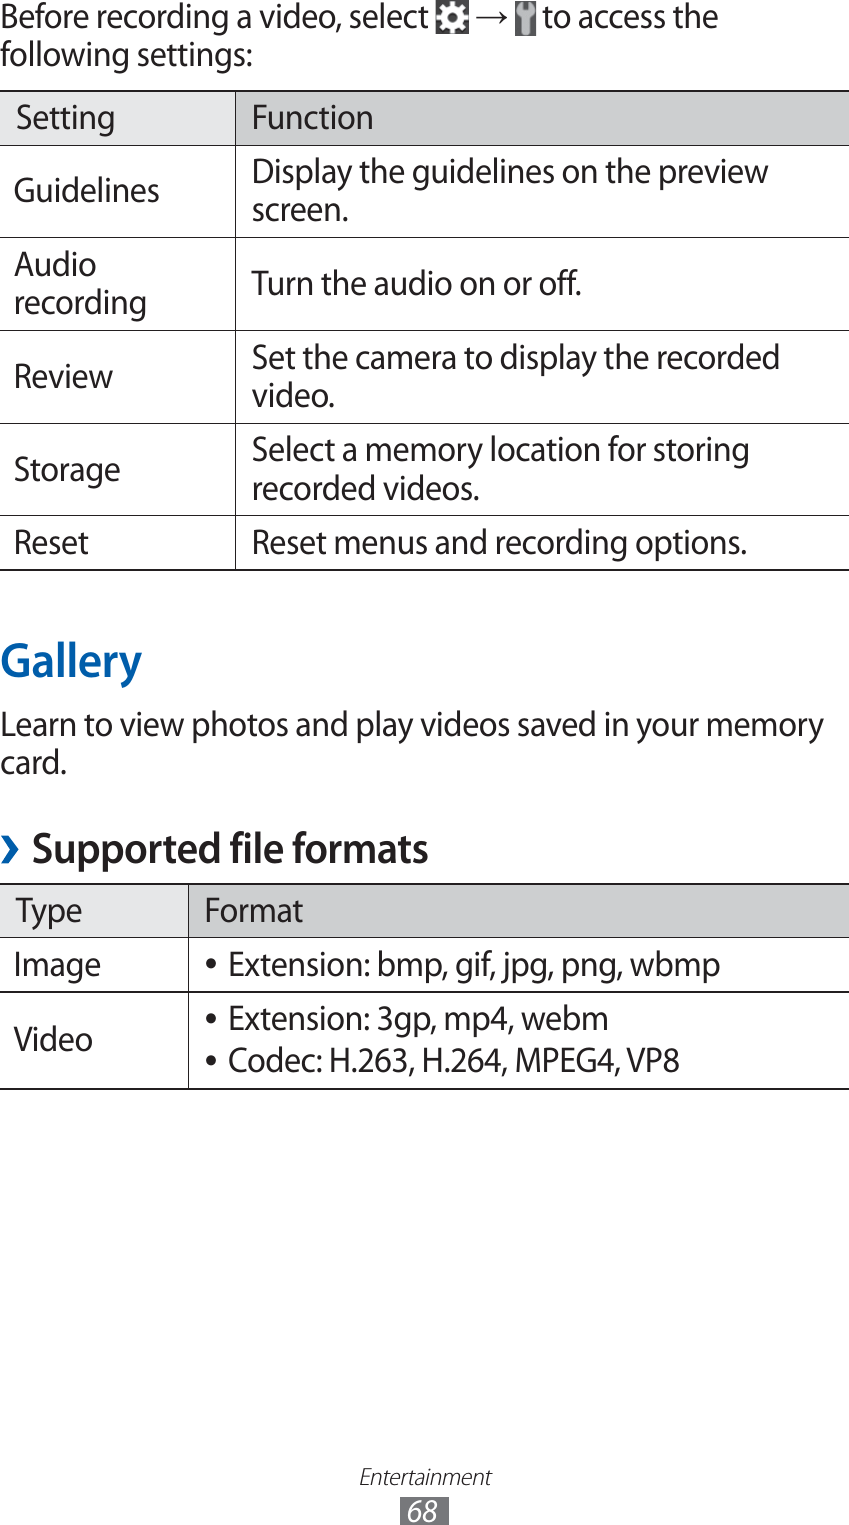
![Entertainment69Some file formats are not supported depending on ●the software of the device.If the file size exceeds the available memory, an error ●can occur when you open files.Playback quality may vary by content type. ●Some files may not play properly depending on how ●they are encoded.View a photo ›1 In Idle mode, open the application list and select Gallery.Select a folder.2 To change the view mode, select 3 or at the top right of the screen.Select a photo (with no icon) to view.4 While viewing a photo, use the following options:To view more photos, scroll left or right. ●To zoom in, place two fingers on the screen and spread ●them apart. To zoom out, move your fingers closer together. You can also select or or double-tap the screen.To send a photo to others, select ●Send via.To delete a photo, select ●Delete.To share a photo with others, press [ ●] → Share.To set a photo as wallpaper or a caller ID image for a ●contact, press [ ] → Set as.](https://usermanual.wiki/Samsung-Electronics-Co/GTS7500W/User-Guide-1689820-Page-72.png)
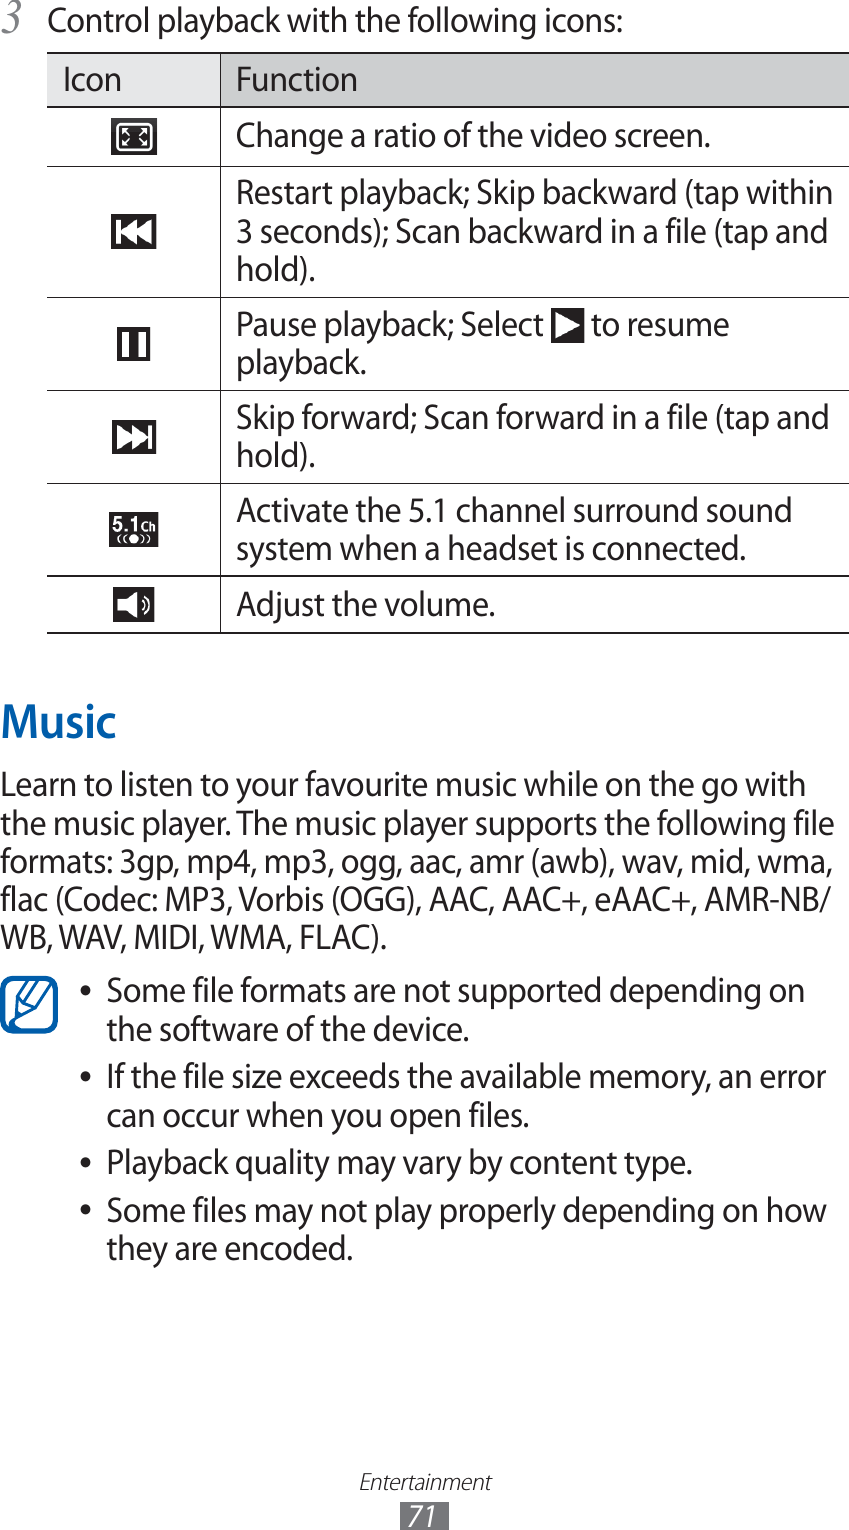
![Entertainment70To use additional features with a photo, press [ ●] → More and use the following options:Print -: Print a photo using a Wi-Fi or USB connection. Your device is compatible only with some Samsung printers.Crop -: Crop an image from a photo.Rotate left -: Rotate a photo anti-clockwise.Rotate right -: Rotate a photo clockwise.Slideshow -: Start a slideshow in the selected folder.Rename -: Rename a photo file.Details -: View photo details.Play a video ›1 In Idle mode, open the application list and select Gallery.Select a video (with the 2 icon) to play.Control playback with the virtual keys.3 VideosLearn to use the video player to play various kinds of videos. The video player supports the following file formats: 3gp, mp4, webm (Codec: MPEG4, H.263, H.264, VP8).Some file formats are not supported depending on ●the software of the device.If the file size exceeds the available memory, an error ●can occur when you open files.Playback quality may vary by content type. ●Some files may not play properly depending on how ●they are encoded.In Idle mode, open the application list and select 1 Videos.Select a video to play.2](https://usermanual.wiki/Samsung-Electronics-Co/GTS7500W/User-Guide-1689820-Page-73.png)
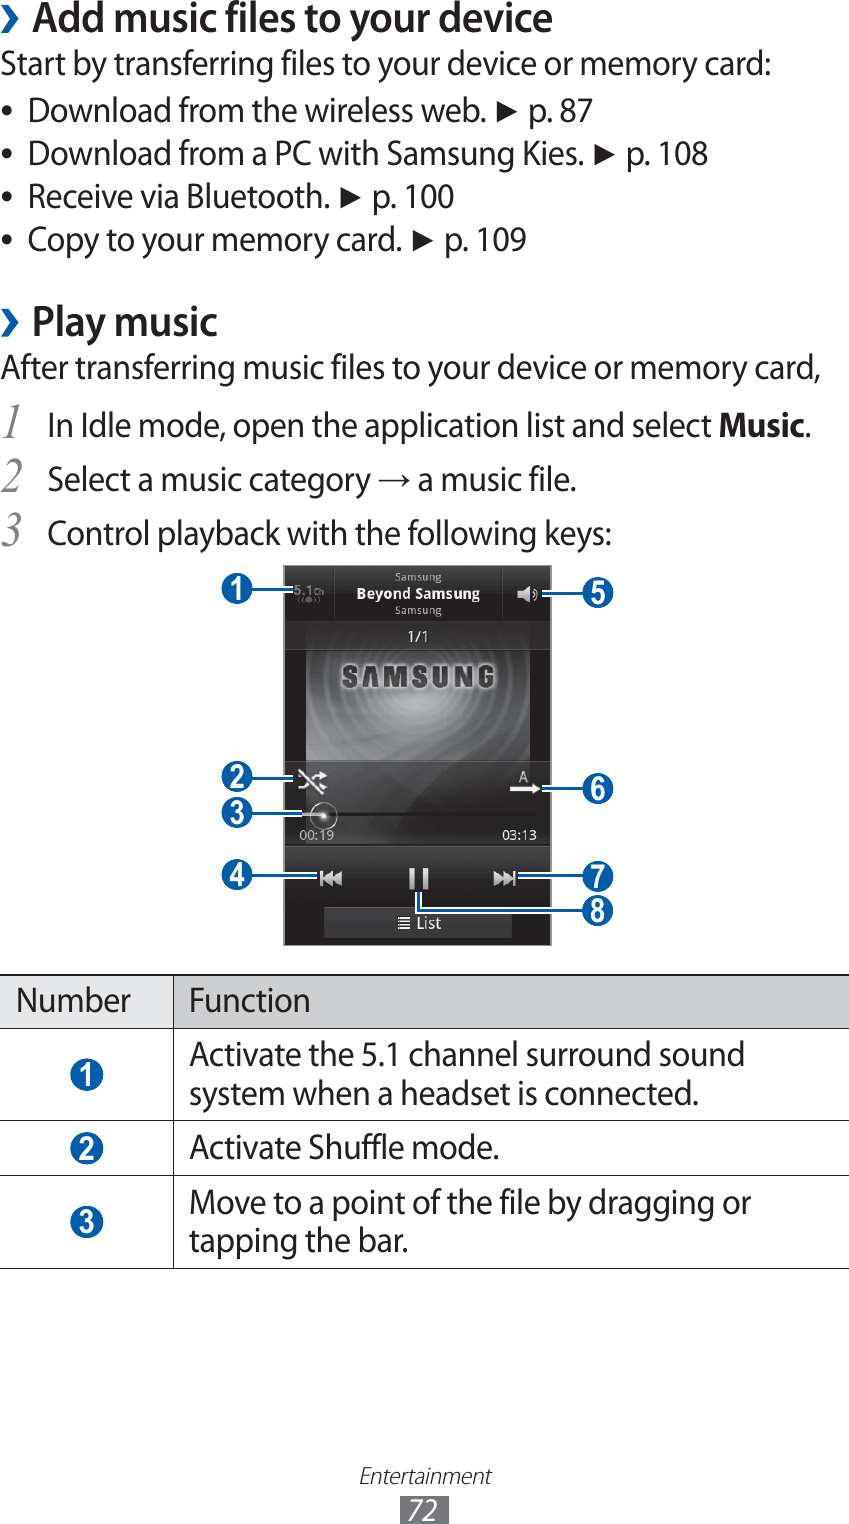
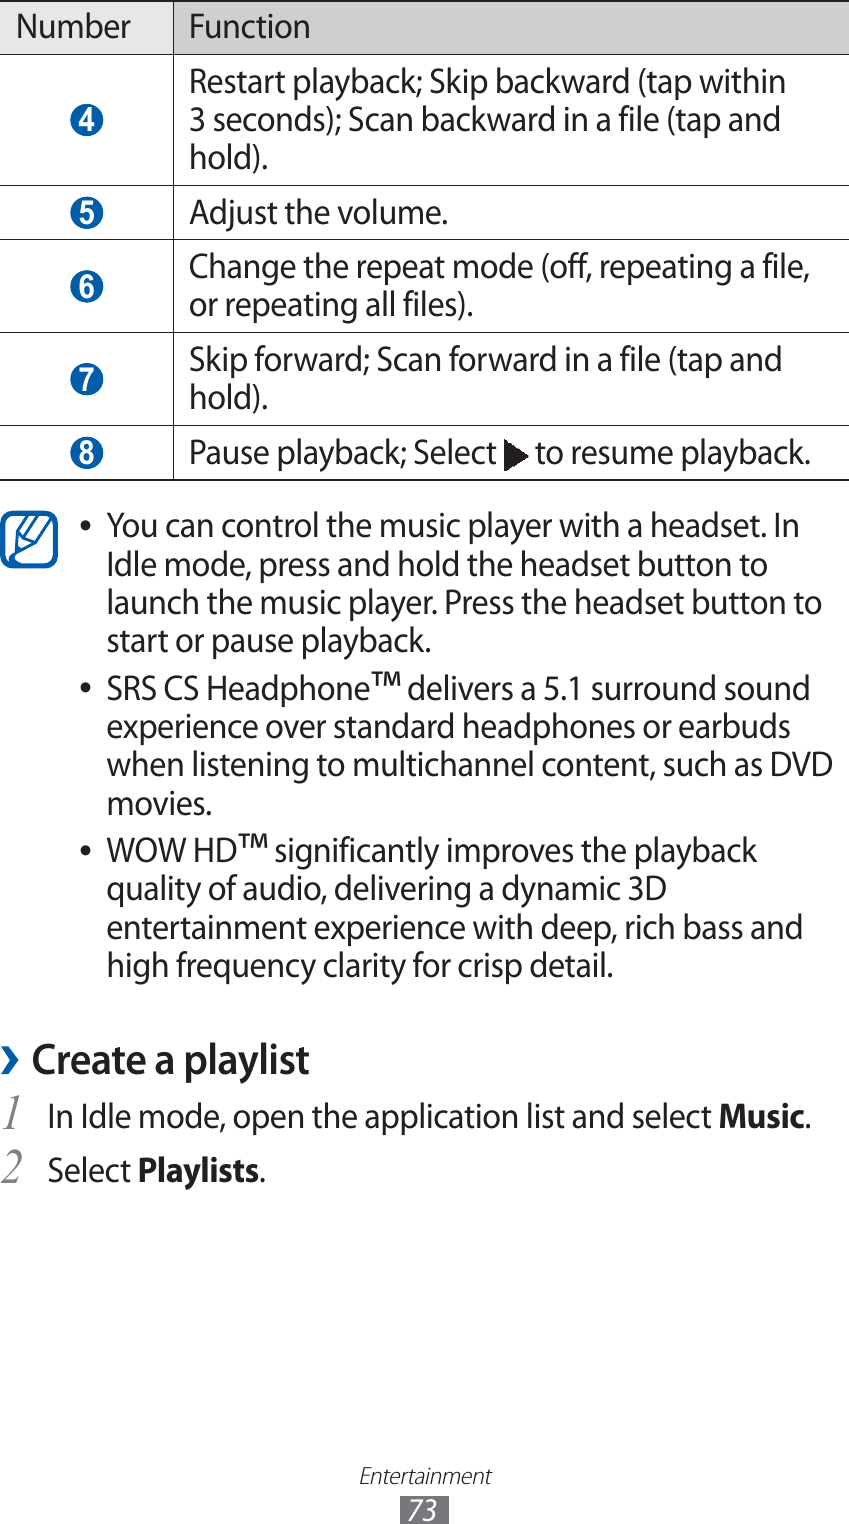
![Entertainment74Press [3 ] → Create.Enter a title for your new playlist and select 4 Save.Select 5 Add music.Select the files you want to include and select 6 Add.During playback, you can add files to a playlist by pressing [] → Add to playlist.Add songs to the quick list ›You can add songs to the quick list and save them as a playlist. During playback, press [ ] → Add to quick list to add the current song to the quick list.To go to the quick list, from the music player main screen, select Playlists → Quick list. To save the quick list as a playlist, press [ ] → Save as playlist.Customise music player settings ›In Idle mode, open the application list and select 1 Music.Press [2 ] → Settings.Adjust the following settings to customise your music 3 player:Option FunctionEqualiser Select a default equaliser type.Sound effect Select a sound effect.Music menu Select music categories to display on the music library screen.](https://usermanual.wiki/Samsung-Electronics-Co/GTS7500W/User-Guide-1689820-Page-77.png)
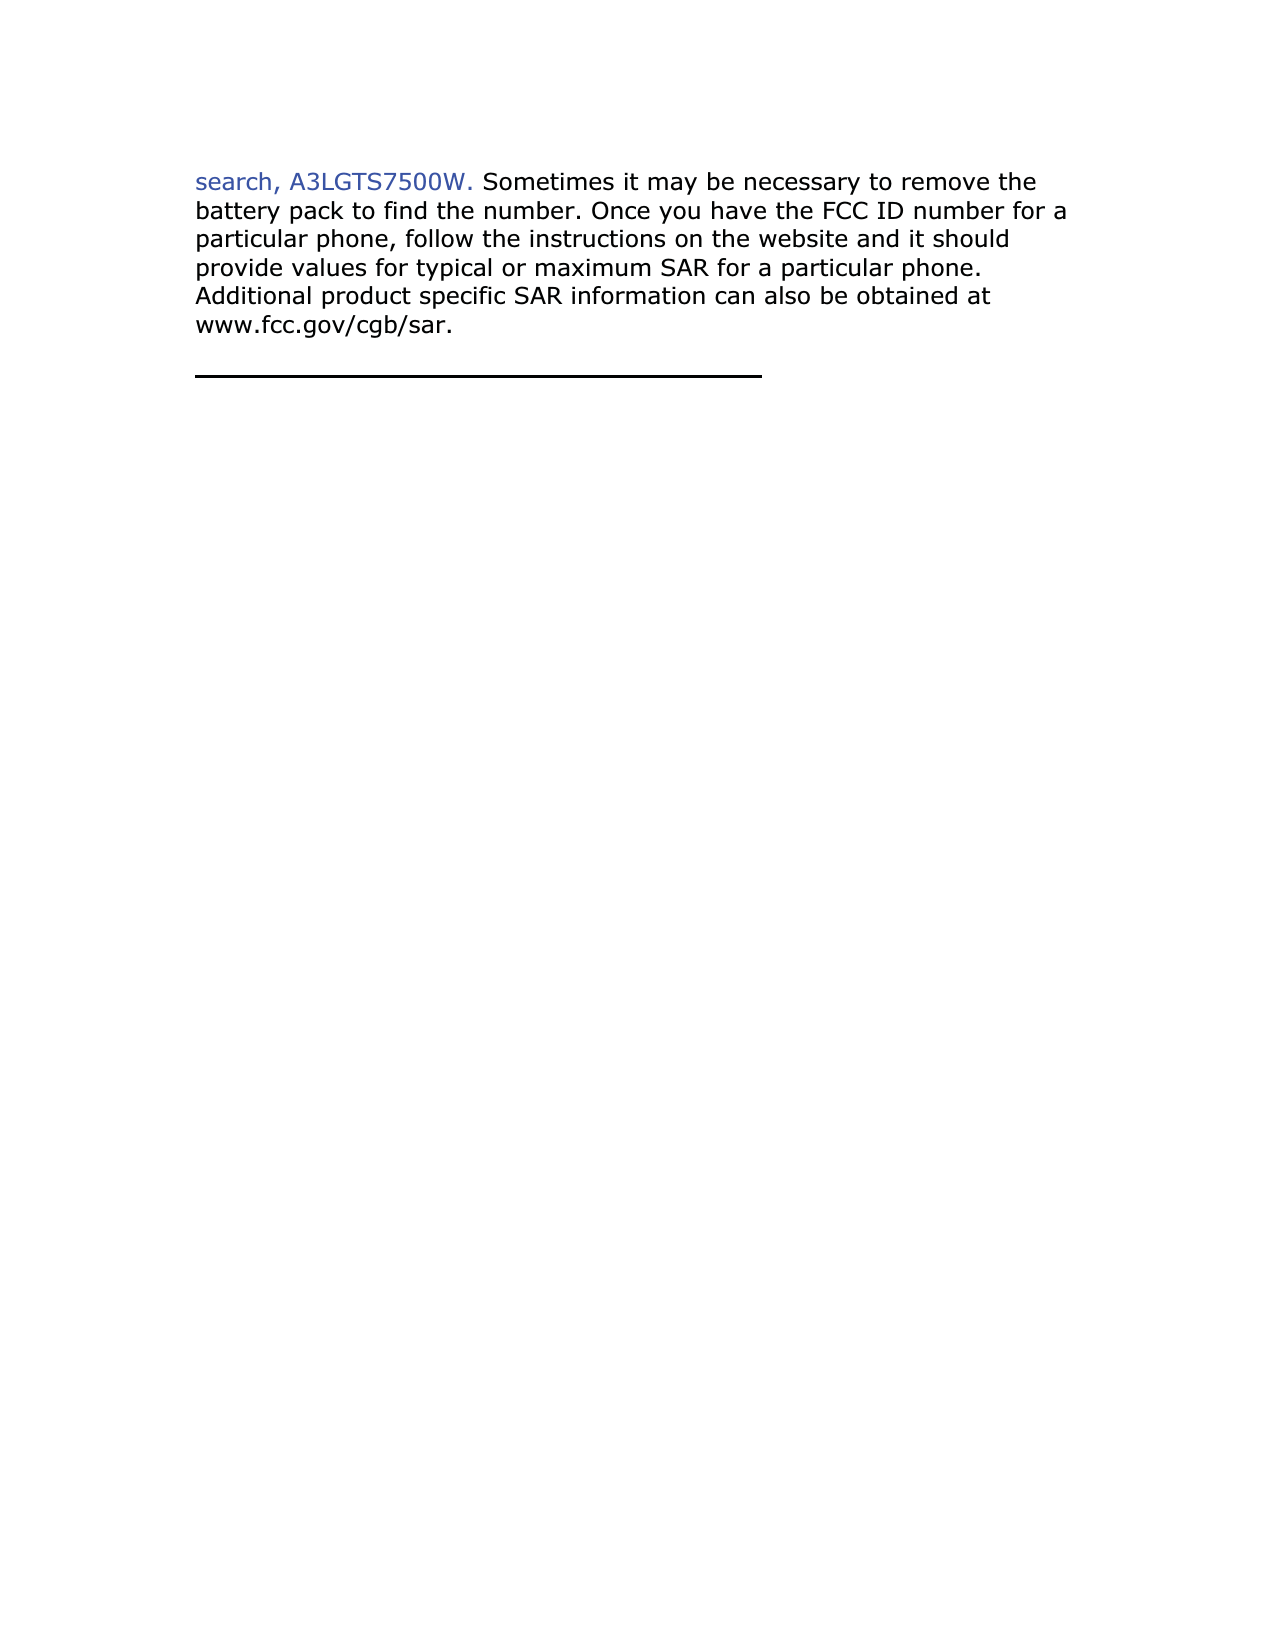
![Entertainment75Option FunctionVisualisation Display an animated visualisation during playback.LyricsSet to display lyrics during playback. The music player supports lyrics with ID3v2 tags only.Music auto off Set the music player to automatically turn off after a specified length of time.FM radioLearn to listen to music and news on the FM radio. To listen to the FM radio, you must connect a headset, which serves as the radio antenna.Listen to the FM radio ›Plug a headset into the device.1 In Idle mode, open the application list and select 2 FM radio.The FM radio scans and saves available stations automatically.The first time you turn on the FM radio, it will start automatic tuning.Select the radio station you want from the all station list 3 and press [ ] to return to the FM radio screen.](https://usermanual.wiki/Samsung-Electronics-Co/GTS7500W/User-Guide-1689820-Page-78.png)
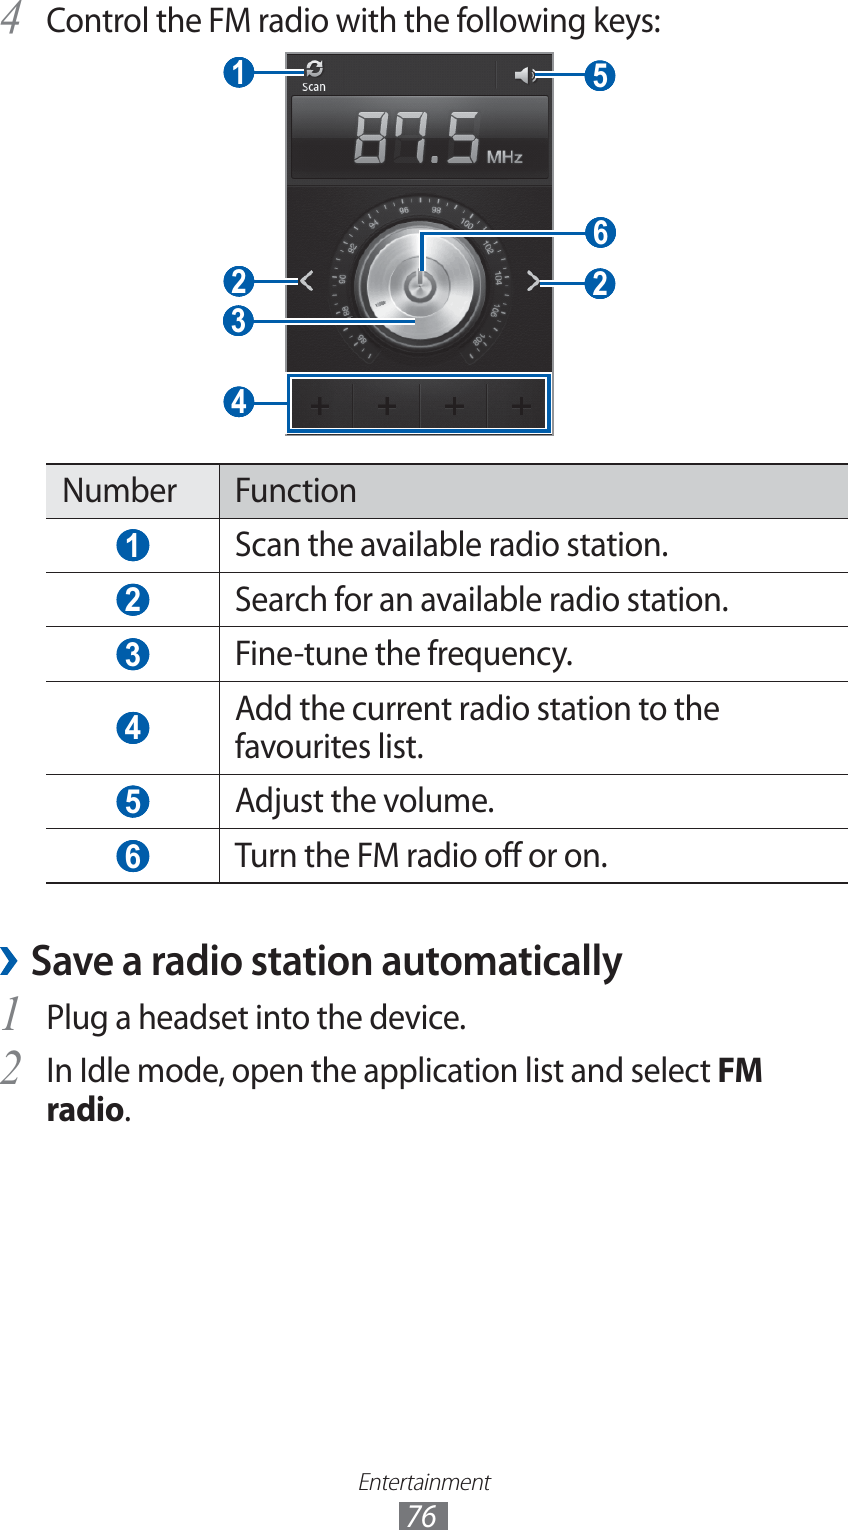
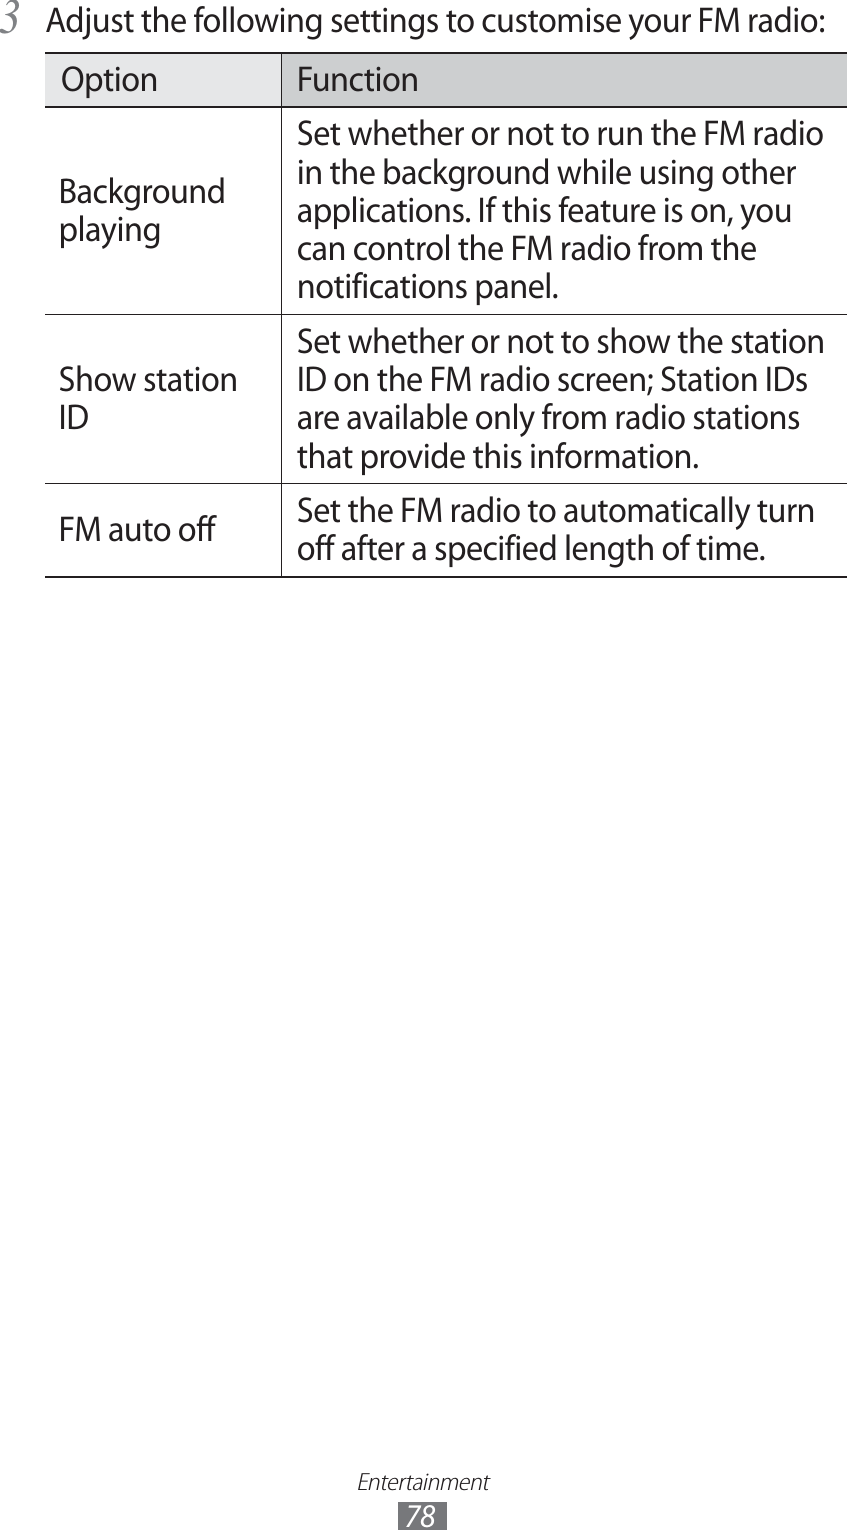
![Entertainment77Press [3 ] → Scan → a scanning option.The FM radio scans and saves available stations automatically.Select the radio station you want from the all station list4 and press [ ] to return to the FM radio screen.Add a radio station to the favourites list ›Plug a headset into the device.1 In Idle mode, open the application list and select 2 FM radio.Select 3 to turn on the FM radio.Scroll to the radio station you want.4 Select 5 to add the radio station to the favourites list.You can add a name for a radio station or remove a radio station; Tap and hold a radio station on the favourites list and select Remove or Rename.Customise FM radio settings ›In Idle mode, open the application list and select 1 FM radio.Press [2 ] → Settings.](https://usermanual.wiki/Samsung-Electronics-Co/GTS7500W/User-Guide-1689820-Page-80.png)
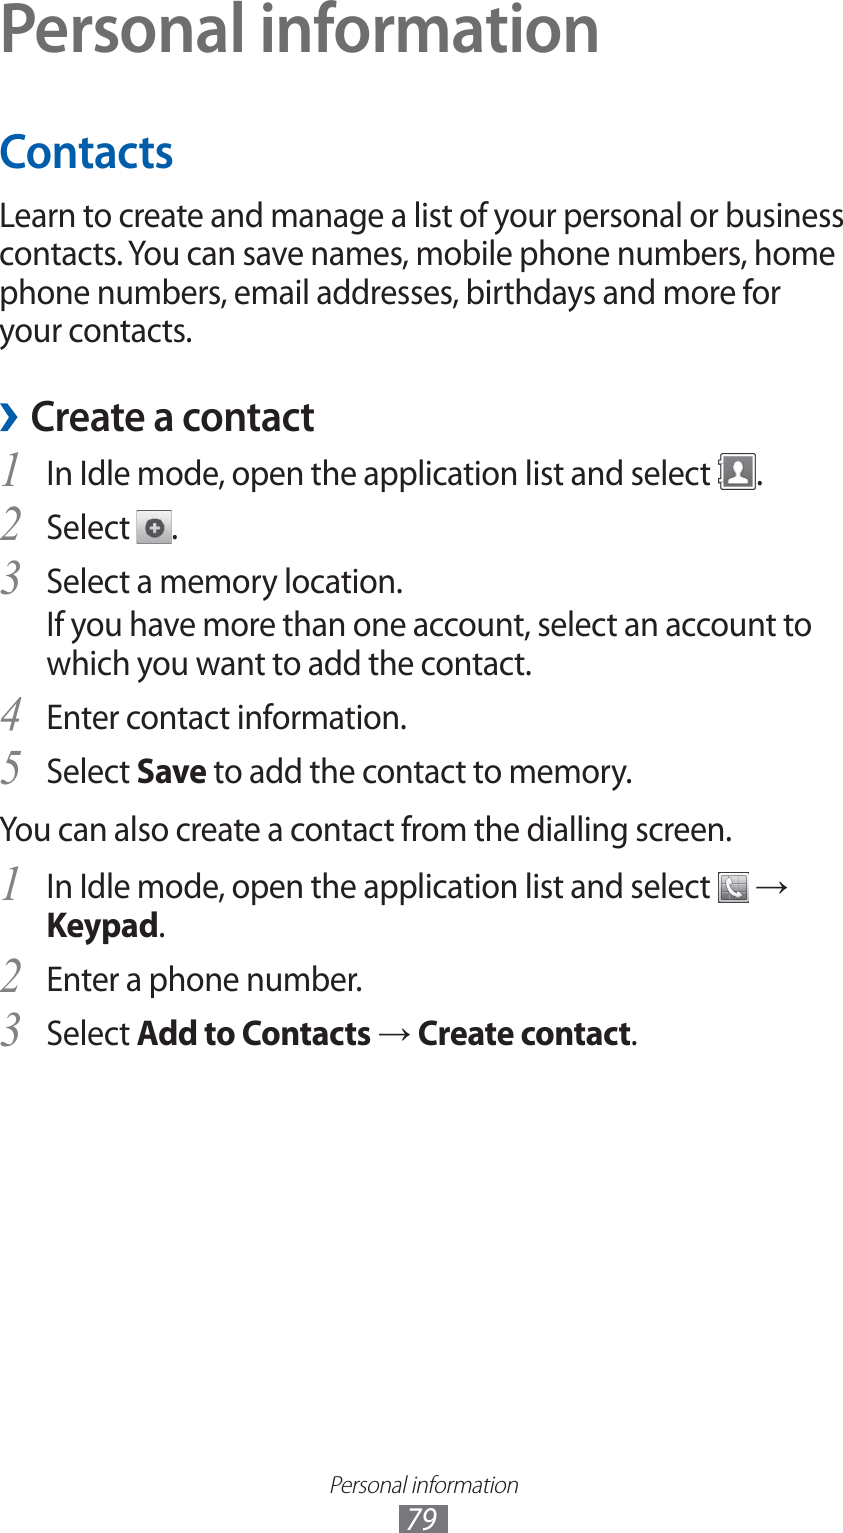
![Personal information80Select a memory location.4 If you have more than one account, select an account to which you want to add the contact.Enter contact information.5 Select 6 Save to add the contact to memory.Find a contact ›1 In Idle mode, open the application list and select .Scroll up or down on the contact list.2 You can also drag your finger along the index on the right side to quickly scroll through the list.Select a contact’s name.3 Once you find a contact, you can use the following options:To call the contact, select a phone number. ●To send a message, select ●.To send an email message, select an email address. ●To edit the contact information, press [ ●] → Edit.To set the contact as your favourites, select ●.Set a speed dial number ›In Idle mode, open the application list and select 1 .Press [2 ] → More → Speed dial setting.Select a location number 3 → a contact.Select a phone number (if necessary).4 You can quickly dial this number by tapping and holding the location number from the dialling screen.](https://usermanual.wiki/Samsung-Electronics-Co/GTS7500W/User-Guide-1689820-Page-83.png)
![Personal information81Create your namecard ›In Idle mode, open the application list and select 1 .Press [2 ] → My profile.Press [3 ] → Edit.Enter your own personal details.4 Select 5 Save.You can send your namecard by attaching it to a message or email or transferring it via the Bluetooth wireless feature.Create a group of contacts ›By creating groups of contacts, you can manage multiple contacts and send messages or email to an entire group. Start by creating a group.In Idle mode, open the application list and select 1 → Groups.Press [2 ] → Create.Enter a name and select a ringtone for the group.3 Select 4 Add member, select contacts to add to the group, and select Add.Select 5 Save. ›Copy contactsTo copy contacts from the SIM or USIM card to your device,In Idle mode, open the application list and select 1 .Press [2 ] → Import/Export → Import from SIM card.](https://usermanual.wiki/Samsung-Electronics-Co/GTS7500W/User-Guide-1689820-Page-84.png)
![Personal information82Select a memory location.3 If you have more than one account, select an account to which you want to add the contact.Select contacts to copy and select 4 Import.To copy contacts from your device to the SIM or USIM card,In Idle mode, open the application list and select 1 .Press [2 ] → Import/Export → Export to SIM card.Select contacts to copy and select 3 Export → OK.Import or export contacts ›To import contact files (in vcf format) from a memory card to your device,In Idle mode, open the application list and select 1 .Press [2 ] → Import/Export → Import from SD card.Select a memory location.3 If you have more than one account, select an account to which you want to add the contact.Select an option for importing a single contact file, 4 multiple contact files, or all contact files, and select OK.Select contact files to import and select 5 OK.To export contacts from your device to a memory card,In Idle mode, open the application list and select 1 .Press [2 ] → Import/Export → Export to SD card.Select 3 OK to confirm.](https://usermanual.wiki/Samsung-Electronics-Co/GTS7500W/User-Guide-1689820-Page-85.png)
![Personal information83CalendarLearn to create and manage daily, weekly or monthly events, and set alarms to remind yourself of important events.Create an event ›In Idle mode, open the application list and select 1 Calendar.Select 2 Tap to create event or press [ ] → Create.If an alert message about the calendar sync appears, 3 select OK.Enter the details of the event as required.4 Select 5 Save.View events ›To change the calendar view,In Idle mode, open the application list and select 1 Calendar.Select a view mode from the top of the calendar.2 To view events of a specific date,In Idle mode, open the application list and select 1 Calendar.Select a date on the calendar.2 To move to a specific day by entering a date manually, ●press [ ] → Go to, enter the date by selecting + or -, and select Set.To select today’s date, press [ ●] → Today.Select an event to view its details.3 You can send the event to others by pressing [ ] → Send via → an option.](https://usermanual.wiki/Samsung-Electronics-Co/GTS7500W/User-Guide-1689820-Page-86.png)
![Personal information84Stop an event alarm ›If you set an alarm for a calendar event, the event alarm icon will appear at the specified time.Open the notifications panel from the top of the screen.1 Select a reminder to view more details about the event.2 To snooze or dismiss the reminder, select the check box 3 next to events you want and select Snooze or Dismiss.MemoLearn to record important information to save and view at a later date.Create a memo ›In Idle mode, open the application list and select 1 Memo.If there is a memo saved, select 2 Create memo or press [] → Create to create a memo.Enter your memo text and select 3 Save.View memos ›In Idle mode, open the application list and select 1 Memo.Press [2 ] → Search or press and hold [ ] to search for a memo (if necessary).](https://usermanual.wiki/Samsung-Electronics-Co/GTS7500W/User-Guide-1689820-Page-87.png)

![Personal information86When you are finished, select 4 Stop.Your memo is saved automatically.To record more voice memos, select 5 Record again.Play a voice memo ›In Idle mode, open the application list and select 1 Voice recorder.Select 2 List.Select a voice memo to play.3 You can send the voice memo to others by pressing [] → Share → an option.](https://usermanual.wiki/Samsung-Electronics-Co/GTS7500W/User-Guide-1689820-Page-89.png)
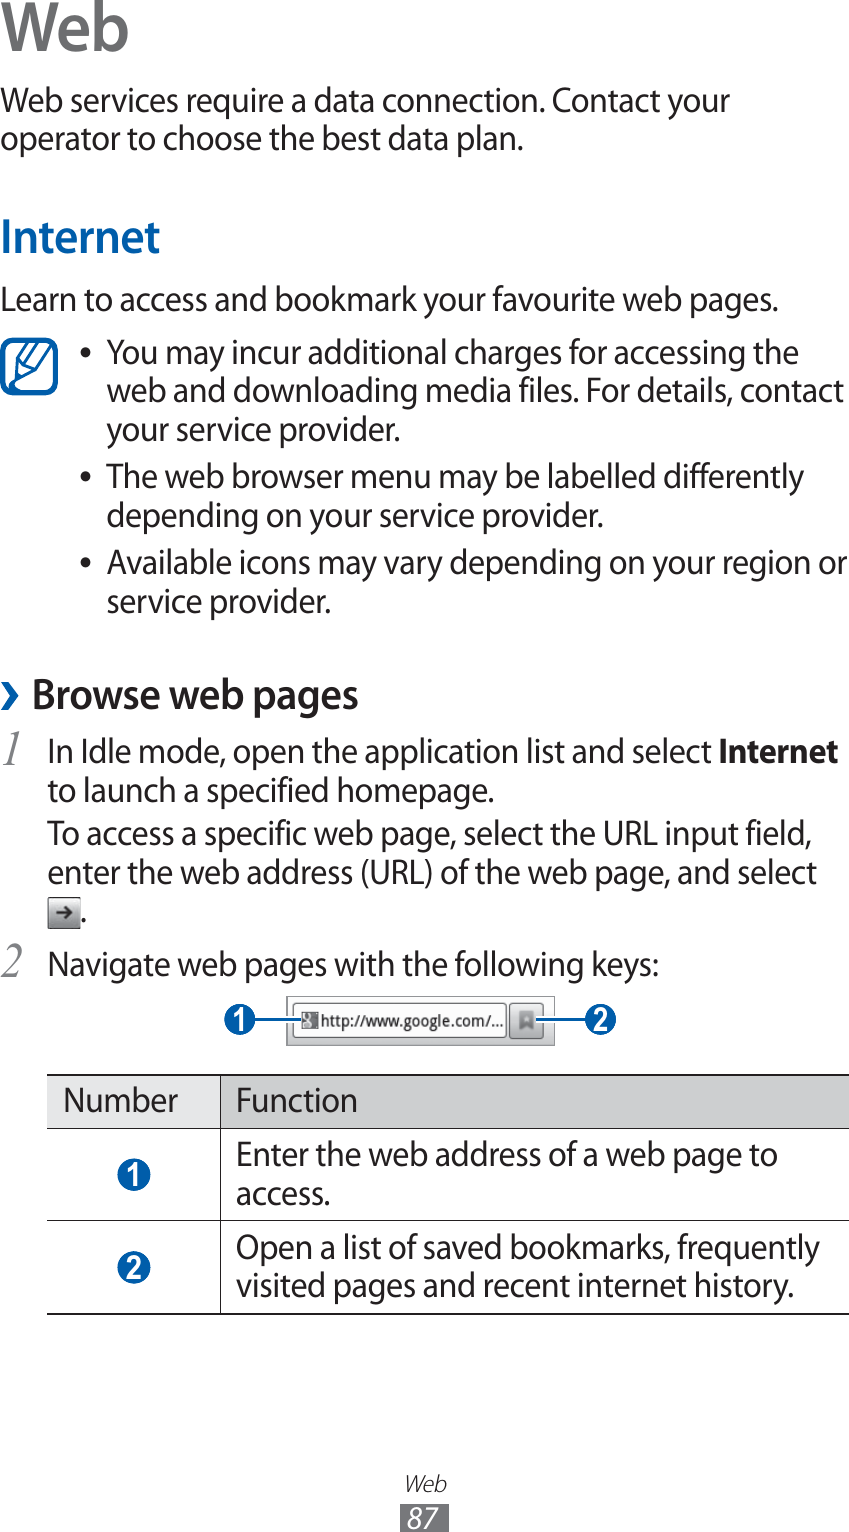
![Web88While browsing the web page, use the following options:To zoom in, place two fingers on the screen and spread ●them apart. To zoom out, move your fingers closer together. You can also double-tap the screen.To open a new window, press [ ●] → New window.To view the currently active windows, press [ ●] → Windows. You can open multiple pages and switch back and forth between them.To reload the current web page, press [ ●] → Refresh.To go to a next page in history, press [ ●] → Forward.To bookmark the current web page, press [ ●] → Add bookmark.To add a shortcut to the current web page to the idle ●screen, press [ ] → More → Add shortcut to Home.To search for text on the web page, press [ ●] → More → Find on page.To view the web page details, press [ ●] → More → Page info.To send the web address (URL) of the web page to others, ●press [ ] → More → Share page.To view the download history, press [ ●] → More → Downloads.To customise the browser settings, press [ ●] → More → Settings.To print the current web page using a WLAN connection, ●press [ ] → More → Print. Your device is compatible only with some Samsung printers.](https://usermanual.wiki/Samsung-Electronics-Co/GTS7500W/User-Guide-1689820-Page-91.png)
![Web91Search for a specific location ›In Idle mode, open the application list and select 1 Maps.If you are launching this application for the first time, 2 select OK.The map will display your current location.Select 3 Search Maps.Enter a keyword for the location and select 4 .To search for a location by voice, select .Select the location you want to view details.5 To view a list of all results for your search, select ●.To zoom in, place two fingers on the screen and spread ●them apart. To zoom out, move your fingers closer together. You can also select or .To add layers to the map, select ●.To view your current location, select ●.To switch to a compass view of the map that changes ●orientation when you move the device, select .To add a star to the location, select the balloon of the ●location name → .Get directions to a specific destination ›In Idle mode, open the application list and select 1 Maps.Press [2 ] → Directions.Enter the addresses of the starting location and the 3 ending location.To select an address from your contact list or starred places, or point the location on the map, select → Contacts, Point on map, or My Places.](https://usermanual.wiki/Samsung-Electronics-Co/GTS7500W/User-Guide-1689820-Page-94.png)
![Web92Select a travel method (car, bus, or walk) and select 4 Get directions.The route is indicated on the map. Depending on the selected travel method, you may see multiple routes. Select a route to view details of your trip and select to view the route on the map.Select 5 or to view only a single part of the route.When you are finished, press [6 ] → Clear Map.LatitudeLearn to share your location with your friends and view friends’ locations via Google Latitude™.This feature may be unavailable depending on your region or service provider.In Idle mode, open the application list and select 1 Latitude.The device automatically joins Latitude.Select 2 → Select from Contacts or Add via email address.Select a friend you want to add, or enter an email address 3 and select Add friends.Select 4 Yes .When your friend accepts your invitation, you can share locations.Press [5 ] → Map View.Your friends’ locations are marked with their photos on the map.](https://usermanual.wiki/Samsung-Electronics-Co/GTS7500W/User-Guide-1689820-Page-95.png)
![Web95Share videos ›In Idle mode, open the application list and select 1 YouTube.Select a video.2 Select 3 → an option.Upload videos ›In Idle mode, open the application list and select 1 YouTube.Press [2 ] → Upload and select a video. Skip to step 8.If you want to upload new videos, select to turn on the camera.Rotate the device anti-clockwise to landscape view.3 Aim the lens at the subject and make any adjustments.4 Select 5 to start recording.Select 6 to stop recording.Select 7 Save to upload the video that you have recorded.Select your Google account if it is linked to YouTube. You 8 can also select Add account and set up an account to sign in YouTube.If you are uploading a video for the first time, select a network type to upload a video.Enter details of the upload and select 9 Upload.](https://usermanual.wiki/Samsung-Electronics-Co/GTS7500W/User-Guide-1689820-Page-98.png)

![Web97News & WeatherLearn to view the weather information and read top news and other news articles.View the weather information ›In Idle mode, open the application list and select 1 News & Weather.Select 2 Weather at the top of the screen.Your device searches for your current location and displays the weather information.You can change the location to view the weather information in another region. Press [ ] → Settings → Weather settings and clear the check box next to Use My Location. Then select a location in Set location.Read news articles ›In Idle mode, open the application list and select 1 News & Weather.Scroll left to a news topic at the top of the screen.2 Select an article to open it.3 To add news topics, press [ ] → Settings → News settings → Select news topics.WOWAccess the Wireless Olympic Works (WOW) service and view game schedules, results, and the latest news from the London Olympics. You can also watch competitions and send messages to the staff. In Idle mode, open the application list and select WOW.](https://usermanual.wiki/Samsung-Electronics-Co/GTS7500W/User-Guide-1689820-Page-100.png)

![Connectivity102Connect to a Wi-Fi AP using a Wi-Fi Protected ›Setup (WPS)Using WPS, you can connect to a secured network.To connect to a Wi-Fi AP with a WPS button,In Idle mode, open the application list and select 1 Settings → Wireless and network → Wi-Fi settings.Select 2 WPS button connection.Press a WPS button on the access point within 2 minutes.3 To connect to a Wi-Fi AP with a WPS PIN,In Idle mode, open the application list and select 1 Settings → Wireless and network → Wi-Fi settings.Select a network indicated by the WPS icon and select 2 WPS PIN.On the access point, enter the PIN and press the start 3 button.Wi-Fi DirectLearn to use the Wi-Fi Direct feature to connect two devices via a Wi-Fi network without requiring an access point.Connect your device to another device ›In Idle mode, open the application list and select 1 Settings → Wireless and network → Wi-Fi Direct settings → OK → Wi-Fi Direct.Press [2 ] → Scan.Select a device and then select 3 Connect.When the owner of the other device accepts the connection, the devices are connected.](https://usermanual.wiki/Samsung-Electronics-Co/GTS7500W/User-Guide-1689820-Page-105.png)
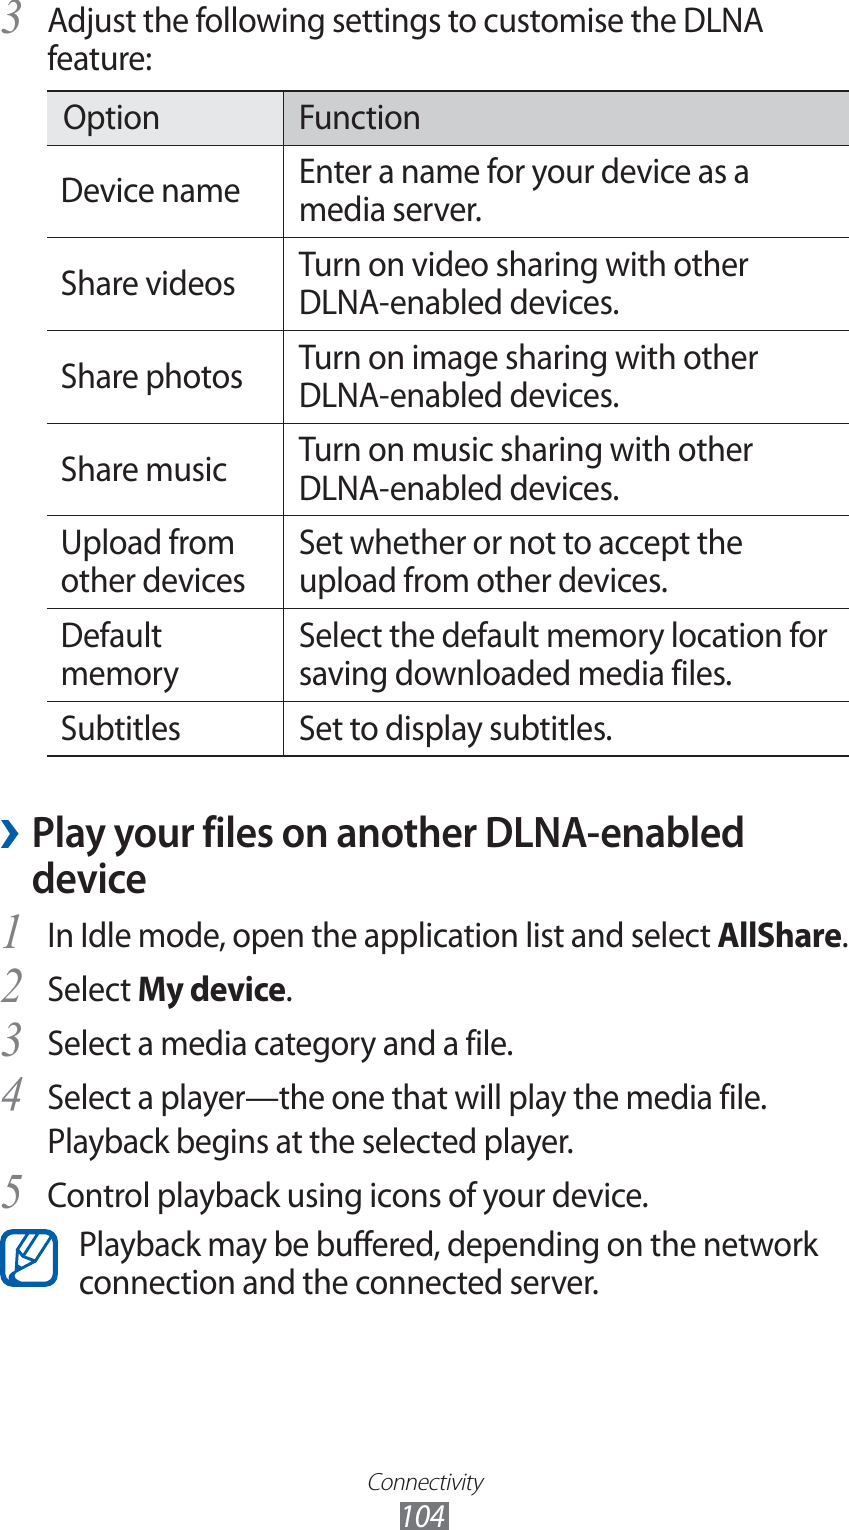
![Connectivity103Send data via Wi-Fi ›Select a file or item, such as a memo, media file, or web 1 address, from an appropriate application or My files.Select an option for sending data via Wi-Fi.2 The method for selecting an option may vary by data type.Search for and select another device.3 Receive data via Wi-Fi ›When prompted, select OK to confirm that you are willing to receive data. Received data is saved to the ShareViaWifi folder.AllShareLearn to use the Digital Living Network Alliance (DLNA) service that enables you to share media files between DLNA-enabled devices in your home over Wi-Fi.You must first activate the Wi-Fi feature and add a Wi-Fi profile. ► p. 101Customise DLNA settings for sharing media ›filesTo allow other DLNA-enabled devices to access media files on your device, you must activate media sharing.Some files may not play on the DLNA-enabled devices depending on the devices.In Idle mode, open the application list and select 1 AllShare.Press [2 ] → Settings.](https://usermanual.wiki/Samsung-Electronics-Co/GTS7500W/User-Guide-1689820-Page-106.png)

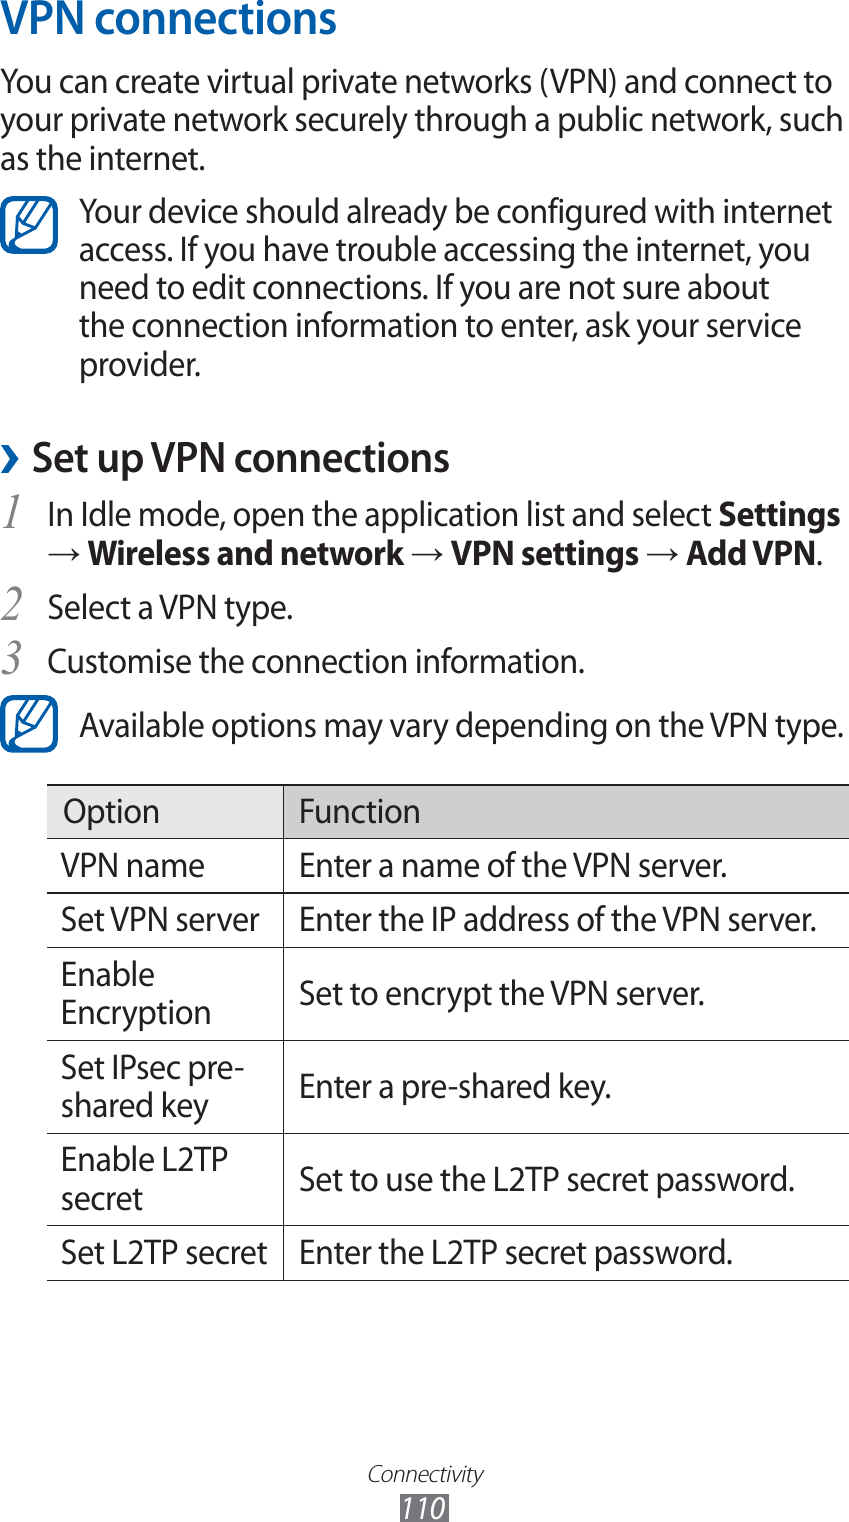
![Connectivity111Option FunctionSet user certificateSelect a user certificate that the VPN server uses to identify you. You can import certificates from the VPN server or download from the web.Set CA certificateSelect a certificate authority (CA) certificate that the VPN server uses to identify you. You can import certificates from the VPN server or download from the web.DNS search domainsEnter the domain name server (DNS) address.When you are finished, press [4 ] → Save.Connect to a private network ›In Idle mode, open the application list and select 1 Settings → Wireless and network → VPN settings.Select a private network.2 Enter the user name and password and select 3 Connect.](https://usermanual.wiki/Samsung-Electronics-Co/GTS7500W/User-Guide-1689820-Page-114.png)
![Tools112ToolsClockLearn to set and control alarms, and world clocks. You can also use the stopwatch and the timer.Set a new alarm ›In Idle mode, open the application list and select 1 Clock → Alarm.Select 2 Create alarm or press [ ] → Create.Set alarm details.3 Select the check box next to Smart alarm to activate simulated nature sounds with the alarm screen prior to the main alarm.When you are finished, select 4 Save.Stop an alarm ›When the alarm sounds,To stop the alarm, select ● and then drag your finger outside of the large circle.To repeat the alarm after a specified length of time, select ● and then drag your finger outside of the large circle.](https://usermanual.wiki/Samsung-Electronics-Co/GTS7500W/User-Guide-1689820-Page-115.png)
![Tools113Delete an alarm ›In Idle mode, open the application list and select 1 Clock → Alarm.Press [2 ] → Delete.Select alarms to delete.3 Select 4 Delete.Create a world clock ›In Idle mode, open the application list and select 1 Clock → World clock.Select 2 Add city or press [ ] → Add.Enter a city name or select one from the city list.3 To select a current city, select Current location.To add more world clocks, repeat steps 2-3.4 To apply the summer time to the clocks, tap and hold a clock and select DST settings.Use the stopwatch ›In Idle mode, open the application list and select 1 Clock → Stopwatch.Select 2 Start to begin the stopwatch.Select 3 Lap to record lap times.When you are finished, select 4 Stop.Select 5 Reset to clear recorded times.](https://usermanual.wiki/Samsung-Electronics-Co/GTS7500W/User-Guide-1689820-Page-116.png)
![Tools114Use the count-down timer ›In Idle mode, open the application list and select 1 Clock → Timer.Set the length of time to count down.2 Select 3 Start to begin the countdown.When the timer expires, select 4 and then drag your finger outside of the large circle.CalculatorLearn to perform mathematical calculations directly on your device like a typical hand-held or desktop calculator.Perform the calculation ›In Idle mode, open the application list and select 1 Calculator.Use the keys that correspond to the calculator display to 2 perform basic mathematical operations.Rotate the device to landscape view to use the scientific calculator. If you deactivate the auto rotation, press [ ] → Scientific calculator.View the calculation history ›In Idle mode, open the application list and select 1 Calculator.Perform the calculation.2 Select 3 to close the calculator keypad.The calculation history appears.To clear the history, press [4 ] → Clear history.](https://usermanual.wiki/Samsung-Electronics-Co/GTS7500W/User-Guide-1689820-Page-117.png)

![Tools116Customise Kies air settings ›In Idle mode, open the application list and select 1 Kies air.Press [2 ] → Settings.Change the following options:3 Option FunctionDevice name Enter a name for your device as a media server.Access requestSet to receive authorisation requests from other devices while your device is connected to a PC.Enable visibility Set the device to be visible to a PC.Time-out Select the length of time the device waits before ending the connection.Lock contents Select the types of data that should not display on the PC browser. Reset settings Reset your settings to the factory default values.Connect a PC to your device via Wi-Fi ›In Idle mode, open the application list and select 1 Kies air → Start.Enter the web address displayed by Kies air in the browser 2 on your PC.Select 3 Allow (if necessary).When connected, you will see your device data on the PC’s web browser.To end the connection, select 4 Stop.](https://usermanual.wiki/Samsung-Electronics-Co/GTS7500W/User-Guide-1689820-Page-119.png)
![Tools117My filesLearn to quickly and easily access all of your images, videos, music, sound clips, and other types of files stored in your memory card.Playback quality may vary by content type. ●Some files may not play properly depending on how ●they are encoded.In Idle mode, open the application list and select 1 My files.Select a folder.2 To return to the Home directory, select ●Home.To move up one level in the file directory, select ●Up.Select a file to open.3 In a folder, press [ ] to use the following options:To send a file to others, select ●Share.To create a new folder, select ●Create folder.To delete files or folders, select ●Delete.To change the view mode, select ●View by.To sort files or folders, select ●List by.To use additional features using a file, such as moving, ●copying or renaming option, select More.SIM ToolkitUse a variety of additional services offered by your service provider. Depending on your SIM or USIM card, this menu may be available but labelled differently.In Idle mode, open the application list and select SIM Toolkit.](https://usermanual.wiki/Samsung-Electronics-Co/GTS7500W/User-Guide-1689820-Page-120.png)
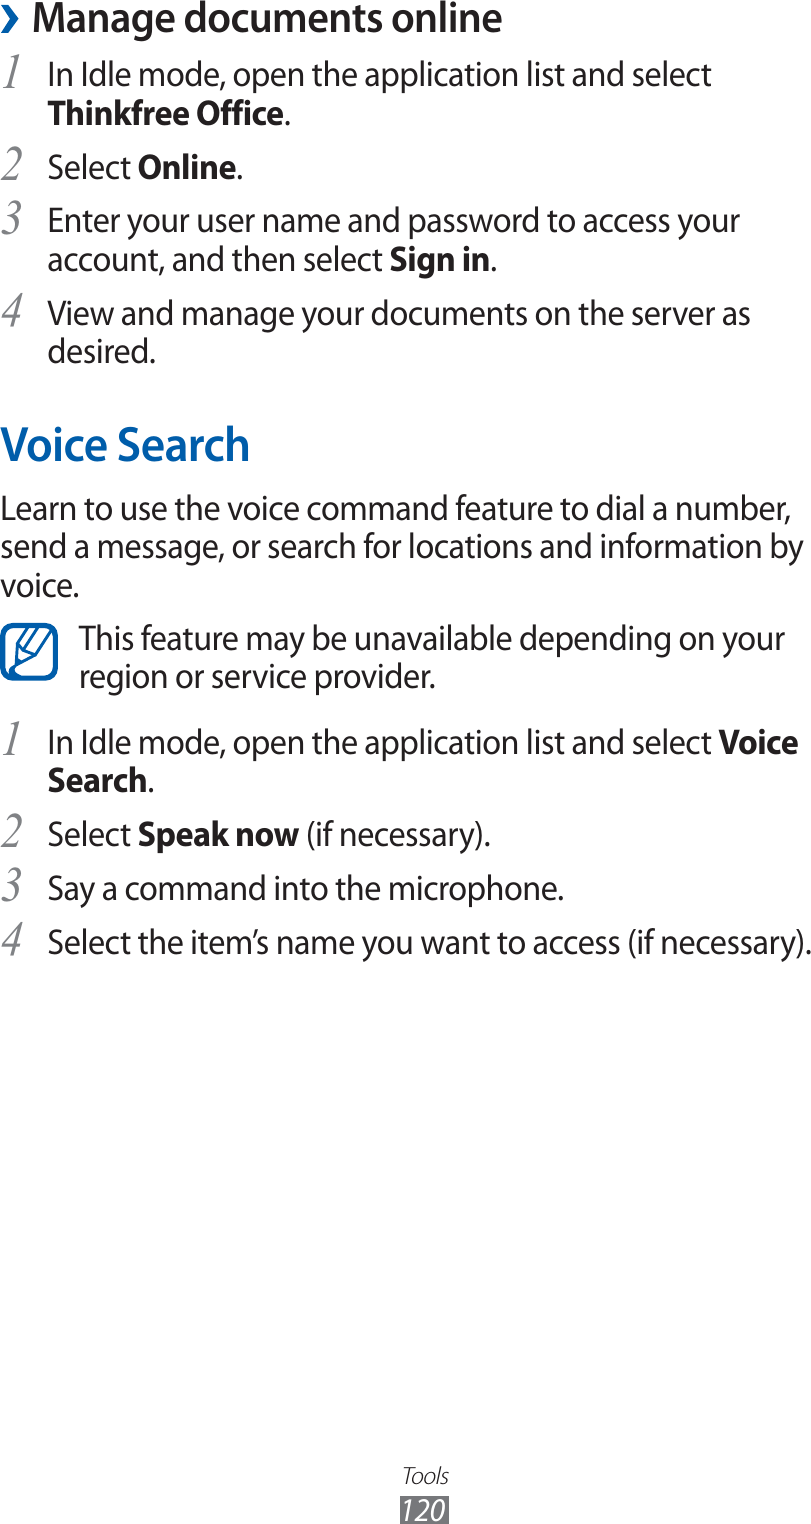
![Tools119Select 3 Accept to confirm, if you are launching this application for the first time.Select 4 Activate now → Close to activate Thinkfree Office.Select 5 My Docs.Press [6 ] → New → a document type.Enter a name for the document and select 7 OK.Enter contents in the document by using the tools at the 8 bottom of the screen.When you are finished editing, select 9 on the toolbar or press [ ] → File → Save.View and edit a document on your device ›In Idle mode, open the application list and select 1 Thinkfree Office.Select 2 My Docs → a document.Select a text encoding type (if necessary).3 View and edit the document as desired.4 To zoom in or out, use the two finger zoom; Place your ●two fingers on the screen and slowly pinch or spread apart.To open the toolbar to edit the document (word, text, or ●excel file), press [ ] → Edit.To search for text in a document, press [ ●] → Find.To change the view mode, press [ ●] → Display mode.To zoom in or out in the document, press [ ●] → Zoom.To customise the settings for viewing or editing ●documents, press [ ] → More → Preferences.When you are finished editing, save the document.5](https://usermanual.wiki/Samsung-Electronics-Co/GTS7500W/User-Guide-1689820-Page-122.png)
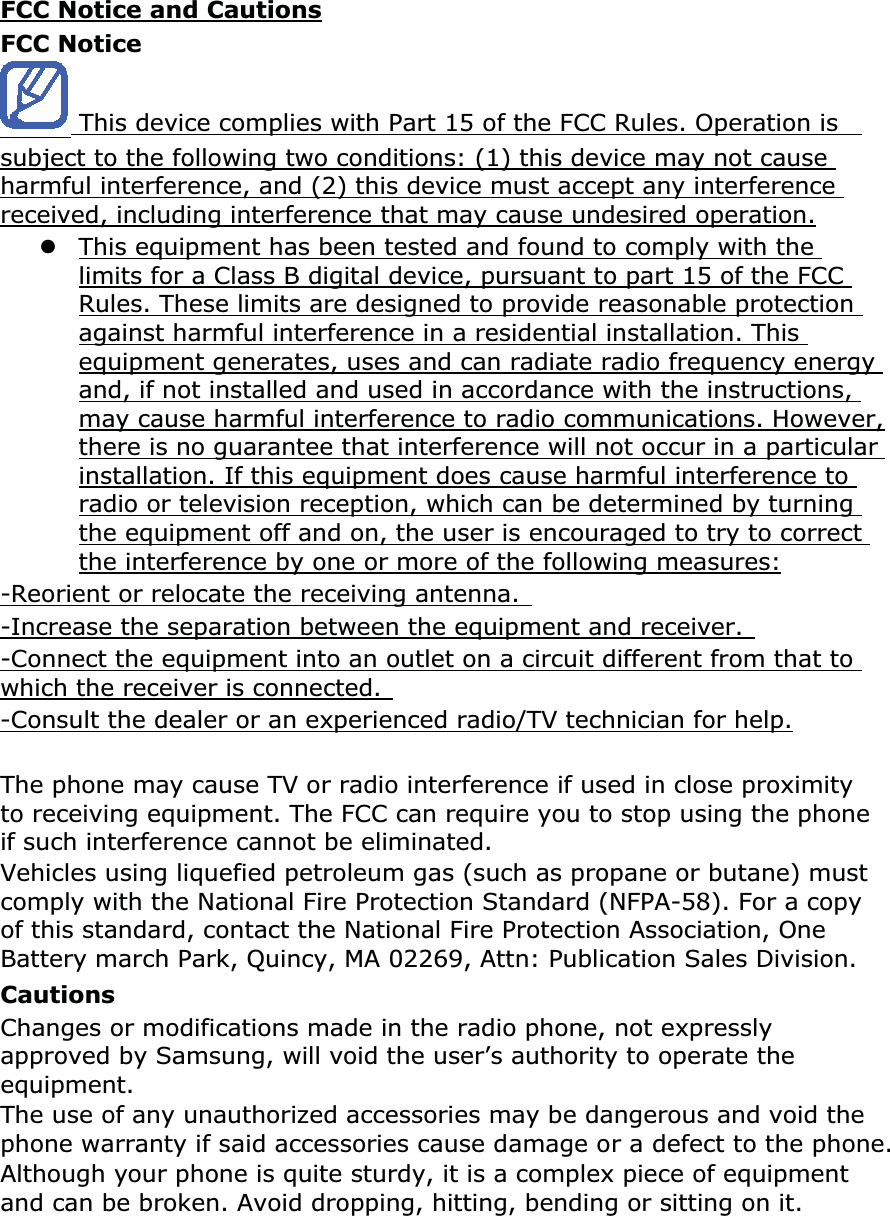
![We, Samsung Electronicsdeclare under our sole responsibility that the productGSM WCDMA BT/Wi-Fi Mobile Phone :GTڈS7500Wto which this declaration relates, is in conformity with the following standards and/or other normativedocuments.We hereby declare that [all essential radio test suites have been carried out and that] the above namedproduct is in conformity to all the essential requirements of Directive 1999/5/EC.TheconformityassessmentprocedurereferredtoinArticle10 and detailed in Annex[ญ]of Directive1999/5/EC has been followed with the involvement of the following Notified Body(ies):BABT, Forsyth House, Churchfield Road, Walton-on-Thames,Surrey, KT12 2TDSUK ଖIdentification mark: 0168The technical documentation kept at :which will be made available upon request.(Representative in the EU)Declaration of Conformity (R&TTE)SAFETY EN 60950-1 : 2006 + A1 : 2010SAREN 50360 : 2001 / AC 2006EN 62209 - 1 : 2006EN 62209 - 2 : 2010EN 62479 : 2010EN 62311 : 2008EMCEN 301 489-01 V1.8.1 (04ڈ2008)EN 301 489-07 V1.3.1 (11ڈ2005)EN 301 489-17 V2.1.1 (05ڈ2009)EN 301 489-24 V1.5.1 (10ڈ2010)RADIOEN 301 511 V9.0.2 (03ڈ2003)EN 301 908ڈ1V4.2.1 (03ڈ2010)EN 301 908ڈ2V4.2.1 (03ڈ2010)EN 300 440ڈ1V1.6.1 (08ڈ2010)EN 300 440ڈ2V1.4.1 (08ڈ2010)EN 300 328 V1.7.1 (10ڈ2006)EN 301 893 V1.5.1 (12ڈ2008)Samsung Electronics QA Lab.ଖIt is not the address of Samsung Service Centre. For the address or the phone number of SamsungService Centre, see the warranty card or contact the retailer where you purchased your product.Samsung Electronics Euro QA Lab.Blackbushe Business Park, Saxony Way,Yateley, Hampshire, GU46 6GG, UKଖJoong-Hoon Choi /Lab Manager(place and date of issue) (name and signature of authorised person)2012.04.13](https://usermanual.wiki/Samsung-Electronics-Co/GTS7500W/User-Guide-1689820-Page-160.png)