Samsung Electronics Co HTXA100 DVD Receiver User Manual HT XA100 XA100C XAA indd
Samsung Electronics Co Ltd DVD Receiver HT XA100 XA100C XAA indd
Contents
- 1. User manual 1 of 3
- 2. User manual 2 of 3
- 3. User manual 3 of 3
User manual 2 of 3
19
ENG ● CONNECTIONS
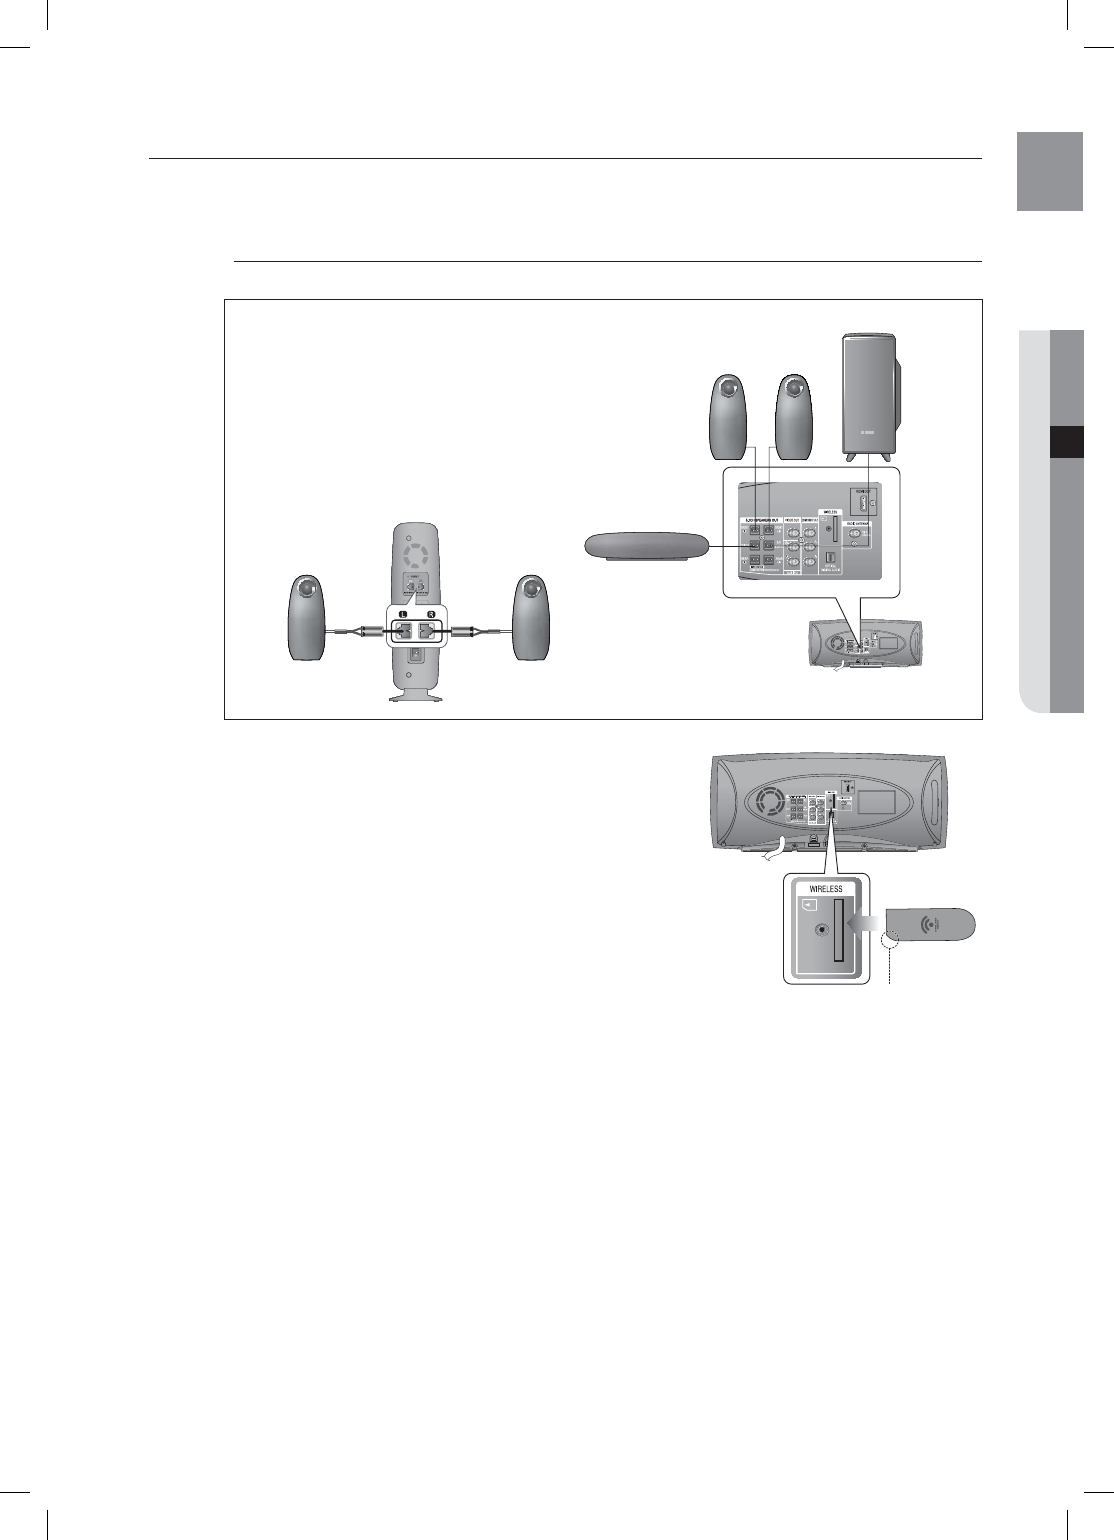
CONNECTING THE OPTIONAL WIRELESS RECEIVING AMPLIFIER
To connect the rear speakers by wireless, you have to purchase the wireless receiving module and TX card from
your Samsung retailer.
When you have Purchased the Wireless Receiving Module (SWA-4000)
Connect the front, center and Subwoofer speakers to the
DVD Player. Please refer to Page 18.
With the DVD Player turned off, insert the TX card into the
TX Card Connection(WIRELESS) on the back of the main
unit.
Hold the TX card so that the slanted side faces downward
and insert the card into the port.
The TX card enables communication between the main
unit and the wireless receiver.
Connect the left and right rear speakers to the wireless
receiving module.
Plug the power cord of the wireless receiving module into the
wall outlet and turn the module ON.
1.
2.
•
•
3.
4.
Front Speaker (R)
Rear Speaker (L)
Subwoofer
Center Speaker
Rear Speaker (R)
WIRELESS RECEIVER MODULE
Front Speaker (L)
TX card
Slanted side faces
down
HT-XA100,XA100C_XAA.indd 19 2008-02-21 5:09:55
20
connections
Place the wireless receiver module at the rear of the listening
position. If the wireless receiver module is too close to the main unit,
some sound interruption may be heard due to interference.
If you use a device such as a microwave oven, wireless LAN Card,
Bluetooth equipment, or any other device that uses the same frequency
(5.8GHz) near the system, some sound interruption may be heard due to
interference.
The transmission distance of a radio wave is about 10m, but may
vary depending on your operating environment. If a steel-concrete
wall or metallic wall is between the main unit and the wireless
receiver module, the system may not operate at all, because the
radio wave cannot penetrate metal.
This product(HT-XA100) is compatible with the wireless receiver module SWA-3000.
Do not insert any other card except the TX card dedicated to the product. The product might be damaged or
the card may not be removed easily.
Do not insert the TX card upside down or in the reverse direction.
Insert the TX card when the DVD Player is turned off. Inserting the card when it is turned on may cause a
problem.
If the TX Card is inserted, sound is not output from the Rear Speaker connectors on the main unit.
The wireless receiving antenna is built into the wireless receiver module. Keep the unit away from water and
moisture.
For optimal listening performance, make sure that the area around the wireless receiver module location is
clear of any obstructions.
If no sound is heard from the wireless rear speakers, switch the mode to DVD 5.1 channel or Dolby ProLogic II.
In 2-CH mode, no sound will be heard from the wireless rear speakers.
J
M
HT-XA100,XA100C_XAA.indd 20 2008-02-21 5:09:56
21
ENG ● CONNECTIONS
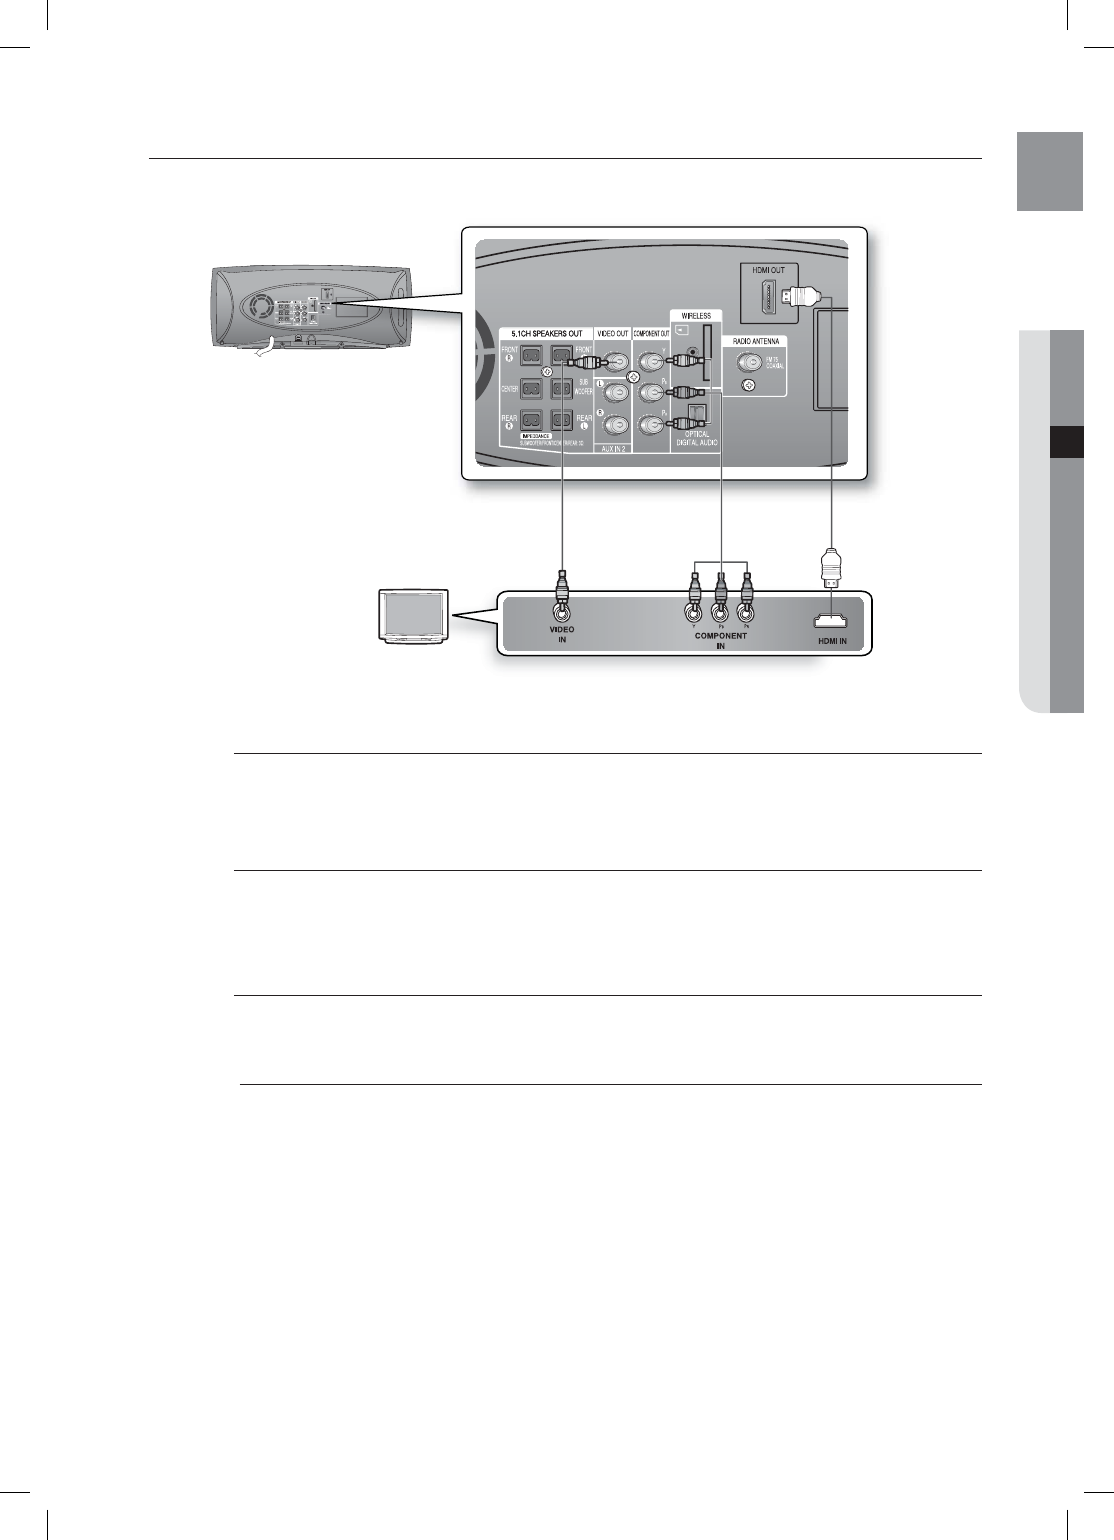
CONNECTING THE VIDEO OUT TO YOUR TV
Choose one of the three methods for connecting to a TV.
METHOD3
(supplied)
METHOD2 METHOD1
METHOD 1 : HDMI
Connect the HDMI cable from the HDMI OUT jack on the back of the DVD Player to the HDMI IN jack
on your TV.
METHOD 2 : Component Video
If your television is equipped with Component Video inputs, connect a Component video cable(not
supplied) from the Component Video Output (PR, PB and Y) jacks on the back of the DVD Player to the
Component Video Input jacks on your TV.
METHOD 3 : Composite Video
Connect the supplied Video cable from the VIDEO OUT jack on the back of the DVD Player to the
VIDEO IN jack on your TV.
The resolution from the Component Output is 480i.
If you use an HDMI cable to connect a Samsung TV to the DVD Player, you can operate the Home Theater
using the TV's remote control. This is only available with SAMSUNG TVs that support Anynet+(HDMI-CEC).
Please check the n logo (If your TV has an n logo, then it supports the Anynet+ function.)
M
HT-XA100,XA100C_XAA.indd 21 2008-02-21 5:09:59

22
connections
HDMI Auto Detection Function
The player's video output will automatically change to HDMI mode when connecting an HDMI cable
while power is on.
HDMI (High Definition Multimedia Interface)
HDMI is an interface that enables the digital transmission of video and audio data with just a single
connector.
Using HDMI, the DVD Home Theater transmits a digital video and audio signals and displays a vivid
picture.
HDMI connection description
HDMI connector - Supports video and digital audio data.
- HDMI outputs only a pure digital signal to the TV.
- If your TV does not support HDCP (High-bandwidth Digital Content Protection), random noise
appears on the screen.
Why does Samsung use HDMI?
Analog TVs require an analog video/audio signal. However, when playing a DVD, the data transmitted
to a TV is digital. Therefore either a digital-to-analog converter (in the DVD Home Theater) or an
analog-to-digital converter (in the TV) is required. During this conversion, the picture quality is
degraded due to noise and signal loss. HDMI technology is superior because it requires no D/A
conversion and is a pure digital signal from the player to your TV.
What is the HDCP?
HDCP (High-band width Digital Content Protection) is a system for protecting DVD content outputted
via HDMI from being copied. It provides a secure digital link between a video source (PC, DVD. etc)
and a display device
(TV, projector. etc). Content is encrypted at the source device to prevent unauthorized copies from
being made.
What is Anynet+?
Anynet+ is a convenient function that offers linked operation of this unit through Samsung TVs with the
Anynet+ feature.
- If your Samsung TV has an n logo, then it supports the Anynet+ function.
-
If you turn on the player and insert a disc, the player will start playing the disc, and the TV will turn on
automatically and switch to HDMI mode.
- If you turn on the player and press the Play button with a disc already inserted, the TV will
immediately turn on and switch to HDMI mode.
•
•
•
•
•
HT-XA100,XA100C_XAA.indd 22 2008-02-21 5:10:00
23
ENG ● CONNECTIONS
HDMI FUNCTION
Resolution Selection
This function allows the user to select the screen resolution for
HDMI output.
In Stop mode, press and hold the SD/HD (Standard Defi nition/High
Defi nition) button on the remote control for longer than 5 seconds.
Resolutions available for the HDMI output are 480p, 720p,
1080i/1080p.
SD(Standard Defi nition) resolution is 480p and HD
(High Defi nition) resolution is 720p, 1080i/1080p.
The default value of HDMI output is 480P.
If the TV does not support the confi gured resolution, you will
not be able to see the picture.
When an HDMI cable is connected, composite and component
video signals are not output.
See your TV owner's manual for more information on how to
select the TV's Video Input source.
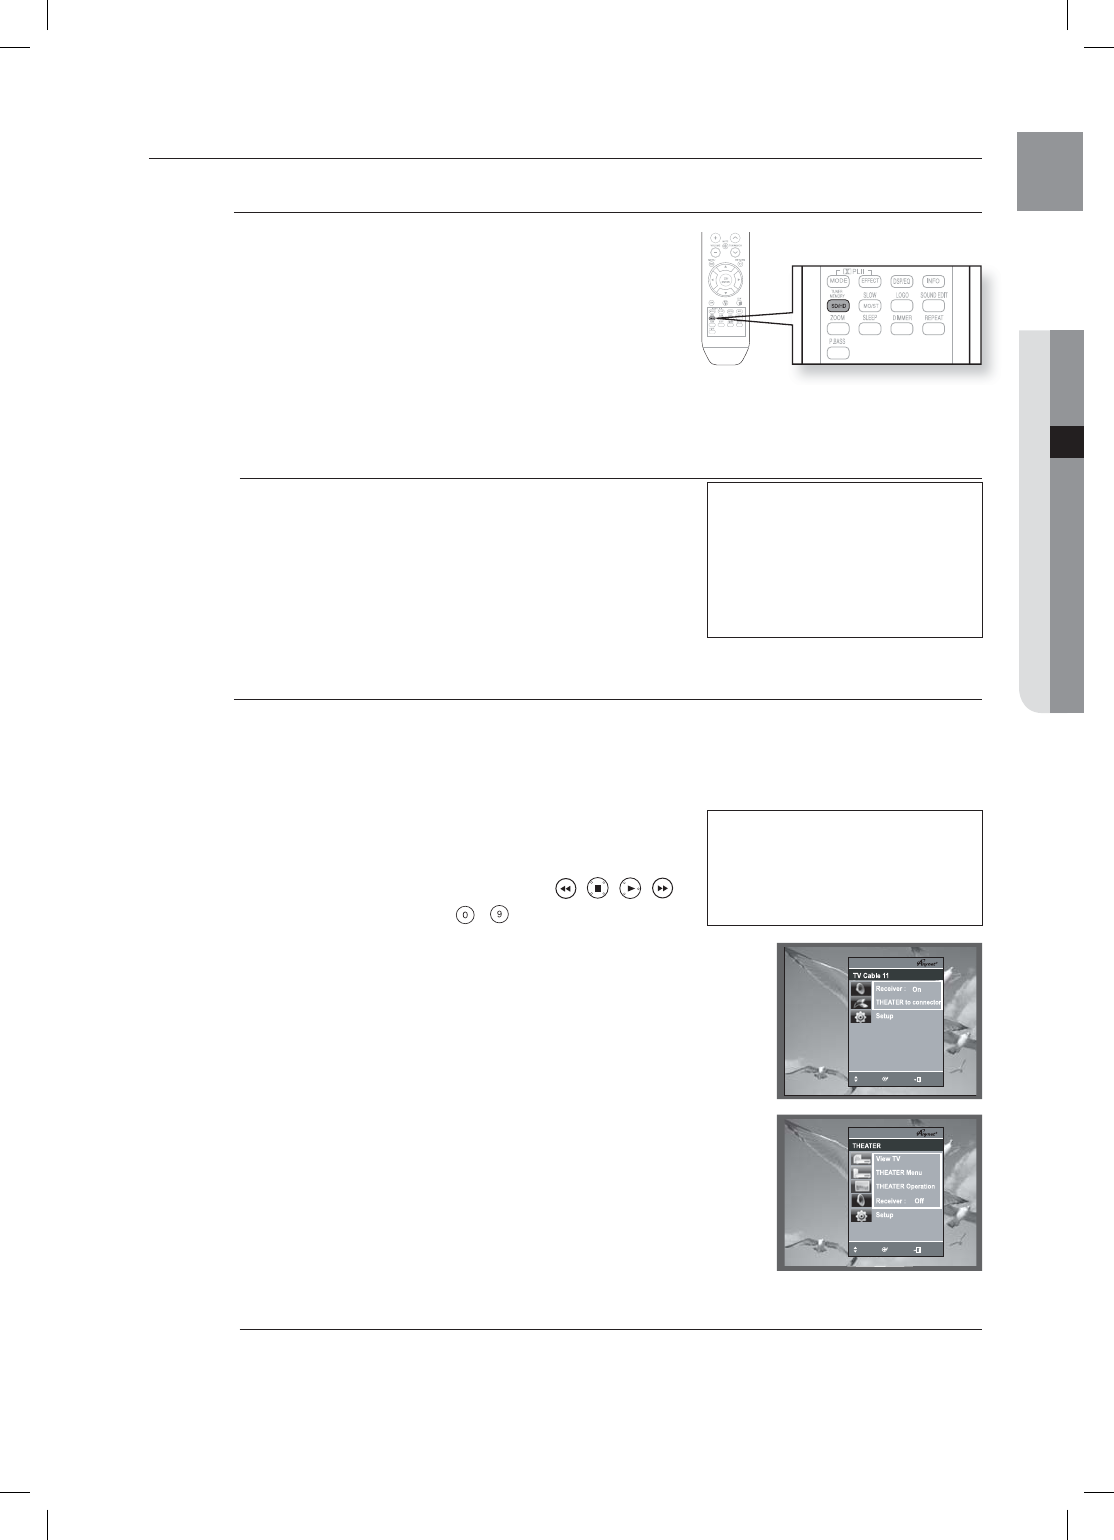
Using Anynet+(HDMI-CEC)
Anynet+ is a function that enables you to control other Samsung Devices with your Samsung TV's
remote control, Anynet + can be used by connecting this Home Theater to a SAMSUNG TV using an
HDMI Cable. This is only available with SAMSUNG TVs that support Anynet+.
Connect the main unit of the Home Theater to a Samsung TV with an HDMI cable. (See page 21)
Set the Anynet+ function on your TV.
(See the TV instructions manual for more information.)
You can operate the Home Theater by using the TV
remote control. (Available TV buttons : , , , ,
▲
, ▼ and ◄, ► buttons, ~ button)
If you select the TV
Set the Anynet+(HDMI-CEC) to On by pressing the Anynet+ button on your TV.
Receiver : On : You can listen to audio through the Home Theater.
Receiver : Off : You can listen to audio through the TV.
If you select the THEATER
Select THEATER to connect and set the option of each item below.
View TV :
If Anynet+(HDMI-CEC) is set to on and you select View TV, the
Home Theater will automatically switch to DIGITAL IN mode.
THEATER Menu :
You can access and control the Home Theater menu.
THEATER Operation : The Home Theater disc playback information
will be displayed.
You can control the Disc operation of the
Home Theater such as title, chapter and
subtitle change.
Receiver : On : You can listen to audio through the Home Theater.
Receiver : Off : You can listen to audio through the TV.
The Theater function is available only when you listen to the audio through the Home Theater with the digital
optical cable connected.
•
•
M
1.
2.
•
•
•
•
•
•
•
•
M
Why use HDMI (High Defi nition
Multimedia Interface)?
This device transmits a DVD video
signal digitally without the process
of converting to analog. You will get
sharper digital pictures when using
an HDMI connection.
.07&
&/5&3
&9*5
.07&
&/5&3
&9*5
.07&
&/5&3
&9*5
With Anynet+
You can operate this unit, power on
your TV, or watch a movie by pressing
the Play button on your Samsung TV's
remote control.
HT-XA100,XA100C_XAA.indd 23 2008-02-21 5:10:05
24
connections
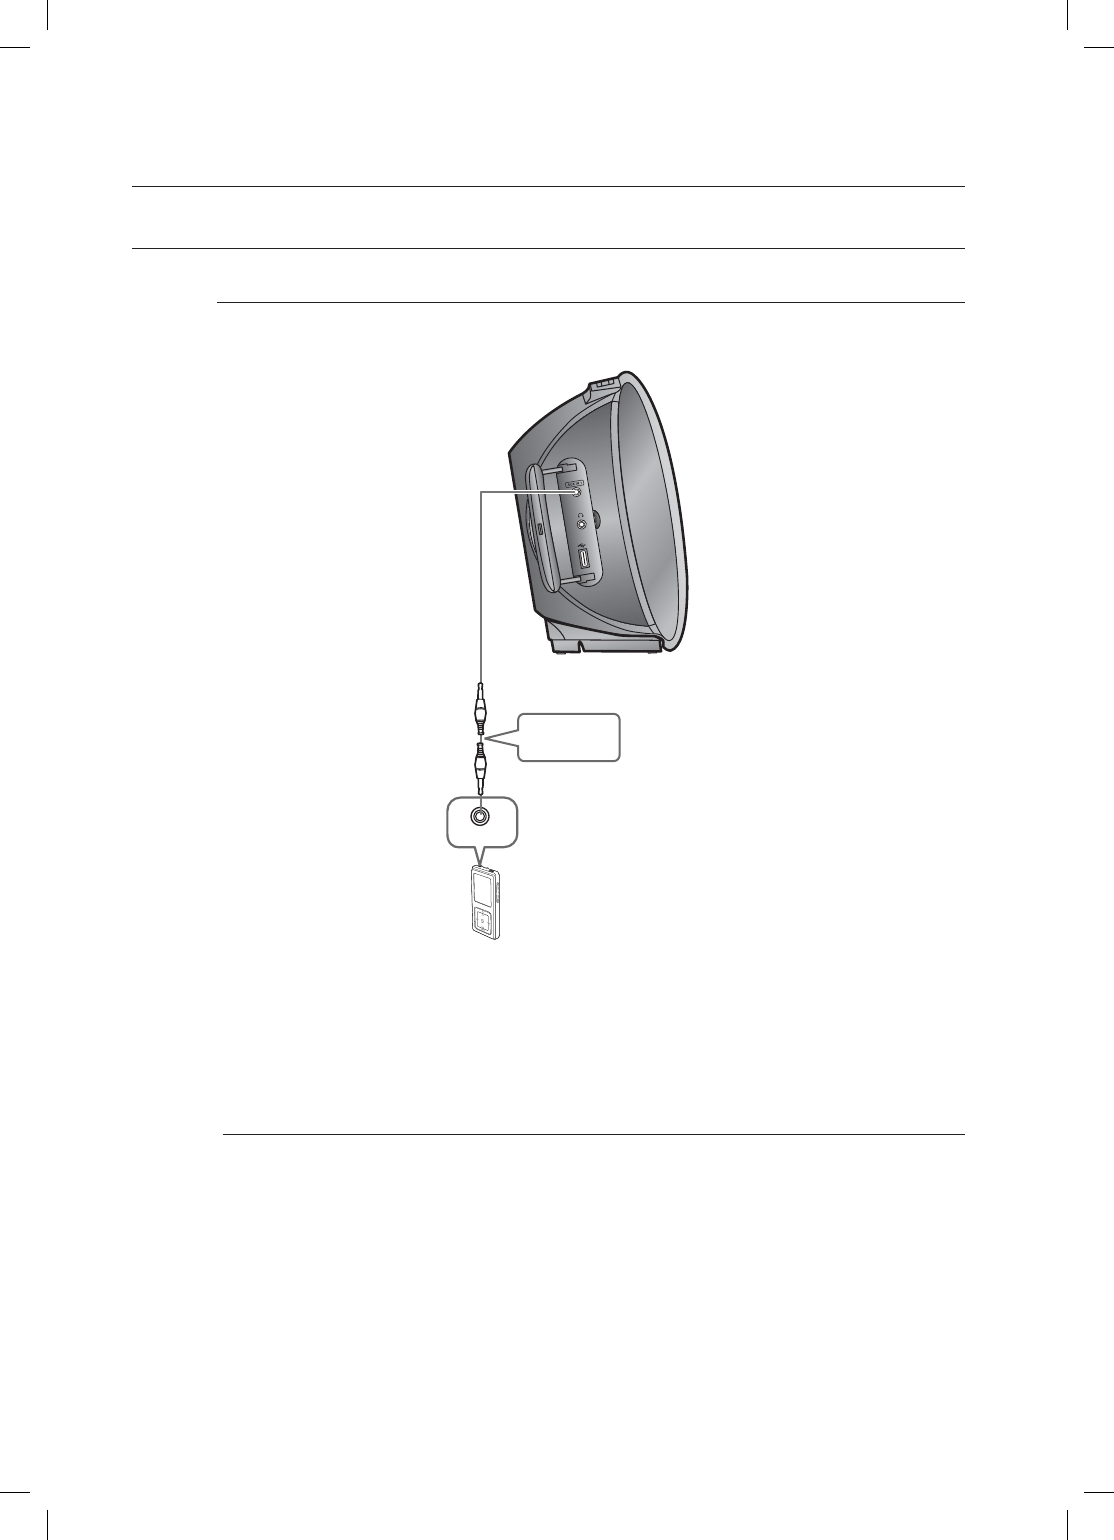
CONNECTING AUDIO FROM EXTERNAL COMPONENTS
AUX1 : Connecting an External Component/MP3 player
Components such as an MP3 Player
Audio Cable
(not supplied)
Audio OUT
Connect AUX IN 1 (Audio) on the Home Theater to the Audio Out of the external component/MP3
player.
Press the AUX button on the remote control to select AUX1 input.
You can also use the FUNCTION button on the main unit.
The mode switches as follows :
DVD/CD DIGITAL IN AUX 1 AUX 2 USB BT AUDIO FM.
When the unit is powered on and you connect an MP3 player, the unit will charge your MP3 player's battery.
1.
2.
•
M
HT-XA100,XA100C_XAA.indd 24 2008-02-21 5:10:06
25
ENG ● CONNECTIONS
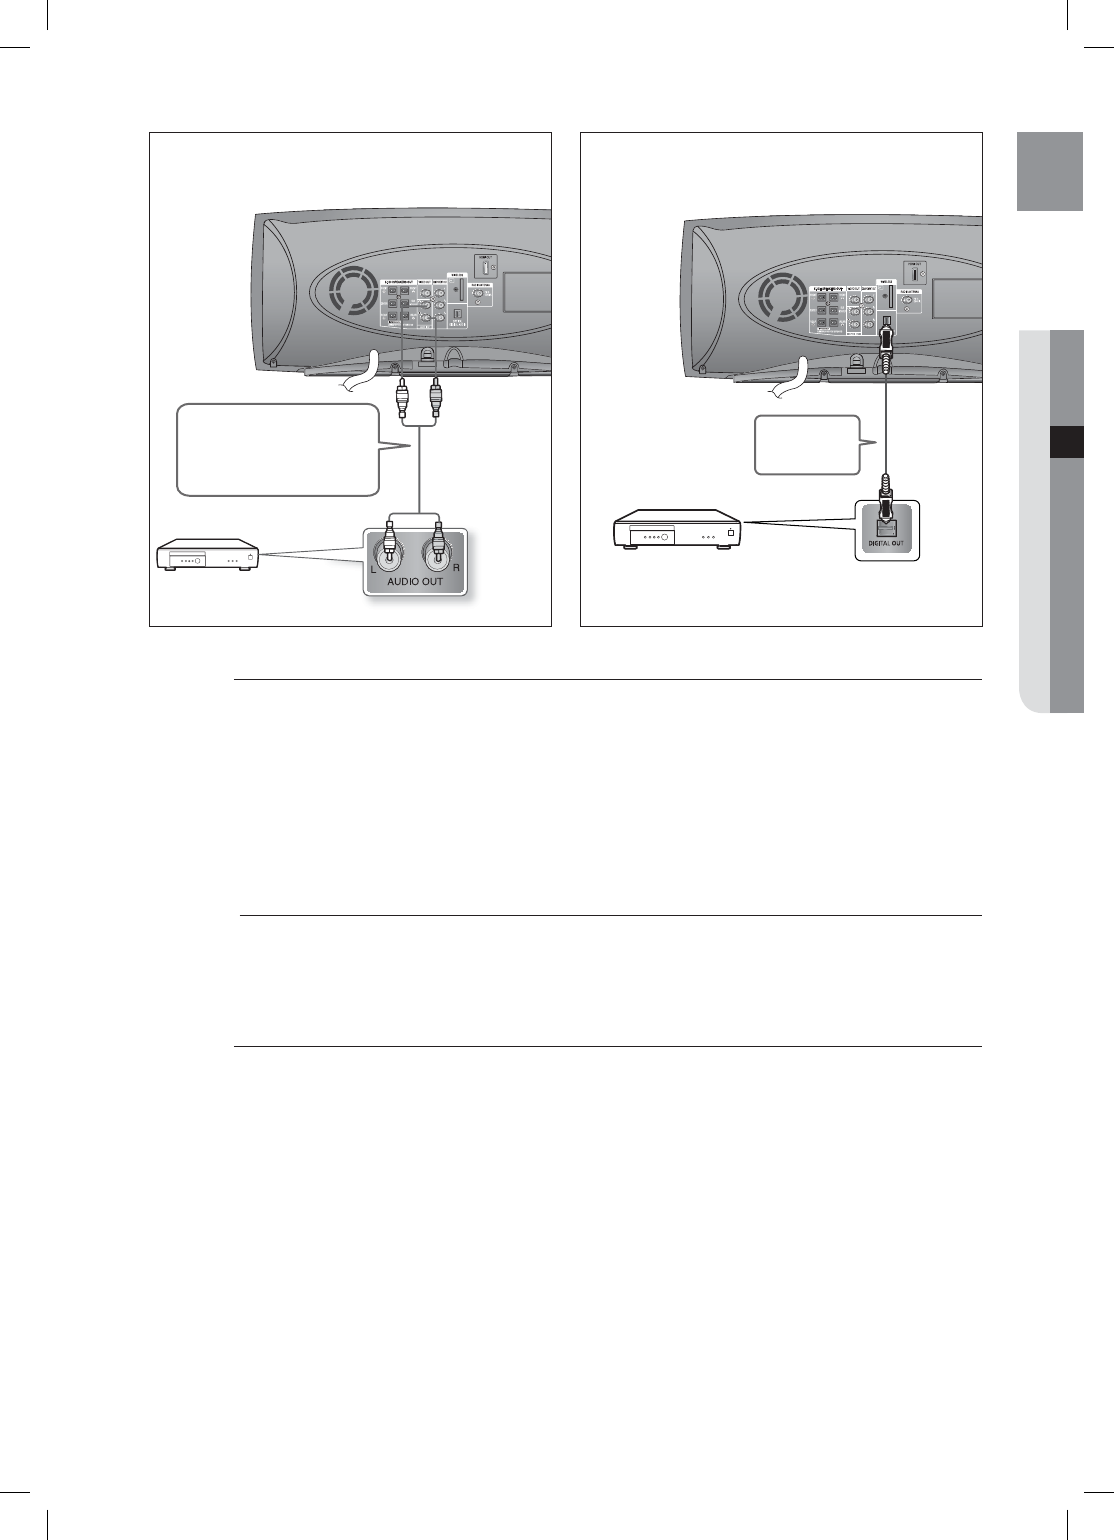
AUX2 : Connecting an External Analog Component
Analog signal components such as a VCR.
Connect AUX IN 2 (Audio) on the Home Theater to the Audio Out of the external analog component.
Be sure to match connector colors.
Press the AUX button on the remote control to select AUX 2 input.
You can also use the FUNCTION button on the main unit.
The mode switches as follows :
DVD/CD DIGITAL IN AUX 1 AUX 2 USB BT AUDIO FM.
You can connect the Video Output jack of your VCR to the TV, and connect the Audio Output jacks of the VCR
to this product.
OPTICAL : Connecting an External Digital Component
Digital signal components such as a Cable Box/Satellite receiver (Set-Top Box).
Connect the Digital Input (OPTICAL) on the Home Theater to the Digital Output of the external digital
component.
Press the AUX button on the remote control to select DIGITAL IN.
You can also use the FUNCTION button on the main unit.
The mode switches as follows :
DVD/CD DIGITAL IN AUX 1 AUX 2 USB BT AUDIO FM.
1.
•
2.
•
M
1.
2.
•
Optical Cable
(not supplied)
AUX2 : Rear Panel OPTICAL : Rear Panel
Audio Cable (not supplied)
If the external analog
component has only one Audio
Out, connect either left or right.
External Analog
Component
External Digital
Component
HT-XA100,XA100C_XAA.indd 25 2008-02-21 5:10:09
26
connections
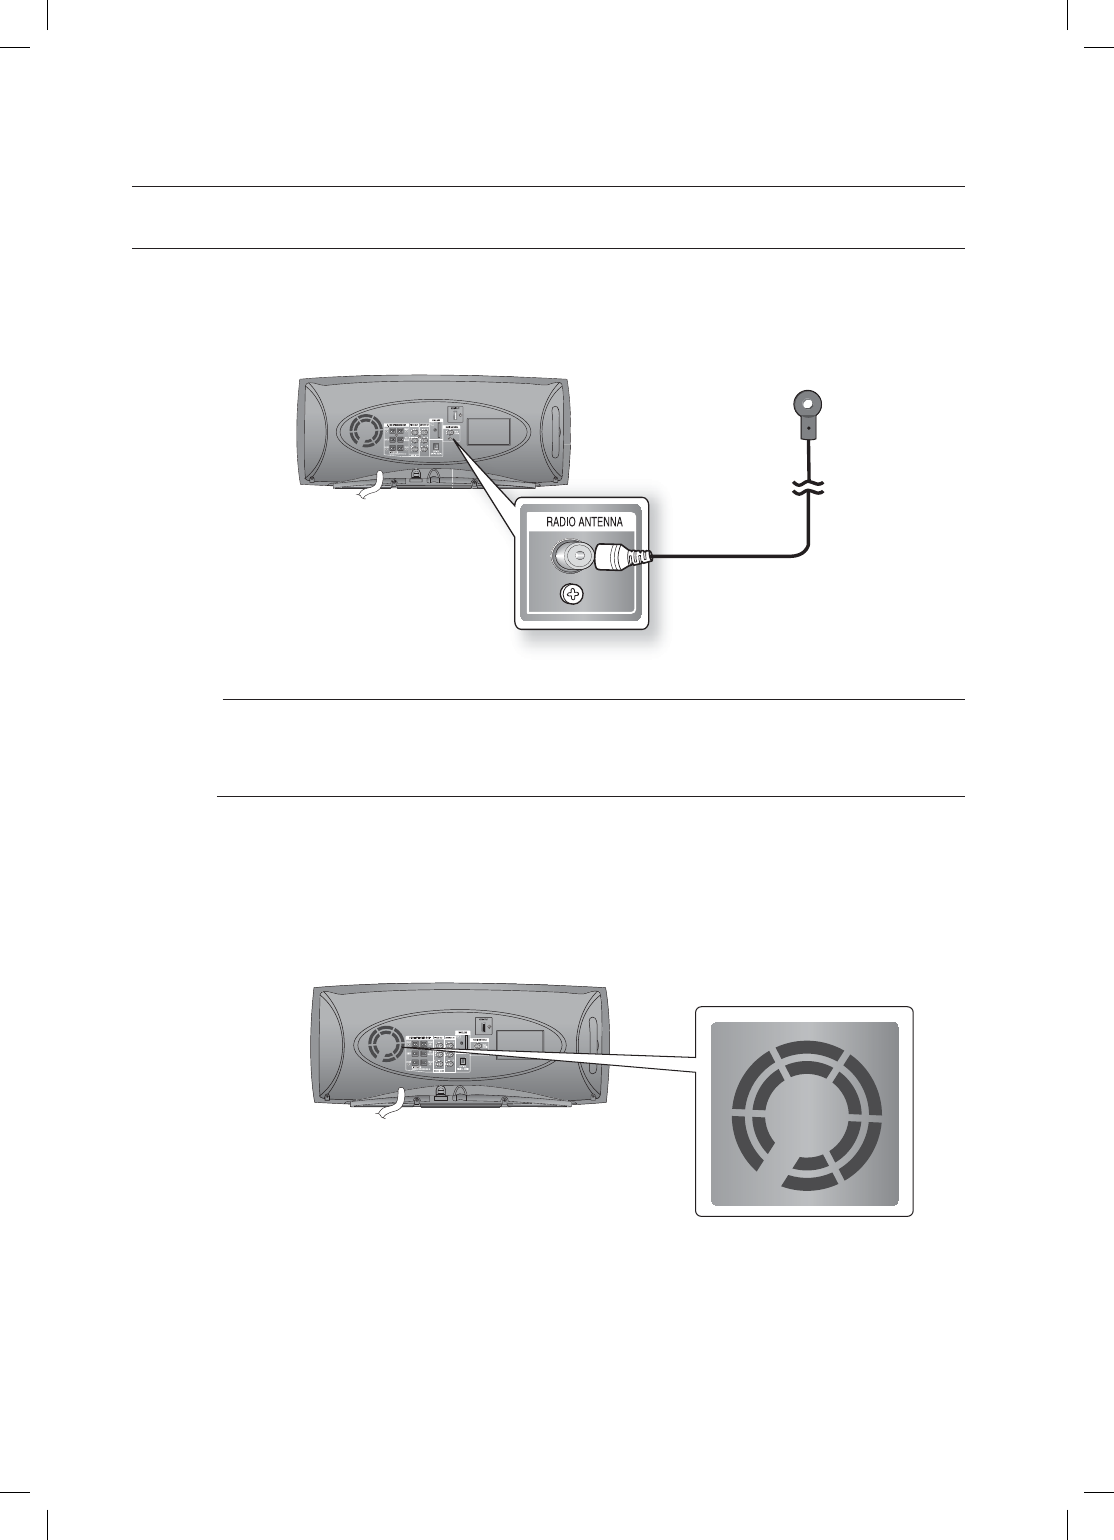
CONNECTING THE FM ANTENNA
Connect the FM antenna supplied to the FM 75Ω COAXIAL Jack.
Slowly move the antenna wire around until you find a location where reception is good, then fasten it
to a wall or other rigid surface.
This unit does not receive AM broadcasts.
Cooling Fan
The cooling fan supplies cool air to the unit to prevent overheating.
Please observe the following cautions for your safety.
Make sure the unit is well-ventilated. If the unit has poor ventilation, the temperature inside the unit
may rise and may damage it.
Do not obstruct the cooling fan or ventilation holes. (If the cooling fan or ventilation holes are covered
with a newspaper or cloth, heat may build up inside the unit and fire may result.)
1.
2.
M
•
•
FM Antenna
(supplied)
HT-XA100,XA100C_XAA.indd 26 2008-02-21 5:10:12

27
ENG ●
BEFORE USING YOUR HOME THEATER
before using your home theater
The DVD Home Theater's remote can be used to control Samsung TVs.
Plug the main unit's power cord into the AC power supply.
Press the DVD RECEIVER button to switch to DVD
RECEIVER mode to operate the DVD Home Theater.
Press the FUNCTION button on the main unit or DVD
button on the remote to enable DVD/CD playback.
Press the TV button to set the remote to TV mode.
Press the POWER button to turn on your Samsung TV with
this remote.
Press the TV/VIDEO button to select VIDEO mode on your
TV.
1.
2.
3.
4.
5.
6.
7*%&0
HT-XA100,XA100C_XAA.indd 27 2008-02-21 5:10:13
28
playback
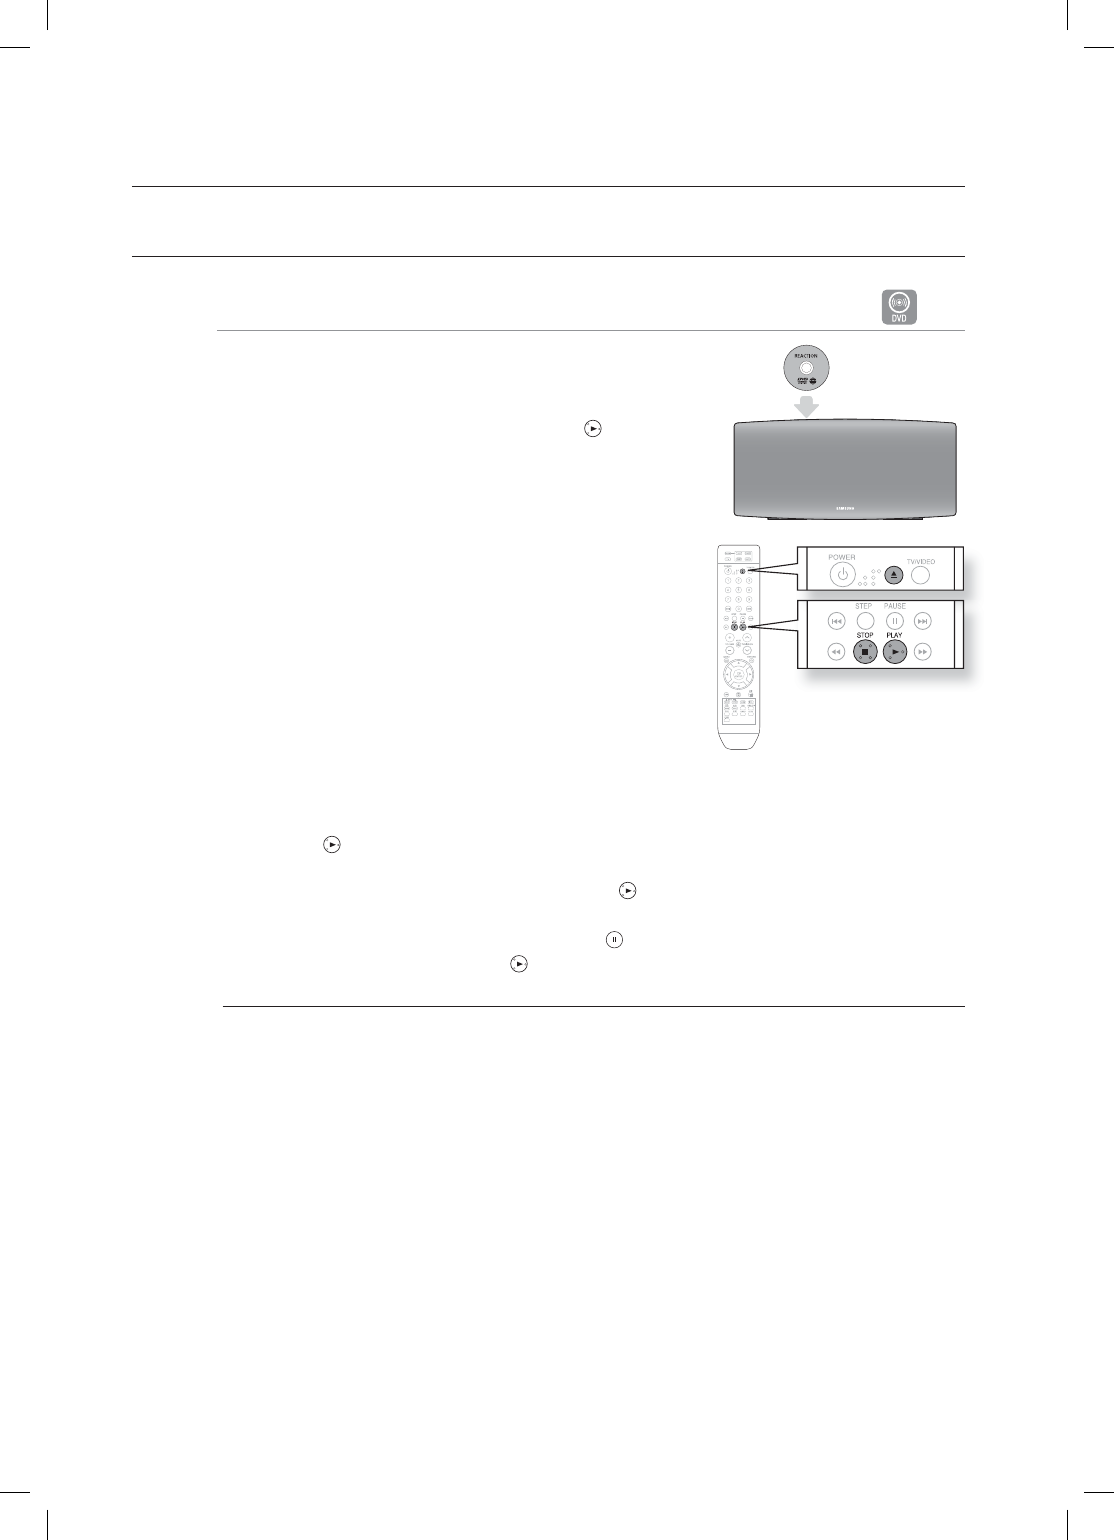
DISC PLAYBACK
B
Load a disc vertically into the Disc Insert Hole.
Place a disc gently into the tray with the disc’s label facing
up.
Close the compartment by pressing the PLAY ( ) button.
Playback starts automatically.
To stop playback, press the STOP () button during playback.
If pressed once, PRESS PLAY is displayed and the stop position will be stored in memory.
If the PLAY ( ) button or ENTER button is pressed, playback resumes from the stop position. (This
function works only with DVDs.)
If pressed twice, STOP is displayed, and if the PLAY ( ) button is pressed, playback starts from the
beginning.
To temporarily pause playback, press the PAUSE ( ) button during playback.
To resume playback, press the PLAY ( ) button again.
Depending on the content of the disc, the initial screen may appear different.
Pirated discs will not run in this player because it violates the CSS (Content Scrambling System :
a copy protection system) recommendations.
1.
•
2.
•
•
•
•
M
HT-XA100,XA100C_XAA.indd 28 2008-02-21 5:10:15
29
ENG ● PLAYBACK
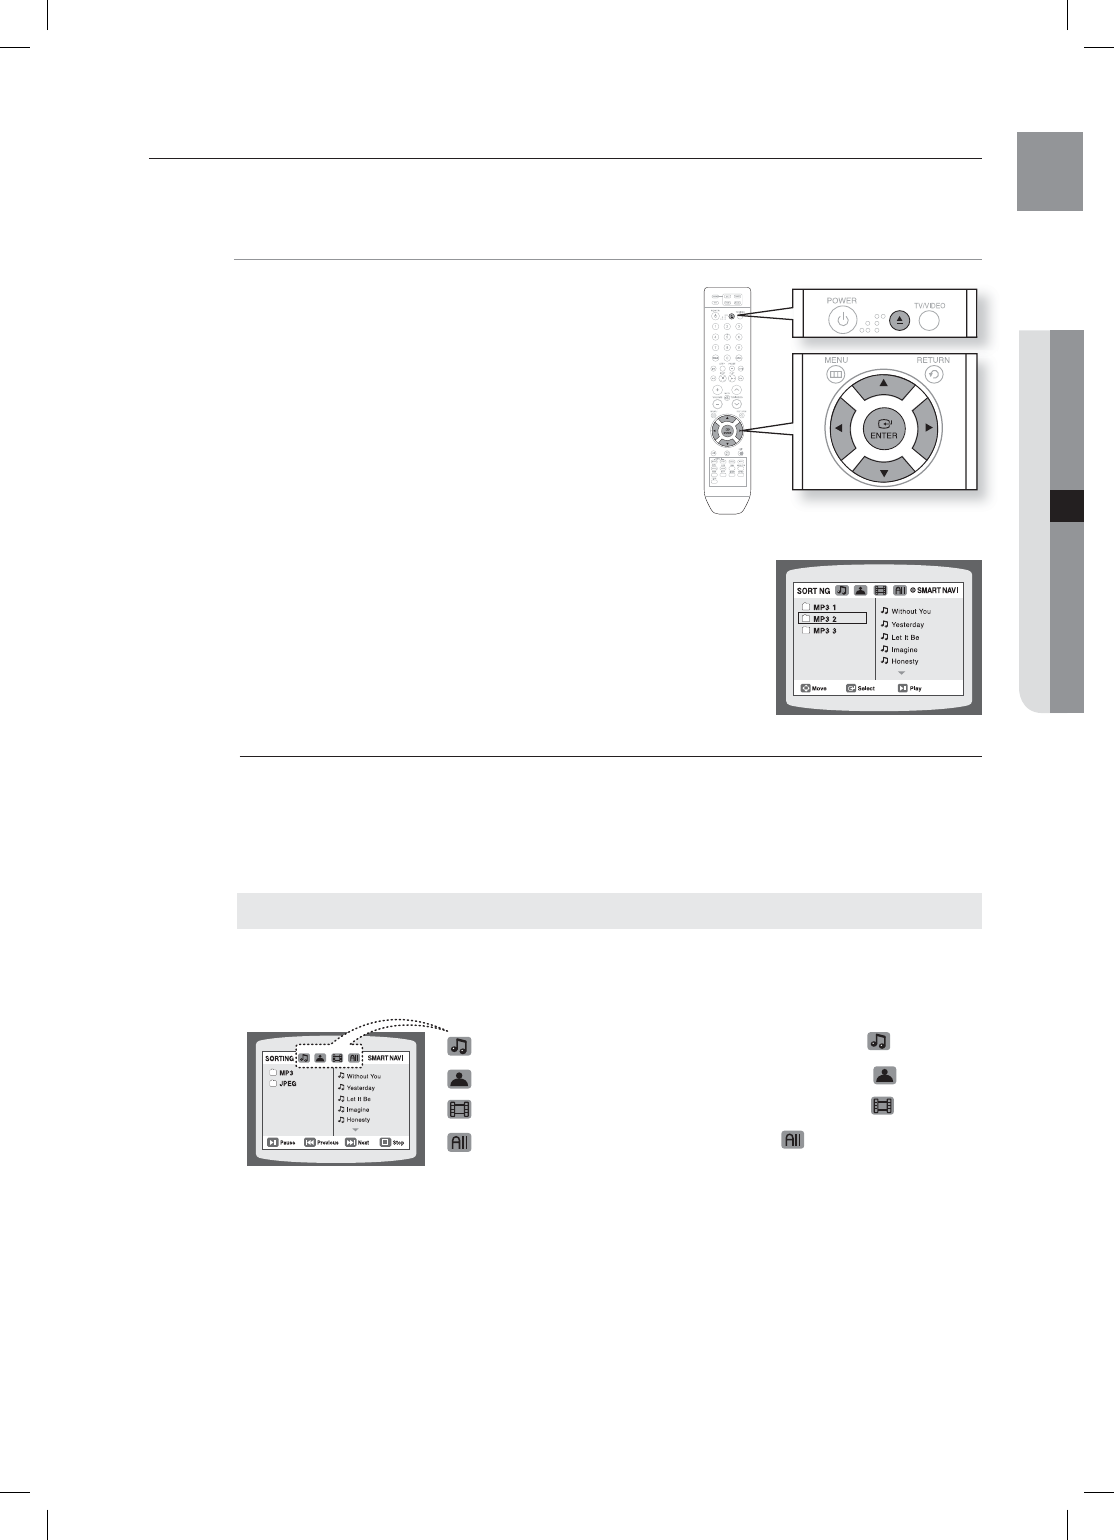
MP3/WMA-CD PLAYBACK
Data CDs (CD-R, CD-RW) encoded in MP3/WMA format can be played.
A
Load the MP3/WMA disc.
The MP3/WMA menu screen will appear and
playback will start.
The appearance of the menu depends on the
MP3/WMA disc.
WMA-DRM fi les cannot be played.
In Stop mode, use the Cursor ▲, ▼, ◄, ► button
to select the album, and then press the ENTER button.
Use the Cursor ▲, ▼ button to select the track.
To change the album, use the Cursor ▲, ▼, ◄, ► button to
select another album in Stop mode, and then press the
ENTER button.
Press the STOP () button to stop playback.
Depending on the recording mode, some MP3/WMA-CDs may not play.
Table of contents of a MP3-CD varies depending on the MP3/WMA track format recorded on the disc.
Press the Cursor ▲,
▼
,
◄
,
►
button when it is in Stop mode and select a desired icon from the
top part of the menu.
Music File Icon : To play music fi les only, select the Icon.
Image File Icon : To view image fi les only, select the Icon.
Movie File Icon : To view movie fi les only, select the Icon.
All File Icon : To view all fi les, select the Icon.
1.
•
•
•
2.
•
3.
4.
M
•
To play a fi le icon in the screen,
HT-XA100,XA100C_XAA.indd 29 2008-02-21 5:10:16
30
playback
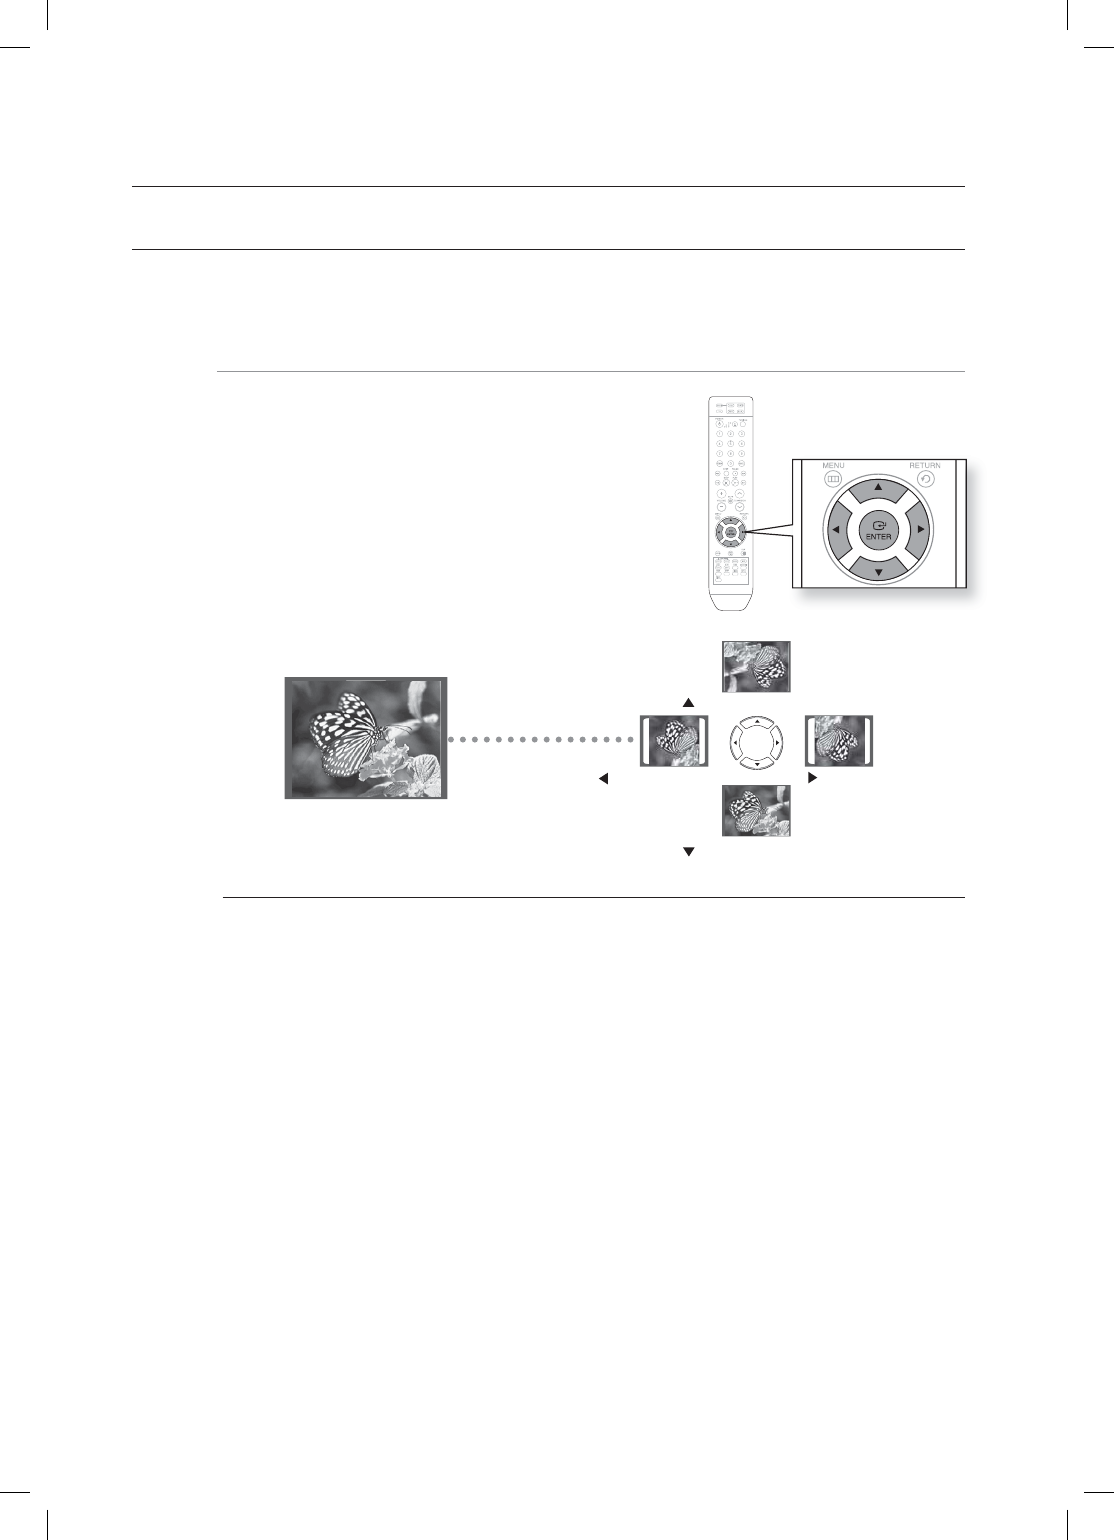
JPEG FILE PLAYBACK
Images captured with a digital camera or camcorder, or JPEG fi les on a PC can be stored on a CD and then played
back with this Home Theater.
Rotate/Flip Function G
Press the Cursor ▲, ▼, ◄, ► button during playback.
The maximum resolutions supported by this product are 5120 x 3480 (or 19.0 MPixel) for standard JPEG fi les
and 2048 x 1536 (or 3.0 MPixel) for progressive image fi les.
If a JPEG fi le is played when the HDMI output resolution is 720p/1080i/1080p, the mode is automatically
switched to 480p.
M
button: Rotate 90°
Clockwise
button: Rotate 90°
Counterclockwise
button: Flip Vertically
button: Flip Horizontally
Original Image
HT-XA100,XA100C_XAA.indd 30 2008-02-21 5:10:19
31
ENG ● PLAYBACK
DIVX PLAYBACK
The functions on this page apply to DivX disc playback.
Skip Forward/Back D
During playback, press the #, $ button.
Goes to the next fi le whenever you press the
$
button,
if there are over 2 fi les in the disc.
Goes to the previous fi le whenever you press the
#
button, if there are over 2 fi les in the disc.
Fast Playback D
During playback, press the , button.
To play back the disc at a faster speed, press the or
button during playback.
Each time you press either button, the playback speed
will change as follows:
2x 4x 8x 32x Normal.
5 Minutes Skip function D
During playback, press the Cursor ◄, ► button.
Playback skips 5 minutes forward whenever you press the Cursor ► button.
Playback skips 5 minutes back whenever you press the Cursor ◄ button.
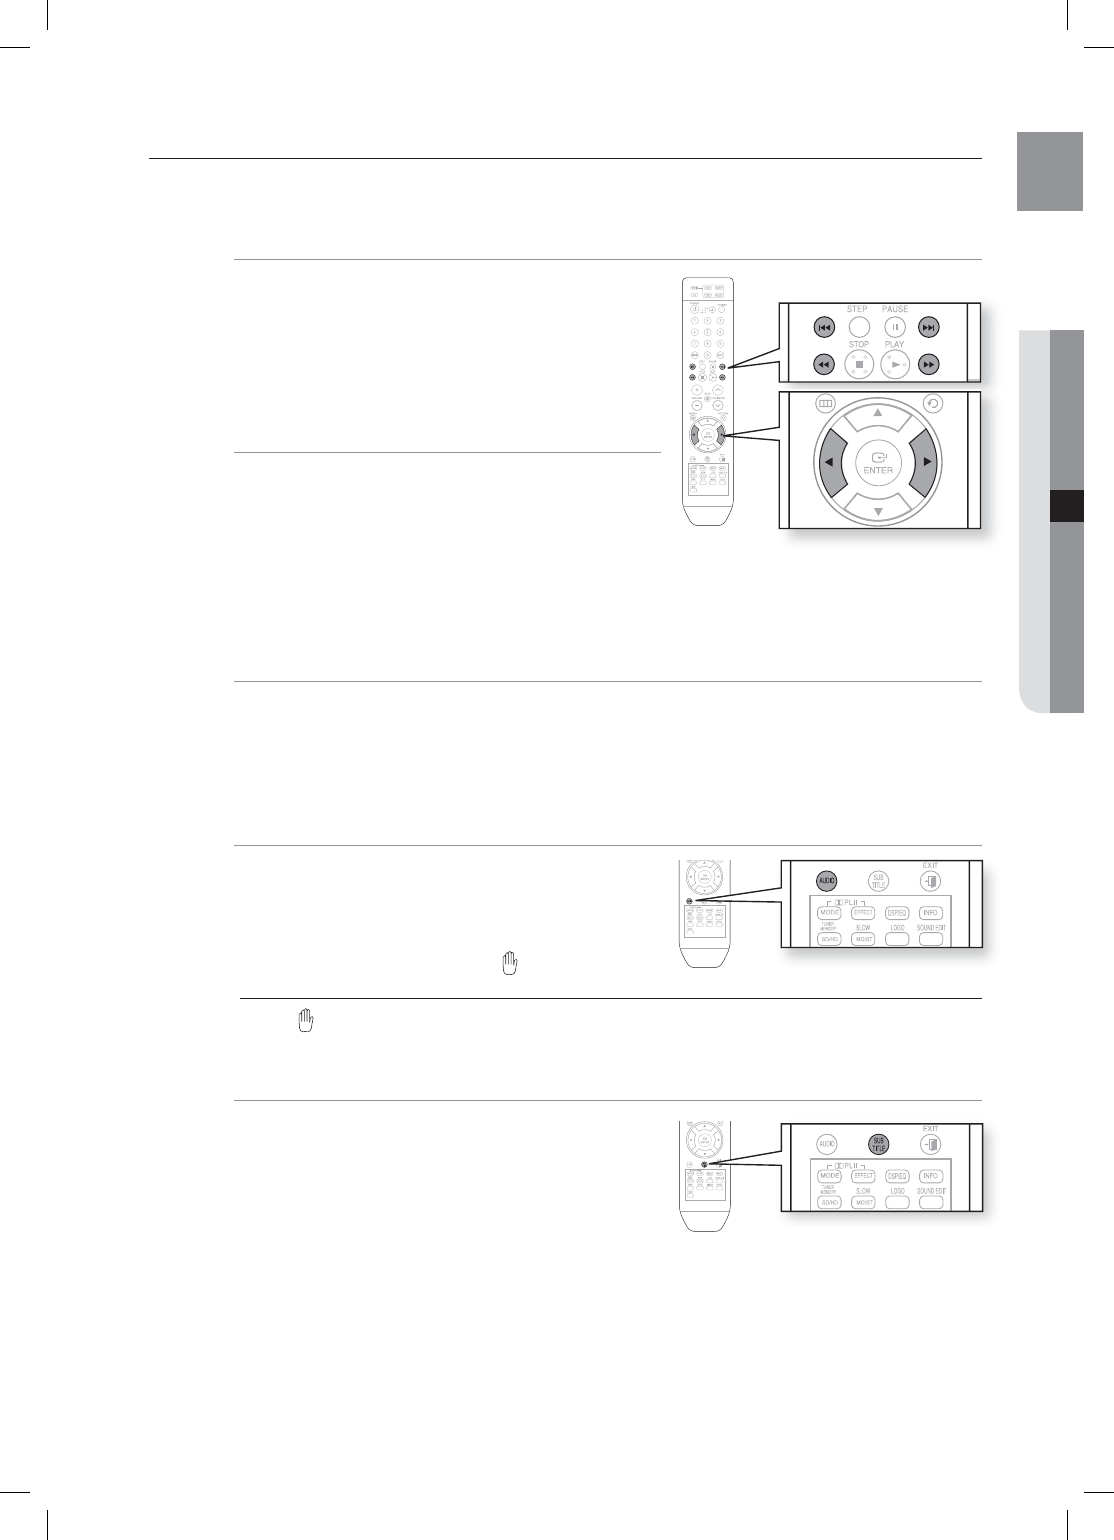
Audio Display D
Press the AUDIO button.
If there are multiple audio languages on a disc, you can
toggle between them.
Each time you press the button, your selection will toggle
between AUDIO (1/N, 2/N ...) and .
is displayed when there is one supported language in the disc.
Subtitle Display D
Press the SUBTITLE button.
Each time you press the button, your selection will toggle
between SUBTITLE (1/N, 2/N ...) and SUBTITLE OFF.
If the disc has only one subtitle fi le, it will be played
automatically.
See number 2 (Caption Function) below for more details
concerning Subtitle usage with DivX discs.
•
•
•
•
•
•
•
M
•
•
•
HT-XA100,XA100C_XAA.indd 31 2008-02-21 5:10:21
32
playback
If the Disc has more than One Subtitle File D
If the disc has more than one subtitle fi le, the default
subtitle may not match the movie and you will have to
select your subtitle language as follows:
In Stop mode, press the Cursor ▲, ▼ button, select the
desired subtitle ( ) from the TV screen, and then
press the ENTER button.
When you select the desired DivX fi le from the TV
screen, the movie will be played normally.
DivX(Digital internet video express)
DivX is a video fi le format developed by Microsoft and is based on MPEG4 compression technology to
provide audio and video data over the Internet in real-time.
MPEG4 is used for video encoding and MP3 for audio encoding so that the users can watch a movie at
near DVD-quality video and audio.
Supported Formats
This product only supports the following media formats.If both video and audio formats are not
supported, the user may experience problems such as broken images or no sound.
Supported Video Formats
Format AVI WMV
Supported Versions DivX3.11~DivX5.1, XviD V1/V2/V3/V7
Supported Audio Formats
Format MP3 WMA AC3 DTS
Bit Rate 80~384kbps 56~128kbps 128~384kbps 1.5Mbps
Sampling Frequency 44.1khz 44.1/48khz 44.1khz
DivX fi les, including audio and video fi les, created in the DTS format can only support up to
6Mbps.
Aspect Ratio : Although the default DivX resolution is 640x480 pixels (4:3), this product supports
up to 800x600 pixels (16:9). TV screen resolutions higher than 800 will not be supported.
When you play a disc whose sampling frequency is higher than 48khz or 320kbps, you may
experience shaking on the screen during playback.
Caption Function
You must have some experience with video extraction and editing in order to use this feature
properly.
To use the caption function, save the caption fi le (*.smi) in the same fi le name as that of the DivX
media fi le (*.avi) within the same folder.
Example. Root Samsung_007CD1.avi
Samsung_007CD1.smi
Up to 60 alphanumeric characters or 30 East Asian characters (2 byte characters such as Korean
and Chinese) for the fi le name.
1.
2.
1.
•
•
•
2.
•
•
•
HT-XA100,XA100C_XAA.indd 32 2008-02-21 5:10:22
33
ENG ● PLAYBACK
USING THE PLAYBACK FUNCTION
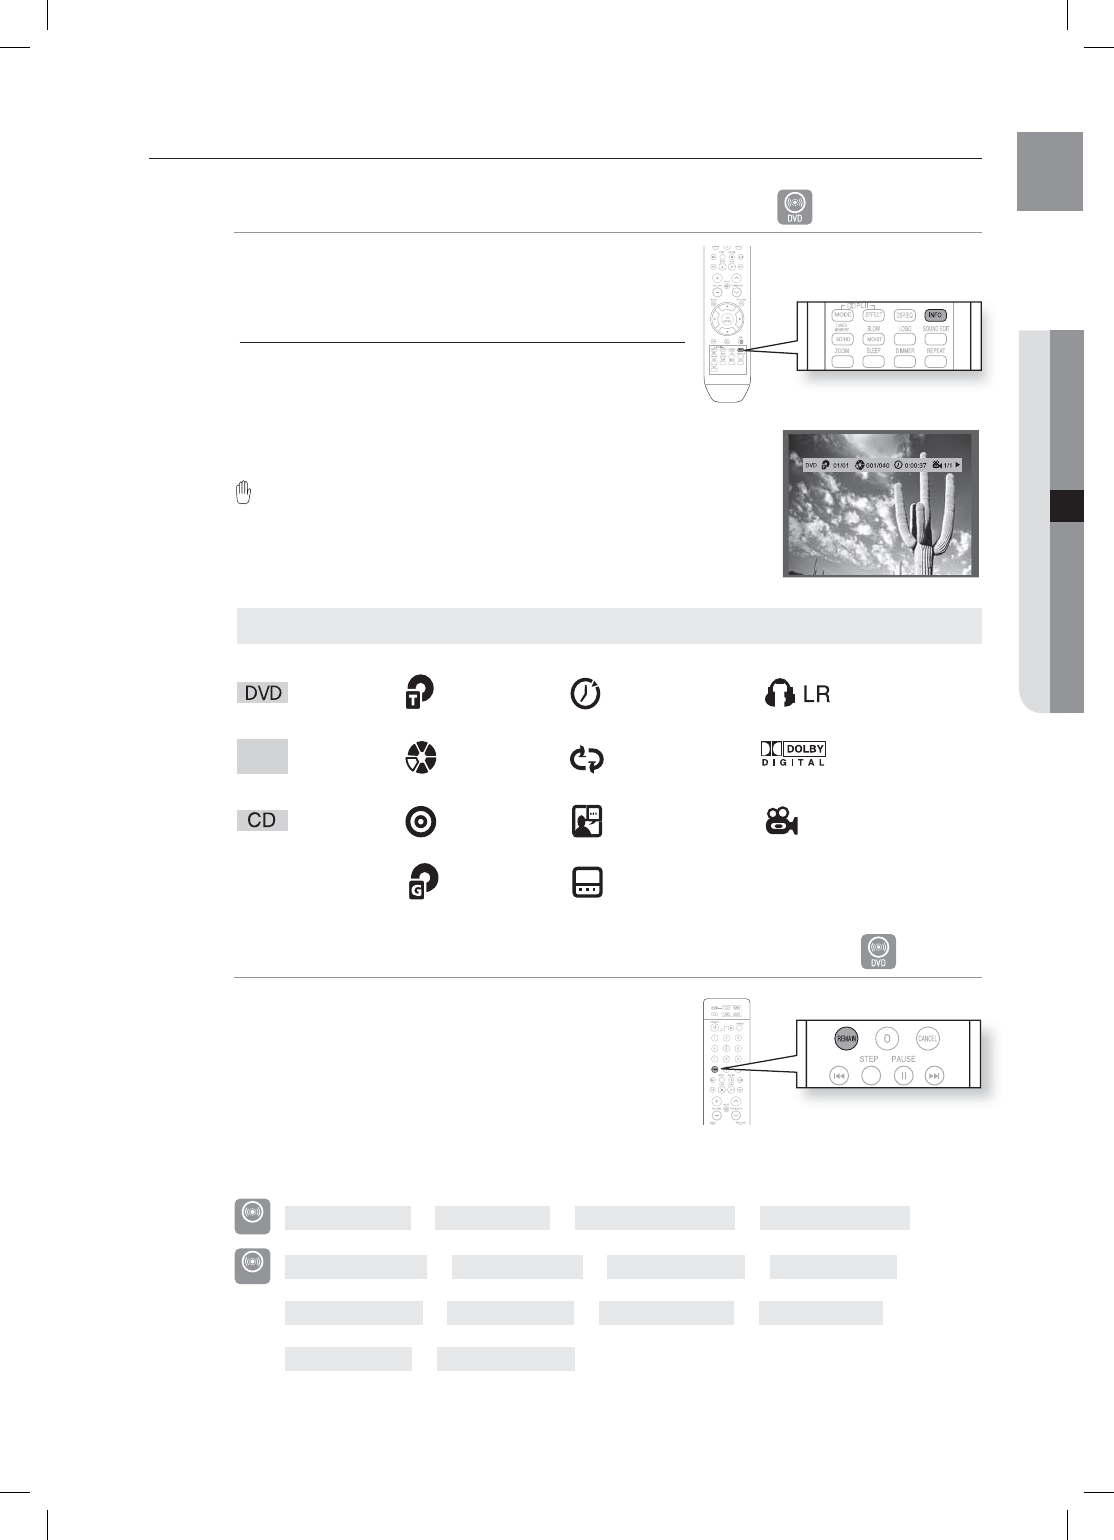
Displaying Disc Information BAGD
You can view disc playback information on the TV screen.
Press the INFO button.
Depending on the disc, the disc information display may
appear different.
Depending on the disc, you can also select
DTS, DOLBY DIGITAL, or PRO LOGIC.
appears on the TV screen!
If this symbol appears on the TV screen when pressing
a button, that operation is not possible with the disc
currently being played.
DVD display TITLE display ELAPSED TIME
display
STEREO (L/R)
display
DVD
AUDIO
DVD-AUDIO
display
CHAPTER
display
REPEAT
PLAYBACK display
DOLBY DIGITAL
display
CD display TRACK (FILE)
display
AUDIO LANGUAGE
display ANGLE display
GROUP
display SUBTITLE display
Checking the Remaining Time BA
Press the REMAIN button.
For checking the total and remaining time of a title or
chapter being played.
Each time the Remain button is pressed
%7%7*%&0
TITLE ELAPSED ➞ TITLE REMAIN ➞ CHAPTER ELAPSED ➞ CHAPTER REMAIN
%7%"6%*0
GROUP ELAPSED ➞ GROUP REMAIN ➞ TRACK ELAPSED ➞ TRACK REMAIN
B
TRACK ELAPSED ➞ TRACK REMAIN ➞ TOTAL ELAPSED ➞ TOTAL REMAIN
A
TRACK REMAIN ➞ TRACK ELAPSED
M
•
Screen Display
HT-XA100,XA100C_XAA.indd 33 2008-02-21 5:10:26
34
playback
Fast Playback BAD
Press the
,
button.
Each time the button is pressed during playback, the
playback speed changes as follows:
2X ➞ 4X ➞ 8X ➞ 32X ➞ PLAY
2X ➞ 4X ➞ 8X ➞ 32X ➞ PLAY
During fast playback of a CD or MP3-CD, sound is heard only at 2x speed, and not at 4x, 8x, and 32x speeds.
Slow Playback D
Press the SLOW button.
Each time the button is pressed during playback, the playback speed changes as follows:
1/2 ➞ 1/4 ➞ 1/8 ➞ 1/2 ➞ 1/4 ➞
1/8 ➞ PLAY
1/2 ➞ 1/4 ➞ 1/8 ➞ PLAY
No sound is heard during slow playback.
Reverse slow playback does not work with DivX.
Skipping Scenes/Songs A
Press the
#
,
$
button.
Each time the button is pressed during playback, the previous
or next chapter, track or directory (fi le) will be played.
You cannot skip chapters consecutively.
•
M
•
M
•
•
D
HT-XA100,XA100C_XAA.indd 34 2008-02-21 5:10:28
35
ENG ● PLAYBACK
Repeat Playback BAGD
Repeat playback allows you to repeatedly play a chapter, title,
track (song), or directory (MP3 fi le).
Press the REPEAT button.
Each time the button is pressed during playback, the repeat
playback mode changes as follows:
%7%7*%&0
REPEAT : CHAPTER ➞ REPEAT : TITLE ➞ REPEAT : OFF
%7%"6%*0
REPEAT : TRACK ➞ REPEAT : GROUP ➞ REPEAT : OFF
B
REPEAT : TRACK ➞ REPEAT : DISC ➞ REPEAT : OFF
BGD
REPEAT : RANDOM ➞ REPEAT : TRACK ➞ REPEAT : DIR
➞ REPEAT : DISC ➞ REPEAT : OFF
CHAPTER : Repeatedly plays the selected chapter.
TITLE : Repeatedly plays the selected title.
GROUP : Repeatedly plays the selected group.
RANDOM : Plays tracks in random order. (A track that has already been played may be played again.)
TRACK : Repeatedly plays the selected track.
DIR : Repeatedly plays all tracks in the selected folder.
DISC : Repeatedly plays the entire disc.
OFF : Cancels Repeat Playback.
To Select a Repeat Playback Mode in the Disc Information Screen
B
Press the INFO button twice.
Press the Cursor ► button to move to REPEAT
PLAYBACK ( ) display.
Press the Cursor ▼ button to select the desired Repeat
Playback mode.
To select another album and track, repeat Steps 2 and
3 above.
Press the ENTER button.
OFF ➞ A- ➞ CHAP ➞ TITLE ➞ OFF
B
OFF ➞ A- ➞ TRACK ➞ DISC ➞ OFF
For DivX, MP3 and JPEG discs, you cannot select Repeat Play from the information display screen.
•
1.
2.
3.
•
4.
M
HT-XA100,XA100C_XAA.indd 35 2008-02-21 5:10:30
36
playback
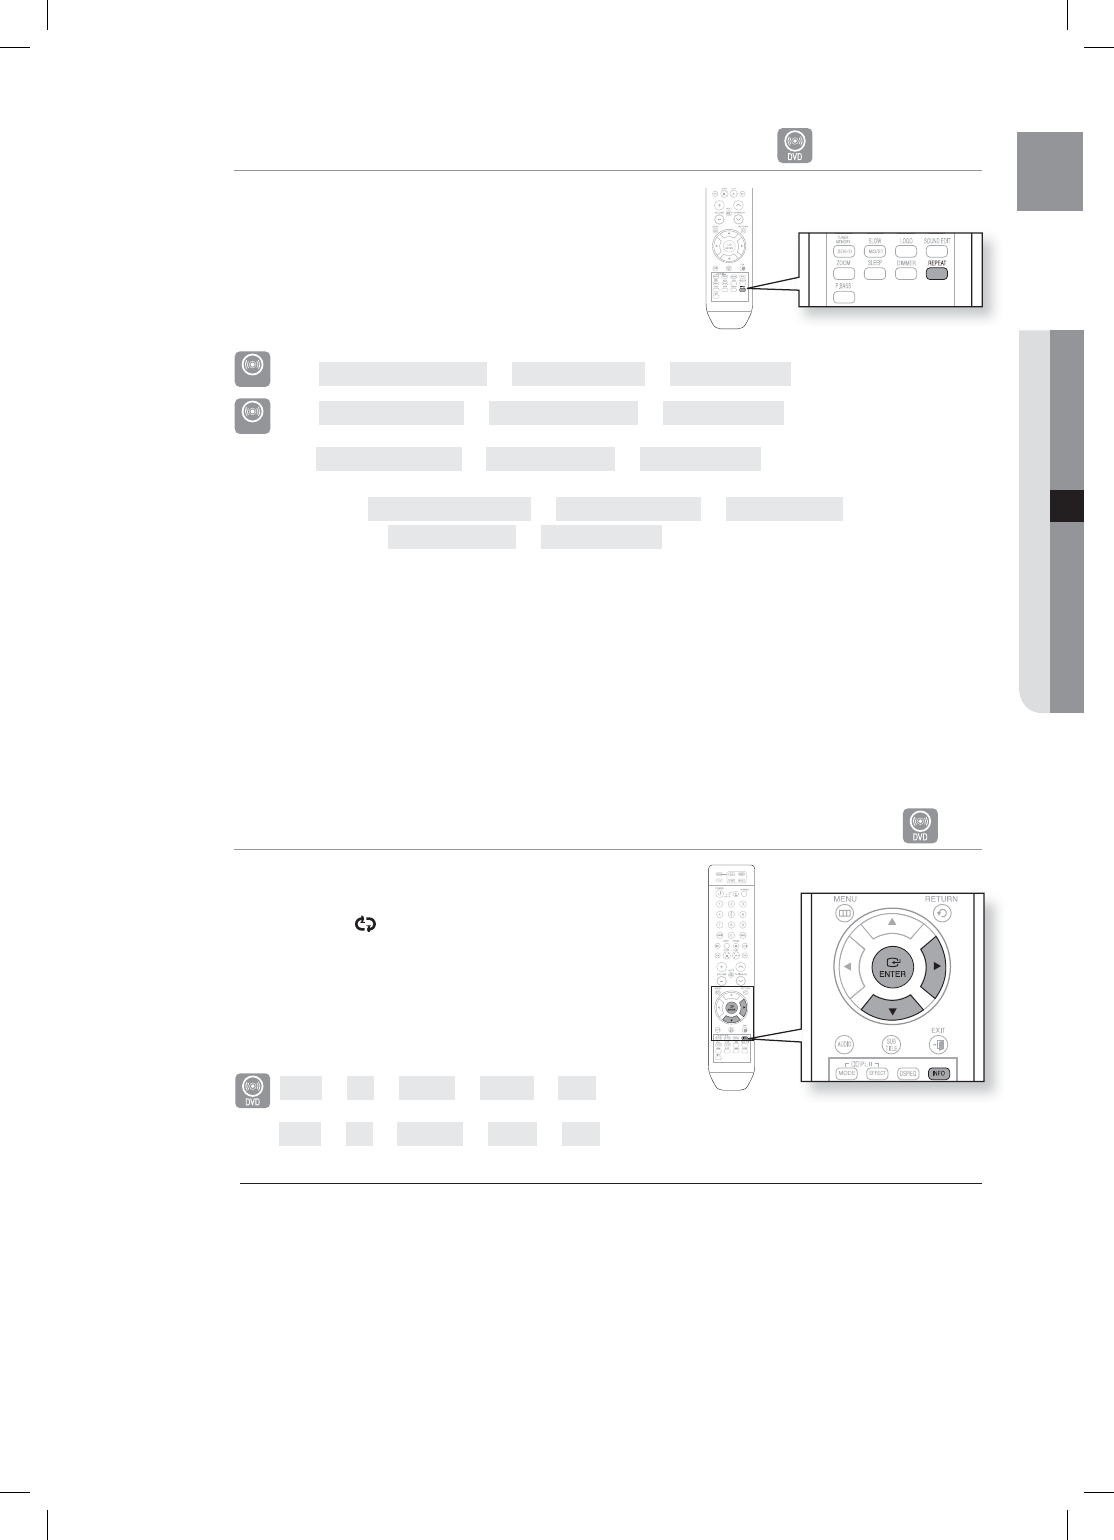
A-B Repeat Playback
You can repeatedly play back a designated section of a DVD.
Press the INFO button twice.
Press the Cursor ► button to move to REPEAT PLAYBACK
() display.
Press the Cursor ▲, ▼ button to select A- and then press
the ENTER button.
When the ENTER button is pressed, the selected position
will be stored in memory.
Press the ENTER button at the end of the desired segment.
The specifi ed segment will be played repeatedly.
A - B
d To return to normal playback, press the Cursor ▲, ▼ button to select OFF.
The A-B Repeat function does not operate with DivX, MP3 or JPEG discs.
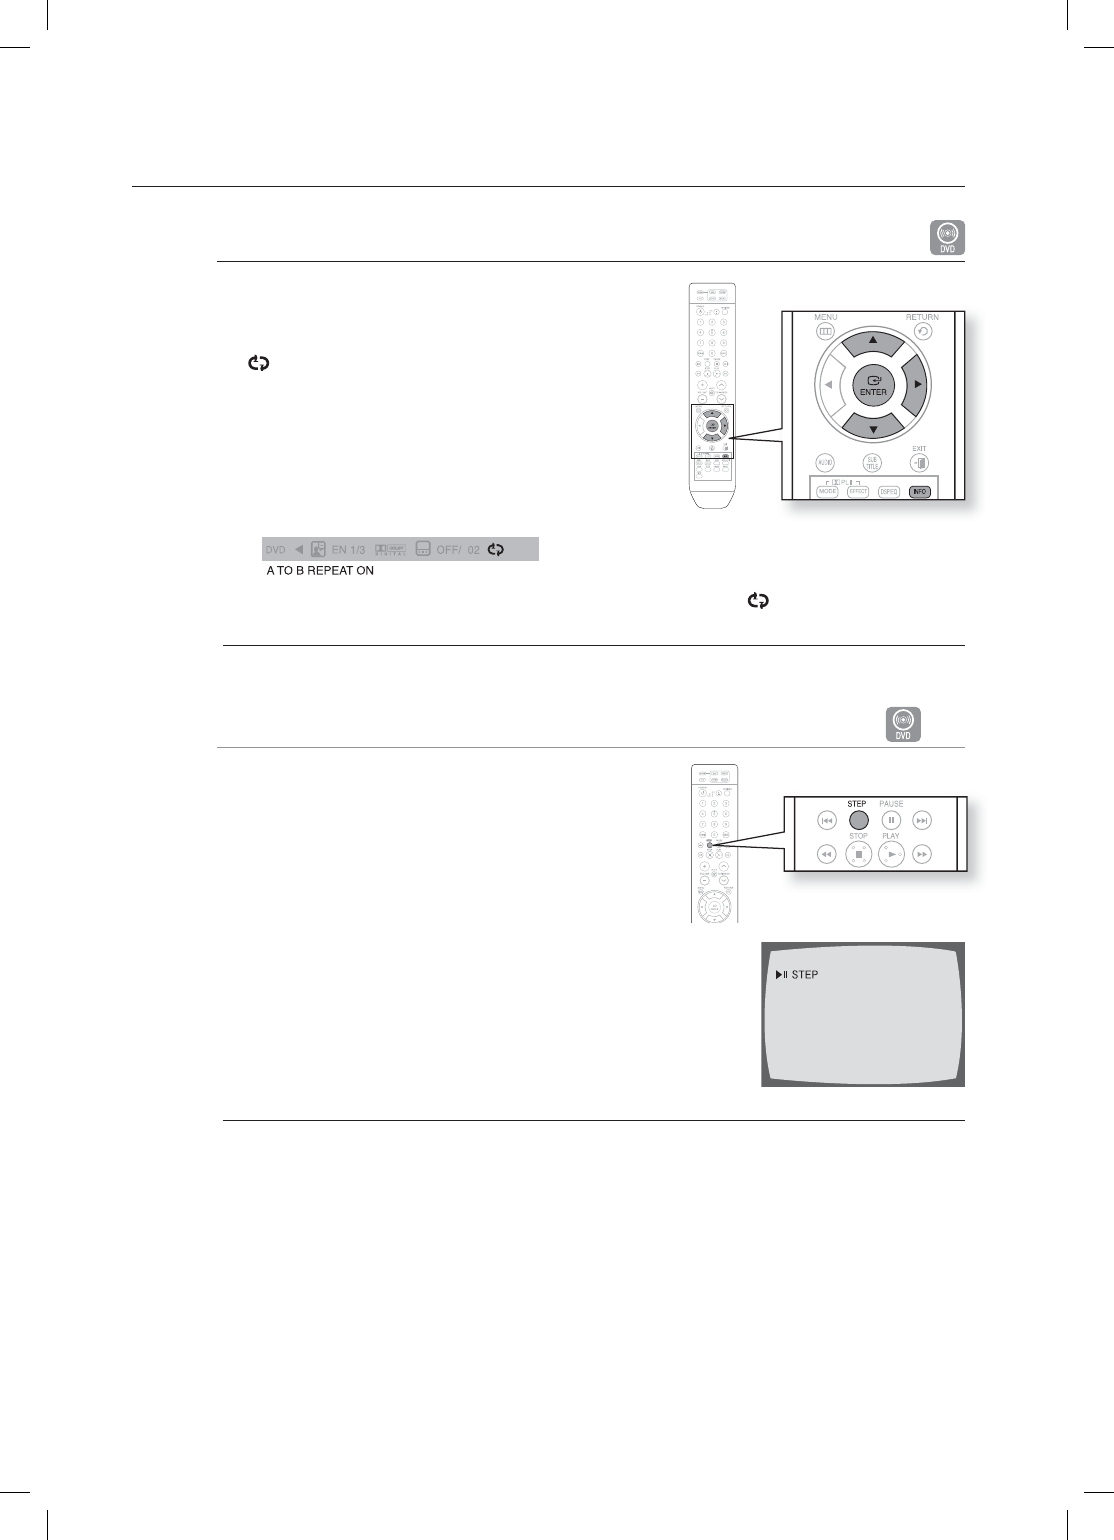
Step Function D
Press the STEP button.
The picture moves forward one frame each time the button is
pressed during playback.
No sound is heard during step motion playback.
1.
2.
3.
•
4.
•
M
•
M
HT-XA100,XA100C_XAA.indd 36 2008-02-21 5:10:32
37
ENG ● PLAYBACK
Angle Function
This function allows you to view the same scene in different
angles.
Press the INFO button.
Press the Cursor ► button to move to ANGLE ( )
display.
Press the Cursor ▲, ▼ button or numeric buttons to select
the desired angle.
Each time the button is pressed, the angle changes as
follows:
1/3 2/3 3/3 1/3
The Angle function works only with discs on which multiple angles have been recorded.
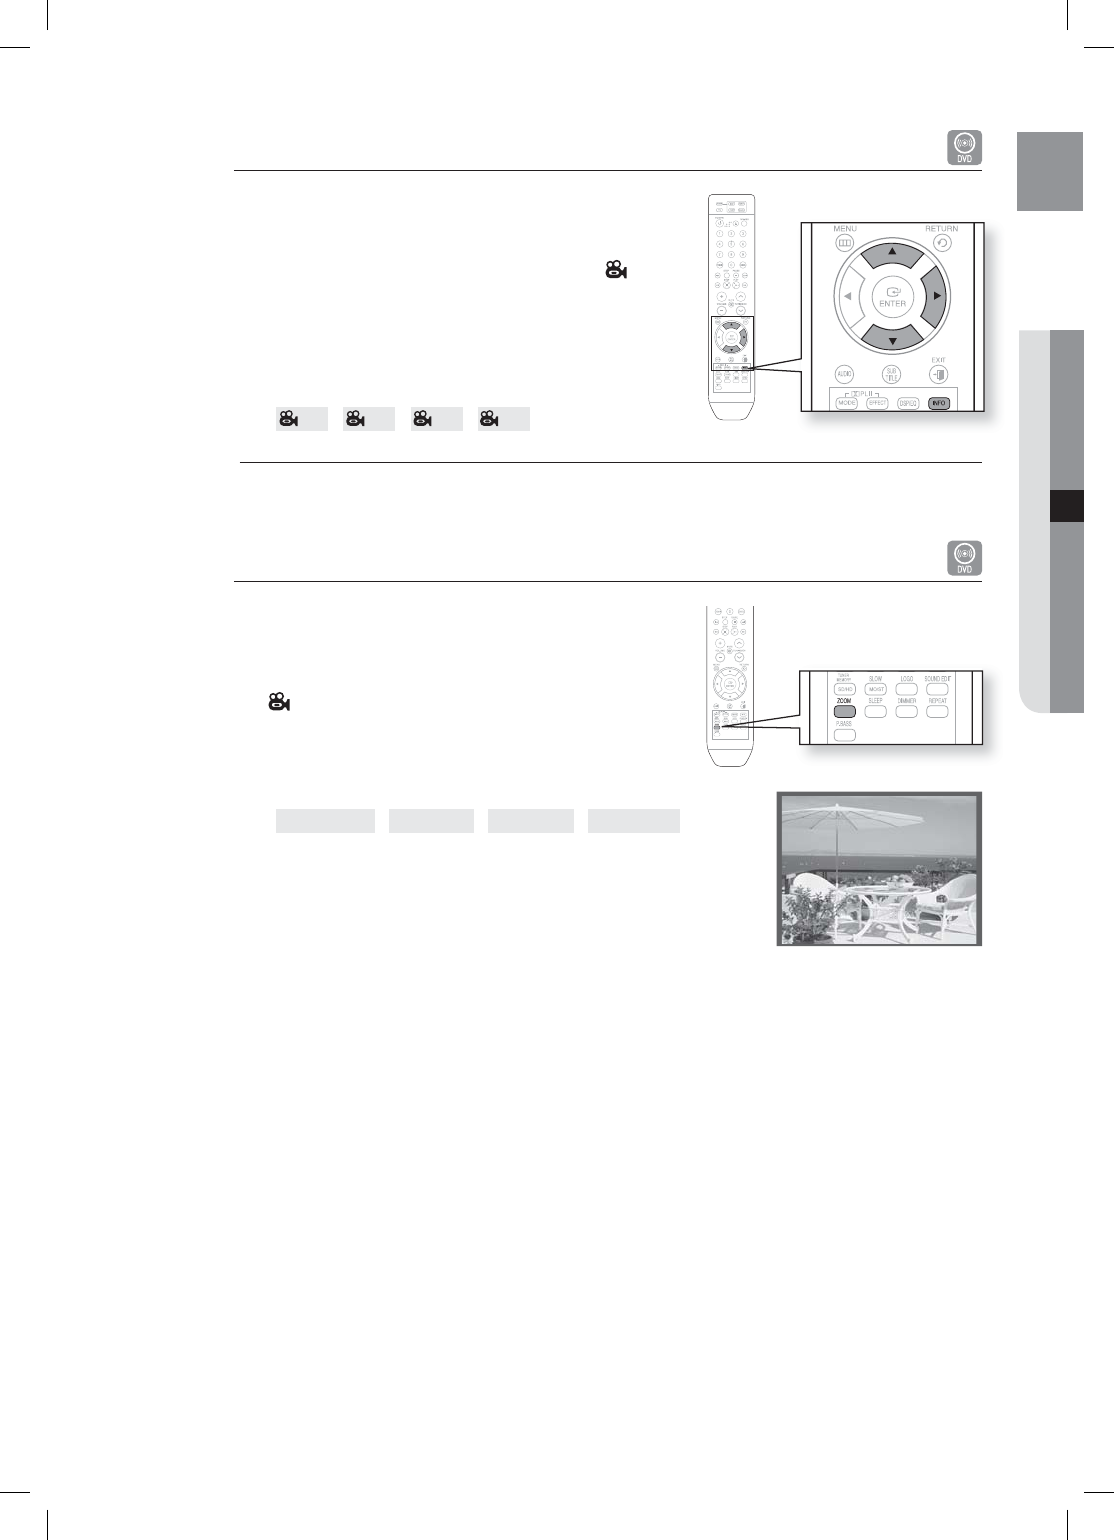
Zoom (Screen Enlarge) Function
This function allows you to enlarge a particular area of the
displayed image.
Press the ZOOM button.
Press the Cursor ▲, ▼, ◄, ► button to move to ANGLE
() display.
Press the ENTER button.
Each time the button is pressed, the zoom level changes
as follows:
ZOOM X 1.5 ZOOM X 2 ZOOM X 3 ZOOM OFF
1.
2.
3.
•
M
1.
2.
3.
•
SELECT ZOOM POSITION
HT-XA100,XA100C_XAA.indd 37 2008-02-21 5:10:34
38
playback
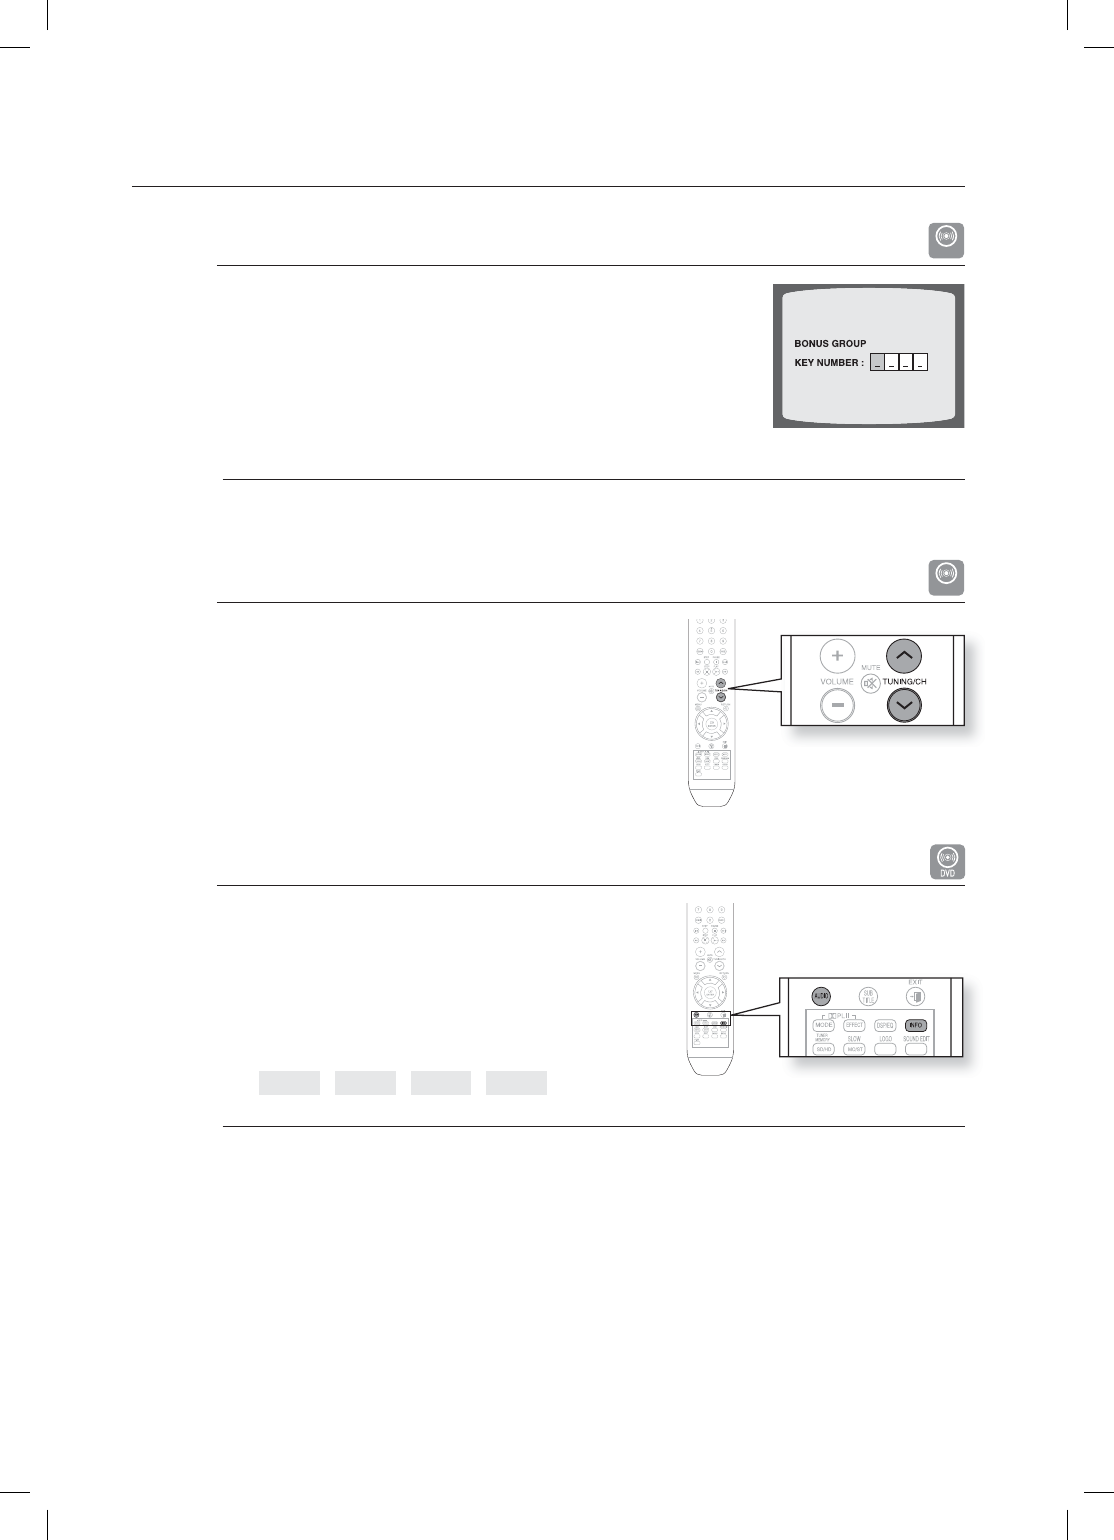
Bonus Group
%7%"6%*0
Some DVD-Audio discs have an extra ‘bonus’ group that requires a 4-digit
key number to access. See the disc packaging for details and the key
number.
When you play a DVD-Audio disc that has a bonus group, the key number
input screen appears automatically.
If you eject the disc, switch the power off, or unplug the player, you will need to re-enter the key number.
Navigating Pages
%7%"6%*0
During playback, press the ., , button on the remote control.
You can select the desired image from a DVD-Audio disc
containing still images.
With some discs, you may not be able to select images.
Audio Language Selection Function
Press the INFO button twice.
Press the Cursor ▲, ▼ button or numeric buttons to select
the desired audio language.
Depending on the number of languages on a DVD disc,
a different audio language (ENGLISH, SPANISH,
FRENCH, etc.) is selected each time the button is
pressed.
EN 1/3 SP 2/3 FR 3/3 EN 1/3
To operate this function, you can also press the AUDIO buttons on the remote control.
Depending on the disc, the Audio Language functions may not be available.
M
•
•
1.
2.
•
M
HT-XA100,XA100C_XAA.indd 38 2008-02-21 5:10:36