Samsung Electronics Co HTZ520 DIGITAL HOME THEATER SYSTEM User Manual 5
Samsung Electronics Co Ltd DIGITAL HOME THEATER SYSTEM 5
Contents
User Manual 5
playback
50
USING AN
iPod
You can enjoy playback of your iPod using the supplied remote control.
Listening to Music (A IPOD function)
You can play music files stored in the iPod player by connecting it to the home
theater system.
Connect the iPod dock connector to the iPod jack on the DVD home 1.
theater.
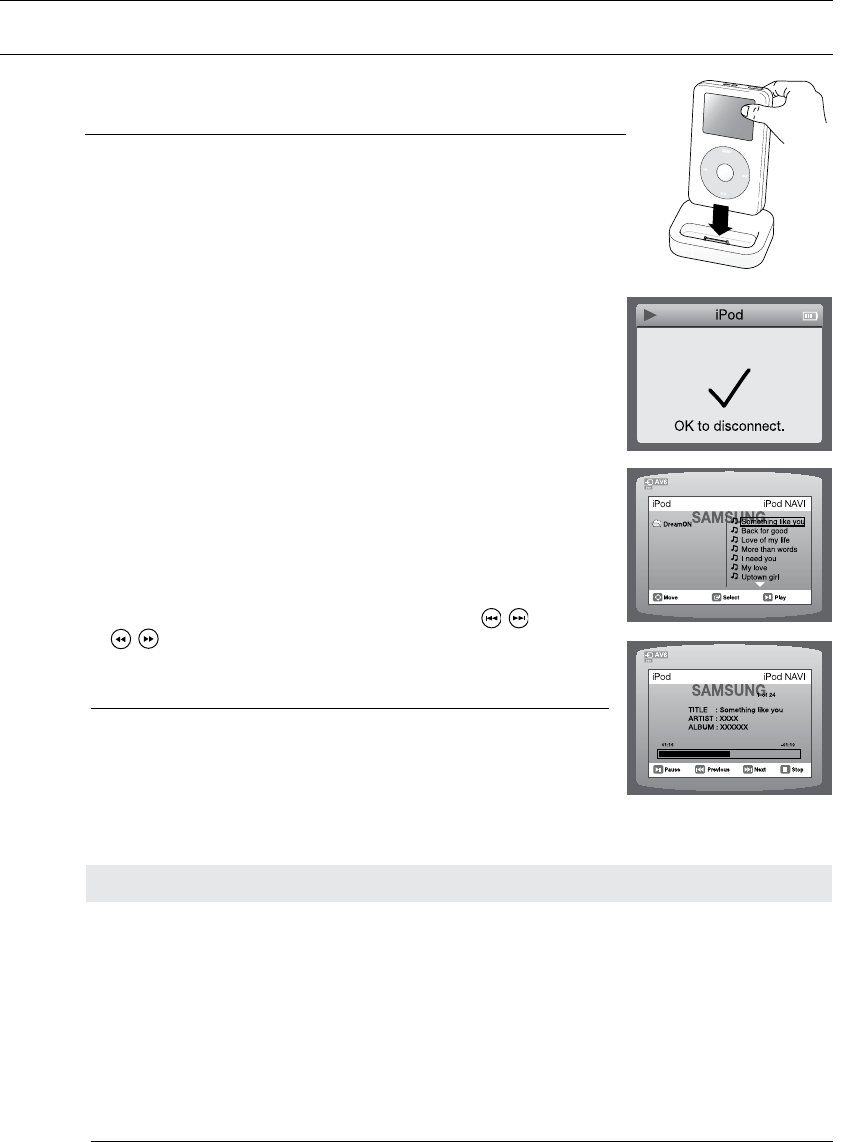
Place the iPod in the Dock.2.
Your iPod is automatically turned on.•
Press the 3. PORT button on the remote control to select OSD IPOD mode.
If the iPod player is connected to the home theater system, each time •
you press the the PORT button, it will be toggled in the order of
USB
OSD IPOD V/P IPOD
.
Press the 4. , buttons on the remote control to select Music and press
the ENTER button.
The • Music categories appear.
Press the 5. , buttons desired category and press the ENTER button.
The music files appear.•
Press the 6. , buttons to select the file to play and press the ENTER
button.
The music will start with a new screen which shows the song title, •
time, artist, and progress bar.
You can use the remote control or main unit to control simple 7.
playback functions such as PLAY, PAUSE, STOP, /,
/ and REPEAT.
Press the • RETURN button to return to the previous menu.
M
See page 31 for compatible iPods. `
Compatibility depends on the software version of your iPod.
This product only supports playing audio from your iPod.
Music categories
File information including the artist name, album name, music title and genre will be displayed according
to the ID3 Tag information on the appropriate music file.
Now Playing : Plays a recently played file or moves to the playback screen of the current file.
Artists : To play by artist.
Songs : To play in numeric or alphabetical order
Playlists : To play by Playlist.
Albums : To play by album.
Genres : To play by genre.
Composer : To play by composer.
M
The category list may differ, depending on the iPod model. `
What is an ID3 Tag? `
This is what is attached to an MP3 to carry information relevant to the file such as
the title, artist, album, year, genre and a comment field.
51
ENG ● PLAYBACK
Watching a Movie (V/P IPOD function)
You can play video files stored in the iPod player by connecting it to the home theater system.
Connect the iPod dock connector to the iPod jack on the DVD home 1.
theater.
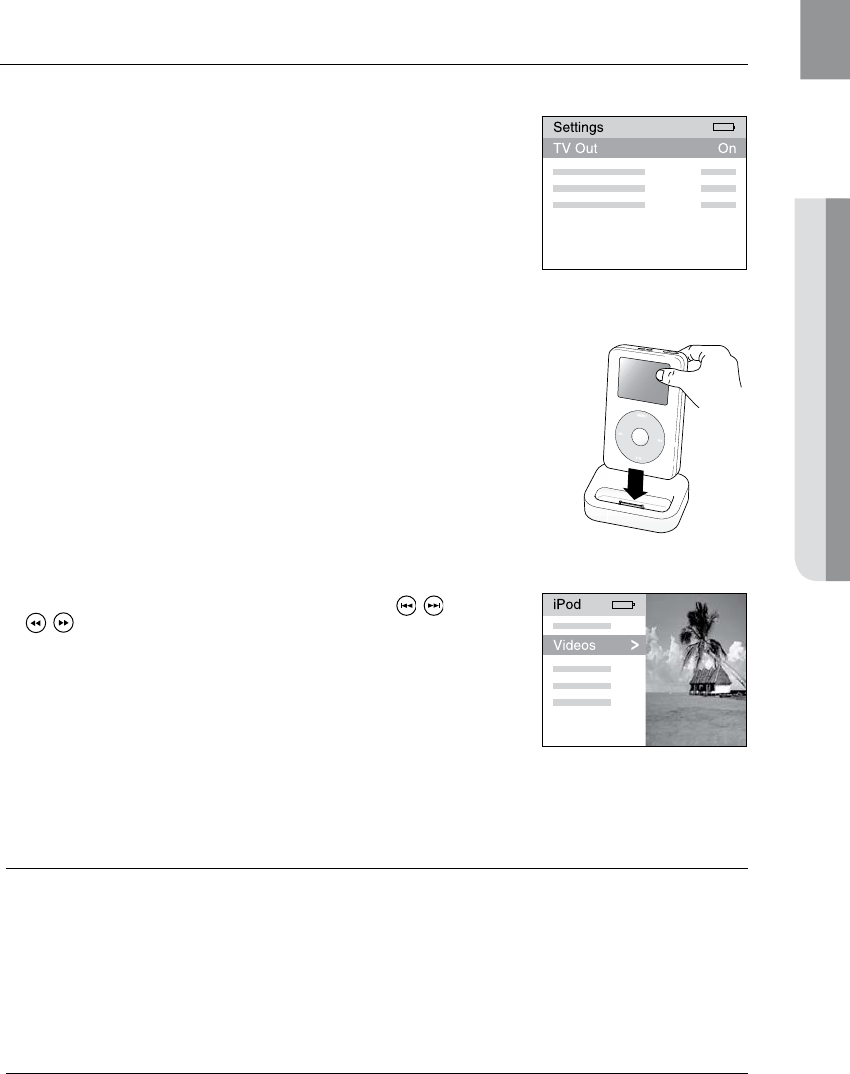
In the iPod screen, move to 2. Videos > Settings and set the TV Out
option to On.
Place the iPod in the Dock. 3.
Press the 4. PORT button on the remote control to select V/P IPOD mode.
If the iPod player is connected to the home theater system, each •
time you press the the PORT button, it will be toggled in the order
of
USB OSD IPOD V/P IPOD.
Set the AV IN option of the TV connected to the home theater system 5.
to COMPOSITE.
Follow the iPod onscreen guide through the following steps.
Press the 6. , buttons on the remote control to select Videos and
press the ENTER button.
Press the 7. , buttons on the remote control to select Movies and press
the ENTER button.
Press the 8. , buttons to select the file to play and press the ENTER
button.
Video files of the iPod player will be played on the TV screen. •
You can use the remote control or main unit to control simple 9.
playback functions such as PLAY, PAUSE, STOP, / and
/.
If you press the • PREV button within 3 seconds after the playback,
the player will stop playing and return to the list screen.
If you press the PREV button 3 seconds or later after the playback,
the player will move to the start screen of the current file.
Press the • NEXT button to stop playing and return to the list
screen.
Press the • RETURN button to return to the previous menu.
M
See page 28 for compatible iPods. `
Compatibility depends on the software version of your iPod.
This product only supports playing audio from your iPod.
When the current file is played to the end, the next file will not be played automatically. `
To play the next file, select a file to play in the list screen of the iPod player.
No other screen than the playback one will appear on the TV screen. Check other screens on `
the iPod player.
J If the TV connected to the home theater system supports HDMI CEC, press the `AUX button on
the remote control to switch the mode to DIGITAL IN if you want to watch TV while an iPod
movie is played.
<iPod Screen>
<iPod Screen>
playback
52
PLAYING MEDIA FILES USING THE USB HOST FEATURE
You can enjoy media files such as pictures, movies and music saved on an MP3 player, USB memory stick or digital
camera in high quality video with 5.1 channel Home Theater sound by connecting the storage device to the USB port of
the Home Theater.
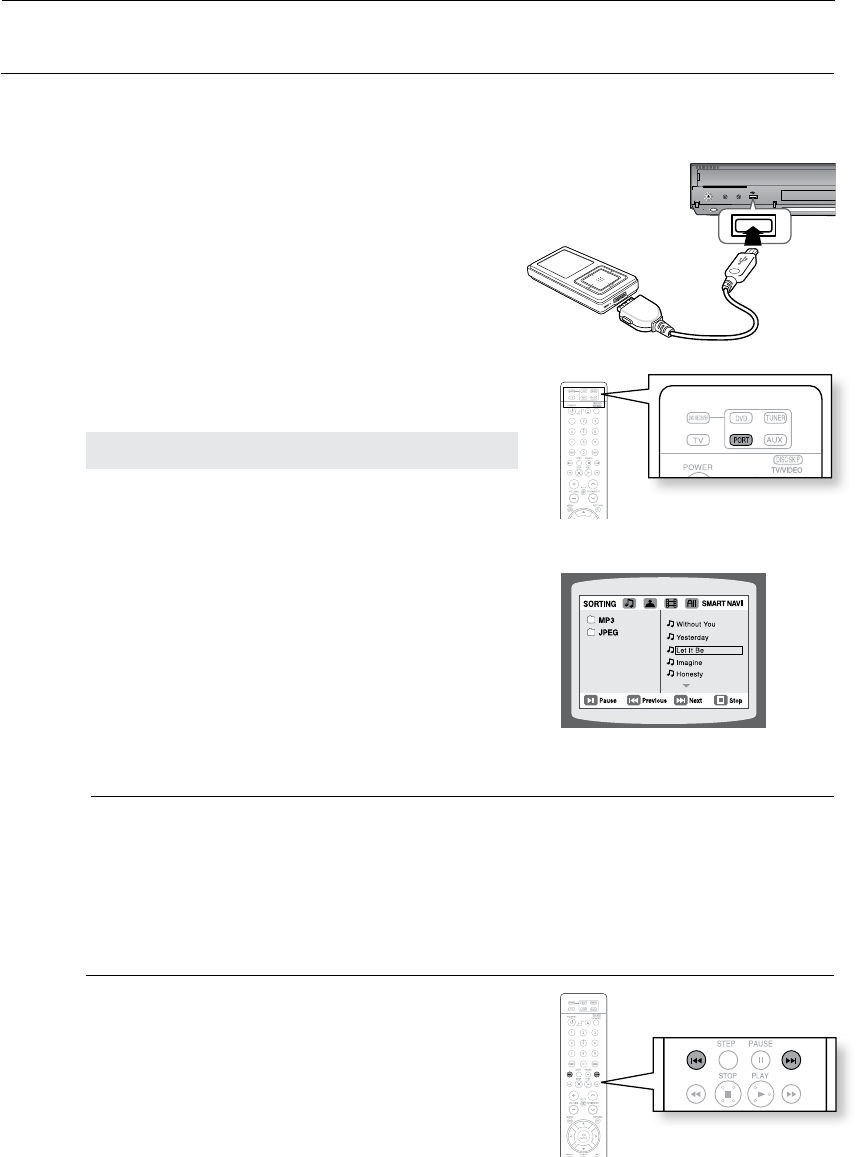
Connect the USB device to the USB port on the front 1.
of the unit.
Press the 2. FUNCTION button on the DVD Player or the
PORT button on the remote control to select the USB
mode.
USB• appears on the display screen and then
disappears.
The USB MENU screen appears on the TV screen •
and the saved file is played.
To stop playback, press the 3. STOP (T) button.
To prevent damage to the memory stored in the USB device,
perform safe removal before disconnecting the USB cable.
Press the • STOP (T) button twice in a row.
The display will show REMOVE USB.
Remove the USB cable.•
M
To listen to your music files with 5.1 channel home theater sound, you must set the Dolby `
Pro Logic II mode to Matrix. (See page 63)
In USB mode, you are not able to change the resolution or use the SETUP menu if there is no `
USB device connected to the USB port.
Skip Forward/Back
During playback, press the [,] button.
When there is more than one file and you press the • ]
button, the next file is selected.
When there is more than one file and you press the • [
button, the previous file is selected.
VOLUME
VOLUME
DISC CHANGE
PHONES FUNCTION
AUX IN 1/
ASC IN
Safe USB Removal
53
ENG ● PLAYBACK
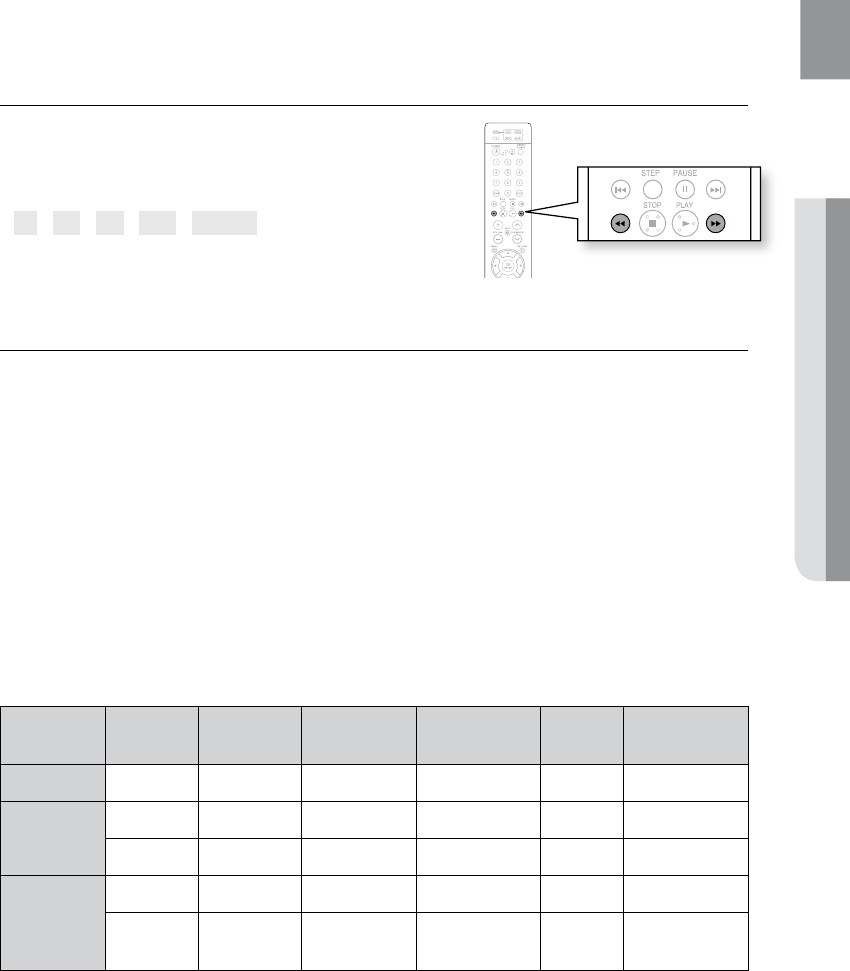
Fast playback
During playback, press the (,) button.
Each time you press either button, the playback speed •
will change as follows:
2x ➞ 4x ➞ 8x ➞ 32x ➞ Normal.
Compatible Devices
USB devices that support USB Mass Storage v1.0. (USB devices that operate as a removable disc 1.
in Windows (2000 or later) without additional driver installation.)
MP3 Player: HDD and flash type MP3 players.2.
Digital camera: Cameras that support USB Mass Storage v1.0.3.
Cameras that operate as a removable disc in Windows (2000 or later) without additional driver installation.•
USB HDD and USB Flash Drive: Devices that support USB2.0 or USB1.1.4.
You may experience a difference in playback quality when you connect a USB1.1 device.•
For a USB HDD, make sure to connect an auxiliary power cord to the USB HDD for proper operation.•
5. USB card Reader: One slot USB card reader and Multi slot USB card reader.
Depending on the manufacturer. the USB card reader may not be supported.•
If you install multiple memory devices into a multi card reader, you may experience problems.•
6. If you use a USB extension cable, the USB device might not be recognized.
Supported Formats
Format File name File
extension Bit rate Version Pixel
Sampling
Frequency
Still Picture JPG JPG .JPEG – – 640x480 –
Music
MP3 .MP3 80~384kbps – – 44.1kHz
WMA .WMA 56~128kbps V8 –44.1kHz
Movie
WMV .WMV 4Mbps V1,V2,V3,V7 720x480
44.1KHz~48KHz
DivX
.AVI,.ASF 4Mbps DivX3.11~
DivX5.1, XviD 720x480
44.1KHz~48KHz
CBI (Control/Bulk/Interrupt) is not supported.•
Digital Cameras that use PTP protocol or require additional program installation when connected to a •
PC are not supported.
A device using NTFS file system is not supported. (The system supports only the FAT file system and •
will not play a movie larger than 1 GB in USB mode.)
Some MP3 players, when connected to this product, may not operate depending on the sector size of •
their file system.
The USB host function is not supported if a product that transfers media files by its manufacturer- •
specific program is connected.
Does not operate with Janus enabled MTP (Media Transfer Protocol) devices.•
The USB host function of this product does not support all USB devices. For information on •
supported devices, see page 73.
CD RIPPING
S.VOL
AUDIO
UPSCALE
54
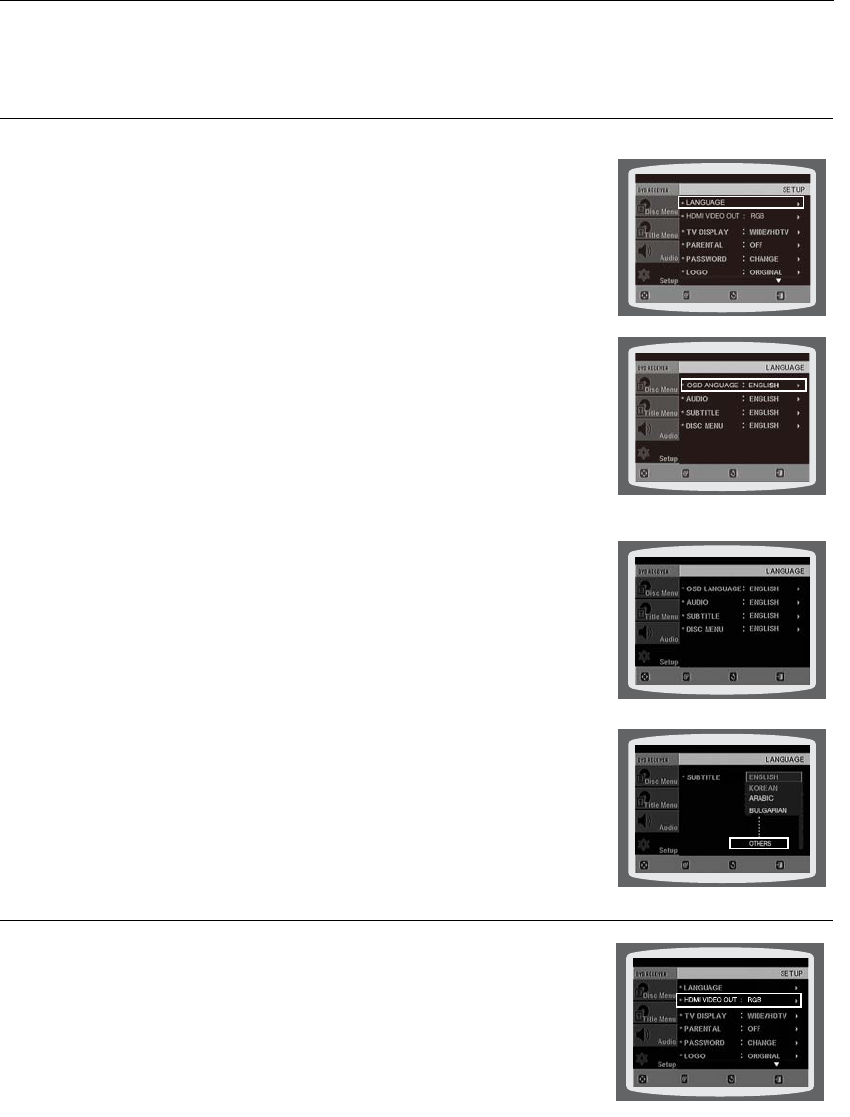
SETTING THE LANGUAGE
OSD(On-Screen Display) language is set to English by default.
In Stop mode, press the 1. MENU button.
Press the Cursor 2.
%
button to move to Setup and then press the
ENTER button.
Select 3. Language and then press the ENTER button.
Press the Cursor 4.
$
,
%
button to select OSD Language and then
press the ENTER button.
Press the Cursor 5.
$
,
%
button to select the desired language
and then press the ENTER button.
Once the setup is complete, the OSD will be English if •
English has been selected as language.
d Press the RETURN button to return to the previous level.
d Press the EXIT button to exit the setup screen.
OSD LANGUAGE• : Selecting the OSD Language
AUDIO• : Selecting the Audio Language (recorded on the disc)
• SUBTITLE : Selecting the Subtitle Language (recorded on the disc)
DISC MENU• : Selecting the Disc Menu Language (recorded on the disc)
a If the language you selected is not recorded on the disc, menu
language will not change even if you set it to your desired language.
OTHERS• : To select another language, select OTHERS and
enter the language code of your country
(see page 72).
AUDIO, SUBTITLE and DISC MENU languages can be
selected
.
SETTING THE HDMI VIDEO OUT MODE
You can select <RGB> or <Y Cb Cr> mode.
In Stop mode, press the 1. MENU button.
Press the Cursor 2.
%
button to move to Setup and then press the
ENTER button.
Press the Cursor 3.
%
button to move to HDMI VIDEO OUT and then
press the ENTER button.
Press the Cursor 4.
$
,
%
button to select the desired item
and then press the ENTER button.
Once the setup is complete, you will be taken to the •
previous screen.
d Press the RETURN button to return to the previous level.
d Press the EXIT button to exit the setup screen.
system setup
For your convenience, you can set this DVD Home Cinema's features for the best use in your home
environment.
MOVE ENTER
EXITRETURN
MOVE ENTER EXITRETURN
MOVE ENTER EXITRETURN
MOVE SELECT EXIT
RETURN
MOVE ENTER
EXITRETURN
55
ENG ● SYSTEM SETUP
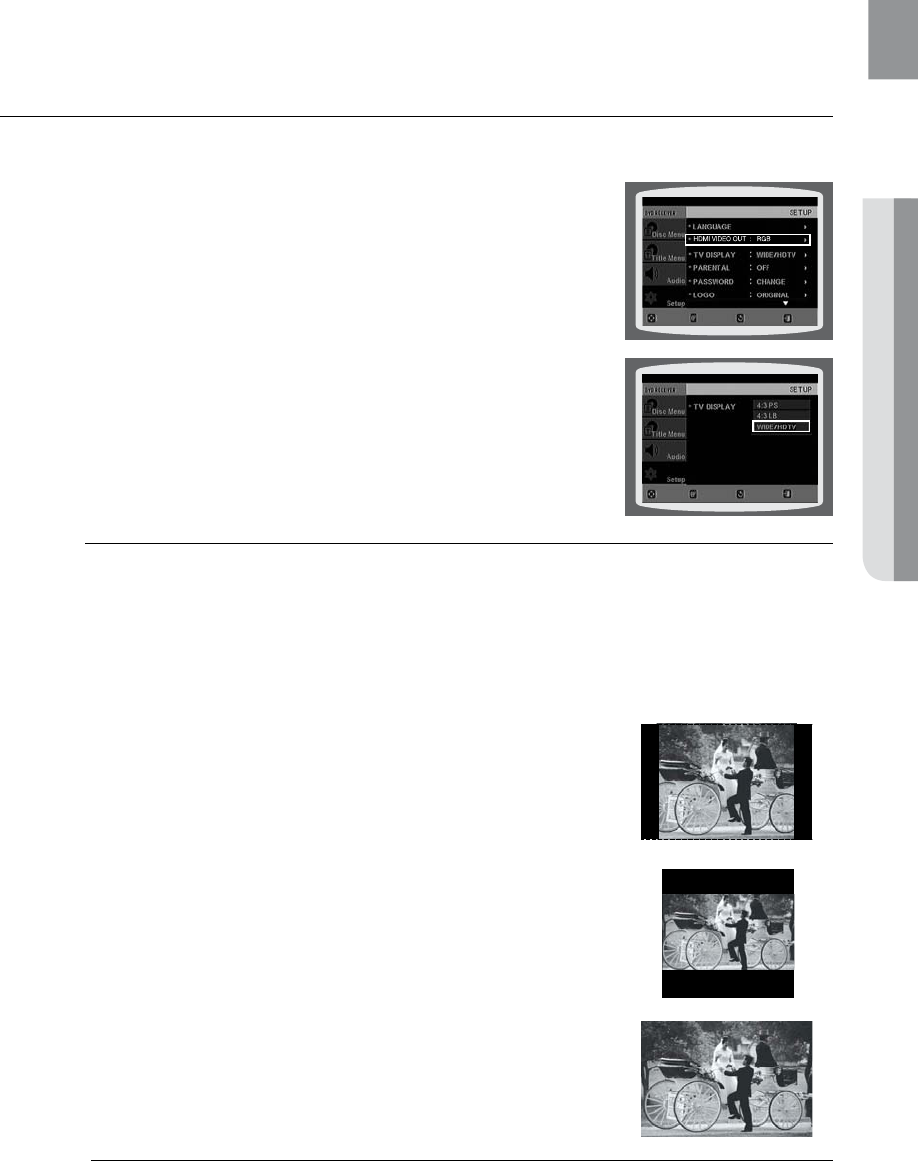
SETTING TV SCREEN TYPE
Depending on your TV type (Widescreen or conventional 4:3), you can select the TV's aspect ratio.
In Stop mode, press the 1. MENU button.
Press the Cursor 2.
%
button to move to Setup and then press the
ENTER button.
Press the Cursor 3.
%
button to move to TV DISPLAY and then
press the ENTER button.
Press the Cursor 4.
$
,
%
button to select the desired item
and then press the ENTER button.
Once the setup is complete, you will be taken to the •
previous screen.
d Press the RETURN button to return to the previous level.
d Press the EXIT button to exit the setup screen.
Adjusting the TV Aspect Ratio (Screen Size)
The horizontal to vertical screen size ratio of conventional TVs is 4:3, while that of widescreen and high
definition TVs is 16:9. This ratio is called the aspect ratio. When playing DVDs recorded in different
screen sizes, you should adjust the aspect ratio to fit your TV or monitor.
For a standard TV, select either 4:3PS or 4:3LB option according to personal preference.
Select WIDE/HDTV if you have a widescreen TV.
4:3PS (4:3 Pan&Scan)
Select this to play a 16:9 picture in the pan & scan mode on a conventional
T V.
You can see the central portion of the screen only (with the sides of the •
16:9 picture cut off).
4:3LB (4:3 Letterbox)
Select this to play a 16:9 picture in the letter box mode on a conventional
T V.
Black bars will appear at the top and bottom of the screen.•
WIDE/HDTV
Select this to view a 16:9 picture in the full-screen mode on your
widescreen TV.
You can enjoy the widescreen aspect.•
M
If a DVD is in the 4:3 ratio, you cannot view it in widescreen. `
Since DVD discs are recorded in various image formats, they will look different depending `
on the software, the type of TV, and the TV aspect ratio setting.
When using HDMI, the screen is automatically converted to Wide mode. `
MOVE ENTER EXITRETURN
MOVE SELECT EXIT
RETURN
56
system setup
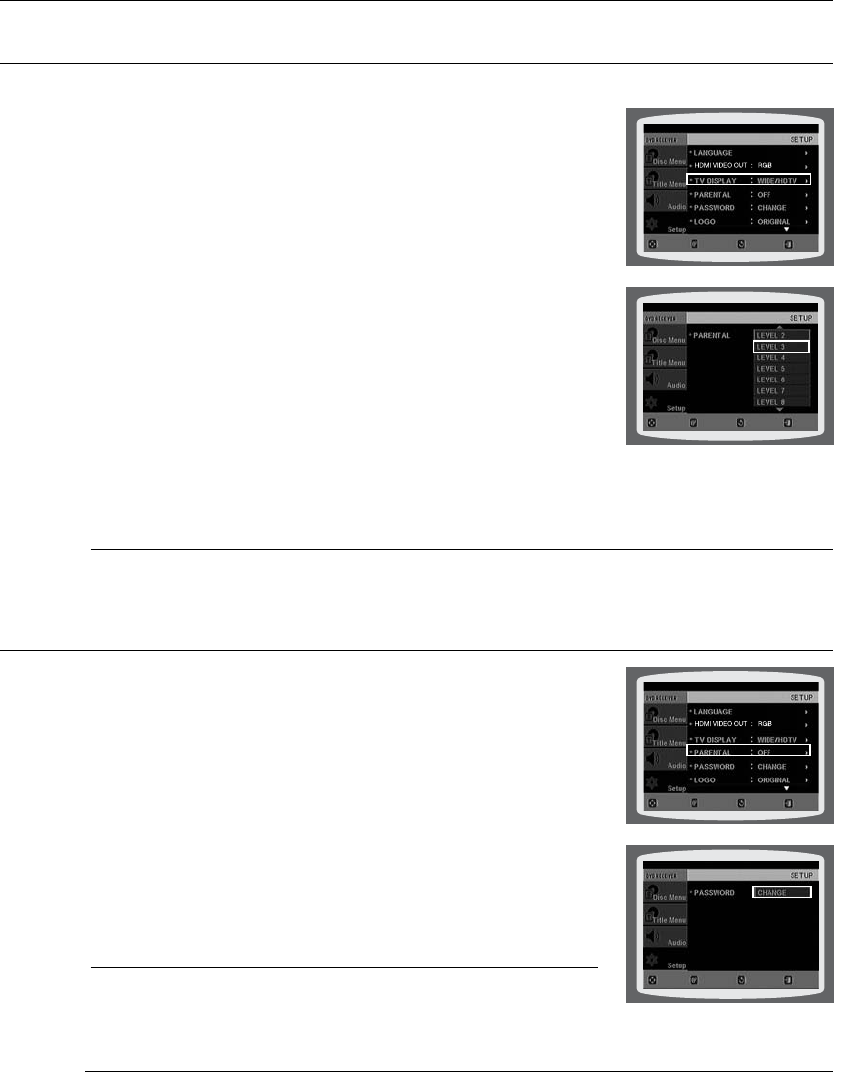
SETTING PARENTAL CONTROLS (RATING LEVEL)
Use this to restrict playback of adult or violent DVDs you do not want children to view.
In Stop mode, press the 1. MENU button.
Press the Cursor 2.
%
button to move to Setup and then press the
ENTER button.
Press the Cursor 3.
%
button to move to PARENTAL and then press the
ENTER button.
Press the Cursor 4.
$
,
%
button to select the desired rating level and then
press the ENTER button.
If you have selected Level 6, you cannot view DVDs with Level 7 or •
higher.
The higher the level, the closer the content is to violent or adult •
material.
5. Enter the password and then press the ENTER button.
The password is set to "7890" by default.•
Once the setup is complete, you will be taken to the previous screen. •
d Press the RETURN button to return to the previous level.
d
Press the EXIT button to exit the setup screen.
M
This function works only if a DVD disc contains the rating level information. `
SETTING THE PASSWORD
You can set the password for the Parental (rating level) setting.
In Stop mode, press the 1. MENU button.
Press the Cursor 2.
%
button to move to Setup and then press the
ENTER button.
Press the Cursor 3.
%
button to move to PASSWORD and then
press the ENTER button.
Press the 4. ENTER button.
Enter the password and then press the 5. ENTER button.
Enter the old password, a new password, and confirm new •
password.
The setting is complete. •
M
The password is set to "7890" by default. `
If you have forgotten the rating level password, do the following
While the player is in No DIsc mode, hold the DVD Players • STOP (T) button for longer than
5 seconds. INITIAL appears on the display and all settings will return to the default values.
Press the • POWER button.
Using the RESET function will erase all stored settings.
Do not use this unless necessary.
MOVE ENTER EXITRETURN
MOVE SELECT EXITRETURN
MOVE SELECT EXITRETURN
MOVE ENTER EXIT
RETURN
57
ENG ● SYSTEM SETUP
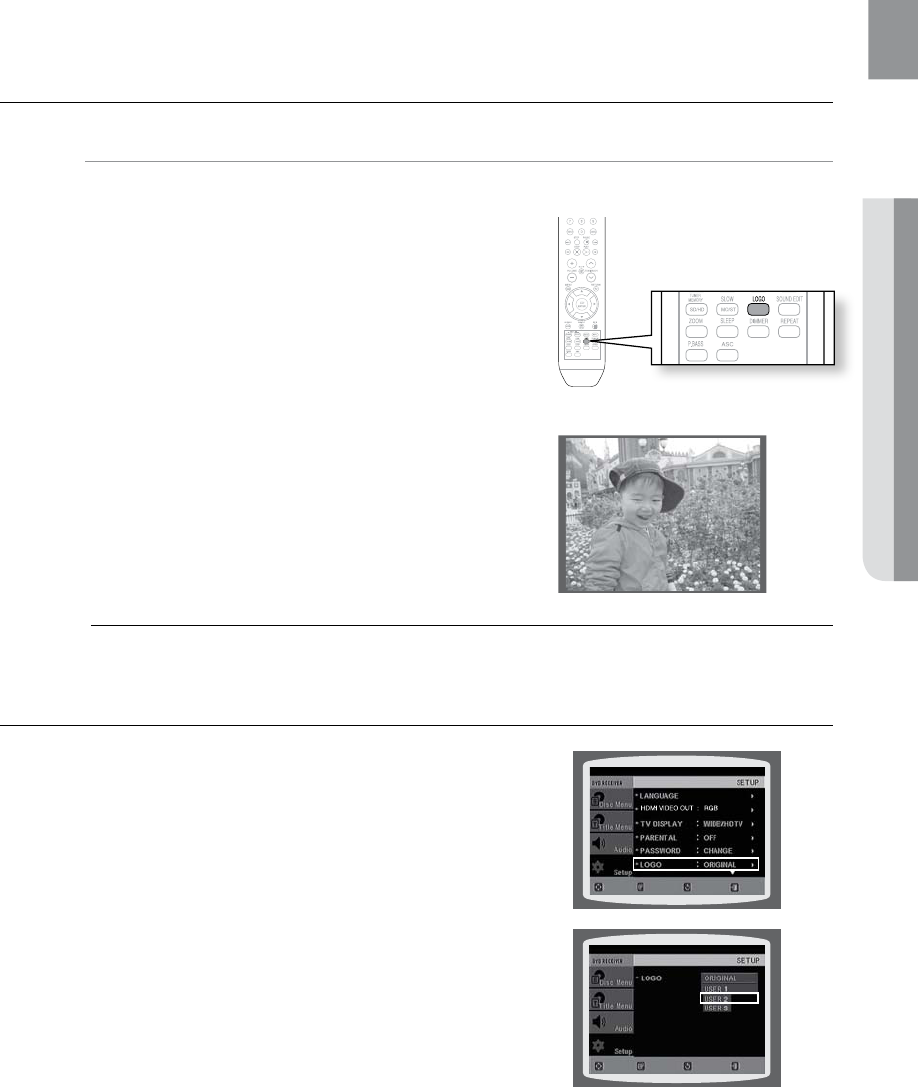
SETTING THE WALLPAPER
dG
While watching a DVD or JPEG CD, you can set the image you like as background wallpaper.
During playback, press the 1. PAUSE button when
an image you like appears.
Press the 2. LOGO button.
COPY LOGO DATA• will be displayed on the TV screen.
The power will turn off and then back on.3.
The selected wallpaper will be displayed. •
You can select up to 3 wallpaper settings. •
M
This function will not work when the HDMI output is 720p, 1080i or 1080p. `
TO SELECT ONE OF THE 3 WALLPAPER SETTINGS YOU'VE MADE
In Stop mode, press the 1. MENU button.
Press the Cursor 2.
%
button to move to Setup and then
press the ENTER button.
Press the Cursor 3.
%
button to move to LOGO and then
press the ENTER button.
Press the Cursor 4.
$
,
%
button to select the desired USER,
and then press the ENTER button.
This selects one of the 3 wallpaper screens.•
5. Press the EXIT button to exit the setup screen.
ORIGINAL • : Select this to set the Samsung Logo image as
your wallpaper.
USER • : Select this to set the desired image as your
wallpaper.
d Press the RETURN button to return to the previous level.
d Press the EXIT button to exit the setup screen.
COPY LOGO DATA
MOVE ENTER EXITRETURN
MOVE SELECT EXIT
RETURN
58
system setup
DviX (R) Registration
Please use the Registration code to register this player with the DivX (R) video on demand format.
To learn more, go to www.divx.com/vod.
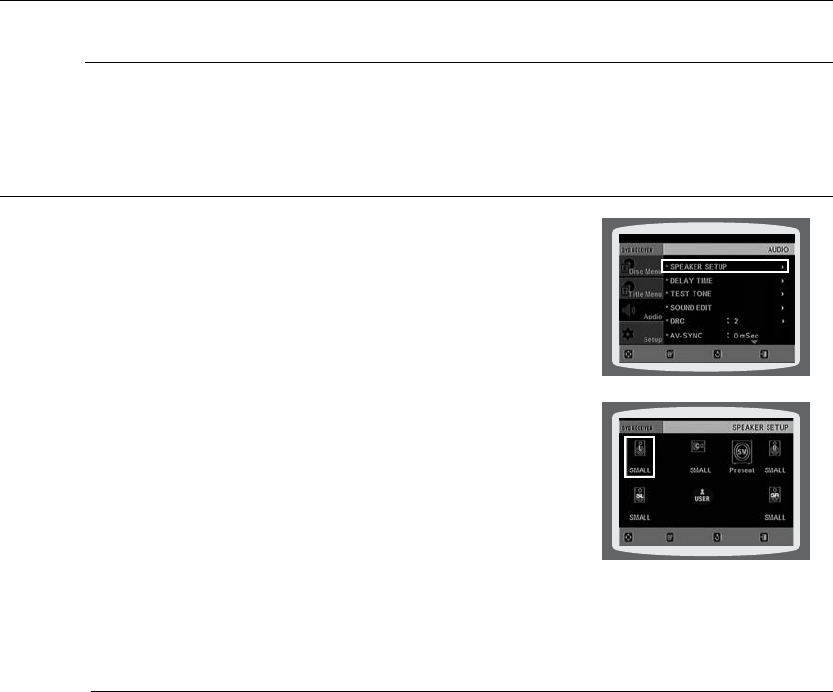
SETTING THE SPEAKER MODE
Signal outputs and frequency responses from the speakers will
automatically be adjusted according to your speaker configuration
and whether certain speakers are used or not.
In Stop mode, press the 1. MENU button.
Press the Cursor 2.
%
button to move to Audio and then press the
ENTER button.
In the 3. SPEAKER SETUP, press the ENTER button again.
Press the Cursor 4. ,,, button to move to the desired
speaker and then press the ENTER button.
For C, SL, and SR, each time the button is pressed, the mode switches •
alternately as follows : SMALL
➞
NONE.
For L and R, the mode is set to SMALL.•
SMALL • : Select this when using the speakers.
NONE • : Select this when no speaker is connected.
d Press the RETURN button to return to the previous level.
d Press the EXIT button to exit the setup screen.
M
Depending on PRO LOGIC and STEREO settings, the speaker mode may vary (see page 63). `
MOVE ENTER EXITRETURN
MOVE CHANGE EXIT
RETURN