Samsung Electronics Co LS22A100 LCD monitor User Manual SA100 X0 Eng
Samsung Electronics Co Ltd LCD monitor SA100 X0 Eng
UserManual.wiki
>
Samsung Electronics Co
>
LS22A100 User Manual
>
User's Manual 01
Contents
1.
User's Manual 01
2.
User's Manual 02
User's Manual 01
Navigation menu
Upload a User Manual
Namespaces
Wiki Guide
HTML
PDF
Info
Views
User Manual
Discussion / Help
Navigation
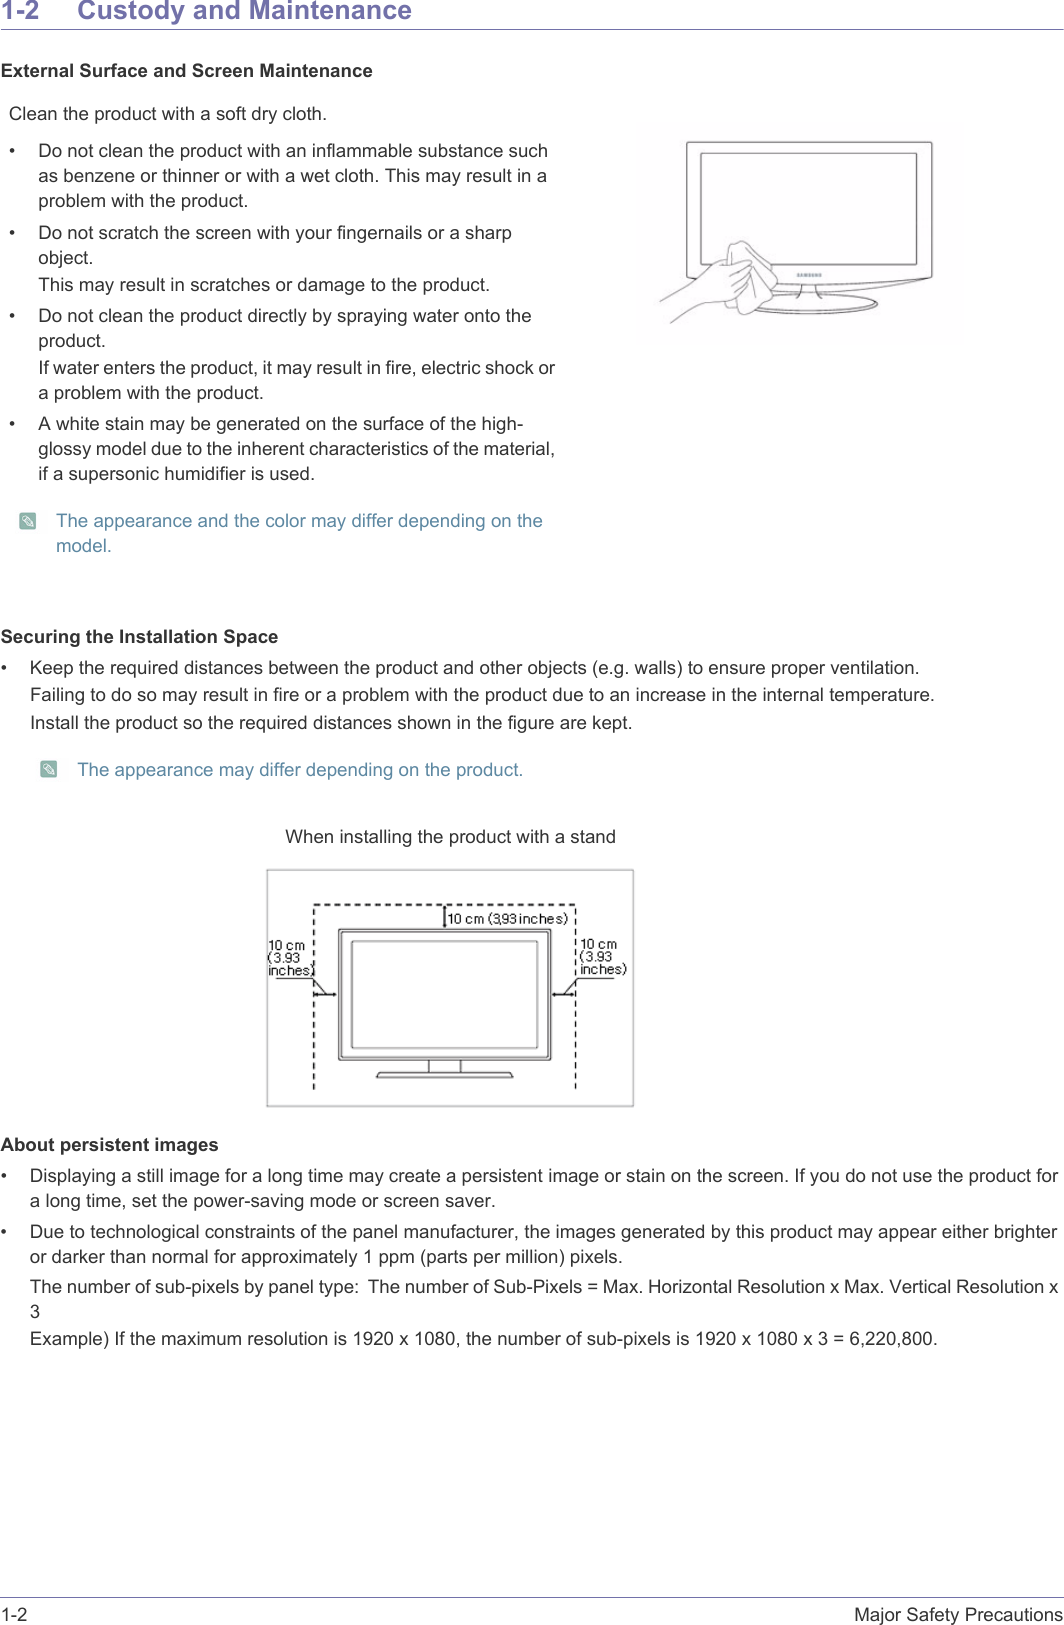
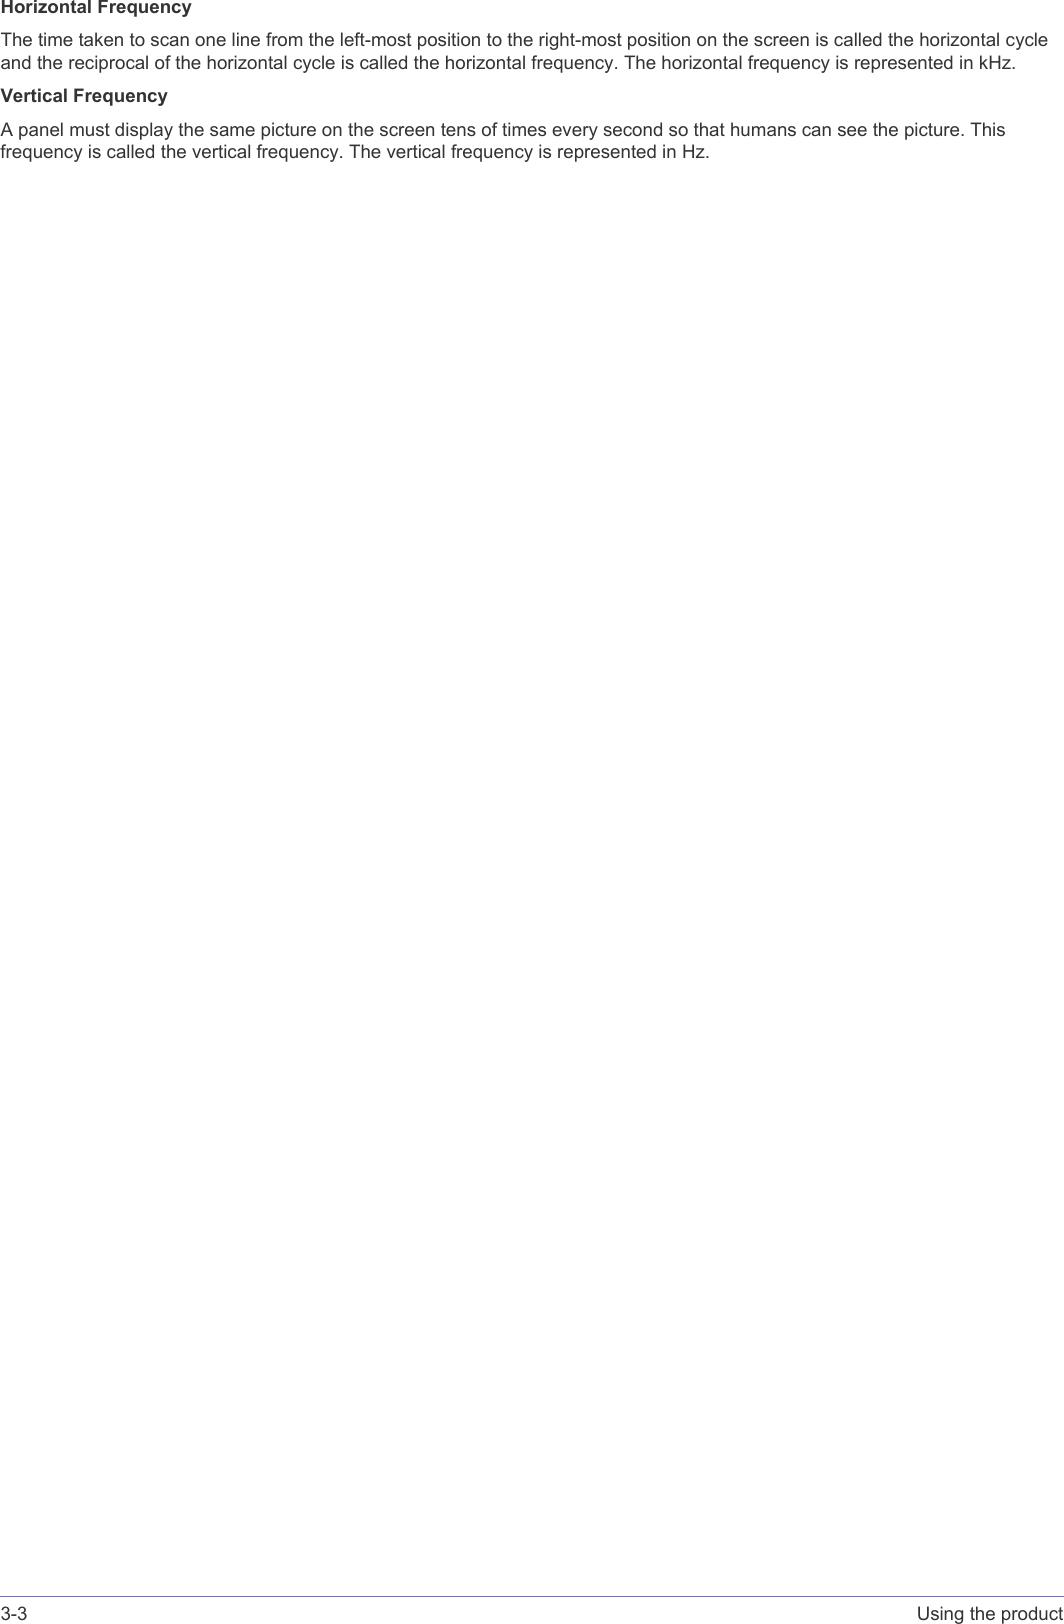
![2-3 Installing the Product2-3 Connecting with a PC The connecting part may differ depending on the product model. 1. Connect the product to a PC depending on the video output supported by the PC.• When the graphics card provides D-Sub (<Analog>) output• Connect the [RGB IN] port of the product to the [D-Sub] port of the PC with the D-Sub cable.2. Connect the power adapter to [DC 12V/14V] on the rear of the product. Connect the power cord to the adapter and wall socket.(The input voltage is switched automatically.) When the product is connected to a PC, you can turn the product on and use it.](https://usermanual.wiki/Samsung-Electronics-Co/LS22A100.User-s-Manual-01/User-Guide-1488399-Page-14.png)

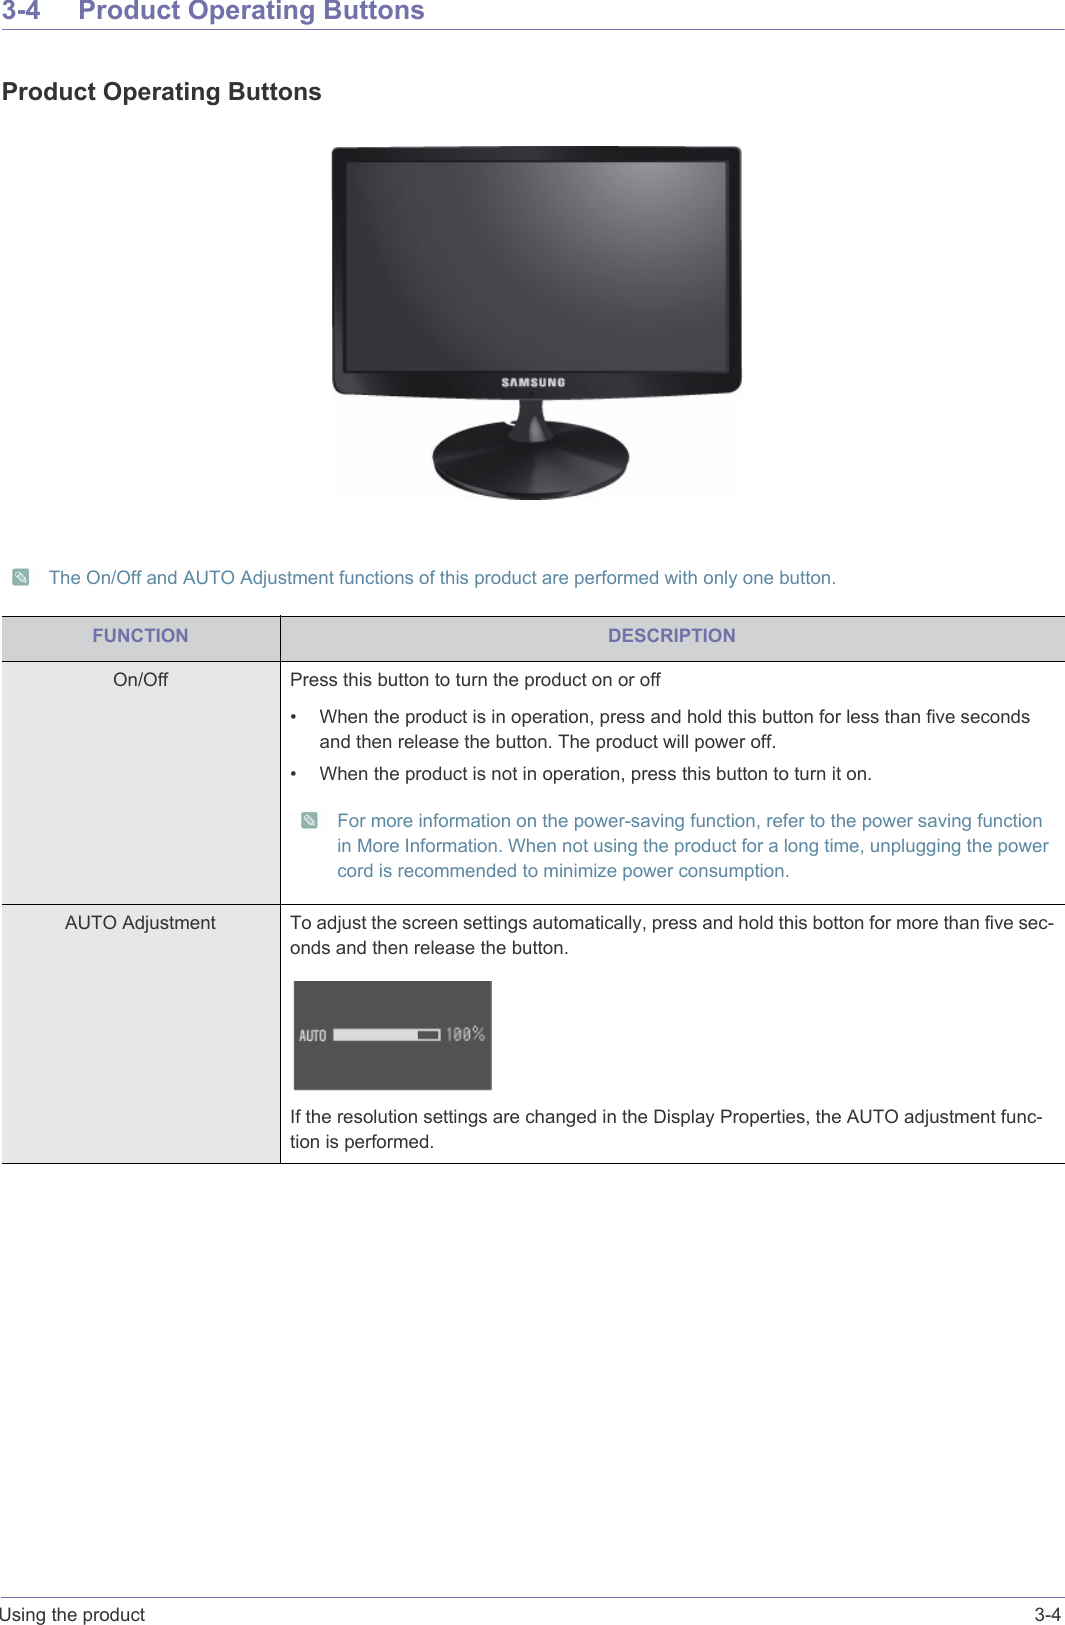
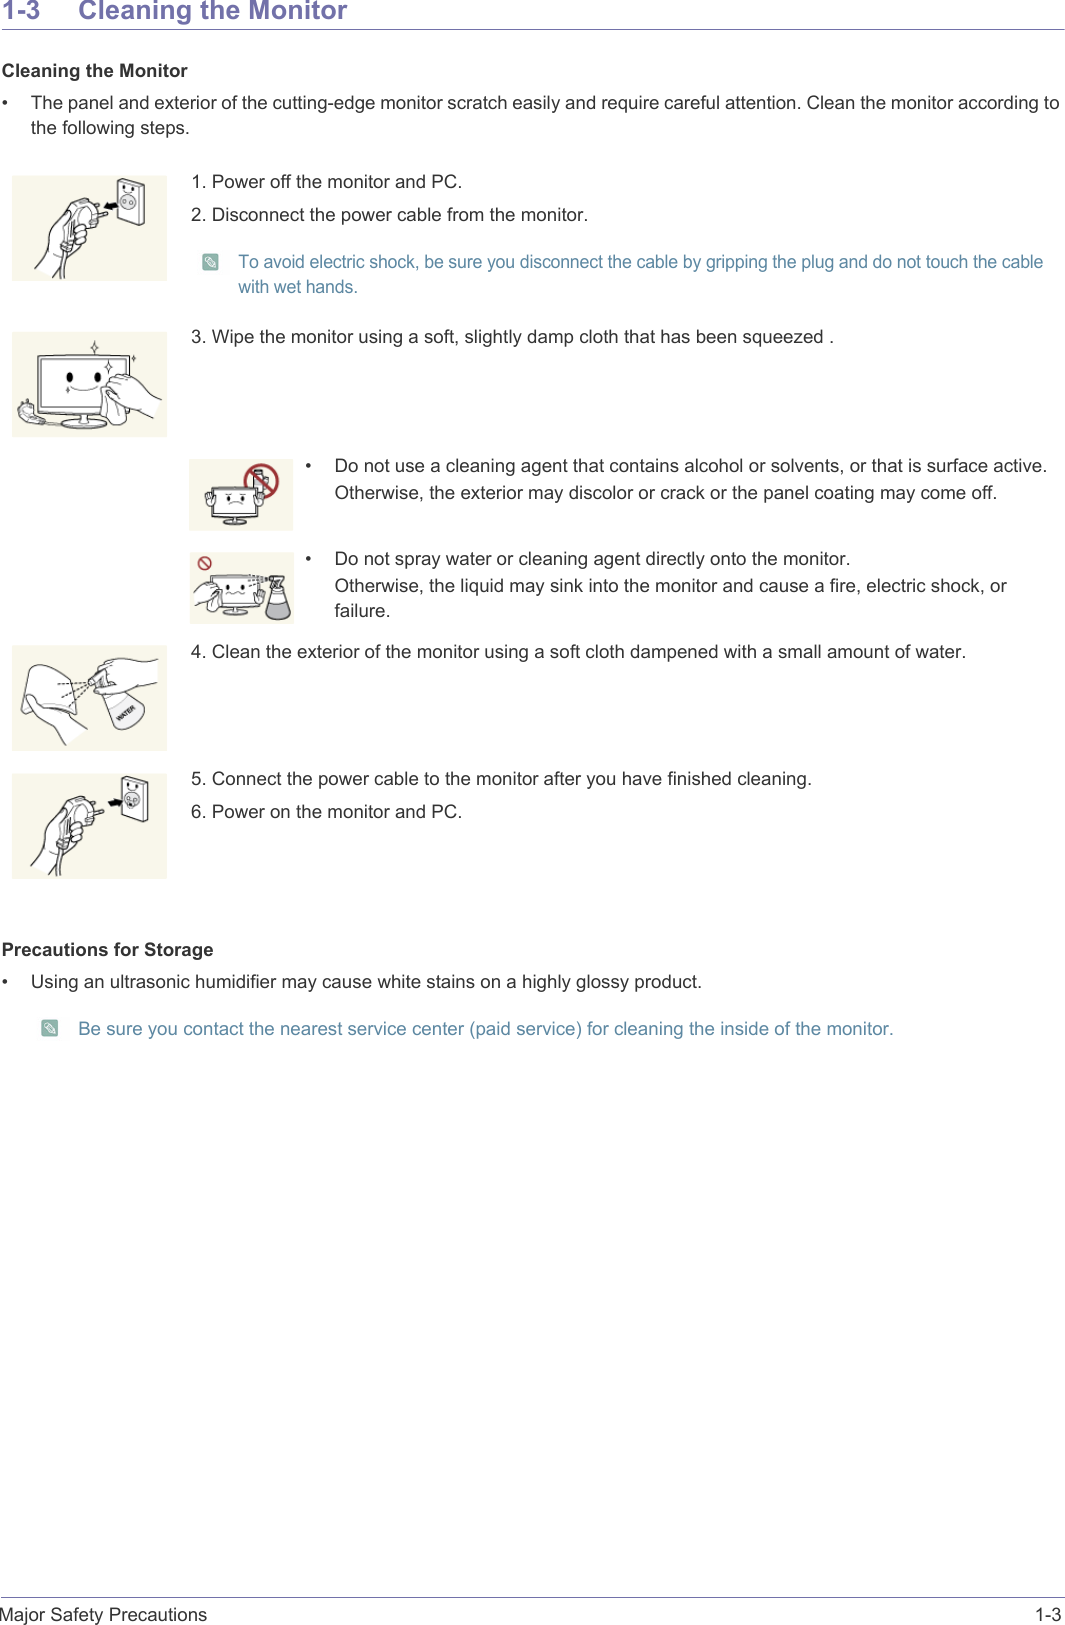
![3-5 Using the product3-5 MagicTuneWhat is MagicTune? MagicTune is a software program that helps with monitor adjustments by providing comprehensive descriptions of monitor functions and easy-to-understand guidelines. Users can adjust the product with the mouse and the keyboard without using the operating buttons of the product.Installing the Software1. Visit Samsung's offcial website to download the lastest MagicTune vertion.http://www.samsung.com/us/consumer/learningresources/monitor/magetune/pop_intro.html2. Complete the remaining software installation steps according to the instructions displayed on the screen. • The software may not work properly if you do not restart the computer after the installation.• The MagicTune icon may not appear depending on the computer system and the product specifications.• If the shortcut icon does not appear, press the F5 key. Restrictions and Problems with the Installation (MagicTune™)The installation of MagicTune™may be affected by the graphics card, motherboard and the networking environment. System RequirementsOS•Windows 2000•Windows XP Home Edition•Windows XP Professional•Windows Vista 32Bit•Windows 7 32Bit For MagicTune™, Windows 2000 or later is recommended. Hardware•At least 32MB of memory •At least 60MB of free space on the hard disk drive For more information, refer to the website. Removing the SoftwareYou can only remove MagicTune™through [Add or Remove Programs ] in Windows.To remove MagicTune™, complete the following steps.1. Click [Start] select [Settings], and select [Control Panel] from the menu.For Windows XP, click [Start], and select [Control Panel] from the menu. 2. Double-click the [Add or Remove Programs] icon in the Control Panel. 3. In the [Add/Remove] window, find and select MagicTune™so that it is highlighted. 4. Click [Change or Remove Programs] to remove the software. 5. Select [Yes] to start removing MagicTune™.](https://usermanual.wiki/Samsung-Electronics-Co/LS22A100.User-s-Manual-01/User-Guide-1488399-Page-22.png)