Samsung Electronics Co ML1670 Laser Printer User Manual bluebird l english
Samsung Electronics Co Ltd Laser Printer bluebird l english
UserManual.wiki
>
Samsung Electronics Co
>
ML1670 User Manual
>
Users Manual 1
Contents
1.
Users Manual 1
2.
Users Manual 2
Users Manual 1
Navigation menu
Upload a User Manual
Namespaces
Wiki Guide
HTML
PDF
Info
Views
User Manual
Discussion / Help
Navigation
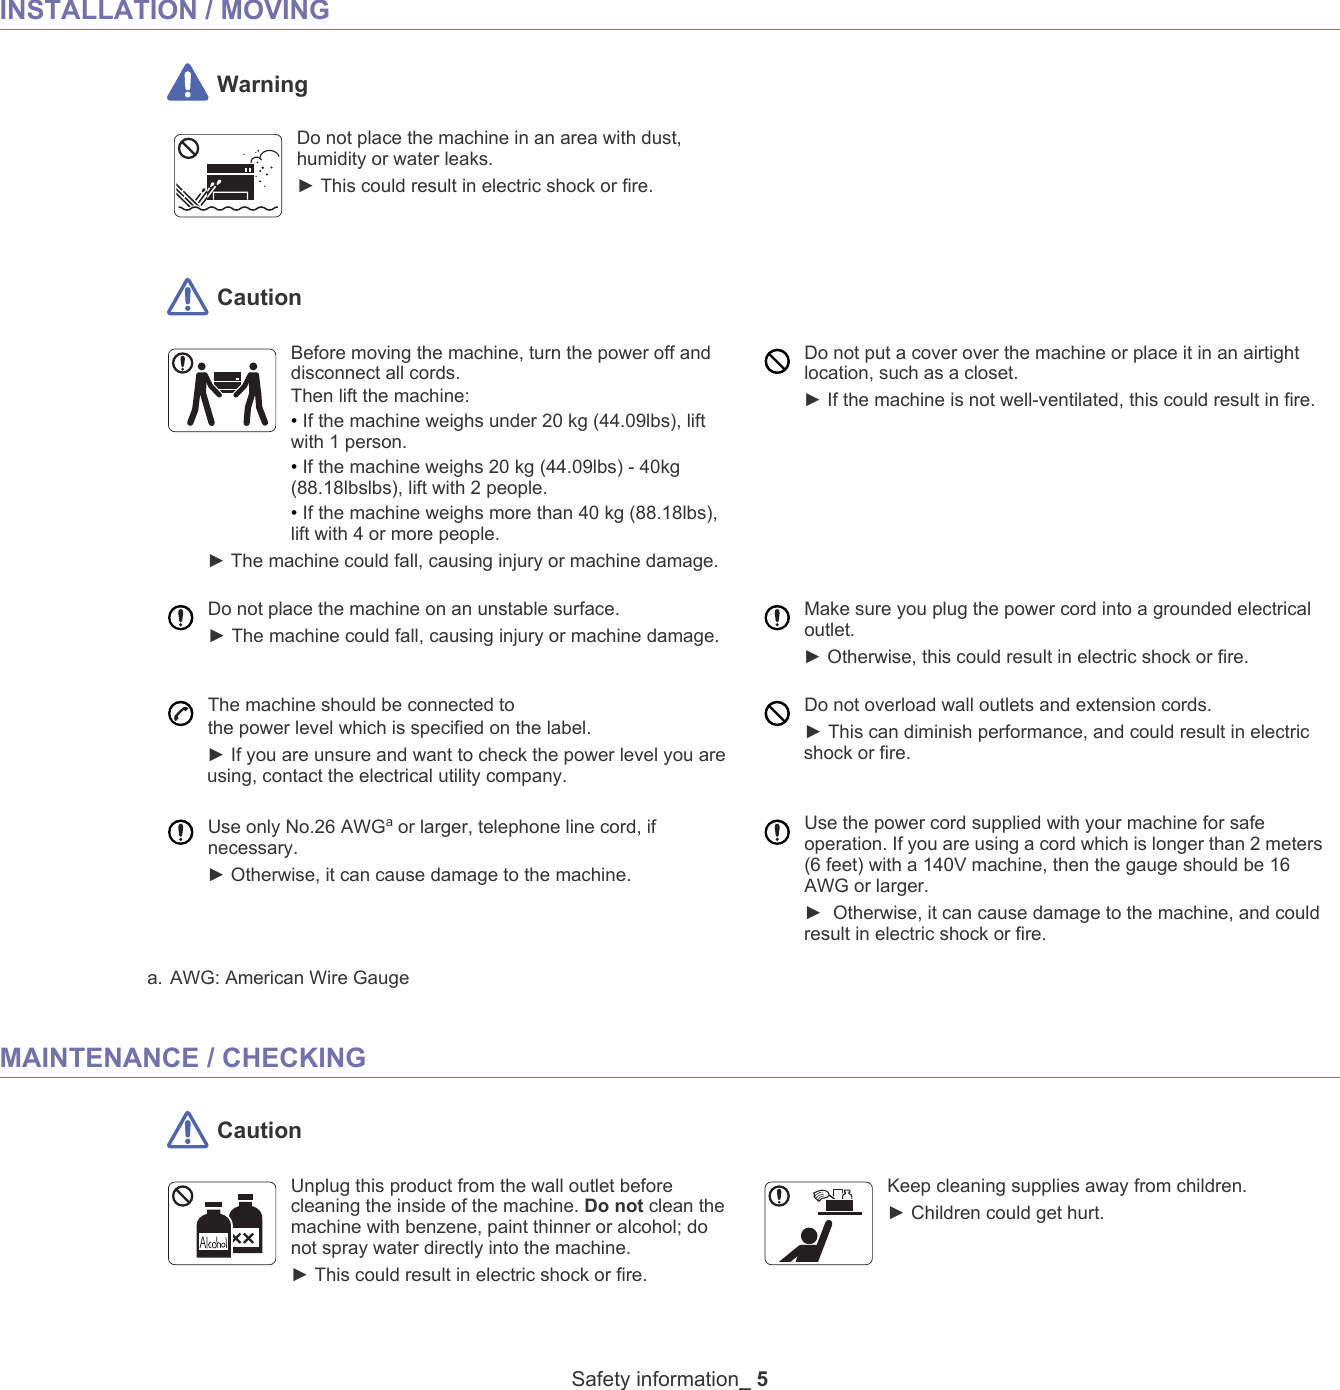
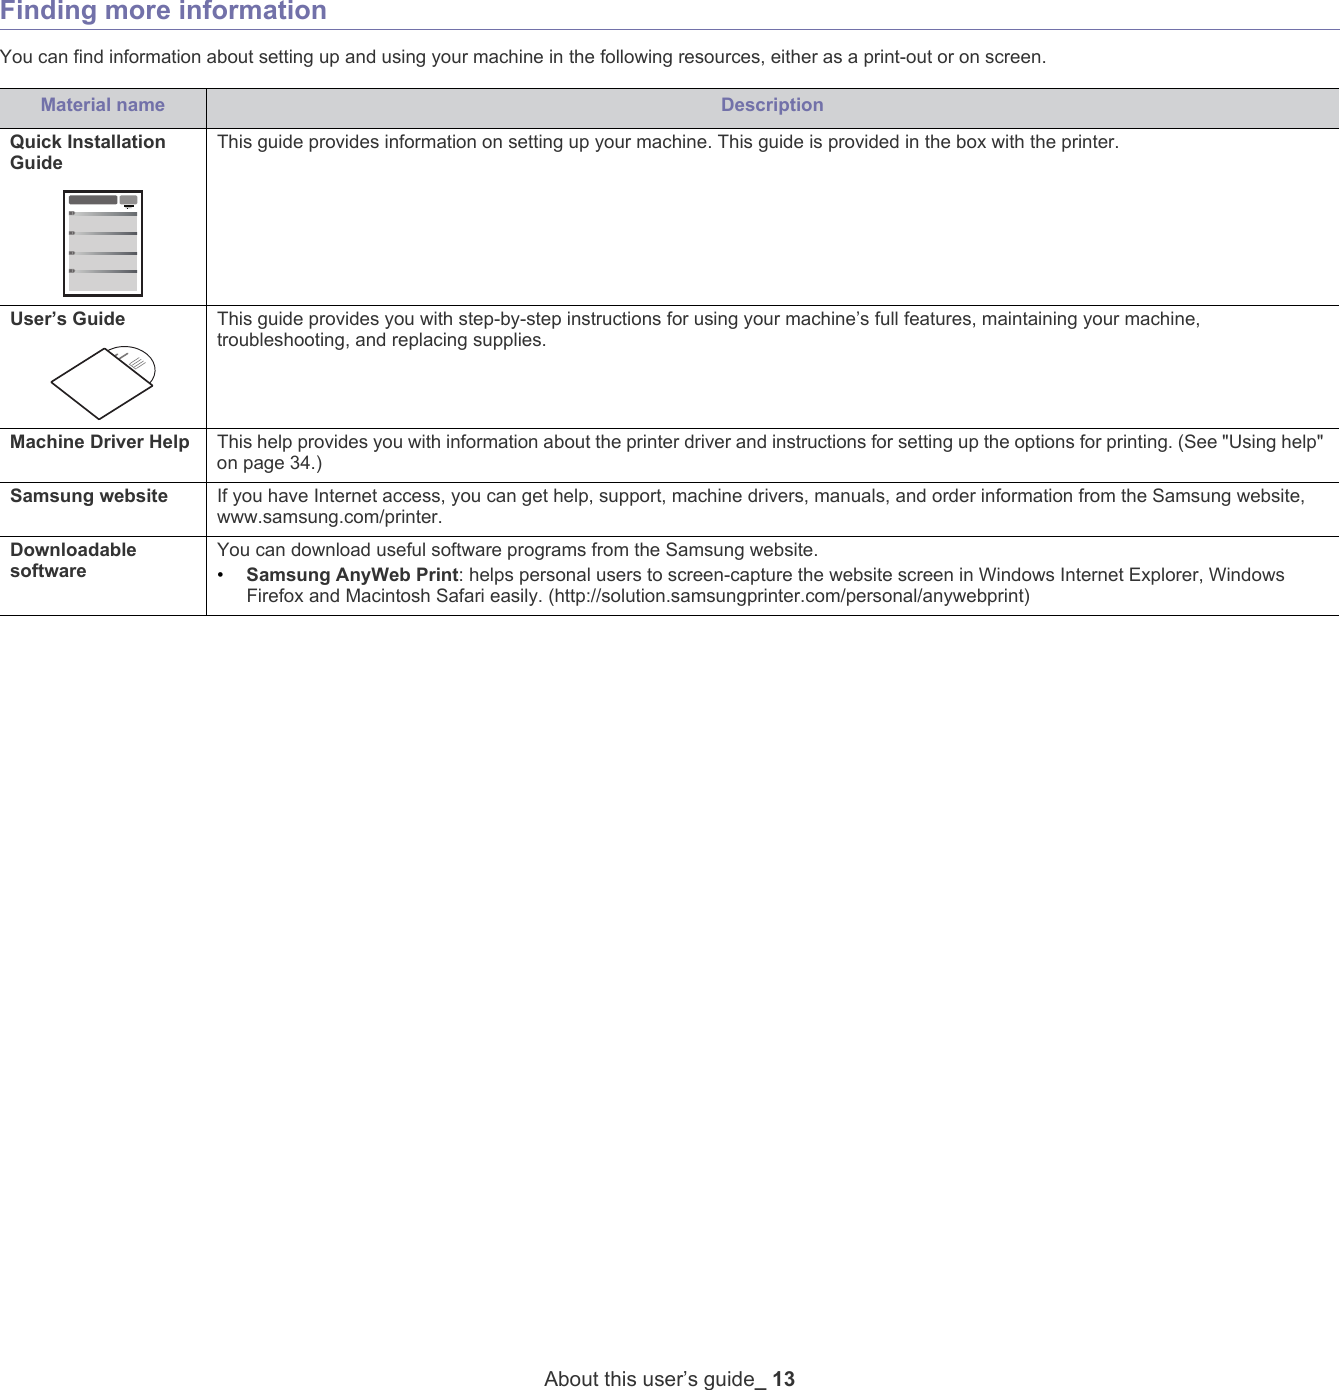
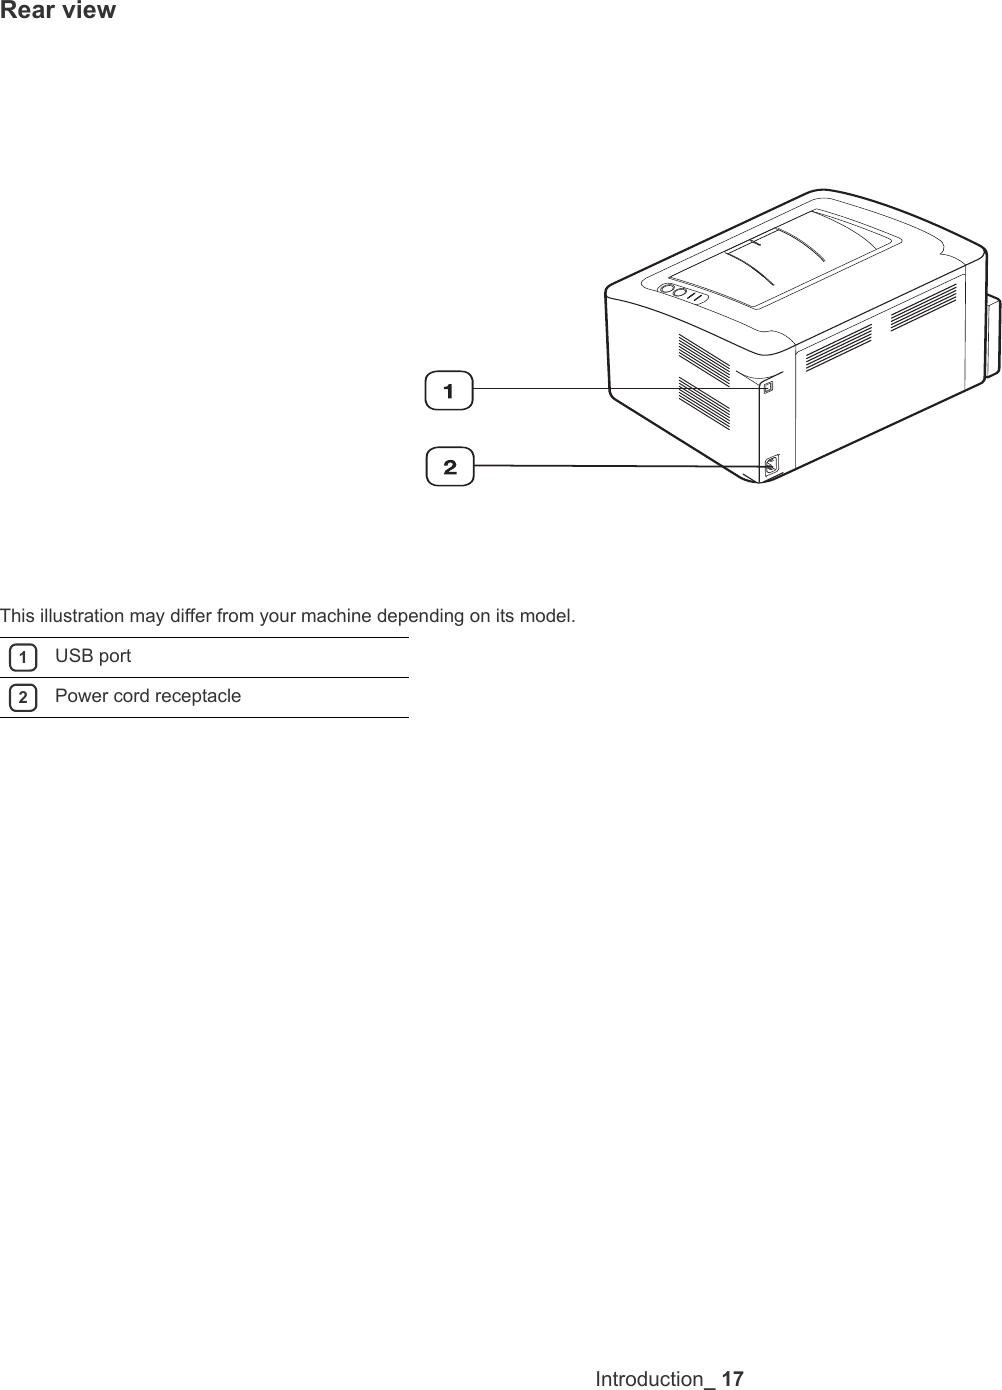

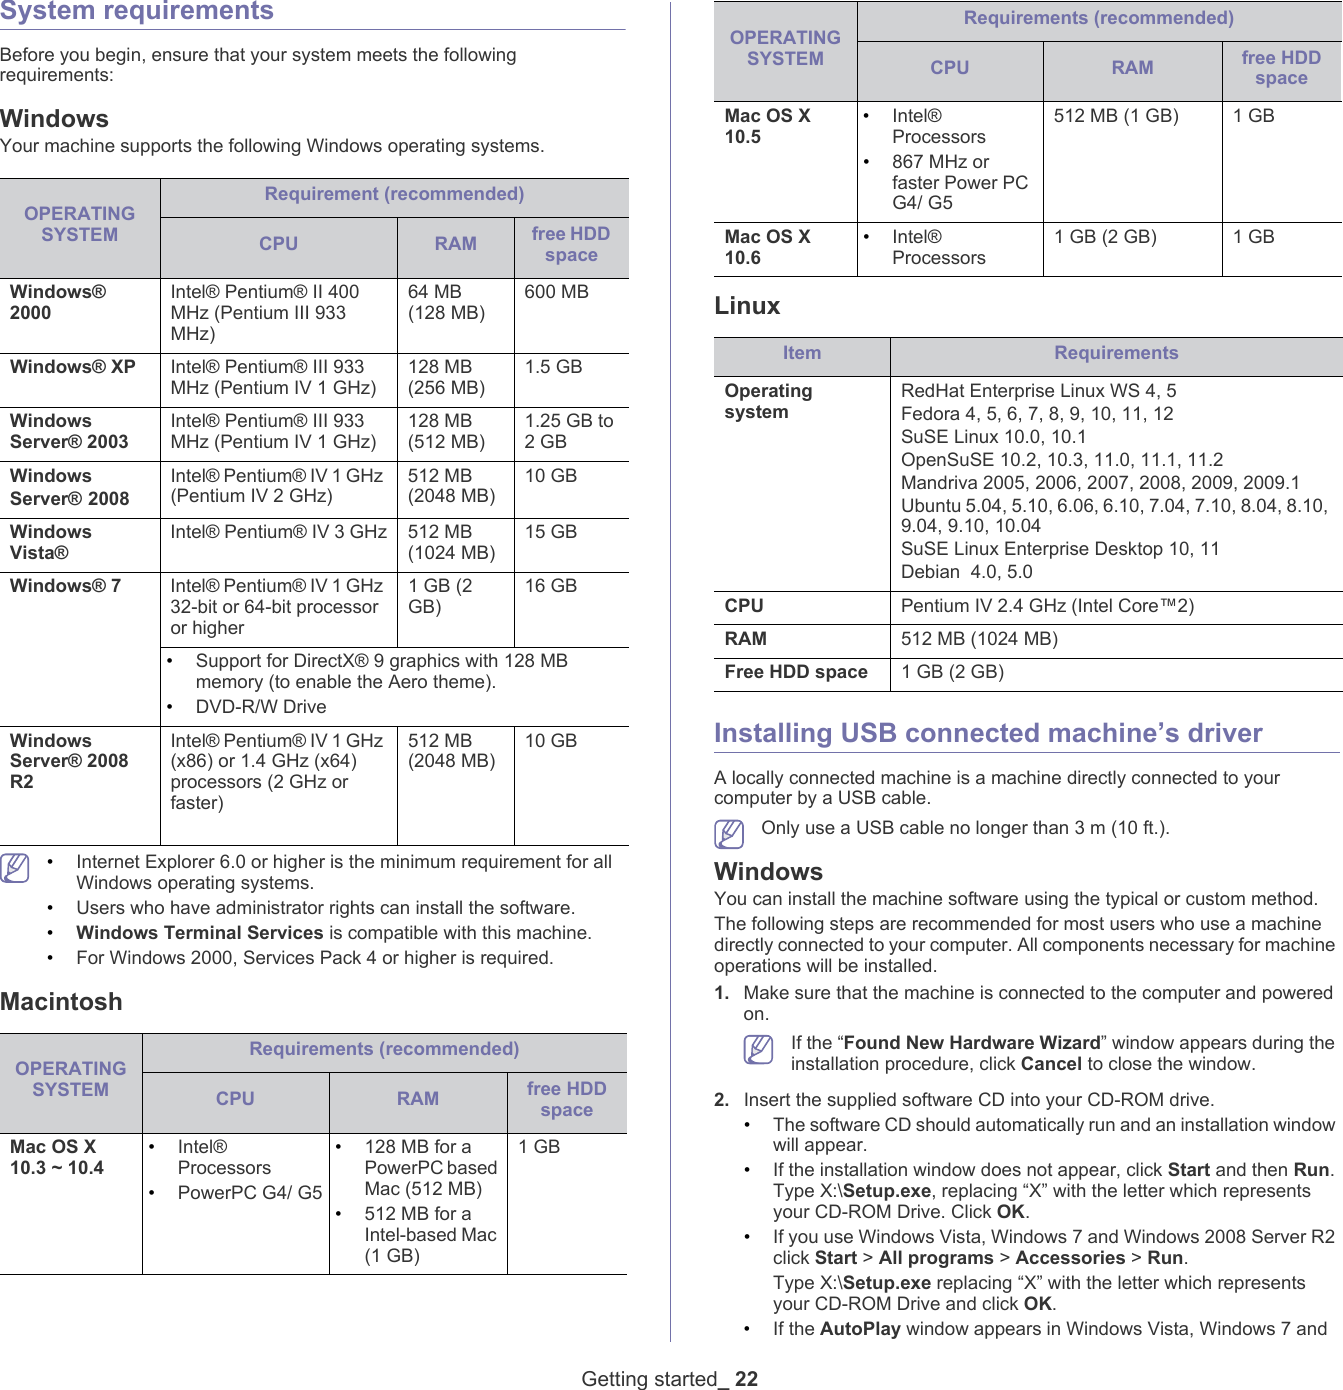
![Getting started_ 24d) After uninstalling the printer driver, reinstall it (see “Installing USB connected machine’s driver” on page 23).MacintoshThe software CD that came with your machine provides you with the PPD file that allows you to use the CUPS driver or Apple LaserWriter driver (only available when you use a machine which supports the PostScript driver) for printing on a Macintosh computer. 1. Make sure that the machine is connected to your computer and powered on.2. Insert the supplied software CD into your CD-ROM drive.3. Double-click the CD-ROM icon that appears on your Macintosh desktop.4. Double-click the MAC_Installer folder.5. Double-click the Installer OS X icon.6. Enter the password and click OK.7. The Samsung Installer window opens. Click Continue.8. Read the license agreement and click Continue.9. Click Agree to agree to the license agreement.10. Select Easy Install and click Install. Easy Install is recommended for most users. All components necessary for machine operations will be installed. If you select Custom Install, you can choose individual components to install.11. When the message which warns that all applications will close on your computer appears, click Continue.12. After the installation is finished, click Quit.13. Open the Applications folder > Utilities > Print Setup Utility.•For Mac OS X 10.5~10.6, open the Applications folder > System Preferences and click Print & Fax.14. Click Add on the Printer List.•For Mac OS X 10.5~10.6, click the “+” icon; a display window will pop up. 15. For Mac OS X 10.3, select the USB tab. •For Mac OS X10.4, click Default Browser and find the USB connection.•For Mac OS X 10.5~10.6, click Default and find the USB connection.16. For Mac OS X 10.3, if Auto Select does not work properly, select Samsung in Printer Model and your machine name in Model Name.•For Mac OS X 10.4, if Auto Select does not work properly, select Samsung in Print Using and your machine name in Model. •For Mac OS X 10.5~10.6, if Auto Select does not work properly, select Select a driver to use... and your machine name in Print Using. Your machine appears on the Printer List, and is set as the default machine.17. Click Add. If the printer driver does not work properly, uninstall the driver and reinstall it. Follow steps below to uninstall the driver for Macintosh.a) Make sure that the machine is connected to your computer and powered on.b) Insert the supplied software CD into your CD-ROM drive.c) Double-click CD-ROM icon that appears on your Macintosh desktop.d) Double-click the MAC_Installer folder.e) Double-click the Installer OS X icon.f) Enter the password and click OK.g) The Samsung Installer window opens. Click Continue.h) Select Uninstall and click Uninstall. i) When the message which warns that all applications will close on your computer appears, Click Continue.j) When the uninstall is done, click Quit.LinuxYou need to download Linux software packages from the Samsung website to install the printer software. Follow the steps below to install the software.Installing the Unified Linux Driver1. Make sure that the machine is connected to your computer and powered on.2. When the Administrator Login window appears, type in root in the Login field and enter the system password. You must log in as a super user (root) to install the machine software. If you are not a super user, ask your system administrator.3. From the Samsung website, download the Unified Linux Driver package to your computer.4. Right click the Unified Linux Driver package and extract the package. 5. Double click cdroot > autorun.6. When the welcome screen appears, click Next.7. When the installation is complete, click Finish.The installation program added the Unified Driver Configurator desktop icon and the Unified Driver group to the system menu for your convenience. If you have any difficulties, consult the on screen help that is available through your system menu or from the driver package Windows applications, such as Unified Driver Configurator. If the printer driver does not work properly, uninstall the driver and reinstall it. Follow the steps below steps to uninstall the driver for Linux.a) Make sure that the machine is connected to your computer and powered on.b) When the Administrator Login window appears, type in “root” in the Login field and enter the system password.You must log in as a super user (root) to uninstall the printer driver. If you are not a super user, ask your system administrator.c) Click the icon at the bottom of the desktop. When the Terminal screen appears, type in:[root@localhost root]#cd /opt/Samsung/mfp/uninstall/](https://usermanual.wiki/Samsung-Electronics-Co/ML1670.Users-Manual-1/User-Guide-1431406-Page-24.png)
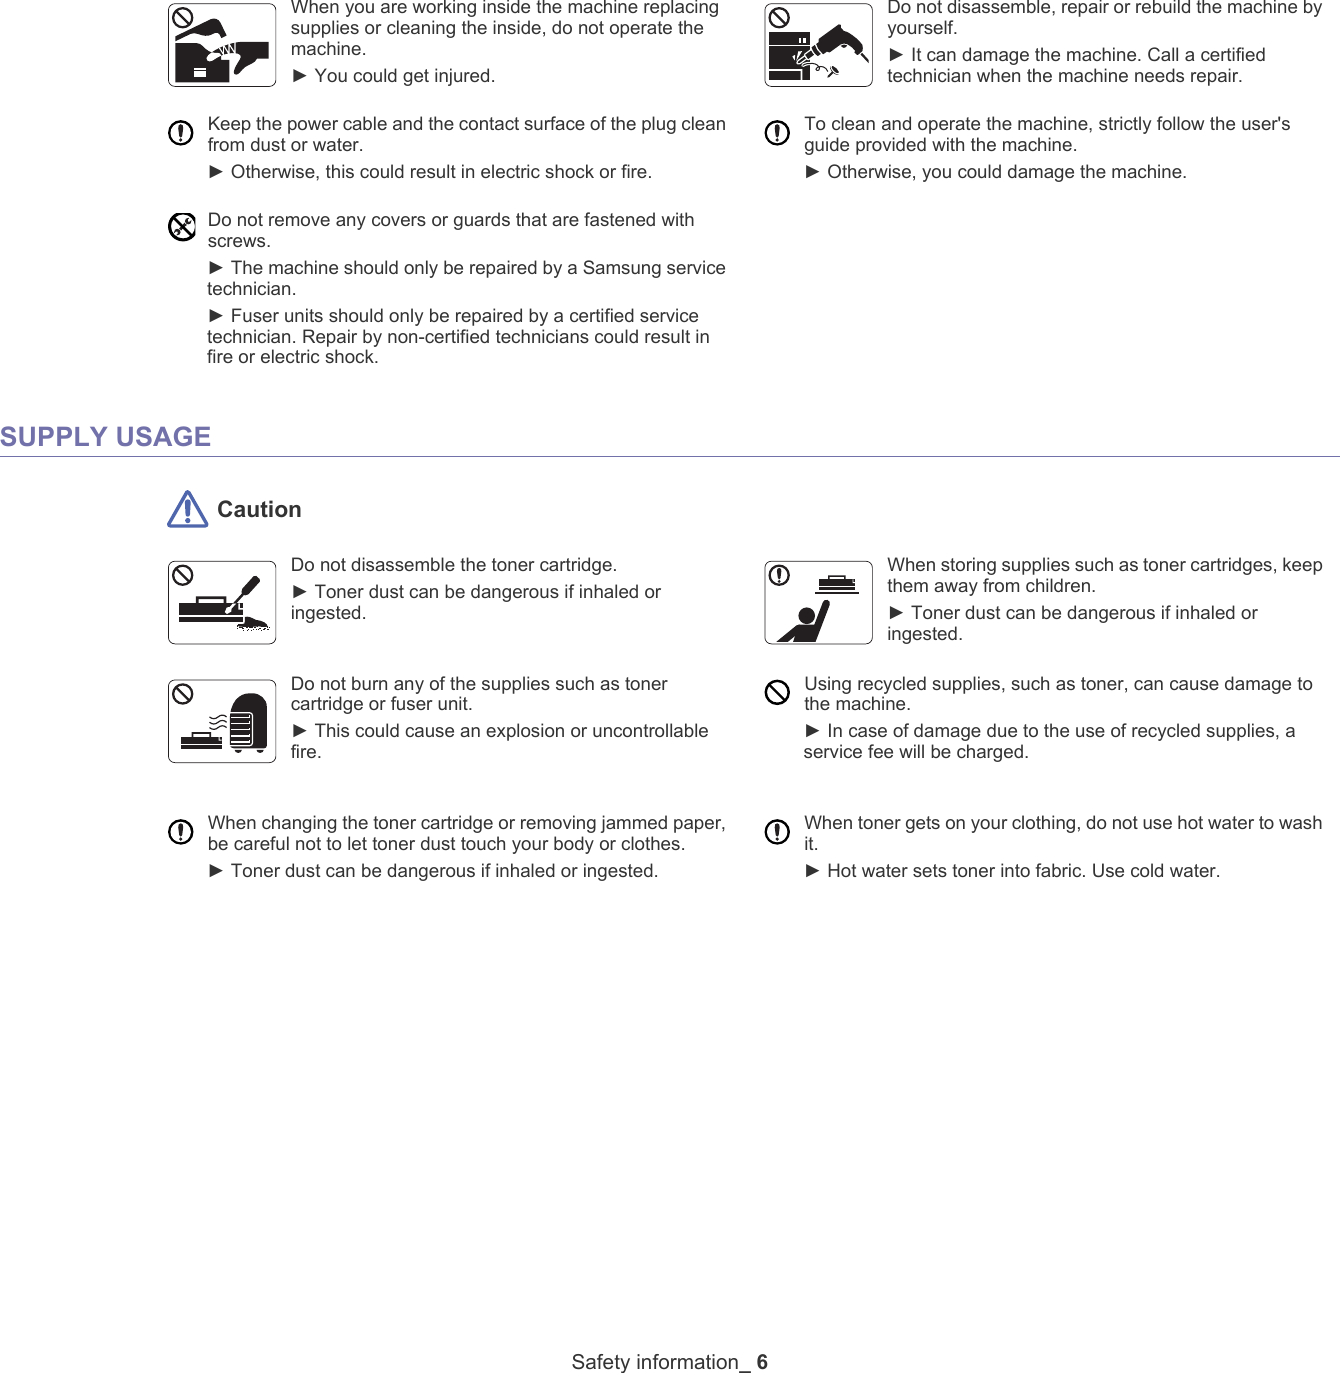
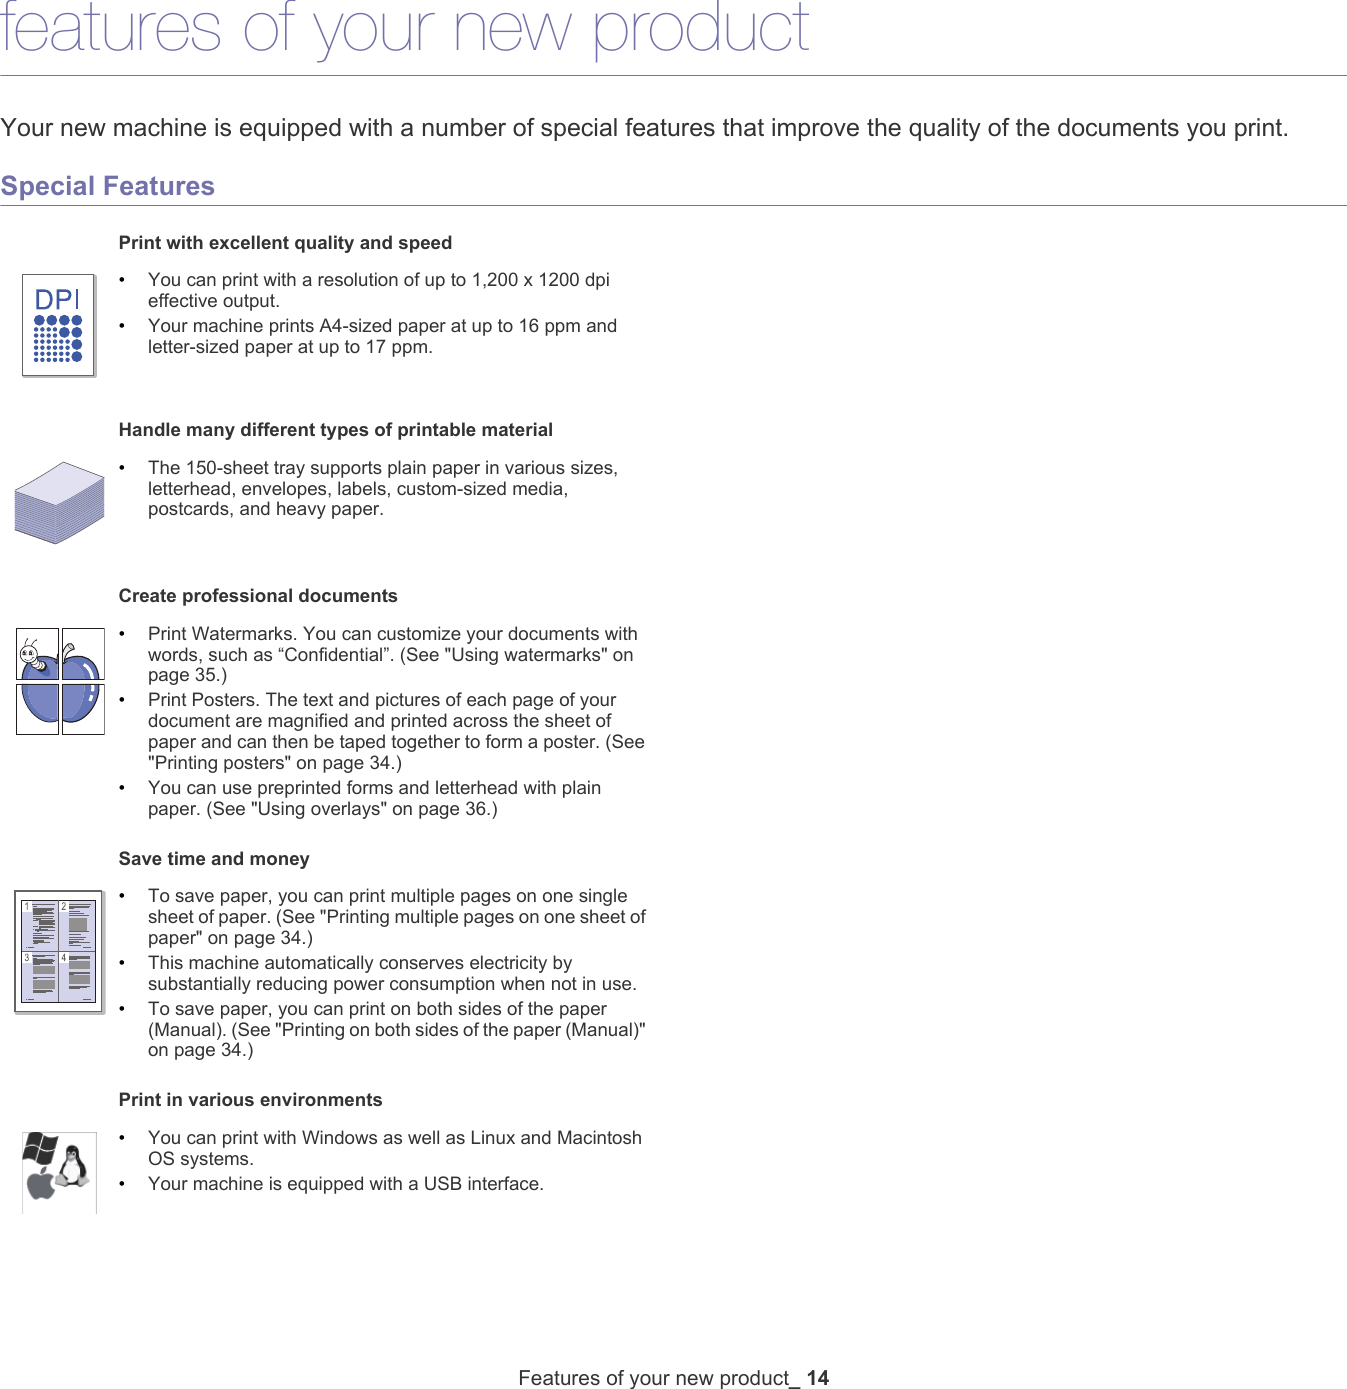
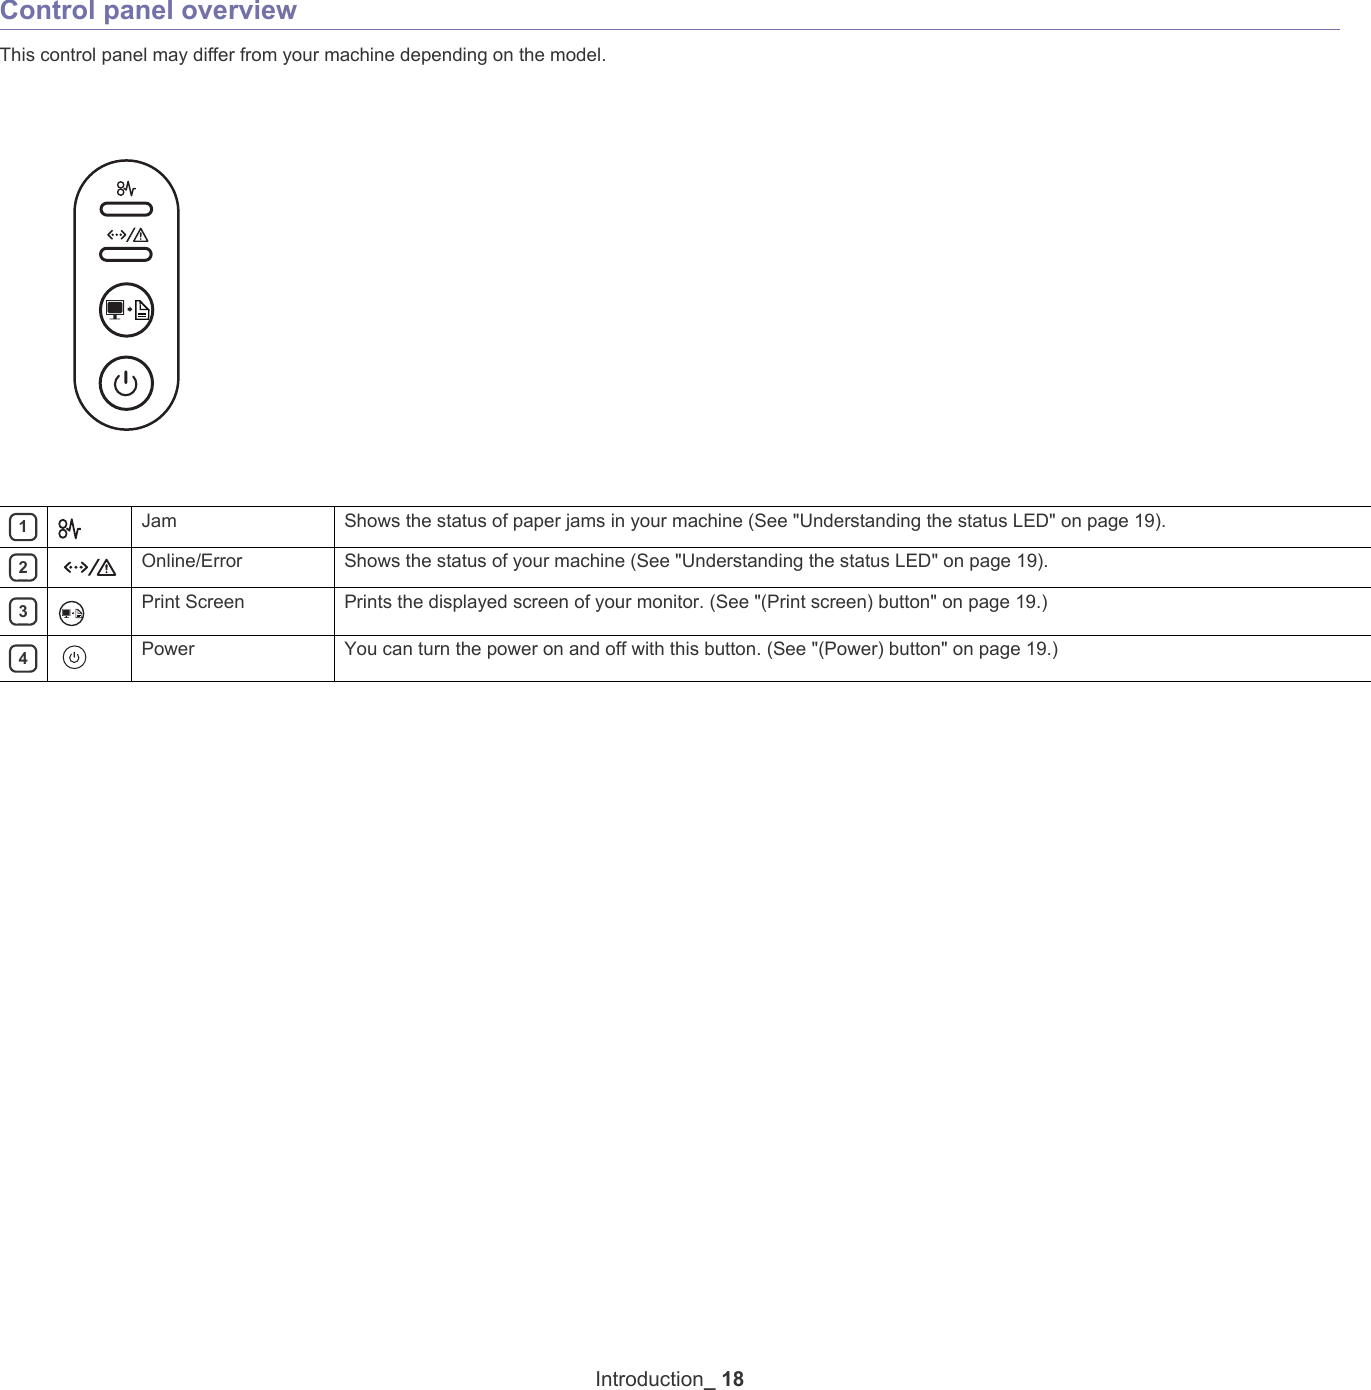
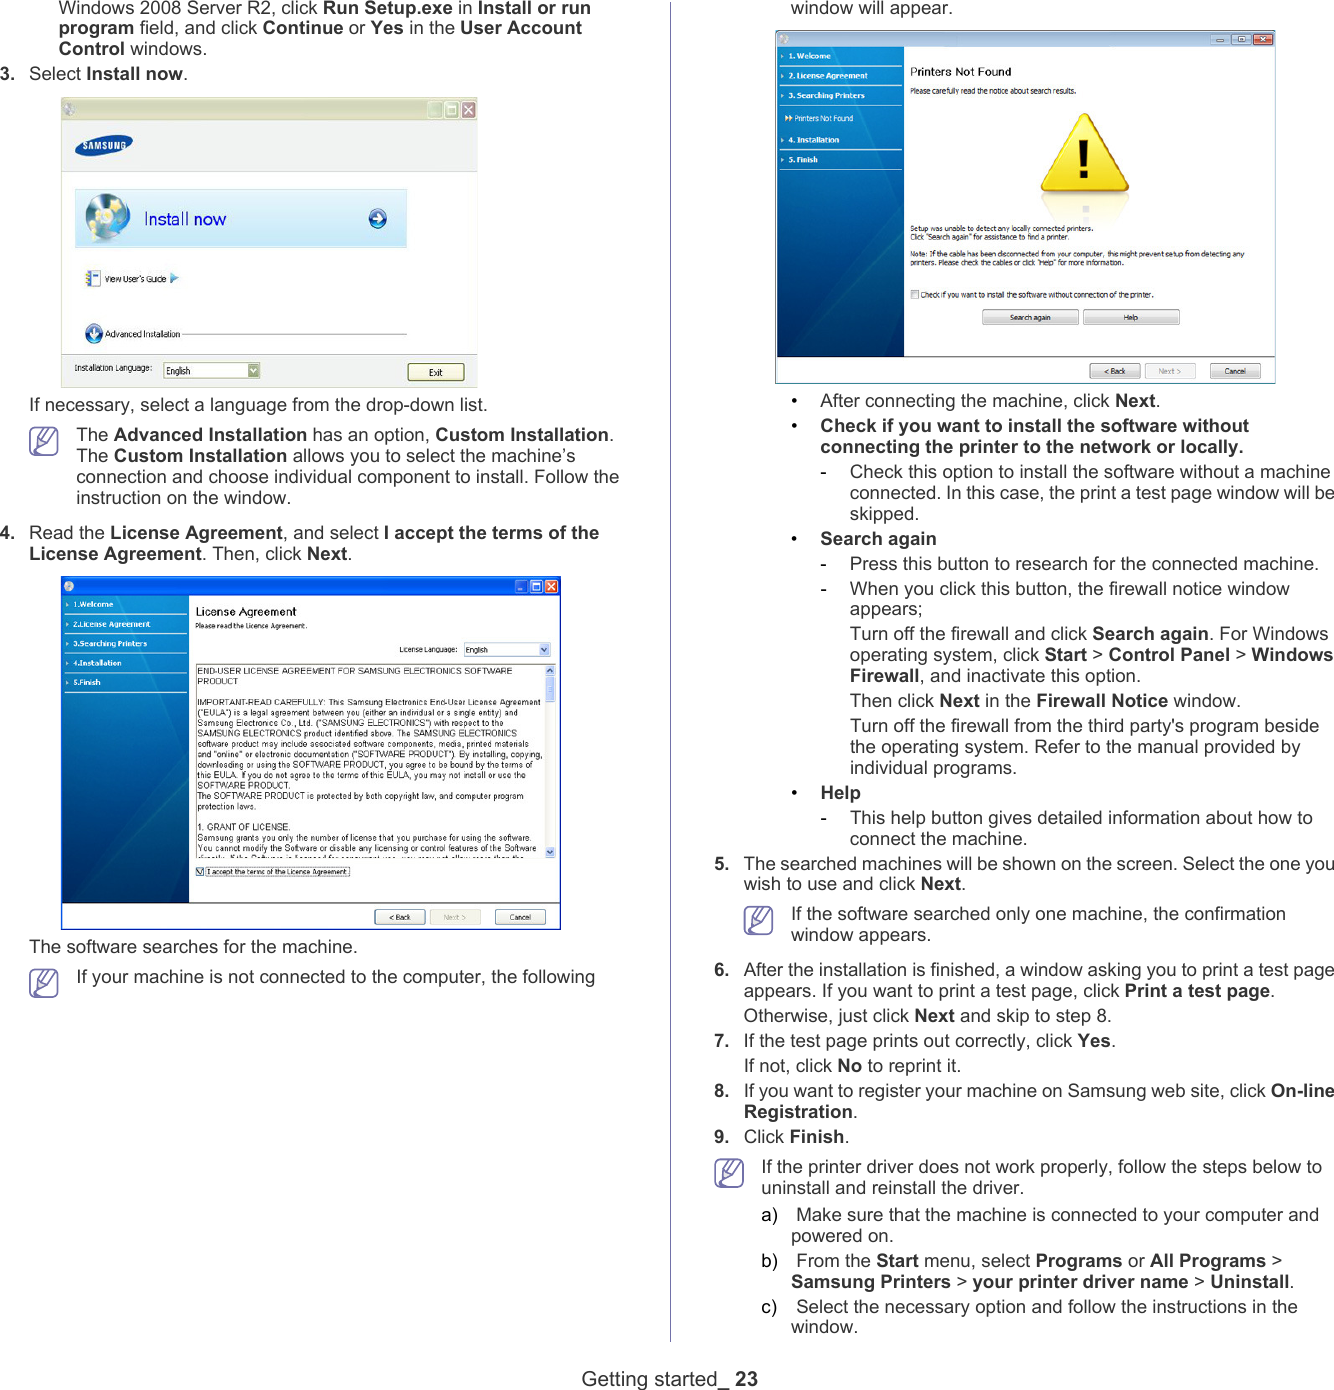
![Getting started_ 25[root@localhost uninstall]#./uninstall.shd) Click Uninstall.e) Click Next. f) Click Finish.Installing the SmartPanel1. Make sure that the machine is connected to your computer and powered on.2. When the Administrator Login window appears, type in root in the Login field and enter the system password. You must log in as a super user (root) to install the machine software. If you are not a super user, ask your system administrator.3. From the Samsung website, download the Smart Panel package to your computer.4. Right click the Smart Panel package and extract the package. 5. Double click cdroot > Linux > smartpanel > install.sh.Sharing your machine locallyFollow the steps below to set up computers to share your machine locally.If the Host computer is directly connected to the machine by a USB cable and is also connected to the local network environment, the client computer connected to the local network can use the shared machine through the host computer to print. 1Host computer A computer which is directly connected to the machine by USB cable. 2Client computers Computers which use the machine shared through the host computer. WindowsSetting up a host computer1. Install your printer driver (See "Installing USB connected machine’s driver" on page 22).2. Click the Windows Start menu. 3. For Windows 2000, select Settings > Printers.•For Windows XP/2003, select Printers and Faxes. •For Windows 2008/Vista, select Control Panel > Hardware and Sound > Printers. •For Windows 7, select Control Panel > Hardware and Sound > Devices and Printers. •For Windows Server 2008 R2, select Control Panel > Hardware > Devices and Printers. 4. Right-click the printer icon. 5. For Windows XP/2003/2008/Vista, press Properties.For Windows 7 and Windows Server 2008 R2, from context menus, select the Printer properties. If Printer properties item has a ► mark, you can select other printer drivers connected with the selected printer.6. Select the Sharing tab.7. Check Change Sharing Options.8. Check the Share this printer checkbox.9. Fill in the Share Name field. Click OK.Setting up a client computer1. Install your printer driver (See "Installing USB connected machine’s driver" on page 22).2. Click the Windows Start menu. 3. Select All programs > Accessories > Windows Explorer.4. Enter the IP address of the host computer in the address bar and press Enter in your keyboard. In case host computer requires a User name and Password, fill in User ID and password of the host computer account.5. Right click the printer icon you want to share and select Connect.6. If a set up complete message appears, click OK. 7. Open the file you want to print and start printing. Macintosh The following steps are for Mac OS X 10.5~10.6. Refer to Mac Help for other OS versions. Setting up a host computer1. Install your printer driver. (See "Macintosh" on page 24.)2. Open the Applications folder > System Preferences and click Print & Fax. 3. Select the printer to share in the Printers list. 4. Select Share this printer.Setting up a client computer1. Install your printer driver. (See "Macintosh" on page 24.)2. Open the Applications folder > System Preferences and click Print & Fax. 3. Click the “+” icon. A display window showing the name of your shared printer appears.4. Select your machine and click Add.](https://usermanual.wiki/Samsung-Electronics-Co/ML1670.Users-Manual-1/User-Guide-1431406-Page-25.png)
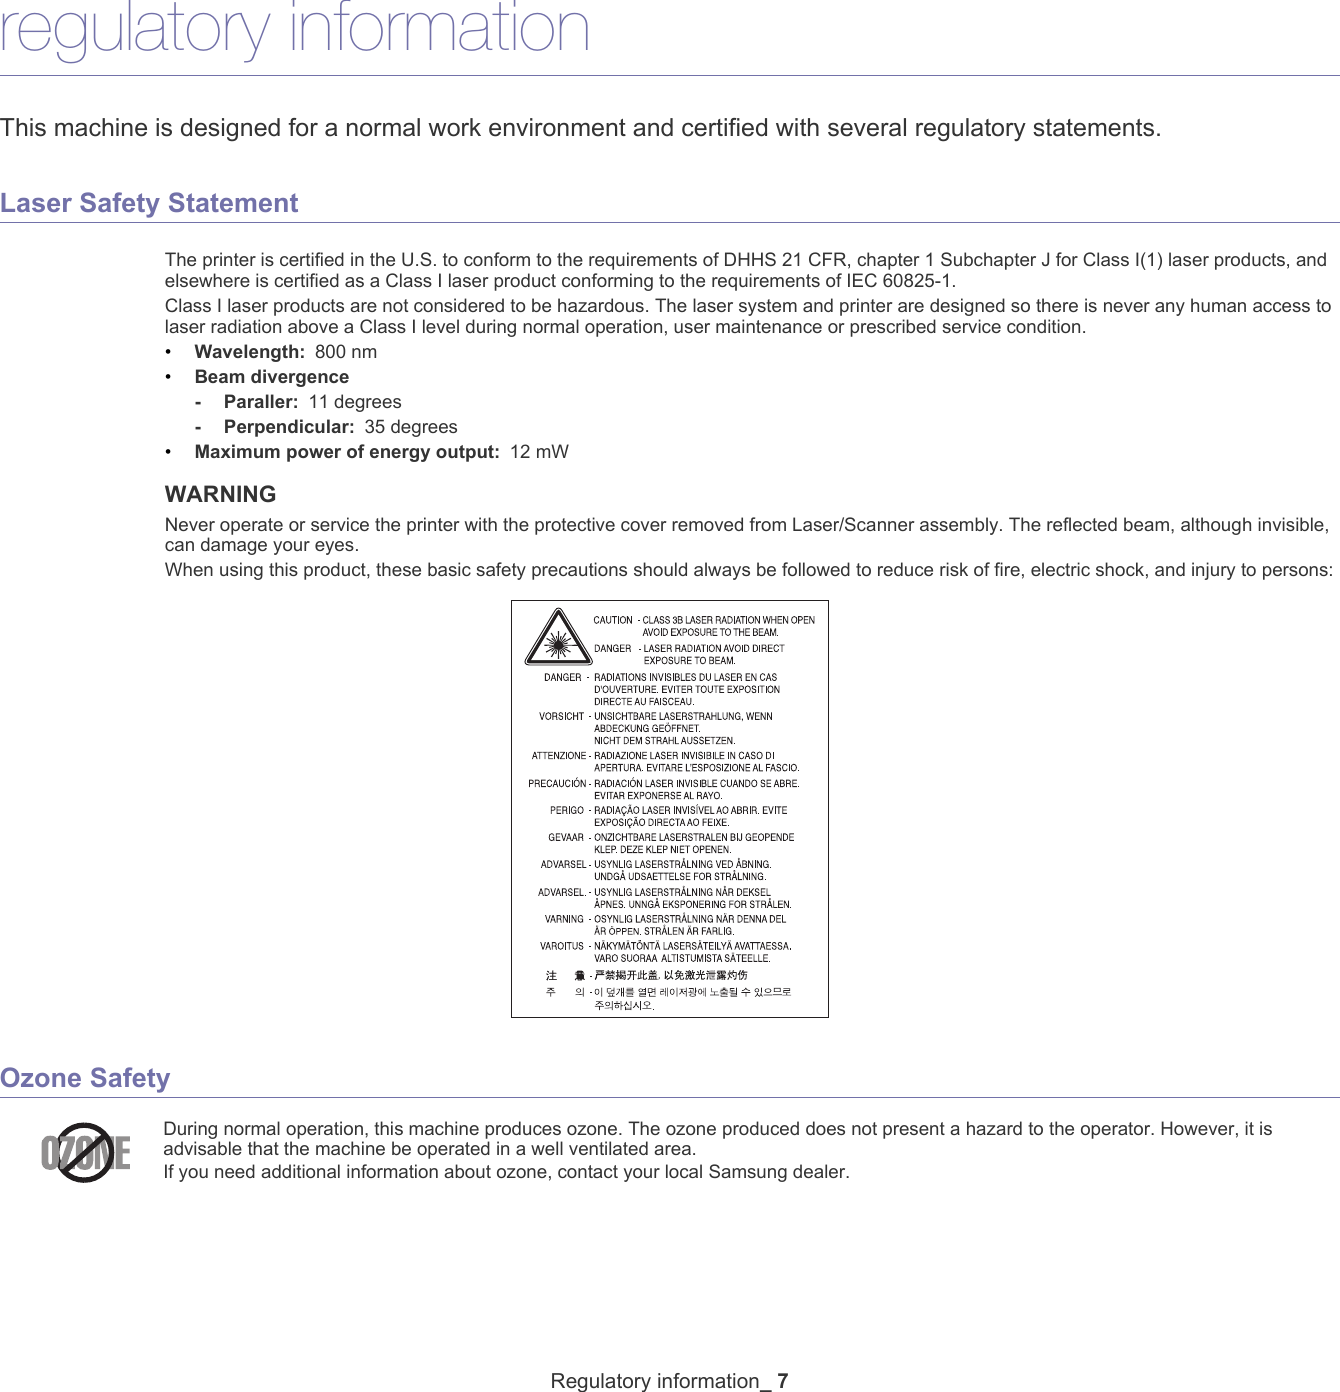
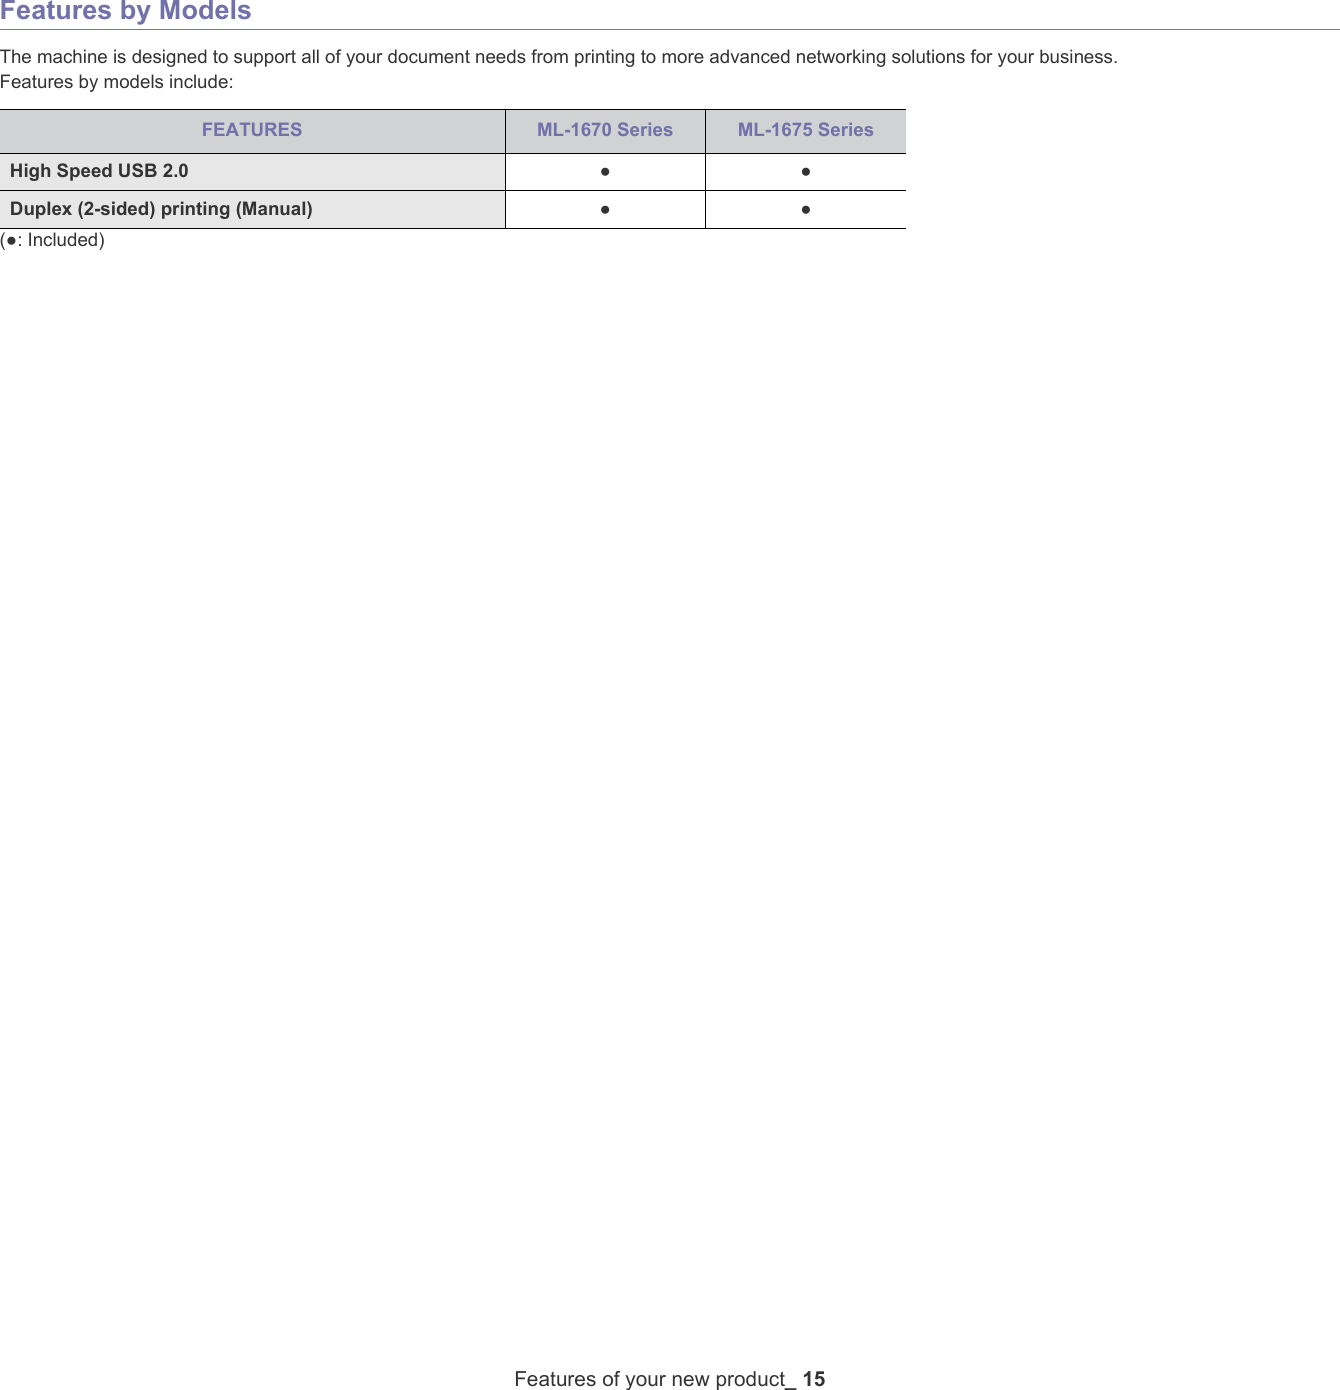
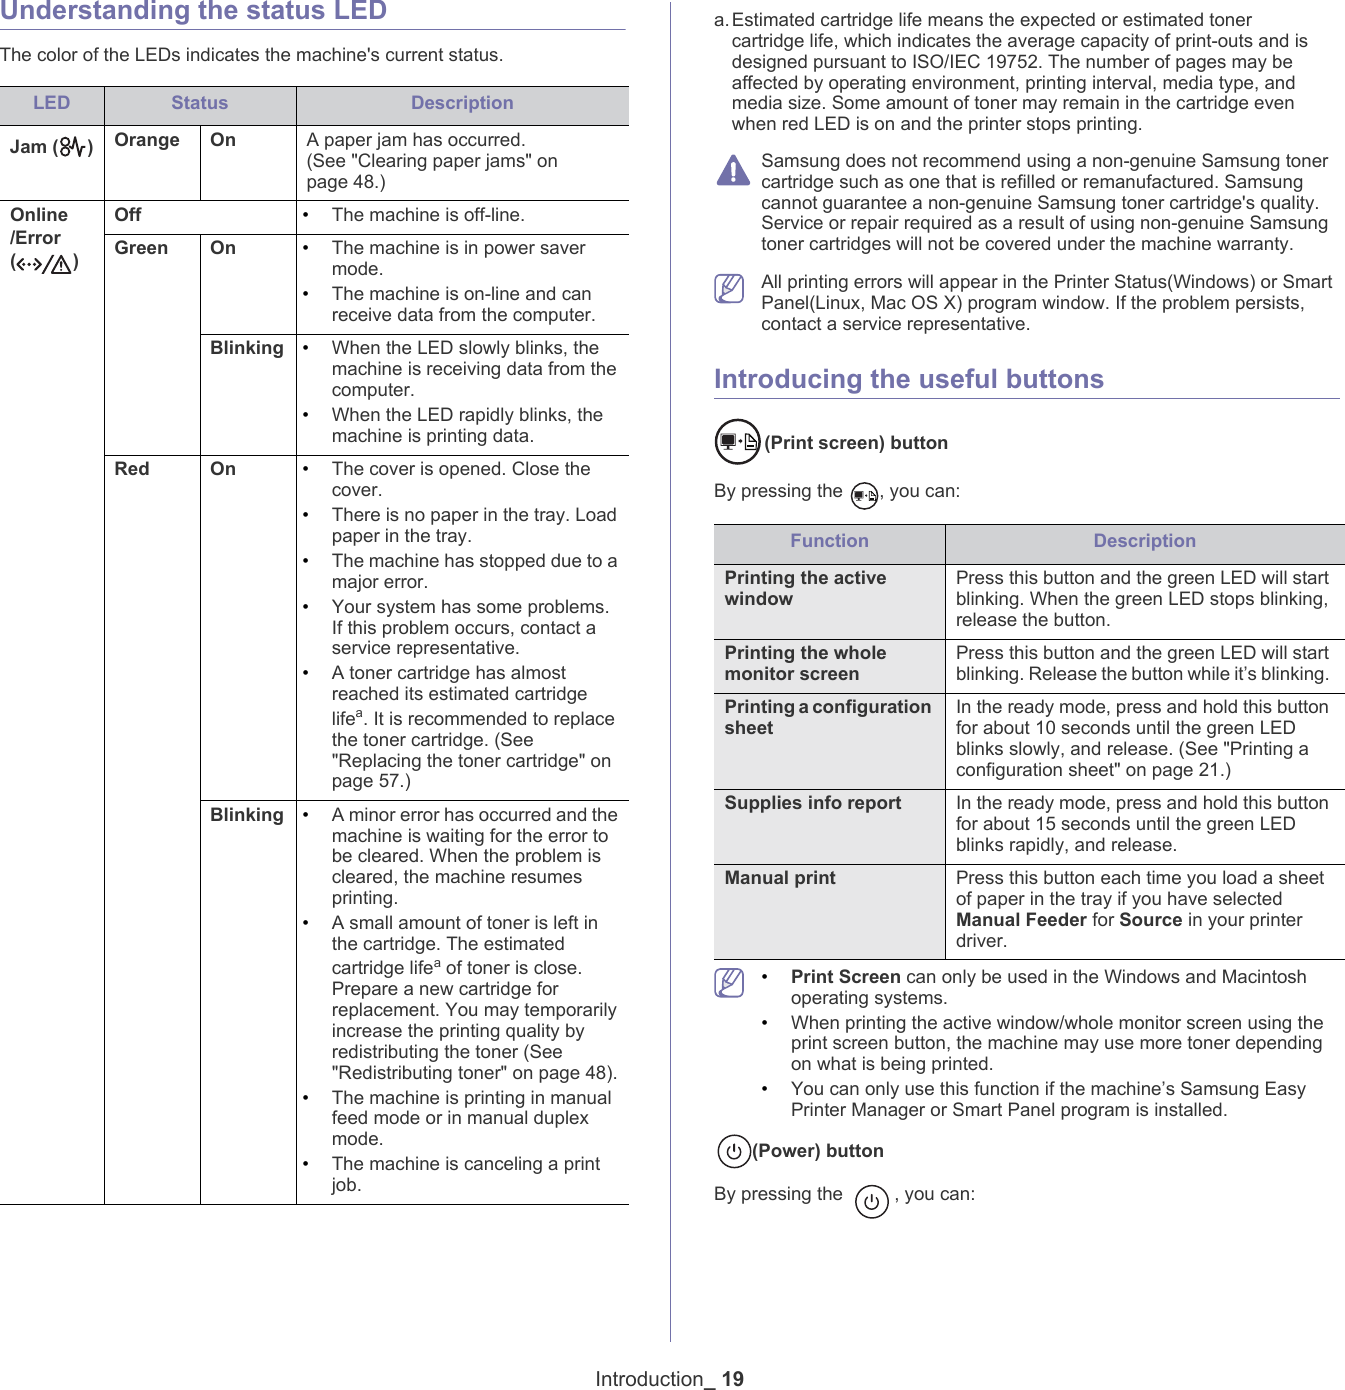
![Basic setup_ 263.basic setupAfter installation is complete, you may want to set the machine’s default settings. Refer to the next section if you would like to set or change values. This chapter gives you step-by-step instructions for setting up the machine.This chapter includes:•Setting the default tray and paper Setting the default tray and paperYou can select the tray and paper you would like to keep using for printing job.From your computerWindows1. Click the Windows Start menu. 2. For Windows 2000, select Settings > Printers.•For Windows XP/2003, select Printer and Faxes. •For Windows 2008/Vista, select Control Panel > Hardware and Sound > Printers. •For Windows 7, select Control Panel > Hardware and Sound > Devices and Printers. •For Windows Server 2008 R2, select Control Panel > Hardware > Devices and Printers. 3. Right-click on your machine.4. For Windows XP/2003/2008/Vista, press Printing Preferences.For Windows 7 and Windows Server 2008 R2, from context menus, select the Printing Preferences. If Printing Preferences item has a ► mark, you can select other printer drivers connected with the selected printer.5. Click Paper tab. 6. Select tray and its options, such as paper size and type.7. Press OK. If you want to use special-sized paper such as a billing paper, select Edit... in the Paper tab in the Printing Preferences. (See "Opening printing preferences" on page 33.)MacintoshMacintosh does not support this function. Macintosh users need to change the default setting manually each time they want to print using other settings. 1. Open a Macintosh application and select the file you want to print.2. Open the File menu and click Print.3. Go to Paper Feed pane.4. Set appropriate tray from which you want to print.5. Go to Paper pane.6. Set paper type to correspond to the paper loaded in the tray from which you want to print.7. Click Print to print. Linux1. Open Terminal Program.2. When the Terminal screen appears, type in the following: [root@localhost root]# lpr <FileName>3. Select Printer and click Properties…4. Click on the Advanced tab.5. Select the tray (source) and its options, such as paper size and type.6. Press OK.Using The power saving featureWhen you will not be using the machine for a while, you can use this feature to save power. 1. Install the driver (See "Installing USB connected machine’s driver" on page 22).2. Select Start > Programs or All Programs > Samsung Printers > Samsung Easy Printer Manager > Samsung Easy Printer Manager.3. Select Device Settings > Machine > Power Save. 4. Select a time you want from the drop-down list.5. Click Save.](https://usermanual.wiki/Samsung-Electronics-Co/ML1670.Users-Manual-1/User-Guide-1431406-Page-26.png)