Samsung Electronics Co ML2510 Laser Printer User Manual ML 25xx
Samsung Electronics Co Ltd Laser Printer ML 25xx
UserManual.wiki
>
Samsung Electronics Co
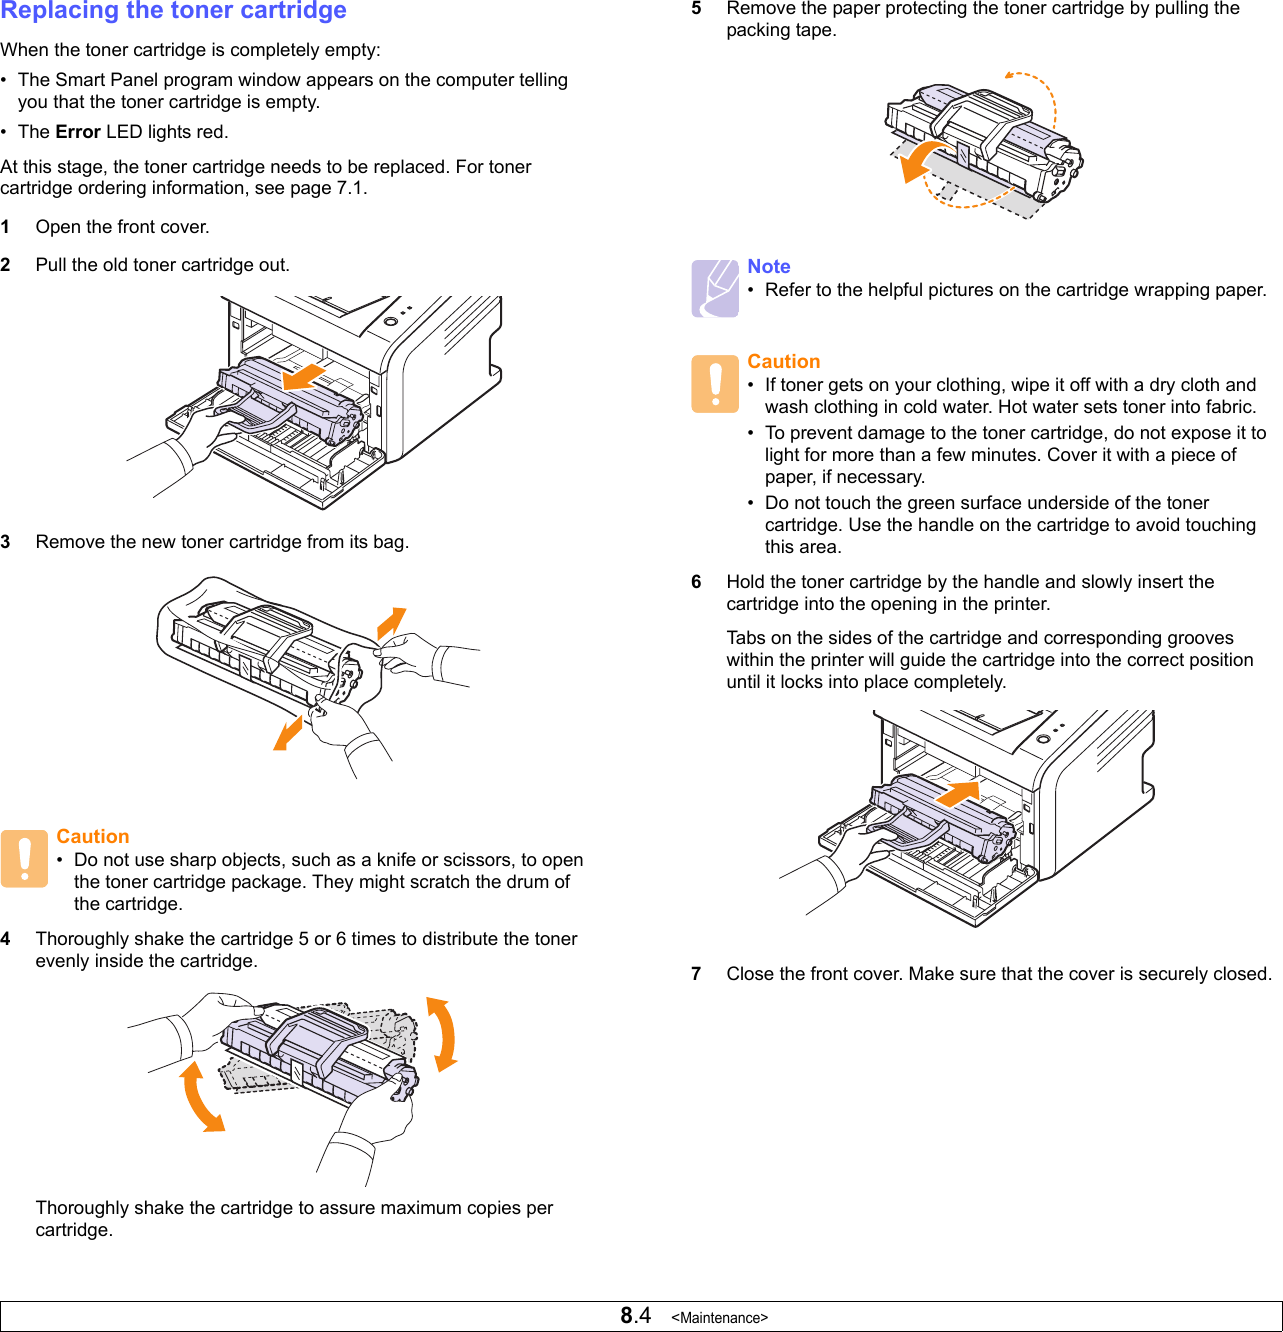
>
ML2510 User Manual
>
Users Manual 1
Contents
1.
Users Manual 1
2.
Users Manual 2
Users Manual 1
Navigation menu
Upload a User Manual
Namespaces
Wiki Guide
HTML
PDF
Info
Views
User Manual
Discussion / Help
Navigation
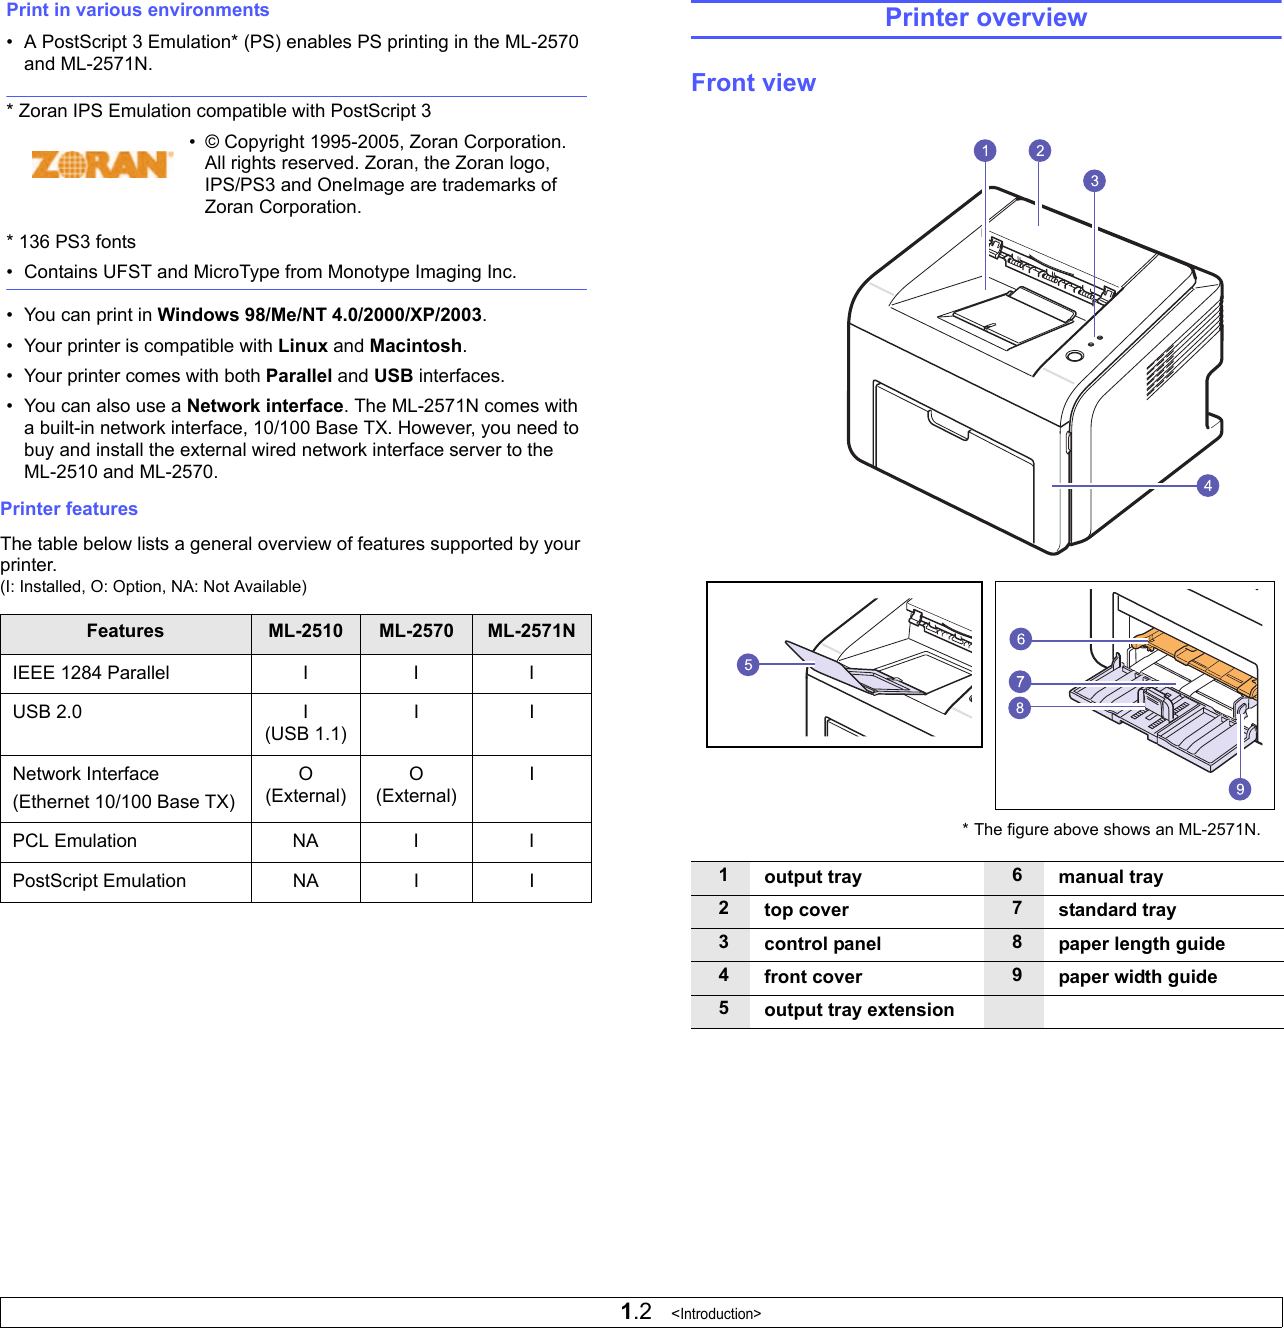
![1.1 <Introduction>1 IntroductionCongratulations on the purchase of your printer!This chapter includes:• Special features• Printer overview• Control panel overview• Finding more information• Selecting a locationSpecial featuresYour new printer is equipped with several special features that improve the print quality. You can:Print with excellent quality and high speed• You can print up to 1200 x 1200 dpi effective output (ML-2570, ML-2571N) or 1200 x 600 dpi effective output (ML-2510). See the Software Section.• Your printer prints A4-sized paper at up to 24 ppma and letter-sized paper at up to 25 ppm. a. pages per minuteHandle paper flexibly• Manual tray supports one sheet of envelopes, labels, transparencies, custom-sized materials, postcards and heavy paper.• Standard 250-sheet tray supports plain paper.• 100-sheet output tray supports convenient access.Create professional documents•Print Watermarks. You can customize your documents with words, such as “Confidential.” See the Software Section.•Print Posters. The text and pictures of each page of your document are magnified and printed across the sheet of paper and can then be taped together to form a poster. See the Software Section.Save time and money• Your printer allows you to use toner save mode to save toner. See the Software Section.• You can print on both sides of the paper manually to save paper [Double-side Printing (Manual)].• You can print multiple pages on a single sheet of paper to save paper (N-Up printing). See the Software Section.• You can use preprinted forms and letterhead with plain paper. See the Software Section.• Your printer automatically conserves electricity by substantially reducing power consumption when not in use.Expand the printer capacity•A Network interface enables network printing. You can buy and add an external wired network interface server to the ML-2510 and ML-2570. The ML-2571N comes with a built-in network interface, 10/100 Base TX. 1 23 4](https://usermanual.wiki/Samsung-Electronics-Co/ML2510.Users-Manual-1/User-Guide-630173-Page-10.png)