Samsung Electronics Co ML2571N Laser Printer User Manual ML 25xx
Samsung Electronics Co Ltd Laser Printer ML 25xx
Contents
- 1. Users Manual 1
- 2. Users Manual 2
Users Manual 2
9.9 <
Troubleshooting>
Common Windows problems
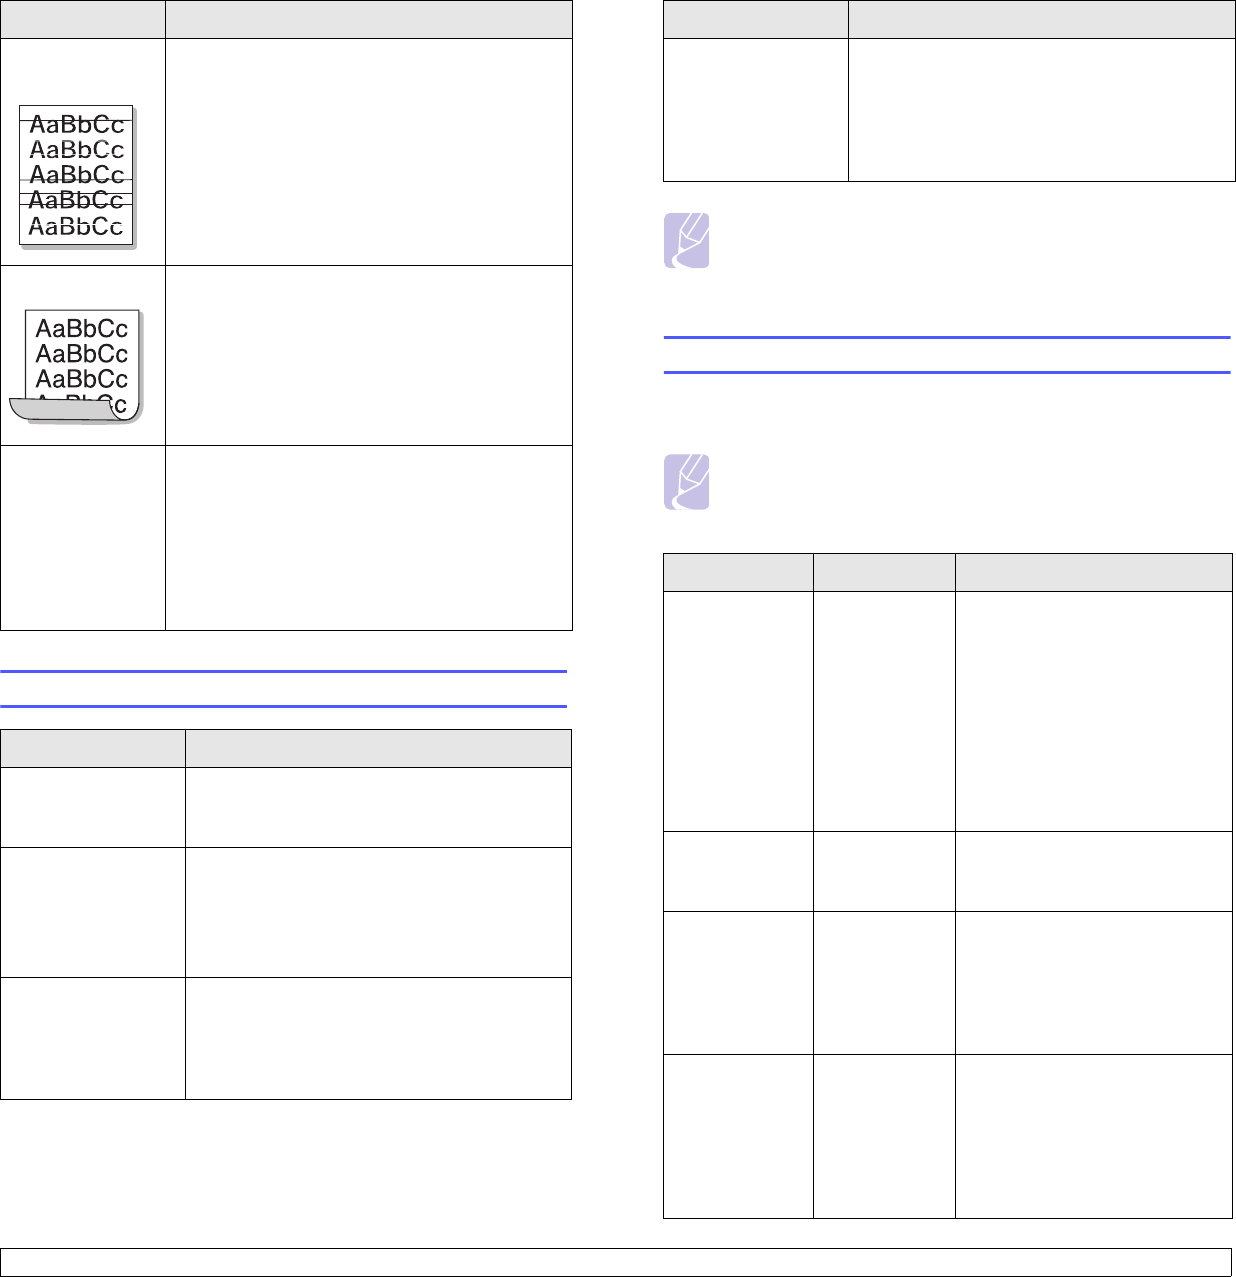
Horizontal
stripes
If horizontally aligned black streaks or smears
appear:
• The toner cartridge may be installed
improperly. Remove the cartridge and
reinsert.
• The toner cartridge may be defective. Install a
new toner cartridge. See page 8.4.
• If the problem persists, the printer may require
repair. Contact a service representative.
Curl If the printed paper is curled or paper does not
feed into the printer:
• Turn over the stack of paper in the tray. Also
try rotating the paper 180° in the tray.
An unknown
image repetitively
appears on a
next few sheets
or loose toner,
light print or
contamination
occurs.
Your printer is probably being used at an altitude
of 2,500 m (8,200 ft) or above.
The high altitude may affect the print quality
such as loose toner or light imaging. You can set
this option through Printer Settings Utility or
Printer Tab in printer driver’s properties. Refer
to the Software Section for detail.
Condition Suggested solutions
“File in Use”
message appears
during installation.
Exit all software applications. Remove all
software from the StartUp Group, then restart
Windows. Reinstall the printer driver.
“Error Writing to
LPTx” message
appears.
• Ensure that the cables are connected
correctly and the printer is on.
• If bi-directional communication is not turned
on in the driver, it will also cause this
message.
“General Protection
Fault”, “Exception
OE”, “Spool32”, or
“Illegal Operation”
messages appear.
Close all other applications, reboot Windows,
and try printing again.
Condition Suggested solutions
Common PostScript problems
The following situations are PostScript language specific and may occur
when several printer languages are being used.
“Fail To Print,” “A
printer timeout error
occurred,”
messages appear.
These messages may appear during printing.
Just keep waiting until the printer finishes
printing. If the message appears in standby
mode or after printing has been completed,
check the connection and/or whether an error
has occurred.
Note
• Refer to Microsoft Windows 98/Me/NT 4.0/2000/XP/2003
User’s Guide that came with your PC for further information on
Windows error messages.
Note
• To receive a printed or screen displayed message when
PostScript errors occur, open the Print Options window and
click the desired selection next to the PostScript errors section.
Condition Possible cause Suggested solutions
PostScript file
can not be
printed.
The PostScript
driver may not
be installed
correctly.
• Print a configuration page
and verify that the PostScript
version is available for
printing.
• Install the PostScript driver;
to installing the PS printer
driver, see the Software
Section.
• If problem consists, contact a
service representative.
“Limit Check
Error” message
appears.
The print job
was too
complex.
You might need to reduce the
complexity of the page or install
more memory.
A PostScript
error page
prints.
Print job may
not be
PostScript.
Make sure that the print job is a
PostScript job. Check to see
whether the software
application expected a setup or
PostScript header file to be sent
to the printer.
When print a
document in
Macintosh with
Acrobat Reader
6.0 or higher,
colors print
incorrectly.
The resolution
setting in the
printer driver
may not be
matched with
that in Acrobat
Reader.
Make sure that the resolution
setting in your printer driver
matches that in Acrobat
Reader.
Condition Suggested solutions
9.10 <
Troubleshooting>
Common Linux problems
Condition Suggested solutions
The print doesn’t
print.
• Check if the printer driver is installed in your
system. Open Unified Driver Configurator
and switch to the Printers tab in Printers
configuration window to look at the list of
available printers. Make sure that your
machine is displayed on the list. If not,
please, invoke Add new printer wizard to set
up your device.
• Check if the printer is started. Open Printers
configuration and select your machine on
the printers list. Look at the description in
the Selected printer pane. If its status
contains “(stopped)” string, please, press
the Start button. After that normal operation
of the printer should be restored. The
"stopped" status might be activated when
some problems in printing occurred. For
instance, this could be an attempt to print
document when MFP port is claimed by a
scanning application.
• Check if the port is not busy. Since
functional components of MFP (printer and
scanner) share the same I/O interface (MFP
port), the situation of simultaneous access
of different “consumer” application to the
same MFP port is possible. To avoid
possible conflicts, only one of them at a time
is allowed to gain control over the device.
The other “consumer” will encounter “device
busy” response. You should open port
configuration and select the port assigned to
your printer. In the Selected port pane you
can see if the port is occupied by some
other application. If this is the case, you
should wait for completion of the current job
or should press Release port button, if you
are sure that the present owner is not
functioning properly.
Check if your application has special print
option such as “-oraw”. If “-oraw” is specified
in the command line parameter then remove it
to print properly. For Gimp front-end, select
“print” -> “Setup printer” and edit command
line parameter in the command item.
The printer does
not appear on the
scanners list.
• Check if your machine is attached to your
computer. Make sure that it is connected
properly via the USB port and is turned on.
• Check if the scanner driver for you machine
is installed in your system. Open Unified
Driver Configurator, switch to Scanners
configuration, then press Drivers. Make
sure that driver with a name corresponding
to your machine's name is listed in the
window.
• Check if the port is not busy. Since
functional components of MFP (printer and
scanner) share the same I/O interface (MFP
port), the situation of simultaneous access
of different “consumer” application to the
same MFP port is possible. To avoid
possible conflicts, only one of them at a time
is allowed to gain control over the device.
The other “consumer” will encounter “device
busy” response. This can usually happen
while starting scan procedure, and
appropriate message box displays. To
identify the source of the problem, you
should open port configuration and select
the port assigned to your scanner. MFP
port's symbol /dev/mfp0 corresponds to
LP:0 designation displayed in the scanners’
options, /dev/mfp1 relates to LP:1 and so
on. USB ports start at /dev/mfp4, so scanner
on USB:0 relates to /dev/mfp4 respectively
and so forth sequentially. In the Selected
port pane you can see if the port is occupied
by some other application. If this is the case,
you should wait for completion of the current
job or should press Release port button, if
you are sure that the present port's owner is
not functioning properly.
Condition Suggested solutions
9.11 <
Troubleshooting>
The printer doesn’t
scan.
• Check if a document is loaded into the
machine.
• Check if your machine is connected to the
computer. Make sure if it is connected
properly if I/O error is reported while
scanning.
• Check if port is not busy. Since functional
components of MFP (printer and scanner)
share the same I/O interface (MFP port), the
situation of simultaneous access of different
“consumer” application to the same MFP
port is possible. To avoid possible conflicts,
only one of them at a time is allowed to gain
control over the device. The other
“consumer” will encounter “device busy”
response. This can usually happen while
starting scan procedure, and appropriate
message box will be displayed.
To identify the source of the problem, you
should open port configuration and select
the port assigned to your scanner. MFP
port’s symbol /dev/mfp0 corresponds to
LP:0 designation displayed in the scanners’
options, /dev/mfp1 relates to LP:1 and so
on. USB ports start at /dev/mfp4, so scanner
on USB:0 relates to /dev/mfp4 respectively
and so forth sequentially. In the Selected
port pane you can see if the port is occupied
by some other application. If this is the case,
you should wait for completion of the current
job or should press Release port button, if
you are sure that the present port’s owner is
not functioning properly.
Can’t scan via
Gimp Front-end.
• Check if Gimp Front-end has “Xsane:Device
dialog..” on the “Acquire” menu. If not, you
should install Xsane plug-in for Gimp on the
your computer. You can find Xsane plug-in
package for Gimp on Linux distribution CD
or Gimp home page. For the detail
information, refer to the Help for Linux
distribution CD or Gimp Front-end
application.
If you wish to use other kind of scan
application, refer to the Help for application.
Condition Suggested solutions
Common Macintosh problems
I encounter error
“Unable to open
MFP port device
file!” when printing
a document.
Please avoid changing print job parameters
(via LPR GUI, for example) while a print job is
in progress. Known versions of CUPS server
break the print job whenever print options are
changed and then try to restart the job from
the beginning. Since Unified Linux Driver
locks MFP port while printing, the abrupt
termination of the driver keeps the port locked
and therefore unavailable for subsequent print
jobs. If this situation occurred, please, try to
release the MFP port.
Condition Suggested solutions
The printer does not
print a document from
Acrobat Reader.
Change the Print Method option to Print
as Image when you print from Acrobat
Reader.
The document has
printed, but the print job
has not disappeared
from the spooler in Mac
OS 10.3.2.
Update your Mac OS to OS 10.3.3 or
higher.
The printer does not
print a document from
Illustrator on IPP
printing.
Change the Data type option in the
Adobe Illustrator print menu to Binary.
Or, you can use Appletalk printing.
Condition Suggested solutions
10.1 <
Specifications>
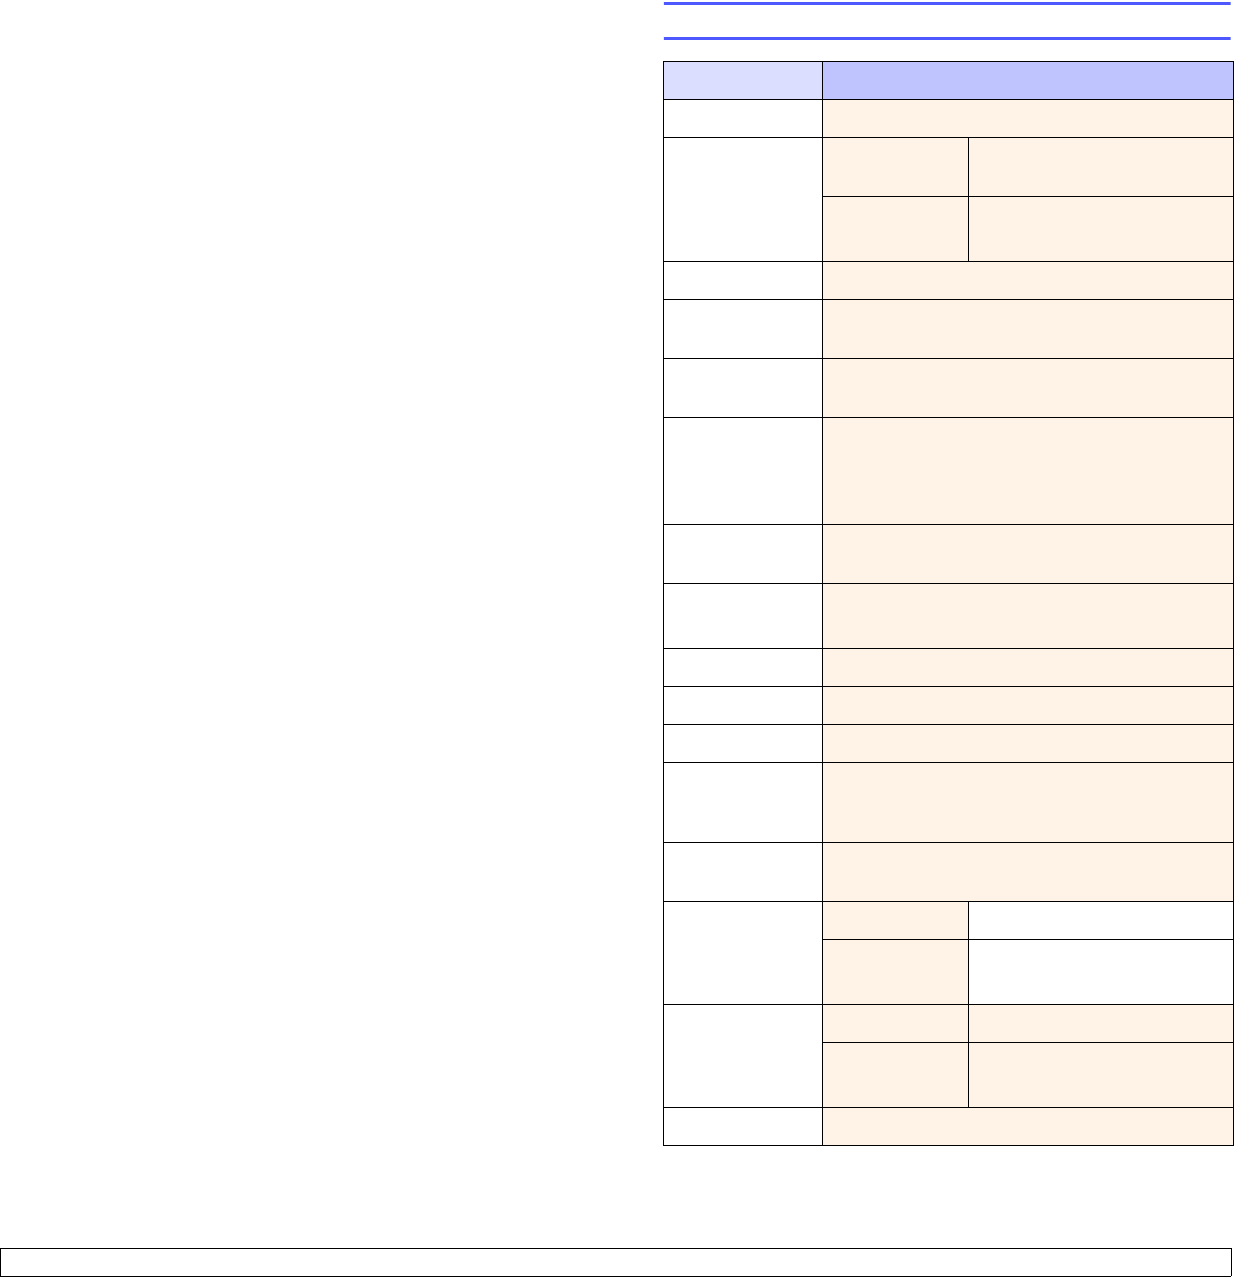
10 Specifications Printer specifications
Item Specifications and description
Printing speedaUp to 24 ppm in A4 (25 ppm in Letter)
Resolution ML-2510 Up to 1200 x 600 dpi effective
output
ML-2570,
ML-2571N
Up to 1200 x 1200 dpi
effective output
Warm-up time Less than 15 seconds
First print out
time
9 seconds (From Ready)
Sleep mode: 25 seconds
Power rating 110 ~ 127 VAC, 50 / 60 Hz, 10 A
220 ~ 240 VAC, 50 / 60 Hz, 5 A
Power
consumption
Average: 380 W (ML-2510), 480 W (ML-2570,
ML-2571N)
Power save mode: Less than 5 W (ML-2510),
8.5 W (ML-2570, ML-2571N)
Noise levelbStandby mode: Less than 35 dBA
Printing mode: Less than 52 dBA
Toner cartridge
lifec3,000 pages at ISO 19752 5% coverage
(ships with 1,000 pages starter toner cartridge)
Duty cycle Monthly: Up to 10,000 pages
Weight 8 Kg (including consumables)
Package weight Paper: 2.5 Kg, Plastic: 0.6 Kg
External
dimensions
(W x D x H)
15.6 X 17.8 X 13.9 inches (378 X 299 X 277 mm)
Operating
environment
Temperature: 50° F to 90° F (10° C to 32° C)
Humidity: 20% to 80% RH
Printer language ML-2510 SPL
ML-2570,
ML-2571N
SPL, PostScript 3, PCL6d,
PCL5e
Memory ML-2510 8 MB (non expandable)
ML-2570,
ML-2571N
32 MB (non expandable)
Fonts Windows fonts
10.2 <
Specifications>
Interface • IEEE 1284 Bidirectional Parallel Standard
- Modes supported: Compatible, Nibble, Byte,
ECP
• USB Interface Standard
- USB 1.1 compliant (ML-2510 only)
- USB 2.0: High Speed USB 2.0 (ML-2570, ML-
2571N only)
- 480 Mbps 1 port
• Network Interface
- Ethernet 10/100 Base TX wired LAN (optional
item in the ML-2510, ML-2570)
OS compatibility • Windows 98/Me/NT 4.0/2000/XP/2003
• Various Linux OS
• Mac 10.3 (ML-2510) or 8.6 ~ 9.2/10.1 ~ 10.4
(ML-2570, ML-2571N)
Printer driverse• SPL: Windows, Linux
• PCL6 driver (ML-2570, ML-2571N only):
Windows 98/Me/NT 4.0/2000/XP/2003
• PostScript driver (ML-2570, ML-2571N only):
Windows 98/Me/NT 4.0/2000/XP/2003,
Macintosh OS 8.6 ~ 9.2/10.1 ~ 10.4
Options Ethernet 10/100 Base TX wired network
interface server
(ML-2510, ML-2570 only)
a. Print speed will be affected by operating system used, computing perfor-
mance, application software, connection method, print media type, print media
size, and job complexity.
b. Sound pressure Level, ISO7779
c. The number of pages may be affected by operating environment, printing inter-
val, print media type, and print media size.
d. Compatible with PCL6 version 2.1
e. Please visit www.samsungprinter.com to download the latest software version.
Item Specifications and description

1
INDEX
A
accessories, order information
7.1
C
cleaning
inside
8.1
outside
8.1
component location
1.2
configuration page, print
8.5
control panel
LED
9.4
overview
1.3
D
demo page, print
2.1
J
jam, clear
9.1
L
LED, meaning
9.4
Linux problems
9.10
loading paper
manual tray
5.5
standard tray
5.4
M
Macintosh problems
9.11
maintenance parts
8.5
manual feed mode, use
5.5
manual tray, use
5.5
N
network interface server, install
4.2
network operating systems
4.1
O
output location
5.6
P
paper guidelines
5.3
paper jam, clear
around the toner cartridge
9.2
manual tray
9.2
paper exit area
9.3
standard tray
9.1
paper load
manual tray
5.5
standard tray
5.4
paper size, specifications
5.2
paper type, specifications
5.2
PostScript problems
9.9
print quality problems, solve
9.7
printing
configuration page
8.5
demo page
2.1
problems
9.5
problem, solve
checklist
9.4
Linux
9.10
Macintosh
9.11
paper jams
9.1
printing
9.5
printing quality
9.7
PS errors
9.9
Windows
9.9
Q
quality problems
9.7
R
redistributing, toner cartridge
8.3
replacing, toner cartridge
8.4
S
special print media, guidelines
5.3
specification, printer
10.1
supplies, order information
7.1
system requirements
Linux
3.3
Macintosh
3.3
Windows
3.2
T
toner cartridge
maintaining
8.3
redistributing
8.3
replacing
8.4
toner save mode, use
2.1
troubleshooting
9.1
W
Windows problems
9.9

Samsung Printer
Software section
1
SOFTWARE SECTION
CONTENTS
Chapter 1:
INSTALLING PRINTER SOFTWARE IN WINDOWS
Installing Printer Software ........................................................................................................ 4
Installing Software for Local Printing ................................................................................. 4
Installing Software for Network Printing ............................................................................. 7
Changing the Software Language ............................................................................................ 10
Reinstalling Printer Software ................................................................................................... 10
Removing Printer Software ..................................................................................................... 11
Chapter 2:
BASIC PRINTING
Printing a Document .............................................................................................................. 12
Printer Settings ..................................................................................................................... 13
Layout Tab .................................................................................................................. 13
Paper Tab .................................................................................................................... 14
Graphics Tab ............................................................................................................... 15
Extras Tab ................................................................................................................... 16
About Tab ................................................................................................................... 16
Printer Tab .................................................................................................................. 16
Using a Favorite Setting ................................................................................................ 17
Using Help ................................................................................................................... 17
2
Chapter 3:
ADVANCED PRINTING
Printing Multiple Pages on One Sheet of Paper (N-Up Printing) ..................................................... 18
Printing Posters ..................................................................................................................... 19
Printing Booklets .................................................................................................................. 19
Printing on Both Sides of Paper ............................................................................................... 20
Printing a Reduced or Enlarged Document ................................................................................ 20
Fitting Your Document to a Selected Paper Size ......................................................................... 20
Using Watermarks ................................................................................................................. 21
Using an Existing Watermark ......................................................................................... 21
Creating a Watermark ................................................................................................... 21
Editing a Watermark ..................................................................................................... 21
Deleting a Watermark ................................................................................................... 21
Using Overlays ...................................................................................................................... 22
What is an Overlay? ...................................................................................................... 22
Creating a New Page Overlay ......................................................................................... 22
Using a Page Overlay .................................................................................................... 22
Deleting a Page Overlay ................................................................................................ 22
Chapter 4:
USING WINDOWS POSTSCRIPT DRIVER
Printer Settings ..................................................................................................................... 23
Advanced
.................................................................................................................. 23
Using Help ................................................................................................................... 23
Chapter 5:
SHARING THE PRINTER LOCALLY
Setting Up a Host Computer ................................................................................................... 24
Setting Up a Client Computer .................................................................................................. 24
Chapter 6:
USING SMART PANEL
Understanding Smart Panel .................................................................................................... 25
Opening the Troubleshooting Guide ......................................................................................... 26
Changing the Smart Panel Program Settings ............................................................................. 26
3
Chapter 7:
USING YOUR PRINTER IN LINUX
Getting Started ..................................................................................................................... 27
Installing the Unified Linux Driver ............................................................................................ 27
Installing the Unified Linux Driver ................................................................................... 27
Uninstalling the Unified Linux Driver ............................................................................... 28
Using the Unified Driver Configurator ....................................................................................... 29
Opening the Unified Driver Configurator .......................................................................... 29
Printers Configuration ................................................................................................... 29
Scanners Configuration (for MFP device only) ................................................................... 30
Ports Configuration ....................................................................................................... 30
Configuring Printer Properties ................................................................................................. 31
Printing a Document .............................................................................................................. 31
Printing from Applications .............................................................................................. 31
Printing Files ................................................................................................................ 32
Scanning a Document (for MFP device only) .............................................................................. 32
Using the Image Manager .............................................................................................. 33
Chapter 8:
USING YOUR PRINTER WITH A MACINTOSH
Installing printer driver for Macintosh ....................................................................................... 35
ML-2510 only ............................................................................................................... 35
ML-2570/ML-2571N only ............................................................................................... 36
Setting Up the Printer ............................................................................................................ 36
ML-2510/2570 only ...................................................................................................... 36
ML-2571N only ............................................................................................................ 37
Printing ................................................................................................................................ 37
Printing a Document ..................................................................................................... 37
Changing Printer Settings .............................................................................................. 38
Printing Multiple Pages on One Sheet of Paper .................................................................. 39
Installing Printer Software in Windows
4
1Installing Printer
Software in Windows
This chapter includes:
• Installing Printer Software
• Changing the Software Language
• Reinstalling Printer Software
• Removing Printer Software
Installing Printer Software
You can install the printer software for local printing or network
printing. To install the printer software on the computer,
perform the appropriate installation procedure depending on
the printer in use.
A printer driver is software that lets your computer
communicate with your printer. The procedure to install drivers
may differ depending on the operating system you are using.
All applications should be closed on your PC before beginning
installation.
Installing Software for Local Printing
A local printer is a printer directly attached to your computer
using the printer cable supplied with your printer, such as a USB
or parallel cable. If your printer is attached to a network, skip
this step and go to “Installing Software for Network Printing” on
page 7.
You can install the printer software using the typical or custom
method.
NOTE
: If the “New Hardware Wizard” window appears during
the installation procedure, click in the upper right corner of
the box to close the window, or click
Cancel
.
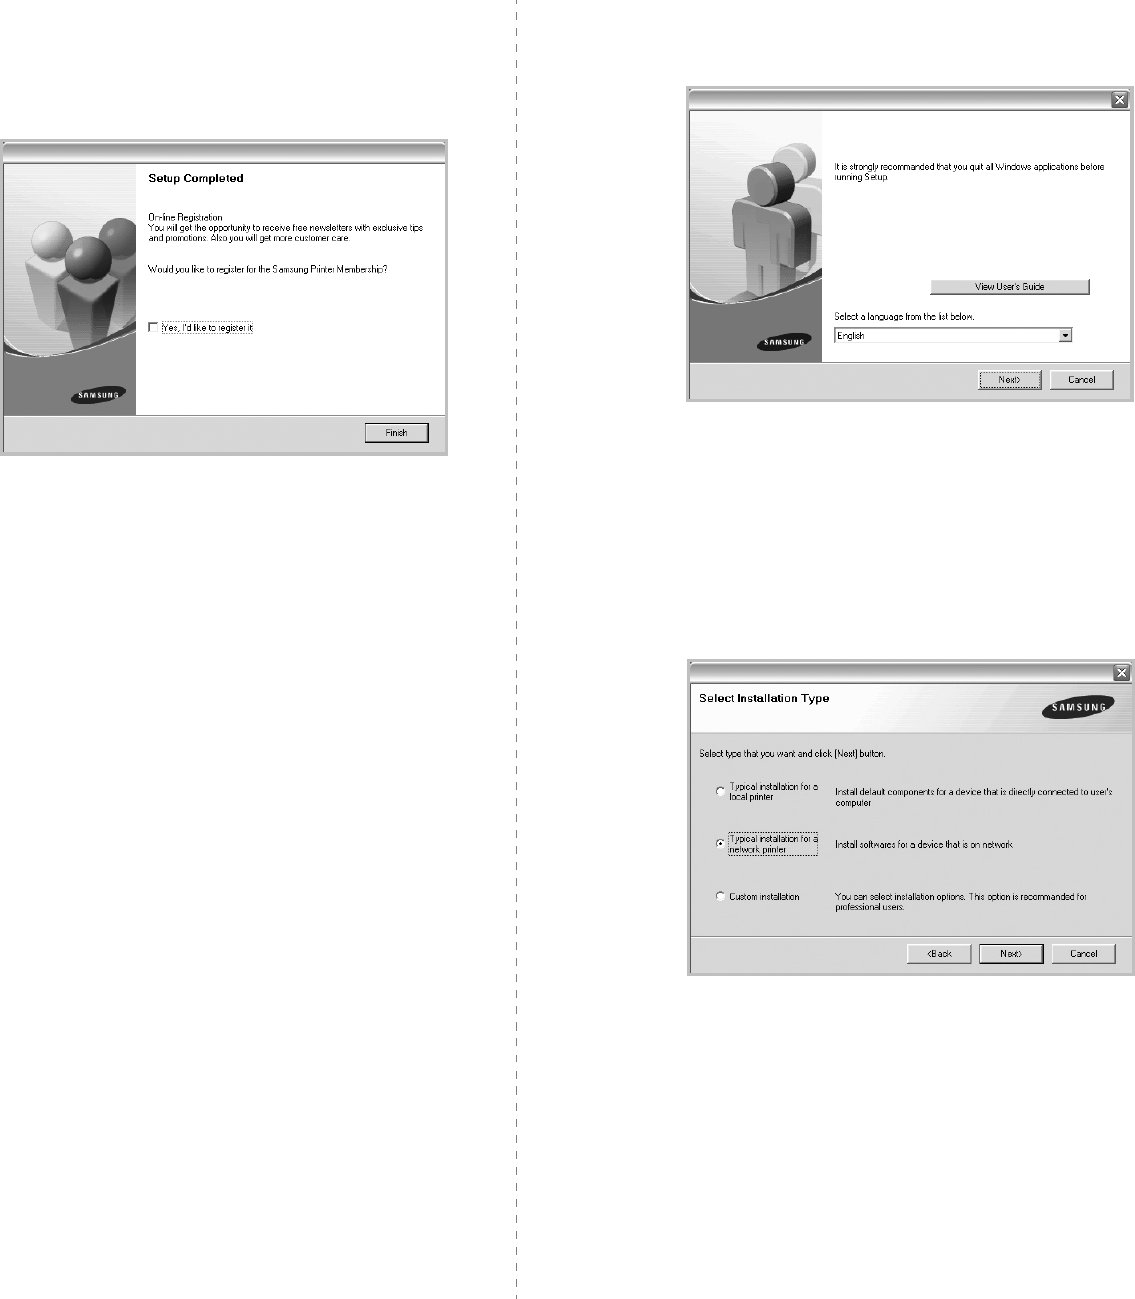
Typical Installation
This is recommended for most users. All components necessary
for printer operations will be installed.
1
Make sure that the printer is connected to your computer
and powered on.
2
Insert the supplied CD-ROM into your CD-ROM drive.
The CD-ROM should automatically run, and an installation
window appears.
If the installation window does not appear, click
Start
and
then
Run
. Type
X:\Setup.exe
, replacing “
X
” with the
letter which represents your drive and click
OK
.
3
Click
Next
.
• If necessary, select a language from the drop-down list.
•
View User’s Guide
: Allows you to view the User’s
Guide. If your computer doesn’t have Adobe Acrobat,
click on this option and it will automatically install Adobe
Acrobat Reader for you.
4
Select
Typical installation for a local printer
. Click
Next
.
Installing Printer Software in Windows
5
NOTE
: If your printer is not already connected to the
computer, the following window will appear.
• After connecting the printer, click
Next
.
• If you don’t want to connect the printer at this time, click
Next
, and
No
on the following screen. Then the installation
will start and a test page will not be printed at the end of the
installation.
• The installation window that appears in this User’s
Guide may differ depending on the printer and
interface in use.
5
After the installation is finished, a window asking you to
print a test page appears. If you choose to print a test
page, select the checkbox and click
Next
.
Otherwise, just click
Next
and skip to step 7.
6
If the test page prints out correctly, click
Yes
.
If not, click
No
to reprint it.
7
To register yourself as a user of Samsung Printers in order
to receive information from Samsung, select the checkbox
and click
Finish
. You are now sent to the Samsung web
site.
Otherwise, just click
Finish
.
NOTE
: After setup is complete, if your printer driver doesn’t
work properly, reinstall the printer driver. See “Reinstalling
Printer Software” on page 10.
Custom Installation
You can choose individual components to install.
1
Make sure that the printer is connected to your computer
and powered on.
2
Insert the supplied CD-ROM into your CD-ROM drive.
The CD-ROM should automatically run, and an installation
window appears.
If the installation window does not appear, click
Start
and
then
Run
. Type
X:\Setup.exe
, replacing “
X
” with the
letter which represents your drive and click
OK
.
Installing Printer Software in Windows
6
3
Click
Next
.
• If necessary, select a language from the drop-down list.
•
View User’s Guide
: Allows you to view the User’s
Guide. If your computer doesn’t have Adobe Acrobat,
click on this option and it will automatically install Adobe
Acrobat Reader for you.
4
Select
Custom installation
. Click
Next
.
5
Select your printer and click
Next
.
NOTE
: If your printer is not already connected to the
computer, the following window will appear.
• After connecting the printer, click
Next
.
• If you don’t want to connect the printer at this time, click
Next
, and
No
on the following screen. Then the installation
will start and a test page will not be printed at the end of the
installation.
• The installation window that appears in this User’s
Guide may differ depending on the printer and
interface in use.
6
Select the components to be installed and click
Next
.
NOTE
: You can change the desired installation folder by
clicking [
Browse
].
7
After the installation is finished, a window asking you to
print a test page appears. If you choose to print a test
page, select the checkbox and click
Next
.
Otherwise, just click
Next
and skip to step 9.
8
If the test page prints out correctly, click
Yes
.
If not, click
No
to reprint it.
Installing Printer Software in Windows
7
9
To register yourself as a user of Samsung Printers in order
to receive information from Samsung, select the checkbox
and click
Finish
. You are now sent to the Samsung web
site.
Otherwise, just click
Finish
.
Installing Software for Network
Printing
When you connect your printer to a network, you must first
configure the TCP/IP settings for the printer. After you have
assigned and verified the TCP/IP settings, you are ready to
install the software on each computer on the network.
You can install the printer software using the typical or custom
method.
Typical Installation
This is recommended for most users. All components necessary
for printer operations will be installed.
1
Make sure that the printer is connected to your network
and powered on. For details about connecting to the
network, see the supplied printer’s User’s Guide.
2
Insert the supplied CD-ROM into your CD-ROM drive.
The CD-ROM should automatically run, and an installation
window appears.
If the installation window does not appear, click
Start
and
then
Run
. Type
X:\Setup.exe
, replacing “
X
” with the
letter which represents your drive and click
OK
.
3
Click
Next
.
• If necessary, select a language from the drop-down list.
•
View User’s Guide
: Allows you to view the User’s
Guide. If your computer doesn’t have Adobe Acrobat,
click on this option and it will automatically install Adobe
Acrobat Reader for you.
4
Select
Typical installation for a network printer
. Click
Next
.
Installing Printer Software in Windows
8
5
The list of printers available on the network appears.
Select the printer you want to install from the list and then
click
Next
.
• If you do not see your printer on the list, click
Update
to
refresh the list, or select
Add TCP/IP Port
to add your
printer to the network. To add the printer to the
network, enter the port name and the IP address for the
printer.
• To find a shared network printer (UNC Path), select
Shared Printer [UNC]
and enter the shared name
manually or find a shared printer by clicking the
Browse
button.
6
After the installation is finished, a window appears asking
you to print a test page and to register yourself as a user
of Samsung Printers in order to receive information from
Samsung. If you so desire, select the corresponding
checkbox(es) and click
Finish
.
Otherwise, just click
Finish
.
NOTE
: After setup is complete, if your printer driver doesn’t
work properly, reinstall the printer driver. See “Reinstalling
Printer Software” on page 10.
Custom Installation
You can choose individual components to install and set a
specific IP address.
1
Make sure that the printer is connected to your network
and powered on. For details about connecting to the
network, see the supplied printer’s User’s Guide.
2
Insert the supplied CD-ROM into your CD-ROM drive.
The CD-ROM should automatically run, and an installation
window appears.
If the installation window does not appear, click
Start
and
then
Run
. Type
X:\Setup.exe
, replacing “
X
” with the
letter which represents your drive and click
OK
.
3
Click
Next
.
• If necessary, select a language from the drop-down list.
•
View User’s Guide
: Allows you to view the User’s
Guide. If your computer doesn’t have Adobe Acrobat,
click on this option and it will automatically install Adobe
Acrobat Reader for you.
4
Select
Custom installation
. Click
Next
.
Installing Printer Software in Windows
9
5
The list of printers available on the network appears.
Select the printer you want to install from the list and then
click
Next
.
• If you do not see your printer on the list, click
Update
to
refresh the list, or select
Add TCP/IP Port
to add your
printer to the network. To add the printer to the
network, enter the port name and the IP address for the
printer.
• To find a shared network printer (UNC Path), select
Shared Printer [UNC]
and enter the shared name
manually or find a shared printer by clicking the
Browse
button.
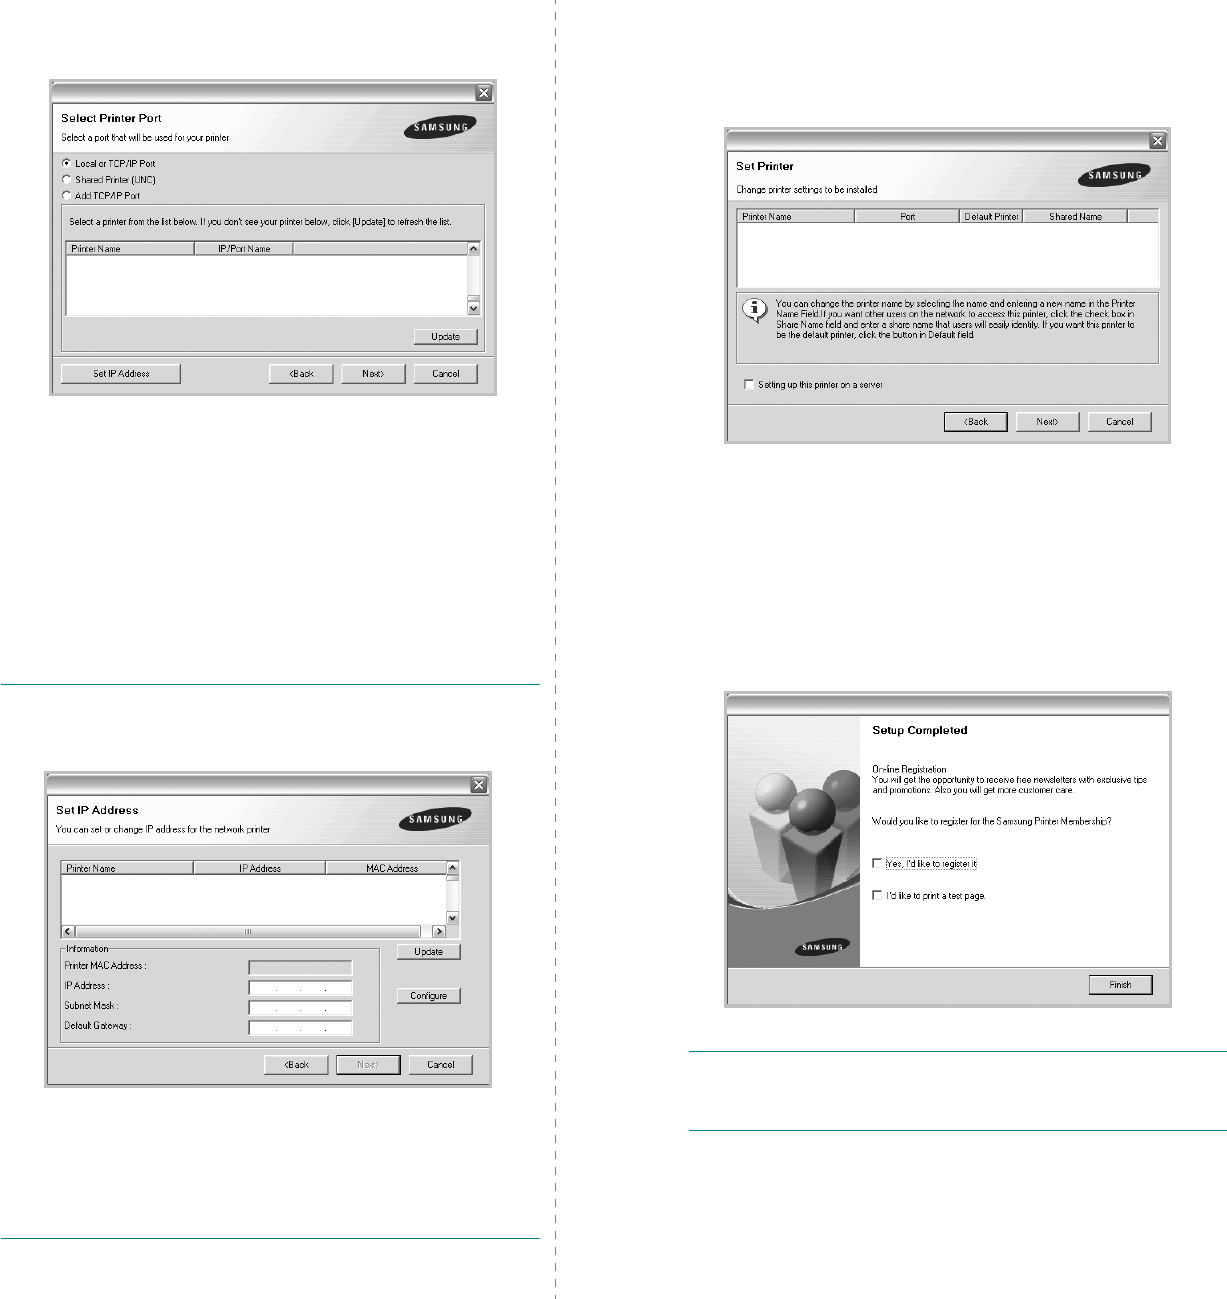
TIP
: If you want to set a specific IP address on a specific
network printer, click the
Set IP Address
button. The Set IP
Address window appears. Do as follows:
a. Select a printer to be set with a specific IP address from the
list.
b. Configure an IP address, subnet mask, and gateway for the
printer manually and click
Configure
to set the specific IP
address for the network printer.
c. Click
Next
.
6
Select the components to be installed. After selecting the
components, the following window appears. You can also
change the printer name, set the printer to be shared on
the network, set the printer as the default printer, and
change the port name of each printer. Click
Next
.
To install this software on a server, select the
Setting up
this printer on a server
checkbox.
7
After the installation is finished, a window appears asking
you to print a test page and to register yourself as a user
of Samsung Printers in order to receive information from
Samsung. If you so desire, select the corresponding
checkbox(es) and click
Finish
.
Otherwise, just click
Finish
.
NOTE
: After setup is complete, if your printer driver doesn’t
work properly, reinstall the printer driver. See “Reinstalling
Printer Software” on page 10.

Installing Printer Software in Windows
10
Changing the Software
Language
After installation of the software, you can change the display
language.
1
Click the Windows
Start
menu.
2
Select
Programs
or
All Programs
and then
your printer
driver name
.
3
Select
Language Selection
.
4
Select the desired language from the language selection
window, and click
OK
.
Reinstalling Printer Software
You can reinstall the software if installation fails.
1
Start Windows.
2
From the
Start
menu select
Programs
or
All Programs
→
your printer driver name
→
Maintenance
.
3
Select
Repair
and click
Next
.
4
The list of printers available on the network appears.
Select the printer you want to install from the list and then
click
Next
.
• If you do not see your printer on the list, click
Update
to
refresh the list, or select
Add TCP/IP Port
to add your
printer to the network. To add the printer to the
network, enter the port name and the IP address for the
printer.
• To find a shared network printer (UNC Path), select
Shared Printer [UNC]
and enter the shared name
manually or find a shared printer by clicking the
Browse
button.
You will see a component list so that you can reinstall any
item individually.
NOTE
: If your printer is not already connected to the
computer, the following window will appear.
• After connecting the printer, click
Next
.
• If you don’t want to connect the printer at this time, click
Next
, and
No
on the following screen. Then the installation
will start and a test page will not be printed at the end of the
installation.
• The reinstallation window that appears in this User’s
Guide may differ depending on the printer and
interface in use.
5
Select the components you want to reinstall and click
Next
.
If you installed the printer software for local printing
and
you select
your printer driver name
, the window
asking you to print a test page appears. Do as follows:
a. To print a test page, select the check box and click
Next
.
b. If the test page prints out correctly, click
Yes
.
If it doesn’t, click
No
to reprint it.
6
When the reinstallation is done, click
Finish
.

Installing Printer Software in Windows
11
Removing Printer Software
1
Start Windows.
2
From the
Start
menu select
Programs
or
All Programs
→
your printer driver name
→
Maintenance
.
3
Select
Remove
and click
Next
.
You will see a component list so that you can remove any
item individually.
4
Select the components you want to remove and then click
Next
.
5
When your computer asks you to confirm your selection,
click
Yes
.
The selected driver and all of its components are removed
from your computer.
6
After the software is removed, click
Finish
.
Basic Printing
12
2Basic Printing
This chapter explains the printing options and common printing
tasks in Windows.
This chapter includes:
• Printing a Document
• Printer Settings
- Layout Tab
- Paper Tab
- Graphics Tab
- Extras Tab
- About Tab
- Printer Tab
- Using a Favorite Setting
- Using Help
Printing a Document
N
OTES
:
• Your printer driver
Properties
window that appears in this
User’s Guide may differ depending on the printer in use.
However the composition of the printer properties window is
similar.
• Check the Operating System(s) that are compatible
with your printer. Please refer to the OS Compatibility
section of Printer Specifications in your Printer User’s
Guide.
• If you need to know the exact name of your printer, you can
check the supplied CD-ROM.
The following procedure describes the general steps required
for printing from various Windows applications. The exact steps
for printing a document may vary depending on the application
program you are using. Refer to the User’s Guide of your
software application for the exact printing procedure.
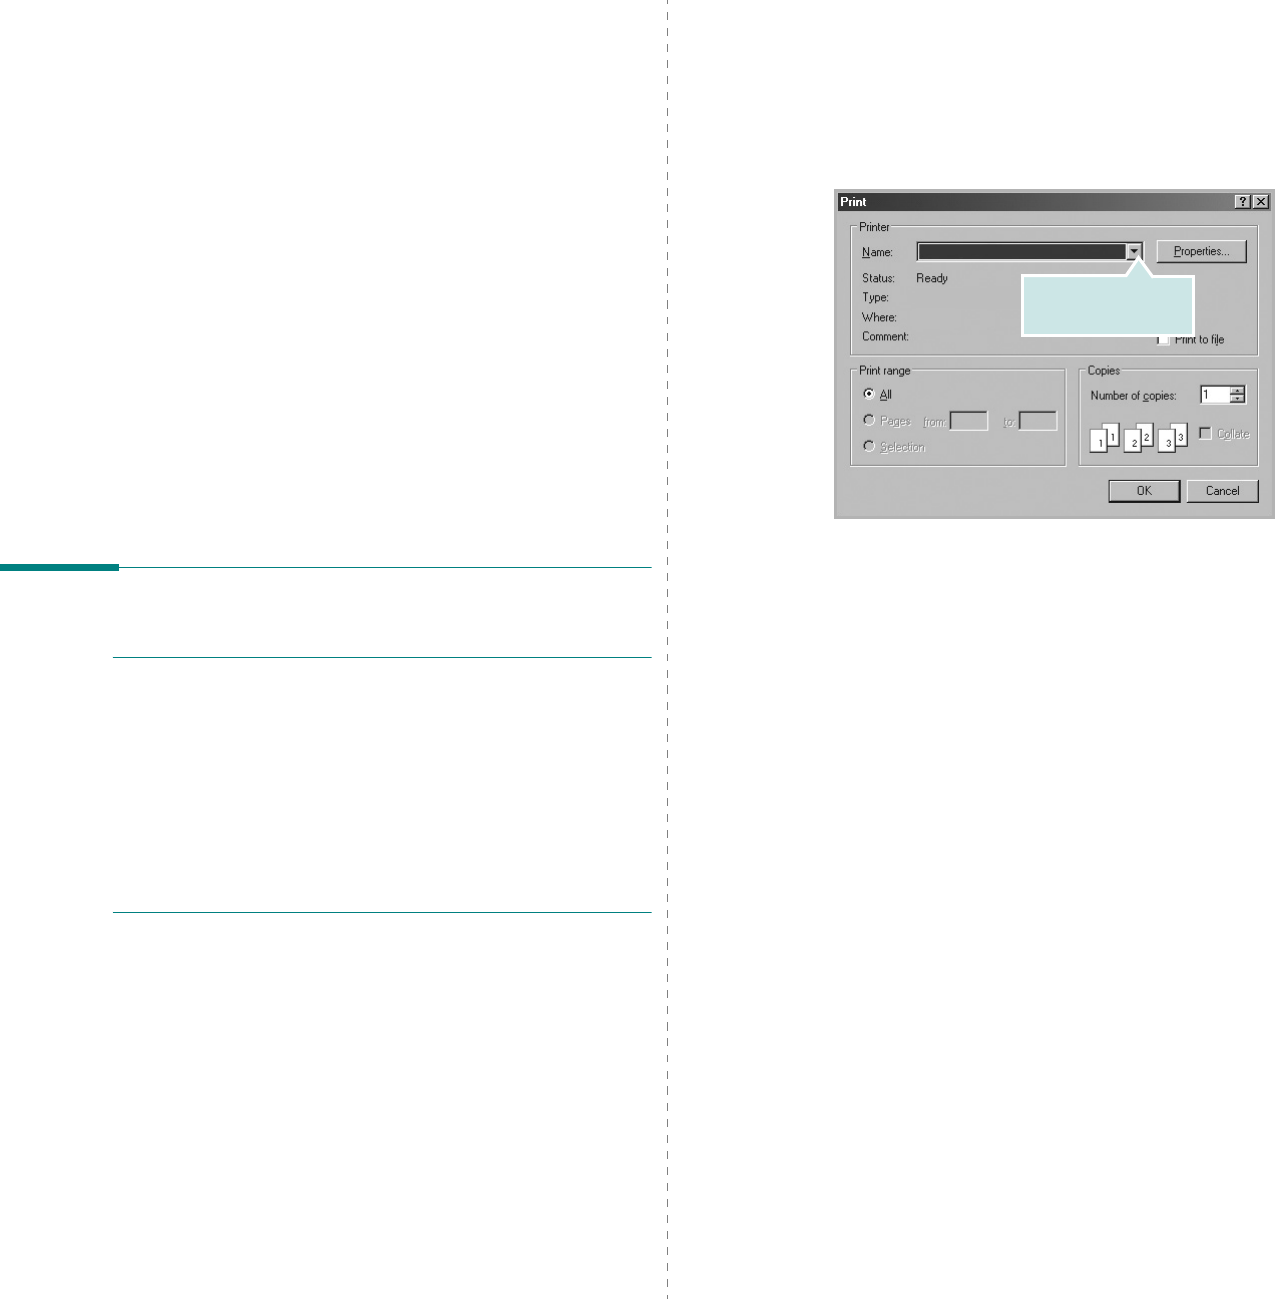
1
Open the document you want to print.
2
Select
Print
from the
File
menu. The Print window is
displayed. It may look slightly different depending on your
application.
The basic print settings are selected within the Print
window. These settings include the number of copies and
print range.
3
Select
your printer driver
from the
Name
drop-down
list.
4
To take advantage of the printer features provided by your
printer driver, click
Properties
or
Preferences
in the
application’s Print window. For details, see “Printer
Settings” on page 13.
If you see
Setup
,
Printer
, or
Options
in your Print
window, click it instead. Then click
Properties
on the next
screen.
5
Click
OK
to close the printer properties window.
6
To start the print job, click
OK
or
Print
in the Print
window.
Make sure that your
printer is selected.
Basic Printing
13
Printer Settings
You can use the printer properties window, which allows you to
access all of the printer options you need when using your
printer. When the printer properties are displayed, you can
review and change the settings needed for your print job.
Your printer properties window may differ, depending on your
operating system. This Software User’s Guide shows the
Properties window for Windows 98.
Your printer driver
Properties
window that appears in this
User’s Guide may differ depending on the printer in use.
If you access printer properties through the Printers folder, you
can view additional Windows-based tabs (refer to your
Windows User’s Guide) and the Printer tab (see “Printer Tab” on
page 16).
N
OTES
:
• Most Windows applications will override settings you specify
in the printer driver. Change all print settings available in the
software application first, and change any remaining settings
using the printer driver.
• The settings you change remain in effect only while you are
using the current program.
To make your changes
permanent
, make them in the Printers folder.
• The following procedure is for Windows XP. For other
Windows OS, refer to the corresponding Windows User's
Guide or online help.
1. Click the Windows
Start
button.
2. Select
Printers and Faxes
.
3. Select your printer driver icon.
4. Right-click on the printer driver icon and select
Printing Preferences
.
5. Change the settings on each tab, click OK.
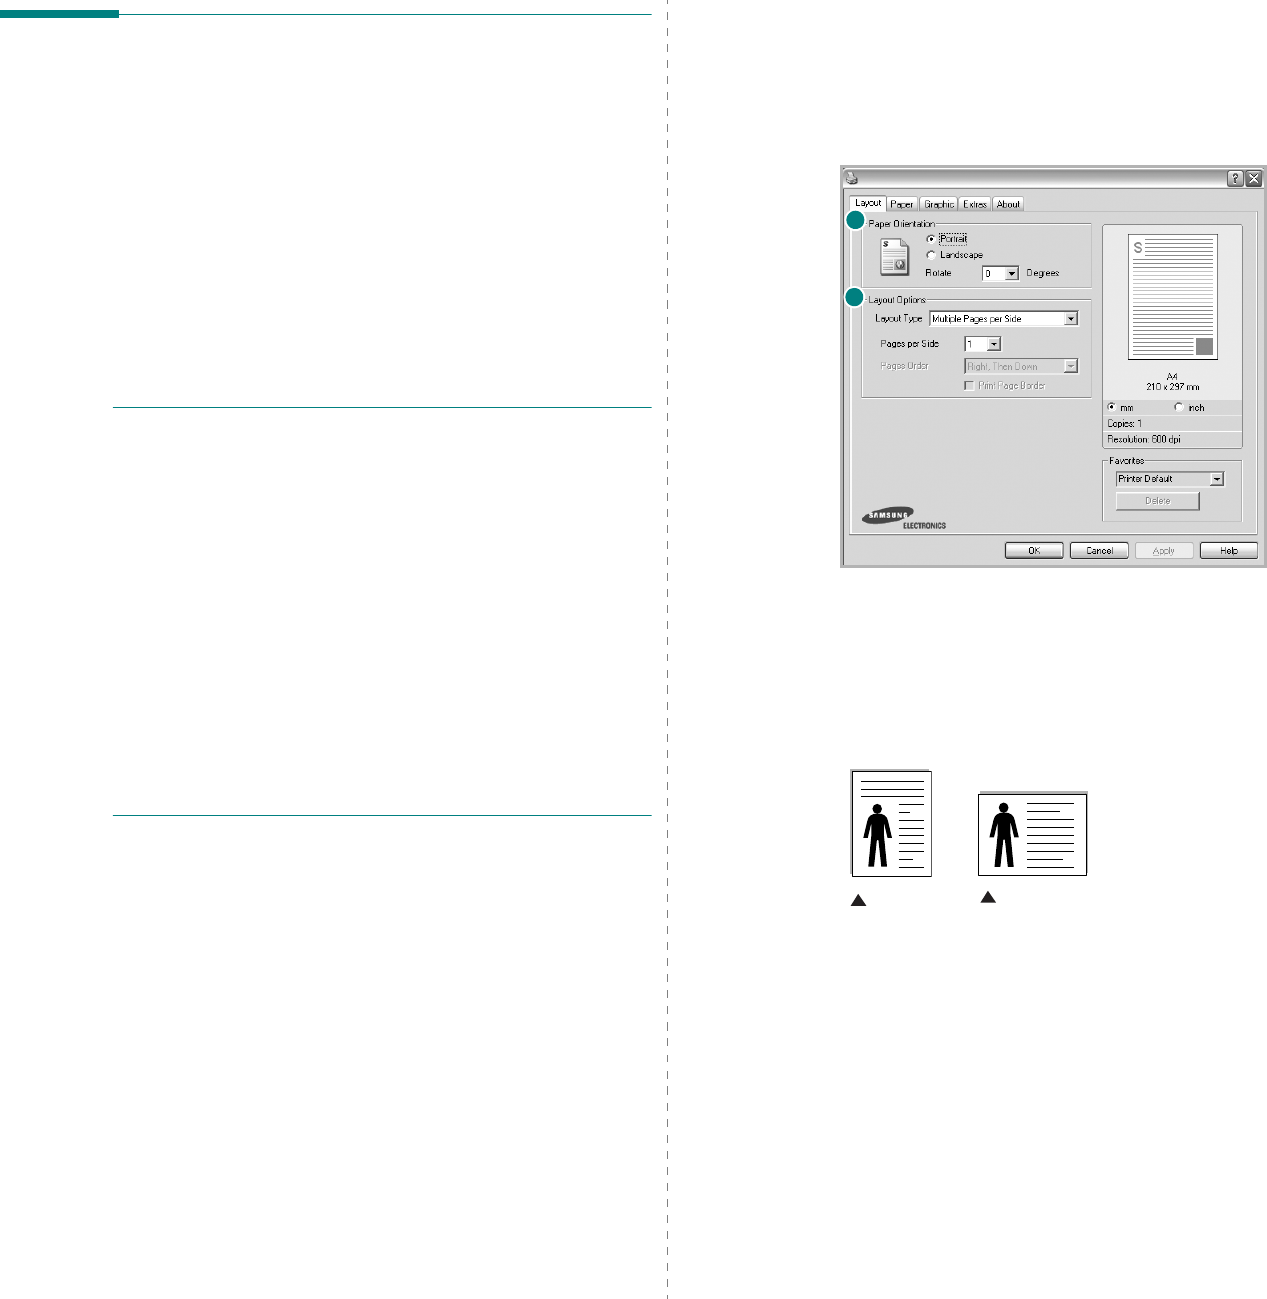
Layout Tab
The
Layout
tab provides options to adjust how the document
appears on the printed page. The
Layout Options
includes
Multiple Pages per Side
and
Poster Printing
. See “Printing
a Document” on page 12 for more information on accessing
printer properties.
Paper Orientation
Paper Orientation
allows you to select the direction in which
information is printed on a page.
•
Portrait
prints across the width of the page, letter style.
•
Landscape
prints across the length of the page, spreadsheet
style.
•
Rotate
allows you to rotate the page the selected degrees.
Layout Options
Layout Options
allows you to select advanced printing options.
You can choose
Multiple Pages per Side
and
Poster Printing
.
•
For details, see
“Printing Multiple Pages on One Sheet of Paper
(N-Up Printing)” on page 18.
•
For details, see
“Printing Posters” on page 19
Double-sided Printing
Double-sided Printing
allows you to print on both sides of
paper.
If this option does not appear, your printer does
not have this feature.
•
For details, see
“Printing on Both Sides of Paper” on page 20.
1
2
Landscape
Portrait
Basic Printing
14
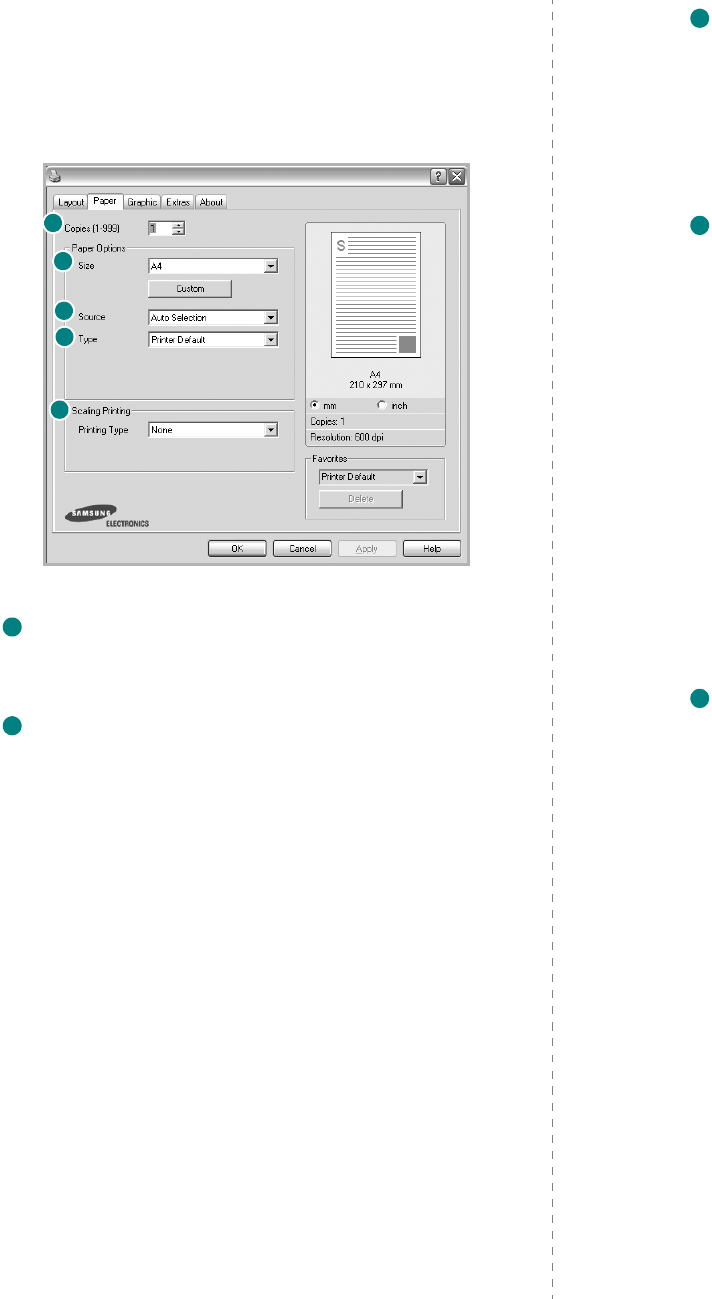
Paper Tab
Use the following options to set the basic paper handling
specifications when you access the printer properties. See
“Printing a Document” on page 12 for more information on
accessing printer properties.
Click the
Paper
tab to access various paper properties.
Copies
Copies
allows you to choose the number of copies to be printed.
You can select 1 to 999 copies.
Size
Size
allows you to set the size of paper you loaded in the tray.
If the required size is not listed in the
Size
box, click
Custom
.
When the
Custom Paper Setting
window appears, set the paper
size and click
OK
. The setting appears in the list so that you can
select it.
1
2
3
4
5
1
2
Source
Make sure that
Source
is set to the corresponding paper tray.
Use
Manual Feed
when printing on special materials like
envelopes and transparencies. You have to load one sheet at a
time into the Manual Tray or Multi-Purpose Tray.
If the paper source is set to
Auto Select
, the printer
automatically picks up print material in the following tray order:
Man ual Tray or Mul ti-Purpose Tray, Tray1, Optional Tray2
Type
Set
Type
to correspond to the paper loaded in the tray from
which you want to print. This will let you get the best quality
printout. If not, print quality may not be acheived as you want.
Cotton
: 20 lb to 24 lb (75~90 g/m2) cotton paper such as Gilbert
25 % and Gilbert 100 %.
Plain Paper
: Normal plain paper. Select this type if your printer is
monochrome and printing on the 16 lb (60 g/m2) cotton paper.
Recycled
: 20 lb to 24 lb (75~90 g/m2) recycled paper.
Color Paper
: 20 lb to 24 lb (75~90 g/m2) color-backgrounded
paper.
First Page
This property allows you to print the first page using a different
paper type from the rest of the document. You can select the
paper source for the first page.
For example, load thick stock for the first page into the Multi-
purpose Tray, and plain paper into Tray1. Then, select
Tray1
in
the
Source
option and
Multi-Purpose Tray
in the
First Page
option.
Some printers do not support this feature.
Scaling Printing
Scaling Printing
allows you to automatically or manually scale
your print job on a page. You can choose from
None
,
Reduce/
Enlarge
, and
Fit to Page
.
•
For details, see
“Printing a Reduced or Enlarged Document” on
page 20.
•
For details, see
“Fitting Your Document to a Selected Paper
Size” on page 20.
3
4
5
Basic Printing
15
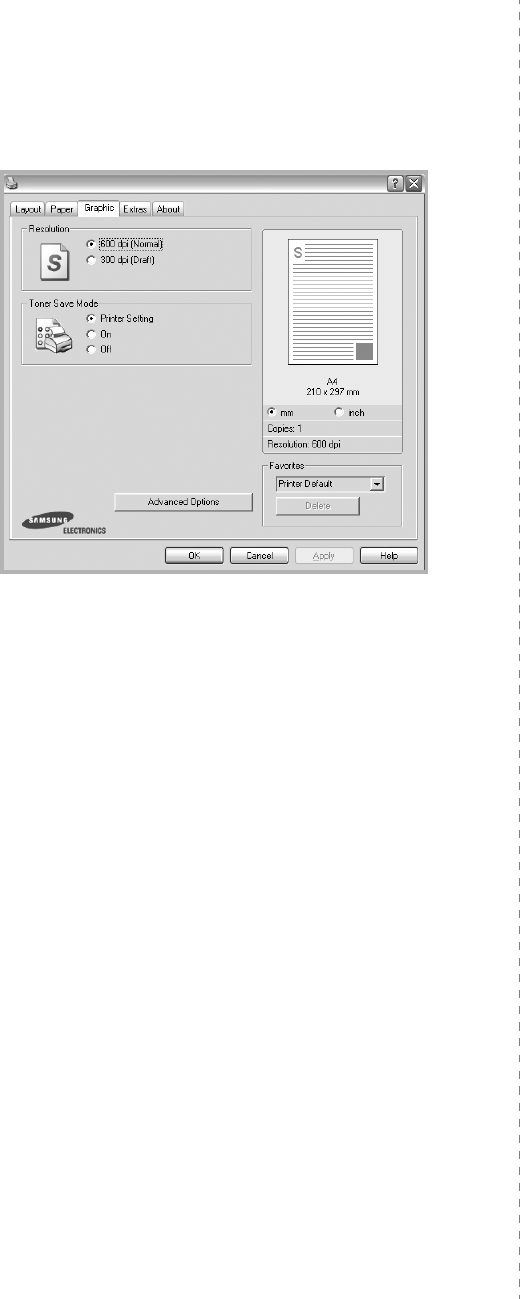
Graphics Tab
Use the following Graphic options to adjust the print quality for
your specific printing needs. See “Printing a Document” on
page 12 for more information on accessing printer properties.
Click the
Graphic
tab to display the properties shown below..
Resolution
The Resolution options you can select may vary
depending on your printer model.
The higher the setting,
the sharper the clarity of printed characters and graphics. The
higher setting also may increase the time it takes to print a
document.
Image Mode
The available options are Normal and Text Enhance.
Some
printers do not support this feature.
•
Printer Setting
: If you select this option, this feature is
determined by the setting you’ve made on the control panel of
the printer.
•
Normal(1,2,3)
: This setting is for normal documents.
•
Text Enhance
: Image Mode allows the user to enhance
printouts.
Toner Save Mode
Selecting this option extends the life of your toner cartridge and
reduces your cost per page without a significant reduction in print
quality.
Some printers do not support this feature.
•
Printer Setting
: If you select this option, this feature is
determined by the setting you’ve made on the control panel of
the printer.
•
On
: Select this option to allow the printer to use less toner on
each page.
•
Off
: If you don’t need to save toner when printing a document,
select this option.
Advanced Options
You can set advanced settings by clicking the
Advanced
Options
button.
•
TrueType Options
:
This option determines what the driver
tells the printer about how to image the text in your document.
Select the appropriate setting according to the status of your
document.
This option may be available only in
Windows 9x/Me, depending on your particular printer
model.
-
Download as Outline
: When this option is selected, the
driver will download any TrueType fonts that are used in your
document not already stored (resident) on your printer. If,
after printing a document, you find that the fonts did not print
correctly, choose Download as bit image and resubmit your
print job. The Download as bit image setting is often useful
when printing Adobe.
This feature is available only
when you use the PCL printer driver.
-
Download as Bitmap
: When this option is selected, the
driver will download the font data as bitmap images.
Documents with complicated fonts, such as Korean or
Chinese, or various other fonts, will print faster in this setting.
-
Print as Graphics
:
When this option is selected, the driver
will download any fonts as graphics. When printing documents
with high graphic content and relatively few TrueType fonts,
printing performance (speed) may be enhanced in this
setting.
•
Print All Text To Black
:
When the
Print All Text To Black
option
is checked, all text in your document prints solid black,
regardless of the color it appears on the screen.
•
Print All Text To Darken
:
When the
Print All Text To Darken
option is checked, all text in your document is allowed to print
darker than on a normal document.
Some printers do not
support this feature.

Basic Printing
16
Extras Tab
You can select output options for your document. See “Printing
a Document” on page 12 for more information about accessing
the printer properties.
Click the
Extras
tab to access the following feature:
Watermark
You can create a background text image to be printed on each
page of your document.
For details, see
“Using Watermarks” on
page 21.
Overlay
Overlays are often used to take the place of preprinted forms and
letterhead paper.
For details, see
“Using Overlays” on page 22.
Output Options
•
Print Subset
: You can set the sequence in which the pages
print. Select the print order from the drop-down list.
-
Normal(1,2,3)
: Your printer prints all pages from the first
page to the last page.
-
Reverse All Pages(3,2,1)
: Your printer prints all pages from
the last page to the first page.
-
Print Odd Pages
: Your printer prints only the odd numbered
pages of the document.
-
Print Even Pages
: Your printer prints only the even
numbered pages of the document.
•
Use Printer Fonts
: When Use Printer Fonts is checked, the
printer uses the fonts that are stored in its memory (resident
fonts) to print your document, rather than downloading the
fonts used in your document. Because downloading fonts takes
time, selecting this option can speed up your printing time.
When using Printer fonts, the printer will try to match the fonts
used in your document to those stored in its memory. If,
however, you use fonts in your document that are very different
from those resident in the printer, your printed output will
appear very different from what it looks like on the screen.
This feature is available only when you use the PCL
printer driver.
1
2
3
1
2
3
About Tab
Use the
About
tab to display the copyright notice and the
version number of the driver. If you have an Internet browser,
you can connect to the Internet by clicking on the web site icon.
See “Printing a Document” on page 12 for more information
about accessing printer properties.
Printer Tab
If you access printer properties through the
Printers
folder,
you can view the
Printer
tab. You can set the printer
configuration.
The following procedure is for Windows XP. For other Windows
OS, refer to the corresponding Windows User's Guide or online
help.
1
Click the Windows
Start
menu.
2
Select
Printers and Faxes
.
3
Select
your printer driver
icon.
4
Right-click on the printer driver icon and select
Properties
.
5
Click the
Printer
tab and set the options.
Basic Printing
17
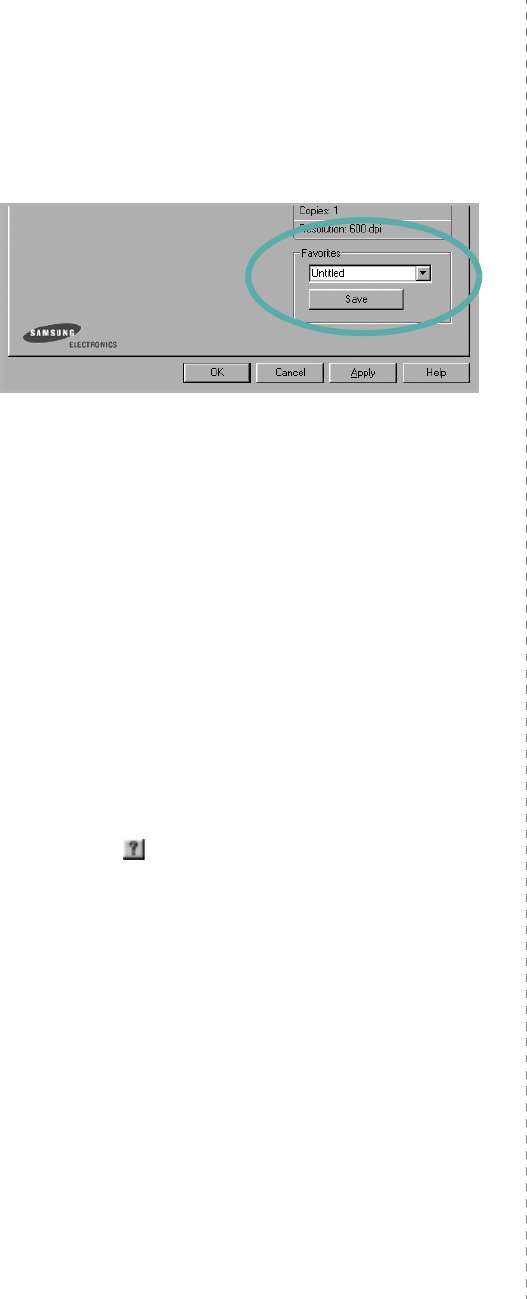
Using a Favorite Setting
The
Favorites
option, which is visible on each properties tab,
allows you to save the current properties settings for future
use.
To save a
Favorites
item:
1
Change the settings as needed on each tab.
2
Enter a name for the item in the
Favorites
input box.
3
Click
Save
.
When you save
Favorites
, all current driver settings are
saved.
To use a saved setting, select the item from the
Favorites
drop
down list. The printer is now set to print according to the
Favorites setting you selected.
To delete a Favorites item, select it from the list and click
Delete
.
You can also restore the printer driver’s default settings by
selecting
Printer Default
from the list.
Using Help
Your printer has a help screen that can be activated by clicking
the
Help
button in the printer properties window. These help
screens give detailed information about the printer features
provided by the printer driver.
You can also click from the upper right corner of the window,
and then click on any setting.
Advanced Printing
18
3Advanced Printing
This chapter explains printing options and advanced printing
tasks.
N
OTE
:
• Your printer driver
Properties
window that appears in this
User’s Guide may differ depending on the printer in use.
However the composition of the printer properties window is
similar.
• If you need to know the exact name of your printer, you can
check the supplied CD-ROM.
This chapter includes:
• Printing Multiple Pages on One Sheet of Paper (N-Up
Printing)
•Printing Posters
• Printing Booklets
• Printing on Both Sides of Paper
• Printing a Reduced or Enlarged Document
• Fitting Your Document to a Selected Paper Size
•Using Watermarks
•Using Overlays
Printing Multiple Pages on One
Sheet of Paper (N-Up Printing)
You can select the number of pages to print on a single sheet
of paper. To print more than one page per sheet, the pages will
be reduced in size and arranged in the order you specify. You
can print up to 16 pages on one sheet.
1
To change the print settings from your software
application, access printer properties. See “Printing a
Document” on page 12.
2
From the
Layout
tab, choose
Multiple Pages per Side
in
the
Layout Type
drop-down list.
3
Select the number of pages you want to print per sheet
(1, 2, 4, 6, 9, or 16) in the
Pages per Side
drop-down
list.
4
Select the page order from the
Page Order
drop-down
list, if necessary.
Check
Print Page Border
to print a border around each
page on the sheet.
5
Click the
Paper
tab, select the paper source, size, and
type.
6
Click
OK
and print the document.
1 2
3 4
Advanced Printing
19
Printing Posters
This feature allows you to print a single-page document onto 4,
9, or 16 sheets of paper, for the purpose of pasting the sheets
together to form one poster-size document.
1
To change the print settings from your software
application, access printer properties. See “Printing a
Document” on page 12.
2
Click the
Layout
tab, select
Poster Printing
in the
Layout Type
drop-down list.
3
Configure the poster option:
You can select the page layout from
Poster<2x2>
,
Poster<3x3>
, or
Poster<4x4>
. If you select
Poster<2x2>
, the output will be automatically stretched
to cover 4 physical pages.
Specify an overlap in millimeters or inches to make it
easier to pasting the sheets together.
4
Click the
Paper
tab, select the paper source, size, and
type.
5
Click
OK
and print the document. You can complete the
poster by pasting the sheets together.
0.15 inches
0.15 inches
Printing Booklets
This printer feature allows you to print your document on both
sides of the paper and arranges the pages so that the paper can
be folded in half after printing to produce a booklet.
1
To change the print settings from your software
application, access the printer properties. See “Printing a
Document” on page 12.
2
From the
Layout
tab, choose
Booklet Printing
from the
Type
drop-down list.
N
OTE
: The booklet printing option is available when A4,
Letter, Legal, or Folio size is selected in the
Size
option on the
Paper
tab.
3
Click the
Paper
tab, and select the paper source, size, and
type.
4
Click
OK
and print the document.
5
After printing, fold and staple the pages.
8
9
8
9
Advanced Printing
20
Printing on Both Sides of Paper
You can print on both sides of a sheet of paper. Before printing,
decide how you want your document oriented.
The options are:
•
Printer Setting
, if you select this option, this feature is
determined by the setting you’ve made on the control
panel of the printer.
If this option does not appear,
your printer does not have this feature.
•
None
•
Long Edge
, which is the conventional layout used in
book binding.
•
Short Edge
, which is the type often used with calendars.
•
Reverse Duplex
, allows you to select general print
order compare to duplex print order.
If this option does
not appear, your printer does not have this feature.
N
OTE
:
• Do not print on both sides of labels, transparencies,
envelopes, or thick paper. Paper jamming and damage to the
printer may result.
• To use double-sided printing, you can use only the following
paper sizes: A4, Letter, Legal, and Folio, with a weight of
20~24 lbs (75~90 g/m
²
).
1
To change the print settings from your software
application, access printer properties. “Printing a
Document” on page 12.
2
From the
Layout
tab, select the paper orientation.
3
From the
Double-sided Printing
section, select the
binding option you want.
4
Click the
Paper
tab and select the paper source, size, and
type.
5
Click
OK
and print the document.
N
OTE
: If your printer does not have a duplex unit, you should
complete the printing job manually. The printer prints every
other page of the document first. After printing the first side of
your job, the Printing Tip window appears. Follow the on-
screen instructions to complete the printing job.
Long Edge
▲
Short Edge
▲
25
3
2
5
3
25
3
2
5
3
Printing a Reduced or Enlarged
Document
You can change the size of a page’s content to appear larger or
smaller on the printed page.
1
To change the print settings from your software
application, access printer properties. See “Printing a
Document” on page 12.
2
From the
Paper
tab, select
Reduce/Enlarge
in the
Printing Type
drop-down list.
3
Enter the scaling rate in the
Percentage
input box.
You can also click the or button.
4
Select the paper source, size, and type in
Paper Options
.
5
Click
OK
and print the document.
Fitting Your Document to a
Selected Paper Size
This printer feature allows you to scale your print job to any
selected paper size regardless of the digital document size. This
can be useful when you want to check fine details on a small
document.
1
To change the print settings from your software
application, access printer properties. See “Printing a
Document” on page 12.
2
From the
Paper
tab, select
Fit to Page
in the
Printing
Type
drop-down list.
3
Select the correct size from the
Target Page
drop-down
list.
4
Select the paper source, size, and type in
Paper Options
.
5
Click
OK
and print the document.
A

Advanced Printing
21
Using Watermarks
The Watermark option allows you to print text over an existing
document. For example, you may want to have large gray
letters reading “DRAFT” or “CONFIDENTIAL” printed diagonally
across the first page or all pages of a document.
There are several predefined watermarks that come with the
printer, and they can be modified, or you can add new ones to
the list.
Using an Existing Watermark
1
To change the print settings from your software
application, access printer properties. See “Printing a
Document” on page 12.
2
Click the
Extras
tab, and select the desired watermark
from the
Watermark
drop-down list. You will see the
selected watermark in the preview image.
3
Click
OK
and start printing.
N
OTE
: The preview image shows how the page will look when
it is printed.
Creating a Watermark
1
To change the print settings from your software
application, access printer properties. See “Printing a
Document” on page 12.
2
Click the
Extras
tab, and click the
Edit
button in the
Watermark
section. The
Edit Watermark
window
appears.
3
Enter a text message in the
Watermark Message
box.
You can enter up to 40 characters. The message displays
in the preview window.
When the
First Page Only
box is checked, the watermark
prints on the first page only.
4
Select watermark options.
You can select the font name, style, size, or grayscale level
from the
Font Attributes
section and set the angle of the
watermark from the
Message Angle
section.
5
Click
Add
to add a new watermark to the list.
6
When you have finished editing, click
OK
and start
printing.
To stop printing the watermark, select
<No Watermark>
from
the
Watermark
drop-down list.
Editing a Watermark
1
To change the print settings from your software
application, access printer properties. See “Printing a
Document” on page 12.
2
Click the
Extras
tab and click the
Edit
button in the
Watermark
section. The
Edit Watermark
window
appears.
3
Select the watermark you want to edit from the
Current
Watermarks
list and change the watermark message and
options.
4
Click
Update
to save the changes.
5
Click
OK
until you exit the Print window.
Deleting a Watermark
1
To change the print settings from your software
application, access printer properties. See “Printing a
Document” on page 12.
2
From the
Extras
tab, click the
Edit
button in the
Watermark section. The
Edit Watermark
window
appears.
3
Select the watermark you want to delete from the
Current
Watermarks
list and click
Delete
.
4
Click
OK
until you exit the Print window.
Advanced Printing
22
Using Overlays
What is an Overlay?
An overlay is text and/or images stored in the computer hard
disk drive (HDD) as a special file format that can be printed on
any document. Overlays are often used to take the place of
preprinted forms and letterhead paper. Rather than using
preprinted letterhead, you can create an overlay containing the
exact same information that is currently on your letterhead. To
print a letter with your company’s letterhead, you do not need
to load preprinted letterhead paper in the printer. You need only
tell the printer to print the letterhead overlay on your
document.
Creating a New Page Overlay
To use a page overlay, you must create a new page overlay
containing your logo or image.
1
Create or open a document containing text or an image for
use in a new page overlay. Position the items exactly as
you wish them to appear when printed as an overlay.
2
To save the document as an overlay, access printer
properties. See “Printing a Document” on page 12.
3
Click the
Extras
tab, and click
Edit
button in the
Overlay
section.
4
In the Edit Overlay window, click
Create Overlay
.
5
In the Create Overlay window, type a name of up to eight
characters in the
File name
box. Select the destination
path, if necessary. (The default is C:\Formover).
6
Click
Save
. The name appears on the
Overlay List
box.
7
Click
OK
or
Yes
to finish creating.
The file is not printed. Instead it is stored on your
computer hard disk drive.
N
OTE
: The overlay document size must be the same as the
documents you print with the overlay. Do not create an overlay
with a watermark.
WORLD BEST
Dear ABC
Regards
WORLD BEST
Using a Page Overlay
After an overlay has been created, it is ready to be printed with
your document. To print an overlay with a document:
1
Create or open the document you want to print.
2
To change the print settings from your software
application, access printer properties. See “Printing a
Document” on page 12.
3
Click the
Extras
tab.
4
Select the desired overlay from the
Overlay
drop-down
list box.
5
If the overlay file you want does not appear in the
Overlay
list, click
Edit
button and
Load Overlay
, and
select the overlay file.
If you have stored the overlay file you want to use in an
external source, you can also load the file when you access
the
Load Overlay
window.
After you select the file, click
Open
. The file appears in the
Overlay List
box and is available for printing. Select the
overlay from the
Overlay List
box.
6
If necessary, click
Confirm Page Overlay When
Printing
. If this box is checked, a message window
appears each time you submit a document for printing,
asking you to confirm your wish to print an overlay on your
document.
If this box is not checked and an overlay has been
selected, the overlay automatically prints with your
document.
7
Click
OK
or
Yes
until printing begins.
The selected overlay downloads with your print job and
prints on your document.
N
OTE
: The resolution of the overlay document must be the
same as that of the document you will print with the overlay.
Deleting a Page Overlay
You can delete page overlays that you no longer use.
1
In the printer properties window, click the
Extras
tab.
2
Click the
Edit
button in the
Overlay
section.
3
Select the overlay you want to delete from the
Overlay
List
box.
4
Click
Delete Overlay
.
5
When a confirming message window appears, click
Yes
.
6
Click
OK
until you exit the Print window.
Using Windows PostScript Driver
23
4Using Windows
PostScript Driver
If you want to use the PostScript driver provided with your
system CD-ROM to print a document.
PPDs, in combination with the PostScript driver, access printer
features and allow the computer to communicate with the
printer. An installation program for the PPDs is provided on the
supplied software CD-ROM.
This chapter includes:
Printer Settings
You can use the printer properties window, which allows you to
access all of the printer options you need when using your
printer. When the printer properties are displayed, you can
review and change the settings needed for your print job.
Your printer properties window may differ, depending on your
operating system. This Software User’s Guide shows the
Properties window for Windows XP.
Your printer driver
Properties
window that appears in this
User’s Guide may differ depending on the printer in use.
N
OTES
:
• Most Windows applications will override settings you specify
in the printer driver. Change all print settings available in the
software application first, and change any remaining settings
using the printer driver.
• The settings you change remain in effect only while you are
using the current program.
To make your changes
permanent
, make them in the Printers folder.
• The following procedure is for Windows XP. For other
Windows OS, refer to the corresponding Windows User's
Guide or online help.
1. Click the Windows
Start
button.
2. Select Printers and Faxes.
3. Select your printer driver icon.
4. Right-click on the printer driver icon and select
Printing Preferences.
5. Change the settings on each tab, click OK.
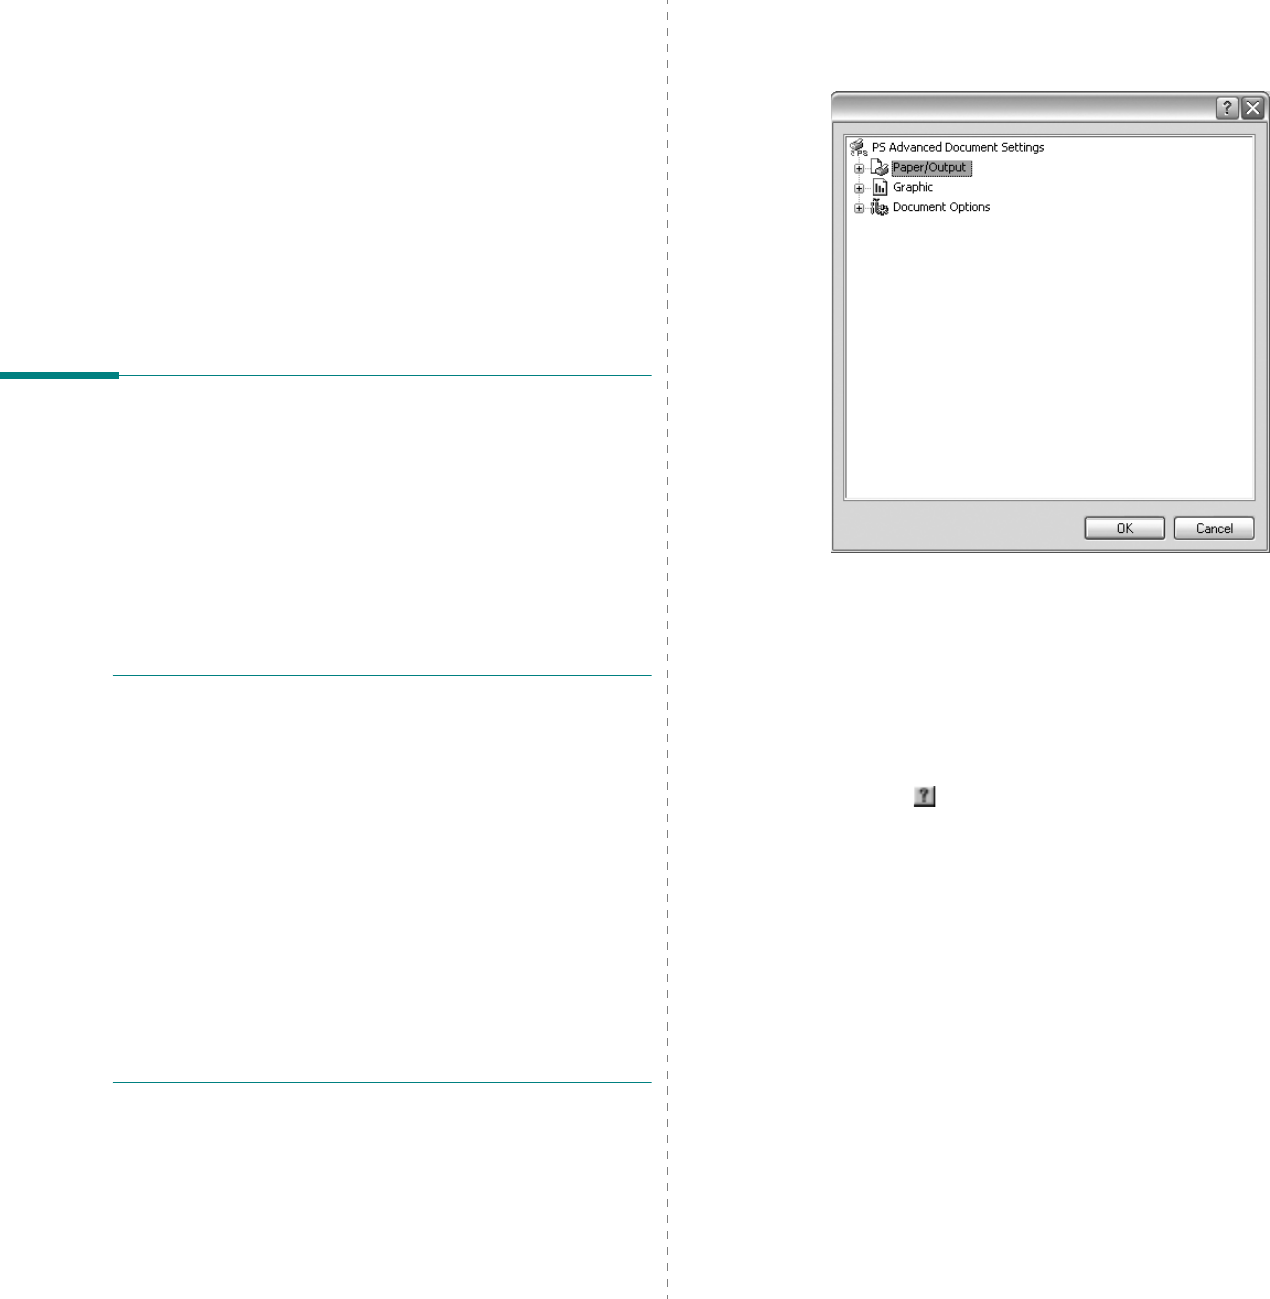
Advanced
You can use advanced settings by clicking the
Advanced
button.
•
Paper/Output
this option allows you to select the size of the
paper loaded in the tray.
•
Graphic
this option allows you to adjust the print quality for
your specific printing needs.
•
Document Options
this options allow you to set the PostScript
options or printer features.
Using Help
You can click from the upper right corner of the window, and
then click on any setting.

Sharing the Printer Locally
24
5Sharing the Printer
Locally
You can connect the printer directly to a selected computer,
which is called “host computer,” on the network.
The following procedure is for Windows XP. For other Windows
OS, refer to the corresponding Windows User's Guide or online
help.
N
OTES
:
• Check the Operating System(s) that are compatible with
your printer. Please refer to the OS Compatibility section of
Printer Specifications in your Printer User’s Guide.
• If you need to know the exact name of your printer, you can
check the supplied CD-ROM.
Setting Up a Host Computer
1
Start Windows.
2
From the
Start
menu select
Printers and Faxes
.
3
Double-click
your printer driver icon
.
4
From the
Printer
menu, select
Sharing
.
5
Check the
Share this printer
box.
6
Fill in the
Shared Name
field, and then click
OK
.
Setting Up a Client Computer
1
Right-click the Windows
Start
button and select
Explorer
.
2
Open your network folder in the left column.
3
Click the shared name.
4
From the
Start
menu select
Printers and Faxes
.
5
Double-click
your printer driver icon
.
6
From the
Printer
menu, select
Properties
.
7
From the
Ports
tab, click
Add Port
.
8
Select
Local Port
and click
New Port
.
9
Fill in the
Enter a port name
field with the shared name.
10
Click
OK
and click
Close
.
11
Click
Apply
and click
OK
.
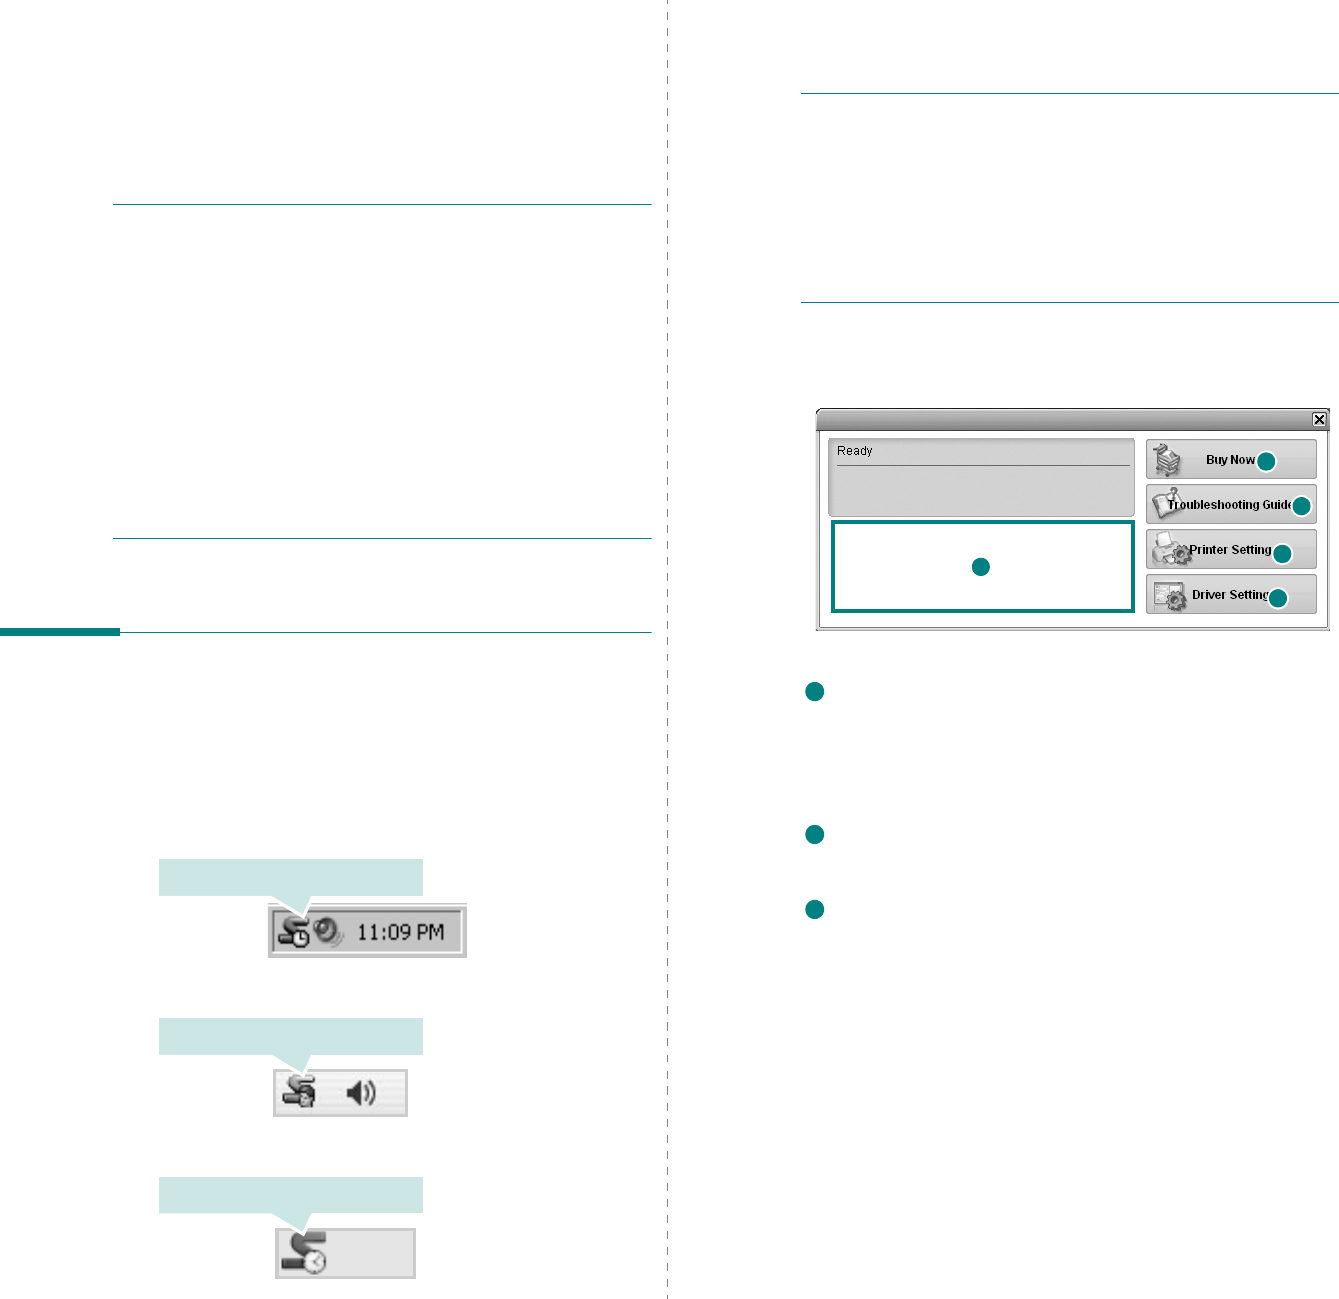
Using Smart Panel
25
6Using Smart Panel
Smart Panel is a program that monitors and informs you of the
status of the printer, and allows you to customize the printer’s
settings.
Smart Panel
is installed automatically when you
install the printer software.
N
OTES
:
• To use this program, you need:
- Windows 98 or higher (Windows NT 4.0 can be used only
for network-supported printers.) To check for Operating
System(s) that are compatible with your printer, refer to
Printer Specifications in your Printer User’s Guide.
- Mac OS X 10.3 or higher
- Linux. To check for Linux systems that are compatible with
your printer, refer to Printer Specifications in your Printer
User’s Guide.
- Internet Explorer version 5.0 or higher for flash animation
in HTML Help.
• If you need to know the exact name of your printer, you can
check the supplied CD-ROM.
Understanding Smart Panel
If an error occurs while printing, Smart Panel appears
automatically, showing the error.
You can also launch Smart Panel manually. Double-click the
Smart Panel icon on the Windows task bar (in Windows), or
Notification Area (in Linux). You can also click it on the status
bar (in Mac OS X).
Double-click this icon in Windows.
Click this icon in Mac OS X.
Click this icon in Linux.
If you are a Windows user, from the
Start
menu, select
Programs
or
All Programs
→
your printer driver name
→
Smart Panel
.
N
OTES
:
• If you have already installed more than one Samsung
printer, first select the printer model you want in order to
use the corresponding Smart Panel. Right-click (in Windows
or Linux) or click (in Mac OS X) the Smart Panel icon and
select
your printer name
.
• The Smart Panel window and its contents shown in this
Software User’s Guide may differ depending on the printer or
Operating System in use.
The Smart Panel program displays the current status of the
printer, the level of toner remaining in the toner cartridge(s)
and various other information. You can also change settings.
Toner Level
You can view the level of toner remaining in the toner
cartridge(s). The printer and the number of toner cartridge(s)
shown in the above window may differ depending on the printer in
use. Any printers do not have this feature.
Buy Now
You can order replacement toner cartridge(s) online.
Troubleshooting Guide
You can view Help to solve problems.
2
4
1
5
3
1
2
3
Using Smart Panel
26
Driver Setting
(Only for Windows)
You can use the printer properties window, which allows you to
access all of the printer options you need for using your
printer.
For details,
See “Printer Settings” on page 13.
Opening the Troubleshooting
Guide
Using the troubleshooting guide, you can view solutions for
error status problems.
Right-click (in Windows or Linux) or click (in Mac OS X) the
Smart Panel icon and select
Troubleshooting Guide
.
5
Changing the Smart Panel
Program Settings
Right-click (in Windows or Linux) or click (in Mac OS X) the
Smart Panel icon and select
Options
.
The following window opens.
•
Display when job is finished for network printer
: The
computer shows the Smart Panel popup window or
balloon when your job is complete in Windows.
(Only for
Windows network-supported printers.)
•
Display when error occurs during printing
: The
computer shows the Smart Panel popup window or
balloon when an error occurs during printing.
•
Display with
:
You can select how the computer shows
you a message. If you select
Popup window (smart
panel)
, the message appears in the Smart Panel popup
window in Windows and Mac OS X.
•
Launch Job Monitor when the job is saved in the
printer
: If you store print jobs on the printer’s hard disk,
the computer opens the Job Monitor window in Windows.
(Only for Windows network-supported printers with
built-in hard disks.)
•
Schedule an automatic status checking every
: The
computer updates the printer status regularly. Setting the
value close to 1 second causes the computer to check the
printer status more frequently, thereby allowing a faster
response to any printer error.
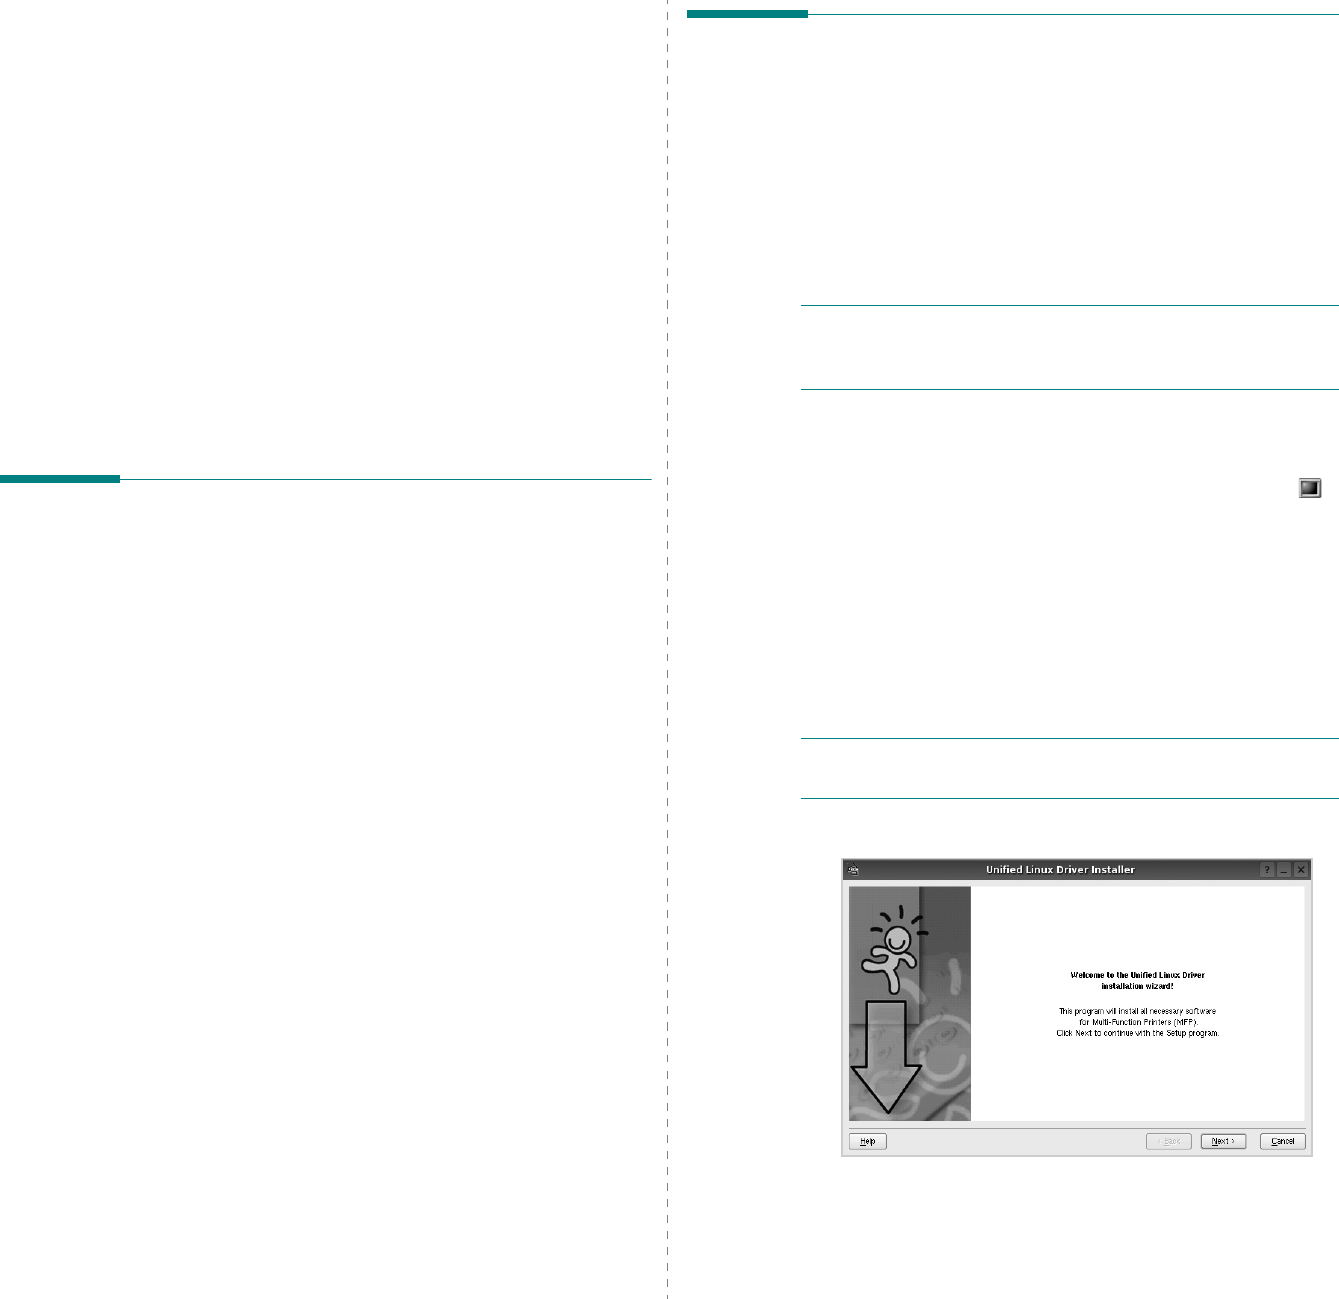
Using Your Printer in Linux
27
7Using Your Printer in
Linux
You can use your machine in a Linux environment.
This chapter includes:
• Getting Started
• Installing the Unified Linux Driver
• Using the Unified Driver Configurator
• Configuring Printer Properties
• Printing a Document
• Scanning a Document (for MFP device only)
Getting Started
The supplied CD-ROM provides you with Samsung’s Unified
Linux Driver package for using your machine with a Linux
computer.
Samsung’s Unified Linux Driver package contains printer and
scanner drivers, providing the ability to print documents and
scan images. The package also delivers powerful applications
for configuring your machine and further processing of the
scanned documents.
After the driver is installed on your Linux system, the driver
package allows you to monitor a number of machine devices via
fast ECP parallel ports and USB simultaneously. The acquired
documents can then be edited, printed on the same local or
network machine devices, sent by e-mail, uploaded to an FTP
site, or transferred to an external OCR system.
The Unified Linux Driver package is supplied with a smart and
flexible installation program. You don't need to search for
additional components that might be necessary for the Unified
Linux Driver software: all required packages will be carried onto
your system and installed automatically; this is possible on a
wide set of the most popular Linux clones.
Installing the Unified Linux
Driver
Installing the Unified Linux Driver
1
Make sure that you connect your machine to your
computer. Turn both the computer and the machine on.
2
When the Administrator Login window appears, type in
root
in the Login field and enter the system password.
N
OTE
: You must log in as a super user (root) to install the
printer software. If you are not a super user, ask your system
administrator.
3
Insert the printer software CD-ROM. The CD-ROM will
automatically run.
If the CD-ROM does not automatically run, click the
icon at the bottom of the desktop. When the Terminal
screen appears, type in:
If the CD-ROM is secondary master and the location to
mount is /mnt/cdrom,
[root@localhost root]#mount -t iso9660 /dev/hdc /mnt/
cdrom
[root@localhost root]#cd /mnt/cdrom/Linux
[root@localhost root]#./install.sh
N
OTE
: The installation program runs automatically if you
have an autorun software package installed and configured.
4
When the welcome screen appears, click
Next
.
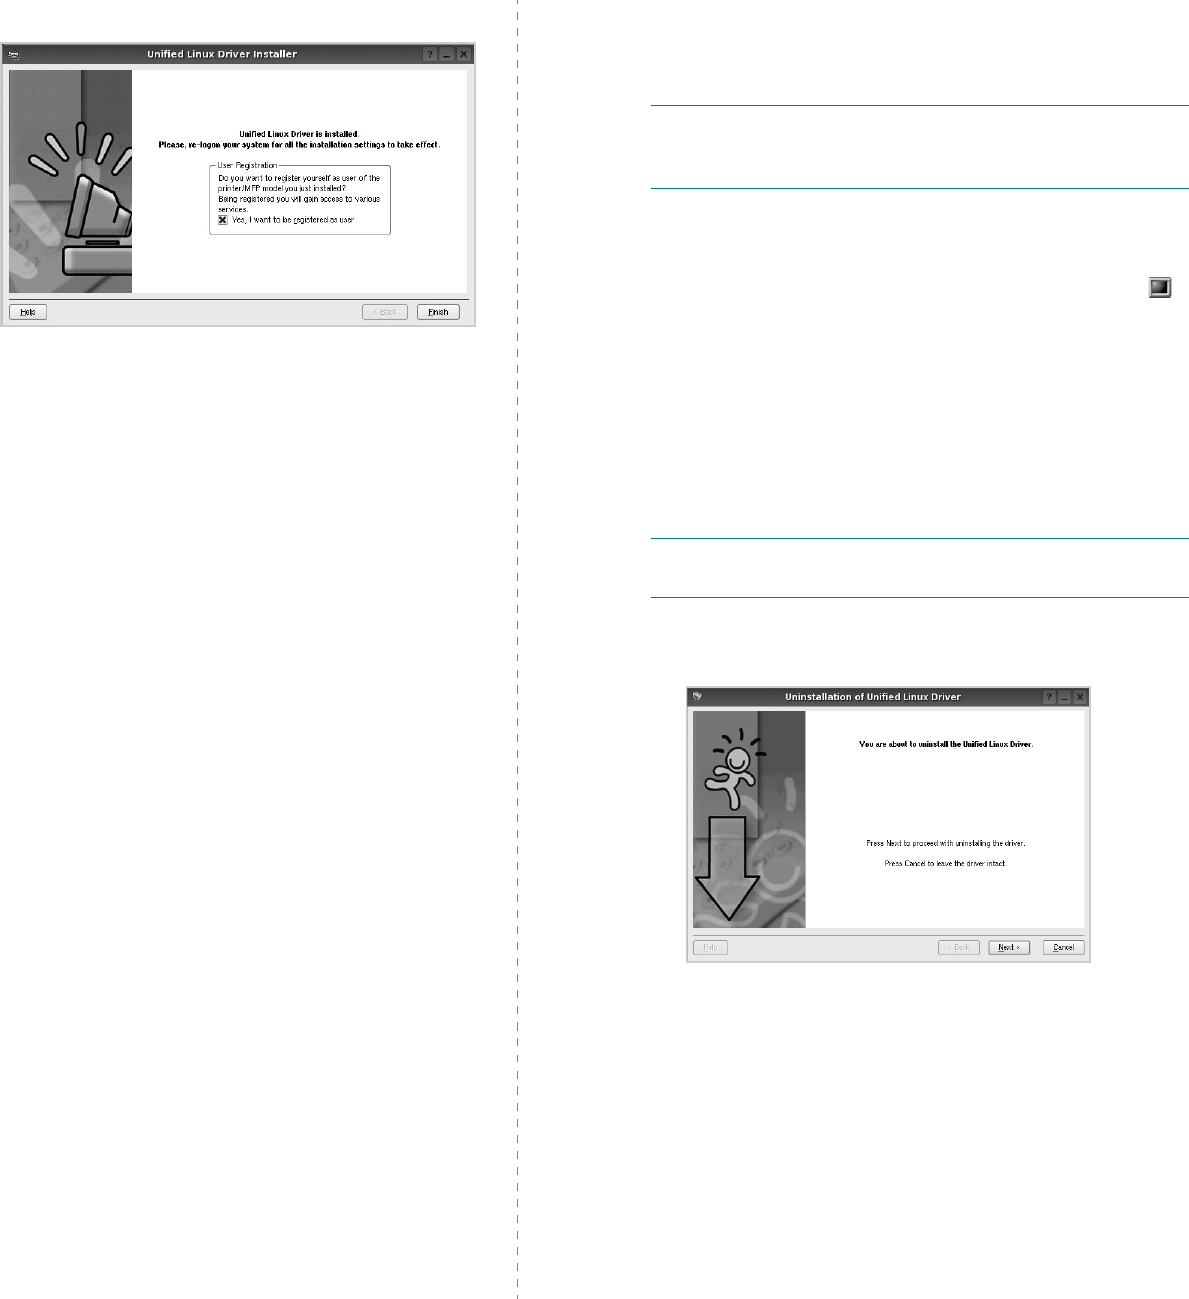
Using Your Printer in Linux
28
5
When the installation is complete, click
Finish
.
The installation program has added the Unified Driver
Configurator desktop icon and Samsung Unified Driver
group to the system menu for your convenience. If you
have any difficulties, consult the onscreen help that is
available through your system menu or can otherwise be
called from the driver package windows applications,
such as
Unified Driver Configurator
or
Image
Manager
.
Uninstalling the Unified Linux Driver
1
When the Administrator Login window appears, type in
root
in the Login field and enter the system password.
N
OTE
: You must log in as a super user (root) to install the
printer software. If you are not a super user, ask your system
administrator.
2
Insert the printer software CD-ROM. The CD-ROM will
automatically run.
If the CD-ROM does not automatically run, click the
icon at the bottom of the desktop. When the Terminal
screen appears, type in:
If the CD-ROM is secondary master and the location to
mount is /mnt/cdrom,
[root@localhost root]#mount -t iso9660 /dev/hdc /mnt/
cdrom
[root@localhost root]#cd /mnt/cdrom/Linux
[root@localhost root]#./uninstall.sh
N
OTE
: The installation program runs automatically if you
have an autorun software package installed and configured.
3
Click
Uninstall
.
4
Click
Next
.
5
Click
Finish
.
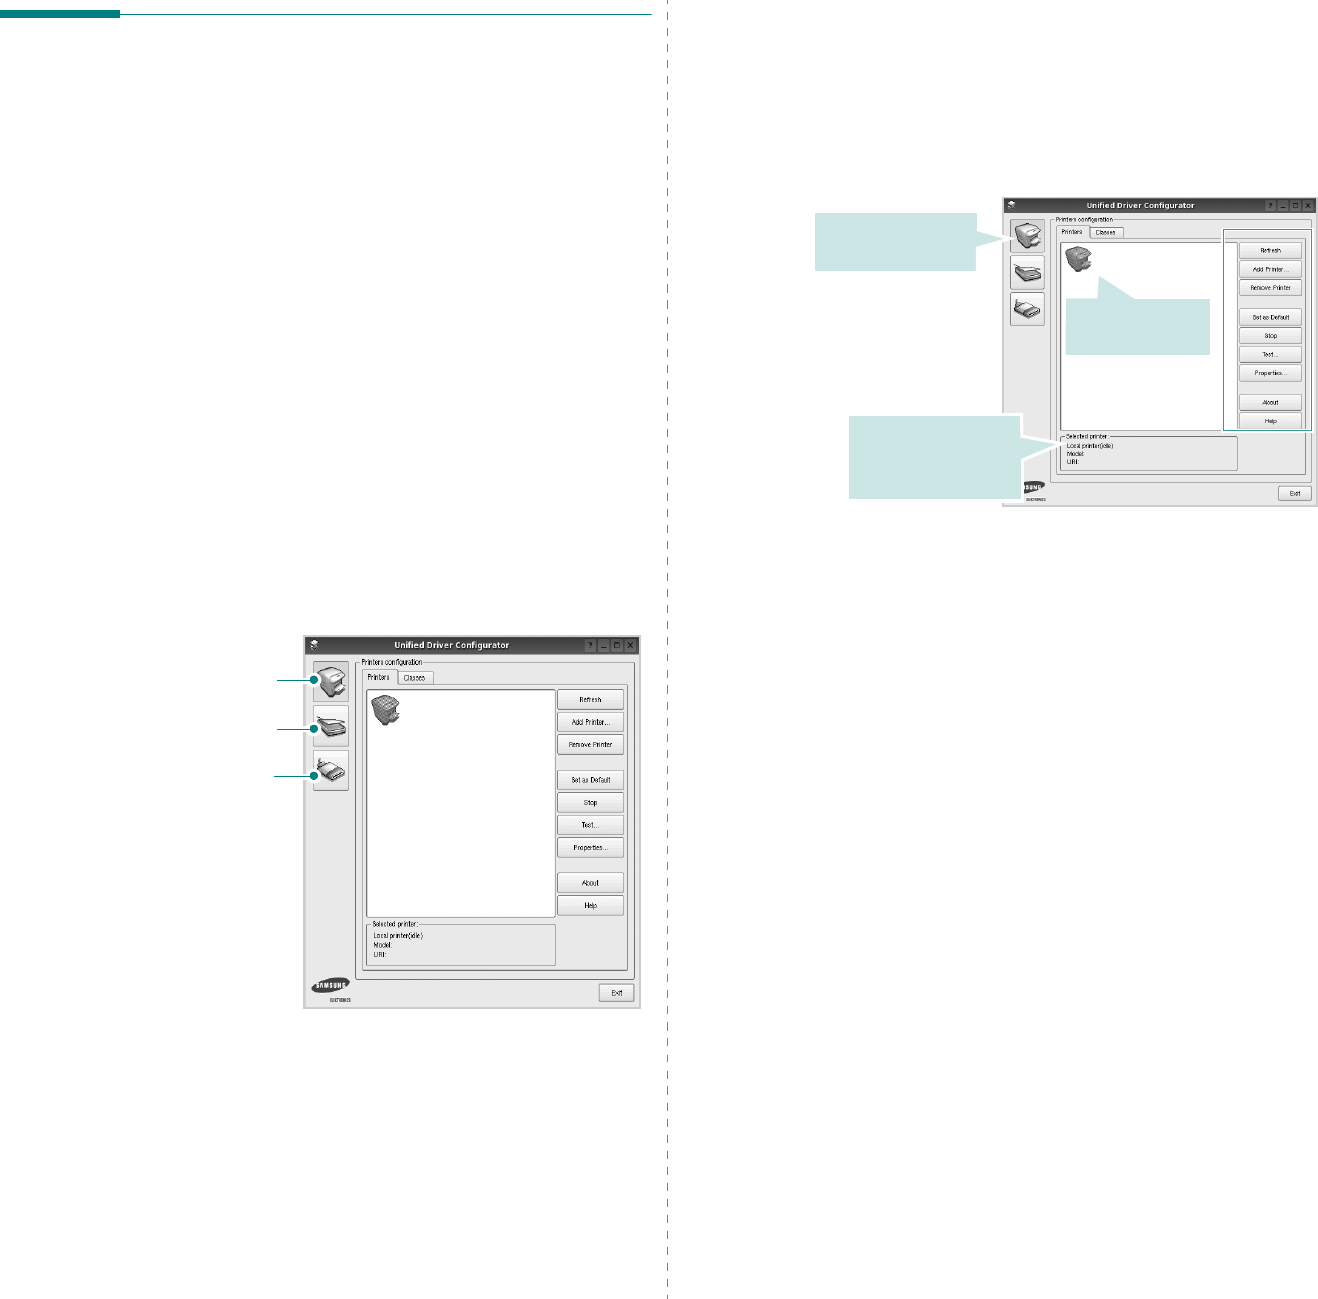
Using Your Printer in Linux
29
Using the Unified Driver
Configurator
Unified Linux Driver Configurator is a tool primarily intended for
configuring Printer or MFP devices. Since an MFP device
combines the printer and scanner, the Unified Linux Driver
Configurator provides options logically grouped for printer and
scanner functions. There is also a special MFP port option
responsible for the regulation of access to an MFP printer and
scanner via a single I/O channel.
After installing the Unified Linux driver (see page A.3), the
Unified Linux Driver Configurator icon will automatically be
created on your desktop.
Opening the Unified Driver
Configurator
1
Double-click
Unified Driver Configurator
on the
desktop.
You can also click the Startup Menu icon and select
Samsung Unified Driver
and then
Unified Driver
Configurator
.
2
Press each button on the Modules pane to switch to the
corresponding configuration window.
You can use the onscreen help by clicking
Help
.
3
After changing the configurations, click
Exit
to close the
Unified Driver Configurator.
Printers Configuration button
Scanners Configuration button
(for MFP device only)
Ports Configuration button
Printers Configuration
Printers configuration has the two tabs;
Printers
and
Classes
.
Printers Tab
You can see the current system’s printer configuration by
clicking on the printer icon button on the left side of the Unified
Driver Configurator window.
You can use the following printer control buttons:
•
Refresh
: renews the available printers list.
•
Add Printer
: allows you to add a new printer.
•
Remove Printer
: removes the selected printer.
•
Set as Default
: sets the current printer as a default
printer.
•
Stop
/
Start
: stops/starts the printer.
•
Test
: allows you to print a test page to check if the
machine is working properly.
•
Properties
: allows you to view and change the printer
properties. For details, see page 31.
Shows all of the
installed printer.
Switches to Printer
configuration.
Shows the status,
model name and
URI of your printer.
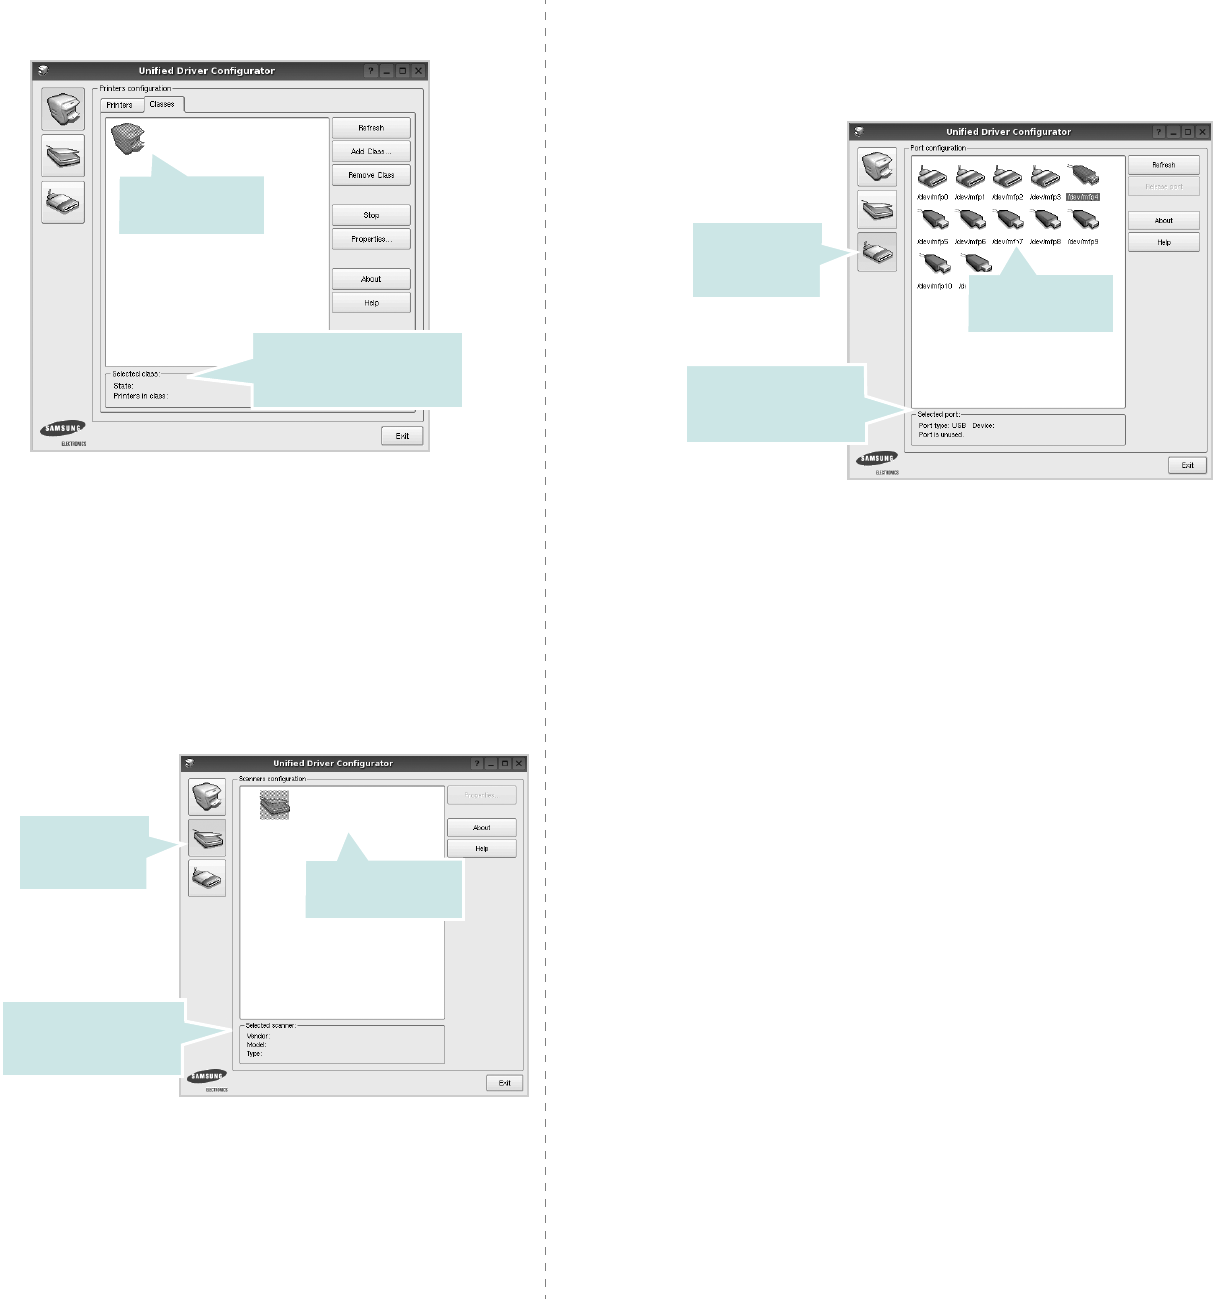
Using Your Printer in Linux
30
Classes Tab
The Classes tab shows a list of available printer classes.
•
Refresh
: Renews the classes list.
•
Add Class... :
Allows you to add a new printer class.
•
Remove Class :
Removes the selected printer class.
Scanners Configuration (for MFP
device only)
In this window, you can monitor the activity of scanner devices,
view a list of installed Samsung MFP devices, change device
properties, and scan images.
•
Properties...
: Allows you to change the scan properties
and scan a document. See page 32.
•
Drivers... :
Allows you to monitor the activity of the scan drivers.
Shows the status of the
class and the number of
printers in the class.
Shows all of the
printer classes.
Switches to
Scanners
configuration. Shows all of the
installed scanners.
Shows the vendor,
model name and type
of your scanner.
Ports Configuration
In this window, you can view the list of available ports, check
the status of each port and release a port that is stalled in busy
state when its owner is terminated for any reason.
•
Refresh
: Renews the available ports list.
•
Release port :
Releases the selected port.
Sharing Ports Between Printers and Scanners
(for MFP device only)
Your machine may be connected to a host computer via the
parallel port or USB port. Since the MFP device contains more
than one device (printer and scanner), it is necessary to
organize proper access of “consumer” applications to these
devices via the single I/O port.
The Samsung Unified Linux Driver package provides an
appropriate port sharing mechanism that is used by Samsung
printer and scanner drivers. The drivers address their devices
via so-called MFP ports. The current status of any MFP port can
be viewed via the Ports Configuration. The port sharing
prevents you from accessing one functional block of the MFP
device, while another block is in use.
When you install a new MFP device onto your system, it is
strongly recommended you do this with the assistance of an
Unified Driver Configurator. In this case you will be asked to
choose I/O port for the new device. This choice will provide the
most suitable configuration for MFP’s functionality. For MFP
scanners I/O ports are being chosen by scanner drivers
automatically, so proper settings are applied by default.
Switches to
ports
configuration.
Shows the port type,
device connected to
the port and status
Shows all of the
available ports.
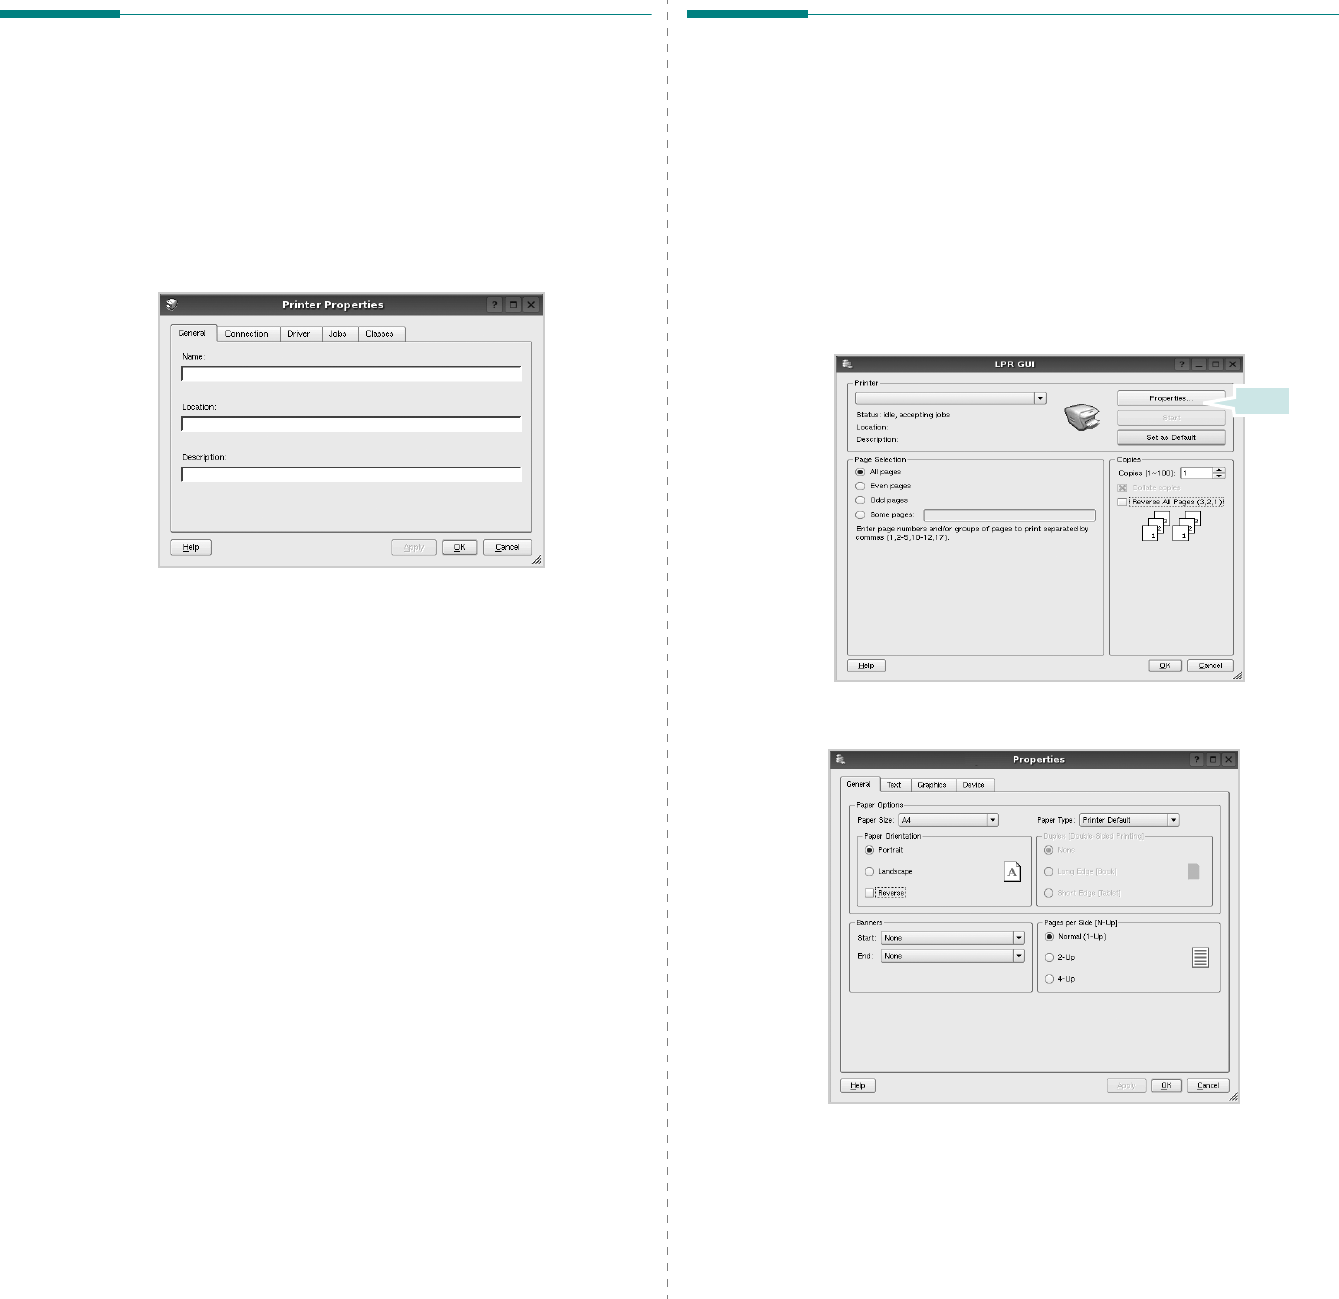
Using Your Printer in Linux
31
Configuring Printer Properties
Using the properties window provided by the Printers
configuration, you can change the various properties for your
machine as a printer.
1
Open the Unified Driver Configurator.
If necessary, switch to Printers configuration.
2
Select your machine on the available printers list and click
Properties
.
3
The Printer Properties window opens.
The following five tabs display at the top of the window:
•
General
: allows you to change the printer location and
name. The name entered in this tab displays on the
printer list in Printers configuration.
•
Connection
: allows you to view or select another port. If
you change the printer port from USB to parallel or vice
versa while in use, you must re-configure the printer port
in this tab.
•
Driver
: allows you to view or select another printer
driver. By clicking
Options
, you can set the default
device options.
•
Jobs
: shows the list of print jobs. Click
Cancel job
to
cancel the selected job and select the
Show completed
jobs
check box to see previous jobs on the job list.
•
Classes
: shows the class that your printer is in. Click
Add to Class
to add your printer to a specific class or
click
Remove from Class
to remove the printer from the
selected class.
4
Click
OK
to apply the changes and close the Printer
Properties Window.
Printing a Document
Printing from Applications
There are a lot of Linux applications that you are allowed to
print from using Common UNIX Printing System (CUPS). You
can print on your machine from any such application.
1
From the application you are using, select
Print
from the
File
menu.
2
Select
Print
directly using
lpr
.
3
In the LPR GUI window, select the model name of your
machine from the Printer list and click
Properties
.
4
Change the printer and print job properties.
Click.
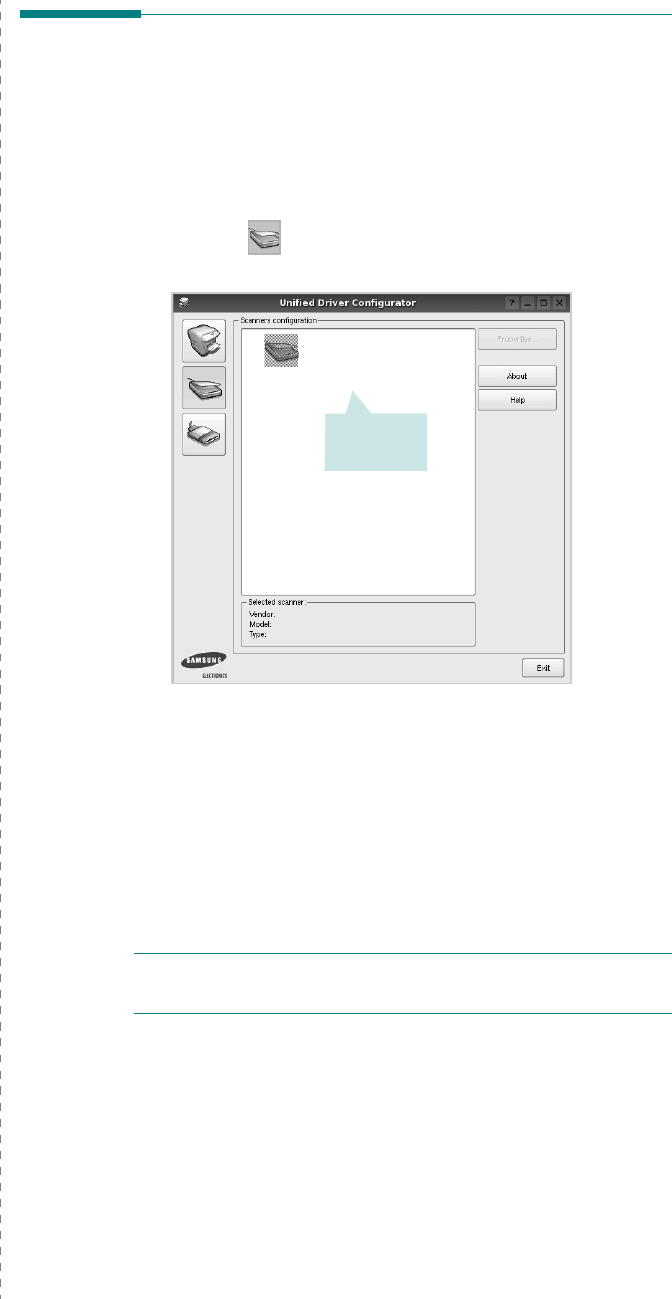
Using Your Printer in Linux
32
The following four tabs display at the top of the window.
•
General
- allows you to change the paper size, the paper
type, and the orientation of the documents, enables the
duplex feature, adds start and end banners, and changes
the number of pages per sheet.
•
Text
- allows you to specify the page margins and set the
text options, such as spacing or columns.
•
Graphics
- allows you to set image options that are used
when printing images/files, such as color options, image
size, or image position.
•
Device
: allows you to set the print resolution, paper
source, and destination.
5
Click
OK
to apply the changes and close the Properties
window.
6
Click
OK
in the LPR GUI window to start printing.
7
The Printing window appears, allowing you to monitor the
status of your print job.
To abort the current job, click
Cancel
.
Printing Files
You can print many different types of files on the Samsung
machine device using the standard CUPS way - directly from
the command line interface. The CUPS lpr utility allows you do
that. But the drivers package replaces the standard lpr tool by
a much more user-friendly Samsung LPR program.
To print any document file:
1
Type
lpr <file_name>
from the Linux shell command
line and press
Enter
. The LPR GUI window appears.
When you type only
lpr
and press
Enter
, the Select
file(s) to print window appears first. Just select any files
you want to print and click
Open
.
2
In the LPR GUI window, select your printer from the list,
and change the printer and print job properties.
For details about the properties window, see page 31.
3
Click
OK
to start printing.
Scanning a Document (for MFP
device only)
You can scan a document using the Unified Driver Configurator
window.
1
Double-click the Unified Driver Configurator on your
desktop.
2
Click the button to switch to Scanners Configuration.
3
Select the scanner on the list.
When you have only one MFP device and it is connected
to the computer and turned on, your scanner appears on
the list and is automatically selected.
If you have two or more scanners attached to your
computer, you can select any scanner to work at any
time. For example, while acquisition is in progress on the
first scanner, you may select the second scanner, set the
device options and start the image acquisition
simultaneously.
N
OTE
: The scanner name shown in Scanners configuration
can be different from the device name.
4
Click
Properties
.
5
Load the document to be scanned
face up into the ADF
(Automatic Document Feeder) or face down on the
document glass.
6
Click
Preview
in the Scanner Properties window.
Click your
scanner.
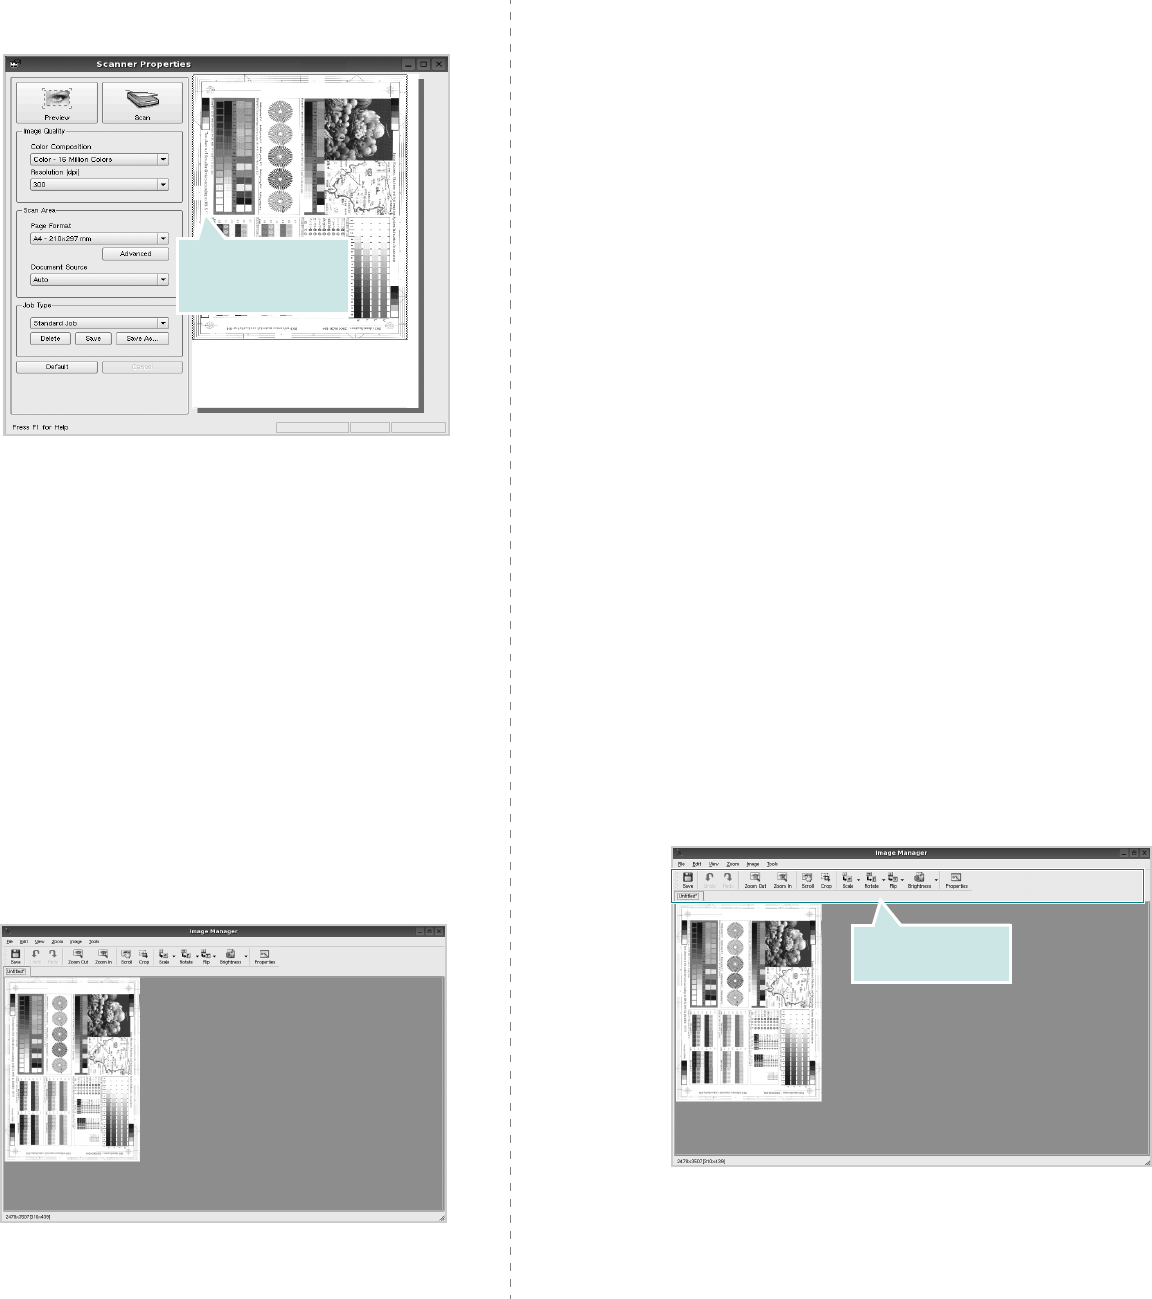
Using Your Printer in Linux
33
The document is scanned and the image preview appears
in the Preview Pane.
7
Change the scan options in the Image Quality and Scan
Area sections.
•
Image Quality
: allows you to select the color
composition and the scan resolution for the image.
•
Scan Area
: allows you to select the page size. The
Advanced
button enables you to set the page size
manually.
If you want to use one of the preset scan option settings,
select from the Job Type drop-down list. For details about
the preset Job Type settings, see page 33.
You can restore the default setting for the scan options
by clicking
Default
.
8
When you have finished, click
Scan
to start scanning.
The status bar appears on the bottom left of the window
to show you the progress of the scan. To cancel scanning,
click
Cancel
.
9
The scanned image appears in the new Image Manager
tab.
If you want to edit the scanned image, use the toolbar.
For further details about editing an image, see page 33.
Drag the pointer to
set the image area
to be scanned.
10
When you are finished, click
Save
on the toolbar.
11
Select the file directory where you want to save the image
and enter the file name.
12
Click
Save
.
Adding Job Type Settings
You can save your scan option settings to retrieve for a later
scanning.
To save a new Job Type setting:
1
Change the options from the Scanner Properties window.
2
Click
Save As
.
3
Enter the name for your setting.
4
Click
OK
.
Your setting is added to the Saved Settings drop-down
list.
To save a Job Type setting for the next scan job:
1
Select the setting you want to use from the Job Type drop-
down list.
2
Click
Save
.
The next time you open the Scanner Properties window,
the saved setting is automatically selected for the scan
job.
To delete a Job Type setting:
1
Select the setting you want to delete from the Job Type
drop-down list.
2
Click
Delete
.
The setting is deleted from the list
Using the Image Manager
The Image Manager application provides you with menu
commands and tools to edit your scanned image.
Use these tools to
edit the image.

Using Your Printer in Linux
34
You can use the following tools to edit the image:
For further details about the Image Manager application, refer
to the onscreen help.
Tools Function
Saves the image.
Cancels your last action.
Restores the action you canceled.
Allows you to scroll through the image.
Crops the selected image area.
Zooms the image out.
Zooms the image in.
Allows you to scale the image size; you can
enter the size manually, or set the rate to
scale proportionally, vertically, or
horizontally.
Allows you to rotate the image; you can
select the number of degrees from the drop-
down list.
Allows you to flip the image vertically or
horizontally.
Allows you to adjust the brightness or
contrast of the image, or to invert the
image.
Shows the properties of the image.

Using Your Printer with a Macintosh
35
8Using Your Printer with
a Macintosh
Your printer supports Macintosh systems with a built-in USB
interface or 10/100 Base-TX network interface card. When you
print a file from a Macintosh computer, you can use the driver by
installing the PPD file.
N
OTE
:
Some printers do not support a network
interface. Make sure that your printer supports a
network interface by referring to Printer Specifications
in your Printer User’s Guide.
This chapter includes:
• Installing printer driver for Macintosh
• Setting Up the Printer
•Printing
Installing printer driver for
Macintosh
ML-2510 only
The CD-ROM that came with your printer provides you with the
PPD file that allows you to use the CUPS driver or Apple
LaserWriter driver
(only available when you use a printer
which supports the PostScript driver)
, for printing on a
Macintosh computer.
Install the Printer driver
1
Make sure that you connect your printer to the computer.
Turn on your computer and printer.
2
Insert the CD-ROM which came with your printer into the
CD-ROM drive.
3
Double-click
CD-ROM icon
that appears on your
Macintosh desktop.
4
Double-click the
MAC_Installer
folder.
5
Double-click the
Printer
folder.
6
Double-click the
Samsung SPL2 Installer
icon.
7
Enter the password and click
OK
.
8
The Samsung SPL Installer window opens. Click
Continue
and then click
Continue
.
9
Select
Easy Install
and click
Install
.
10
After the installation is finished, click
Quit
.
Uninstalling the Printer driver
Uninstall is required if you are upgrading the software, or if
installation fails.
1
Insert the CD-ROM which came with your printer into the
CD-ROM drive.
2
Double-click
CD-ROM icon
that appears on your
Macintosh desktop.
3
Double-click the
MAC_Installer
folder.
4
Double-click the
Printer
folder.
5
Double-click the
Samsung SPL2 Installer
icon.
6
Enter the password and click
OK
.
7
The Samsung SPL Installer window opens. Click
Continue
and then click
Continue
.
8
Select
Uninstall
and then click
Uninstall
.
9
When the uninstallation is done, click
Quit
.

Using Your Printer with a Macintosh
36
ML-2570/ML-2571N only
The PostScript driver CD-ROM that came with your machine
provides you with the PPD file to use the PS driver, Apple
LaserWriter driver, for printing on a Macintosh computer.
Also, it provides you with the Twain driver for scanning on a
Macintosh computer.
1
Connect your machine to the computer using the USB
cable or the Ethernet cable.
2
Turn on your computer and the machine.
3
Insert the PostScript driver CD-ROM which came with your
machine into the CD-ROM drive.
4
Double-click the
Samsung_MFP
on your Macintosh
desktop.
5
Double-click the
MAC_Installer
folder.
Double-click the
Samsung_MFP Installer OSX
icon.
6
Click
Continue
.
7
Click
Install
.
8
After the installation is finished, click
Quit
.
Setting Up the Printer
Set up for your printer will be different depending on which
cable you use to connect the printer to your computer—the
network cable or the USB cable.
ML-2510/2570 only
For a Network-connected Macintosh
N
OTE
:
Some printers do not support a network
interface. Before connecting your printer, make sure
that your printer supports a network interface by
referring to Printer Specifications in your Printer User’s
Guide.
1
Follow the instructions on “Installing printer driver for
Macintosh” on page 35 to install the PPD and Filter files on
your computer.
2
Open
Print Setup Utility
from the
Utilities
folder.
3
Click
Add
on the
Printer List
.
4
Select the
IP Printing
tab.
5
Select Socket/HP Jet Direct in Printer Type.
When printing a document containing many
pages, printing performance may be enhanced by
choosing Socket for Printer type option.
6
Enter the printer’s IP address in the
Printer Address
field.
7
Enter the queue name in the
Queue Name
field. If you
cannot determine the queue name for your printer server,
try using the default queue first.
8
Select
Samsung
in
Printer Model
and your printer
in
Model Name
.
9
Click
Add
.
10
Your printer’s IP address appears on the
Printer List
, and
is set as the default printer.
For a USB-connected Macintosh
1
Follow the instructions on “Installing printer driver for
Macintosh” on page 35 to install the PPD and Filter files on
your computer.
2
Open
Print Setup Utility
from the
Utilities
folder.
3
Click
Add
on the
Printer List
.
4
Select the
USB
tab.
5
Select
Samsung
in
Printer Model
and your printer in
Model Name
.
6
Click
Add
.
Your printer appears on the
Printer List
, and is set as the
default printer.
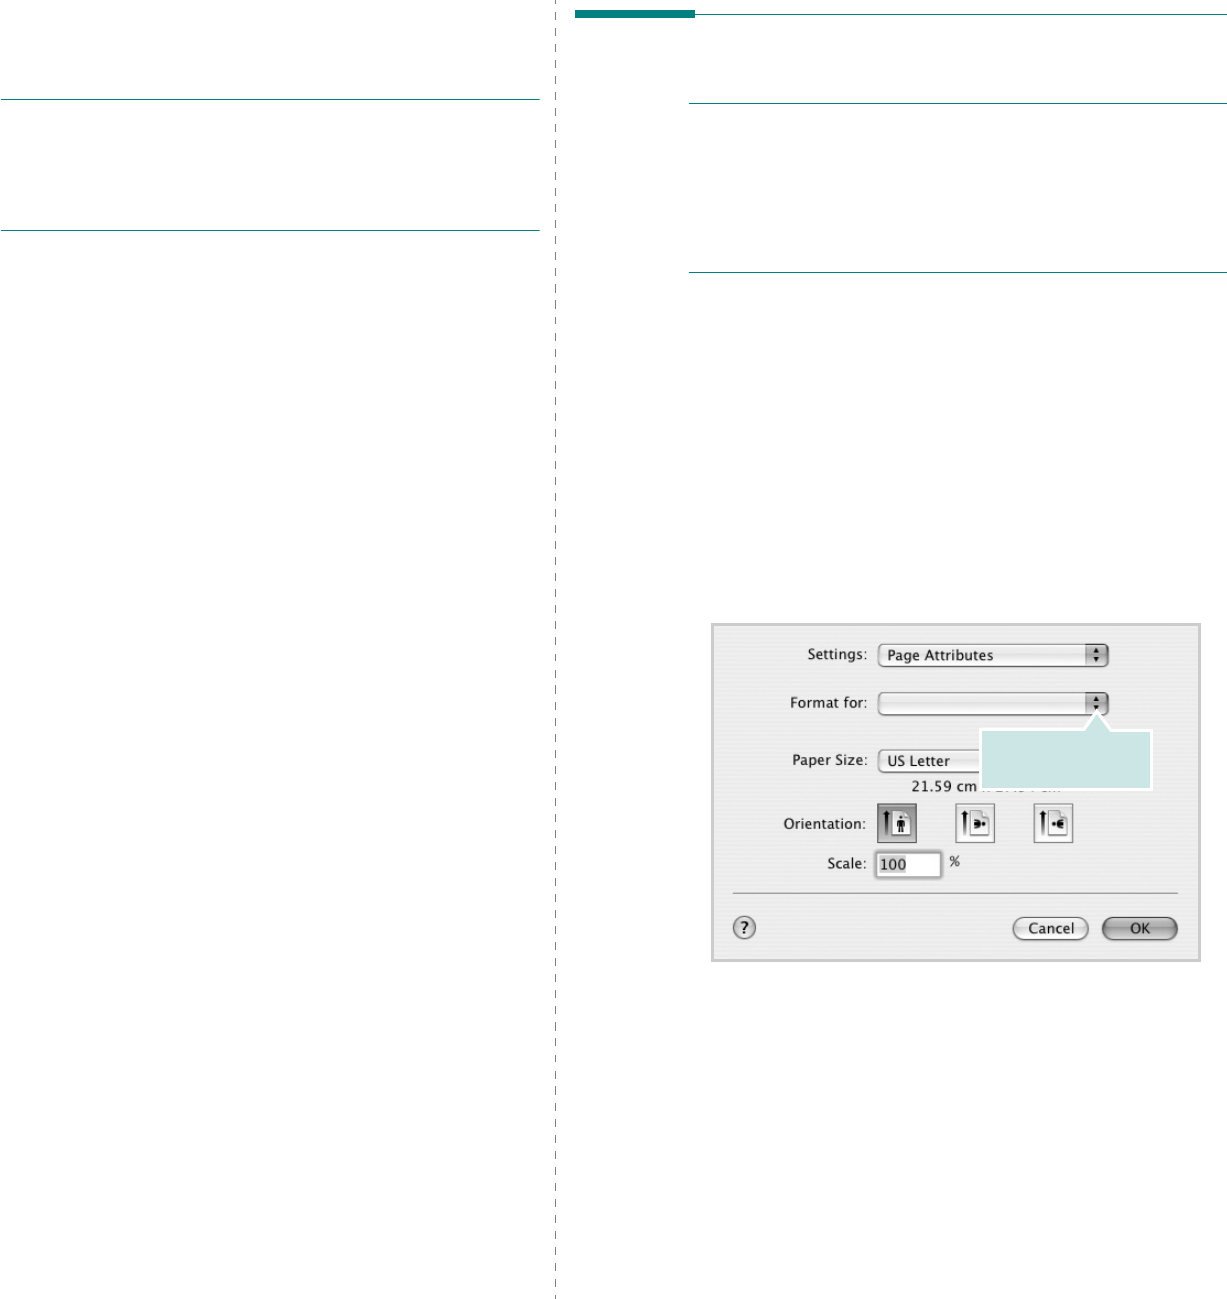
Using Your Printer with a Macintosh
37
ML-2571N only
For a Network-connected Macintosh
N
OTE
:
Some printers do not support a network
interface. Before connecting your printer, make sure
that your printer supports a network interface by
referring to Printer Specifications in your Printer User’s
Guide.
1
Follow the instructions on “Installing printer driver for
Macintosh” on page 35 to install the PPD file on your
computer.
2
Open
Print Center
or
Printer Setup Utility
from the
Utilities folder.
3
Click
Add
on the Printer List.
4
Select the
AppleTalk
tab.
The name of your machine appears on the list. Select
SEC000xxxxxxxxx
from the printer box, where the
xxxxxxxxx
varies depending on your machine.
5
Click
Add
.
6
If Auto Select does not work properly, select
Samsung
in
Printer Model
and
your printer name
in
Model Name
.
Your machine appears on the Printer List and is set as the
default printer.
For a USB-connected Macintosh
1
Follow the instructions on “Installing printer driver for
Macintosh” on page 35 to install the PPD file on your
computer.
2
Open
Print Center
or
Printer Setup Utility
from the
Utilities folder.
3
Click
Add
on the Printer List.
4
Select the
USB
tab.
5
Select
your printer name
and click
Add
.
6
If Auto Select does not work properly, select
Samsung
in
Printer Model
and
your printer name
in
Model Name
.
Your machine appears on the Printer List and is set as the
default printer.
Printing
N
OTES
:
• The Macintosh printer’s properties window that appears in
this User’s Guide may differ depending on the printer in use.
However the composition of the printer properties window is
similar.
• You can check your printer name in the supplied CD-
ROM.
Printing a Document
When you print with a Macintosh, you need to check the printer
software setting in each application you use. Follow these steps
to print from a Macintosh.
1
Open a Macintosh application and select the file you want
to print.
2
Open the
File
menu and click
Page Setup
(
Document
Setup
in some applications).
3
Choose your paper size, orientation, scaling, and other
options and click
OK
.
4
Open the
File
menu and click
Print
.
5
Choose the number of copies you want and indicate which
pages you want to print.
6
Click
Print
when you finish setting the options.
▲
Mac OS 10.3
Make sure that your
printer is selected.
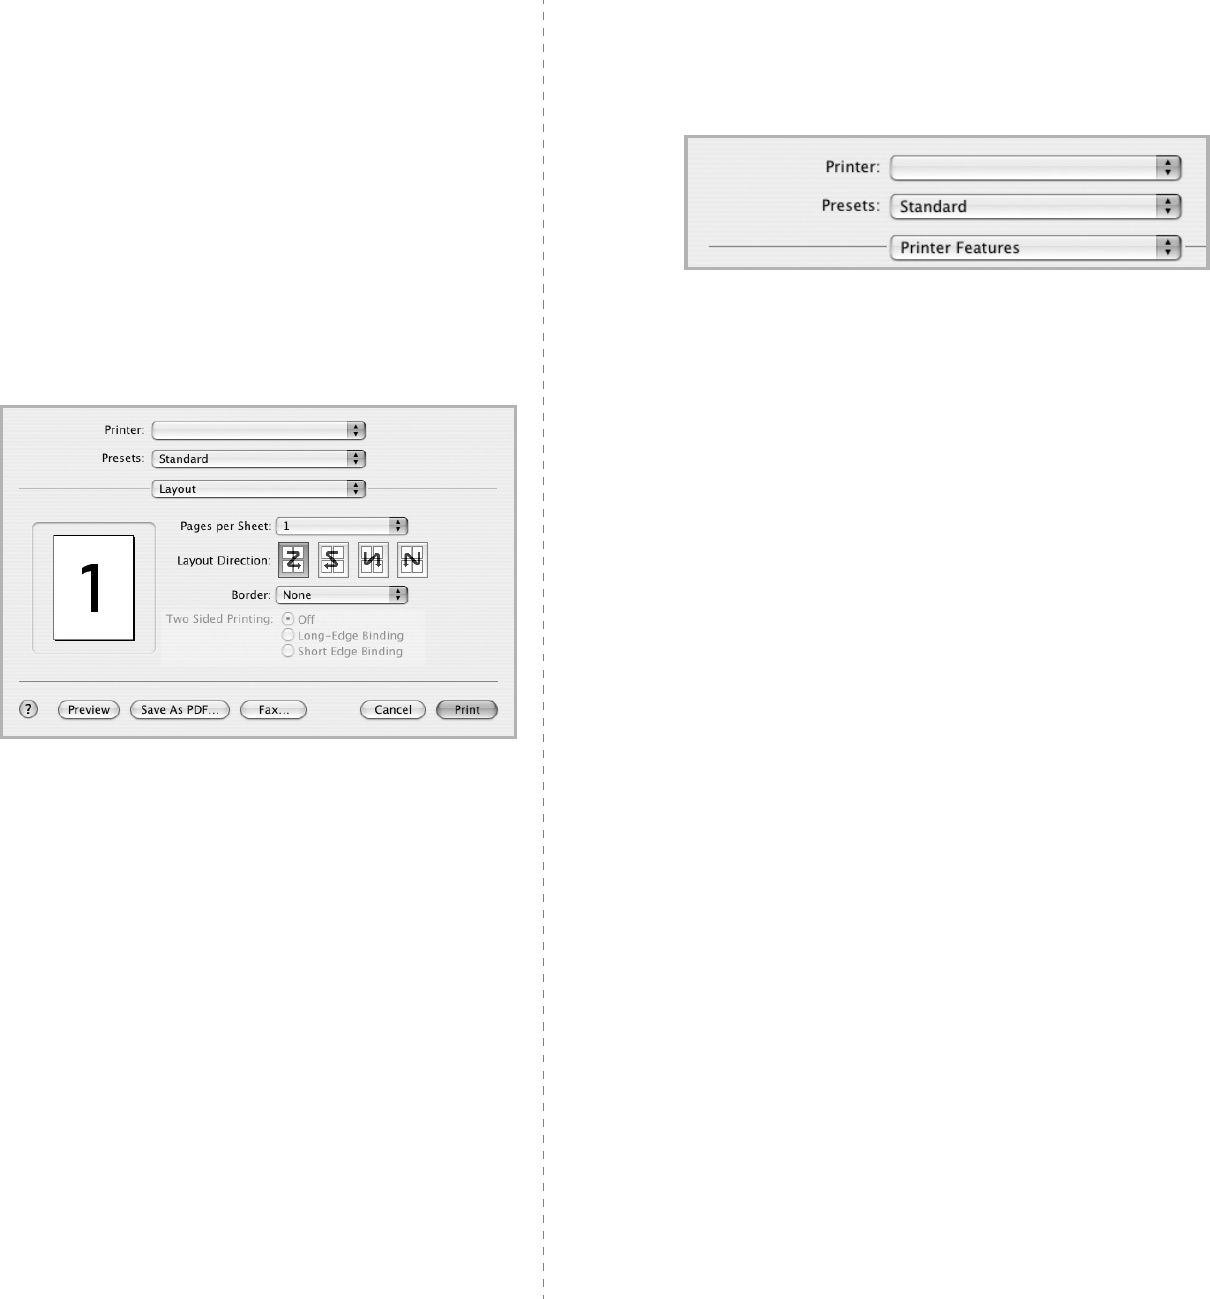
Using Your Printer with a Macintosh
38
Changing Printer Settings
You can use advanced printing features when using your
printer.
From your Macintosh application, select
Print
from the
File
menu. The printer name which appears in the printer properties
window may differ depending on the printer in use. Except for
the name, the composition of the printer properties window is
similar.
Layout Setting
The
Layout
tab provides options to adjust how the document
appears on the printed page. You can print multiple pages on
one sheet of paper.
Select
Layout
from the
Presets
drop-down list to access the
following features. For details, see “Printing Multiple Pages on
One Sheet of Paper” on the next column.
▲
Mac OS 10.3
Printer Features Setting
The
Printer Features
tab provides options for selecting the
paper type and adjusting print quality.
Select
Printer Features
from the
Presets
drop-down list to
access the following features:
Reverse Duplex
Allows you to select general print order compare to duplex print
order.
Image Mode
Image Mode allows the user to enhance printouts. The available
options are Normal and Text Enhance.
Fit to Page
This printer feature allows you to scale your print job to any
selected paper size regardless of the digital document size. This
can be useful when you want to check fine details on a small
document.
Paper Type
Set
Type
to correspond to the paper loaded in the tray from
which you want to print. This will let you get the best quality
printout. If you load a different type of print material, select the
corresponding paper type.
Resolution(Quality)
The Resolution options you can select may vary
depending on your printer model.
You can select the
printing resolution. The higher the setting, the sharper the clarity
of printed characters and graphics. The higher setting also may
increase the time it takes to print a document.
▲
Mac OS 10.3
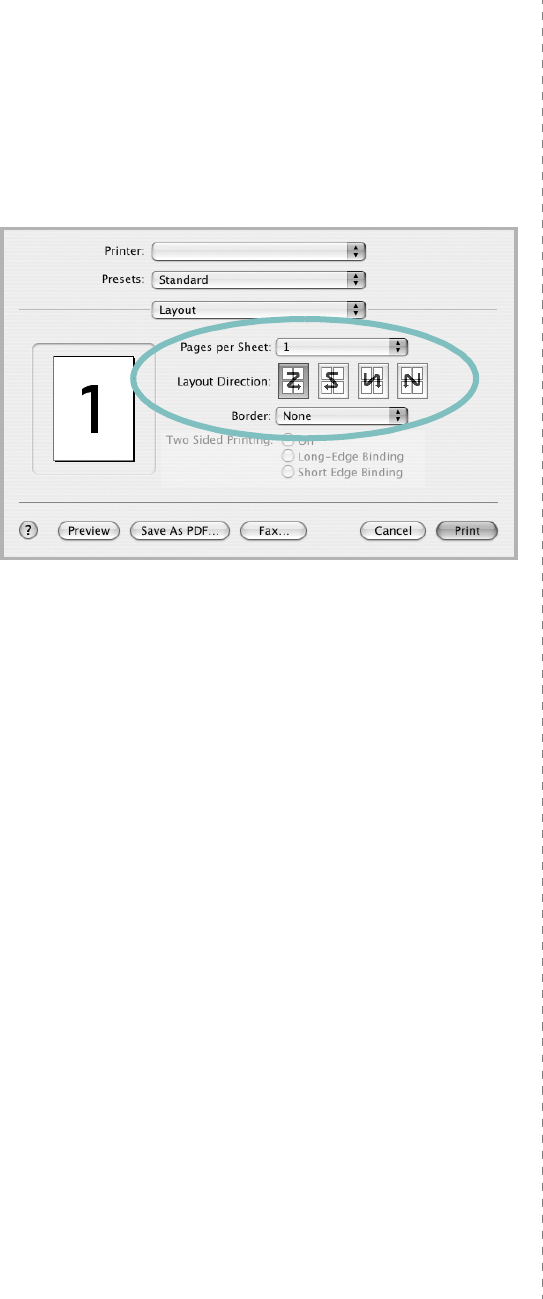
Using Your Printer with a Macintosh
39
Printing Multiple Pages on One Sheet
of Paper
You can print more than one page on a single sheet of paper.
This feature provides a cost-effective way to print draft pages.
1
From your Macintosh application, select
Print
from the
File
menu.
2
Select
Layout
.
3
Select the number of pages you want to print on one sheet
of paper on the
Pages per Sheet
drop-down list.
4
Select the page order from the
Layout Direction
option.
To print a border around each page on the sheet, select
the option you want from the
Border
drop-down list.
5
Click
Print
, and the printer prints the selected number of
pages on one side of each page.
▲
Mac OS 10.3
40
SOFTWARE SECTION
INDEX
A
advanced printing, use
18
B
booklet printing
19
D
document, print
Macintosh
37
Windows
12
double-sided printing
20
E
Extras properties, set
16
F
favorites settings, use
17
G
Graphics properties, set
15
H
help, use
17, 23
I
install
printer driver
Macintosh
35
Windows
4
installing
Linux software
27
L
language, change
10
Layout properties, set
Macintosh
38
Windows
13
Linux
driver, install
27
printer properties
31
printing
31
scanning
32
M
Macintosh
driver
install
35
uninstall
35
printing
37
setting up the printer
36
MFP driver, install
Linux
27
N
n-up printing
Macintosh
39
Windows
18
O
orientation, print
32
Windows
13
overlay
create
22
delete
22
print
22
P
Paper properties, set
14
paper size, set
14
print
32
paper source, set
32
Windows
14
paper type, set
Macintosh
38
print
32
poster, print
19
PostScript driver
installing
23
print
document
12
fit to page
20
from Macintosh
37
from Windows
12
N-up
Macintosh
39
Windows
18
overlay
22
poster
21
scaling
20
watermark
21
print resolution
32
printer driver
install
Macintosh
35
printer driver, install
Linux
27
printer properties
Linux
31
printer properties, set
Macintosh
38
Windows
13, 23
printer resolution, set
Macintosh
38
Windows
15
printer software
install
Windows
4
uninstall
Macintosh
35
Windows
11
printing
booklets
19
double-sided
20
from Linux
31
R
resolution
printing
32
41
S
scanning
Linux
32
setting
darkness
15
favorites
17
image mode
15
resolution
Macintosh
38
Windows
15
toner save
15
true-type option
15
software
install
Macintosh
35
Windows
4
reinstall
Windows
10
system requirements
Macintosh
35
uninstall
Macintosh
35
Windows
11
status monitor, use
25
T
toner save, set
15
U
uninstall, software
Macintosh
35
Windows
11
uninstalling
MFP driver
Linux
28
W
watermark
create
21
delete
21
edit
21
print
21

Rev. 1.00