Samsung Electronics Co ML3310ND Laser Printer User Manual magpie basic english
Samsung Electronics Co Ltd Laser Printer magpie basic english
UserManual.wiki
>
Samsung Electronics Co
>
ML3310ND User Manual
>
Users Manual 1
Contents
1.
Users Manual 1
2.
Users Manual 2
3.
Users Manual 3
Users Manual 1
Navigation menu
Upload a User Manual
Namespaces
Wiki Guide
HTML
PDF
Info
Views
User Manual
Discussion / Help
Navigation

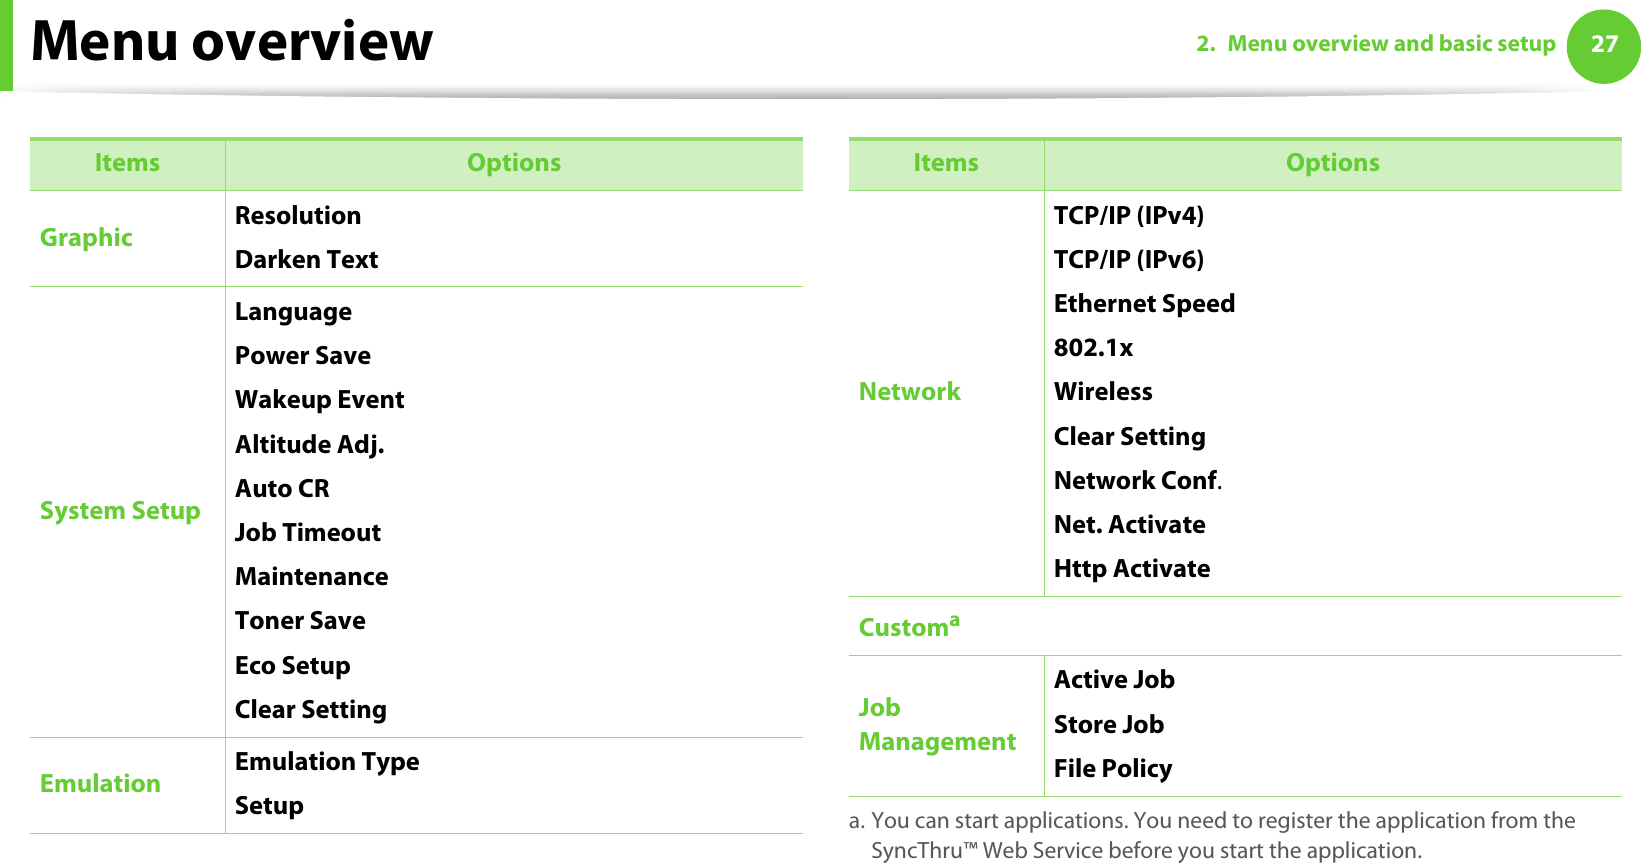
![262. Menu overview and basic setupMenu overview The control panel provides access to various menus to set up the machine or use the machine’s functions. • These menus can be accessed by pressing (Menu) button. Press the arrows until the needed menu item appears and press OK.• An asterisk (*) appears next to the currently selected menu. • Some menus may not appear on the display depending on options or models. If so, it is not applicable to your machine.• For models that do not have the display screen on the control panel, this feature is not applicable.• Some menu names may differ from your machine depending on its options or the models. Items OptionsInformationMenu MapConfigurationSupplies Info.Demo PagePCL FontPS FontEPSON FontUsage CounterAccount ReportLayoutOrientationCommon MarginMP TrayTray XEmulation Mar.DuplexPaperCopiesMP Tray/ [Tray <x>]Paper SourceTray Chaining](https://usermanual.wiki/Samsung-Electronics-Co/ML3310ND.Users-Manual-1/User-Guide-1363915-Page-26.png)