Samsung Electronics Co NX30 Digital Camera User Manual 07 EK GC200
Samsung Electronics Co Ltd Digital Camera 07 EK GC200
UserManual.wiki
>
Samsung Electronics Co
>
NX30 User Manual
User Manual
Navigation menu
Upload a User Manual
Namespaces
Wiki Guide
HTML
PDF
Info
Views
User Manual
Discussion / Help
Navigation
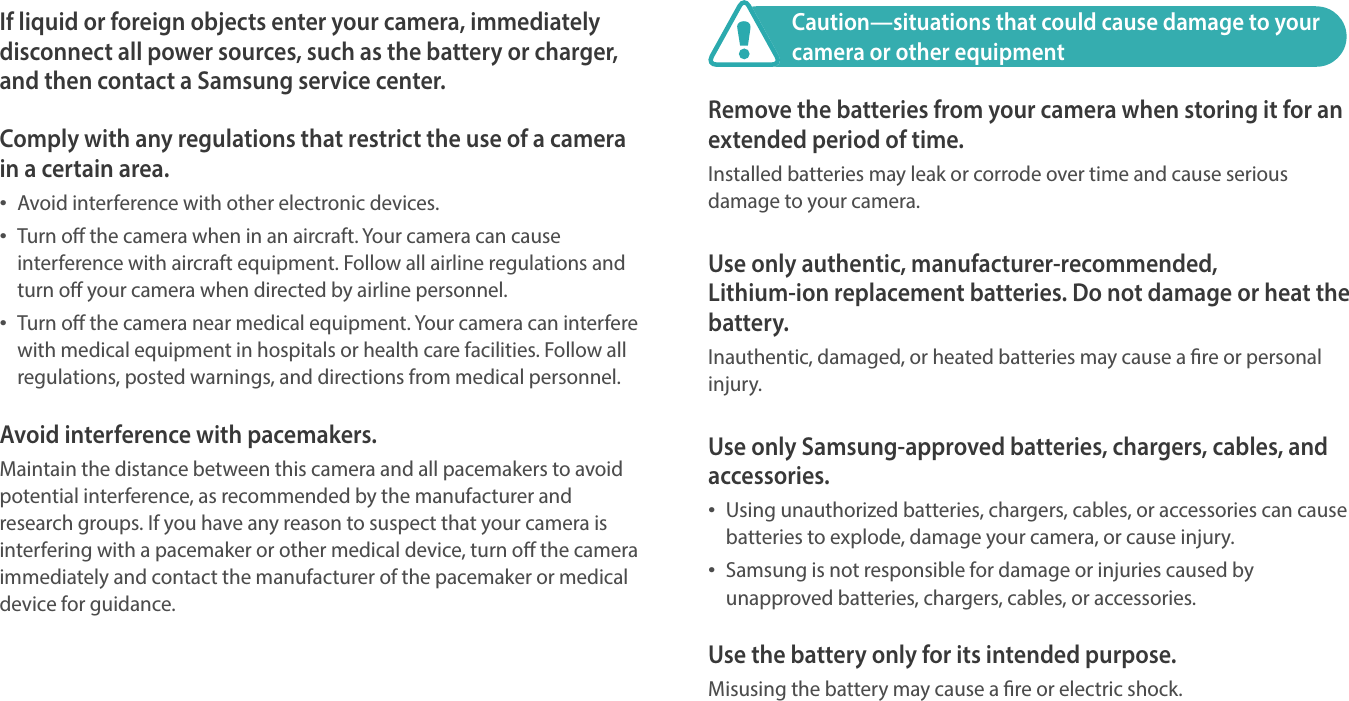
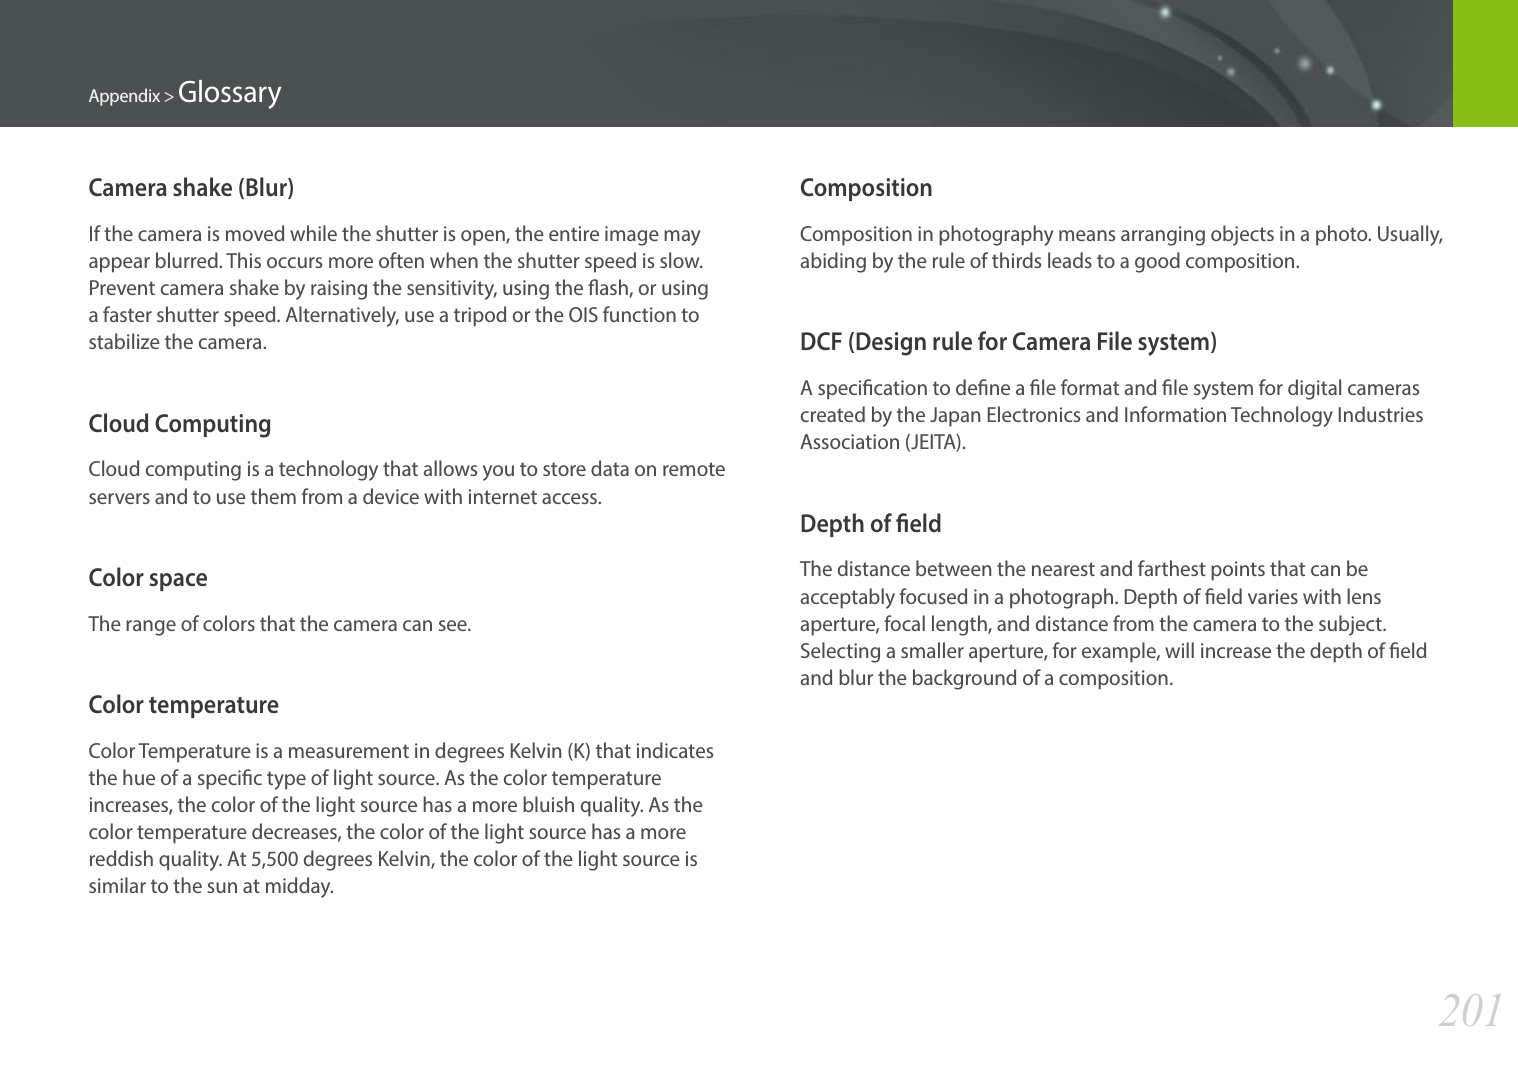
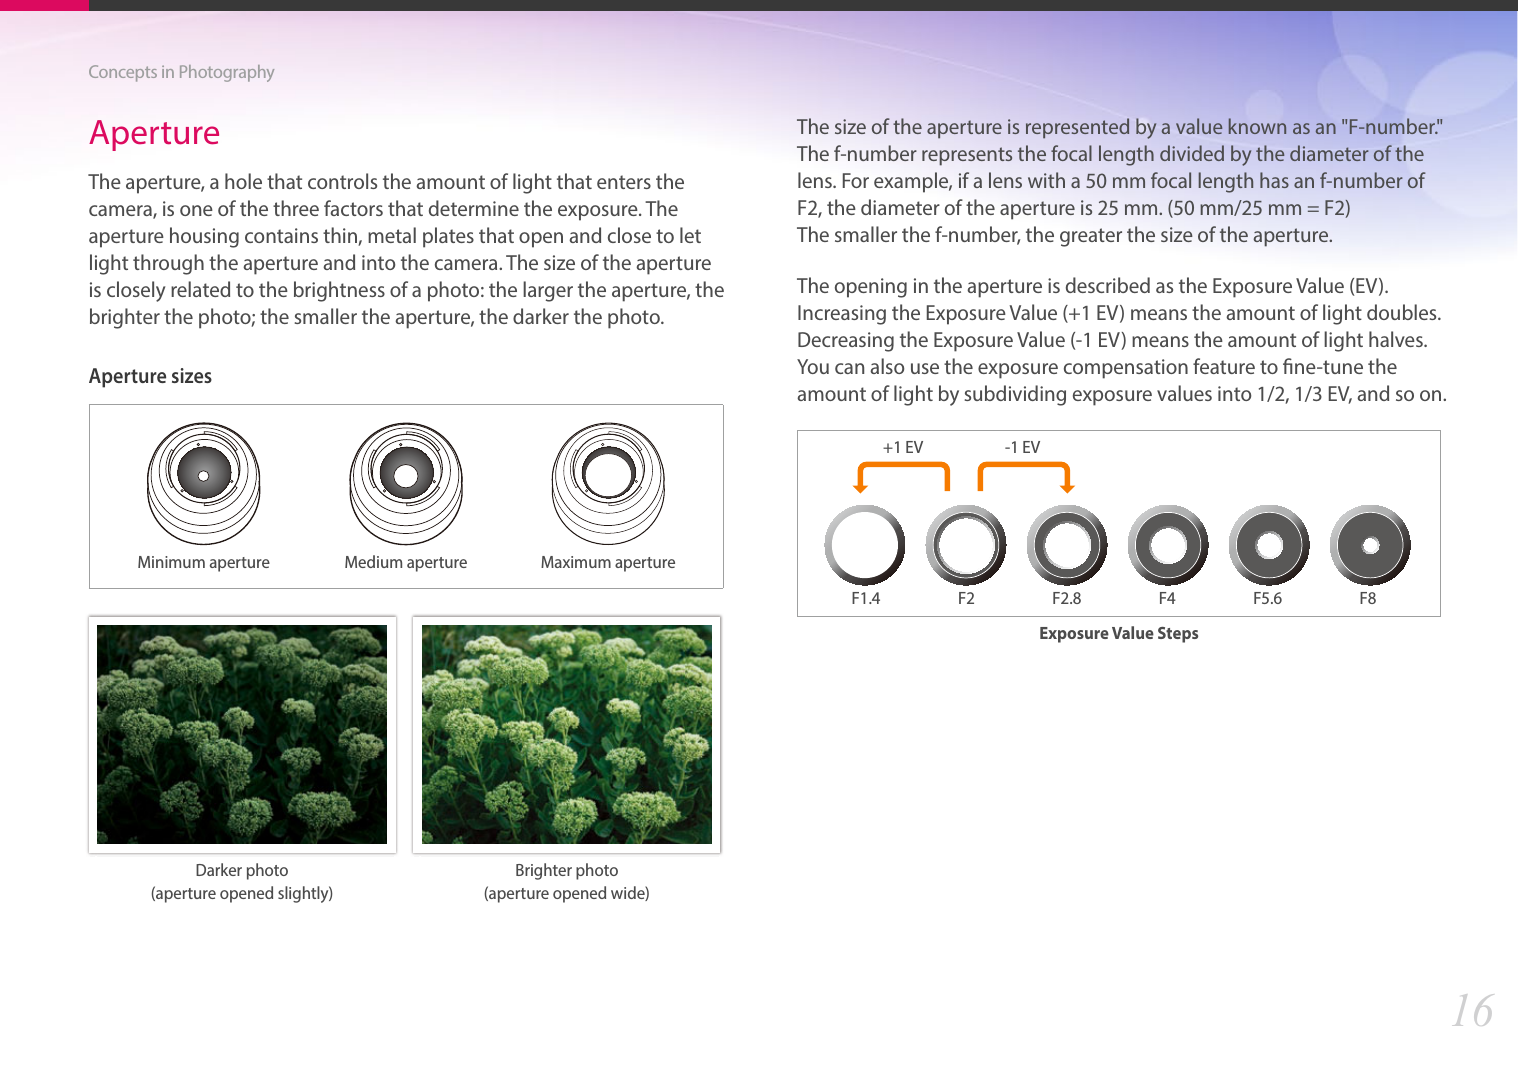
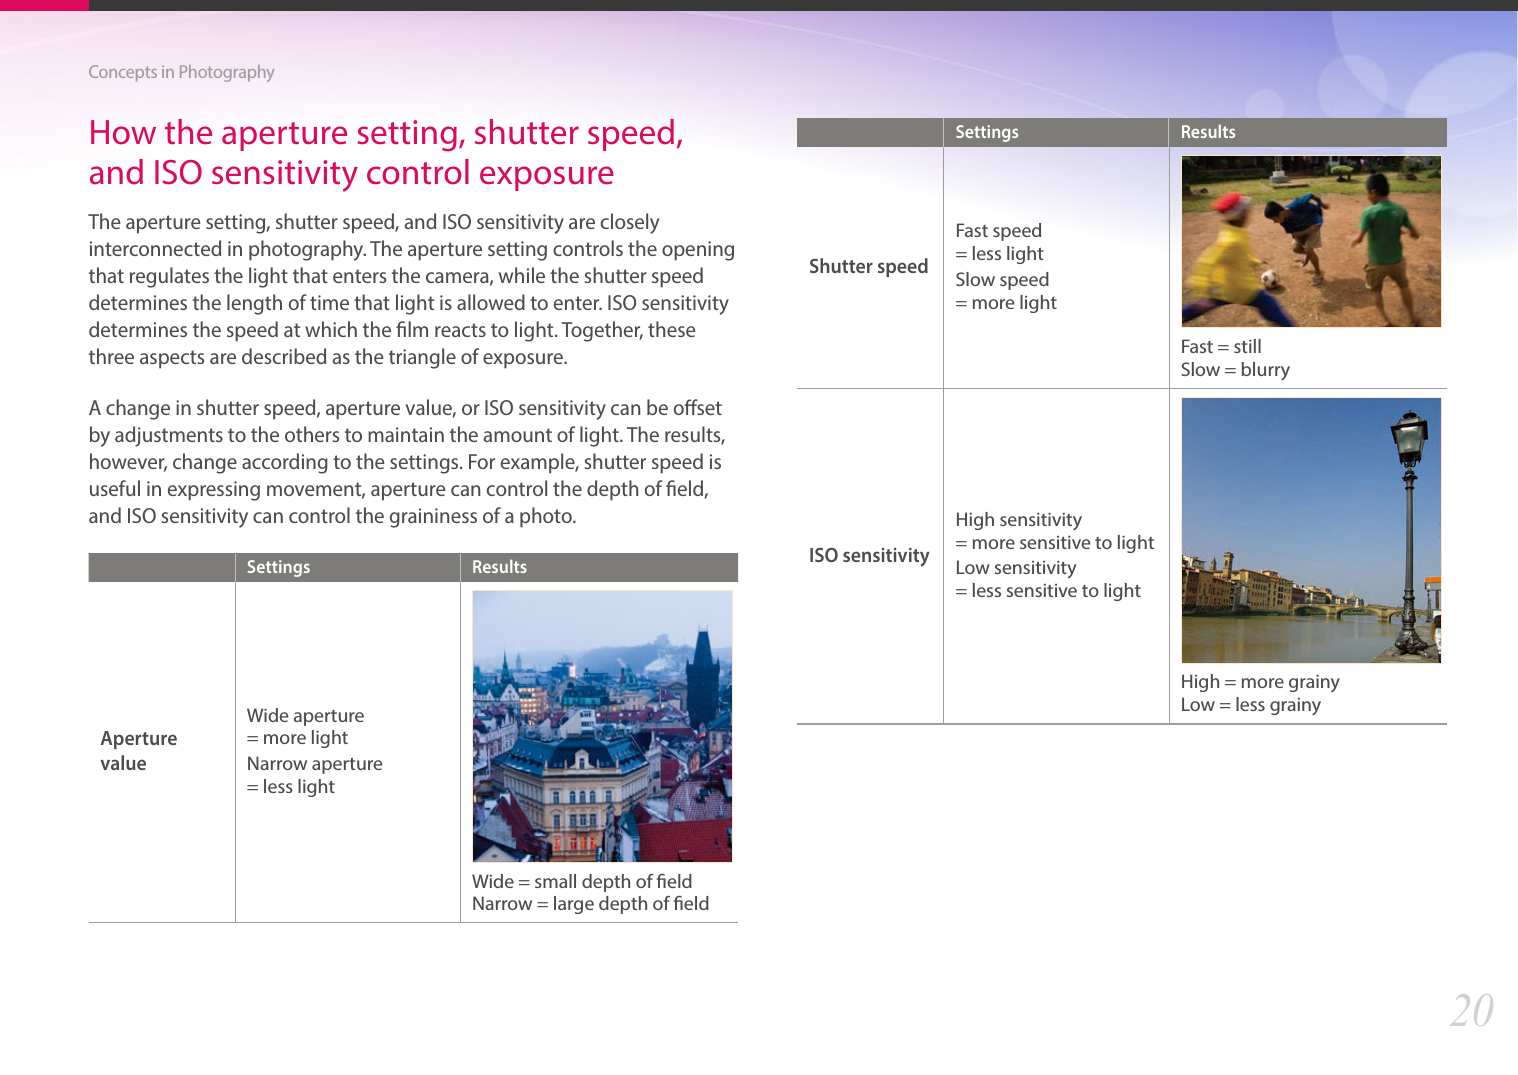
![6Indications used in this manualMode indicationsMode IndicationSmart AutotProgramPAperture PriorityAShutter PrioritySManualMCustom1 TCustom2 ULens PriorityiSmartsWireless NetworkBIcons used in this manualIcon FunctionAdditional informationSafety warnings and precautions[ ]Camera buttons. For example, [Shutter] represents the shutter button.( )Page number of related informationĺThe order of options or menus you must select to perform a step; for example: Select b ĺ Quality (represents select b, and then Quality). *Annotation](https://usermanual.wiki/Samsung-Electronics-Co/NX30/User-Guide-2157335-Page-7.png)
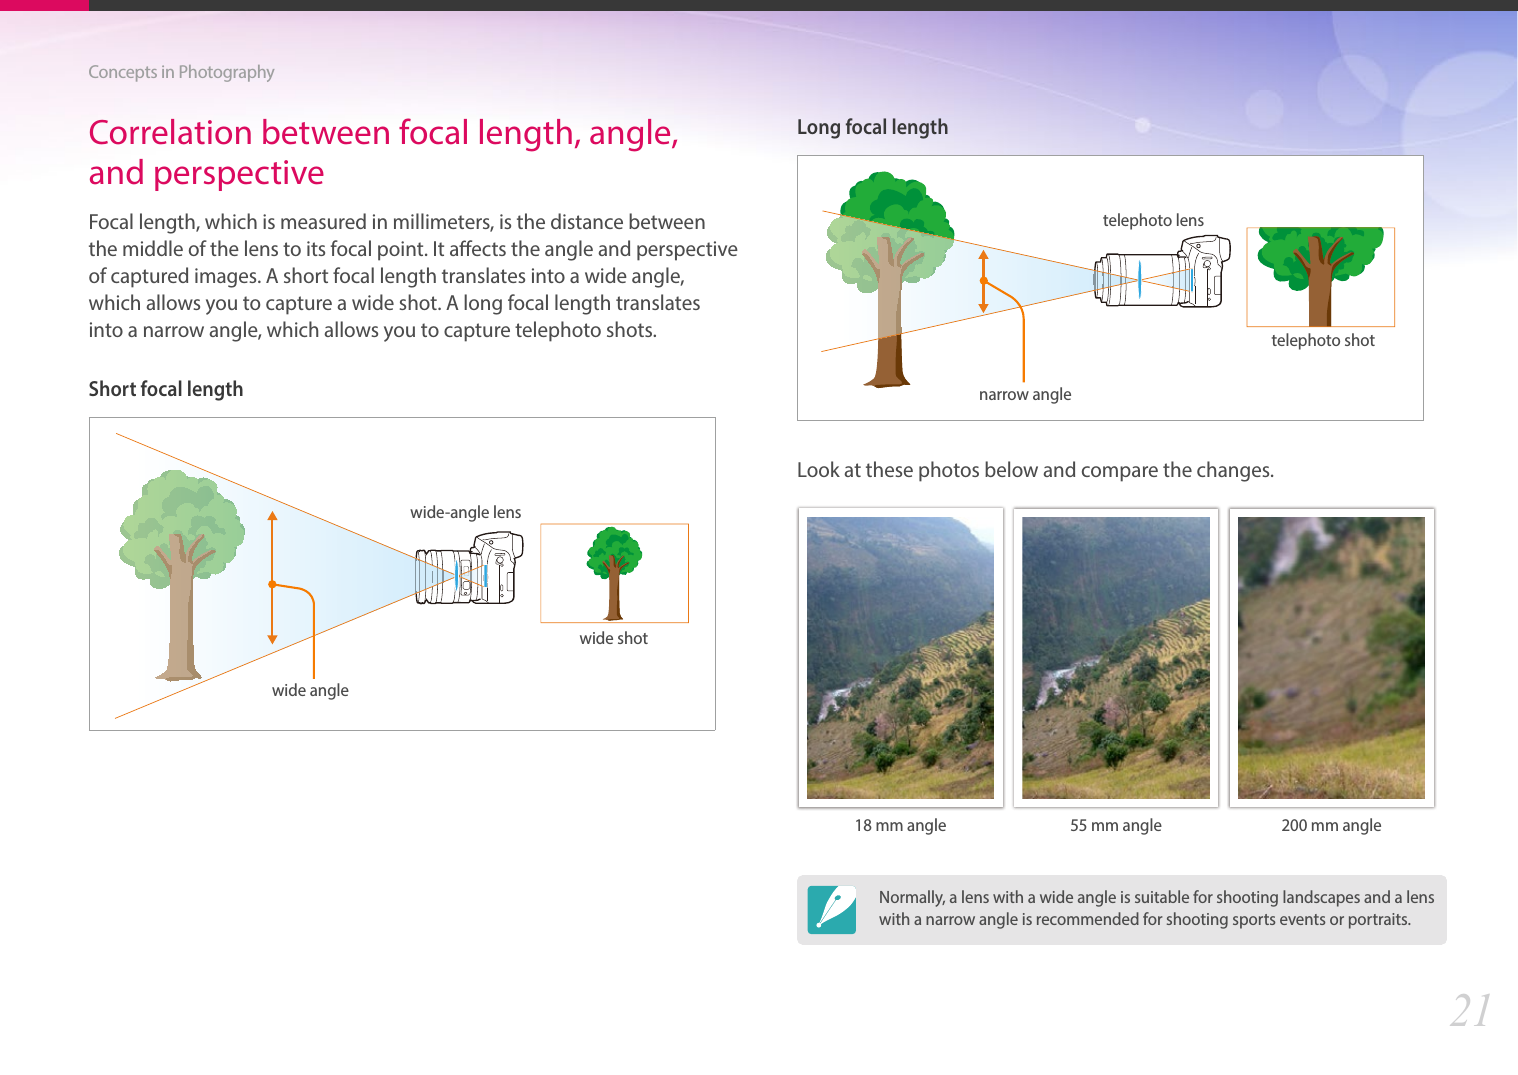
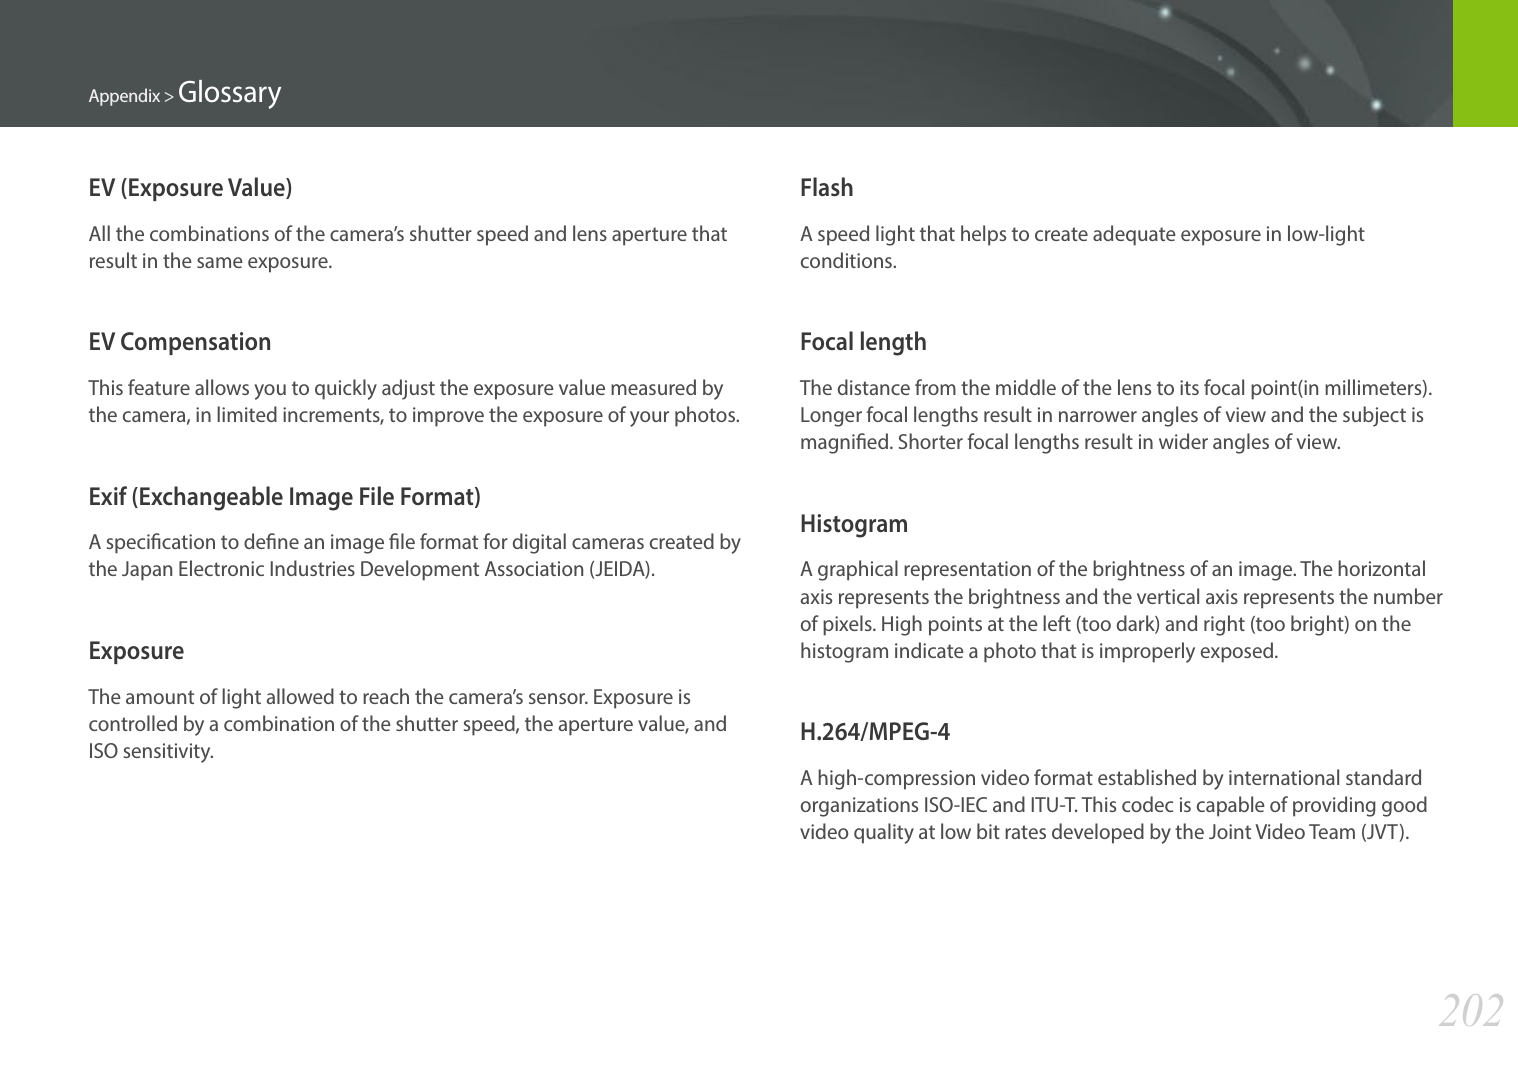
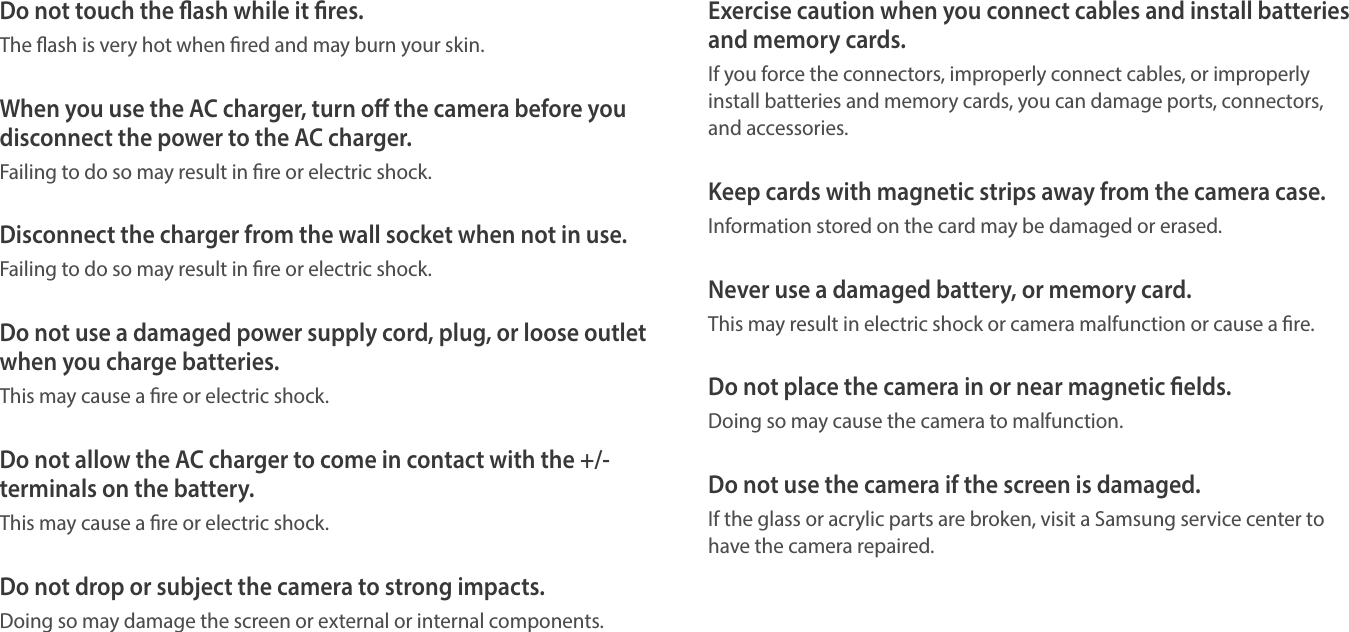
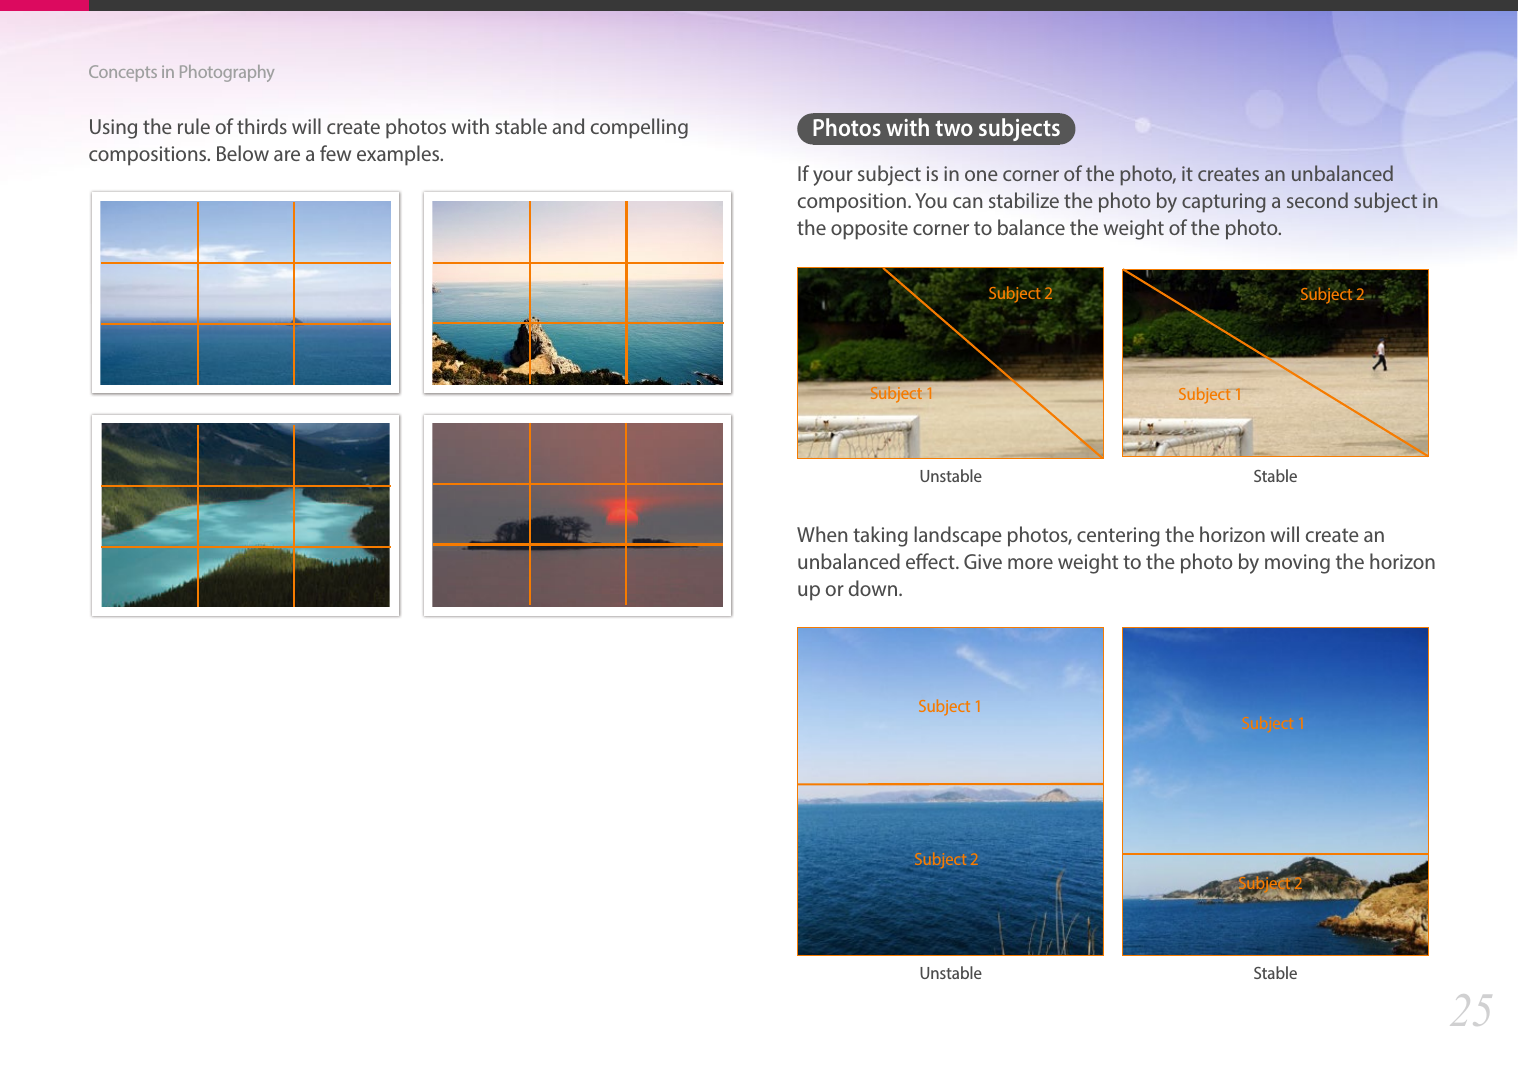
![24Concepts in PhotographyDOF previewYou can press [Depth preview] to get an idea of what your shot will look like before shooting. The camera adjusts the aperture to the predened settings and shows the results on the screen. Set the function of the Depth preview button to Optical Preview. (p. 161)CompositionIt is fun to capture a photo of the beauty of world with a camera. No matter how the world is beautiful, however, a poor composition cannot capture the beauty of it.When it comes to composition, it is very important to prioritize subjects. Composition in photography means arranging objects in a photo. Usually, abiding by the rule of thirds leads to a good composition.Rule of ThirdsTo use the rule of thirds, divide the image into a 3x3 pattern of equal rectangles.To compose photos that best emphasize the subject, make sure the subject is located at one of the corners of the center rectangle.](https://usermanual.wiki/Samsung-Electronics-Co/NX30/User-Guide-2157335-Page-25.png)

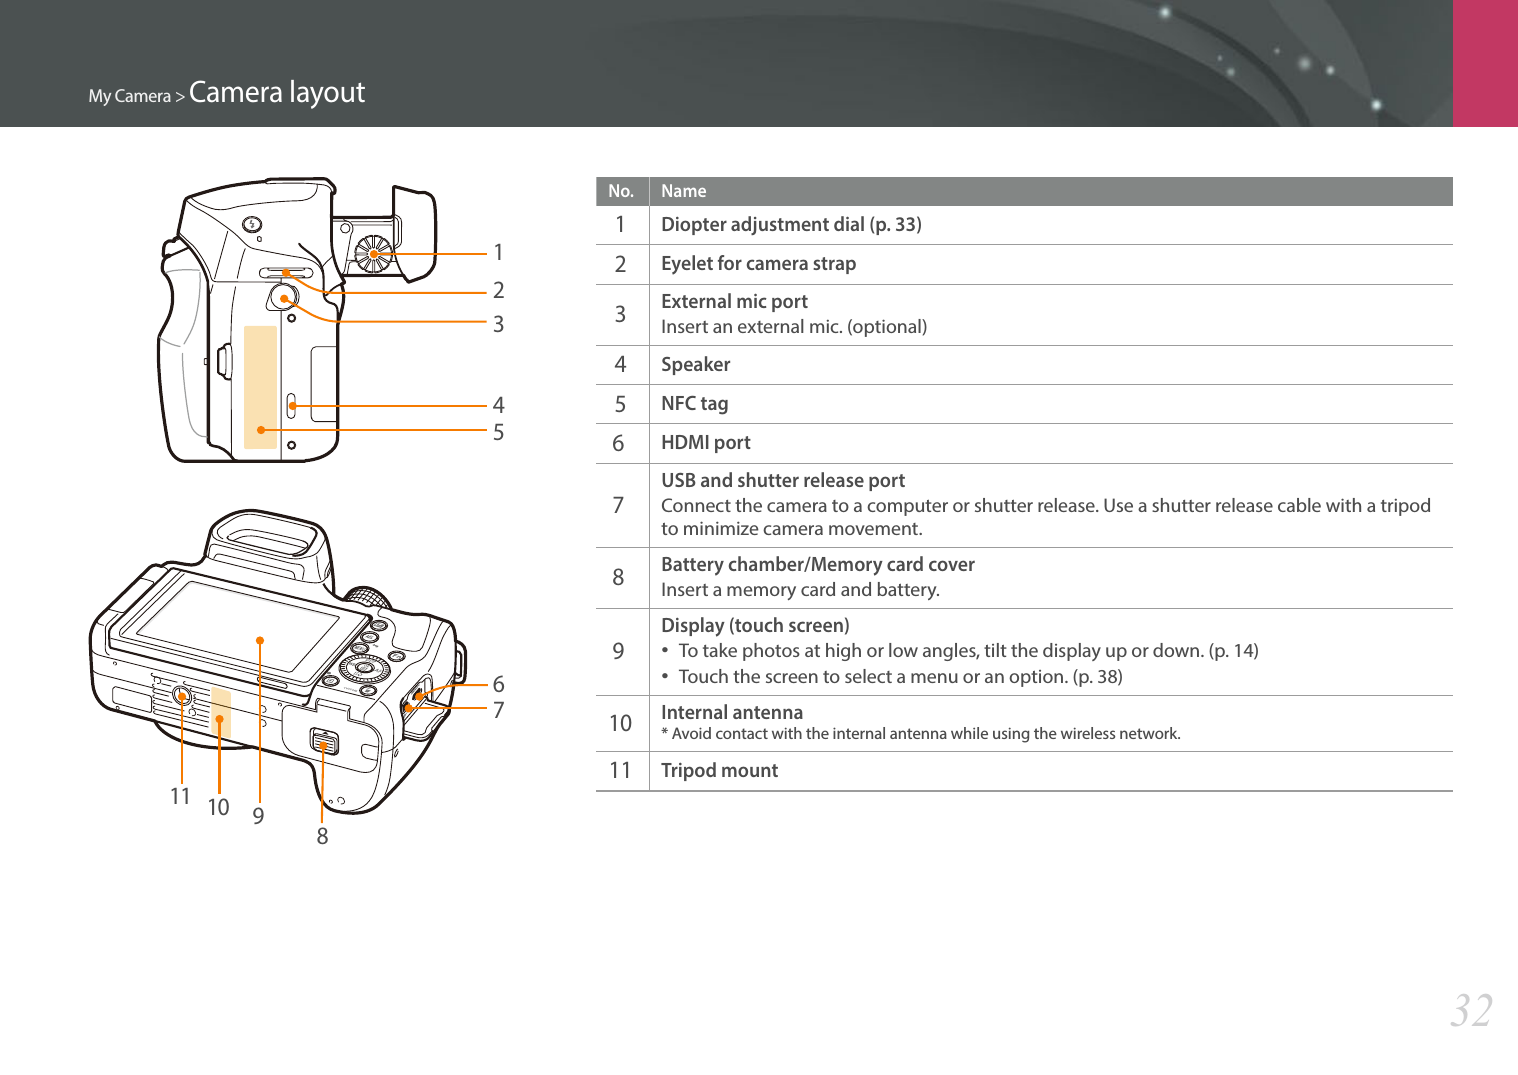
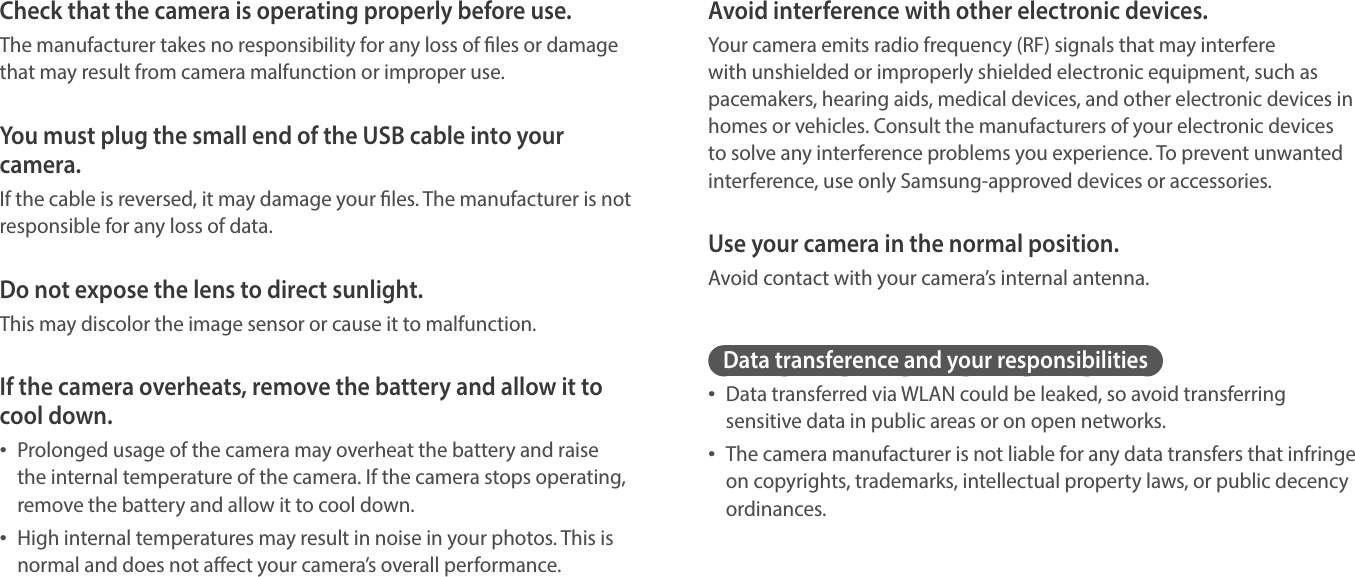
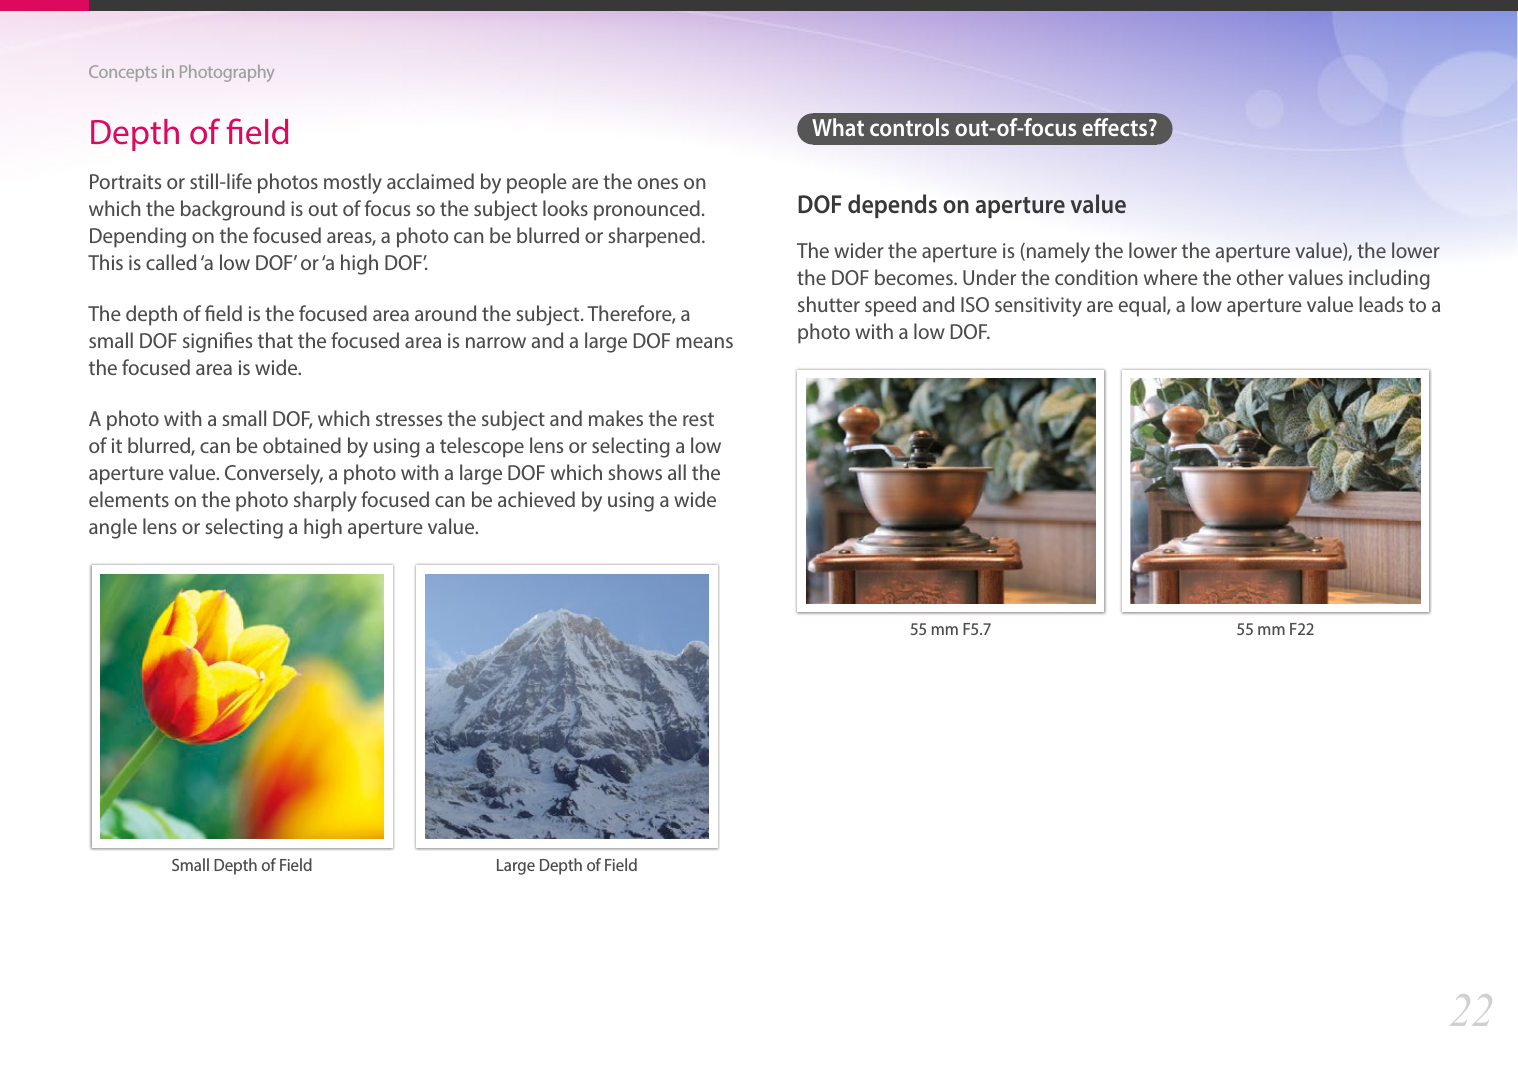
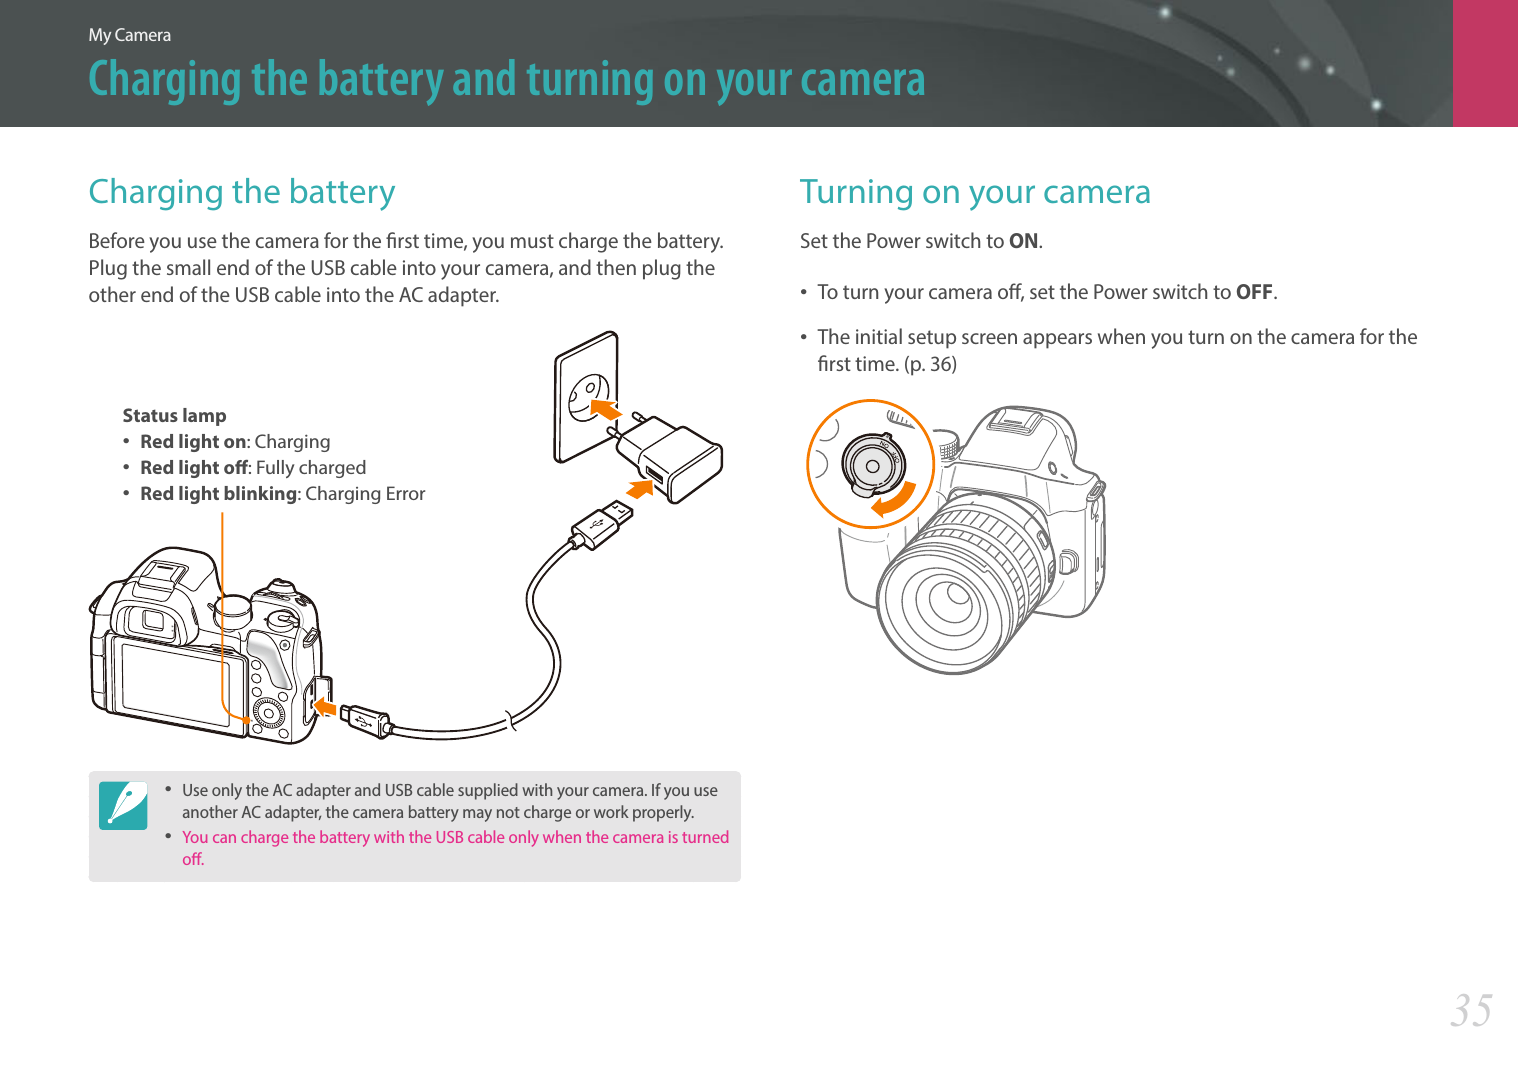
![My Camera > Camera layout33Adjusting the viewnder angle and the diopterAdjust the angle of the viewnder to take photos at low angles. Pull out the viewnder gently(➊) and tilt it to adjust the angle(➋).The diopter adjustment dial is accessible when you pull out the viewnder. If the image is not clear through the viewnder, rotate the diopter adjustment dial to improve the image.Using the DIRECT LINK buttonYou can turn on the Wi-Fi feature conveniently by pressing [DIRECT LINK]. Press [DIRECT LINK] again to return to the previous mode.Setting the DIRECT LINK buttonYou can select a Wi-Fi function to launch when you press [DIRECT LINK]. (p. 161)To set a DIRECT LINK option, In Shooting mode, press [m] ĺ d ĺ Key Mapping ĺDIRECT LINKĺ an option.](https://usermanual.wiki/Samsung-Electronics-Co/NX30/User-Guide-2157335-Page-34.png)
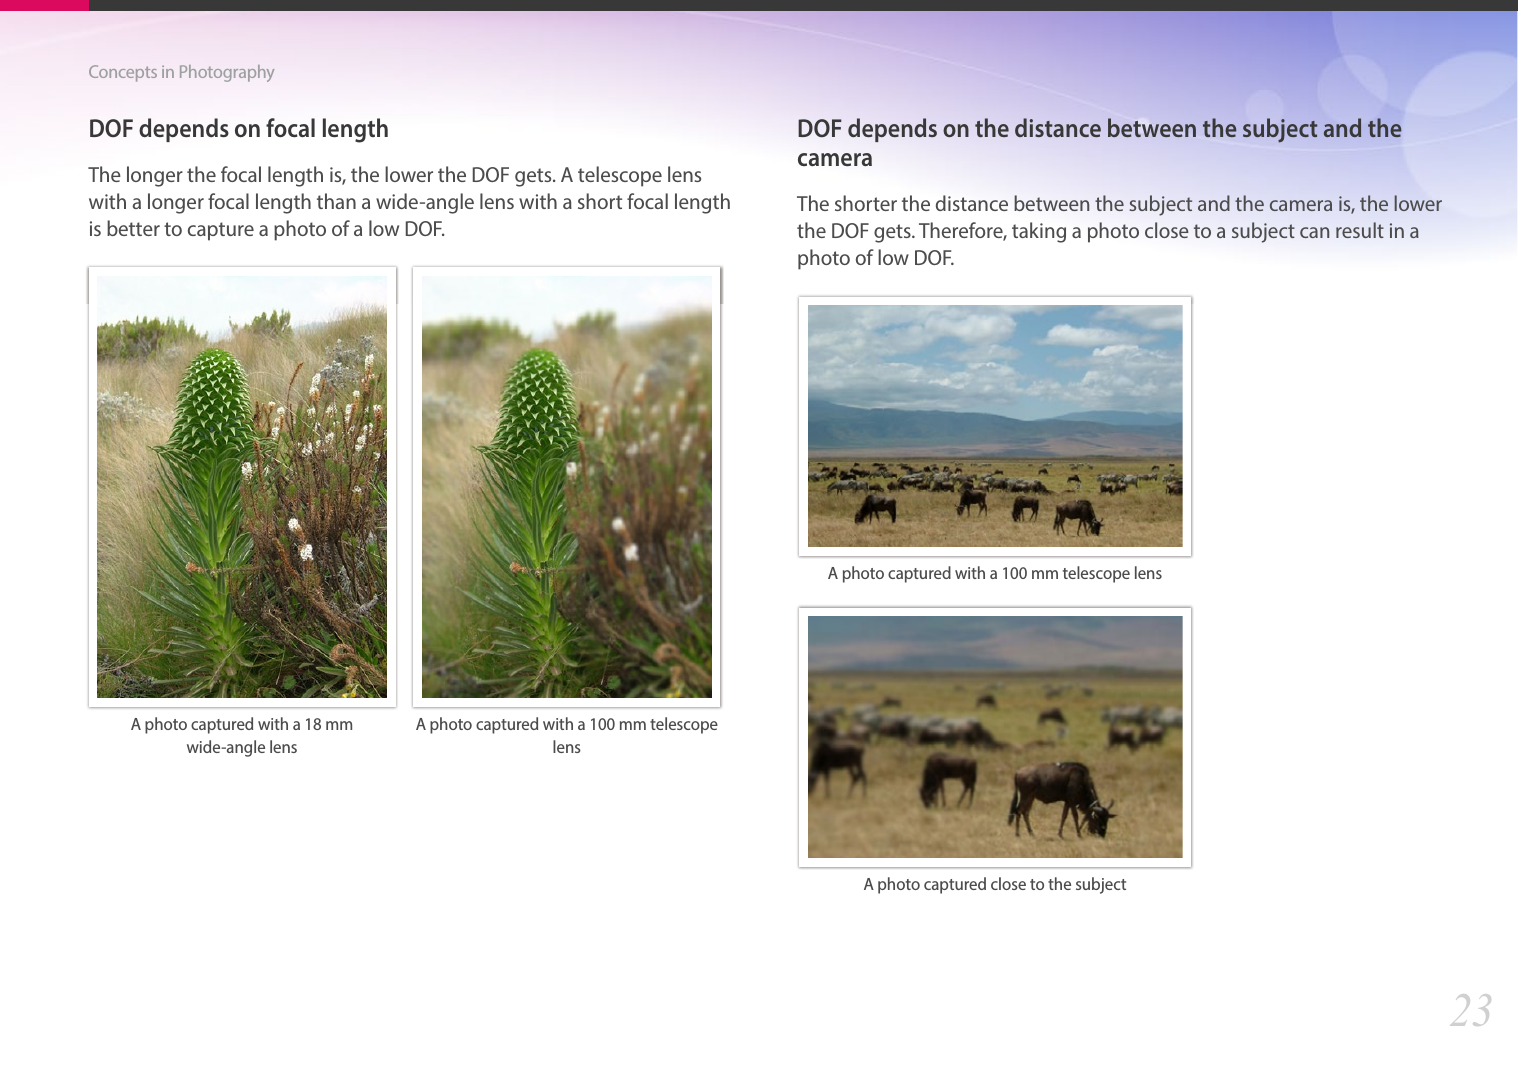
![My Camera36Performing the initial setupWhen you turn on your camera for the rst time, the initial setup screen appears. The language is preset for the country or region where the camera is sold. You can change the language as desired. You can also select an item by touching it on the screen.1 Press [I] to select Time Zone, and then press [o].2 Press [D/I] to select a time zone, and then press [o].Back SetTime Zone[GMT +00:00] London[GMT -01:00] Cape Verde[GMT -02:00] Mid-Atlantic[GMT -03:00] Buenos Aires, Sao Paulo[GMT -03:30] Newfoundland 3 Press [I] to select Date Settings, and then press [o].4 Press [C/F] to select an item (Year/Month/Day).5 Press [D/I] to set the option, and then press [o].Back SetYearMonth DaySet date• The screen may dier depending on the language selected. 6 Press [I] to select Time Settings, and then press [o].7 Press [C/F] to select an item (Hr/Min/DST). 8 Press [D/I] to set the option, and then press [o].BackSet timeSetDSTHr Min](https://usermanual.wiki/Samsung-Electronics-Co/NX30/User-Guide-2157335-Page-37.png)
![37My Camera > Performing the initial setup9 Press [I] to select Date Type, and then press [o].10 Press [D/I] to select a date type, and then press [o].Back SetLanguageTime ZoneDate SettingsTime SettingsDate TypeDate TypeYYYY/MM/DDMM/DD/YYYYDD/MM/YYYYLondonEnglish11 Press [I] to select Time Type, and then press [o].12 Press [D/I] to select a time type, and then press [o].Back SetLondon2014/01/0110:00 AMTime ZoneDate SettingsTime SettingsDate TypeTime TypeTime Type12H24H13 Press [m] to nish the initial setup.](https://usermanual.wiki/Samsung-Electronics-Co/NX30/User-Guide-2157335-Page-38.png)
![My Camera38Selecting functions (options)Selecting with buttonsScroll the jog dial or rotate the navigation button or press [D/I/C/F] to move, and then press [o] to select an option.Selecting by touchDo not use sharp objects, such as pens or pencils, to touch the screen. You can damage the screen.Dragging: Touch and hold an area on the screen, and then drag your nger.Touching: Touch an icon to select a menu or an option.Flicking: Gently ick your nger across the screen.](https://usermanual.wiki/Samsung-Electronics-Co/NX30/User-Guide-2157335-Page-39.png)
![My Camera > Selecting functions (options)39• When you touch or drag the screen, discolorations may occur. This is not a malfunction, but a characteristic of the touch screen. Touch or drag lightly to minimize the discolorations.• The touch screen may not work properly if you use the camera in extremely humid environments.• The touch screen may not work properly if you apply screen protection lm or other accessories to the screen.• Depending on the viewing angle, the screen may appear dim. Adjust the brightness or viewing angle to improve the resolution.Using mPress [m] or touch on the screen, and then change shooting options or settings.E.g. Selecting the photo size in P mode1 Rotate the mode dial to P.2 Press [m] or touch .3 Scroll the jog dial or rotate the navigation button or press [D/I] to move to b, and then press [o].• You can also touch b on the screen.4 Scroll the jog dial or rotate the navigation button or press [D/I] to move to Photo Size, and then press [o].• You can also drag the option list, and then touch an option.Back SelectAutoSharePhoto SizeQualityISOMinimum Shutter Speed O](https://usermanual.wiki/Samsung-Electronics-Co/NX30/User-Guide-2157335-Page-40.png)
![My Camera > Selecting functions (options)405 Scroll the jog dial or rotate the navigation button or press [D/I] to move to an option, and then press [o].• You can also drag the option list, and then touch an option.• Press [m] or touch Back to go back to the previous menu.Back SetAutoSharePhoto SizeQualityISOMinimum Shutter Speed(3:2) (5472x3648) (3:2) (3888x2592) (3:2) (2976x1984) (3:2) (1728x1152) (16:9) (5472x3080)Photo Size6 Press [m] or touch Back to switch to Shooting mode.Using the Smart panelPress [f] or touch on the screen to access some functions such as Exposure, ISO, and White Balance.E.g. Adjust the exposure value in P mode1 Rotate the mode dial to P.2 Press [f] or touch .](https://usermanual.wiki/Samsung-Electronics-Co/NX30/User-Guide-2157335-Page-41.png)
![My Camera > Selecting functions (options)413 Rotate the navigation button or press [D/I/C/F] to move to EV, and then press [o]. • You can directly select an option by scrolling the jog dial without having to press [o].• You can also select an option by touching it.EV : 0.0AdjustBackYou can adjust some options by dragging them. 4 Scroll the jog dial or rotate the navigation button or press [C/F] to adjust the exposure value, and then press [o].• You can also drag the dial on the screen, and then touch Set to adjust the option.EV : 0.0Back Set](https://usermanual.wiki/Samsung-Electronics-Co/NX30/User-Guide-2157335-Page-42.png)

![My Camera > Display icons45Changing the information displayedPress [D] repeatedly to change the display type.Mode Display typeShooting• Basic shooting information (Shooting mode, Shutter speed, Aperture value, Exposure value, ISO sensitivity, etc.)• Basic shooting information + Shooting option buttons (MENU, Fn, AutoShare, Touch AF) + Level gauge• Basic shooting information + Shooting option buttons + Current shooting options information (Photo size, Drive mode, Flash, Metering, AF mode, etc.)• Basic shooting information + Shooting option buttons + Current shooting options information + Histogram + Date and timePlayback• Basic information• Display all information about the current le.• Display all information about the current le including RGB histogram.Viewing the notication panelTouch at the top of the display to open the notication panel bar. Drag the bar downward to open the notication panel. You can adjust the display brightness or view battery life and data storage information. You can also view photo size and quality, exposure value, and ISO sensitivity. Drag the notication panel upward to close it.AutoStorage Space10 SheetBattery levelNoticationsDrive Photo Size EVQuick Panel](https://usermanual.wiki/Samsung-Electronics-Co/NX30/User-Guide-2157335-Page-46.png)
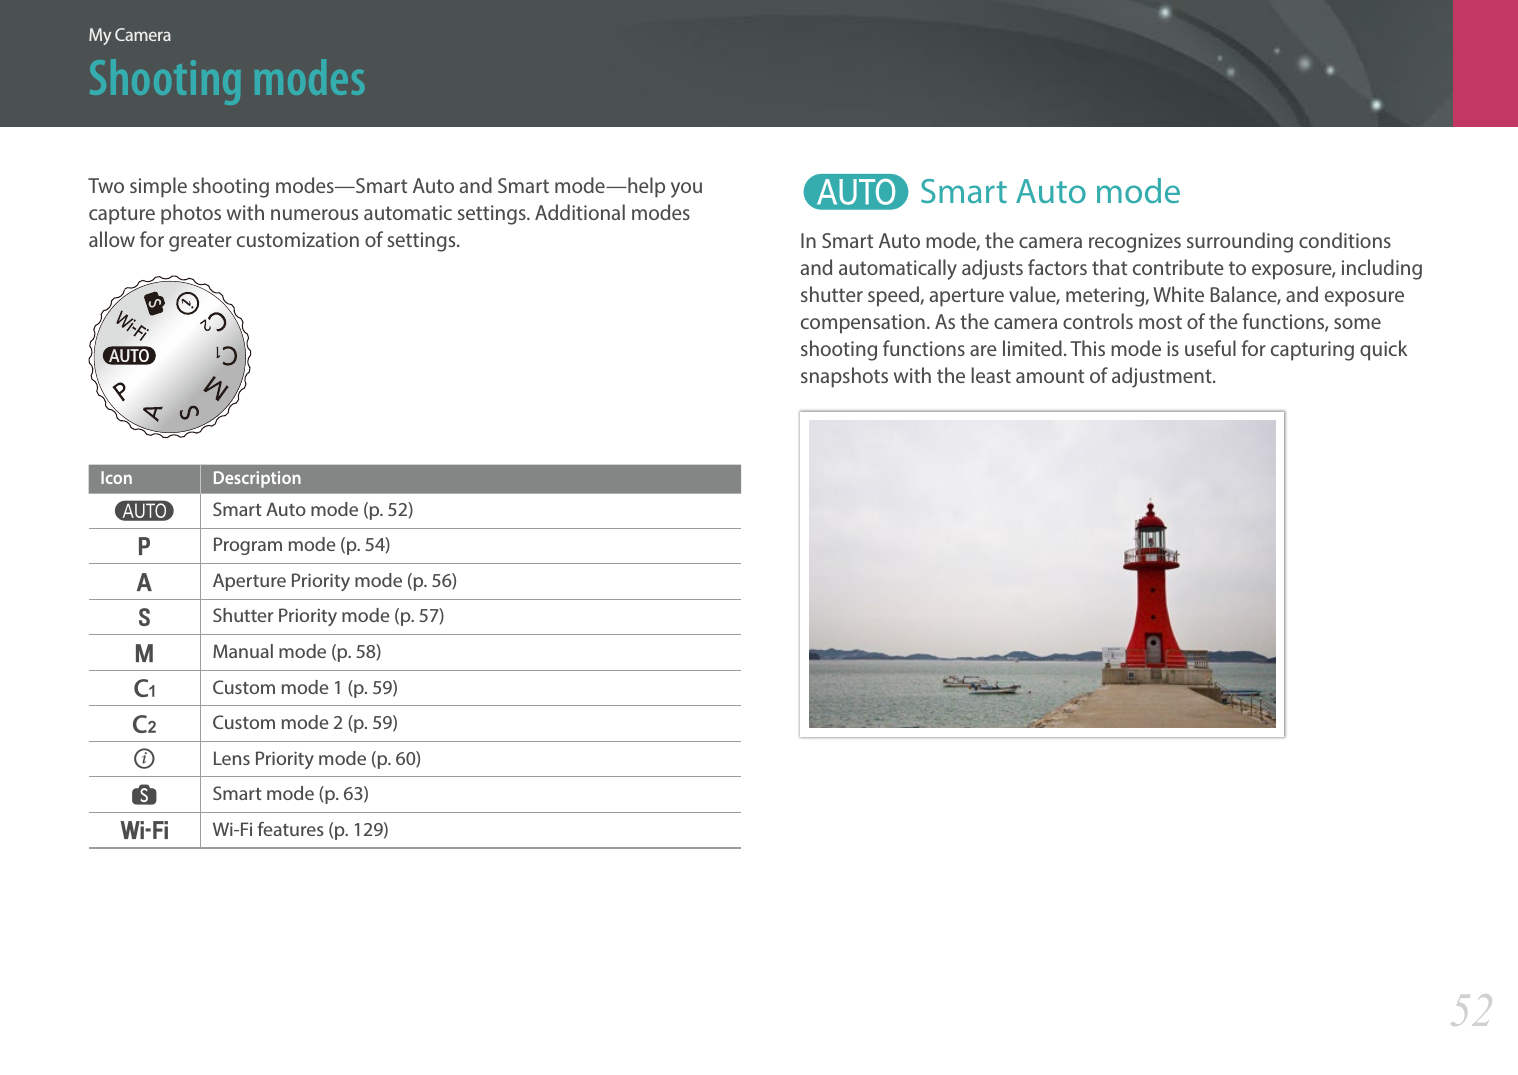
![My Camera > Shooting modes531 Rotate the mode dial to t.2 Align your subject in the frame.3 Half-press [Shutter] to focus.• The camera selects a scene. An appropriate scene icon appears at the screen.ARecognizable scenesIcon DescriptionLandscapesScenes with bright white backgroundsLandscapes at nightPortraits at nightIcon DescriptionLandscapes with backlightingPortraits with backlightingPortraitsClose-up photos of objectsClose-up photos of textSunsetsIndoors, darkPartially litClose-up with spot lightingPortraits with spot lightingBlue skiesForested areas typically consist of green-colored subjectsClose-up photos of colorful subjectsCamera is stabilized on a tripod and the subject is not moving for a certain period of time. (when shooting in the dark)Actively moving subjectsFireworks (when using a tripod)4 Press [Shutter] to capture the photo.](https://usermanual.wiki/Samsung-Electronics-Co/NX30/User-Guide-2157335-Page-54.png)
![My Camera > Shooting modes54• The camera may detect dierent scenes, even the same subjects, depending on external factors such as camera shake, lighting, or distance to the subject.• If the camera does not recognize an appropriate scene mode, it uses the default settings for the Smart Auto mode.• Even if it detects a face, the camera may not select a portrait mode depending on the subject's position or lighting.• Even if you use a tripod, the camera may not detect the tripod mode ( ) if the subject is moving.• The camera consumes more battery power, because it changes settings often to select appropriate scenes.P Program modeThe camera automatically adjusts shutter speed and aperture value so that an optimal exposure value can be achieved.This mode is useful when you want to capture shots of constant exposure while being able to adjust other settings.1 Rotate the mode dial to P.2 Set the desired options. 3 Half-press [Shutter] to focus, and then press [Shutter] to capture the photo.](https://usermanual.wiki/Samsung-Electronics-Co/NX30/User-Guide-2157335-Page-55.png)
![My Camera > Shooting modes55Program ShiftProgram Shift function lets you adjust the shutter speed and aperture value while the camera maintains the same exposure. When you scroll the jog dial to the left or rotate the navigation button counter-clockwise, the shutter speed decreases and the aperture value increases. When you scroll the jog dial to the right or rotate the navigation button clockwise, the shutter speed increases and the aperture value decreases.Minimum shutter speedSet the shutter speed not to be slower than the selected speed. However, if an optimal exposure value cannot be achieved because the ISO sensitivity reached the maximum ISO value that is set by Auto ISO Range, shutter speed may be slower than the selected minimum shutter speed.To set the minimum shutter speed, In Shooting mode, press [m] ĺ b ĺ Minimum Shutter Speed ĺ an option.• This feature is available only when the ISO sensitivity is set to Auto.• This feature is available only in Program or Aperture Priority mode.](https://usermanual.wiki/Samsung-Electronics-Co/NX30/User-Guide-2157335-Page-56.png)
![My Camera > Shooting modes56A Aperture Priority modeIn Aperture Priority mode, the camera automatically calculates shutter speed according to the aperture value you choose. You can adjust the depth of eld (DOF) by changing the aperture value. This mode is useful for taking portraits, owers, or landscape shots. Large Depth of Field Small Depth of Field1 Rotate the mode dial to A.2 Scroll the jog dial or rotate the navigation button to adjust the aperture value. • You can also adjust the aperture value by pressing [f], moving to the aperture value, and then scrolling the jog dial or dragging the screen. 3 Set the desired options. 4 Half-press [Shutter] to focus, and then press [Shutter] to capture the photo.• In low-light settings, you may need to increase the ISO sensitivity to prevent blurred photos.• To set the minimum shutter speed, in Shooting mode, press [m] ĺ b ĺ Minimum Shutter Speed ĺ an option.](https://usermanual.wiki/Samsung-Electronics-Co/NX30/User-Guide-2157335-Page-57.png)
![My Camera > Shooting modes57S Shutter Priority modeIn Shutter Priority mode, the camera automatically adjusts the aperture value according to the shutter speed you choose. This mode is useful for capturing photos of fast-moving subjects or for creating tracer eects in a photo.For example, set the shutter speed to over 1/500 s to freeze the subject. To make the subject appear blurred set the shutter speed to below 1/30 s.Slow shutter speed Fast shutter speed1 Rotate the mode dial to S.2 Scroll the jog dial or rotate the navigation button to adjust the shutter speed.• You can also adjust the shutter speed by pressing [f], moving to the shutter speed, and then scrolling the jog dial or dragging the screen.3 Set the desired options. 4 Half-press [Shutter] to focus, and then press [Shutter] to capture the photo.In order to compensate for the reduced amount of light allowed by fast shutter speeds, open the aperture and let in more light. If your photos are still too dark, increase the ISO value.](https://usermanual.wiki/Samsung-Electronics-Co/NX30/User-Guide-2157335-Page-58.png)
![My Camera > Shooting modes58M Manual modeManual mode lets you adjust the shutter speed and aperture value manually. In this mode, you can fully control the exposure of your photos.This mode is useful in controlled shooting environments, such as a studio, or when it is necessary to ne-tune camera settings. The Manual mode is also recommended for shooting night scenes or reworks.1 Rotate the mode dial to M.2 Scroll the jog dial to adjust the shutter speed.3 Rotate the navigation button to adjust the aperture value. • You can also adjust the shutter speed or the aperture value by pressing [f], moving to the shutter speed or the aperture value, and then scrolling the jog dial or dragging the screen.4 Set the desired options.5 Half-press [Shutter] to focus, and then press [Shutter] to capture the photo.Using Framing ModeWhen you adjust the aperture value or shutter speed, the exposure changes according to the settings, so the display may darken. With this function on, the brightness of the display is constant regardless of the settings, so you can better frame your shot.To use Framing Mode,In Shooting mode, press [m] ĺ b ĺ Framing Mode ĺ an option.](https://usermanual.wiki/Samsung-Electronics-Co/NX30/User-Guide-2157335-Page-59.png)
![My Camera > Shooting modes59Using the Bulb functionUse the Bulb function to shoot night scenes or the night sky. While you are pressing [Shutter], the shutter is left open so you can create moving light eects.To use a bulb, Completely scroll the jog dial to the left to Bulb ĺ Press and hold [Shutter] for the desired time.• If you set a high ISO value or open the shutter for a long time, image noise may increase.• Drive options, ash, and One touch shot cannot be used with the Bulb function.• The Bulb function is available only in Manual mode.• Use a tripod and shutter release to prevent your camera from shaking.• The longer you open the shutter, the longer it takes to save a photo. Do not turn the camera o while the camera saves a photo. • If you use this function for a long time, use a fully charged battery. T U Custom modeCustom mode lets you create your own shooting modes by adjusting options and saving them.Saving custom modes1 Rotate the mode dial to P, A, S, M, T, or U.2 Set shooting options.3 Press [m], and then select d ĺ Manage Custom Mode ĺ Save.• You can also save a custom mode by pressing [f], and then touching .4 Verify the shooting options, and then select Save.5 Use the on-screen keyboard to enter a name for the mode. (p. 134)6 Press [o] to save a mode.You can save up to 10 custom modes.](https://usermanual.wiki/Samsung-Electronics-Co/NX30/User-Guide-2157335-Page-60.png)
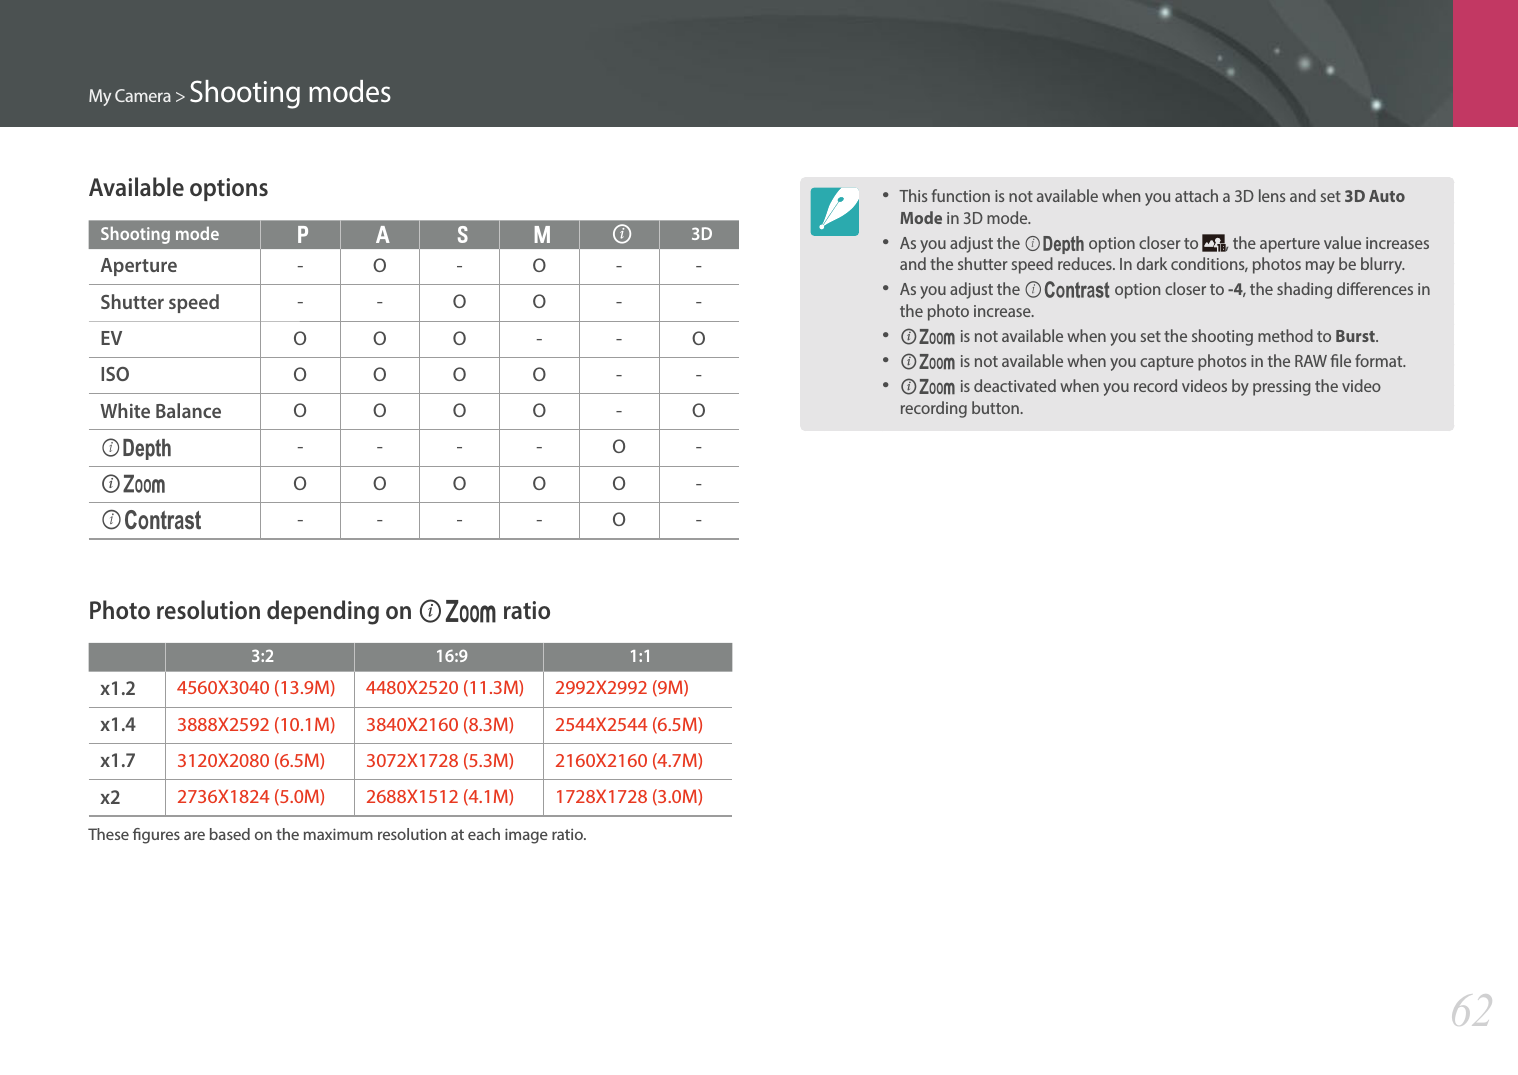
![My Camera > Shooting modes60Selecting custom modes1 Rotate the mode dial to T or U.2 Press [m], and then select d ĺ Manage Custom Mode ĺ Open ĺ a mode.• If there is no custom mode saved, you can select a shooting mode, set shooting options, and save new custom modes.3 Verify the shooting options, and then select OK.Deleting custom modes1 Rotate the mode dial to P, A, S, M, T, or U.2 Press [m], and then select d ĺ Manage Custom Mode ĺ Delete.3 Select a mode to delete, and then press [n].i Lens Priority modeUsing the iFn standard functionWhen you use [i-Function] on an i-Function lens, you can manually select and adjust shutter speed, aperture value, exposure value, ISO sensitivity, and White Balance on the lens. You can also adjust the depth of eld or contrast of the photo or use the Z function.Select an option.Adjust an option value.1 Rotate the mode dial to P, A, S, M, or i.2 Press [m], and then select d ĺ iFn Setting ĺ iFn Mode ĺ iFn Stadard.](https://usermanual.wiki/Samsung-Electronics-Co/NX30/User-Guide-2157335-Page-61.png)
![My Camera > Shooting modes613 Press [m] to return to Shooting mode.4 Press [i-Function] on the lens to select a setting.• To display setting items, select [m] ĺ d ĺ iFn Setting ĺ iFn Stadard ĺ an item.• You can also press [i-Function], and then press [D/I] or drag the screen to select a setting.Option DescriptionAperture valueAdjust the aperture value.Shutter speedAdjust the shutter speed.ISOAdjust the ISO sensitivity.EVAdjust the exposure value.White BalanceSelect a White Balance option.ZZoom in on a subject with less degradation of photo quality than the Digital zoom. However, the photo resolution may change compared to when you zoom in by rotating the zoom ring.Option DescriptionEAdjust the depth of eld to blur or sharpen the background.GAdjust the contrast to increase or decrease the shading dierences in the photo.5 Adjust the focus ring to select an option.• You can also scroll the jog dial or rotate the navigation button or drag the screen to select an option.6 Half-press [Shutter] to focus, and then press [Shutter] to capture the photo.](https://usermanual.wiki/Samsung-Electronics-Co/NX30/User-Guide-2157335-Page-62.png)
![My Camera > Shooting modes63Using the iFn plus functionOn an i-Function lens, press and hold [i-Function], and then press [N], [W], or [a] on the camera. You can start assigned functions or open the settings menu with i-Function. E.g. Assigning the photo quality function to the Metering button1 Rotate the mode dial to P, A, S, or M.2 Select [m] ĺ d ĺ iFn Setting ĺ iFn Plus ĺ Metering ĺ Quality.3 Press [m].4 Select iFn Mode ĺ iFn Plus.5 Press [m] to return to Shooting mode.6 Press [i-Function] on an i-Function lens and [N] on the camera together.7 Select a photo quality option.8 Half-press [Shutter] to focus, and then press [Shutter] to capture the photo.s Smart modeIn Smart mode, you can capture photos with options that are preset for a specic scene.1 Rotate the mode dial to s.2 Select a scene. Drag to navigate options.Switch to the grid view.Switch to the list view.](https://usermanual.wiki/Samsung-Electronics-Co/NX30/User-Guide-2157335-Page-64.png)
![My Camera > Shooting modes64Option DescriptionBeauty FaceCapture a portrait with options to hide facial imperfections.Best FaceCapture multiple photos and replace faces to create the best possible image.LandscapeCapture still-life scenes and landscapes.MacroCapture small or close-up subjects.Action FreezeCapture subjects moving at high speed.Rich TonesCapture a photo with vibrant colors.PanoramaCapture a wide panoramic scene in a single photo.WaterfallCapture scenes with waterfalls.Multi ExposureCapture multiple photos and overlap them to create one photo.Creative ShotCapture photos with eects applied automatically. Smart Jump ShotSet an area to automatically capture a jumping subject when movement is detected.SilhouetteCapture subjects as dark shapes against a light background.Option DescriptionSunsetCapture scenes at sunset, with natural-looking reds and yellows.NightCapture multiple photos in low light conditions without a ash. The camera combines them to create a single image that is brighter and has less blurring.FireworksCapture scenes with reworks.Light TraceCapture scenes with the light trailing in low-light conditions.3 Half-press [Shutter] to focus, and then press [Shutter] to capture.](https://usermanual.wiki/Samsung-Electronics-Co/NX30/User-Guide-2157335-Page-65.png)
![My Camera > Shooting modes65Using the Best Face modeIn Best Face mode, you can capture multiple photos and replace faces to create the best possible image. Use this mode to select the best image for each individual when capturing group photos.1 Rotate the mode dial to s, and then select Best Face.2 Align your subject in the frame, and then half-press [Shutter] to focus.3 Press [Shutter] to capture the photo.• The camera captures 5 photos consecutively.• The rst photo is set as the background image.• The camera automatically detects faces after shooting.4 Touch a face to replace.Back Save5 Touch the best image from the 5 faces that were captured.• Repeat steps 4 and 5 to replace the rest faces of the photo.• The icon will appear on the image that the camera recommends.Back Save6 Press [o] to save the photo. • Use a tripod to prevent your camera from shaking.• The resolution is set to 5.9M or smaller.](https://usermanual.wiki/Samsung-Electronics-Co/NX30/User-Guide-2157335-Page-66.png)
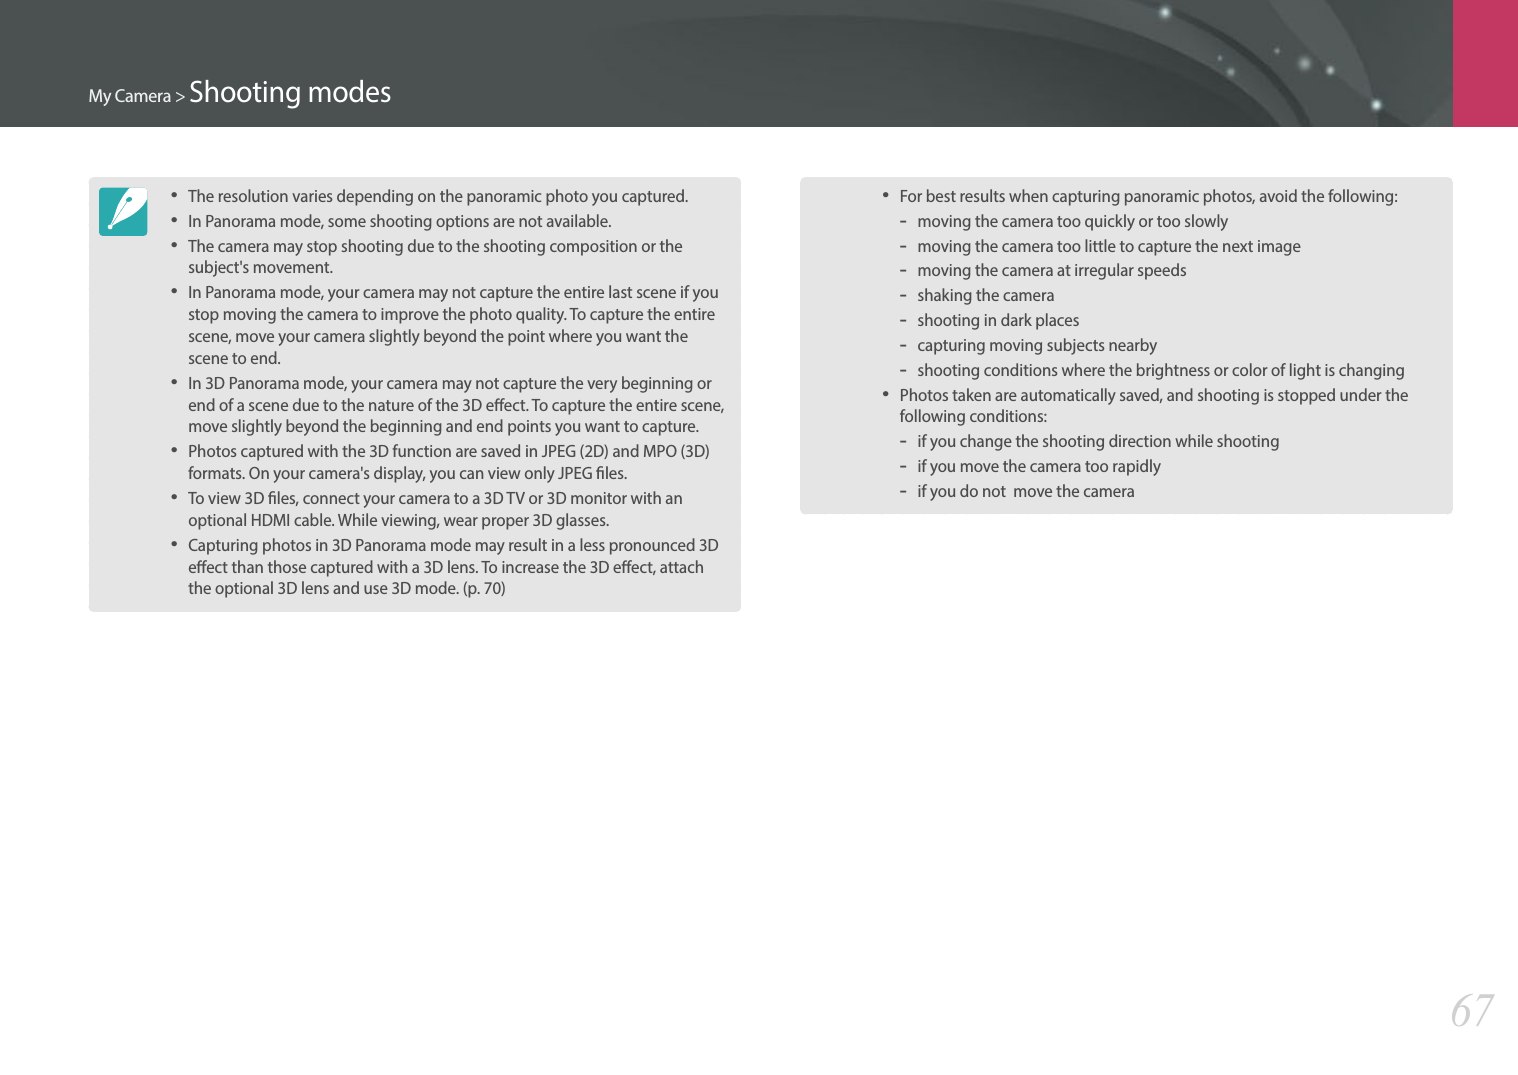
![My Camera > Shooting modes66Capturing panoramic photosCapture a 2D or 3D panoramic photo. Captured 3D panoramic photos can be viewed only on a 3D TV or 3D monitor.1 Rotate the mode dial to s, and then select Panorama.2 Press [m] ĺ b ĺ Panorama ĺ Live Panorama or 3D.3 Press [m] to return to Shooting mode.4 Press and hold [Shutter] to start shooting.5 With [Shutter] pressed, slowly move the camera in the direction you selected.• In 3D Panorama mode, you can capture a scene only in horizontal directions.• An arrow toward the direction of motion is displayed, and the entire shooting image is displayed in the preview box.• When the scenes are aligned, the camera captures the next photo automatically.6 When you are nished, release [Shutter].• The camera will automatically save the shots into one photo.• If you release [Shutter] while shooting, the panoramic shooting stops and photos that have been captured are saved.](https://usermanual.wiki/Samsung-Electronics-Co/NX30/User-Guide-2157335-Page-67.png)
![My Camera > Shooting modes68Using the Smart Jump Shot modeIn Smart Jump Shot mode, you can set an area to capture a jumping subject. The camera will automatically capture a photo when movement is detected.1 Rotate the mode dial to s, and then select Smart Jump Shot.2 Drag the box on the screen to the desired location.3 Drag the corners of the box to adjust the size of the box.4 Press [Shutter] or [o] to capture the photo.• The AF-assist light/Timer lamp will blink.• When a subject is detected within the box on the screen, the camera will capture 5 photos consecutively.5 Touch the best image from the 5 photos to select it. 6 Press [o] to save the photo. In dark environments the camera may not detect movement. Where possible take photos in bright shooting conditions.](https://usermanual.wiki/Samsung-Electronics-Co/NX30/User-Guide-2157335-Page-69.png)
![My Camera > Shooting modes69Recording a videoIn Shooting mode, you can record Full HD videos (1920X1080) by pressing (Video recording). The camera lets you record a video up to 29 minutes and 59 seconds in length at 60, 30, 24, or 15 fps, and saves the les in MP4 (H.264) format. 60 fps is available only with 1920X1080 and 1280X720 and 24 fps is available only with 1920X810. 15 fps is available only with some Smart Filter options. The sound is recorded via the camera's microphone.You can set the exposure by adjusting the aperture value and shutter speed for the mode you selected. When you use a lens that does not have an AF/MF switch while recording a video, press [F] to deactivate or activate the AF function. When you use the lens that has an AF/MF switch, the AF function works according to the switch’s setting.Select Fader to fade in or out a scene. You can also select Voice, Wind Cut, or other options to set recording options. (p. 111)1 Rotate the mode dial to t, P, A, S, M, T, U, i, or s.• This feature may not work in some modes.2 Set the desired options.3 Press (Video recording) to start recording.4 Press (Video recording) again to stop.• H.264 (MPEG-4 part10/AVC) is the latest video coding format established in 2003 collaboratively by ISO-IEC and ITU-T. Since this format uses a high compression rate, more data can be saved in less memory space.• If you have the image stabilizer option on when shooting a movie, the camera may record the image stabilizer sound.• The zoom sound or other lens sounds may be recorded if you adjust the lens while recording a video.• When using an optional video lens, the autofocus noise is not recorded.• If you remove the camera lens while recording a movie, the recording will be interrupted. Do not change the lens while recording.• If you attach an external microphone while recording a movie, sound will not be recorded through the external microphone. (The previous settings are maintained.) If you remove the external microphone while recording a movie, sound will not be recorded. Turn o the camera before attaching or removing the external microphone.](https://usermanual.wiki/Samsung-Electronics-Co/NX30/User-Guide-2157335-Page-70.png)
![My Camera > Shooting modes70• If you change the shooting angle of the camera suddenly while shooting a movie, the camera may not be able to record images accurately. Use a tripod to minimize camera shake.• The camera supports only the Multi AF function when recording a video. You cannot use any other focus area setting functions, such as Face Detection AF.• When the size of a movie le exceeds 4 GB, the camera automatically stops recording even if the maximum recording time (29 minutes and 59 seconds) has not been reached.• If you use a slow writing memory card, the recording of your movie can be interrupted because the card cannot process data at the rate the video is being shot. If this occurs, replace the card with a faster memory card or reduce the video size (for example, from 1280X720 to 640X480).• When formatting a memory card, always format using the camera. If you format on another camera or a PC, you can lose les on the card or cause a change in the capacity of the card.• When you press the video recording button, Z turns o.• While recording a video in the same ISO sensitivity, the screen may be darker than taking a photo. Adjust the ISO sensitivity.• When you record a video in P, A, or S mode, ISO is automatically set to Auto.3D modeYou can capture 3D photos or videos with an optional 3D lens.SAMSUNG 45 mm F1.8 [T6] 2D/3D lens (example)Set the 2D/3D switch on the lens to 3D, and then capture a photo or video 1.5–5 m away from the subject.](https://usermanual.wiki/Samsung-Electronics-Co/NX30/User-Guide-2157335-Page-71.png)
![My Camera > Shooting modes71• 3D mode is always on, regardless of the mode dial of the camera, except B.• To use auto 3D options that enable the camera to set shooting options automatically depending on shooting conditions in 3D mode, press [m] ĺ b ĺ 3D Auto Mode ĺ On.• To change the 3D recording option, press [m] ĺ g ĺ 3D REC Mode ĺ a desired option.* DefaultIcon DescriptionSide by Side*: Displays two images next to each other.Frame Packing: Displays the images for the left and right eye alternately in frames.• Available shooting options dier compared to other shooting modes.• You can select either 4.1M (2688X1512) or 2.1M (1920X1080) photo size.• The video resolution is set to 1920X1080.• Videos recorded in 3D may be dark or playback may be jittery.• Shooting in low temperatures may result in color distortion in images and may consume more battery power.• You may not be able to shoot properly in conditions below 8.5 LV/900 lux. For best results, capture photos in places with sucient light.• When you photograph objects that contain polarizing material, such as a display, sunglasses, or a polarizing lter, or use the polarizing material with your lens, the images may appear dark or the 3D eect may not be applied properly.• Use a tripod to prevent your camera from shaking.• If you rotate or tilt the camera vertically while shooting, the 3D eect may not be applied properly. Capture images with the camera in the normal position.• If you shoot in uorescent lighting or capture images displayed by projectors or TVs, the images may appear black due to the icker eect.• In 3D mode, the Enlarge x8 option of MF Assist may not be available.• The camera's display shows 3D videos only in 2D.• Photos captured with the 3D function are saved in JPEG (2D) and MPO (3D) formats. On your camera's display, you can view only JPEG les.• To view 3D les, connect your camera to a 3D TV or 3D monitor with an optional HDMI cable. While viewing, wear proper 3D glasses.• You cannot use the ash in 3D mode.](https://usermanual.wiki/Samsung-Electronics-Co/NX30/User-Guide-2157335-Page-72.png)
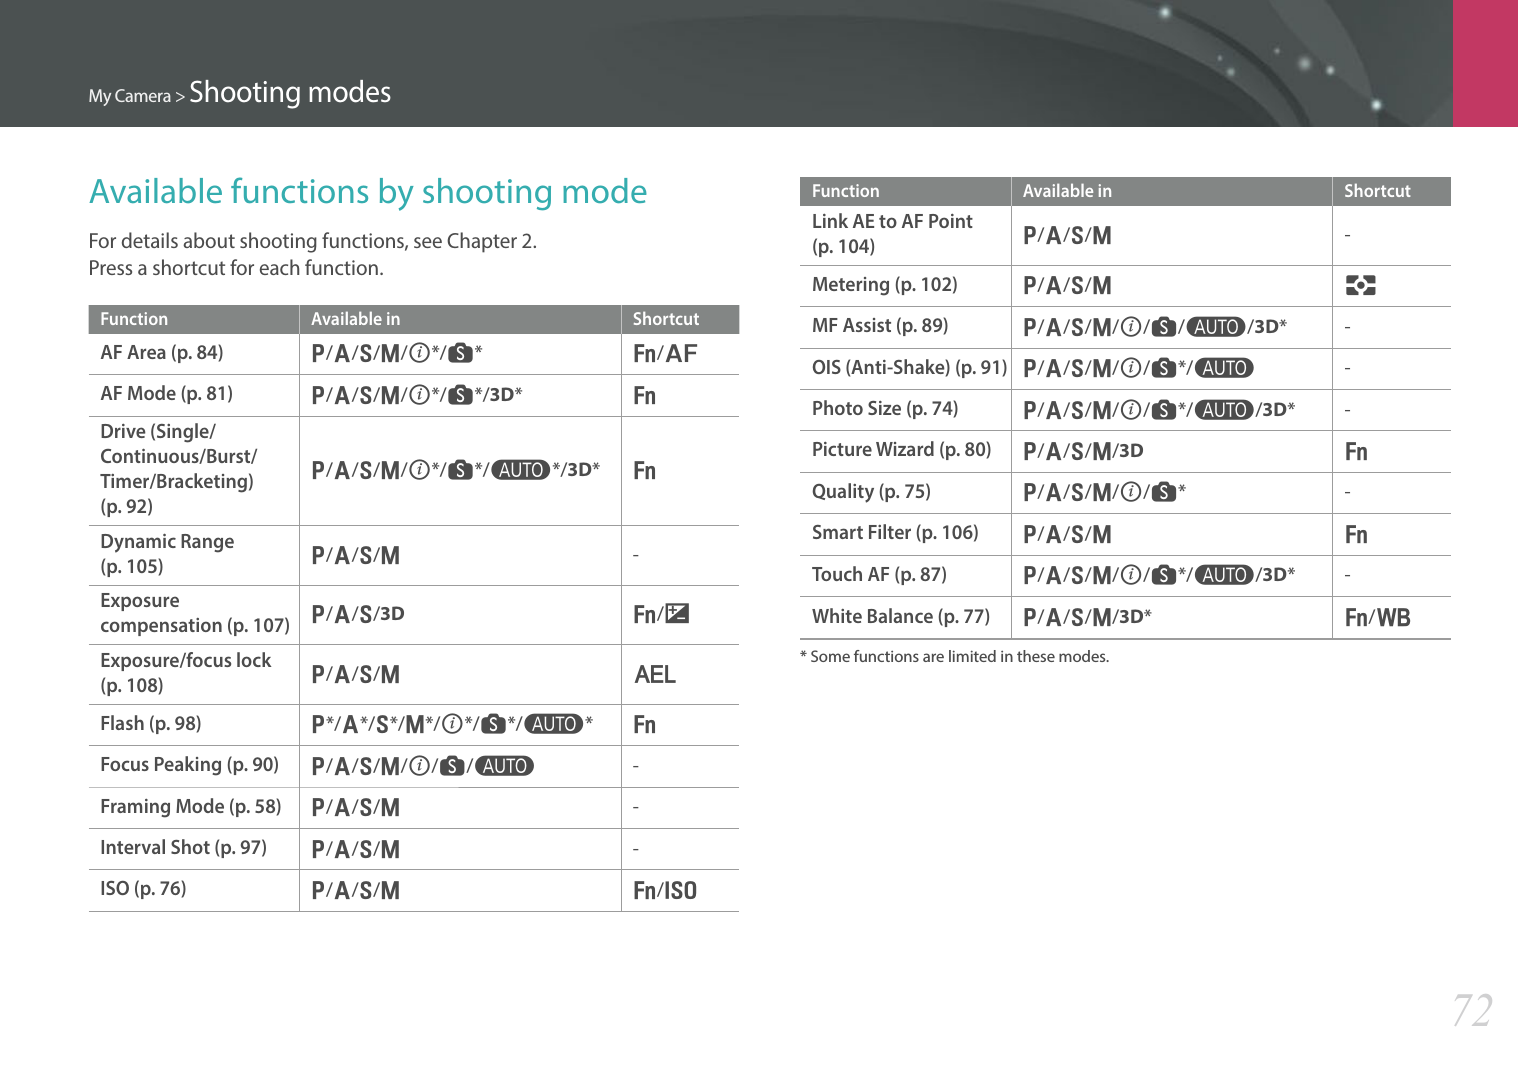
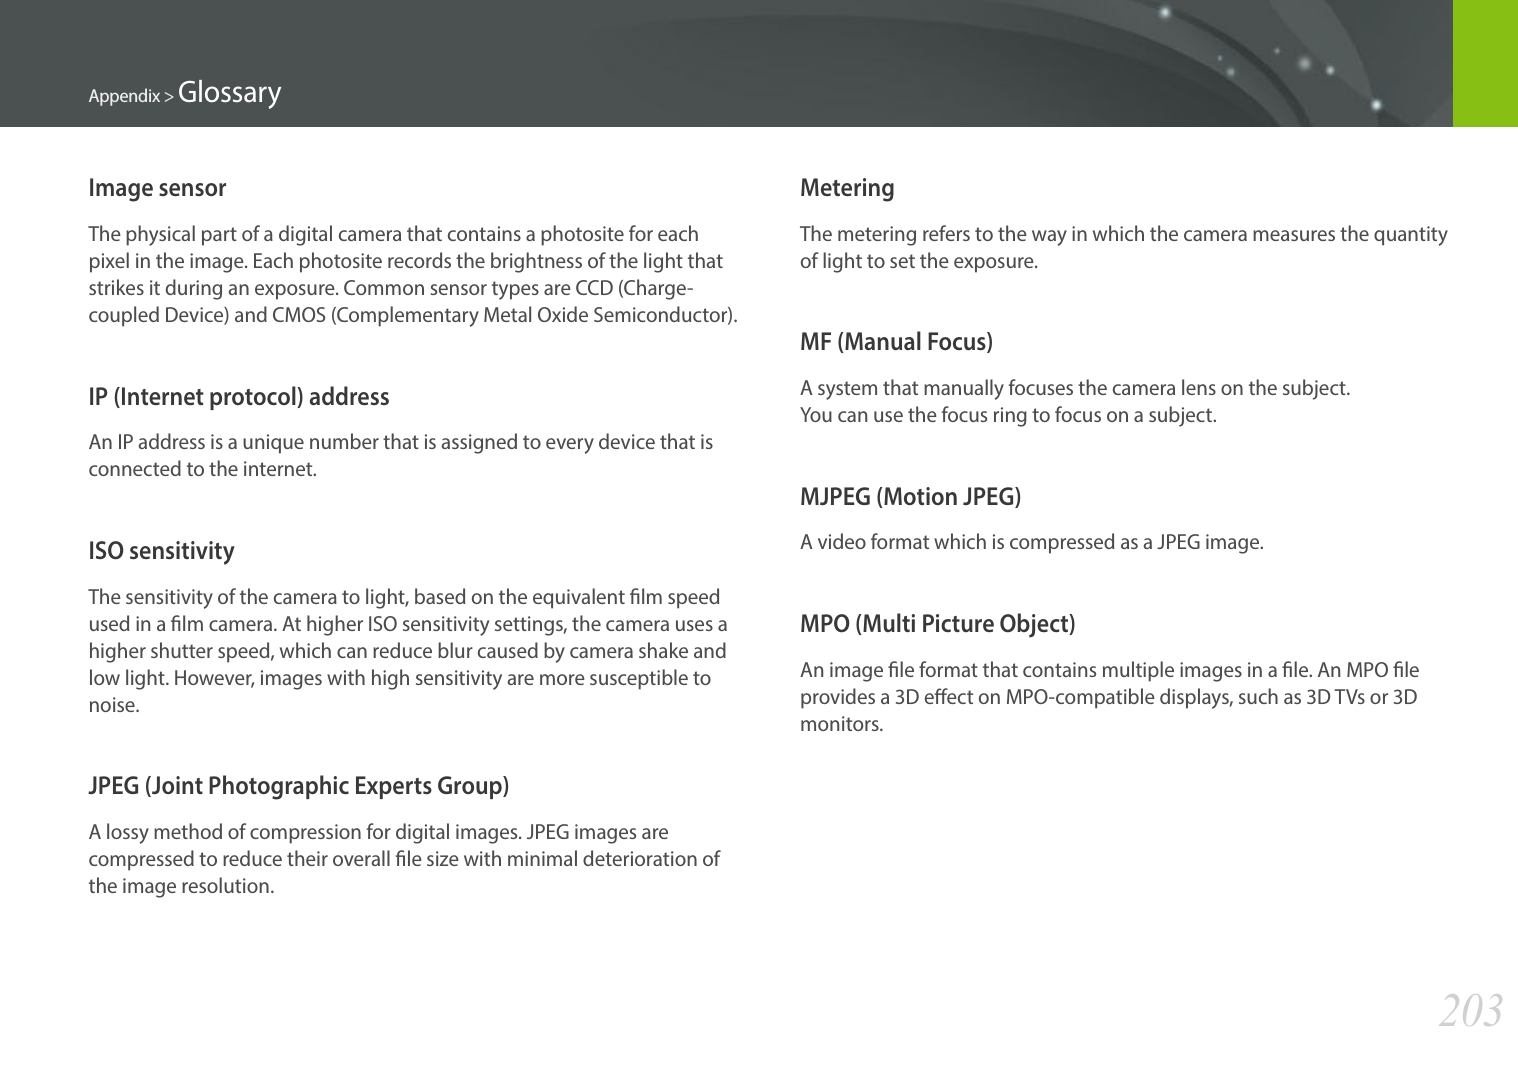
![Shooting Functions7474Shooting FunctionsShooting FunctionsPhoto sizeAs you increase the resolution, your photo or video will include more pixels, so it can be printed on larger paper or displayed on a larger screen. When you use a high resolution, the le size will also increase. Select a low resolution for photos that will be displayed in a digital picture frame or uploaded to the web.To set the size, In Shooting mode, press [m] ĺ b ĺ Photo Size ĺ an option.* DefaultIcon Size Recommended for(3:2) 5472x3648* Printing on A0 paper.(3:2) 3888x2592 Printing on A2 paper.(3:2) 2976x1984 Printing on A4 paper.(3:2) 1728x1152 Printing on A5 paper.(16:9) 5472x3080 Printing on A1 paper or viewing on an HDTV.(16:9) 3712x2088 Printing on A3 paper or viewing on an HDTV.(16:9) 2944x1656 Printing on A4 paper or viewing on an HDTV.(16:9) 1920x1080 Printing on A5 paper or viewing on an HDTV.(1:1) 3648x3648 Printing a square photo on A1 paper.(1:1) 2640x2640 Printing a square photo on A3 paper.(1:1) 2000x2000 Printing a square photo on A4 paper.(1:1) 1024x1024 Attaching to an email. Available options may dier depending on shooting conditions.Size and Resolution](https://usermanual.wiki/Samsung-Electronics-Co/NX30/User-Guide-2157335-Page-75.png)
![75Shooting Functions > Size and ResolutionQualityThe camera saves photos in either the JPEG or RAW format.Photos captured by a camera are often transformed to the JPEG format and stored in the memory according to the settings of the camera at the time of shooting. RAW les are not transformed to the JPEG format and are stored in the memory without any changes. RAW les have the le extension "SRW". To adjust and calibrate exposures, White Balances, tones, contrasts, and colors of the RAW les, or to convert them into JPEG or TIFF format, use the Adobe Photoshop Lightroom program found on the supplied DVD-ROM.Ensure you have enough space on the memory card to save photos in the RAW format.To set the quality, In Shooting mode, press [m] ĺ b ĺ Quality ĺ an option.* DefaultIcon Format DescriptionJPEGSuper Fine*:• Compressed for the best quality.• Recommended for printing in large size.JPEGFine:• Compressed for better quality.• Recommended for printing in normal size.* DefaultIcon Format DescriptionJPEGNormal:• Compressed for normal quality.• Recommended for printing in small size or uploading to the web.RAWRAW:• Save a photo without data loss.• Recommended for editing after shooting.RAW+JPEG RAW + S.Fine: Save a photo in both the JPEG (S.Fine quality) and RAW format.RAW+JPEG RAW + Fine: Save a photo in both the JPEG (Fine quality) and RAW format.RAW+JPEG RAW + Normal: Save a photo in both the JPEG (Normal quality) and RAW format.Available options may dier depending on shooting conditions.](https://usermanual.wiki/Samsung-Electronics-Co/NX30/User-Guide-2157335-Page-76.png)
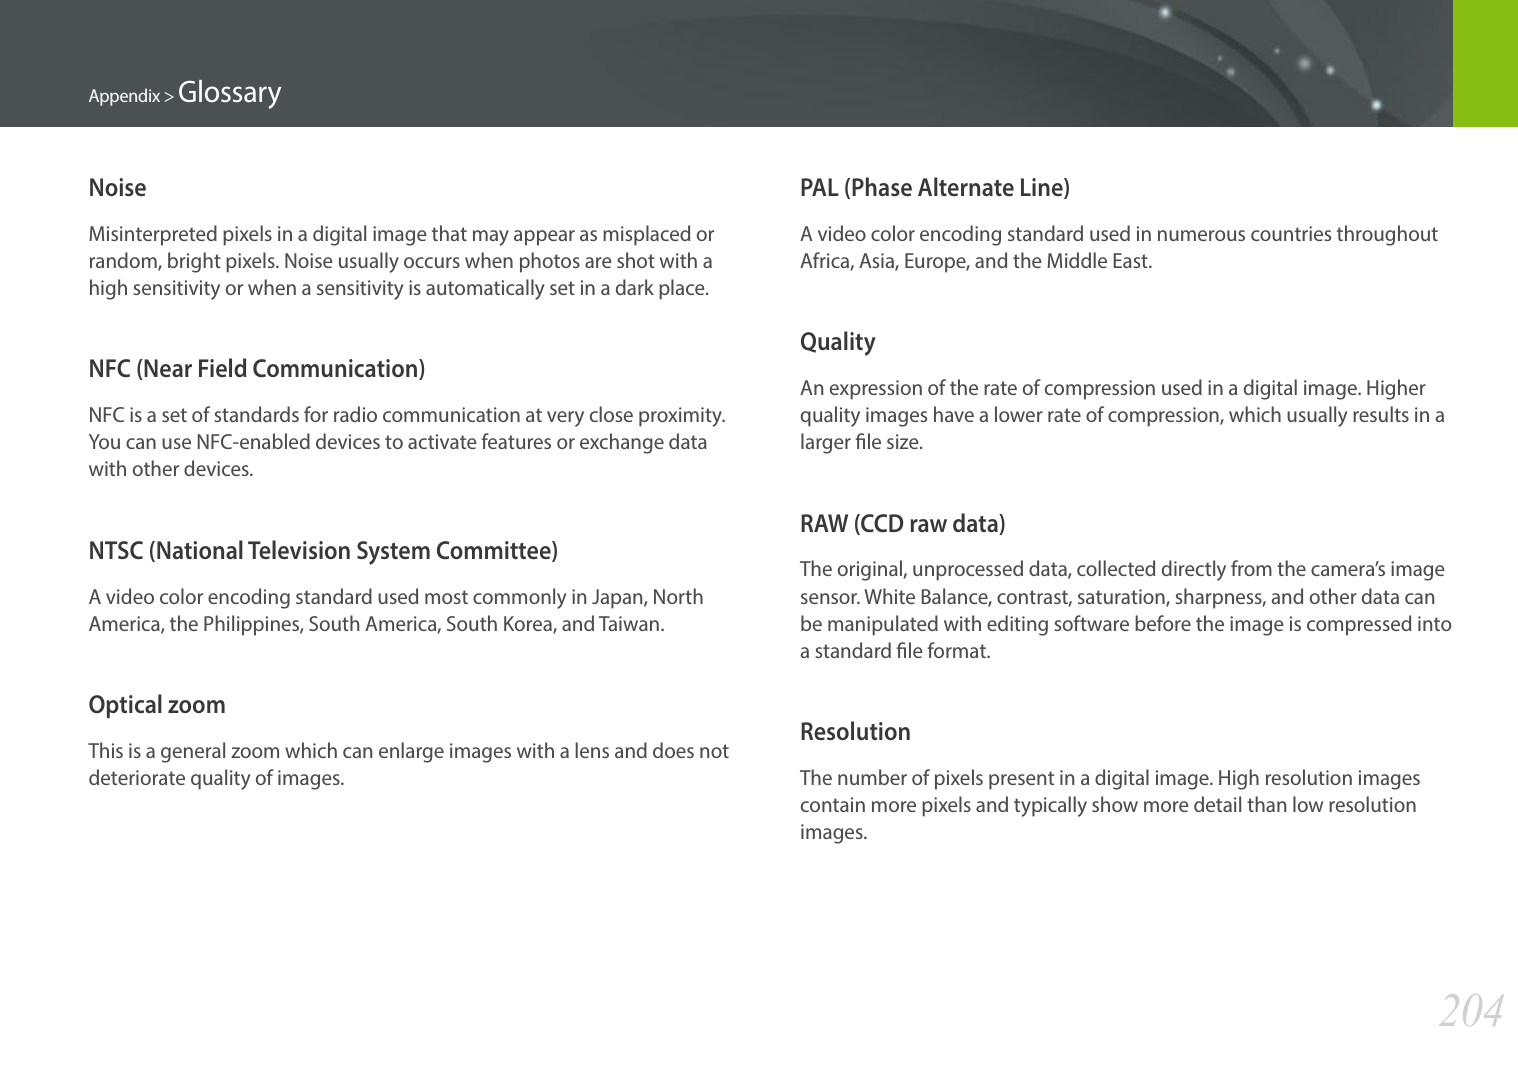
![Shooting Functions7676Shooting FunctionsShooting FunctionsThe ISO sensitivity value represents the sensitivity of camera to light. The larger the ISO value, the more sensitive the camera is to light. Consequently, by selecting a higher ISO sensitivity value, you can capture photos in dim or dark places at faster shutter speeds. However, this may increase electronic noise and result in a grainy photo.To set ISO sensitivity, In Shooting mode, press [I] ĺ an option.ExamplesISO 100 ISO 400ISO 800 ISO 3200• You can also set the option by pressing [m] ĺ b ĺ ISO ĺ an option in Shooting mode.• Increase the ISO value in places where ash use is prohibited. You can capture a clear photo by setting a high ISO value without having to secure more light.• Use the Noise Reduction function in order to reduce the visual noise that can appear on photos of a high ISO value. (p. 156)• Available options may dier depending on the shooting conditions.ISO sensitivity](https://usermanual.wiki/Samsung-Electronics-Co/NX30/User-Guide-2157335-Page-77.png)
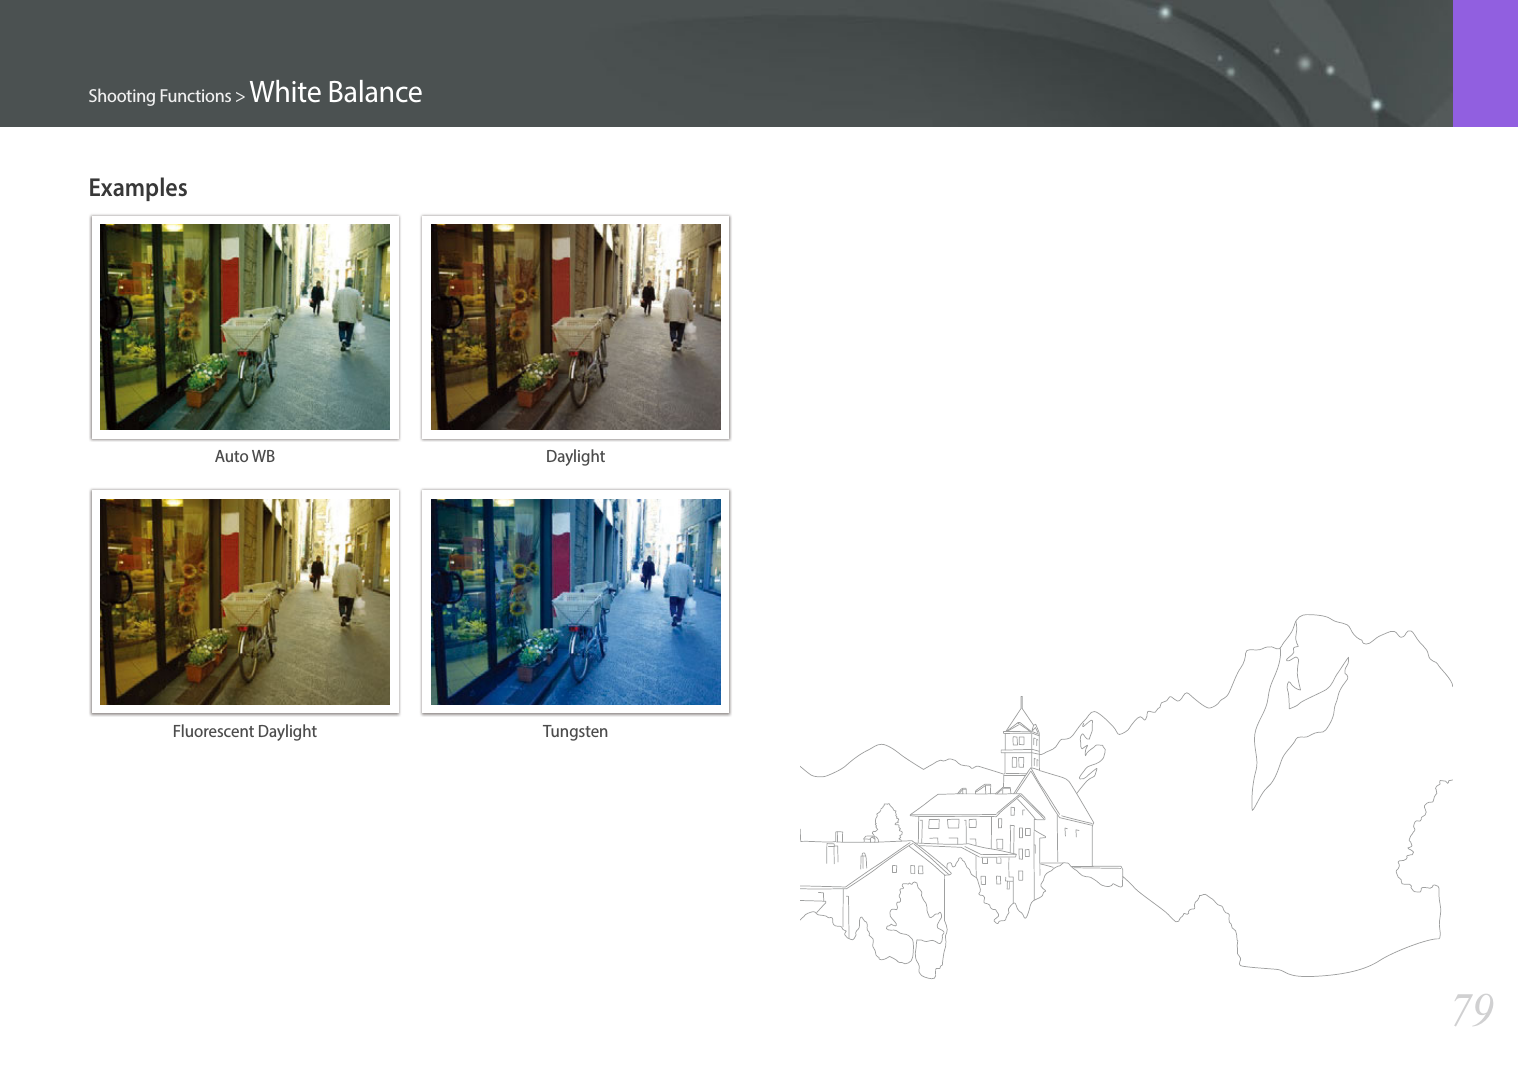
![Shooting Functions7777Shooting FunctionsShooting FunctionsWhite Balance represents the light source that inuences on the color of a photo. The color of a photo depends on the type and quality of the light source. If you want the color of your photo to be realistic, select an appropriate lighting condition to calibrate the White Balance, such as Auto WB, Daylight, Cloudy, Tungsten, or adjust color temperature manually.You can also adjust color for the preset light sources so that the colors of the photo match the actual scene under mixed lighting conditions.To set the White Balance, In Shooting mode, press [C] ĺ an option.* DefaultIcon DescriptionAuto WB*: Use automatic settings depending on the lighting conditions.Daylight: Select when taking outdoor photos on a sunny day. This option results in photos closest to the natural colors of the scene.Cloudy: Select when taking outdoor photos on a cloudy day or in shadows. Photos captured on cloudy days tend to be more bluish than on sunny days. This option osets that eect.* DefaultIcon DescriptionFluorescent White: Select when shooting under a daylight uorescent lamp. Especially for white uorescent light with a color temperature of about 4,200K.NFluorescent NW: Select when shooting under a daylight uorescent lamp. Especially for white uorescent light of very white hues with a temperature of about 5,000K.DFluorescent Daylight: Select when shooting under a daylight uorescent lamp. Especially for white uorescent light of slightly bluish hue with a temperature of about 6,500K.Tungsten: Select when taking indoor photos under incandescent bulbs or halogen lamps. Incandescent tungsten bulbs tend to have a reddish hue. This option osets that eect.Flash WB: Select when using a ash.Custom Set: Use your pre-dened settings. You can manually set the White Balance by pressing [D], and then shooting a white sheet of paper. Fill the spot metering circle with the paper and set the White Balance.White Balance](https://usermanual.wiki/Samsung-Electronics-Co/NX30/User-Guide-2157335-Page-78.png)
![78Shooting Functions > White Balance* DefaultIcon DescriptionColor Temperature: Manually adjust the color temperature of the light source. Color temperature is a measurement in degrees Kelvin that indicates the specic type of light source. As the color temperature increases, the color distribution becomes cooler. Alternatively, as the color temperature decreases, the color distribution becomes warmer. Press [D], and then adjust the color temperature.Clear skyFluorescent HFluorescent LCloudyHalogen lampDaylightTungstenCandle light• You can also set the option by pressing [m] ĺ b ĺ White Balance ĺ an option in Shooting mode. • Available options may dier depending on shooting conditions.Customizing preset White Balance optionsYou can also customize preset White Balance options.To customize preset options,In Shooting mode, press [C] ĺ an option ĺ [D] ĺ scroll the jog dial or rotate the navigation button or press [D/I/C/F]. White Balance : DaylightBack Set ResetYou can also touch an area on the screen.](https://usermanual.wiki/Samsung-Electronics-Co/NX30/User-Guide-2157335-Page-79.png)
![Shooting Functions8080Shooting FunctionsShooting FunctionsPicture Wizard lets you apply dierent photo styles to your photo to create various looks and emotional moods. You can also create and save your own photo styles by adjusting color, saturation, sharpness, and contrast for each style.There is no rule for which style is suitable in which conditions. Experiment with dierent styles and nd your own settings.To set a photo style, In Shooting mode, press [m] ĺ b ĺ Picture Wizard ĺ an option.ExamplesStandard Vivid PortraitLandscape Forest RetroCool Calm Classic• You can also adjust the value of the preset style settings. Select a Picture Wizard option, press [D], and then adjust color, saturation, sharpness, or contrast.• To customize your own picture wizard, select , , or , and then adjust the color, saturation, sharpness, and contrast.• Picture Wizard options cannot be set with Smart Filter options at the same time.Picture Wizard (photo styles)](https://usermanual.wiki/Samsung-Electronics-Co/NX30/User-Guide-2157335-Page-81.png)
![Shooting Functions8181Shooting FunctionsShooting FunctionsAF modeLearn how to adjust the camera’s focus according to the subjects.You can select a focusing mode appropriate to the subject among Single Auto Focus, Continuous Auto Focus, and Manual Focus. The AF function is activated when you press [Shutter] halfway. In the MF mode, you have to rotate the focus ring on the lens to focus manually.In most cases, you can have a focus by selecting Single AF. Fast moving subjects or subjects of a color similar to the background are dicult to focus. Select an appropriate focusing mode for such instances.If your lens has an AF/MF switch, you must set the switch according to the selected mode. Set the switch to AF when you select Single AF or Continuous AF. Set the switch to MF when you select Manual Focus.When your lens has no AF/MF switch, press [F] to select a desired AF mode.To set the auto focus mode, In Shooting mode, press [F] ĺ an option.• You can also set the option by pressing [m] ĺ b ĺ AF Mode ĺ an option in Shooting mode.• The available options may dier depending on the lens in use.](https://usermanual.wiki/Samsung-Electronics-Co/NX30/User-Guide-2157335-Page-82.png)
![82Shooting Functions > AF modeSingle AFSingle AF is appropriate for shooting a still subject. When you press [Shutter] halfway, the focus xes in the focus area. The area turns green when the focus is achieved.Continuous AFWhile you are pressing [Shutter] halfway, the camera continues to automatic focusing. Once the focus area is xed on the subject, the subject is always in focus even when moving. This mode is recommended for shooting a person on a bicycle, a running dog, or a car racing scene.](https://usermanual.wiki/Samsung-Electronics-Co/NX30/User-Guide-2157335-Page-83.png)
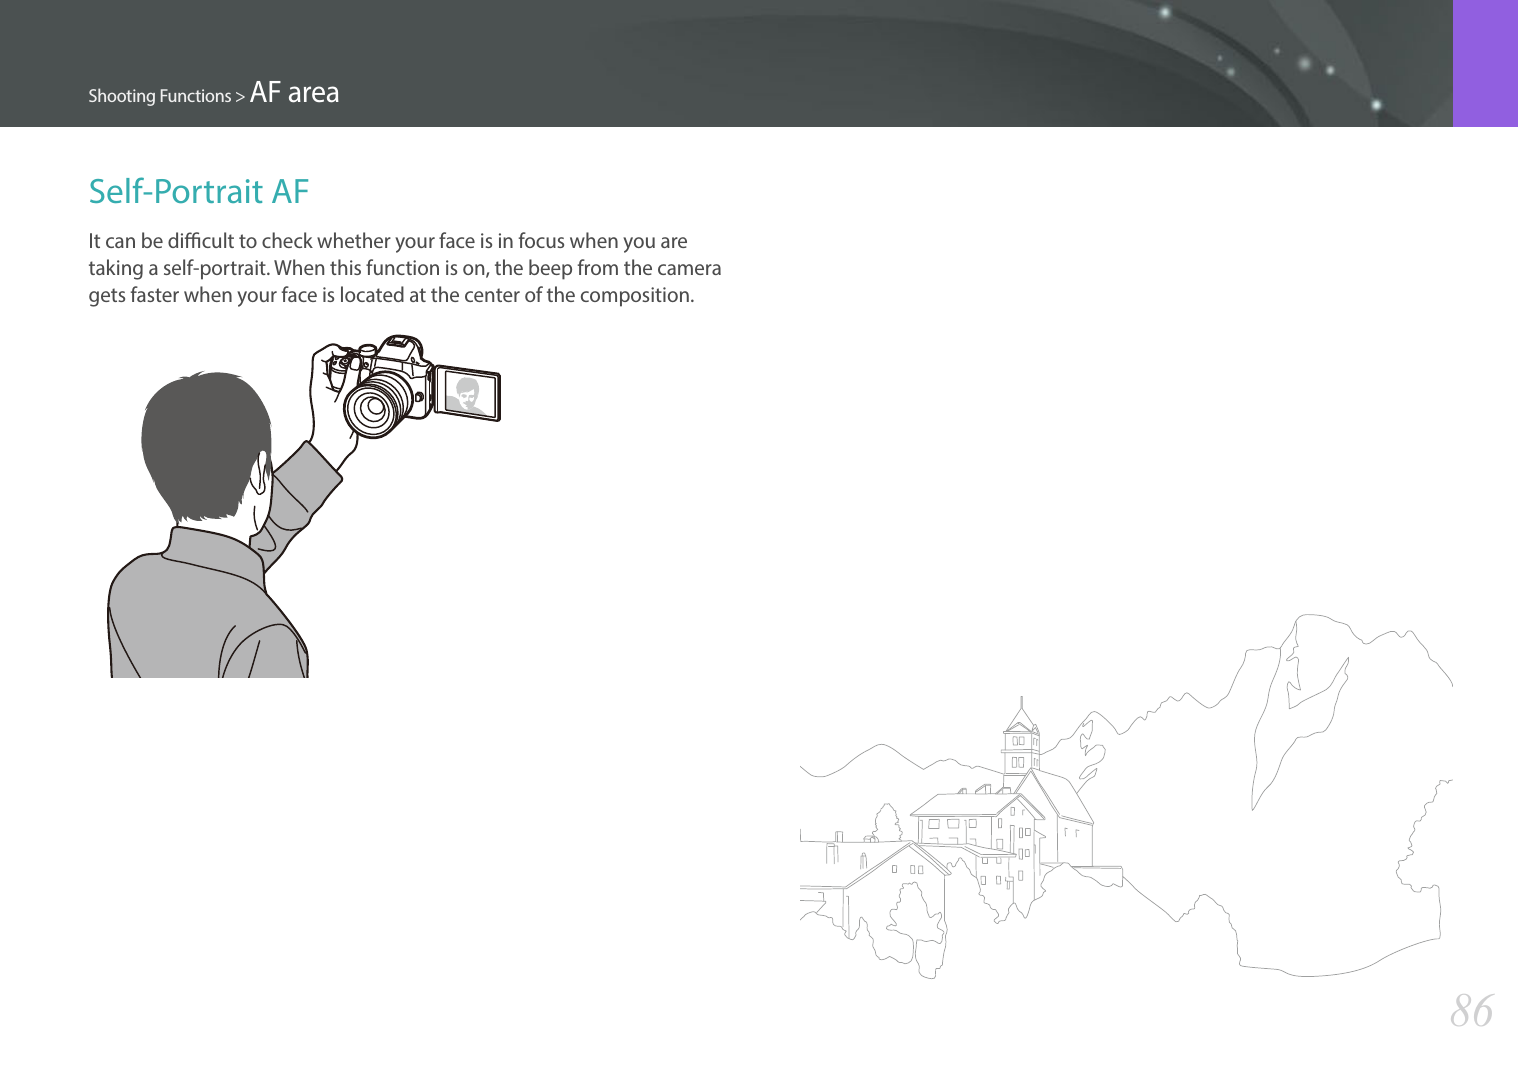
![Shooting Functions8484Shooting FunctionsShooting FunctionsThe AF area function changes the positions of the focus area.Generally, cameras focus on the nearest subject. When there are a lot of subjects, however, unwanted subjects can be in focus. In order to prevent unwanted subjects from being in focus, change the focus area so that a desired subject is in focus. You can get a clearer and sharper photo by selecting an appropriate focus area.To set the auto focus area, In Shooting mode, press [m] ĺb ĺ AF Area ĺ an option.• Available options may dier depending on shooting conditions.• When the AF/MF switch is set to MF, you cannot change the AF area from the shooting menu.• When you use the Face Detection AF option, the camera focuses on the area with the white frame automatically.• Depending on the Picture Wizard options, Face Detection may not be eective.• When you set manual focus, Face Detection may not be available.• Face Detection may not be eective when: -the subject is far from the camera -it is too bright or too dark -the subject is not facing the camera -the subject is wearing sunglasses or a mask -the subject’s facial expression changes drastically -the subject is backlit or the lighting conditions are unstableSelection AFYou can set the focus on an area you want. Apply an out-of-focus eect to make the subject more distinguishable.The focus on the photo below was repositioned and resized so that it ts the subject’s face. To resize or move the focus area, in Shooting mode, press [o]. Use the navigation button to move the focus area. Scroll the jog dial to resize the focus area.AF area](https://usermanual.wiki/Samsung-Electronics-Co/NX30/User-Guide-2157335-Page-85.png)
![85Shooting Functions > AF areaMulti AFThe camera displays a green rectangle in places where focus is set correctly. The photo is divided into two or more areas, and the camera obtains focus points of each area. It is recommended for scenery photos.When you press [Shutter] halfway, the camera displays the focus areas as shown in the photo below.Face Detection AFThe camera focuses on human faces preferentially. Faces of up to 10 people can be detected. This setting is recommended for shooting a group of people.When you press [Shutter] halfway, the camera focuses on faces as shown in the photo below. In cases of shooting a group of people, the camera displays the focus on the nearest person’s face in white and the rest of the people’s faces in gray.](https://usermanual.wiki/Samsung-Electronics-Co/NX30/User-Guide-2157335-Page-86.png)
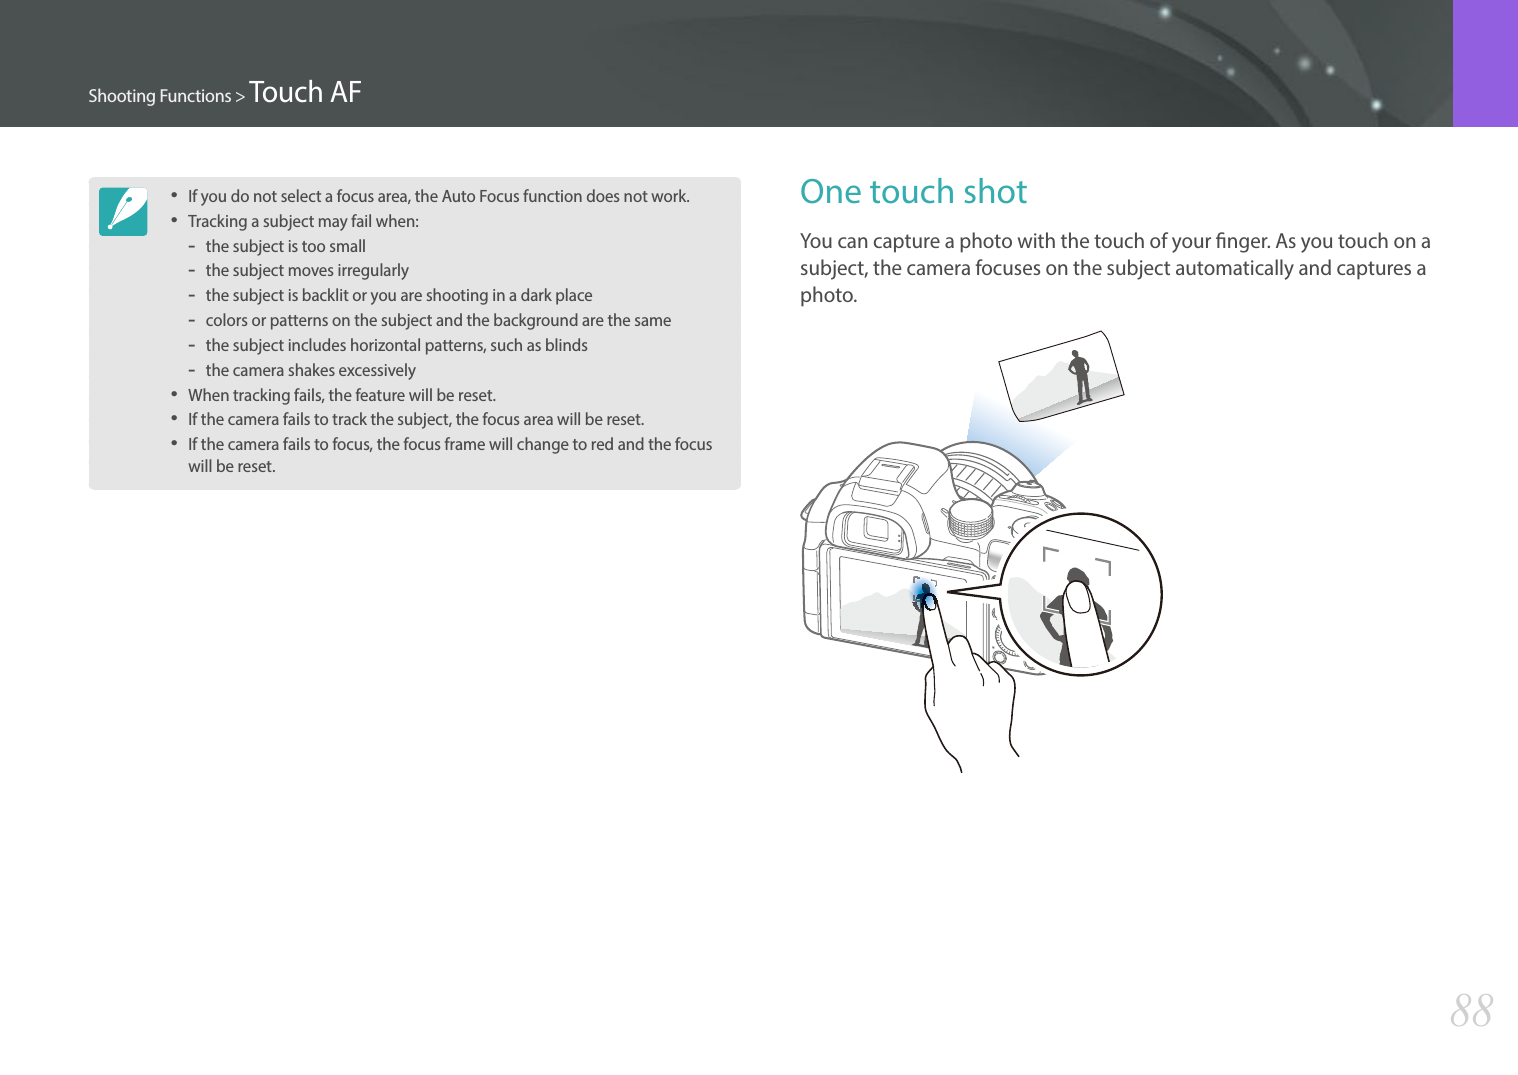
![Shooting Functions8787Shooting FunctionsShooting FunctionsTracking AFTracking AF allows you to track and automatically focus on your subject, even when the subject is moving or when you change the shooting composition. White frame: Your camera is tracking the subject.Green frame: Your subject is in focus when you half-press [Shutter].Red frame: Your camera failed to focus. Select or focus on a focal area that you touch on the screen. Additionally, focus on the subject and capture a photo by touching on the screen.To set Touch AF, In Shooting mode, press [m] ĺb ĺTouch AF ĺ an option.Available options may dier depending on the shooting conditions.Touch AFTouch AF allows you to select and focus on the focus area that you touch on the screen.AF PointThe focal area will correspond to the area you touch on the screen and the focus will not be achieved. Touch AF](https://usermanual.wiki/Samsung-Electronics-Co/NX30/User-Guide-2157335-Page-88.png)
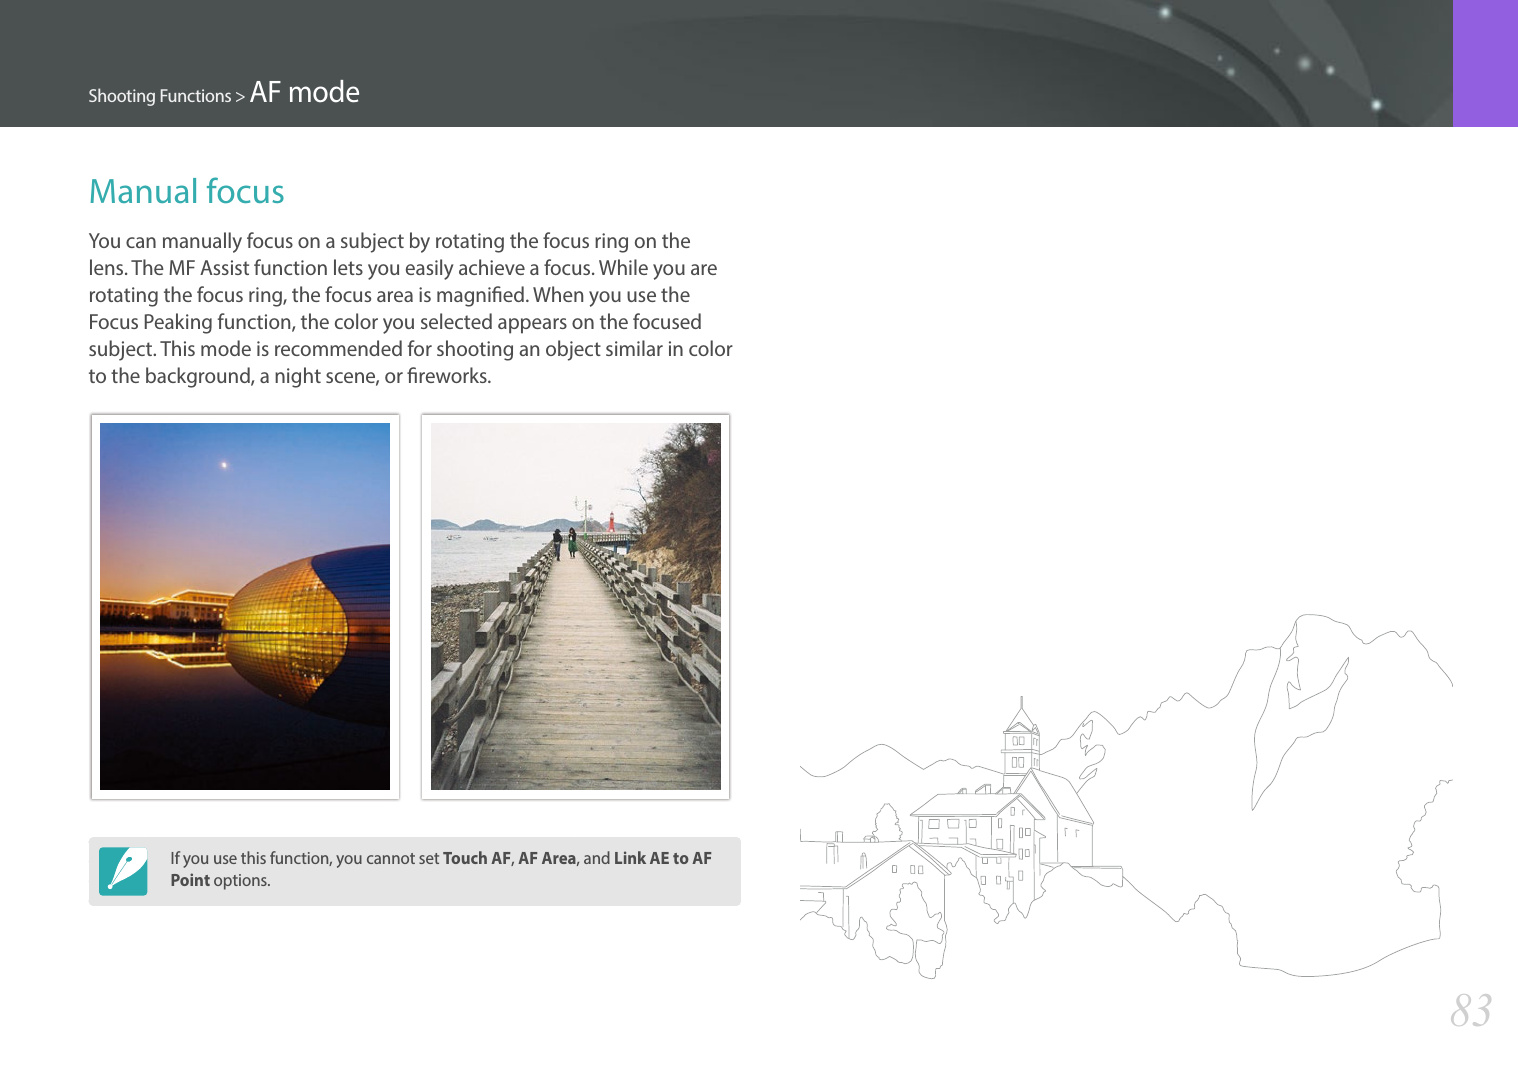
![Shooting Functions8989Shooting FunctionsShooting FunctionsIn the manual focus mode, you have to rotate the focus ring on the lens to focus. When you use the MF Assist function or the Focus Peaking function, you can achieve a clearer focus. This function is only available on a lens that supports manual focus.You can also use the Direct Manual Focus (DMF) function to adjust the focus manually. After focusing with the Auto Focus function, adjust the focus by rotating the focus ring.MF AssistIn the manual focus mode, you can enlarge the scene and easily adjust the focus while rotating the focus ring.To set the manual focus assist, In Shooting mode, press [m] ĺ b ĺ MF Assist ĺ an option.* DefaultOption DescriptionODo not use the MF Assist function.Enlarge x5*The focus area is magnied by 5 times when you rotate the focus ring.Enlarge x8The focus area is magnied by 8 times when you rotate the focus ring.Focus assist](https://usermanual.wiki/Samsung-Electronics-Co/NX30/User-Guide-2157335-Page-90.png)
![90Shooting Functions > Focus assistFocus PeakingIn the manual focus mode, the color you selected appears on the focused subject to help you focus while rotating the focus ring.To set Focus Peaking options, In Shooting mode, press [m] ĺ b ĺ Focus Peaking ĺ an option.* DefaultOption DescriptionLevelSet a sensitivity for detecting the focused subject. (O, High, Normal*, Low)ColorSet a color to appear on the focused subject. (White*, Red, Green)DMF (Direct Manual Focus) You can adjust the focus manually by rotating the focus ring after achieving the focus by half-pressing [Shutter]. This feature may not be available with some lenses.To set the DMF function, In Shooting mode, press [m] ĺ d ĺ DMF ĺ an option.Setting DMF responsivenessSet the focus ring's response when you use the DMF function. If you select High, slight rotations of the focus ring are made to adjust the focus. If you select Low, longer rotations of the focus ring are made to adjust the focus. This feature may not be available with some lenses.To set DMF Resposiveness options, In Shooting mode, press [m] ĺ d ĺ DMF Responsiveness ĺ High, Medium, or Low.](https://usermanual.wiki/Samsung-Electronics-Co/NX30/User-Guide-2157335-Page-91.png)
![Shooting Functions9191Shooting FunctionsShooting FunctionsUse the Optical Image Stabilization (OIS) function to minimize camera shake. OIS may not be available with some lenses.Camera shake tends to occur in dark places or when shooting indoors. In such cases, the camera uses slower shutter speeds in order to increase the amount of light taken in, which can result in a blurry photo. You can prevent this situation by using the OIS function.If your lens has an OIS switch, you have set the switch to ON to use the OIS function.To set OIS options, In Shooting mode, press [m] ĺb ĺ OIS (Anti-Shake) ĺ an option.* DefaultIcon DescriptionMode 1*: The OIS function is applied only when you press [Shutter] in full or half.Mode 2: The OIS function is on.O: The OIS function is o. (This option may not be available with some lenses.)Optical Image Stabilization (OIS)Without OIS correction With OIS correction• OIS may not function properly when: -you move your camera to follow a moving subject -there is too much camera shake -the shutter speed is slow (for example, when you select Night in s mode) -the battery is low -you capture a close-up shot• If you use the OIS function with a tripod, your images may be blurred by the vibration of the OIS sensor. Deactivate the OIS function when you use a tripod.• If the camera is hit or dropped, the display will be blurry. If this occurs, turn o the camera, and then turn it on again.• Use the OIS function only when needed because the function consumes more battery power.• To set an OIS option on the menu, set the OIS switch on your lens to ON.• This option may not be available with some lenses.• O may not be available with some lenses.](https://usermanual.wiki/Samsung-Electronics-Co/NX30/User-Guide-2157335-Page-92.png)
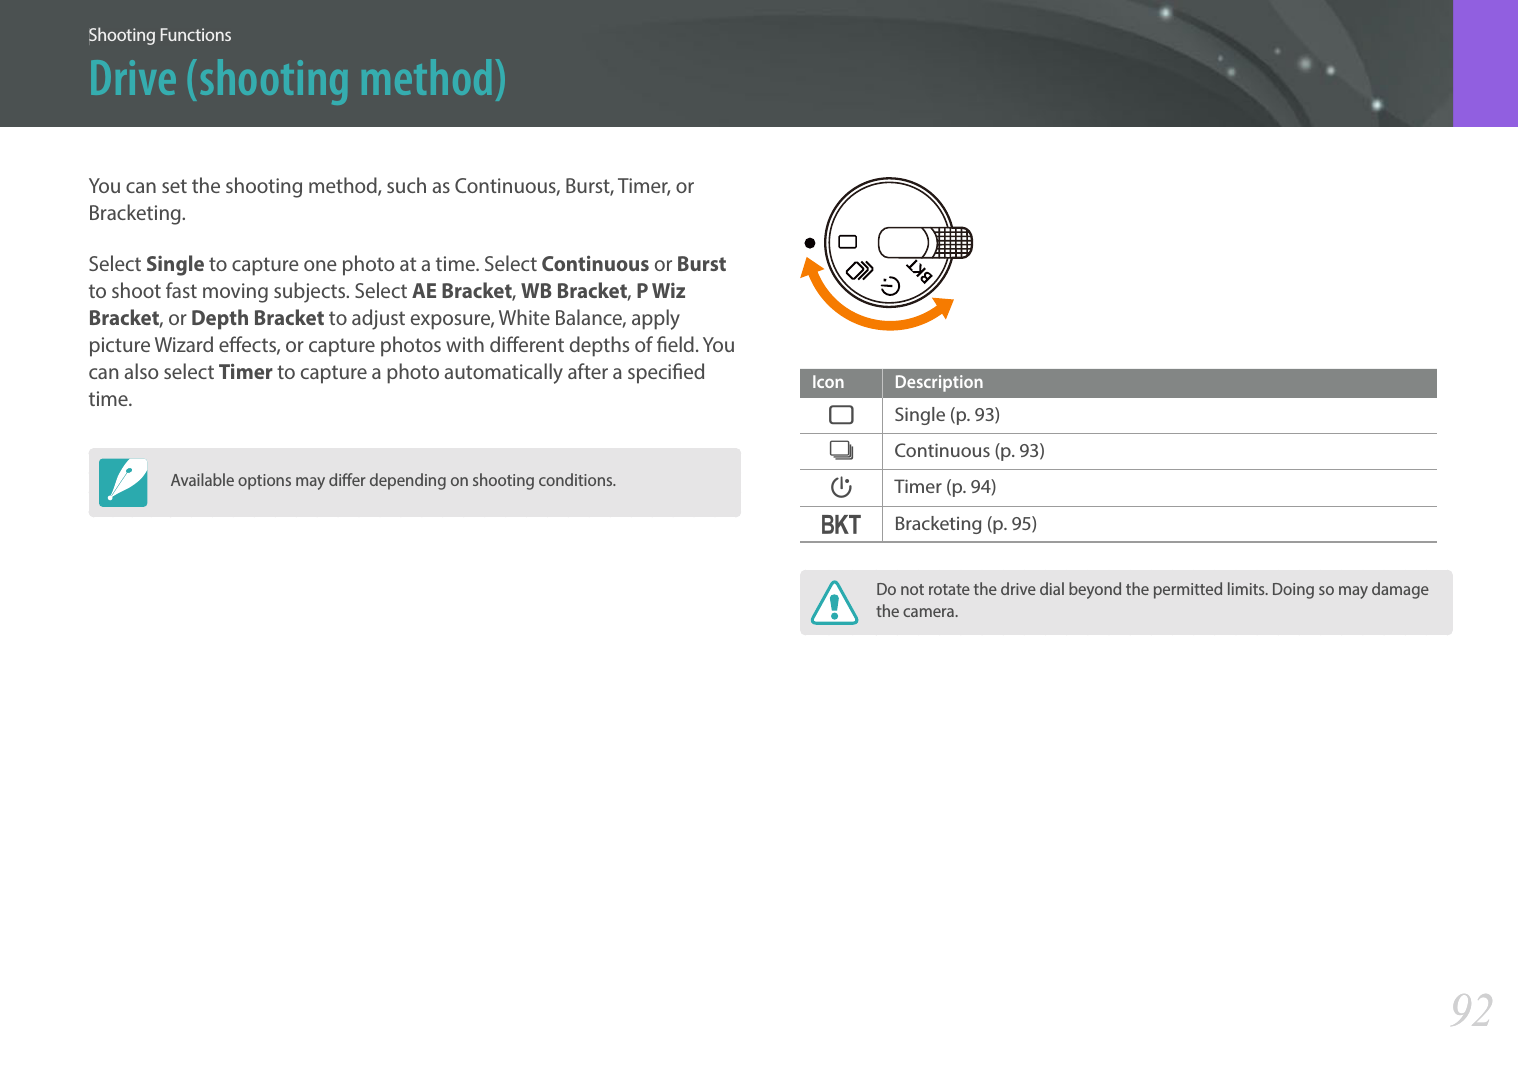
![93Shooting Functions > Drive (shooting method)SingleCapture one photo whenever you press [Shutter]. Recommended for general conditions.To set the shooting method, Rotate the drive dial to H.ContinuousContinuously capture photos while you are pressing [Shutter]. You can capture up to 4 photos (Continuous Normal) or 9 photos (Continuous High) per second.To set the shooting method, Rotate the drive dial to J, press [m] ĺ b ĺ Drive Settings ĺ Continuous ĺ Continuous High or Continuous Normal.If you select Continuous High, the noise reduction function is not available.](https://usermanual.wiki/Samsung-Electronics-Co/NX30/User-Guide-2157335-Page-94.png)
![94Shooting Functions > Drive (shooting method)BurstConsecutively capture up to 10 shots per second (3 seconds), 15 shots per second (2 seconds), or 30 shots per second (1 second) when you press [Shutter] once. It is recommended for shooting the rapid motion of fast moving subjects such as racing cars.To set the shooting method, Rotate the drive dial to J, press [m] ĺ b ĺ Drive Settings ĺ Continuous ĺ Burst ĺ an option.• The photo size is set to 5M. • It may take longer to save a photo. • You cannot use the ash with this option.• Shutter speed must be faster than 1/30 second.• Photos captured with this option may be slightly enlarged when saving.• You cannot set an ISO option higher than ISO 3200.• This option cannot be used with the RAW le format and is not available when the photo quality is set to RAW.TimerCapture a photo after a specied time. You can also set the shooting interval, number of shots, and shooting time.To set the shooting method, Rotate the drive dial to K.To set the timer details, set the drive dial to K, press [m] ĺ b ĺ Drive Settings ĺ Timer ĺ an option.](https://usermanual.wiki/Samsung-Electronics-Co/NX30/User-Guide-2157335-Page-95.png)
![95Shooting Functions > Drive (shooting method)Auto Exposure Bracketing (AE Bracket)When you press [Shutter], the camera captures 3 consecutive photos: the original, one a step darker, and one a step lighter. Use a tripod to prevent blurry photos as the camera captures three photos continuously. You can adjust the settings in Bracket Set menu.To set the shooting method, Rotate the drive dial to L, press [m] ĺ b ĺ Drive Settings ĺ Bracket ĺ AE Bracket.Exposure -2OriginalExposure +2White Balance Bracketing (WB Bracket)When you press [Shutter], the camera captures 3 consecutive photos: the original and two more with dierent White Balance settings. The original photo is captured when you press [Shutter]. The other two are automatically adjusted according to the White Balance you have set. You can adjust the settings in Bracket Set menu.To set the shooting method, Rotate the drive dial to L, press [m] ĺ b ĺ Drive Settings ĺ Bracket ĺ WB Bracket.WB-2OriginalWB+2This option cannot be used with the RAW le format and is not available when the photo quality is set to RAW.](https://usermanual.wiki/Samsung-Electronics-Co/NX30/User-Guide-2157335-Page-96.png)
![96Shooting Functions > Drive (shooting method)Picture Wizard Bracketing (P Wiz Bracket)When you press [Shutter], the camera captures three consecutive photos, each with a dierent Picture Wizard setting. The camera captures a photo and applies the three Picture Wizard options you have set to the image captured. You can select three dierent settings in Bracket Set menu.To set the shooting method, Rotate the drive dial to L, press [m] ĺ b ĺ Drive Settings ĺ Bracket ĺ P Wiz Bracket.VividStandardRetroThis option cannot be used with the RAW le format and is not available when the photo quality is set to RAW.Depth Bracketing When you press [Shutter], the camera captures three consecutive photos, each with a dierent depth of eld. Use a tripod to prevent blurry photos as the camera captures three photos continuously. You can adjust the settings in Bracket Set menu. To set the shooting method, Rotate the drive dial to L, select [m] ĺ b ĺ Drive Settings ĺ Bracket ĺ Depth Bracket.This feature is available only in Program or Aperture priority mode.Bracketing settingYou can set up the options for each bracketing. (p. 157)To set a bracketing option, In Shooting mode, press [m] ĺ d ĺ Bracket Set ĺ an option.](https://usermanual.wiki/Samsung-Electronics-Co/NX30/User-Guide-2157335-Page-97.png)
![Shooting Functions9797Shooting FunctionsShooting FunctionsSet the shooting interval and the number of shots to be captured automatically. Use this function to capture photos at regular intervals during an event such as a lunar eclipse or a sunrise.To capture an interval shot, In Shooting mode, press [m] ĺ b ĺ Interval Capture ĺ a shooting interval and the number of shots.• Shooting intervals can be set to seconds if the shooting interval is less than one minute. For intervals longer than one minute, intervals can be set to minutes and hours only.• Use a shutter release cable with a tripod to minimize camera movement when capturing interval shots.• Connect the power cable if the shooting interval is long or the number of shots to be taken is high.Interval Capture](https://usermanual.wiki/Samsung-Electronics-Co/NX30/User-Guide-2157335-Page-98.png)
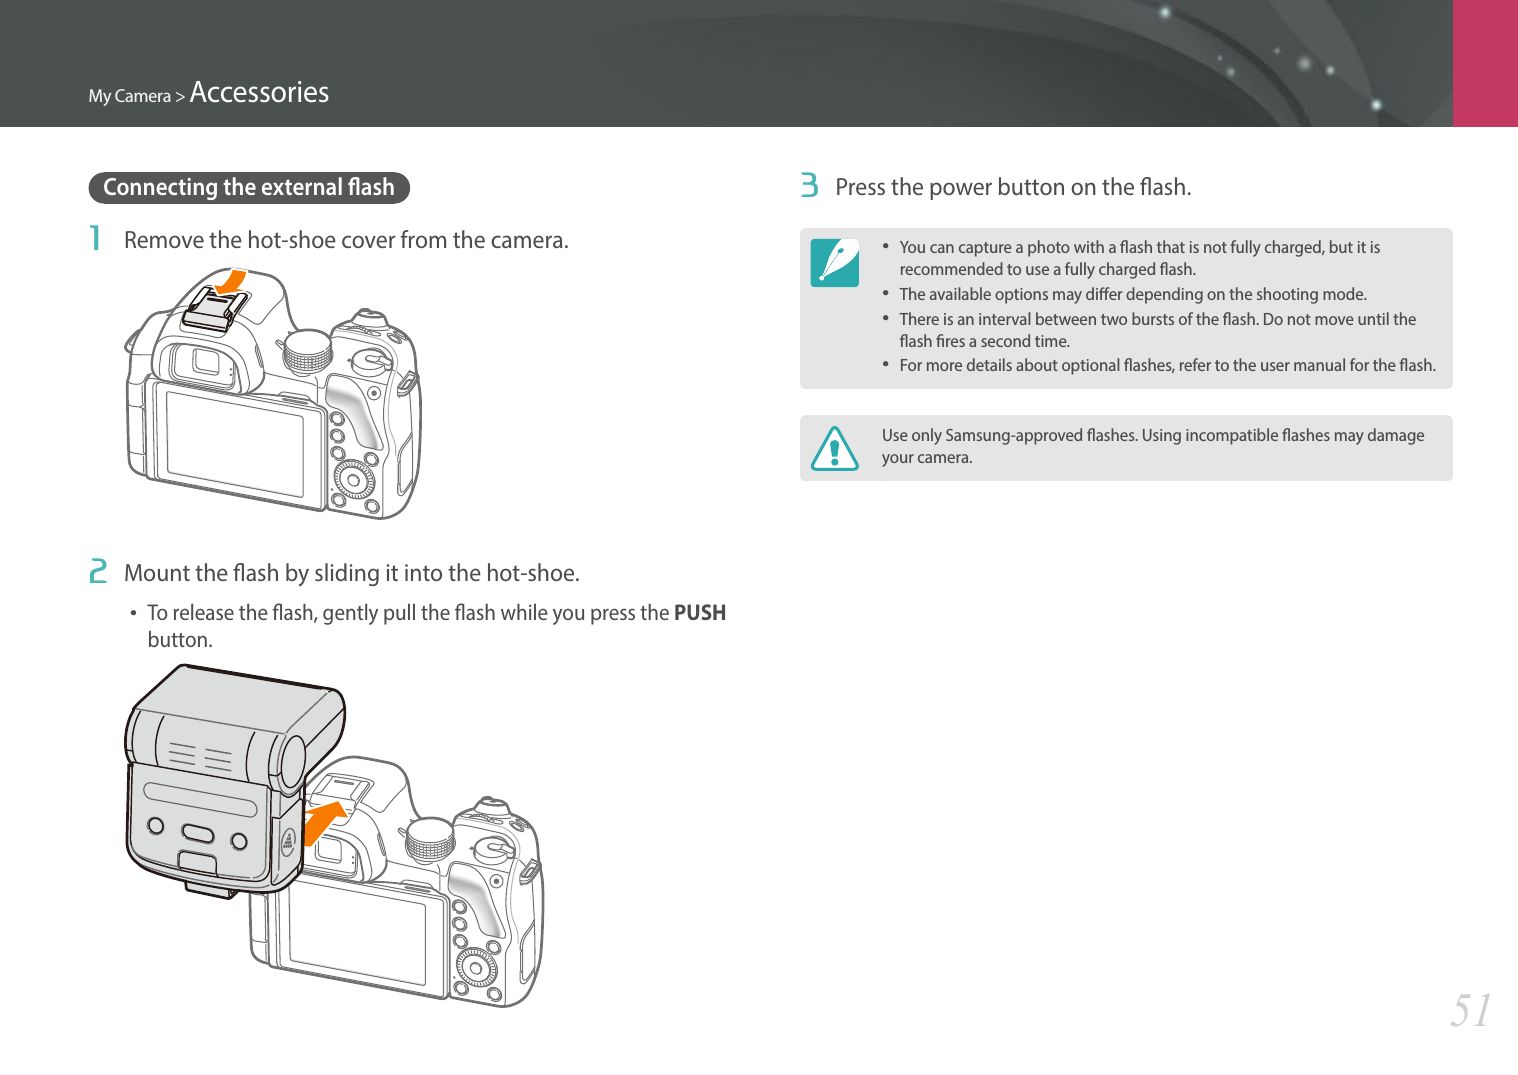
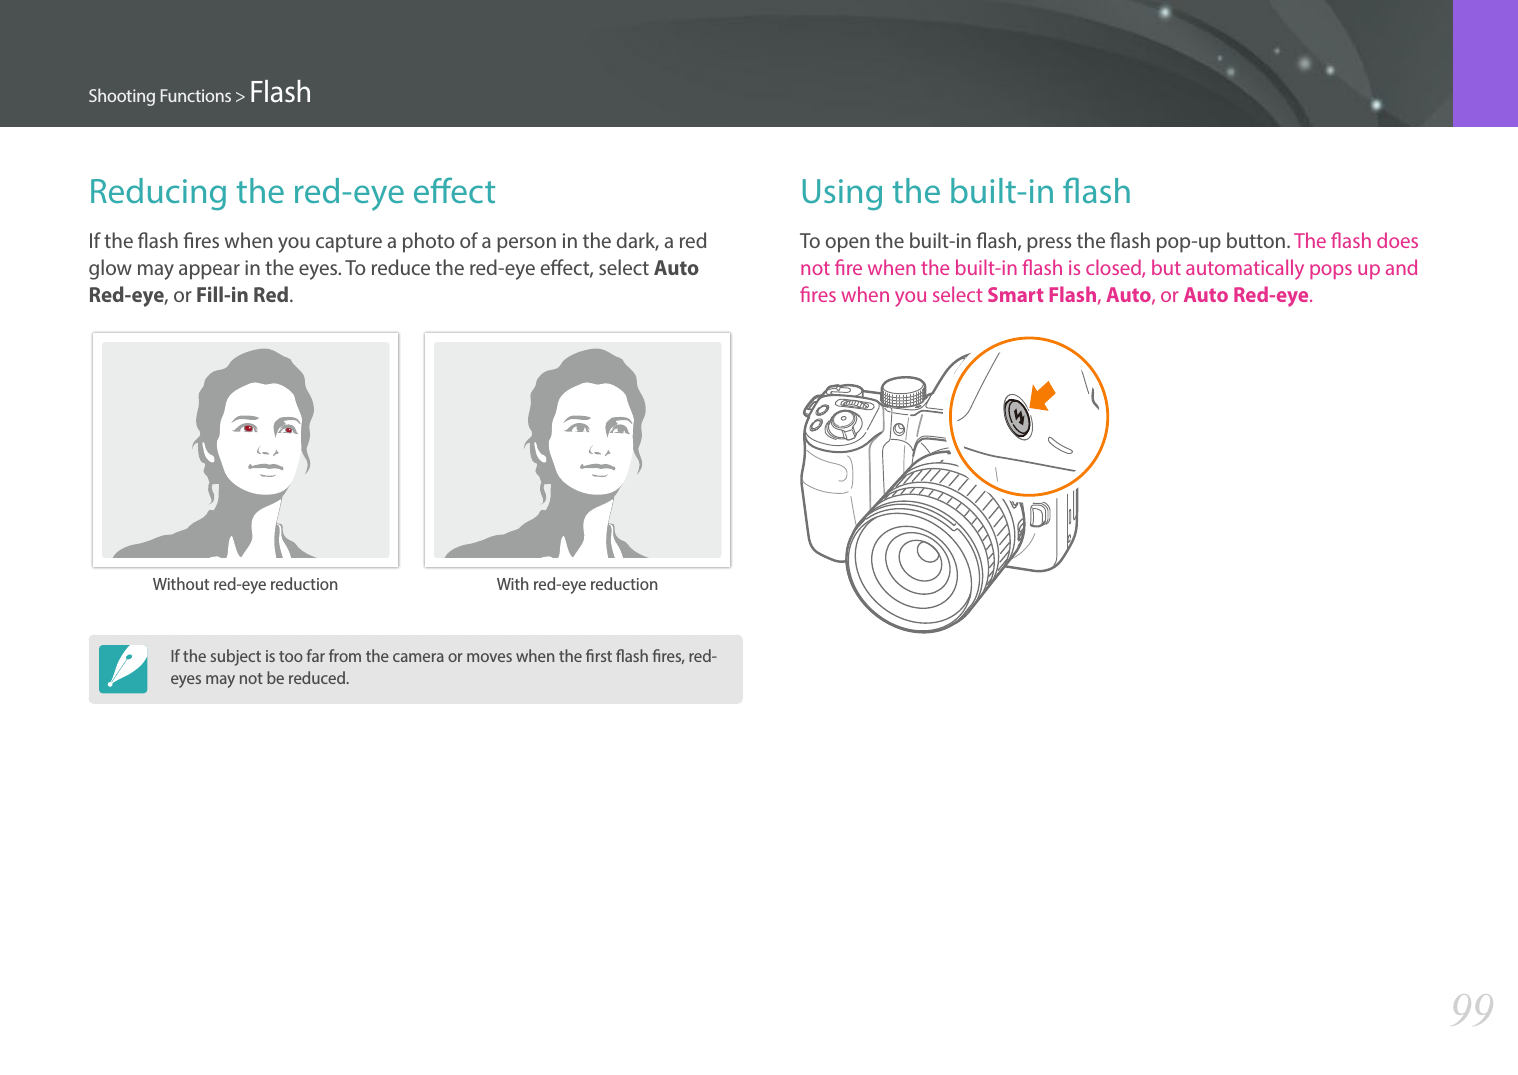
![Shooting Functions9898Shooting FunctionsShooting FunctionsIn order to capture a realistic photo of a subject, the amount of light should be constant. When the light source varies, you can use a ash and supply a constant amount of light. Select appropriate settings according to a light source and a subject.To set ash options, In Shooting mode, press [m] ĺ b ĺ Flash ĺ an option.Icon DescriptionO: Do not use the ash.ASmart Flash: The camera automatically adjusts the brightness of the ash according to the amount of light in the surrounding environment.AAuto: The ash automatically res in dark places.Auto Red-eye: The ash automatically res and reduces red-eyes.Fill in: The ash res whenever you capture a photo. (Brightness is automatically adjusted.)Fill-in Red: The ash res whenever you capture a photo and reduces red-eyes.1st Curtain: The ash res immediately after the shutter opens. The camera captures a photo of a subject earlier in an action sequence clearly. Ball moving directionIcon Description2nd Curtain: The ash res just before the shutter closes. The camera captures a photo of a subject later in an action sequence clearly. Ball moving directionHHi-speed Sync: If the shutter speed is faster than the sync speed the ash will re multiple times at high speed. The ash starts to re while the shutter opens. This option is available when you attach a compatible, external ash only.• The available options may dier depending on shooting conditions.• There is an interval between two bursts of the ash. Do not move until the ash res a second time.• If you select O, the ash does not re even when an external ash is attached.Use only Samsung-approved ashes. Using incompatible ashes may damage your camera. Flash](https://usermanual.wiki/Samsung-Electronics-Co/NX30/User-Guide-2157335-Page-99.png)
![100Shooting Functions > FlashAdjusting the ash intensityWhen the ash is on, adjust the ash intensity +/-2 levels.To set the ash intensity,In Shooting mode, select [m] ĺ b ĺ Flash ĺ an option ĺ [D] ĺ scroll the jog dial or rotate the navigation button or press [C/F] to adjust the ash intensity. Back Set ResetFlash : Fill in• You can also drag the slider or touch +/- to adjust the intensity.• Adjusting the flash intensity may not be eective when: -the subject is too close to the camera -you set a high ISO sensitivity -the exposure value is too big or too small• In some shooting modes, you cannot use this function.• If you attach an intensity-adjustable external ash to the camera, the intensity settings of the ash will be applied. • If the subject is too close when you use the ash, some light may be blocked, resulting in a dark photo. Ensure that the subject is within the recommended range, which varies by lens.• When a lens hood is attached, the light from the ash can be blocked by the hood. Remove the hood to use the ash.](https://usermanual.wiki/Samsung-Electronics-Co/NX30/User-Guide-2157335-Page-101.png)
![101Shooting Functions > FlashFlash settingsSet the ash mode, exposure value, ash brightness, or multi ash when you attach an external ash to the camera. You can also set wireless sync to control internal or external ash.Setting external ashTo set external ash,In Shooting mode, press [m] ĺ b ĺ External Flash Settings ĺ an option.Option DescriptionFlash Mode• A-TTL: In the A-TTL (Advanced Through The Lens) mode, the camera measures the light reected by the subject through the lens. Then, it calculates the optimum exposure based on the exposure value and shutter speed.• Manual Flash: The ash emits the full amount of light or the ash intensity can be adjusted manually.• Multi Flash: When you press [Shutter], the ash res multiple times based on the number you have set. Flash EVSet the exposure of the ash when the ash mode is A-TTL.Flash Brightness Set the brightness of the ash when the ash mode is Manual Flash.Multi Flash SettingsSet the count, brightness, or frequency of the ash when the ash mode is Multi Flash.Setting wireless sync for internal or external ashSet wireless sync to control internal and external ash units remotely via wireless signals. The remote system consists of a master ash that is mounted on the camera and one or more slave ash units. A slave ash is assigned to one of three groups: A, B, or C.To set wireless sync,In Shooting mode, press [m] ĺ b ĺ Internal Wireless Flash or External Wireless Flash ĺ an option. Option DescriptionUse Wireless FlashSet to use wireless sync.ChannelSelect channels for wireless sync. There are four remote channels available to allow multiple remote systems to operate at the same time. Master and slave ash units, in the same remote system, must be set to the same channel.Group Flash ModeSet the ash mode for group A, B, or C. Changes to the ash mode must be made on the master in group A only. The changes are then applied to all groups in the system. A remote system in Group Flash mode can use either A-TTL or Manual mode only.](https://usermanual.wiki/Samsung-Electronics-Co/NX30/User-Guide-2157335-Page-102.png)
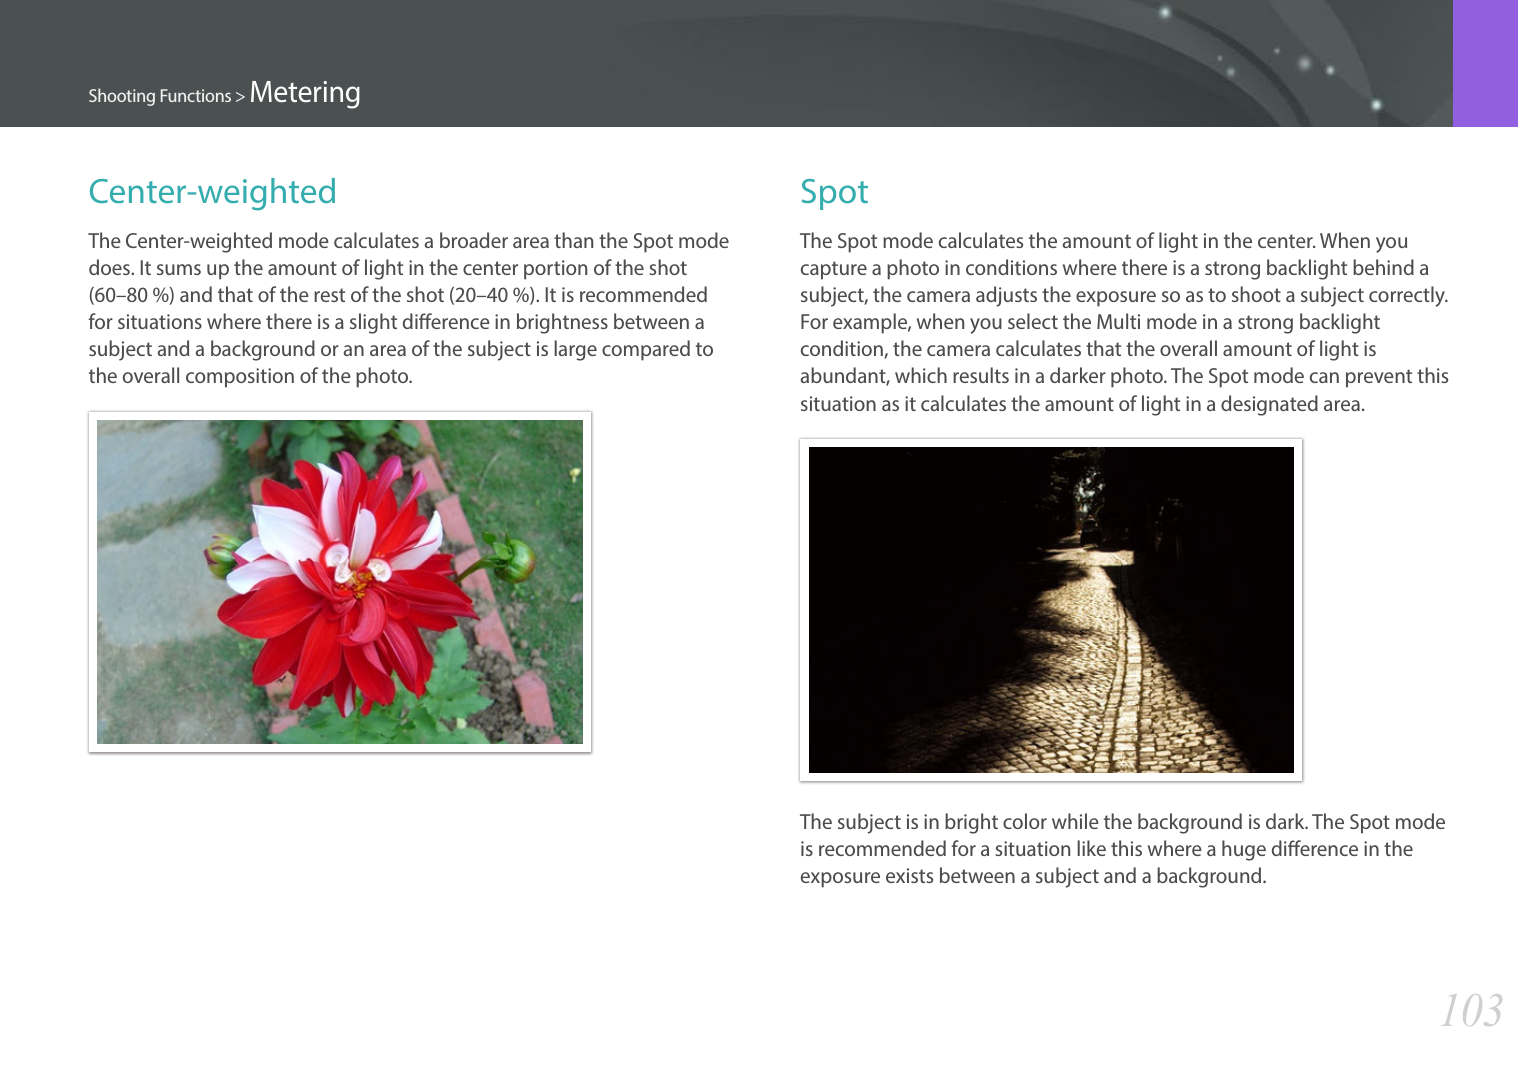
![Shooting Functions102102Shooting FunctionsShooting FunctionsThe metering mode refers to the way in which a camera measures the quantity of light.The camera measures the amount of light in a scene, and in many of its modes, uses the measurement to adjust various settings. For example, if a subject looks darker than its actual color, the camera captures an overexposed photo of it. If a subject looks lighter than its actual color, the camera captures an underexposed photo of it.The brightness and overall mood of the photo can also be aected by how the camera measures the amount of light. Select an appropriate setting for a shooting condition.To set a metering option, In Shooting mode, press [N] ĺ an option.MultiThe Multi mode calculates the amount of light in multiple areas. When light is sucient or insucient, the camera adjusts the exposure by averaging the overall brightness of the scene. This mode is suitable for general photos.Metering](https://usermanual.wiki/Samsung-Electronics-Co/NX30/User-Guide-2157335-Page-103.png)
![104Shooting Functions > MeteringMeasuring the exposure value of the focus area When this function is turned on, the camera automatically sets an optimal exposure by calculating the brightness of the focus area. This function is only available when you select Spot metering or Multi metering, and Selection AF.To set this function, In Shooting mode, press [m] ĺ b ĺ Link AE to AF Point ĺ an option.](https://usermanual.wiki/Samsung-Electronics-Co/NX30/User-Guide-2157335-Page-105.png)
![Shooting Functions105105Shooting FunctionsShooting FunctionsThis function automatically corrects the loss of bright detail that can occur due to shading dierences in the photo.To set Dynamic Range options, In Shooting mode, press [m] ĺ b ĺ Dynamic Range ĺ an option.Without Dynamic Range eect With Dynamic Range eect* DefaultIcon DescriptionO*: Do not use Dynamic Range.Smart Range+: Correct the loss of bright detail.You cannot set ISO 100. HDR: Capture 2 photos with dierent exposures, and then combine them to create a single image automatically.• You cannot set an ISO option higher than ISO 3200.• Dynamic Range options cannot be set with Picture Wizard options at the same time.Dynamic Range](https://usermanual.wiki/Samsung-Electronics-Co/NX30/User-Guide-2157335-Page-106.png)
![Shooting Functions106106Shooting FunctionsShooting FunctionsSmart Filter lets you apply special eects to your photos. You can select various lter options to create special eects that are dicult to be achieved with normal lenses.To set Smart Filter options,In Shooting mode, press [m] ĺ b ĺ Smart Filter ĺ an option.* DefaultOption DescriptionO*No eectVignettingApply the retro-looking colors, high contrast, and strong vignette eect of Lomo cameras.MiniatureApply a tilt-shift eect to make the subject appear in miniature.Colored PencilApply a colored pencil painting eect.WatercolorApply a watercolor painting eect.Wash drawingApply a washed-out eect.Oil SketchApply an oil sketching eect.Ink SketchApply an ink sketching eect.AcrylApply an acryl painting eect.* DefaultOption DescriptionNegativeApply a negative lm eect.RedDesaturate all colors but red.GreenDesaturate all colors but green.BlueDesaturate all colors but blue.YellowDesaturate all colors but yellow. Smart Filter options cannot be set with Picture Wizard options at the same time.Smart Filter](https://usermanual.wiki/Samsung-Electronics-Co/NX30/User-Guide-2157335-Page-107.png)
![Shooting Functions107107Shooting FunctionsShooting FunctionsThe camera automatically sets the exposure by measuring the levels of light from the photo’s composition and the position of a subject. If the exposure set by the camera is higher or lower than you expected, you can adjust the exposure value manually. The exposure value is adjustable in ±3 increments. The camera displays the exposure warning in red for each step beyond ±3 range.To adjust the exposure value, while holding down [W], scroll the jog dial. You can also adjust the exposure value by pressing [f], and then selecting EV.You can check the exposure value by the position of the exposure level indicator.Exposure level indicatorIncreased exposure (brighter)Decreased exposure (darker) Exposure warning Standard exposure index-2Original+2Viewing the overexposure guideSet the overexposed areas of a photo to blink. You can view overexposed photos in Shooting mode.To view the overexposure guide,In Shooting mode, press [m] ĺ b ĺ Overexposure Guide ĺ an option.Exposure compensation](https://usermanual.wiki/Samsung-Electronics-Co/NX30/User-Guide-2157335-Page-108.png)
![Shooting Functions108108Shooting FunctionsShooting FunctionsWhen you cannot achieve an appropriate exposure because of a strong color contrast or you want to capture a photo on which the subject is out of the auto focus area, lock the focus or exposure and then capture a photo.To lock the exposure or focus, adjust the photo’s composition on which you want to focus or calculate the exposure, and then press [a].After locking the exposure or focus, aim the lens where you desire, and then press [Shutter].You can change the function assigned to the button to focus lock, exposure lock, or both of them. A function executed by half-pressing [Shutter] varies according to the function assigned to [a]. (p. 161)Exposure/Focus lock](https://usermanual.wiki/Samsung-Electronics-Co/NX30/User-Guide-2157335-Page-109.png)
![Shooting Functions109109Shooting FunctionsShooting FunctionsThe functions available for video are explained below.Movie sizeSet the movie size.To set movie size options, In Shooting mode, press [m] ĺ g ĺ Movie Size ĺ an option.* DefaultIcon Size Recommended for*1920X1080 (60 fps) (16:9)View on a Full HDTV. (Playable only on Full HDTVs capable of playback at 60 fps.)1920X1080 (30 fps) (16:9) View on a Full HDTV. 1920X1080 (15 fps) (16:9) View on a Full HDTV. (Available only with some Smart Filter options.)1920X810 (24 fps) (Approx. 2.35:1) View on a Full HDTV. 1280X720 (60 fps) (16:9) View on an HDTV.1280X720 (30 fps) (16:9) View on an HDTV.640X480 (30 fps) (4:3) View on a TV.320X240 (30 fps) (4:3) Post on a website using the wireless network (30 seconds maximum).Movie qualitySet the Movie quality.To set movie quality options, In Shooting mode, press [m] ĺ g ĺ Movie Quality ĺ an option.* DefaultIcon Extension DescriptionMP4 (H.264) Normal: Record videos in normal quality.MP4 (H.264) HQ*: Record videos in high quality.Video functions](https://usermanual.wiki/Samsung-Electronics-Co/NX30/User-Guide-2157335-Page-110.png)
![110Shooting Functions > Video functionsMulti MotionSet the playing speed of a video.To set playing speed options,In Shooting mode, press [m] ĺg ĺMulti Motion ĺ an option.* DefaultIcon Descriptionx0.25: Record a video and play it at 1/4 normal speed. (Available only with 640x480 or 320x240)x0.5: Record a video and play it at 1/2 normal speed. (Available only with 1920x1080 (30 fps), 1280x720 (30 fps), 640x480, or 320x240)x1*: Record a video and play it at normal speed.x5: Record a video and play it at 5X normal speed.x10: Record a video and play it at 10X normal speed.x20: Record a video and play it at 20X normal speed.• If you select an option other than x1, sound will not be recorded.• The available options may dier depending on shooting conditions.DIS (Anti-Shake)Set the Digital Image Stabilization function.To set the DIS function,In Shooting mode, press [m] ĺg ĺ DIS (Anti-Shake) ĺan option.* DefaultOption DescriptionO*Do not use the DIS function.OnUse the DIS function.](https://usermanual.wiki/Samsung-Electronics-Co/NX30/User-Guide-2157335-Page-111.png)
![111Shooting Functions > Video functionsVoiceSometimes, a muted video is more appealing than the one with sound. Turn the voice o to record a muted video. To set voice options, In Shooting mode, press [m] ĺ g ĺ Voice ĺ an option.Wind CutWhen you record videos in noisy environments, unintended sounds can be recorded in videos. In particular, severe wind noise recorded in videos distracts you from enjoying your videos. Use the Wind Cut function to remove some surrounding noise in addition to wind noise.To reduce wind sound, In Shooting mode, press [m] ĺ g ĺ Wind Cut ĺ an option.FaderYou can fade in or fade out a scene using the fader function on the camera without having to do it on a PC. Set the fade in option to gradually fade in at the start of the scene. Set the fade out option to gradually fade out the scene. Use the function appropriately and add dramatic eects on your videos.To set fader options, In Shooting mode, press [m] ĺ g ĺFader ĺ an option.* DefaultIcon DescriptionO*: Fader function not used.In: Scene gradually fades in.Out: Scene gradually fades out.In-Out: The fader function is applied at the start and end of the scene.When you use the fader function, it may take longer to save a le.](https://usermanual.wiki/Samsung-Electronics-Co/NX30/User-Guide-2157335-Page-112.png)
![112Shooting Functions > Video functionsMic LevelSet the mic level for the shooting conditions. To set the mic level, In Shooting mode, press [m] ĺ g ĺ Mic Level ĺ an option.* DefaultIcon DescriptionAAuto*: Set the mic level automatically.MManual: Set the mic level manually.](https://usermanual.wiki/Samsung-Electronics-Co/NX30/User-Guide-2157335-Page-113.png)
![114Playback/EditingLearn how to view photo and video thumbnails and how to protect or delete les.If you perform no operations for a while, information and icons on the screen disappear. When you operate the camera again, they will reappear.Viewing photos1 Press [y].• The most recent le you captured will be displayed.2 Rotate the navigation button or press [C/F] to scroll through les.• You can also drag the image left or right to move to another le.You may not be able to edit or play back les that were captured with other cameras, due to unsupported sizes or codecs. Use a computer or another device to edit or play back these les.Viewing image thumbnailsIn order to search for photos and videos you want, convert to the thumbnail view. The thumbnail view displays multiple images at a time so that you can easily look through items you wish to nd. You can also classify and display les by category, such as date or le type.AllScroll the jog dial to the left to select the thumbnail view mode.(Scroll the jog dial to the right to return to the previous mode.)Searching and managing files](https://usermanual.wiki/Samsung-Electronics-Co/NX30/User-Guide-2157335-Page-115.png)
![115Playback/Editing > Searching and managing lesViewing les by category1 In the thumbnail view, press [m] ĺ z ĺ Filter ĺ a category.• You can also touch the current category name to open the option list.* DefaultOption DescriptionAll*View les normally.DateView les by the date they were saved.TypeView les by the le type.2 Select a list to open it.3 Select a le to view it.4 Touch to return to the previous view.Viewing les as a folderContinuous and burst shots appear as a folder. Selecting a folder will play back all photos automatically. Deleting a folder will delete all photos in the folder.1 In Playback mode, rotate the navigation button or press [C/F] to move to a desired folder.• You can also drag the image left or right to move to a desired folder.• The camera will automatically play back photos in the folder.2 Scroll the jog dial to the right to open the folder.• You can also touch the folder on the screen to open the folder.](https://usermanual.wiki/Samsung-Electronics-Co/NX30/User-Guide-2157335-Page-116.png)
![116Playback/Editing > Searching and managing les3 Rotate the navigation button or press [C/F] to move to another le. • You can also drag the image left or right to move to another le.4 Scroll the jog dial to the left or press [o] to return to Playback mode.• You can also touch to return to Playback mode.Protecting lesProtect your les from accidental deletion.1 In Playback mode, press [m] ĺ z ĺ Protect ĺ Select.2 Rotate the navigation button or press [C/F] to select a le, and then press [o].3 Press [f].• You cannot delete or rotate a protected le.• You can directly protect a le in Playback mode by selecting a le, and then pressing [ ]. To unprotect the le, press [ ] again.](https://usermanual.wiki/Samsung-Electronics-Co/NX30/User-Guide-2157335-Page-117.png)
![117Playback/Editing > Searching and managing lesLock/Unlock all lesLock or unlock all les.1 In Playback mode, press [m] ĺ z ĺ Protect ĺ All.2 Select an option.Option DescriptionLockLock all les.UnlockUnlock all les.CancelReturn to the previous menu.Deleting lesDelete les in Playback mode and secure more space on your memory card. Protected les are not deleted.Deleting a single leYou can select a single le and delete it.1 In Playback mode, select a le, and then press [n].2 When the pop-up message appears, select Ye s.](https://usermanual.wiki/Samsung-Electronics-Co/NX30/User-Guide-2157335-Page-118.png)
![118Playback/Editing > Searching and managing lesDeleting multiple lesYou can select multiple les and delete them.1 In Playback mode, press [m] ĺ z ĺ Delete ĺ Select.• Alternatively, in thumbnails view, press [n], and then select les to delete.2 Select les you want to delete by rotating the navigation button or pressing [C/F], and then press [o].• Press [o] again to cancel your selection.3 Press [n].4 When the pop-up message appears, select Yes.Deleting all lesYou can delete all les on the memory card at once.1 In Playback mode, press [m].2 Select z ĺ Delete ĺ All.3 When the pop-up message appears, select Yes.](https://usermanual.wiki/Samsung-Electronics-Co/NX30/User-Guide-2157335-Page-119.png)
![119Playback/EditingEnlarging a photoYou can enlarge photos when viewing them in Playback mode. You can also use the Trim function to extract the portion of the image displayed on the screen and save it as a new le.Magnied areaMagnication (The maximum magnication may dier by resolution.) Full Image CropScroll the jog dial to the right to enlarge a photo. (Scroll the jog dial to the left to reduce a photo.)To Do thisMove magnied areaPress [D/I/C/F].Crop the enlarged imagePress [f]. (saved as a new le)Return to the original imagePress [o].• You can also pinch your ngers together or spread them apart on the screen to reduce or enlarge a photo. You can also double-tap an area to enlarge it quickly.• You can scroll through les by rotating the navigation button, even when a photo is enlarged.Viewing a slide showYou can view photos in a slide show, apply various eects to the slide show, and play background music.1 In Playback mode, press [m].2 Select z ĺ Slide Show Options.3 Select a slide show eect option.• Skip to step 4 to start a slide show with no eects.* DefaultOption DescriptionPlay ModeSet whether or not to repeat the slide show. (One Play*, Repeat)IntervalSet the interval between photos. (1 sec*, 3 sec, 5 sec, 10 sec)MusicSet background audio.Eect• Set a scene change eect between photos.• Select O to cancel eects.Viewing photos](https://usermanual.wiki/Samsung-Electronics-Co/NX30/User-Guide-2157335-Page-120.png)
![120Playback/Editing > Viewing photos4 Press [m].5 Select Start Slide Show.6 View the slide show.• Press [o] to pause.• Press [o] again to resume. • Press [m] to stop the slide show and return to Playback mode.• Press [D/I] to adjust the volume level.Viewing interval shotsView photos that are captured with the Interval Capture function.To view interval shots, In Playback mode, press [m] ĺ z ĺ Play Interval Shots.Auto rotatingWith Auto Rotate on, the camera automatically rotates photos you have captured vertically so they t the screen horizontally.To set auto rotate options, In Playback mode, press [m] ĺ z ĺ Auto Rotate ĺ an option.](https://usermanual.wiki/Samsung-Electronics-Co/NX30/User-Guide-2157335-Page-121.png)
![121Playback/EditingIn Playback mode, you can play a video, capture an image from a video, or crop a video to save as another le.StopCaptureIcon Description/View previous le/Scan backward. (Each time you touch the icon while playing the video, you change the scan speed in this order: 2X, 4X, 8X.)/Pause or resume playback./View next le/Scan forward. (Each time you touch the icon while playing the video, you change the scan speed in this order: 2X, 4X, 8X.)Adjust the volume or mute the sound. Scanning backward or forwardTo scan backwards or forwards through a video le while it is playing, use one of the following methods.• Touch / . Each time you touch the icon, you change the scan speed in this order: 2X, 4X, 8X.• Press [C/F]. Each time you press the button, you change the scan speed in this order: 2X, 4X, 8X.• Scroll the jog dial to the left or right. As you scroll faster, the scanning speed will also becomes faster.• Drag the handles that appear on the progress bar to the left or right. You can change the playback position in the video.• Drag an area on the screen to the left or right. You can change the playback position in the video.Playing videos](https://usermanual.wiki/Samsung-Electronics-Co/NX30/User-Guide-2157335-Page-122.png)
![122Playback/Editing > Playing videosAdjusting the brightness of a videoAdjust the brightness of a video while playing it.To adjust the brightness of a video, Touch the left half of the display ĺ drag the slider on the brightness control bar upward or downward.Adjusting the volume of a videoAdjust the volume of a video while playing it.To adjust the volume of a video, Touch the right half of the display or ĺ drag the slider on the volume control bar upward or downward.Trimming a video during playback1 In Playback mode, scroll to a video, and then press [m].2 Select Trim Movie.3 Press [o] or touch to start playing the video.4 Press [o] or touch at the point where you want the trimming to begin.5 Press [f] or touch Start Point.6 Press [o] or touch to resume playing the video.7 Press [o] or touch at the point where you want the trimming to end.](https://usermanual.wiki/Samsung-Electronics-Co/NX30/User-Guide-2157335-Page-123.png)
![123Playback/Editing > Playing videosCapturing an image during playback1 While viewing a video, press [o] or touch at the point where you want to capture an image.2 Press [f] or touch Capture.• You cannot capture an image from a video recorded in 3D mode.• The resolution of the captured image will be the same as the original video.• The captured image is saved as a new le.8 Press [f] or touch End Point.9 Press [f] or touch Trim to trim a video.• You can adjust the scene to be cropped by dragging the handles that appear on the progress bar.10 When the pop-up message appears, select Ye s.• You cannot trim a video recorded in 3D mode.• The original video should be at least 10 seconds long.• The camera will save the edited video as a new le and leave the original video intact.](https://usermanual.wiki/Samsung-Electronics-Co/NX30/User-Guide-2157335-Page-124.png)
![124Playback/EditingPerform photo editing tasks, such as resizing, rotating, or reducing red-eye eects. Edited photos are saved as new les under dierent le names. Photos captured in some modes cannot be edited with the Image Edit function.To edit images, In Playback mode, scroll to a photo, and then press [f] ĺ an option.• You can also edit images in Playback mode by selecting a photo, and then pressing [m] ĺ z ĺ Edit Image. • Some images may not be edited with the Image Edit function. In this case, use the supplied image editing software.• The camera will save edited photos as new les.• When you edit photos, the camera will automatically convert them to a lower resolution. Photos that you rotate or resize manually are not automatically converted to a lower resolution.• You cannot edit photos while viewing les as a folder. Open the folder and select a photo to edit each photo.Cropping a photo1 Touch ĺ .2 Drag the top left or the bottom right corner of the box to adjust the size of the area.3 Drag the box to move the location of the area.4 Press [f] or touch Done. 5 Touch to save.Editing photos](https://usermanual.wiki/Samsung-Electronics-Co/NX30/User-Guide-2157335-Page-125.png)
![125Playback/Editing > Editing photosRotating a photo1 Touch ĺ .2 Touch an option.Rotate : Right 90˚Cancel Done3 Press [f] or touch Done.4 Touch to save.• You can also rotate a photo in Playback mode by pressing [m], and then selecting z ĺ Rotate ĺ a desired option.• The camera will overwrite the original le.Resizing photosChange the size of a photo and save it as a new le.1 Touch ĺ .2 Touch an option.Resize : 10.1M 3:2Cancel Done3 Press [f] or touch Done.4 Touch to save.Available resize options dier depending on the original size of the photo.](https://usermanual.wiki/Samsung-Electronics-Co/NX30/User-Guide-2157335-Page-126.png)
![126Playback/Editing > Editing photosAdjusting your photosYou can correct captured photos by adjusting the brightness, contrast, or color. 1 Touch .2 Touch an adjusting option.• If you selected (Auto adjustment), skip to step 4.Icon DescriptionOriginal (Reset to the original image)Auto adjustmentBrightnessContrastSaturationRGB adjustmentColor TemperatureExposureHue3 Scroll the jog dial or rotate the navigation button or press [C/F] to adjust the option.• You can also drag the slider or touch +/- to adjust the option.4 Press [f] or touch Done.5 Touch to save.](https://usermanual.wiki/Samsung-Electronics-Co/NX30/User-Guide-2157335-Page-127.png)
![127Playback/Editing > Editing photosRetouching faces1 Touch ĺ .2 Scroll the jog dial or rotate the navigation button or press [C/F] to adjust the option.• You can also drag the slider or touch +/- to adjust the option.• As the number increases, the skin tone becomes brighter and smoother.3 Press [f] or touch Done.• To cancel correction, touch .4 Touch to save.Reducing red-eye1 Touch ĺ .2 Press [f] or touch Done.• To cancel correction, touch .3 Touch to save.](https://usermanual.wiki/Samsung-Electronics-Co/NX30/User-Guide-2157335-Page-128.png)
![128Playback/Editing > Editing photosApplying Smart Filter eectsApply special eects to your photos.1 Touch , and then touch an option.Smart Filter : VignettingCancel DoneOption DescriptionOriginalNo eectVignettingApply the retro-looking colors, high contrast, and strong vignette eect of Lomo cameras.MiniatureApply a tilt-shift eect to make the subject appear in miniature.Colored PencilApply a colored pencil painting eect.WatercolorApply a watercolor painting eect.Wash drawingApply a washed-out eect.Option DescriptionOil PaintingApply an oil painting eect.Ink PaintingApply an ink painting eect.AcrylApply an acryl painting eect.NegativeApply a negative lm eect.RedDesaturate all colors but red.GreenDesaturate all colors but green.BlueDesaturate all colors but blue.YellowDesaturate all colors but yellow. 2 Press [f] or touch Done.3 Touch to save.](https://usermanual.wiki/Samsung-Electronics-Co/NX30/User-Guide-2157335-Page-129.png)
![130Wireless networkConnecting to a WLAN and configuring network settingsLearn to connect via an access point (AP) when you are in a range of a WLAN. You can also congure network settings.Connecting to a WLAN1 Rotate the mode dial to B.2 Select , , , , or .3 Press [f], and then select Wi-Fi Setting.• In some modes, follow the on-screen instructions until the Wi-Fi Setting screen appears.• The camera automatically searches for available AP devices.4 Select an AP.Wi-Fi SettingRefreshSamsung1Samsung2Samsung3Samsung4• Select Refresh to refresh connectable APs.• Select Add wireless network to add an AP manually. Your AP name must be in English to add the AP manually.Icon DescriptionAd hoc APSecured APWPS APSignal strengthPress [F] or touch to open network setting options.• When you select a secured AP, a pop-up window appears. Enter the required passwords to connect to the WLAN. For information about entering text, refer to "Entering text". (p. 134)• When a login page appears, refer to "Using the login browser". (p. 132)• When you select an unsecured AP, the camera will connect to the WLAN.• If you select a WPS prole supported AP, select ĺ WPS PIN Connection, and then enter a PIN on the AP device. You can also connect to a WPS prole supported AP by selecting ĺ WPS button connection on the camera, and then pushing the WPS button on the AP device.• The same AP may be listed twice, with dierent frequencies, because your camera supports the dual band function.• If a pop-up message about data collection regulations appears, read and agree to it.](https://usermanual.wiki/Samsung-Electronics-Co/NX30/User-Guide-2157335-Page-131.png)
![131Wireless network > Connecting to a WLAN and conguring network settingsSetting network options1 In the Wi-Fi Setting screen, move to an AP, and then press [F] or touch .2 Select each option, and then enter the required information.Option DescriptionNetwork PasswordEnter the network password.IP SettingSet the IP address automatically or manually.Manually setting the IP address1 In the Wi-Fi Setting screen, move to an AP, and then press [F] or touch .2 Select IP Setting ĺ Manual.3 Select each option, and then enter the required information.Option DescriptionIPEnter the static IP address.Subnet MaskEnter the subnet mask.GatewayEnter the gateway.DNS ServerEnter the DNS address.](https://usermanual.wiki/Samsung-Electronics-Co/NX30/User-Guide-2157335-Page-132.png)
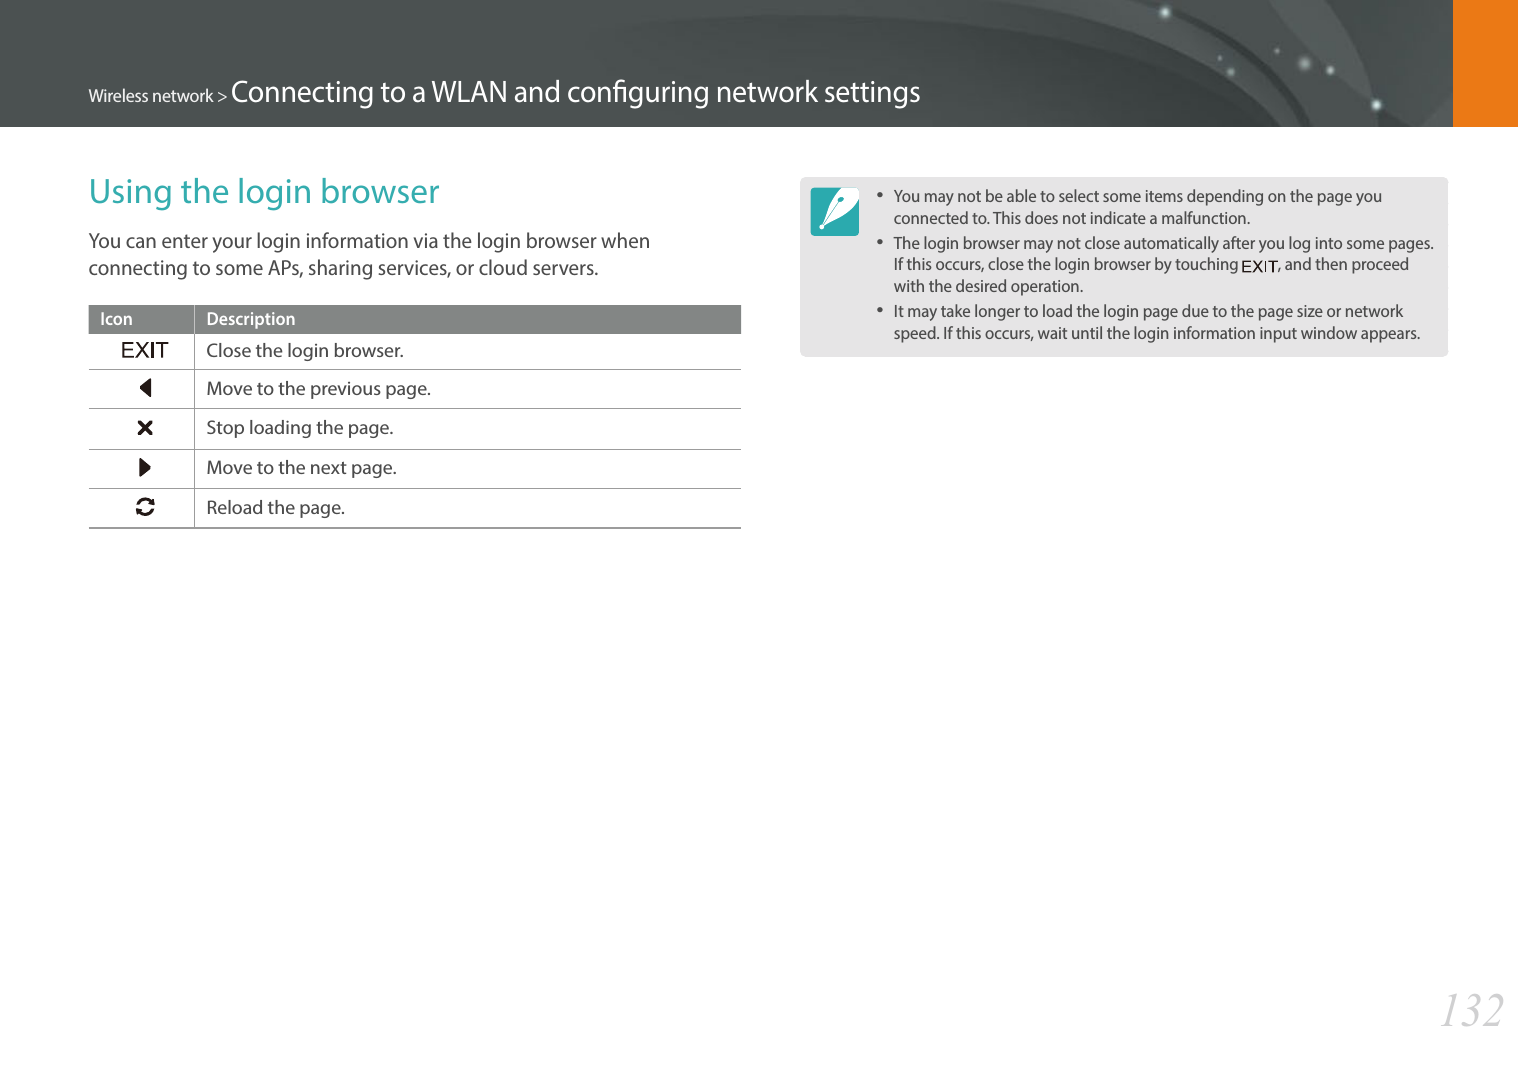
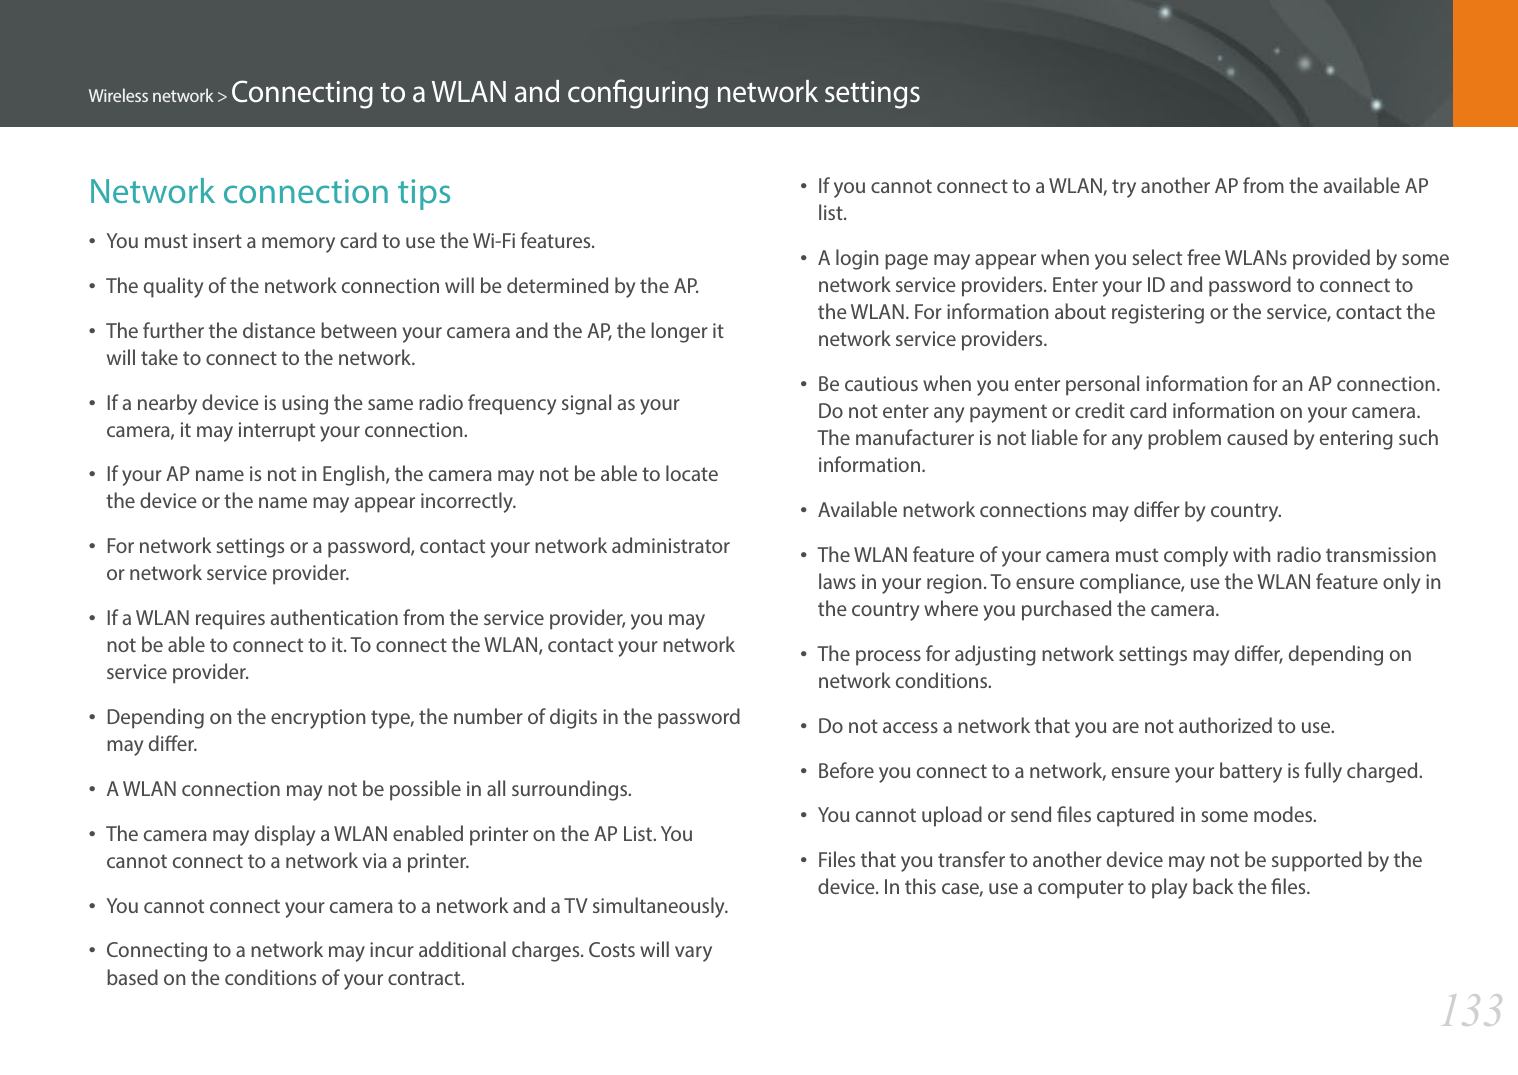
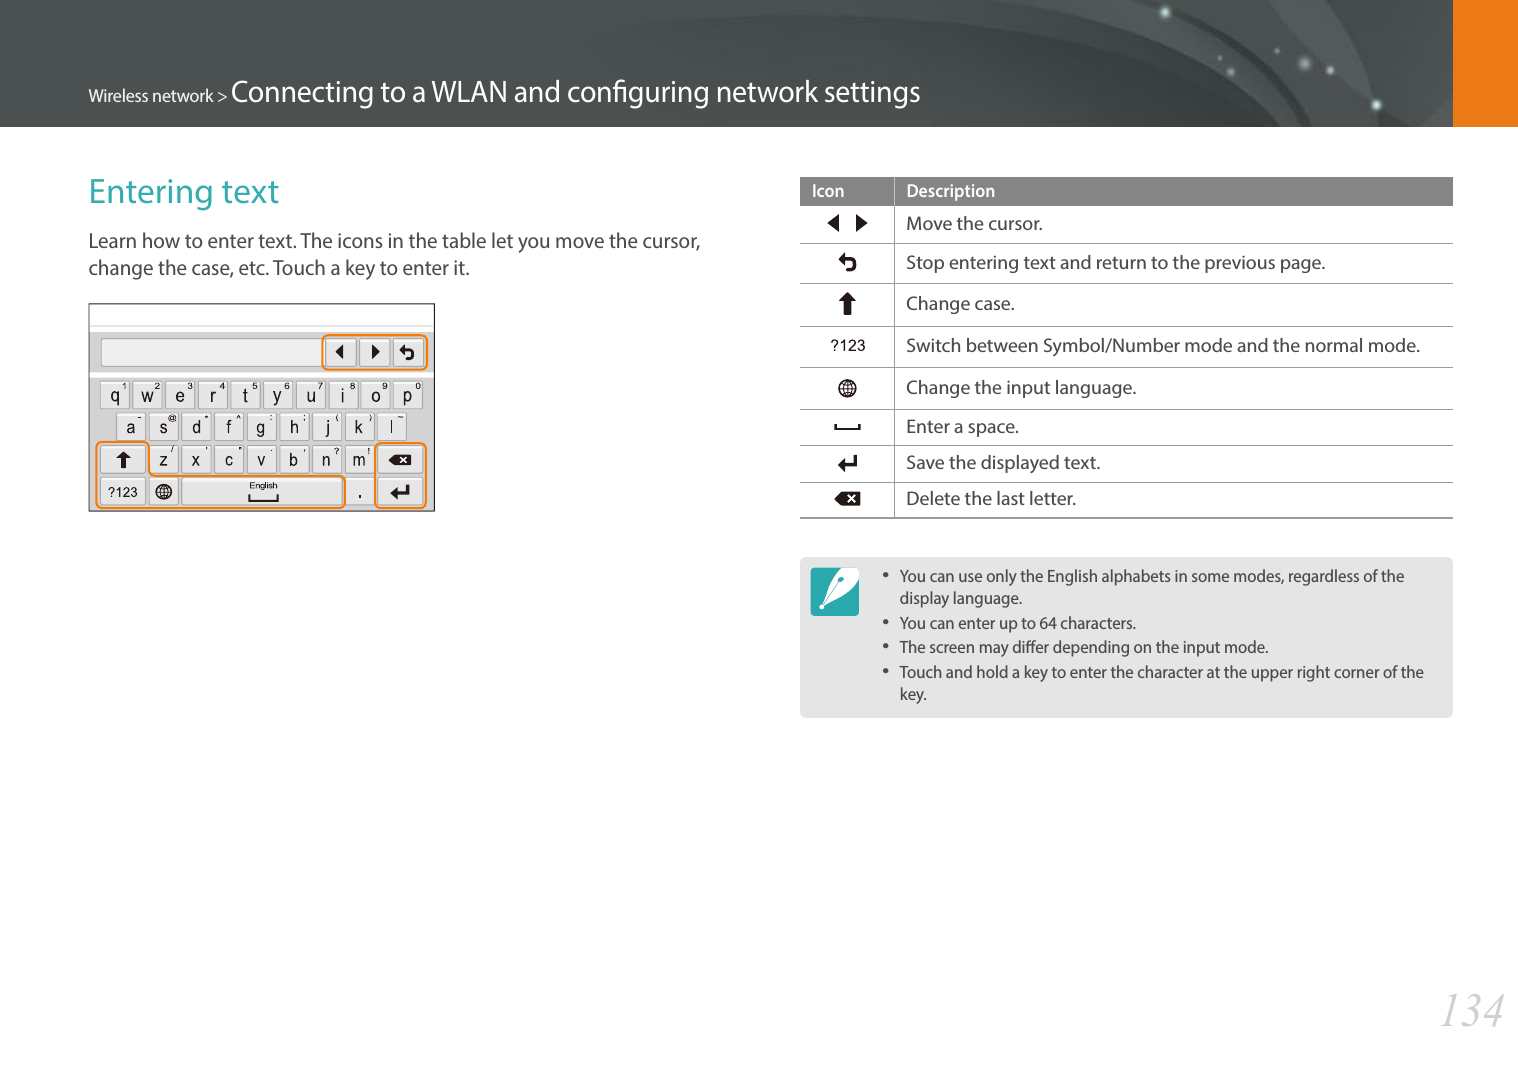
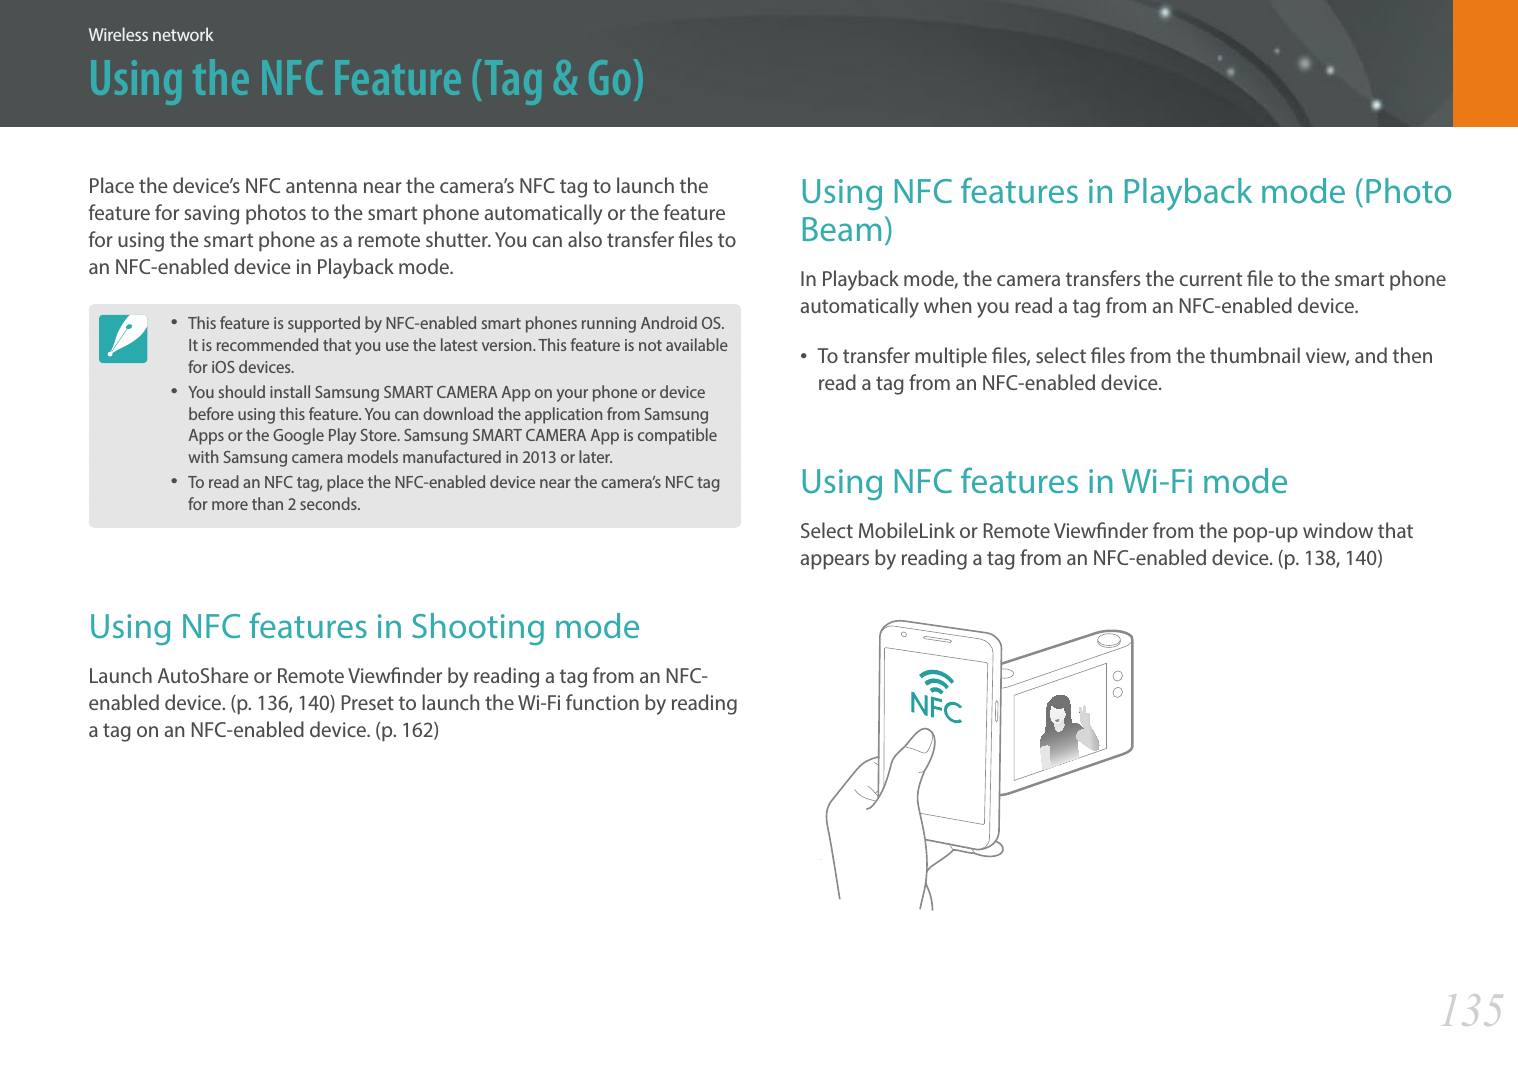
![136Wireless networkSaving files to a smart phone automaticallyThe camera connects to a smart phone that supports the AutoShare feature via a WLAN. When you capture a photo with your camera, the photo is saved to the smart phone automatically.• The AutoShare feature is supported by smart phones or tablets running Android OS or iOS. (Some features may not be supported by some models.) Before using this feature, update the device’s rmware to the latest version. If the rmware version is not the most recent, this function may not perform properly. • You should install Samsung SMART CAMERA App on your phone or device before using this feature. You can download the application from Samsung Apps, the Google Play Store, or the Apple App Store. Samsung SMART CAMERA App is compatible with Samsung camera models manufactured in 2013 or later. • If you set this function, the setting is maintained even when you change the Shooting mode.• This feature may not be supported in some modes or may not be available with some shooting options.1 In Shooting mode, press [m].2 Select b ĺ AutoShare ĺ On.• If the pop-up message that prompts you to download the application appears, select Next.3 On the smart phone, turn on Samsung SMART CAMERA App.• For iOS devices, turn on the Wi-Fi feature before turning on the application.• To start the application automatically on an NFC-enabled smart phone, turn on the function and place the smart phone near the NFC tag (p. 32) on the camera. Verify that the smart phone is connected to your camera, and then skip to step 6.4 Select the camera from the list and connect the smart phone to the camera.• The smart phone can connect to only one camera at a time.](https://usermanual.wiki/Samsung-Electronics-Co/NX30/User-Guide-2157335-Page-137.png)
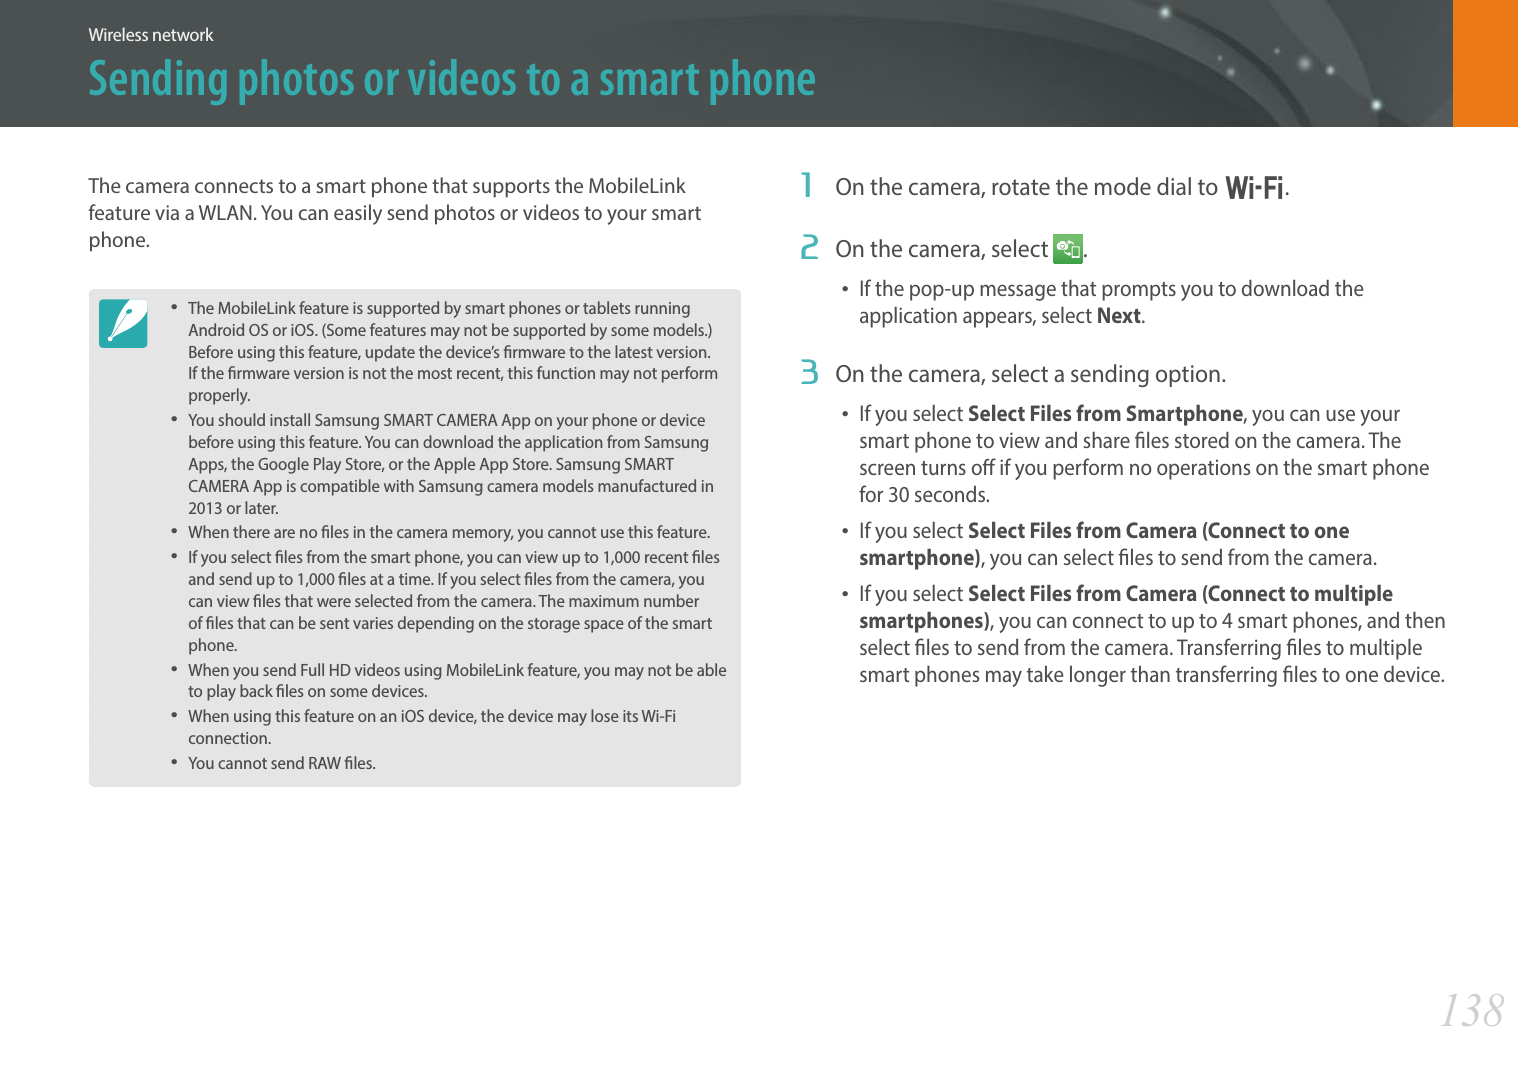
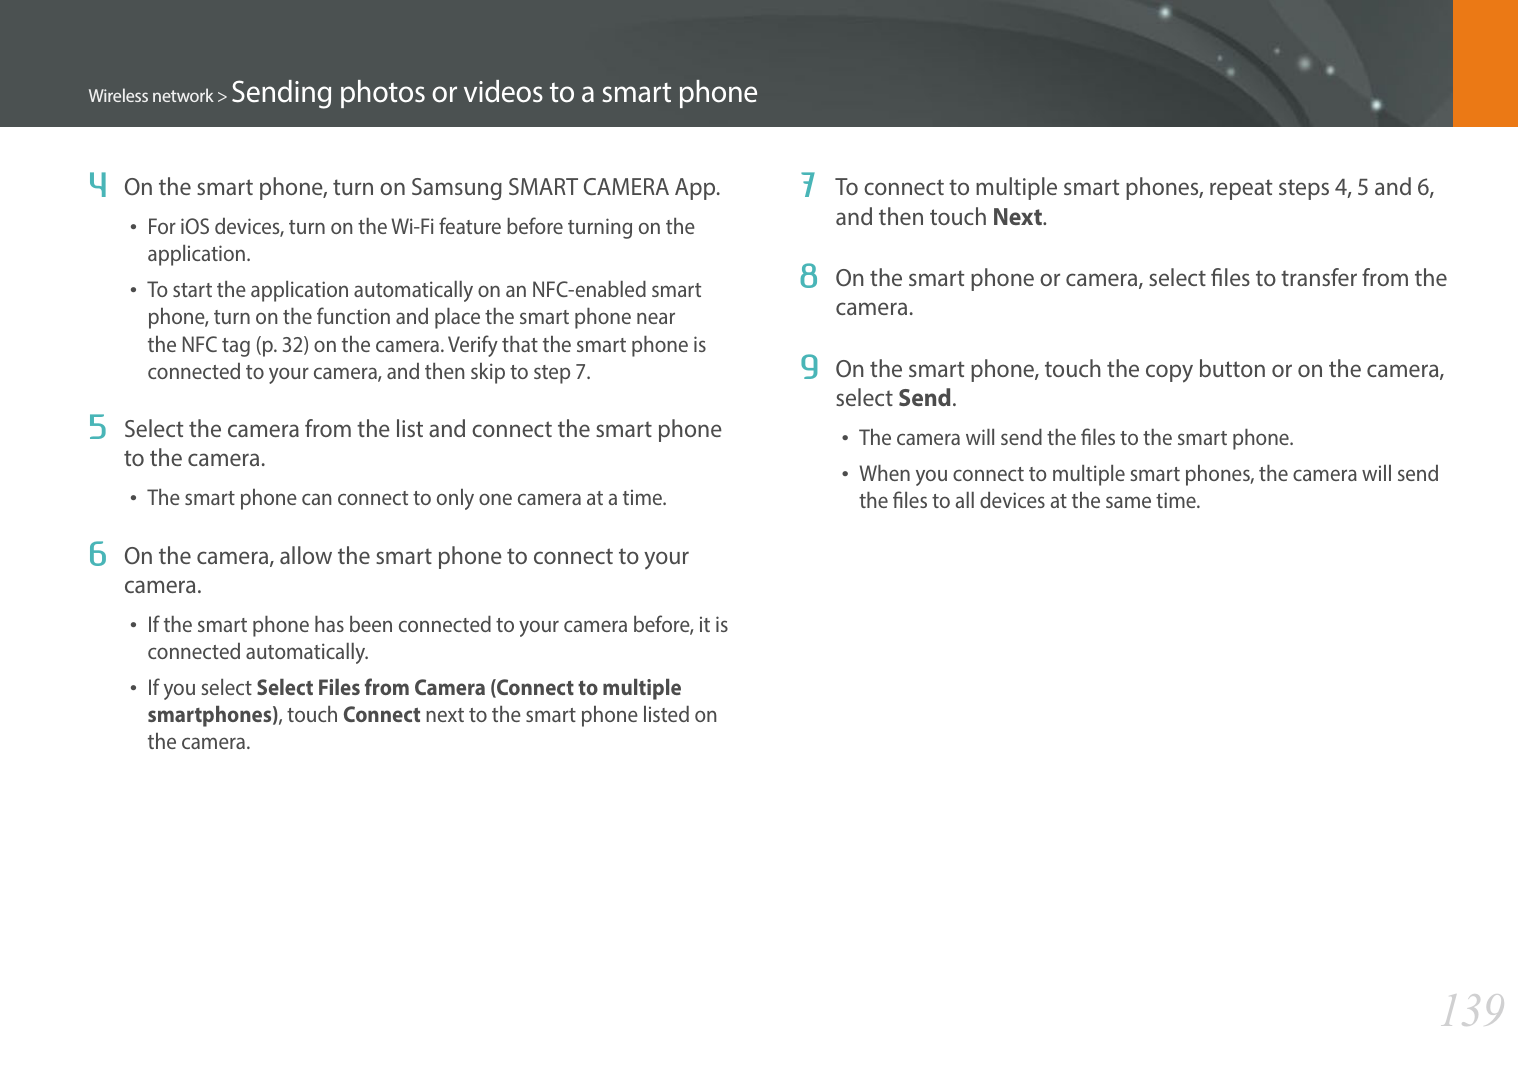
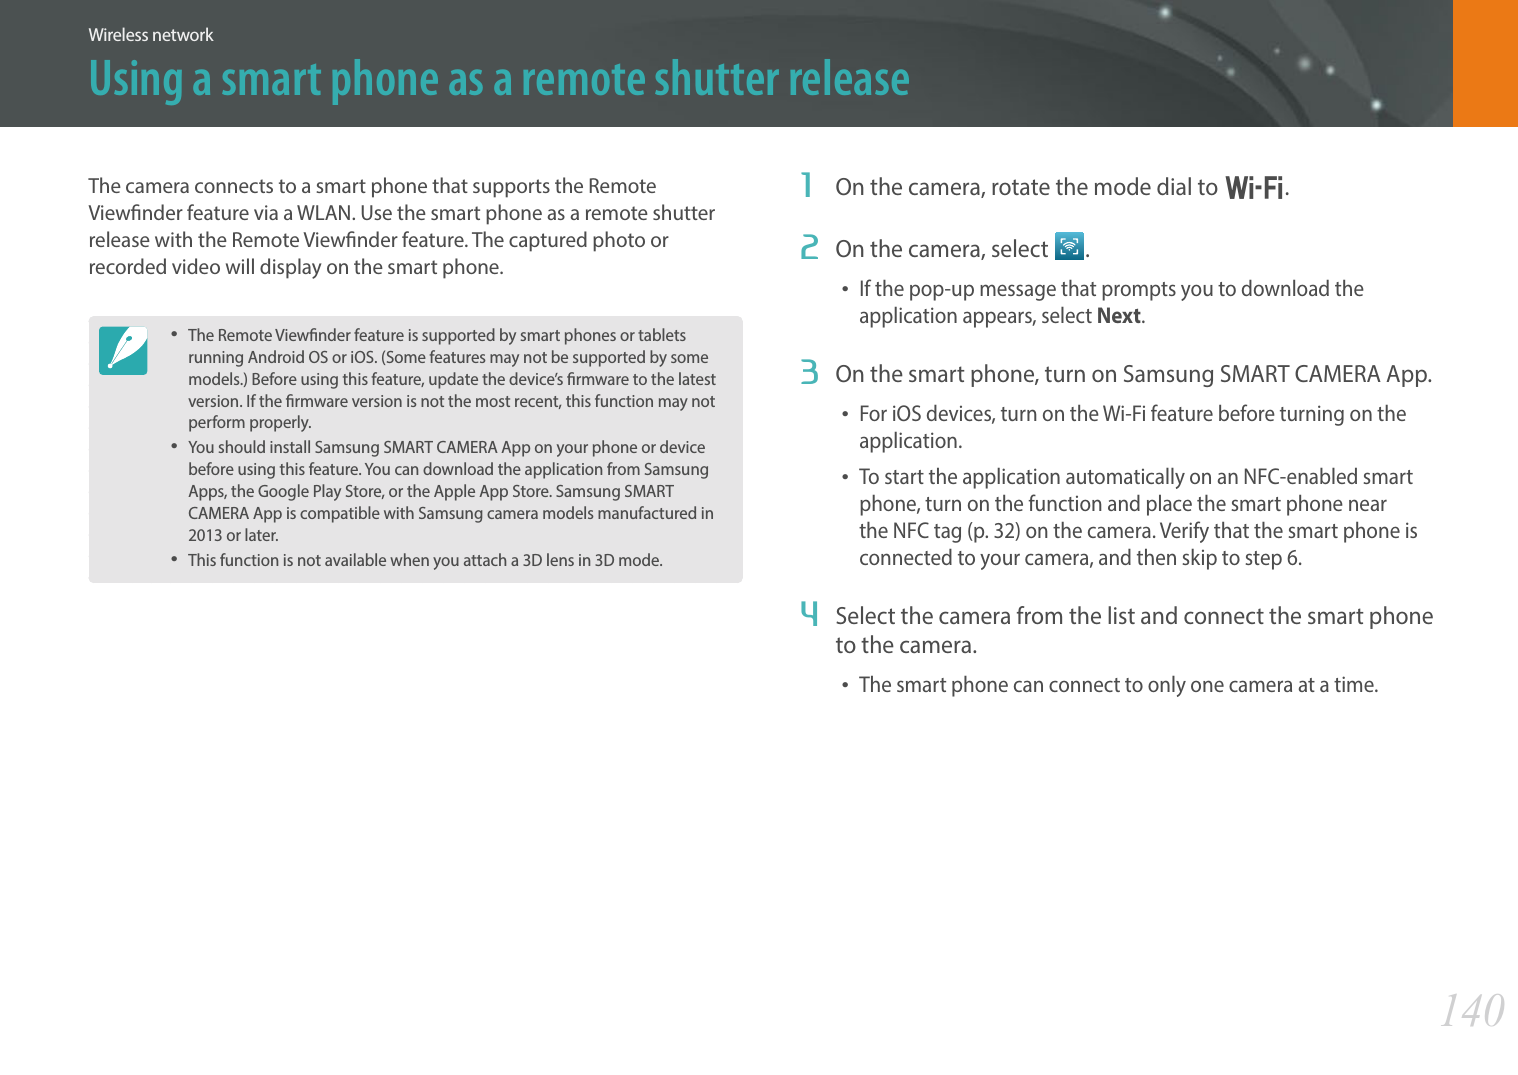
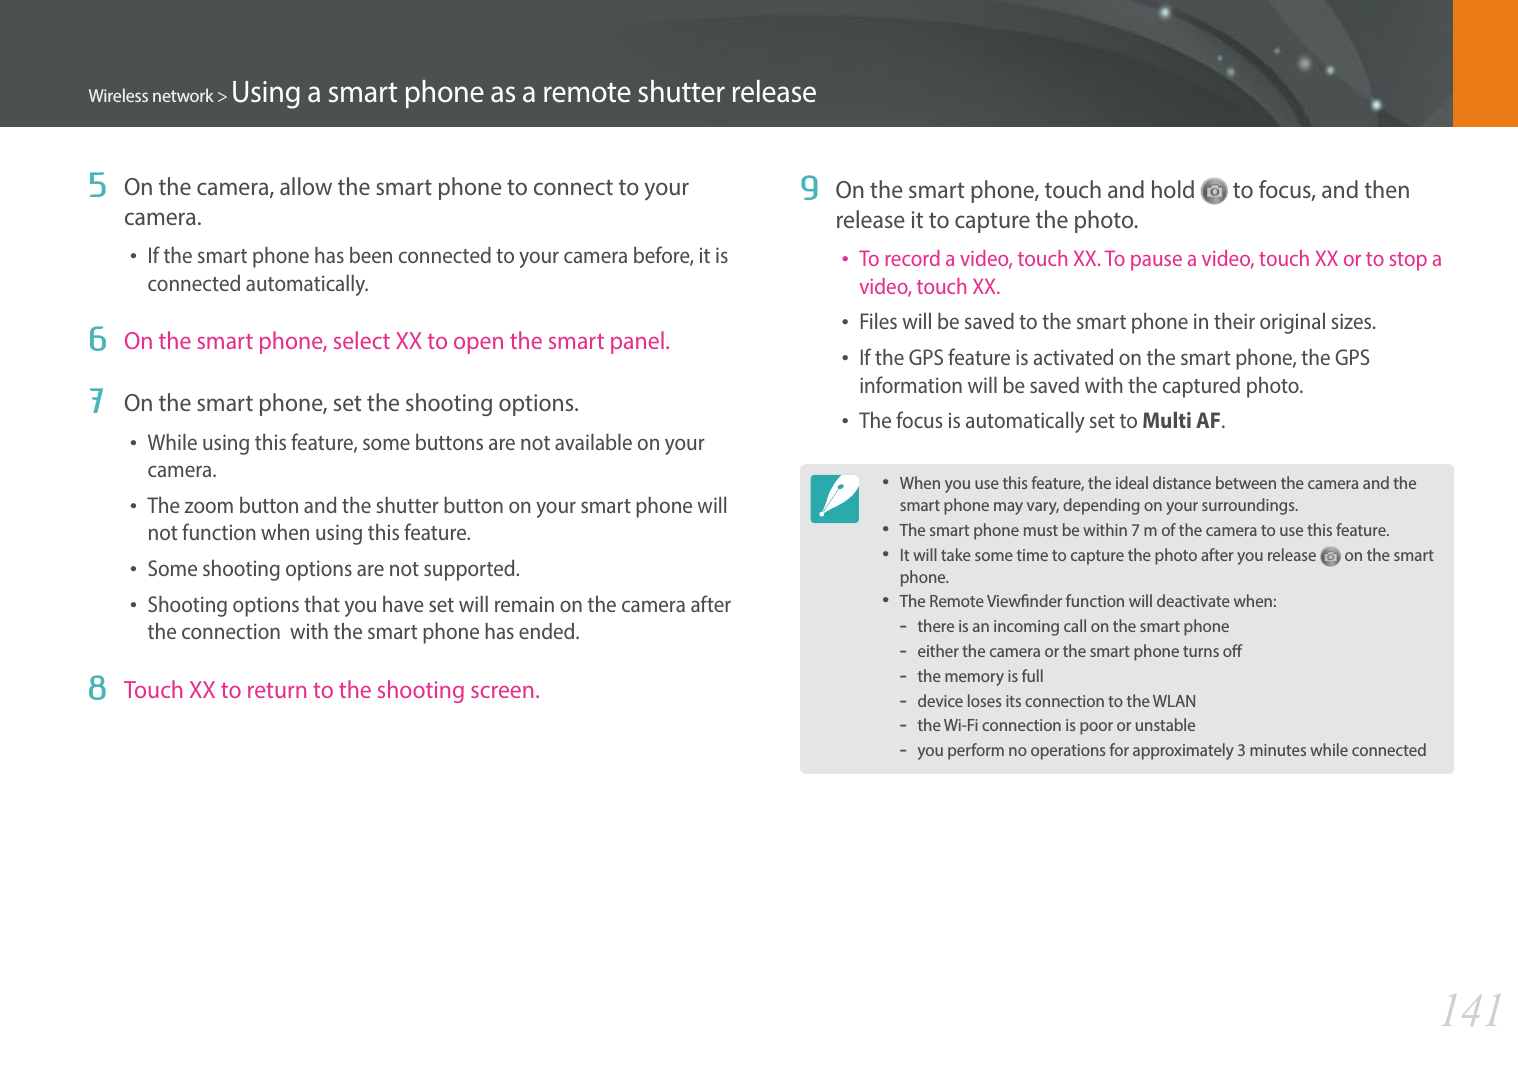
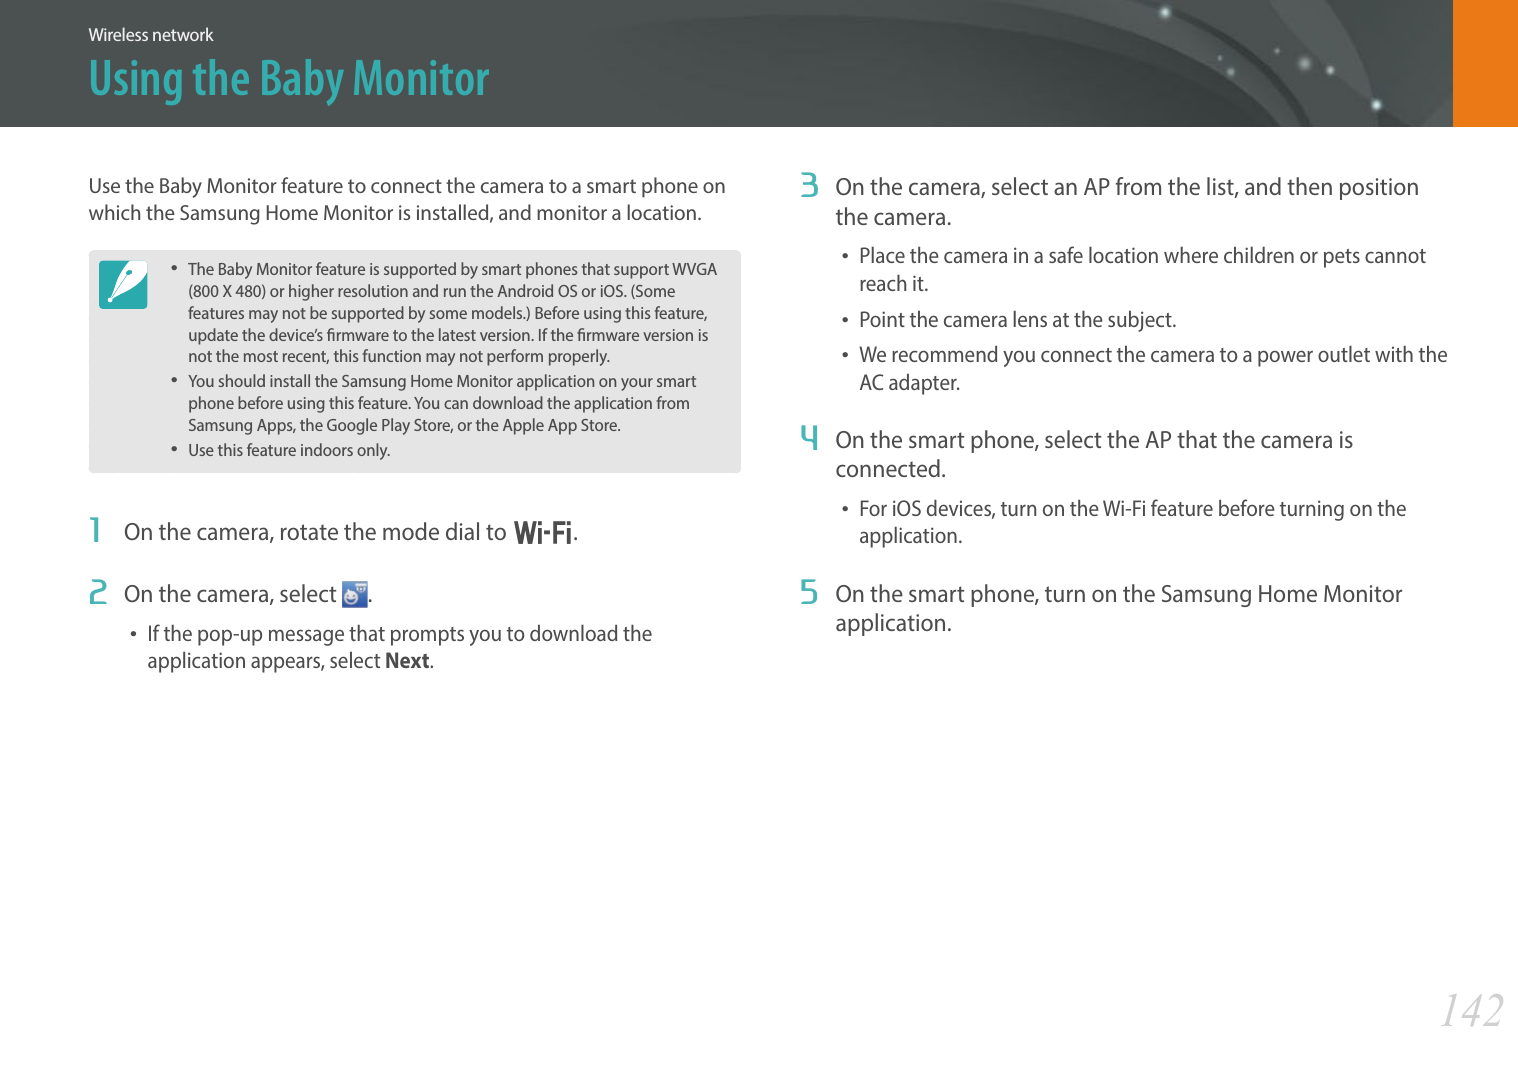
![143Wireless network > Using the Baby Monitor6 Start live video or sound monitoring.• Watch live video from the camera on your smart phone. During video monitoring, touch Sound Monitoring Mode button on the smart phone to stop the video stream. If the camera detects noise, an alarm will notify you on the smart phone.• During live video monitoring via the smart phone, video is not saved on the camera.• If the monitored location is dark, touch to turn on the AF-assist light.• During sound monitoring, alarms will sound on the smart phone if the camera detects noise for a short period at a volume that is higher than the designated level. • During live video monitoring, alarms will not sound on the smart phone even if the camera detects noise.7 Touch to exit the Samsung Home Monitor application.Adjusting the noise level for alarm activationYou can set the level of noise that will activate an alarm while using sound monitoring. Press [D/I] to adjust the noise level.Noise level for alarm activation:When the camera detects noise that exceeds the designated level for a short period, an alarm will sound.SensitivityDo not use this feature for illegal purposes.Exit Wi-Fi Setting](https://usermanual.wiki/Samsung-Electronics-Co/NX30/User-Guide-2157335-Page-144.png)
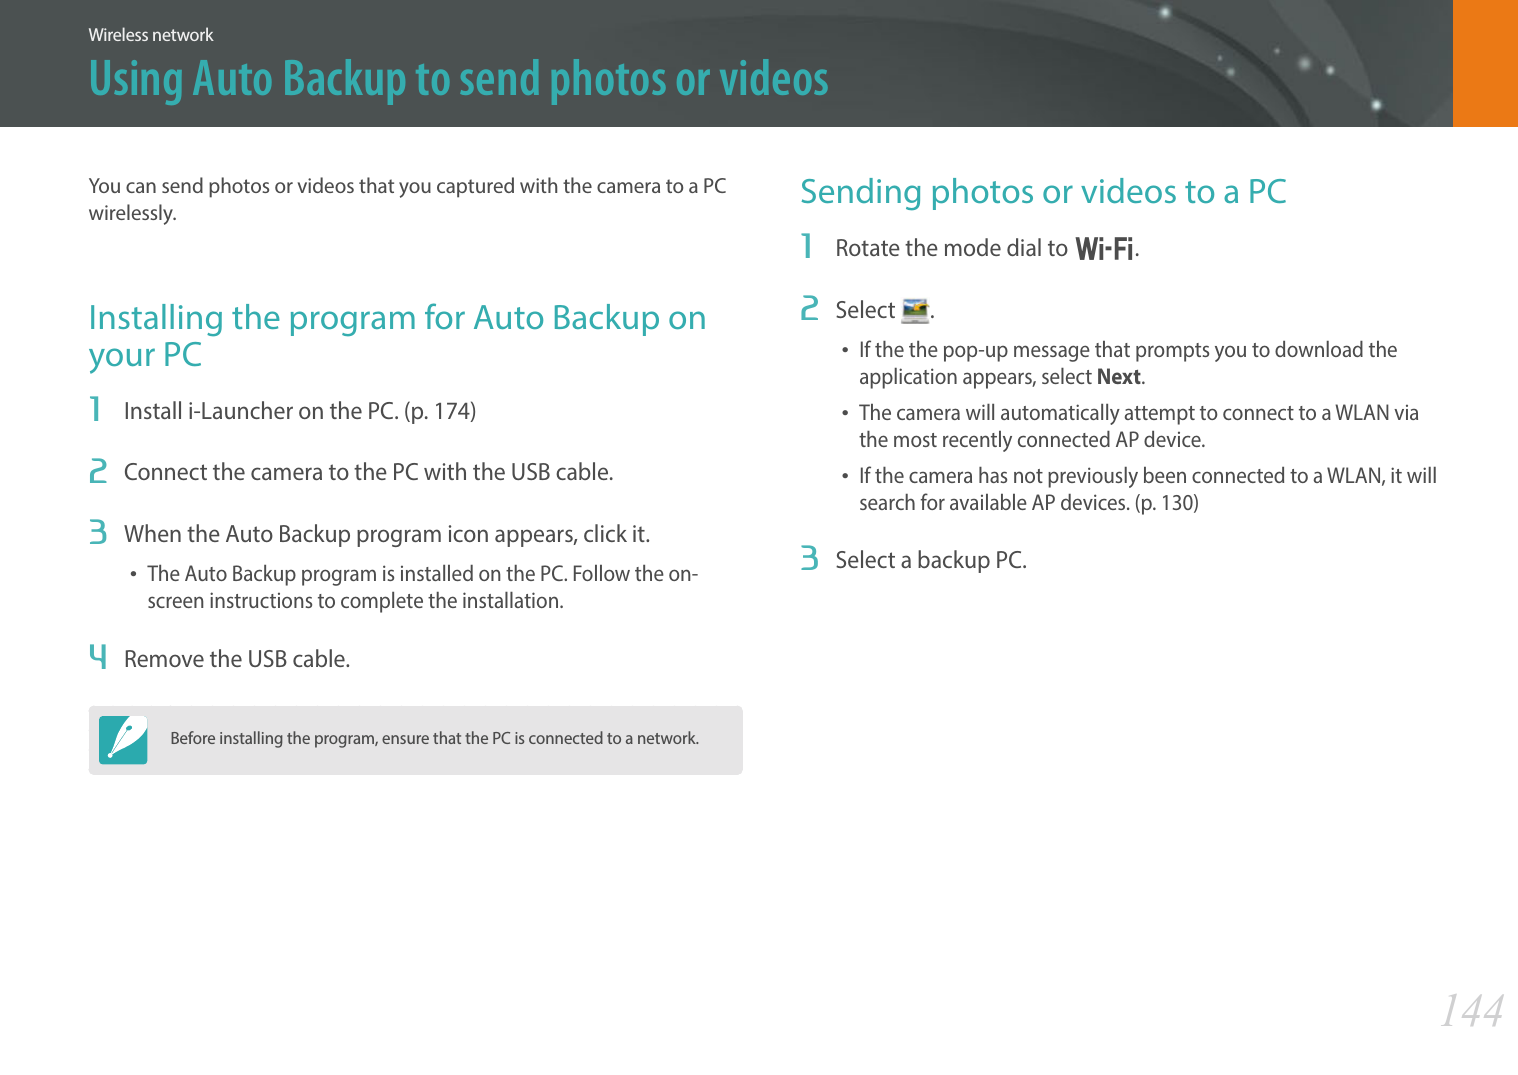

![146Wireless network5 Select the Name box, enter your name, and then touch .Sender SettingNameSaveEmailReset6 Select the Email box, enter your email address, and then touch .7 Select Save to save your changes.• To delete your information, select Reset.You can change settings in the email menu and send photos or videos stored on the camera via email.Changing email settingsIn the email menu, you can change settings for storing your information. You can also set or change the email password. For information about entering text, refer to "Entering text". (p. 134)Storing your information1 Rotate the mode dial to B.2 Select .• The camera will automatically attempt to connect to a WLAN via the most recently connected AP device.• If the camera has not previously been connected to a WLAN, it will search for available AP devices. (p. 130)3 Press [f].4 Select Sender Setting.Sending photos or videos via email](https://usermanual.wiki/Samsung-Electronics-Co/NX30/User-Guide-2157335-Page-147.png)
![147Wireless network > Sending photos or videos via emailSetting an email password1 Rotate the mode dial to B.2 Select .• The camera will automatically attempt to connect to a WLAN via the most recently connected AP device.• If the camera has not previously been connected to a WLAN, it will search for available AP devices. (p. 130)3 Press [f].4 Select Setting Password ĺ On.• To deactivate the password, select O.5 When the pop-up appears, select OK.• The pop-up disappears automatically even if you do not select OK. 6 Enter a 4-digit password.7 Enter the password again.8 When the pop-up appears, select OK.If you lost your password, you can reset it by selecting RESET on the password setting screen. When you reset the information, the previously saved user’s setting information and email address will be deleted.](https://usermanual.wiki/Samsung-Electronics-Co/NX30/User-Guide-2157335-Page-148.png)
![148Wireless network > Sending photos or videos via emailChanging the email password1 Rotate the mode dial to B.2 Select .• The camera will automatically attempt to connect to a WLAN via the most recently connected AP device.• If the camera has not previously been connected to a WLAN, it will search for available AP devices. (p. 130)3 Press [f].4 Select Change Password.5 Enter your current 4-digit password.6 Enter a new 4-digit password.7 Enter the new password again.8 When the pop-up appears, select OK.Sending photos or videos via emailYou can send photos or videos stored on the camera via email. For information about entering text, refer to "Entering text". (p. 134)1 Rotate the mode dial to B.2 Select .• The camera will automatically attempt to connect to a WLAN via the most recently connected AP device.• If the camera has not previously been connected to a WLAN, it will search for available AP devices. (p. 130)3 Connect to a WLAN. (p. 130)4 Select the Sender box, enter your email address, and then touch .• If you have previously saved your information, it will be inserted automatically. (p. 146)• To use an address from the list of previous senders, select ĺ an address.](https://usermanual.wiki/Samsung-Electronics-Co/NX30/User-Guide-2157335-Page-149.png)
![149Wireless network > Sending photos or videos via email5 Select the Receiver box, enter an email address, and then touch .• To use an address from the list of previous recipients, select ĺ an address.• Select to add additional recipients. You can input up to 30 recipients.• Select to delete an address from the list.6 Select Next.7 Select les to send.• You can select up to 20 les. The total size must be 7 MB or less.8 Select Next.9 Select the comment box, enter your comments, and then touch .10 Select Send.• The camera will send the email.• When an email fails to send, a message prompting you to send it again appears. • Even if a photo appears to have transferred successfully, errors with the recipient’s email account may cause the photo to be rejected or recognized as spam.• You may not be able to send an email if no network connection is available or if your email account settings are incorrect.• You cannot send an email if the le size exceeds the limit. The maximum photo resolution you can send is 2M and the longest video you can upload is a video recorded using . If the selected photo resolution is higher than 2M, it will be automatically resized to a lower resolution.• If you cannot send an email because of rewall or user authentication settings, contact your network administrator or network service provider.• When there are no les in the camera memory, you cannot use this feature.• You can also send an email in Playback mode by pressing [m], and then selecting Share(Wi-Fi) ĺ Email or by selecting ĺ Email.](https://usermanual.wiki/Samsung-Electronics-Co/NX30/User-Guide-2157335-Page-150.png)
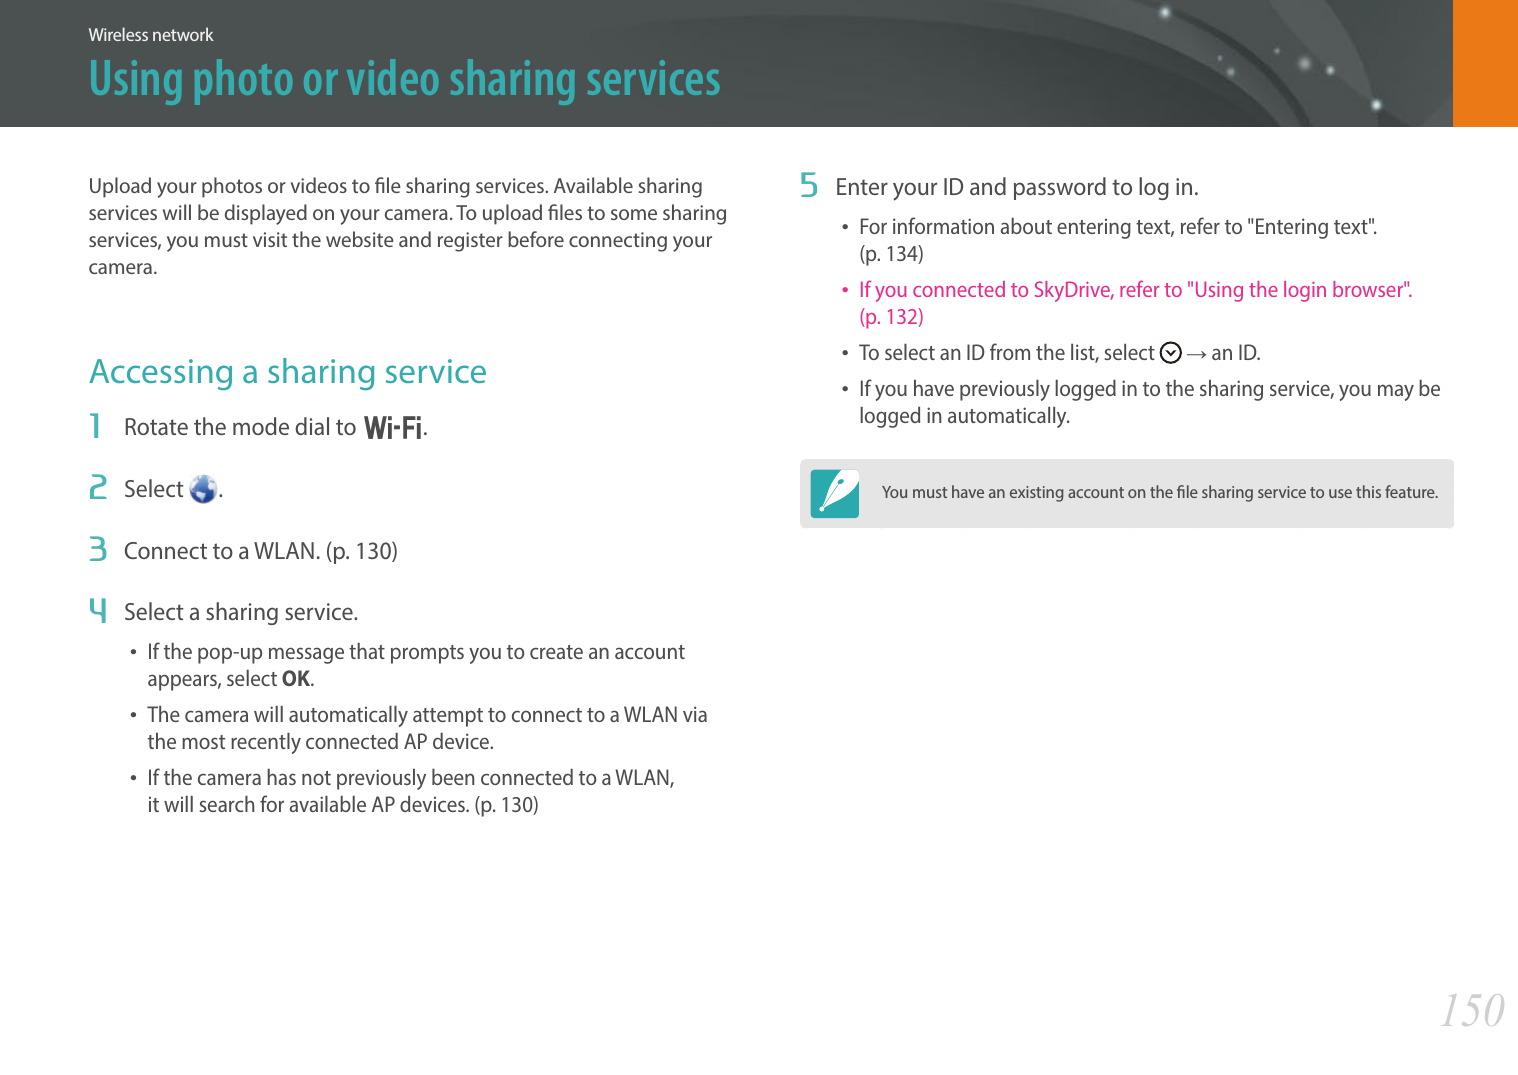
![151Wireless network > Using photo or video sharing servicesUploading photos or videos1 Access the sharing service with your camera.2 Select les to upload.• You can select up to 20 les. The total size must be 10 MB or less. (On some sharing services, the total size or number of les may vary.)3 Select Upload.• The camera will upload photos or videos. • When an upload fails, a message prompting you to upload it again appears. • On some sharing services, you can enter your comments by selecting the comment box. For information about entering text, refer to "Entering text". (p. 134)• You can set an upload folder for Facebook by pressing [f], and then selecting Upload Folder (Facebook) on the sharing service's list screen.• You cannot upload les if the le size exceeds the limit. The maximum photo resolution you can upload is 2M, and the longest video you can upload is a video recorded using . If the selected photo resolution is higher than 2M, it will be automatically resized to a lower resolution. (On some sharing services, the maximum photo resolution may vary.)• The method of uploading photos or videos may dier depending on the selected sharing service.• If you cannot access a sharing service because of rewall or user authentication settings, contact your network administrator or network service provider.• Uploaded photos or videos may be automatically titled with the date they were captured.• The speed of your internet connection may aect how quickly photos upload or web pages open.• When there are no les in the camera memory, you cannot use this feature.• You can also upload photos or videos to le sharing services in Playback mode by pressing [m], and then selecting Share(Wi-Fi) ĺ a sharing service or by selecting ĺ a sharing service.• You cannot upload videos to some sharing services.• When you upload photos to SkyDrive, they will be resized to 2M while maintaining their aspect ratios.](https://usermanual.wiki/Samsung-Electronics-Co/NX30/User-Guide-2157335-Page-152.png)
![152Wireless networkUsing Samsung Link to send filesYou can upload les from your camera to the Samsung Link online storage or to registered devices, or view les on a Samsung Link device connected to the same AP.Uploading photos to an online storage or registered devices1 Rotate the mode dial to B.2 Select ĺWeb storage.• If the guide message appears, select OK.• The camera will automatically attempt to connect to a WLAN via the most recently connected AP device.• If the camera has not previously been connected to a WLAN, it will search for available AP devices. (p. 130)• To change the size for uploaded photos, press [f], and then select Upload Image Size.3 Enter your ID and password, and then select Login ĺ OK.• For information about entering text, refer to "Entering text". (p. 134)• To select an ID from the list, select ĺ an ID.• If you have previously logged in to the website, you may be logged in automatically.To use this feature, you must create a Samsung Link account and an account with an aliated online storage service using your PC. After nishing creating accounts, add your online storage account to Samsung Link.4 Select an online storage service or a registered device.• To refresh the list of online storage or registered devices, touch Rescan.• Devices that are not currently connected to the network will not appear on the list. • Before you use this feature, you must visit the Samsung Link website with your PC and register an online storage or device. 5 Select les to upload, and then select Upload. • You cannot upload video les to Samsung Link online storage.• When there are no les in the camera memory, you cannot use this feature.• You can upload up to 20 les.• You can also upload photos in Playback mode by pressing [m], and then selecting Share(Wi-Fi) ĺ Samsung Link or by selecting ĺ Samsung Link.](https://usermanual.wiki/Samsung-Electronics-Co/NX30/User-Guide-2157335-Page-153.png)
![153Wireless network > Using Samsung Link to send lesViewing photos or videos on devices that support Samsung Link1 Rotate the mode dial to B.2 Select ĺNearby devices.• The camera will automatically attempt to connect to a WLAN via the most recently connected AP device. • If the camera has not previously been connected to a WLAN, it will search for available AP devices. (p. 130)• You can set to allow only selected devices or all devices to connect by pressing [f], and then selecting DLNA Access Control on the screen.• A sharing le list is created. Wait until other devices can nd your camera.3 Connect the Samsung Link device to a network, and then turn on the Samsung Link feature.• Refer to your device's user manual for more information.4 On the camera, allow the Samsung Link device to connect to your camera.5 On the Samsung Link device, select a camera to connect.6 On the Samsung Link device, browse the shared photos or videos.• For information about searching for the camera and browsing the photos or videos on the Samsung Link device, refer to the device's user manual.• Videos may not play smoothly depending on the type of Samsung Link device or the network condition. For smooth playback, use a 5 GHz dual-band AP device.APS A camera is connected to a TV that supports Samsung Link via WLAN.](https://usermanual.wiki/Samsung-Electronics-Co/NX30/User-Guide-2157335-Page-154.png)
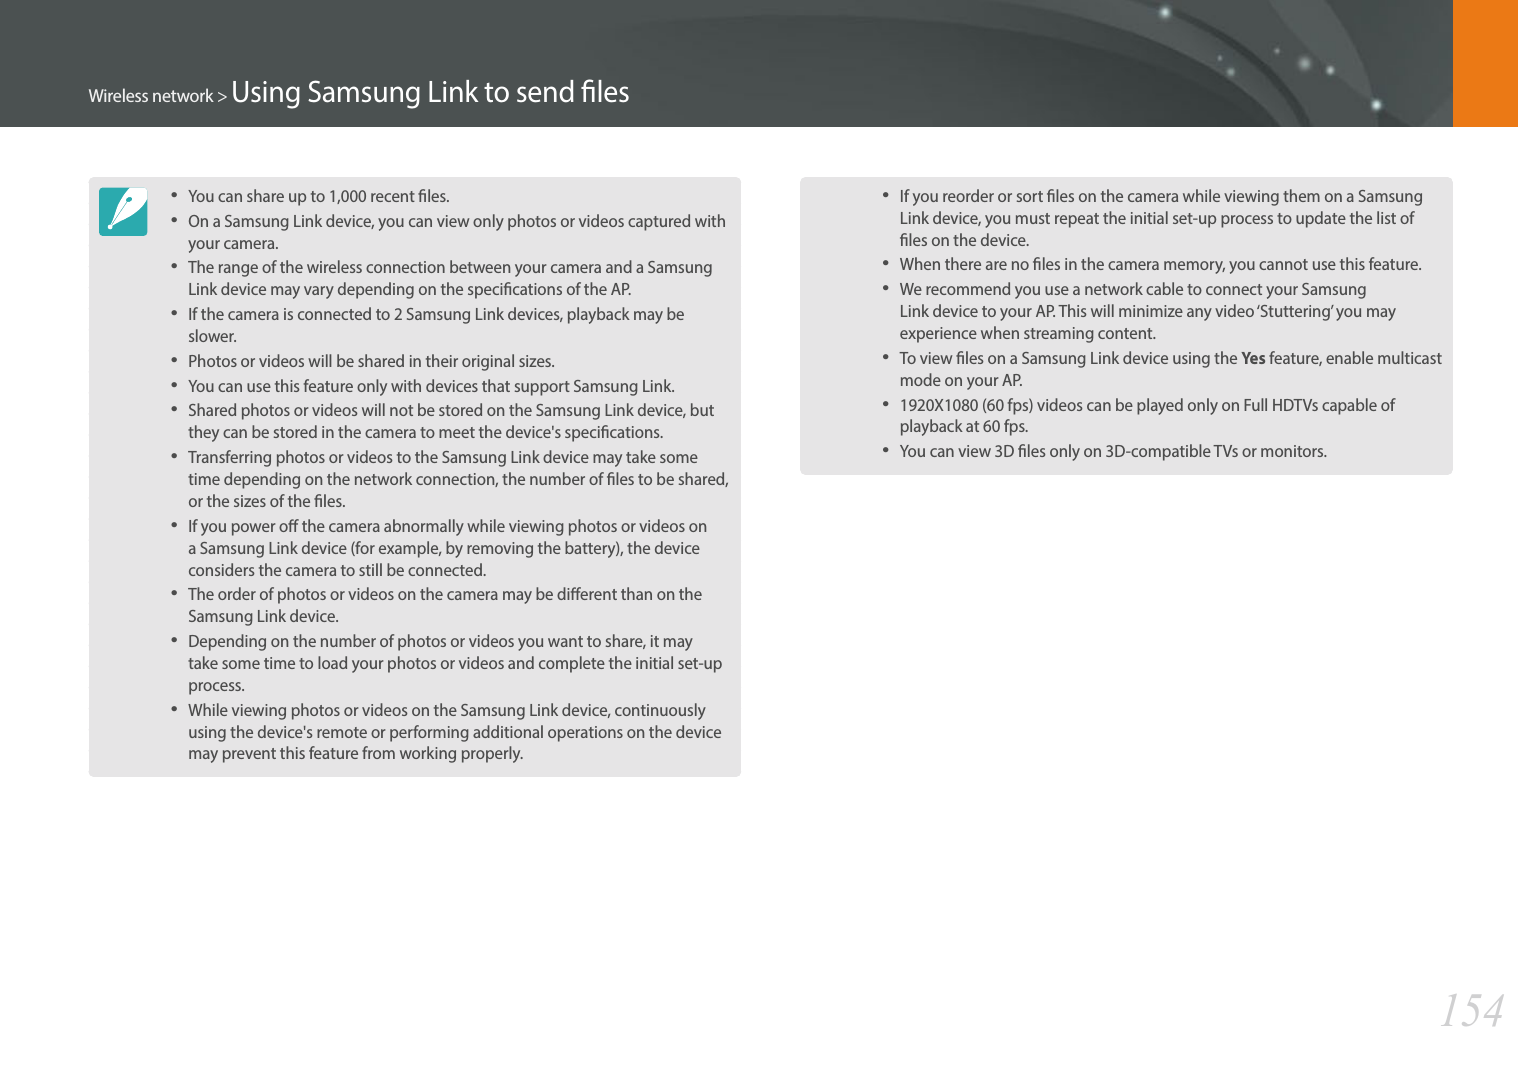
![156Camera settings menuYou can set the user environment with these settings.To set user options, In Shooting mode, press [m] ĺ d ĺ an option.Available items and the order of them may dier depending on shooting conditions.Manage Custom ModeCreate your own shooting modes by adjusting options and saving them. Open saved custom modes or delete them.ISO CustomizingISO StepYou can set the size for the ISO sensitivity by either 1/3 or 1 step.Auto ISO RangeYou can set the maximum ISO value under which each EV step is chosen when you set the ISO to Auto.* DefaultOption Value1/3 StepISO 125, ISO 160, ISO 200, ISO 250, ISO 320, ISO 400, ISO 500, ISO 640, ISO 800, ISO 1000, ISO 1250, ISO 1600, ISO 2000, ISO 2500, ISO 3200*1 StepISO 200, ISO 400, ISO 800, ISO 1600, ISO 3200*Noise ReductionUse the Noise Reduction to reduce the visual noise in photos.* DefaultOption DescriptionHigh ISO NRThis function reduces noise that may occur when you set a high ISO sensitivity. (O, High, Normal*, Low)Long Term NRThis function reduces noise when you set the camera for a long exposure. (O, On*)User settings](https://usermanual.wiki/Samsung-Electronics-Co/NX30/User-Guide-2157335-Page-157.png)
![157Camera settings menu > User settingsBracket SetYou can set up the options for each bracketing.* DefaultOption DescriptionAE Bracket SetSet the exposure interval. Drag the slider or touch the arrows to select an option. (-/+0.3 EV*, -/+0.7 EV, -/+1.0 EV, -/+1.3 EV, -/+1.7 EV, -/+2.0 EV, -/+2.3 EV, -/+2.7 EV, -/+3.0 EV)WB Bracket SetAdjust the White Balance interval range of the 3 bracketed photos. Touch the left/right arrows to adjust the Amber/Blue values or touch the up/down arrows to adjust the Magenta/Green values. (AB-/+3*, AB-/+2, AB-/+1, MG-/+3, MG-/+2, MG-/+1)For example, AB-/+3 adjusts the Amber value plus or minus three steps. MG-/+3 adjusts the Magenta value the same amount.P Wiz Bracket SetSelect 3 Picture Wizard settings the camera uses to capture the 3 bracketed photos.Depth Bracket SetSet the depth interval. Drag the slider or touch the arrows to select an option. (-/+0.3, -/+0.7, -/+1.0*, -/+1.3, -/+1.7, -/+2.0, -/+2.3, -/+2.7, -/+3.0) DMF (Direct Manual Focus)You can adjust the focus manually by rotating the focus ring after achieving the focus by half-pressing [Shutter]. This feature may not be available with some lenses.DMF ResponsivenessSet the focus ring response when you use the DMF function. If you select High, slight rotations of the focus ring are made to adjust the focus. If you select Low, longer rotations of the focus ring focus are made to adjust the focus. This feature may not be available with some lenses. (High*, Medium, Low)](https://usermanual.wiki/Samsung-Electronics-Co/NX30/User-Guide-2157335-Page-158.png)

![159Camera settings menu > User settingsDistortion CorrectYou can correct lens distortion that might occur from lenses. This feature may not be available with some lenses.Touch OperationSet to enable touch operation in Shooting mode.* DefaultOption DescriptionODo not use touch operations in Shooting mode. (You can use touch operations in other situations.) On*Use touch operations in Shooting mode.iFn SettingYou can select options that can be adjusted when you press [i-Function] on an i-Function lens.Option DescriptioniFn Mode• iFn Standard: Adjust the shutter speed, aperture value, and other options on the lens by pressing [i-Function].• iFn Plus: On an i-Function lens, press [i-Function] and a button on the camera at the same time to assign a function to that button.iFn StandardSelect options that can be adjusted when you press [i-Function].iFn Plus• Metering: Select an option that can be adjusted when you press [i-Function] and [N] together.• EV: Select an option that can be adjusted when you press [i-Function] and [W] together.• AEL: Select an option that can be adjusted when you press [i-Function] and [a] together.](https://usermanual.wiki/Samsung-Electronics-Co/NX30/User-Guide-2157335-Page-160.png)
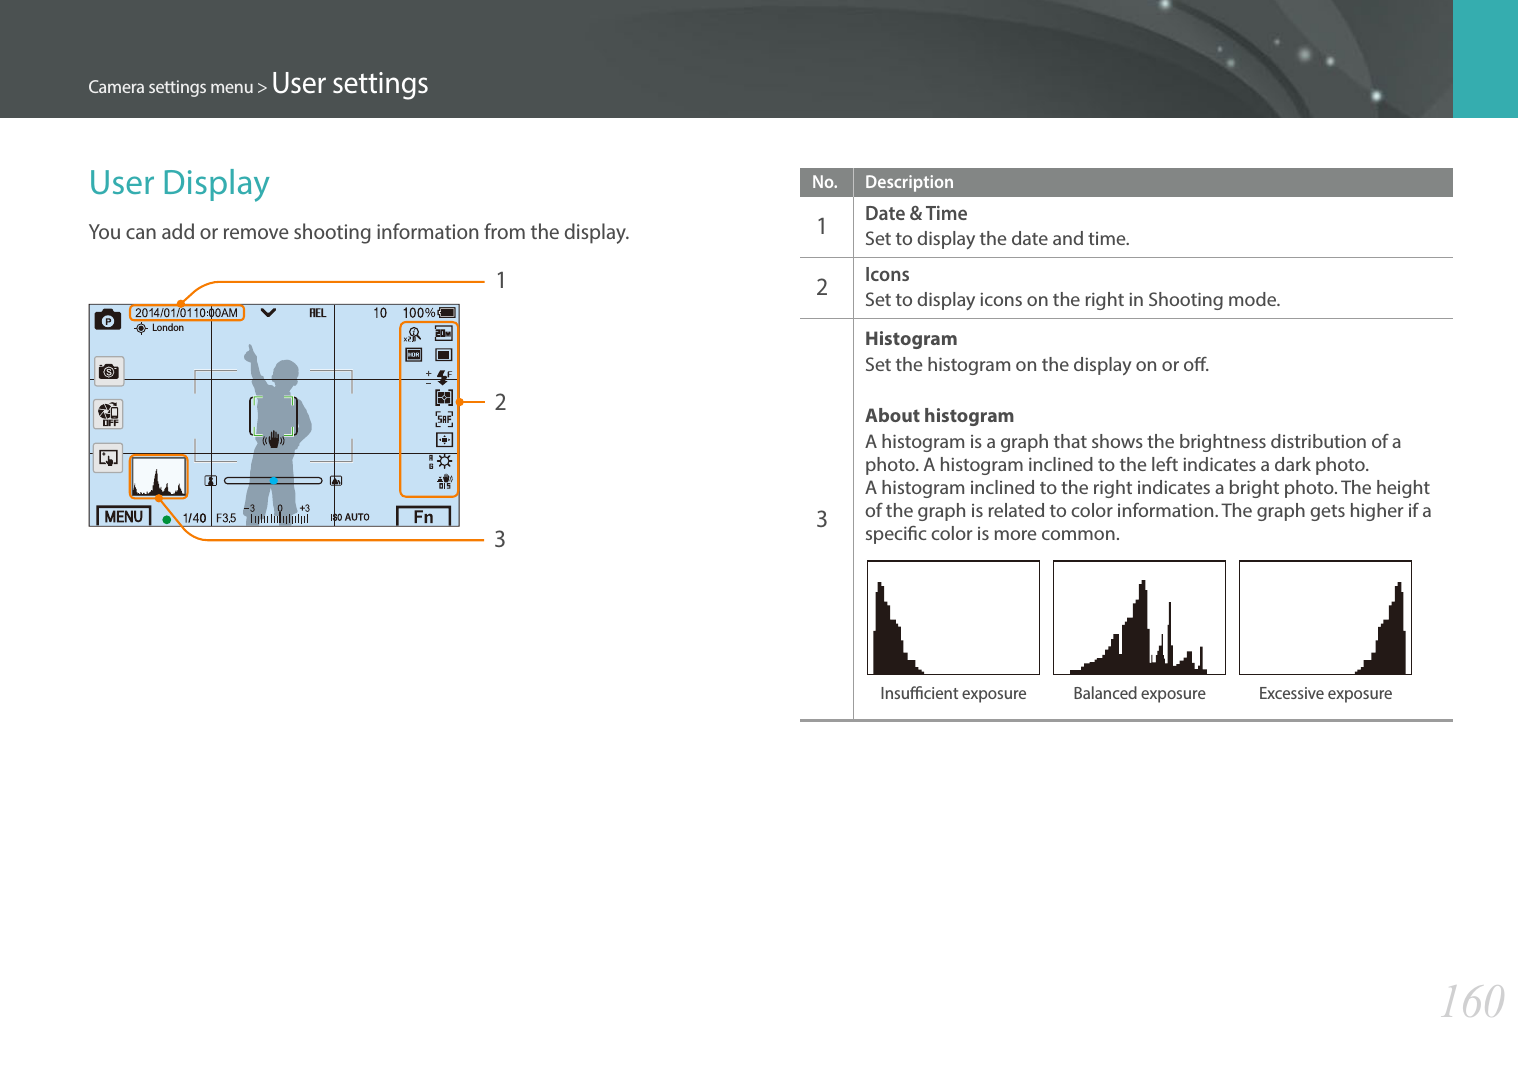
![161Camera settings menu > User settingsKey MappingYou can change the function assigned to the Preview button, the Custom button, the AEL button or the DIRECT LINK button.* DefaultButton FunctionPreviewSet the Depth Preview button's function.• Optical Preview*: Execute the Depth of Field Preview function for the current aperture value. (p. 24)• One Touch WB (White Balance): Execute the Custom White Balance function.• One Touch RAW +: Save a le in the RAW+JPEG format. To save a le in JPEG format, press the button again.CustomSet the Custom button's function.• Picture Wizard*: Select a Picture Wizard option directly.• AF Area: Select an auto focus area option directly.• Reset: Reset some settings.* DefaultButton FunctionAELSet the AEL button’s function. You can change the function assigned to the button to focus lock or exposure lock. The AEL and AFL functions save the exposure value or focus area respectively when a photo is captured. A function executed by half-pressing [Shutter] varies according to the function assigned to [a].• AEL*: Execute the auto exposure lock function. (Half-pressing [Shutter] executes the auto focus lock function.)• AEL Hold: Keep executing the auto exposure lock function after shooting. (The exposure remains locked even after you capture a photo.)• AFL: Execute the auto focus lock function. (Half-pressing [Shutter] executes the auto exposure lock function.)• AEL + AFL: Execute the auto exposure and focus lock functions together. (Half-pressing [Shutter] executes no function.)DIRECT LINKSet the DIRECT LINK button's function. (AutoShare*, MobileLink, Remote Viewnder, Baby Monitor, Auto Backup, Email, SNS and Cloud, Samsung Link)](https://usermanual.wiki/Samsung-Electronics-Co/NX30/User-Guide-2157335-Page-162.png)
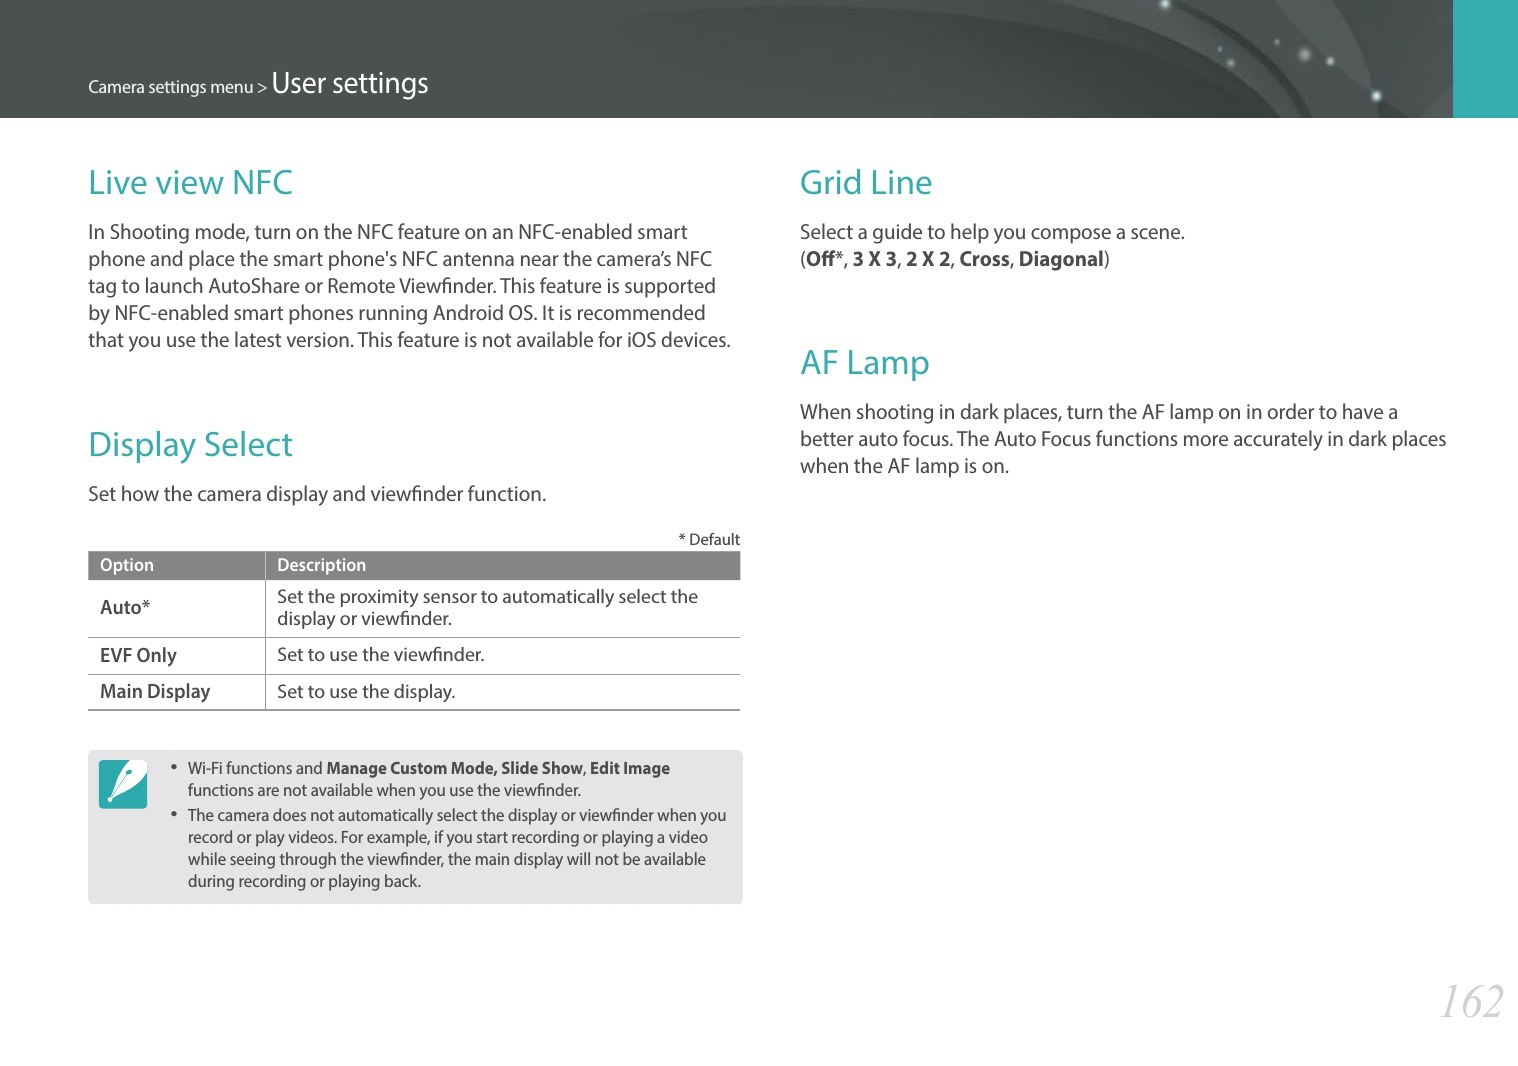
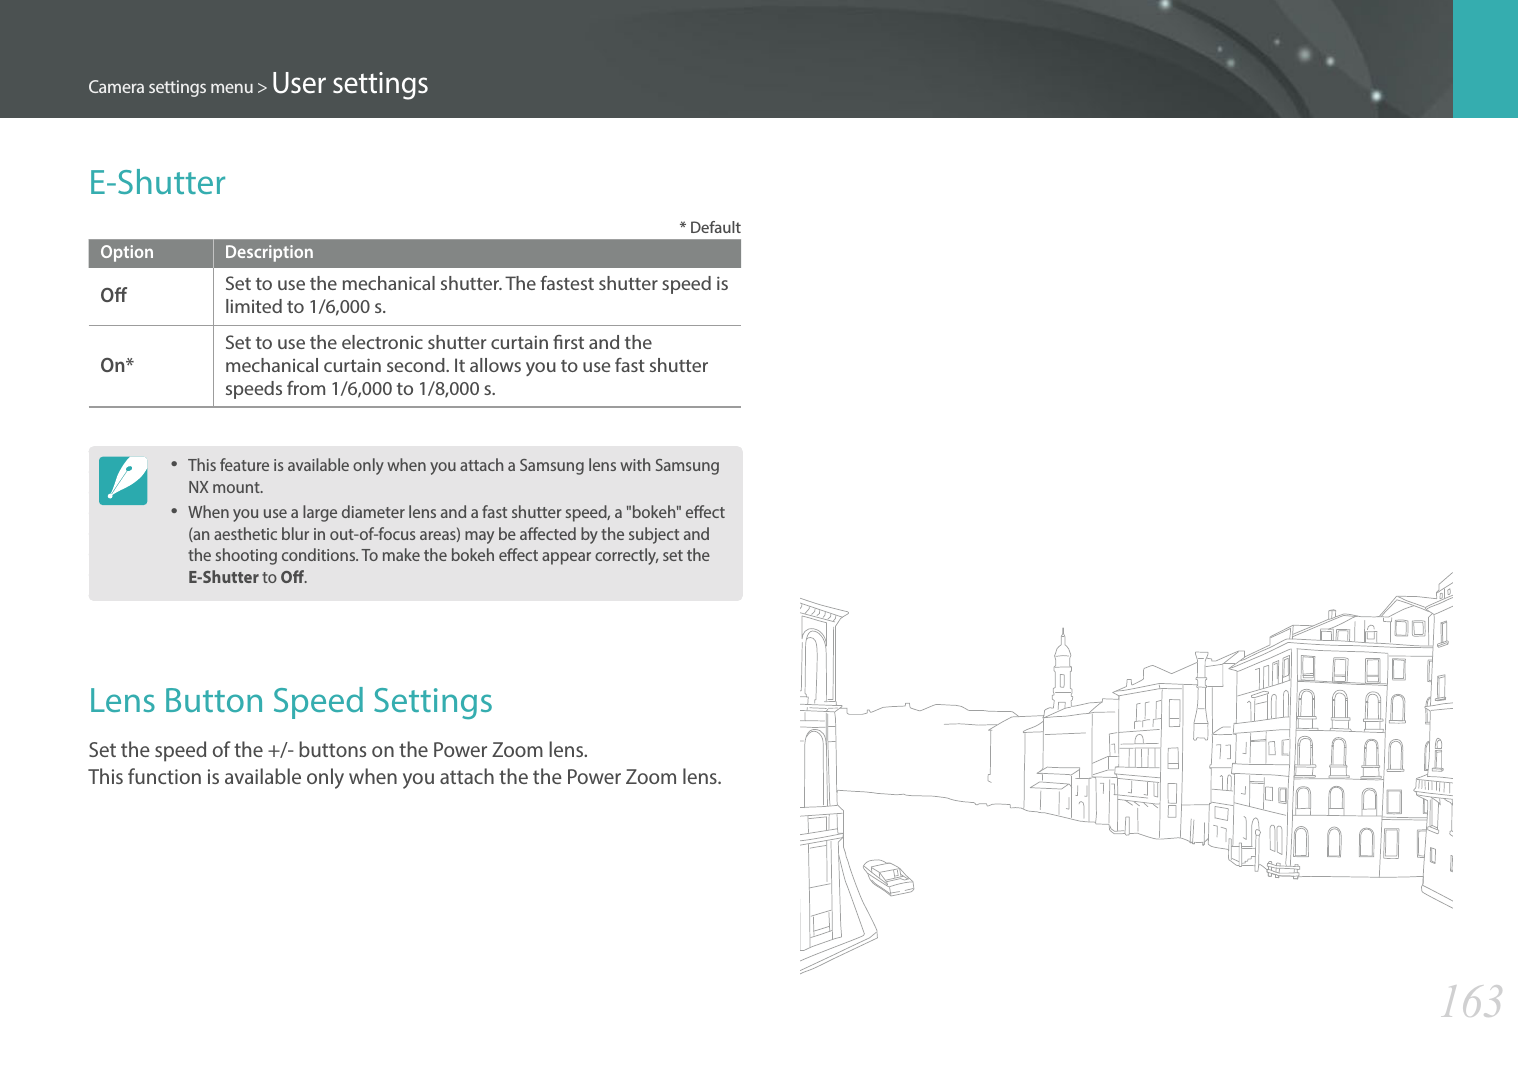
![164Camera settings menuLearn to congure your camera's settings.To set Setting options, In Shooting or Playback mode, press [m] ĺ q ĺ an option.* DefaultItem DescriptionSounds• System Volume: Set the sound volume or turn all sound o entirely. (O, Low, Medium*, High)Even if the system volume is turned o, the camera emits the sound while playing a video or a slide show.• AF Sound: Set the sound the camera emits when you half-press the shutter button on or o. (O, On*)• Button Sound: Set the sound the camera emits when you press the buttons or touch the screen on or o. (O, On*)Quick ViewSet the Quick View time length–the amount of time the camera displays a photo immediately after you capture it. (O, 1 sec*, 3 sec, 5 sec, Hold)* DefaultItem DescriptionDisplay AdjustAdjust the display brightness, auto brightness setting, display color, or level gauge.• Display Brightness: You can adjust the display brightness manually.• Auto Brightness: Turn auto brightness on or o. (O, On*)• Display Color: You can adjust the display color manually.• Horizontal Calibration: Calibrate the level gauge. If the level gauge is not level, position the camera on the level surface, and then follow the on-screen instructions.• You cannot access the Horizontal Calibration option in Playback mode.• You cannot calibrate the level gauge in portrait orientation.Auto Display OSet the display o time. The display turns o if you do not use the camera for the time you set. (O, 30 sec*, 1 min, 3 min, 5 min, 10 min)Setting](https://usermanual.wiki/Samsung-Electronics-Co/NX30/User-Guide-2157335-Page-165.png)
![165Camera settings menu > Setting* DefaultItem DescriptionPower SaveSet power shut o time. The camera shuts o if you do not use it for the time you set. (30 sec, 1 min*, 3 min, 5 min, 10 min, 30 min)• The camera retains the power-o time setting even if you replace the battery.• Power Save may not work if the camera is connected to a computer or a TV or playing a slide show or a movie.Help Guide Display• Mode Help Guide: Set to display help text about the selected mode when changing shooting modes. (O, On*)• Function Help Guide: Set to display help text about menus and functions. (O, On*)Press [n] to hide the help text.LanguageSet a language the camera shows on the display.Date and TimeSet date, time, date format, time zone and whether to imprint the date on photos. (Time Zone, Date Settings, Time Settings, Date Type, Time Type, Imprint)• The date appears on the lower right side of the photo.• When you print a photo, some printers may not print the date appropriately. * DefaultItem DescriptionVideo OutSet the video signal output appropriate for your country when connecting the camera to an external video device such as a monitor or HDTV.• NTSC: USA, Canada, Japan, Korea, Taiwan, Mexico, etc.• PAL (Supports only PAL B, D, G, H, or I): Australia, Austria, Belgium, China, Denmark, Finland, France, Germany, England, Italy, Kuwait, Malaysia, New Zealand, Singapore, Spain, Sweden, Switzerland, Thailand, Norway, etc.Anynet+ (HDMI-CEC)When you connect the camera to an HDTV that supports Anynet+ (HDMI-CEC), you can control the play function of the camera with the TV remote control.• O: You cannot control the play function of camera with the TV remote control.• On*: You can control the play function of camera with the TV remote control.HDMI OutputWhen you connect the camera to an HDTV with an HDMI cable, you can change the resolution of the image.• NTSC: Auto*, 1080p, 720p, 480p, 576p (activates only when PAL is selected)If the connected HDTV does not support the resolution you select, the camera sets the resolution one level lower.](https://usermanual.wiki/Samsung-Electronics-Co/NX30/User-Guide-2157335-Page-166.png)
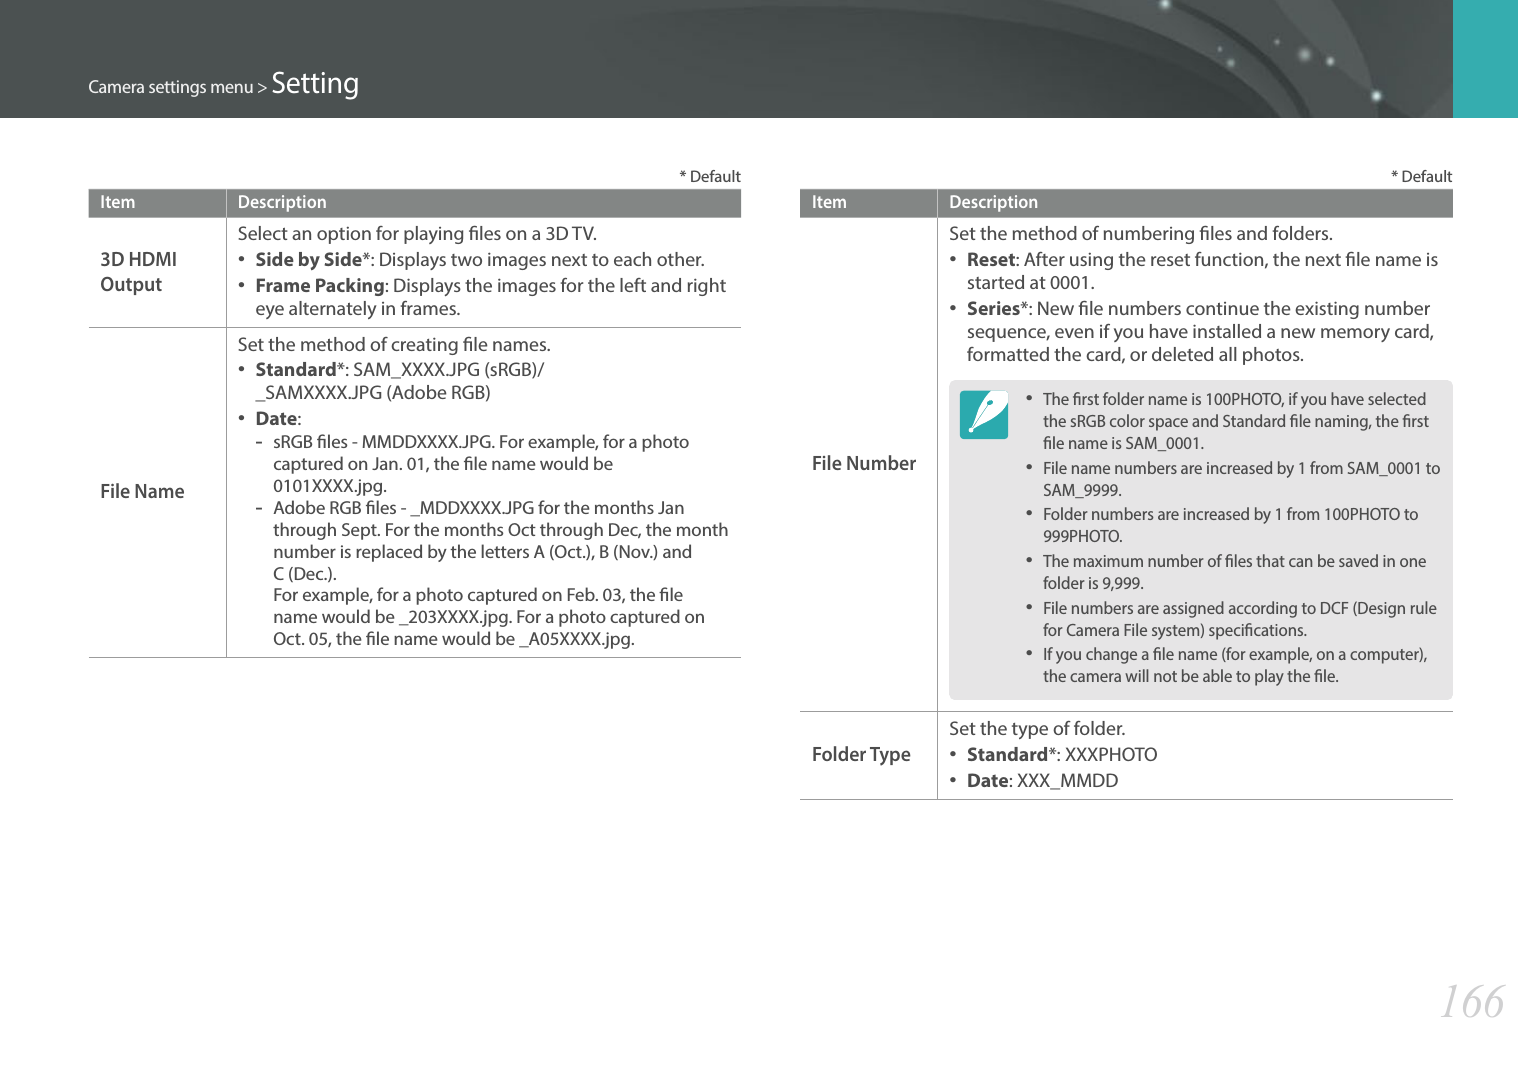
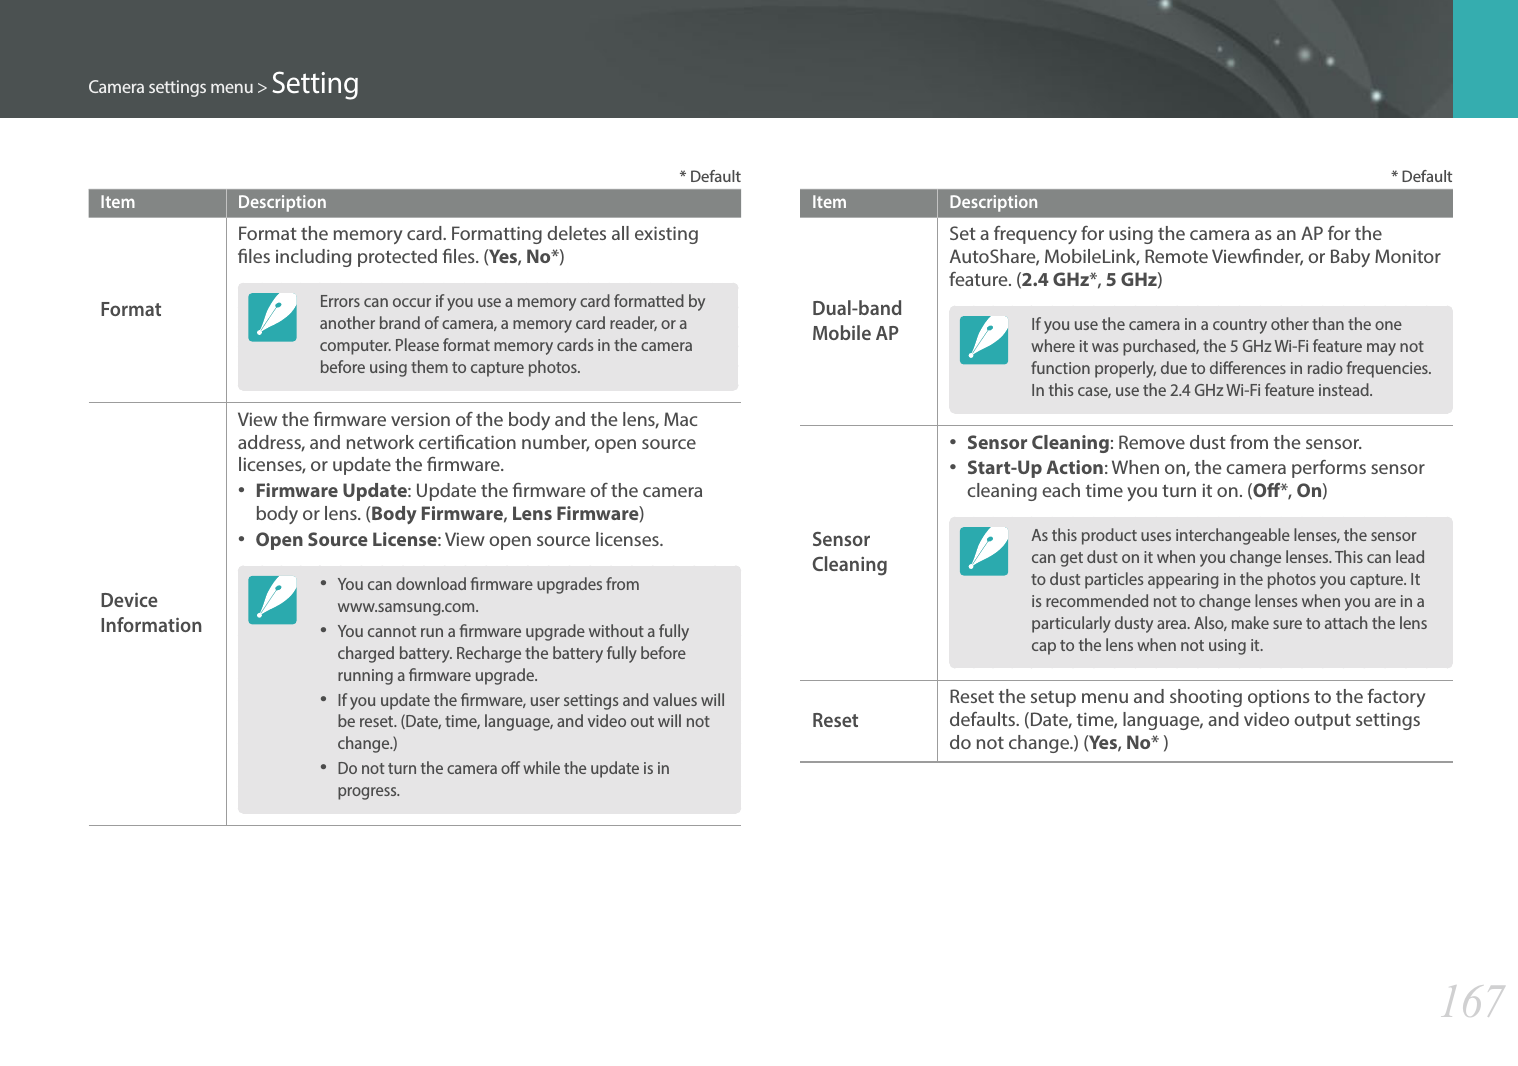
![169Connecting to external devicesPlay back photos or videos by connecting your camera to an HDTV (3D TV) using an optional HDMI cable.Viewing les on an HDTV1 In Shooting or Playback mode, press [m] ĺ q ĺ HDMI Output ĺ an option. (p. 165)2 Turn o your camera and HDTV.3 Connect your camera to your HDTV with the optional HDMI cable.4 Turn on your HDTV, and then select the HDMI video source.5 Turn on the camera.• The camera automatically enters into Playback mode when you connect it to an HDTV.6 View photos or play videos using the camera buttons.• When using the HDMI cable, you can connect the camera to an HDTV using the Anynet+(CEC) method. • The Anynet+(CEC) functions allow you to control connected devices using the TV remote control.• If the HDTV supports Anynet+(CEC), the TV turns on automatically when used in conjunction with the camera. This feature may not be available on some HDTVs.• You can capture a photo or video when the camera is connected to an HDTV, but some functions are limited.• When connected to an HDTV, some of the camera’s playback functions may not be available.• The length of time after which the camera and an HDTV are connected may vary depending on the memory card that you are using. As the main feature of a memory card is to increase the transfer speed, it is not necessarily true to say that a memory card with a faster transfer speed is also fast in using the HDMI function.• 1920X1080 (60 fps) videos can be played only on Full HDTVs capable of playback at 60 fps.Viewing files on an HDTV or 3D TV](https://usermanual.wiki/Samsung-Electronics-Co/NX30/User-Guide-2157335-Page-170.png)
![170Connecting to external devices > Viewing les on an HDTV or 3D TVViewing les on a 3D TVYou can view photos or videos captured in 3D mode or with the 3D Panorama option in Smart mode on a 3D TV.1 In Shooting or Playback mode, press [m] ĺ q ĺ HDMI Output ĺ an option. (p. 165)2 Select 3D HDMI Output ĺ an option. (p. 166)3 Turn o your camera and 3D TV.4 Connect your camera to your 3D TV with the optional HDMI cable.5 Turn on your 3D TV, and then select the HDMI video source.6 Turn on your camera.• The camera automatically enters into Playback mode when you connect it to a 3D TV.7 Move to a 3D le, and then press [I] to switch to 3D mode.• Press [I] again to switch to 2D Mode.8 Turn on your TV's 3D function.• Refer to your TV's user manual for more details.9 View 3D photos or play 3D videos using the camera buttons.• You cannot view an MPO le in 3D eect on TVs that do not support the le format.• Use proper 3D glasses when you view an MPO le or a 3D video le on a 3D TV.• Capturing photos in 3D Panorama mode may result in a less pronounced 3D eect than those captured in 3D mode with a 3D lens.Do not view the 3D photos or videos captured by your camera on a 3D TV or 3D monitor for an extended period of time. It may cause unpleasant symptoms, such as eyestrain, fatigue, nausea, and more.](https://usermanual.wiki/Samsung-Electronics-Co/NX30/User-Guide-2157335-Page-171.png)
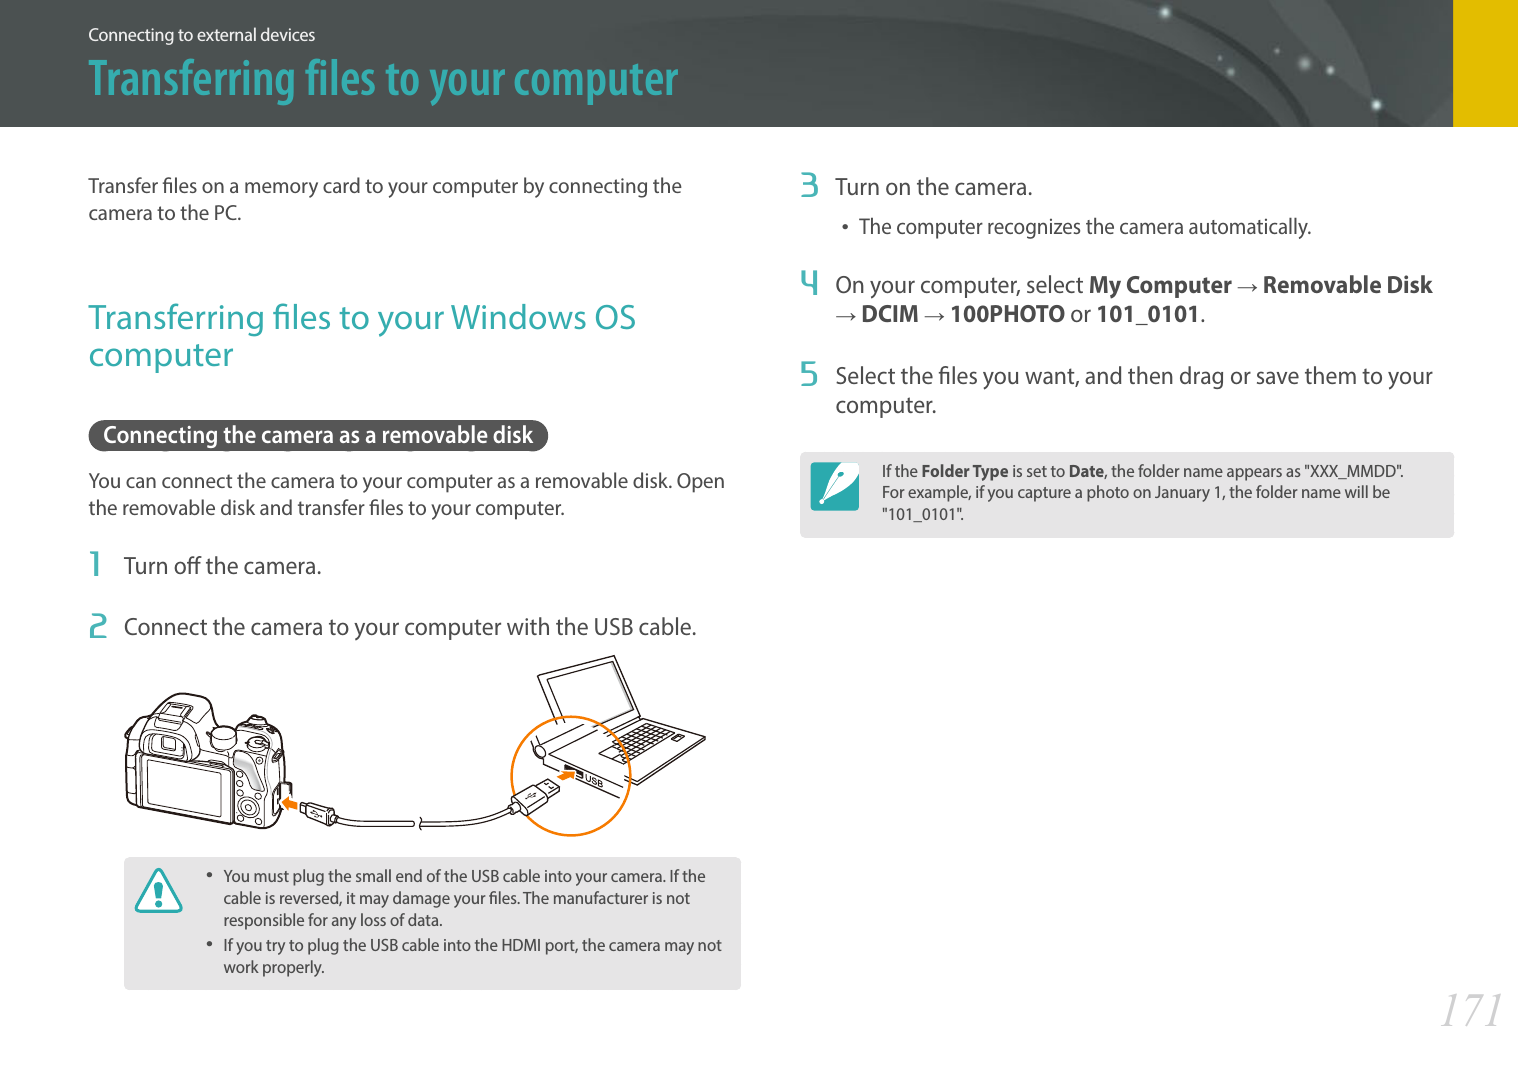
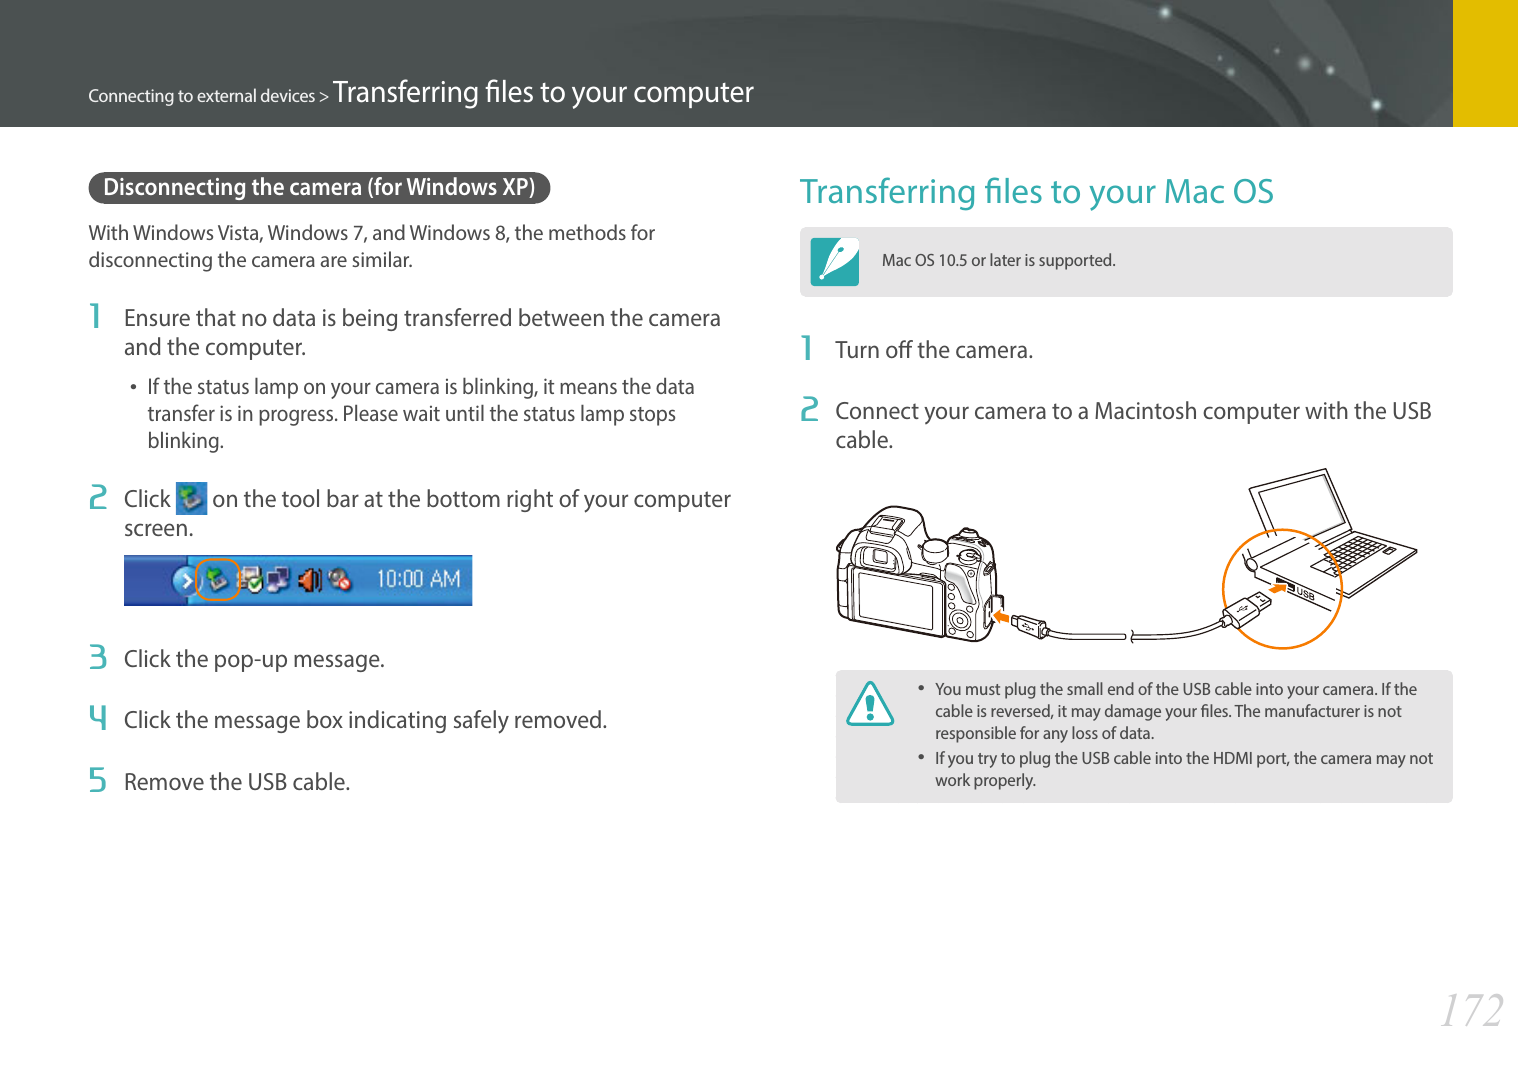
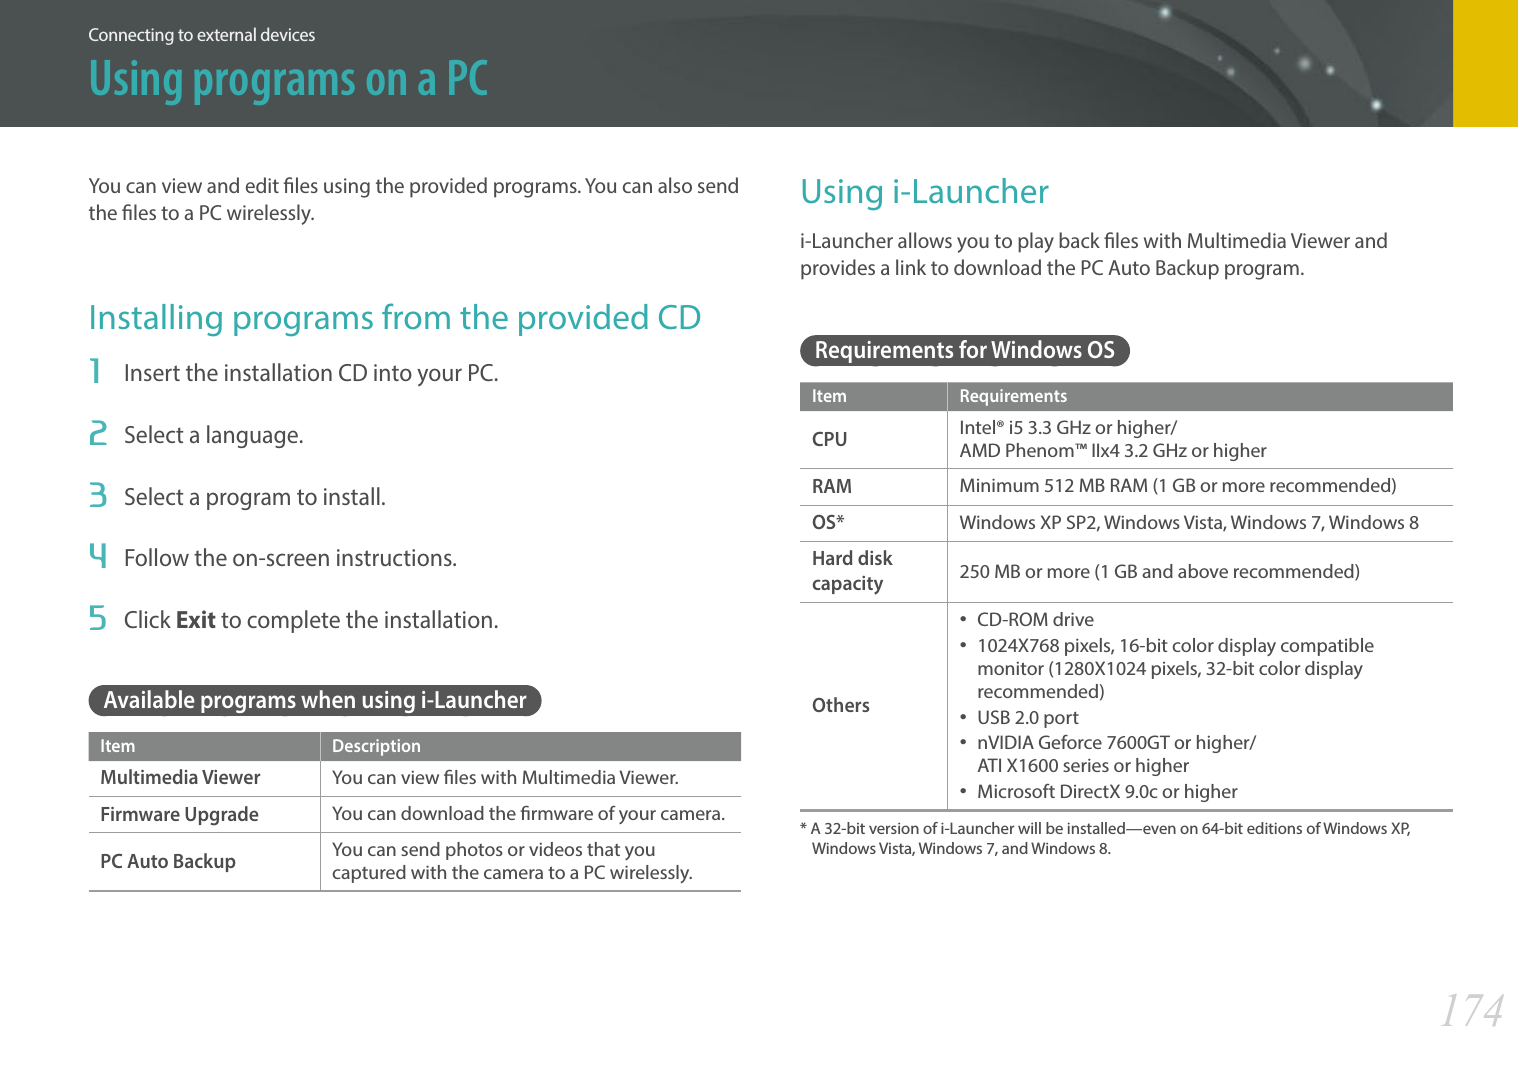
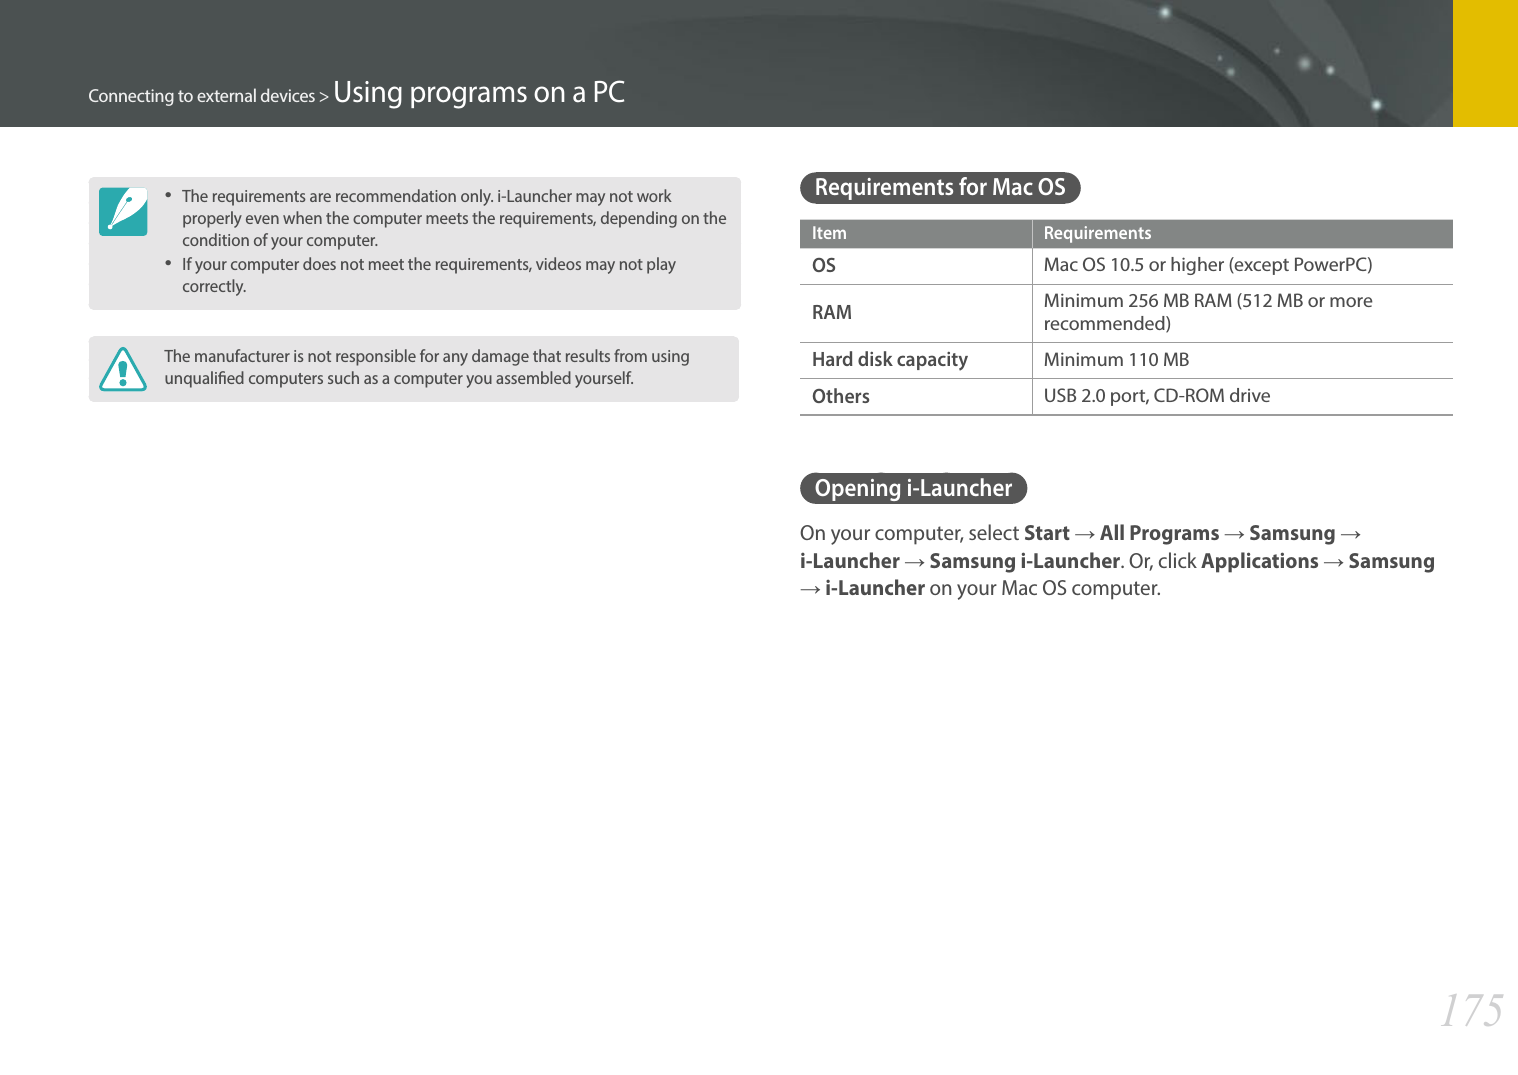
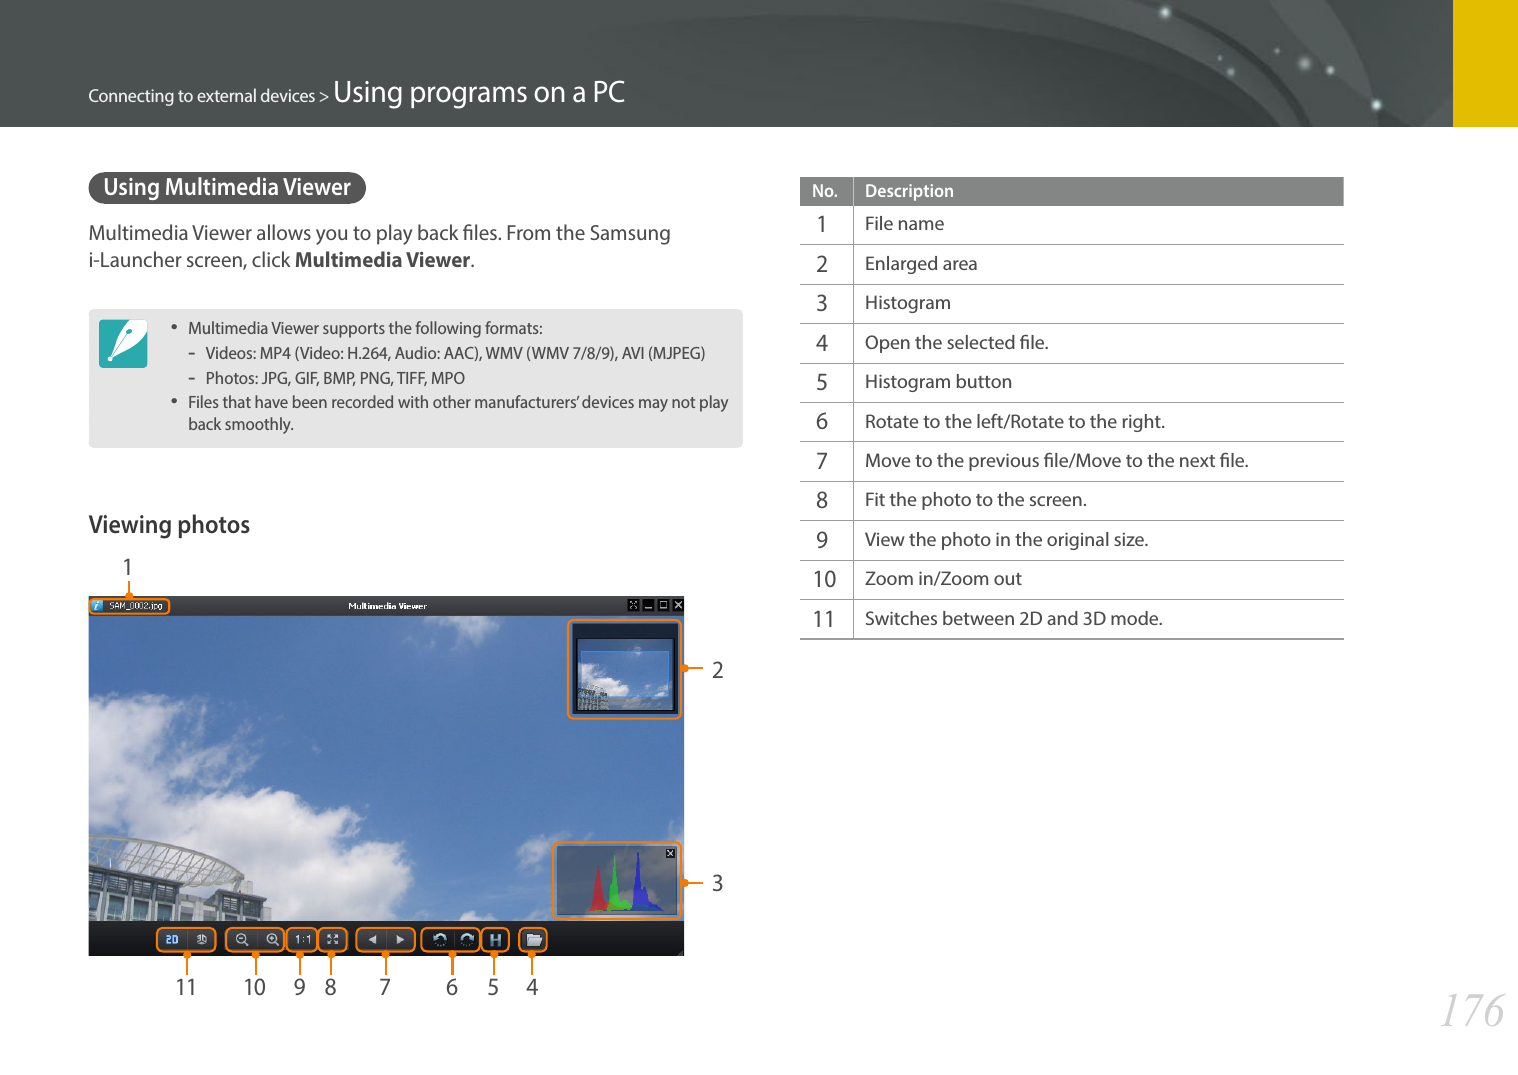
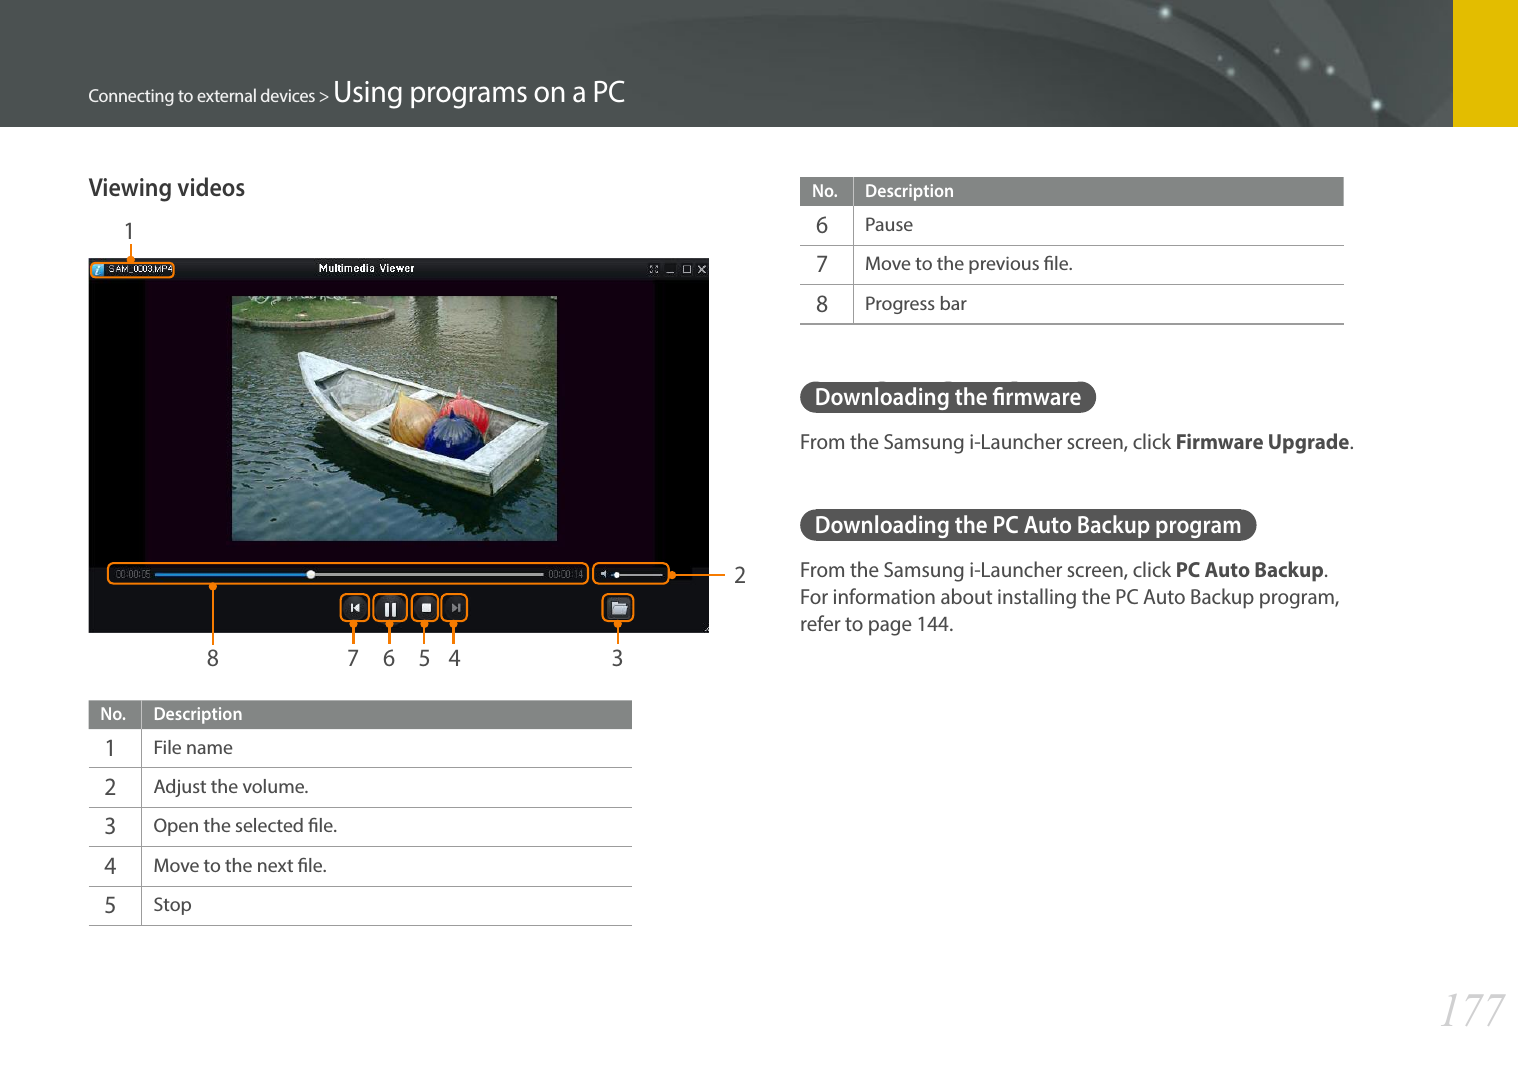
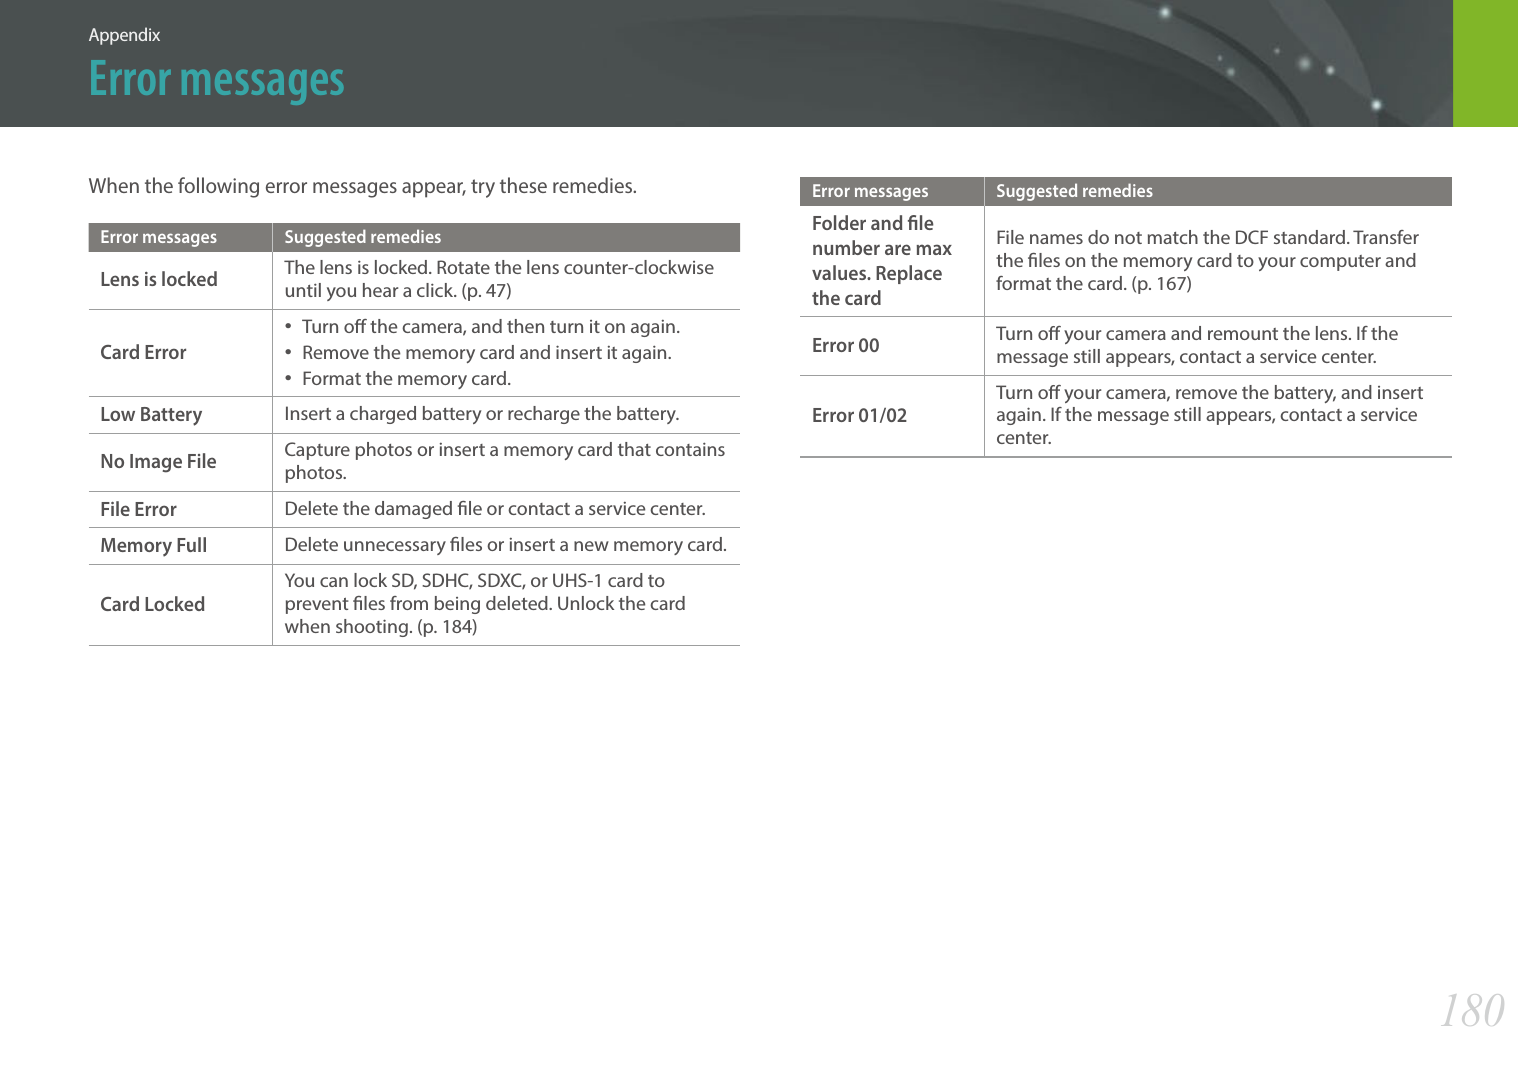
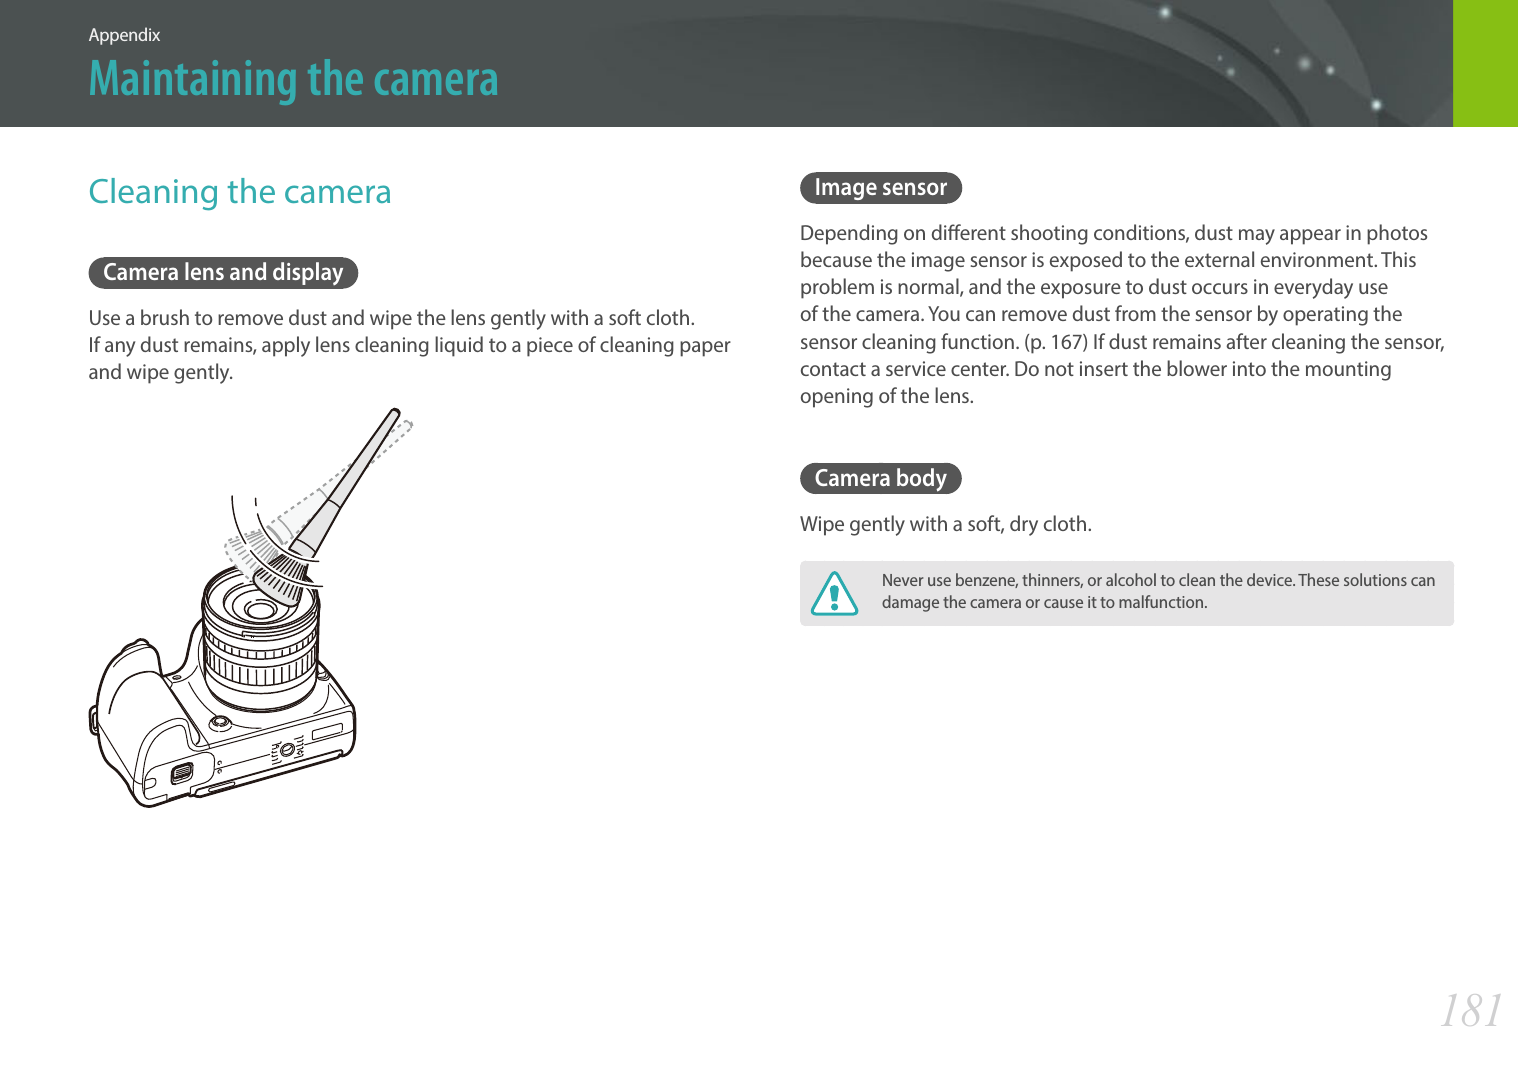
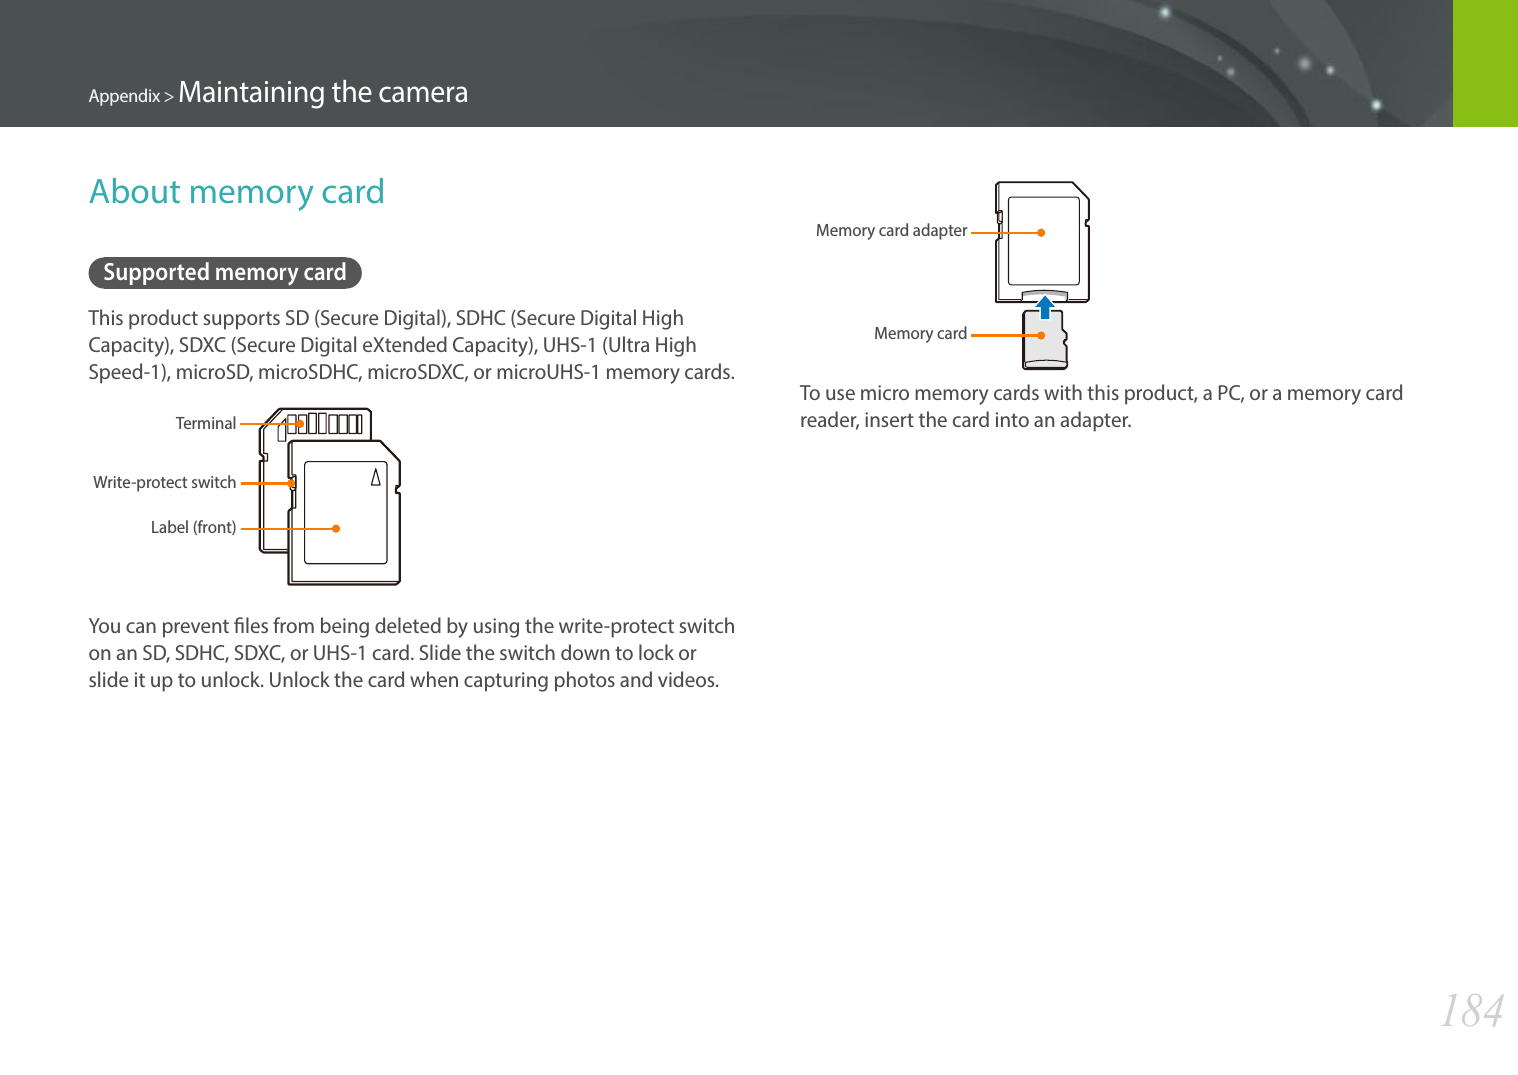
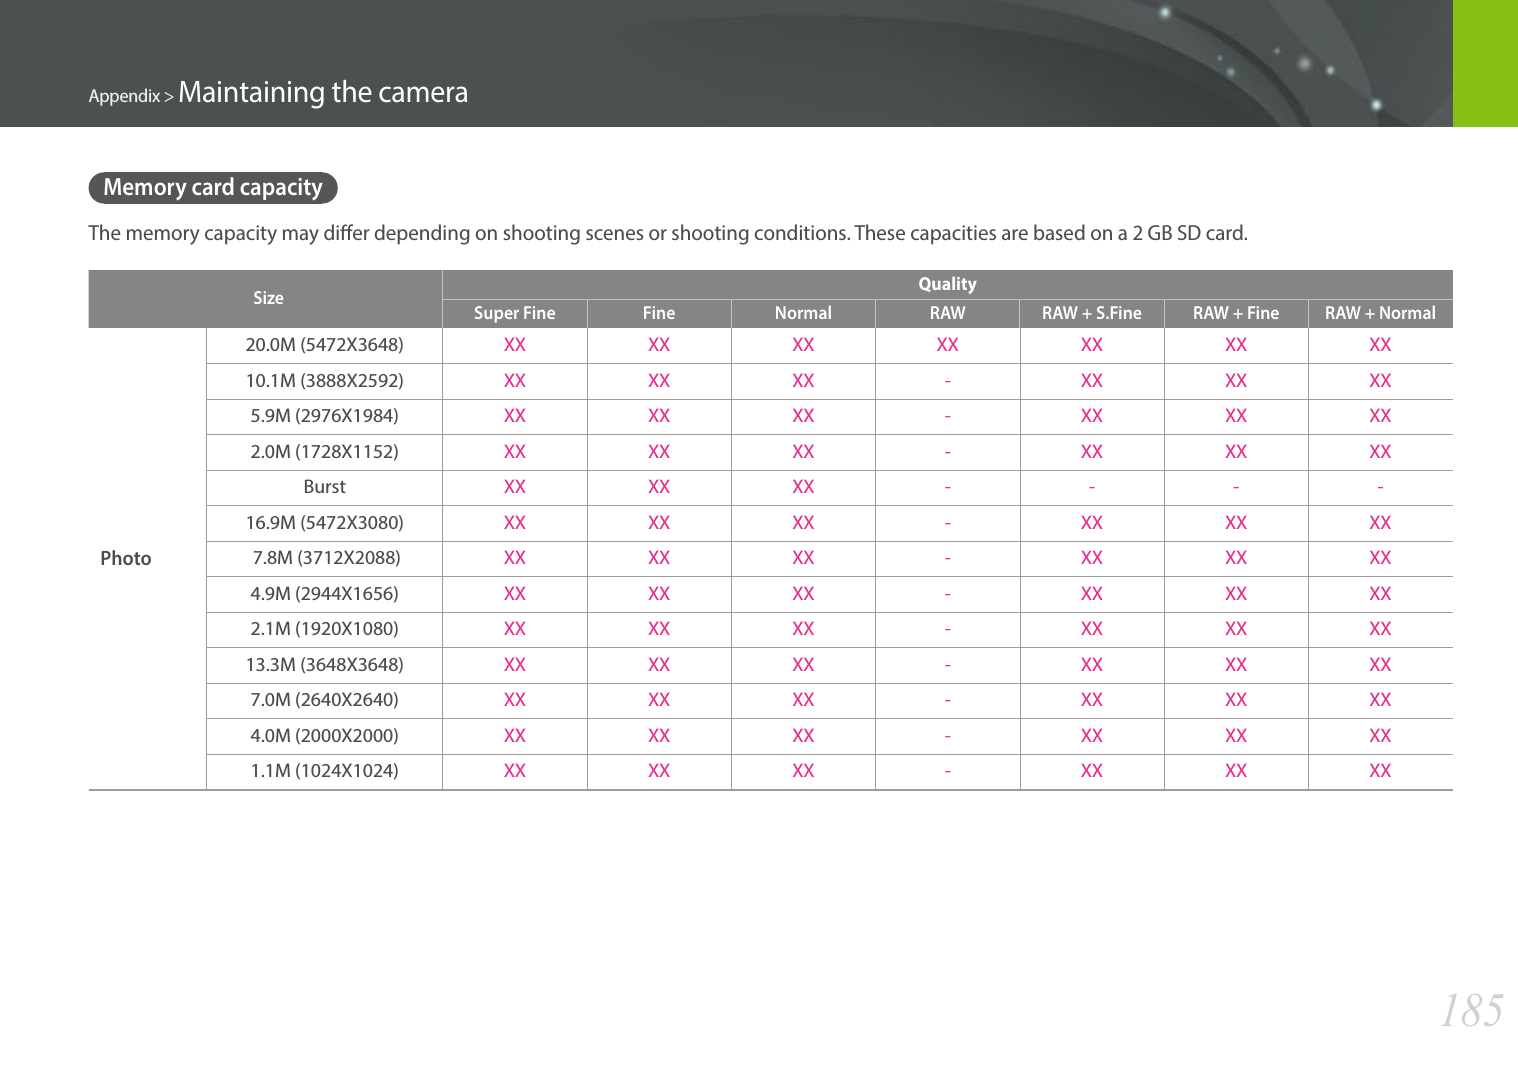
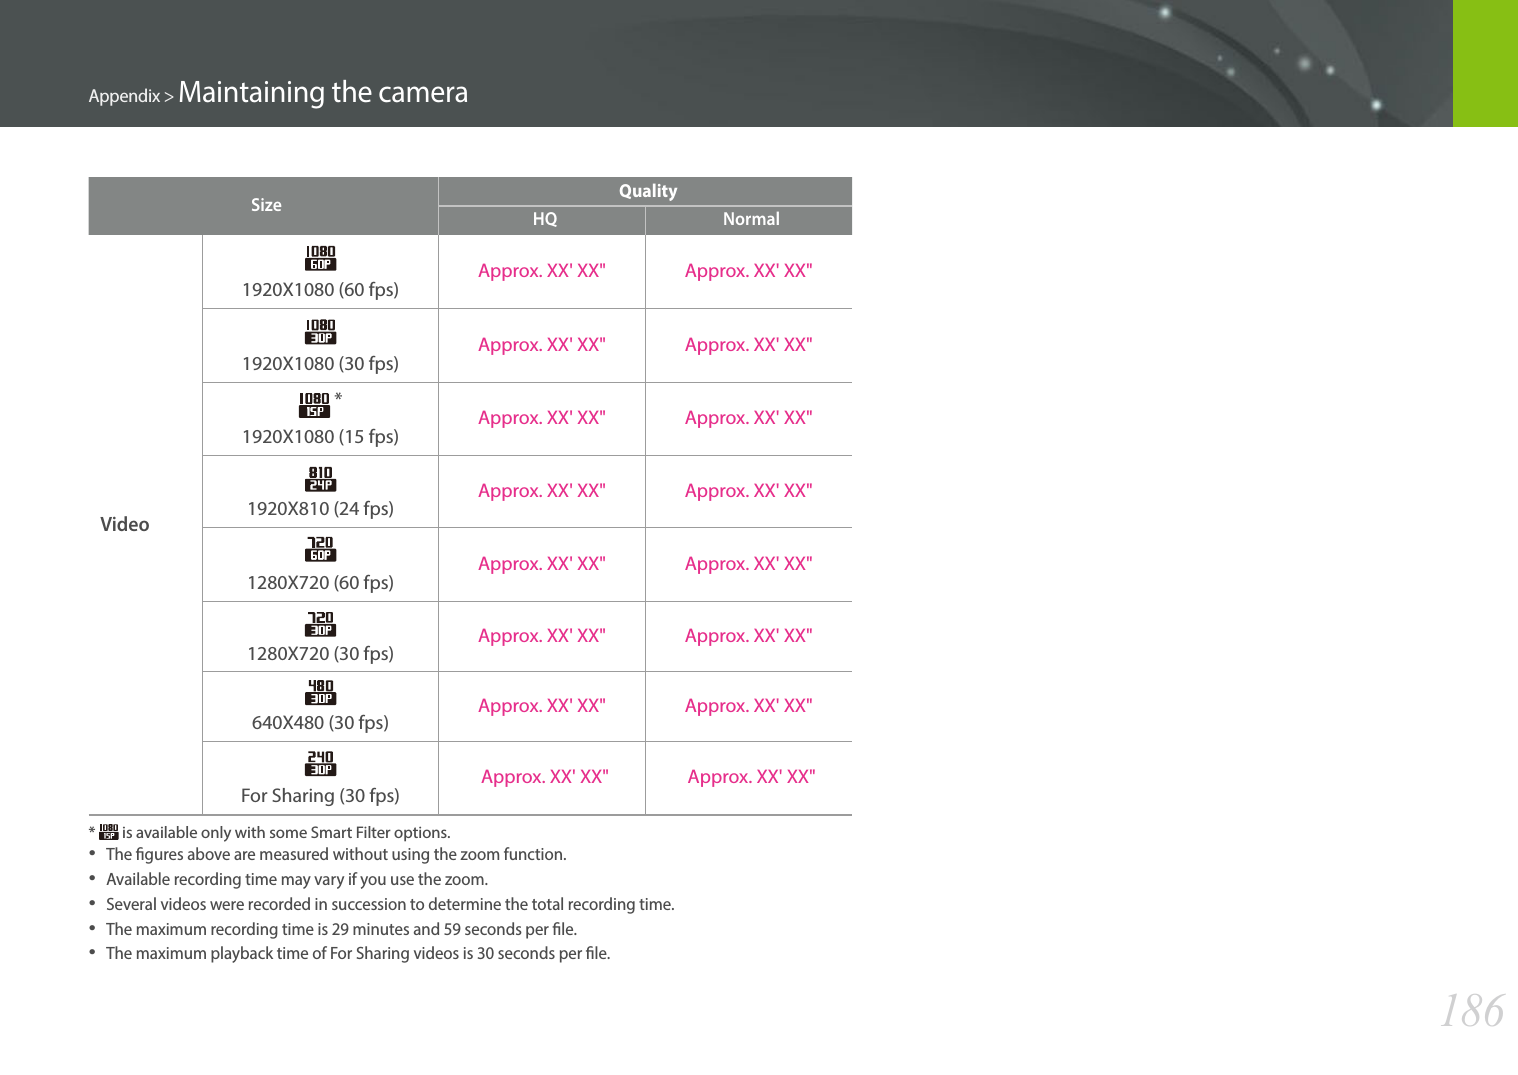
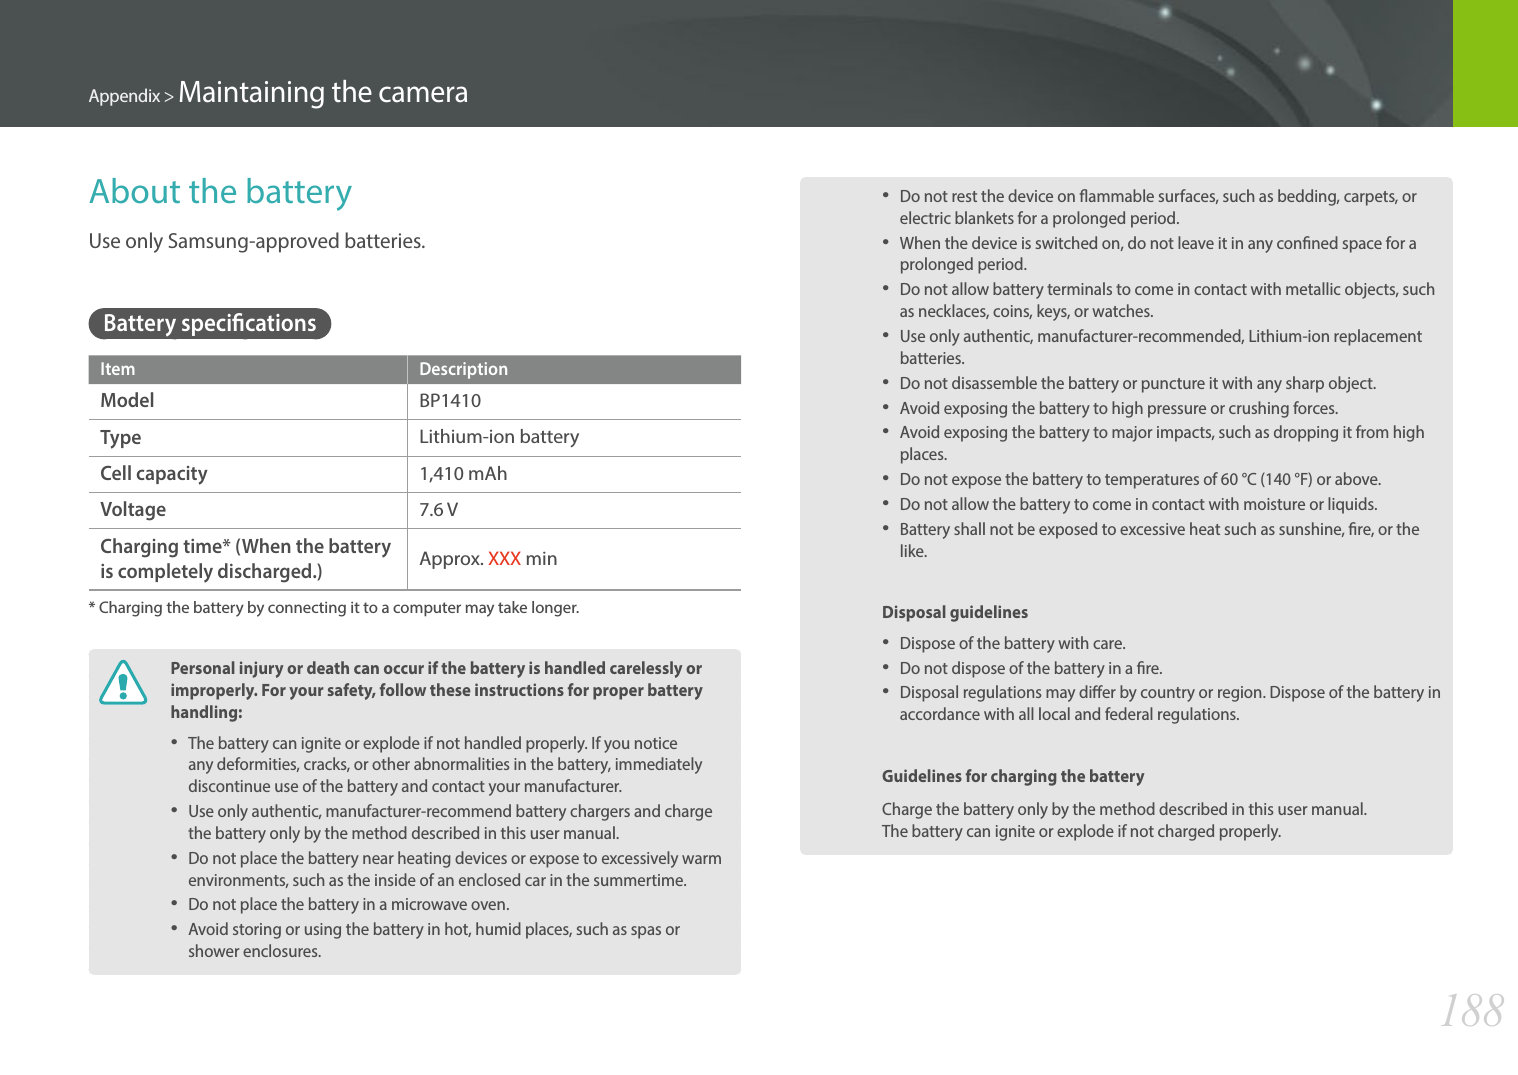
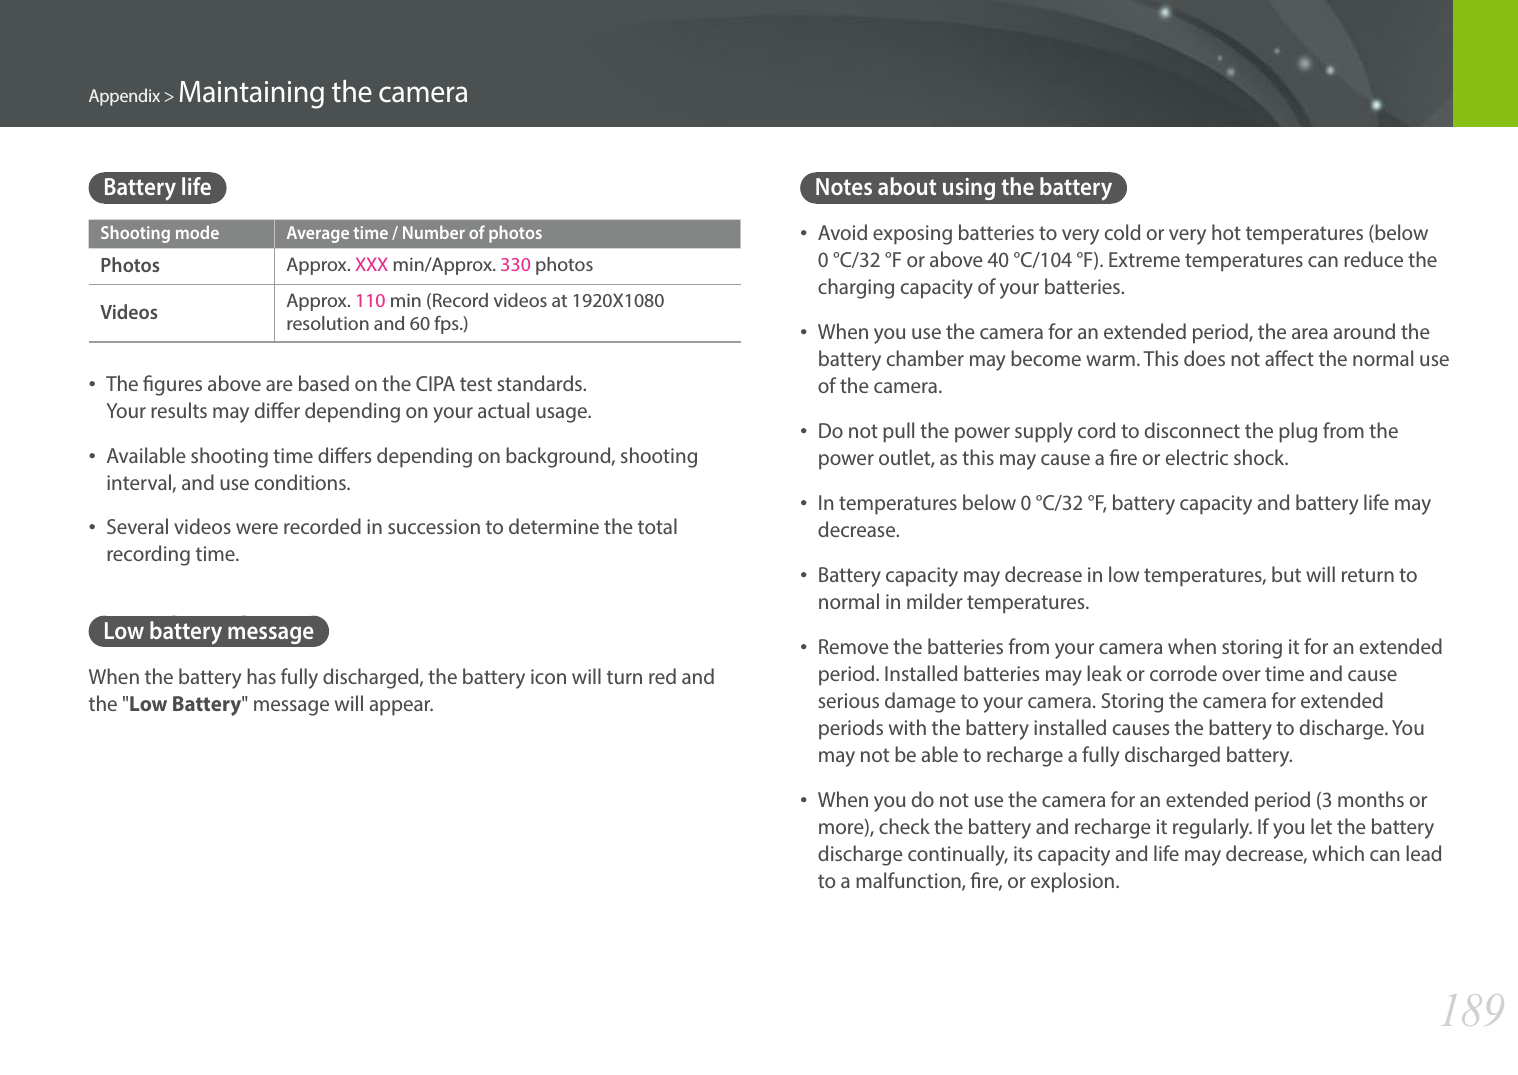
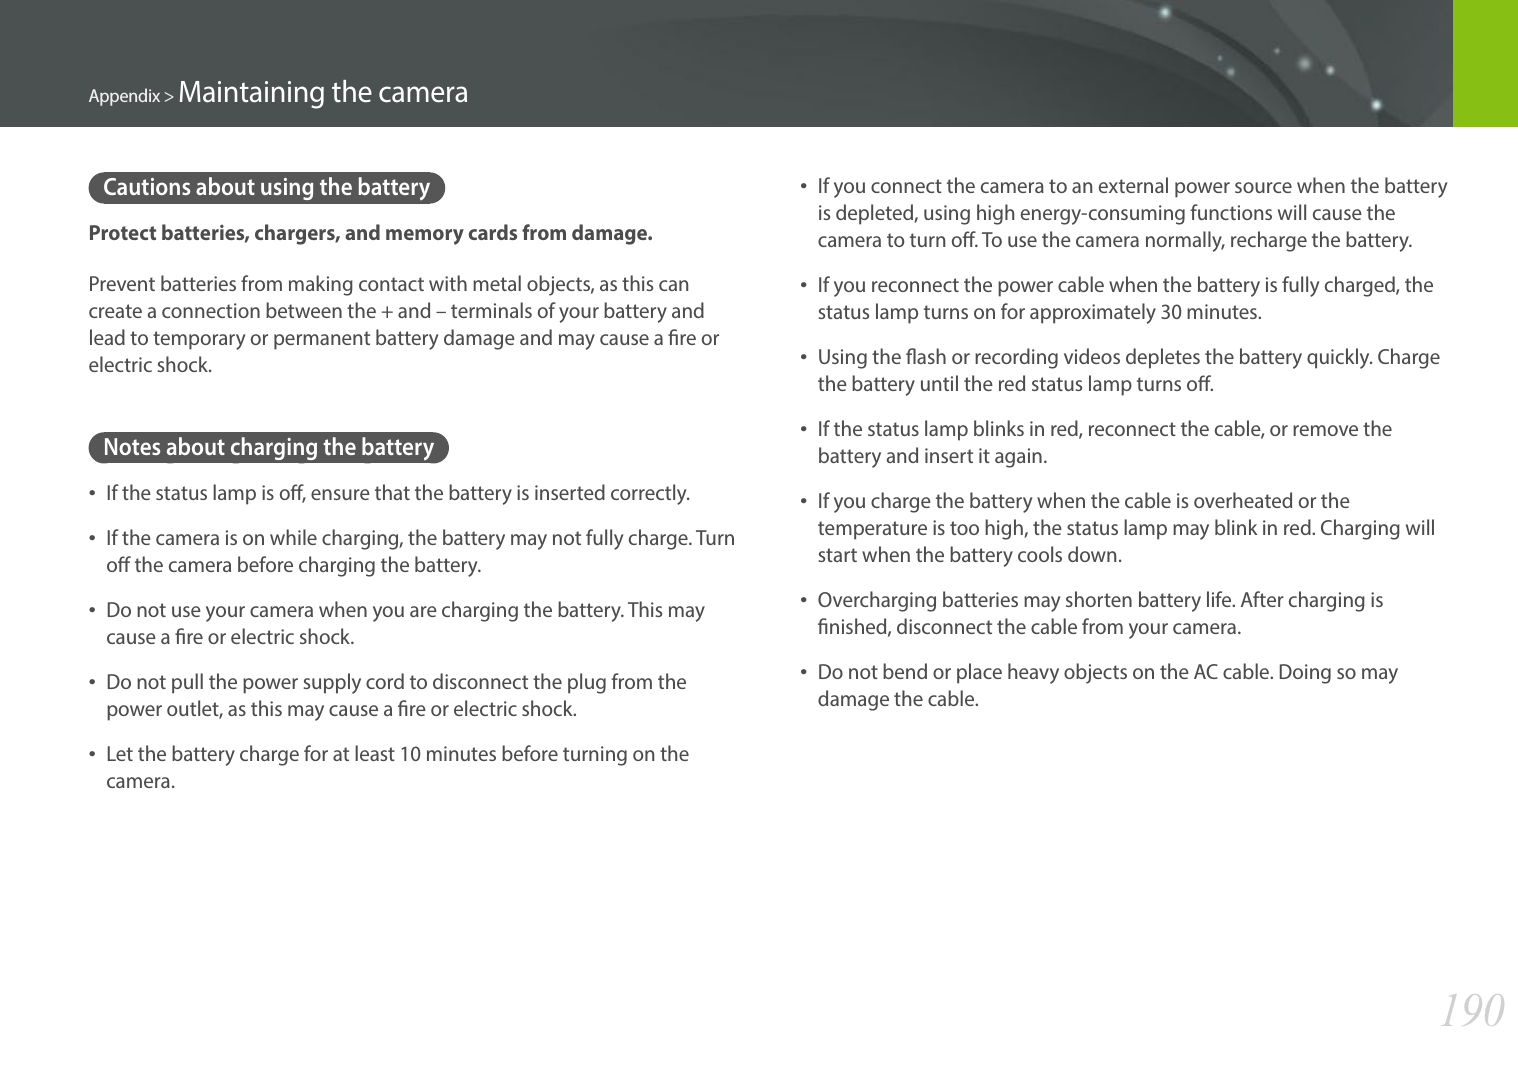
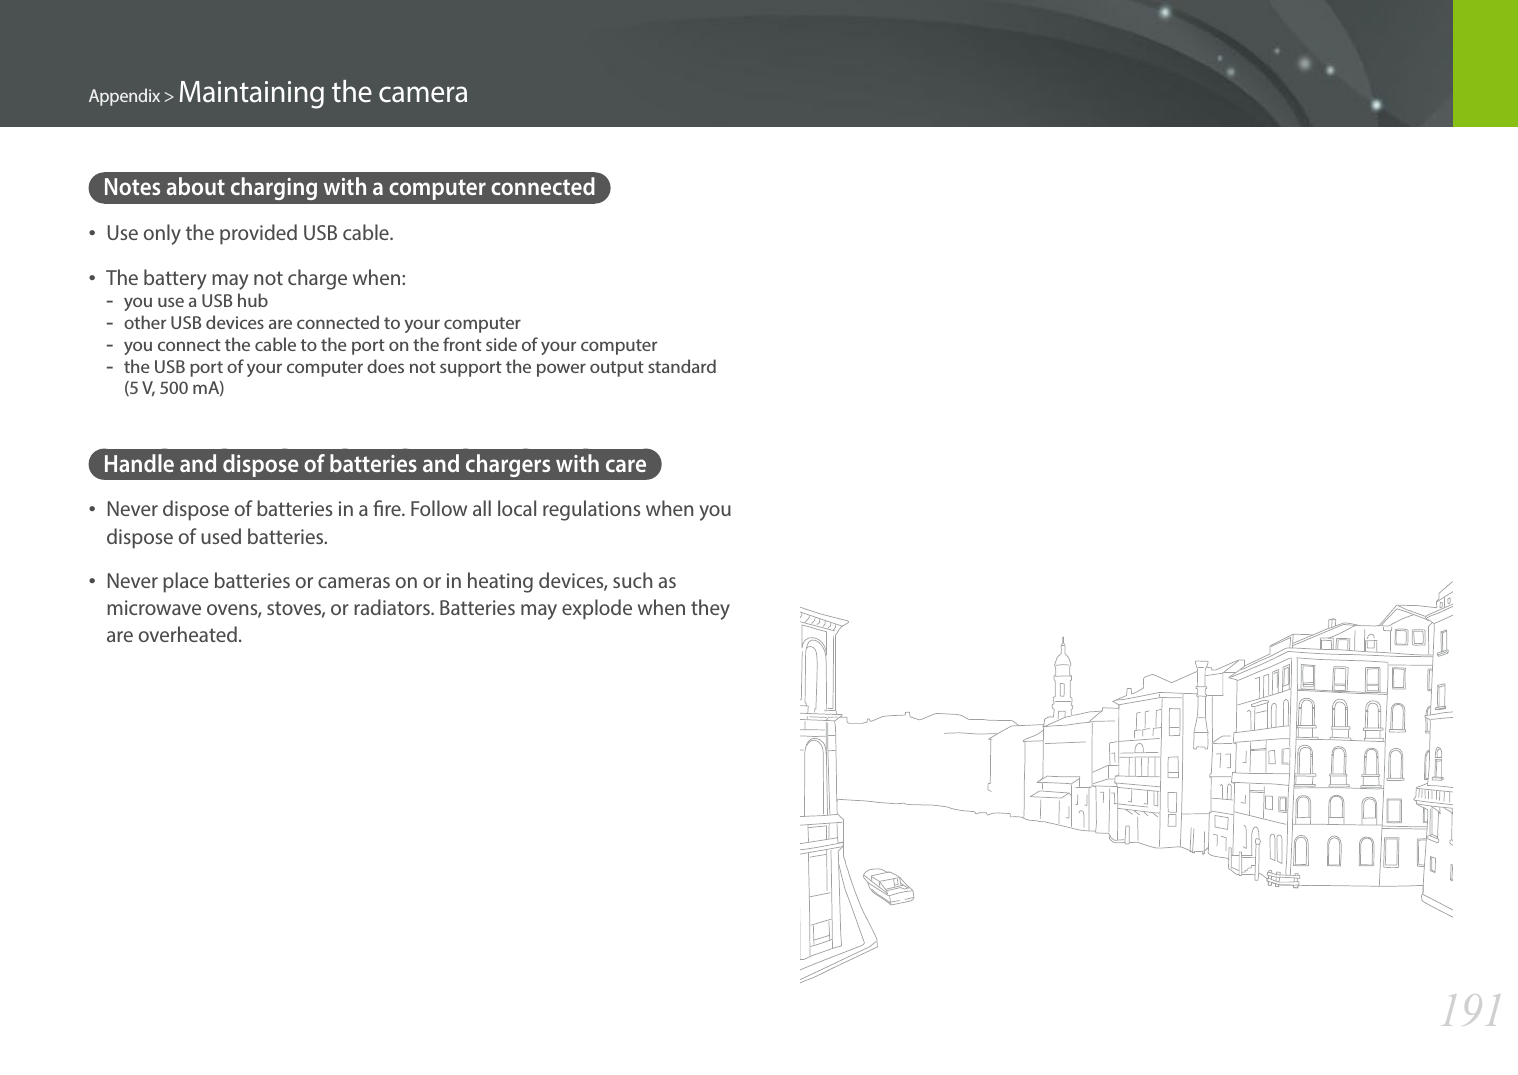
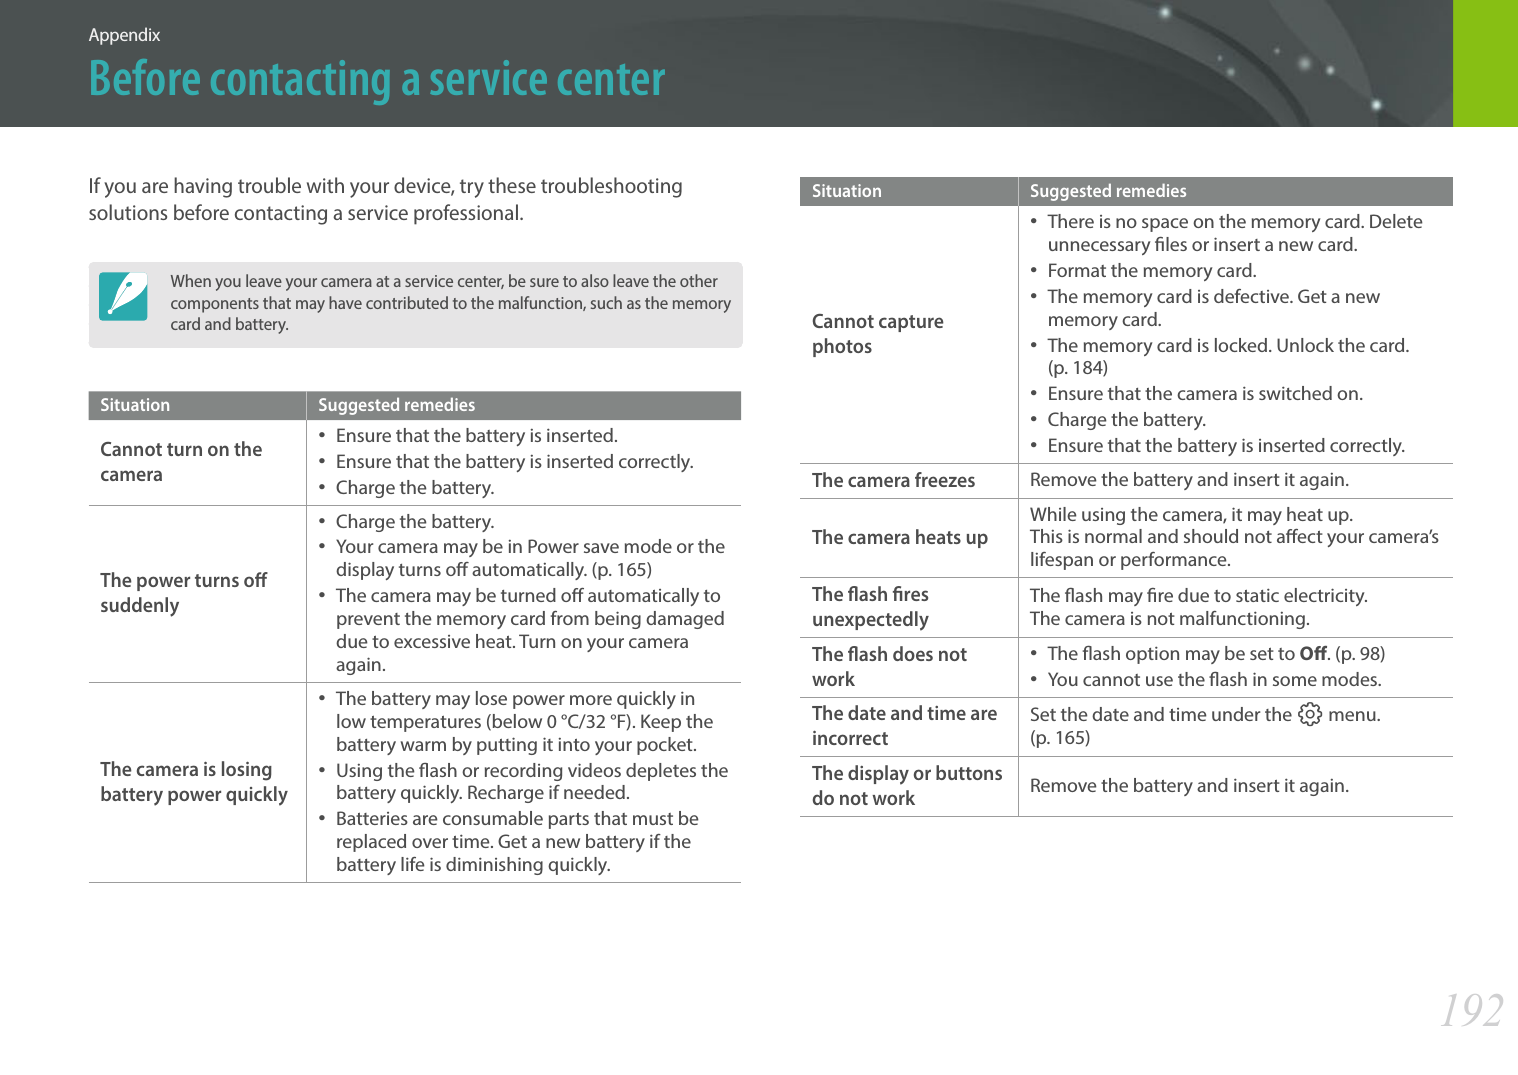
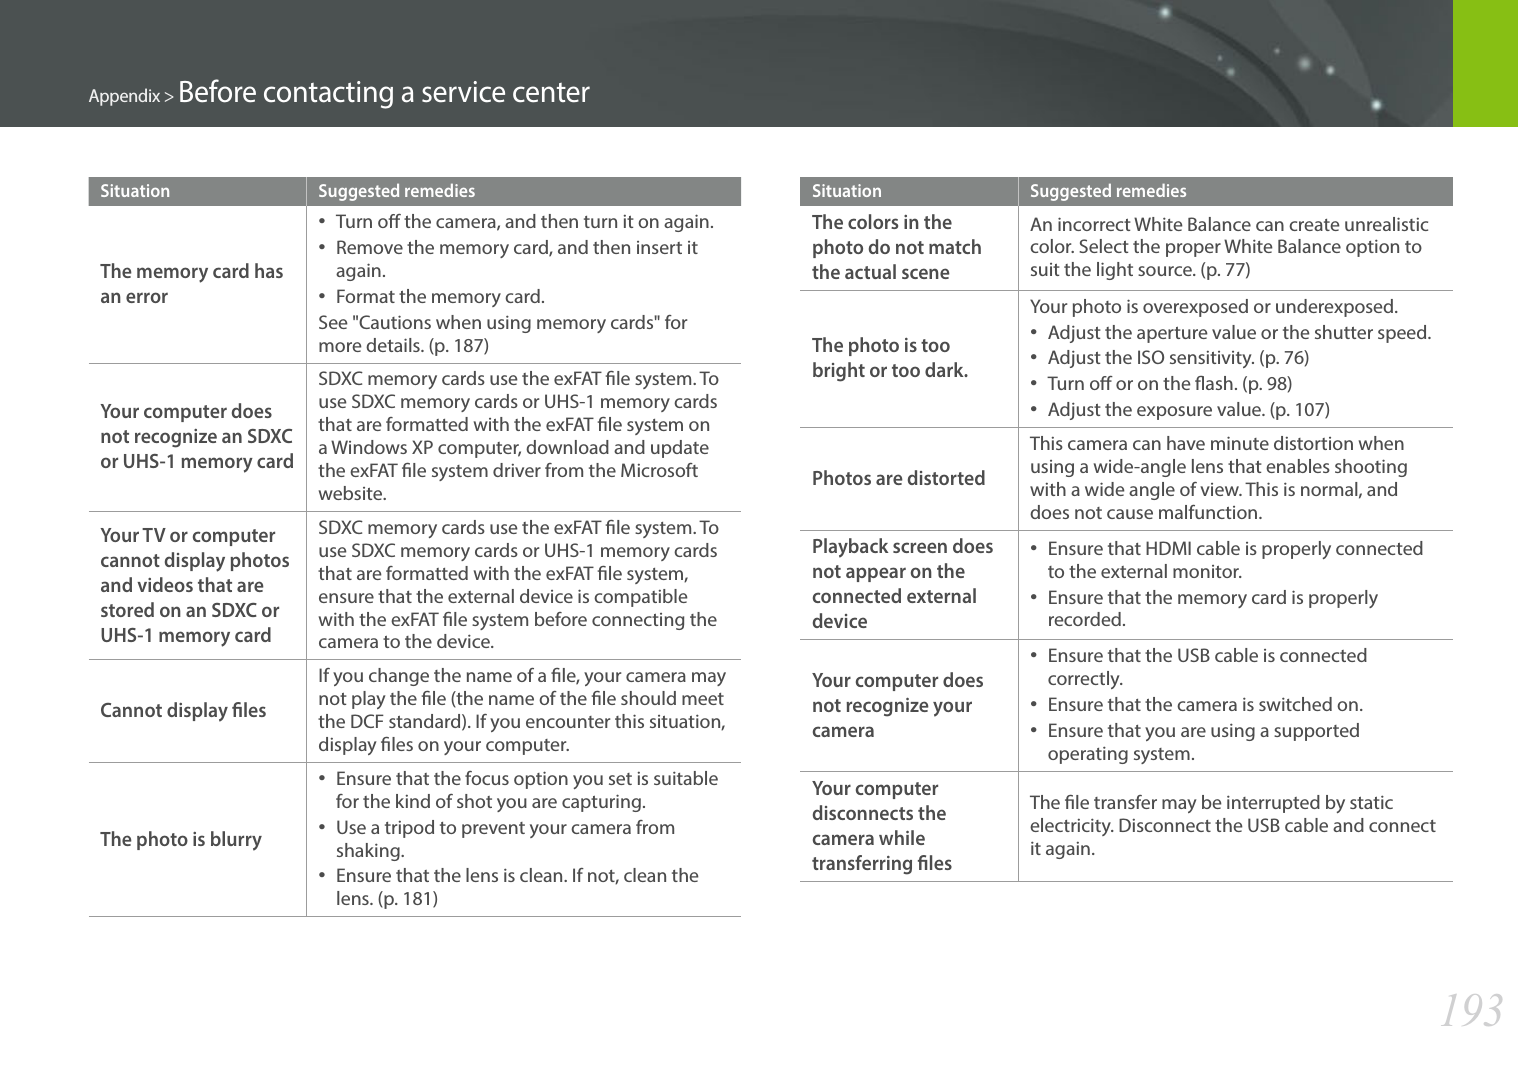
![194Appendix > Before contacting a service centerSituation Suggested remediesYour computer cannot play videosVideos may not play on some video player programs. To play video les captured with your camera, use the Multimedia Viewer program that you can install with the i-Launcher program on your computer.i-Launcher is not functioning properly• End i-Launcher and restart the program.• Depending on your computer's specications and environment, the program may not launch automatically. In this case, click Stat ĺ All Programs ĺ Samsung ĺ i-Launcher ĺ Samsung i-Launcher on your Windows computer. (For Windows 8, open Start screen, and then select All apps ĺ Samsung i-Launcher.) Or, click Applications ĺ Samsung ĺ i-Launcher on your Mac OS computer.Cannot set the DPOF for RAW lesYou cannot set the DPOF for RAW les.Auto Focus does not work• Subject is not in focus. When the subject is outside the AF area, shoot by moving the subject inside the AF area and half-pressing [Shutter].• Subject is too close. Step back from the subject and shoot.• The focus mode is set to MF. Switch the mode to AF.Situation Suggested remediesAEL feature does not workAEL feature does not work in t, M, i, and s modes. Select another mode to use this feature.Lens does not work• Ensure that the lens is properly mounted. • Remove the lens from the camera and remount it.External ash or GPS does not workEnsure that the external device is properly mounted and turned on.The date & time settings screen appears when you power on the camera• Set the date and time again.• This screen appears when the camera’s internal power source is completely discharged. Insert a fully charged battery and wait at least 72 hours in power o status for the internal power source to be recharged.](https://usermanual.wiki/Samsung-Electronics-Co/NX30/User-Guide-2157335-Page-195.png)