Samsung Electronics Co RF4289RSG309 LCD control panel module User Manual
Samsung Electronics Co Ltd LCD control panel module
UserManual.wiki
>
Samsung Electronics Co
>
RF4289RSG309 User Manual
User manual
Navigation menu
Upload a User Manual
Namespaces
Wiki Guide
HTML
PDF
Info
Views
User Manual
Discussion / Help
Navigation
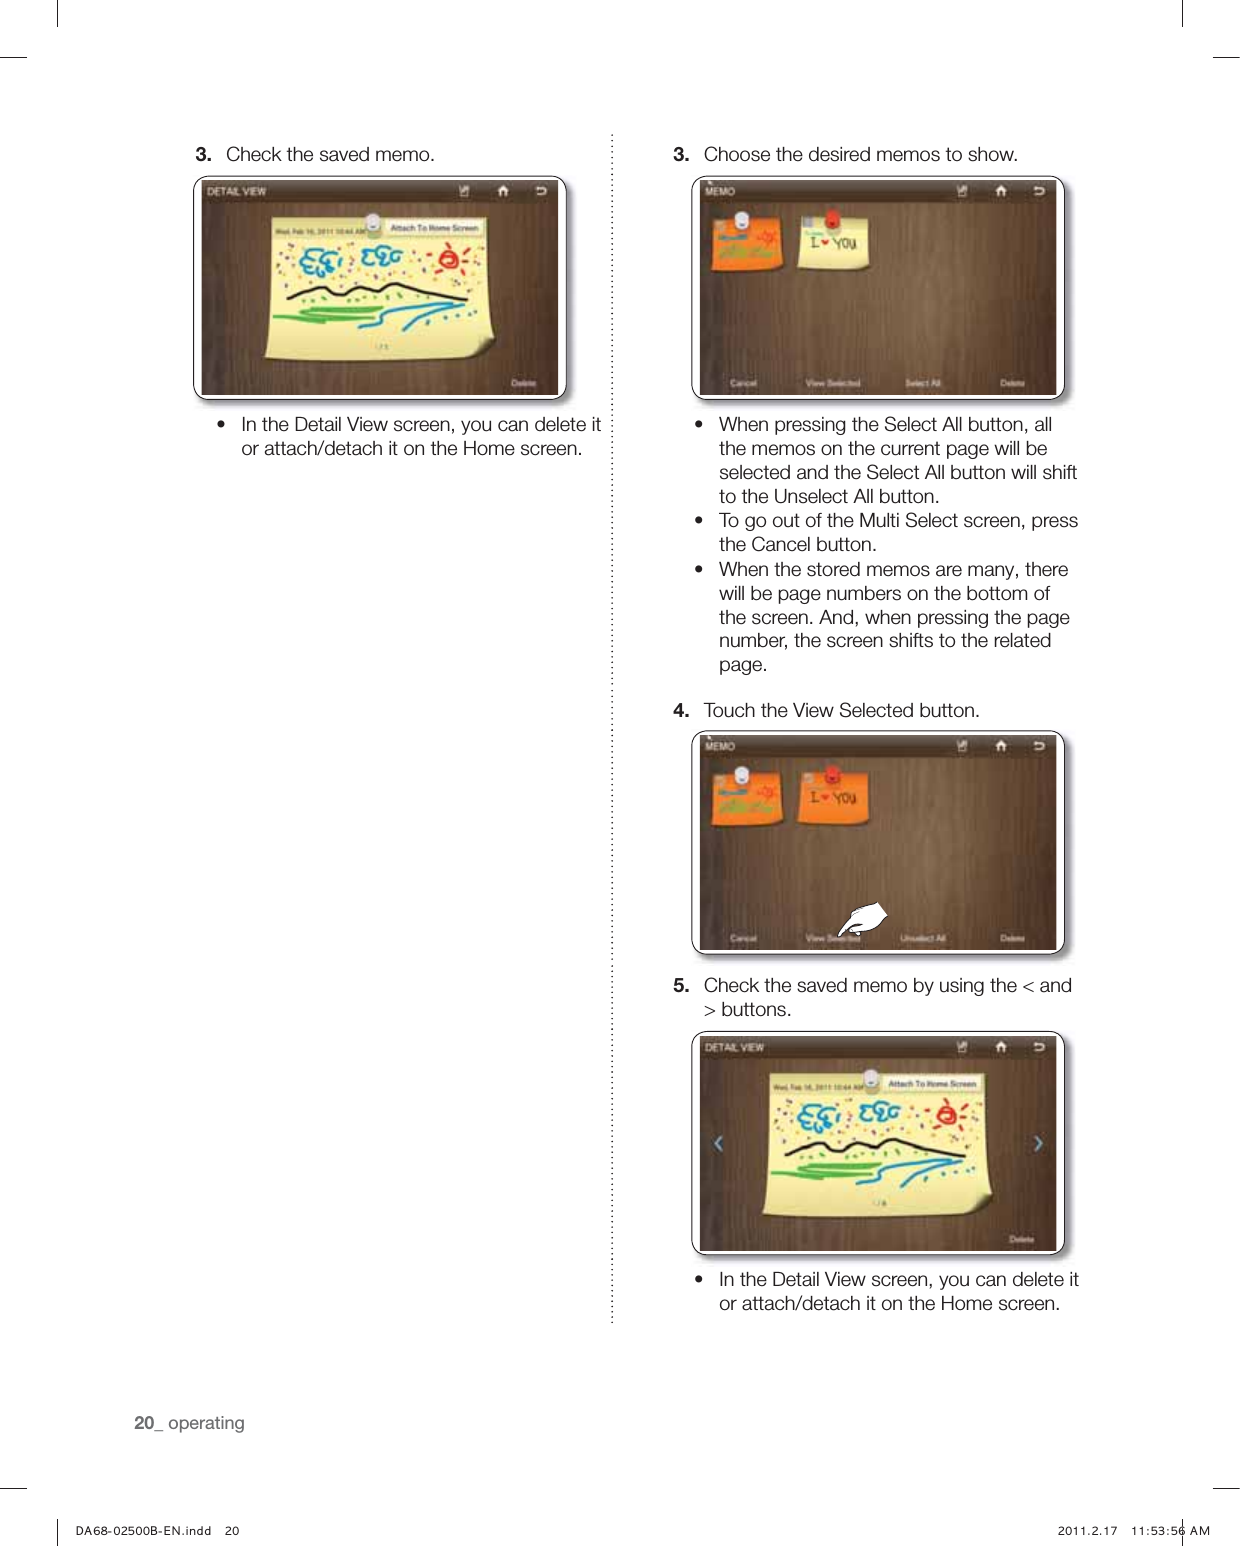
![operating _1502 OPERATINGŘ The freezer or fridge temperature may change depending on the door opening/closing frequencies, the food quantity, the ambient temperature, etc.Ř Temperatures vary at each food storage section in the freezer and refrigerator compartments.Ř When the room temperature increases, there can be an “Abnormally High Temperature” pop-up. In this case, when the Freezer and the Fridge temperatures become normal, the pop-up will be automatically cancelled. But, when the pop-up is not cancelled after a long operation time, please contact your nearest repair center.SETTING THE POWER FREEZE/POWER COOLThe Power Freeze and Power Cool functions can be used to quickly lower the temperature of the freezer and fridge compartments. Use the following instructions to activate these functions.1. Touch the Freezer/Fridge temperature on the Home screen.2. Touch the Power Freeze and/or Power Cool button(s); then touch the Save button.Ř To cancel the Power Freeze and the Power Cool, press the [Power Freeze] or the [Power Cool] button again or select a Temperature Setting button.Ř Energy consumption increases during Power Freeze and/or Power Cool usage.Ř When the question icon (?) is selected, its function description screen pops up. And, the [OK] button is selected on the popup screen, it goes back to the Temperature Display Screen.Ř When you turn on Power Freeze/Power Cool, the refrigerator’s compressor speeds up and is louder than during normal operation.,) *-6QVLL "")5](https://usermanual.wiki/Samsung-Electronics-Co/RF4289RSG309/User-Guide-1425118-Page-15.png)

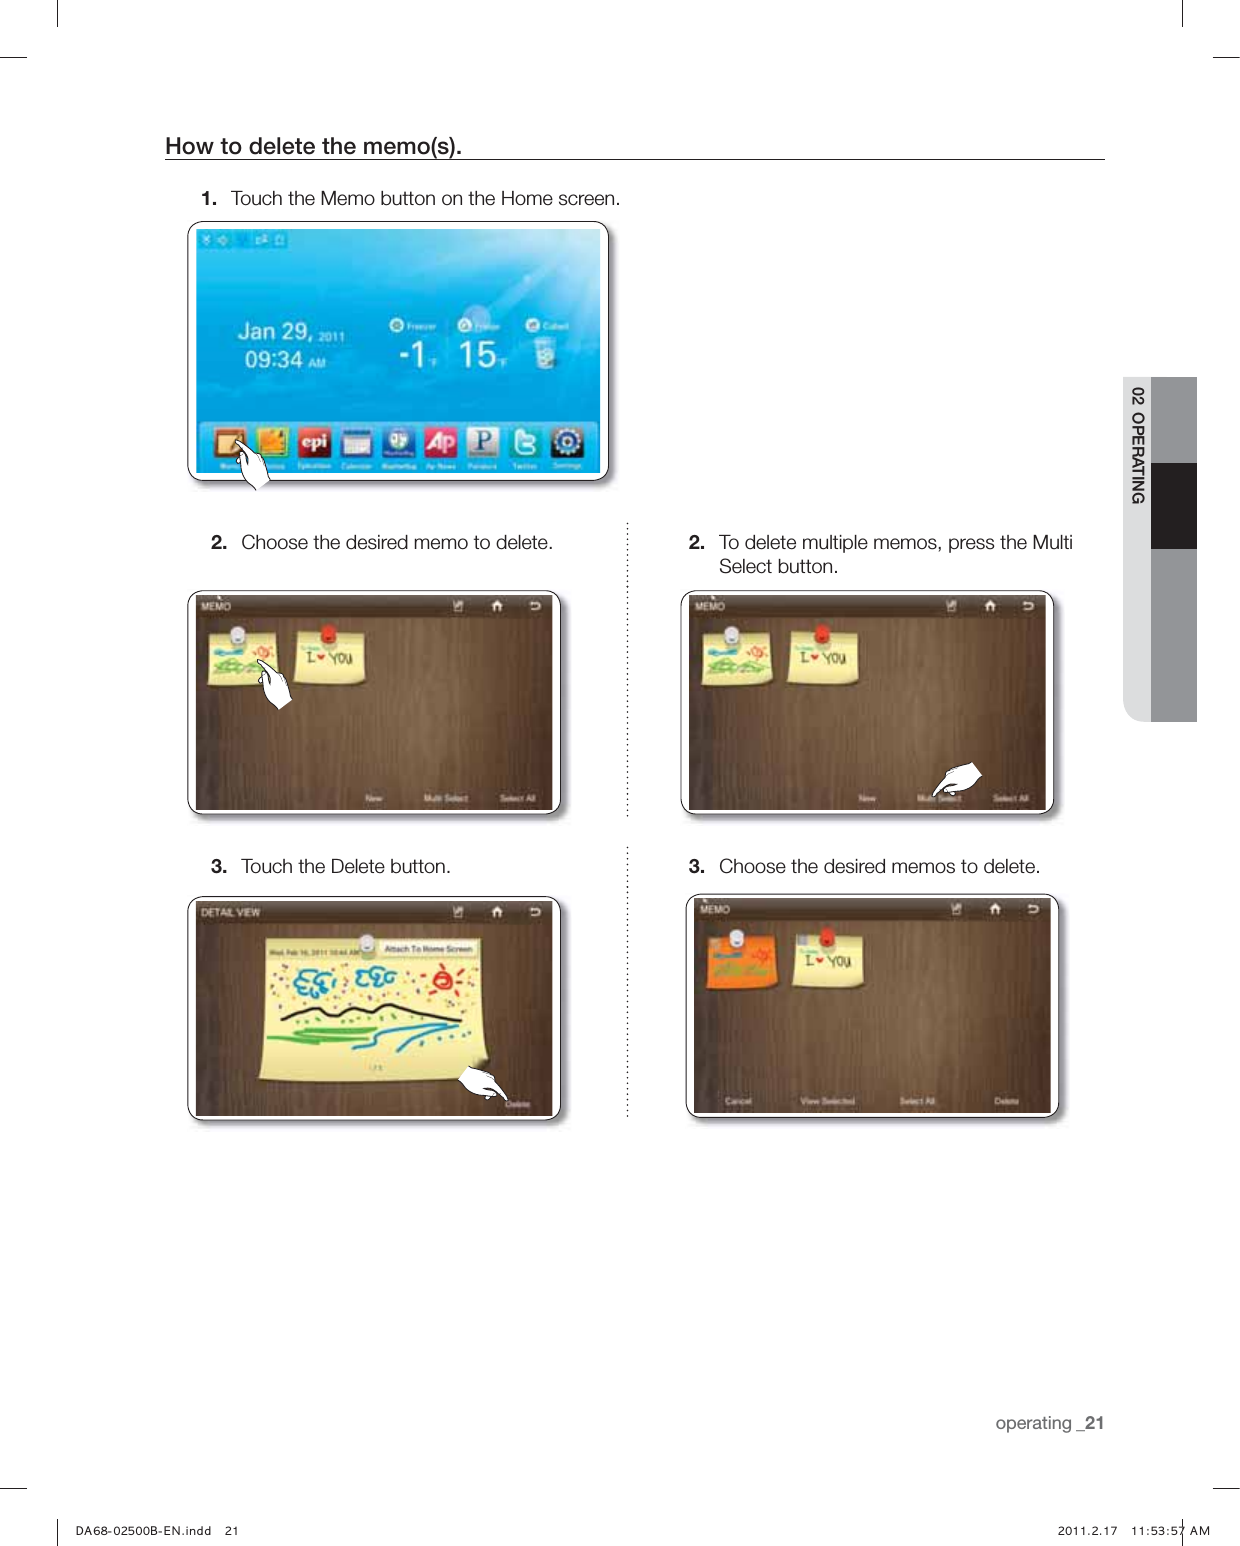
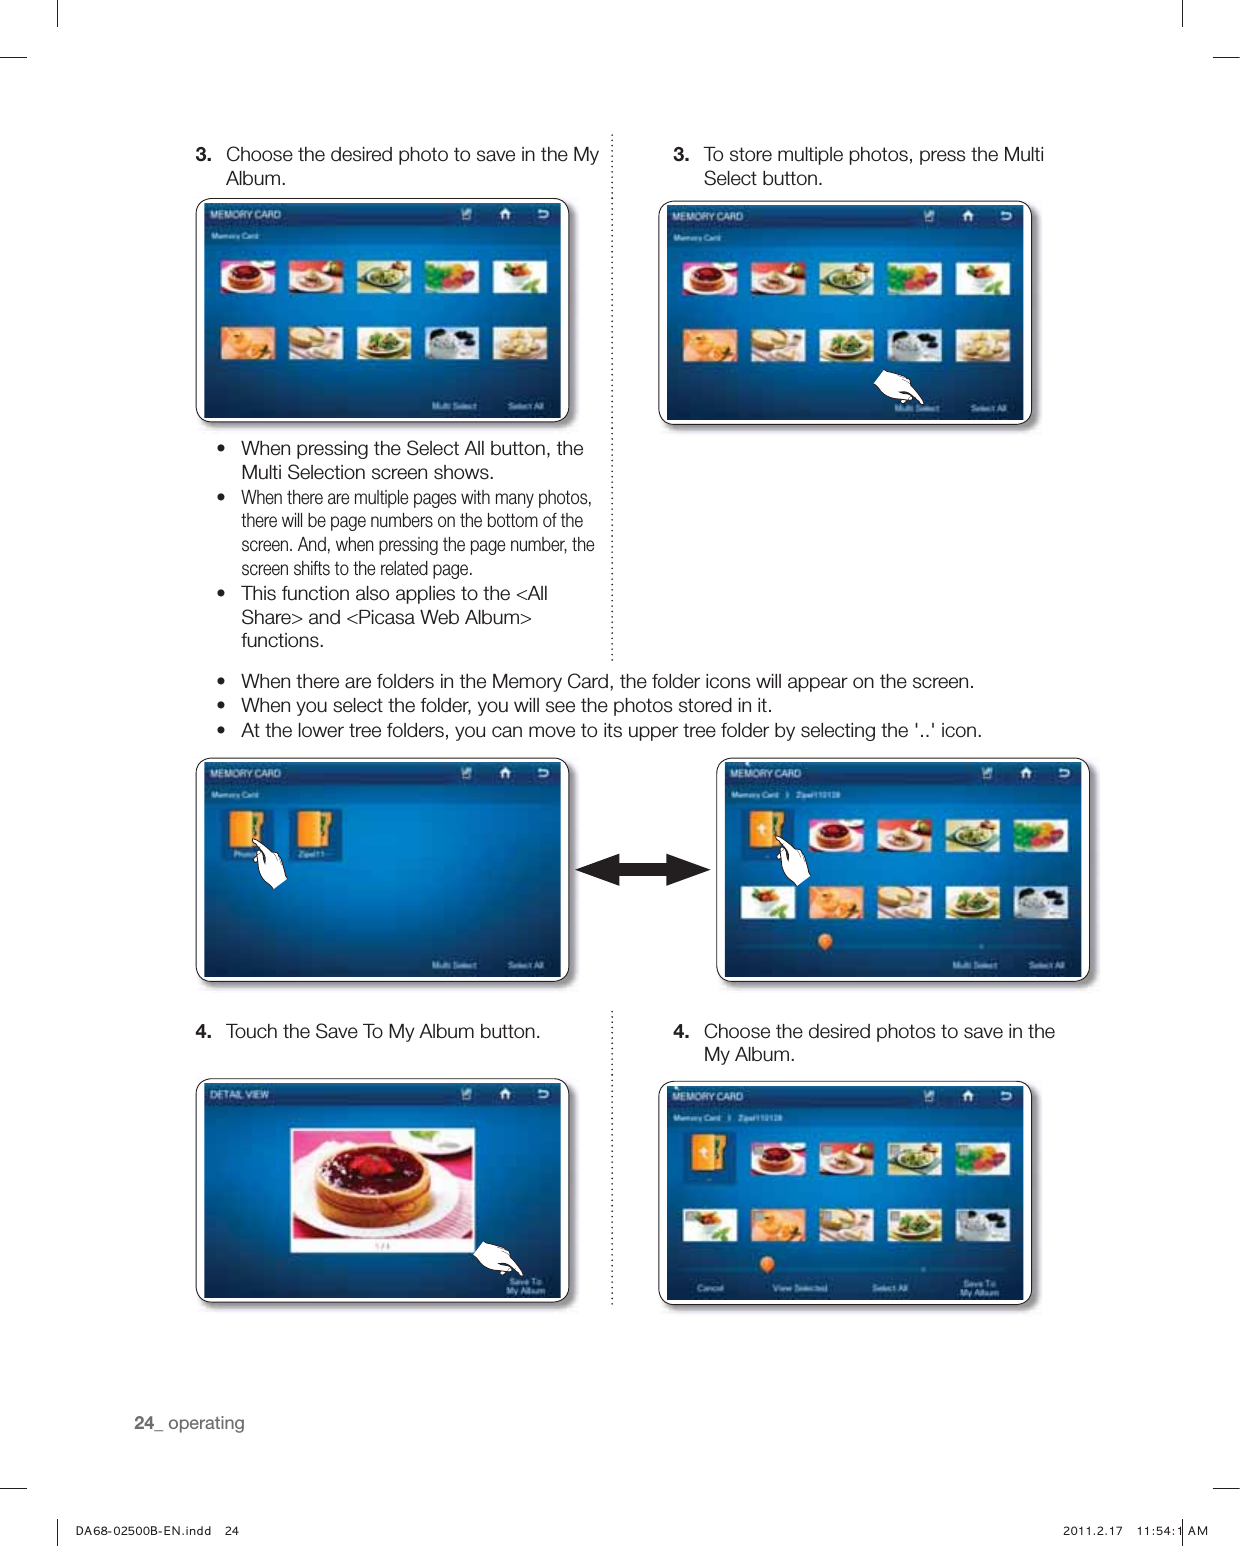

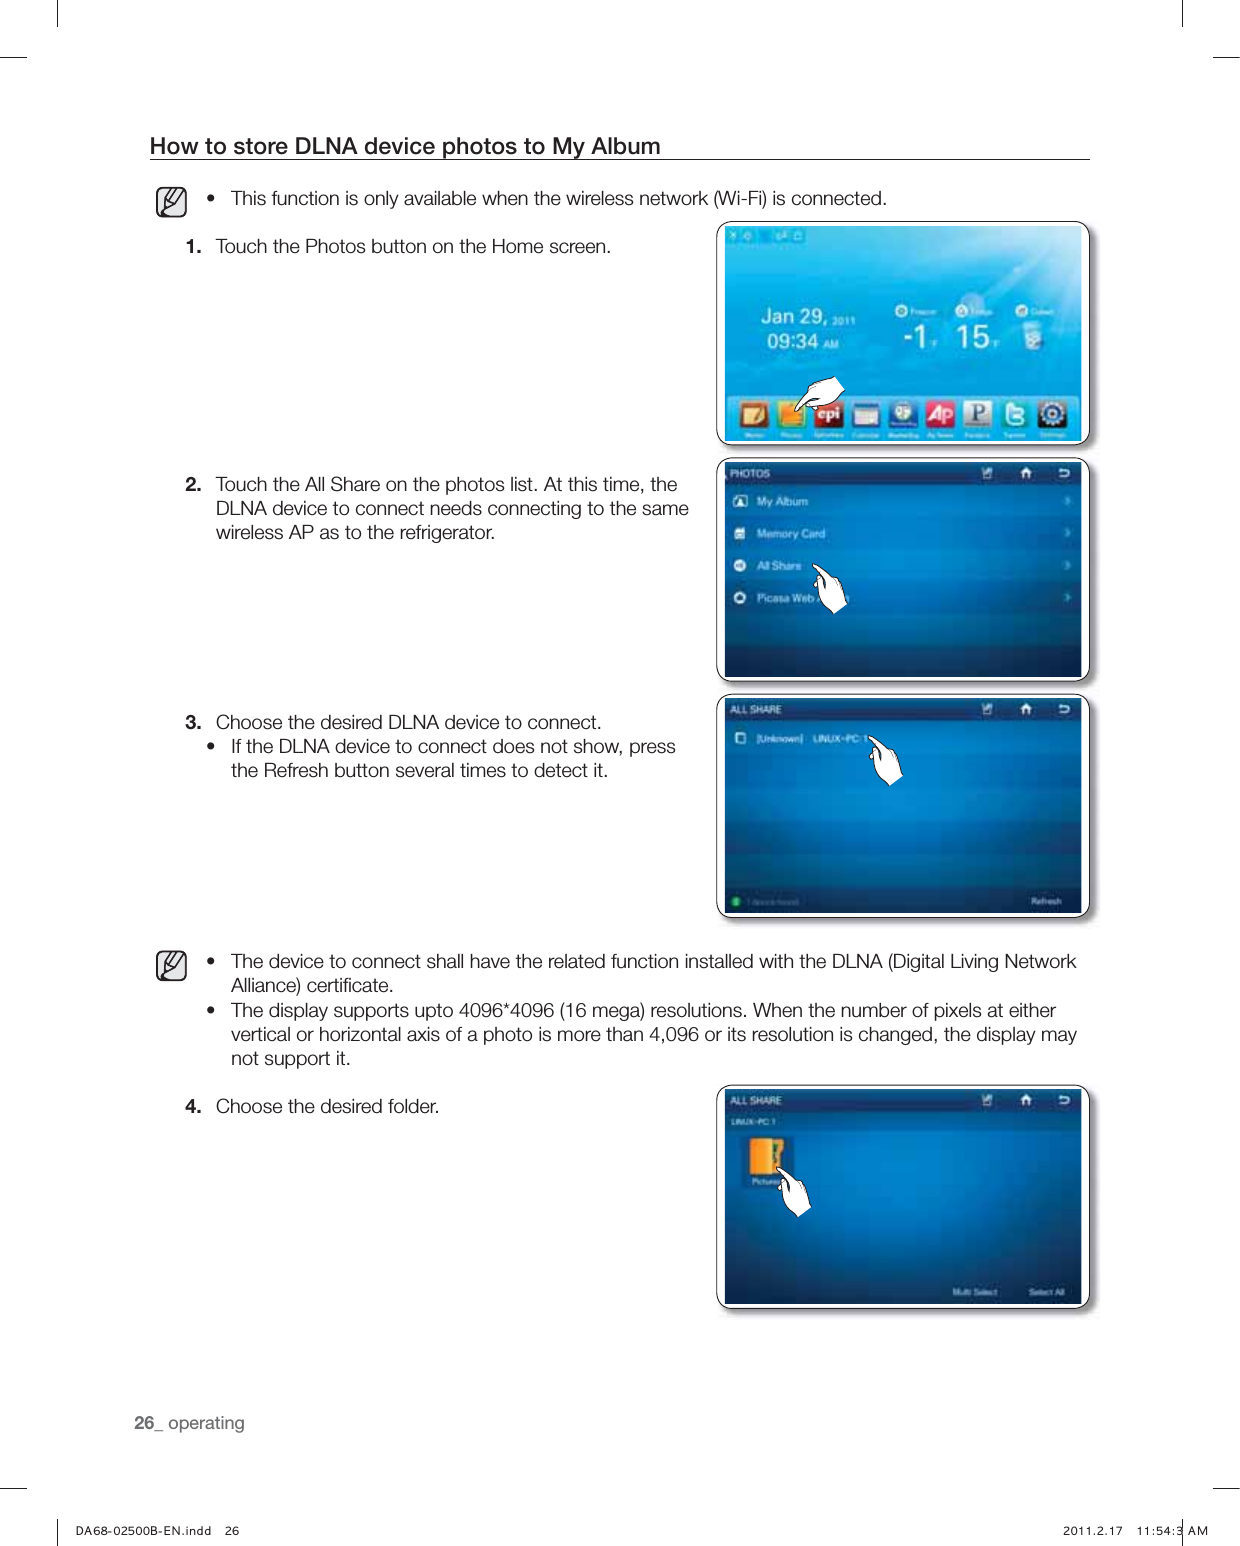
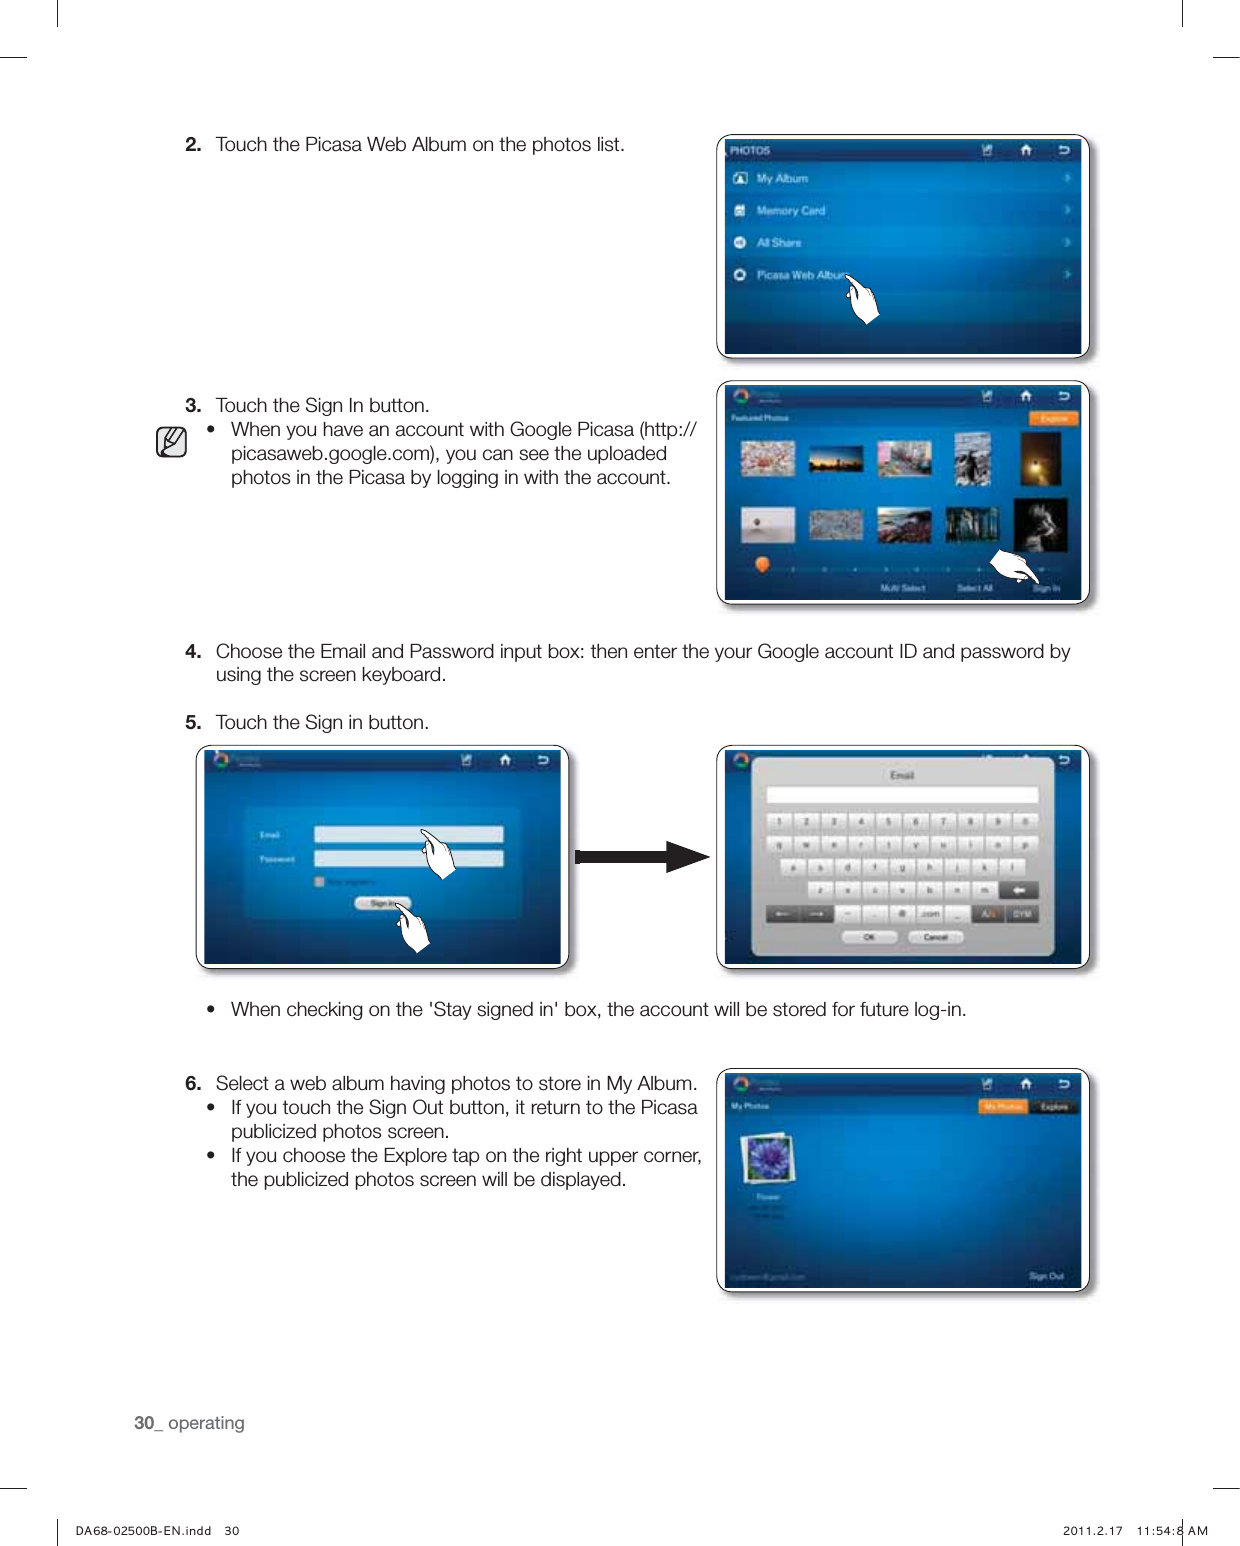
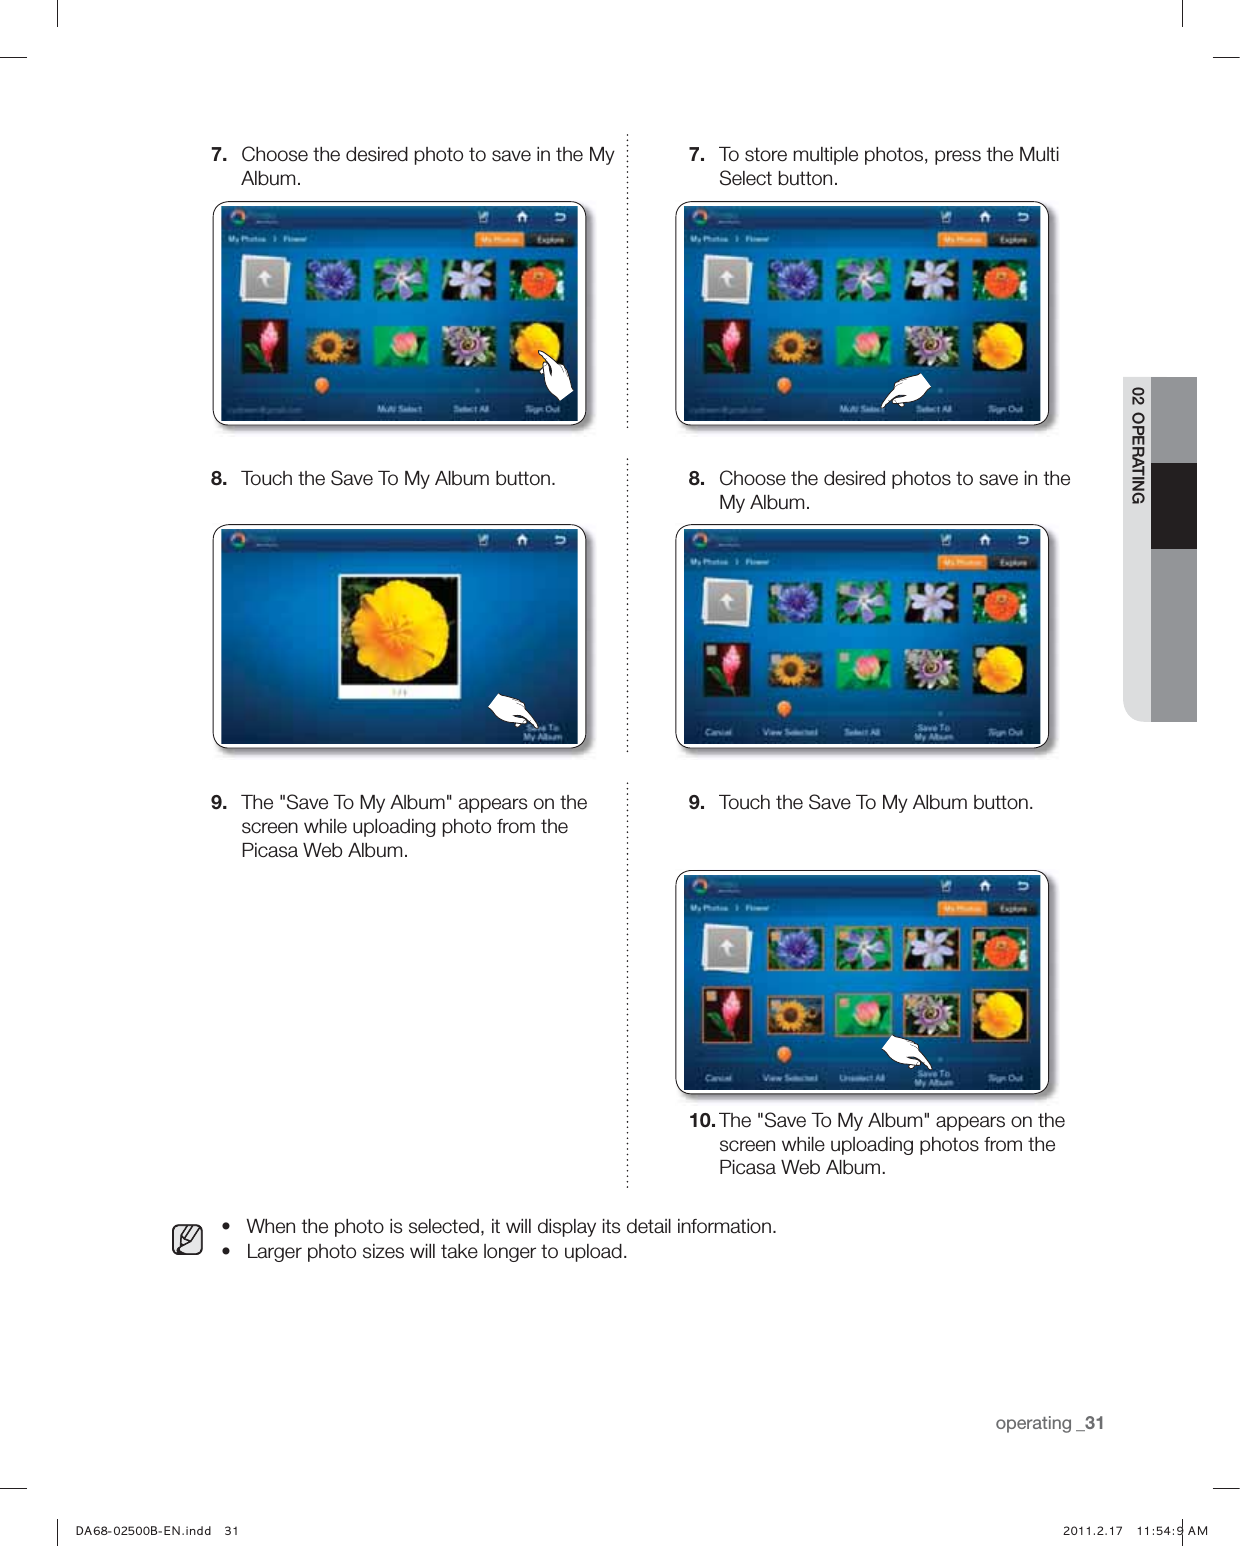
![28_ operatingŘ Larger photo sizes will take longer to upload.Ř The wireless network is used to transmit photos in the DLNA device. So, the transmission may not work properly depending on the network conditions.Ř When the photo is selected, it will display its detail information.How to save photos in the Picasa Web Album to My Album.[Publicized Photos]You can download and see the publicized photos from Google Picasa Web Album.Ř This function is only available when the wireless network (Wi-Fi) is connected.1. Touch the Photos button on the Home screen.2. Touch the Picasa Web Album on the photos list.3. Choose the desired photo to save in the My Album.3. To store multiple photos, press the Multi Select button.,) *-6QVLL "")5](https://usermanual.wiki/Samsung-Electronics-Co/RF4289RSG309/User-Guide-1425118-Page-28.png)
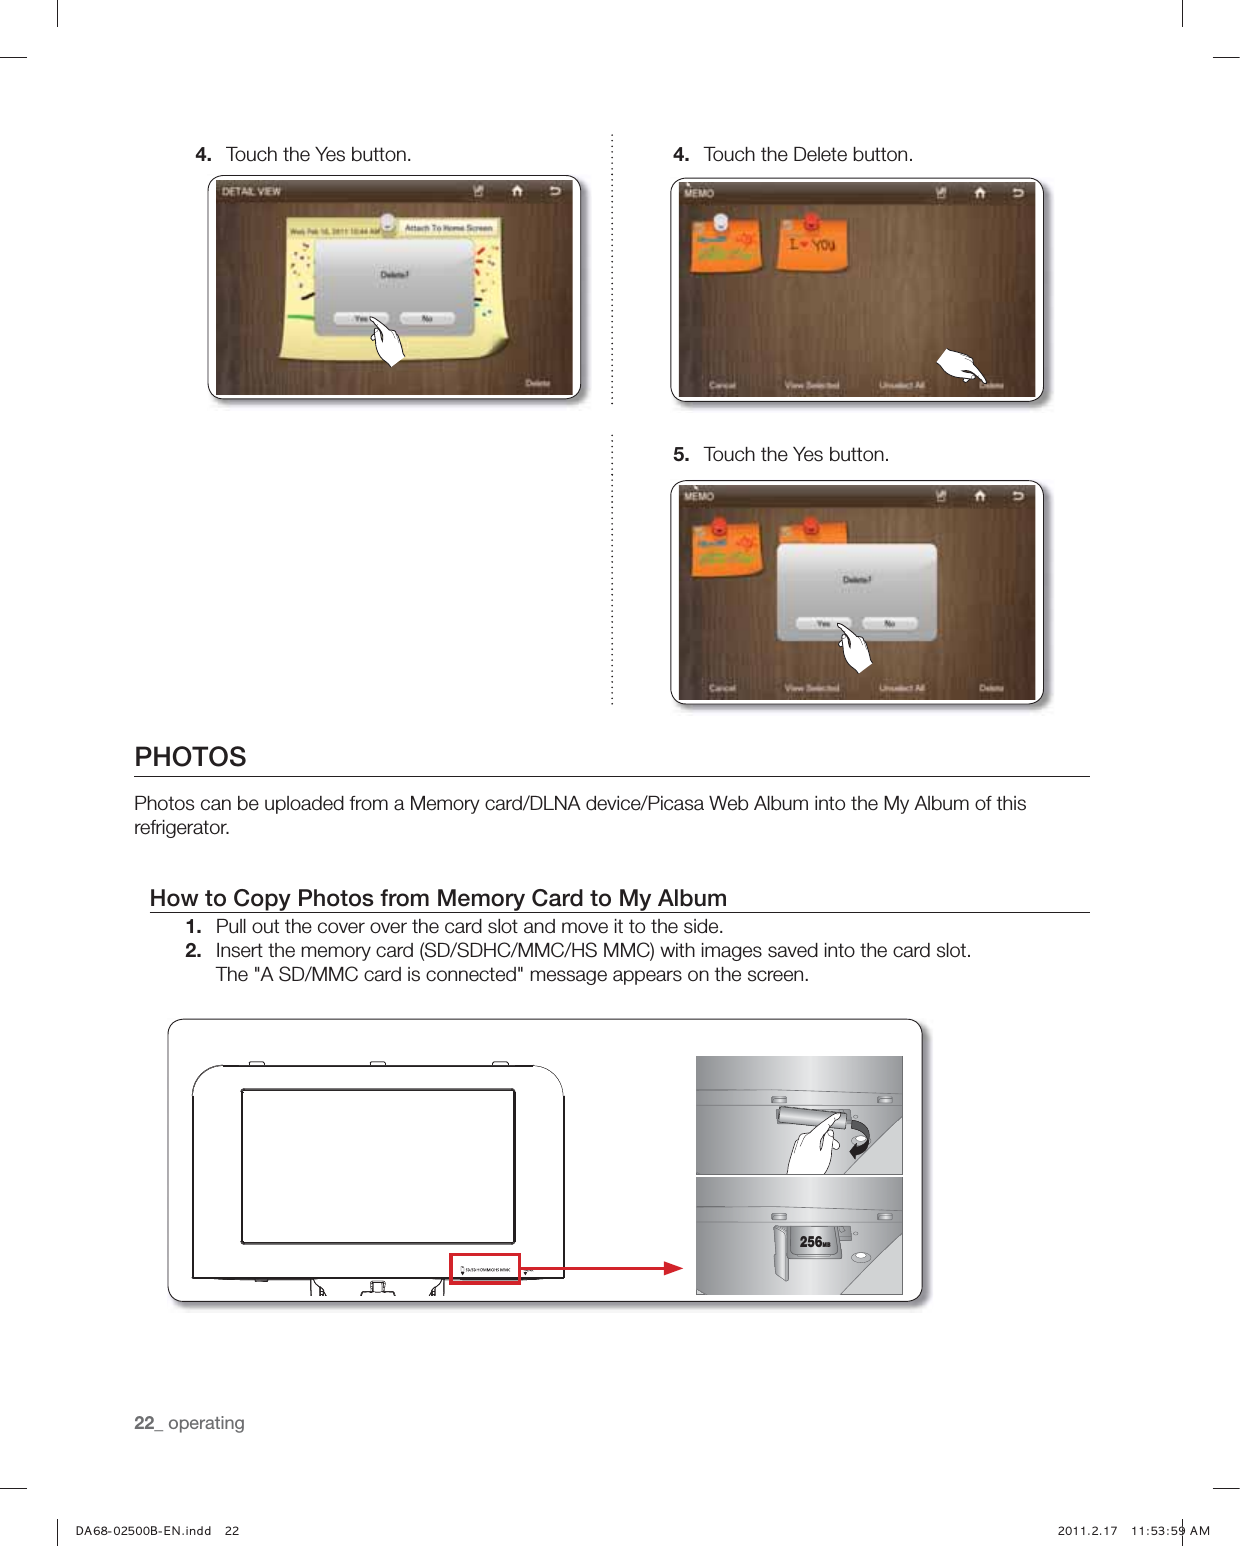
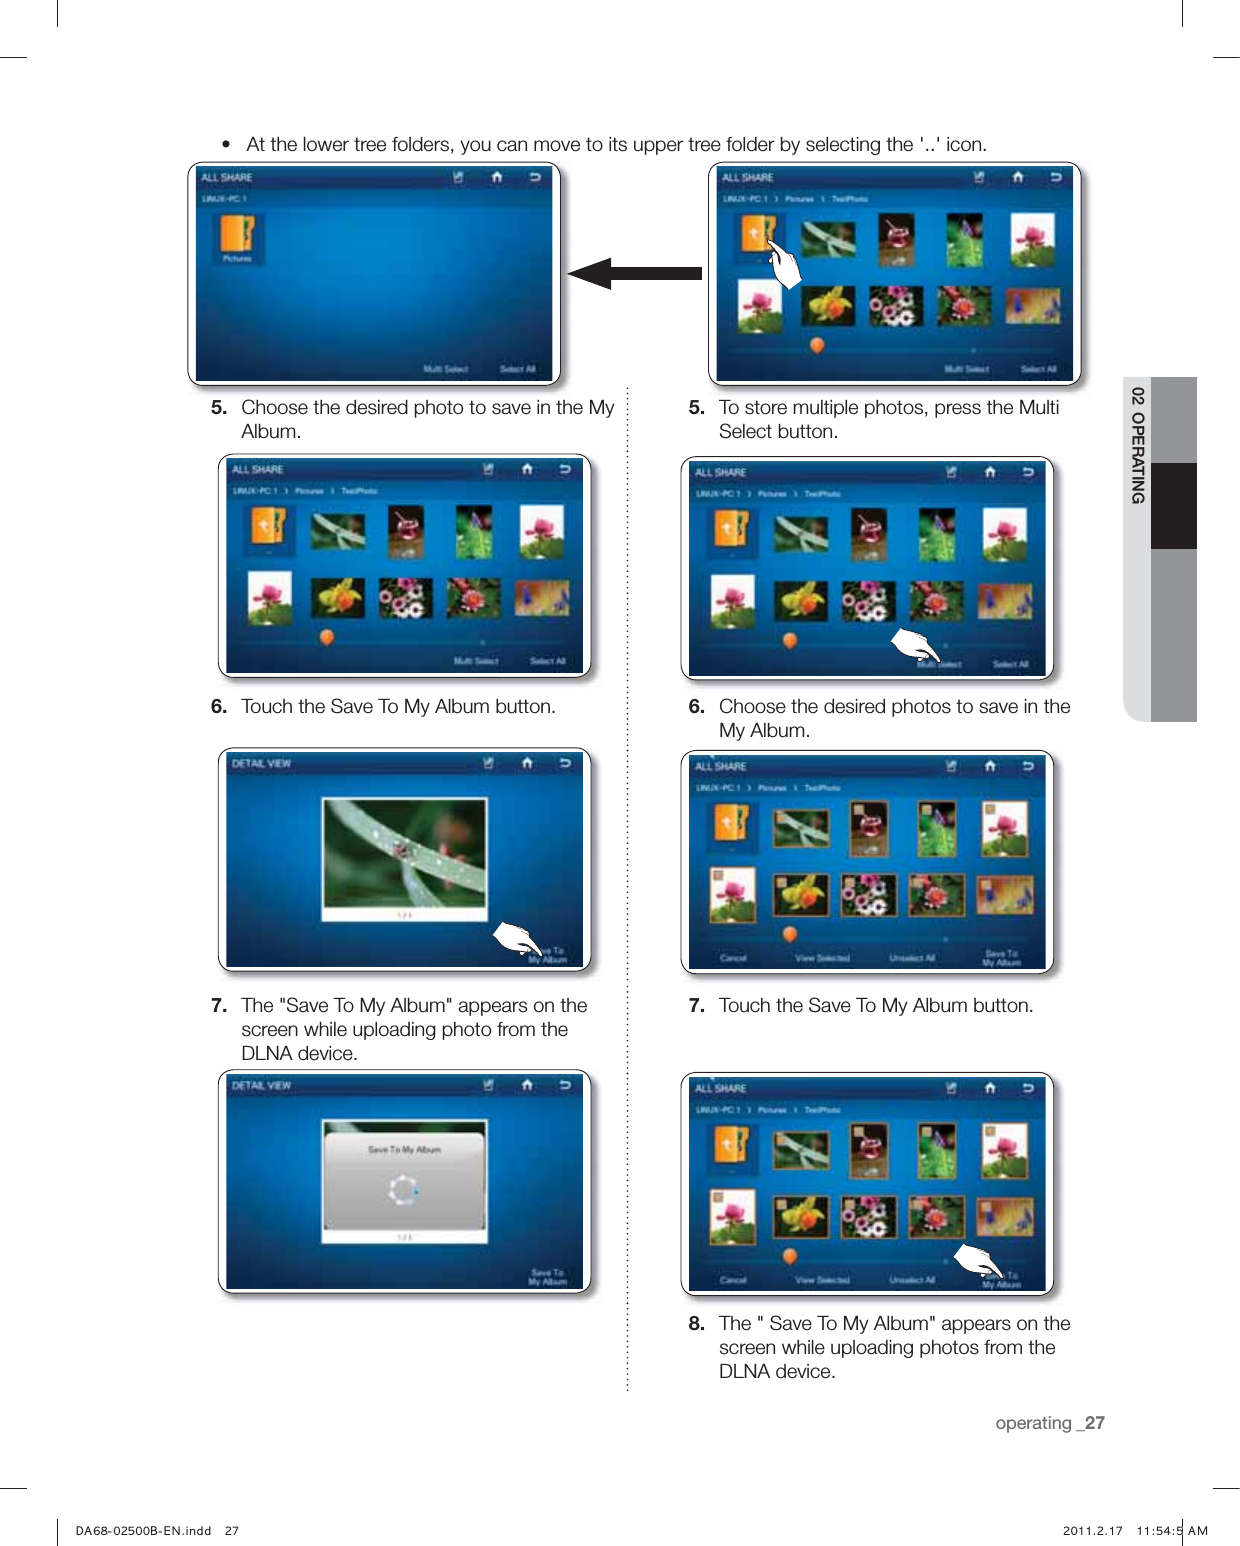
![operating _2902 OPERATING4. Touch the Save To My Album button. 4. Choose the desired photos to save in the My Album.5. The "Save To My Album" appears on the screen while uploading photo from the Picasa Web Album.5. Touch the Save To My Album button.6. The " Save To My Album" appears on the screen while uploading photos from the Picasa Web Album.Ř When the photo is selected, it will display its detail information.Ř Larger photo sizes will take longer to upload.Ř According to the status of the wireless network, you may not expect smooth transmission.[Personalized Photos]You can download and see the personalized photos from Google Picasa Web Album.Ř This function is available only when the refrigerator is connected to the wireless network (Wi-Fi).Ř To use this unction, it needs a Google account.1. Touch the Photos button on the Home screen.,) *-6QVLL! "")5](https://usermanual.wiki/Samsung-Electronics-Co/RF4289RSG309/User-Guide-1425118-Page-29.png)

![50_ operating3. Touch the Sign in button.Ř When you forgot the password, press the I forgot my password button to get an email for your password setting to the email address registered.4. When the device needs a registration, press the ' I'm new to Pandora' text and register it with the Activation Code being popped-up: then touch the Continue button.5. Choose the desired station.Ř It supports 100 of stations in maximum.Ř Stations can be created at www.pandora.com or through mobile devices supporting the Pandora.Ř If other stations are selected, it is possible to play the selected songs in those stations.6. When the Bookmark button( ) is touched while playing a song, it is to be added to the Song Bookmark List and its list can be viewed at the Pandora site.Ř By bookmarking my favorite songs, it is possible to check the song list and to purchase various albums on the [Your Profile] page at www.pandora.com.,) *-6QVLL "")5](https://usermanual.wiki/Samsung-Electronics-Co/RF4289RSG309/User-Guide-1425118-Page-50.png)

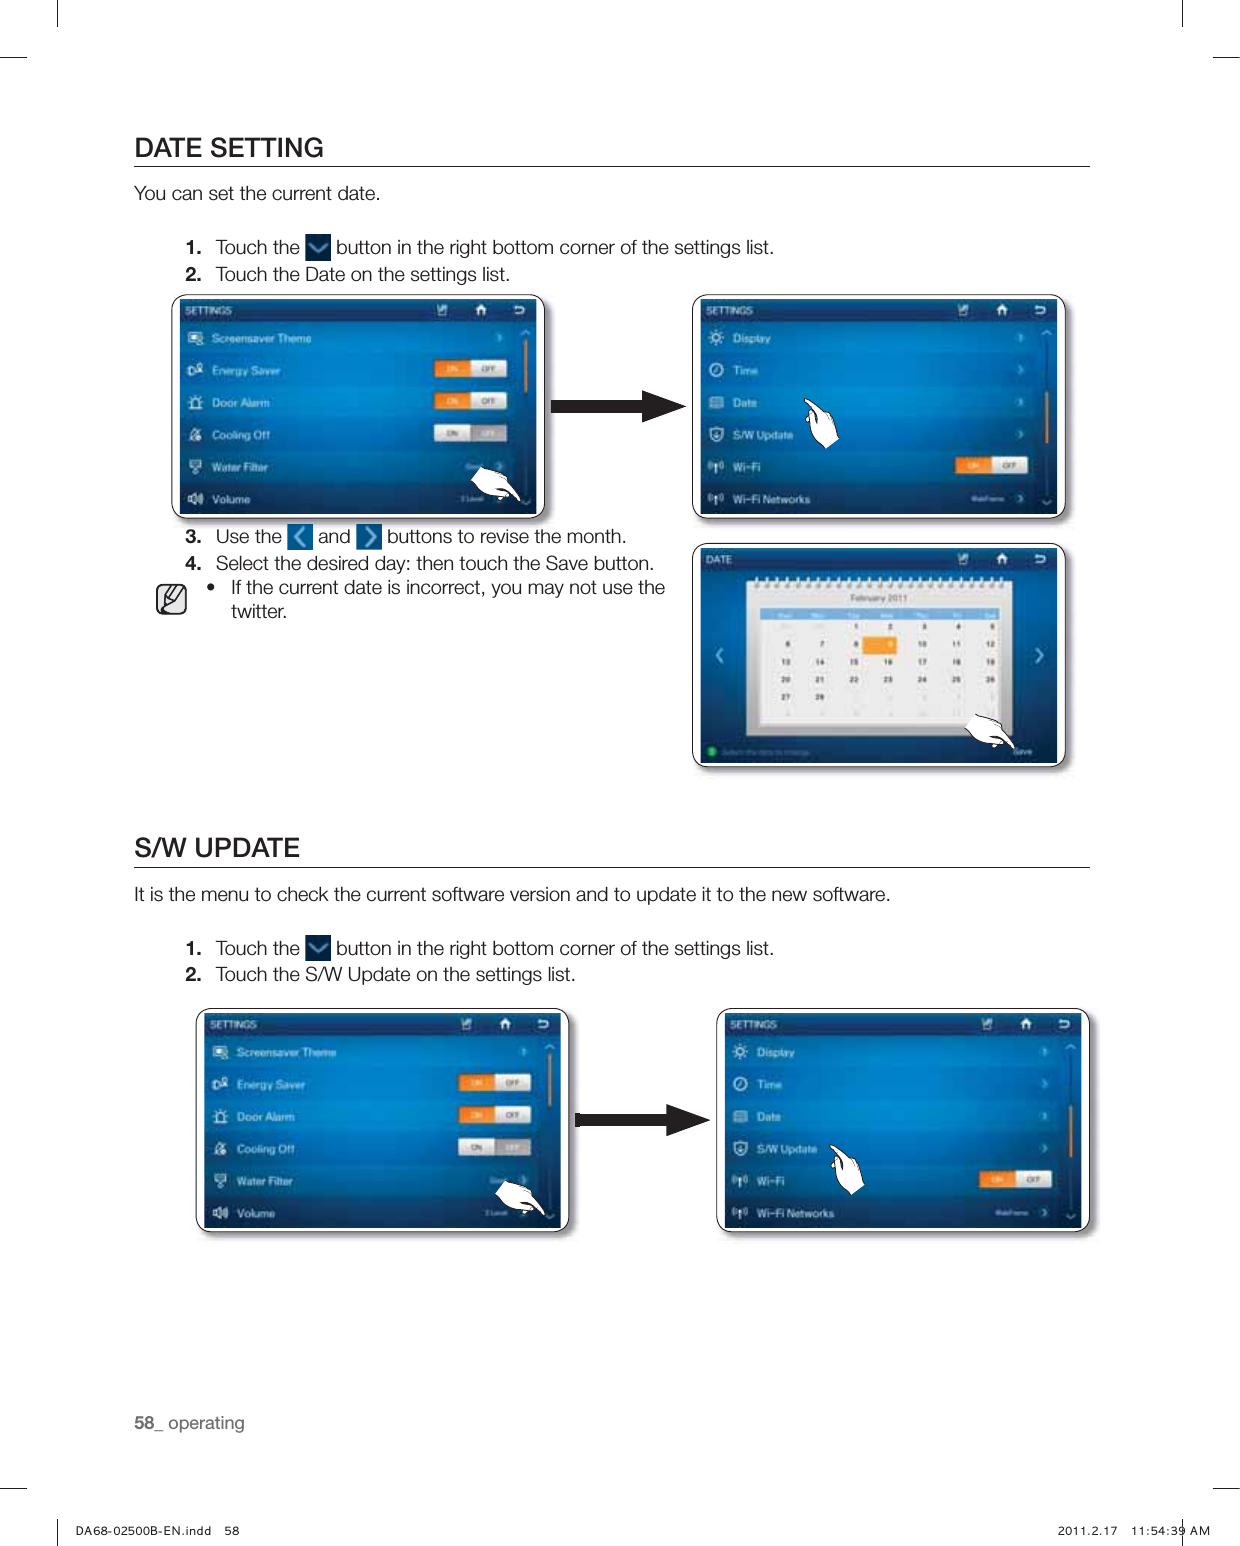
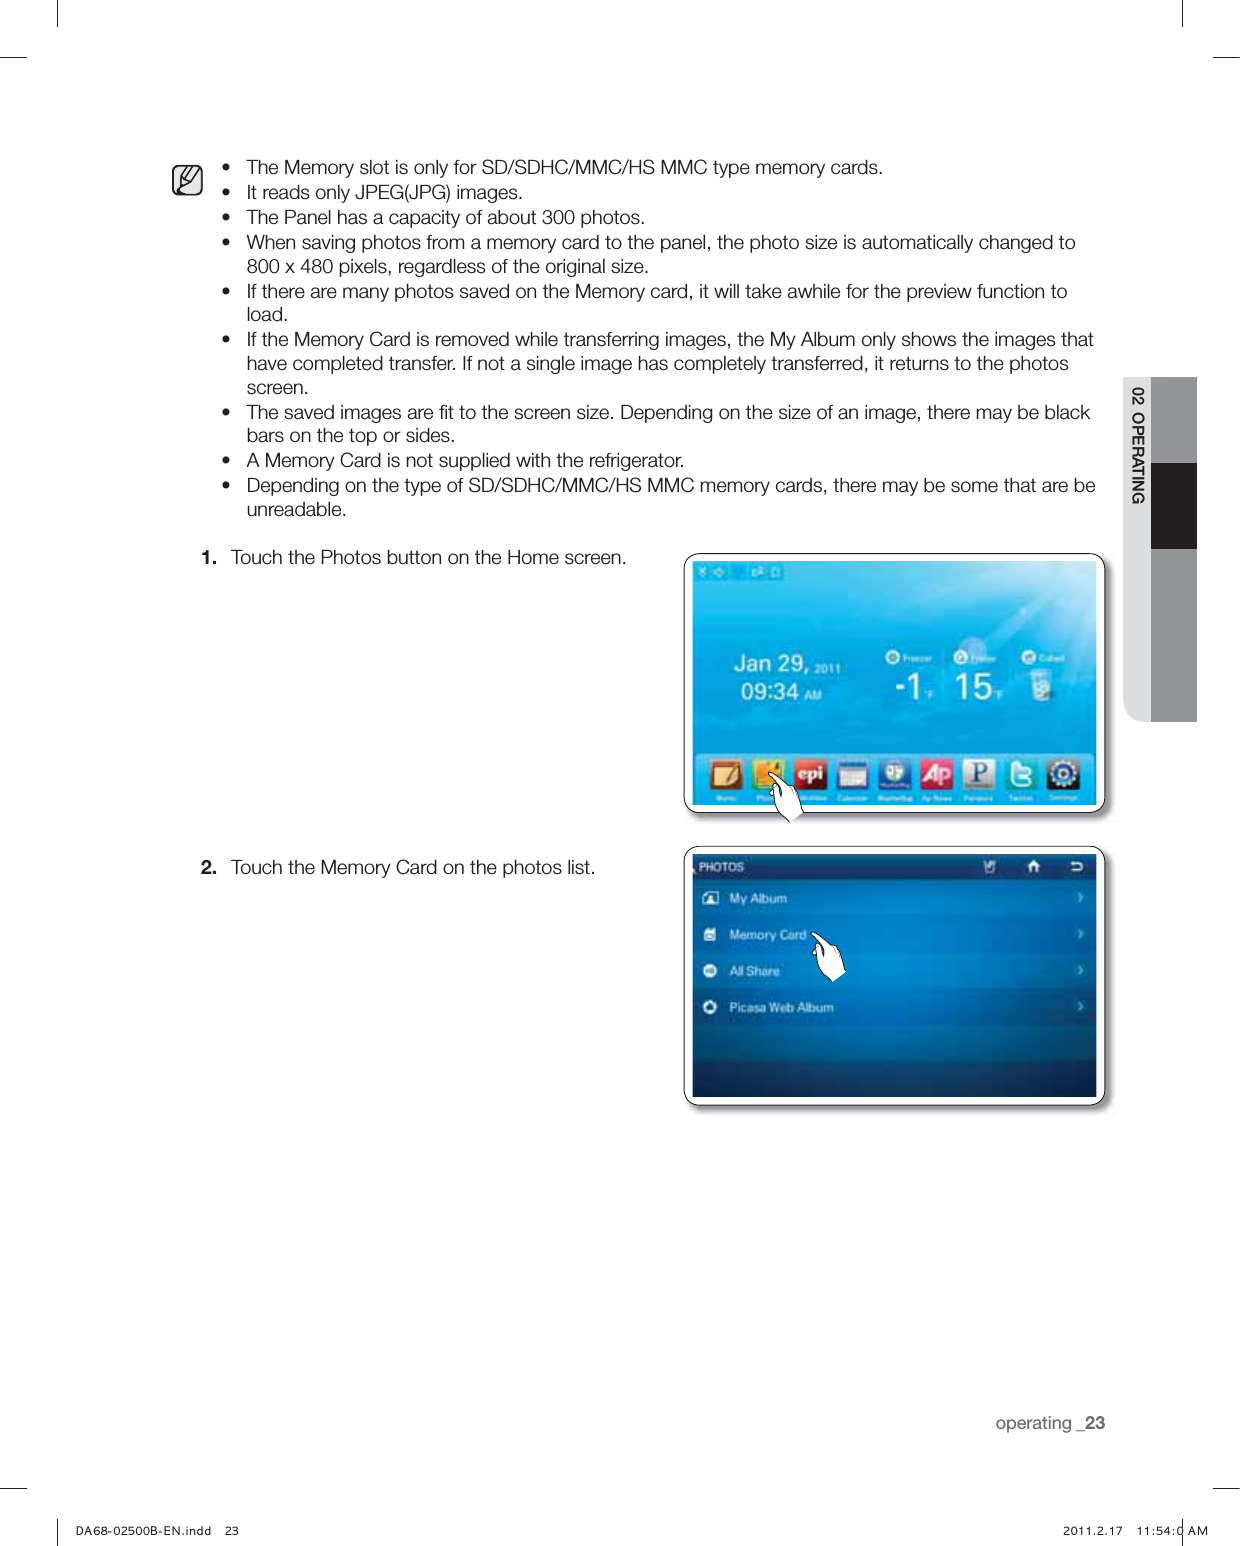
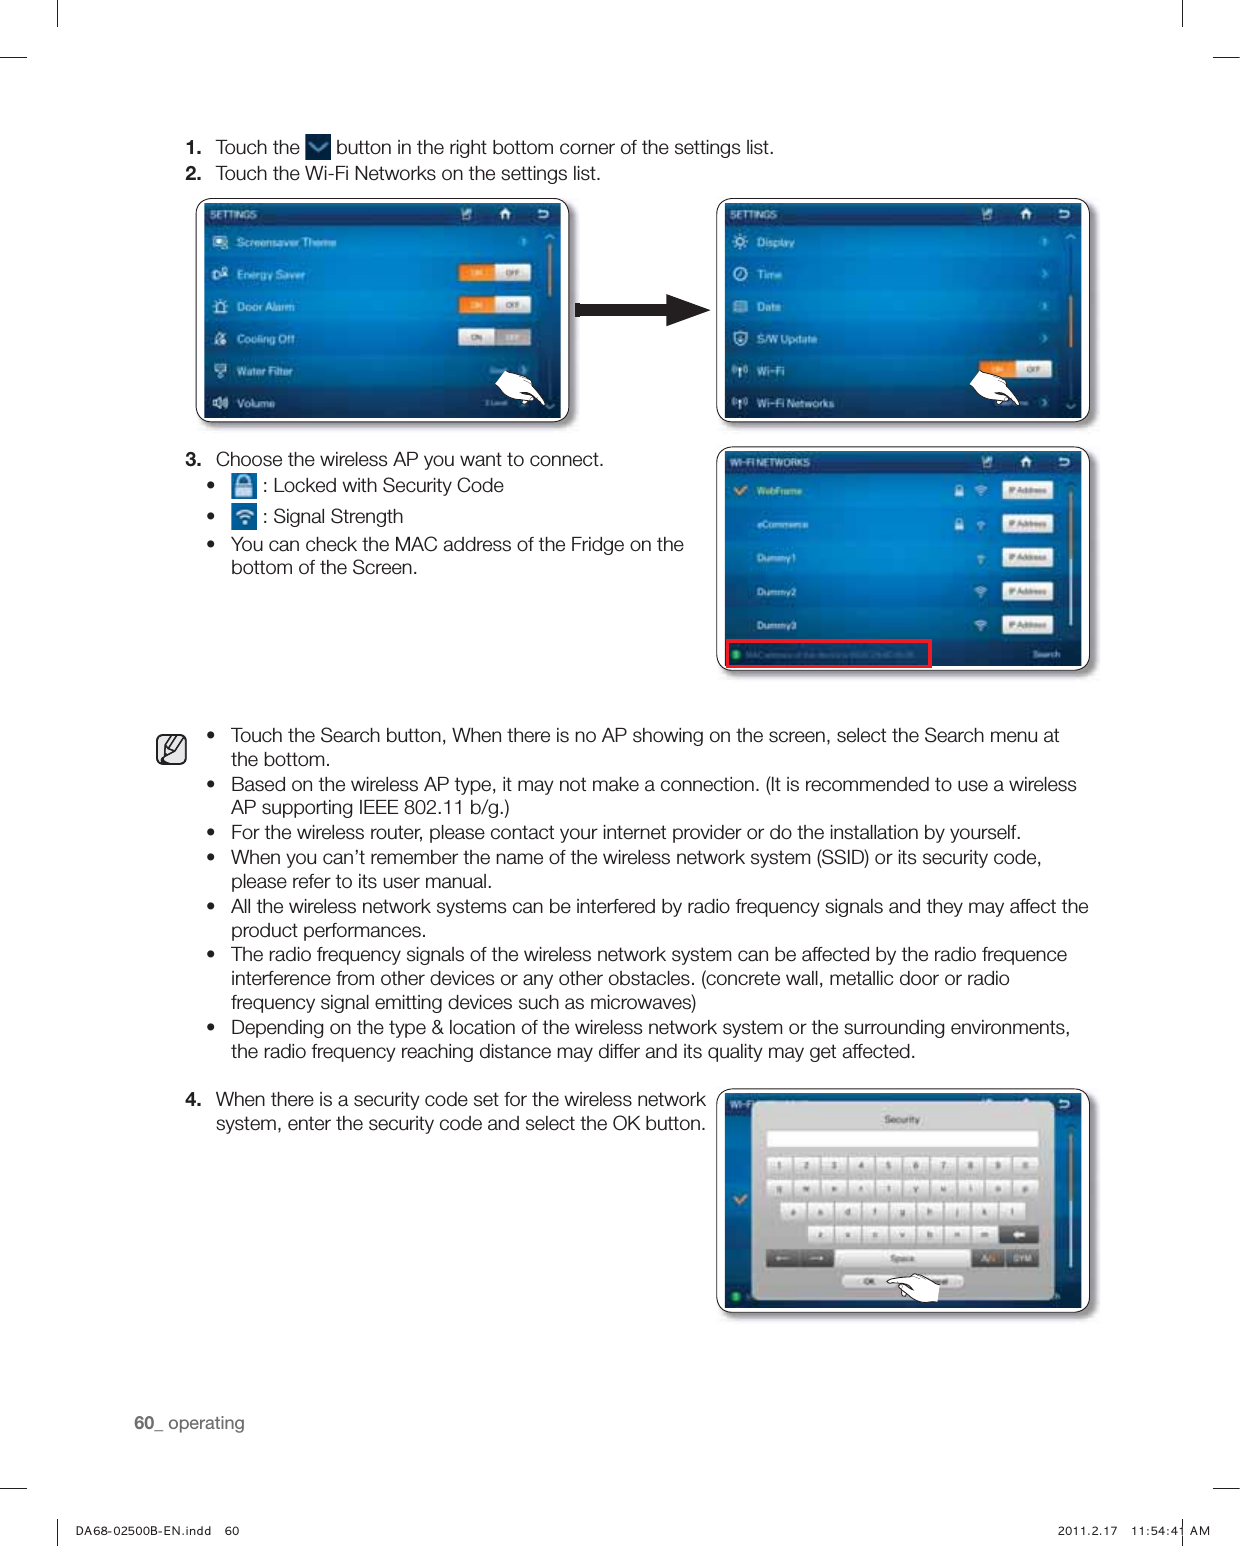
![operating _5902 OPERATINGŘ The software update is offered as through the wireless network. When the updated software is offered through the wireless network, the Upgarde button is activated on the right bottom corner of the screen. And, when selecting the Upgrade button, it starts updating right away (it takes about 10 seconds). When the update is completed, it needs rebooting the system.Ř Open Source License Notice - This product uses open source software. In the case of using open source software, Open Source Licenses are available on the product menu. Press [Legal Information] button to see the detail information.WI-FI ON OR OFFIt is to set turning on and off the wireless network.1. Touch the button in the right bottom corner of the settings list.2. Select the Wi-Fi ON or OFF buttons on the settings list.WI-FI NETWORKSAt the above Wi-Fi menu, when the wireless network turns on, it will search an wireless AP to do the network connection.Ř Other than the router installed at your home, other routers installed at your neighbors or nearby offices can be detected while connecting to the wireless network. It is illegal to use other’s router without permission and it will be subject to legal responsibilities. So, make a connection to the wireless router being permitted.CAUTION,) *-6QVLL! "")5](https://usermanual.wiki/Samsung-Electronics-Co/RF4289RSG309/User-Guide-1425118-Page-59.png)
![64_ operating4. If you touch each level text or Help button, you can see information about Smart Grid Function. Higher Level means higher peak time than lower levels.Ř If Modem is not connected, The message can be found.How to override the Smart Grid Control1. Touch the button button two times in the right bottom corner of the settings list.2. Select the Smart Grid on the settings list.3. If you want appliances to operate according to DR-Level(or Smart Grid), touch Override "Off" button. If you want appliances to operate irrespective of DR-Level(or Smart Grid), touch Override "On" button.[Turn On Override] [Turn Off Override],) *-6QVLL "" )5](https://usermanual.wiki/Samsung-Electronics-Co/RF4289RSG309/User-Guide-1425118-Page-64.png)