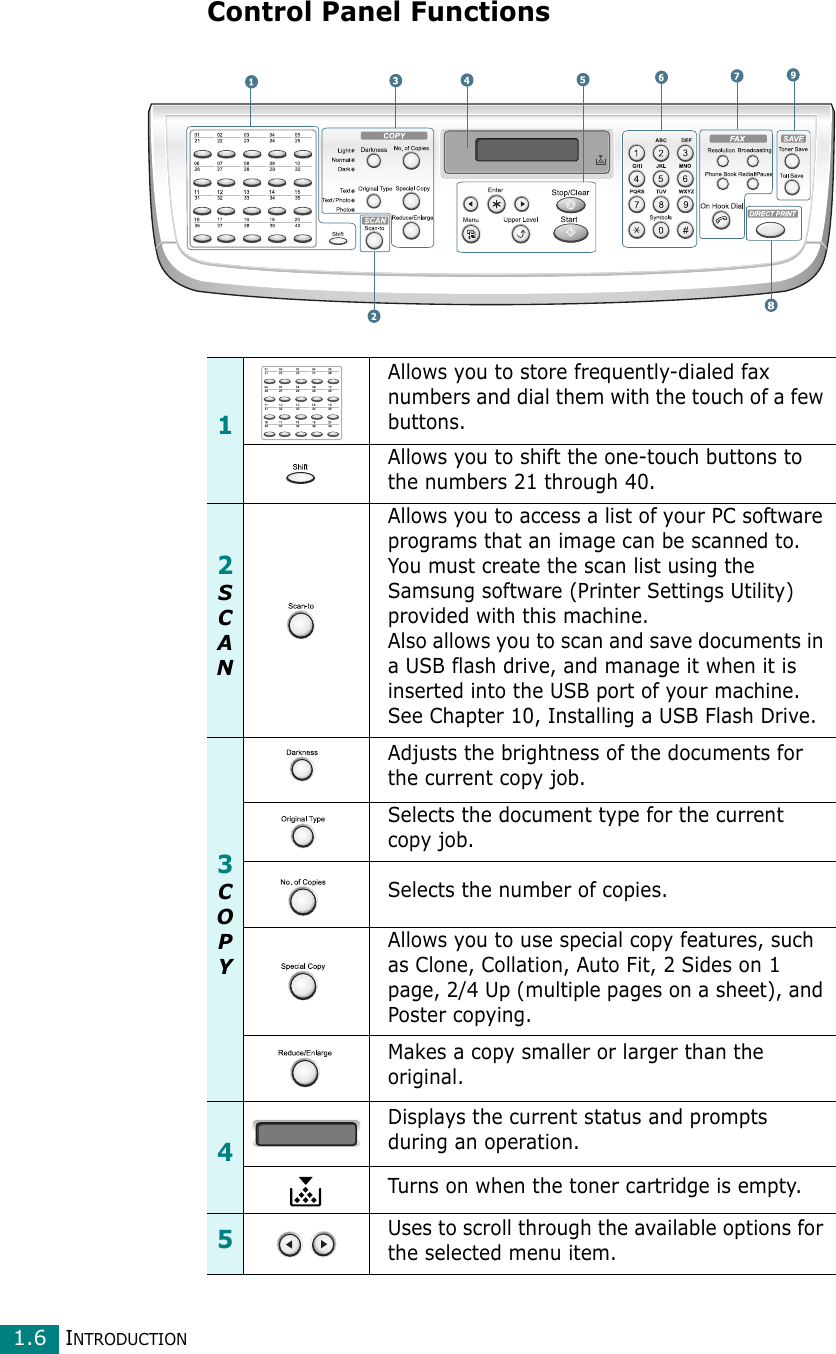
Samsung Electronics Co RK20MFF Multi Function Printer User Manual 4720FN EN
Samsung Electronics Co Ltd Multi Function Printer 4720FN EN
UserManual.wiki
>
Samsung Electronics Co
>
RK20MFF User Manual
>
Users Manual 1
Contents
1.
Users Manual 1
2.
Users Manual 2
Users Manual 1
Navigation menu
Upload a User Manual
Namespaces
Wiki Guide
HTML
PDF
Info
Views
User Manual
Discussion / Help
Navigation


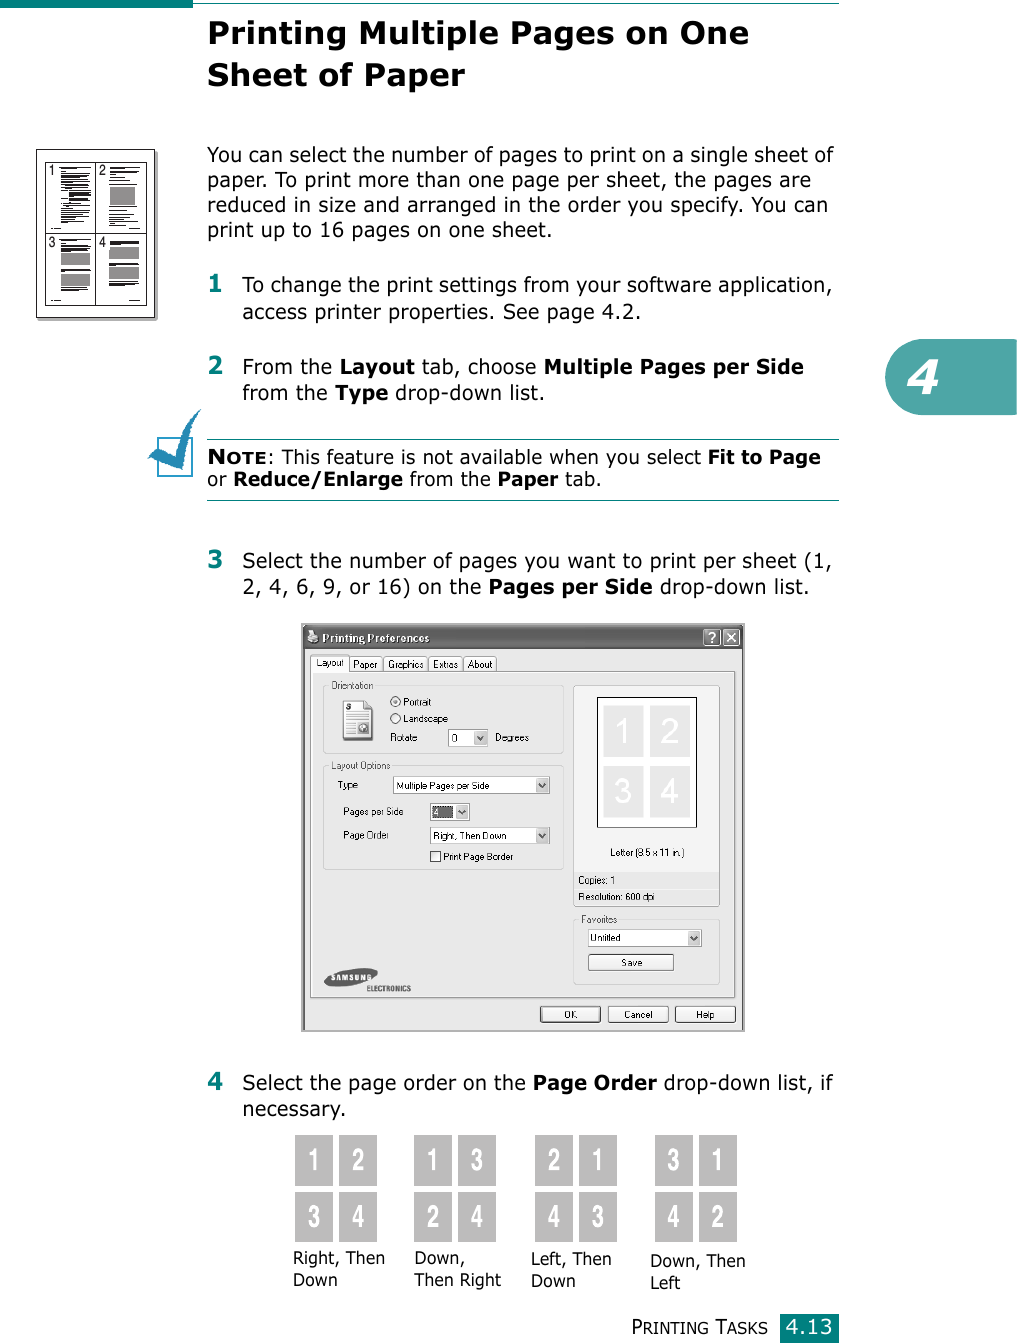
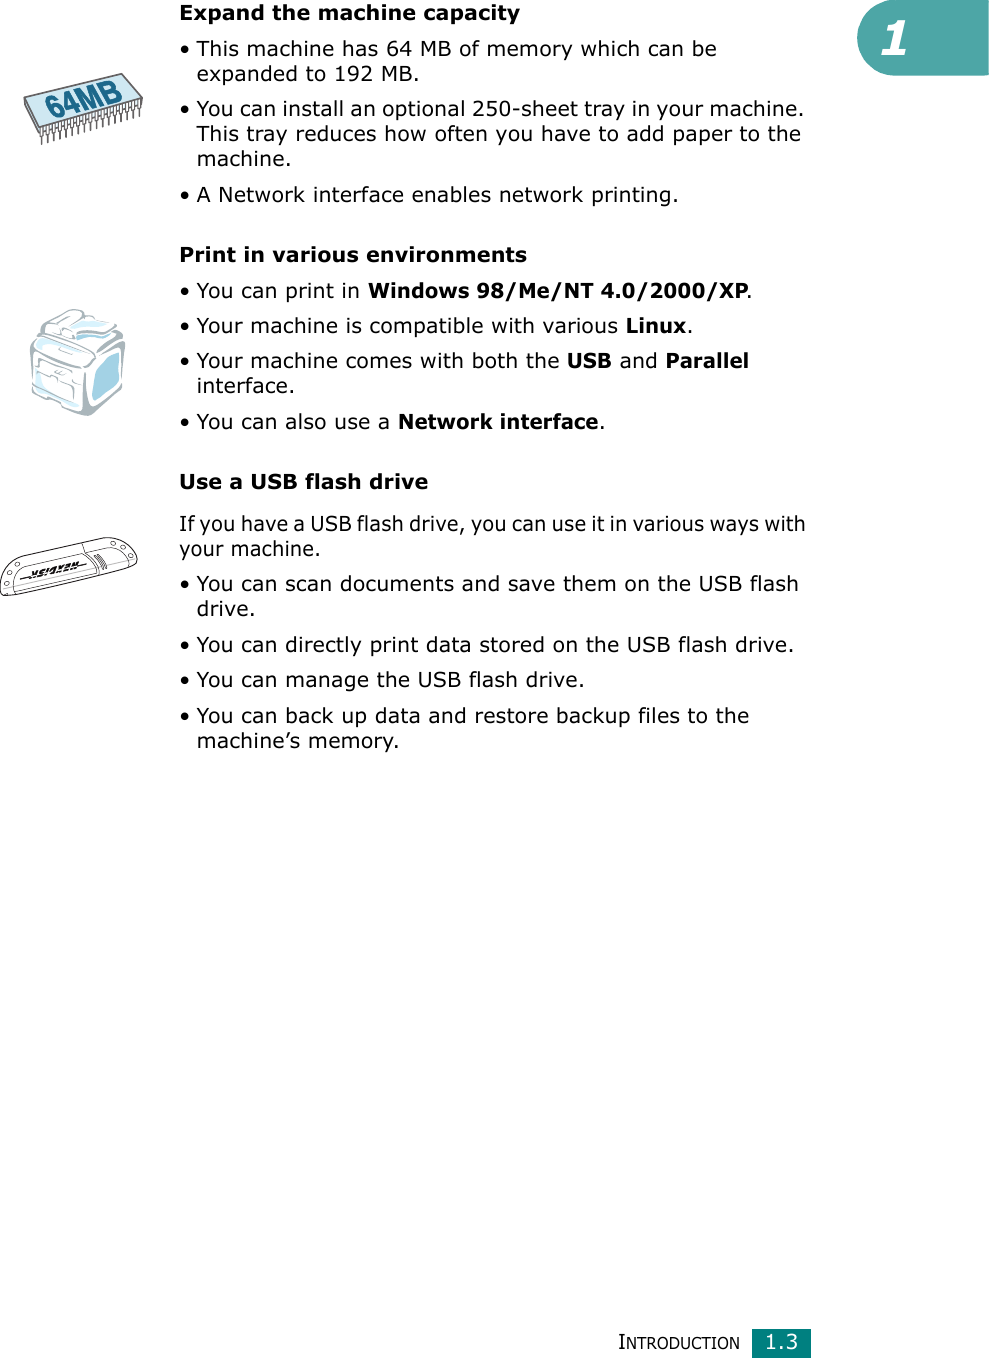
![INTRODUCTION1.2Special FeaturesYour new machine is equipped with special features that improve the print quality. You can:Print with excellent quality and speed• You can print up to 1200 dpi [Best]. See page 4.8.• Your machine prints A4-sized paper at up to 20 ppm and letter-sized paper at up to 20 ppm (pages per minute).Handle paper flexibly•Multipurpose Tray supports letterhead, envelopes, labels, transparencies, custom-sized materials, postcards, and heavy paper. A 50-sheet Multipurpose Tray supports plain paper.•The Standard 250-sheet input tray (Tray1) and optional 250-sheet input tray (Tray2) supports A4/letter-sized paper.Create professional documents•Print Watermarks. You can customize your documents with words, such as “Confidential.” See page 4.18.•Print Posters. The text and pictures of each page of your document are magnified and printed across the sheet of paper and taped together to form a poster. See page 4.14.Save time and money • You can print multiple pages on one single sheet of paper to save paper.• You can use preprinted forms and letterhead on plain paper. See “Using Overlays” on page 4.21• This machine automatically conserves electricity by substantially reducing power consumption when not printing.• This machine meets Energy Star guidelines for energy efficiency.](https://usermanual.wiki/Samsung-Electronics-Co/RK20MFF.Users-Manual-1/User-Guide-571022-Page-19.png)


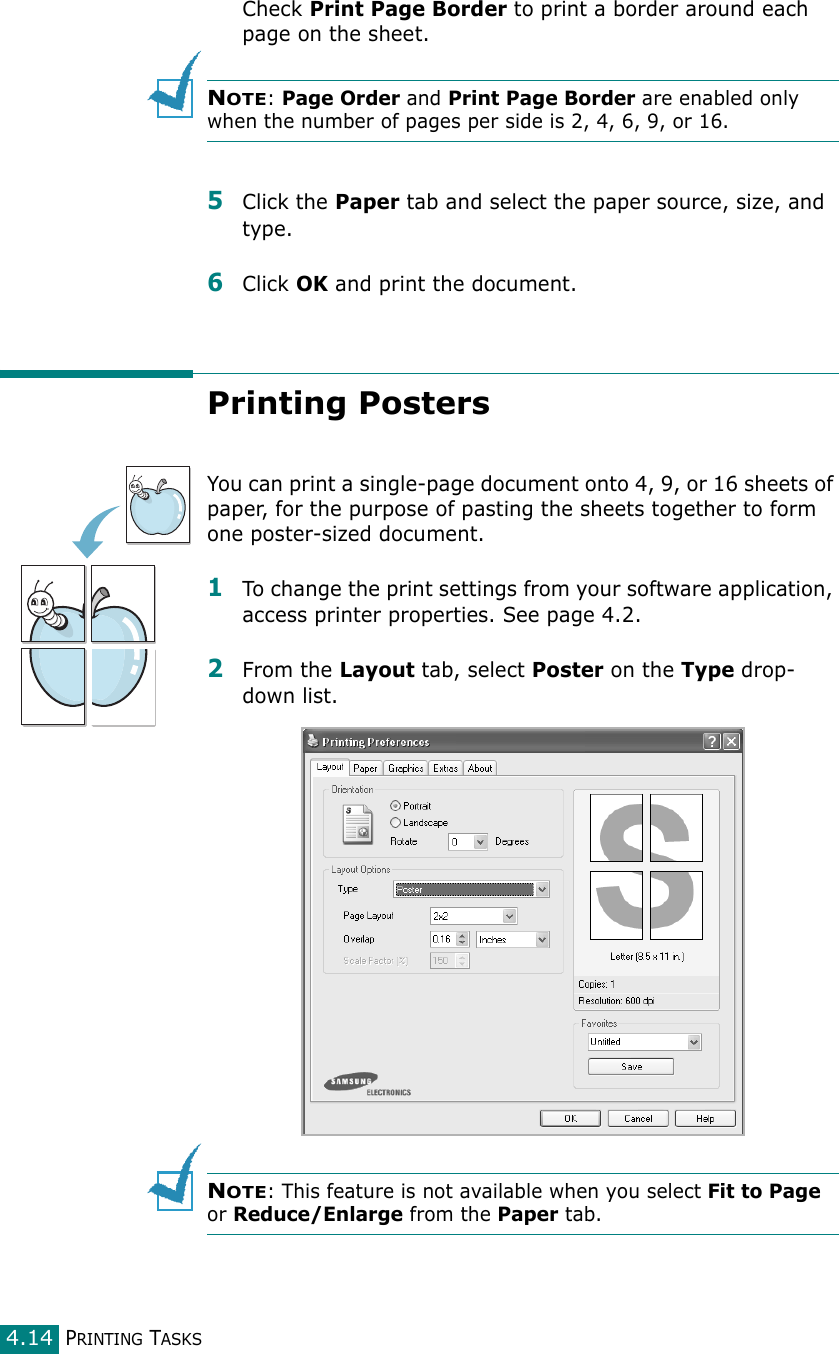
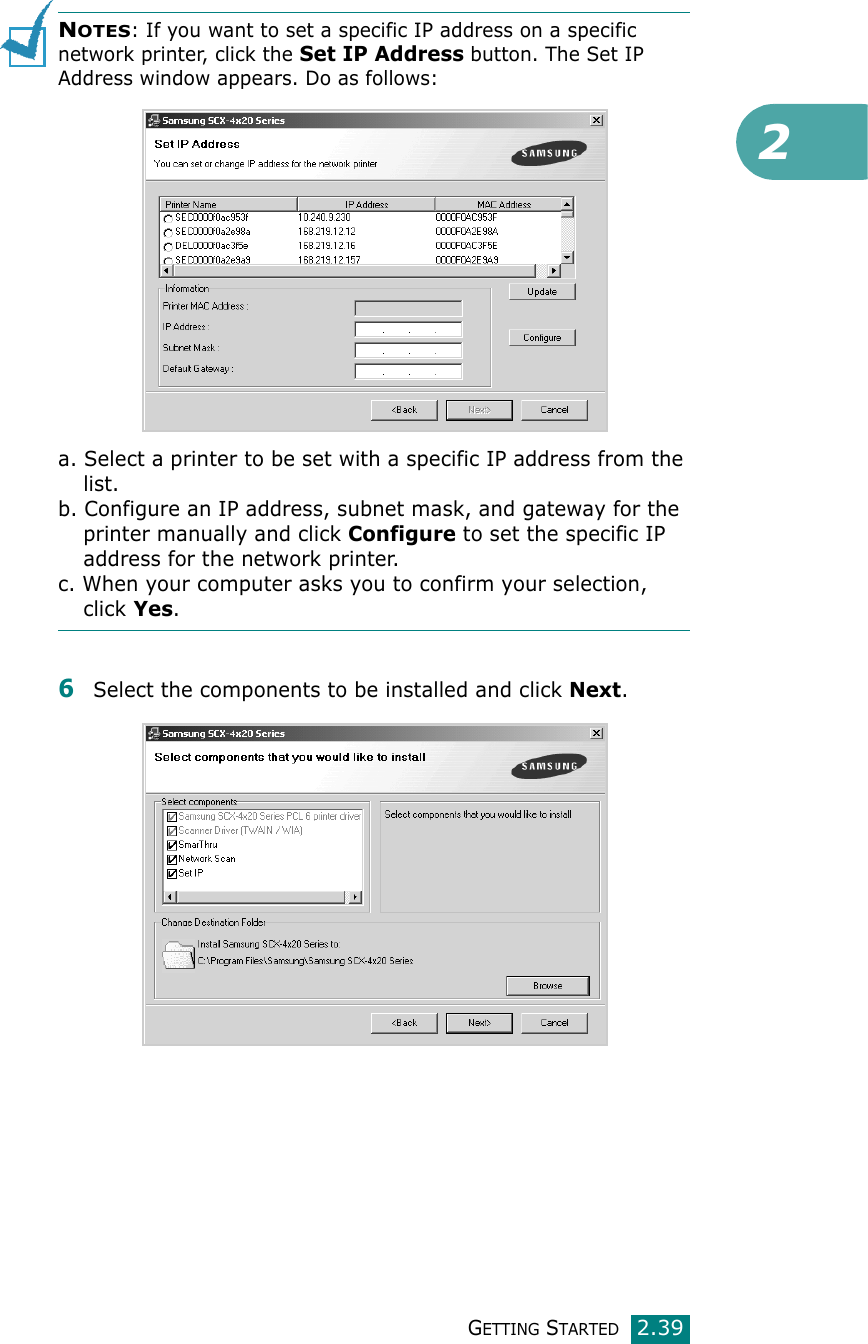
![GETTING STARTED2.365The list of printers available on the network appears. Select the printer you want to install from the list and then click Next. • If you do not see your printer on the list, click Update to refresh the list, or select Add TCP/IP Port to add your printer to the network. To add the printer to the network, enter the port name and the IP address for the printer.• To find a shared network printer (UNC Path), select Shared Printer [UNC] and enter the shared name manually or find a shared printer by clicking the Browse button.6After the installation is finished, a window appears asking you to print a test page and to register yourself as a user of Samsung Printers in order to receive information from Samsung. If you so desire, select the corresponding checkbox(es) and click Finish.Otherwise, just click Finish.NOTE: After setup is complete, if your printer driver doesn’t work properly, reinstall the printer driver. See “Repairing Software” on page 2.41.](https://usermanual.wiki/Samsung-Electronics-Co/RK20MFF.Users-Manual-1/User-Guide-571022-Page-61.png)
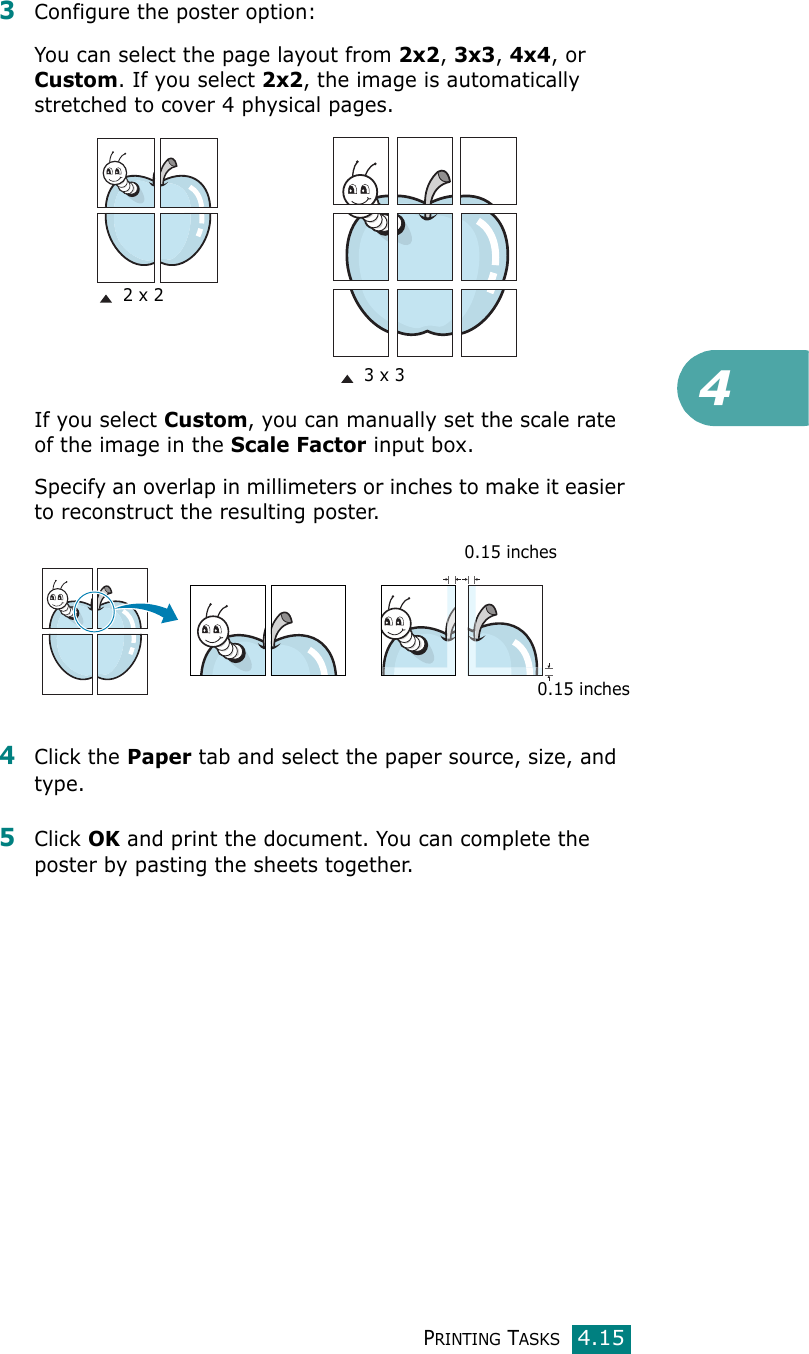
![GETTING STARTED2.384Select Custom installation. Click Next.5The list of printers available on the network appears. Select the printer you want to install from the list and then click Next. • If you do not see your printer on the list, click Update to refresh the list, or select Add TCP/IP Port to add your printer to the network. To add the printer to the network, enter the port name and the IP address for the printer.• To find a shared network printer (UNC Path), select Shared Printer [UNC] and enter the shared name manually or find a shared printer by clicking the Browse button.](https://usermanual.wiki/Samsung-Electronics-Co/RK20MFF.Users-Manual-1/User-Guide-571022-Page-63.png)
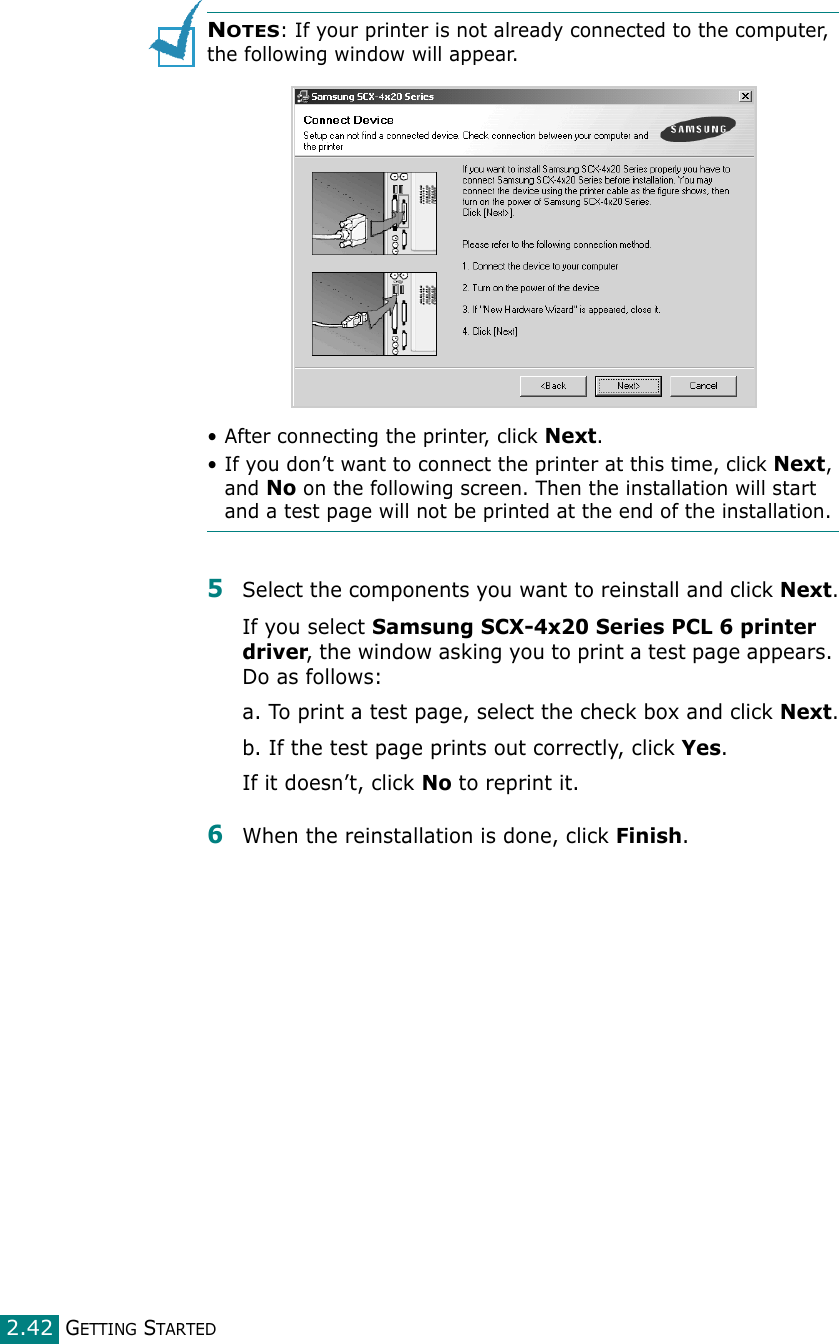
![2GETTING STARTED2.41Repairing SoftwareRepair is required if your installation fails or the software does not work properly. This Repair procedure does not physically repair SmarThru and Network Scan software.1Start Windows.2From the Start menu select Programs or All Programs → Samsung SCX-4x20 Series → Maintenance.3Select Repair and click Next.4The list of printers available on the network appears. Select the printer you want to reinstall from the list and then click Next. • If you do not see your printer on the list, click Update to refresh the list, or select Add TCP/IP Port to add your printer to the network. To add the printer to the network, enter the port name and the IP address for the printer.• To find a shared network printer (UNC Path), select Shared Printer [UNC] and enter the shared name manually or find a shared printer by clicking the Browse button.You will see a component list so that you can reinstall any item individually.](https://usermanual.wiki/Samsung-Electronics-Co/RK20MFF.Users-Manual-1/User-Guide-571022-Page-66.png)


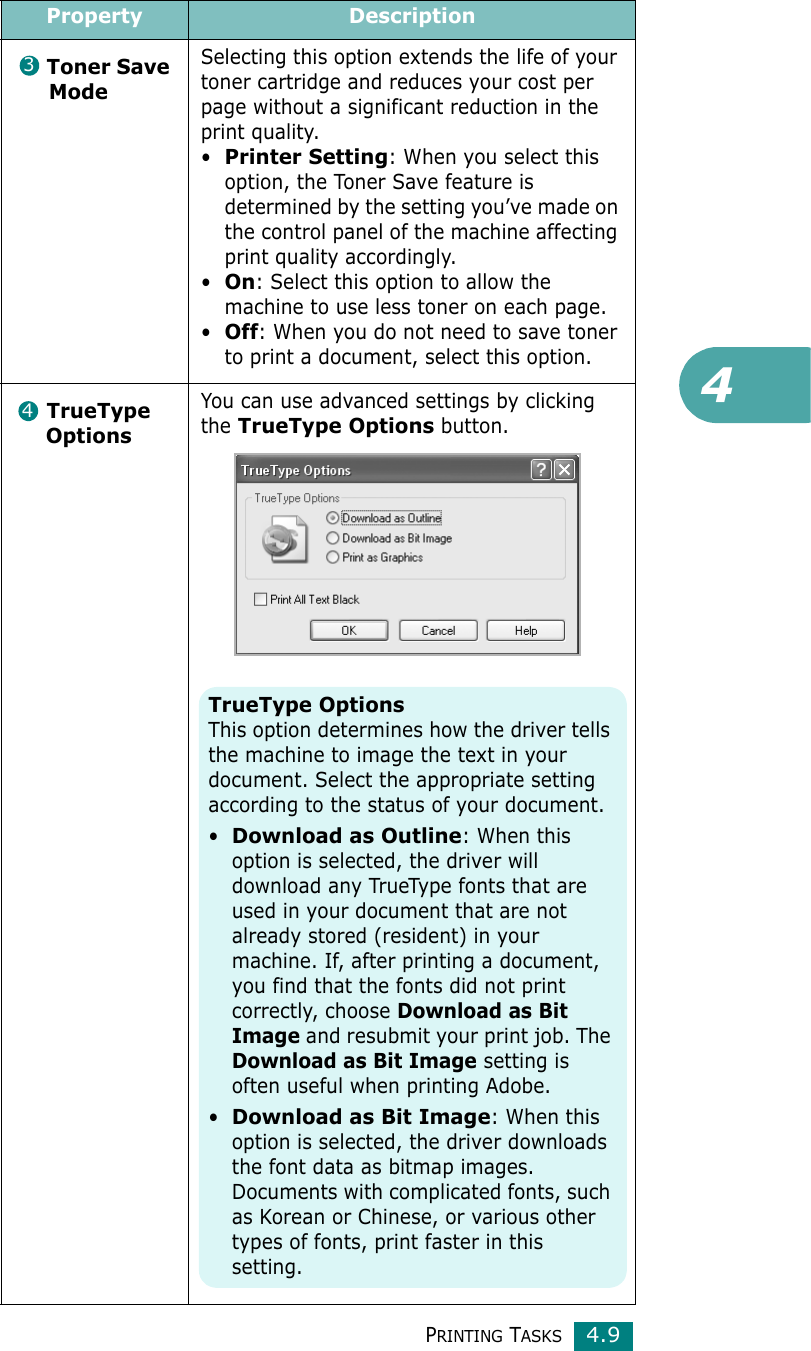
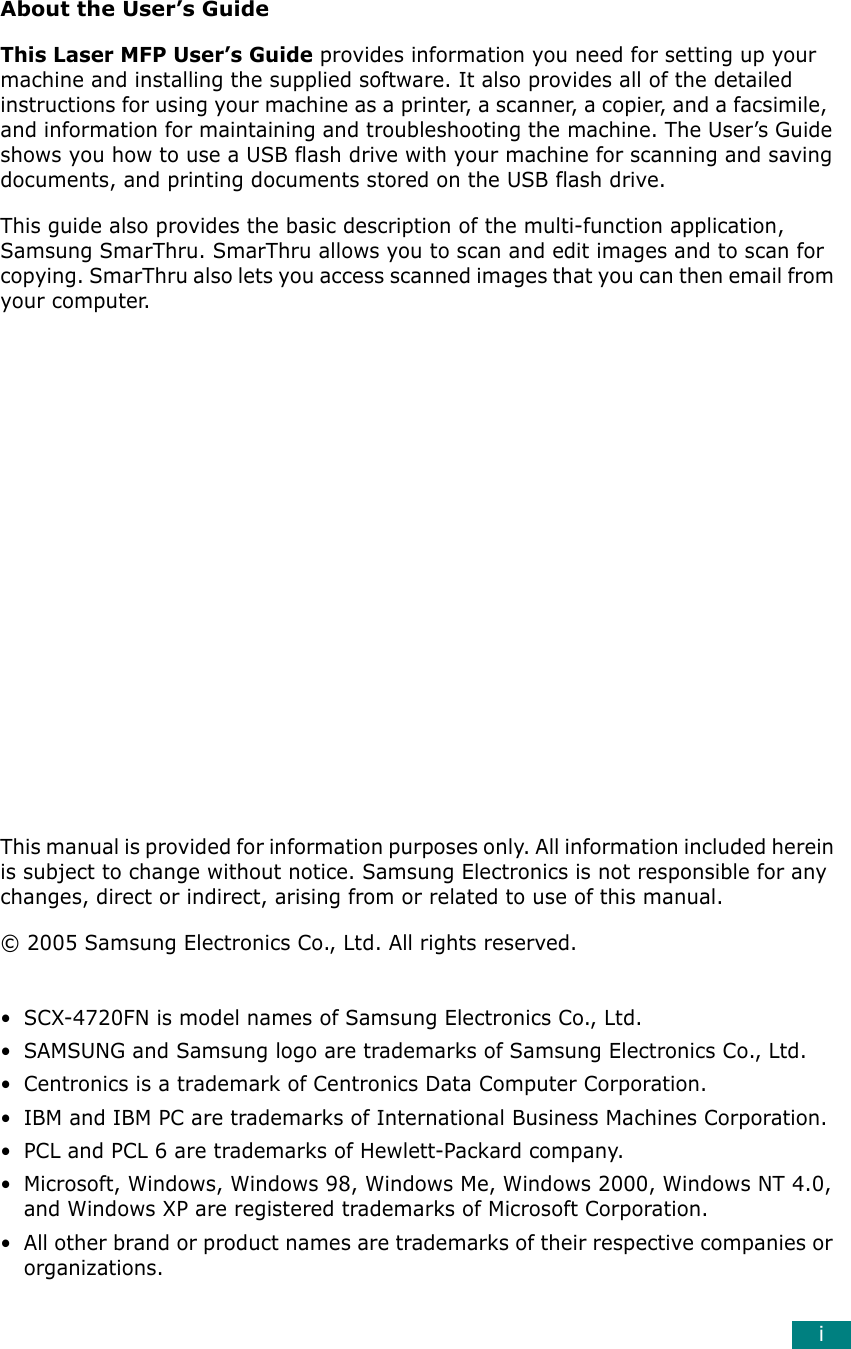
![PRINTING TASKS4.8Graphic TabUse the following options to adjust the print quality for your specific printing needs. See page 4.2 for more information about accessing printer properties.Click the Graphics tab to display the properties shown below. Property DescriptionResolutionYou can select the printing resolution by choosing from 1200 dpi [Best], 600 dpi [Normal], or 300 dpi [Draft]. The higher the setting, the sharper the printed characters and graphics. Higher settings may increase the time it takes to print a document.Image ModeSome printed characters or images appear to have jagged or uneven edges. Set this Image Mode option to improve the print quality of your text and image, and make the characters and images appear smoother. •Printer Setting: When you select this option, this feature is determined by the setting you’ve made on the control panel of the machine, affecting print quality accordingly.•Normal: This setting prints images in the normal mode. •Text Enhance: This setting refines the print quality of characters by smoothing out jagged edges that can occur on the angles and curves of each character. •Image Enhance: This setting refines the print quality of photo images. 123412](https://usermanual.wiki/Samsung-Electronics-Co/RK20MFF.Users-Manual-1/User-Guide-571022-Page-93.png)