Samsung Electronics Co S950WL WLAN Card Inside Notebook PC User Manual Manual
Samsung Electronics Co Ltd WLAN Card Inside Notebook PC Manual
UserManual.wiki
>
Samsung Electronics Co
>
S950WL User Manual
Manual
Navigation menu
Upload a User Manual
Namespaces
Wiki Guide
HTML
PDF
Info
Views
User Manual
Discussion / Help
Navigation


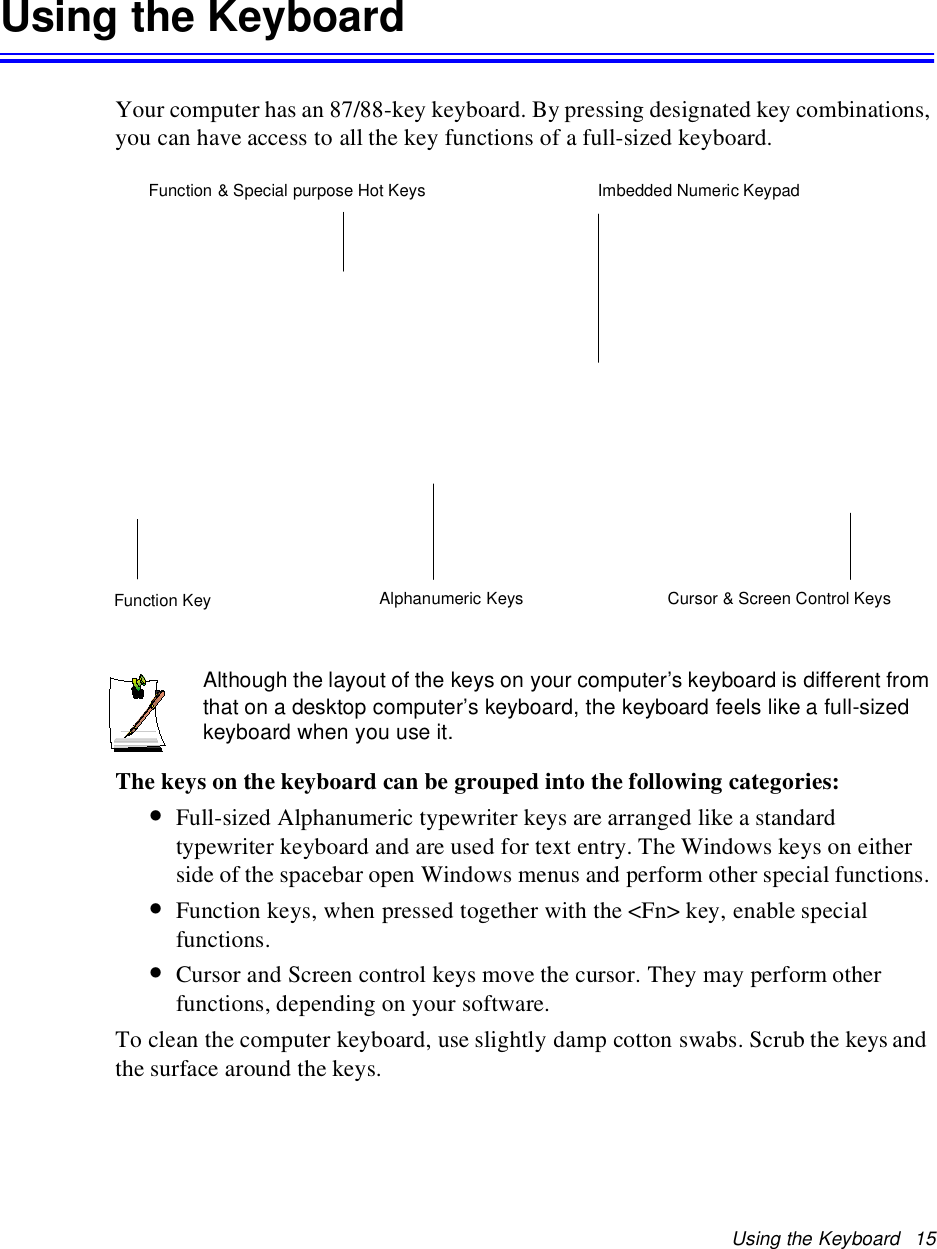


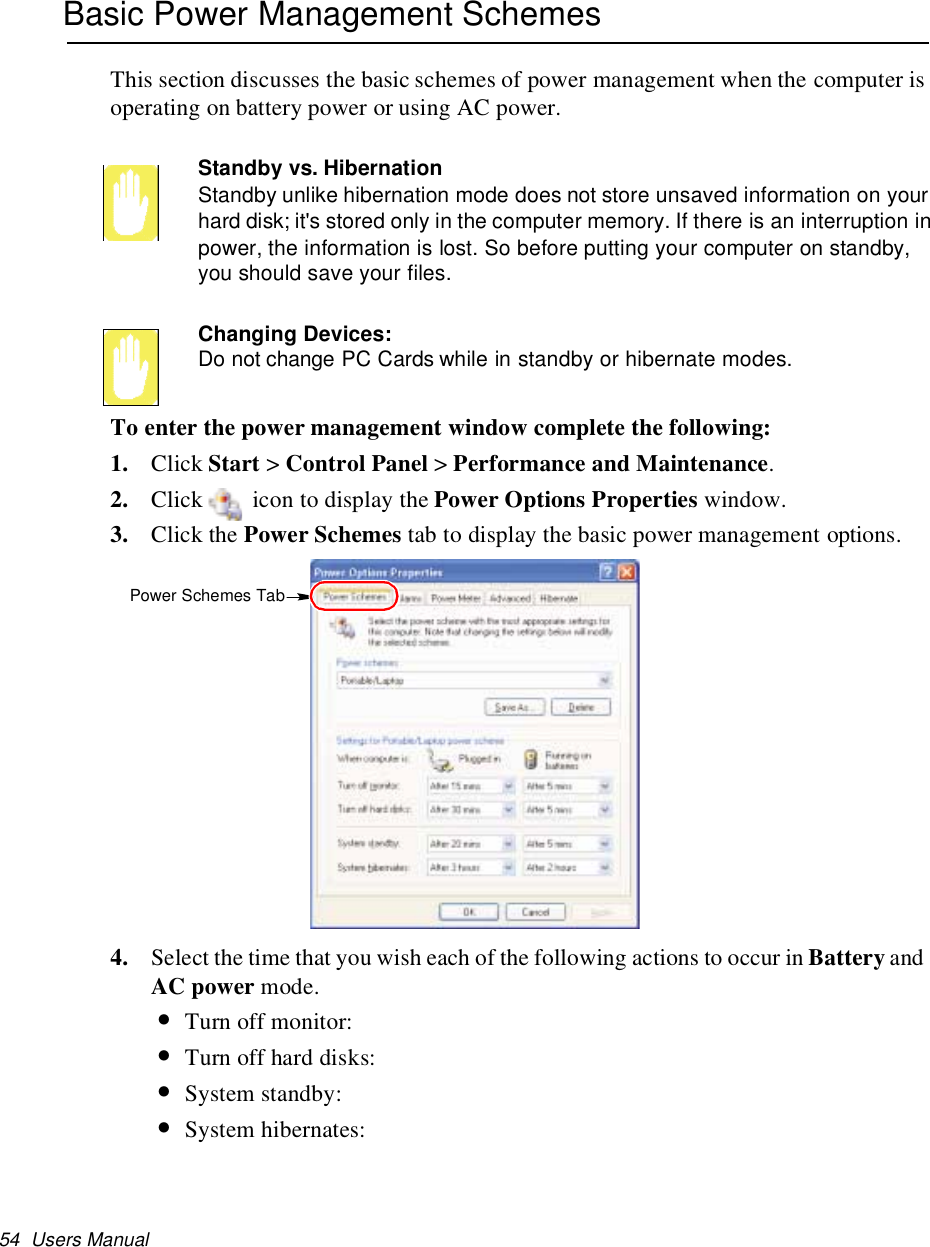
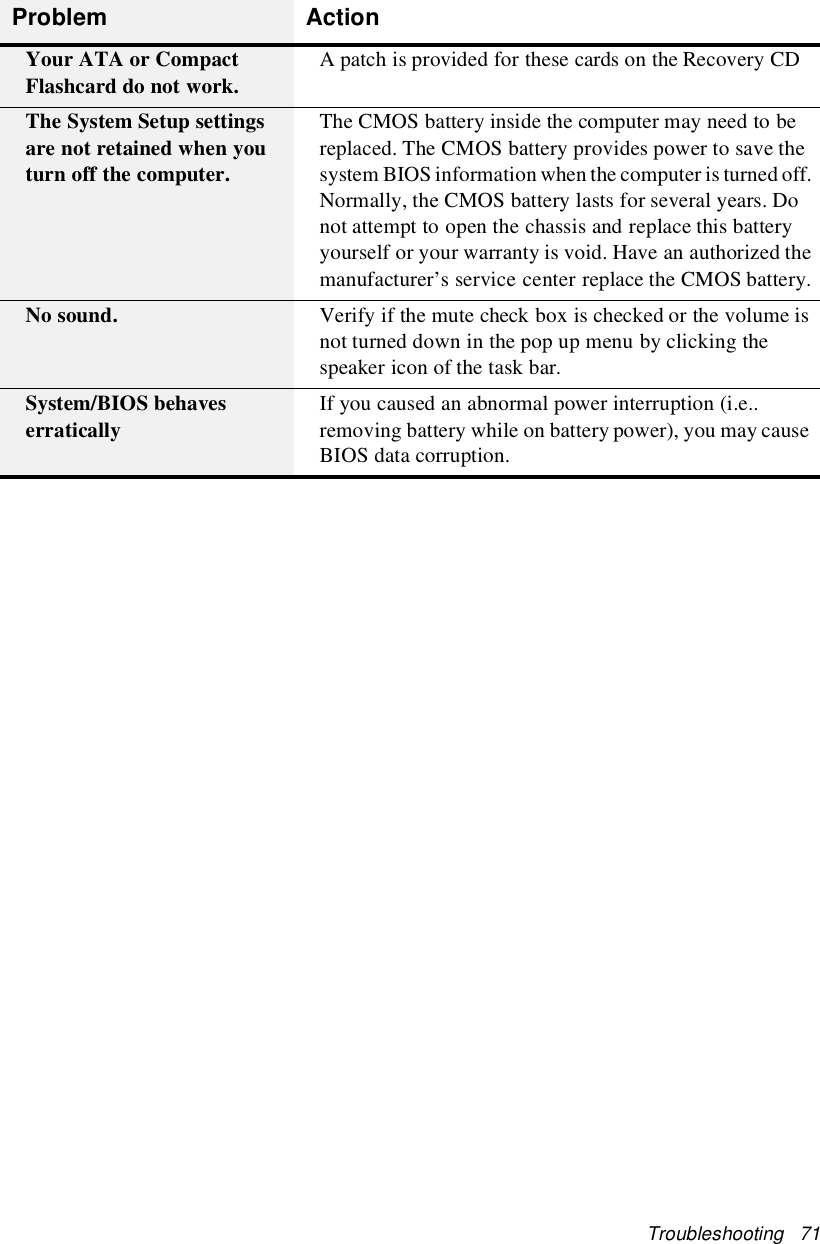
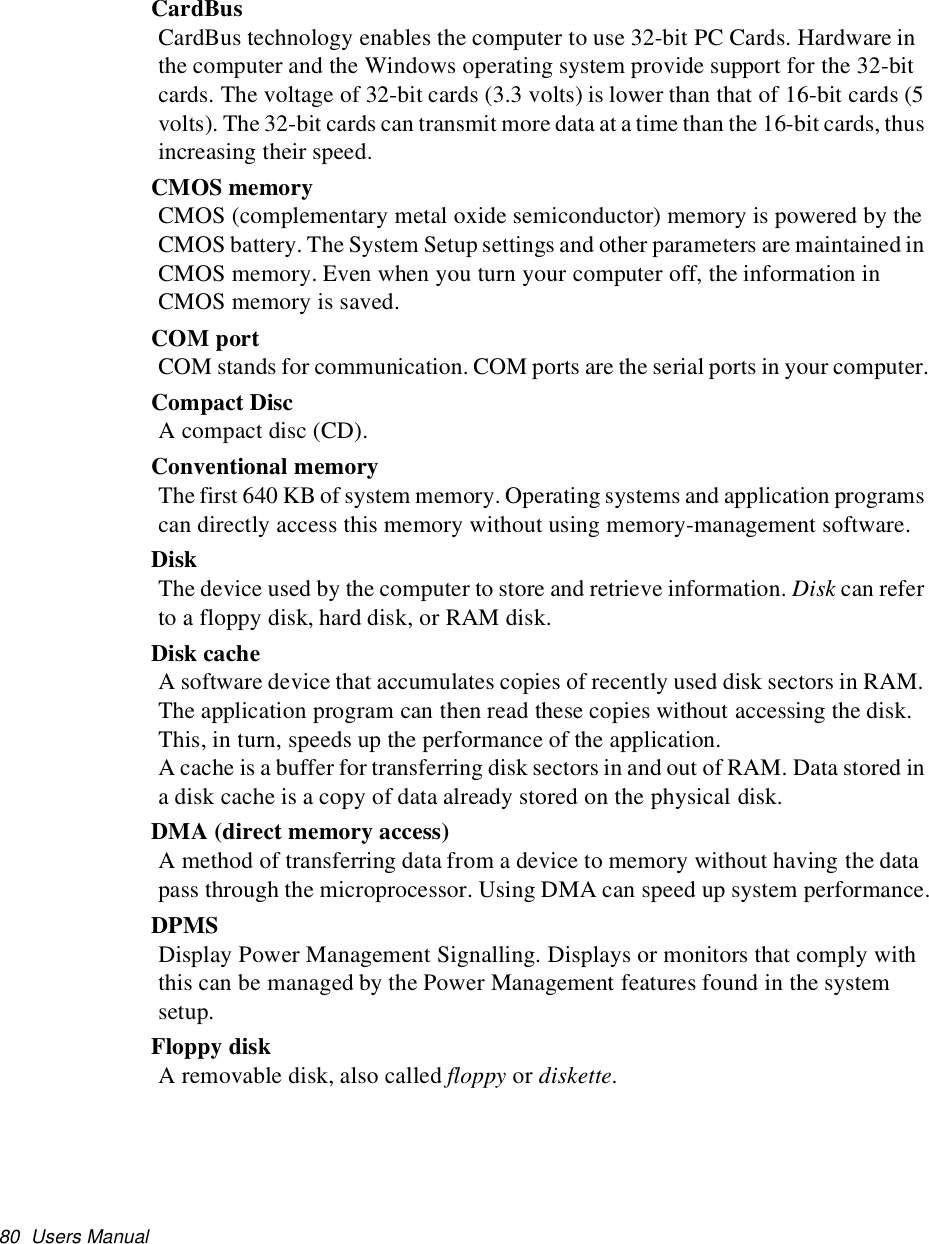
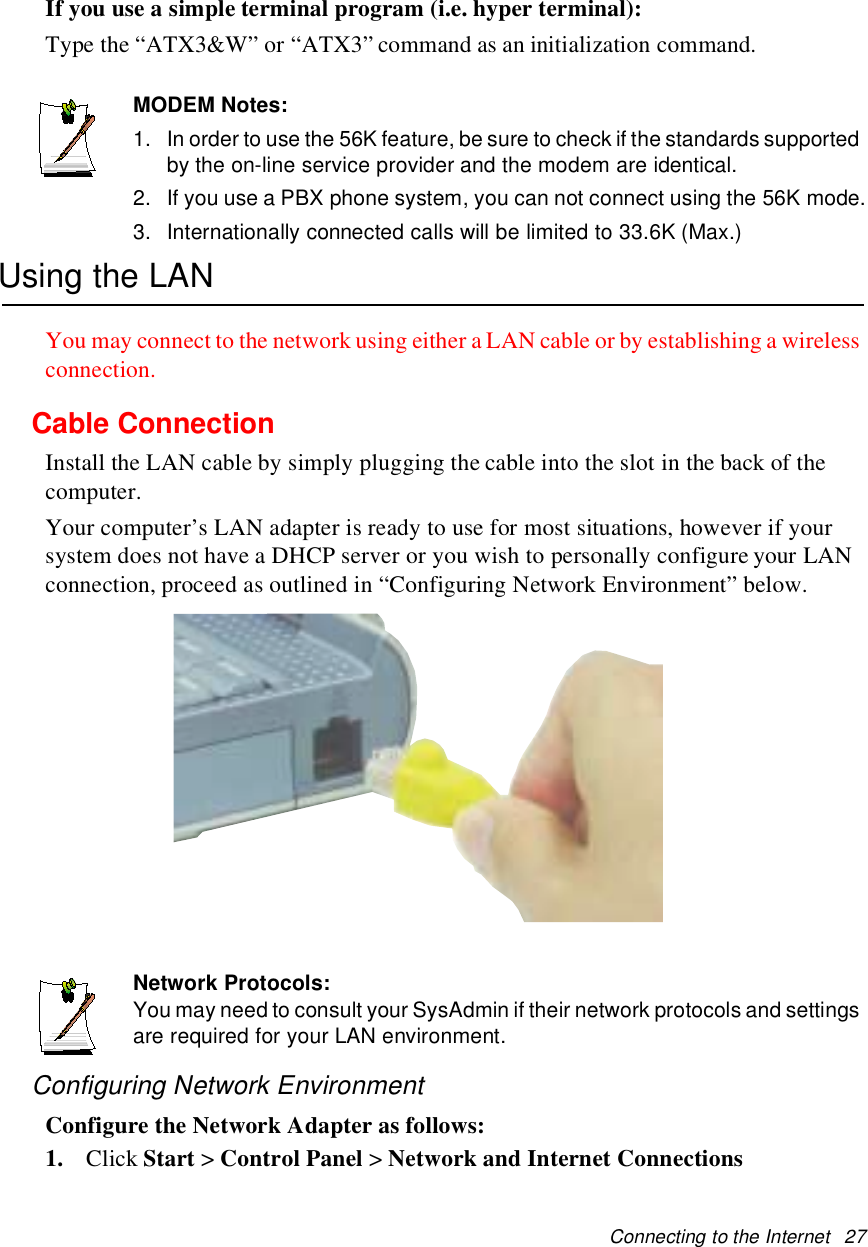
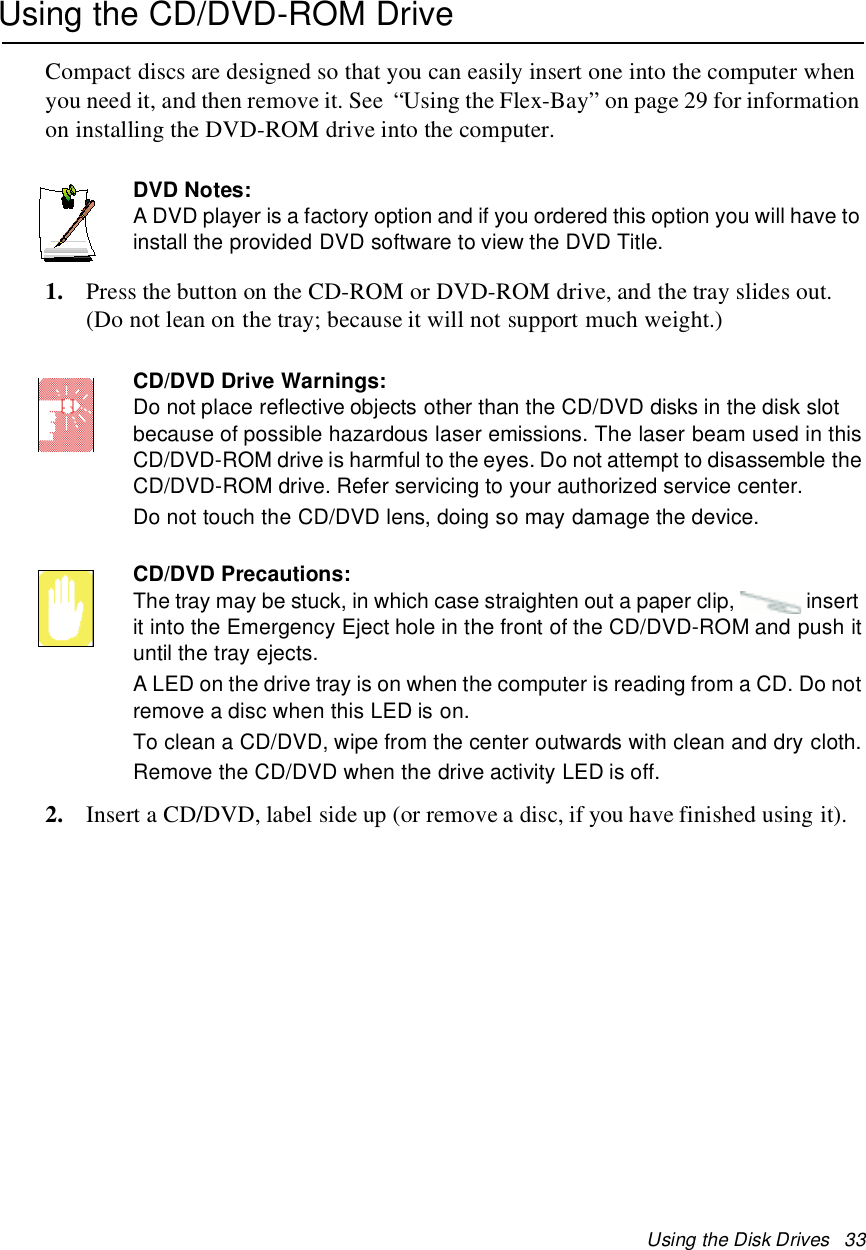
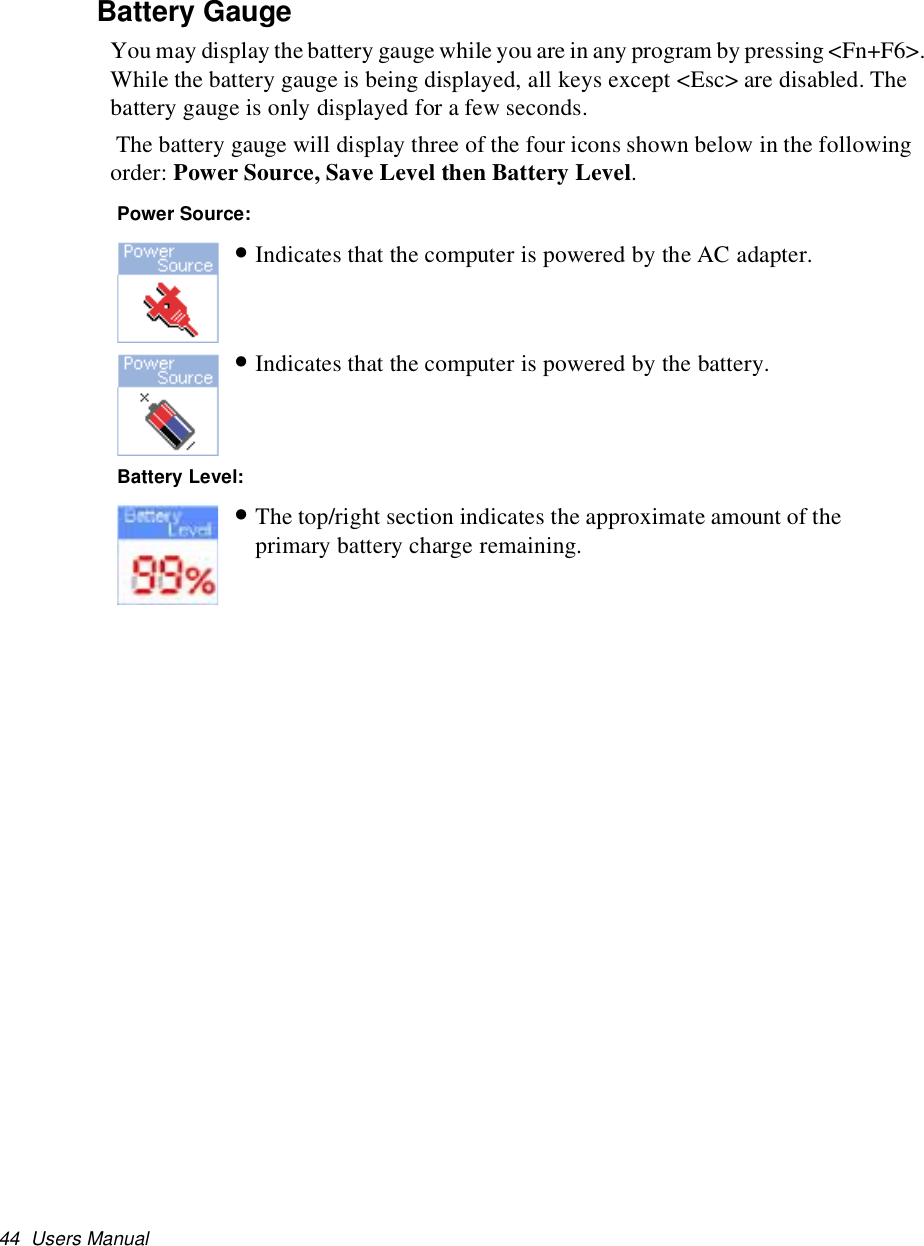
![Connecting to the Internet 25Connecting to the InternetThis section explains how to connect you to the internet. For details on how to establishthe connection contact the Internet Service Provider [ISP] or system administrator[SysAdmin].Using the ModemInstall the Modem cable by simply plugging the cable into the slot in the back of thecomputer.1. Contact your Internet Service Provider to obtain information or CD required tomake the connection in your area.2. After the cable is connected create a “Dialup” connection by clickingStart >Control Panel >Network and Internet Connections.3. Click Set up or change your Internet connection >Setup to start the connectionwizard.4. Follow the instructions in provided in the Make New Connection wizard.Modem Cable(Minimum 26 AWG)](https://usermanual.wiki/Samsung-Electronics-Co/S950WL/User-Guide-176301-Page-35.png)


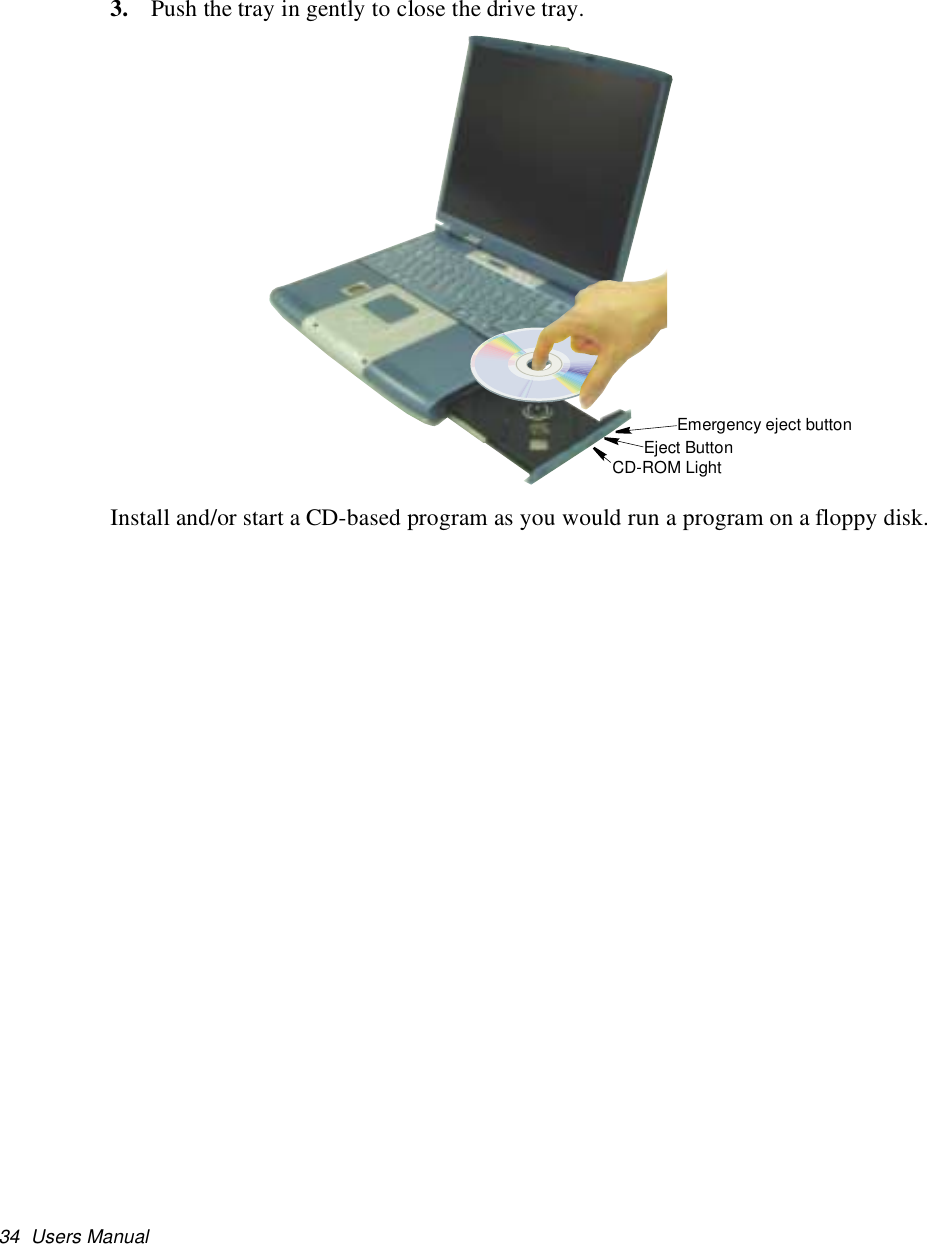

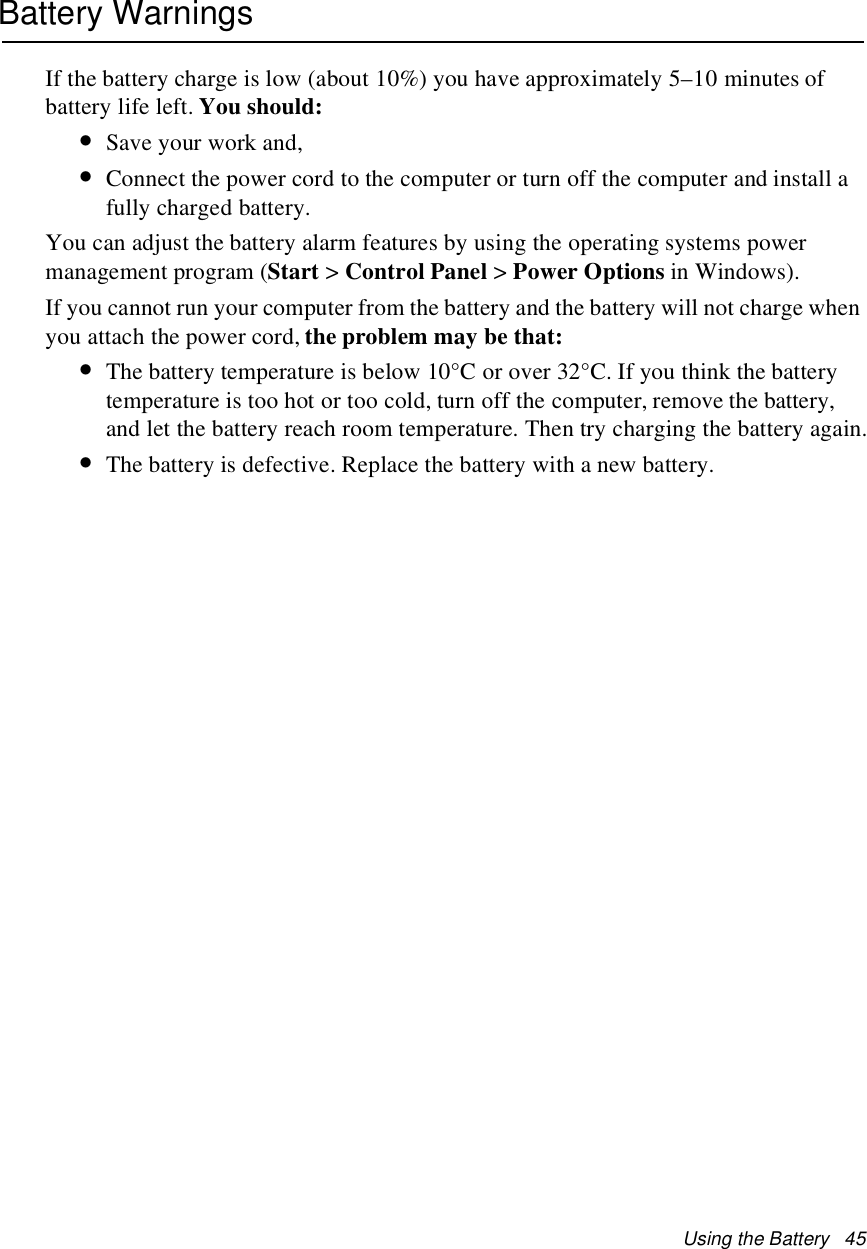
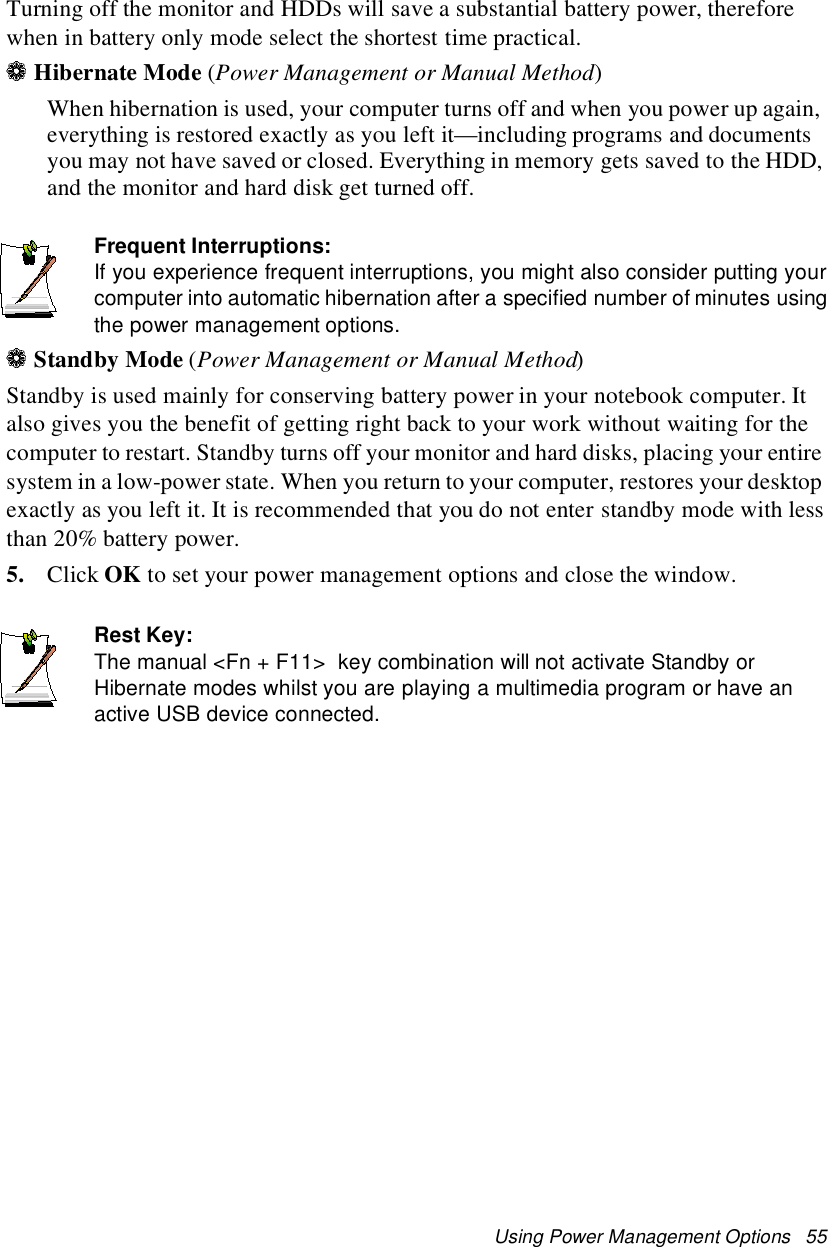
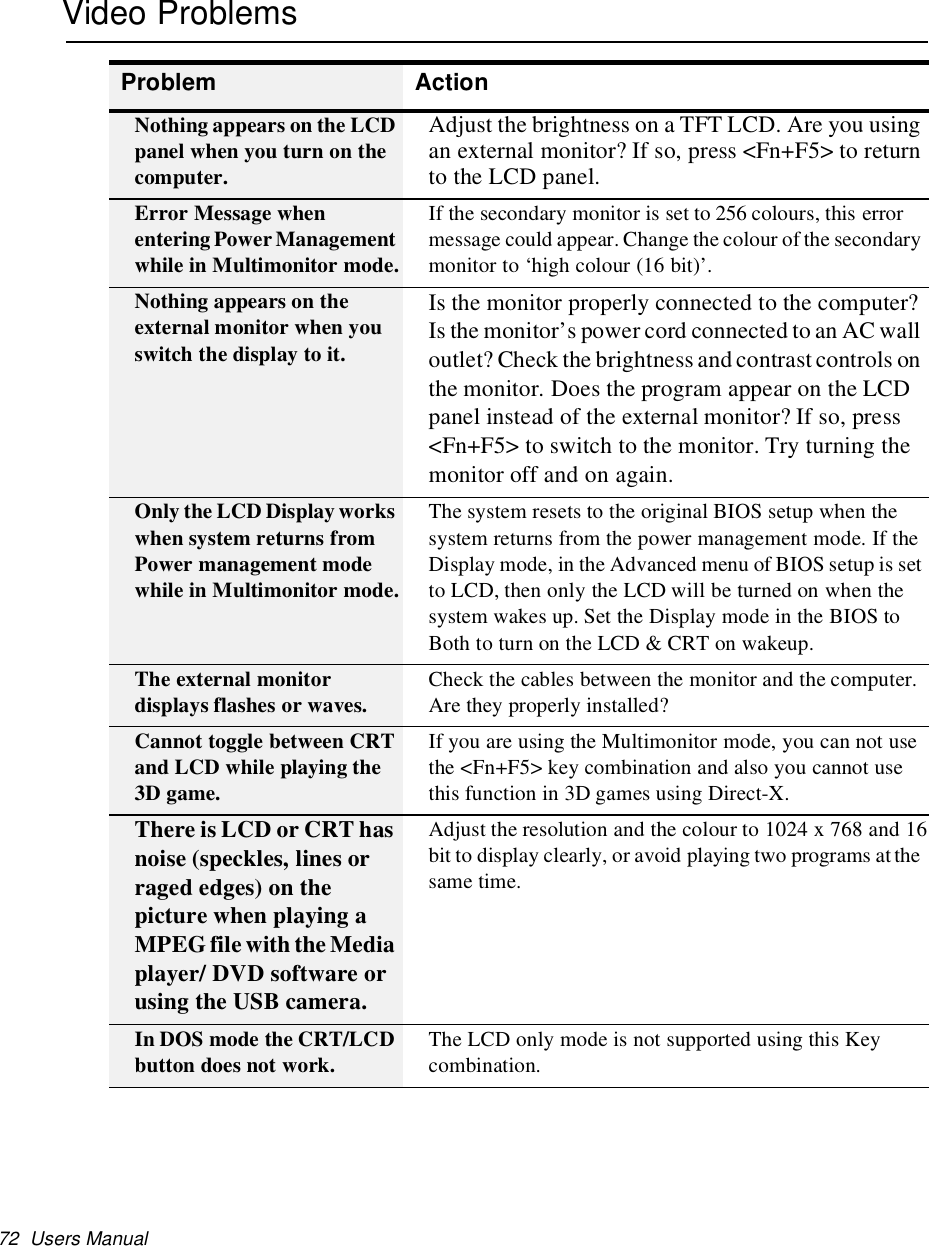
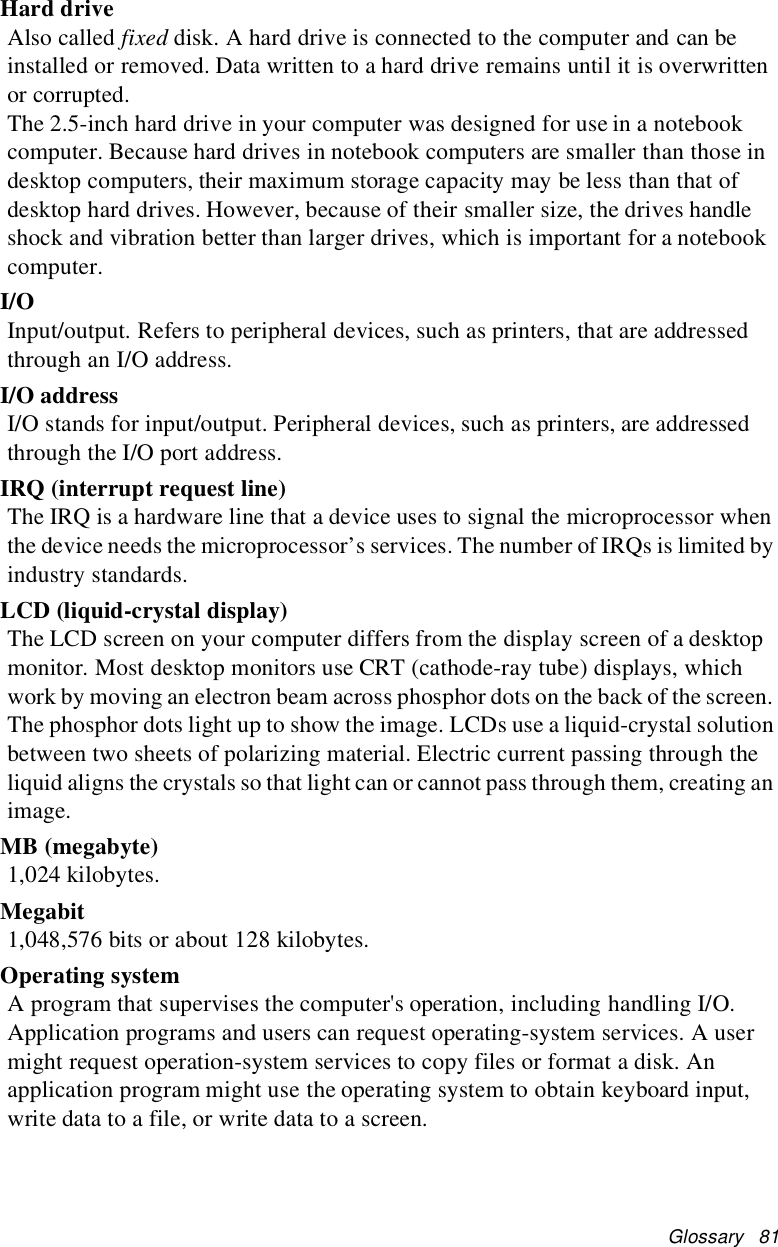
![Using Power Management Options 53Task Bar InterfaceYou may change the Intel® SpeedStep™setting by double clicking on the icon onthe task bar. This will open the Intel®SpeedStepTM technology popup window.The following will explain each of the above numbered items.1. This option will allow automatic or “Ask me before automatically changing” CPUspeed changes based on the power supply source.2. Each power supply option has a drop down window and when youclick on thearrow the drop down selector appears, displayed in number above. Theseoptions allow the user to set operation of the CPU based on the power supplysource.3. These are the available options for each type of supplied power.4. The Intel®SpeedStepTM technology [Advanced] popup window has 3 optionsthat are self explanatory.](https://usermanual.wiki/Samsung-Electronics-Co/S950WL/User-Guide-176301-Page-63.png)