Samsung Electronics Co SCH570 Single-Mode Cellular CDMA Phone User Manual A
Samsung Electronics Co Ltd Single-Mode Cellular CDMA Phone A
Users Manual
CDMA PORTABLE
CELLULAR TELEPHONE
SCH-570
OWNER’S MANUAL
SCH-570 (1-19) 10/26/98 9:00 AM Page 1
3
You are advised to turn off the phone
when at a gas station.
NEVER store or carry inflammable gas,
liquids or explosive materials in the
same compartment as your cellular
phone.
Safety Precautions
The use of cellular phones in an aircraft:
◆Is dangerous to aircraft operations.
◆May disrupt the cellular network.
◆Is illegal.
Failure to observe in-flight regulations
may lead to the suspension of cellular
services and/or legal action.
The illustrations below indicate the safety
precautions to be taken when using your cellular
telephone.
Parts List
The SCH-570 product contains the following parts.
Phone Charger Battery (BTL1062S)
Strap Manual
(Quick Reference
Card included)
NEVER use your phone while driving,
even if hands free operation is allowed.
ALWAYS park your vehicle first.
In some countries, it is illegal to use
mobile and radio telephones while
driving.
DO NOT use the power adapter if:
◆The power cord is damaged.
◆The phone has been dropped or
undergone a shock.
Have an authorized service center repair
the phone. NEVER try to repair the
phone by yourself.
Symbols
Press/Push
①= Step number Important
☞
Note
2
SCH-570 (1-19) 10/26/98 9:00 AM Page 2
5
Contents
4
Front View of the Phone . . . . . . . . . . . . . . . . . . . . . . . . . . . 6
Rear View of the Phone . . . . . . . . . . . . . . . . . . . . . . . . . . . . 7
LCD Display and Indicators . . . . . . . . . . . . . . . . . . . . . . . . . 8
Preparation
Installing the Battery Pack . . . . . . . . . . . . . . . . . . . . . . . . . . 9
Charging the Battery Pack . . . . . . . . . . . . . . . . . . . . . . . . . .10
Tips on Battery Charging . . . . . . . . . . . . . . . . . . . . . . . . . . .11
Checking the Battery Charge Level . . . . . . . . . . . . . . . . . . .12
Basic Operation
Turning the Phone On and Off . . . . . . . . . . . . . . . . . . . . . . .13
Extending the Antenna . . . . . . . . . . . . . . . . . . . . . . . . . . . .14
Making a Call . . . . . . . . . . . . . . . . . . . . . . . . . . . . . . . . . . .15
Using One Touch Silent Mode . . . . . . . . . . . . . . . . . . . . . . . 16
Receiving Calls . . . . . . . . . . . . . . . . . . . . . . . . . . . . . . . . . .17
Adjusting Volumes . . . . . . . . . . . . . . . . . . . . . . . . . . . . . . . .18
Mute . . . . . . . . . . . . . . . . . . . . . . . . . . . . . . . . . . . . . . . . . .19
Recording the Other Person’s Talking
During Telephone Conversation . . . . . . . . . . . . . . . . . . . . . .20
Choosing Alert Type . . . . . . . . . . . . . . . . . . . . . . . . . . . . . . .21
Choosing Ringer Bell . . . . . . . . . . . . . . . . . . . . . . . . . . . . . .22
Redialing the Last Numbers . . . . . . . . . . . . . . . . . . . . . . . . 23
Memory Dialing
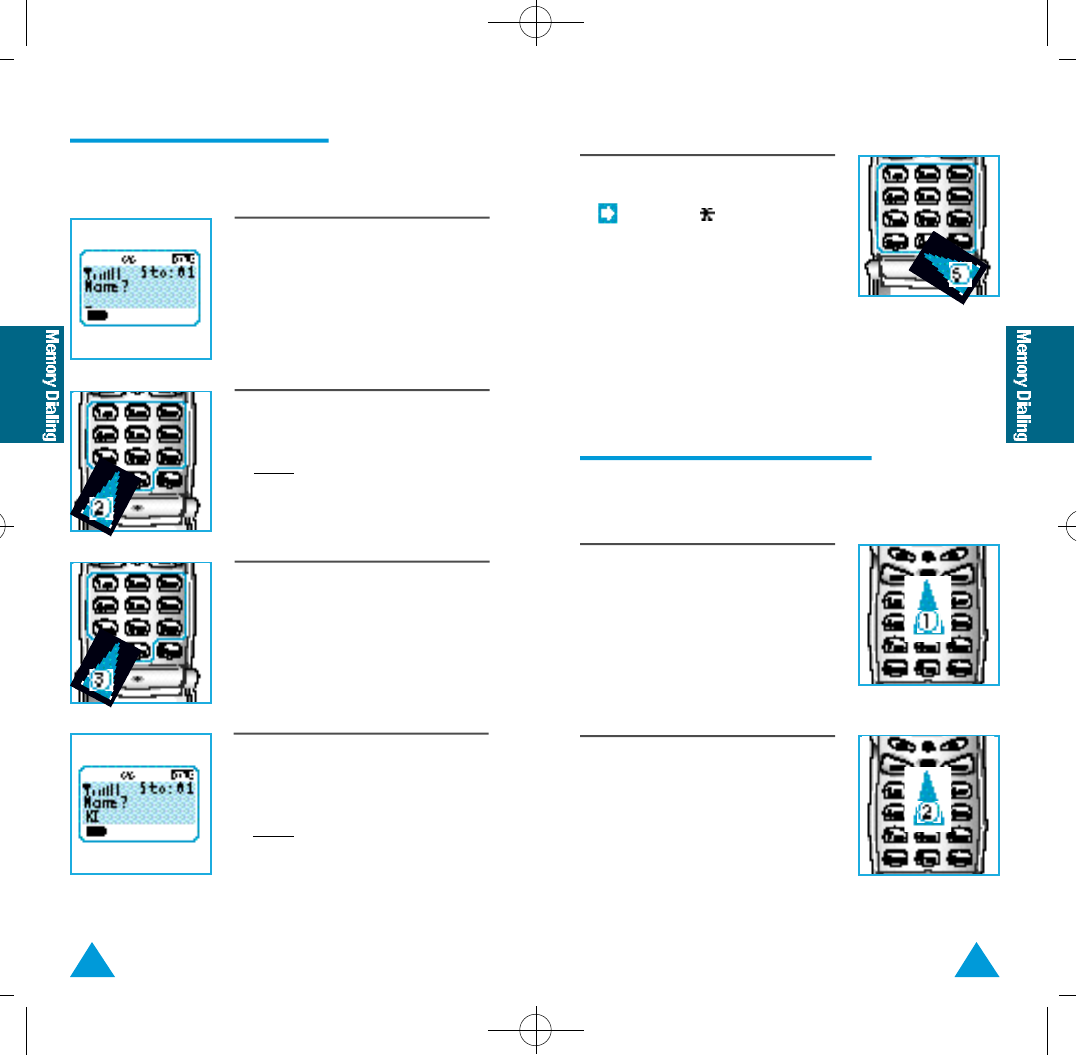
Finding an Empty Memory Location . . . . . . . . . . . . . . . . . . .25
Storing Numbers in Memory . . . . . . . . . . . . . . . . . . . . . . . . 26
Entering Name in Memory . . . . . . . . . . . . . . . . . . . . . . . . . .28
Correcting a Name or Number . . . . . . . . . . . . . . . . . . . . . . .29
Storing Numbers into Numeric Group . . . . . . . . . . . . . . . . . 30
One-Touch Dialing . . . . . . . . . . . . . . . . . . . . . . . . . . . . . . . .31
Two-Touch Dialing . . . . . . . . . . . . . . . . . . . . . . . . . . . . . . . .31
Searching for Numbers in Memory . . . . . . . . . . . . . . . . . . .32
Erasing Numbers in Memory . . . . . . . . . . . . . . . . . . . . . . . . 36
Voice Dialing
Voice Dialing . . . . . . . . . . . . . . . . . . . . . . . . . . . . . . . . . . . .38
Recording Name . . . . . . . . . . . . . . . . . . . . . . . . . . . . . . . . . 38
Checking Recoded Name . . . . . . . . . . . . . . . . . . . . . . . . . . .40
Erasing Recorded Name . . . . . . . . . . . . . . . . . . . . . . . . . . . 40
Using Voice Dial . . . . . . . . . . . . . . . . . . . . . . . . . . . . . . . . . 42
Useful Features
Turning Tones On and Off . . . . . . . . . . . . . . . . . . . . . . . . . . 45
Sending Your Own Phone Number . . . . . . . . . . . . . . . . . . . .48
Displaying Your Own Phone Number . . . . . . . . . . . . . . . . . . 48
System Selection . . . . . . . . . . . . . . . . . . . . . . . . . . . . . . . . .49
Message Service . . . . . . . . . . . . . . . . . . . . . . . . . . . . . . . . .50
Setting Alarm . . . . . . . . . . . . . . . . . . . . . . . . . . . . . . . . . . .54
DTMF Dialing . . . . . . . . . . . . . . . . . . . . . . . . . . . . . . . . . . .57
Timers . . . . . . . . . . . . . . . . . . . . . . . . . . . . . . . . . . . . . . . . .59
Advanced Features
Using Calculator . . . . . . . . . . . . . . . . . . . . . . . . . . . . . . . . .64
Using Stop Watch . . . . . . . . . . . . . . . . . . . . . . . . . . . . . . . . 65
Automatic Feature Setup . . . . . . . . . . . . . . . . . . . . . . . . . . . 66
Changing Greeting Message . . . . . . . . . . . . . . . . . . . . . . . .69
Restricting the Use of the Phone . . . . . . . . . . . . . . . . . . . . . 70
Changing Lock Code . . . . . . . . . . . . . . . . . . . . . . . . . . . . . .73
Locking the Phone . . . . . . . . . . . . . . . . . . . . . . . . . . . . . . . . 74
Warning Beep Generation . . . . . . . . . . . . . . . . . . . . . . . . . .75
Choosing NAM . . . . . . . . . . . . . . . . . . . . . . . . . . . . . . . . . . 76
Setting the Phone to Send PIN . . . . . . . . . . . . . . . . . . . . . .77
System Reset . . . . . . . . . . . . . . . . . . . . . . . . . . . . . . . . . . .79
Miscellaneous
Cleaning Your Cellular Phone . . . . . . . . . . . . . . . . . . . . . . . . 80
Battery Safety Precautions . . . . . . . . . . . . . . . . . . . . . . . . .81
Accessories . . . . . . . . . . . . . . . . . . . . . . . . . . . . . . . . . . . . .83
Troubleshooting . . . . . . . . . . . . . . . . . . . . . . . . . . . . . . . . . .84
LCD Messages . . . . . . . . . . . . . . . . . . . . . . . . . . . . . . . . . . 87
Summary . . . . . . . . . . . . . . . . . . . . . . . . . . . . . . . . . . . . . . . 89
SCH-570 (1-19) 10/26/98 9:00 AM Page 4
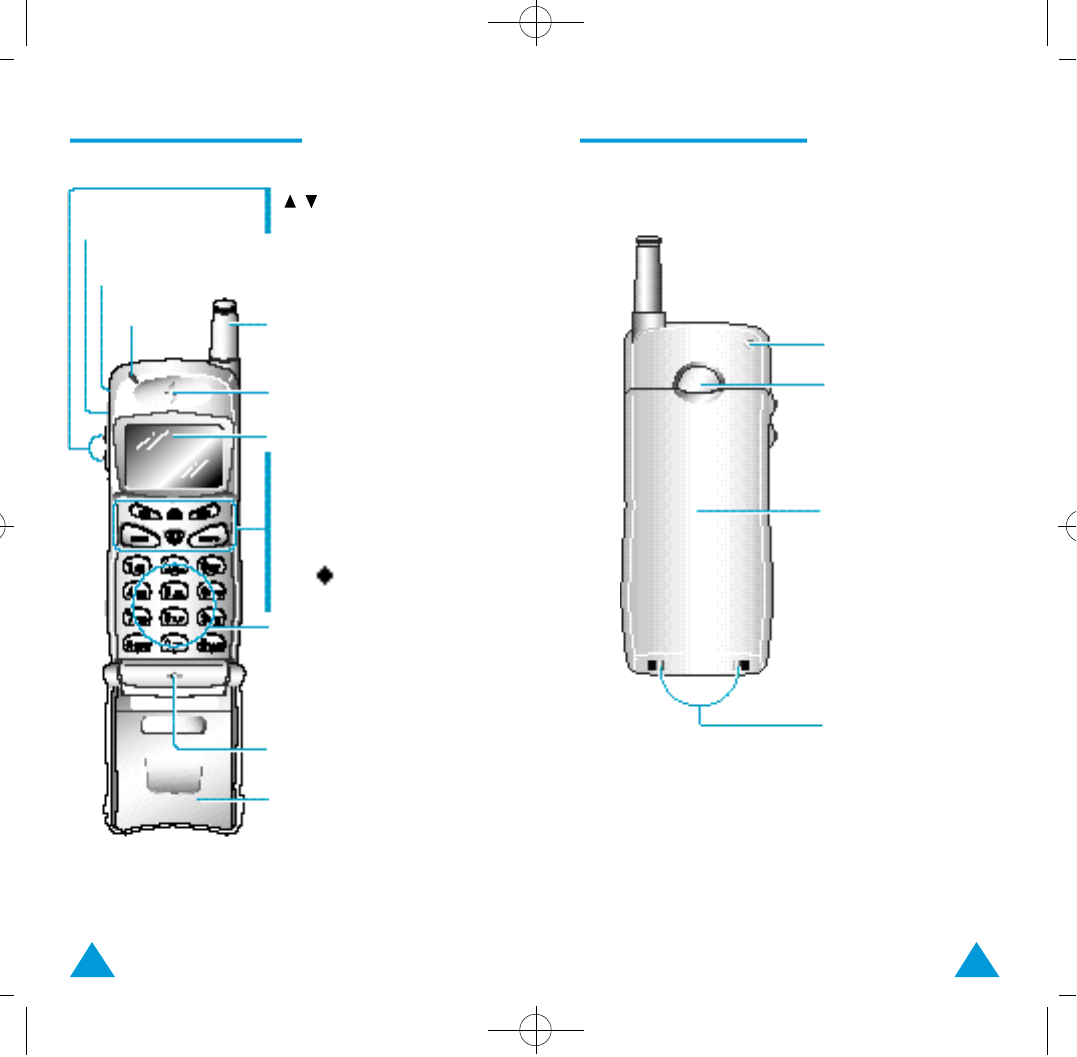
7
Earmicrophone
Receiving lamp
Buzzer
Antenna
Speaker
LCD display
Number Keypad
Microphone
Cover
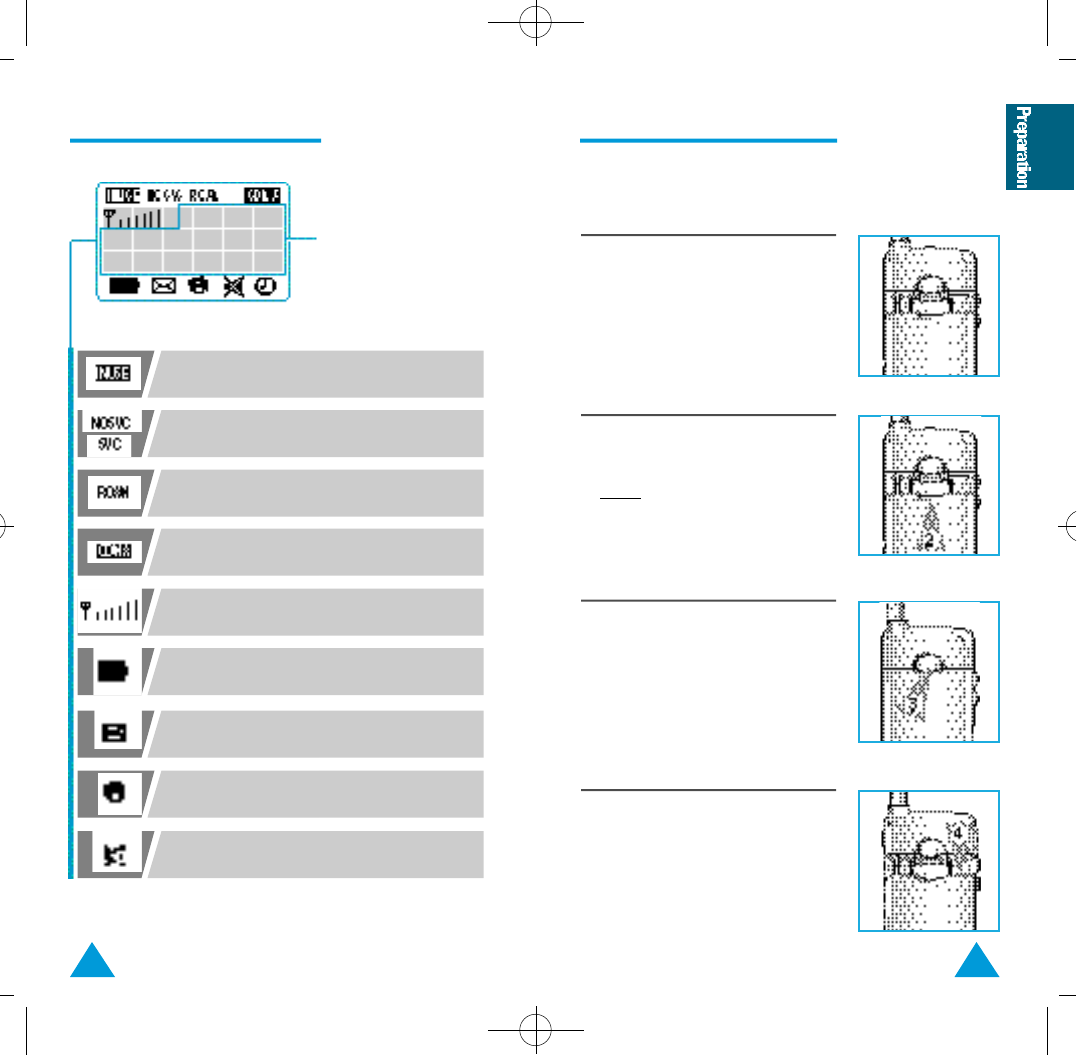
STO : stores names and numbers in
memory
RCL : recalls stored memory entries
FCN : helps access special features
SEND : makes a call
CLR : clears messages on LCD
END/ : ends a call. Also it turns
power on and off
adjusts volume or
scrolls options menu
Battery lock/unlock button
Battery
Charging points
6
Front View of the Phone Rear View of the Phone
Strap hole
SCH-570 (1-19) 10/26/98 9:00 AM Page 6
9
1. To attach the battery pack after
charging, align it with the phone
about 1cm (1/2”) away from its place
so that the two arrows on the phone
are seen, the battery charge contacts
pointing downward.
displays the dialed
numbers and the
current status
2. Slide the battery pack upwards until
it clicks firmly into position.
Result: Your phone is now ready to be
turned on.
8
Installing the Battery Pack
3. To remove the battery pack, release it
by pressing the button on the rear of
the phone.
4. Slide the battery pack downward
about 1cm (1/2”) and lift it away from
the phone.
LCD Display and Indicators
blinks while your phone selects a channel
and lights up when the line is connected.
NOSVC: no service area
SVC: service area
lights up when your phone is out of the
home area.
CDMA: digital mode
displays the signal strength level with
the number of bars.
displays the battery charge level status with
the number of blocks.
indicates you have voicemail or text
messages.
indicates the vibration mode.
indicates silent mode (lamp mode).
SCH-570 (1-19) 10/26/98 9:00 AM Page 8
11
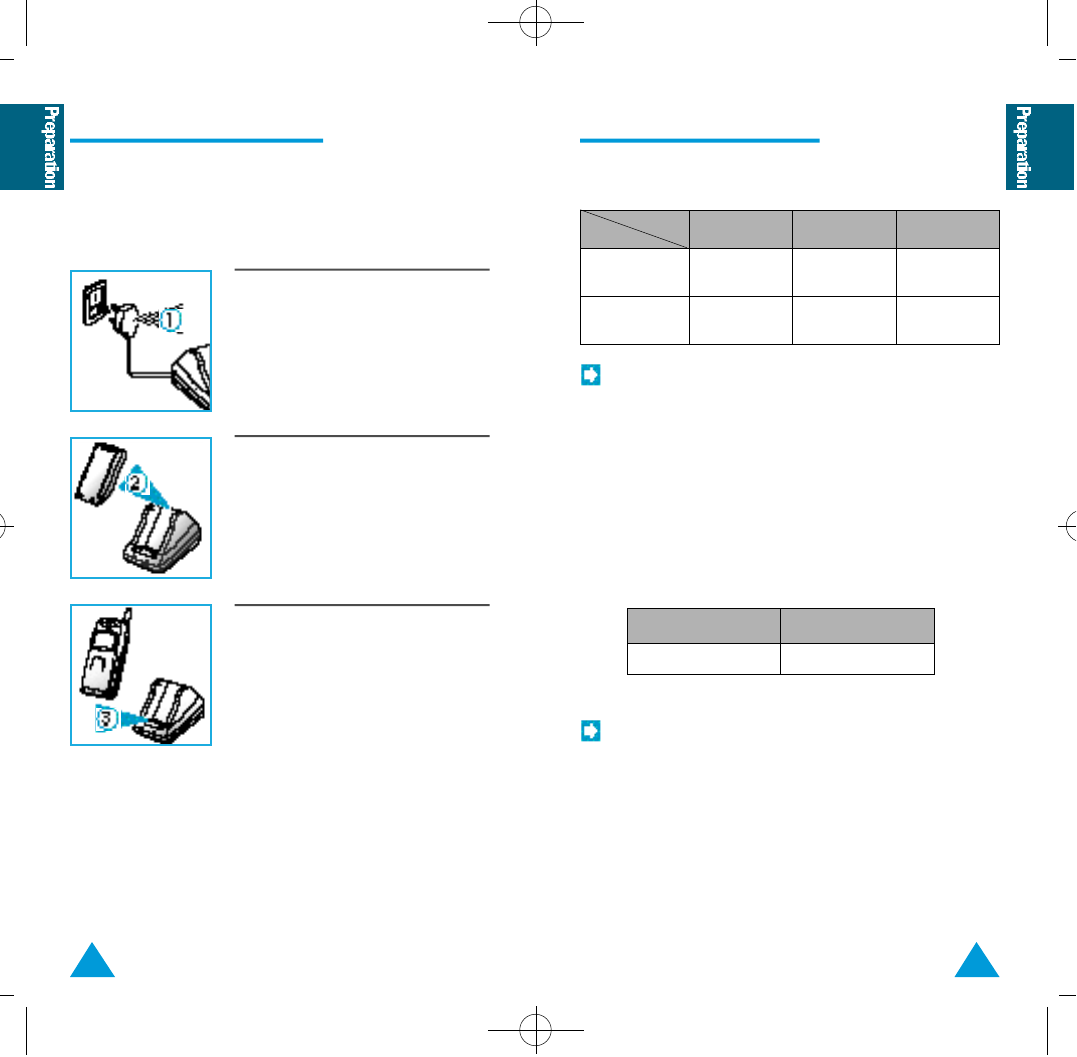
1. Plug the power cord of the charger
into an appropriate wall socket.
◆When the power is connected
correctly, the yellow lamp on the
charger flickers once.
2. To charge the battery pack, insert the
battery pack into the rear slot of the
charger.
◆The lamp marked BATT on the front
panel of the charger lights up red.
3. If you do not wish to use your phone
while charging the battery, you can:
◆Leave the battery pack attached to
the phone.
◆Place the phone in the front slot of
the charger. The lamp marked
PHONE on the front panel of the
charger lights up red.
10
Charging the Battery Pack
When you purchase the product, the battery is not
fully charged. Please charge the battery fully before
you operate your phone.
If the lamp blinks yellow, the battery pack is not properly
inserted or the contact of the charging terminal is stained or
rusty. When this occurs, remove the battery pack, check the
charging terminal and reinsert the battery pack. If this does
not work properly, replace the battery pack with a new one.
Tips on Battery Charging
◆The lamp color indicates the charging status as follows:
Front (phone
charging lamp) (off) green
yellow green
Status Standby
red
red
Charging Completed
Slot
Rear (battery
charging lamp)
•If both the front and rear slots are occupied, the charging
time may be longer.
•When both the front and rear slots are occupied, the front
slot charges first.
•It is normal for the battery pack to become warm during
charging.
◆The full charging time is different according to the battery type
as follows: (min)
Standard Extended-life
about 180 about 210
SCH-570 (1-19) 10/26/98 9:00 AM Page 10
13
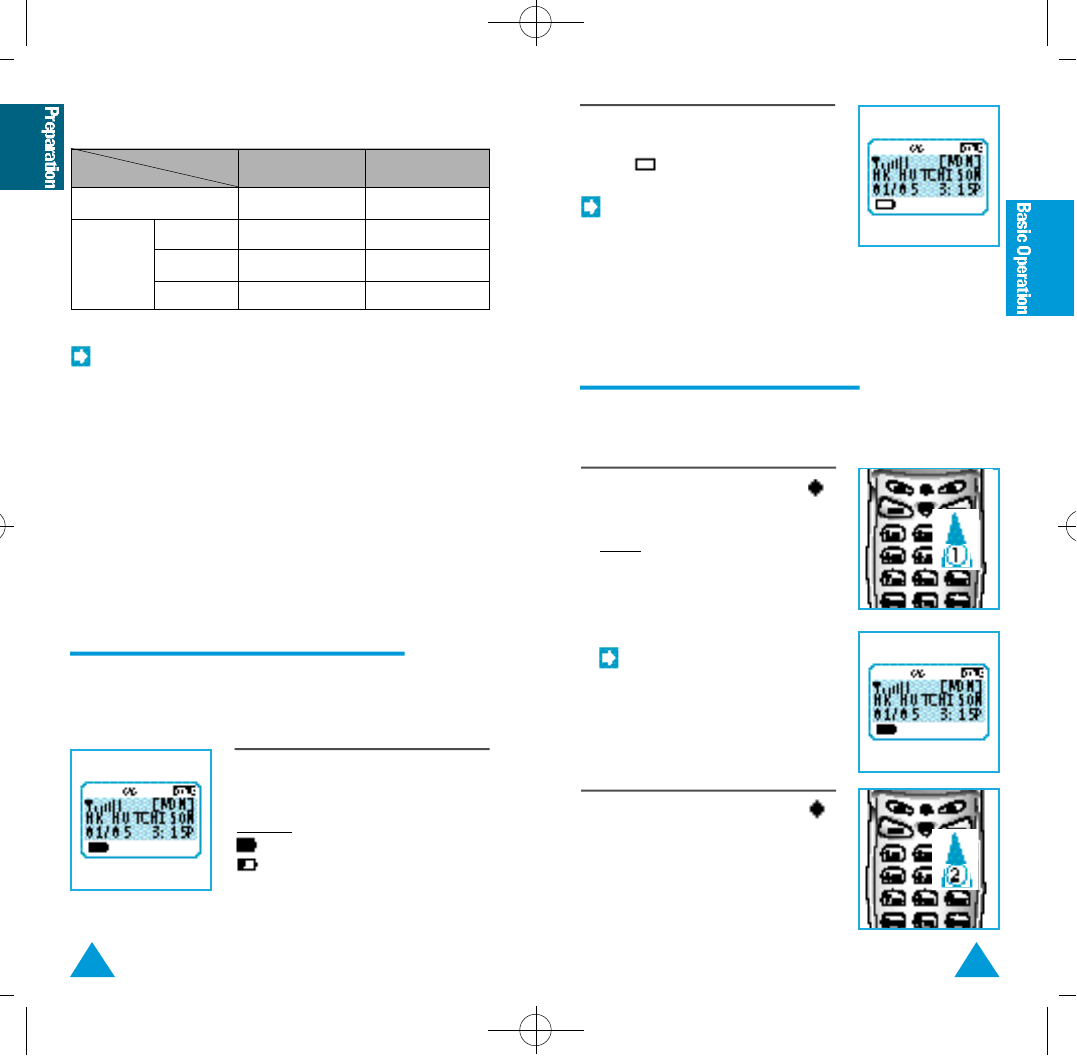
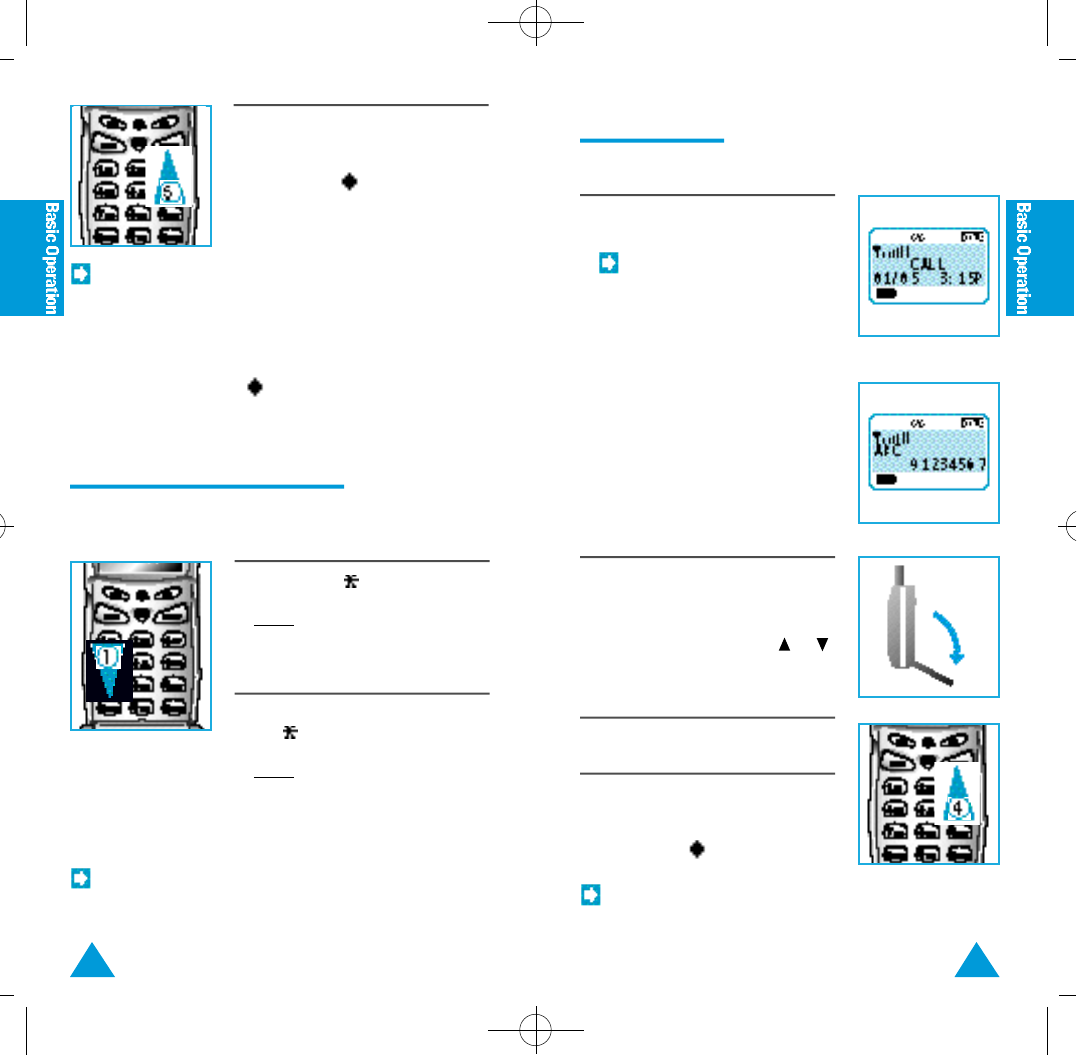
1. To turn on the phone, press END/
and hold.
Result: The phone
◆Beeps
◆Displays the greeting message, your
phone number, and current date and
time.
If the phone is locked, the
message LOCKED is displayed.
To unlock the phone, enter the
lock code. You can place a 3-digit
emergency call when the phone
is locked.
2. To turn off the phone, press END/
until you hear a beep tone.
Turning the Phone On and Off
The phone can only place and receive calls when it
is turned on.
12
•If any button is pressed in the low
battery status, the LCD backlight
lamp is not turned on.
• If the battery is fully discharged, a
warning tone sounds three times
and the power is turned off.
The number of blocks represents the
battery charge level.
Example:
Battery fully charged
Battery low
When the battery drops to a low level,
the phone beeps and the battery icon
turns to .
Checking the Battery Charge Level
The battery charge level is displayed at the left
corner of the LCD display.
•The operating time varies according to the service mode you
are using.
•If you stay in no-service area for a long time, the operating
time may be shorten.
•The standby time is different according to the service type
provided from the supplier.
•The battery is a consumable product, so that the battery life
will be reduced. We guarantee the battery for 6 months.
When the battery life is reduced by half, purchase new
battery.
◆When fully charged, the new battery will last as follows:
Talk mode about 120 min about 150 min
Standby
mode
SLOT 0 15-25 hr 25-35 hr
Battery Standard Extended
Status
SLOT 1 30-40 hr 40-55 hr
SLOT 2 50-70 hr 60-90 hr
SCH-570 (1-19) 10/26/98 9:00 AM Page 12
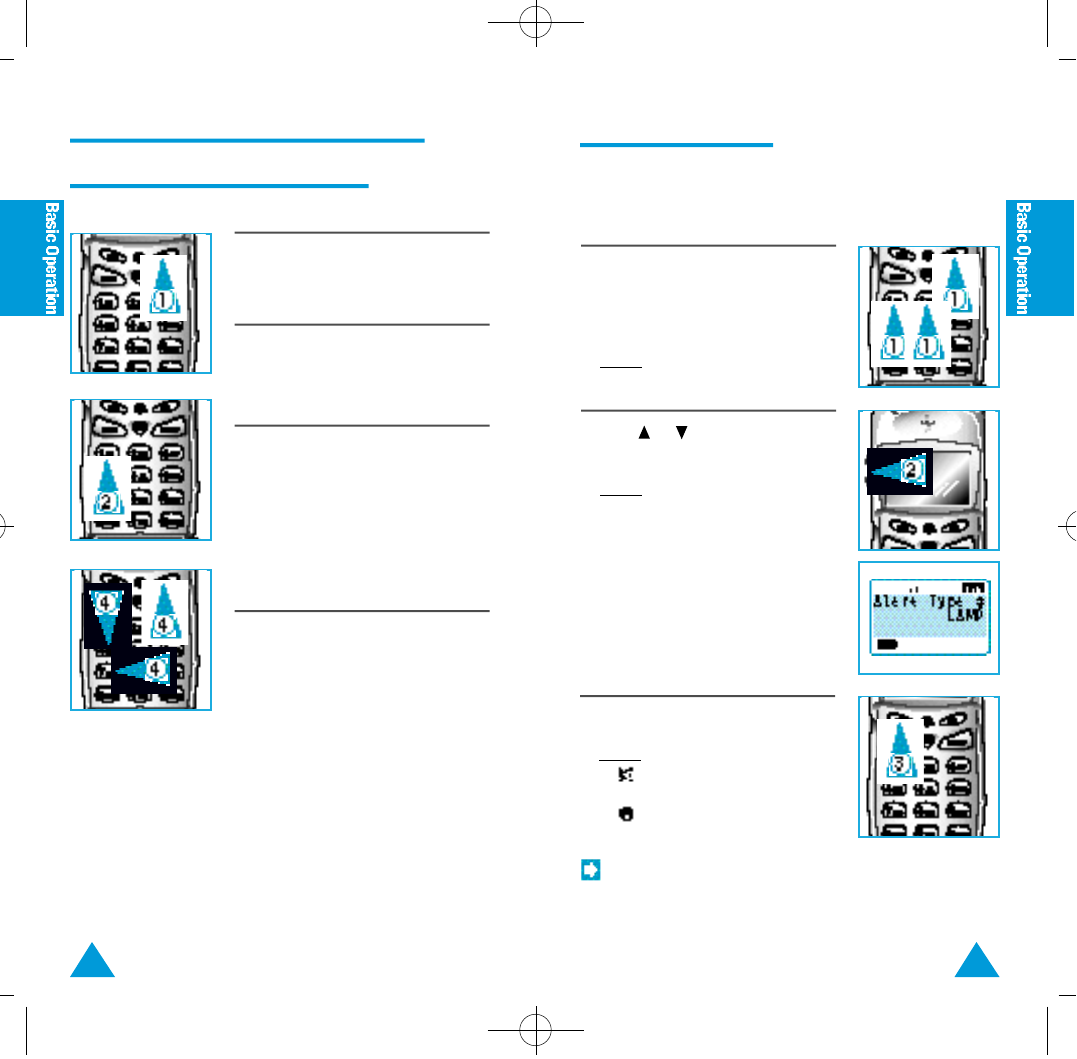
15
1. Open the cover, and enter desired
telephone number, including the area
code.
Result: The number entered is
displayed.
You can only make a call when the phone is turned
on.
2. If you make a mistake:
◆Press CLR once or more until the
incorrect digit or digits are cleared.
◆Continue entering your number.
To clear the whole number, press
CLR and hold.
3. When you have entered the whole
number, press SEND.
Result:
◆The number is dialed.
◆The I N U S E indication is displayed.
14
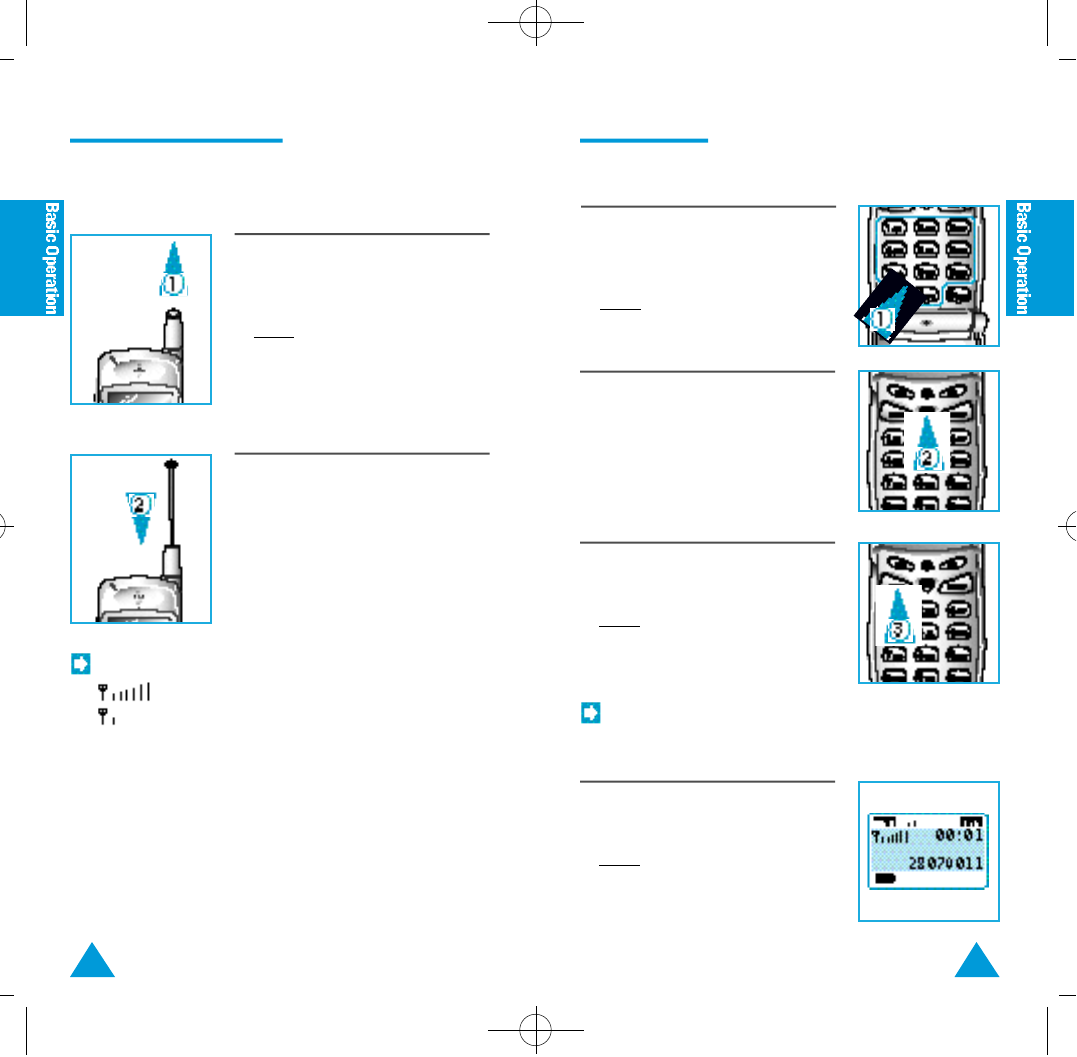
1. Grasp the knob on the end of the
antenna and carefully pull the
antenna out to its full extension.
Result: Reception quality is improved.
2. When you have finished the call,
push the antenna back in.
The signal strength is indicated on the display:
Strong signal
Weak signal If the connect tone feature is set, you can hear the connect
tone when your phone is connected to the basestation system
to make a call.
Extending the Antenna Making a Call
For best performance, extend the antenna fully
when you use the phone.
4. If the other party answers, begin the
conversation.
Result: Call time is displayed. For
further details, see ‘Call Time Display’
under ‘Automatic Feature Setup’ on
page 68.
SCH-570 (1-19) 10/26/98 9:00 AM Page 14
17
You can receive calls when the phone is turned on.
16
1. When there is an incoming call, the
phone rings.
• You can choose the alert type;
bell, vibrator, lamp, or
vibrator+bell. For details, see
page 21.
• If there are missed calls you
not answered, the number of
the calls appears on the first
line of the display.
•If the call is made on a cellular
phone the caller’s cellular
phone number is already stored
in your phone’s memory, your
phone displays the caller’s
number and name (if stored
with the number).
or
2. To answer the call:
If the cover is... Do...
Closed Open the cover
or Press or .
Already opened Press any button.
3. Begin the conversation.
2. To release the Silent mode, press and
hold again.
Result: The phone is reset to the alert
type previously chosen. The message,
for example, Change to BELL
m o d e is displayed.
4. When you have finished the call:
◆Close the cover
or
◆Press END/ .
If ‘Restrict Incoming Call’ feature is activated and there is an
incoming call, the message PAGE RESTRICTED is
displayed and you can not answer the call. For details, see
page 70.
If your party does not answer your call and you turn on the
automatic redial feature (see page 67), INUSE flickers and
REDIAL appears on the LCD. Your phone is automatically
redialing the number. When a call is connected using
automatic redialing, the phone rings once to alert you so that
you may begin conversation. If you do not want the number to
be redialed, press END/ .
5. When you have finished the call:
◆Close the cover.
or
◆Press END/ .
Receiving Calls
You can set the phone not to make any sound, for
example, ringer or keytone at the touch of a button.
Using One Touch Silent Mode
1. Press and hold in Standby mode.
Result: The phone vibrates with
message Change to Silent
m o d e in the display.
If you try to select alert type while the phone is under the
silent mode, Restricted by Silent mode
message is displayed and the phone returns to Standby mode.
SCH-570 (1-19) 10/26/98 9:00 AM Page 16

This feature allows you to mute the phone’s
microphone, so you can have a private
conversation with someone without the person at
the other end listening.
☞This function is only available during a telephone conversation.
19
1. Press FCN while you are over the
phone.
2. Press numeric button 3.
Result: The message M U T E is
displayed. The person you’re talking to
can no longer hear you, but you can
hear your correspondent.
3. Press FCN and numeric button 3
again when you wish to resume the
conversation with your party.
Result: The message M U T E
disappears on the display and you can
speak with your party.
Adjusting Volumes
You can adjust the volume of the sounds generated
on your phone by using the volume buttons ( )
on the left side of the phone.
Keytone Volume
☞This function is only available in standby mode.
Mute
Earphone Volume
☞This function is only available during a telephone conversation.
1. Press or until you reach the
desired volume level.
1. Press or until you reach the
desired volume level.
Ringer Volume
☞This function is only available in standby mode.
1. Press:
◆FCN
followed by
◆Numeric button 5
2. Press or until you reach the
desired volume level.
18
SCH-570 (1-19) 10/26/98 9:00 AM Page 18
21
1. Press:
◆FCN
followed by
◆Numeric buttons 2and 1.
Result: The alert type currently
selected is displayed.
You can choose a call alert type that informs you of
an incoming call. There are bell, lamp indication, or
vibration modes.
2. Press or until the desired mode
is displayed.
Result: The alert types you can choose
are displayed:
◆BELL : the bell sounds and the
receiving lamp flickers.
◆VIBRATOR : the phone vibrates and
the receiving lamp flickers.
◆LAMP : the receiving lamp flickers.
◆VIB+BELL : the phone vibrates
three times, then the bell sounds
and the receiving lamp flickers.
Recording the Other Person’s Talking
During Telephone Conversation
Choosing Alert Type
1. To record, press FCN during a
telephone conversation.
2. Press numeric button 1. The LCD
displays Recording.
3. The recording is stored in 30-second
memory, so it is recommened to
record shorter than 30 seconds. The
recording will stop automatically after
30 seconds.
4. To listen to the recording, press FCN
in Standby mode, then press numeric
buttons 4and 7.
3. Press STO.
Result:
◆appears if the LAMP mode is
selected.
◆appears if the VIBRATOR or
VIB+BELL mode is selected.
20
•When you use the hands-free kit, you cannot choose the
VIBRATOR, LAMP or VIB+BELL indication modes.
•The VIBRATOR and VIB+BELL mode are not available in some
countries.
SCH-570 (20-45) 10/26/98 9:01 AM Page 2
23
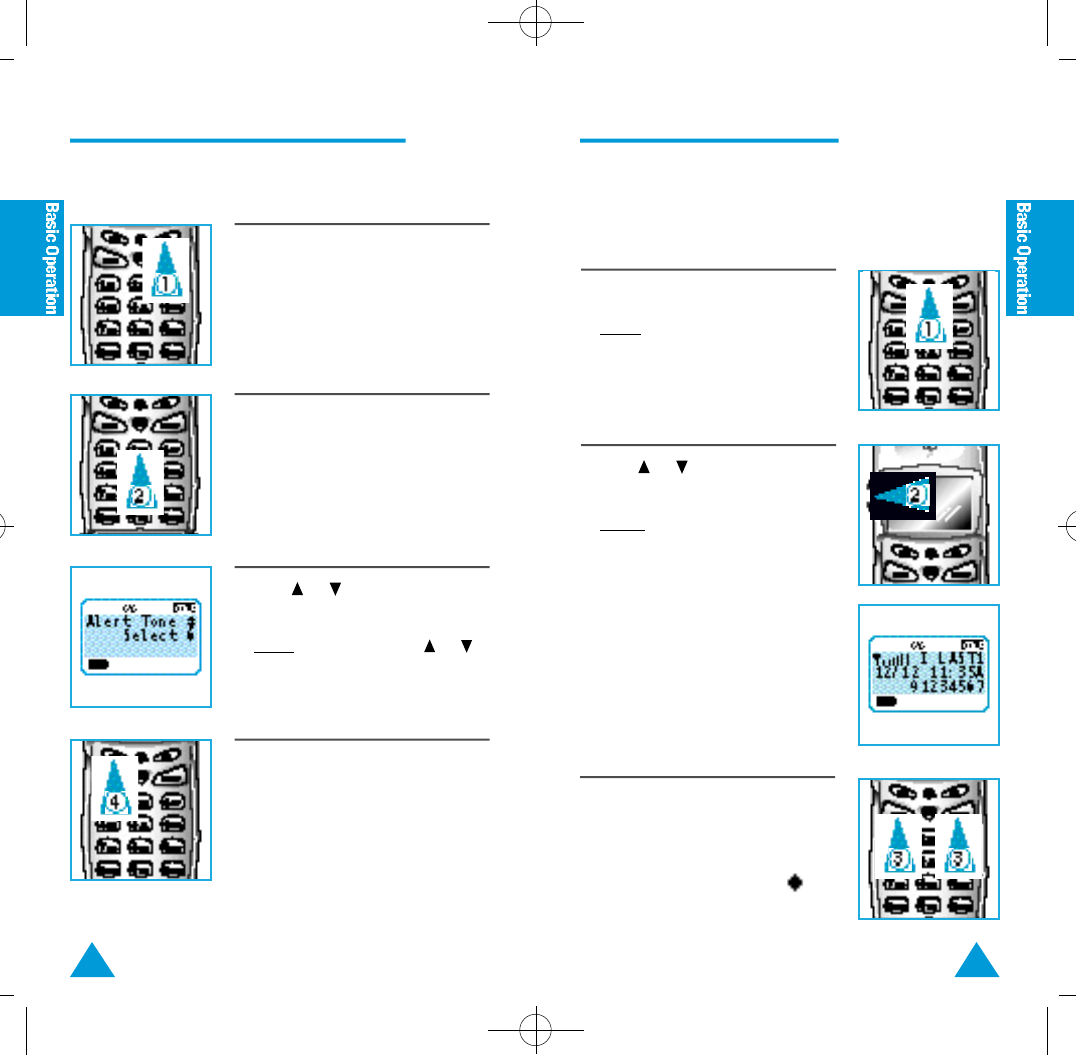
1. Press RCL twice.
Result: The last number and the time
you called or you received are
displayed.
2. Press or until the desired
number is displayed.
Result:
◆The last number is stored in ‘LAST
0’. The 10 recently called, received,
or missed numbers are displayed
from ‘LAST 0’ to ‘LAST 9’.
◆Each entry is preceded by one of
three letters; “I” for incoming, “O”
for outgoing, or “M” for missed call.
Choosing Ringer Bell
1. Press FCN.
You have a choice of 13 different ringer bells to
inform you of an incoming call.
2. Press numeric button 2twice.
3. Press or repeatedly until you
find the desired ringer bell.
Result: Each time you press or ,
a different ringer bell sounds.
4. Press STO.
3. To... Press...
Redial the number SEND
in the display
Exit this function END/
22
Redialing the Last Numbers
Your phone stores the last 10 calls you made and
received. You can scroll through the numbers and
easily dial the number.
To Scan and Redial
SCH-570 (20-45) 10/26/98 9:01 AM Page 4
25
To Erase All Numbers in Redial Memory
1. Press:
◆FCN
followed by
◆Numeric button 0
Result: You are asked to enter the lock
code.
2. Enter the current lock code.
The lock code is preset to 0000.
An asterisk ( ) is displayed for
each digit entered.
3. Press numeric button 8.
4. Press or to choose ‘YES’.
24
5. Press STO.
Result: The messages W A I T, and then
LAST CALLS ARE CLEARED
are displayed.
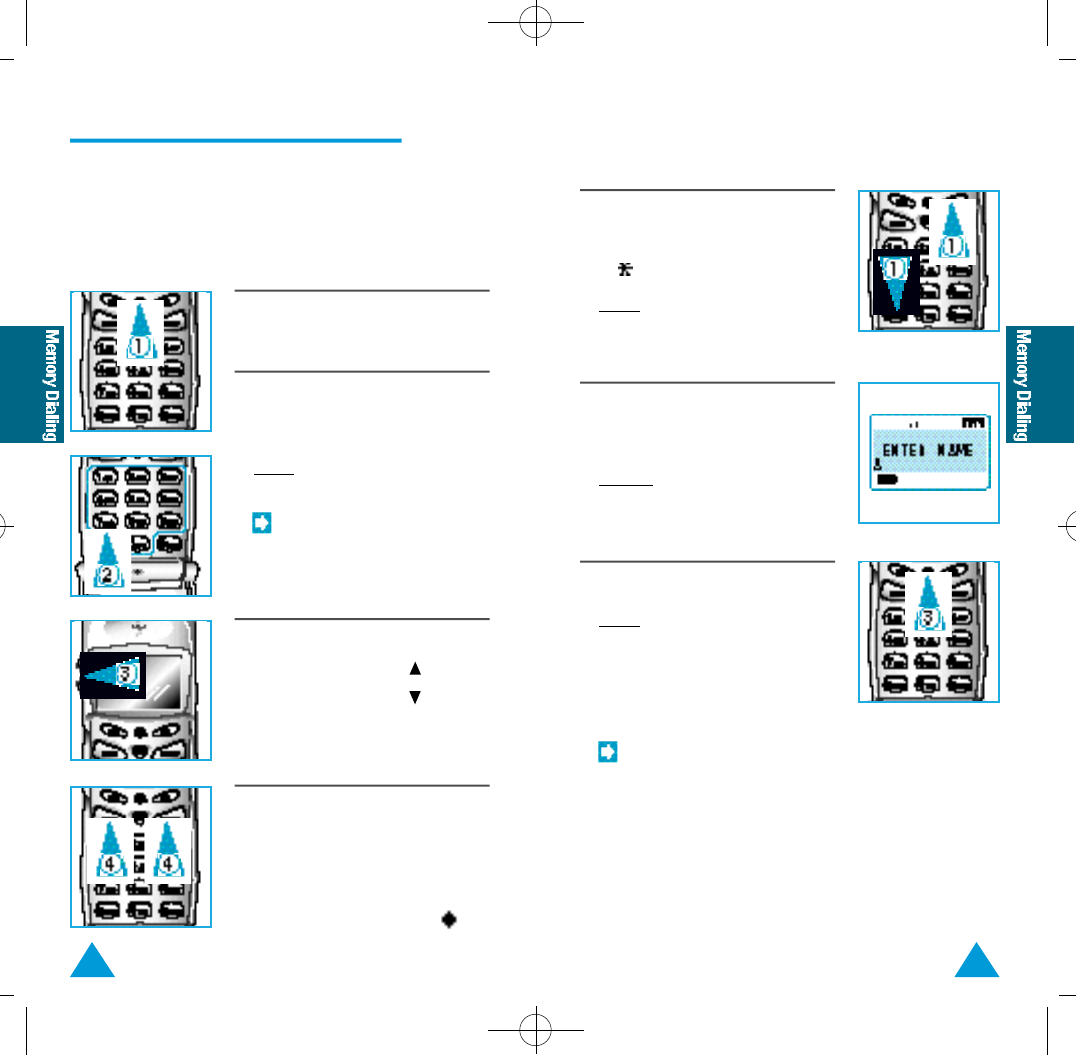
Finding an Empty Memory Location
You can search an empty memory location before
you store the phone numbers into the memory.
Any Empty Location
1. Press:
◆RCL
followed by
◆
Result: The message S E A R C H I N G
EMPTY MEMORY is displayed, then
empty locations are displayed.
2. Press or to display the other
available locations.
Empty Location Under a Specified Group
You can search an empty location under a specified
group. For details, see ‘Storing Numbers into
Numeric Group’ on page 30.
1. Press RCL.
2. Press:
◆Group number (0-7)
followed by
◆
Example: To search for an empty
location from 20 to 29, press numeric
button 2.
3. Press or to display the other
available locations.
SCH-570 (20-45) 10/26/98 9:01 AM Page 6

27
4. To enter the name, press the button
marked with the desired letter.
• For details on entering name,
see ‘Entering Name in Memory’
on page 28.
•If you do not wish to enter a
name, just skip over this step.
5. Press STO.
•If you are selecting a location between 0 and 9, precede that
number with a zero (0).
•If there is no empty location, the message MEM.(00-79)
IS FULL is displayed.
• If the message Memory Used! Store? YES is
displayed, a number has already been stored in the memory
location chosen. Press or :
To... Choose...
Replace it with the new one YES, then STO
Assign another location NO, then STO
•The customer service phone number is prestored to the
location 00 at factory. If you do not modify the location, you
can see CUSTOMER SVR and the service phone number
in the display while you are searching for numbers in
memory. For details on ‘Searching for Numbers in Memory’,
see page 32.
You can store the numbers that you dial frequently
in the memory for a convenient dialing.
◆Up to 80 numbers can be stored in memory location 00-79.
◆Memory locations from 00 to 09 are used for one-touch dial.
◆To help identify the numbers stored in the memory, you can
associate a name with each one.
26
1. Enter the desired telephone number
of up to 31 digits including the area
code.
Result: The numbers entered are
displayed.
2. Press STO.
Result: The LCD displays a message to
enter a memory location number.
3. To... Press...
Assign a specific 2-digit location
location number between
00 through 79
Store the number
in the first
available location
Storing Numbers in Memory
SCH-570 (20-45) 10/26/98 9:01 AM Page 8
29
1. Start when the LCD prompts to enter
name.
2. Press the number button marked with
the desired letter.
Result: The first letter marked on the
button is displayed. For example press
5for the letter ‘J’.
3. If necessary, press the same button
until you find the desired letter.
4. When the desired letter appears,
press another number button marked
with the next desired letter.
Result: The cursor moves to right and
displays the next letter chosen.
28
Entering Name in Memory
Names of up to 12 letters can be stored together
with phone numbers in the memory.
Correcting a Name or Number
If you make a mistake while entering a name or
number, you can correct it in the following way.
1. To correct a letter or digit:
◆Press CLR once or more until the
incorrect letter or digit is cleared.
◆Continue entering your name or
number.
2. To clear the whole name or number,
press CLR for more than one second.
5. Repeat steps 3 and 4 for each letter.
If you press and #, the cursor
moves to the left and right. Use
these buttons to correct a wrong
letter or insert a space between
the letters.
SCH-570 (20-45) 10/26/98 9:02 AM Page 10
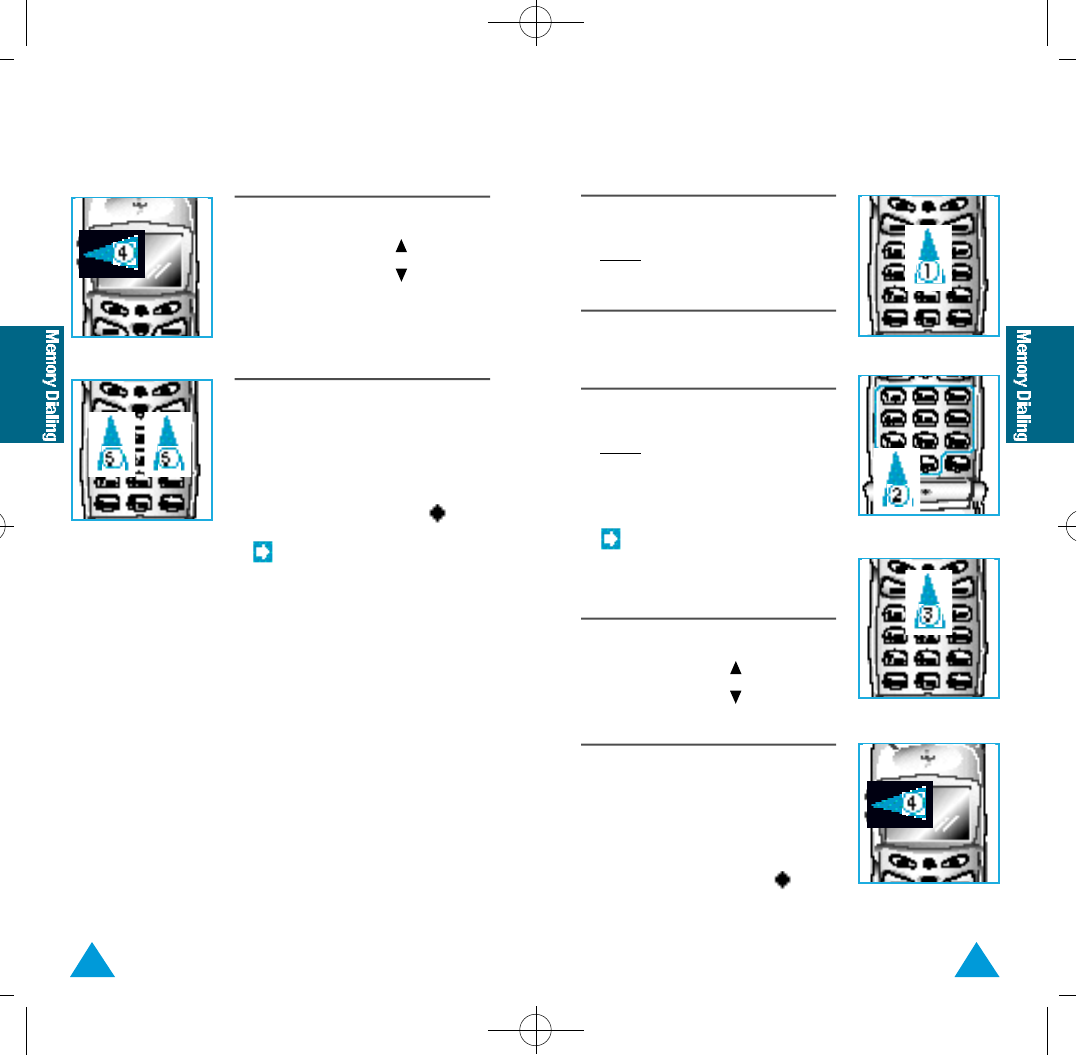
31
1. Enter the desired telephone number,
including the area code.
Result: The number entered is
displayed.
2. Press STO.
Result: The LCD prompts to enter
memory location number.
5. Press STO.
3. Enter the location group number (0-7).
0: From 00 to 09
1: From 10 to 19
2: From 20 to 29
. .
. .
. .
. .
7: From 70 to 79
4. Press .
• If there is no empty location,
the message MEM.(X0-X9)
IS FULL is displayed.
•If you want to enter a name,
enter the name. For details,
see ‘Entering Name in
Memory’ on page 28.
Storing Numbers into Numeric Group
You can store the associated numbers in a group.
Example:
◆individual phone numbers ; 00-09
◆office phone numbers ; 10-19
◆business phone numbers ; 20-29
30
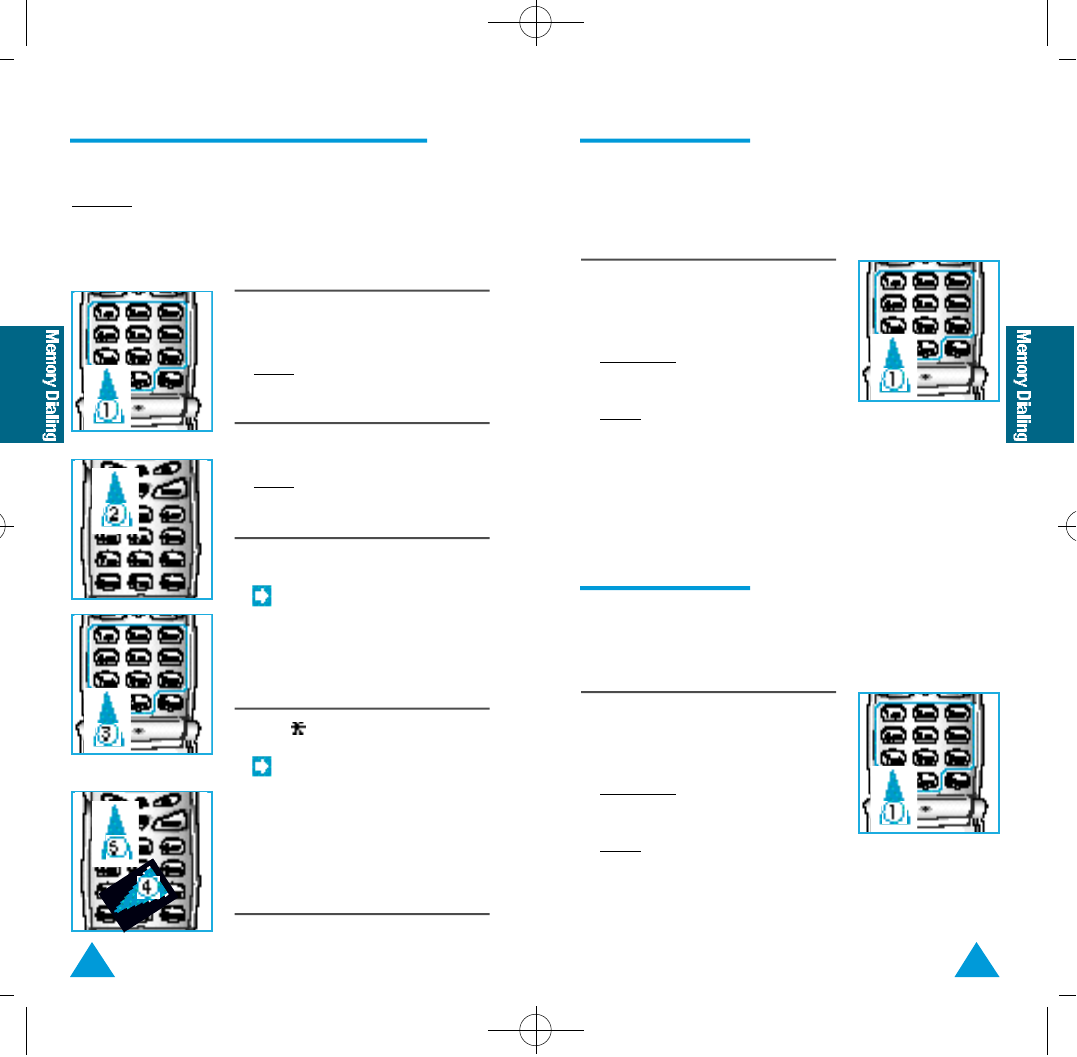
One-Touch Dialing
Memory locations 00 to 09 are special one-touch
locations. You can dial the phone numbers stored in
the memory from 00 to 09 simply by pressing one
button.
1. Press and hold the second digit of the
memory location containing the
number to be dialed.
For example: Location no.09
Press 9and hold.
Result: The number stored is
◆Displayed
◆Dialed
Two-Touch Dialing
Once you have stored phone numbers in the
memory, you can dial them easily whenever you
want.
1. Press the first digit briefly, then hold
down the second digit of the memory
location.
For example: Location no.23
Press 2briefly and hold down 3.
Result: The number stored is
◆Displayed
◆Dialed
SCH-570 (20-45) 10/26/98 9:02 AM Page 12
33
By Location Number
By Name
1. Press RCL.
2. Enter the number of the memory
location at which you wish to start
the scan.
Result: The phone number and
associated name (if any) are displayed.
If the location is empty,
LOCATION EMPTY is
displayed.
3. To display the... Press...
Next memory location
Previous memory
location
4. When you have found the desired
number:
To... Press...
Make the call SEND
Exit the function END/
Searching for Numbers in Memory
If you do not remember which telephone numbers
have been stored in the various memory locations,
you can scan through the locations until you find
the one you are looking for.
32
1. Press:
◆FCN
followed by
◆
Result: The messages SORT NAMES
and then ENTER NAME are
displayed.
2. Enter all or the first part of the name
to search by using the number button
marked with the desired letter.
Example: Enter A to find all names
beginning with the letter A.
3. Press RCL.
Result:
◆The number of the name matching
the request is displayed.
◆The first name is displayed with:
• The memory location number
• The telephone number
• If the message NAME NOT
FOUND is displayed, the name
matching the request is not in
the memory.
• If the message NO STORED
NAME is displayed, the
number stored with the name
is not in the memory.
SCH-570 (20-45) 10/26/98 9:02 AM Page 14
35
4. To display the... Press...
Next name
Previous name
5. When you have found the desired
number.
To... Press...
Make the call SEND
Exit the function END/
This feature is also available
while you are over the phone.
34
By Partial Phone Number
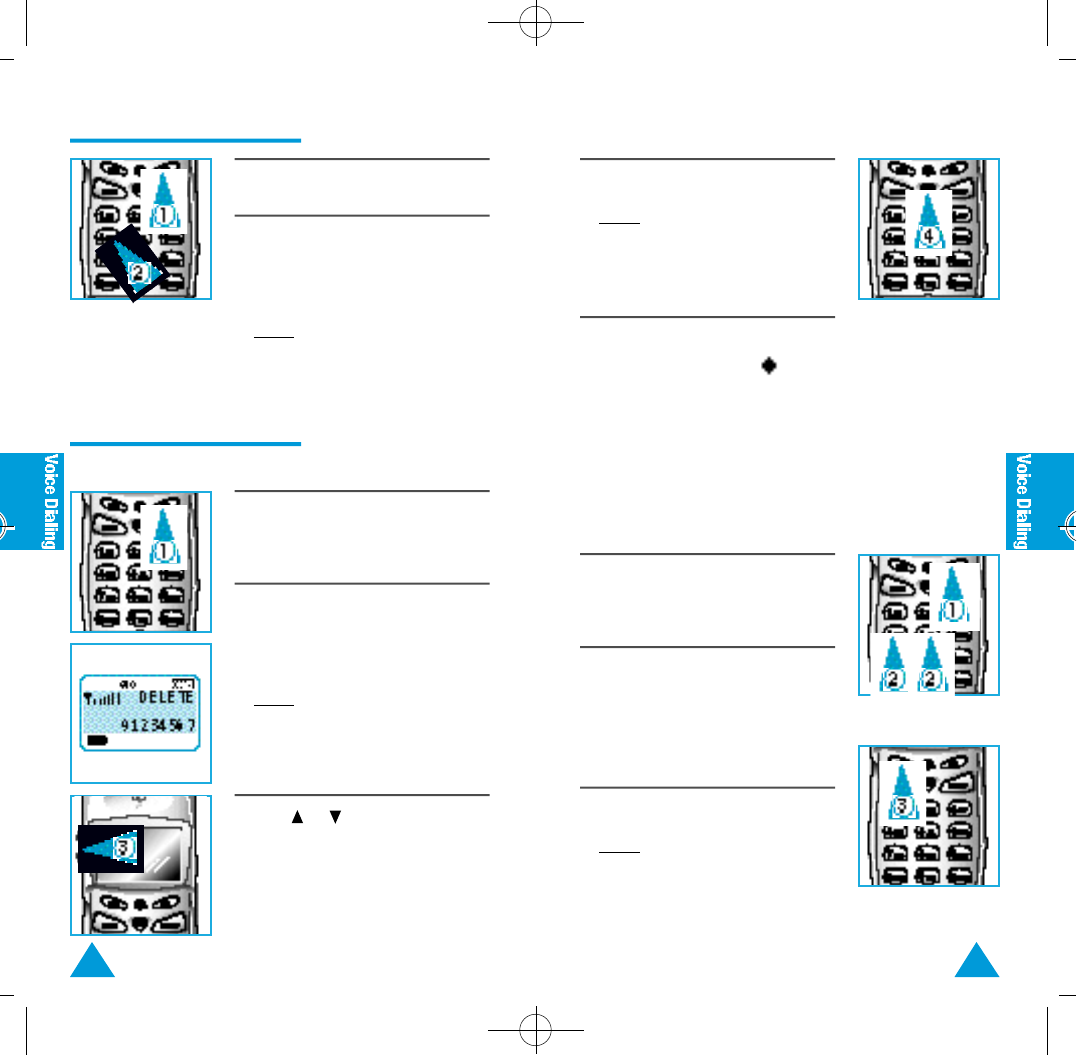
1. Press CLR and hold.
Result: The number on the display is
erased.
2. Enter part of the phone number you
remember.
3. Press RCL.
Result: The first number matching the
request is displayed with:
• memory location number
• name (if any)
‘NO MATCH NUMBER’ is
displayed if there is no number
matching the request.
4. To display the... Press...
Next number
Previous number
5. When you have found the desired
number.
To... Press...
Make the call SEND
Exit the function END/
SCH-570 (20-45) 10/26/98 9:02 AM Page 16
37
If you store a new number into an occupied
location, the new number replaces the old number
automatically. If you want to delete the old number
without storing a new one, do the following:
To Erase a Specific Number
36
1. Press CLR and hold.
Result: The telephone number on the
display is erased.
2. Press STO.
3. Enter the location number under
which the phone number you want to
erase is stored.
4. Press or :
To... Choose...
Erase the location YES
Choose another location NO
5. Press STO.
Result: The stored phone number is
erased and the message C L E A R E D is
displayed.
Erasing Numbers in Memory
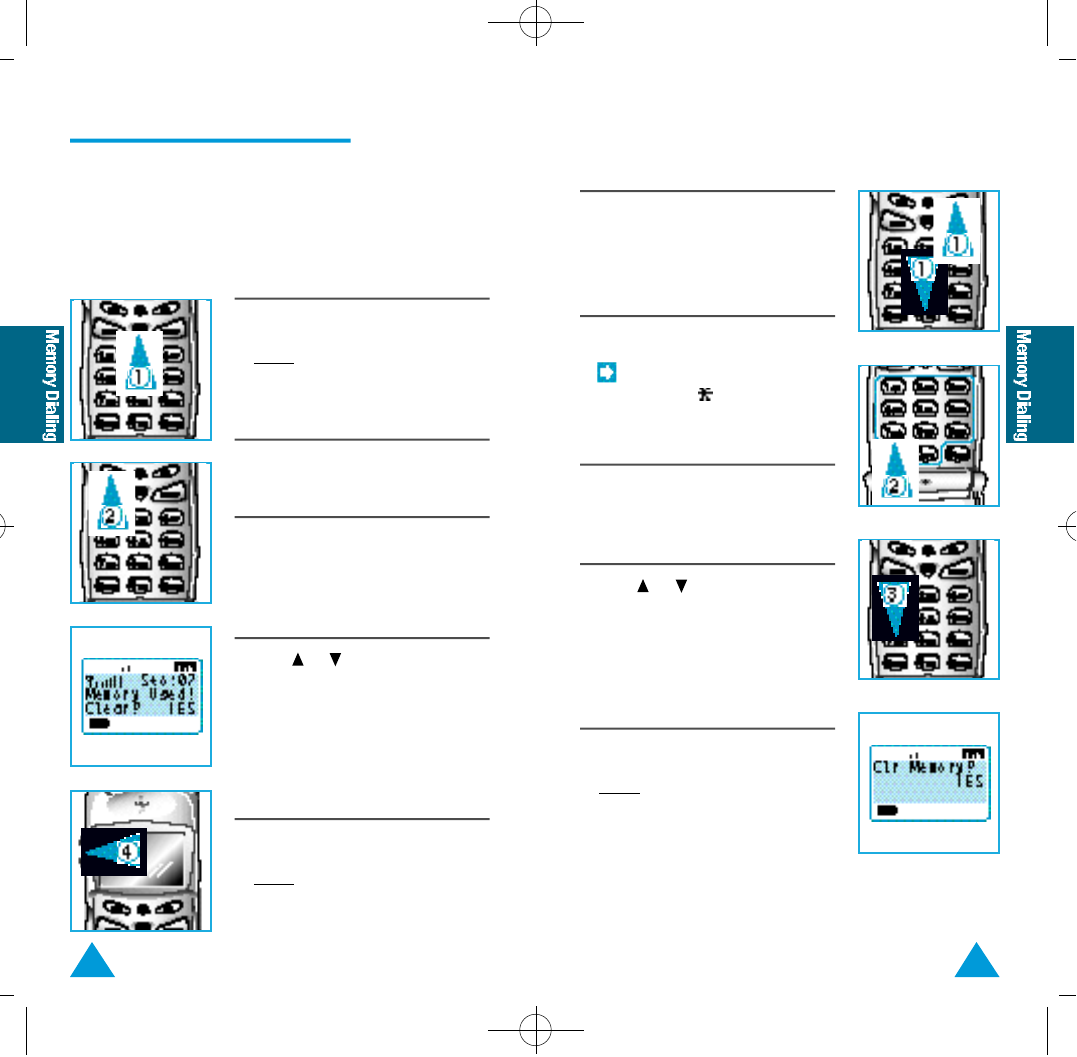
To Erase All Numbers in Memory
1. Press:
◆FCN
followed by
◆Numeric button 0.
2. Enter the lock code.
The lock code is preset to 0000.
An asterisk ( ) is displayed for
each digit entered.
3. Press numeric button 7to choose ‘Clr
Memory’ function.
4. Press or :
To... Choose...
Erase all numbers YES
Cancel this operation NO
5. Press STO.
Result: The message A L L
MEMORIES ARE CLEARED is
displayed.
SCH-570 (20-45) 10/26/98 9:02 AM Page 18
39
This feature allows you to dial a phone number just
by saying a name into the phone. To use this
feature, you have to record name and phone
number (up to 20) into the phone.
1. Press FCN.
2. Press:
◆Numeric button 4
followed by
◆Numeric button 1
Result: Your phone announces ‘Please
say name’.
4. Say the name again.
Result: Your phone plays back the
name and announces ‘Please enter
phone number, then press the “STO”
button.’
If the phone fails to recognize the
name correctly, it announces
‘Please say name again.’
3. Say the desired name.
Result: Your phone plays back the
name, then announces ‘Please say
name again’ to confirm the name.
38
5. Enter the desired phone number.
Recording Name
Voice Dialing
6. Press STO.
Result: The phone announces ‘Saved’
when recording is finished
successfully.
If the phone announces ‘Your
instruction can not be processed.
Please try again’, recording is not
completed properly. Try to record
the name again.
◆Avoid recording similar names phonetically. If you record a
similar name to the one already in memory, the phone
announces ‘Please try another name since a similar name
already exist.’
◆Avoid recording in a noisy place.
◆Speak clearly and naturally.
◆The person who will use the phone should record the name. The
phone does not recognize the name if the voice sounds
differently.
◆Avoid too long or short name. It is recommended to contain 2 to
5 syllables.
◆If this feature does not work properly, erase the name, and
record with another name.
◆It is recommended to practise several times to obtain best
result.
◆You can record up to 20 names. If you record more than 20, the
phone announces ‘Memory is full.’
Tips on Recording Name
SCH-570 (20-45) 10/26/98 9:02 AM Page 20
41
1. Press FCN.
2. Press:
◆Numeric button 4
followed by
◆Numeric button 4
Result: Your phone plays the recorded
name.
40
Checking Recoded Name
4. Press CLR when you find the name.
Result: Your phone announces
‘Deleted’, then you hear the next
name.
5. To... Press...
Exit the function END/
Erase another one Repeat Steps 3-4.
All Names
1. Press FCN.
2. Press:
◆Numeric button 4
followed by
◆Numeric button 5
3. Press STO.
Result: Your phone sounds a long beep
and all names are deleted.
1. Press FCN.
2. Press:
◆Numeric button 4
followed by
◆Numeric button 3
Result: Your phone announces ‘Press
the “CLR” button, if you want to delete
a name.’
3. Press or repeatedly until you
find the one you want to delete.
Erasing Recorded Name
A Particular Name
SCH-570 (20-45) 10/26/98 9:02 AM Page 22
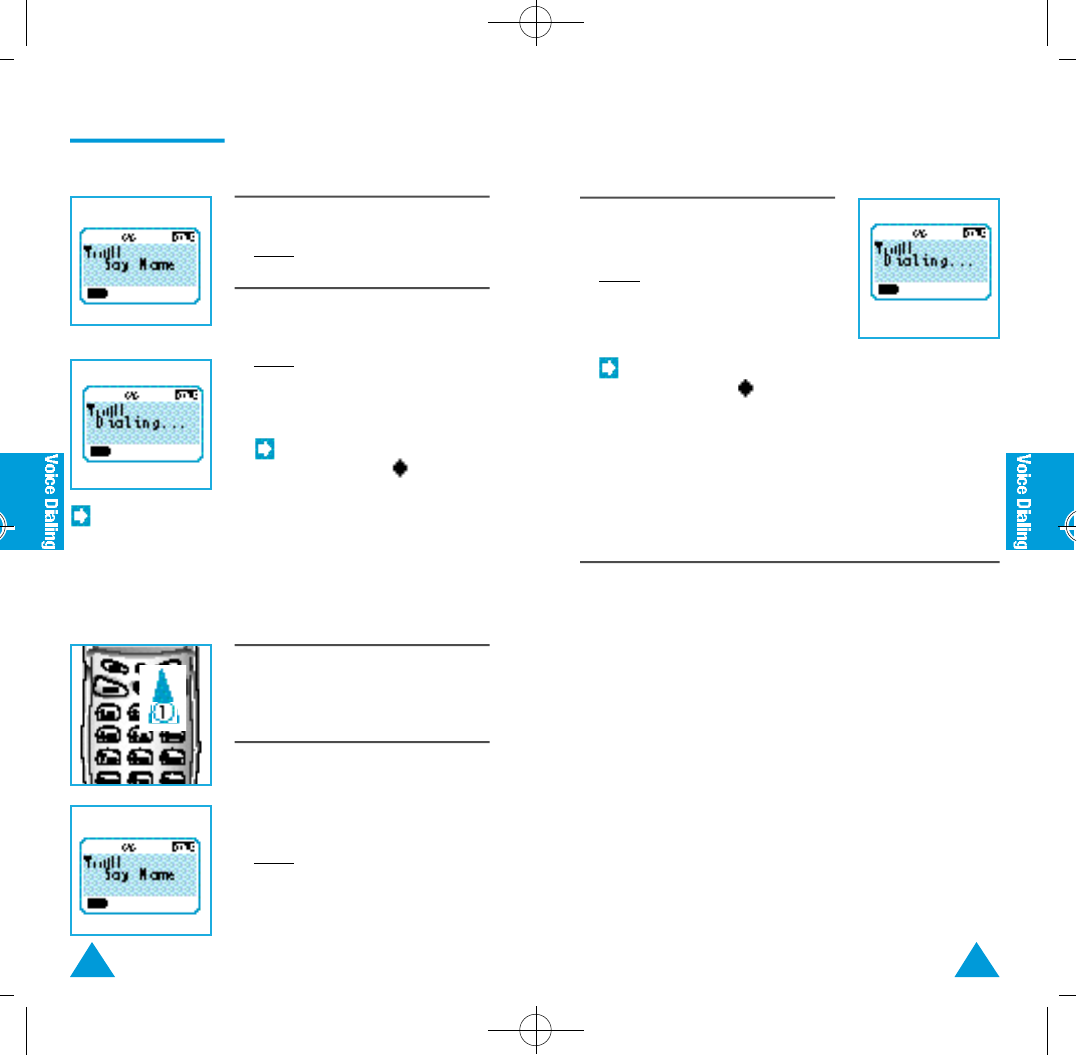
43
1. Open the cover.
Result: Your phone announces ‘Please
say name.’
2. Say the name you want to make a
call.
Result: Your phone plays the name and
announces ‘Calling in progress’, then
dials the number stored with the
name.
If the phone plays a different
name, press END/ and start
over again.
• To activate automatic voice dial mode, you have to turn the
automatic voice dial feature on. See page 44.
• You can dial a phone number using number keypad when
you hear ‘Please say name.’
Using Voice Dial
In Automatic Mode
42
1. Press FCN.
2. Press:
◆Numeric button 4
followed by
◆Numeric button 2
Result: Your phone announces ‘Please
say name.’
In Manual Mode
3. Say the name you want to make a
call.
Result: Your phone plays the name and
announces ‘Calling in progress’, then
dials the number stored with the
name.
If the phone plays a different
name, press END/ and start
over again.
Tips on Using Voice Dial
◆Speak clearly and naturally. If you sound the name in a different
tone from the one you recorded, the phone does not recognize
the name. The phone announces ‘Please say name again.’ If you
fail several times, the phone announces ‘Your instruction can
not be processed. Please try again’.
◆Avoid using in a noisy place. If not, the phone announces
‘Please retry in a quiet place.’
◆If you do not speak name within a specified time, the phone
will beep and the message Time over will be displayed.
SCH-570 (20-45) 10/26/98 9:02 AM Page 24
4. To turn on the keytone, press:
◆FCN
followed by
◆Numeric button 4.
Result: The message S I L E N T
disappears and the keytone sounds.
If you want to call for ARS
service or pager, you have to
turn on the keytone.
4544
To Turn On/Off Automatic Voice Dial Feature
1. Press FCN.
2. Press:
◆Numeric button 4
followed by
◆Numeric button 6
3. Press or :
To... Choose...
Turn the feature on YES
Turn the feature off NO
4. Press STO.
Keytone
You can press a number during conversation
without transmitting the annoying beep tones to
the person to whom you are speaking.
☞This function is only available during a telephone conversation.
1. Press FCN while you are over the
phone.
2. Press numeric button 4.
Result: The message S I L E N T is
displayed.
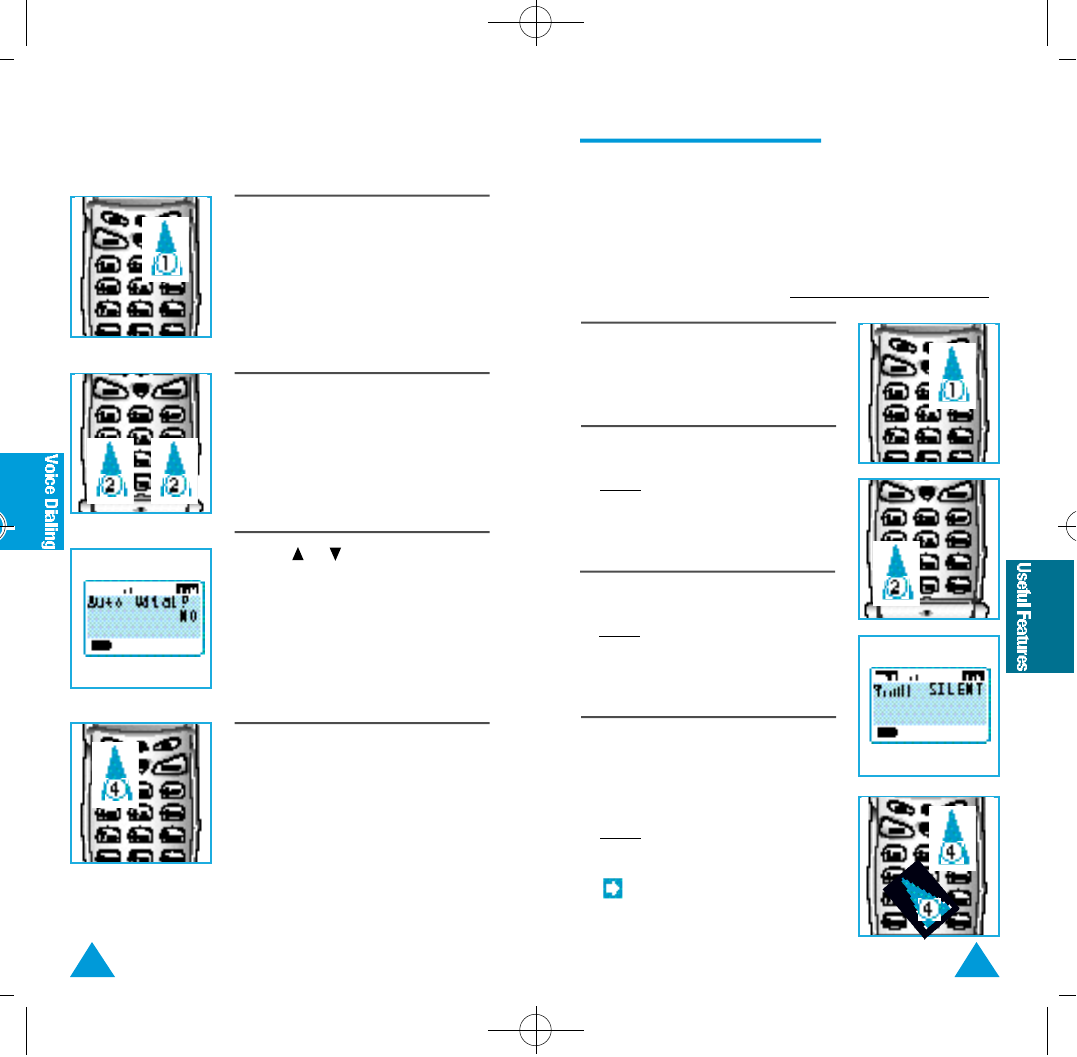
Turning Tones On and Off
3. Enter the desired number.
Result: You and your party are not
annoyed with the keytone.
SCH-570 (20-45) 10/26/98 9:03 AM Page 26
4746
Call Release Tone
This feature enables the phone to sound a release
tone when a call is released. When you purchase
your phone, the release tone is preset to ‘NO’.
1. Press FCN.
2. Press:
◆Numeric button 1
followed by
◆Numeric button 7.
3. Press or to:
To... Choose...
Turn the feature on YES
Turn the feature off NO
4. Press STO.
1. Press FCN.
2. Press:
◆Numeric button 1
followed by
◆Numeric button 8.
3. Press or to:
To... Choose...
Turn the feature on YES
Turn the feature off NO
Connect Tone
This feature enables the phone to sound a
connection tone when your phone is connected to
the basestation system to make a call. When you
purchase your phone, the connection tone is preset
to ‘NO’.
4. Press STO.
SCH-570 (46-71) 10/26/98 9:04 AM Page 2
4948
1. When the pager asks you to enter
your phone number after calling
paging system, press:
◆FCN
followed by
◆Numeric button 9.
Result: ‘SENDING DTMF’ appears
in the display. While the message
blinks several times, your phone
number is dialed automatically.
Sending Your Own Phone Number
You can send your phone number with a simple
press of buttons.
☞This function is only available during a telephone conversation.
1. Press:
◆RCL
followed by
◆#
Result: The message PHONE #: and
your own phone number are displayed.
If you have your own phone
numbers more than one number,
press or to check the next
number.
Displaying Your Own Phone Number
You can check your own phone number.
1. Press FCN.
2. Press:
◆Numeric button 6.
3. Press or repeatedly until the
desired mode is displayed. See
‘System Mode’.
4. Press STO.
System Mode
System A Only : Your phone will
use only system A.
System A is preferred :
Your phone will seek service on system
A. If the call cannot be completed, the
phone will automatically seek service
on system B.
System B Only : Your phone will
use only system B.
System B is preferred :
Your phone will seek service on system
B. If the call cannot be completed, the
phone will automatically seek service
on system A.
Home System Only : Your phone
can place and receive calls only on your
home system. Roaming in other cities is
not possible.
System Selection
The system selection feature of your phone enables
you to choose which of the system providers you
will use.
SCH-570 (46-71) 10/26/98 9:04 AM Page 4

5150
◆By displaying ‘NEW *Voice
Mail*’, ‘NEW *Text Msgs* ’,
or ‘NEW * Page * ’ message.
◆By sounding alert tone once or every
2 minutes (if the ‘SMS Alert’ is
turned on. See page 54.)
◆By displaying at the bottom of
the LCD display.
This feature allows the phone to receive
alphanumeric messages or voicemails. Contact
your service provider for availability of this feature.
• Your phone can receive up to 10 text messages or one voice
mail.
•Each message can contain a maximum of 160 alphanumeric
characters.
•The messages are stored in the order they were received.
Finding Out You Have a Message
Your phone alerts you when you have new
voicemail or text messages in several ways:
• If the message is urgent, ‘URGENT!’ is displayed instead
of ‘NEW’.
•If a caller left a callback number, your phone displays the
number.
•If the memory is full with messages, ‘Memory Full !’
is displayed. You must erase the old messages to receive a
new message.
Message Service
To Retrieve Messages in Voicemail
1. Press:
◆FCN
followed by
◆Numeric button 7.
Result:
◆Your phone displays the message
options you can choose;
1 : V o i c e,2 : T e x t,3 : E r a s e
A l l,4:SMS Alert. Use or
to see the option hidden in the
display.
◆The total number of new messages
is also displayed.
2. To listen to new or saved messages,
press the numeric button 1.
Result: Your phone displays:
◆Total number of messages stored in
the voicemail center
◆Date and time the message was
received
3. Press SEND.
Result: Your phone calls and connects
to the Voice Mail center.
4. You can check the voicemails by
following the directions provided by
your service provider.
SCH-570 (46-71) 10/26/98 9:04 AM Page 6

5352
1. Press:
◆FCN
followed by
◆Numeric button 7.
Result:
◆Your phone displays the message
options you can choose;
1 : V o i c e,2 : T e x t,3 : E r a s e
A l l,4:SMS Alert. Use or
to see the option hidden in the
display.
◆The total number of new messages
is also displayed.
2. To read the text messages, press the
numeric button 2.
Result: Your phone displays:
◆Date and time the message was
received
◆Callback number (if a caller left)
3. Press or to scroll through the
available messages.
4. After you read the message:
To... Press...
Display the Numeric
previous message button 7
Display the next Numeric
message button 9
Erase the message CLR
Exit this function END/
To Read Text Messages
1. When you’re reading a text message,
if the person who called you left a
callback number, your phone displays
the page number.
2. You can return the call
instantaneously by pressing SEND.
Callback
1. Press:
◆FCN
followed by
◆Numeric buttons 7and 3.
2. To... Press...
Erase all messages CLR
Cancel and exit END/
this function
To Erase All Messages
SCH-570 (46-71) 10/26/98 9:04 AM Page 8
5554
1. Press:
◆FCN
followed by
◆Numeric buttons 7and 4.
2. Press or until you find the
desired alert type.
Result: There are three receiving alert
modes (O F F,O N C E,EVERY 2
M I N) available.
3. Press STO.
1. Press:
◆FCN
followed by
◆Numeric buttons 3and 2.
2. Press numeric button 1to choose
‘Set’.
3. Press or to choose the alarm
mode.
Result: Each time you press or ,
ONE TIME or D A I L Y is
alternatively displayed.
◆ONE TIME : Alarm will be
activated one time.
◆D A I L Y : Alarm will be activated
on a specified time every day
unless you release the alarm
feature.
4. Press STO.
Result: If any alarm time is already set,
the message ALARM TIME and the
appointed time are displayed.
5. Enter the time you want to set.
Result:
◆If the current time is already set,
you can specify the alarm time.
Enter the hour and minute.
◆If the current time is not set, enter
the time duration your phone has to
wait in minutes.
If you enter the invalid number,
move the cursor to the desired
digit by pressing or #and
correct the number.
To Set AlarmTo Choose Alert Type for Message Receiving
When a message is received, the phone can alert
you with the alert type chosen every 2 minutes
until the message is checked.
You can set the phone to sound an alarm at an
appointed time. If you set an alarm time, the phone
will sound an alarm automatically at the appointed
time.
Setting Alarm
SCH-570 (46-71) 10/26/98 9:04 AM Page 10

5756
6. Press STO.
• The phone will beep and the
message -ALARM- will be
displayed at the appointed time.
• To stop a beep tone, open/ close
the cover, or press any button.
Otherwise the beep tone will
stop automatically after 3
minutes.
1. Press:
◆FCN
followed by
◆Numeric buttons 3and 2.
2. Press numeric button 2to choose
‘Release’.
3. Press or to choose ‘YES’.
4. Press STO.
To Release Alarm
If you turn the phone off, then on when alarm is set:
If the alarm time is appointed... Alarm setup...
At the current time mode Remains to be on.
Using time duration (in minute) mode Cancels.
DTMF Dialing
This feature allows you to utilize additional phone
services, such as accessing an alternate long
distance network, signaling pager, or banking by
phone. The following two features will make it
easier to send DTMF tone.
If SILENT is displayed, turn on the keytone. See ‘Turning
Tones On and Off’ on page 45.
Using Memory
If you want to use this feature, store the numbers
(ID code, credit card number, etc) in a memory
location.
1. After you call the service, press RCL
when the service asks to enter the
DTMF code.
2. Enter the location number to be
dialed.
Example: ◆Credit card number
◆Password
Result: The number stored in the
location is displayed.
3. Press:
◆FCN
followed by
◆SEND
SCH-570 (46-71) 10/26/98 9:05 AM Page 12

5958
1. Press FCN.
2. Press numeric buttons 3and 1.
Result: The cities you can choose are
displayed as follows:
Hongkong, Bangkok, Beijing, Cairo,
Caracas, Chicago, Denver, Honolulu,
London, Los Angeles, Moscow, New
Delhi, NewYork, Paris, Rangoon, Rio de
Janeiro, Rome, Samoa, San Francisco,
Seoul, Sydney, Tokyo, Teheran,
Wellington.
3. Press or until you find the
desired city.
Result: You can check the time of 24
cities.
Using Pause
You can insert a pause once or more between the
DTMF tones. You can dial up to 36 digits including
the pause.
1. Enter the phone number of the
service that you wish to access.
2. Press:
◆STO
followed by
◆#
Result: The pause indication ‘p’ is
displayed after the phone number.
3. Enter the number to be dialed in
DTMF.
5. Press SEND again.
If a pause is inserted more than
once, press SEND repeatedly to
transmit the next number after
the pause.
4. Press SEND.
Result: When the special service
answers, you hear the announcement
to enter the numbers.
Your phone provides versatile features related with
timer as follows:
◆Checking World Time
◆Setting Current Time
◆Checking Last Call Time
◆Checking Cumulative Air Time
◆Clearing Cumulative Air Time
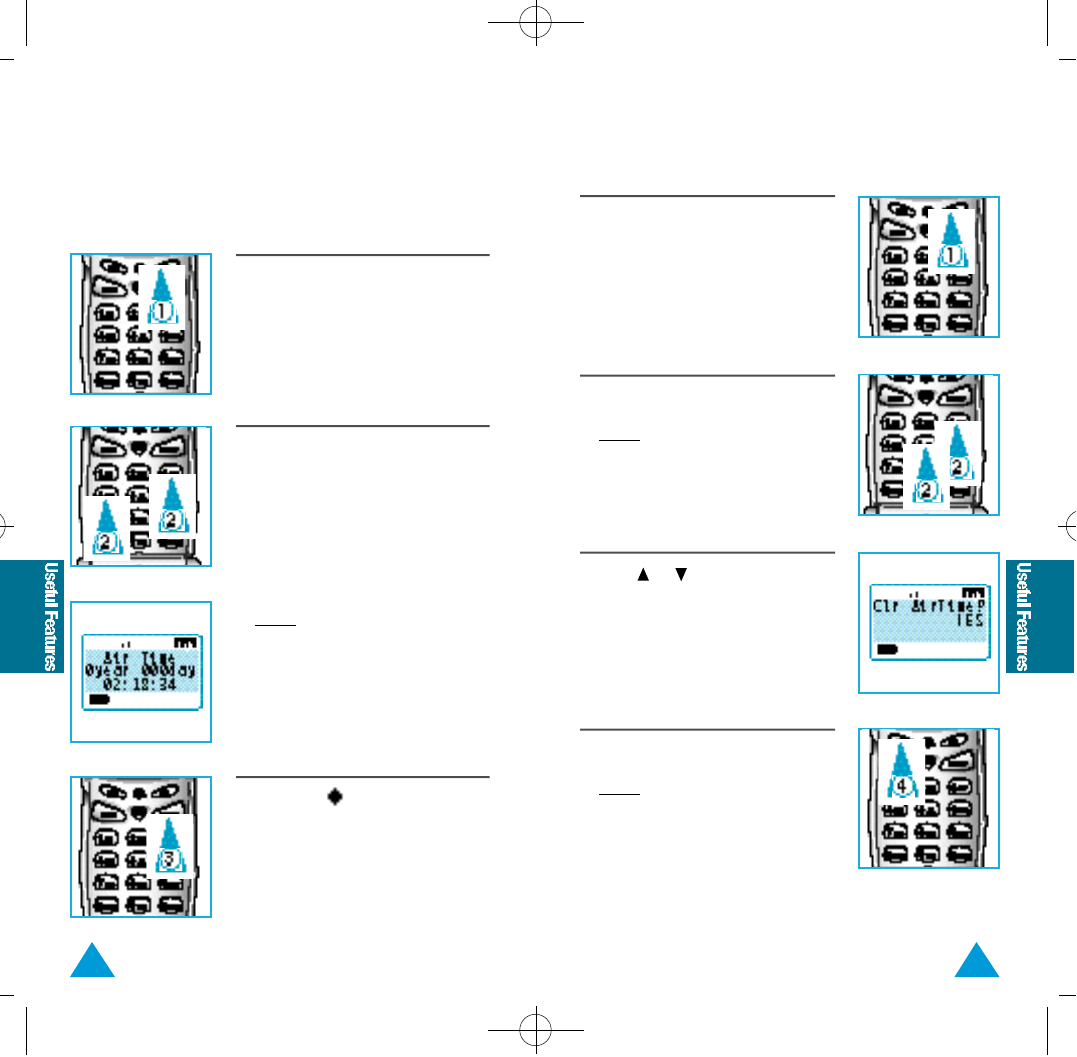
To Check World Time
Timers
SCH-570 (46-71) 10/26/98 9:05 AM Page 14

6160
4. Enter the desired city number.
Result: The current time of the desired
city is displayed.
5. To... Press...
Check time or
for other cities
Exit this function CLR
If the LCD displays ‘PLEASE ENTER CDMA SERVICE
FOR TIME’ when you try to check world time, you cannot
get correct world time information unless you set correct
current time. To set a current time, or to check the current time,
see ‘To Set and Change Current Time’ on page 61.
1. Press FCN.
2. Press numeric buttons 3and 0.
Result: The current time, if any
previously set, is displayed.
3. Enter the current time using the
number button.
• Press the number button in
sequence of month/day/year/
hour/minute.
• If you entered wrong number,
move the cursor to the desired
digit by pressing or #, then
correct the number.
Example: For March, 15th, 1998,
2:15PM, enter 031519981415 in
sequence.
4. Press STO.
Result: The current time is displayed.
If you enter an invalid time, the
message INVALID TIME is
displayed.
To Set and Change Current Time
SCH-570 (46-71) 10/26/98 9:05 AM Page 16
6362
To Check the Last Call or the Cumulative Air Time
This feature allows you to check the duration of the
last call or the cumulative air time.
To Erase the Cumulative Air Time
1. Press FCN.
3. Press END/ to exit this function.
2. To check... Press...
Last call Numeric
time button 3
twice
Cumulative Numeric
air time buttons 3
and 4.
Result: The call time chosen is
displayed in year/day/hour/
minute/second.
1. Press FCN.
2. Press numeric buttons 3and 5.
Result: The message C l r
A i r T i m e ? is displayed.
4. Press STO.
Result: AIR TIME IS
C L E A R E D is displayed and all
cumulative air time is deleted.
3. Press or to choose ‘YES’.
SCH-570 (46-71) 10/26/98 9:05 AM Page 18
65
1. Press:
◆FCN
followed by
◆Numeric button 1,0.
Result: Timer is displayed.
2. To start the timer, press STO.
Using Calculator
You can calculate using the phone.
1. Press:
◆FCN
followed by
◆Numeric button 1,9.
Result: CALCULATOR is displayed.
2. Enter the number. The calculator can
show a maximum of 7 digits.
64
3. Press STO repeatedly until the
desired calculation symbol (+, -, x, /)
appears.
Result: The number you entered
moves in the bottom line.
4. Enter the other number you want to
calculate.
5. To... Press...
See the result FCN.
Calculate other numbers Repeat steps
3 and 4.
Clear the value CLR
(Hold down).
Return to Standby mode END.
Using Stop Watch
3. To stop, press FCN.
Result: The time display stops, but
the timer keeps counting.
4. To... Press...
Resume STO.
Reset to zero FCN (Hold down).
Exit END.
SCH-570 (46-71) 10/26/98 9:05 AM Page 20
Tone Length: You can change the tone length. Your phone is
preset to Short at the factory. If the remote machine does not
access the tone generated from your phone, change the tone
length to Long.
When you call a paging system, your phone should be in
Short mode. 6766
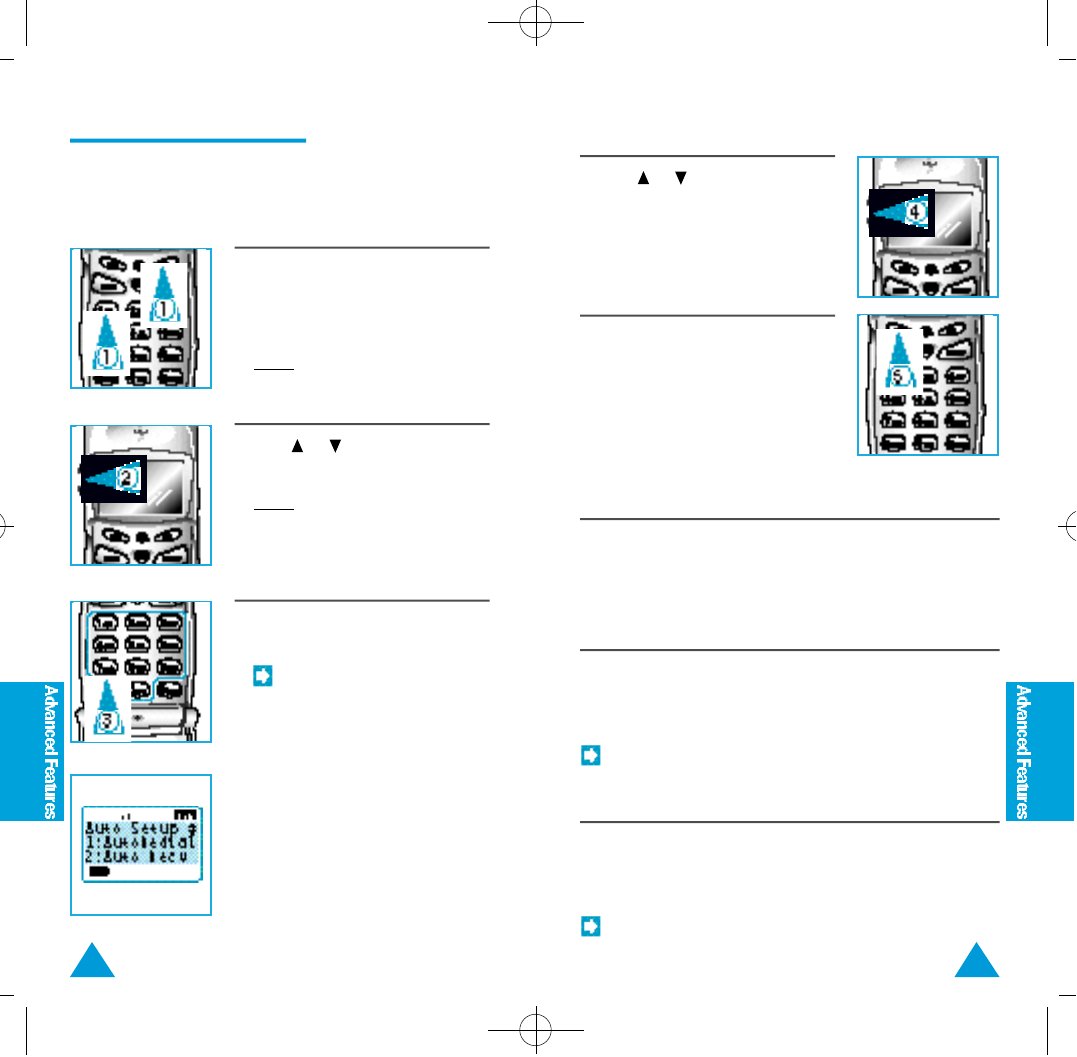
Automatic Feature Setup
You can change the status of an automatic feature
already setup in your phone.
To Change the Status of Automatic Feature
1. Press:
◆FCN
followed by
◆Numeric button 1
Result: The features you can choose
are displayed.
2. Press or until you find the
feature you wish to change.
Result: The phone shows a function
number you have to press to choose
the feature.
3. Press the function number of the
feature.
The function numbers are as
follows:
1: Auto Redial
2: Auto Receiving
3: Tone Length
4: Backlight
5: Call Time Display
6: Present Time Display
7: Release Tone Setting
8: Connect Tone Setting
9: Calculator
0: Stop Watch
4. Press or to choose the status
you want.
5. Press STO.
Selectable Features
Automatic Redial: When this feature is activated (YES mode), a
number is automatically redialed if the call is not connected
successfully. If the phone is connected to the system while
redialing the number, you can hear the connect tone. If it is
disabled (NO mode), you must redial manually.
Automatic Receiving: If this feature is activated (YES mode)
and a call is received, the phone will answer the call automatically
after 2 rings. If it is disabled (NO mode), you must open the cover
or press any button to answer the call.
If you have chosen LAMP, VIBRATOR, or VIB+BELL mode to alert
the incoming call, the Automatic Receiving feature will not
activate.
SCH-570 (46-71) 10/26/98 9:05 AM Page 22
6968
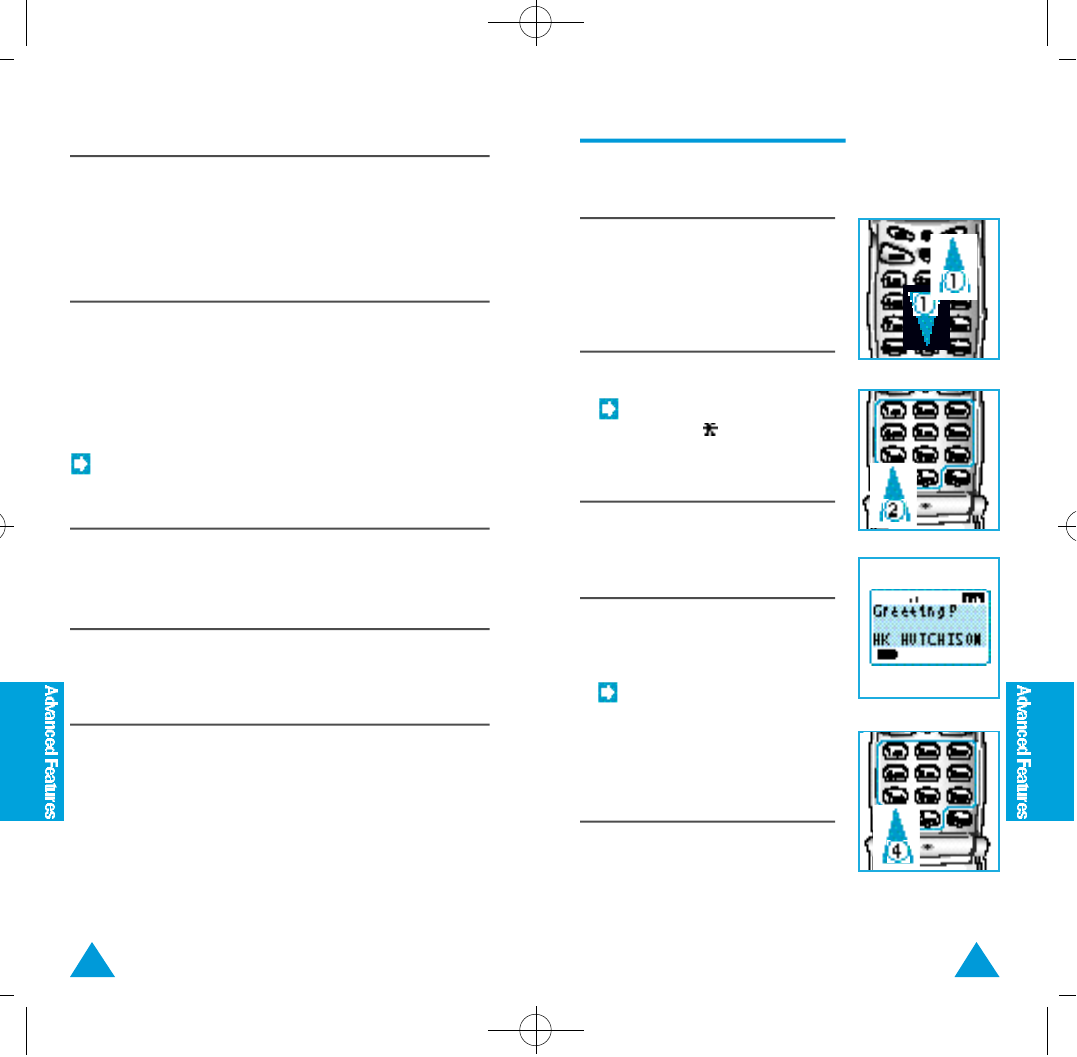
Changing Greeting Message
This feature allows you to change the greeting
message displayed when you turn on the phone.
1. Press:
◆FCN
followed by
◆Numeric button 0
2. Enter the lock code.
The lock code is preset to 0000.
An asterisk ( ) is displayed for
each digit entered.
3. Press numeric button 1to choose
‘Greeting’ function.
4. Enter new greeting message with the
number button marked with the
desired letter.
• You can enter the greeting
message up to 12 digits.
• Refer to page 28 for entering
letter with the number button.
5. Press STO.
Backlight: When you turn on your phone, the LCD display and
keypad light up. You can choose from Automatic or Always
OFF. In Automatic mode, the light goes off automatically 8
seconds after the last button is pressed. If you choose Always
OFF mode, the light is always off.
Call Time Display: If this feature is activated (ON mode), the call
time counter is automatically displayed when the phone is
connected to the system. You can check the call time during
telephone conversation. In OFF mode, you must activate the call
time display manually by pressing FCN and numeric button 2while
you are over the phone. To turn off the feature, press FCN and 2
again.
The call charge starts to count when the call is actually
connected.
Present Time Display: If this feature is activated (ON mode), the
current time is displayed. In OFF mode, the current time is not
displayed.
Release Tone: When this feature is activated (YES mode), the
phone sounds a release tone when a call is released. In NO mode,
the phone does not generate a release tone. See page 46.
Connect Tone: When this feature is activated (YES mode), the
phone makes a connection tone when your phone is connected to
the basestation system to make a call. In NO mode, the phone
does not generate a connection tone. See page 47.
SCH-570 (46-71) 10/26/98 9:05 AM Page 24

7170
1. Press:
◆FCN
followed by
◆Numeric button 0
Result: The LCD display asks to enter
your lock code.
2. Enter the lock code.
Result: If the correct lock code is
entered, the Setup menu is displayed.
•The lock code is preset to 0000
at factory.
• For further details on the lock
code, see ‘Changing Lock Code’
on page 73.
Restricting the Use of the Phone
You can restrict the use of the phone by
unauthorized person. There are 4 restriction modes
you can choose as follows:
◆Restrict Dial from Memory: In this mode, you cannot access
the memory feature. Storing number in memory or recalling
number from memory is prohibited. If you try to use the memory
feature, MEMORY IS RESTRICTED is displayed.
◆Restrict Incoming Call: In this mode, you cannot answer
incoming calls. PAGE RESTRICTED is displayed.
◆Restrict International Call: In this mode, you cannot dial an
international call number beginning 00. If you try to dial a phone
number beginning 00, INT. CALL IS RESTRICTED is
displayed.
◆Restrict Special Call: In this mode, you cannot dial a special
phone number having 2 digits or less. If you try to dial a number
less than 2 digits, SPEC. CALL IS RESTRICTED is
displayed.
In all restriction mode, you are allowed to make emergency
calls.
3. Press 4to select ‘Restrict’ function.
Result: The restriction modes you can
choose are displayed.
SCH-570 (46-71) 10/26/98 9:05 AM Page 26
7372
Changing Lock Code
When you purchase your phone, the lock code is
preset to 0000.
1. Press:
◆FCN
followed by
◆Numeric button 0
2. Enter the current lock code.
Result: An asterisk ( ) is displayed for
each digit entered.
3. Press numeric button 3to choose
‘Lock Code’ function.
4. Enter the new lock code.
The lock code must be 4 digits.
5. Press STO.
If you enter fewer than 4 digits,
‘TOO FEW DIGITS!’ is
displayed and the phone returns
to step 4.
6. Press STO.
4. To restrict... Press...
Memory dial Numeric button 1
Incoming call Numeric button 2
International call Numeric button 3
Special call Numeric button 4
5. Press or :
To... Choose...
Turn on the feature YES
Turn off the feature NO
SCH-570 (46-71) 10/26/98 9:06 AM Page 28
75
Locking the Phone
1. Press:
◆FCN
followed by
◆#
2. Enter the lock code.
The lock code is preset to 0000.
An asterisk ( ) is displayed for
each digit entered.
Warning Beep Generation
If you lock the phone, calls can not be made until
correct lock code is entered. You can, however, still
receive incoming calls.
• When LOCKED is displayed, pressing the lock code allows
you to use the phone until you turn off the phone. If the
phone is turned on, the lock status is reset.
• You can make an emergncy call while the phone is locked.
3. Press or :
To... Choose...
Turn on the feature YES
Turn off the feature NO
4. Press STO.
74
You can set your phone to generate beeps
◆every one minute during your phone conversation to indicate the
call time passed.
◆when service area is changed.
1. Press:
◆FCN
followed by
◆Numeric button 0
2. Enter the lock code.
Result: The lock code is preset to
0000. An asterisk ( ) is displayed for
each digit entered.
3. To set... Press...
One-minute beep Numeric
during conversation button 5
Service area Numeric
change alert button 6
4. Press or :
To... Choose...
Turn on the feature YES
Turn off the feature NO
5. Press STO.
SCH-570 (72-91) 10/26/98 9:07 AM Page 2
77
1. Press:
◆FCN
followed by
◆Numeric button 0
2. Enter the lock code.
Result: The lock code is preset to
0000. An asterisk ( ) is displayed for
each digit entered.
3. Press numeric button 9to choose ‘Set
NAM’ function.
4. Press or to choose the desired
NAM mode.
Maximum of 4 NAM selections
are available.
5. Press STO.
76
Choosing NAM
NAM feature allows you to subscribe to one or
more service networks. If your system supplier provides this service and
you have PIN assigned by the system supplier, you
can set your phone to send PIN when you make a
call. This feature prevents the phone being used by
unauthorized person. For information on this
service in detail, contact your system supplier.
1. Press:
◆FCN
followed by
◆Numeric button 0
3. Press numeric button 2.
4. Press or :
To... Choose...
Turn on the feature Prompt
Turn off the feature Never
2. Enter the lock code.
Result: The lock code is preset to
0000. An asterisk ( ) is displayed for
each digit entered.
Setting the Phone to Send PIN
SCH-570 (72-91) 10/26/98 9:07 AM Page 4

79
5. Press STO.
78
1. If you’ve chosen ‘Prompt’ to send PIN,
the LCD prompts you to choose to
send PIN or not each time a call is
connected.
2. To... Press...
Send PIN
No send #
To Use the Feature
This feature changes the status of the phone to
manufacturer’s default status. If you want to reset
all changed status to manufacturer’s default status,
use this feature.
System Reset
1. Press:
◆FCN
followed by
◆Numeric button 0
2. Enter the lock code.
Result: The lock code is preset to
0000. An asterisk ( ) is displayed for
each digit entered.
3. Press numeric button 0to choose
‘ResetPhone’ function.
Result: The message R e s e t
Phone? YES is displayed.
4. Press or :
To... Choose...
Reset the phone YES
Exit this function NO
5. Press STO.
Result: The message WAIT TO
RESET PHONE is displayed and all
functions (except for greeting, lock
code and voice dial information) are
converted to the default status.
SCH-570 (72-91) 10/26/98 9:07 AM Page 6
8180
1. Use a damp cloth to clean your
cellular phone. Do not allow water to
get into the phone, particularly the
battery.
2. Do not use abrasive powders or
sponges or any solvents, such as
trichlorethylene or acetone, as they
may damage the plastic surfaces.
Cleaning Your Cellular Phone
There are no specific cleaning requirements for
your cellular phone.
3. If the battery or charger terminals
become stained or rusty, clean them
with a soft cloth.
Battery Safety Precautions
The illustrations below indicate the precautions to
be taken with the battery packs.
DO NOT use or charge the batteries in
extreme temperature conditions:
◆Above 95°F ( 35°C)
◆Below 41°F ( 5°C)
DO NOT use any charging devices other
than the ones supplied with your
cellular phone.
Any replacement battery pack must be
of the same manufacturer and type.
Used batteries should not be disposed
of in a fire or waste bin. Dispose of
them in accordance with local
legislation.
SCH-570 (72-91) 10/26/98 9:07 AM Page 8

8382
DO NOT disassemble the battery packs.
There are no user-serviceable parts
inside it. DO NOT drop the batteries or
subject them to physical shocks.
Keep the batteries out of children’s
reach.
If the batteries are not used for a long
period of time (about one year), their
service life may be reduced. Store them
in a cool, dry place.
Accessories
Cigarette Lighter Charger
(CLC26)
Allows you to charge your batteries
in your vehicle.
Ear Microphone (EMP20)
Battery
BTL1062S : Standard battery
BTL1662E : Extended-life battery
SCH-570 (72-91) 10/26/98 9:07 AM Page 10

8584
Troubleshooting
Before contacting an authorized service center,
perform the following simple checks. They may
save you the time and expense of an unnecessary
service call.
NOSVC is displayed in the display.
◆Make sure you are in the service area.
◆If you have changed the service system, wait for about 2
minutes.
◆Make sure you have chosen correct service mode (See page
49).
◆Sometimes, NOSVC indication appears briefly. It is normal.
Beep tone sounds when you make a call.
◆The call is not made successfully.
• When beep tone sounds, press SEND again so that the
number is redialed automatically.
• To cancel automatic redial, press END/ .
Ringer bell does not sound and receiving lamp flickers.
◆You have set the phone to the lamp mode (See page 21).
LOCKED is displayed and you cannot make a call.
◆The phone is locked.
• Press lock code (Default:0000).
•If you forgot the lock code, consult with the service center.
Battery usage time is different with that of this manual.
◆If there are lots of tries to make a call in no-service area, the
usage time may be reduced.
◆After charging, please store battery in a cool, dry place.
The phone isn’t turned on, even though the battery is full.
◆Remove battery from the phone and reattach it.
The phone does not work properly, or does not work at all.
◆Remove battery from the phone and reattach it.
MAINTENANCE REQUIRED is displayed
◆Make sure the phone is registered to use.
Nothing is displayed
◆Check that the battery pack has been charged and installed
correctly.
◆Check that the phone has been switched on (END/ pressed
for more than one second).
You have entered a number but does not dial.
◆Have you pressed the SEND button?
◆Is the cellular phone service currently available (SVC
displayed)?
◆Are you accessing the right cellular network (if the phone is
programmed for dual network use)?
Your party cannot reach you
◆Is your phone switched on (END/ pressed for more than one
second)?
◆Are you accessing the right cellular network (if the phone is
programmed for dual network use)?
Your party cannot hear you
◆Have you switched off the microphone (MUTE displayed)?
◆Are you holding the phone close enough to your mouth? The
microphone is located at the bottom of the phone.
SCH-570 (72-91) 10/26/98 9:07 AM Page 12
8786
The phone starts beeping and flashes on the display
◆The battery pack is insufficiently charged. Replace the pack and
recharge it fully until the lamp on the charger turns green.
The audio quality of the call is poor
◆Check the signal strength indicator ( ) on the display; the
number of bars indicate the signal strength from strong
( ) to weak ( ).
◆Try extending the antenna, moving the phone slightly or moving
closer to window if you are in a building.
No number is dialed when you recall a memory location
◆Check that the numbers have been stored correctly, by using the
memory scan feature (See page 32).
◆Re-store them in the memory, if necessary.
If the above guidelines do not enable you to solve the
problem, take a note of:
◆The model and serial numbers of your phone
◆Your warranty details
◆A clear description of the problem
Then contact your local dealer or SAMSUNG Authorized Service
Center.
AIR TIME IS
C L E A R E D
ALL MEMORIES
ARE CLEARED
ALL MEMORIES
ARE EMPTY
INT.CALL IS
R E S T R I C T E D
INVALID TIME
LAST CALLS ARE
C L E A R E D
LOCATION EMPTY
M A I N T E N A N C E
R E Q U I R E D
MEM. (00-79) IS
F U L L
MEMORY IS
R E S T R I C T E D
MEMORY USED!
CLEAR? YES
MEMORY USED!
STORE? YES
NAME NOT FOUND
Cumulative call time is cleared.
All the phone numbers stored
in memory are cleared.
There is no phone number
stored in memory.
While the phone is restricted,
you have tried to make an
international call beginning 00.
You have entered invalid or
no time.
All the phone numbers in
redial memory are cleared.
The memory location you
chose is empty.
The phone number is not
registered in the base station.
There is no empty location
under which you can store
phone numbers.
While the phone is restricted,
you have tried to make a call
by memory dial.
A phone number stored in the
selected memory location is
cleared.
A phone number is already
stored in the selected memory
location.
The name you are trying to
recall does not exist.
LCD Messages
SCH-570 (72-91) 10/26/98 9:07 AM Page 14

8988
NO LAST CALL
NO MATCH NUMBER
NO PHONE NUMBER
NO SERVICE
NO STORED NAME
PAGE RESTRICTED
PLEASE ENTER
CDMA SERVICE
FOR TIME
REDIAL CALL
F A I L E D
SEARCHING EMPTY
M E M O R Y
SPEC.CALL IS
R E S T R I C T E D
TOO FEW DIGITS!
WAIT TO RESET
P H O N E
Restricted by
Silent mode
There is no phone number
stored in redial memory.
The phone number you are
trying to recall does not exist.
You have pressed SEND
without entering a phone
number.
The phone is out of service
area.
Name is not stored with the
phone number into memory.
While the phone is restricted,
you have tried to answer call.
You have tried to check world
time while the current time is
not set.
The call cannot be made
completely even after
automatic redialing.
The phone is searching empty
memory.
While the phone is restricted,
you have tried to make a
special call.
Too few digits for your lock
code.
The phone is being initialized.
While silent mode is selected,
you can not change the alert
type and can not adjust
keytone.
Summary
BASIC OPERATION
Turning on and off END/ (press and hold)
Making a call Phone number + SEND
Receiving a call Any button
or
Open the cover
Adjusting volume
• Keytone (in standby mode) /
• Speaker (while over the phone) /
• Ringer FCN +5+ / (on the side )
Mute (while over the phone) FCN +3
Choosing alert type FCN +2+1+ / + STO
Choosing ringer bell FCN +2+2+ / + STO
Last 10 number
• Scanning and dial RCL +RCL +/+SEND
• Erasing all numbers FCN +0+ lock code + 8+
in redial memory / + STO
Using One Touch (press and hold)
Silent mode
MEMORY DIALING
Finding empty location RCL + + /
Finding empty location RCL +0-7 + + /
under a specified group
Storing numbers into
• Specific memory Phone number + STO +
location location (00-79) + name + STO
• Any empty Phone number + STO +
location + name + STO
• Specific numeric Phone number + STO +0-7
group + + name + STO
SCH-570 (72-91) 10/26/98 9:08 AM Page 16
Turning off keytone (while over the phone) FCN +4
Sending own number (while over the phone) FCN +9
Own number display RCL +#
Selecting system FCN +6+/+STO
Message service
•To retrieve FCN +7+1+SEND
voice mail
•To read text FCN +7+2+/
message
•To callback SEND
•To erase all FCN +7+3+CLR
messages
•To choose FCN +7+4+/+STO
alert type
Setting alarm
•Turn on FCN +3+2+1+/+STO +
alarm time + STO
•Turn off FCN +3+2+2+/+STO
DTMF dialing
•Using memory dial (while over the phone) RCL +
location (00-79)+ FCN +SEND
•Using pause insert Phone number + STO +#+
Phone number + SEND +SEND
Calculating with the phone
FCN +1+9
Stop Watch FCN +1+0
Recording Name FCN +4+1+ Say name (twice) +
Phone number + STO
Checking Name FCN +4+4
Erasing
•A particular name F C N + 4+ 3+ / + C L R + E N D
•All names FCN +4+5+STO
Using Voice Dial
• In automatic mode Open the cover + Say name
• In manual mode FCN +4+2+ Say name
• To turn on/off FCN +4+6+ / + STO
automatic voice dial feature
• To listen to the FCN +4+7
recording of the other’s talking
• To record (while over the phone ) FCN +1
the other’s talking 9190
Calling numbers by
• One-touch 0-9 (hold the last digit of the
hot line memory 00-09)
• Two-touch 10-79 (press shortly the first
digit and hold the last digit)
Scanning memories by
• Location number RCL + location (00-79) + /
• Name FCN + + name + RCL + /
• Partial phone The first part of phone number as
number long as you know + R C L + /
Erasing numbers stored in
• Specific memory CLR (hold) +STO + location
location (00-79) + STO
• All memories F C N+ 0+ lock code + 7+ / + S T O
VOICE DIALING
USEFUL FEATURES
SCH-570 (72-91) 10/26/98 9:08 AM Page 18
9392
selectable features setup
• Automatic redial FCN +1+1+ / + STO
• Automatic receive FCN +1+2+ / + STO
• Tone length FCN +1+3+ / + STO
• LCD Back light FCN +1+4+ / + STO
• Call time display FCN +1+5+ / + STO
or
(while over the phone) FCN +2
• Current time display FCN +1+6+ / + STO
• Release tone FCN +1+7+ / + STO
• Connect tone FCN +1+8+ / + STO
Changing greeting FCN +0+ lock code + 1+ new
message greeting + STO
Restrict phone use
• No memory dial FCN +0+ lock code + 4+1+
/ + STO
• No incoming call FCN +0+ lock code + 4+2+
/ + STO
• No international FCN +0+ lock code + 4+3+
call / + STO
• No special call FCN +0+ lock code + 4+4+
/ + STO
Changing lock code FCN +0+ current lock code + 3+
new code + STO
Auto lock FCN +#+ lock code + / +
STO
One-minute beep FCN +0+ lock code + 5+ /
during conversation + STO
Service area change FCN +0+ lock code + 6+ /
alert + STO
Choosing NAM FCN +0+ lock code + 9+ /
+STO
Setting to send PIN FCN +0+ lock code + 2+ /
+STO
System reset FCN +0+ lock code + 0+ /
+STO
Checking world time FCN +3+1+ / + city number
Setting current time FCN +3+0+ time + STO
Checking last call time FCN +3+3
Cumulative call time
• Checking FCN +3+4
• Erasing FCN +3+5+ / + STO
ADVANCED FEATURES
SCH-570 (72-91) 10/26/98 9:08 AM Page 20
SCH-570 (72-91) 10/26/98 9:09 AM Page 22
Printed in Korea
Code No.: GH68-60723A
Hong Kong China.
9/98. Rev. 1.0
Licensed by QUALCOMM Incorporated under one or more
of the following Patents.
U.S. Patent No. 4,901,307 5,056,109 5,099,204
5,101,501 5,103,459 5,107,225
5,109,390
SCH-570 (72-91) 10/26/98 9:10 AM Page 24