Samsung Electronics Co SCHN191 Single-Mode Cellular Phone (CDMA) User Manual 00 N191cover
Samsung Electronics Co Ltd Single-Mode Cellular Phone (CDMA) 00 N191cover
UserManual.wiki
>
Samsung Electronics Co
>
SCHN191 User Manual
Users Manual
Navigation menu
Upload a User Manual
Namespaces
Wiki Guide
HTML
PDF
Info
Views
User Manual
Discussion / Help
Navigation


![19GGeettttiinngg SSttaarrtteedd18GGeettttiinngg SSttaarrtteeddSwitching the Phone On/OffHold down for more than one second to switch thephone on.The service light on the left of the phone flashes, and analert sounds. When the system locates services, thegreeting message displays along with the date andtime.You can now place and receive calls.If the phone is out of service, the icon appears inthe display. In this case, you cannot make and receivecalls. You can try again later when service is available.Note: You can change the LCD display language. Tochange the language, use the Language menu option(5-5); for further details, refer to page 69.When you wish to switch the phone off, hold downfor more than two seconds.Note: If you want to switch the phone off in Lock mode,unlock the phone first by pressing and holding .[SERVICE PROVIDER]11:25A 05/09 ThuYour Phone’s ModeStandby ModeStandby is the most basic state of your phone. Thephone goes into Standby mode soon after you turn it on,or whenever you briefly press . When your phone isin Standby mode, you will typically see the greetingmessage and current date and time. If you enter a phonenumber, you can press to dial it, or press tosave it in the internal phone book. Press at any time to return to Standby mode. Becareful; if you are on a call when you press , youwill return to Standby mode, but it also disconnects thecall. Press several times or hold it down to returnto Standby mode without ending the call.The Main Menu is accessed when you are in Standbymode.Talk ModeYou can place and answer calls only when your phone isturned on. During a call, the phone is in Talk mode.While you are in Talk mode, pressing gives you alist of options referred to as “In-Use Menu” See page 29for details on the options.](https://usermanual.wiki/Samsung-Electronics-Co/SCHN191/User-Guide-277957-Page-11.png)
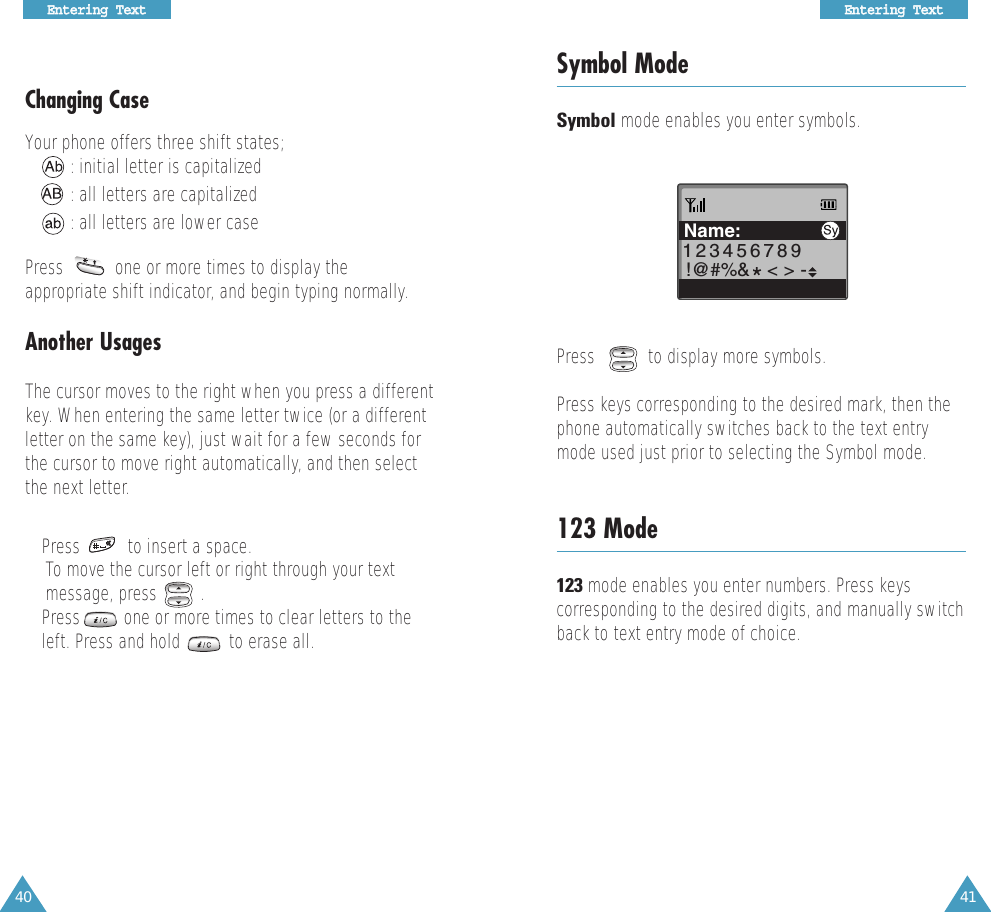
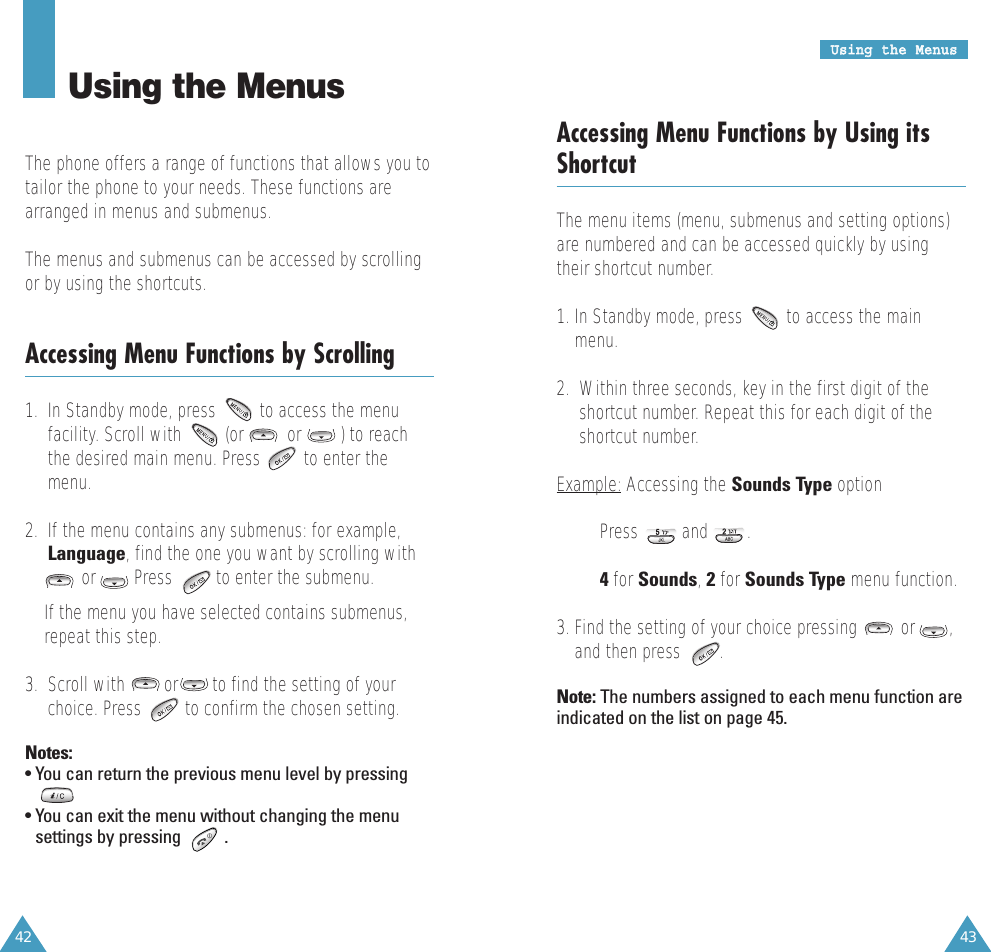
![39EEnntteerriinngg TTeexxtt38EEnntteerriinngg TTeexxttABC ModeWhen typing in Hebrew and English mode, you shouldpress key labeled with the required letter:-Once for the first letter-Twice for the second letter-And so on.For example, you press three times quickly to display the letter “C” , two times quickly to displaythe letter “K”. So, this method is called multi-tap typing.Refer to the table on next page for the list of charactersassigned on each key.(Caps Lock mode)List of characters available:Key Characters in the Order DisplayedChanging CaseYour phone offers three shift states; • : initial letter is capitalized• : all letters are capitalized• : all letters are lower casePress one or more times to display theappropriate shift indicator, and begin typing normally.Scrolling• To move the cursor left or right through your textmessage, press .• To scroll through alternate word choices for the keysyou have entered, press . Clearing Letters and WordsPress one or more times to clear letters to the left.Press and hold to erase all. AB C2DE F 3GH I 4JK L5MN O 6PQ RS7TU V8WX Y Z 90.@ , : ? - ; ‘ / ( ) ! # % & *< > _ + = “ \ { } $ [ ] 1](https://usermanual.wiki/Samsung-Electronics-Co/SCHN191/User-Guide-277957-Page-21.png)