Samsung Electronics Co SCHR890 Multi-Band CDMA/LTE Phone with WLAN, Bluetooth and RFID User Manual r890
Samsung Electronics Co Ltd Multi-Band CDMA/LTE Phone with WLAN, Bluetooth and RFID r890
Contents
- 1. Users Manual 1
- 2. Users Manual 2
Users Manual 1
GH68_3XXXXA Printed in Korea
ANDROID SMARTPHONE
User Manual
Please read this manual before operating your
phone and keep it for future reference.
By accessing this document, the recipient agrees and
acknowledges that all contents and information in this document (i) are confidential and proprietary information
of Samsung, (ii) shall be subject to the non-disclosure regarding project H and Project B, and (iii) shall not be
disclosed by the recipient to any third party. Samsung Proprietary and Confidential

USC_SCH-R890_UM_Eng_MG3_CH_081313_D3
Intellectual Property
All Intellectual Property, as defined below, owned by or which is otherwise the property of Samsung or its respective suppliers
relating to the SAMSUNG Phone, including but not limited to, accessories, parts, or software relating there to (the “Phone
System”), is proprietary to Samsung and protected under federal laws, state laws, and international treaty provisions. Intellectual
Property includes, but is not limited to, inventions (patentable or unpatentable), patents, trade secrets, copyrights, software,
computer programs, and related documentation and other works of authorship. You may not infringe or otherwise violate the
rights secured by the Intellectual Property. Moreover, you agree that you will not (and will not attempt to) modify, prepare
derivative works of, reverse engineer, decompile, disassemble, or otherwise attempt to create source code from the software. No
title to or ownership in the Intellectual Property is transferred to you. All applicable rights of the Intellectual Property shall remain
with SAMSUNG and its suppliers.
Open Source Software
Some software components of this product incorporate source code covered under GNU General Public License (GPL), GNU Lesser
General Public License (LGPL), OpenSSL License, BSD License and other open source licenses. To obtain the source code covered
under the open source licenses, please visit:
http://opensource.samsung.com
.
Disclaimer of Warranties; Exclusion of Liability
EXCEPT AS SET FORTH IN THE EXPRESS WARRANTY CONTAINED ON THE WARRANTY PAGE ENCLOSED WITH THE PRODUCT, THE
PURCHASER TAKES THE PRODUCT "AS IS", AND SAMSUNG MAKES NO EXPRESS OR IMPLIED WARRANTY OF ANY KIND
WHATSOEVER WITH RESPECT TO THE PRODUCT, INCLUDING BUT NOT LIMITED TO THE MERCHANTABILITY OF THE PRODUCT OR
ITS FITNESS FOR ANY PARTICULAR PURPOSE OR USE; THE DESIGN, CONDITION OR QUALITY OF THE PRODUCT; THE
PERFORMANCE OF THE PRODUCT; THE WORKMANSHIP OF THE PRODUCT OR THE COMPONENTS CONTAINED THEREIN; OR
COMPLIANCE OF THE PRODUCT WITH THE REQUIREMENTS OF ANY LAW, RULE, SPECIFICATION OR CONTRACT PERTAINING
By accessing this document, the recipient agrees and
acknowledges that all contents and information in this document (i) are confidential and proprietary information
of Samsung, (ii) shall be subject to the non-disclosure regarding project H and Project B, and (iii) shall not be
disclosed by the recipient to any third party. Samsung Proprietary and Confidential

THERETO. NOTHING CONTAINED IN THE INSTRUCTION MANUAL SHALL BE CONSTRUED TO CREATE AN EXPRESS OR IMPLIED
WARRANTY OF ANY KIND WHATSOEVER WITH RESPECT TO THE PRODUCT. IN ADDITION, SAMSUNG SHALL NOT BE LIABLE FOR
ANY DAMAGES OF ANY KIND RESULTING FROM THE PURCHASE OR USE OF THE PRODUCT OR ARISING FROM THE BREACH OF
THE EXPRESS WARRANTY, INCLUDING INCIDENTAL, SPECIAL OR CONSEQUENTIAL DAMAGES, OR LOSS OF ANTICIPATED PROFITS
OR BENEFITS.
Modification of Software
SAMSUNG IS NOT LIABLE FOR PERFORMANCE ISSUES OR INCOMPATIBILITIES CAUSED BY YOUR EDITING OF REGISTRY SETTINGS,
OR YOUR MODIFICATION OF OPERATING SYSTEM SOFTWARE.
USING CUSTOM OPERATING SYSTEM SOFTWARE MAY CAUSE YOUR DEVICE AND APPLICATIONS TO WORK IMPROPERLY. YOUR
CARRIER MAY NOT PERMIT USERS TO DOWNLOAD CERTAIN SOFTWARE, SUCH AS CUSTOM OS.
SAFE™ (Samsung Approved For Enterprise)
SAFE™: "SAFE™" (Samsung for Enterprise) is a mark for a Samsung device which has been tested against Samsung's own
internal criteria for interoperability with certain third party security-related solutions for MDM and VPN. The testing includes field
testing with local network connection and menu tree testing which tests functionality of the solutions in conjunction with the
Samsung device. During the testing, the device is tested with the security solutions to see if the solutions work with the device as
described by the third party security solution providers. The testing, for example, includes field testing with local network
connection and menu tree testing which tests functionality of the solutions in conjunction with the Samsung device. For more
information about Samsung's SAFE™ program, please refer to
www.samsung.com/us/safe
.
Disclaimer of Warranties: EXCEPT AS OTHERWISE PROVIDED IN THEIR STANDARD END USER LICENSE AND WARRANTY, TO THE
FULL EXTENT PERMITTED BY LAW SAMSUNG ELECTRONICS CO., LTD., SAMSUNG TELECOMMUNICATIONS AMERICA, LLC, AND
THEIR AFFILIATES (COLLECTIVELY REFERRED TO HEREIN AS THE "SAMSUNG ENTITIES") EXPRESSLY DISCLAIM ANY AND ALL
WARRANTIES, EXPRESS OR IMPLIED, INCLUDING ANY WARRANTY OF MERCHANTABILITY, FITNESS FOR A PARTICULAR PURPOSE,
INTEROPERABILITY OR NON-INFRINGEMENT, WITH RESPECT TO INFORMATION TECHNOLOGY SECURITY PROTECTION, SAFE™
By accessing this document, the recipient agrees and
acknowledges that all contents and information in this document (i) are confidential and proprietary information
of Samsung, (ii) shall be subject to the non-disclosure regarding project H and Project B, and (iii) shall not be
disclosed by the recipient to any third party. Samsung Proprietary and Confidential

DEVICES AND APPLICATIONS TESTED WITH SAFE™ DEVICES. IN NO EVENT SHALL THE SAMSUNG ENTITIES BE LIABLE FOR ANY
DIRECT, INDIRECT, INCIDENTAL, PUNITIVE, OR CONSEQUENTIAL DAMAGES OF ANY KIND WHATSOEVER WITH RESPECT TO
INFORMATION TECHNOLOGY SECURITY PROTECTION, SAFE™ DEVICES OR APPLICATIONS TESTED WITH SAFE™ DEVICES. In
addition, information technology security protection will be affected by features or functionality associated with, among other
things the e-mail platform, master data management, and virtual private network solutions selected by the software provider,
solution provider or user. Choice of an e-mail, master data management, and virtual private network solution is at the sole
discretion of the software provider, solution provider or user and any associated effect on information technology security
protection is solely the responsibility of the software provider, solution provider or user. For complete statement of limited
warranty, please refer to
www.samsung.com/us/safe
, available on the web and where Samsung smartphone and Galaxy Tab™
devices are sold. [101212]
Samsung Telecommunications America (STA), LLC
Headquarters:
1301 E. Lookout Drive
Richardson, TX 75082
Customer Care Center:
1000 Klein Rd.
Plano, TX 75074
Toll Free Tel: 1.888.987.HELP (4357)
By accessing this document, the recipient agrees and
acknowledges that all contents and information in this document (i) are confidential and proprietary information
of Samsung, (ii) shall be subject to the non-disclosure regarding project H and Project B, and (iii) shall not be
disclosed by the recipient to any third party. Samsung Proprietary and Confidential

©2013 Samsung Telecommunications America, LLC. Samsung is a registered trademark of Samsung Electronics Co., Ltd.
Do you have questions about your Samsung Mobile Phone?
For 24 hour information and assistance, we offer a new FAQ/ARS System (Automated Response System) at:
www.samsung.com/us/support
The Bluetooth® word mark, figure mark (stylized “B Design”), and combination mark (Bluetooth word mark and “B Design”) are
registered trademarks and are wholly owned by the Bluetooth SIG.
Nuance®, VSuite™, T9® Text Input, and the Nuance logo are trademarks or registered trademarks of Nuance Communications,
Inc., or its affiliates in the United States and/or other countries.
microSD™, microSDHC™ and the microSD logo are Trademarks of the SD Card Association.
Adobe and Flash are either registered trademarks or trademarks of Adobe Systems Incorporated in the United States and/or other
countries.
DivX®, DivX Certified® and associated logos are trademarks of Rovi Corporation or its subsidiaries and are used under license.
DivX Certified® to play DivX® video up to HD 720p, including premium content.
ABOUT DIVX VIDEO: DivX® is a digital video format created by DivX, LLC, a subsidiary of Rovi Corporation. This is an official DivX
Certified® device that plays DivX video. Visit
www.divx.com
for more information and software tools to convert your files into DivX
videos.
ABOUT DIVX VIDEO-ON-DEMAND: This DivX Certified® device must be registered in order to play purchased DivX Video-on-
Demand (VOD) movies. To obtain your registration code, locate the DivX VOD section in License settings under Settings > More >
Internet Address:
http://www.samsung.com
By accessing this document, the recipient agrees and
acknowledges that all contents and information in this document (i) are confidential and proprietary information
of Samsung, (ii) shall be subject to the non-disclosure regarding project H and Project B, and (iii) shall not be
disclosed by the recipient to any third party. Samsung Proprietary and Confidential

About device > Legal information > License settings. Go to
vod.divx.com
for more information on how to complete your
registration.
Wi-Fi®, the Wi-Fi CERTIFIED logo, and the Wi-Fi logo are registered trademarks of the Wi-Fi Alliance.
LTE is a trademark of ETSI.
Google, the Google logo, Google Search, Gmail, Maps, Navigation, Places, Google Talk, YouTube, Picasa, Android and Google Play
are trademarks of Google, Inc.
©Samsung Telecommunications America, LLC (“Samsung”). Samsung and Super AMOLED are both trademarks of Samsung
Electronics Co., Ltd. and/or its related entities. All product and brand names are trademarks or registered trademarks of their
respective companies. Screen images simulated. Appearance of the phone may vary.
By accessing this document, the recipient agrees and
acknowledges that all contents and information in this document (i) are confidential and proprietary information
of Samsung, (ii) shall be subject to the non-disclosure regarding project H and Project B, and (iii) shall not be
disclosed by the recipient to any third party. Samsung Proprietary and Confidential

1
Table of Contents
Section 1: Getting Started .......................... 7
Understanding this User Manual . . . . . . . . . . . . 7
Battery Cover . . . . . . . . . . . . . . . . . . . . . . . . . . 8
Battery . . . . . . . . . . . . . . . . . . . . . . . . . . . . . . 12
Extending Your Battery Life . . . . . . . . . . . . . . 16
Initial Device Configuration . . . . . . . . . . . . . . . 16
Switching the Device On or Off . . . . . . . . . . . . 19
Restarting the Device . . . . . . . . . . . . . . . . . . . 19
Locking and Unlocking the Device . . . . . . . . . 19
Creating a New Google Account . . . . . . . . . . . 20
Signing into Your Google Account . . . . . . . . . . 20
Confirming the Default Image and
Video Storage Location . . . . . . . . . . . . . . . . 21
Creating a Samsung Account . . . . . . . . . . . . . 21
Voicemail . . . . . . . . . . . . . . . . . . . . . . . . . . . . 22
Task Manager . . . . . . . . . . . . . . . . . . . . . . . . 23
Google Now . . . . . . . . . . . . . . . . . . . . . . . . . . 25
Section 2: Understanding Your Phone ..... 26
Features . . . . . . . . . . . . . . . . . . . . . . . . . . . . 26
Front View . . . . . . . . . . . . . . . . . . . . . . . . . . . 27
Back View . . . . . . . . . . . . . . . . . . . . . . . . . . . 28
Side Views . . . . . . . . . . . . . . . . . . . . . . . . . . . 29
Device Display . . . . . . . . . . . . . . . . . . . . . . . . 30
Status Bar . . . . . . . . . . . . . . . . . . . . . . . . . . . 30
Function Keys . . . . . . . . . . . . . . . . . . . . . . . . . 38
Home Screen . . . . . . . . . . . . . . . . . . . . . . . . . 38
Applications . . . . . . . . . . . . . . . . . . . . . . . . . . 41
Screen Navigation . . . . . . . . . . . . . . . . . . . . . 42
Menu Navigation . . . . . . . . . . . . . . . . . . . . . . 44
Customizing the Screens . . . . . . . . . . . . . . . . 46
Section 3: Call Functions and
Contacts List ........................................52
Displaying Your Phone Number . . . . . . . . . . . 52
Making a Call . . . . . . . . . . . . . . . . . . . . . . . . . 52
Ending a Call . . . . . . . . . . . . . . . . . . . . . . . . . 53
Making Emergency Calls . . . . . . . . . . . . . . . . 54
Dialing Options . . . . . . . . . . . . . . . . . . . . . . . . 55
Answering a Call . . . . . . . . . . . . . . . . . . . . . . 56
By accessing this document, the recipient agrees and
acknowledges that all contents and information in this document (i) are confidential and proprietary information
of Samsung, (ii) shall be subject to the non-disclosure regarding project H and Project B, and (iii) shall not be
disclosed by the recipient to any third party. Samsung Proprietary and Confidential
2
Managing Reject Calls . . . . . . . . . . . . . . . . . . . 56
International Calls . . . . . . . . . . . . . . . . . . . . . .57
Pause Dialing . . . . . . . . . . . . . . . . . . . . . . . . .58
Wait Dialing . . . . . . . . . . . . . . . . . . . . . . . . . . . 58
Redialing the Last Number . . . . . . . . . . . . . . . 59
Speed Dialing . . . . . . . . . . . . . . . . . . . . . . . . . 59
In Call Options . . . . . . . . . . . . . . . . . . . . . . . . . 61
Using S Voice . . . . . . . . . . . . . . . . . . . . . . . . .67
Logs Tab . . . . . . . . . . . . . . . . . . . . . . . . . . . . .68
Section 4: Entering Text ............................72
Text Input Methods . . . . . . . . . . . . . . . . . . . . .72
Selecting the Text Input Method . . . . . . . . . . .72
Entering Text Using Swype . . . . . . . . . . . . . . .73
Using the Samsung Keyboard . . . . . . . . . . . . . 77
Using the Google Voice Typing . . . . . . . . . . . . . 80
Section 5: Accounts and Contacts ...........82
Accounts . . . . . . . . . . . . . . . . . . . . . . . . . . . . . 82
Contacts List . . . . . . . . . . . . . . . . . . . . . . . . . .82
Finding a Contact . . . . . . . . . . . . . . . . . . . . . .86
Contact List Options . . . . . . . . . . . . . . . . . . . .89
Contact Menu Options . . . . . . . . . . . . . . . . . . . 90
Contact Entry Options . . . . . . . . . . . . . . . . . . . 91
Linking Contact Information . . . . . . . . . . . . . . .91
Sending a Namecard . . . . . . . . . . . . . . . . . . . .94
Copying Contact Information . . . . . . . . . . . . . .95
Synchronizing Contacts . . . . . . . . . . . . . . . . . .96
Display Options . . . . . . . . . . . . . . . . . . . . . . . .97
Adding more Contacts via Accounts and Sync .98
Additional Contact Options . . . . . . . . . . . . . . . .99
Groups . . . . . . . . . . . . . . . . . . . . . . . . . . . . . .100
The Favorites Tab . . . . . . . . . . . . . . . . . . . . .103
Section 6: Messages ...............................104
Types of Messages . . . . . . . . . . . . . . . . . . . .104
Creating and Sending Messages . . . . . . . . . .105
Message Options . . . . . . . . . . . . . . . . . . . . . .106
Viewing Newly Received Messages . . . . . . . .110
Deleting Messages . . . . . . . . . . . . . . . . . . . .112
Message Search . . . . . . . . . . . . . . . . . . . . . .113
Messaging Settings . . . . . . . . . . . . . . . . . . . .113
Assigning Messages as Spam . . . . . . . . . . . .116
Accessing Your Spam Folder . . . . . . . . . . . . .118
Text Templates . . . . . . . . . . . . . . . . . . . . . . .118
Using Email . . . . . . . . . . . . . . . . . . . . . . . . . .118
Microsoft Exchange Email (Outlook) . . . . . . . .124
By accessing this document, the recipient agrees and
acknowledges that all contents and information in this document (i) are confidential and proprietary information
of Samsung, (ii) shall be subject to the non-disclosure regarding project H and Project B, and (iii) shall not be
disclosed by the recipient to any third party. Samsung Proprietary and Confidential
3
Using Google Mail . . . . . . . . . . . . . . . . . . . . 130
Hangouts . . . . . . . . . . . . . . . . . . . . . . . . . . . 132
Google + . . . . . . . . . . . . . . . . . . . . . . . . . . . 132
Messenger . . . . . . . . . . . . . . . . . . . . . . . . . . 133
Section 7: Multimedia ............................ 134
Assigning the Default Storage Location . . . . 134
Using the Camera . . . . . . . . . . . . . . . . . . . . 135
Camera Options . . . . . . . . . . . . . . . . . . . . . . 136
Quick Settings . . . . . . . . . . . . . . . . . . . . . . . 138
Camera and Camcorder Settings . . . . . . . . . 139
Using the Camcorder . . . . . . . . . . . . . . . . . . 143
Sharing Pictures . . . . . . . . . . . . . . . . . . . . . 145
Editing a Photo . . . . . . . . . . . . . . . . . . . . . . . 151
The Gallery . . . . . . . . . . . . . . . . . . . . . . . . . 153
AllShare Cast Hub . . . . . . . . . . . . . . . . . . . . 154
Section 8: Applications and Widgets ..... 156
Accessing Applications . . . . . . . . . . . . . . . . 156
Applications List . . . . . . . . . . . . . . . . . . . . . . 158
Camera . . . . . . . . . . . . . . . . . . . . . . . . . . . . 160
ChatON . . . . . . . . . . . . . . . . . . . . . . . . . . . . 161
Chrome . . . . . . . . . . . . . . . . . . . . . . . . . . . . 161
City ID . . . . . . . . . . . . . . . . . . . . . . . . . . . . . 162
Clock . . . . . . . . . . . . . . . . . . . . . . . . . . . . . . 162
Contacts . . . . . . . . . . . . . . . . . . . . . . . . . . . . 165
Downloads . . . . . . . . . . . . . . . . . . . . . . . . . . 165
Dropbox . . . . . . . . . . . . . . . . . . . . . . . . . . . . 166
Email . . . . . . . . . . . . . . . . . . . . . . . . . . . . . . 168
Flipboard . . . . . . . . . . . . . . . . . . . . . . . . . . . 168
Gallery . . . . . . . . . . . . . . . . . . . . . . . . . . . . . 169
Gmail . . . . . . . . . . . . . . . . . . . . . . . . . . . . . . 169
Google . . . . . . . . . . . . . . . . . . . . . . . . . . . . . 169
Google Settings . . . . . . . . . . . . . . . . . . . . . . 169
Google + . . . . . . . . . . . . . . . . . . . . . . . . . . . 170
Group Play . . . . . . . . . . . . . . . . . . . . . . . . . . 170
Hangouts . . . . . . . . . . . . . . . . . . . . . . . . . . . 172
Help . . . . . . . . . . . . . . . . . . . . . . . . . . . . . . . 172
Local . . . . . . . . . . . . . . . . . . . . . . . . . . . . . . 173
Maps . . . . . . . . . . . . . . . . . . . . . . . . . . . . . . 173
Messages . . . . . . . . . . . . . . . . . . . . . . . . . . . 176
Messenger . . . . . . . . . . . . . . . . . . . . . . . . . . 176
Music . . . . . . . . . . . . . . . . . . . . . . . . . . . . . . 177
Using Playlists . . . . . . . . . . . . . . . . . . . . . . . 180
Creating a Playlist . . . . . . . . . . . . . . . . . . . . 180
Transferring Music Files . . . . . . . . . . . . . . . . 181
By accessing this document, the recipient agrees and
acknowledges that all contents and information in this document (i) are confidential and proprietary information
of Samsung, (ii) shall be subject to the non-disclosure regarding project H and Project B, and (iii) shall not be
disclosed by the recipient to any third party. Samsung Proprietary and Confidential
4
Removing Music Files . . . . . . . . . . . . . . . . . .181
My Files . . . . . . . . . . . . . . . . . . . . . . . . . . . .181
Navigation . . . . . . . . . . . . . . . . . . . . . . . . . . . 183
Phone . . . . . . . . . . . . . . . . . . . . . . . . . . . . . .185
Play Books . . . . . . . . . . . . . . . . . . . . . . . . . . 185
Play Magazines . . . . . . . . . . . . . . . . . . . . . . .186
Play Movies & TV . . . . . . . . . . . . . . . . . . . . . .186
Play Music . . . . . . . . . . . . . . . . . . . . . . . . . .187
Play Store . . . . . . . . . . . . . . . . . . . . . . . . . . . 194
Downloading a New Google Application . . . . . 194
Launching an Installed Google Application . . . 196
POLARIS Office 5 . . . . . . . . . . . . . . . . . . . . . .197
S Memo . . . . . . . . . . . . . . . . . . . . . . . . . . . .197
S Translator . . . . . . . . . . . . . . . . . . . . . . . . .199
S Voice . . . . . . . . . . . . . . . . . . . . . . . . . . . . . 200
Samsung Apps . . . . . . . . . . . . . . . . . . . . . . .201
Samsung Hub . . . . . . . . . . . . . . . . . . . . . . . .201
Samsung Link . . . . . . . . . . . . . . . . . . . . . . . .204
Settings . . . . . . . . . . . . . . . . . . . . . . . . . . . . .207
Story Album . . . . . . . . . . . . . . . . . . . . . . . . .207
TripAdvisor . . . . . . . . . . . . . . . . . . . . . . . . . .207
Video . . . . . . . . . . . . . . . . . . . . . . . . . . . . . . .208
Voice Recorder . . . . . . . . . . . . . . . . . . . . . . .208
Voice Search . . . . . . . . . . . . . . . . . . . . . . . . .209
VPN Client . . . . . . . . . . . . . . . . . . . . . . . . . . .210
WatchON . . . . . . . . . . . . . . . . . . . . . . . . . . . .210
YouTube . . . . . . . . . . . . . . . . . . . . . . . . . . . .215
Section 9: Connections ...........................216
Wi-Fi . . . . . . . . . . . . . . . . . . . . . . . . . . . . . . .216
Bluetooth . . . . . . . . . . . . . . . . . . . . . . . . . . . .218
Enable Downloading for Web Applications . . .224
PC Connections . . . . . . . . . . . . . . . . . . . . . . .224
USB Tethering . . . . . . . . . . . . . . . . . . . . . . . .225
Mobile HotSpot . . . . . . . . . . . . . . . . . . . . . . .226
Section 10: Settings ................................229
Accessing Settings . . . . . . . . . . . . . . . . . . . .229
Wi-Fi Settings . . . . . . . . . . . . . . . . . . . . . . . .230
Data Usage . . . . . . . . . . . . . . . . . . . . . . . . . .236
More Networks . . . . . . . . . . . . . . . . . . . . . . .236
VPN . . . . . . . . . . . . . . . . . . . . . . . . . . . . . . . .238
Lock Screen . . . . . . . . . . . . . . . . . . . . . . . . .241
Display Settings . . . . . . . . . . . . . . . . . . . . . . .247
Sound Settings . . . . . . . . . . . . . . . . . . . . . . .249
Home Screen Mode . . . . . . . . . . . . . . . . . . . .251
By accessing this document, the recipient agrees and
acknowledges that all contents and information in this document (i) are confidential and proprietary information
of Samsung, (ii) shall be subject to the non-disclosure regarding project H and Project B, and (iii) shall not be
disclosed by the recipient to any third party. Samsung Proprietary and Confidential
5
Call Settings . . . . . . . . . . . . . . . . . . . . . . . . 252
Blocking Mode . . . . . . . . . . . . . . . . . . . . . . . 255
Driving Mode . . . . . . . . . . . . . . . . . . . . . . . . 256
Power Saving Mode . . . . . . . . . . . . . . . . . . . 256
Accessory . . . . . . . . . . . . . . . . . . . . . . . . . . 257
Accessibility Settings . . . . . . . . . . . . . . . . . . 257
Language and Input Settings . . . . . . . . . . . . 259
Motions and gestures . . . . . . . . . . . . . . . . . . 265
Smart screen . . . . . . . . . . . . . . . . . . . . . . . . 266
Voice control . . . . . . . . . . . . . . . . . . . . . . . . 267
Add Account . . . . . . . . . . . . . . . . . . . . . . . . 267
Backing up to the Cloud . . . . . . . . . . . . . . . . 268
Backup and Reset . . . . . . . . . . . . . . . . . . . . 269
Backing up Your Data Before Factory Reset . 270
Location Services . . . . . . . . . . . . . . . . . . . . . 273
Security . . . . . . . . . . . . . . . . . . . . . . . . . . . . 274
Application Manager . . . . . . . . . . . . . . . . . . 276
Battery Usage . . . . . . . . . . . . . . . . . . . . . . . 279
SD Card & Device Storage . . . . . . . . . . . . . . 279
Date and Time . . . . . . . . . . . . . . . . . . . . . . . 281
About Device . . . . . . . . . . . . . . . . . . . . . . . . 281
Software Update . . . . . . . . . . . . . . . . . . . . . 282
Section 11: Health and Safety Information ..
284
Exposure to Radio Frequency (RF) Signals . . 284
Specific Absorption Rate (SAR) Certification
Information . . . . . . . . . . . . . . . . . . . . . . . . 289
FCC Part 15 Information to User . . . . . . . . . . 291
Commercial Mobile Alerting System (CMAS) . 291
Smart Practices While Driving . . . . . . . . . . . 292
Battery Use and Safety . . . . . . . . . . . . . . . . . 293
Samsung Mobile Products and Recycling . . . 295
UL Certified Travel Charger . . . . . . . . . . . . . . 296
Display / Touch-Screen . . . . . . . . . . . . . . . . 296
GPS . . . . . . . . . . . . . . . . . . . . . . . . . . . . . . . 297
Emergency Calls . . . . . . . . . . . . . . . . . . . . . 297
Care and Maintenance . . . . . . . . . . . . . . . . . 298
Responsible Listening . . . . . . . . . . . . . . . . . 299
Operating Environment . . . . . . . . . . . . . . . . . 301
FCC Hearing Aid Compatibility (HAC)
Regulations for Wireless Devices . . . . . . . 303
Restricting Children's Access to Your
Mobile Device . . . . . . . . . . . . . . . . . . . . . . 305
FCC Notice and Cautions . . . . . . . . . . . . . . . 305
By accessing this document, the recipient agrees and
acknowledges that all contents and information in this document (i) are confidential and proprietary information
of Samsung, (ii) shall be subject to the non-disclosure regarding project H and Project B, and (iii) shall not be
disclosed by the recipient to any third party. Samsung Proprietary and Confidential
6
Other Important Safety Information . . . . . . . . 306
Section 12: Warranty Information ..........308
Standard Limited Warranty . . . . . . . . . . . . . . 308
End User License Agreement for Software . . . 313
Index .........................................................321
By accessing this document, the recipient agrees and
acknowledges that all contents and information in this document (i) are confidential and proprietary information
of Samsung, (ii) shall be subject to the non-disclosure regarding project H and Project B, and (iii) shall not be
disclosed by the recipient to any third party. Samsung Proprietary and Confidential

Getting Started 7
Section 1: Getting Started
This section allows you to quickly start using your Samsung
GALAXY S4 Mini phone by installing the SIM and microSD
cards, installing and charging the battery, activating your
service, and setting up your voicemail account.
Understanding this User Manual
The sections of this manual generally follow the features of
your phone. A robust index for features begins on page 321.
Also included is important safety information that you should
know before using your phone. Most of this information is
near the back of the guide, beginning on page 284.
This manual gives navigation instructions according to the
default display settings. If you select other settings,
navigation steps may be different.
Unless otherwise specified, all instructions in this manual
assume that you are starting from the Home screen. To get to
the Home screen, you may need to unlock the phone or
keypad. ( For more information, refer to “Security” on page
290.)
Note:
Instructions in this manual are based on default settings,
and may vary from your phone, depending on the
software version on your phone, and any changes to the
phone’s Settings.
Unless stated otherwise, instructions in this User
Manual start with the phone unlocked, at the Home
screen.
All screen images in this manual are simulated. Actual
displays may vary, depending on the software version of
your phone and any changes to the phone’s Settings.
By accessing this document, the recipient agrees and
acknowledges that all contents and information in this document (i) are confidential and proprietary information
of Samsung, (ii) shall be subject to the non-disclosure regarding project H and Project B, and (iii) shall not be
disclosed by the recipient to any third party. Samsung Proprietary and Confidential
8
Special Text
In this manual, you’ll find text that is set apart from the rest.
These are intended to point out important information, share
quick methods for activating features, to define terms, and
more. The definitions for these methods are as follows:
•
Notes
: Presents alternative options for the current feature, menu,
or sub-menu.
•
Tips
: Provides quick or innovative methods, or useful shortcuts.
•
Example
: Gives an example of the feature or procedure.
•
Important
: Points out important information about the current
feature that could affect performance.
•
Warning
: Brings to your attention important information to
prevent loss of data or functionality, or even prevent damage to
your phone.
Text Conventions
This manual provides condensed information about how to
use your phone. To make this possible, the following text
conventions are used to represent often-used steps:
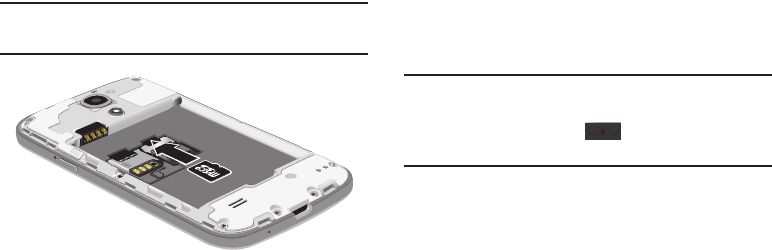
Battery Cover
The battery, micro SIM card and SD card are installed under
the battery cover.
Important!
Before removing or replacing the battery cover,
make sure the device is switched off. To turn the
device off, hold down the key until the
power-off image displays, then tap
Power off
.
➔
Arrows are used to represent the sequence of
selecting successive options in longer, or
repetitive, procedures.
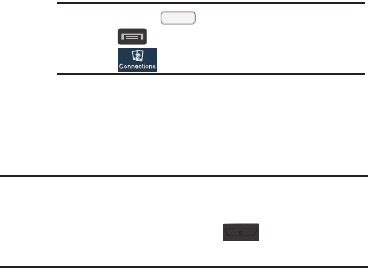
Example:
“Press
Home
, then touch
Menu
➔
Settings
➔
Connections
➔
Wi-Fi
.”
By accessing this document, the recipient agrees and
acknowledges that all contents and information in this document (i) are confidential and proprietary information
of Samsung, (ii) shall be subject to the non-disclosure regarding project H and Project B, and (iii) shall not be
disclosed by the recipient to any third party. Samsung Proprietary and Confidential
Getting Started 9
Caution!
Do not bend or twist the back cover excessively
during installation or removal. Doing so may damage
the cover.
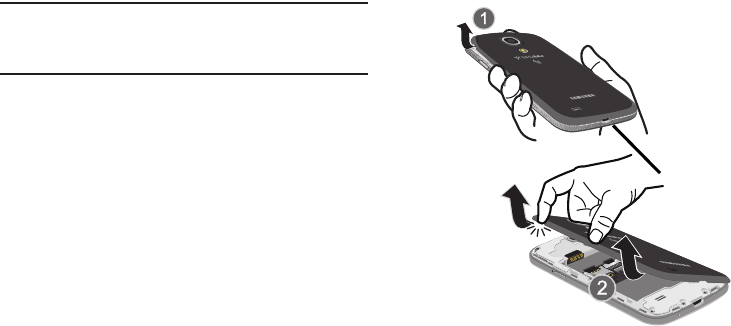
To remove the battery cover:
1. Hold the device firmly and locate the cover release
latch (1).
2. Place your fingernail in the opening (2) and firmly
“pop” the cover off the device (similar to a soda can).
To replace the battery cover:
Position the battery cover over the battery
compartment and press down until you hear a click.
Release Latch
By accessing this document, the recipient agrees and
acknowledges that all contents and information in this document (i) are confidential and proprietary information
of Samsung, (ii) shall be subject to the non-disclosure regarding project H and Project B, and (iii) shall not be
disclosed by the recipient to any third party. Samsung Proprietary and Confidential

10
SIM Card Overview
Important!
Before removing or replacing the micro SIM card,
make sure the device is switched off. To turn the
phone off, hold down the key until the
power-off image displays, then tap
Power off
.
The micro SIM card is loaded with your subscription details
such as your telephone number, PIN, available optional
services, and many other features.
Important!
The micro SIM card and its information can be
easily damaged by scratching or bending, so be
careful when handling, inserting, or removing the
card. Keep all SIM cards out of reach of small
children.
Some features on your device (such as Wi-Fi Calling) can be
unlocked by using the new micro SIM card.
To use this new micro SIM card, call or contact Customer
Service for more information.
This card contains the necessary information for identifying
and authenticating the user to the IMS (IP Multimedia
Subsystem).
Installing and Removing the SIM card
This device uses a different type of SIM card called a “micro
SIM”. Other larger SIM cards will not function or fit within this
slot.
To install the SIM card:
1. Carefully slide the micro SIM card into the SIM card
socket until it clicks into place.
2. Make sure that the card’s gold contacts face into the
phone and that the upper-left angled corner of the card
is positioned as shown.
Micro SIM card
By accessing this document, the recipient agrees and
acknowledges that all contents and information in this document (i) are confidential and proprietary information
of Samsung, (ii) shall be subject to the non-disclosure regarding project H and Project B, and (iii) shall not be
disclosed by the recipient to any third party. Samsung Proprietary and Confidential
Getting Started 11
To remove the micro SIM card:
1. Remove the battery cover.
2. Carefully place your fingernail into the end of the micro
SIM slot and push the card slightly out.
3. Carefully slide the card out of the micro SIM card
socket.
Note:
If the card is not inserted correctly, the device will not
detect it and no service is available. If this happens, turn
off the device, remove the card, and reinstall the card in
the correct orientation.
Installing the microSD Memory Card
Your device supports an optional (external) microSD™
memory cards for storage of media such as music, pictures,
video and other files. The SD card is designed for use with
this mobile device and other devices.
Note:
microSD memory cards include capacities of up to 4GB.
microSDHC™ memory card types can range from 4GB
to up to 32GB.
microSDXC™ memory card types can include
capacities greater than 32GB.
Note:
This device supports a memory card of up to a 64GB.
1. Remove the battery cover.
2. Locate the microSD card slot on the inside of the
device.
3. Orient the card with the gold strips facing down.
4. Carefully slide the microSD card into the card socket
until it clicks into place.
By accessing this document, the recipient agrees and
acknowledges that all contents and information in this document (i) are confidential and proprietary information
of Samsung, (ii) shall be subject to the non-disclosure regarding project H and Project B, and (iii) shall not be
disclosed by the recipient to any third party. Samsung Proprietary and Confidential
12
Important!
Be sure to align the gold contact pins on the card
with the phone’s contact pins.
Removing the microSD Memory Card
1. Remove the battery cover.
2. Firmly press the card into the slot and release it. The
card should pop partially out of the slot.
3. Remove the card from the slot.
4. Replace the battery cover.
Battery
Before using your device for the first time, install the battery
and charge it fully.
Important!
Before removing or replacing the battery, make
sure the device is switched off. To turn the device
off, hold down the key until the power-off
image displays, then tap
Power off
.
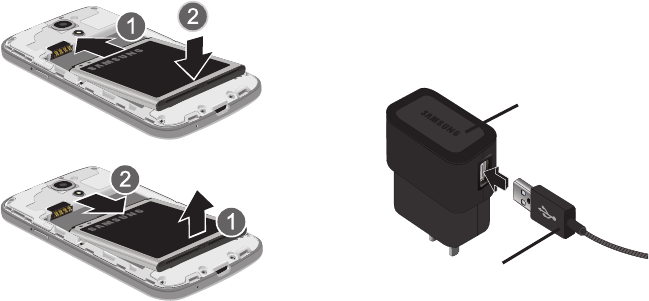
Installing the Battery
1. Slide the battery into the compartment (1) so that the
tabs on the end align with the slots at the bottom of the
phone, making sure the connectors align.
2. Gently press down to secure the battery (2).
By accessing this document, the recipient agrees and
acknowledges that all contents and information in this document (i) are confidential and proprietary information
of Samsung, (ii) shall be subject to the non-disclosure regarding project H and Project B, and (iii) shall not be
disclosed by the recipient to any third party. Samsung Proprietary and Confidential
Getting Started 13
Removing the Battery
Grip the battery at the top end (3) and lift it up and out
of the battery compartment (4).
Charging the Battery
Your device is powered by a rechargeable Li-ion battery. A
wall charger, which is used for charging the battery, is
included with your device. Use only approved batteries and
chargers. Ask your local Samsung dealer for further details.
Before using your device for the first time, you must fully
charge the battery. A discharged battery recharges fully in
approximately 4 hours.
Installing Battery
Removing Battery
Charging Head
USB Cable
By accessing this document, the recipient agrees and
acknowledges that all contents and information in this document (i) are confidential and proprietary information
of Samsung, (ii) shall be subject to the non-disclosure regarding project H and Project B, and (iii) shall not be
disclosed by the recipient to any third party. Samsung Proprietary and Confidential
14
Note:
Verify that the battery is installed prior to connecting the
wall charger. If both the wall charger is connected and
the battery is not installed, the handset will power cycle
continuously and prevent proper operation. Failure to
unplug the wall charger before you remove the battery,
can cause the device to become damaged.
Important!
It is recommended you fully charge the battery
before using your device for the first time.
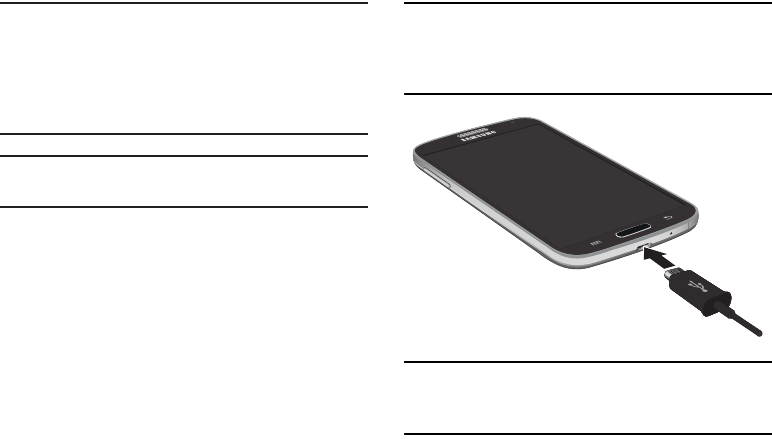
1. Connect the USB cable to the charging head.
2. Locate the Charger/Accessory jack.
3. Insert the USB cable into the device’s Charger/
Accessory jack.
4. Plug the charging head into a standard AC power
outlet. The device turns on with the screen locked and
indicates both its charge state and percent of charge.
Warning!
While the device is charging, if the touch screen
does not function due to an unstable power supply
unplug the USB power adapter from the power outlet
or unplug the USB cable from the device.
Note:
If the charger is incorrectly connected, damage to the
accessory port will occur therefore voiding the phone’s
warranty.
By accessing this document, the recipient agrees and
acknowledges that all contents and information in this document (i) are confidential and proprietary information
of Samsung, (ii) shall be subject to the non-disclosure regarding project H and Project B, and (iii) shall not be
disclosed by the recipient to any third party. Samsung Proprietary and Confidential

Getting Started 15
5. When charging is finished, first unplug the charger’s
power plug from the AC wall outlet, then disconnect
the charger’s connector from the phone.
Important!
If your handset has a touch screen display, please
note that a touch screen responds best to a light
touch from the pad of your finger or a non-metallic
stylus. Using excessive force or a metallic object
when pressing on the touch screen may damage
the tempered glass surface and void the warranty.
For more information, refer to “Standard Limited
Warranty” on page 324
Low Battery Indicator
When the battery level is low and only a few minutes of talk
time remain (~15% charge), a warning tone sounds and the
“Battery low” message repeats at regular intervals on the
display. In this condition, your device conserves its remaining
battery power, by dimming the backlight.
When the battery level becomes too low, the device
automatically turns off.
The on-screen battery charge is represented (by default) as a
colored battery icon. You can also choose to display a
percentage value. Having a percentage value on-screen can
provide a better idea of the remaining charge on the battery.
Press ➔ and then tap
Settings
➔
My device
tab ➔
Display
➔
Show battery percentage
.
For more information, refer to “Display Settings” on page
256
By accessing this document, the recipient agrees and
acknowledges that all contents and information in this document (i) are confidential and proprietary information
of Samsung, (ii) shall be subject to the non-disclosure regarding project H and Project B, and (iii) shall not be
disclosed by the recipient to any third party. Samsung Proprietary and Confidential

16
Extending Your Battery Life
Active applications, light levels, Bluetooth usage, and GPS
functionality all act to drain your battery. The following is a
list of helpful tips that can help conserve your battery power:
•
Reduce your backlight on time.
•
Turn Bluetooth off when not in use.
•
Turn Wi-Fi off when not in use.
•
Deactivate the GPS when not needed. Most applications using
this function will periodically query the GPS satellites for your
current location; each query drains your battery.
•
Do not wait until your battery is completely depleted before
charging your device. Repeating this process of a complete
discharge and recharge can over time reduce the storage
capacity of any battery.
•
Turn off Automatic application sync.
•
Use the Power Saving feature to deactivate some hardware and
interface functions.
•
Check the Battery use screen to review what features or functions
are consuming your battery resources.
•
Check the Running Services and close any unnecessary
applications.
•
Use the Task Manager feature to end/shutdown background
applications that are still running. These minimized applications
can, over time, cause your device to “slow down”.
•
Turn off any streaming services after use (see Running Services).
•
Animated wallpapers use processing power, memory, and more
power. Change your Live Wallpaper to a non-animated Wallpaper
gallery or Gallery image.
Initial Device Configuration
1. Select a language from the associated field.
English is the default language.
Note:
If you are visually impaired or have difficulty hearing, tap
Accessibility
to configure the accessibility settings.
2. Tap
Next
.
Note:
You may be prompted with a notification that your
activation is completed.
3. At the
Wi-Fi
screen, move the slider to activate the
feature and connect to either an existing Wireless
Access Point (WAP) or tap
Next
to continue.
By accessing this document, the recipient agrees and
acknowledges that all contents and information in this document (i) are confidential and proprietary information
of Samsung, (ii) shall be subject to the non-disclosure regarding project H and Project B, and (iii) shall not be
disclosed by the recipient to any third party. Samsung Proprietary and Confidential
Getting Started 17
4. If prompted, assign the
Date and time
settings. Enable
the Automatic date and time field, select a time zone,
and tap
Next
.
•
If you disable the Automatic date and time feature, you can
then manually assign this information.
Note:
The Date and time menu may not display if
automatically detected via your internal microSIM card.
5. At the
Samsung account
screen, select one of the
following options:
•
If this is your first time, tap
Create new account
.
•
If you have previously created a Samsung account, tap
Sign in
.
– or –
Tap
Skip
to continue with the setup process and create
an account later. For more information, refer to
“Creating a Samsung Account” on page 21
6. At the
Got Google?
screen, choose either
Yes
to log into
your existing Google account or
No
to continue.
•
If you selected
Yes
, on the Sign in screen, enter your current
Google Email and Password information and tap ( )
Next
.
•
Tap
OK
to agree to the Google legal agreements.
•
If prompted to enable purchases, tap
Set up credit card
and
enter your credit card information and click
Save
.
•
Click
Skip
to continue without entering this information.
7. If you indicated that you did not have a current Google
account, then at the
Make it Google
screen, choose
either
Get an account
to create a new account or
Not now
to continue.
8. Select/deselect the desired
Google & location
services
and tap (
Next
).
Note:
Enabling Google location services can drain battery
power.
By accessing this document, the recipient agrees and
acknowledges that all contents and information in this document (i) are confidential and proprietary information
of Samsung, (ii) shall be subject to the non-disclosure regarding project H and Project B, and (iii) shall not be
disclosed by the recipient to any third party. Samsung Proprietary and Confidential
18
9. When prompted, enter a
First
and
Last
name then tap
(
Next
). This will help to identify this as your
device.
10. When prompted with the Dropbox activation screen,
you can choose to either:
Create account
,
Sign in
,
Disclaimer
, or tap
Skip
to continue.
Note:
For more information, refer to “Dropbox” on page 168
11. From the
Learn about key features
screen:
•
Tap an available field to display an on-screen tutorial.
•
Turn on a feature by sliding the activation slider to the ON
position ( ).
12. Tap
Next
.
13. Accept the current device name.
– or –
Tap the
Device name
field and use the on-screen
keyboard to rename your device.
Important!
The device name is also used to provide an
identification for your device’s Bluetooth and
Wi-Fi Direct names.
14. Tap
Finish
to complete the setup process.
15. Read the on-screen Collect diagnostics information.
Note:
This software collects only diagnostic data from your
device so that technicians can better troubleshoot
issues with your device.
16. Select either
More Info...
(to read additional
information) or
Close
to close the message screen.
ON
ON
By accessing this document, the recipient agrees and
acknowledges that all contents and information in this document (i) are confidential and proprietary information
of Samsung, (ii) shall be subject to the non-disclosure regarding project H and Project B, and (iii) shall not be
disclosed by the recipient to any third party. Samsung Proprietary and Confidential
Getting Started 19
Important!
Selecting
Close
only closes the current description
screen and does not disable data collection.
To disable data collection, go to
Settings
➔
Accounts
tab ➔
Backup and reset
➔
Collect
diagnostics
and turn off the
Allow diagnostics to be
collected
feature. For more information, refer to
“Collect Diagnostics” on page 288
Switching the Device On or Off
Once the device has been configured, you will not be
prompted with setup screens again.
To turn the device on:
Press and hold (
Power/End
) until the device
switches on.
The device searches for your network and after finding
it, you can make or receive calls.
Note:
The display language is preset to English at the factory.
To change the language, use the Language menu. For
more information, refer to “Language and Input
Settings” on page 275
To turn the device off:
1. Press and hold (
Power/End
) until the Device
options screen displays.
2. Tap
Power off
().
Restarting the Device
1. Press and hold (
Power/End
) until the Device
options screen displays.
2. Tap
Restart
().
Locking and Unlocking the Device
By default, the device screen locks when the backlight turns
off.
Place your finger on the screen and swipe the glass in
any of the directions shown unlock the device.
Note:
You can choose to configure lock settings to prevent
unauthorized use of your device. For more information,
refer to “Security” on page 290.
By accessing this document, the recipient agrees and
acknowledges that all contents and information in this document (i) are confidential and proprietary information
of Samsung, (ii) shall be subject to the non-disclosure regarding project H and Project B, and (iii) shall not be
disclosed by the recipient to any third party. Samsung Proprietary and Confidential
20
Creating a New Google Account
You should create a Google™ Account when you first use
your device in order to fully utilize the functionality. This
account provides access to several device features such as
Gmail™, Hangouts™, and the Google Play Store™
applications. Before you are able to access Google
applications, you must enter your account information. These
applications sync between your device and your online
Google account.
To create a new Google Account from your device:
1. From the Home screen, tap (
Play Store
).
2. Read the introduction and tap
New
to begin.
3. Follow the on-screen instructions to create a Google
Account.
– or –
If this is not the first time you are starting the device,
tap ➔ (
Gmail
).
Note:
If you already have a Google account, you only need to
sign in.
Signing into Your Google Account
1. Launch an application that requires a Google account
(such as Play Store or Gmail).
2. Click
Existing
.
3. Tap the
Email
and
Password
fields and enter your
information.
4. Tap (
Sign in
). Your device communicates with the
Google servers to confirm your information.
5. If prompted, you can enable the option to stay up to
date on news and offers, then tap
OK
.
By accessing this document, the recipient agrees and
acknowledges that all contents and information in this document (i) are confidential and proprietary information
of Samsung, (ii) shall be subject to the non-disclosure regarding project H and Project B, and (iii) shall not be
disclosed by the recipient to any third party. Samsung Proprietary and Confidential

Getting Started 21
Confirming the Default Image and
Video Storage Location
Although the device is configured to store new pictures and
videos to the Memory card, it is a very good idea to confirm
this location before using your device.
Important!
Too many users can overlook this storage
destination until something goes wrong. It is
recommended that you verify this location or
change it before initiating the use of the camera or
camcorder features.
1. From the Home screen, tap
Apps
➔
Camera
.
2. Press and then tap
Settings
➔ (
Settings
)
and scroll up to the
Storage
entry.
3. Tap this entry and select the desired default storage
location for newly taken pictures or videos. Choose
from:
Device
or
Memory card
.
Note:
It is recommended that you set the option to
Memory
card
.
4. Press to return to the Home screen.
Creating a Samsung Account
Just as important as setting up and activating a Google
account to help provide access to Play Store, etc.. An active
Samsung account is required to begin accessing applications
such as Samsung Hub.
Note:
The Samsung account application will manage your
access to the previously mentioned applications, and
there is no longer a need to remember different
passwords for each application.
1. From the Home screen, press and then tap
Settings
➔
Accounts
tab.
2. Navigate to the
My accounts
area
and then tap
Add account
➔
Samsung account
.
3. If you have previously created a Samsung account, tap
Sign in
.
– or –
If this is your first time, tap
Create new account
.
By accessing this document, the recipient agrees and
acknowledges that all contents and information in this document (i) are confidential and proprietary information
of Samsung, (ii) shall be subject to the non-disclosure regarding project H and Project B, and (iii) shall not be
disclosed by the recipient to any third party. Samsung Proprietary and Confidential
22
4. Follow the on-screen instructions.
Note:
You may be prompted to confirm your credentials via
email.
5. If prompted, follow the on-screen instructions to verify
your account via the provided email address.
Note:
Without confirming your email address and following the
documented procedures, related applications will not
function properly since it is Samsung account that is
managing their username and password access.
Voicemail
Setting Up Your Voicemail
Your device automatically transfers all unanswered calls to
voicemail, even if your device is in use or turned off. As soon
as your battery is charged and the micro SIM card inserted,
activate your voicemail account.
Important!
Always use a password to protect against
unauthorized access.
For new users, follow the instructions below to set up voice
mail:
Note:
Voicemail setup may be different depending on your
network.
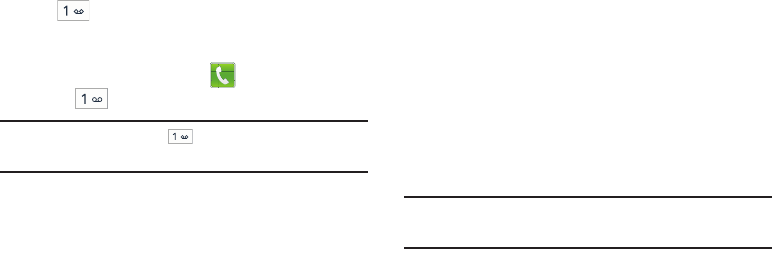
1. From the Home screen, tap and then touch and
hold the key until the device dials voicemail.
You may be prompted to enter a password.
2. Follow the tutorial to create a password, a greeting,
and a display name.
By accessing this document, the recipient agrees and
acknowledges that all contents and information in this document (i) are confidential and proprietary information
of Samsung, (ii) shall be subject to the non-disclosure regarding project H and Project B, and (iii) shall not be
disclosed by the recipient to any third party. Samsung Proprietary and Confidential
Getting Started 23
Accessing Your Voicemail
You can access your Voicemail by either pressing and
holding on the keypad, or by using the phone’s
Application icon, then tapping the Voicemail application.
To access Voice Mail using the menu:
1. From the Home screen, tap and then touch and
hold until the device dials voicemail.
Note:
Touching and holding will launch the voicemail
application.
2. When connected, follow the voice prompts from the
voicemail center.
Accessing Your Voicemail From Another Phone
1. Dial your wireless phone number.
2. When you hear your voicemail greeting, press the
asterisk key on the phone you are using.
3. Enter your passcode.
Task Manager
Your device can run applications simultaneously, with some
applications running in the background.
Sometimes your device might seem to slow down over time,
and the biggest reason for this are background applications.
These are applications that were not properly closed or
shutdown and are still active but minimized. The Task
Manager not only lets you see which of these applications
are still active in the background but also easily lets you
choose which applications are left running and which are
closed.
Note:
The larger the number of applications running on your
phone, the larger the energy drain on your battery.
By accessing this document, the recipient agrees and
acknowledges that all contents and information in this document (i) are confidential and proprietary information
of Samsung, (ii) shall be subject to the non-disclosure regarding project H and Project B, and (iii) shall not be
disclosed by the recipient to any third party. Samsung Proprietary and Confidential

24
Task Manger Overview
Press and hold (
Home
) and then tap
(
Task manager
). This screen contains the following
tabs:
• Active applications
display those currently active applications
running on your phone.
•Downloaded
displays any installed packages or applications
from the Play Store that are taking up memory space. Tap
Uninstall
to remove them from your phone.
•RAM
, which displays the amount of current RAM (Random
Access Memory) currently being used and allow you to
Clear
Memory
.
•Clear defaults
allows you to clear which applications are
launched by default.
•Storage
displays a visual graph indicating the available and
used space within the System storage and external SD card.
Shutting Down an Currently Active Application
Press and hold (
Home
) and then tap
(
End all
)
– or –
1. Press and hold (
Home
) and then tap
(
Task manager
).
2. From the
Active applications
tab, tap
End
to close
selected applications.
– or –
Tap
End all
to close all background running
applications.
By accessing this document, the recipient agrees and
acknowledges that all contents and information in this document (i) are confidential and proprietary information
of Samsung, (ii) shall be subject to the non-disclosure regarding project H and Project B, and (iii) shall not be
disclosed by the recipient to any third party. Samsung Proprietary and Confidential
Getting Started 25
Google Now
Google Now® recognizes a user’s repeated actions
performed on the device (including access of common
locations, repeated calendar appointments, search queries,
etc.). This information is then used to display more relevant
information to the user in the form of “cards”. These
scrollable on-screen cards are displayed when the Google
Now application is launched.
These cards are not manually added.
The service uses your GPS, Google Search, and usage
information to generate these cards automatically.
To initially set up Google Now:
1. Press and hold (
Home
) and then tap
(
Google Now
).
2. Follow the on-screen instructions to review the
available information.
3. When prompted, agree to launch the application. Some
initial on-screen “cards” are shown. A default is the
Weather card that provides updated weather
information in your area.
To configure the Google Now settings:
1. Press and hold and then tap (
Google Now
).
2. Press and select
Settings
.
3. Access each desired Settings page and configure it as
desired.
When these condition are met, new card information starts to
display in the Google Now list of cards.
By accessing this document, the recipient agrees and
acknowledges that all contents and information in this document (i) are confidential and proprietary information
of Samsung, (ii) shall be subject to the non-disclosure regarding project H and Project B, and (iii) shall not be
disclosed by the recipient to any third party. Samsung Proprietary and Confidential

26
Section 2: Understanding Your Phone
Features
•
Touch screen with virtual (on-screen) QWERTY keyboard
•
Brilliant 4-inch WVGA screen (480x800)
•
Delivering data speeds faster than the current 3G network
technology by using 4G LTE and High Speed Packet Access Plus
(HSPA+).
•
Android 4.2.2, Jelly Bean Platform
•
Smart Switch™ compliant. For more information, see
www.samsungsmartswitch.com
•
Wi-Fi
®
Capability
•
Apps available to download from the Google Play™ Store and
Samsung Apps
•
Access Movies, TV Shows, Music, Games, and Books with
Samsung Hub™
•
Compliant with AllShare Cast Hub
®
•
5 Megapixel Camera and Camcorder with autofocus and digital
zoom
•
VGA Front Facing camera for Video Chat
•
Share Shot picture sharing functionality
•
S-Beam file transfer technology
•
Share Shot camera sharing-capable via multi-connect Wi-Fi
Direct connection
•
Bluetooth enabled
•
NFC-compatible
•
Full Integration of Google Mobile™ Services (Gmail, YouTube,
Google Maps, Google Voice Search)
•
Multiple Messaging Options: Text/Picture/Video Messaging and
Google Hangouts™
•
Corporate and Personal Email
•
Music Player with multitasking features
•
Music Player (AAC, AAC+, eAAC+, MP3, and WMA)
•
Speakerphone
•
Support for microSD™ and microSDHC™ Memory Cards up to
64GB capacity
•
Pre-loaded e-reader applications such as: Play Books™ and Play
Magazines™
•
Assisted GPS (Google Navigation)
•
Webkit-based browser
By accessing this document, the recipient agrees and
acknowledges that all contents and information in this document (i) are confidential and proprietary information
of Samsung, (ii) shall be subject to the non-disclosure regarding project H and Project B, and (iii) shall not be
disclosed by the recipient to any third party. Samsung Proprietary and Confidential
Understanding Your Phone 27
•
Expandable memory slot - supports up to 64GB microSD
•
Mobile HotSpot and USB Tethering-capability
•
Video Chat via Google Hangouts™
•
Google Play™ Music
•
Wi-Fi
®
Calling via the use of a micro SIM card
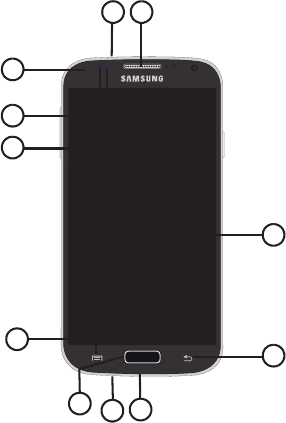
Front View
8
9
6
5
10
17
2
1
3
4
By accessing this document, the recipient agrees and
acknowledges that all contents and information in this document (i) are confidential and proprietary information
of Samsung, (ii) shall be subject to the non-disclosure regarding project H and Project B, and (iii) shall not be
disclosed by the recipient to any third party. Samsung Proprietary and Confidential
28
1.
Earpiece
:
Use during calls to listen to callers.
2.
LED Indicator
: Flashes or glows to alert you to alert
notifications or phone status.
3.
Menu Key
: Press to display options for the current
screen.
4.
Home Key
: Press to display the Home screen, or Lock
screen if the phone is locked. Press and hold to display
recent applications or to launch Task Manager.
5.
Microphone
: Use during calls to allow callers to hear
your voice, and when recording.
6.
Back Key
: Press to return to the previous screen or
option.
7.
2 Megapixel Front Camera
: Use for taking pictures and
recording video.
8.
Proximity and Light Sensors
: Detect the presence of
nearby objects to control device functions or blank the
screen display, such as when you hold the phone to
your ear during a phone call. Detect ambient light to
determine screen brightness when
Brightness
is set to
Automatic brightness
(see “Adjusting Screen
Brightness” on page 248), and when taking pictures
with the Front camera.
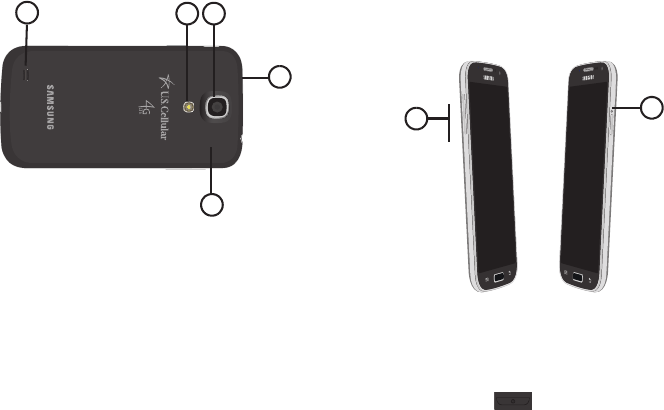
Back View
The following illustration shows the external elements of your
device:
1.
Camera lens
is used to take photos.
2.
Flash
is used to take photos in low-light conditions.
3.
External speaker
allows you to hear ringers, music, and
other sounds offered by your phone.
4.
microSD Card Slot
(internal) allows you use a microSD
card to expand the memory of your device.
By accessing this document, the recipient agrees and
acknowledges that all contents and information in this document (i) are confidential and proprietary information
of Samsung, (ii) shall be subject to the non-disclosure regarding project H and Project B, and (iii) shall not be
disclosed by the recipient to any third party. Samsung Proprietary and Confidential
Understanding Your Phone 29
5.
Headset jack
allows you to connect a hands-free
headset so you can listen to music.
Side Views
The following illustration shows the side elements of your
device:
1.
Volume key
allows you to adjust the ringer volume in
standby mode (with the phone open) or adjust the voice
volume during a call. When receiving an incoming call:
•
Pressing the volume key down mutes the ring tone.
2.
Power/End key
ends a call or switches the
phone off and on. Press and hold for two seconds to
turn toggle the Silent mode or Airplane mode states,
turn the device on or off, or Restart.
4
2 1
5
3
2
1
By accessing this document, the recipient agrees and
acknowledges that all contents and information in this document (i) are confidential and proprietary information
of Samsung, (ii) shall be subject to the non-disclosure regarding project H and Project B, and (iii) shall not be
disclosed by the recipient to any third party. Samsung Proprietary and Confidential
30
Device Display
Your display provides information about the device’s status,
and is the interface to manage features. The display
indicates your connection status, signal strength, battery
status and time. Icons display at the top of the device when
an incoming call or message is received and also alerts you
at a specified time when an alarm was set. The screen also
displays notifications, and Application (or shortcut) bar with
five primary shortcuts: Phone, Contacts, Messaging, Internet,
and Apps.
Display settings
In this menu, you can change various settings for the for the
wallpaper, cube, brightness or backlight.
From the Home screen, tap
Apps
➔
(
Settings
) ➔
My device
tab ➔
Display
.
For more information, refer to “Display Settings” on
page 256.
Status Bar
The Status Bar shows information about the connection
status, signal strength, phone battery level, and time, and
displays notifications about incoming messages, calls and
other actions.
This list identifies the icons you see on your phone’s display
screen:
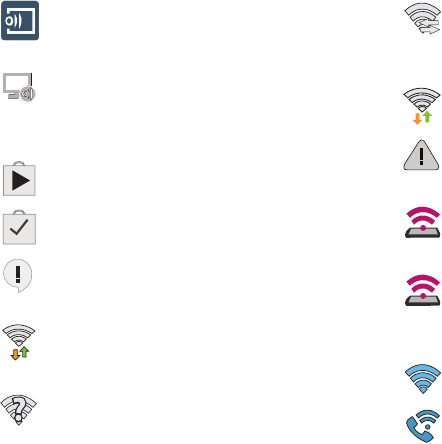
Indicator Icons
This list identifies the symbols you’ll see on your device’s
display and Indicator area:
Note:
Some Notification icons can be hidden manually by
toggling the status of the Notification panel function. For
more information, refer to “Accessing Additional Screen
Functions” on page 37
My device
My device
Displays your current signal strength. The greater
the number of bars, the stronger the signal.
Indicates that the Airplane Mode is active. You
cannot send or receive any calls or access online
information.
By accessing this document, the recipient agrees and
acknowledges that all contents and information in this document (i) are confidential and proprietary information
of Samsung, (ii) shall be subject to the non-disclosure regarding project H and Project B, and (iii) shall not be
disclosed by the recipient to any third party. Samsung Proprietary and Confidential
Understanding Your Phone 31
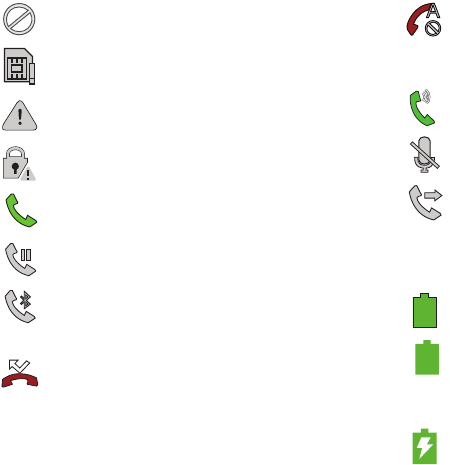
Indicates there is no signal available.
Displays when there is no SIM card in the phone.
Displays when there is a system error or alert.
Displays to indicate a security warning. You are
prompted to set a screen lock password.
Displays when a call is in progress. Icon is
displayed in the Status bar area.
Displays when a call is on hold. Icon displays in the
Status bar area.
Displays when an active call is routed through a
Bluetooth headset. Icon displays in the Status bar
area.
Displays when you have missed an incoming call.
Displays when you device is set to automatically
reject all incoming calls. The All numbers option
is enabled from within
Call settings
➔
Call rejection
➔
Auto reject mode
menu.
Displays when the speakerphone is on. Icon
displays in the Status bar area.
Displays when the microphone is muted. Icon
displays in the Status bar area.
Displays when Call forwarding is set to Always
forward. Displayed in the Status bar when the
current call is minimized. For more information,
refer to “Configuring Additional Voice Call Settings”
on page 265
Displays your current battery charge level. Icon
shown is fully charged.
Displays when the current battery is 100 percent
charged and the Display battery percentage option
is enabled within the
Settings
➔
My device
tab ➔
Display
menu.
Displays your battery is currently charging.
100%100%
By accessing this document, the recipient agrees and
acknowledges that all contents and information in this document (i) are confidential and proprietary information
of Samsung, (ii) shall be subject to the non-disclosure regarding project H and Project B, and (iii) shall not be
disclosed by the recipient to any third party. Samsung Proprietary and Confidential
32
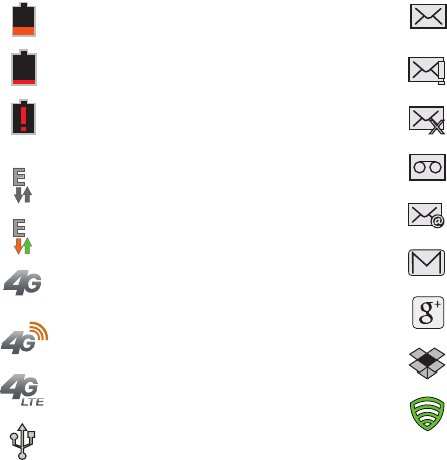
Displays your current battery charge level is
low (Charge: ~28% - 15%).
Displays your current battery charge level is
very low (Charge: ~15% - 5%).
Shows your current battery only has up to 4%
power remaining and will soon shutdown.
(Charge: ~4% - 1%).
Displays when your connection to an EDGE network
is active.
Displays when your phone is communicating with
the EDGE network.
Displays when your connection to a UTMS, HSDPA,
HSPA, or HSPA+ network is active.
Displays when your phone is communicating with
the UTMS, HSDPA, HSPA, or HSPA+ network.
Displays when your connection to a 4G LTE network
is active.
Displays when the phone has detected an active
USB connection and is in a USB Debugging mode.
Displays when there is a new text message.
Displays when an outgoing text message has
failed to be delivered.
Displays when an incoming text message
content has failed to be downloaded.
Displays when there is a new voicemail message.
Displays in the notifications window when there
is a new Email message.
Displays in the notifications window when there
is a new Gmail message.
Displays when a new Google+ notification has
been received.
Displays when the user is prompted to set up a
new Dropbox account.
Displays when the user is prompted with a Lookout
Security notification.
By accessing this document, the recipient agrees and
acknowledges that all contents and information in this document (i) are confidential and proprietary information
of Samsung, (ii) shall be subject to the non-disclosure regarding project H and Project B, and (iii) shall not be
disclosed by the recipient to any third party. Samsung Proprietary and Confidential
Understanding Your Phone 33
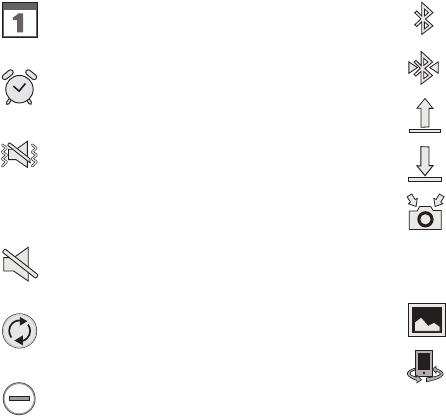
Displays when the time and date for a Calendar Event
has arrived. For more information, refer to
“Calendar” on page 161
Displays when an alarm is set.
For more information, refer to “Setting an Alarm” on
page 164
Displays when the device is in Silent mode.
All sounds except media and alarms are silenced,
and Silent mode is set to
Vibrate
. For more
information, refer to “Silent mode via Device
Options Screen” on page 257
Displays when the device is in Silent mode.
All sounds are silenced, and Silent mode is set to
Mute
.
Displays when data synchronization and
application sync is active and synchronization is in
progress for Gmail, Calendar, and Contacts.
Displays when the Blocking mode feature is
active. For more information, refer to “Blocking
Mode” on page 271
Displays when Bluetooth technology is active and
enabled.
Displays when the Bluetooth technology is active
and communicating with an external device.
Displays when the an outbound file transfer is in
progress.
Displays when a file or application download is in
progress.
Displays when the Share shot option is enabled
from within the Camera Shooting mode menu and
images and being shared via Wi-Fi Direct.
For more information, refer to “Camera Options” on
page 141
Displays when a screen capture has been taken
and stored in the clipboard.
Displays when your device is connected being
used to control streaming media and is connected
to a Digital Living Network Alliance (DLNA)
certified devices.
By accessing this document, the recipient agrees and
acknowledges that all contents and information in this document (i) are confidential and proprietary information
of Samsung, (ii) shall be subject to the non-disclosure regarding project H and Project B, and (iii) shall not be
disclosed by the recipient to any third party. Samsung Proprietary and Confidential
34
Displays when your device is currently sharing/
streaming media to paired device using the
Samsung Link application.
Displays when AllShare Cast Hub is active,
connected to your device, and communicating.
For more information, refer to “AllShare Cast Hub”
on page 158.
Displays when updates are available for download.
Displays when a Play Store download has
completed.
Displays when Hangout updates are available for
download. For more information, refer to
“Hangouts” on page 137.
Displays when Wi-Fi is connected, active, and
communicating with a Wireless Access Point
(WAP).
Displays when Wi-Fi is active and there is an
available open wireless network.
Displays when Wi-Fi Direct is active and
configured for a direct connection to another
compatible device in the same direct
communication mode.
Displays when Wi-Fi Direct is communicating
with another compatible device.
Displays to alert you to disable an active Wi-Fi
Direct connection if not in use - to conserve
battery power.
Displays when the USB Tethering mode is active
and communicating. For more information, refer to
“USB Tethering” on page 229.
Displays when Wi-Fi is being used as a Mobile
HotSpot feature is active and communicating.
For more information, refer to “Mobile HotSpot” on
page 230.
Displays when a share shot has been established
with other users via a Wi-Fi Direct connection.
Displays when the Wi-Fi calling feature is active.
Minutes used while connected to the Wi-Fi network
count against available rate plan minutes.
By accessing this document, the recipient agrees and
acknowledges that all contents and information in this document (i) are confidential and proprietary information
of Samsung, (ii) shall be subject to the non-disclosure regarding project H and Project B, and (iii) shall not be
disclosed by the recipient to any third party. Samsung Proprietary and Confidential

Understanding Your Phone 35
Displays when you are currently in Emergency
calling mode. You must exit this mode to resume
normal calling function.
Displays in the notifications window when there are
too many on-screen notification icons to display.
Tap to show more notifications.
Tap to select a text input method.
Displays in the notifications window when a
song is currently playing within the Music
application.
Displays in the notifications window when a song is
currently playing within the Play Music application.
Displays when your device’s GPS is on and
communicating.
Displays when the external SD card (internal
microSD) has been disconnected (unmounted)
from the phone and is now ready for either removal
or formatting.
Displays when the External SD card is being
prepared for mounting to the device. This is
required for communication with the External SD
card.
Displays when the microSD card has been
improperly or unexpectedly removed.
Displays when storage within either the internal
location or the external SD card has reached its
capacity. It is recommended you either move
files off or delete them to make additional room.
Displays when Power saving mode is enabled.
Displays when the Power saving alert notification
has been activated. You are then prompted to view
your current battery level.
Displays when TTY device has been inserted.
Displays when the Driving Mode is active.
For more information, refer to “Driving Mode” on
page 271.
By accessing this document, the recipient agrees and
acknowledges that all contents and information in this document (i) are confidential and proprietary information
of Samsung, (ii) shall be subject to the non-disclosure regarding project H and Project B, and (iii) shall not be
disclosed by the recipient to any third party. Samsung Proprietary and Confidential
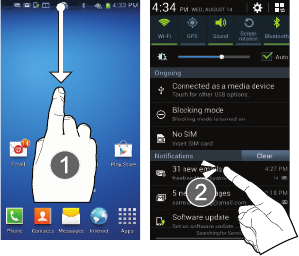
36
Notification Bar
The Notification area indicates new message events (data
sync status, new messages, calendar events, call status,
etc). You can expand this area to display the Notification
screen that provides more detailed information about the
current on-screen notification icons.
1. Touch the Status bar to reveal the Notifications tab, and
then drag the tab to the bottom of the screen to open
the Notifications panel (1).
2. Tap a notification entry to open the associated
application (2).
Clearing Notifications
1. Touch and drag the Status bar down to the bottom of
the screen to open the Notifications panel.
2. Tap
Clear
. The notifications are cleared from the panel.
By accessing this document, the recipient agrees and
acknowledges that all contents and information in this document (i) are confidential and proprietary information
of Samsung, (ii) shall be subject to the non-disclosure regarding project H and Project B, and (iii) shall not be
disclosed by the recipient to any third party. Samsung Proprietary and Confidential
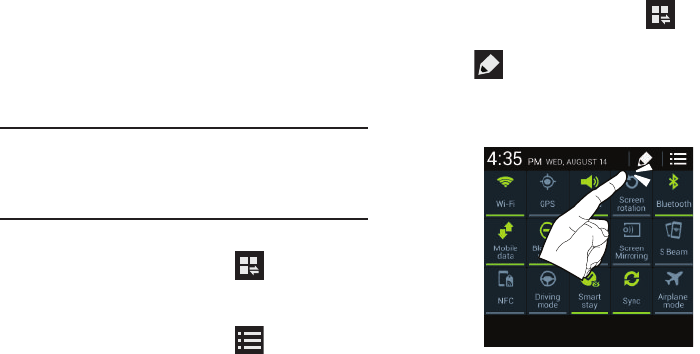
Understanding Your Phone 37
Accessing Additional Screen Functions
In addition to notifications, this screen also provides quick
and ready access to device functions. These can be quickly
activated or deactivated.
Scrolling across a horizontal list of functions has been
enhanced with an accessible Grid view.
Note:
You can select the function buttons you see at the top of
the Notifications panel.
Only 5 buttons are shown at any one time.
The Grid view is the only way to view all functions.
To activate the Grid view:
From the Notification panel, tap (
Open Grid view
)
to display additional functions.
To minimize the Grid view:
From the Notification panel, tap (
Close Grid view
)
to show only your primary functions.
To customize the functions displayed:
1. From the Notification screen, tap (
Open Grid
view
) to display additional functions.
2. Tap (
Edit
) then locate the Notifications panel area
located at the bottom of the Notifications panel screen.
3. Touch and hold a desired function then drag it to the
top row.
By accessing this document, the recipient agrees and
acknowledges that all contents and information in this document (i) are confidential and proprietary information
of Samsung, (ii) shall be subject to the non-disclosure regarding project H and Project B, and (iii) shall not be
disclosed by the recipient to any third party. Samsung Proprietary and Confidential
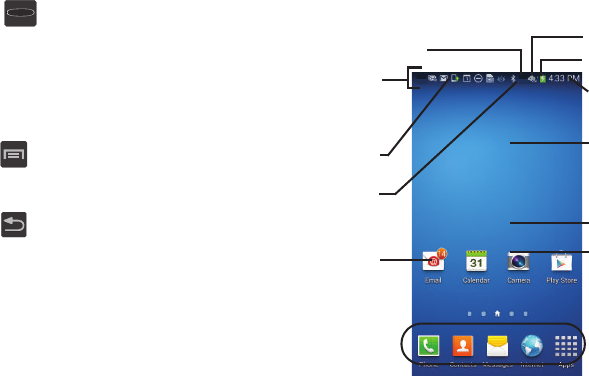
38
Function Keys
Your device comes equipped with three main function keys
that can be used on any screen:
Home
,
Menu
, and
Back
.
Home Key
The
Home
key ( ) takes you back to your Home screen
(indicated by a white Home icon).
Press and hold to launch the Recent apps/Task
manager screen. For more information, refer to
“Accessing Recently-Used Applications” on page 45
Menu Key
The
Menu
key ( ) activates an available menu function for
the current screen or application.
Back Key
The
Back
key ( ) returns you to the previously active
screen. If the on-screen keyboard is currently open, this key
closes the keyboard.
Home Screen
The Home screen is the starting point for using the
applications on your phone. There are initially seven
available panels, each populated with default shortcuts or
applications. You can customize each of these panels.
Widget
Home Screen
Primary
Notification
Shortcuts
Status Bar
area
Status
area
Shortcuts
Battery status
Connection Status
Time
Signal strength
Google Search
By accessing this document, the recipient agrees and
acknowledges that all contents and information in this document (i) are confidential and proprietary information
of Samsung, (ii) shall be subject to the non-disclosure regarding project H and Project B, and (iii) shall not be
disclosed by the recipient to any third party. Samsung Proprietary and Confidential
Understanding Your Phone 39
•
Notification area
displays those icons associated with end-user
notifications such as: email messages, calls (missed, call in
progress), new voicemail, upcoming event, USB connection,
Emails, and Text/MMS messages.
–
These notifications display at the top-left of the screen (within
the Status bar area) and display important user information.
–
This information can be accessed by swiping down from the
Status bar (page 36).
•
Status area
displays those icons associated with the status of
the device such as communication, coverage, Bluetooth, 4G/3G,
Wi-Fi communication, battery levels, GPS, etc.
•
Home Screen
is a customizable screen that provides information
about notifications and device status, and allows access to
application Widgets.
•
Extended Home Screens
extend beyond the current visible
screen width to provide more space for adding icons, widgets,
and other customization features.
–
There are six available extended screens (panels) each of
which may be populated with its own shortcuts or widgets.
These screens share the use of the five Primary Shortcuts.
–
The current screen is indicated at the bottom by a white
square. Up to seven (7) total screens are available.
Note:
Both the status bar and primary shortcuts are visible
across all screens.
•
Google search
is an on-screen Internet search engine powered
by Google™. Tap to access the Voice Actions feature where you
can verbally enter a search term and initiate an online search.
–
Tap (
Voice Actions
) to launch the function from within
this Google widget.
•
Widgets
are self-contained on-screen applications (not
shortcuts). These can be placed onto any of the available screens
(Home or extended).
•
Shortcuts
are icons that launch available device applications
such as Camera, YouTube, Contacts, Phone, Email, Play Store,
etc. These function the same as shortcuts on your computer.
–
Although some may already be found on the Extended Home
screens, the majority can also be found within the Applications
screens.
–
The Application screens can be accessed by tapping
Apps
from the Primary shortcuts area.
–
Shortcuts can be removed from a screen and added back any
number of times.
By accessing this document, the recipient agrees and
acknowledges that all contents and information in this document (i) are confidential and proprietary information
of Samsung, (ii) shall be subject to the non-disclosure regarding project H and Project B, and (iii) shall not be
disclosed by the recipient to any third party. Samsung Proprietary and Confidential
40
•
Primary Shortcuts
: are four shortcuts present throughout all of
the available screens and can be used to both navigate within the
device or launch any of the following functions:
–
Phone
( ) launches the phone-related screen functions
(Keypad, Logs, Favorites, and Contacts).
–
Contacts
( ) launches the Contacts-related screens
(Phone, Groups, Favorites, and Contacts).
–
Messaging
( ) launches the Messaging menu (create new
messages or open an existing message string).
–
Internet
( ) launches the built-in Web browser.
–
Apps
launches the Applications page.
•
Tap
Apps
to access the Applications screens.
•
While in the Applications screens, tap
(
Back
) to easily
return to the Home screen.
As you transition from screen to screen, a screen indicator
(located at the bottom) displays the currently active panel.
Home Screen Menu Settings
When on the Home screen, press and then select any of
the following menu options:
•
Add apps and widgets
allows you to quickly access the Widget
tab where you can then drag a selected widget to an available
area on a selected screen.
•
Create folder
allows you to create on-screen folders to help
organize files of application shortcuts.
•
Set wallpaper
allows you to assign the current wallpaper for the
Home screen, Lock screen, or Home and lock screens. Choose
from Gallery, Live wallpapers, or Wallpapers.
•
Edit page
allows you to add or remove extended screens from
your device. You can have up to six extended screens (one Home
screen and six Extended screens).
•
Search
displays the Google Search box that you can use to
search for a key term online.
•
Settings
provides quick access to the device’s settings menu.
–
The Settings menu can also be accessed by pressing
and then tapping
➔
Settings
.
•
Help
displays the on-screen Help application. For more
information, refer to
“Help”
on page 174
By accessing this document, the recipient agrees and
acknowledges that all contents and information in this document (i) are confidential and proprietary information
of Samsung, (ii) shall be subject to the non-disclosure regarding project H and Project B, and (iii) shall not be
disclosed by the recipient to any third party. Samsung Proprietary and Confidential
Understanding Your Phone 41
Applications
The Application menu provides quick access to the most
frequently used applications. Applications display on each of
the three panels on the Applications screens.
Important!
Once you log into your Google account. All
previously downloaded apps should now be
populated within the Application screens.
Application Screen Menu Settings
When on the Apps screen, the following menu options are
available:
1. Press and then tap
Apps
.
2. Press and then select from the following options:
•Play Store
: provides quick access to the Play Store (page 208).
•Edit
: allows you to organize your current applications by moving
them around the screen, edit or delete existing Apps folders.
•Create folder
: allows you to create an application folder where
you can better organize and group desired apps.
• Uninstall
: allows you to uninstall a user-downloaded
application. Only those applications that are not default to the
device can be downloaded. Tap to remove the selected
app.
• Downloaded applications
: allows you to filter the view of apps
to only those applications that you have downloaded.
•View type
: allows you to customize the way the Apps menu
listing is shown (page 48).
• Share apps
: allows you to share information about selected
applications with external users (page 47).
• Hide applications
: allows you to specify which current
applications are hidden from view in this menu. Once you have
selected the apps, tap
Done
.
• Show hidden applications
: allows you to specify which
previously hidden applications are can be made visible again
for viewing in this menu. Once you have selected the apps, tap
Done
.
3. Press to return to the Home screen.
By accessing this document, the recipient agrees and
acknowledges that all contents and information in this document (i) are confidential and proprietary information
of Samsung, (ii) shall be subject to the non-disclosure regarding project H and Project B, and (iii) shall not be
disclosed by the recipient to any third party. Samsung Proprietary and Confidential

42
Screen Navigation
Using the touch screen display and the keys, you can
navigate the features of your device and enter characters.
The following conventions are used in this manual to
describe the navigation action in the procedures.
Navigating Through the Screens
The following terms describe the most common hardware
and on-screen actions.
•
Press and hold
:
Pressing relates to use of the hardware keys and
buttons to select or activate an item. For example: press the
Navigation key to scroll through a menu. Some buttons and keys
require you to press and hold them to activate a feature, for
example, you press the Lock key to lock and unlock the device.
•
Tap
: Use a brief touch to select items on the display or to enter
text on the virtual QWERTY keyboard. For example: touch an
Application icon to open the application. A light touch works best.
•
Touch and hold
: Touch and hold an icon or key to open the
available options, or to access a pop-up menu. For example:
touch and hold from the Home screen to access a menu of
customization options.
•
Flick
: Move your finger in lighter, quicker strokes than swiping.
This finger gesture is always used in a vertical motion, such as
when flicking through contacts or a message list.
•
Swipe or slide
: Quickly drag your finger vertically or horizontally
across the screen. This allows you to move the area of focus or to
scroll through a list. For example: slide your finger left or right on
the Home screen to scroll among the seven panels.
•
Drag
: Press and hold your finger with some pressure before you
start to move it. Do not release your finger until you have reached
the target position.
•
Rotate
: Automatically change the screen orientation from portrait
to landscape by turning the device sideways. For example: rotate
to landscape orientation when entering text, to provide a larger
keyboard, or when viewing web content to minimize scrolling.
•
Pinch
: “Pinch” the screen using your
thumb and forefinger to zoom out when
viewing a picture or a Web page. (Move
fingers inward to zoom out.)
•
Spread
: “Spread” the screen using your thumb and forefinger to
zoom in when viewing a picture or a Web page. (Move fingers
outward to zoom in.)
By accessing this document, the recipient agrees and
acknowledges that all contents and information in this document (i) are confidential and proprietary information
of Samsung, (ii) shall be subject to the non-disclosure regarding project H and Project B, and (iii) shall not be
disclosed by the recipient to any third party. Samsung Proprietary and Confidential
Understanding Your Phone 43
Note:
These screens can be re-arranged in any desired order.
For more information, refer to “Customizing the
Screens” on page 46
•
Motion Navigation and Activation
: The device comes equipped
with the ability to assign specific functions to certain device
actions that are detected by both the accelerometer and
gyroscope.
Accessing Recently-Used Apps
1. Press and hold from any screen to open the
recently-used applications window.
2. Tap an icon to open the selected application.
– or –
Tap to go to the Task manager.
– or –
Tap to go to Google Search.
– or –
Tap to delete the record of all recently used
applications.
By accessing this document, the recipient agrees and
acknowledges that all contents and information in this document (i) are confidential and proprietary information
of Samsung, (ii) shall be subject to the non-disclosure regarding project H and Project B, and (iii) shall not be
disclosed by the recipient to any third party. Samsung Proprietary and Confidential
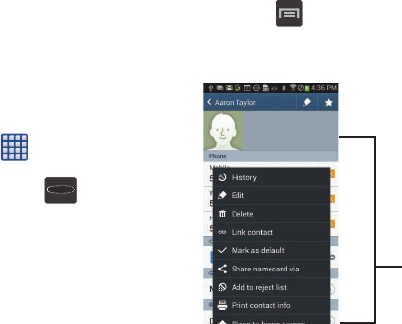
44
Menu Navigation
You can tailor the device’s range of functions to fit your needs
using both menus and applications. Menus, sub-menus, and
features are accessed by scrolling through the available
on-screen menus. Your device defaults with seven screens.
Navigating Through the Application Menus
There are three default Application Menu screens available.
As you add more applications from the Play Store, more
screens are created to house these new apps.
1. From the Home screen, tap
Apps
. The first
Application Menu screen displays.
•
To close the Applications screen, press
(
Home
)
.
2. Sweep the screen to access the other menus.
3. Tap any of the on-screen icons to launch the
associated application.
Using Sub-Menus
Sub-menus are available from within most screen and
applications.
1. Press . A sub-menu displays at the bottom of the
screen.
2. Tap an available on-screen option.
Sub-Menu items
By accessing this document, the recipient agrees and
acknowledges that all contents and information in this document (i) are confidential and proprietary information
of Samsung, (ii) shall be subject to the non-disclosure regarding project H and Project B, and (iii) shall not be
disclosed by the recipient to any third party. Samsung Proprietary and Confidential
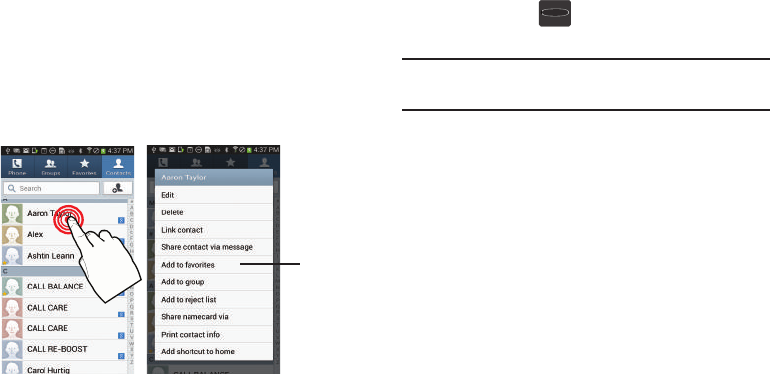
Understanding Your Phone 45
Using Context Menus
Context menus (also called pop-up menus) contain options
that apply to a specific item on the screen. They function
similarly to menu options that display when you right click
your mouse on your desktop computer.
Touch and hold an item on-screen to open its context
menu.
Accessing Recently-Used Applications
1. Press and hold to open the recently-used
applications window.
Note:
This recent applications screen also provides access to
the
Task manager
.
2. A pop-up displays the six most recently used
applications.
3. Tap an icon to open the recent application.
Context
Menu
By accessing this document, the recipient agrees and
acknowledges that all contents and information in this document (i) are confidential and proprietary information
of Samsung, (ii) shall be subject to the non-disclosure regarding project H and Project B, and (iii) shall not be
disclosed by the recipient to any third party. Samsung Proprietary and Confidential
46
Customizing the Screens
You can customize the Home screens (panels) to display the
Widgets, Shortcuts, Folders, or Wallpapers. For example, one
screen could contain the Music Player shortcut and other
forms of media, while another screen might contain
communication apps such as Gmail.
You can customize your Home screen by doing the following:
•
Adding, Deleting, and Rearranging screens
•
Assigning a New Home screen
•
Adding and Removing Primary Shortcuts
•
Sharing Application Information
•
Managing Shortcuts
•
Adding and Removing Widgets
•
Changing the Background (Wallpapers)
Adding and Deleting Screens
Your phone comes with seven screens. You can delete these
screens and then add them back later.
Note:
These screens can be deleted and re-arranged.
Important!
Your phone can only contain at most seven screens
and at least one screen.
To delete a screen:
1. From the Home screen, press and then tap
Edit page
.
2. Touch and hold, then drag the undesired screen up to
the
Remove
tab ( ).
3. Press to return to the main Home screen.
To add a screen:
1. From the Home screen, press and then tap
Edit page
.
2. Tap (
Add screen
). The newly added screen
appears as the last page.
3. Press to return to the main Home screen.
By accessing this document, the recipient agrees and
acknowledges that all contents and information in this document (i) are confidential and proprietary information
of Samsung, (ii) shall be subject to the non-disclosure regarding project H and Project B, and (iii) shall not be
disclosed by the recipient to any third party. Samsung Proprietary and Confidential
Understanding Your Phone 47
Rearranging the Screens
1. From the Home screen, press and then tap
Edit page
.
2. Touch and hold a screen and then drag it into its new
location. Upper-left is screen position #1 and
bottom-right is screen last screen.
Assigning a New Home Screen
1. From the Home screen, press and then tap
Edit page
.
2. Tap . The new Home screen then indicates this
(
Home screen
) icon at the top of the selected
screen.
Sharing an App
The device’s Applications menu now comes with a feature
that allows you to share information about your selected
applications with external users.
1. From the Home screen, tap
Apps
.
2. Press and then tap
Share apps
.
3. Place a check mark alongside those applications you
wish to share information about and tap
Done
.
Note:
Shared applications consist of those that have
previously been downloaded from the Play Store.
4. Select a sharing method. Choose from: Add to
Dropbox, Bluetooth, Email, Gmail, Google, Google+,
Hangouts, Memo, Messages, and Wi-Fi Direct.
5. The recipient is notified about the receipt of the new
information.
Managing Shortcuts
Note:
To move a shortcut from one screen to another, you
must carefully touch and hold the shortcut and slowly
drag it to the edge of the screen. As the shortcut turns
light blue, you can begin to move it to the adjacent
screen.If this does not work, delete it from its current
screen. Activate the new screen and then add the
selected shortcut.
By accessing this document, the recipient agrees and
acknowledges that all contents and information in this document (i) are confidential and proprietary information
of Samsung, (ii) shall be subject to the non-disclosure regarding project H and Project B, and (iii) shall not be
disclosed by the recipient to any third party. Samsung Proprietary and Confidential
48
To add a shortcut from the Applications screen:
1. From the Home screen, select a screen location for
your new shortcut by scrolling across your available
screens until you reach the desired one.
2. Tap
Apps
( ) to reveal all your current available
applications. By default, applications are displayed as
an Alphabetical grid.
3. Scroll across the screens and locate your desired
application.
4. Touch and hold the on-screen icon. The new shortcut
then appears to hover over the current screen.
5. While still holding the on-screen icon, position it on the
current screen. Once complete, release the screen to
lock the shortcut into its new position.
To add a shortcut via the Add to Home screen:
1. From the Home screen, navigate to a screen with an
empty area.
2. Touch and hold an empty area of the screen.
3. From the
Home screen
window, tap
Apps and widgets
➔
Apps
.
4. Scroll across the pages and touch and hold an
application to place a copy on the current screen.
To delete a shortcut:
1. From the Home screen, touch and hold the desired
shortcut. This unlocks it from its location on the current
screen.
2. Drag the shortcut over the
Remove
tab ( ) and
release it.
Adding and Removing Primary Shortcuts
Note:
You can change any of your primary shortcuts with the
exception of the
Apps
shortcut.
To remove a primary shortcut:
From the Home screen, touch and hold the primary
shortcut you want to replace, then drag it to an empty
space on any available screen. The primary shortcuts
are now updated to show an empty slot.
By accessing this document, the recipient agrees and
acknowledges that all contents and information in this document (i) are confidential and proprietary information
of Samsung, (ii) shall be subject to the non-disclosure regarding project H and Project B, and (iii) shall not be
disclosed by the recipient to any third party. Samsung Proprietary and Confidential

Understanding Your Phone 49
To insert a new primary shortcut:
1. From the Home screen, tap
Apps
.
2. Locate your desired application, then touch and hold
the on-screen icon to position it on a desired screen.
For more information, refer to “Managing Shortcuts”
on page 47
3. Locate the screen with the desired shortcut you want
to add as the new primary shortcut.
4. Touch and hold the shortcut until it detaches from the
screen.
5. Touch and hold the new shortcut, then drag it into the
empty space within the row of primary shortcuts. The
new primary shortcut will now display on both the
Home and Extended screens.
Adding and Removing Widgets
Widgets are self-contained applications that can be placed
on any screen. Unlike shortcuts, widgets display as
applications.
To add a Widget:
1. From the Home screen, tap
Apps
➔
Widgets
tab.
2. Scroll across the Widget pages and locate a desired
Widget.
3. Touch and hold an available Widget until it detaches
from the screen.
4. While still holding the Widget, scroll left or right across
the available screens and let go of the Widget to place
it on your current screen.
By accessing this document, the recipient agrees and
acknowledges that all contents and information in this document (i) are confidential and proprietary information
of Samsung, (ii) shall be subject to the non-disclosure regarding project H and Project B, and (iii) shall not be
disclosed by the recipient to any third party. Samsung Proprietary and Confidential

50
To remove a Widget:
1. Touch and hold a Widget until it unlocks from the
current screen.
2. Drag the widget over the
Remove
tab ( ) and
release it.
•
As you place the Widget into the Trash, both items turn red.
•
This action doesn’t delete the Widget, it just removes it from the
current screen.
To place a widget onto a different screen:
1. Touch and hold the widget until it becomes
transparent.
2. Slowly drag it past the edge of the screen until the
adjacent page appears highlighted and it then snaps
onto the new page.
3. Drag the widget to its desired position on the new
screen.
4. Repeat these steps to continue moving it to other
screens.
Managing Wallpapers
Wallpapers consist of either Gallery images (user taken), Live
wallpapers (animated backgrounds), or Wallpaper gallery
(default phone wallpapers).
Note:
Selecting animated Live wallpapers will require
additional battery power.
To change the current Home screen wallpaper:
1. Navigate to any screen.
– or –
Press to go to the Home screen.
2. Touch and hold an empty area of the screen.
3. From the
Home screen
window tap
Set wallpaper
➔
Home screen
.
4. Select a Wallpaper type:
•
Tap
Gallery
to select from a user image stored in the camera
image gallery, crop the image, and tap
Done
.
•
Tap
Live wallpapers
to select from a list of animated
backgrounds, once done tap
Set wallpaper
.
•
Tap
Wallpapers
, scroll through the images, tap a wallpaper
image, then tap
Set wallpaper
.
By accessing this document, the recipient agrees and
acknowledges that all contents and information in this document (i) are confidential and proprietary information
of Samsung, (ii) shall be subject to the non-disclosure regarding project H and Project B, and (iii) shall not be
disclosed by the recipient to any third party. Samsung Proprietary and Confidential

Understanding Your Phone 51
Note:
Wallpapers supports the following image types: JPEG,
PNG, GIF, BMP, and WBMP.
To change Wallpapers from Settings Menu:
1. From the main
Settings
page, tap
My device
tab ➔
Display
➔
Wallpaper
.
– or –
Touch and hold an empty area of the screen and select
Set wallpaper
.
2. Choose from
Home screen
,
Lock screen
, or
Home and
lock screen
.
Note:
The
Home and lock screens
is an additional option that
allows you to change both screens at the same time.
3. Select a wallpaper type (
Gallery
,
Live wallpaper
, or
Wallpapers
).
4. Choose an image and tap
Done
or
Set wallpaper
.
To change the current Lock screen wallpaper:
1. Navigate to any screen, touch and hold an empty area
of the screen, and tap
Set wallpaper
➔
Lock screen
.
– or –
From the main
Settings
page, tap
My device
tab ➔
Display
➔
Wallpaper
➔
Lock screen
.
2. Select a Wallpaper type:
•
Tap
Gallery
to select from a user image stored in the camera
image gallery, crop the image, and tap
Done
.
•
Tap
Travel wallpaper
to display recommended destination
images on your lock screen. Select a slideshow interval.
•
Tap
Wallpaper
, scroll through the images, tap a wallpaper
image, then tap
Set wallpaper
.
By accessing this document, the recipient agrees and
acknowledges that all contents and information in this document (i) are confidential and proprietary information
of Samsung, (ii) shall be subject to the non-disclosure regarding project H and Project B, and (iii) shall not be
disclosed by the recipient to any third party. Samsung Proprietary and Confidential
52
Section 3: Call Functions and Contacts List
This section describes features and functionality associated
with making or answering calls, and the Contacts list, which
is used to store contact information.
Displaying Your Phone Number
From the Home screen, press and then tap
Settings
➔
More
tab ➔
About device
➔
Status
. Your phone number displays in the
My phone number
field.
Note:
The device’s
Settings
menu can also be activated
by pressing Menu and then tapping
Settings
.
Making a Call
You can store phone numbers that are regularly used to the
SIM card or to the device’s memory. These entries are
referred to as the
Contacts list
.
Note:
If your screen goes black during your interaction with
the device (launching Keypad, etc.), you might be
accidentally swiping over the front sensors.
1. From the Home screen, tap
Phone
.
2. Enter the phone number and then tap .
If you make a mistake while dialing, tap to
clear the last digit. Touch and hold to clear the
entire sequence.
Note:
When you activate the Auto retry option in the
Call settings
➔
Other call settings
menu, the device
automatically redials up to 10 times when the person
does not answer the call or is already on the phone,
provided your call is not sent to voicemail.
By accessing this document, the recipient agrees and
acknowledges that all contents and information in this document (i) are confidential and proprietary information
of Samsung, (ii) shall be subject to the non-disclosure regarding project H and Project B, and (iii) shall not be
disclosed by the recipient to any third party. Samsung Proprietary and Confidential
Call Functions and Contacts List 53
Quick Dialing a Number from the Contacts List
1. From the Home screen, tap (
Contacts
).
2. Locate a contact from the list.
3. Touch and drag your finger over the number by going
to the right. This action places a call to the recipient.
Running a Call in the Background
If you exit the current call screen and return to the Home
screen, you are visually notified that you are still on an active
call by the green phone icon displayed in the Status bar.
This is the best way to stay on your current call and do
something else (multi-task) such as access the Contacts list,
view a recent email, locate a picture, etc.
Ending a Call
Briefly tap the key to end the call.
Note:
To redial a recent number, tap at the end of the call
or locate the number from the Logs list, tap the entry
and tap
Call
.
Ending a Call from the Status Bar
1. From an active call, you can launch a separate
application or return to the Home screen. The current
call is kept active in the background.
2. Tap the Status bar to reveal the Notifications tab, and
then drag the tab to the bottom of the screen to open
the Notifications panel.
3. Tap
End
to end the currently active call.
In Call Notification
Call
By accessing this document, the recipient agrees and
acknowledges that all contents and information in this document (i) are confidential and proprietary information
of Samsung, (ii) shall be subject to the non-disclosure regarding project H and Project B, and (iii) shall not be
disclosed by the recipient to any third party. Samsung Proprietary and Confidential
54
Making Emergency Calls
If you do not have a SIM card installed the first time you turn
on the phone, the
Insert SIM card to make calls
message
displays and an animated tutorial shows you how to install
the SIM card.
Without a SIM card, you can only make an emergency call
with the phone; normal cell phone service is not available.
Making an Emergency Call Without a SIM card
installed
1. Tap
Emergency call
from the on-screen display to make
an emergency call.
2. Enter 9-1-1 and tap . Complete your call.
During this type of call, you will have access to the
Speaker mode, Keypad, and End Call features.
Note:
Selecting Location consent may drain battery power. For
more information, refer to “Power Saving Mode” on
page 272
3. Tap to exit this calling mode.
Making an Emergency Call With a SIM card installed
The Emergency calling mode makes redialing an emergency
number a 1-tap process. Before you can resume normal
calling operations, you should first exit this mode.
1. Swipe the Lock screen to unlock the device.
2. From the Home screen, tap .
3. Enter the emergency number (ex: 911) and then tap
.
4. Complete your call. During this type of call, you will
have access to the Speaker mode, Keypad, and End
Call features.
Note:
This mode can drain your battery power more rapidly
than a normal calling mode.
5. At the Emergency Callback screen, follow the
on-screen instructions.
By accessing this document, the recipient agrees and
acknowledges that all contents and information in this document (i) are confidential and proprietary information
of Samsung, (ii) shall be subject to the non-disclosure regarding project H and Project B, and (iii) shall not be
disclosed by the recipient to any third party. Samsung Proprietary and Confidential
Call Functions and Contacts List 55
Dialing Options
When you enter numbers on the Keypad, you will see three
on-screen options.
From the keypad screen, use one of the following options:
•
Voicemail
( ) to access your Voicemail service.
•
Call
( ) to call the entered number.
•
Delete
( ) to delete digits from the current number.
To view additional dialing options:
After entering a number, tap :
• Send message
to send the current caller a text message while
still maintaining the current call active.
•Add to contacts
to add the current number to either a new or
existing Contacts entry.
• Speed dial setting
to access the Speed dialing setting menu
where you can assign a speed dial location to a current
Contacts entry.
• Add 2-sec pause
to insert a two-second pause to enter a
2-second delay within a number string (the phone continues
dialing after 2 seconds without any additional keys being
pressed.
Tip:
You can create pauses longer than two seconds by
entering multiple 2 second pauses.
• Add wait
to insert a hard pause within the number string (the
phone waits for your input). A wait requires that any
consecutive numbers be manually sent by tapping
Yes
.
• Call settings
to provide you access to the Call settings screen.
By accessing this document, the recipient agrees and
acknowledges that all contents and information in this document (i) are confidential and proprietary information
of Samsung, (ii) shall be subject to the non-disclosure regarding project H and Project B, and (iii) shall not be
disclosed by the recipient to any third party. Samsung Proprietary and Confidential
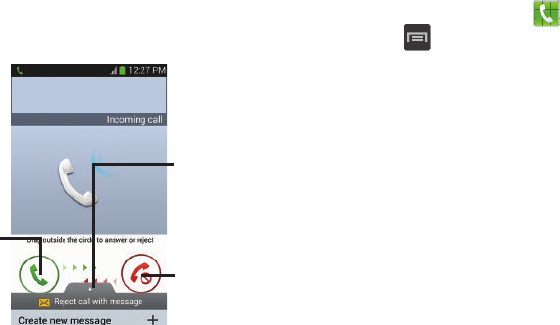
56
Answering a Call
When somebody calls you, the phone rings and displays the
incoming call image. The caller's phone number, picture, or
name if stored in Contacts List, displays.
Pressing the Volume down button mutes the ringer.
If the incoming call is from a number stored in your Contacts,
the entry’s name displays. You may also see the caller’s
phone number, if available.
Managing Reject Calls
This feature allows you to categorize both known and
unknown callers as rejected contacts. These Contacts are
then added to your Rejection list which can be managed for
individual entries from within the Contacts list or as a whole
from the Call rejection screen.
1. From the Home screen, tap .
2. Press and then tap
Call settings
➔
Call rejection
.
3. Tap the
Auto reject mode
field to configure your
automatic rejection settings. Rejected calls are routed
automatically to your voicemail. Choose from:
•Off
: disables the auto rejection feature.
• All numbers
: enables the features for all known and unknown
numbers, including those contacts that are not assigned to the
rejection list.
• Auto reject numbers
: automatically rejects all entries assigned
to the Reject list/Blacklist.
Touch and
slide in any
direction to Touch and slide
in any direction
to reject the call
Touch and drag
upward to reject
with a message
answer the
call
By accessing this document, the recipient agrees and
acknowledges that all contents and information in this document (i) are confidential and proprietary information
of Samsung, (ii) shall be subject to the non-disclosure regarding project H and Project B, and (iii) shall not be
disclosed by the recipient to any third party. Samsung Proprietary and Confidential
Call Functions and Contacts List 57
Adding numbers to the rejection list
Entries can be added to the list via either the Contacts menu
or via the Auto reject list menu. The Contacts menu option
assigns all numbers for an individual as rejected. The Auto
reject list allows to assign individual numbers.
To assign multiple numbers as rejected via Contacts:
1. From the Home screen, tap (
Contacts
).
2. Locate an entry and tap it to open the Contact
Overview Screen (page 96).
3. Press and then tap
Add to reject list
. All phone
numbers associated with this entry are then added to
the reject list.
To assign single number as rejected via Auto reject list:
1. From the main
Call settings
page, tap
Call rejection
➔
Auto reject list
.
2. Tap (
Create
) and either enter the phone number
or select a Contact from your Logs or Contacts list.
3. Tap
Save
to complete the assignment.
International Calls
1. From the Home screen, tap and then touch and
hold until the device shows “+” on-screen.
2. Use the on-screen keypad to enter the country code,
area code, and phone number.
3. If you make a mistake, tap once to delete a
single digit.
– or –
Touch and hold to delete all digits.
4. Tap .
By accessing this document, the recipient agrees and
acknowledges that all contents and information in this document (i) are confidential and proprietary information
of Samsung, (ii) shall be subject to the non-disclosure regarding project H and Project B, and (iii) shall not be
disclosed by the recipient to any third party. Samsung Proprietary and Confidential
58
Pause Dialing
You can dial or save phone numbers with pauses for use with
automated systems, such as voicemail or financial phone
numbers.
•
2-Second Pause
automatically sends the next set of numbers
after a two-second pause. This is indicated in the number string
as a comma (
,
).
1. From the Home screen, tap and use the
on-screen keypad to enter the phone number.
2. Press and then tap
Add 2-sec pause
. This feature
adds an automatic two-second pause.
3. Use the keypad to enter the additional numbers that
are dialed automatically after the second pause.
Tip:
You can create pauses longer than three seconds by
entering multiple 2 second pauses.
4. Tap .
Wait Dialing
Inserting a Wait into your dialing sequence means that the
phone waits until it hears a dial tone before proceeding with
the next sequence of numbers.
•
Wait
sends the next set of numbers only after tapping
Yes
. This is
indicated in the number string as a semicolon (
;
).
Note:
Do not add multiple Waits (;) to a number string as this
will continue to prompt you after each sequence.
1. From the Home screen, tap and use the
on-screen keypad to enter the phone number.
2. Press and then tap
Add wait
. This feature causes
the phone to require your acceptance before sending
the next set of entered digits.
3. Tap .
4. Once prompted to
Send the following tones?
, tap
Yes
to
dial the remaining digits.
By accessing this document, the recipient agrees and
acknowledges that all contents and information in this document (i) are confidential and proprietary information
of Samsung, (ii) shall be subject to the non-disclosure regarding project H and Project B, and (iii) shall not be
disclosed by the recipient to any third party. Samsung Proprietary and Confidential
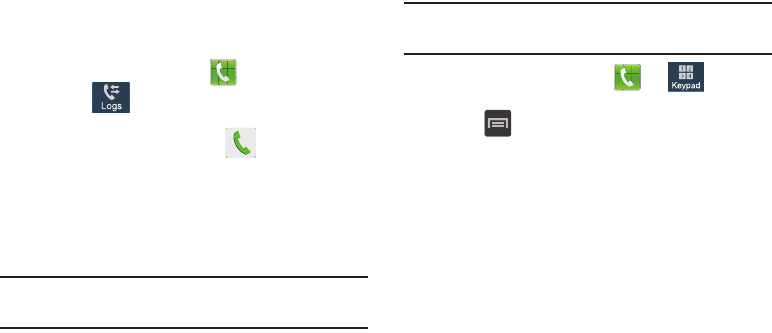
Call Functions and Contacts List 59
Redialing the Last Number
The device stores the numbers of the calls you’ve dialed,
received, or missed if the caller is identified.
To recall any of these numbers:
1. From the Home screen, tap .
2. Tap the (
Logs
tab) to display the list of recent
calls.
3. Tap the name/number and tap .
Speed Dialing
Once you have stored phone numbers from your Contacts
List, you can set up to 99 speed dial entries (2-100) and then
dial them easily whenever you want, simply by touching the
associated numeric key.
Note:
Speed dial location #1 must be reserved for Voicemail
use.
Setting Up Speed Dial Entries
Important!
Speed dial location #1 is reserved for Voicemail. No
other number can be assigned to this slot.
1. From the Home screen, tap ➔ (
Keypad
tab).
2. Press
and then tap
Speed dial setting
. The
Speed
dial setting
screen displays a virtual list of locations
with the numbers 2 through 100.
3. Tap an unassigned number slot. The
Select contact
screen displays.
4. Tap a contact and select a number to assign it to the
speed dial location. The selected contact number/
image displays in the speed dial number box.
By accessing this document, the recipient agrees and
acknowledges that all contents and information in this document (i) are confidential and proprietary information
of Samsung, (ii) shall be subject to the non-disclosure regarding project H and Project B, and (iii) shall not be
disclosed by the recipient to any third party. Samsung Proprietary and Confidential
60
Changing a Speed Dial Entry Order
1. From the Home screen, tap ➔
Keypad
tab.
2. Press
and then tap
Speed dial setting
.
Important!
The number 1 is reserved for Voicemail and
another number cannot be assigned to this slot.
3. Press
and then tap
Change order
.
4. Tap the current entry then tap the new target speed
dial location.
Note:
Tapping 2 existing speed dial locations causes the
entries to switch positions.
5. Tap
Done
. to store the change.
6. Press to return to the previous screen.
Removing a Speed Dial Entry
1. From the Home screen, tap ➔
Keypad
tab.
2. Press
and then tap
Speed dial setting
.
3. Touch and hold a existing on-screen speed dial
location and select
Remove
from the context menu.
– or –
Press
and then tap
Remove
. Tap an entry and
select (
Remove entry
). Select either
Done
(to complete the deletion) or
Cancel
(to exit).
4. Press to return to the previous screen.
Making a Call Using Speed Dial
You can assign a short cut number to a phone number in the
Contacts List for speed dialing.
1. From the Home screen, tap .
2. Touch and hold a previously created speed dial location
(numbers 2-100, or 1 if you are dialing voice mail) until
the number begins to dial.
3. If you are not certain of the speed dial location, tap
➔
➔
Speed dial setting
and tap a speed
dial number to view the assigned phone number.
By accessing this document, the recipient agrees and
acknowledges that all contents and information in this document (i) are confidential and proprietary information
of Samsung, (ii) shall be subject to the non-disclosure regarding project H and Project B, and (iii) shall not be
disclosed by the recipient to any third party. Samsung Proprietary and Confidential
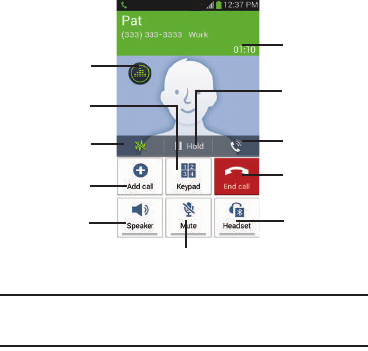
Call Functions and Contacts List 61
In Call Options
Your device provides a number of features that are available
for use during a call.
Note:
Noise reduction and Extra volume features are disabled
while using Wi-Fi Calling.
Adjusting the Call Volume
During a call, use the Volume keys on the left side of the
device, to adjust the earpiece volume.
During a call, press the
Up
volume key to increase the
volume level and the
Down
volume key to decrease the
level.
– or –
Adjust the audio by enabling selecting an audio preset.
Tap the on-screen
Personalize call sound
button select
an equalizer setting for the incoming call.
•
Enabled/disabled via the Call settings menu (
Call settings
➔
Personalize call sound
). For more information, refer to
“Configuring General Call Settings”
on page 292
– or –
Quickly add more volume to the incoming audio by
tapping the on-screen
Extra volume
button
From the Home screen, you can also adjust the ring volume
using these keys.
Dialer
Adds a
Activates or
Deactivates
Ends the
call
Places a
call on hold
Mutes or Unmutes
Activates or
Deactivates
Bluetooth
the call Headset
speakerphone
Personalized
call sound
new call
Noise
Reduction
Call duration
Extra volume
By accessing this document, the recipient agrees and
acknowledges that all contents and information in this document (i) are confidential and proprietary information
of Samsung, (ii) shall be subject to the non-disclosure regarding project H and Project B, and (iii) shall not be
disclosed by the recipient to any third party. Samsung Proprietary and Confidential
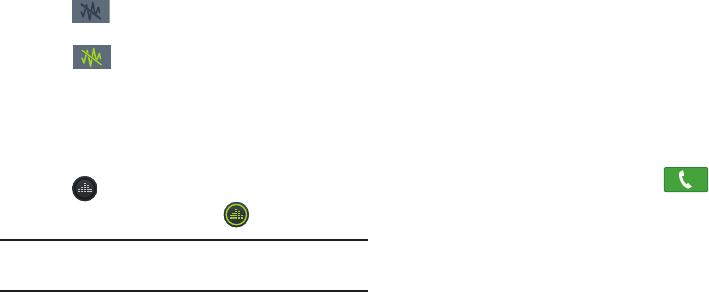
62
Adjusting Noise Reduction
During a call it may be necessary to adjust the noise
reduction feature. Activating this feature can improve the
quality of your conversation by reducing ambient noise.
1. Tap
(
Noise reduction off
) to toggle the status
and activate the feature.
2. Tap
(
Noise reduction on
) to toggle the status
and deactivate the feature.
Personalizing the Call Sound Setting
During a call it may be necessary to adjust the sound of the
incoming call by selecting an audio equalizer setting for the
current call.
1. Tap (
Personalize call sound
).
2. Confirm the option is enabled .
Note:
If prompted to enable the feature via the Call settings
menu, go to
Call settings
➔
Personalize call sound
.
3. Select an available option.
Choose from: Adapt Sound, Soft sound, Clear sound,
and Off.
Placing a Call on Hold
You can place the current call on hold whenever you want. If
your network supports this service, you can also make
another call while a call is in progress.
To place a call on hold:
1. Tap
Hold
to place the current call on hold.
2. Tap
Unhold
to activate the call that is on hold.
To make a new call while a call is in progress:
1. Enter the new phone number that you wish to dial or
look it up in Call history.
2. Once connected, tap
Add call
to dial the second call.
3. Dial the new phone number and tap .
To switch between the two calls:
Tap
Swap
.
The previous In call number turns gray and displays
On hold. The new active call displays a green
background behind the number.
By accessing this document, the recipient agrees and
acknowledges that all contents and information in this document (i) are confidential and proprietary information
of Samsung, (ii) shall be subject to the non-disclosure regarding project H and Project B, and (iii) shall not be
disclosed by the recipient to any third party. Samsung Proprietary and Confidential
Call Functions and Contacts List 63
Turning the Speakerphone on and off
While on a call, you can use your Speakerphone by following
these steps:
1. Tap (
Speaker off
) to toggle the speakerphone on.
2. Tap (
Speaker on
) to toggle the speakerphone off.
Tip:
When the speaker is turned
On
, the color of the speaker is
green. When the speaker is turned
Off
, the color of the
speaker is white.
Muting a Call
1. Tap (
Mute off
) to turn mute on so the other caller
cannot hear you speaking.
2. Tap (
Mute on
) to turn mute off and resume your
conversation.
Switching to Bluetooth Headset
1. Pair the target Bluetooth headset prior to your call.
2. While on a call, switch to the Bluetooth headset instead
of speaker by tapping (
Headset off
).
3. At the prompt, tap
OK
to enable Bluetooth if it is not
already activated.
4. While on a call, switch back to the device speaker by
tapping (
Headset on
).
More In-call Options
During a call you can save the current caller’s information to
the Contacts list, or create a Memo.
Viewing the Contacts List
During a call you can look up a number in the Contacts list.
1. Press and then tap
Contacts
.
2. Browse the Contacts list for the information you need.
3. Press to return to the active call.
Speaker
Speaker
Mute
Mute
Headset
Headset
By accessing this document, the recipient agrees and
acknowledges that all contents and information in this document (i) are confidential and proprietary information
of Samsung, (ii) shall be subject to the non-disclosure regarding project H and Project B, and (iii) shall not be
disclosed by the recipient to any third party. Samsung Proprietary and Confidential
64
Creating a Memo During a Call
During a call it may be necessary to record information (a
Note).
1. Press and then tap
Memo
.
2. Use the keyboard to enter the note then tap
Save
.
Creating a Message During a Call
During a call you can create a message.
1. Press and then tap
Message
➔ (
Compose
).
2. Address and create the message.
3. Review your message and tap (
Send
).
Multi-Party calls
Making a Multi-Party Call
A multi-party call is a network service that multiple people to
participate in a multi-party or conference call.
For further details about subscribing to this service, contact
Customer service.
Setting up a Multi-Party Call
1. From the Home screen, tap .
2. Dial the number for the first participant and tap
.
3. Once connected, tap
Add call
, enter the second phone
number and tap . The first caller is placed on
hold.
4. Wait for the second caller to answer the incoming call
and tap
Merge
. The two calls are now joined into a
multi-party call and display in the order in which they
were called.
By accessing this document, the recipient agrees and
acknowledges that all contents and information in this document (i) are confidential and proprietary information
of Samsung, (ii) shall be subject to the non-disclosure regarding project H and Project B, and (iii) shall not be
disclosed by the recipient to any third party. Samsung Proprietary and Confidential

Call Functions and Contacts List 65
Important!
Multiple callers can be joined to a single
multi-party line. Additional callers participate in a
new Multiparty session and are held in conjunction
with the previous multiparty call. You can swap or
place each multi-party call on hold.
Having a Private Conversation With One Participant
Note:
The Manage conference call option is not available for
multi-party calls created while using the Wi-Fi Calling
feature. You must be on the cellular network to use the
manage feature.
When you have two participants in a multi-party session, it
might be necessary to place one of those participants on
hold so that a private conversation can be held with a single
caller. While you are in a multi-party call:
1. Press and then tap
Manage conference call
.
2. Tap (
Split Caller
) adjacent to the participants you
would like to split from the current multi-line call. The
list displays the callers in the order they were dialed.
Note:
The option is not available for multi-party calls created
while using the Wi-Fi Calling feature. You must be on the
cellular network to use the manage feature.
3. Tap the participant to which you want to speak
privately.
You can now talk privately to that person while the
other participants can continue to converse with each
other. If there is only one other participant, that person
is placed on hold.
4. To return to the multi-party call, tap the Merge icon. All
of the multi-party call participants can now hear each
other.
By accessing this document, the recipient agrees and
acknowledges that all contents and information in this document (i) are confidential and proprietary information
of Samsung, (ii) shall be subject to the non-disclosure regarding project H and Project B, and (iii) shall not be
disclosed by the recipient to any third party. Samsung Proprietary and Confidential
66
Dropping One Participant
1. Press and then tap
Manage conference call
➔
to the right of the number to drop.
The participant is disconnected and you can continue
the call with the other participant.
2. Tap to end your conversation with the remaining
caller.
Call Waiting
You can answer an incoming call while you have a call in
progress, if this service is supported by the network and you
have previously set the Call waiting option to Activate.
You are notified of an incoming call by a call waiting tone. For
more information, refer to “Configuring Additional Voice Call
Settings” on page 265
To answer a new call while you have a call in progress:
1. In a single motion, touch and slide it in any
direction to answer the new incoming call.
2. Tap an option from the Accept call after menu:
• Putting xxx on hold
to place the previous caller on hold while
you answer the new incoming call.
• Ending call with xxx
to end the previous call and answer the
new call.
Note:
The new caller appears at the top of the list. The
previous caller is placed on hold and appears at the
bottom of the list.
3. Tap Swap to switch between the two calls. This places
the new caller on hold and activates the previous call.
Important!
The currently active call displays with a green
background.
4. Tap
Swap
again to switch back.
End
By accessing this document, the recipient agrees and
acknowledges that all contents and information in this document (i) are confidential and proprietary information
of Samsung, (ii) shall be subject to the non-disclosure regarding project H and Project B, and (iii) shall not be
disclosed by the recipient to any third party. Samsung Proprietary and Confidential
Call Functions and Contacts List 67
Using S Voice
This is a voice recognition application used to activate a wide
variety of functions on your device. This is a natural language
recognition application.
This goes beyond the Google Search Voice Actions feature
that simply recognizes Google commands and search terms.
You can ask it questions (Is it raining in Dallas?) or give it
commands (Show me where to find cheap gas).
1. From the Home screen, tap
Apps
➔
(
S Voice
).
2. Read the on-screen disclaimer information and tap
Confirm
to continue.
3. Review the Terms of Service and tap
Agree
to continue.
4. Navigate through the following on-screen tutorial
screens by reading the information and tapping
Next
,
or tap
Skip
to continue without reading the information.
5. Wake up the application by repeating the phrase
Hi Galaxy
.
Note:
The wake-up command/phrase can be changed from
“Hi Galaxy” to anything else.
6. Tap (
Speak
) if the device does not hear you or
to give it a command.
Example 1:
•
I want to find the best pizza online.
•
Tap and say “Find me the best Pizza”. This launches
an Internet search.
Example 2:
•
I want to go to Cambridge.
•
Tap and say “Navigate to Cambridge”. This launches
the Map application and indicates where this is in relation to
your current position.
By accessing this document, the recipient agrees and
acknowledges that all contents and information in this document (i) are confidential and proprietary information
of Samsung, (ii) shall be subject to the non-disclosure regarding project H and Project B, and (iii) shall not be
disclosed by the recipient to any third party. Samsung Proprietary and Confidential
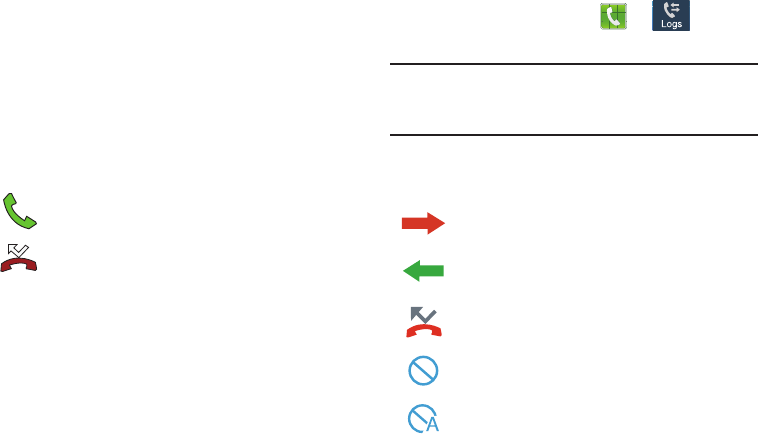
68
Logs Tab
The Logs tab is a list of the phone numbers (or Contacts
entries) for calls you placed, accepted, or missed. The Logs
tab makes redialing a number fast and easy. It is continually
updated as your device automatically adds new numbers to
the beginning of the list and removes the oldest entries from
the bottom of the list.
The Notification area of the Home screen (upper left) displays
phone notifications, status, or alerts such as:
Accessing the Logs Tab
1. From the Home screen, tap ➔ (
Logs
tab).
2. Tap an entry to view available options.
Note:
The Logs tab only records calls that occur while the
phone is turned on. If a call is received while it is turned
off, it will not be included in your calling history.
Each entry contains the phone number (if it is available) and
Contacts entry name (if the number is in your Contacts).
Displays when a call is in progress.
Displays when a call was missed.
Indicates all outgoing calls made from your device.
Indicates any received calls that were answered.
Indicates a missed call.
Indicates any received calls that were rejected.
Indicates auto rejected calls.
By accessing this document, the recipient agrees and
acknowledges that all contents and information in this document (i) are confidential and proprietary information
of Samsung, (ii) shall be subject to the non-disclosure regarding project H and Project B, and (iii) shall not be
disclosed by the recipient to any third party. Samsung Proprietary and Confidential
Call Functions and Contacts List 69
Accessing Call log from The Notifications Area
1. Locate from the Notifications area of the Status
bar.
2. Tap the Status bar to reveal the Notifications tab, and
then drag the tab to the bottom of the screen to open
the Notifications panel.
3. Tap the Missed call entry to open the Logs screen.
This list provides easy access to redial an entry, or you can
also choose to access two types of history entry lists
depending on how they are touched.
Call logs - Caller Overview
•
Tap a contact entry name or number to reveal the
Call options
screen:
• Create contact
to save the number if it is not already in your
Contacts.
•View contact
to view the Contact details for the current entry.
•Update existing
to update an existing Contacts entry with the
current number.
•Call
allows you to redial the entry by name or number.
• Send message
allows you to create a new text message to the
selected entry.
•Time
provides the time and date of the call and its duration.
•View more
to view additional log information from the current
entry.
• Copy to dialing screen
press to pass the current
number to your dialer and then edit the selected number before
you place your next outbound call.
• Delete
press to delete the Contacts entry.
• Send number
press to send the current Contacts entry
information to an external recipient.
• Add to reject list
press to add the current phone
number to an automatic rejection list. Similar to a block list, the
selected caller are blocked from making an incoming calls to
your phone.
•
Touch and hold an entry to display the entry-specific context
menu:
• Copy to dialing screen
to make alterations to the current
phone number prior to redial.
•Add to contacts
to save the number if it is not already in your
Contacts.
• Send number
to send the current Contacts entry information to
an external recipient.
By accessing this document, the recipient agrees and
acknowledges that all contents and information in this document (i) are confidential and proprietary information
of Samsung, (ii) shall be subject to the non-disclosure regarding project H and Project B, and (iii) shall not be
disclosed by the recipient to any third party. Samsung Proprietary and Confidential

70
•View contact
to view the information for the currently stored
Contacts entry.
• Add to reject list
to add the current phone number to an
automatic rejection list. Similar to a block list, the selected caller
is blocked from making an incoming calls to your phone.
•Delete
to delete the entry from the Logs list.
Altering Numbers from the Logs List
If you need to make a call from the Logs screen and you
need to alter the number prior to dialing, you can add the
appropriate prefix by prepending the number.
1. From the Home screen, tap ➔
Logs
tab.
2. Touch and hold an entry to access the entry-specific
context menu.
3. Tap
Copy to dialing screen
.
4. Edit the number using the on-screen keypad or delete
digits by pressing to erase the numbers.
5. Tap once the number has been changed.
Erasing the Call logs List
You can delete either an individual call log entry or all current
entries from the Logs list.
To clear a single entry from the list:
1. From the Home screen, tap ➔
Logs
tab.
2. Touch and hold an entry and select
Delete
➔
Delete
.
To clear all entries from the list:
1. From the Home screen, tap ➔
Logs
tab.
2. Press and then tap
Delete.
3. Tap
Select all
.
4. Tap
Delete
➔
Delete
to continue with the erasure.
– or –
Tap
Cancel
to stop the current process.
By accessing this document, the recipient agrees and
acknowledges that all contents and information in this document (i) are confidential and proprietary information
of Samsung, (ii) shall be subject to the non-disclosure regarding project H and Project B, and (iii) shall not be
disclosed by the recipient to any third party. Samsung Proprietary and Confidential
Call Functions and Contacts List 71
Call Duration
1. From the Home screen, tap ➔
Logs
tab.
2. Press and then tap
Call duration
.
3. The following times are displayed for Voice and Data:
•Last call
: shows the length of time for the last call.
• Dialed calls
: shows the total length of time for all calls made.
• Received calls
: shows the total length of time for all calls
received.
• All calls
: shows the total length of time for all calls made and
received.
You may reset these times to zero by pressing
then tapping
Reset
.
Viewing Missed Calls from Lock Screen
When you are unable to answer a call for any reason and
your screen is locked, the number of missed calls are
displayed on the Lock screen immediately after a call is
missed.
1. Press (
Power/End
) to reactivate the screen.
2. Touch and drag the button (with the number of missed
calls on it) anywhere on the screen. The Logs tab is
then displayed.
By accessing this document, the recipient agrees and
acknowledges that all contents and information in this document (i) are confidential and proprietary information
of Samsung, (ii) shall be subject to the non-disclosure regarding project H and Project B, and (iii) shall not be
disclosed by the recipient to any third party. Samsung Proprietary and Confidential
72
Section 4: Entering Text
This section describes how to select the desired text input
method when entering characters into your device. This
section also describes the predictive text entry system that
reduces the amount of key strokes associated with entering
text.
Your device comes equipped with an orientation detector that
can tell if the phone is being held in an upright (Portrait) or
sideways (Landscape) orientation. This is useful when
entering text.
Your device also provides several on-screen keypad text
entry options to make the task of text entry that much easier.
Text Input Methods
There are three text input methods available:
•
Google voice typing
: provides a voice to text interface.
•
Samsung keyboard
(default): an on-screen QWERTY
keyboard that can be used in both portrait and landscape
orientation.
•
Swype
: is enabled so as you can enter text as you swipe
across the on-screen keyboard. Instead of tapping each
key, use your finger to trace over each letter of a word.
The on-screen QWERTY keypad works the same in both
portrait and landscape mode.
Selecting the Text Input Method
The Text Input Method can be assigned from within one of
two locations:
Settings Menu:
From the Home screen, press and then tap
Settings
➔
My device
tab ➔
Language and
input
➔
Default
and select an input method.
Text Input field:
1. From a screen where you can enter text, in a single
motion, touch and drag the Status bar down to the
bottom of the screen to open the Notifications screen.
2. Tap (
Select input method
) and select an
available input method.
My device
My device
By accessing this document, the recipient agrees and
acknowledges that all contents and information in this document (i) are confidential and proprietary information
of Samsung, (ii) shall be subject to the non-disclosure regarding project H and Project B, and (iii) shall not be
disclosed by the recipient to any third party. Samsung Proprietary and Confidential

Entering Text 73
Entering Text Using Swype
Swype™ is the default text input method that allows you to
enter a word by sliding your finger or stylus from letter to
letter, lifting your finger between words. Swype uses error
correcting algorithms and a language model to predict the
next word. Swype also includes a touch predictive text
system.
The on-screen keyboard options are different between the
Android keyboard and Swype on-screen input methods.
Note:
During its initial use, you may be prompted by a series of
Swype Connect set up screens. Follow the initial
on-screen set up instructions.
Enabling and Configuring Swype
If you configure another text input method (Samsung
keyboard) you must re-enable Swype before using the
Swype keyboard.
For more detailed information on configuring Swype settings,
see “Swype Settings” on page 278.
When Swype is enabled there can also be normal keyboard
functionality.
1. From the main
Settings
page, tap
My device
tab ➔
Language and input
.
2. Tap
Default
➔
Swype
.
Swype Text Entry Tips
You can access the SwypeTips application and watch a video
or tutorial on using Swype. You can also use the following
Swype text entry tips.
•
Create a squiggle (like an S shape) to create a double letter (such
as
pp
in apple).
•
Touch and hold a key to view the punctuation menu then make a
selection.
•
Move your finger or stylus over the apostrophe to enter
contractions.
•
Double-touch on the word you want to change to correct a
misspelled word, then touch the delete key to erase one
character. Touch and hold the delete key to erase an entire word.
By accessing this document, the recipient agrees and
acknowledges that all contents and information in this document (i) are confidential and proprietary information
of Samsung, (ii) shall be subject to the non-disclosure regarding project H and Project B, and (iii) shall not be
disclosed by the recipient to any third party. Samsung Proprietary and Confidential
74
Selecting a Text Input Mode in Swype
1. From a screen where you can enter text, tap the text
input field to reveal the on-screen keyboard.
2. With Swype as your text entry method, select one of
the following text mode options:
•ABC
to use Swype with alphanumeric characters from
the on-screen keyboard.
•SYM
(Symbol)
to enter numbers and symbols from the
on-screen keyboard.
Note:
After typing an initial uppercase character, the key
changes to and all letters that follow are in lower
case.
Swype Keyboard Overview
• Recipients
: a field where you can enter the recipients of the
current message. You can choose from
Groups
,
Favorites
,
Contacts
, or
Logs
.
• Text Input field
: a field where text, number, or other characters
can be entered.
• CAPS/ALT key
: When in 123ABC mode, this key changes the
capitalization of the subsequent entered characters. When in
SYM mode, this key can show additional symbol characters.
• SWYPE settings
: Touch and hold this button to access the
Swype settings screen.
• Text Input mode
: There are two available modes:
123ABC
and
SYM.
–
123ABC mode contains alphanumeric characters and a few
common punctuation marks. Text mode button indicates
SYM
.
–
SYM mode contains only symbols and numbers. Text mode
button indicates
123ABC
.
Edit
ABC
123
+!=
By accessing this document, the recipient agrees and
acknowledges that all contents and information in this document (i) are confidential and proprietary information
of Samsung, (ii) shall be subject to the non-disclosure regarding project H and Project B, and (iii) shall not be
disclosed by the recipient to any third party. Samsung Proprietary and Confidential

Entering Text 75
Using 123ABC Mode in SWYPE
In
123ABC
mode, you can enter only letters and a few
common punctuation marks from the on-screen keyboard.
The text mode key shows .
1. From a screen where you can enter text, tap the text
input field to reveal the on-screen keyboard.
2. Tap to configure the keyboard for 123ABC mode
(showing letters and numbers on the on-screen keys).
Once in this mode, the text input type shows .
Note:
After typing an initial uppercase character, the key
changes to and all letters that follow are in lower
case.
3. Swipe your finger continuously over the letters to form
a word.
–
If you make a mistake, tap to erase a single character.
Touch and hold to erase an entire word.
4. Tap (
Send
) to deliver the message.
Text input field
CAPS/ALT
Text Input mode
Delete
Current
SWYPE Settings
key
Recipients
Mode
Suggestions
123
+!=
Edit
ABC
123
+!=
By accessing this document, the recipient agrees and
acknowledges that all contents and information in this document (i) are confidential and proprietary information
of Samsung, (ii) shall be subject to the non-disclosure regarding project H and Project B, and (iii) shall not be
disclosed by the recipient to any third party. Samsung Proprietary and Confidential

76
By default, the first letter of an entry is capitalized and the
following letters are lower case. After a word is entered and
you lift your finger, the cursor automatically adds a space
after the word.
Note:
If multiple word choices exist for your Swype entry, an
on-screen popup appears to provide additional word
choices.
Entering Numbers and Symbols in SWYPE
By using the on-screen keyboard in portrait mode, some
symbols are not available (such as Emoticons or Smileys).
In SYM mode using Swype, you can only enter symbols and
numbers from the on-screen keyboard.
Once in SYM mode, the text mode key shows .
1. From a screen where you can enter text, tap the text
input field to reveal the on-screen keyboard.
2. Tap to configure the keyboard for SYM mode.
Once in this mode, the text input type shows .
3. Tap the on-screen key for the number or symbol you
want to enter.
4. Tap to select from additional symbols.
For example:
•
To enter
®
: tap
➔
and select the
®
key.
All lowercase
Displays when the next character is entered in
lowercase. Pressing this while in 123SYM mode,
reveals additional numeric-symbols keys.
Initial Uppercase
Displays when the first character of each word is
entered as uppercase but all subsequent
characters are lowercase.
All Uppercase
Displays when all characters are entered as
uppercase characters.
Edit
ABC
123
+!=
Edit
ABC
2
1
123
+!=
2
1
By accessing this document, the recipient agrees and
acknowledges that all contents and information in this document (i) are confidential and proprietary information
of Samsung, (ii) shall be subject to the non-disclosure regarding project H and Project B, and (iii) shall not be
disclosed by the recipient to any third party. Samsung Proprietary and Confidential
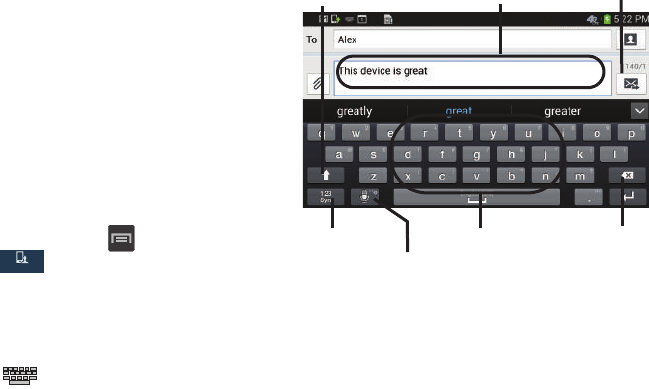
Entering Text 77
Using the Samsung Keyboard
This QWERTY keyboard can be used to enter text in either a
Portrait or landscape orientation. The only difference
between the two orientations are the sizes of the keys.
From a screen where you enter text, rotate your phone
counterclockwise to a landscape orientation. The on-screen
QWERTY keyboard displays.
The Samsung Keyboard
This device has a built-in, QWERTY keypad (portrait mode) or
keyboard (landscape mode). Using the QWERTY keypad/
keyboard, you can type letter, numbers, punctuation, and
other characters.
To use the Samsung keyboard you must first configure the
settings to default to the Samsung keyboard.
1. From the Home screen, press and then tap
Settings
➔
My device
tab ➔
Language and
input
➔
Default
➔
Samsung keyboard
.
– or –
From a screen where you can enter text, touch and
drag the Status bar down to the bottom of the screen,
then select (
Select input method
)
➔
Samsung
keyboard
.
2. The virtual keyboard is then assigned to the Samsung
keyboard configuration for all subsequent text input.
For more detailed information on configuring Samsung
Keyboard settings, see “Samsung Keyboard Settings” on
page 276.
My device
My device
Text input field
Shift key
Input Mode
Input Options
Delete
Current Mode
Indicator
Send
/Settings
By accessing this document, the recipient agrees and
acknowledges that all contents and information in this document (i) are confidential and proprietary information
of Samsung, (ii) shall be subject to the non-disclosure regarding project H and Project B, and (iii) shall not be
disclosed by the recipient to any third party. Samsung Proprietary and Confidential
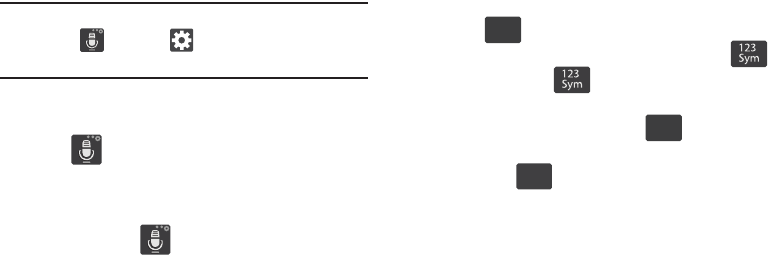
78
Entering Text using Different Input Options
Although the default text input method with the Samsung
keyboard is to use the on-screen keys you have other
options.
Note:
To access settings, touch and hold the
Input Methods
button , then tap (
Settings
) then select it from
the available options.
1. From within an active message, tap the text input field
to reveal the on-screen keyboard.
2. Tap (
Input Methods
) to use the default Voice
typing input method to convert your spoken words to
on-screen text.
– or –
Touch and hold to select from other input
methods such as:
•Voice
to launch Google Voice.
•Clipboard
to launch the device’s clipboard area from where
you can select a current clipboard item to place in your current
message.
• Settings
to access the Samsung keyboard settings menu.
Changing the Text Input Mode in Keyboard
1. From a screen where you can enter text, tap the text
input field to reveal the on-screen keyboard.
2. With Samsung keyboard as your text entry method,
select one of the following text mode options:
•Abc
: to use alphabetic characters from the on-screen
keyboard. In this mode, the text mode button displays .
•Symbol/Numeric
: to enter numbers by pressing the
numbers selecting them on the on-screen keyboard. In this
mode, the text mode button displays .
There are up to 2 available pages of numeric symbols available
by tapping .
ABC
ABC
ABC
ABC
1/2
1/2
By accessing this document, the recipient agrees and
acknowledges that all contents and information in this document (i) are confidential and proprietary information
of Samsung, (ii) shall be subject to the non-disclosure regarding project H and Project B, and (iii) shall not be
disclosed by the recipient to any third party. Samsung Proprietary and Confidential
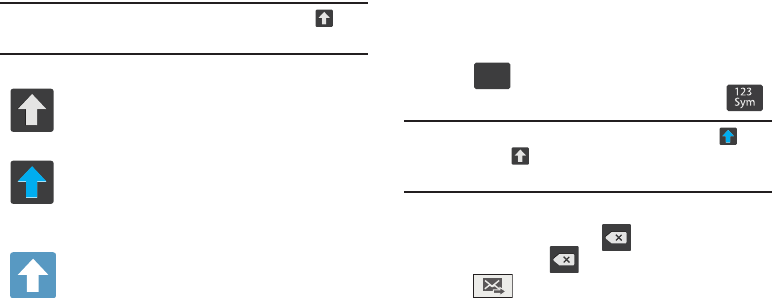
Entering Text 79
Note:
After typing an initial uppercase character, tap to
toggle capitalization.
By default, the first letter of a new entry is capitalized and the
following letters are lowercased. After a character is entered,
the cursor automatically advances to the next space.
Using ABC Mode in Samsung Keyboard
1. From a screen where you can enter text, tap the text
input field to reveal the on-screen keyboard.
2. Tap to configure the keyboard for ABC mode.
Once in this mode, the text input type displays .
Note:
After typing an initial uppercase character, the key
changes to and all letters that follow are in lower
case.
3. Enter your text using the on-screen keyboard.
–
If you make a mistake, tap to erase a single character.
Touch and hold to erase an entire word.
4. Tap
Send
to deliver the message.
All lowercase
Displays when the next character is entered in
lowercase.
Initial Uppercase
Displays when the first character of each word is
entered as uppercase but all subsequent
characters are lowercase.
All Uppercase
Displays when all characters are entered as
uppercase characters.
ABC
ABC
By accessing this document, the recipient agrees and
acknowledges that all contents and information in this document (i) are confidential and proprietary information
of Samsung, (ii) shall be subject to the non-disclosure regarding project H and Project B, and (iii) shall not be
disclosed by the recipient to any third party. Samsung Proprietary and Confidential
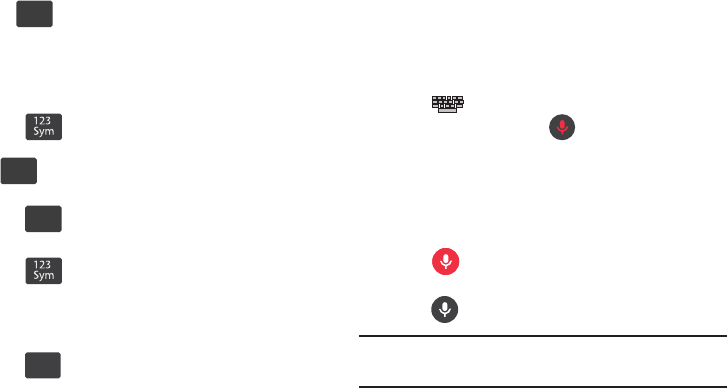
80
Using Symbol/Numeric Mode
Use the Symbol/Numeric Mode to add numbers, symbols,
or emoticons. While in this mode, the text mode key
displays .
1. From a screen where you can enter text, tap the text
input field to reveal the on-screen keyboard. Rotate the
phone counterclockwise to a landscape orientation, if
desired.
2. Tap to configure the keyboard for Symbol
mode. Once in this mode, the text input type shows
.
3. Tap a number, symbol, or emoticon character.
4. Tap to return to ABC mode.
To enter symbols:
1. Tap to configure the keyboard for Symbol
mode.
2. Tap the appropriate symbol key.
– or –
Tap button to cycle through additional pages.
•
The first number on this key indicates which page (1 or 2) of
additional characters is active.
Using the Google Voice Typing
This feature uses Google voice recognition to convert your
spoken words into on-screen text.
You can use your voice to enter text using the Google Voice
typing feature.
1. From the keyboard, touch the top of the screen and
drag it down to display your notification panel.
2. Tap (
Select input method
) ➔
Google voice typing
.
3. At the Listening prompt (
Speak now
), speak
clearly and distinctly into the microphone.
The text displays in the message as you are speaking.
For more detailed information on configuring Google Voice
Typing settings, see “Configure Google Voice Typing” on
page 275.
4. Tap (
Done
) when you are finished.
– or –
Tap (
Resume
) to resume recognition.
Note:
The feature works best when you break your message
down into smaller segments.
ABC
ABC
ABC
ABC
ABC
ABC
1/2
1/2
By accessing this document, the recipient agrees and
acknowledges that all contents and information in this document (i) are confidential and proprietary information
of Samsung, (ii) shall be subject to the non-disclosure regarding project H and Project B, and (iii) shall not be
disclosed by the recipient to any third party. Samsung Proprietary and Confidential

Entering Text 81
Using Google Voice Typing
1. From a screen where you can enter text, in a single
motion, touch and drag the Status bar down to the
bottom of the screen, then select (
Select input
method
)
➔
Google voice typing
. The virtual keyboard is
then removed and all subsequent input to done using
the microphone as text to speech.
2. Speak into the device’s microphone and watch your
text as it is entered on-screen.
3. Tap
DELETE
if the text is incorrect.
By accessing this document, the recipient agrees and
acknowledges that all contents and information in this document (i) are confidential and proprietary information
of Samsung, (ii) shall be subject to the non-disclosure regarding project H and Project B, and (iii) shall not be
disclosed by the recipient to any third party. Samsung Proprietary and Confidential
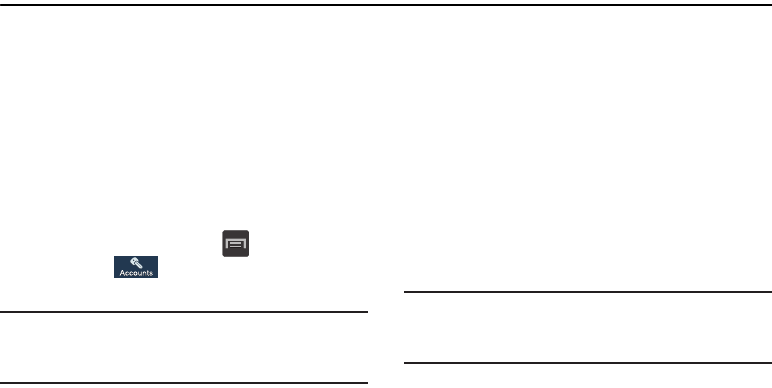
82
Section 5: Accounts and Contacts
This section explains how to use and manage your Contacts
List. You can save phone numbers to your phone’s memory.
Accounts
From the Accounts menu you decide if you want applications
to synchronize, send, and receive data at any given time, or if
you want the applications to synchronize automatically. After
determining how you want the accounts to synchronize,
indicate which account to synchronize with your Contacts
list.
1. Sign in to your Google account.
2. From the Home screen, press and then tap
Settings
➔
Accounts
tab and then navigate to
the
My accounts
area.
Note:
The Accounts area lists those accounts that were added
to the device and provides an
Add account
button to
quickly and easily add new ones.
Contacts List
Creating a Contact
The default storage location for saving phone numbers to
your Contacts List is your device’s built-in memory.
If existing Google and Corporate email accounts were
synchronized to your phone, these accounts are available to
your device during the creation of new entries. These new
Contacts entries can be assigned or saved to synced
accounts such as Phone, SIM, Google, or Corporate.
Your device automatically sorts the Contacts entries
alphabetically. You can create either a
Device
,
SIM
,
Samsung
account
,
Google
, or
Microsoft Exchange ActiveSync
contact.
Important!
The Google and Microsoft Exchange ActiveSync
account types are only visible after creating an
email account of those types on your phone.
•
Device
contacts are stored locally on the device.
By accessing this document, the recipient agrees and
acknowledges that all contents and information in this document (i) are confidential and proprietary information
of Samsung, (ii) shall be subject to the non-disclosure regarding project H and Project B, and (iii) shall not be
disclosed by the recipient to any third party. Samsung Proprietary and Confidential
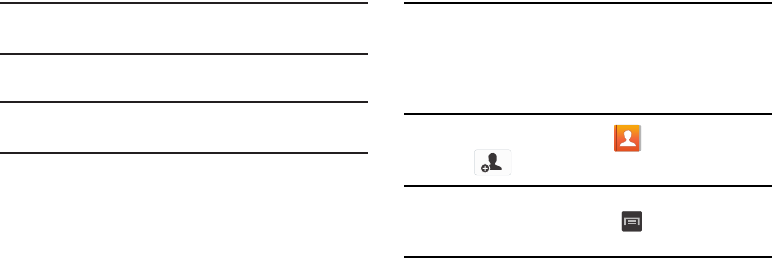
Accounts and Contacts 83
Note:
If the phone is ever reset to its factory default
parameters, contacts stored on the phone can be lost.
•
SIM
contacts are stored onto the micro SIM Card.
Note:
SIM contacts only store the Name and Phone number for
an entry.
•
Samsung account
contacts are shared with your existing
Samsung account.
•
Google
contacts are shared with your existing Google account
and can also be imported to your phone after you have created a
Google Mail account.
•
Microsoft Exchange ActiveSync
(also known as Work or
Outlook) contacts are those contacts that are intended to be
shared with either an Exchange Server or from within Microsoft
®
Outlook
®
.
•
Add new account
lets you create a new account type. Choose
from Samsung account, Google, or Microsoft Exchange
ActiveSync.
Note:
When storing an entry onto your micro SIM card, note
that only the Name, and Number are saved. To save
additional information for a particular contact, such as
notes, email, dates, etc., it is important to save that
Contact into your phone’s onboard memory.
1. From the Home screen, tap (
Contacts
).
2. Tap
to create a contact.
Note:
You can also add a new contact by entering a number
from the keypad and pressing and then tap
Add to Contacts
➔
Create contact
. Continue with step 3.
3. Tap a destination type (
Device
,
SIM
,
Samsung account
,
Google
, or
Microsoft Exchange ActiveSync
) (depending
on where you want to save the new contact
information).
By accessing this document, the recipient agrees and
acknowledges that all contents and information in this document (i) are confidential and proprietary information
of Samsung, (ii) shall be subject to the non-disclosure regarding project H and Project B, and (iii) shall not be
disclosed by the recipient to any third party. Samsung Proprietary and Confidential
84
4. Tap the
Name
field and enter a name for this contact
using the displayed keypad.
•
Tap to access additional name entries such as: Name
prefix, First name, Middle name, Last name, and Name suffix.
5. Tap the image icon and select a photo for this contact.
Selections are:
Image
,
Pictures by people
, or
Take
picture
.
Note:
The label entries below can change and are dependant
on the selected destination type (ex: the Other and
Custom might not display with an Exchange ActiveSync
account destination type).
6. Tap the label button (to the left of the
Phone
field) and
scroll through the list to select a category such as
Mobile
,
Work
,
Home
,
Main
,
Work Fax
,
Home Fax
,
Pager
,
Other
, or
Custom
.
7. Tap a phone number field and enter a phone number.
•
Tap on the QWERTY keyboard to remove a previously
entered phone number.
•
Tap to enter an additional phone number
•
Tap to remove a previously entered phone number.
8. Enter additional information such as:
Groups
,
Ringtone
,
Message alert
,
Vibration pattern
or tap
Add another field
to input additional category information.
• Add another field
contains the following options: Phonetic
name, Organization, Email, IM, Address, Notes, Nickname,
Website, Events, or Relationship.
9. Tap
Save
to complete and store the new entry.
– or –
Tap
Cancel
to delete the current entry.
To save a Number from your Keypad:
1. From the Home screen, tap (
Phone
).
2. Enter a phone number using the on-screen dialpad.
3. Tap
Add to Contacts
➔
Create contact
or select the
Contact entry from the on-screen list.
– or –
Press and then tap
Add to Contacts
➔
Create
contact
or select the Contact entry from the on-screen
list.
If you are updating an existing contact, tap the entry
from the list and proceed to step 5.
By accessing this document, the recipient agrees and
acknowledges that all contents and information in this document (i) are confidential and proprietary information
of Samsung, (ii) shall be subject to the non-disclosure regarding project H and Project B, and (iii) shall not be
disclosed by the recipient to any third party. Samsung Proprietary and Confidential

Accounts and Contacts 85
4. Tap a destination type (
Device
,
SIM
,
Samsung account
,
Google
, or
Microsoft Exchange ActiveSync
) (depending
on where you want to save the new contact
information).
5. Tap the
Name
and enter a name for this contact using
the displayed keypad.
•
Tap to access additional name entries such as: Name
prefix, First name, Middle name, Last name, and Name suffix.
6. Tap the image icon and select a photo for this contact.
Selections are:
Image
,
Pictures by people
, or
Take
picture
.
Note:
The label entries below can change and are dependant
on the selected destination type (ex: the Other and
Custom might not display with an Exchange ActiveSync
account destination type).
7. Tap the label button (to the left of the
Phone
field) and
scroll through the list to select a category such as
Mobile
,
Work
,
Home
,
Main
,
Work Fax
,
Home Fax
,
Pager
,
Other
, or
Custom
.
8. Enter additional fields as desired.
9. Tap
Save
to complete and store the new entry.
– or –
Tap
Cancel
to delete the current entry.
Note:
For further details about how to enter characters, see
“Text Input Methods” on page 77.
By accessing this document, the recipient agrees and
acknowledges that all contents and information in this document (i) are confidential and proprietary information
of Samsung, (ii) shall be subject to the non-disclosure regarding project H and Project B, and (iii) shall not be
disclosed by the recipient to any third party. Samsung Proprietary and Confidential
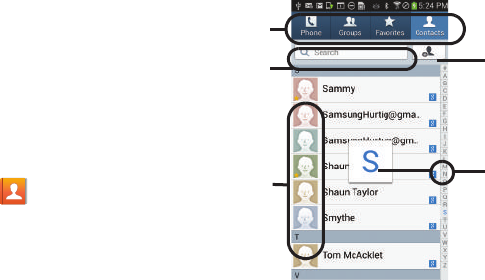
86
Finding a Contact
You can store phone numbers and their corresponding
names onto either your SIM card, your phone’s built-in
memory, or an external location (such as Google, or
Exchange). They are all physically separate but are used as a
single entity, called Contacts.
Depending on the storage size of the particular SIM card, the
maximum number of phone numbers the card can store may
differ.
1. From the Home screen, tap (
Contacts
).
2. Swipe up or down until the contact displays.
– or –
Tap the
Search
field and begin entering the entry’s
name. Matching entries are then displayed. This
process filters through all of your current account
Contact entries to only show you the matching entries.
– or –
Touch and hold the letter tab area (on the right) until
on-screen letters display, then scroll through the list.
You are then taken to that section of the Contacts list.
Touch the contact entry.
Create
Contacts
Tabs
Tabbed
Navigation
Search
Contacts Contacts
field
By accessing this document, the recipient agrees and
acknowledges that all contents and information in this document (i) are confidential and proprietary information
of Samsung, (ii) shall be subject to the non-disclosure regarding project H and Project B, and (iii) shall not be
disclosed by the recipient to any third party. Samsung Proprietary and Confidential
Accounts and Contacts 87
Editing Contact Information
1. From the Home screen, tap .
2. Tap a contact name from the list and tap (
Edit
).
– or –
Select a contact name and press and then tap
Edit
.
– or –
Touch and hold a Contacts entry from the main
Contacts list and then tap
Edit
.
3. Edit the contact information then:
•
Tap
Save
to complete and store the new entry or
•
Tap
Cancel
to delete the current entry.
Adding a Number to an Existing Contact
1. From the Home screen, tap .
2. Touch and hold an entry and select
Edit
to reveal the
Contact entry’s details screen.
3. Tap a phone number field and enter a phone number.
•
Tap on the QWERTY keyboard to remove a previously
entered phone number.
•
Tap to enter an additional phone number
•
Tap to remove a previously entered phone number.
4. Enter additional information such as:
Groups
,
Ringtone
,
Message alert
,
Vibration pattern
or tap
Add another field
to input additional category information.
•Add another field
contains the following options: Phonetic
name, Organization, Phone, IM, Notes, Nickname, Website,
Events, or Relationship.
5. Tap
Save
to complete and store the new entry.
– or –
Tap
Cancel
to delete the current entry.
By accessing this document, the recipient agrees and
acknowledges that all contents and information in this document (i) are confidential and proprietary information
of Samsung, (ii) shall be subject to the non-disclosure regarding project H and Project B, and (iii) shall not be
disclosed by the recipient to any third party. Samsung Proprietary and Confidential
88
Adding a Pause or Wait to an Existing Contact
1. From the Home screen, tap and use the
on-screen keypad to enter a new phone number.
2. Press and then tap
Add 2-sec pause
. This feature
adds an automatic two-second pause.
– or –
Press and then tap
Add wait
. This feature causes
the phone to require your acceptance before sending
the next set of entered digits.
3. Tap
Add to Contacts
➔
Update existing
.
4. Scroll through the available list of existing entries and
select the desired target.
Note:
This new phone number is then added as a new number
to the selected entry.
5. Tap the label button (to the left of the new phone
number) and scroll through the list to select a category
type.
6. Tap
Save
to store and update the entry.
Deleting Contacts
Important!
Once Contacts list entries are deleted, they cannot
be recovered.
1. From the Home screen, tap .
2. Touch and hold a contact name from the list and select
Delete ➔
OK
.
By accessing this document, the recipient agrees and
acknowledges that all contents and information in this document (i) are confidential and proprietary information
of Samsung, (ii) shall be subject to the non-disclosure regarding project H and Project B, and (iii) shall not be
disclosed by the recipient to any third party. Samsung Proprietary and Confidential

Accounts and Contacts 89
Contact List Options
1. From the Home screen, tap .
2. Press . The following options display:
•Delete
: allows you to delete 1 or more of your contacts.
•Import/Export
: imports or exports contacts to or from the USB
storage location, SIM card or SD card.
• Share namecard via
: allows you can to send namecards via
methods such as Bluetooth, Email, Gmail, Messages, or
Wi-Fi Direct.
• Merge accounts
: allows you to merge all of your current
Contact entries with either your active Google or Samsung
account. If several of your contacts are from other external
sources, this allows you to “back them up” or copy them to
your Samsung account. Tap
OK
to continue or
Cancel
to exit.
• Speed dial setting
: allows you to set up speed-dialing.
• Send message/email
: allows you to send a text /picture
message or an email using your Google account.
• Contacts to display
: allows you to choose to display All
contacts, those on your Device, SIM card, Samsung account,
Gmail, or only display contacts that are part of a Customized
list.
•Settings
: allows you to configure where you save new contacts
to, or view your service numbers, or send contact information.
Options include: Only contacts with phones, List by, Display
contacts by, Service numbers, Contact sharing settings, and
Accounts.
•Help
: provides an on-screen Help file that covers most high
level topics for Contacts.
By accessing this document, the recipient agrees and
acknowledges that all contents and information in this document (i) are confidential and proprietary information
of Samsung, (ii) shall be subject to the non-disclosure regarding project H and Project B, and (iii) shall not be
disclosed by the recipient to any third party. Samsung Proprietary and Confidential

90
Contact Menu Options
1. From the Home screen, tap .
2. Touch and hold an entry to reveal the context menu.
The following options display:
•Edit
: allows you to edit the currently selected Contacts entry.
•Delete
: allows you to delete the currently selected Contacts
entry.
• Link contact
: allows you to link the current contact to another
current contact. Similar to a “see also” feature. If you can’t
remember a contact’s information, linking entries can help you
find the person you are looking for.
• Share contact via message
: allows you to send the current
entry info via text message.
• Add to favorites
: allows you to copy the current Contacts entry
to the list within the Favorites tab.
• Remove from favorites
: allows you to remove the current
Contacts entry from the Favorites tab.
• Add to group
: allows you to add the current Contacts entry to
an existing group.
• Add to reject list/ Remove from reject list
: allows you to add
or remove the current Contacts entry to a list of automatically
rejected incoming phone numbers.
Note:
If an entry does not have a phone number, the reject list
option will not display.
• Share namecard via
: allows you to send the current Contact
entry’s information to an external recipient via either
Bluetooth
,
Dropbox
(if enabled),
Email
(Exchange or Internet),
Gmail
,
Messages
, or
Wi-Fi Direct
.
• Print contact info
: allows you to print selected information on
a compatible Samsung printer.
• Add shortcut to home
: adds a shortcut to the current Contacts
entry to an available screen location.
By accessing this document, the recipient agrees and
acknowledges that all contents and information in this document (i) are confidential and proprietary information
of Samsung, (ii) shall be subject to the non-disclosure regarding project H and Project B, and (iii) shall not be
disclosed by the recipient to any third party. Samsung Proprietary and Confidential

Accounts and Contacts 91
Contact Entry Options
1. From the Home screen,
tap .
2. Tap an entry to reveal the
Contact entry’s Overview
Screen
. This screen contains Name, contact numbers,
email, and linked contact information.
3. Press to reveal the context menu specific to this
entry.
4. Tap an available option.
Linking Contact Information
Most people maintain multiple email accounts, social
networking logins, and other similar account information. For
example, a Facebook account login name might differ from a
corporate email account login because they are maintained
separately and for different groups of people.
This device can synchronize with multiple accounts. When
you synchronize your phone with those accounts, each
account creates a separate contact entry in the Contacts list.
If one of your contacts (Amy Smith) has a regular email
account that you maintain in Gmail, but also has a Facebook
account under her maiden and married name, as well as a
Video! chat account, when you merge those accounts into
your Contacts list you can link all of her entries and view the
information in one record.
Linking contact information makes sending messages easy.
You can select any account email address or information all
from one screen, versus searching multiple, individual
screens to locate the desired account information.
By accessing this document, the recipient agrees and
acknowledges that all contents and information in this document (i) are confidential and proprietary information
of Samsung, (ii) shall be subject to the non-disclosure regarding project H and Project B, and (iii) shall not be
disclosed by the recipient to any third party. Samsung Proprietary and Confidential
92
Next time you synchronize your device with your accounts,
any updates contacts make to email account names, email
addresses, etc. automatically update in your contacts list.
1. From the Home screen, tap .
2. Tap a contact name (the name you want to link to
another entry) to reveal the
Contact entry’s Overview
Screen
.
Note:
Typically this is the same contact with a different name
or account information.
3. Press and then tap
Link contact
.
4. Tap the second contact entry (the entry in which to
link). The second contact is now linked with the first
and the account information is merged into one screen.
The first contact image displays for both entries, and
the first contact’s name is used.
For example: If Amy (original entry) is joined with Julie
(second entry). Julie seems to disappear and only Amy
remains. Tap the Amy entry (showing the Amy image)
to view both.
5. Tap the main linked contact to view the contact
information you linked. The contacts and information
displays with an icon next to the contact name to
indicate what type of account information is contained
in the entry.
By accessing this document, the recipient agrees and
acknowledges that all contents and information in this document (i) are confidential and proprietary information
of Samsung, (ii) shall be subject to the non-disclosure regarding project H and Project B, and (iii) shall not be
disclosed by the recipient to any third party. Samsung Proprietary and Confidential
Accounts and Contacts 93
Unlinking a Contact
1. From the Home screen, tap .
2. Tap a contact name (the account name from which you
want to unjoin an entry). This reveals the details for
entry.
Note:
Typically this is the same contact with a different name
or account information.
3. Tap the
Connection
area.
– or –
Press and then tap
Separate contact
.
4. Tap next to the entry you want to unlink and
select
OK
. The contacts are “unlinked” or separated
and no longer display in the merged record screen.
Both contacts display separately.
Marking a Contact as Default
When you use applications such as the Voice Dialer or other
messaging type applications, the application needs to know
which information is primary (default) in a contact entry list.
For example, when you say “Call John Smith”, if you have
three phone records for John Smith, the Voice dialer is
looking for the “default” number or entry.
The
Mark as default
option marks one entry in a contact
record to use as the default. This comes in handy when you
have multiple entries for the same person.
1. From the Home screen, tap .
2. Tap a Contact entry.
3. Press and then tap
Mark as default
. The Mark as
default screen displays radio buttons next to the
contact name, phone number, or other contact
information.
4. Tap the radio button next to the entry information you
want to be the primary information (such as name,
phone number, or email) and select
Done
.
By accessing this document, the recipient agrees and
acknowledges that all contents and information in this document (i) are confidential and proprietary information
of Samsung, (ii) shall be subject to the non-disclosure regarding project H and Project B, and (iii) shall not be
disclosed by the recipient to any third party. Samsung Proprietary and Confidential
94
Note:
If there are multiple phone numbers assigned to an
entry, assigning a number as the default means that the
default number is automatically dield when you initiate a
call.
Sending a Namecard
A Namecard contains contact information, and can be sent to
recipients as a Virtual Business Card (V-card) attachment
using Bluetooth, Google Mail, or as a message.
1. From the Home screen, tap .
2. Tap a Contact entry.
3. Press and then tap
Share namecard via
and select
a delivery method:
Bluetooth
,
Dropbox
(if enabled),
ChatON
,
Email
(Exchange or Internet),
Gmail
,
Messages
, or
Wi-Fi Direct
.
The Namecard attaches to the selected message type
and is delivered when you send the message.
Note:
Email displays as an option only after an Internet or
Exchange email account was gt6mjgtmjnnnnk
created.
Sending All Current Namecards
Rather than selecting once Contact entry at a time, you can
send all of your current entries at once.
1. From the Home screen, tap .
2. Press and then tap
Import/Export
➔
Share
namecard via
.
3. Tap
Select all
to place a check mark alongside all
currently displayed Contact entries.
4. Tap
Done
and select a delivery method:
• Bluetooth
to transmit the contacts to another Bluetooth-
compatible device.
•
ChatON
•Email
to attach the contact cards to a new outgoing email
(Exchange or Internet).
Note:
The Web storage Upload feature requires that you be
logged into your Samsung account prior to upload.
•Gmail
to attach the contact cards to a new outgoing Internet-
based email.
• Messages
to attach the contact cards to a new outgoing text
message.
By accessing this document, the recipient agrees and
acknowledges that all contents and information in this document (i) are confidential and proprietary information
of Samsung, (ii) shall be subject to the non-disclosure regarding project H and Project B, and (iii) shall not be
disclosed by the recipient to any third party. Samsung Proprietary and Confidential
Accounts and Contacts 95
• Wi-Fi Direct
to transmit the entries to another Wi-Fi Direct
enabled device.
Sending a namecard using Bluetooth
You must create a Contact prior to sending a namecard to a
recipient. For more information, refer to “Creating a Contact”
on page 82
1. From the Home screen, tap .
2. Touch and hold the entry to reveal the on-screen
context menu.
3. Tap
Share namecard via
➔
Bluetooth
.
Important!
You must activate Bluetooth to use this feature.
4. Tap the Bluetooth device in which to send this name
card. Bluetooth forwards the namecard to the recipient.
Copying Contact Information
Copying Contact Information to the SIM Card
The default storage location for saving phone numbers to
your Contacts list is your device’s built-in memory. This
procedure allows you to copy numbers saved to the phone’s
memory, onto the SIM card.
1. From the Home screen, tap .
2. From the Contacts List, press and then tap
Import/Export
➔
Export to SIM card
.
3. Tap
Select all
to choose all current phone contact
entries.
– or –
Select a specific entry by touching an entry. A check
mark indicates a selection.
4. Tap
Done
. The name and phone number for the
selected contact is then copied to the SIM.
By accessing this document, the recipient agrees and
acknowledges that all contents and information in this document (i) are confidential and proprietary information
of Samsung, (ii) shall be subject to the non-disclosure regarding project H and Project B, and (iii) shall not be
disclosed by the recipient to any third party. Samsung Proprietary and Confidential
96
Copying Contact Information to the microSD
Card
This procedure allows you to copy entry information saved
on the phone’s memory, onto the SIM card.
1. From the Home screen, tap .
2. From the Contacts List, press and then tap
Import/Export
➔
Export to SD card
.
3. Tap
OK
to choose all current phone contact entries.
Synchronizing Contacts
Syncing data from your managed accounts allows you to add
and manage a new or existing contact from your online or
remote accounts to your phone. Prior to syncing, you must
first have an active Google or Microsoft Exchange account
with current Contact entries, and be signed into your account
via the phone.
With syncing, any Contacts entries (with phone numbers,
email addresses, pictures, etc.) are updated and synced with
your device.
Note:
You must log into your Gmail and Microsoft Exchange
ActiveSync accounts using this device in order to
synchronize contacts.
1. From the Home screen, press and then tap
Settings
➔
Accounts
tab and then select the
email account containing the contacts to synchronize.
2. Tap next to the account field to reveal the
account’s synchronization settings screen.
•
If displays
next to the
account field, this indicates a
synchronization error.
By accessing this document, the recipient agrees and
acknowledges that all contents and information in this document (i) are confidential and proprietary information
of Samsung, (ii) shall be subject to the non-disclosure regarding project H and Project B, and (iii) shall not be
disclosed by the recipient to any third party. Samsung Proprietary and Confidential
Accounts and Contacts 97
3. Toggle the active state of the
Sync Contacts
field to
synchronize only Contacts. A green check mark
indicates the feature is enabled.
Note:
The process of updating your Contacts tab can take
several minutes. If after 10-20 minutes, your list was not
updated, repeat steps 2-3.
Your
Contacts
tab reflects any updated Contact
information.
Display Options
The Display options menu allows you to allows you to choose
which contacts to display. You can also choose to display
only contacts that have phone numbers.
Note:
Once a display filter is selected, only those Contact
entries display until the
All contacts
option is
re-selected.
1. From the Home screen, tap .
2. Press and then tap
Contacts to display
. Select any
of the following to filter according to the selection:
• All contacts
allows you to display all available Contacts.
•Device
lists those Contacts currently found only on your Phone.
•SIM
lists those Contacts currently found only on your SIM card.
• Samsung account
lists those Contacts currently found and
sync’d within the Samsung account.
• Google
lists those Contacts currently found within the Google
account.
• Microsoft Exchange ActiveSync
lists those Contacts currently
found within the Exchange account.
By accessing this document, the recipient agrees and
acknowledges that all contents and information in this document (i) are confidential and proprietary information
of Samsung, (ii) shall be subject to the non-disclosure regarding project H and Project B, and (iii) shall not be
disclosed by the recipient to any third party. Samsung Proprietary and Confidential

98
• Customized list
allows you to enable which account
categories are displayed. For example, on Google contacts, you
can filter which Contact categories display (Friends, Family,
etc..)
Adding more Contacts via Accounts
and Sync
When you synchronize applications such as Facebook,
Twitter, MySpace, a corporate email account, or Google,
using the Accounts and sync option synchronizes the data
from the selected account type with your Contacts list.
1. From the Home screen, press and then tap
Settings
➔
Accounts
tab, touch an account,
and then tap
Add account
.
2. Determine which type of account information you want
to synchronize with your Contact list. Selections are:
Samsung account
,
Dropbox
,
Email
,
Google
,
LDAP
,
Microsoft Exchange ActiveSync
, or
Sync apps with
Facebook
.
3. Tap an account type to add.
4. Follow the prompts. The selected account type
synchronizes with your Contacts list.
5. After synchronizing accounts you may want to link
contact information. For more information, refer to
“Linking Contact Information” on page 91
To add Facebook content to your Contacts list:
You can now add your Facebook contact information, such as
pictures, email, and phone numbers directly to your Contacts
list. All of their current contact information is then migrated
over to your phone. If a Contacts entry already exists with a
slightly different name, separate entries are created and can
later be linked (joined) together into a single entry.
Important!
This process not only synchronizes your contact
information but also your status, events, and more.
1. From the Home screen, tap
Play Store
.
2. Search for and select the
Facebook
app.
3. When you are prompted to download the Facebook
application from the Play Store.
4. Tap
INSTALL
➔
ACCEPT
to complete the process.
5. Tap
OPEN
to launch the application.
By accessing this document, the recipient agrees and
acknowledges that all contents and information in this document (i) are confidential and proprietary information
of Samsung, (ii) shall be subject to the non-disclosure regarding project H and Project B, and (iii) shall not be
disclosed by the recipient to any third party. Samsung Proprietary and Confidential
Accounts and Contacts 99
6. Log into your Facebook account, enter your account’s
access
Email
and
Password
information, and tap
Log in
.
7. If prompted, configure any requested optional
permissions and tap
Log in
.
8. If prompted, select a Contacts Sync option. Choose
from: Sync all, Sync with existing contacts, or Don’t
sync.
9. Tap
Done
to complete the login and sync process.
To resync Social Network Contacts:
1. From the Home screen, press and then tap
Settings
➔
Accounts
tab and then tap
Facebook
and
toggle the check mark beside the desired fields.
2. Choose the parameters to sync (ex: Sync Calendar,
Sync Contacts, or Sync Gallery) and tap
Sync now
.
Note:
From the main Accounts and sync page you can also tap
Sync all
to resync all accounts.
Additional Contact Options
Sending an Email to a Contact
Note:
Contacts must contain and email account and address
before you can use the Send email feature.
1. From the Home screen, tap .
2. Press and then tap
Send message/email
➔
Send
email
. Contacts that contain an email address display.
3. Tap the contact(s) to which you want to send an email.
A check mark displays next to the selection.
Note:
The select contact must have an email as part of their
details screen.
4. Tap
Done
.
5. Select an email account type.
6. Compose the email and tap
Send
.
By accessing this document, the recipient agrees and
acknowledges that all contents and information in this document (i) are confidential and proprietary information
of Samsung, (ii) shall be subject to the non-disclosure regarding project H and Project B, and (iii) shall not be
disclosed by the recipient to any third party. Samsung Proprietary and Confidential

100
Export/Import
For more information, refer to “Copying Contact Information”
on page 95
Contact List Settings
From this menu you can determine the default storage
location for Contacts, display your phone’s primary number,
and view service numbers listed in your Contact list.
1. From the Home screen, tap .
2. Press and then tap
Settings
. Configure any of the
following options:
• Only contacts with phones
allows you to display only those
contacts containing phone numbers.
•List by
defines how the current list of Contacts are sorted:
First name
or
Last name
.
• Display contacts by
defines how the current list of Contacts
are listed:
First name first
(ex: Steve Smith) or
Last name first
(Smith, Steve).
• Contact sharing settings
allows you configure how your
Contacts entries are sent: individually or as a single file
containing all available entries.
Tap
Settings
to select a share setting.
•Accounts
provides quick access to your current account’s sync
settings.
Groups
This feature allows you to add a new or existing contact to a
call group. This group can be one of the already present
groups (Family, Friends, or Work) or a user-created group.
Creating a New Caller Group
1. From the Home screen, tap ➔
Groups
tab.
2. Press and then tap
Create
.
3. Tap the
Group name
field and use the on-screen
keypad to enter a new group name. For more
information, refer to “Text Input Methods” on page 77
4. Tap
Group ringtone
and select a ringtone for the group.
Selections are:
Default ringtone, Ringtones
(select from
available ringtones) or
Add
(to navigate your device and
select an existing audio file).
5. Tap
Message alert
and select a message alert ringtone
to be associated with this group.
By accessing this document, the recipient agrees and
acknowledges that all contents and information in this document (i) are confidential and proprietary information
of Samsung, (ii) shall be subject to the non-disclosure regarding project H and Project B, and (iii) shall not be
disclosed by the recipient to any third party. Samsung Proprietary and Confidential

Accounts and Contacts 101
6. Tap
Vibration pattern
and select a unique vibration
pattern either from an available list or Create your own.
This pattern is then associated with this group.
7. Tap
Add member
to add Contacts to the new group.
8. From the available list of contacts, tap the contact(s)
you want to add. A check mark displays next to contact
entry. Then tap
Done
.
– or –
Tap
Select all
to place a check mark alongside all
current entries. Then tap
Done
.
9. Tap
Save
to store the newly created group.
Note:
Some externally maintained group types (such as
Google) can only be managed or updated remotely
online vs via the device. These external types will not
allow editing or deleting members locally via the phone.
Adding an Existing Entry to a Current Caller
Group
1. From the Home screen, tap ➔
Groups
tab.
2. Tap a group entry ➔
Add group member
.
3. From the available list of contacts, tap the contact(s)
you want to add. A check mark displays next to contact
entry.
4. Tap
Done
. The selected contacts are added to the
group.
Removing an Entry From a Caller Group
1. From the Home screen, tap ➔
Groups
tab.
2. Tap a group entry.
3. Press and then tap
Remove member
.
4. Tap all of the contacts you want to remove from this
group. A check mark displays next to contact entry.
5. Tap
Done
.The contacts are removed from the group.
By accessing this document, the recipient agrees and
acknowledges that all contents and information in this document (i) are confidential and proprietary information
of Samsung, (ii) shall be subject to the non-disclosure regarding project H and Project B, and (iii) shall not be
disclosed by the recipient to any third party. Samsung Proprietary and Confidential
102
Editing a Caller Group
To edit a Group entry, there must be at least one member as
part of the selected group.
1. From the Home screen, tap ➔
Groups
tab.
2. Touch and hold a group entry then select
Edit group
.
3. Make modifications to the
Group name
,
Group ringtone
,
Message alert
,
Vibration pattern
fields, or
Add member
.
4. Tap
Save
.
Deleting a Caller Group
1. From the Home screen, tap ➔
Groups
tab.
2. Press and then tap
Delete groups
.
3. Select either
Select all
or tap the desired group.
4. Tap
Delete
.
5. Select either the
Group only
or
Group and group
members
.
6. Tap
OK
.
Sending a Message to a Group
1. From the Home screen, tap ➔
Groups
tab.
2. Tap an existing group, and press and then tap
Send message
.
– or –
Touch and hold a group entry and select
Send message
.
3. Select the recipients of the new message (indicated by
a green check mark). If an entry contains multiple
phone numbers, each must be selected individually.
4. Tap
Done
.
5. Type your message, and tap (
Send
).
By accessing this document, the recipient agrees and
acknowledges that all contents and information in this document (i) are confidential and proprietary information
of Samsung, (ii) shall be subject to the non-disclosure regarding project H and Project B, and (iii) shall not be
disclosed by the recipient to any third party. Samsung Proprietary and Confidential

Accounts and Contacts 103
The Favorites Tab
The Favorites tab is a list of the phone numbers that were
designated as favorite contacts. For more information, refer
to “Logs Tab” on page 73
1. From the Home screen, tap .
2. Tap
Favorites
tab.
Adding a contact to your favorites list:
1. From within the Favorites tab, press and select
Add to favorites
.
2. Place a check mark alongside the Contacts entries to
assign as favorites.
3. Tap
Done
to complete the process.
By accessing this document, the recipient agrees and
acknowledges that all contents and information in this document (i) are confidential and proprietary information
of Samsung, (ii) shall be subject to the non-disclosure regarding project H and Project B, and (iii) shall not be
disclosed by the recipient to any third party. Samsung Proprietary and Confidential
104
Section 6: Messages
This section describes how to send or receive different types
of messages. It also explains the features and functionality
associated with messaging.
Types of Messages
Your phone provides the following message types:
•
Text Messages
•
Multimedia (Picture, Video, and Audio) Messages
•
Email and Gmail Messages
•
Google Hangouts
•
Messenger
The Short Message Service (SMS) lets you send and receive
text messages to and from other mobile phones or email
addresses. To use this feature, you may need to subscribe to
your service provider’s message service.
The Multimedia Messaging Service (MMS) lets you send and
receive multimedia messages (such as picture, video, and
audio messages) to and from other mobile phones or email
addresses. To use this feature, you may need to subscribe to
your service provider’s multimedia message service.
Important!
During the creation of a text message, adding an
image, sound file, or video clip automatically
changes it from a text message (SMS) to a
multimedia message (MMS).
Message Icons on the Status Bar
Messaging icons are displayed on the Status Bar at the top of
the display when new messages are received. For more
information, refer to “Status Bar” on page 32
Note:
The Messaging application can also be accessed by
pressing and then tapping
Apps
➔
(
Messaging
).
By accessing this document, the recipient agrees and
acknowledges that all contents and information in this document (i) are confidential and proprietary information
of Samsung, (ii) shall be subject to the non-disclosure regarding project H and Project B, and (iii) shall not be
disclosed by the recipient to any third party. Samsung Proprietary and Confidential
Messages 105
Creating and Sending Messages
1. From the Home screen, tap
(
Messaging
) ➔
(
Compose
).
2. Tap the
Enter recipient
field to manually enter a
recipient.
– or –
Tap to select from one of the following:
• Groups
: to select a recipient from the Group list.
•Favorites
: to select a recipient from the Favorites list.
•Contacts
: to select a recipient from your Contacts list (valid
entries must have a wireless phone number or email address).
•Logs
: to select a recipient from a list of recently sent
messages.
3. If adding a recipient from either Groups, Favorites,
Contacts, or Logs, tap the contact to place a check
mark then tap
Done
. The contact displays in the
recipient field.
Note:
Delete any unnecessary members by tapping their
name/number in the recipient area and selecting
Delete
.
4. Add more recipients by tapping either the
Enter
recipient
field or and selecting recipients.
5. Tap the
Enter message
field and use the on-screen
keypad to enter a message. For more information, refer
to “Text Input Methods” on page 77
6. Review your message and tap (
Send
).
7. If you have more than one recipient, the same text
message is sent to all recipients in the Enter Recipients
field.
Note:
If you exit a message before you send it, it is
automatically saved as a draft.
By accessing this document, the recipient agrees and
acknowledges that all contents and information in this document (i) are confidential and proprietary information
of Samsung, (ii) shall be subject to the non-disclosure regarding project H and Project B, and (iii) shall not be
disclosed by the recipient to any third party. Samsung Proprietary and Confidential
106
Quick Messaging a Number from the Contacts
List
1. From the Home screen, tap
Contacts
.
2. Locate an entry from the Contacts list.
3. In a single motion, touch and drag your finger over the
number by going to the left. This action addresses a
new text message to the selected recipient.
Message Options
Options before composing a message
1. From the Home screen, tap
Messaging
.
2. Before composing a message, from the main Message
screen press from the main Messaging screen to
display additional messaging options:
•Search
: allows you to search through all of your messages for
a certain word or string of words. Use the on-screen keypad to
enter a word or phrase in which to search, then tap .
For more information, refer to
“Message Search”
on page
113
• Delete threads
: allows you to delete any message thread.
Select the messages to delete and a green check mark will
display next to the message. Tap Delete. For more information,
refer to
“Deleting a single message thread”
on page 112
•Draft messages
: displays the draft messages folder and its
contents.
• Locked messages
: displays the locked messages folder and
its contents.
• Scheduled messages
: displays the scheduled messages
folder and its contents.
• Spam messages
: displays the spam messages folder and its
contents.
• Text templates
: displays your available text message reply
templates. For more information, refer to
“Text Templates”
on
page 118
• Settings
: allows you to access Messaging settings. For more
information, refer to
“Messaging Settings”
on page 113
By accessing this document, the recipient agrees and
acknowledges that all contents and information in this document (i) are confidential and proprietary information
of Samsung, (ii) shall be subject to the non-disclosure regarding project H and Project B, and (iii) shall not be
disclosed by the recipient to any third party. Samsung Proprietary and Confidential

Messages 107
3. From the Messaging screen list, touch and hold an
on-screen message and select an option:
• Add to Contacts
: allows you to add the sender to either a new
or existing Contacts entry.
•View contact
: allows you to view the current entry information
for the sender.
• Delete thread
: deletes the entire message and its bubbles.
Deleting a single message threadFor more information, refer to
“Deleting a single message bubble”
on page 112
• Add to spam numbers
: allows you to tag a number as spam
so that these messages can be directly delivered to your spam
folder.
Options while in a current message
1. From the Home screen, tap
Messaging
.
2. From within an open message, press to display
additional messaging options:
• Insert smiley
: allows you to add insert smiley icons
images (emoticons).
•Add text
: allows you to add text items from sources
such as: Memo, Calendar, Location, Contacts, and Text
templates.
•Preview
(only in MMS): allows you to add preview the
MMS message prior to delivery.
•Add to contacts
: allows you to add the sender to either a new
or existing Contacts entry.
•View contact
: reveals the current Contact’s overview screen.
• Add slide
: converts an SMS message into an MMS
(Multimedia) message and allows you to attach an existing
slideshow.
• Remove slide
: allows you to remove a previously attached
slideshow.
• Add subject
: allows you to enter a subject.
By accessing this document, the recipient agrees and
acknowledges that all contents and information in this document (i) are confidential and proprietary information
of Samsung, (ii) shall be subject to the non-disclosure regarding project H and Project B, and (iii) shall not be
disclosed by the recipient to any third party. Samsung Proprietary and Confidential

108
• Duration (5 secs)
(only in MMS): allows you to change the
duration of the image slideshow.
• Layout (bottom)
(only in MMS): allows you to change the
layout.
• Add recipients
: allows you to enter additional recipients to the
message.
• Delete message
: allows you to erase either select specific
message bubbles or all current messages bubbles.
• Scheduling
: allows you to schedule a time for the current
message to be delivered.
• Add to spam numbers
: allows you to tag a number as spam
so that these messages can be directly delivered to your spam
folder.
•Discard
: closes the current open message.
Note:
You must be logged into your Samsung account prior to
using the S Translator feature.
•Translate
: launches a Translate popup menu. Here you can
both assign the sender’s original language and assign a target
language for the recipient (they will receive your message in the
designated language).
–
Enable the translate feature then configure the available options
as desired. Tap
OK
to store the new settings.
Adding attachments to a message
To add an attachment to your message, tap (
Attach
)
and select one of the following options:
•
Image
: allows you to tap an existing image from your Pictures list
to add it to your message.
•
Take a picture
: allows you to temporarily exit the message, take
a photo with phone’s camera, and then add it to your message by
tapping
Save
.
•
Video
: allows you to choose an existing video from the Videos list,
then add it to your message
.
•
Record video
: allows you to temporarily exit the message,
record a video clip using the phone’s camera, and then add it
to your message by tapping
Save
.
By accessing this document, the recipient agrees and
acknowledges that all contents and information in this document (i) are confidential and proprietary information
of Samsung, (ii) shall be subject to the non-disclosure regarding project H and Project B, and (iii) shall not be
disclosed by the recipient to any third party. Samsung Proprietary and Confidential

Messages 109
•
Audio
: allows you to choose an existing audio file from the
Audio list, then add it to your message by tapping the circle to
the right of the audio so that it turns green, then tapping
Done
.
•
Record audio
: allows you to temporarily exit the message and
record an audio clip using the phone’s microphone. It is then
automatically attached to the message.
•
Memo
: allows you to add an S Memo that you have created.
•
Calendar
: allows you to add an event from your calendar.
•
Location
: allows you to attach a thumbnail of a map showing
your location.
•
Contacts
: allows you to tap on an existing Address Book entry,
then add it to your message by tapping
Done
.
Adding Additional Text
You can copy text such as names, phone numbers, and
events from your Contacts, Calendar, or a Memo.
1. While composing a message, press ➔
Add text
.
2. At the Add text screen, select one of the following:
•Memo
: allows you to insert text from an existing S Memo.
•Calendar
: allows you to add the name, date, and time of a
calendar event to your message.
•Location
: allows you to add an address and the link to the
location on Google Maps.
•Contacts
: allows you to add the name and phone number of
any of your contacts to your message.
• Text templates
: allows you to add pre-defined phrases and
sentences. For more information, refer to
“Text Templates”
on page 118
The information is added to your message.
By accessing this document, the recipient agrees and
acknowledges that all contents and information in this document (i) are confidential and proprietary information
of Samsung, (ii) shall be subject to the non-disclosure regarding project H and Project B, and (iii) shall not be
disclosed by the recipient to any third party. Samsung Proprietary and Confidential
110
Viewing Newly Received Messages
When you receive a message, your phone notifies you by
displaying within the Notification area at the top left of
your Home screen.
To read a message:
1. Open the Notification Bar and select the message. For
more information, refer to “Notification Bar” on page
38
– or –
From the Home screen, tap
then tap the new
message to view its contents. The selected message
displays on the screen.
2. Tap to play a multimedia message.
•
To pause playback of the multimedia message, tap .
3. In a single motion, touch and drag up or down the page
to scroll through the message (if additional pages were
added).
Message Threads
Sent and received text and picture messages are grouped
into message threads. Threaded messages allow you to see
all the messages exchanged (similar to a chat program) and
displays a contact on the screen.
Message threads are listed in the order in which they were
received, with the latest message displayed at the top.
To reply to a text message:
1. From the Home screen, tap .
2. While the message is open, tap the
Enter message
field
and then type your reply message.
3. Compose your reply.
Your texts are colored Blue and your caller’s replies are
Yellow.
4. Tap (
Send
) to deliver your reply.
– or –
Press and then select one of the available
message options (page 106).
By accessing this document, the recipient agrees and
acknowledges that all contents and information in this document (i) are confidential and proprietary information
of Samsung, (ii) shall be subject to the non-disclosure regarding project H and Project B, and (iii) shall not be
disclosed by the recipient to any third party. Samsung Proprietary and Confidential
Messages 111
To access message thread options:
From the main Messaging screen, touch and hold the
message to display the following options:
•View contact
: displays the Contact’s Overview page.
•Add to contacts
: begins the process of adding the new
number to your Contacts list.
• Delete thread
: deletes the currently selected message thread.
•Add to spam numbers
: adds the current sender to a spam list.
ny new texts from this sender are automatically blocked.
To access additional Bubble options:
Touch and hold the message bubble within an active
message conversation to display the following options:
• Delete message
: deletes the currently selected message
bubble from the thread.
• Copy message text
: copies the currently selected message
bubble from the thread.
•Lock/Unlock message
: locks or unlocks the currently selected
message bubble from being accidentally deleted.
•Forward
: allows you to forward the currently selected message
bubble to an external recipient.
•Copy to SIM
: copies the currently selected message bubble as
a single text message within the SIM card.
• View message details
: displays details for the currently
selected message bubble.
•Translate
: translates the text from the currently selected
bubble into a desired language.
By accessing this document, the recipient agrees and
acknowledges that all contents and information in this document (i) are confidential and proprietary information
of Samsung, (ii) shall be subject to the non-disclosure regarding project H and Project B, and (iii) shall not be
disclosed by the recipient to any third party. Samsung Proprietary and Confidential
112
Deleting Messages
Deleting a single message thread
1. From the Home screen, tap .
2. Touch and hold a message from the Messages list,
then select
Delete thread
.
3. At the prompt, tap
OK
to delete or
Cancel
to exit.
Deleting multiple message threads
1. From the Home screen, tap .
2. Press and then tap
Delete threads
.
3. Tap each message thread you want to delete. A check
mark displays beside each selected message.
4. Tap
Delete
.
5. At the prompt, tap
OK
to delete or
Cancel
to end the
process.
Deleting a single message bubble
1. From the Home screen, tap .
2. Open a message to reveal the message string.
3. Touch and hold a message bubble, then select
Delete
message
.
4. At the prompt, tap
OK
to delete or
Cancel
to exit.
Deleting multiple message bubbles
1. From the Home screen, tap .
2. Open a message to reveal the message string.
3. Press and then tap
Delete messages
.
4. Place a check mark on the individual bubbles targeted
for deletion or choose
Select all
.
5. Tap
Delete
to erase or
Cancel
to exit.
By accessing this document, the recipient agrees and
acknowledges that all contents and information in this document (i) are confidential and proprietary information
of Samsung, (ii) shall be subject to the non-disclosure regarding project H and Project B, and (iii) shall not be
disclosed by the recipient to any third party. Samsung Proprietary and Confidential
Messages 113
Message Search
You can search through your messages by using the
Message Search feature.
1. From the Home screen, tap .
2. Press and then tap
Search
.
3. Use the on-screen keypad to enter a word or phrase in
which to search, then tap .
4. All messages that contain the entered search string
display.
Messaging Settings
To configure the settings for text messages, multimedia
messages, Voice mails, and Push messages.
1. From the Home screen, tap .
2. Press and then tap
Settings
.
The following Messaging settings are available:
General settings
• Delete old messages
: deletes old messages when the limit is
reached, rather than overwriting them.
• Text message limit
: allows you to set a limit on how many text
messages are allowed in one conversation.
• Multimedia message limit
: allows you to set a limit on how
many multimedia messages are allowed in one conversation.
Text message (SMS) settings
• Delivery reports
: when this option is activated, the network
informs you whether or not your message was delivered.
• Manage SIM card messages
: allows you to manage the
messages stored on the SIM card.
• Message center
: allows you to enter the number of your
message center where your messages reside while the system
is attempting to deliver them.
• Input mode
: allows you to set the input mode for your text
messages. Choose from: GSM Alphabet, Unicode, or
Automatic.
Multimedia message (MMS) settings
• Delivery reports
: when this option is activated, the network
informs you whether or not your message was delivered.
•Read reports
: when this option is activated, your phone
receives a request for a read reply along with your message to
the recipient.
•Auto-retrieve
: allows the message system to automatically
retrieve messages.
By accessing this document, the recipient agrees and
acknowledges that all contents and information in this document (i) are confidential and proprietary information
of Samsung, (ii) shall be subject to the non-disclosure regarding project H and Project B, and (iii) shall not be
disclosed by the recipient to any third party. Samsung Proprietary and Confidential
114
• Roaming auto retrieve
: allows the message system to
automatically retrieve while roaming.
•Creation mode
: allows you to select the creation mode: Free,
Restricted, or Warning.
–
Restricted
: you can only create and submit messages with
content belonging to the Core MM Content Domain.
–
Warning
: the phone will warn you via pop up messages that
you are creating a multimedia message which does not fit the
Core MM Content Domain.
–
Free
: you may add any content to the message.
•MMS alert
: alerts you when the messaging modes changes
from an SMS (text) to MMS (multimedia) mode.
Display
• Bubble style
: allows you to choose from several bubble styles
for your messages. Bubbles are the rounded boxes that
surround each message.
• Background style
: allows you to choose from several
background styles for your messages.
• Use the volume key
: allows you to change the text size by
using the up or down volume keys.
Push message settings
• Push messages
: allows you to receive push messages from
the network.
• Service loading
: allows you to set the type of service loading
notification. Choose from: Always, Prompt, or Never.
Notification settings
• Notifications
: allows you to see message notifications on your
status bar.
• Select ringtone
: allows you to set the ringtone for your
message notifications.
•Vibrate
: allows you to configure the vibration mode associated
with message alerts.
• Message alert repetition
: allows you to set the interval for new
message alerts. Choose from: Once, Every 2 minutes, or
Every 10 minutes.
• Preview message
: when enabled, allows you to view a brief
preview of new message text on the Status bar.
By accessing this document, the recipient agrees and
acknowledges that all contents and information in this document (i) are confidential and proprietary information
of Samsung, (ii) shall be subject to the non-disclosure regarding project H and Project B, and (iii) shall not be
disclosed by the recipient to any third party. Samsung Proprietary and Confidential

Messages 115
Emergency message settings
•Emergency alerts
: allows you to configure emergency alert
settings. You can enable/disable those alert categories you
wish to receive. Choose from: Imminent extreme alert,
Imminent severe alert, and AMBER alerts.
Note:
The Presidential alert can not be disabled.
• Emergency notification preview
: allows you to play a sample
emergency alert tone. Tap
Stop
to cancel the playback.
Signature settings
• Add signature
: when enabled, this feature allows you to create
a signature at the end of your outgoing text messages.
• Signature text
: allows you to enter a desired signature for your
message.
Spam message settings
• Spam settings
: when enabled, allows you to configure
available spam settings such as:
–
Add to spam numbers
: allows you to manually enter and
assign a phone number as being sent from a spam source.
–
Add to spam phrases
: allows you to assign a specific text
phrase as belonging to a spam message. Ex: Dear friend.
–
Block unknown senders
: when active, automatically blocks
incoming messages from unknown sources or blocked
numbers.
Emergency Alert Configuration
This device is designed to receive wireless emergency alerts
from the Commercial Mobile Alerting System (CMAS); which
may also be known as the Personal Localized Alerting
Network (PLAN). If your wireless provider has chosen to
participate in CMAS/PLAN, alerts are available while in the
provider's coverage area. If you travel outside your provider's
coverage area, wireless emergency alerts may not be
available. For more information, please contact your wireless
provider.
Emergency Alerts allows customers to receive
geographically-targeted messages. Alert messages are
provided by the US Department of Homeland Security and
will alert customers of imminent threats to their safety within
their area. There is no charge for receiving an Emergency
Alert message.
By accessing this document, the recipient agrees and
acknowledges that all contents and information in this document (i) are confidential and proprietary information
of Samsung, (ii) shall be subject to the non-disclosure regarding project H and Project B, and (iii) shall not be
disclosed by the recipient to any third party. Samsung Proprietary and Confidential
116
There are three types of Emergency Alerts:
•
Alerts issued by the President
•
Alerts involving imminent threats to safety of life
•
AMBER Alerts (missing child alert)
Customers may choose not to receive Extreme Alerts, Severe
Alerts, and AMBER Alerts.
Important!
Alerts issued by the President can not be disabled.
To disable Extreme, Severe, and AMBER Alerts:
1. From the Home screen, tap .
2. Press and then tap
Settings
.
3. Scroll to the bottom and select
Emergency alerts
. All
alerts are enabled by default (check mark showing).
4. Tap on an alert option to disable the alert and remove
the check mark.
Assigning Messages as Spam
You can now assign either a phone number as spam or use a
key term or phrase. Any message assigned as spam is
automatically placed with your Spam messages folder.
To assign a phone number from Messages list as spam:
1. From the Home screen, tap .
2. Touch and hold a message from a phone number.
3. Select
Add to spam numbers
and tap
OK
.
To assign a phone number manually as spam:
1. From the Home screen, tap .
2. Press and then tap
Settings
.
3. Locate and activate the
Spam settings
option.
• Spam settings
: when enabled, allows you to configure
available spam settings such as:
4. Tap
Add to spam numbers
➔ (
Add
).
•
This function allows you to manually enter and assign a phone
number as being sent from a spam source.
By accessing this document, the recipient agrees and
acknowledges that all contents and information in this document (i) are confidential and proprietary information
of Samsung, (ii) shall be subject to the non-disclosure regarding project H and Project B, and (iii) shall not be
disclosed by the recipient to any third party. Samsung Proprietary and Confidential
Messages 117
5. Tap the
Number
field to manually enter phone number.
– or –
Tap to select from either your existing Logs or
Contacts.
– or –
Tap
Match criteria
and select a parameter that must
match for the spam action to take effect. Choose from:
Same as, Starts with (ex: 800 or 888), Ends with, or
includes.
6. Tap
Save
.
To register text phrases as spam:
Some incoming messages might not be associated with a
phone number but rather an email address. In these cases,
the only way to block those messages, would be assign a
key used term or phrase to activate the Spam block. Ex:
“Dear friend”, “Stock Alert”, or “Act Now”.
1. From the Home screen, tap .
2. Press and then tap
Settings
.
3. Locate and activate the
Spam settings
option.
4. Tap
Add to spam phrases
➔ (
Add
).
•
This function allows you to assign a specific text phrase as
belonging to a spam message. Ex: Dear friend.
5. Enter a term or word into the field.
Note:
The term is case sensitive. Ex: “Act Now” is not the
same as “act now”.
6. Tap
Save
.
To register unknown numbers as spam:
Some incoming messages might not be associated with
either a phone number or email address. These incoming
messages contain no information as their info is blocked by
the sender.
1. From the Home screen, tap .
2. Press and then tap
Settings
.
3. Locate and activate the
Spam settings
option.
4. Tap
Block unknown senders
. A green check mark
indicates the feature is active.
• Block unknown senders
: when active, automatically blocks
incoming messages from unknown sources or blocked
numbers.
By accessing this document, the recipient agrees and
acknowledges that all contents and information in this document (i) are confidential and proprietary information
of Samsung, (ii) shall be subject to the non-disclosure regarding project H and Project B, and (iii) shall not be
disclosed by the recipient to any third party. Samsung Proprietary and Confidential
118
If an incoming message is designated in coming from an
unknown sender, it is automatically assigned as spam and is
now located in your Spam folder.
Accessing Your Spam Folder
Any message assigned as spam is automatically placed with
your Spam messages folder.
1. From the Home screen, tap .
2. Press and then tap
Spam messages
.
Text Templates
This screen displays your available text message reply
templates. This is a readily accessible list of both default and
user-defined text snippets that can be used to quickly reply
to incoming messages.
1. From the Home screen, tap .
2. From the Messaging list, press and then tap
Text templates
.
3. Tap a message to immediately insert it into your
current message conversation.
To create your own text template:
1. From the Home screen, tap .
2. From the Messaging list, press and then tap
Text templates
.
3. Tap (
Create text template
).
4. Enter a new text string and tap
Save
.
Using Email
Email (or Internet Email) enables you to review and create
email using several email services. You can also receive text
message alerts when you receive an important email. Your
phone’s Email application lets you access and manage
multiple email accounts simultaneously in one convenient
location.
There are currently three main types of email accounts on
your phone: Gmail, Internet-based email (Gmail, Yahoo, etc..),
and Microsoft Exchange (Corporate email or Outlook®).
To send and receive email messages through an ISP (Internet
Service Provider) account, or if you wish to use your device
to access your corporate email through a VPN (Virtual Private
Network), you will first need to set up an IMAP or POP
account.
By accessing this document, the recipient agrees and
acknowledges that all contents and information in this document (i) are confidential and proprietary information
of Samsung, (ii) shall be subject to the non-disclosure regarding project H and Project B, and (iii) shall not be
disclosed by the recipient to any third party. Samsung Proprietary and Confidential
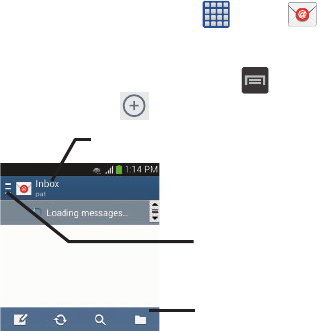
Messages 119
•
IMAP
(Internet Message Access Protocol) - This protocol is
frequently used in large networks and commercial settings.
IMAP4 is the current standard.
•
POP3
(Post Office Protocol) - This protocol is supported by most
ISPs (Internet service providers) and common among consumer
applications. POP3 is the current standard.
•
Microsoft Exchange ActiveSync
- This protocol is frequently
used with a large corporate email server system and provides
access to email, contact, and calendar synchronization.
Creating an Internet Email Account
1. From the Home screen, tap
Apps
➔
(
Email
).
2. If you already have other email account setup:
•
Open an existing email account, press and then tap
Settings
➔
(
Add account
).
– or –
Enter your
Email address
and
Password
information.
• Email address
: your Internet email address.
• Password
: typically your network access password
(case-sensitive).
Account name
Access available
accounts and
folders
Email functions
By accessing this document, the recipient agrees and
acknowledges that all contents and information in this document (i) are confidential and proprietary information
of Samsung, (ii) shall be subject to the non-disclosure regarding project H and Project B, and (iii) shall not be
disclosed by the recipient to any third party. Samsung Proprietary and Confidential

120
3. Tap
Show password
to display the password as you
enter it in the associated field.
•
Tap
Manual setup
to configure your connection settings
manually (POP3 or IMAP). Follow the on-screen prompts and
enter the information specific to your email provider.
•
Tap
Send email from this account by default
to assign this
email account as your default account for all outgoing emails.
4. Tap
Next
.
5. At the
Account options
screen, select the frequency
which the device should check for new email on the
server and tap
Next
.
Important!
The
Sync Email
feature must be enabled to allow
synching between your device and the remote
server.
•
Tap the
Notify me when email arrives
field to receive new
email notifications.
•
Tap the
Automatically download attachments when
connected to Wi-Fi
field to assist with faster access to large
email attachments when using Wi-Fi.
6. At the
Set up email
screen, name the account and enter
a screen name to identify yourself on this account.
•
The unique account name is used to differentiate this account
from other email accounts accessed by your device.
7. Tap
Done
to store the new account.
Messages for this account display on the Inbox tab. You can
also view Personal information for this account, Receipts (if
you setup the account to return receipts), Travel information,
and more (if available).
Opening an Email
1. From the Home screen, tap ➔ (
Email
).
2. Tap (account name field upper-left) to open
the complete email account list page.
•
Selecting
Combined view
allows you to view all the emails for
your current accounts, managed by the application, to be listed
on a single screen.
3. Select an email account and tap an email message.
By accessing this document, the recipient agrees and
acknowledges that all contents and information in this document (i) are confidential and proprietary information
of Samsung, (ii) shall be subject to the non-disclosure regarding project H and Project B, and (iii) shall not be
disclosed by the recipient to any third party. Samsung Proprietary and Confidential
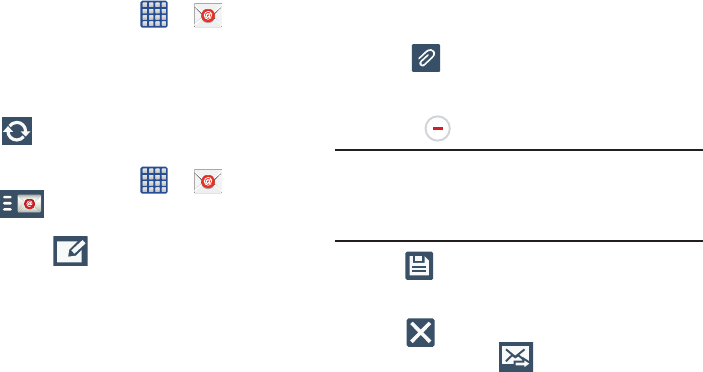
Messages 121
Refreshing Email messages
1. From the Home screen, tap ➔ (
Email
).
2. Select an email account.
•
If you are already in an email account, tap the account name
field (upper-left) to open the complete email account list page.
•
Select an available email account.
3. Tap (
Refresh
).
Composing Email
1. From the Home screen, tap ➔ (
Email
).
2. Tap (account name field upper-left) to open
the complete email account list page.
3. Tap
Inbox
➔ (
Compose
).
4. Enter the recipient’s email address in the
To
field.
•
If you are sending the email message to several recipients,
separate the email addresses with a comma. You can add as
many message recipients as you want.
5. Tap
Add Cc/Bcc
to add additional carbon copy and blind
copy recipients.
•
Use the
Cc
field to carbon copy additional recipients.
•
Use the
Bcc
field to blind copy additional recipients.
6. Tap the
Subject
field and enter the email subject.
7. Tap the email text field and compose your email
message.
•
To add an attachment (such as image, video, audio, etc..),
tap
Attach
(from the top of the screen) and make a
category selection.
–
Tap the file you wish to attach.
–
Tap
to delete the attached file.
Note:
If you attach an image to your email, you have the option
to resize it prior to delivery. Choose from: Original,
Large (70%), Medium (30%), or Small (10%). Once
chosen, tap either
Always
or
Just once
.
8. Tap (
Save
) to store a draft of the current email on
your device so that you can come back later and
continue the email.
9. Tap (
Delete
) to discard the current email.
10. Once complete, tap (
Send
).
By accessing this document, the recipient agrees and
acknowledges that all contents and information in this document (i) are confidential and proprietary information
of Samsung, (ii) shall be subject to the non-disclosure regarding project H and Project B, and (iii) shall not be
disclosed by the recipient to any third party. Samsung Proprietary and Confidential

122
Configuring Email Settings
1. From the Home screen, tap ➔ (
Email
).
2. Select an account.
3. Press and then tap
Settings
and alter any of the
following General settings:
• Display settings
: allows you to configure the way in which your
email list displays. Options include: Auto fit content, Message
preview line, and Title line list.
• Compose and send settings
: allows you to configure the
functions available during both creating and sending emails.
Options include: Quick responses, Default image size, Delay
email sending.
• Priority send settings
: allows you to assign Contacts as
priority senders, configure a priority sender inbox, assign email
notifications, ringotnes, and vibration pattrerns for emails from
these senders.
•Auto advance
: allows you to assign an action after an email is
deleted. Choose from: Next email, Previous email, or Email list.
• Confirm deletions
: requires that you provide confirmation
before deleting a selected email.
•Spam addresses
: allows you to create a list of spam email
addresses.
• Rules for filtering
: allows you to create and manage filters for
emails. Filter parameters include: Filter name, Subject includes,
or From.
– or –
Press and then tap
Settings
➔
Account settings
➔
<Account>
. Alter any of the following settings:
• Sync settings
to configure the following sync options:
–
Sync Email
: enables automatic email synching between your
device and the remote server.
–
Sync schedule
: allows you to control the email sync schedule
on both Peak and Off-Peak times.
–
Size to retrieve emails
: configures the incoming email size
allowed to pass through to your phone automatically without
user interaction. Emails with attachments larger than
configured will have to be retrieved manually.
By accessing this document, the recipient agrees and
acknowledges that all contents and information in this document (i) are confidential and proprietary information
of Samsung, (ii) shall be subject to the non-disclosure regarding project H and Project B, and (iii) shall not be
disclosed by the recipient to any third party. Samsung Proprietary and Confidential
Messages 123
•Signature
: Lets you attach a customized signature to the
bottom of all outgoing emails.
–
In a single motion touch and slide the
Signature
slider to the
right to turn it on.
–
Tap the
Signature
field, change the current text, and tap
OK
to
save the new signature.
• Default account
: Assign this account as the default email
account used for outgoing messages.
• Email notifications
: Activates the email notification icon to
display on the status bar when you receive a new email (Gmail,
etc..).
• Select ringtone
: Plays a selected ringtone when a new email
message is received.
•Vibrate
: Activates a vibration when a new email message is
received.
4. Tap the
More settings
field to access additional options:
• Account name
: displays your uniquely created account display
name.
•Your name
: displays the name used in the From field of your
outgoing email messages.
• Always Cc/Bcc myself
allows you to include your own email
address in either the CC, Bcc, or None fields. Lets you always
receive a copy of outgoing emails.
•Show images
: allows you to view embedded images located
within the body of the currently displayed email.
• Number of emails to load
: allows you to select the number of
on-screen emails to keep loaded on the screen by default.
• Auto download attachments
: allows the device to
automatically download email attachments when an active
Wi-Fi connection is detected. This process speeds up the
process of downloading an emails attachments for offline
review by not using a 3G or 4G/LTE network connection.
• Auto resend times
: enables the device to resend an outgoing
email a specified number of times if delivery fails.
•Security options
: allows you to enable several security options
such as: Encrypt all, Sign all, Create keys, Private keys, Public
keys, and Set default key. These security policies could restrict
some functions from corporate servers.
–
Security policy list
: lists the current email’s security policy.
These policies could restrict some functions from corporate
servers.
By accessing this document, the recipient agrees and
acknowledges that all contents and information in this document (i) are confidential and proprietary information
of Samsung, (ii) shall be subject to the non-disclosure regarding project H and Project B, and (iii) shall not be
disclosed by the recipient to any third party. Samsung Proprietary and Confidential
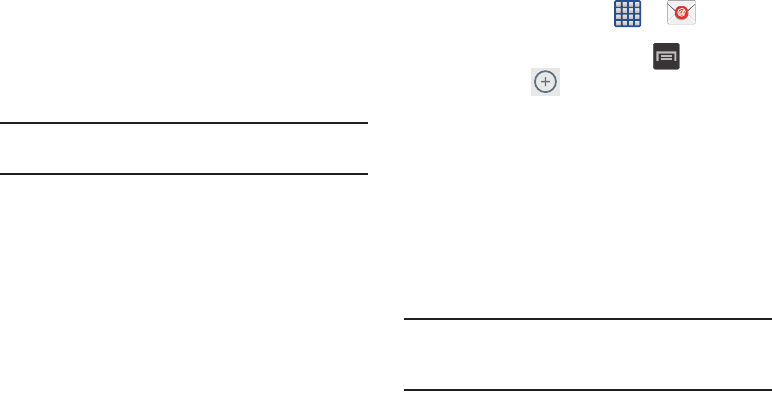
124
• Incoming settings
: Lets you specify incoming email settings,
such as User name, Password, IMAP server, Security type,
Port, and IMAP path prefix.
• Outgoing settings
: Lets you specify outgoing email settings,
such as SMTP server, Security type, Port, Require sign-in, User
name, or Password.
Note:
Some the above options may not be displayed when
using some Internet account types.
Microsoft Exchange Email (Outlook)
Your phone also provides access to your company’s Outlook
Exchange server. If your company uses either Microsoft
Exchange Server 2003 or 2007, you can use this email
application to wirelessly synchronize your email, Contacts,
and Calendar information directly with your company’s
Exchange server.
Setting Up a Microsoft Exchange Email account
1. From the Home screen, tap ➔ (
Email
).
2. If you already have other email account setup:
•
Open an existing email account, press and then tap
Settings
➔
(
Add account
).
– or –
Enter your
Email address
and
Password
information.
• Email address
: your Outlook work email address.
• Password
: typically your network access password
(case-sensitive).
3. Tap
Show password
to display the password as you
enter it in the associated field.
4. Tap
Send email from this account by default
, to make
this your default email account for outbound emails.
Note:
If selected, the
Manual setup
button changes to read
Microsoft Exchange ActiveSync
. If activated, skip to
step 6.
5. Tap
Next
. Consult your Network or IT Administrator for
further details and support.
By accessing this document, the recipient agrees and
acknowledges that all contents and information in this document (i) are confidential and proprietary information
of Samsung, (ii) shall be subject to the non-disclosure regarding project H and Project B, and (iii) shall not be
disclosed by the recipient to any third party. Samsung Proprietary and Confidential

Messages 125
6. Tap
Microsoft Exchange ActiveSync
(from the add new
email account screen).
Note:
If prompted with an on-screen notification that the
connection that the “Setup could not finish”, tap
Edit details
to continue with a manual update of
necessary information.
7. When prompted to provide additional detailed
information within the Exchange server settings
screen, enter an updated
Domain
, and confirm your
user name
and
Password
information.
Important!
Remember to manually place the cursor in the
correct spot and enter a Domain name before the
“
[Domain]\[user name]
” entry. Most servers only
provide a username.
8. Update or re-enter your
Exchange server
information
within the appropriate field. This field can often be
populated with incorrect or out of date information
provided by your server.
• Exchange Server
: your exchange server remote email
address. Typically starts with
mail.XXX.com
. Obtain this
information from your company network administrator.
Important!
Do not accept the default entry as this is a guess
based on returned information.
•
If your network requires SSL encryption, tap the
Use secure
connection (SSL)
field to place a check mark in the box and
activate this additional level. Most often, this option should be
enabled.
Important!
If your Exchange server requires this feature,
leaving this field unchecked can prevent
connection.
9. Consult your IT Administrator if it is necessary to
enable the
Use client certification
option.
10. With the new server information entered, tap
Next
.
11. Read the on-screen
Activation
disclaimer and, when
prompted, tap
OK
. The device then verifies your
incoming server settings.
By accessing this document, the recipient agrees and
acknowledges that all contents and information in this document (i) are confidential and proprietary information
of Samsung, (ii) shall be subject to the non-disclosure regarding project H and Project B, and (iii) shall not be
disclosed by the recipient to any third party. Samsung Proprietary and Confidential
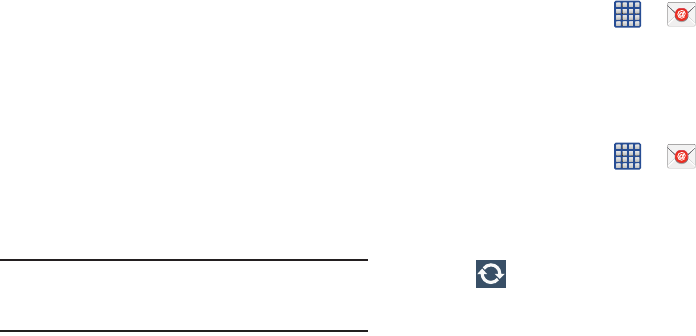
126
12. If prompted, read the
Remote security administration
information and tap
OK
to accept the service and
continue.
13. Adjust the various
Account options
configuration fields
and tap
Next
. It may take a few seconds for the next
screen to load.
•
Enabling the
Automatically download attachments when
connected to Wi-Fi
option decreases the wait time to access
large email attachments.
14. If prompted, read the
Activate device administrator?
screen and tap
Activate
to complete the email setup
process.
Note:
This process can take a few minutes. If the previous
setup screen re-appears,
ignore it and do not alter any
fields
during this process.
15. Identify your new work email account with a unique
name (Ex: Work), then tap
Done
.
Opening an Exchange Email
1. From the Home screen, tap ➔ (
Email
).
2. Tap the account name field (upper-left) to open the
complete email account list page.
3. Select an exchange email account and tap an email
message.
Refreshing Exchange Email
1. From the Home screen, tap ➔ (
Email
).
2. Select an email account.
•
If you are already in an email account, tap the account name
field (upper-left) to open the complete email account list page.
•
Select an available email account.
3. Tap (
Refresh
).
Composing Exchange Email
For more information, refer to “Composing Email” on
page 121.
By accessing this document, the recipient agrees and
acknowledges that all contents and information in this document (i) are confidential and proprietary information
of Samsung, (ii) shall be subject to the non-disclosure regarding project H and Project B, and (iii) shall not be
disclosed by the recipient to any third party. Samsung Proprietary and Confidential
Messages 127
Deleting an Exchange Email Message
Touch and hold an email (from your inbox list) and
select
Delete
from the on-screen context menu.
– or –
With the email message displayed, tap (
Delete
).
Configuring Microsoft Exchange Email Settings
1. From the Home screen, press and then tap
Settings
and then navigate to the
Accounts
area.
2. Tap the Microsoft Exchange account.
3. Press and then tap
Settings
and alter any of the
following General settings:
• Display settings
: allows you to configure the way in which your
email list displays. Options include: Auto fit content, Message
preview line, and Title line list.
• Compose and send settings
: allows you to configure the
functions available during both creating and sending emails.
Options include: Quick responses, Default image size, Delay
email sending.
• Priority send settings
: allows you to assign Contacts as
priority senders, configure a priority sender inbox, assign email
notifications, ringotnes, and vibration pattrerns for emails from
these senders.
•Auto advance
: allows you to assign an action after an email is
deleted. Choose from: Next email, Previous email, or Email list.
• Confirm deletions
: requires that you provide confirmation
before deleting a selected email.
• Spam addresses
: allows you to create a list of spam email
addresses.
• Rules for filtering
: allows you to create and manage filters for
emails. Filter parameters include: Filter name, Subject includes,
or From.
– or –
Press and then tap
Settings
➔
Account settings
➔
<Microsoft Account>
. Alter any of the following
settings:
• Sync settings
to configure the following sync options:
–
Sync Email
: enables automatic email synching between your
device and the remote server.
By accessing this document, the recipient agrees and
acknowledges that all contents and information in this document (i) are confidential and proprietary information
of Samsung, (ii) shall be subject to the non-disclosure regarding project H and Project B, and (iii) shall not be
disclosed by the recipient to any third party. Samsung Proprietary and Confidential
128
–
Sync schedule
: allows you to control the email sync schedule
on both Peak and Off-Peak times.
–
Period to sync email
to assign the sync range for your
incoming and outgoing email messages between your phone
and your external exchange server. How many days worth of
email messages should the phone and server synchronize.
Choose from:
Automatic, All, 1 day
,
3 days
,
1 week
,
2 weeks
, or
1 month
.
–
Size to retrieve emails
configures the incoming email size
allowed to pass through to your phone automatically without
user interaction. Emails with attachments larger than
configured will have to be retrieved manually.
•Signature
: Lets you attach a customized signature to the
bottom of all outgoing emails.
–
In a single motion touch and slide to the right to turn it on.
–
Tap the
Signature
field, change the current text, and tap
Done
to save the new signature.
• Out of office settings
allows you to both activate/deactivate
your email’s out of office settings, and configure both the
start/end dates and your outgoing message.
•Default account
: Assign this account as the default email
account used for outgoing messages.
• Email notifications
: Activates the email notification icon to
display on the status bar when a new email is received.
• Select ringtone
: Plays a selected ringtone when a new email
message is received.
•Vibrate
: Activates a vibration when a new email message is
received.
4. Tap the
More settings
field to access additional options:
• Account name
displays the name used by the device to track
the account.
• Always Cc/Bcc myself
allows you to include your own email
address in either the CC, Bcc, or None fields. Lets you always
receive a copy of outgoing emails.
•Show images
: allows you to view embedded images located
within the body of the currently displayed email.
• Auto download attachments
: allows the device to
automatically download email attachments when an active
Wi-Fi connection is detected. This process speeds up the
process of downloading an emails attachments for offline
review by not using a 3G or 4G/LTE network connection.
By accessing this document, the recipient agrees and
acknowledges that all contents and information in this document (i) are confidential and proprietary information
of Samsung, (ii) shall be subject to the non-disclosure regarding project H and Project B, and (iii) shall not be
disclosed by the recipient to any third party. Samsung Proprietary and Confidential

Messages 129
• Auto resend times
enables the phone to resend an outgoing
email a specified number of times if delivery fails.
The default is 3 auto resends.
• Folder sync settings
allows you to configure the sync settings
for various folders such as Inbox, Drafts, Outbox, etc..
• Period to sync Calendar
assigns a period for your phone to
sync calendar events. Choose from:
2 weeks, 1 month
,
3 months
,
6 months
, or
All calendar
.
• Empty server trash
: allows you to delete your email account’s
trash bin remotely.
•Sync Contacts
synchronizes the contacts between your device
and the remote exchange server.
•Sync Calendar
synchronizes your exchange calendar entries
between your device and the remote exchange server.
• Sync Task
synchronizes your exchange tasks entries between
your device and the remote exchange server.
• In case of sync conflict
allows you to assign the master
source on emails. If there is a conflict with the current email
sync you can assign the server as the main source for all
emails (
Server has priority
) or assign the phone to be the main
source and update the server accordingly (
Device has
priority
).
•Security options
: allows you to enable several security options
such as: Encryption, Encryption algorithm, Sign, Sign
algorithms, Email certificates, and Security policy list. These
security policies could restrict some functions from corporate
servers.
–
Security policy list
: lists the current email’s security policy.
These policies could restrict some functions from corporate
servers.
• Exchange server settings
provides access to the
Domain\user name, Password, and Exchange server settings.
5. Press to return to the previous page.
By accessing this document, the recipient agrees and
acknowledges that all contents and information in this document (i) are confidential and proprietary information
of Samsung, (ii) shall be subject to the non-disclosure regarding project H and Project B, and (iii) shall not be
disclosed by the recipient to any third party. Samsung Proprietary and Confidential
130
Using Google Mail
Google Mail (Gmail) is Google’s web-based email. When you
first setup the phone, Gmail is configured. Depending on the
synchronization settings, Gmail is automatically synchronized
with your Gmail account.
Signing into Google Mail
1. From the Home screen, tap ➔ (
Gmail
).
Note:
You must sign in to your Gmail account in order to
access features such as Google Mail and Play Store.
2. Tap
New
if you do not have a Google account.
– or –
Tap
Existing
if you have a Google account.
The Inbox loads conversations and email.
Opening Gmail
1. From the Home screen, tap ➔ (
Gmail
).
2. Tap an existing email message.
Refreshing Gmail Mail
From within the Gmail message list, tap (
Refresh
)
at the bottom of the screen to refresh the screen, send
and receive new emails, and synchronize your email
with the Gmail account.
Other Gmail Options
1. From the main Gmail screen, tap (
Labels
) at the
bottom of the screen to set up and manage Labels for
your Gmail messages.
2. From the main Gmail screen, tap (
Search
) at the
bottom of the screen to search through your Gmail
messages.
Composing a Gmail Message
1. From the Home screen, tap ➔ (
Gmail
).
2. From the Gmail Inbox, tap (
Compose
) at the
bottom of the screen to create a new message.
3. Enter the recipients Email address in the
To
field.
Tip:
Separate multiple recipient email addresses with a
comma.
By accessing this document, the recipient agrees and
acknowledges that all contents and information in this document (i) are confidential and proprietary information
of Samsung, (ii) shall be subject to the non-disclosure regarding project H and Project B, and (iii) shall not be
disclosed by the recipient to any third party. Samsung Proprietary and Confidential

Messages 131
4. Press and select
Add Cc/Bcc
to add a carbon or
blind copy.
5. Enter the subject of this message in the
Subject
field.
6. Tap the
Compose email
field and begin composing your
message.
7. Once complete tap (
Send
).
Viewing a Gmail Message
1. From the Gmail Inbox, tap a message to view the
following options located at the bottom of the screen:
•Archive
: archives the selected Email.
• Delete
: deletes the currently selected Email.
•Labels
: assigns a label to the current Email.
• Mark as Unread
: tags the current message as unread
and returns you to the Google Mail Inbox.
• Newer
: swiping to the right displays newer Emails.
•Older
: swiping to the left displays older Emails.
2. Press to select one of the following additional
options:
• Mark important/Mark not important
: assigns the current
email an important status.
•Mute
: mutes the conversation.
•Report spam
: reports the Email message as spam.
• Report phishing
: reports the Email message as a phishing
email attempt.
• Settings
: allows you to configure the General, or Notification
settings.
• Send feedback
: sends feedback to Google.
•Help
: launches the browser and displays Google Mobile Help
information.
Creating an Additional Gmail Account
1. From the Home screen, tap ➔ (
Gmail
).
2. Press and then tap
Settings
➔
ADD ACCOUNT
and
follow the same steps as referenced in the previous
section. For more information, refer to “Signing into
Google Mail” on page 130.
By accessing this document, the recipient agrees and
acknowledges that all contents and information in this document (i) are confidential and proprietary information
of Samsung, (ii) shall be subject to the non-disclosure regarding project H and Project B, and (iii) shall not be
disclosed by the recipient to any third party. Samsung Proprietary and Confidential
132
Hangouts
Previously known as Google Talk™, is an updated place to
hangout, share photos, and even video calls. This is a free
web-based application for instant messaging offered by
Google. Conversation logs are automatically saved to a Chats
area in your Gmail account. This allows you to search a chat
log and store them in your Gmail accounts.
Note:
Before using this application, you must first have an
active Gmail account available and be currently logged
in.
1. From the Home screen, tap ➔ (
Hangouts
).
Note:
If you are not already logged into Google, refer to the
instructions for signing in on page 130.
2. When prompted, read the on-screen information and
confirm your phone number is correct before using the
application. Tap
Confirm
.
Note:
Confirming your phone number does not make it publicly
available.
Google +
Google+ makes messaging and sharing with your friends a
lot easier. You can set up Circles of friends, visit the Stream
to get updates from your Circles, use Messenger for fast
messaging with everyone in your Circles, or use Instant
Upload to automatically upload videos and photos to your
own private album on Google+.
1. Sign on to your Google account. For more information,
refer to “Creating a New Google Account” on page 19
2. From the Home screen, tap
Apps
➔
(
Google+
).
3. Select the account you want to use to sign in to
Google+.
– or –
Tap
Add account
to create another account.
By accessing this document, the recipient agrees and
acknowledges that all contents and information in this document (i) are confidential and proprietary information
of Samsung, (ii) shall be subject to the non-disclosure regarding project H and Project B, and (iii) shall not be
disclosed by the recipient to any third party. Samsung Proprietary and Confidential
Messages 133
4. Follow the on-screen instructions to use Google+.
5. Visit
www.google.com/mobile/+/
for more information.
Messenger
Messenger allows you to bring groups of friends together into
a simple group conversation. When you get a new
conversation in Messenger, Google+ sends an update to your
device.
1. Sign on to your Google account. For more information,
refer to “Creating a New Google Account” on page 19.
2. From the Home screen, tap
Apps
➔
(
Messenger
).
– or –
From the Google+ application, select
Messenger
.
3. Select the account you want to use to sign in to
Google+.
– or –
Tap
Add account
to create another account.
4. When prompted, follow the on-screen procedures to
configure the Sync contacts parameters.
5. When prompted, configure the photo backup
parameters as desired and tap
Done
.
6. Tap from the upper-left of the screen and select
from an available list of features such as: Find People,
Communities, Hangouts, etc..
To create a new message:
1. Tap from the upper-left of the screen and select
Messenger
.
2. Tap to start a new message.
3. In the upper text field, enter a name, email address, or
circle.
4. In the bottom
Type a message
field, enter a message
then tap (
Send
).
By accessing this document, the recipient agrees and
acknowledges that all contents and information in this document (i) are confidential and proprietary information
of Samsung, (ii) shall be subject to the non-disclosure regarding project H and Project B, and (iii) shall not be
disclosed by the recipient to any third party. Samsung Proprietary and Confidential
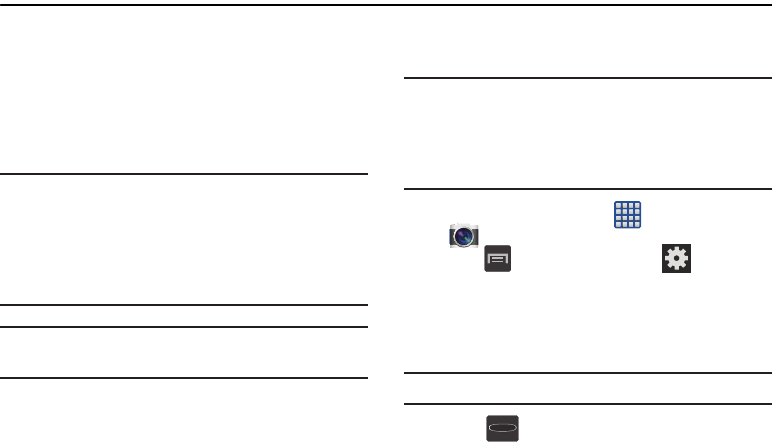
134
Section 7: Multimedia
This section explains how to use the multimedia features of
your device, including the Camera/Camcorder, Music Player,
Samsung Link, and how to manage your photos, images and
sounds.
You can take photographs and shoot video by using the
built-in camera functionality. Your camera produces photos in
JPEG format.
Important!
Do not take photos of people without their
permission.
Do not take photos in places where cameras are
not allowed.
Do not take photos in places where you may
interfere with another person’s privacy.
Note:
An SD card is no longer needed to take pictures or shoot
video since there is already built-in storage.
Assigning the Default Storage
Location
Important!
Too many users can overlook this storage location
until something goes wrong. It is recommended
that you verify this location or change it before
initiating the use of the camera or camcorder
features.
1. From the Home screen, tap
Apps
➔
Camera
.
2. Press and then tap
Settings
➔
Settings
and
scroll up to the
Storage
entry.
3. Tap this entry and select the desired default storage
location for newly taken pictures or videos. Choose
from:
Device
or
Memory card
.
Note:
The recommended setting is to the
Memory card
..
4. Press to return to the Home screen.
By accessing this document, the recipient agrees and
acknowledges that all contents and information in this document (i) are confidential and proprietary information
of Samsung, (ii) shall be subject to the non-disclosure regarding project H and Project B, and (iii) shall not be
disclosed by the recipient to any third party. Samsung Proprietary and Confidential

Multimedia 135
Using the Camera
Taking Photos
Taking pictures with your device’s built-in camera is as
simple as choosing a subject, pointing the camera, then
pressing the camera key.
Note:
When taking a photo in direct sunlight or in bright
conditions, shadows may display on the photo.
1. From the Home screen, tap
Apps
➔
Camera
.
2. Using the device’s main display screen as a viewfinder,
adjust the image by aiming the camera at the subject.
Note:
On your initial activation of the camera, firmware
configuration can take up to 1 minute. This is a one time
process.
3. Before you take a picture, use the
Up
and
Down
Volume
keys to zoom in or out. You can magnify the picture up
to x4 (400 percent).
– or –
Pinch the screen to zoom out or pinch outwards to
zoom in.
4. If desired, before taking the photo, you can tap
on-screen icons to access various camera options and
settings.
5. You can also tap the screen to move the focus to a
desired area of interest.
6. Tap
Camera
until the shutter sounds. (The picture
is automatically stored within your designated storage
location (page 134). If no microSD is installed, all
pictures are stored on the Phone.) For more
information, refer to “Camera Options” on page 136.
By accessing this document, the recipient agrees and
acknowledges that all contents and information in this document (i) are confidential and proprietary information
of Samsung, (ii) shall be subject to the non-disclosure regarding project H and Project B, and (iii) shall not be
disclosed by the recipient to any third party. Samsung Proprietary and Confidential
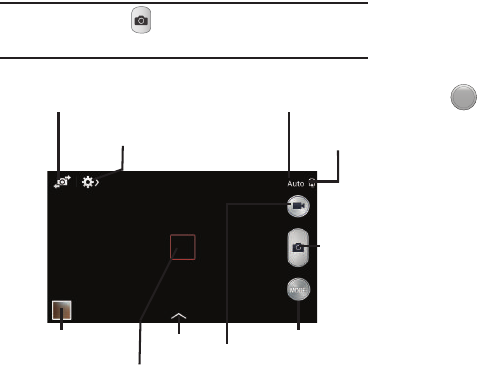
136
Note:
Touch and hold to take a burst shot. These are
saved using a Fine image quality.
Camera Options
Options are represented by icons across both sides of the
screen.
1. From the camera viewfinder, tap the Mode button
to change the mode to one of the following:
–
Auto
: Use this mode to automatically adjust the exposure, color,
and brightness settings. This mode allows single image shots or
burst shots.
–
Beauty face
: Use this to take photos with lightened faces for
gentler images.
–
Best photo
: Use this to take multiple photos in a short time,
and then choose the best photos among them. Press the
Shutter button to take multiple photos. When Gallery opens, tap
and hold thumbnails of photos to save, and then tap Done.
–
Continuous shot
: Use this to take pictures continuously at a
rate of 3 per second. You can take up to 20 continuous pictures
at a time.
Self-portrait
Effects
Record video
button
Camera mode
Quick Settings Battery
Charge
Image viewer
Take
Picture
Mode (Change)
Viewfinder
MODE
By accessing this document, the recipient agrees and
acknowledges that all contents and information in this document (i) are confidential and proprietary information
of Samsung, (ii) shall be subject to the non-disclosure regarding project H and Project B, and (iii) shall not be
disclosed by the recipient to any third party. Samsung Proprietary and Confidential

Multimedia 137
–
Best face
: Use this to take multiple group shots at the same
time and combine them to create the best possible image. Press
the Shutter button to take multiple photos. When Gallery opens,
tap the yellow frame on each face, and choose the best
individual face for the subject. After choosing a pose for each
individual, tap Done to merge the images into a single photo,
and tap Save.
–
Sound & shot
: Use this mode to enrich pictures by adding
background sounds for a few seconds. The background sound
is recorded for up to 9 seconds after taking the photo.
–
Rich tone (HDR)
: Use this to take photos with richer colors and
contrasts.
–
Panorama
: Use this to take wide panoramic photos. Press the
Shutter button to take a photo, and then move the camera in
any direction. When the blue frame aligns with the preview
screen, the camera automatically takes another shot in the
panoramic sequence. To stop shooting, press the Shutter button
again.
–
Sports
: Use this to take fast action photos.
–
Night
: Use this to take brighter, clearer pictures in low light
settings without the use of the flash.
2. The following shortcuts display on the camera screen :
Focus area
: displays the area of the image used as the
main focus area. If the image is too close, the square
will turn red.
Self portrait
: allows you to set the front camera so
you can take pictures of yourself.
Quick Settings
: activates the Quick Settings menu
bar from where you can select several additional
settings.For more information, refer to “Quick
Settings” on page 138
Image viewer
: allows you to access the Image
viewer and the various viewing options for a
selected picture. The last picture you took, displays as
a thumbnail in the Image viewer icon.
Effects/Downloads
: provides access to pre-installed
and downloaded effects. Default effects include:
No effect, Vignette, Grey-scale, Sepia, Vintage, Faded
color, Turquoise, Tint, Cartoon, Moody, Rugged, Oil
pastel, and Fisheye.
By accessing this document, the recipient agrees and
acknowledges that all contents and information in this document (i) are confidential and proprietary information
of Samsung, (ii) shall be subject to the non-disclosure regarding project H and Project B, and (iii) shall not be
disclosed by the recipient to any third party. Samsung Proprietary and Confidential
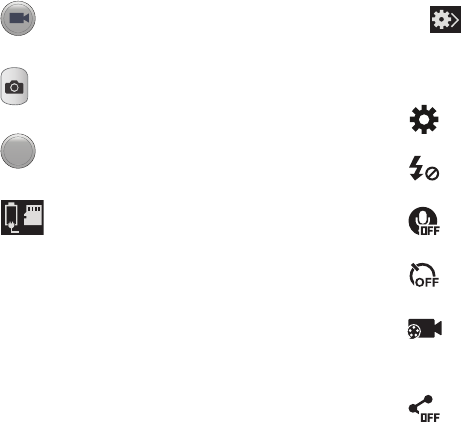
138
Quick Settings
Tap at the top of the display to quickly change Camera
settings. Not all of the following options are available in both
still camera and video camera modes. The available options
vary by mode.
Camcorder button
: shoots a video when pressed.
Camera button
: takes a photo when pressed in
Camera mode.
Mode button
: allows you to select from different
camera modes.
Storage location/Connection Status
: indicates the
device is connected to an adapter and the current
storage location for images (Phone or Memory card)
on the device.
MODE
Camera settings
:
configure Camera settings.
Flash
:
activate or deactivate the flash.
Voice control
:
activate or deactivate the voice control
to take photos.
Timer
: sets a delay timer. Selections are: Off, 2 sec, 5
sec, and 10 sec.
Recording mode
:
select a resolution for videos.
Choose from: Normal, Limit for MMS, Slow motion, or
Fast motion.
Share functions
:
activate or deactivate the sharing
options. Choose from Off, Share Shot, or Buddy photo
share.
By accessing this document, the recipient agrees and
acknowledges that all contents and information in this document (i) are confidential and proprietary information
of Samsung, (ii) shall be subject to the non-disclosure regarding project H and Project B, and (iii) shall not be
disclosed by the recipient to any third party. Samsung Proprietary and Confidential
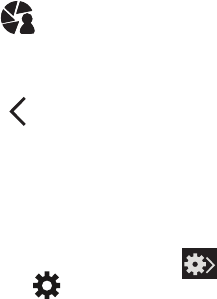
Multimedia 139
Camera and Camcorder Settings
This section describes the different settings that you can
configure on your camera. Not all of the following options are
available in both still camera and video camera modes. The
available options vary by mode.
1. From the viewfinder, tap
Quick Settings
➔
Camera Settings
.
2. The follow settings are located under the Camera,
Camcorder, and General tabs. The settings that are
displayed will depend on what camera mode you are
in.
Camera
:
•Photo size
: Select a resolution for photos. Use higher
resolution for higher quality. Higher resolution photos take up
more memory.
• Face detection
: allows you to adjust the camera focus based
on face detection technology.
• Metering
: allows you to set how the camera measures or
meters the light source: Center-weighted, Matrix, or Spot.
•ISO
: determines how sensitive the light meter is on your digital
camera. Choose from Auto, 100, 200, or 400. Use a lower ISO
number to make your camera less sensitive to light, a higher
ISO number to take photos with less light, or Auto to let the
camera automatically adjust the ISO for each of your shots.
•Anti-shake
: compensates for camera movement.
Camcorder
:
•Video size
: Select a resolution for videos. Use higher resolution
for higher quality. Higher resolution videos take up more
memory.
Share shot - Shooting mode
: lists the current
shooting modes available from with the Share
Shot mode. Choose from Easy connect, Wi-Fi
Direct, or Cancel.
Quick Settings
: hide Quick settings.
By accessing this document, the recipient agrees and
acknowledges that all contents and information in this document (i) are confidential and proprietary information
of Samsung, (ii) shall be subject to the non-disclosure regarding project H and Project B, and (iii) shall not be
disclosed by the recipient to any third party. Samsung Proprietary and Confidential
140
Settings
:
• GPS tag
: attach a GPS location tag to the photo. To improve
GPS signals, avoid shooting in locations where the signal may
be obstructed, such as between buildings or in low-lying areas,
or in poor weather conditions. Your location may display on
your photos when you upload them to the Internet.
To avoid this, deactivate the GPS tag setting.
•Review
: set this option if you want to view each picture after
you take it. Select a time value.
•Volume key
: assigns a function to the volume key. Choose
from The zoom key, The camera key, or The record key.
•Timer
: Use this for delayed-time shots. You can set the timer to
Off, 2 sec, 5 sec, or 10 sec.
• White balance
: Select an appropriate white balance, so
images have a true-to-life color range. The settings are
designed for specific lighting situations. These settings are
similar to the heat range for white-balance exposure in
professional cameras.
•Exposure value
: allows you to adjust the brightness level by
moving the slider.
• Guidelines
: Display viewfinder guides to help composition
when selecting subjects.
•Flash
: activate or deactivate the flash.
• Voice control
: activates/deactivates voice control feature that
allows you to verbally take a photo.
• Contextual filename
: allows you to have your location added
as part of the filename. You must first activate GPS tag
described above.
•Storage
: Select the memory location for storage.
• Reset
: Reset the camera settings.
By accessing this document, the recipient agrees and
acknowledges that all contents and information in this document (i) are confidential and proprietary information
of Samsung, (ii) shall be subject to the non-disclosure regarding project H and Project B, and (iii) shall not be
disclosed by the recipient to any third party. Samsung Proprietary and Confidential
Multimedia 141
Pictures and Videos Image Viewer Options
After you take a photo or record a video, you can access
various options.
Photo viewing options
1. Tap a thumbnail to view the picture.
Note:
If no control icons are displayed on the screen in
addition to the picture, tap anywhere on the screen to
display them.
2. The following options are available at the top of the
screen:
• Change player
: allows you to select a different
streaming device from your available list.
•Share via
: allows you to share the picture via Group
Play, Add to Dropbox, Bluetooth, Email, Gmail, Google+,
Hangouts, Messaging, Picasa, Share by Samsung UI, and
Wi-Fi Direct.
•Edit
: (when in Landcsape mode) allows you to edit the
current image. Launches the Photo Editor application. For more
information, refer to
“Editing a Photo”
on page 151
Note:
The photo editor application is not preloaded and must
be downloaded from the Play Store or via Samsung
Apps.
• Delete
: allows you to delete the current picture.
3. Press for additional options such as:
–
Edit
: (while in Portrait mode), allows you to assign the current
image as a favorite.
–
Favorite
: allows you to assign the current image as a favorite.
–
Slideshow
: allows you to see your photos in a slideshow.
–
Photo frame
: takes the current image and creates a
surrounding photo frame that can be edited with edited text or
drawn object, then saved.
–
Photo note
:
allows you
to write notes on your current image
and then save it.
–
Copy to clipboard
allows you to copy one or more pictures to a
different folder.
–
Print
: allows you to print the current image on a compatible
Samsung printer.
–
Rename
: allows you to rename the current file.
By accessing this document, the recipient agrees and
acknowledges that all contents and information in this document (i) are confidential and proprietary information
of Samsung, (ii) shall be subject to the non-disclosure regarding project H and Project B, and (iii) shall not be
disclosed by the recipient to any third party. Samsung Proprietary and Confidential
142
–
Set as
: allows you to assign the current image as a Contact
photo, Home screen, Lock screen, or Home and lock screens.
–
Buddy photo share
: allows you to share the current image
with active buddies.
–
Rotate left
: allows you to rotate the view of the current image in
a counterclockwise direction.
–
Rotate right
: allows you to rotate the view of the current image
in a clockwise direction.
–
Crop
: provides an on-screen box that allows you to crop the
current picture. Tap
Done
to update the image with the new
dimensions or tap
Cancel
to ignore any changes.
–
Set as
: allows you to assign the current image as either a
Contact photo, Home screen, Lock screen, or Home and lock
screens.
–
Details
: files details such as Title, Time, Width, Height,
Orientation, File Size, and Path.
–
Settings
: provides access to the Gallery options menu. Choose
from SNS data management and Tags.
Video viewing options
Note:
If no control icons are displayed on the screen in
addition to the picture, tap anywhere on the screen to
display them.
1. Tap a video to select it.
2. Tap to play the video.
• Change player
: allows you to select a different
streaming device from your available list.
•Share via
: allows you to share the video via ChatON,
Add to Dropbox, Bluetooth, Email, Gmail, Google+, Messaging,
Picassa, Wi-Fi Direct, or YouTube.
•Trim
: activates the Trim feature so that you can edit the
length of the current video.
• Delete
: allows you to delete the current video.
Choose either
OK
or
Cancel
.
3. Press for additional options.
By accessing this document, the recipient agrees and
acknowledges that all contents and information in this document (i) are confidential and proprietary information
of Samsung, (ii) shall be subject to the non-disclosure regarding project H and Project B, and (iii) shall not be
disclosed by the recipient to any third party. Samsung Proprietary and Confidential
Multimedia 143
Using the Camcorder
In addition to taking photos, the camera also doubles as a
camcorder that also allows you to record, view, and send
high definition videos.
Shooting Video
Tip:
When shooting video in direct sunlight or in bright
conditions, it is recommended that you provide your
subject with sufficient light by having the light source
behind you.
Note:
The camera may not be able to properly record videos to
a memory card with a slow transfer speed.
1. From the Home screen, tap
Apps
➔
Camera
to activate the camera mode.
2. Using the camera’s main display screen as a
viewfinder, adjust the image by aiming the camcorder
at the subject.
3. Before you take a video, use the Volume control
buttons to zoom in or out. You can magnify the video up
to x4 (400 percent).
Note:
Use either the Up and Down volume keys or spread/
pinch the screen to zoom in or out. For more
information, refer to “Navigating Through the Screens”
on page 44
4. Tap the Video key ( ) to begin shooting video. The
red light will blink while recording.
5. Tap anywhere on the screen to re-focus the camcorder
on that object. The camcorder auto-focuses on the
new target area.
6. Tap the
Stop
key ( ) to stop the recording and save
the video file to your Camera album.
– or –
Tap the Pause key ( ) to pause the recording.
7. Once the file is saved, tap the image viewer, then tap
(
Play
) to playback your video for review.
8. Press to return to the viewer.
By accessing this document, the recipient agrees and
acknowledges that all contents and information in this document (i) are confidential and proprietary information
of Samsung, (ii) shall be subject to the non-disclosure regarding project H and Project B, and (iii) shall not be
disclosed by the recipient to any third party. Samsung Proprietary and Confidential
144
Accessing Videos
When you shoot a video, the file is saved in the Camera
folder. You can view your videos immediately or view them
anytime in the Camera folder.
1. From the Home screen, tap
Apps
➔
Gallery
.
2. Select a folder location and tap a video icon to begin
video playback.
3. Tap
Play
to begin video playback.
– or –
Touch and hold the video icon from the main Gallery to
select the video (indicated by a colored border) and
display the following video menu context options:
•Share via
: allows you to share the video via Add to
Dropbox, Bluetooth, Email, Gmail, Google+, Messaging,
Picassa, Wi-Fi Direct, or YouTube.
• Delete
: allows you to delete the current video.
Choose either OK or Cancel.
– or –
Touch and hold a listed video file to place a check mark
alongside and then press for additional options:
–
Slideshow
:
allows you to see your files in a slideshow or
access the slideshow settings.
–
Hide items
: allows you to hide the current file from appearing in
the Gallery.
– or –
With the video displayed on-screen (but not playing),
press for additional options:
–
Favorite
: tags the current video as a favorite file
.
–
Slideshow
–
Rename
: allows you to rename the filename of the currently
selected video.
–
Details
: displays video file information.
–
Settings
: provide access to the Galley settings page. From this
page you can configure the SNS data management and Tag
options.
By accessing this document, the recipient agrees and
acknowledges that all contents and information in this document (i) are confidential and proprietary information
of Samsung, (ii) shall be subject to the non-disclosure regarding project H and Project B, and (iii) shall not be
disclosed by the recipient to any third party. Samsung Proprietary and Confidential

Multimedia 145
Sharing Pictures
Pictures are the best way of remembering the moment, but
an even better treat is to share them with others.
Two new features allow you to either instantly share a series
of pictures as they are taken or quickly share a picture
without using email or messaging.
•
Share Shot
is a great way to instantly share a series of pictures
among a group of users. The best example for this feature is
having multiple users instantly sharing each others pictures at a
company or family gathering. As each person takes a separate
picture with their own device, they are all pooled together and
instantly display in each user’s Gallery.
No more “Email your pictures to me later”. Each person walks out
of the event with all the pictures taken by everyone.
This method of image transfer requires that both devices have
Wi-Fi Direct active and be paired prior to use.
Note:
You can only share a shot with other external users who
also have their Wi-Fi Direct feature active.
•
S Beam Transfer
uses the NFC (near Field Communication)
feature found on your device to transmit large files directly to
another compatible device by
direct touch
.
This method of image transfer requires that you enable NFC and
S Beam prior to use.
For more information, refer to
“Using S Beam to Share
Pictures”
on page 147
Enabling Share Shot
Share shot is a Wi-Fi Direct group sharing feature where
multiple users can Wi-Fi connect their devices and then all
share each others pictures in real-time. This is really useful
in group events (ex: family gathering or company party)
where you don’t want to have to email everyone later and
make sure you all can share your pics at a later date.
For more information, refer to “Wi-Fi Direct Setup and
Settings” on page 238
The general process is:
•
Enable Wi-Fi Direct communication
•
Pair your device with other users
•
Enable Share shot
By accessing this document, the recipient agrees and
acknowledges that all contents and information in this document (i) are confidential and proprietary information
of Samsung, (ii) shall be subject to the non-disclosure regarding project H and Project B, and (iii) shall not be
disclosed by the recipient to any third party. Samsung Proprietary and Confidential
146
To enable Wi-Fi Direct:
Important!
The target device must already be connected to the
same Wi-Fi and have its Wi-Fi Direct feature active
and scanning before you can your pairing.
1. From the main
Settings
page, tap
Connections
tab.
2. Slide the
Wi-Fi
slider to the right to turn it on. The slider
color indicates the activation status.
3. Tap
Wi-Fi
➔
Wi-Fi Direct
.
Your device automatically scans and lists Wi-Fi Direct
compatible devices.
– or –
Tap
Scan
and select the single device name to begin
the connection process to another Wi-Fi Direct
compatible device.
– or –
Tap
Multi-connect
➔
Scan
and select all the device
names to begin the connection process to these Wi-Fi
Direct compatible devices.
Note:
The target device must also have Wi-Fi Direct service
active and running before it is detected by your device.
4. Tap
Done
. The direct connection is established.
Confirm displays in the Status bar.
5. The recipient taps
OK
when prompted to complete the
connection. Your status field now displays “Connected”
and your connected device is listed on the screen.
6. Each partner (including yourself) taps
Accept
to
consent to the new Wi-Fi Direct pairing.
To enable Share shot on Camera:
1. From the Home screen, tap
Camera
➔
Quick Settings
➔
Share
➔
Share shot
.
2. If you are prompted to activate your Wi-Fi Direct
connection, tap
OK
and follow the activation
procedures for Wi-Fi Direct.
By accessing this document, the recipient agrees and
acknowledges that all contents and information in this document (i) are confidential and proprietary information
of Samsung, (ii) shall be subject to the non-disclosure regarding project H and Project B, and (iii) shall not be
disclosed by the recipient to any third party. Samsung Proprietary and Confidential
Multimedia 147
To configure your Share Shot options:
1. Confirm the Share Shot viewfinder is active and
Shooting modes
displays at the top of the screen.
2. Tap
Devices for sharing with
to display list of
current share shot participants.
3. Tap a participants entry and remove the green check
mark to stop sharing images with select participants.
4. Tap
Shooting modes
to regain access to the Share
menu.
5. Tap
Shooting modes
➔
Off
to disable share shot
while maintaining a Wi-Fi Direct connection.
To take share shot images:
1. Tap
Camera
until the shutter sounds.
2. From the Home screen, tap
Apps
➔
Gallery
to locate your newly shot images located in their
default storage location.
3. Confirm
Share shot images delivered/received
displays in the Notifications area of the screen.
Using S Beam to Share Pictures
This feature (when activated via NFC) allows you to beam
large files directly to another compatible device that is in
direct contact. These files can be larger, such as Videos, HD
pictures, and other large files.You can beam images and
videos from your gallery, music files from your music player,
and more.
1. From the main
Settings
page, tap
Connections
tab.
2. If not already active, touch and slide the
NFC
slider to
the right to turn it on.
3. Tap
S Beam
and make sure the feature is turned on.
4. If not already active, in a single motion touch and slide
the
S Beam
slider to the right to turn it on.
5. On the source device (containing the desired image or
video), tap
Apps
➔
Gallery
.
6. Locate and tap the selected image to open it in the
preview window.
Important!
Neither device must be in Lock mode or displaying
the Lock screen. They must both be active and
unlocked. It is recommended that the target device
be on the Home screen.
By accessing this document, the recipient agrees and
acknowledges that all contents and information in this document (i) are confidential and proprietary information
of Samsung, (ii) shall be subject to the non-disclosure regarding project H and Project B, and (iii) shall not be
disclosed by the recipient to any third party. Samsung Proprietary and Confidential
148
7. Place the two active NFC-enabled devices back to back
to begin.
Note:
If the
Touch to beam
screen does not display on the
source device:
- Separate the devices
- Verify the image is visible in the preview window on
the source device (providing the file)
- Place the device back to back again
8. From the
Touch to beam
screen, tap the reduced image
preview to begin the transfer. After a few seconds
(depending on file size) the recipient sees the
transferred file displayed on their screen.
To share multiple pictures via S Beam:
1. On the source device (containing the desired image or
video), tap
Apps
➔
Gallery
.
2. Locate the selected folder.
3. Touch and hold the first image to place a check mark
on it and touch each desired image.
4. Place the two active NFC-enabled devices back to back
to begin.
5. From the
Touch to beam
screen, tap the reduced image
preview to begin the transfer.
6. When prompted, separate the two devices.
By accessing this document, the recipient agrees and
acknowledges that all contents and information in this document (i) are confidential and proprietary information
of Samsung, (ii) shall be subject to the non-disclosure regarding project H and Project B, and (iii) shall not be
disclosed by the recipient to any third party. Samsung Proprietary and Confidential
Multimedia 149
Camera Gallery Options
The Gallery is where you can access the Gallery of stored
camera images.
1. From the Home screen, tap
Apps
➔
Gallery
.
2. Select a folder location (ex:
Camera
) and tap an image
to open it.
– or –
Touch and hold an image to place a box around the file
and select multiple files.
– or –
Tap the upper-right camera to begin taking pictures
that are placed in this folder.
– or –
3. Tap the on-screen image to use additional image menu
options. For more information, refer to “Pictures and
Videos Image Viewer Options” on page 141
Sharing a Gallery Image to a Target Device
Important!
Make sure all communicating devices are
connected to the same Wi-Fi.
1. Launch Samsung Link on the target device (such as an
Internet TV, Samsung Tablet, etc.).
2. From the Home screen, tap
Apps
➔
Gallery
.
Note:
You must sign in to your Samsung Account before you
can use this feature.
3. Open a selected image.
4. Tap (
Stream to connected devices
) and select an
available target device to begin streaming.
5. On a target device (ex: Internet TV) select the
on-screen
Allow
button to continue.
Note:
At this stage your device is requesting access to share
media with the external source.
By accessing this document, the recipient agrees and
acknowledges that all contents and information in this document (i) are confidential and proprietary information
of Samsung, (ii) shall be subject to the non-disclosure regarding project H and Project B, and (iii) shall not be
disclosed by the recipient to any third party. Samsung Proprietary and Confidential
150
6. Confirm
AllShare Controller enabled
displays in
the Notification area at the top of the device. This icon
indicates that you are using your device as the media
source.
Taking a Screen Shot
Also known as a screen capture, this feature allows you to
mimic the print screen function on most computers.
1. From the main
Settings
page, tap
My device
tab ➔
Motions and gestures
.
2. Touch and slide the
Palm motion
slider to the right to
turn it on.
Note:
At least one feature must be activated before Palm
motion can be activated.
3. Slide a feature’s activation slider to the
ON
position.
4. Display the screen you want to capture, then place the
side of your palm along the one side of the device and
then slowly swipe it in the opposite direction over the
screen.
Assigning an Image as a Contact Photo
1. From the Home screen, tap
Apps
➔
Gallery
.
2. Select a folder location and tap a file to open it.
3. Press and then tap
Set as
➔
Contact photo
.
4. Tap a contact in which to assign this image.
5. Using the on-screen crop feature, crop the image by
dragging it around or out from its corners.
6. Tap
Done
to store the new image.
By accessing this document, the recipient agrees and
acknowledges that all contents and information in this document (i) are confidential and proprietary information
of Samsung, (ii) shall be subject to the non-disclosure regarding project H and Project B, and (iii) shall not be
disclosed by the recipient to any third party. Samsung Proprietary and Confidential
Multimedia 151
Assigning an Image as a Wallpaper
1. From the Home screen, tap
Apps
➔
Gallery
.
2. Select a folder location and tap a file to open it.
3. Press and then tap
Set as
.
4. Select one of the these options:
• Contact photo
assigns the current image as a Contact photo.
•Home screen
assigns the current image to the home screen
background. This image is spread across all available screens.
• Lock screen
assigns the selected image to the background for
the lock screen.
• Home and lock screens
assigns the current image to both the
Home screen and Lock screens.
5. Touch and drag the crop box anywhere on the picture.
Touch and drag the sides of the crop box to zoom in or
out to create a cropped area.
6. Tap
Done
to assign the wallpaper image.
– or –
Tap
Cancel
to stop without updating the wallpaper
image.
Editing a Photo
You can edit your photos using the built-in Photo editor
application on your device. The photo editor application
provides basic editing functions for pictures that you take on
your phone. Along with basic image tuning like brightness,
contrast, and color it also provides a wide variety of effects
used for editing the picture.
1. From the Home screen, tap
Apps
➔
Gallery
.
2. Select a folder location and tap a file to open it.
3. Press and then tap
Edit
.
•Drawing
: allows you to draw on top of the photo.
•Frame
: adds a frame style to this photo.
4. Select an image area by touching and holding the
image and then selecting an available option:
•Edit image
: edits the image after you select the action in which
to edit.
• Selection mode
: provides several on-screen selection options
such as: Select area, Inverse selection, Selection size, and
Selection mode (Select area, Inverse selection, Selection size,
and Selection mode).
• Select all
: select the entire area of the current image.
By accessing this document, the recipient agrees and
acknowledges that all contents and information in this document (i) are confidential and proprietary information
of Samsung, (ii) shall be subject to the non-disclosure regarding project H and Project B, and (iii) shall not be
disclosed by the recipient to any third party. Samsung Proprietary and Confidential
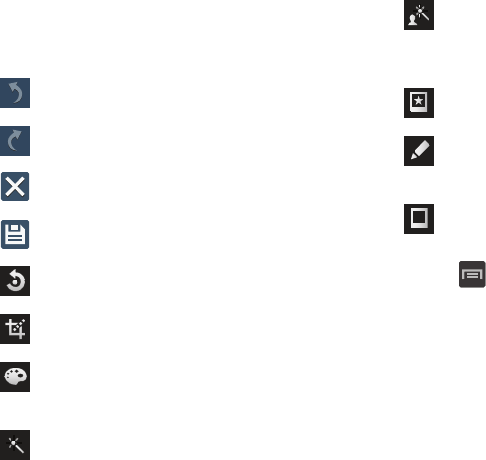
152
•Clipboard
: copies the currently selected are to your device’s
clipboard.
5. Use the following editor controls to edit your picture:
6. Press to access the following options:
• Save as
: allows you to rename your current image and save it
to your gallery.
•Select image
: allows you to select a new image for editing.
• Take picture
: allows you to activate the camera and take a
new image for editing.
Previous
: lets you undo the current operation.
Next
: lets you redo the previous operation.
Cancel/Delete
: exits the current photo editing
session.
Save
: stores the currently edited photo.
Rotate
: allows you to rotate a photo in all 4
directions. You can also mirror image a photo.
Crop
: allows you to crop (cut-out) an area of a
photo.
Color
: allows you to Auto adjust color, Brightness,
Contrast, Saturation, Adjust RGB, Temperature,
Exposure, and Hue of a photo.
Effects
: allows you to add various effects to your
photo.
Portrait
: allows you to apply various face
correction effects such as: Red-eye fix, Airbrush
face, Face brightness, Out-of-focus, Beauty face,
Funny face, or Spot healing.
Sticker
: allows you to place various pre-created
on-screen stickers atop your current image.
Drawing
: allows you to add draw directly on your
current picture by using either a brush/pen or
eraser.
Frame
: places a pre-created border style atop
your current image.
By accessing this document, the recipient agrees and
acknowledges that all contents and information in this document (i) are confidential and proprietary information
of Samsung, (ii) shall be subject to the non-disclosure regarding project H and Project B, and (iii) shall not be
disclosed by the recipient to any third party. Samsung Proprietary and Confidential
Multimedia 153
•Share via
: allows you to share your saved photo via Add to
Dropbox, Bluetooth, Email, Gmail, Google+, Group Play,
Hangouts, Memo, Messaging, Picasa, S Memo, or Wi-Fi
Direct.
•Set as
: assigns the currently saved image as either a: Contact
photo, Home and lock screens, Home screen, or Lock screen.
The Gallery
The Gallery is where you view photos and play back videos.
For photos, you can also perform basic editing tasks, view a
slideshow, set photos as wallpaper or caller image, and
share as a picture message.
Note:
If the phone displays a memory full message when
accessing the Gallery, access
Files
and remove some of
the media files from the folders, and then open the
Gallery.
Opening the Gallery
From the Home screen, tap
Apps
➔
Gallery
. For more information, refer to “Camera Gallery
Options” on page 149
Note:
If you stored your files in folders (directories) on the
storage card, Gallery displays these folders as separate
albums. The top left album contains all the pictures in
the storage card.
By accessing this document, the recipient agrees and
acknowledges that all contents and information in this document (i) are confidential and proprietary information
of Samsung, (ii) shall be subject to the non-disclosure regarding project H and Project B, and (iii) shall not be
disclosed by the recipient to any third party. Samsung Proprietary and Confidential
154
Viewing a Video within the Gallery
1. From the Home screen, tap
Apps
➔
Gallery
.
2. Locate your folder and video.
3. Tap (
Play
) to playback your video.
AllShare Cast Hub
This hardware allows you to enjoy what’s currently on your
device directly on your TV.
Note:
There is no need to be connected to a Wi-Fi network or
to be logged into your Samsung Account to use this
feature.
AllShare Cast Hub establishes a WI-Fi Direct connection
between the device and the hub.
For more information about this device, go to:
http://www.samsung.com/us/mobile/cell-phones-accessories/EAD-
T10JDEGSTA
Connecting AllShare Cast Hub
To connect your AllShare Cast Hub hardware:
1. Connect the AllShare Cast Hub to a power source using
the USB Travel Adapter.
Note:
The status LED begins to blink solid red to indicate
the startup process has begun.
Screen Mirroring
(with Hub
accessory)
This feature functions with an
external AllShareCast Hub to fully
mirror what is currently displayed on
your device to the external TV.
By accessing this document, the recipient agrees and
acknowledges that all contents and information in this document (i) are confidential and proprietary information
of Samsung, (ii) shall be subject to the non-disclosure regarding project H and Project B, and (iii) shall not be
disclosed by the recipient to any third party. Samsung Proprietary and Confidential
Multimedia 155
2. Connect your TV to the AllShare Cast Hub via an HDMI
cable (A-to-A cable).
3. Change the source input on your TV to match the input
port used by the incoming HDMI cable.
Note:
The television screen should now display an on-screen
tutorial showing you how to configure your device’s
AllShare Cast Hub and device settings.
To activate Screen Mirroring on your device:
1. From the Home screen, press and then tap
Settings
➔
Connections
tab
➔
Screen
Mirroring
.
2. If not already on, tap the
Screen Mirroring
and then
move the slider to the right to turn it on. The slider
color indicates the activation status.
LED Color/Patterns Description
Red - Solid
Indicates the AllShare Cast Hub is
booting or processing.
Red - Blinking
Indicates the AllShare Cast Hub is in
standby mode (ready for connection).
Blue - Solid
Indicates the AllShare Cast Hub is
ready to be connected with a new
device.
By accessing this document, the recipient agrees and
acknowledges that all contents and information in this document (i) are confidential and proprietary information
of Samsung, (ii) shall be subject to the non-disclosure regarding project H and Project B, and (iii) shall not be
disclosed by the recipient to any third party. Samsung Proprietary and Confidential
156
Section 8: Applications and Widgets
This section contains a description of each application and
widget that is available in the Apps and Widget menus, the
function, and how to launch that particular application or
widget. If the application or widget is already described in
another section of this user manual, then a cross reference
to that particular section is provided.
Note:
This manual only addresses applications that were
loaded on your device as of the date of purchase.
Information concerning third party applications that you
may choose to download from the Google Play Store or
other sources should be obtained from the application
provider directly and not from Samsung.
Tip:
To open applications quickly, add the icons of frequently-
used applications to one of the Home screens. (For
details, see “Home Screen” on page 38.)
You can also add an application icon as a Primary
Shortcut that will display on all Home screens. If you add
an application as a primary shortcut, the application icon
will not be displayed in the Apps menu.
Accessing Applications
1. Press
Home
, then touch
Apps
, and the
Apps
tab. The
Apps
screen displays.
2. Sweep your finger right or left to scroll the Apps
screens.
3. Touch the application’s icon to launch the app.
Downloading and Installing Apps
Find new apps to download and install on your device:
•
Play Store
: For more information, refer to
“Play Store”
on
page 194.
•
Samsung Apps
: For more information, refer to
“Samsung
Apps”
on page 201.
By accessing this document, the recipient agrees and
acknowledges that all contents and information in this document (i) are confidential and proprietary information
of Samsung, (ii) shall be subject to the non-disclosure regarding project H and Project B, and (iii) shall not be
disclosed by the recipient to any third party. Samsung Proprietary and Confidential

Applications and Widgets 157
Customizing the Applications Screens
Choosing a view
By default, application icons display in Customizable grid
view. You can change the view to Alphabetical grid view or
Alphabetical list view.
1. From the
Apps
screen, touch
Menu
➔
View type
.
The available options are:
• Customizable grid
: Arrange application icons in the order you
prefer.
• Alphabetical grid
: Application icons automatically arranged in
alphabetical order.
• Alphabetical list
: Application icons automatically listed in
alphabetical order.
Moving Application icons
With the
Apps
screen in Customizable grid view, you can
arrange the application icons to suit yourself.
1. From the
Apps
screen, touch
Menu
, then touch
Edit
.
Note:
The
Edit
option is not available with the
Apps
screen
View type
set to
Alphabetical list
.
2. Touch and hold an application icon, then drag it to a
new location.
3. Touch
Save
when you are finished.
Filtering Application icons
You can select which icons display in the
Apps
screen.
From the
Apps
screen, touch
Menu
, then touch
either of the following options:
• Downloaded applications
: Shows only those applications you
have downloaded and installed on your phone.
• Hide applications
: Mark those applications you do not want to
display on the
Apps
screen by touching their icons (check
marks display in their check boxes), then touch
Done
. The
Apps
screen displays without the hidden applications.
By accessing this document, the recipient agrees and
acknowledges that all contents and information in this document (i) are confidential and proprietary information
of Samsung, (ii) shall be subject to the non-disclosure regarding project H and Project B, and (iii) shall not be
disclosed by the recipient to any third party. Samsung Proprietary and Confidential
158
Applications List
Calculator
Use your phone’s Calculator to perform arithmetical
calculations (addition, subtraction, multiplication, and
division).
1. From the Home screen, tap
Apps
➔
Calculator
.
2. Enter the first number using the on-screen numeric
keys.
3. Enter the operation for your calculation by touching the
corresponding on-screen arithmetic function key.
4. Enter the second number.
5. To view the result, touch equals (
=
).
6. To view calculator history, touch located at
the top of the calculator buttons. A history of your past
calculations displays. Touch again to
display the calculator keypad.
7. To clear the calculator history, touch
Menu
➔
Clear history
.
8. To change the text size, touch
Menu
➔
Text size
.
Touch Small, Medium, or Large.
9. To display the scientific calculator, rotate your phone to
the landscape (horizontal) position.
Calendar
Record events and appointments to manage your schedule.
Tip:
A Calendar widget is available in Widgets.
1. From the Home screen, tap
Apps
➔
Calendar
.
2. Touch a tab to choose a calendar view:
•Year
: Display the current year and scroll to other years.
•Month
: Display the current month and scroll to other months.
• Week
: Display the current week, and scroll to other weeks.
•Day
: Display today’s schedule, and scroll to other days.
•List
: Display events and tasks in a chronological list.
•Task
: Display tasks in a chronological list.
3. Touch
Menu
for these options:
•Go to
: Display a specific date.
•Delete
: Delete an event.
•Sync
: Synchronize your phones calendar with your account
calendars.
By accessing this document, the recipient agrees and
acknowledges that all contents and information in this document (i) are confidential and proprietary information
of Samsung, (ii) shall be subject to the non-disclosure regarding project H and Project B, and (iii) shall not be
disclosed by the recipient to any third party. Samsung Proprietary and Confidential
Applications and Widgets 159
•Calendars
: Displays the calendar types and edit them. You can
also add an account and calendar.
•Settings
: Customize the calendar.
Customizing the Calendar
1. From the Home screen, tap
Apps
➔
Calendar
.
2. Touch
Menu
➔
Settings
to configure these
settings:
•View settings
:
–
View styles
: Choose Month view style (Calendar view +
pop-up or Calendar view + list) and/or Week view (Timeline,
Analog).
–
First day of week
: Choose a day to begin each week.
–
Hide declined events
: Enable or disable display of events.
–
Lock time zone
: When enabled, sets event times and dates to
a specified time zone, so that times and dates will not change if
you move to another time zone.
–
Select time zone
: When Lock time zone is enabled, specify the
time zone for all events.
–
Show week number
: Display the number of the week (1 – 52)
in a
W
column to the left of
Sun
.
–
Calendars
: Select calendars to display.
• Event notification
:
–
Set alerts & notifications
: Choose Alert to receive alerts,
Status bar notification to display notifications in the Status bar, or
Off for no notifications or alerts.
–
Select ringtone
: Choose a ringtone for event notifications, then
touch
OK
.
–
Vibration
: Enable/disable vibration for event notifications.
–
Quick responses
: Pre-composed text to include with email
notifications to meeting attendees, guests, and so on.
By accessing this document, the recipient agrees and
acknowledges that all contents and information in this document (i) are confidential and proprietary information
of Samsung, (ii) shall be subject to the non-disclosure regarding project H and Project B, and (iii) shall not be
disclosed by the recipient to any third party. Samsung Proprietary and Confidential
160
Sending Events
Send events as vCalendar files to other compatible devices.
1. From the Home screen, tap
Apps
➔
Calendar
.
2. Touch an event to display its details.
3. Touch
Menu
➔
Share via
.
4. Select the desired Sharing method from the
Share via
pop-up.
5. Follow the prompts to send a copy of a Calendar event
to another device.
Camera
Use your 5 megapixel camera feature to produce photos
in a JPEG format. The Camcorder shoots High Definition video in
an MP4 format.
Note:
A microSD card is no longer necessary before you take
pictures or shoot video.
It is recommended that you confirm your default storage
location for images and videos.
From the Home screen, tap
Apps
➔
Camera
.
For more information, refer to “Using the Camera” on page 135.
By accessing this document, the recipient agrees and
acknowledges that all contents and information in this document (i) are confidential and proprietary information
of Samsung, (ii) shall be subject to the non-disclosure regarding project H and Project B, and (iii) shall not be
disclosed by the recipient to any third party. Samsung Proprietary and Confidential
Applications and Widgets 161
ChatON
Provides a global mobile communication service where you
can chat with more than 2 buddies via a group chat. Share
things such as pictures, videos, animation messages
(Scribbles), audio, Contacts, Calendar entries, and Location
information.
For more information, visit:
https://web.samsungchaton.com
.
1. From the Home screen, tap
Apps
➔
ChatON
.
2. At the ChatON display, tap
Sign in
to sign in to your
Samsung account if you have not already done so. For
more information, refer to “Creating a Samsung
Account” on page 14
– or –
Tap
Skip
if you have already signed in to your Samsung
account.
3. Enter your real name and tap
OK
.
4. Follow the on-screen instructions to add a buddy and
begin your chat session.
Chrome
The Google Chrome app allows you to use the Google
Chrome Web browser on your device.
1. From the Home screen, tap
Apps
➔
Chrome
.
2. Read the Google Chrome Terms of Service and tap
Accept and Continue
.
3. If you have an existing Chrome account, tap
Sign in
to
bring your open tabs, bookmarks, and omnibox data
from your computer to your phone, otherwise tap
No
thanks
.
4. Follow the on-screen instructions to use Google
Chrome.
By accessing this document, the recipient agrees and
acknowledges that all contents and information in this document (i) are confidential and proprietary information
of Samsung, (ii) shall be subject to the non-disclosure regarding project H and Project B, and (iii) shall not be
disclosed by the recipient to any third party. Samsung Proprietary and Confidential
162
City ID
Subscribe to City ID to display city and state for incoming
calls and to look up city and state information for phone
numbers.
Note:
City ID requires a subscription, after a limited free trial.
From the Home screen, tap
Apps
➔
City ID
.
Clock
Here you can set an Alarm, configure and view the World
clock, use a Stopwatch, set a Timer, or use a Desk Clock.
The applications display in a tabular format and quickly
accessed with the touch of a finger.
From the Home screen, tap
Apps
➔
Clock
.
Setting an Alarm
1. From the Home screen, tap
Apps
➔
Clock
.
2. From the
Alarm
tab, tap
Create alarm
.
3. Use the arrow symbols to enter adjust the hour, and
minutes, then tap
AM
or
PM
(toggles depending on
which was last selected).
4. Tap the
Alarm repeat
field and touch the number of
times you want this alarm to repeat. Selections are:
day blocks or
Repeat Weekly
. Selected day blocks turn
blue when active.
5. Tap the
Alarm type
field and select one of the following:
Melody
,
Vibration
,
Vibration and melody
, or
Briefing
.
6. Tap
More
to configure additional alarm settings such as
volume slider, Alarm tone, Location alarm, Snooze,
Smart alarm, and assign a name.
To configure additional alarm settings:
1. Tap
More
to access additional alarm settings.
2. Tap the
Alarm tone
field and either select an available
tone or select
Add
to use locate a sound to use as an
alarm ringtone. Tap
OK
to activate the ringtone.
3. Slide the slider bar left or right in the
Alarm volume
field
to decrease or increase the alarm volume. A sample of
the volume level plays.
4. Move the
Location alarm
slider to the right to activate
the feature, then follow the on-screen instructions to
enter a location. When activated, the alarm only
sounds when you are at a specific location.
By accessing this document, the recipient agrees and
acknowledges that all contents and information in this document (i) are confidential and proprietary information
of Samsung, (ii) shall be subject to the non-disclosure regarding project H and Project B, and (iii) shall not be
disclosed by the recipient to any third party. Samsung Proprietary and Confidential

Applications and Widgets 163
5. Move the
Snooze
slider to the right to activate the
feature. Tap the field to assign a
Interval
time
(3 minutes, 5 minutes, 10 minutes, 15 minutes, or
30 minutes) and
Repeat
(1 time, 2 times, 3 times,
5 times, and 10 times).
•Interval
indicates the length of time the alarm will remain silent
between alarm notifications (snooze time).
•Repeat
indicates the numbers of snooze sessions that are
assigned to this alarm. How many times will the snooze silence
the alarm.
6. Move the
Smart alarm
slider to the right to activate this
feature which slowly increases screen brightness and
the volume of nature tones to simulate dawn breaking.
Tap the field to assign a interval time (1 minute,
3 minutes, 5 minutes, 10 minutes, 15 minutes, or
30 minutes) and nature tone (Fairy fountain, Birdsong
by the lake, Sparkling mist, The secret forest, Serenity,
or Gentle spring rain).
•Interval
category describes the length of time the alarm will
remain silent between alarm notifications (snooze time).
•Tone
category provides one of several nature sounds that are
used as the alarm tone.
7. Tap the
Name
field and enter a name for this Alarm.
8. Tap
Save
to store the new alarm event.
Turning Off an Alarm
To stop an alarm when it sounds, touch and slide
to any direction.
Setting the Snooze Feature
To activate the Snooze feature after an alarm sounds,
touch and slide to any direction. Snooze must
first be set in the alarm settings.
Deleting an Existing Alarm
1. From within the
Clock
application, touch and hold an
on-screen alarm event.
2. Tap
Delete
.
World Clock
This feature allows you to find out what time it is another part
of world.
1. From within the
Clock
application, tap the
World clock
tab.
2. Tap
Add city
then scroll and select the desired city, or
tap in the search field to locate a city.
By accessing this document, the recipient agrees and
acknowledges that all contents and information in this document (i) are confidential and proprietary information
of Samsung, (ii) shall be subject to the non-disclosure regarding project H and Project B, and (iii) shall not be
disclosed by the recipient to any third party. Samsung Proprietary and Confidential

164
To assign DST settings:
1. Locate a desired city from the World clock list.
2. Touch and hold a city and select
DST settings
.
3. Select a DST setting (Automatic, Off, or 1 hour).
If Daylight Savings Time is selected, a sun symbol
displays next to the World Clock city listing.
Stopwatch
This feature allows you to capture elapsed time while letting the
stopwatch keep running.
1. From within the
Clock
application, tap
Stopwatch
tab.
2. Tap
Start
to start the stopwatch counter.
3. Tap
Lap
to begin the lap time counter.
4. Tap
Stop
to stop the counter.
5. Tap
Restart
to restart the lap counter. You can have
multiple lap times.
6. Tap
Reset
to reset the counter.
Setting a Timer
1. From within the
Clock
application, tap
Timer
tab.
2. Tap the
Hours
,
Minutes
, or
Seconds
field and use the
on-screen keypad to enter the hour, minute, or
seconds. The timer plays an alarm at the end of the
countdown.
3. Tap
Start
to start the timer.
4. Tap
Stop
to stop the timer or
Reset
to reset the timer
and start over.
5. Tap
Restart
to resume the timer counter.
Configuring a Desk Clock
This feature lets you activate an on-screen clock that can be
viewed when the device is docked.
1. From within the
Clock
application, tap
Desk clock
tab.
The default Desk clock displays.
Note:
You might have to scroll across the tabs to locate the
Desk clock tab at the far right.
By accessing this document, the recipient agrees and
acknowledges that all contents and information in this document (i) are confidential and proprietary information
of Samsung, (ii) shall be subject to the non-disclosure regarding project H and Project B, and (iii) shall not be
disclosed by the recipient to any third party. Samsung Proprietary and Confidential
Applications and Widgets 165
2. To make changes, press
and then tap
Settings
.
The following options are displayed while in full-screen
mode:
•Calendar
: when this is checked, the calendar displays. Tap to
uncheck.
• Weather
: when this is activated, the location, temperature, and
weather condition displays. Touch and slide the slider to the
right to turn it on.
•Dock
: allows you to set your Dock settings such as Dock
sound, Audio output mode, Desk home screen display,
Automatic unlock, and Audio output. For more information,
refer to
“Accessory”
on page 272
3. Tap to display the Desk clock in full-screen mode.
4. To make changes in full screen mode, press
and
then tap:
• Edit shortcuts
: allows you to edit the shortcuts shown at the
bottom of full screen mode.
• Hide/Show shortcuts
: allows you to hide or view the current
on-screen shortcuts located along the bottom of the full screen
mode.
•Settings
: provides access to the Desk clock settings menu
from where you can alter the following: Hide status bar,
Wallpaper, Calendar, Weather, and Dock.
• Date and time
: provides access to the Date and time menu.
Contacts
The default storage location for saving phone numbers to
your Contacts List is your phone’s built-in memory.
From the Home screen, tap
Apps
➔
Contacts
.
For more information, refer to “Contacts List” on page 87
Downloads
Provides quick access to tabs containing a list of your current
downloaded files (Internet and Other).
1. From the Home screen, tap
Apps
➔
Downloads
.
2. Place a check mark on an available file to select it.
3. Choose an available action such as Share, Delete, Sort
by size/date, or Clear list.
By accessing this document, the recipient agrees and
acknowledges that all contents and information in this document (i) are confidential and proprietary information
of Samsung, (ii) shall be subject to the non-disclosure regarding project H and Project B, and (iii) shall not be
disclosed by the recipient to any third party. Samsung Proprietary and Confidential
166
Dropbox
Works to provide access to your desktop files directly from
your device. This applications allows you to bring your files
with you when you're on the go, edit files in your Dropbox
from your device, upload photos and videos to Dropbox, and
share your selected files freely with family and friends.
The in-device application works in conjunction with a partner
program placed on a target computer using an active Internet
connection.
Dropbox creates a folder that automatically synchronizes its
contents across all of your connected devices on your
account. Update a file to your Dropbox on your computer, and
its automatically updated to the same folder on your other
devices.
Download the Desktop application
1. Use your computer’s browser to navigate to:
http://www.dropbox.com/
.
Important!
The computer application must be installed on the
computer containing the desired files. This
computer must have an active Internet connection.
2. Follow the on-screen setup and installation instructions
on your target computer containing the desired files.
Note:
It might be necessary to configure your router’s firewall
settings to allow this application to gain access to the
Internet.
Accessing Dropbox on your Device
1. From the Home screen, tap
Apps
➔
Dropbox
➔
Start
.
2. Tap
Sign in
, enter your current account credentials, and
tap
Sign in
.
– or –
Tap
Sign up for Dropbox
and follow the on-screen
instructions to register for a new account.
3. Follow the on-screen instructions.
4. Initially, you will need to configure your
Camera Upload
parameters. Choose from Wi-Fi only or Wi-Fi or data
plan.
•
Tap
Turn on Camera Upload
after making your selection.
By accessing this document, the recipient agrees and
acknowledges that all contents and information in this document (i) are confidential and proprietary information
of Samsung, (ii) shall be subject to the non-disclosure regarding project H and Project B, and (iii) shall not be
disclosed by the recipient to any third party. Samsung Proprietary and Confidential

Applications and Widgets 167
Caution!
Enabling this feature can incur data charges
(depending on your plan) if the Wi-FI or data plan is
selected.
5. Tap
Access Dropbox
at the top of the application
window to access the files and folders you area
currently sharing from your computer.
6. Tap an item to open it.
7. Tap the bottom of the image to reveal additional
options:
•Delete
to erase the current file.
• Add to Album
to create a new album and add a series of
images.
•Share
via applications such as: Copy link, Bluetooth, Email,
Gmail, Google, Google+, Hangouts, Memo, Messaging, or
Wi-Fi Direct.
•More
to choose from options such as:
–
Open with...
to open the current file with the default in-device
application.
–
Export
to transfer the current file to another location via:
Save to SD card, Bluetooth, Email, Gmail, Google+, Group Play,
Hangouts, Messaging, Picasa, Share by Samsung UI, or
Wi-Fi Direct.
8. Tap (
Up a Directory Level
) at the top of the
application window to navigate up a single level with
every tap.
9. Tap (
Camera Uploads/Albums
) at the top of the
application window to access your Uploads and
Albums tabs.
10. Tap (
Tag as Favorite
) at the top of the application
window to assign favorite files.
By accessing this document, the recipient agrees and
acknowledges that all contents and information in this document (i) are confidential and proprietary information
of Samsung, (ii) shall be subject to the non-disclosure regarding project H and Project B, and (iii) shall not be
disclosed by the recipient to any third party. Samsung Proprietary and Confidential
168
Manually uploading a Picture to Dropbox
1. From the Home screen, tap
Apps
➔
Camera
.
2. After the image is taken, tap the Image Viewer box at
the bottom right. This previews the current image.
3. Tap the image to reveal the image options at the top of
the screen.
4. Tap ➔
Add to Dropbox
select a folder
location and tap
Upload
.
Note:
If your share folder is located on your computer, you will
momentarily receive an on-screen popup notifying you
that a new image was uploaded to your shared Dropbox
folder.
Email
Email enables you to review and create email using most
email services. The device alerts you when you receive an
email message.
From the Home screen, tap
Apps
➔
(
Email
).
For more information, refer to “Using Email” on page 123.
Flipboard
This application creates a personalized digital magazine out
of everything being shared with you. Access news stories,
personal feeds and other related material. Flip through your
Facebook newsfeed, tweets from your Twitter account,
photos from friends and much more.
1. From the Home screen, tap
Apps
➔
Flipboard
.
2. Swipe up on the Flipboard screen, then tap
Flipboard
Account
at the top of the display.
3. Tap
Create
to set up a new Flipboard account.
– or –
Tap
Sign In
to log into your previously created profile.
4. Follow the on-screen instructions to use Flipboard.
By accessing this document, the recipient agrees and
acknowledges that all contents and information in this document (i) are confidential and proprietary information
of Samsung, (ii) shall be subject to the non-disclosure regarding project H and Project B, and (iii) shall not be
disclosed by the recipient to any third party. Samsung Proprietary and Confidential
Applications and Widgets 169
Gallery
The Gallery is where you view photos and play back videos.
For photos, you can also perform basic editing tasks, view a
slideshow, set photos as wallpaper or caller image, and
share as a picture message.
From the Home screen, tap
Apps
➔
Gallery
.
For more information, refer to “The Gallery” on page 157.
Gmail
Google Mail (Gmail) is a web-based email service. Gmail is
configured when you first set up your phone. Depending on
your synchronization settings, Gmail can automatically
synchronize with your Gmail account on the Web.
From the Home screen, tap
Apps
➔
Gmail
.
For more information, refer to “Using Google Mail” on page
135.
Google
Use Google Search to search the Web.
From the Home screen, tap
Apps
➔
Google
and enter the search text.
– or –
Tap on the Google Search bar and say the search
information.
Google Settings
As Google has become more intertwined with other
applications, this menu provides a quick and ready access
point to configure preferences for Google+, Maps & Latitude,
Location, etc.. You can also use the Search function to
initiate a Google Search from this menu.
1. From the Home screen, tap
Apps
➔
Google Settings
and select an on-screen option.
2. Tap one of the following options:
Apps with Google+
Sign in
,
Google+
,
Location
,
Maps & Latitude
,
Search
,
and
Ads
.
3. Follow the on-screen prompts.
By accessing this document, the recipient agrees and
acknowledges that all contents and information in this document (i) are confidential and proprietary information
of Samsung, (ii) shall be subject to the non-disclosure regarding project H and Project B, and (iii) shall not be
disclosed by the recipient to any third party. Samsung Proprietary and Confidential
170
Google +
Google+ makes messaging and sharing with your friends a
lot easier. You can set up Circles of friends, visit the Stream
to get updates from your Circles, use Messenger for fast
messaging with everyone in your Circles, or use Instant
Upload to automatically upload videos and photos to your
own private album on Google+.
From the Home screen, tap
Apps
➔
Google+
.
For more information, refer to “Google +” on page 137.
Group Play
This application lets you share documents, photos or music
in real-time with other connected friends.
Note:
Group play is not the same as Screen mirroring which
requires a connection to a Wi-Fi capable Samsung TV or
via the use of the AllShare Cast Hub.
For more information, refer to “AllShare Cast Hub” on
page 158
Important!
To share a Group Play, all users must be connected
to the same Wi-Fi access point.
1. From the Home screen, tap
Apps
➔
Group Play
.
2. Read the on-screen information and tap
Agree
to
continue.
3. Follow the on-screen tutorials.
By accessing this document, the recipient agrees and
acknowledges that all contents and information in this document (i) are confidential and proprietary information
of Samsung, (ii) shall be subject to the non-disclosure regarding project H and Project B, and (iii) shall not be
disclosed by the recipient to any third party. Samsung Proprietary and Confidential
Applications and Widgets 171
Creating a group
If you have media you want to share, create a group for other
users to join to and then share/collaborate with what you are
sharing.
The creator of the group is the leader and it the source of the
shared file. All other joined members can then interact with
the file being shared.
1. Connect to an active Wireless Access Point and confirm
your other participants are also connected to this same
Wi-Fi.
2. From the Home screen, tap
Apps
➔
Group Play
.
3. Tap the
Set group password
field to enable the function
which requires users to enter a password prior to
connecting to your new group.
4. Tap
Create group
. If previously selected, enter your
group password and tap
OK
. Mobile AP is enabled.
5. Tap one of the media items listed under the
Share and
play content
heading.
6. Tap to select the items you want to share (indicated by
a check mark), then tap
Done
or
OK
.
7. Have your friends sign onto Group Play from their
devices (see below) and they can view your media
using you as a Mobile AP.
Joining a group
A joiner is the participant of an already created group. You
can only view and interact with media shared by the leader
of an existing group.
1. Connect to an active Wireless Access Point and confirm
your connection is this same Wi-Fi as the group leader.
2. From the Home screen, tap
Apps
➔
Group Play
.
3. Tap
Join group
. Your device then scans for available
groups for you to join.
4. Select a group to join. Once connected, you can then
select the shared content and interact with your
group’s shared media.
5. Press and select
Help
for additional information.
By accessing this document, the recipient agrees and
acknowledges that all contents and information in this document (i) are confidential and proprietary information
of Samsung, (ii) shall be subject to the non-disclosure regarding project H and Project B, and (iii) shall not be
disclosed by the recipient to any third party. Samsung Proprietary and Confidential
172
Hangouts
Previously known as Google Talk™, is an updated place to
hangout, share photos, and even video calls. This is a free
web-based application for instant messaging offered by
Google. Conversation logs are automatically saved to a Chats
area in your Gmail account. This allows you to search a chat
log and store them in your Gmail accounts.
From the Home screen, tap
Apps
➔
Hangouts
.
For more information, refer to “Hangouts” on page 137.
Help
Provides access to built-in Help information.
1. From the Home screen, tap
Apps
➔
Help
.
2. Select an on-screen topics for more information:
•New features
: provides help on all of the new features and
applications such as Smart screen and Group Play.
•Basics
: provides basic information on using your device such
as Keys, Lock screen, Notifications, Home screen, Keyboard,
Phone, Messaging, and Update your device.
• Settings
: provides information on settings for Wi-Fi, Bluetooth,
Ringtone, Power saving mode, NFC, and Screen Mirroring.
•Applications
: provides information on how to use basic
applications like Contacts, Email, Internet, Camera, etc.
Accessing the Internet
To access the Browser:
From the Home screen, tap
Apps
➔
Internet
.
By accessing this document, the recipient agrees and
acknowledges that all contents and information in this document (i) are confidential and proprietary information
of Samsung, (ii) shall be subject to the non-disclosure regarding project H and Project B, and (iii) shall not be
disclosed by the recipient to any third party. Samsung Proprietary and Confidential
Applications and Widgets 173
Local
Local (formerly known as Google Places) displays company
logos on a layer of Google Maps. When viewing an area you
can quickly locate a business or person, find out more
information about the business, see coupons, public
responses, and more.
1. From the Home screen, tap
Apps
➔
Local
.
2. Tap (
Search
) and then use the
Search Maps
field
to manually enter a desired place or choose from
among the various categories. Matches are filtered by
those closest to your current location.
3. Locate and tap one of the listed places (Restaurants,
Cafes, Bars, Attractions, [user added searches],
RECOMMENDATIONS, or IN THIS AREA a list of places
within this category displays.
4. Tap the Maps icon to launch the related maps feature.
5. Press and then tap
Add a search
. The functions
adds additional search shortcuts to the places screen.
Maps
Google Maps allow you to track your current location, view
real-time traffic issues, and view detailed destination
directions. There is also a search tool included to help you
locate places of interest or a specific address. You can view
locations on a vector or aerial map, or you can view locations
at the street level.
Important!
Before using Google Maps you must have an active
data (3G/4G/LTE) or Wi-Fi connection. The Maps
application does not cover every country or city.
From the Home screen, tap
Apps
➔
Maps
.
Important!
For best results, it is recommended that you enable
all of your location services. For more information,
refer to “Location Services” on page 289.
By accessing this document, the recipient agrees and
acknowledges that all contents and information in this document (i) are confidential and proprietary information
of Samsung, (ii) shall be subject to the non-disclosure regarding project H and Project B, and (iii) shall not be
disclosed by the recipient to any third party. Samsung Proprietary and Confidential

174
Enabling a Location source
Before you use Google Maps and find your location or search
for places of interest, you must enable a location source. To
enable the location source you must enable the wireless
network, or enable the GPS satellites.
Important!
The more location determining functions are
enabled, the more accurate the determination is of
your position.
1. From the main
Settings
page, tap
More
tab ➔
Location
services
.
2. Tap
Use GPS satellites
to enable the GPS satellite.
3. Tap
Use wireless networks
to allow apps to use data
from sources such as Wi-Fi and mobile networks to
provide a better approximation of your current location.
4. Tap
My places
to enable the storage of your favorite
locations.
To receive better GPS signals, avoid using your device in the
following conditions:
•
inside a building or between buildings
•
in a tunnel or underground passage
•
in poor weather
•
around high-voltage or electromagnetic fields
•
in a vehicle with tinted windows
Opening Maps
1. From the Home screen, tap
Apps
➔
Maps
.
2. Tap the upper-right My location button to find your
location on the map with a blinking blue dot.
3. Locate the bottom row of the buttons to access
additional options:
•Search
: allows you to search for a place of interest.
•Directions
: displays navigation directions to a location from a
starting point.
By accessing this document, the recipient agrees and
acknowledges that all contents and information in this document (i) are confidential and proprietary information
of Samsung, (ii) shall be subject to the non-disclosure regarding project H and Project B, and (iii) shall not be
disclosed by the recipient to any third party. Samsung Proprietary and Confidential

Applications and Widgets 175
•Local
: provides access to the places menu where you can
quickly locate a business or person, find out more information
about a business, see coupons, public responses, and more
(Local). Locate and tap one of the listed places (Restaurants,
Cafes, Bars, Attractions, or select from available categories
such as Entertainment, ATMs, Gas stations, Hotels, Post office,
or Taxi.)
•Layers
: allows you to switch map views:
–
Traffic
: (available only in selected areas) Real-time traffic
conditions are displayed over roads as color-coded lines. Each
color represents how fast the traffic is moving.
–
Satellite
: Maps uses the same satellite data as Google Earth.
Satellite images are not real-time. Google Earth acquires the
best imagery available, most of which is approximately one to
three years old.
–
Terrain
: combines a topographical view of the area’s terrain
with the current map location.
–
Transit Lines
: displays the overlapping transit lines on your
map.
–
Latitude
: allows you to see your friend's locations and share
your location with them.
–
My Maps
: displays a list of your preferred maps.
–
Bicycling
: displays the overlapping cycling trails on your map.
–
Wikipedia
: displays any Wikipedia markers and info on your
map.
4. Press and select one of the following options:
• Clear Map
: allows you to remove all markings and layers from
the map.
• Make available offline
: allows you to store map-related
information locally on your device and access it even when the
device is offline.
•Settings
: allows you to select the following additional options:
–
Display
: allows you to enable/disable the Zoom Buttons, Scale
Bar, and Bubble action.
–
Offline and cache
: allows you to set options to pre-fetch map
tiles when not using Wi-Fi and to clear the cache that holds the
map tiles. Choose from: Automatic caching, Clear all map titles,
or Clear My Places cache.
–
Location settings
: lets you access and configure the location
settings.
–
Sign in
: allows you to sign into your current Google account.
By accessing this document, the recipient agrees and
acknowledges that all contents and information in this document (i) are confidential and proprietary information
of Samsung, (ii) shall be subject to the non-disclosure regarding project H and Project B, and (iii) shall not be
disclosed by the recipient to any third party. Samsung Proprietary and Confidential
176
–
Labs
: this is a testing ground for experimental features that
aren’t ready for primetime. They may change, break or
disappear at any time. Click on a Lab to enable or disable it.
–
What’s New
: provides access to the Play Store from where you
can update the application manually.
–
About
: displays general information about Google maps such
as Version, Platform, Locale, Total data sent, Total data received,
Free memory, etc.
–
Feedback
: allows you to provide application feedback.
–
Terms, Privacy & Notices
: displays the Terms and Conditions,
Privacy Policy, or Legal Notices information. Select the desired
information from the pop-up menu.
•Help
: provides help information.
Messages
This application allows you to use the Short Message Service
(SMS) to send and receive short text messages to and from
other mobile phones.
You can also use the Multi Media Service (MMS) to create
multimedia messages to send and receive from other mobile
phones.
From the Home screen, tap
Apps
➔
Messages
.
For more information, refer to “Messages” on page 109.
Messenger
Messenger allows you to bring groups of friends together into
a simple group conversation. When you get a new
conversation in Messenger, Google+ sends an update to your
device.
From the Home screen, tap
Apps
➔
Messenger
.
For more information, refer to “Messenger” on page 138.
By accessing this document, the recipient agrees and
acknowledges that all contents and information in this document (i) are confidential and proprietary information
of Samsung, (ii) shall be subject to the non-disclosure regarding project H and Project B, and (iii) shall not be
disclosed by the recipient to any third party. Samsung Proprietary and Confidential