Samsung Electronics Co SCHW531 Single-Band CDMA Phone with Bluetooth User Manual C1A6B8F120BEF8C0BD
Samsung Electronics Co Ltd Single-Band CDMA Phone with Bluetooth C1A6B8F120BEF8C0BD
UserManual.wiki
>
Samsung Electronics Co
>
SCHW531 User Manual
Users Manual
Navigation menu
Upload a User Manual
Namespaces
Wiki Guide
HTML
PDF
Info
Views
User Manual
Discussion / Help
Navigation

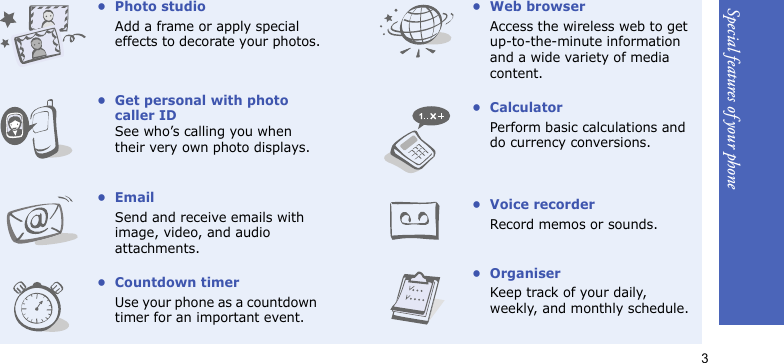
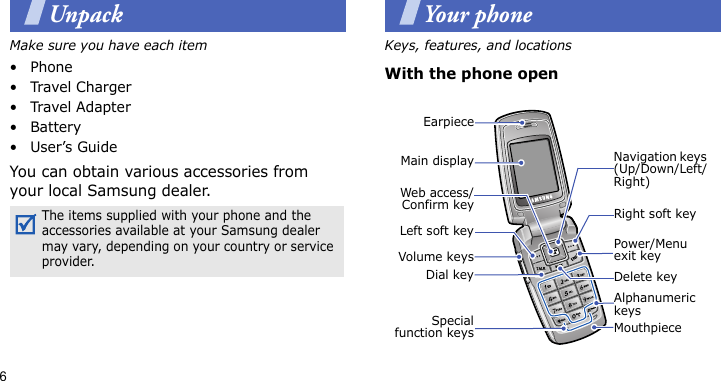
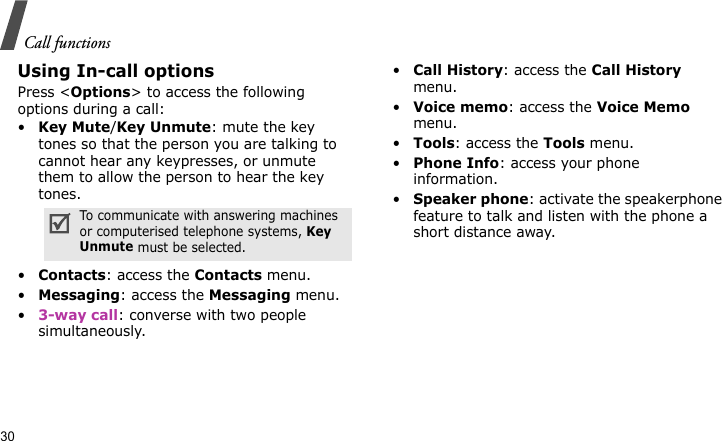
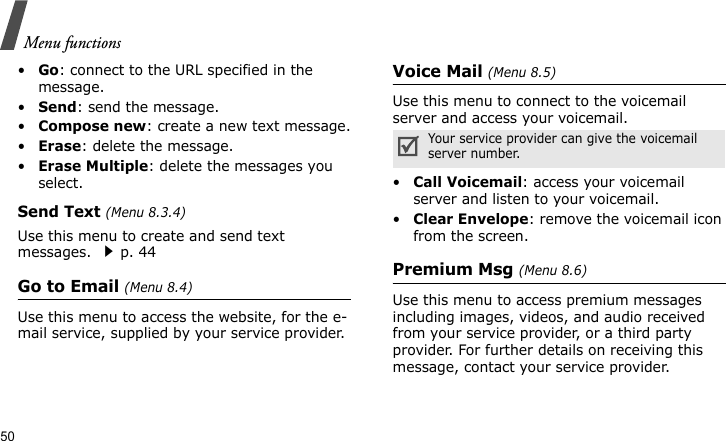
![2About this GuideThis User’s Guide provides you with condensed information about how to use your phone. To quickly learn the basics for your phone, please refer to “Get started” and “Step outside the phone.”In this guide, the following instruction icons appear:Indicates that you need to pay careful attention to the subsequent information regarding safety or phone features.Indicates that you can get more information on the referenced page. →Indicates that you need to press the Navigation keys to scroll to the specified option and then select it.[ ] Indicates a key on the phone. For example, [TALK]< >Indicates a soft key, whose function is displayed on the phone screen. For example, <Favorites>• GSM and CDMA networksSwitch back and forth between GSM and CDMA networks anytime, anywhere.Special features of your phone• Camera and camcorderUse the camera module on your phone to take a photo or record a video.•MP3 playerPlay music files using your phone as an MP3 player. You can use other phone functions while listening to music.](https://usermanual.wiki/Samsung-Electronics-Co/SCHW531/User-Guide-721425-Page-5.png)
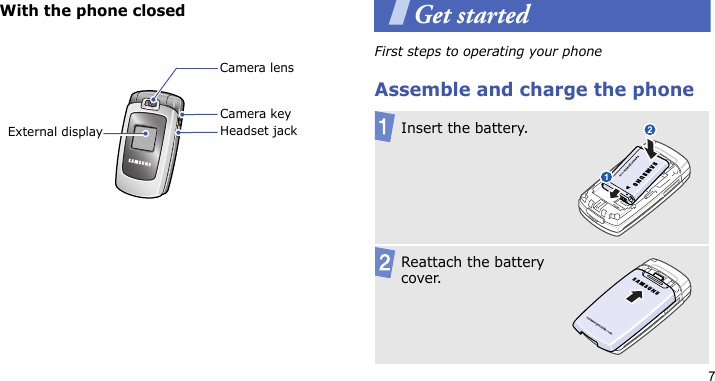
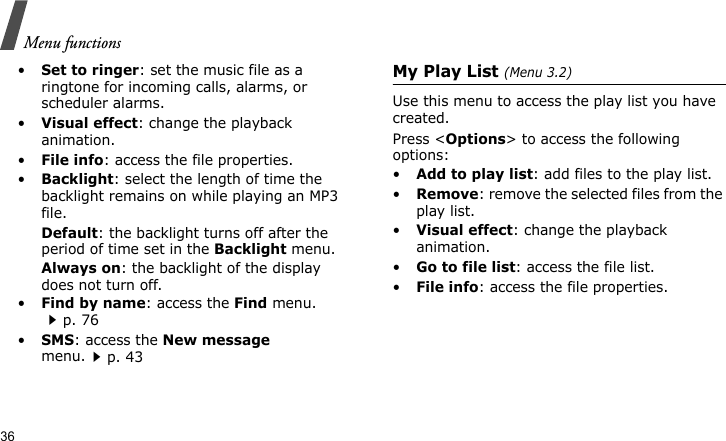
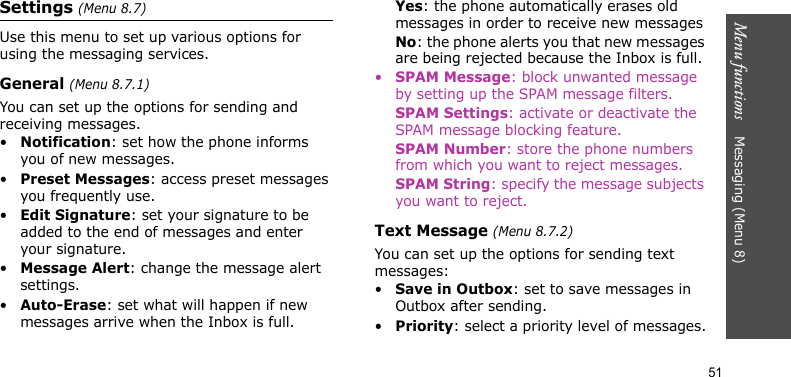
![5Overview of menu functionsTo access Menu mode, press [MENU OK] in Idle mode.1 Webp. 312 Call Historyp. 321 Outgoing Calls2 Incoming Calls3 Missed Calls4 Recent Calls5 GSM Call Costp. 32p. 33p. 33p. 33p. 343 Music Playerp. 341 Music Player2 My Play List3 Music Files4 Music Settingsp. 34p. 36p. 37p. 374 Voice servicesp. 381 Voice Memo2 Servicesp. 38p. 385 Missed Alertsp. 396 Bluetoothp. 391 Bluetooth2 Settingsp. 39p. 407 My Contentp. 41GamesRingersScreen SaversApplicationsCaller Tunesp. 41p. 42p. 42p. 43p. 438 Messagingp. 431 Send Message2 Picture Msg3 Text Message4 Go to Email5 Voice Mail6 Premium Msg7 Settings8 SOS messagep. 43p. 46p. 48p. 50p. 50p. 50p. 51p. 529 Toolsp. 531 Planner2 Memo Pad3 World Time4 Alarm5 Calculator6 User Memory7 Set Timep. 53p. 57p. 58p. 58p. 59p. 59p. 63* Picturesp. 631 Take Photo2 My Album3 Picture Msg4 Photo Studio5 Settingsp. 63p. 68p. 71p. 71p. 750 Contactsp. 761 Find2 Add New Entry3 My Phone #4 Speed Dial #s5 Groupp. 76p. 77p. 78p. 78p. 79Press <Favorites> in Idle mode.# Settingsp. 801 Display2 Sounds3 Internet4 Security5 Launch Pad6 Network Selection7 Others8 Phone Infop. 80p. 82p. 83p. 83p. 85p. 85p. 86p. 88Favorites1 My Phone Number2 Send Text3 Send Picture4 Get New Games5 Get New Ringersp. 88p. 43p. 43p. 41p. 42W531TOC.fm Page 5 Wednesday, October 11, 2006 4:31 PM](https://usermanual.wiki/Samsung-Electronics-Co/SCHW531/User-Guide-721425-Page-8.png)
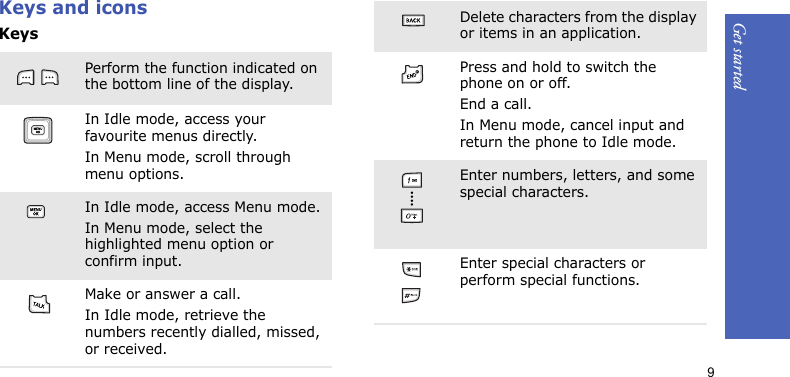
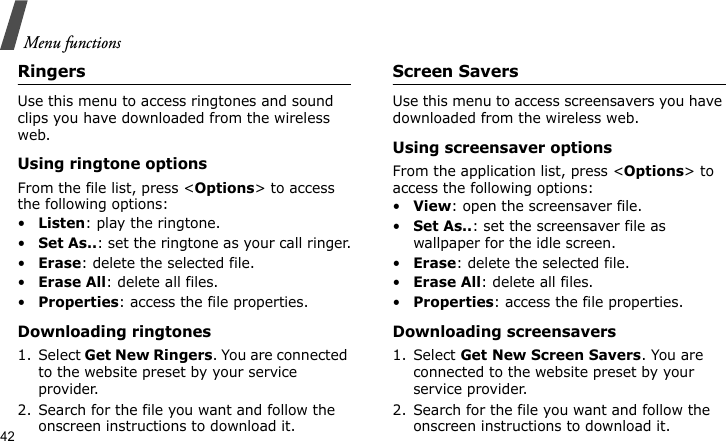
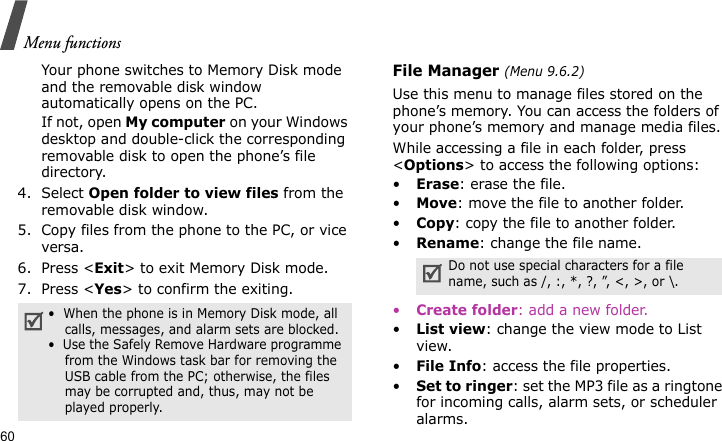
![Get started8Power on or offPlug the travel adapter into the phone. Plug the adapter into a standard AC power outlet.When the phone is completely charged, unplug the adapter from the power outlet and from the phone.Switch onDo not switch on the phone when mobile phone use is prohibited.1. Open the phone.2. Press [END].3. If necessary, enter the PIN and press <OK>.Switch off1. Open the phone.2. Press and hold [END].](https://usermanual.wiki/Samsung-Electronics-Co/SCHW531/User-Guide-721425-Page-11.png)
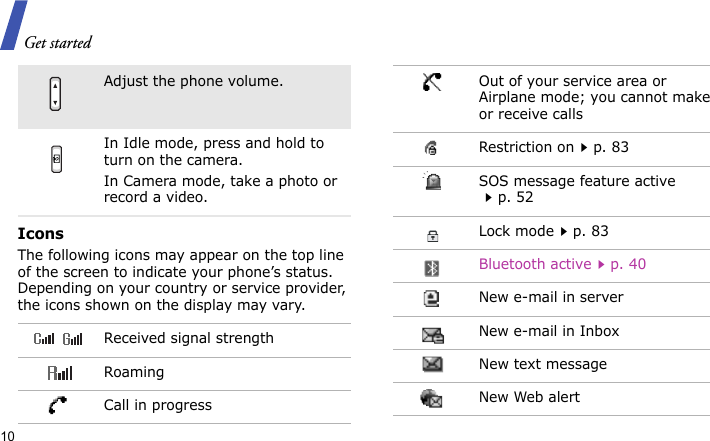
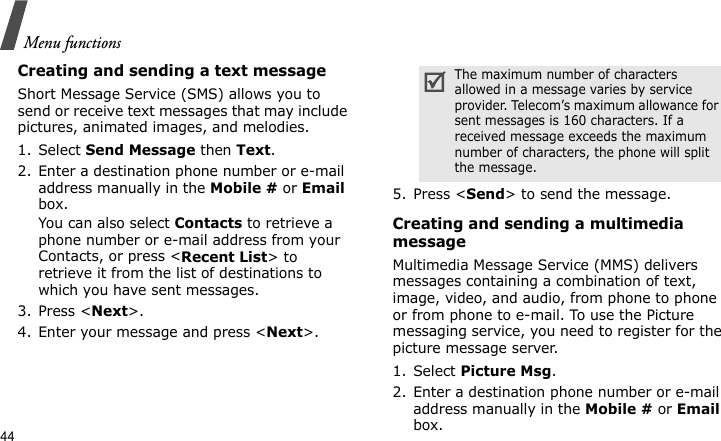
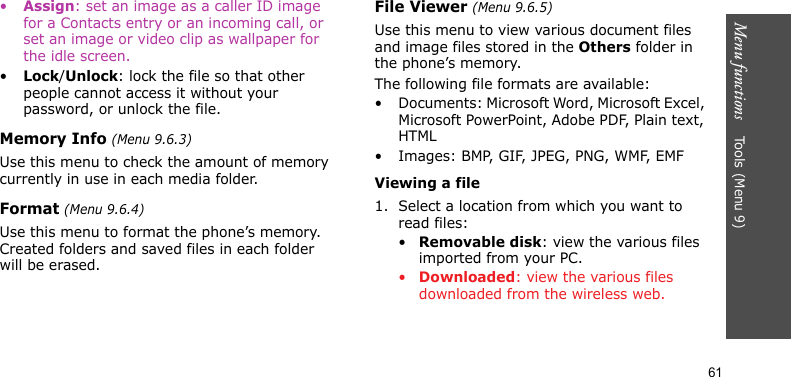
![Get started11Access menu functionsNew voicemailUrgent messageAlarm setp. 58Ringer type settingp. 82• : Level 1~8 or 1 Beep• : Level 1~8 or 1 Beep with vibration• : Ringer Off or Silent All• : Ringer Off with vibration•: Vibration AllAnswering machine feature activep. 86Battery power levelSelect an option1. Press a desired soft key.2. Press the Navigation keys to move to the next or previous option.3. Press <Select>, <OK>, or [MENU OK] to confirm the function displayed or option highlighted.4. To exit, choose either of the following methods:• Press <Back> or [BACK] to move up one level.• Press [END] to return to Idle mode.](https://usermanual.wiki/Samsung-Electronics-Co/SCHW531/User-Guide-721425-Page-14.png)
![Get started12Customise your phoneUse menu numbersPress the number key corresponding to the option you want.1. In Idle mode, press [MENU OK] and select Settings → Sounds → Ringer → Voice Calls.2. Select With Caller ID or No Caller ID.3. Select a ringtone category.4. Select a ringtone.Call ringer melodyYou can set wallpaper for the idle screen on the displays.1. In Idle mode, press [MENU OK] and select Settings → Display → Screen Saver → Main LCD or Sub LCD.2. Select an image or video category.3. Scroll to an image or video clip and press <Assign>.Idle mode wallpaper](https://usermanual.wiki/Samsung-Electronics-Co/SCHW531/User-Guide-721425-Page-15.png)
![Get started13You can customise the appearance of Menu mode.For Menu Style:1. In Idle mode, press [MENU OK].2. Press <Options> and select Menu Style.3. Select a menu style.For Focus Effect:1. In Idle mode, press [MENU OK].2. Press <Options> and select Focus Effect.3. Select an effect.Menu mode appearanceFor Background: 1. In Idle mode, press [MENU OK].2. Press <Options> and select Background.3. Select an image.](https://usermanual.wiki/Samsung-Electronics-Co/SCHW531/User-Guide-721425-Page-16.png)
![Get started14You can switch the phone to Silent mode or Vibration mode to avoid disturbing other people.To activate Silent mode:1. In Idle mode, press [ / ] and select Silent All.2. Press <Done>.To activate Vibration mode:1. In Idle mode, press [ / ] and select Vibration All.2. Press <Done>.Silent mode or Vibration modeYou can set the Navigation keys to function as shortcuts to access your favourite menus.1. In Idle mode, press [MENU OK] and select Settings → Launch Pad.2. Select a key.3. Select a menu to be assigned to the key.Menu shortcuts](https://usermanual.wiki/Samsung-Electronics-Co/SCHW531/User-Guide-721425-Page-17.png)
![Get started15You can protect the phone against unauthorised use with a phone password.1. In Idle mode, press [MENU OK] and select Settings → Security.2. Enter the default password, the last 4-digit of your phone number and press <OK>.3. Select Change Lock.Phone lock4. Enter a new 4-digit password and press <OK>.5. Enter the new password again and press <OK>.6. Select Lock Phone.7. Select Lock Now or On Power-Up.](https://usermanual.wiki/Samsung-Electronics-Co/SCHW531/User-Guide-721425-Page-18.png)
![16Make/Answer callsStep outside the phoneBegin with your camera, the web, and other special featuresUse the camera1. In Idle mode, enter an area code and phone number.2. Press [TALK].3. To end the call, press [END].1. When the phone rings, press [TALK].2. To end the call, press [END].Press [ / ].Make a callAnswer a callAdjust the volume during a call1. Open the phone.2. In Idle mode, press and hold [] to turn on the camera.3. Aim the lens at the subject and make any desired adjustments.4. Press [MENU OK], or [ ] to take a photo.5.Press [Save]. The phone returns to Capture mode automatically.Take a photo](https://usermanual.wiki/Samsung-Electronics-Co/SCHW531/User-Guide-721425-Page-19.png)
![Step outside the phone171. In Idle mode, press [ ] and select My Album.2. Select an album.3. Scroll to the photo you want and press <Expand>.1. In Idle mode, press and hold [ ] to turn on the camera.2. Press [1] three times to select the icon.3. Press < > to start recording.4. Press < > to stop recording. 5. Press <Save>. The phone returns to Camcorder mode automatically.View a photoRecord a video1. In Idle mode, press [] and select My Album → Gallery.2. Select an album.3. Scroll to a video clip and press <Expand>.4. Press <Play>.Play a video](https://usermanual.wiki/Samsung-Electronics-Co/SCHW531/User-Guide-721425-Page-20.png)
![Step outside the phone18Browse the webUsing a built-in web browser, you can easily access the wireless web to get a variety of up-to-date services and information and to download web content.In Idle mode, press [MENU OK] and select Web.Launch the web browser• To scroll line by line, press [Up] or [Down]. • To scroll page by page, press [/].• To select a browser item, press <GO> or [MENU OK].• To return to the previous page, press [BACK].• To access options, press the right soft key.Navigate the web](https://usermanual.wiki/Samsung-Electronics-Co/SCHW531/User-Guide-721425-Page-21.png)
![Step outside the phone19Use ContactsTo save as a new entry:1. In Idle mode, enter a phone number and press [MENU OK].2. Select New entry → a number type.3. Specify contact information: Photo ID, Name, Storage location, Phone number, Pager, Fax, Email, URL, Nickname, Memo, Group, and Ring.4. Press <Done> to save the entry.Add an entryTo add to an existing entry:1. In Idle mode, enter a phone number and press [MENU OK].2. Select Existing entry.3. Enter the first few letters of the name you want.4. Select an entry from the list.5. Select a number type.6. Press <Done> to save the entry.](https://usermanual.wiki/Samsung-Electronics-Co/SCHW531/User-Guide-721425-Page-22.png)
![Step outside the phone20 Send messages1. In Idle mode, press <Contacts>.2. Enter the first few letters of the name you want.3. Select an entry.4. Scroll to a number and press [TALK] to dial.Find an entry1. In Idle mode, press [MENU OK] and select Messaging → Send Message → Text.2. Enter a phone number or e-mail address or select it from your Contacts or recent message log.3. Press <Next>.4. Enter your message and press <Next>.5. Press <Send> to send the message.Send a text message (SMS)](https://usermanual.wiki/Samsung-Electronics-Co/SCHW531/User-Guide-721425-Page-23.png)
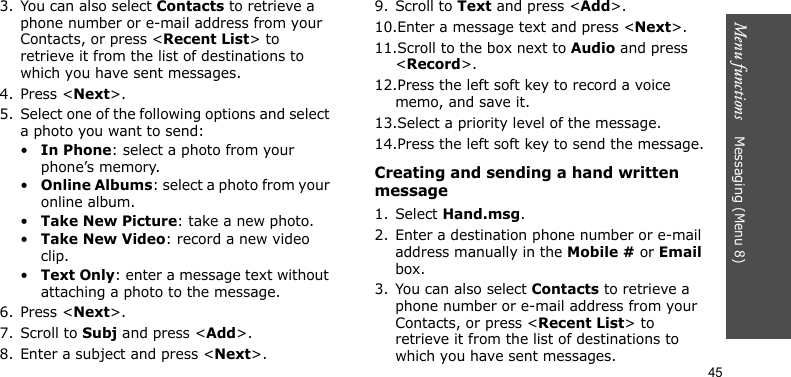
![Step outside the phone211. In Idle mode, press [MENU OK] and select Messaging → Send Message → Picture Msg.2. Enter a phone number or e-mail address or select it from your Contacts or recent message log.3. Press <Next>.4. Select a photo or video clip from your phone’s memory, a memory card, or online album.5. Press <Next>.6. Scroll to Subj and press <Add>.Send a multimedia message (MMS)7. Enter a subject and press <Next>.8. Scroll to Text and press <Add>.9. Enter a message text and press <Next>.10.Scroll to the box next to Audio and press <Record>.11.Press the left soft key to record a voice memo, and save it.12.Select a priority level of the message.13.Press the left soft key to send the message.](https://usermanual.wiki/Samsung-Electronics-Co/SCHW531/User-Guide-721425-Page-24.png)
![Step outside the phone22View messagesWhen a notification appears: The message displays.When you have any missed alerts:The message displays with a missed alert list. 1. Scroll to a message.2. Press <View>. The message displays.From the Inbox:1. In Idle mode, press [MENU OK] and select Messaging → Text Message → Inbox.2. Select a text message.View a text messageWhen a notification appears: The message displays.When you have any missed alerts:The message displays with a missed alert list. Press <View>. The message displays.From the Inbox:1. In Idle mode, press [MENU OK] and select Messaging → Picture Msg → Inbox.2. Select a multimedia message.View a multimedia message](https://usermanual.wiki/Samsung-Electronics-Co/SCHW531/User-Guide-721425-Page-25.png)
![Step outside the phone23Use BluetoothYour phone is equipped with Bluetooth technology, enabling you to connect the phone wirelessly to a Bluetooth headset or hands-free car kit.In Idle mode, press [MENU OK] and select Bluetooth → Settings → Enable → On.1. In Idle mode, press [MENU OK] and select Bluetooth → Bluetooth → Search.2. Scroll to a device and press <Add Lis>.Turn on BluetoothSearch for and pair with a Bluetooth device3. Enter a Bluetooth PIN or the other device’s Bluetooth PIN, if it has one, and press <OK>.When the owner of the other device enters the same code, pairing is complete.Search for and pair with a Bluetooth device](https://usermanual.wiki/Samsung-Electronics-Co/SCHW531/User-Guide-721425-Page-26.png)
![24Enter textT9, Alpha, Symbol, and Number modesYou can enter text for some features such as messaging, Contacts, or Calendar, using T9 mode, Alpha mode, Symbol mode, and Number mode.Changing the text input modePress <Mode> and select the input mode you want.Using T9 modeT9 is a predictive text input mode that allows you to key in any character using single keystrokes.Entering a word in T9 mode1. Press [2] to [9] to start entering a word. Press each key once for each letter. For example, press [4], [3], [5], [5], and [6] to enter Hello in T9 mode. T9 predicts the word that you are typing, and it may change with each key that you press.2. Enter the whole word before editing or deleting characters.3. When the word displays correctly, go to step 4. Otherwise, press [0] to display alternative word choices for the keys that you have pressed. • For example, Of and Me use [6] and [3].4. Press [ ] to insert a space and enter the next word.](https://usermanual.wiki/Samsung-Electronics-Co/SCHW531/User-Guide-721425-Page-27.png)
![Enter text 25Other T9 mode operations• Press [1] to enter periods or apostrophes automatically.• Press [ ] to change case.• Press [ ] to insert a space.• Press the Navigation keys to move the cursor.• Press [BACK] to delete characters one by one. Press and hold [BACK] to clear the display.Using Alpha modePress the appropriate key until the character you want appears on the screen.Other Alpha mode operations• To enter the same letter twice or to enter a different letter on the same key, wait for the cursor to move to the right automatically or press [Right]. Then, enter the next letter.• Press [ ] to change case.• Press [ ] to insert a space.• Press the Navigation keys to move the cursor.•Press [BACK] to delete characters one by one. Press and hold [BACK] to clear the display.Using Symbol modeSymbol mode enables you to insert symbols.• To display more symbols, press [Left] or [Right].• To select a symbol, press the corresponding number key.Using Number modeNumber mode enables you to enter numbers. Press the keys corresponding to the digits you want.](https://usermanual.wiki/Samsung-Electronics-Co/SCHW531/User-Guide-721425-Page-28.png)
![26Call functionsAdvanced calling featuresMaking a call1. In Idle mode, enter an area code and phone number.2. Press [TALK].3. When you want to end the call, press [END].Making an international call1. In Idle mode, press and hold [0]. The + character appears.2. Enter the country code, area code, and phone number, then press [TALK].Redialling recent numbers1. In Idle mode, press [TALK] to display the list of recent numbers.2. Scroll to the number you want and press [TALK].Making a call from ContactsOnce you have stored a number in Contacts, you can dial the number by selecting it from Contacts.p. 76You can also use the speed dial feature to assign number keys to your most frequently called numbers.p. 781. In Idle mode, enter a speed dial number. The entry saved for the speed dial number displays.2. Press [TALK].Press [BACK] to clear the last digit or press and hold [BACK] to clear the whole display. You can move the cursor to edit an incorrect digit.](https://usermanual.wiki/Samsung-Electronics-Co/SCHW531/User-Guide-721425-Page-29.png)
![Call functions 27Pause diallingWhen you call an automated system, like a banking service, you are required to enter a password or account number. Instead of manually entering the numbers each time, you can enter the necessary DTMF tones separated by pauses before dialling.1. In Idle mode, enter the phone number you want to dial, such as a bank’s teleservice number.2. Press <Options> and select Hard Pause or 2sec Pause to insert a pause.•Hard Pause: insert a hard pause. Numbers after the “P” pause will be sent when you press [TALK].•2sec Pause: insert a 2-second pause. Numbers after the “T” pause will be sent automatically.3. Enter a number to be sent after the pause, such as your account number, PIN, etc.4. Repeat steps 2 and 3 to add more pauses and numbers, if necessary.5. Press [TALK] to make a call.6. After connecting, wait for a prompt from the system, and then press [TALK] at each prompt, if applicable.The DTMF tones are sent.Answering a callWhen you receive an incoming call, the phone rings and displays the incoming call image. Press <Answer> or [TALK] to answer the call.DTMF tones are the tones you hear when you press the number keys. DTMF tones allow you to communicate with computerized telephone systems, for example, voicemail servers or telebanking systems.](https://usermanual.wiki/Samsung-Electronics-Co/SCHW531/User-Guide-721425-Page-30.png)
![Call functions28Tips for answering a call• When By any key is active, you can press any key, except for <Ignore>, [END], and [/].p. 86• When By folder open is active, you can simply open the phone.p. 86• Press <Ignore> to reject a call. • Press [ / ], [BACK], or [END] to mute the call ringer.Viewing missed callsIf you have missed calls, the screen displays how many calls you have missed.1. Press [MENU OK].2. If necessary, scroll through the missed calls.3. Press [TALK] to dial the number you want.Using the headsetUse the headset to make or answer calls without holding the phone. Connect the headset to the jack on the left side of the phone. The button on the headset works as follows:Options during a callYou can access a number of functions during a call.To Pressredial the last call and hold the button.answer a call and hold the button.end a call and hold the button.](https://usermanual.wiki/Samsung-Electronics-Co/SCHW531/User-Guide-721425-Page-31.png)
![Call functions 29Adjusting the volume during a callUse [ / ] to adjust the earpiece volume during a call.Press [ ] to increase the volume level and [ ] to decrease the volume level.Answering a second callYou can answer an incoming call while already on the phone, if your network supports it and you have activated the call waiting feature.1. Press [TALK] to answer the call. The first call is automatically put on hold.2. Press [TALK] to switch between the calls.3. To end the current call, press [END].Making a three-way callIf you have activated three-way calling service, you can have a conversation with two people simultaneously.1. During a call, press [TALK] and make another call.The first caller is placed on hold.2. Press [TALK] to begin the three-way call.Switching your microphone off or onYou can temporarily switch off your phone’s microphone so that the person on the phone cannot hear you.During a call, press <Mute>. To switch the microphone on, press <Unmute>.](https://usermanual.wiki/Samsung-Electronics-Co/SCHW531/User-Guide-721425-Page-32.png)
![Menu functions Web (Menu 1)31Menu functionsAll menu options listedWeb (Menu 1)The Wireless Application Protocol (WAP) browser on your phone allows you to access the wireless web. From the wireless web, you can access up-to-date information and a wide variety of media content, such as games, wallpapers, ringtones, and music files.To access this menu, press [MENU OK] in Idle mode and select Web.Launching the web browserSelecting this menu launches the web browser and accesses the homepage of your service provider.Navigating the web browserUsing page optionsFrom any web page, press the right soft key to access the following options:•Back: go back to the previous page.•Home: return to the homepage.•Forward: move forward through pages in history.•Mark this Page: bookmark the current page.To Pressscroll line by line [Up] or [Down]. scroll page by page [ / ].select a browser item<GO> or [MENU OK].return to the previous page[BACK].](https://usermanual.wiki/Samsung-Electronics-Co/SCHW531/User-Guide-721425-Page-34.png)
![Menu functions32•View Bookmarks: access the bookmark list.•Search: launch a Google search.•Send page to...: send the URL of the current page via SMS.•Go to URL: enter a URL address manually.•History: access the list of web pages you have accessed.•Refresh this page: reload the current page with updated information.•More: change the various settings for the browser.Show URL: display the URL address of the current web page.Restart Browser: restart the browser without exiting it.About Browser: access version and copyright information about the browser.Preferences: change the browser display and sound settings.Exiting the web browserPress [END] to end the network connection and exit the browser.Call History (Menu 2)Use this menu to view the calls you have dialled, received, or missed.To access this menu, press [MENU OK] in Idle mode and select Call History.Outgoing Calls (Menu 2.1)This menu displays the most recent calls you have dialled.](https://usermanual.wiki/Samsung-Electronics-Co/SCHW531/User-Guide-721425-Page-35.png)
![Menu functions Call History (Menu 2)33Accessing a call history1. Press [Left] or [Right] to move to another call type.2. Press [Up] or [Down] to scroll through the call list. 3. Press [MENU OK] to view the details of a call, or press <Call> or [TALK] to dial a number.Using call history optionsWhile viewing call details, press <Options> to access the following options:•Send msg.: send a message to the selected number.•Show Contacts: access the contact information, if saved in Contacts.•Save: save the number in Contacts, if not saved.•Prepend: add an area code or service number before dialling the selected number.•Erase: delete the call history.Incoming Calls (Menu 2.2) This menu displays the most recent calls you have received. Missed Calls(Menu 2.3)This menu displays the most recent calls you did not answer.Recent Calls (Menu 2.4)This menu displays the most recent calls dialled, received, or missed.](https://usermanual.wiki/Samsung-Electronics-Co/SCHW531/User-Guide-721425-Page-36.png)
![Menu functions34GSM Call Cost (Menu 2.5)This GSM network feature lets you view the cost of calls.Music Player (Menu 3)Use this menu to play music files.To access this menu, press [MENU OK] in Idle mode and select Music Player.Music Player (Menu 3.1)You can play MP3 files. First, you need to save MP3 files in your phone’s memory.Downloading MP3 filesUse the following methods to save MP3 files:• Download from the wireless webp. 31• Copy directly from a PCp. 59Creating a play listBefore playing MP3 files, you need to add them to the play list. If the play list is empty, the list of the MP3 files stored in your phone’s memory displays.1. Press <Options> and select Add to play list.2. Press <Check> to select the files you want.3. Press <Add>.4. To play the music files, press <Play>.Playing MP3 filesFrom the MP3 player screen, press [MENU OK] to begin playback.Even if the phone is in Silent mode, it will play the sound.](https://usermanual.wiki/Samsung-Electronics-Co/SCHW531/User-Guide-721425-Page-37.png)

![Menu functions Music Player (Menu 3)37Music Files (Menu 3.3)Use this menu to access MP3 files stored in the phone’s memory.Press <Options> to access the following options:•Open files: access the file list and create a play list.•Add to play list: add the MP3 files in the selected folder or the selected MP3 file to the play list.•Move: move the file to another folder.•Copy: copy the file to another folder.•Rename: change the file name.•Sort: change the sort order of the file list.•File info: access the file properties.•Set to ringer: set the music file as a ringtone for incoming calls, alarms, or scheduler alarms.•Erase: erase the selected files.•Create folder: add a new folder.Music Settings (Menu 3.4)Use this menu to customise settings for using the MP3 player feature. •Skip Length: select the interval by which the phone skips forward or backward through a music file when you press [Left] or [Right].•Load Default: restore the default settings for the MP3 player.•Clock View: set whether the MP3 player to display the current timeDo not use special characters for a file name, such as /, :, *, ?, ”, <, >, or \.](https://usermanual.wiki/Samsung-Electronics-Co/SCHW531/User-Guide-721425-Page-40.png)
![Menu functions38Voice services (Menu 4)Use this menu to access voice-related features.To access this menu, press [MENU OK] in Idle mode and select Voice services.Voice Memo (Menu 4.1)Use this menu to record voice memos. A voice memo can be up to one minute long.Record (Menu 4.1.1)You can record voice memos and save them in the phone’s memory.1. Speak into the microphone.•Press <Pause> to pause recording.•Press <Resume> to resume recording.2. When you have finished, press <Finish> or [MENU OK].Review (Menu 4.1.2)You can access the voice memos you have recorded. Select the voice memo you want.While viewing the voice memo list, press <Options> to access the following options:•Edit Caption: change the file name.•Erase: delete the selected file.•Erase All: delete all files.•Info: access the file properties.Services (Menu 4.2)Your phone is pre-programmed with contact numbers for various services. Use this menu to dial your customer service centre or service representative for direct assistance.](https://usermanual.wiki/Samsung-Electronics-Co/SCHW531/User-Guide-721425-Page-41.png)
![Menu functions Missed Alerts (Menu 5)39Missed Alerts (Menu 5)When you are unable to acknowledge an alarm for scheduled items or alarm alerts, or when you have missed a call or an alert for a message, the phone stores the alarm or alert until you confirm it. To access this menu, press [MENU OK] in Idle mode and select Missed Alerts.Bluetooth (Menu 6)Use this menu to connect your phone to other compatible devices wirelessly using Bluetooth technology.Bluetooth (Menu 6.1)Using Bluetooth wireless, you can connect the phone wirelessly to a Bluetooth headset or hand-free car kit to talk hands-free.Bluetooth technology allows free wireless connections between all Bluetooth-compliant devices within a range of 10 meters. Since the devices communicate using radio waves, they do not need to be in line of sight to each other.Searching and pairing with a Bluetooth device1. Press <Search>.After searching, a list of devices to which you can connect displays. • If there are obstacles between the devices, the operating distance may be reduced.• It is recommended that you don’t use the Bluetooth feature while using multimedia features, such as voice recorder, camera or camcorder, and Media player, or vice versa, for better performance.• Some devices, especially those that are not tested or approved by SIG, may be in compatible with your phone.](https://usermanual.wiki/Samsung-Electronics-Co/SCHW531/User-Guide-721425-Page-42.png)
![Menu functions402. Scroll to the device and press <Add Lis>.3. Enter a Bluetooth PIN and press < OK>. This code is used just once and you do not need to memorise it.When the owner of the other device enters the same code, pairing is complete.Waiting for pairing with a Bluetooth device1. Press <Add New> and select Wait for request.2. Select a visibility options, Always Visible or Visible for 3min.3. Enter a Bluetooth PIN and press [MENU OK].4. Scroll to the device and press <Add to list>.When the owner of the other device enters the same code, pairing is complete.Using device optionsFrom the device list, press <Option> to access the following options:•Add New: search for a device.•Info: access the selected device information.Settings (Menu 6.2)Use this menu to change the Bluetooth settings.•Enable: activate or deactivate the Bluetooth feature.•Visibility: allow other Bluetooth devices to locate your phone, or not.•Device Name: assign another Bluetooth device name to your phone name.Some devices, especially headsets or hands-free car kits, may have a fixed Bluetooth PIN, such as 0000. If the other device has a code, you must enter it.](https://usermanual.wiki/Samsung-Electronics-Co/SCHW531/User-Guide-721425-Page-43.png)
![Menu functions My Content (Menu 7)41•Device Info: access your phone information for using Bluetooth services.My Content (Menu 7)The My Content menu allows you to access Games, ringtones, screensavers, and various applications stored in your phone’s memory.To access this menu, press [MENU OK] in Idle mode and select My Content.GamesUse this menu to access and download Games.Accessing a gameSelect a game from the game list and follow the onscreen instructions. The procedure may differ from game to game.Using Games optionsFrom the application list, press <Options> to access the following options:•Run: launch the selected application.•Erase: delete the selected application.•Erase All: delete all applications.•Settings: set permission settings for services charging you additional costs, such as network access and GPS service.•Properties: access the application properties.Downloading Games1. Select Get New Games. You are connected to the website preset by your service provider.2. Search for the application you want and follow the onscreen instructions to download it.](https://usermanual.wiki/Samsung-Electronics-Co/SCHW531/User-Guide-721425-Page-44.png)
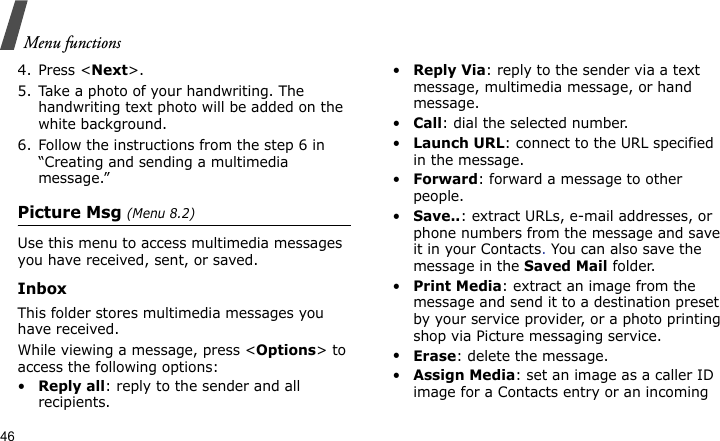
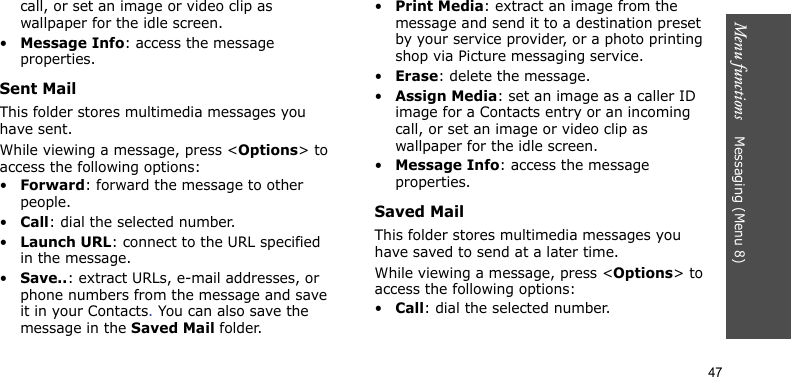
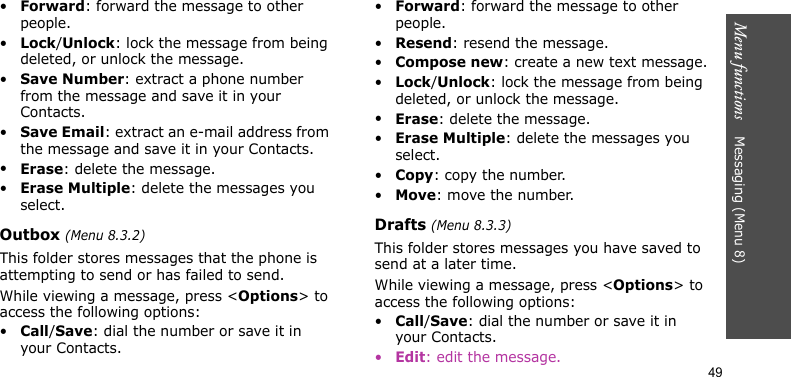
![Menu functions Messaging (Menu 8)43Applications Use this menu to access various applications you have downloaded from the wireless web. Using Java application optionsFrom the application list, press <Options> to access the following options:•Run: launch the selected application.•Erase: delete the selected application.•Erase All: delete all applications.•Settings: set permission settings for services charging you additional costs, such as network access and GPS service.•Properties: access the application properties.Downloading various applications1. Select Get New Applications. You are connected to the website preset by your service provider.2. Search for the application you want and follow the onscreen instructions to download it.Caller Tunes Use this menu to connect to the website preset by your service provider, and access ringtones to use on your phone for ringback tone service.Messaging (Menu 8)Use the Messaging menu to send and receive text messages, multimedia messages, and hand written messages.To access this menu, press [MENU OK] in Idle mode and select Messaging.Send Message (Menu 8.1)Use this menu to create and send messages.](https://usermanual.wiki/Samsung-Electronics-Co/SCHW531/User-Guide-721425-Page-46.png)

![Menu functions52•Call Back #: set the callback number to be added to outgoing text messages.GSM Settings (Menu 8.7.3)You can customise the settings for your outgoing messages in a GSM network:•Service centre: set the number of your message centre.•Validity period: set the length of time your messages are stored in the SMS server.•Message type: set the default message type. The network can convert the messages into the selected format.•Reply path: allow the recipient to reply to you through your message centre.•Delivery report: set the network to inform you when your message has been delivered.•Voice mail centre: set the number of your voicemail centre. Please contact your service provider for further details.SOS message (Menu 8.8)In an emergency, you can send SOS messages to your family or friends for help. Use this menu to specify options for sending SOS messages.Activating the SOS message feature1. Select SOS On/Off → On to activate the SOS message feature.2. Specify the phone numbers to which you want to send SOS messages and press <Save>.3. Press <Yes> to send a message to the saved phone numbers.Sending an SOS messageWhen your phone is closed, press [ / ] 4 times. The phone switches to Emergency mode and sends the preset SOS message. To exit Emergency mode, press [END].](https://usermanual.wiki/Samsung-Electronics-Co/SCHW531/User-Guide-721425-Page-55.png)
![Menu functions Tools (Menu 9)53Changing the SOS message ringer• To change the alert type for incoming SOS messages, access Set SOS Alarm and select the option you want.Tools (Menu 9)Use this menu to access Bluetooth services, keep track of your schedule, create tasks, make memos, or set alarms. You can also use your phone as a countdown timer, world clock, and calculator.To access this menu, press [MENU OK] in Idle mode and select Tools.Planner (Menu 9.1)Use this menu to keep track of your schedule, make your task list. You can also use your phone as a countdown timer.Today (Menu 9.1.1)Use this menu to access Planner items stored for the current day.Press [Left] or [Right] to display your schedule item list, task list, or countdown timers.For further details about storing items, see the Schedule, Task, or Count menu.Scheduler (Menu 9.1.2)Use this menu to manage your monthly, weekly, or daily schedule. When you enter the Scheduler menu, the calendar in Month view appears with today’s date indicated by a blue box. Selecting a day• Press [Left] or [Right] to move by day.• Press [Up] or [Down] to move by week.• Press [ / ] to move by month.](https://usermanual.wiki/Samsung-Electronics-Co/SCHW531/User-Guide-721425-Page-56.png)
![Menu functions54Using calendar optionsPress <Options> to access the following options:•Add new: add a new Planner item.•View type: change the view mode of the calendar.•Jump to date: enter the specific date you want to access.•Assign: set the current calendar to be displayed in Idle mode.•Erase All: delete all items on the calendar.Creating an item1. Select a date on the calendar.2. Select Add new.3. Enter the item information and press <Done>.4. Press [Left] or [Right] to select the item type and press [Down].5. Press [Left] or [Right] to set how long before the item the alarm is to alert you and press [Down].6. Press [Left] or [Right] to select a repeat option and press [Down].7. Select the Melody line and select an alarm tone and press [Down].8. Enter the starting date and time for the item and press [Down].9. Enter the ending date and time for the item and press [Down].10.Select a phone number to be displayed when the alarm alerts you to the item.11.Press <Done> to save the item.](https://usermanual.wiki/Samsung-Electronics-Co/SCHW531/User-Guide-721425-Page-57.png)
![Menu functions Tools (Menu 9)55Viewing an itemOnce you have scheduled items, the following icons and the number of items for a specific day appear at the bottom of the calendar.1. Select a date on the calendar to display the items for the day.2. Select an item to view its details.Using item optionsWhile viewing an item, press <Options> to access the following options:•Add new: add a new item.•Erase: delete the selected item.While viewing the item list, press <Options> to access the following options:•Jump to date: enter the specific date you want to access.•Assign: set the Planner items for the current day to be displayed in Idle mode.•Erase: delete the selected item.•Erase All: delete all items on the calendar.Task List (Menu 9.1.3)Use this menu to create a list of tasks that need to be done.Creating a new task1. Enter the task information. If there is any task already stored, press <Add New>.2. Press <Done>.3. Select a priority and press [Down].• Personal • Business• Anniversary • Event• Vacation](https://usermanual.wiki/Samsung-Electronics-Co/SCHW531/User-Guide-721425-Page-58.png)
![Menu functions564. Enter a due time and press [Down].5. Enter the due date.6. Press <Done> to save the task.Viewing a taskFrom the task list, select the task you want.Using task optionsWhile viewing a task, press <Options> to access the following options:•Add new: add a new item.•Erase: delete the selected item.While viewing the task list, press <Options> to access the following options:•Add new: add a new task.•Set state: change the task status.•Forward: set the task forward. •In Process: set the task in the process.•Completed: set the task completed.•Assign: set the task to be displayed in Idle mode.•Erase: erase the selected task.•Erase All: delete all of the completed tasks or all tasks from the list.Countdown (Menu 9.1.4)Use this menu to set a time and date for a future event and then check to see how many days, hours, and minutes remain before that event. You can also check how much time has passed since an event has passed.Creating a countdown timer1. Enter the details for the countdown timer. If there is already an existing timer, press <Add New>.2. Enter text and Press <Done>.](https://usermanual.wiki/Samsung-Electronics-Co/SCHW531/User-Guide-721425-Page-59.png)
![Menu functions Tools (Menu 9)573. Enter the time to/from which you want to count down. 4. Press [Down].5. Enter the date to/from which you want to count down.6. Press <Done> to save the timer.Using timer optionsWhile viewing timer details, press <Options> to access the following options:•Add new: add a new timer.•Erase: delete the selected timer.While viewing the timer list, press <Options> to access the following options:•Assign: set the timer to be displayed in Idle mode.•Erase: delete the selected timer.•Erase All: delete all timers.Memo Pad (Menu 9.2)Use this menu to make memos of important things you need to remember.Creating a new memo1. Enter a memo. If there is any memo already stored, press <Add New>.2. Press [MENU OK] to save the memo.Viewing a memoFrom the memo list, select a memo.Using memo optionsWhile viewing a memo, press <Options> to access the following options: •Skin: change the background image for the memo text. Press [Left] or [Right] to select an image and press <Assign>.•Add new: add a new memo.](https://usermanual.wiki/Samsung-Electronics-Co/SCHW531/User-Guide-721425-Page-60.png)
![Menu functions58•Erase: delete the selected memo.While viewing the memo list, press <Options> to access the following options:•Erase: delete the selected memo.•Erase All: delete all memos.World Time (Menu 9.3)Use this menu to find out what time it is in another part of the world.Viewing a world timeFrom the world map, press [Left] or [Right] to scroll to the city you want. As the time line moves, the time and date of the given zone display.Applying daylight savings timeFrom the world map, press <DST> and select On. Alarm (Menu 9.4)Use this menu to set alarms to sound at specific times.Setting an alarm1. Select an alarm.2. Set each alarm option:•Alarms: activate the alarm.•Time: enter the time for the alarm to ring. •Alarm: select an alarm tone.•Repeat: select a repeat option.•Snooze: select the snooze interval.3. Press <Done>.Stopping an alarm•Press any key.•Press <Snooze> to stop the alarm and cause it to sound again after the length of time specified in Snooze has elapsed. You can do this a maximum of 5 times.](https://usermanual.wiki/Samsung-Electronics-Co/SCHW531/User-Guide-721425-Page-61.png)
![Menu functions Tools (Menu 9)59Deactivating an alarm1. Select the alarm you want to deactivate.2. Select Off on the Alarms line.3. Press <Done>.Calculator (Menu 9.5)Use this menu to perform basic arithmetic functions, such as addition, subtraction, multiplication, and division.1. Enter the first number. • Press [ ] or the left soft key to insert a decimal point.•Press [] to change the number to a negative sign (-) or positive sign (+).2. Press one of the Navigation keys to access the math function you want.3. Enter the second number.4. Press [MENU OK] to view the result.5. If necessary, repeat from step 2 to continue the calculation.User Memory (Menu 9.6)Use this menu to connect your phone to a PC and copy media files from/to a PC, as you would use an external memory disk.Connect PC (Menu 9.6.1)Use this menu to connect your phone to a PC.1. Connect a PC data cable to the jack at the bottom of the phone and the USB port of the PC.2. Access the Connect to PC menu.3. Enter the phone password and press <OK>.When you use the phone for the first time, or reset it, you need to set up a 4- to 8-digit password.](https://usermanual.wiki/Samsung-Electronics-Co/SCHW531/User-Guide-721425-Page-62.png)
![Menu functions Pictures (Menu *)63Set Time (Menu 9.7)You can set the current time and date.Enter the time in 24-hour format and the date in the order of day, month, and year.While in a service area, you are not allowed to change the time and date setting since the phone receives time information from the network. If your phone do not receive time information from the network when you turn it on, you can use this menu.Pictures (Menu *)You can use the camera module embedded in your phone to take photos and record videos.To access this menu, press [MENU OK] in Idle mode and select Pictures, or press [].Take photo (Menu *.1)Use this menu to take a photo in various modes or record a video. The camera produces JPEG photos and MP4 video clips.• Do not take photos of people without their permission.• Do not take photos in a place where cameras are not allowed.• Do not take photos in a place where you may interfere with another person’s privacy.When you take a photo in direct sunlight or in bright conditions, shadows may appear on the photo.](https://usermanual.wiki/Samsung-Electronics-Co/SCHW531/User-Guide-721425-Page-66.png)
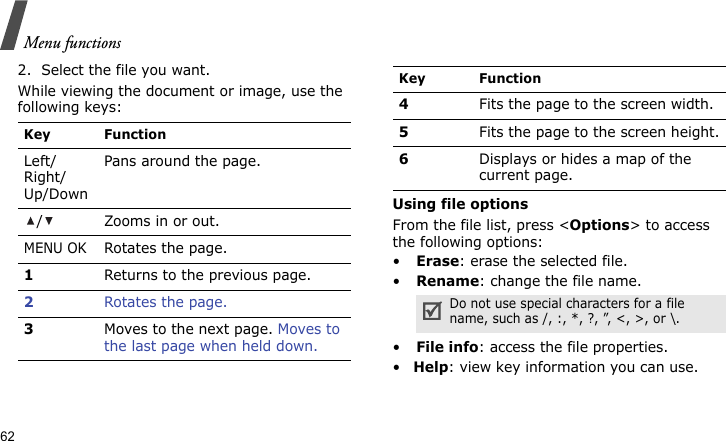
![Menu functions64Taking a photo1. Access the Take photo menu or press and hold [] in Idle mode.2. When you use the camera for the first time, press [2] to change the preview screen.3. Press [1] to select the camera mode until the mode icon you want appears:• Single ( ): take a photo.• Serial ( ): take a serial of action stills.• Divided ( ): take several stills and save them in one frame. • Video ( ): record a video clip.p. 66• Mail ( ): take a photo for adding to an e-mail. After taking a photo, press <Send> to send the photo as part of an e-mail.p. 464. Make any desired adjustments.• Press the left soft key or <Options> to access camera options.p. 65• Use the keypad to change the camera settings or switch to other camera modes.p. 665. Press <Capture> or [] to take a photo.When you are taking serial shot images, the camera takes photos successively.6.To Pressrotate the image [MENU OK].view one of the series shot photos<Expand>.save the photo <Save>. The photo is saved in the My Album folder.return to Capture mode<Cancel> or [BACK].](https://usermanual.wiki/Samsung-Electronics-Co/SCHW531/User-Guide-721425-Page-67.png)
![Menu functions Pictures (Menu *)65Reviewing a photo immediately after savingAfter saving a photo, you can view the photo in Quick view mode by pressing [0] in Capture mode. The captured image displays on the screen.• To access the file properties, press <Options> and select Info.• To delete the file, press <Options> and select Delete.• To return to Capture mode, press [0] or [BACK].Using camera options in Capture modeIn Capture mode, press the left soft key or <Options> to access the following options:•Mode: use the following camera modes:Single shot: take a photo in normal mode.Series shot: take series of action stills. You can select the number of photos the camera will take.Divided shot: take several stills and save them in one frame. You can select the layout.Video cam: record a video clip.•Size/Quality: select an image size or image quality.•White balance: adjust the colour balance of the photo. You can make your photo appear warmer or cooler.•Self timer: set a time delay before the camera takes a photo.•Revision: apply a special effect or decorative frame.•Preview layout: select the default preview mode. When you select Actual ratio, the phone shows the image in actual ratio.•Quick view: switch to Quick view mode.](https://usermanual.wiki/Samsung-Electronics-Co/SCHW531/User-Guide-721425-Page-68.png)
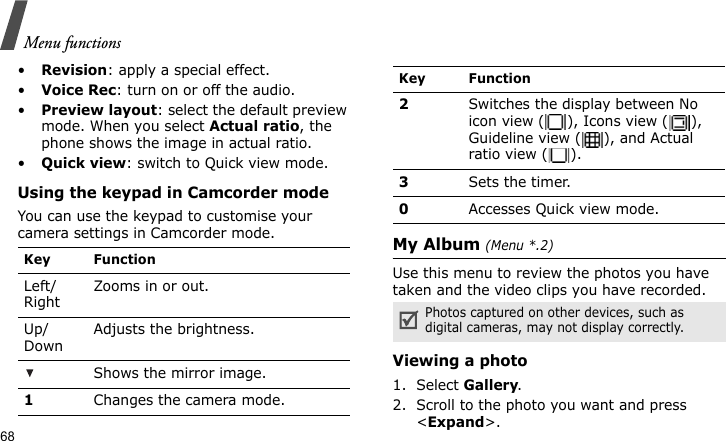
![Menu functions66Using the keypad in Capture modeYou can use the keypad to customise your camera settings in Capture mode.Recording a video1. In Capture mode, press [1] to select the icon.2. Make any desired adjustments.• Press the left soft key or <Options> to access camera options.p. 67• Use the keypad to change the camera settings or switch to other camera modes.p. 683. Press < > to start recording.Press < > to pause recording and then press < > to resume.4. When you are finished, press < >.Key FunctionLeft/RightZooms in or out. (Not available for the maximum resolution)Up/DownAdjusts the brightness.Shows the mirror image.1Changes the camera mode.2Switches the display between No icon view ( ), Icons view ( ), Guideline view ( ), and Actual ratio view ( ).3Sets the timer.0Accesses Quick view mode.5.To Pressreview the video clip[MENU OK].](https://usermanual.wiki/Samsung-Electronics-Co/SCHW531/User-Guide-721425-Page-69.png)
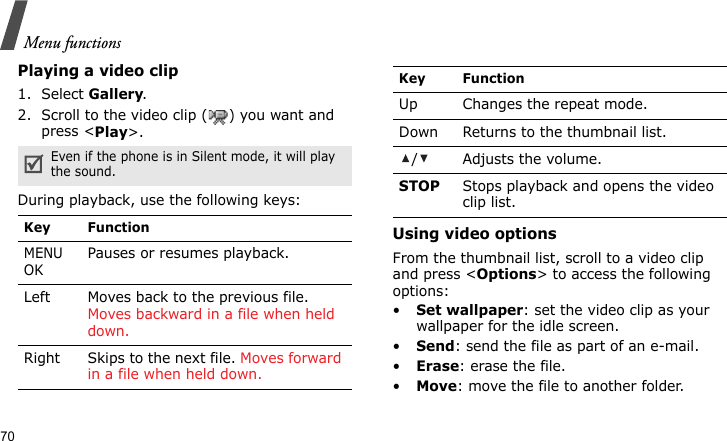
![Menu functions Pictures (Menu *)67Reviewing a video immediately after savingAfter saving a video clip, you can play the video clip in Quick view mode by pressing [0] in Camcorder mode. Pressing < > initiates playing of the video clip.• To access file properties, press <Options> and select Info.• To delete the file, press <Options> and select Delete.• To return to Camcorder mode, press [0] or [BACK].Using camera options in Camcorder modeIn Camcorder mode, press the left soft key or <Options> to access the following options:•Mode: use the following camera modes:Single shot: take a photo in normal mode.Series shot: take series of action stills. You can select the number of photos the camera will take.Divided shot: take several stills and save them in one frame. You can select the layout.Video cam: record a video clip.•Size/Quality: select a frame size or image quality.•White balance: adjust the colour balance of the video. You can make your video appear warmer or cooler.•Self timer: set a time delay before the camera records a video.save the video clip <Save>. The video is saved in the My Album folder.return to Camcorder mode<Cancel> or [BACK].5.To Press](https://usermanual.wiki/Samsung-Electronics-Co/SCHW531/User-Guide-721425-Page-70.png)
![Menu functions Pictures (Menu *)693. Press [Left] or [Right] to view other photos.4. Press <Multi> to return to the thumbnail list.Press <Enlarge> to view the photo on a full screen.Creating a new folder1. On the My album screen, press <Create>.2. Enter a name for the folder and press <Save>.Using photo optionsFrom the thumbnail list, scroll to a photo and press <Options> to access the following options:•Print: print the photo by connecting the phone to a printer via USB. Some printers may not be compatible with the phone.•Send: send the file as part of an e-mail.•Assign: set the image as your wallpaper for the idle screen, the opening or closing image, or the caller ID image for a Contacts entry.•Erase: erase the file.•Move: move the file to another folder.•Copy: copy the file to another folder.•Photo studio: access the Photo studio menu.p. 71•Rename: change the file name. •Lock/Unlock: lock the file so that other people cannot access it without your password, or unlock the file.•Grid(4)/Grid(9): view 4 photos or 9 photos on each screen.•Sort: change the sort order of the file list.•File Info: access the file properties.Do not use special characters for a file name, such as /, :, *, ?, ”, <, >, or \.](https://usermanual.wiki/Samsung-Electronics-Co/SCHW531/User-Guide-721425-Page-72.png)
![Menu functions Pictures (Menu *)71•Copy: copy the file to another folder.•Rename: change the file name.•Lock/Unlock: lock the file so that other people cannot access it without your password, or unlock the file.•Grid(4)/Grid(9): view 4 photos or 9 photos on each screen.•Sort: change the sort order of the file list. •File Info: access the file properties.Picture Msg (Menu *.3)Use this menu to access multimedia messages you have received, sent, or saved.p. 46Photo Studio (Menu *.4)Photo studio is a great tool for managing photos. Use this menu to edit photos by applying special effects or adding comments.Wizard Effect (Menu *.4.1)You can apply a special effect to a photo.1. Select a photo.2. Press [Left] or [Right] to select an effect.You can compare the photo with the original one by pressing <Compare>.3. Press <Save>.4. Enter a name for the photo and press <Save>.Do not use special characters for a file name, such as /, :, *, ?, ”, <, >, or \.](https://usermanual.wiki/Samsung-Electronics-Co/SCHW531/User-Guide-721425-Page-74.png)
![Menu functions72Basic Effect (Menu *.4.2)You can change the colour tone of a photo.1. Select a photo.2. Press [Left] or [Right] to select a colour tone.You can compare the photo with the original one by pressing <Compare>.3. Press <Save>.4. Enter a name for the photo and press <Save>.Decoration (Menu *.4.3)You can add a decorative frame, clip, or photo cut-out to a photo. You can also add text to the photo.1. Select a photo.2. Press <Options> to access one of the following editing options:•Fun frame: select a decorative frame using [Left] or [Right].•Clip: select an image. You can move it to the position you want by pressing the Navigation keys.•Photo sticker: select a photo cut-out.Photo sticker•Text: enter text. After entering text, you can change the font size and colour, and the brightness of the font colour. You can move text to the position you want by pressing the Navigation keys.3. After adding decorations, press <Save>.4. Enter a name for the photo and press <Save>.](https://usermanual.wiki/Samsung-Electronics-Co/SCHW531/User-Guide-721425-Page-75.png)
![Menu functions Pictures (Menu *)73Photo Sticker (Menu *.4.4)You can make a photo cut-out using a photo.1. Select a photo.2. Scroll to a photo cut-out type using [Left] or [Right] and press <Select>.3. Press [Left] or [Right] to adjust the photo cut-out size and press <Next>.4. Move the photo cut-out to the position you want using the Navigation keys and press <Save>.The part of the photo is saved as a photo cut-out.Video Capture (Menu *.4.5)You can save a single video clip frame as a photo.1. Select a video clip.2. When the part of the video clip you want to capture appears, press <Capture>.The video clip frame displays.3. Press <Save>.4. Enter a name for the video clip frame and press <Save>.Composition (Menu *.4.6)You can make a new image by combining two photos.1. When the Main field highlights, press <Import>.2. Select a photo.The photo is inserted into the Main field.3. When the BG field highlights, press <Import>.4. Select a photo.](https://usermanual.wiki/Samsung-Electronics-Co/SCHW531/User-Guide-721425-Page-76.png)
![Menu functions745. Press <Next>.6. Press [Left] or [Right] to adjust the image brightness and press <Save>.7. Enter a name for the photo and press <Save>.Revision (Menu *.4.7)You can change the image properties of a photo, such as the sharpness, brightness, saturation, or blur.1. Select a photo.2. Press <Options> to access the following options:•Sharpness: adjust the image sharpness. •Brightness: adjust the image brightness.•Saturation: adjust the degree of the grey of the image colour. •Blur: adjust the clarity of the image.3. After changing the properties, press <OK>.You can compare the photo with the original one by pressing <Compare>.4. Press <Save>.5. Enter a name for the photo and press <Save>.Resize (Menu *.4.8)You can change the size of a photo. To resize, the original photo must be at least 320*240.1. Select a photo.2. Press <Change> and select the size you want.3. Press <Save>.4. Enter a name of the photo and press <Save>.](https://usermanual.wiki/Samsung-Electronics-Co/SCHW531/User-Guide-721425-Page-77.png)
![Menu functions Pictures (Menu *)75Flip (Menu *.4.9)You can change the orientation of a photo.1. Select a photo.2. Select a direction icon by pressing [Left] or [Right].3. Select an orientation for the photo using [Up] or [Down].4. Press <Save>.5. Enter a name for the photo and press <Save>.Text Composition (Menu *.4.0)You can extract text from a photo and add it to another photo.1. When the Main field highlights, press <Import>.2. Select a photo.The photo is inserted into the Main field.3. When the Char field highlights, press <Import>.4. Select a photo.5. Press <Next>. 6. Press <Save>.7. Enter a name for the photo and press <Save>.Settings (Menu *.5)Use this menu to change the default camera settings.•Photo Sound: select a sound to indicate a shutter release sound and a self timer sound.It may not be possible to extract text from a non-mono colour background photo.](https://usermanual.wiki/Samsung-Electronics-Co/SCHW531/User-Guide-721425-Page-78.png)
![Menu functions76•Interruption: set whether to accept calls, messages, or alarm alerts while in Capture mode or Camcorder mode.•Reset: restore the default settings for the camera.•Auto Saving: turn the auto saving feature on or off.•Album Lock: lock the photos so that no one can view your photos and video clips without your permission.Contacts (Menu 0)You can store phone numbers with associated names in your phone’s memory called Contacts to make it easy for you to make a call without having to remember the phone number.To access this menu, press [MENU OK] in Idle mode and select Contacts.Find (Menu 0.1)Use this menu to search for numbers in Contacts.Finding an entry1. Enter the first few letters of the name that you want to find.2. Select the name from the list.3. Scroll to a number and press [TALK] to dial.Using Contacts optionsWhile viewing contact details, press <Options> to access the following options: •Mail: send an e-mail to the selected number.•E-mail: send an e-mail to the selected e-mail address.](https://usermanual.wiki/Samsung-Electronics-Co/SCHW531/User-Guide-721425-Page-79.png)
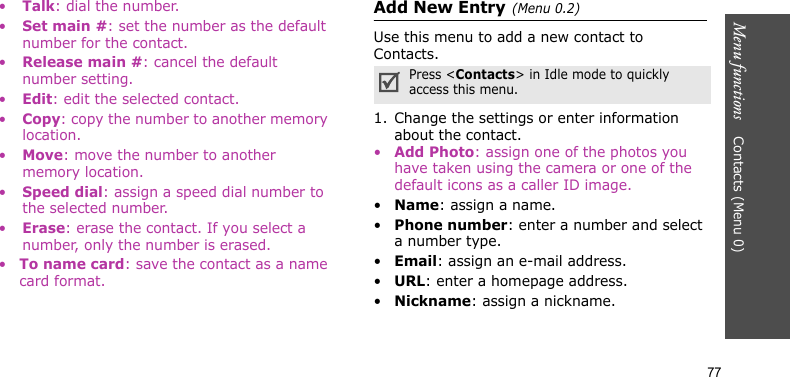
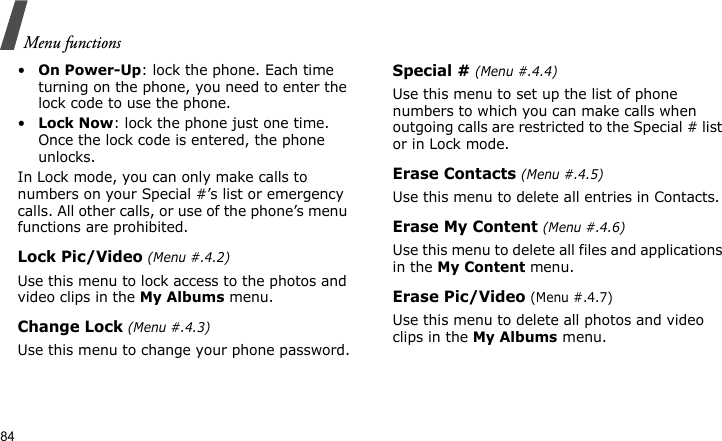
![Menu functions78•Memo: add a memo about the person.•Group: assign the contact to a caller group.•Ring: assign a ringtone to alert you to a call from the person.•Photo: assign an image to alert you to a call from the person.2. Press <Done> to save the contact.My Phone # (Menu 0.3)Use this menu to check your phone number.Speed Dial #s (Menu 0.4)Once you have stored phone numbers in Contacts, you can set up to 99 speed-dial entries and then dial them easily by pressing the associated one or two number keys.Assigning speed dial numbers1. Enter a key location number you want or select an empty location from the list. Key 1 is reserved for your voicemail server.2. Press <Assign>.3. Enter the first few letters of the name you want.4. Scroll to an entry.5. Press [Left] or [Right] to select a number, if the contact has more than one number.6. Press <OK>.Managing speed dial entriesFrom the Speed dial list, scroll to an entry and press <Options> to access the following options:•Erase: clear the selected speed dial setting for a key.](https://usermanual.wiki/Samsung-Electronics-Co/SCHW531/User-Guide-721425-Page-81.png)
![Menu functions Contacts (Menu 0)79•Erase All: clear all speed dial settings.Dialling speed dial entries• For 1-digit locations, press and hold the corresponding number key in Idle mode.• For other locations, press the first number key and press and hold the last number key in Idle mode.Group (Menu 0.5)Use this menu to organise your contacts in caller groups.Adding members to a caller group1. Select a group.2. Press <Options> and select Add new.3. Scroll to the contact you want and press [MENU OK] and then <Done>.Managing caller groupsWhile viewing the group list, press <Menu> to access the following options:•Rename group: change the group name.•Erase group: delete the selected group. Group members, however, will not be deleted from Contacts.•Set Ringer: assign a ringtone to alert you to a call from the group members.•Add member: add members to the selected group.](https://usermanual.wiki/Samsung-Electronics-Co/SCHW531/User-Guide-721425-Page-82.png)
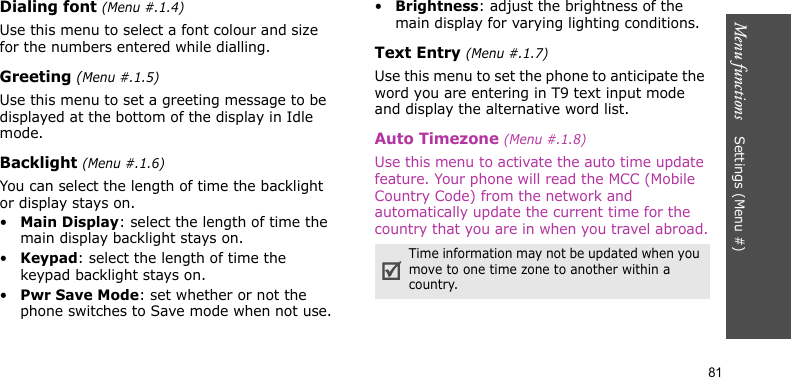
![Menu functions80Settings (Menu #)The Settings menu provides you with various setting options to customise the phone to your preferences and needs. You can also reset the settings to their default status.To access this menu, press [MENU OK] in Idle mode and select Settings.Display (Menu #.1)Use this menu to change settings for the display and backlight.Screen Saver (Menu #.1.1)You can set up the idle screen on both displays.•Main LCD: select an image or video clip to be displayed on the main display.•Sub LCD: select an image to be displayed on the external display.Set Foreground (Menu #.1.2)Use this menu to set the phone to display a function screen in Idle mode.•Digital Clock: display the current date and time with a digital clock. You can change the item placement by pressing [Left] or [Right].•Calendar: display a calendar.•Others: display your schedule items for the current date or on the calendar, task list, none, countdown timer, or speed dial screen.Incoming Call (Menu #.1.3)Use this menu to select an image to be displayed on the screen when you have incoming calls. Using the selected image, you can distinguish calls from a person in your Contacts or from a person who is not saved in you Contacts.](https://usermanual.wiki/Samsung-Electronics-Co/SCHW531/User-Guide-721425-Page-83.png)

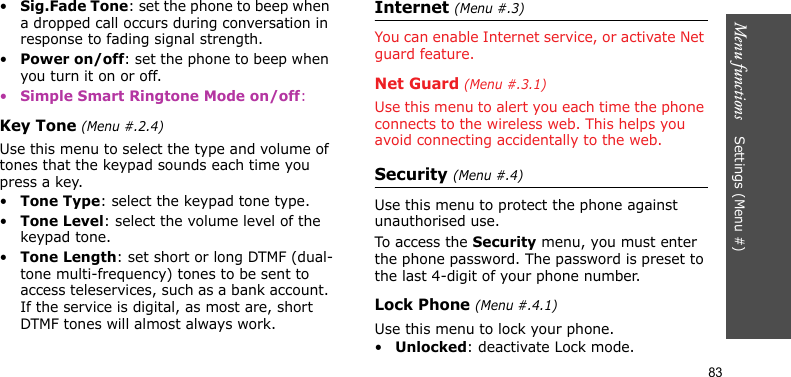

![Menu functions Settings (Menu #)87Key Guard (Menu #.7.3)You can prevent accidental key pressing by using Key Guard mode. To activate the Key Guard feature, select the period of time your phone waits for before locking the keypad.When you have an incoming call or the time for an alarm comes in Key Guard mode, the mode is automatically deactivated and the phone goes to Idle mode. It will be automatically activated after the specified amount of time when you end the call or stop the alarm.Once Key Guard mode is activated, you can temporarily unlock your keypad by pressing [ /] and pressing and holding [].Audio Routing (Menu #.7.4)Use this menu to change the sound output. If you select Headset Only, you need to plug the headset into your headset jack to make or receive calls.TTY Mode (Menu #.7.5)A TTY (also known as a TDD or Text Telephone) is a telecommunications device that allows people who are deaf, hearing impaired, or who have speech or language disabilities, to communicate by telephone.Your phone is compatible with TTY devices. Please check with the manufacturer of your TTY device to ensure that it supports digital wireless transmission. Your phone and TTY device will connect via a special cable that plugs into your phone's headset jack. If this cable was not provided with your TTY device, contact your TTY device manufacturer to purchase the connector cable.](https://usermanual.wiki/Samsung-Electronics-Co/SCHW531/User-Guide-721425-Page-90.png)
![Solve problems90• You are trying to access an option for which you have no subscription with your service provider. Contact the service provider for further details.You have entered a number but it was not dialled• Be sure that you have pressed [TALK].• Be sure that you have accessed the right cellular network.• Be sure that you have not set an outgoing call barring option.Your correspondent cannot reach you• Be sure that your phone is switched on. ([END] pressed for more than one second.)• Be sure that you have accessed the right cellular network.• Be sure that you have not set an incoming call barring option.Your correspondent cannot hear you speaking• Be sure that he microphone is switched on.• Be sure that you are holding the phone close enough to your mouth. The microphone is located at the bottom of the phone.The phone starts beeping and “Low battery” flashes on the display• Your battery is insufficiently charged. Recharge the battery.The audio quality of the call is poor• Check the signal strength indicator on the display ( ). The number of bars indicates the signal strength from strong ( ) to weak ( ).• Try moving the phone slightly or moving closer to a window if you are in a building.](https://usermanual.wiki/Samsung-Electronics-Co/SCHW531/User-Guide-721425-Page-93.png)


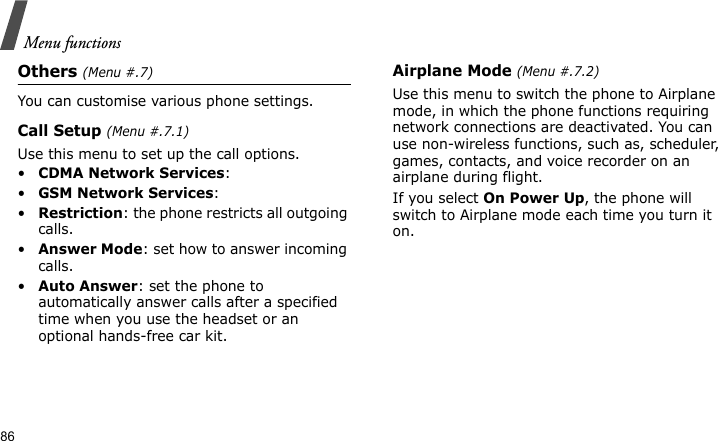
![Health and safety information108Emergency callsThis phone, like any wireless phone, operates using radio signals, wireless, and landline networks as well as user-programmed functions, which cannot guarantee connection in all conditions. Therefore, you should never rely solely on any wireless phone for essential communications like medical emergencies.To make or receive calls, the phone must be switched on and in a service area with adequate signal strength. Emergency calls may not be possible on all wireless phone networks or when certain network services and/or phone features are in use. Check with local service providers.To make an emergency call:1. Switch on the phone.2. Key in the emergency number for your present location. Emergency numbers vary by location.3. Press [TALK].If certain features are in use (call barring, for example), you may first need to deactivate those features before you can make an emergency call. Consult this document and your local cellular service provider.When making an emergency call, remember to give all the necessary information as accurately as possible. Remember that your phone may be the only means of communication at the scene of an accident; do not cut off the call until given permission to do so.Restricting Children’s access to your Phone Your phone is not a toy. Children should not be allowed to play with it because they could hurt themselves and others, damage the phone or make calls that increase your phone bill.](https://usermanual.wiki/Samsung-Electronics-Co/SCHW531/User-Guide-721425-Page-111.png)