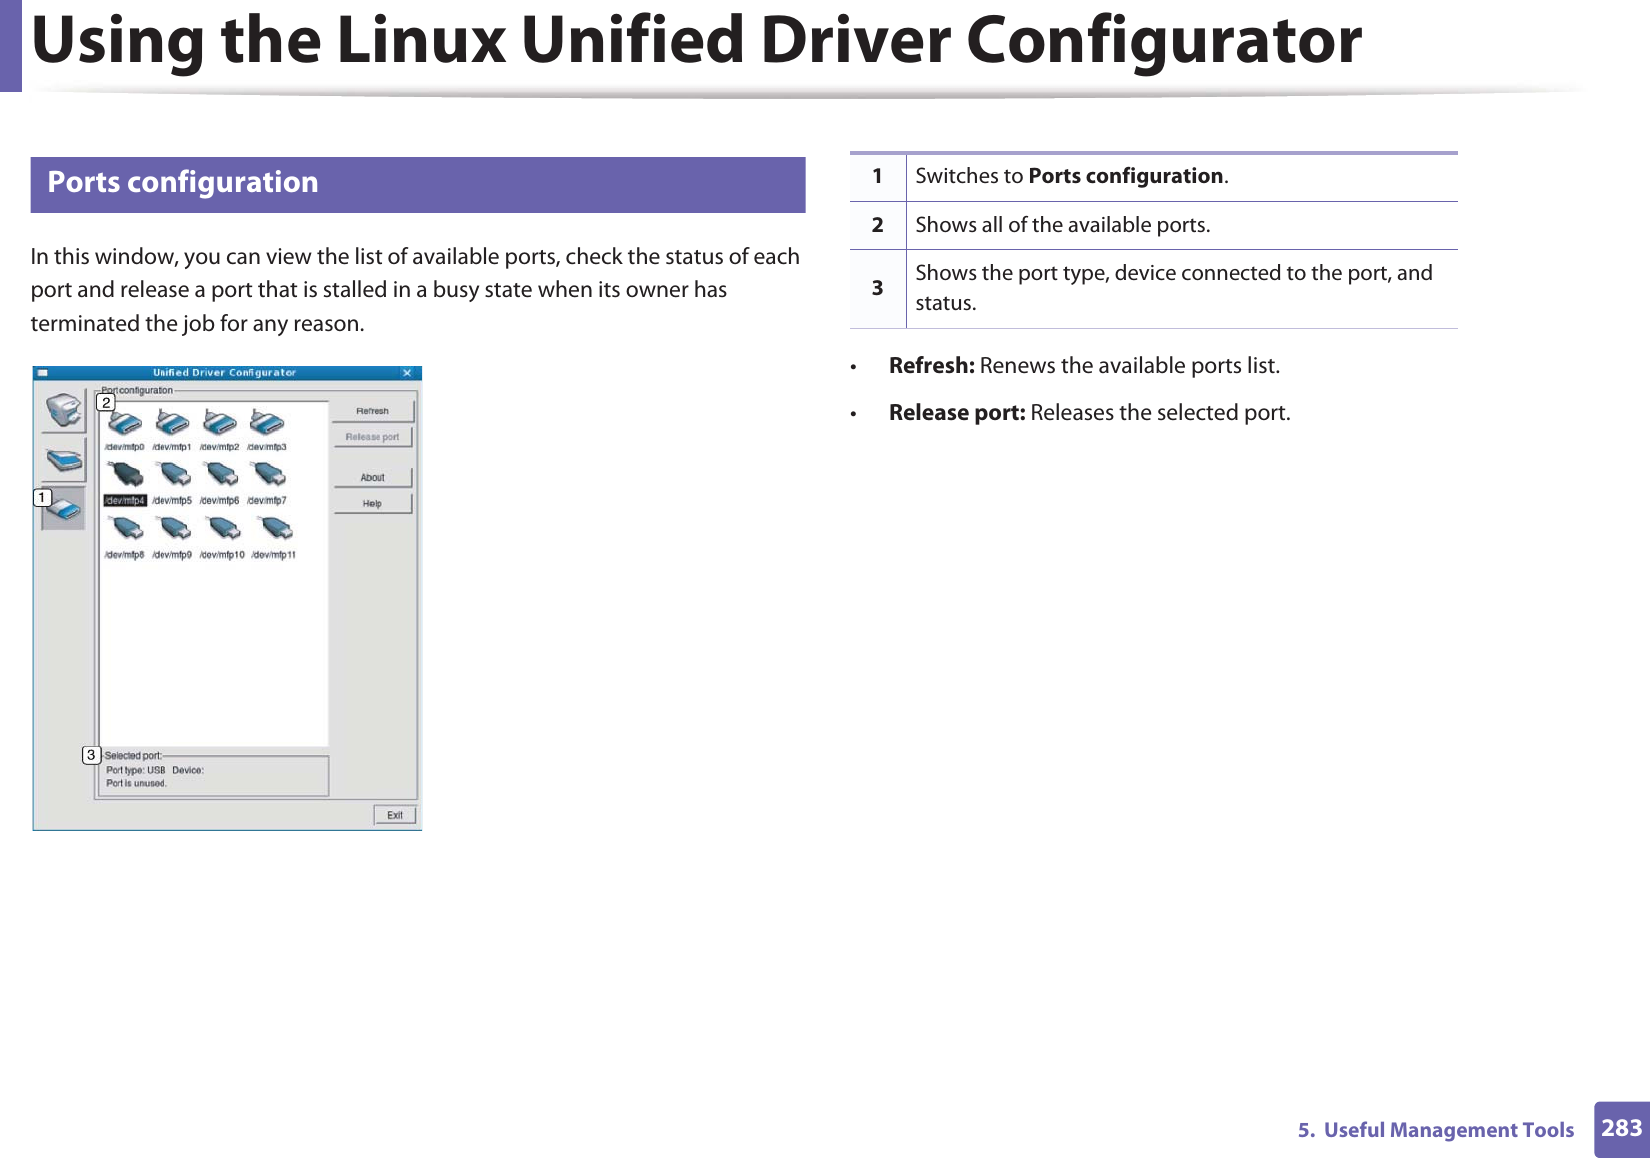
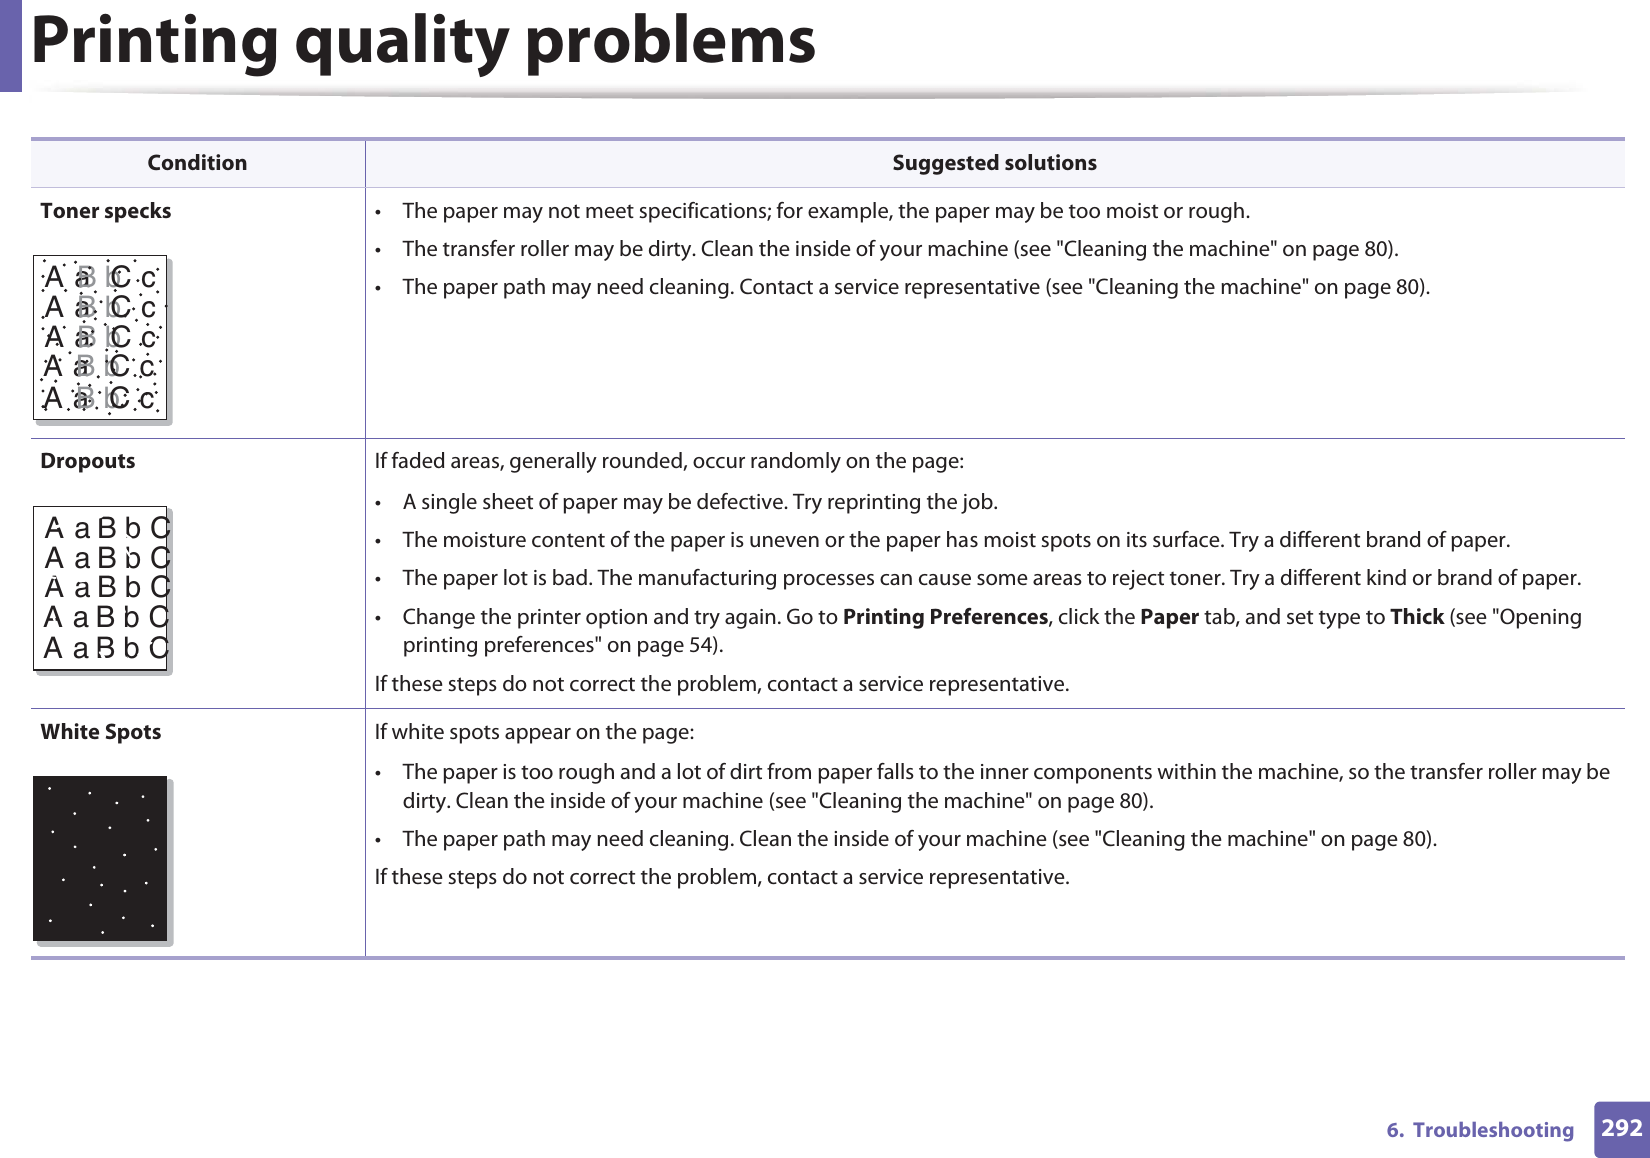
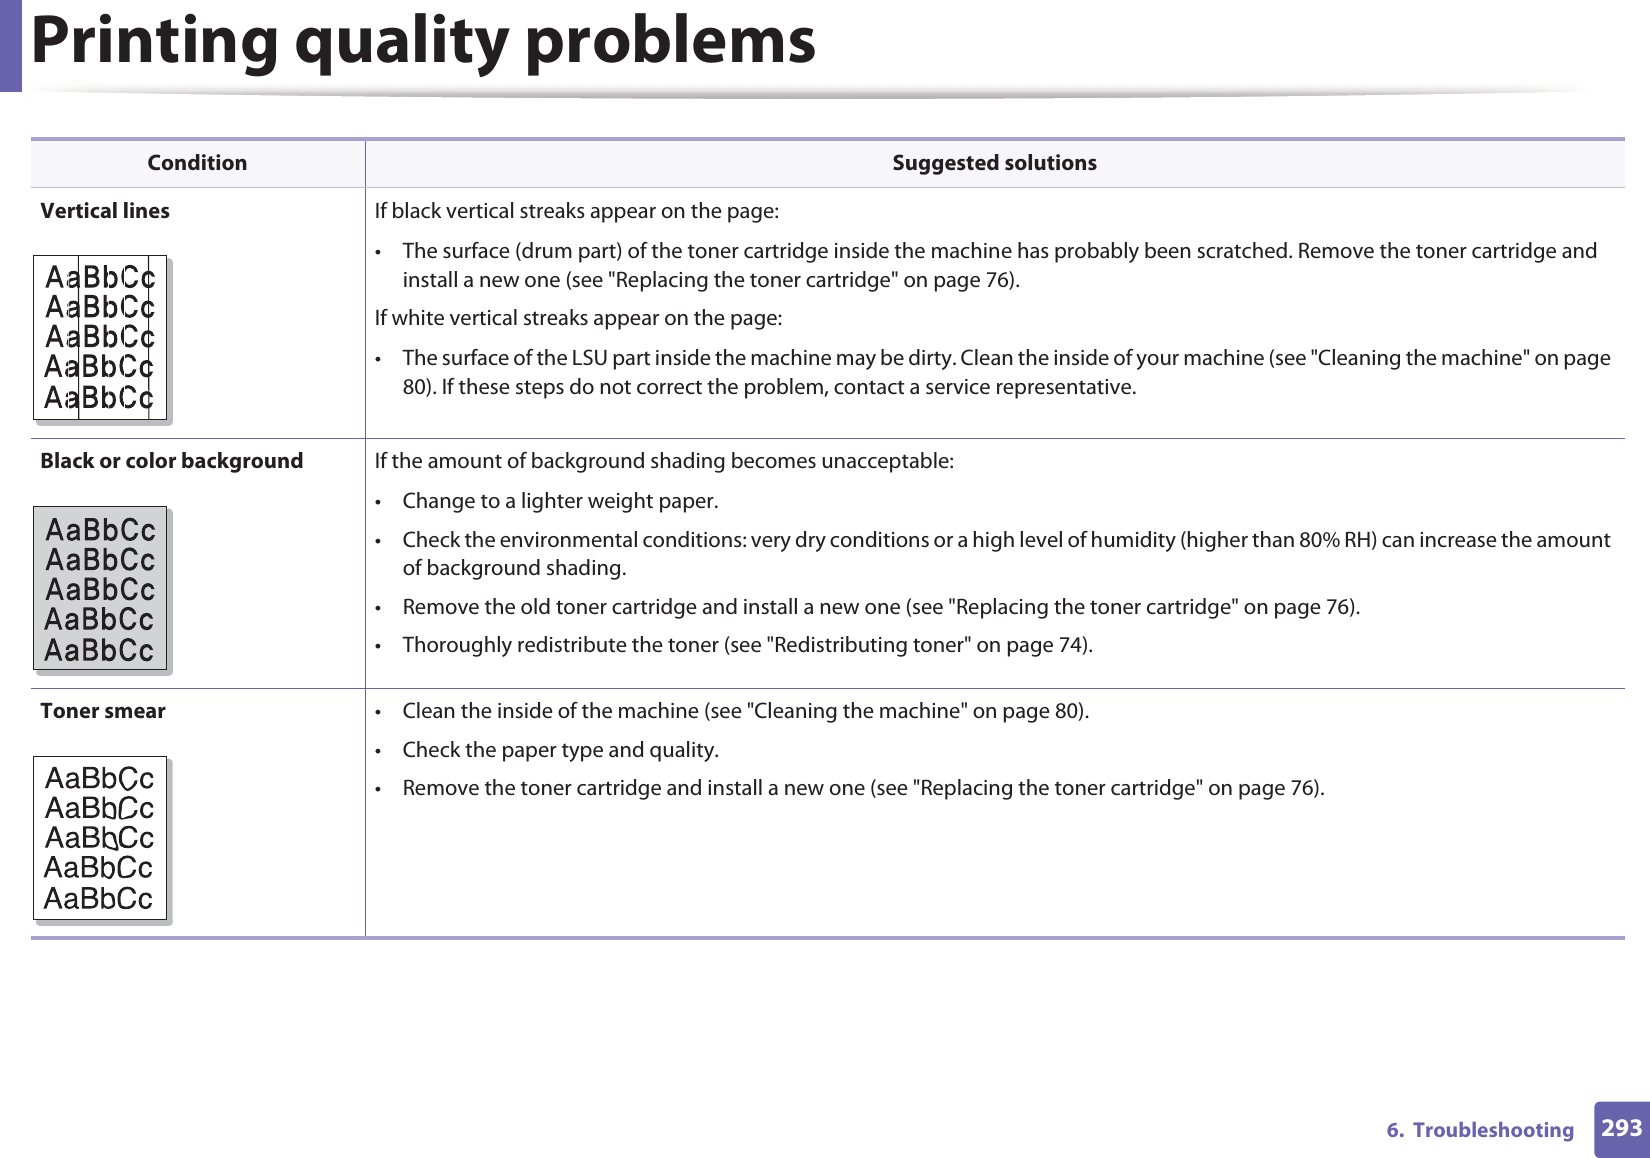
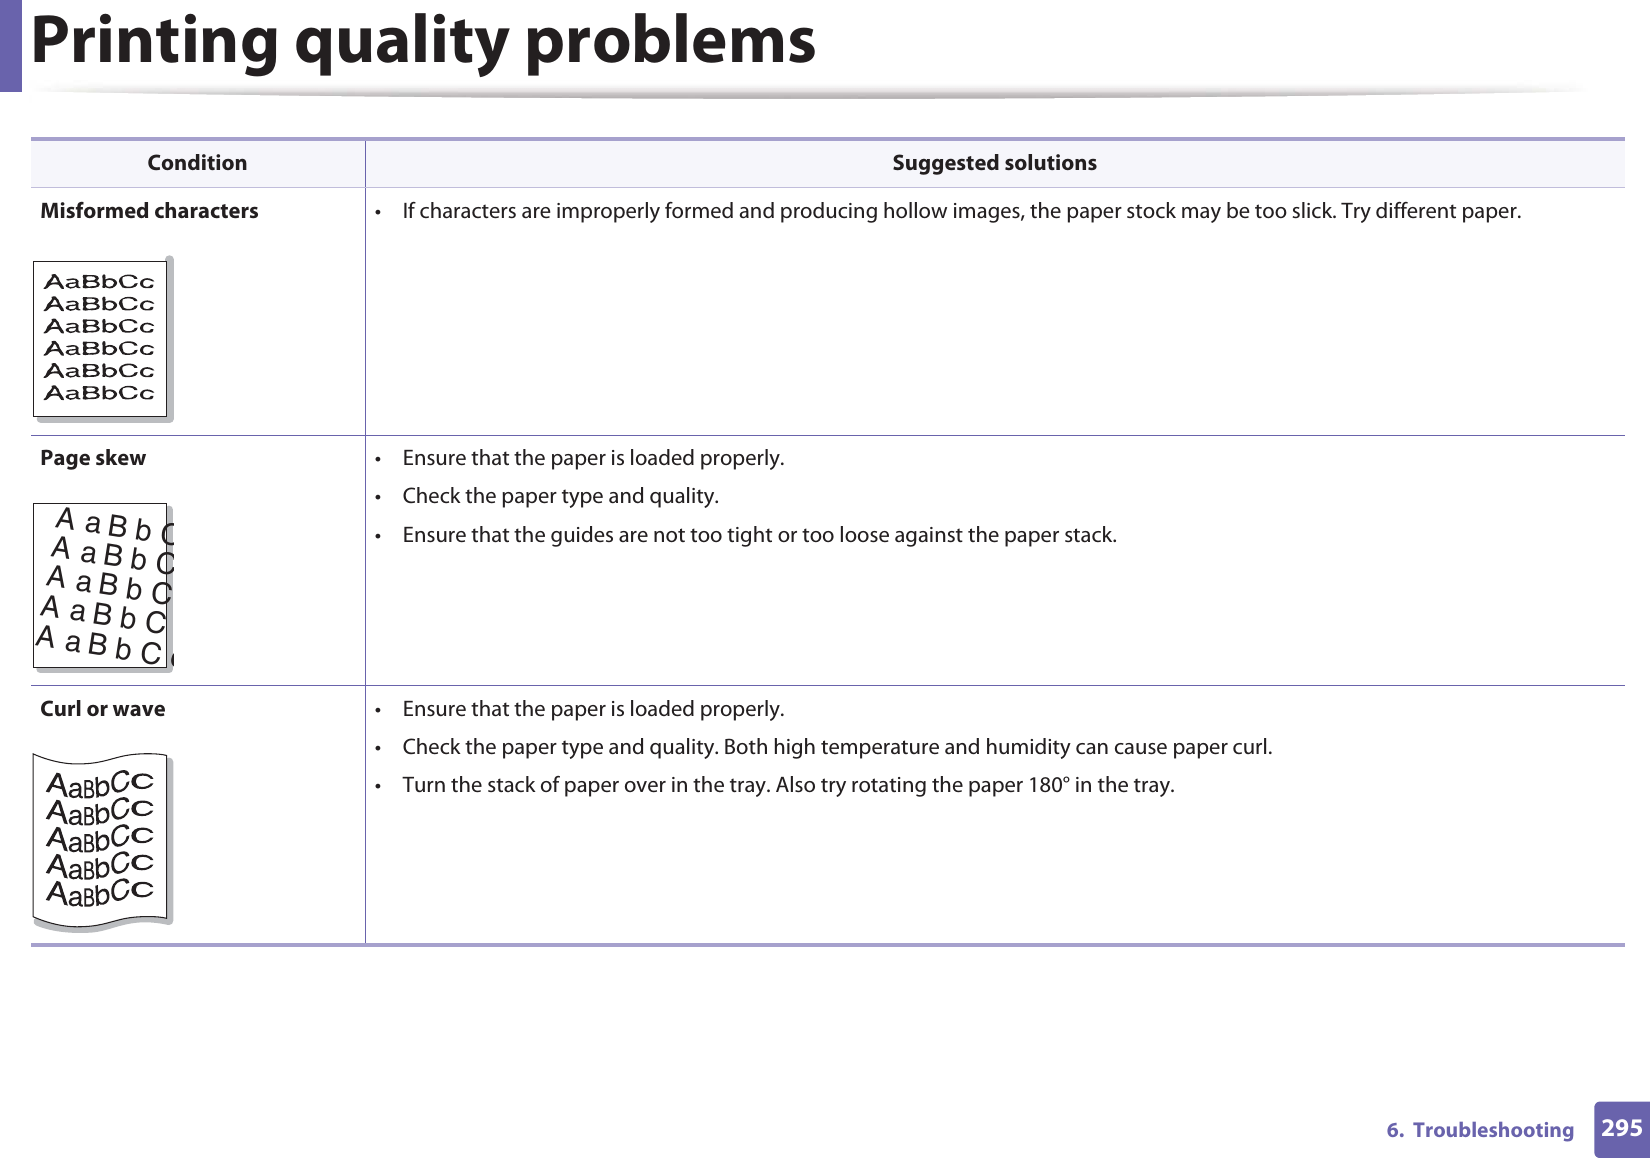
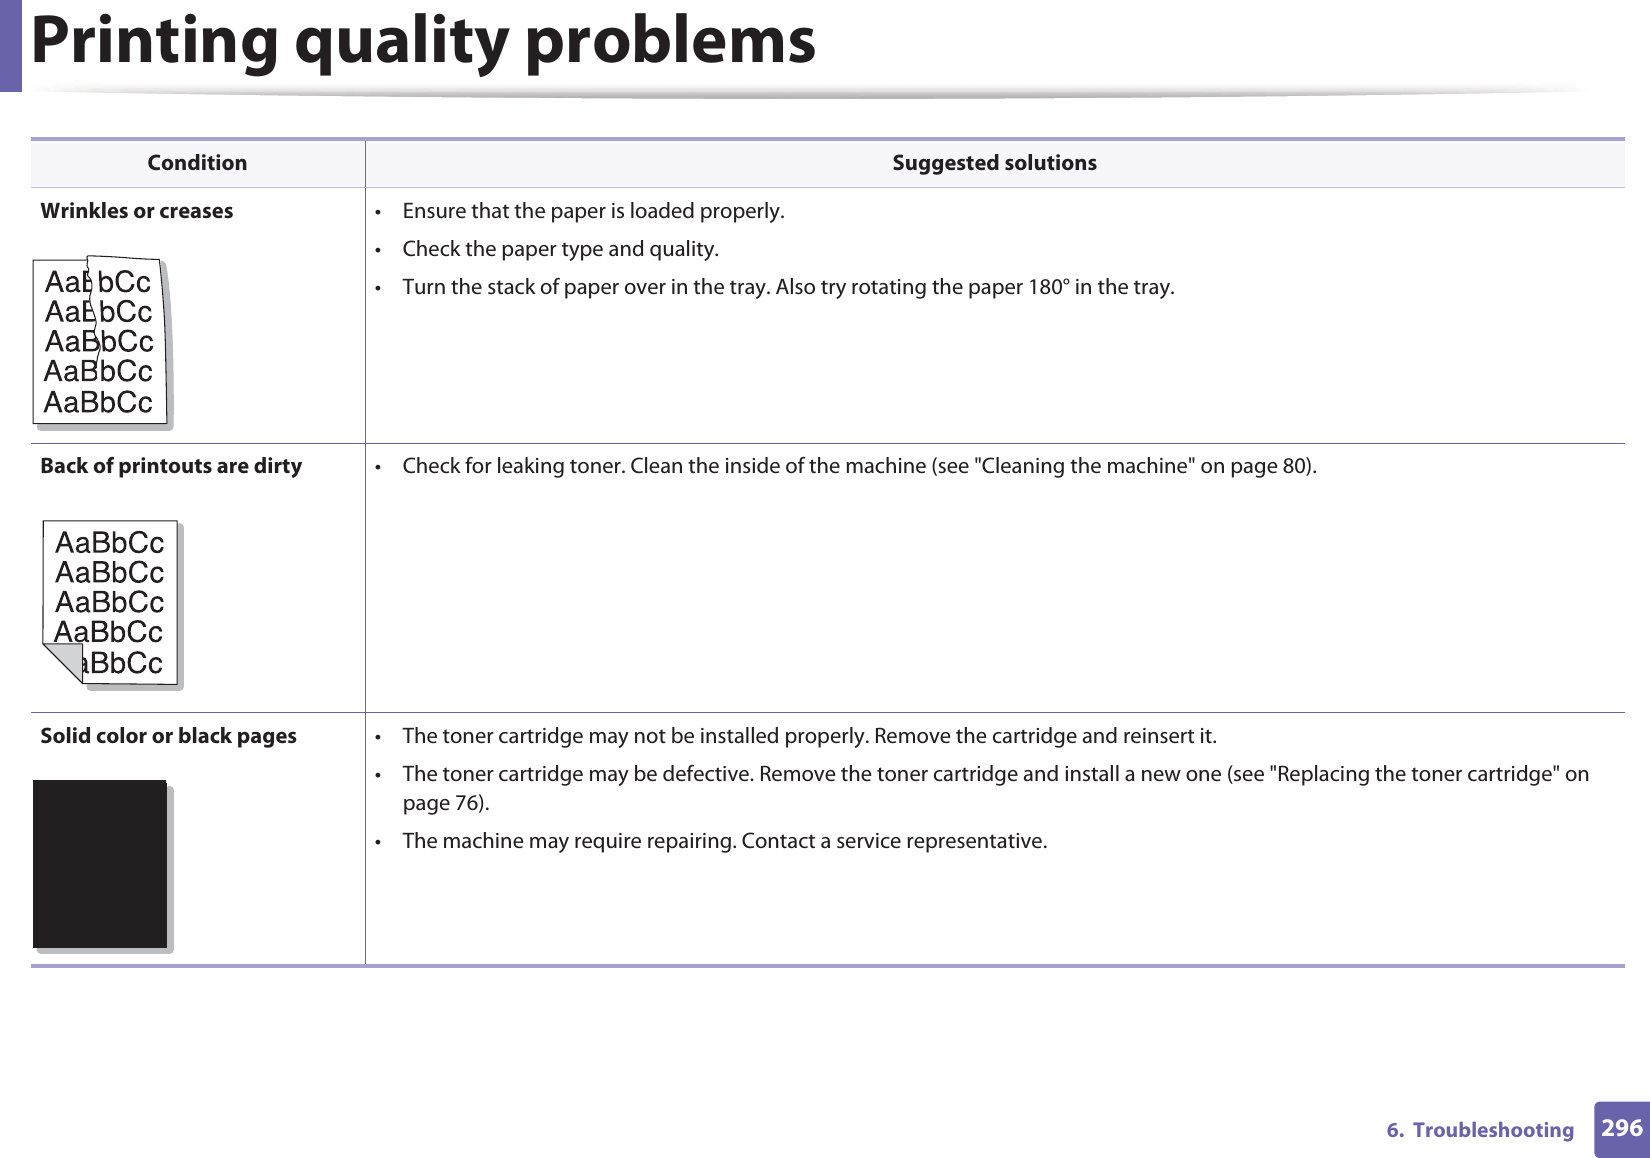
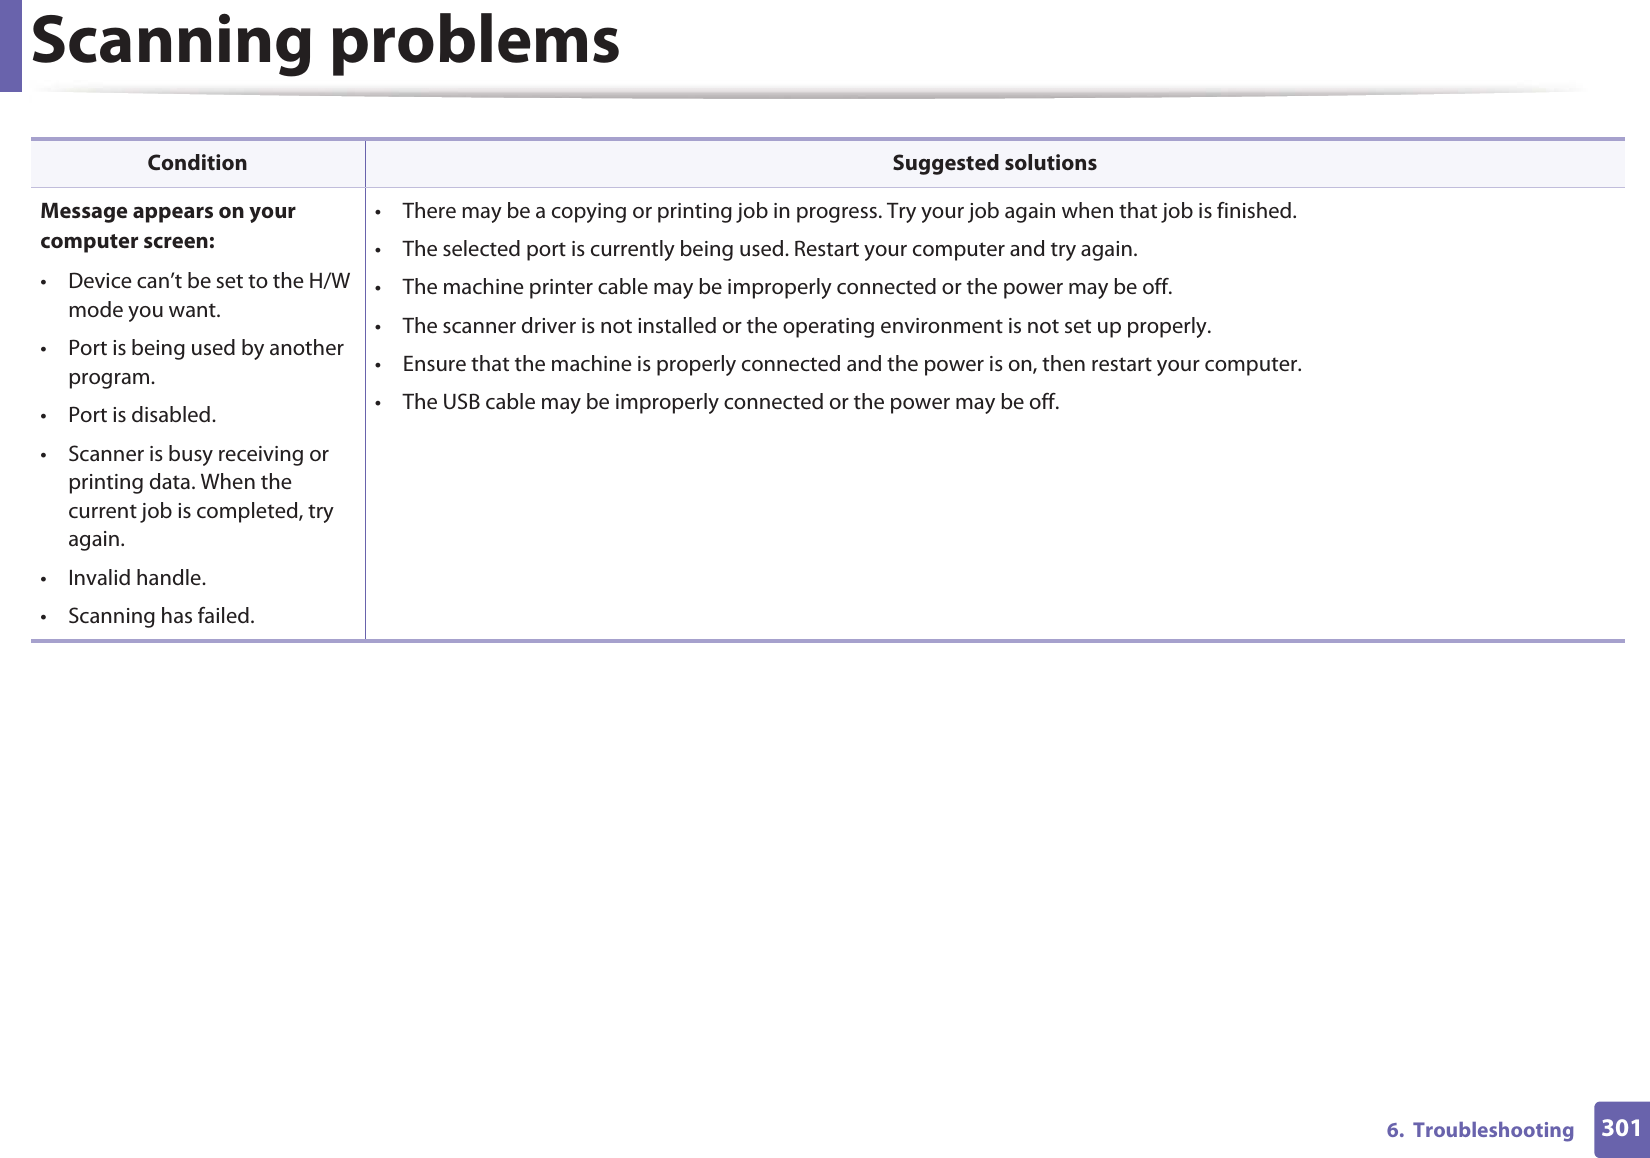
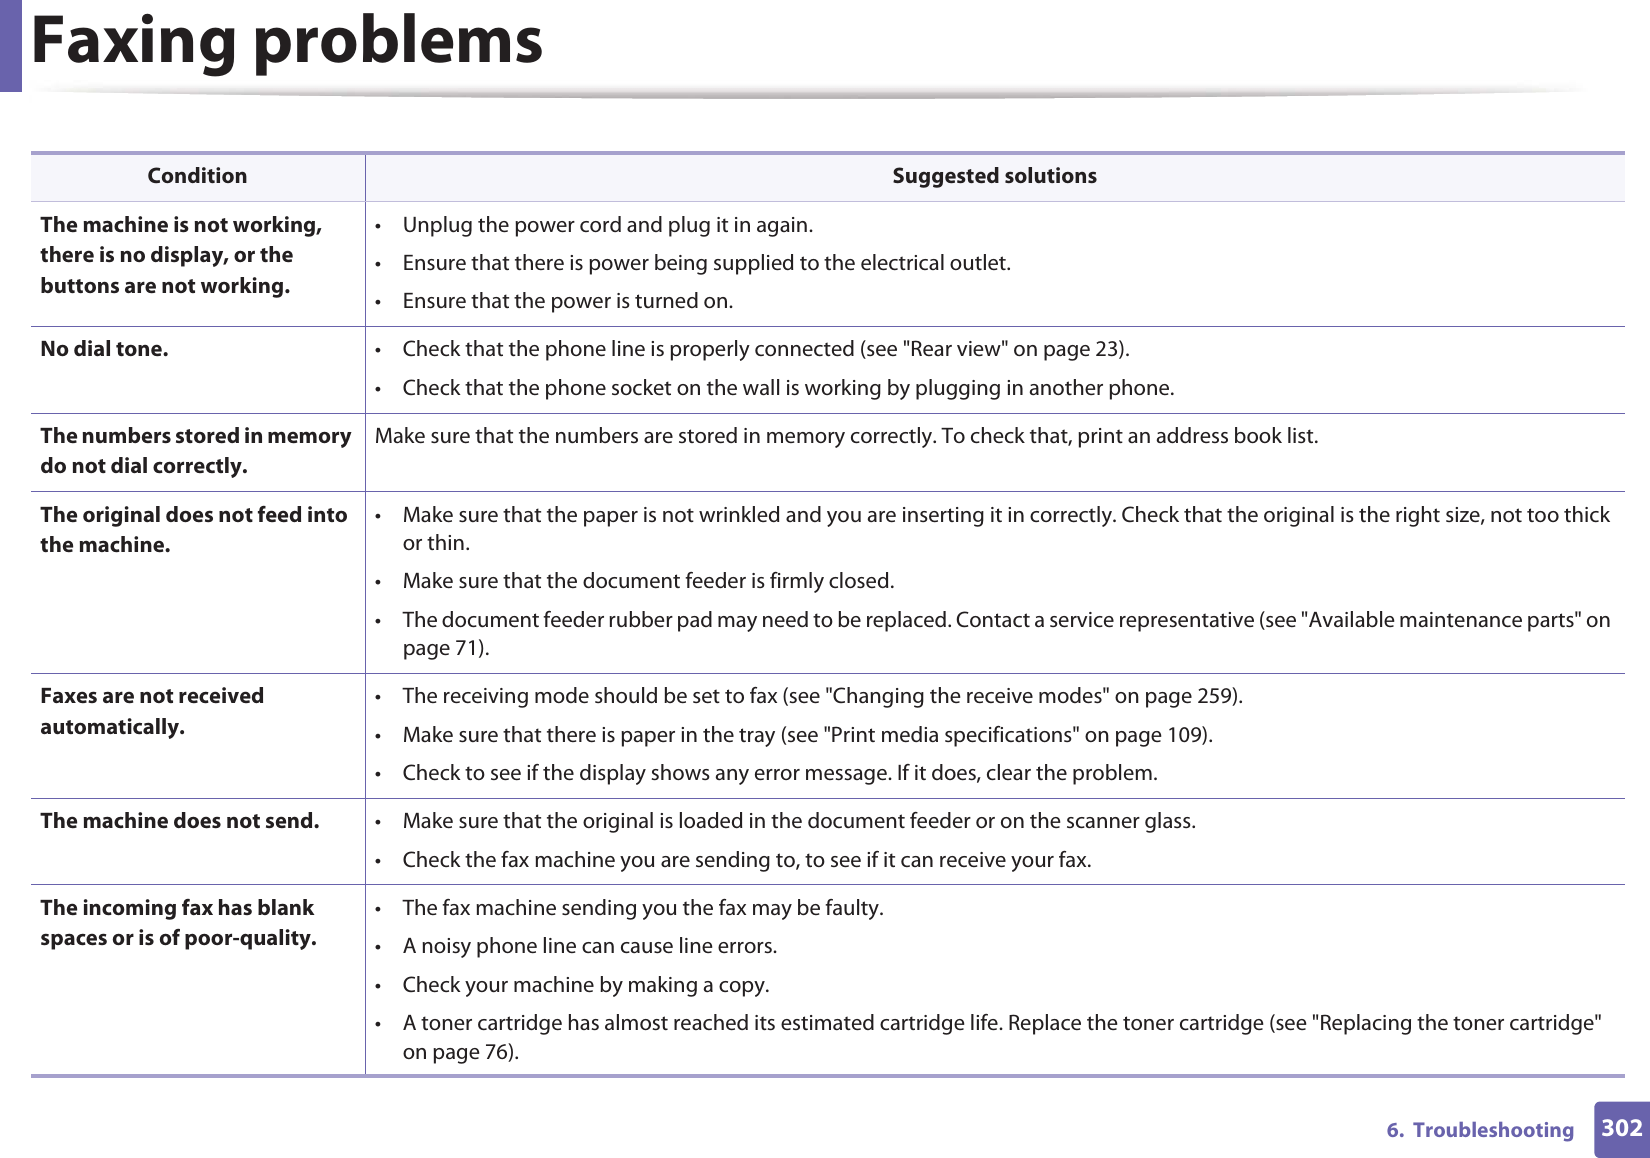
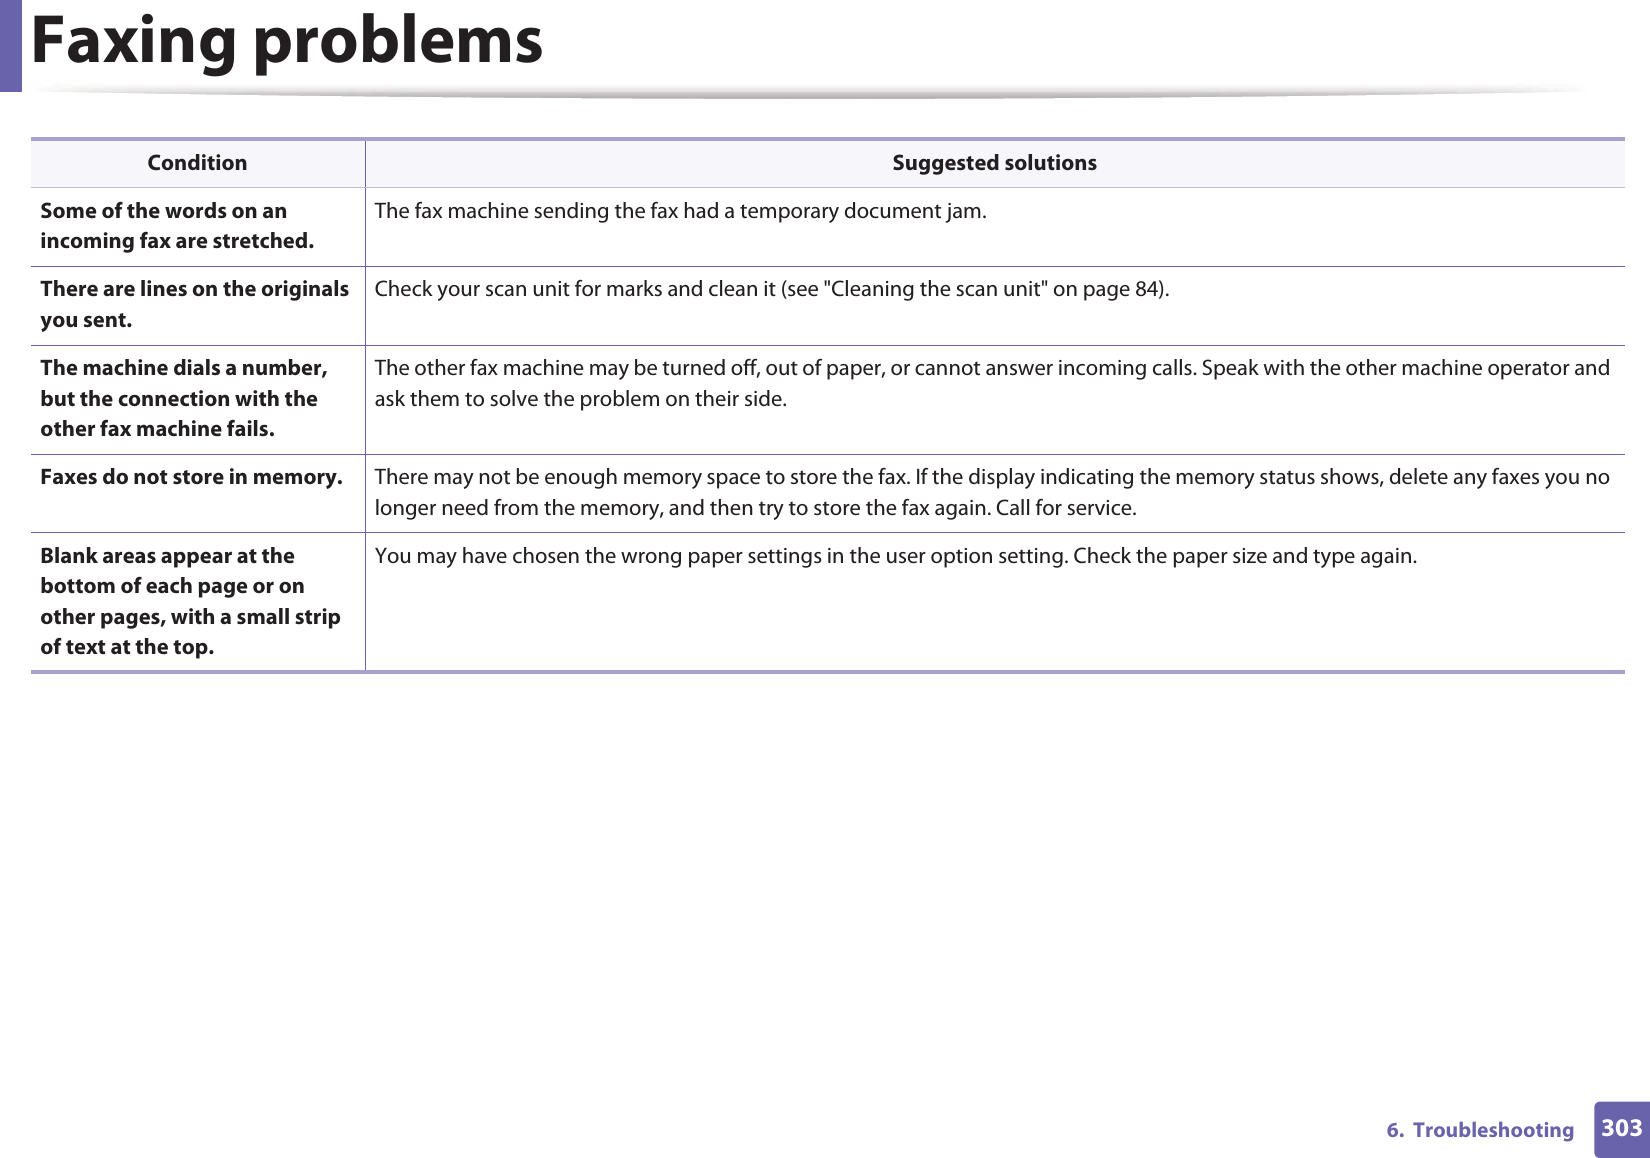
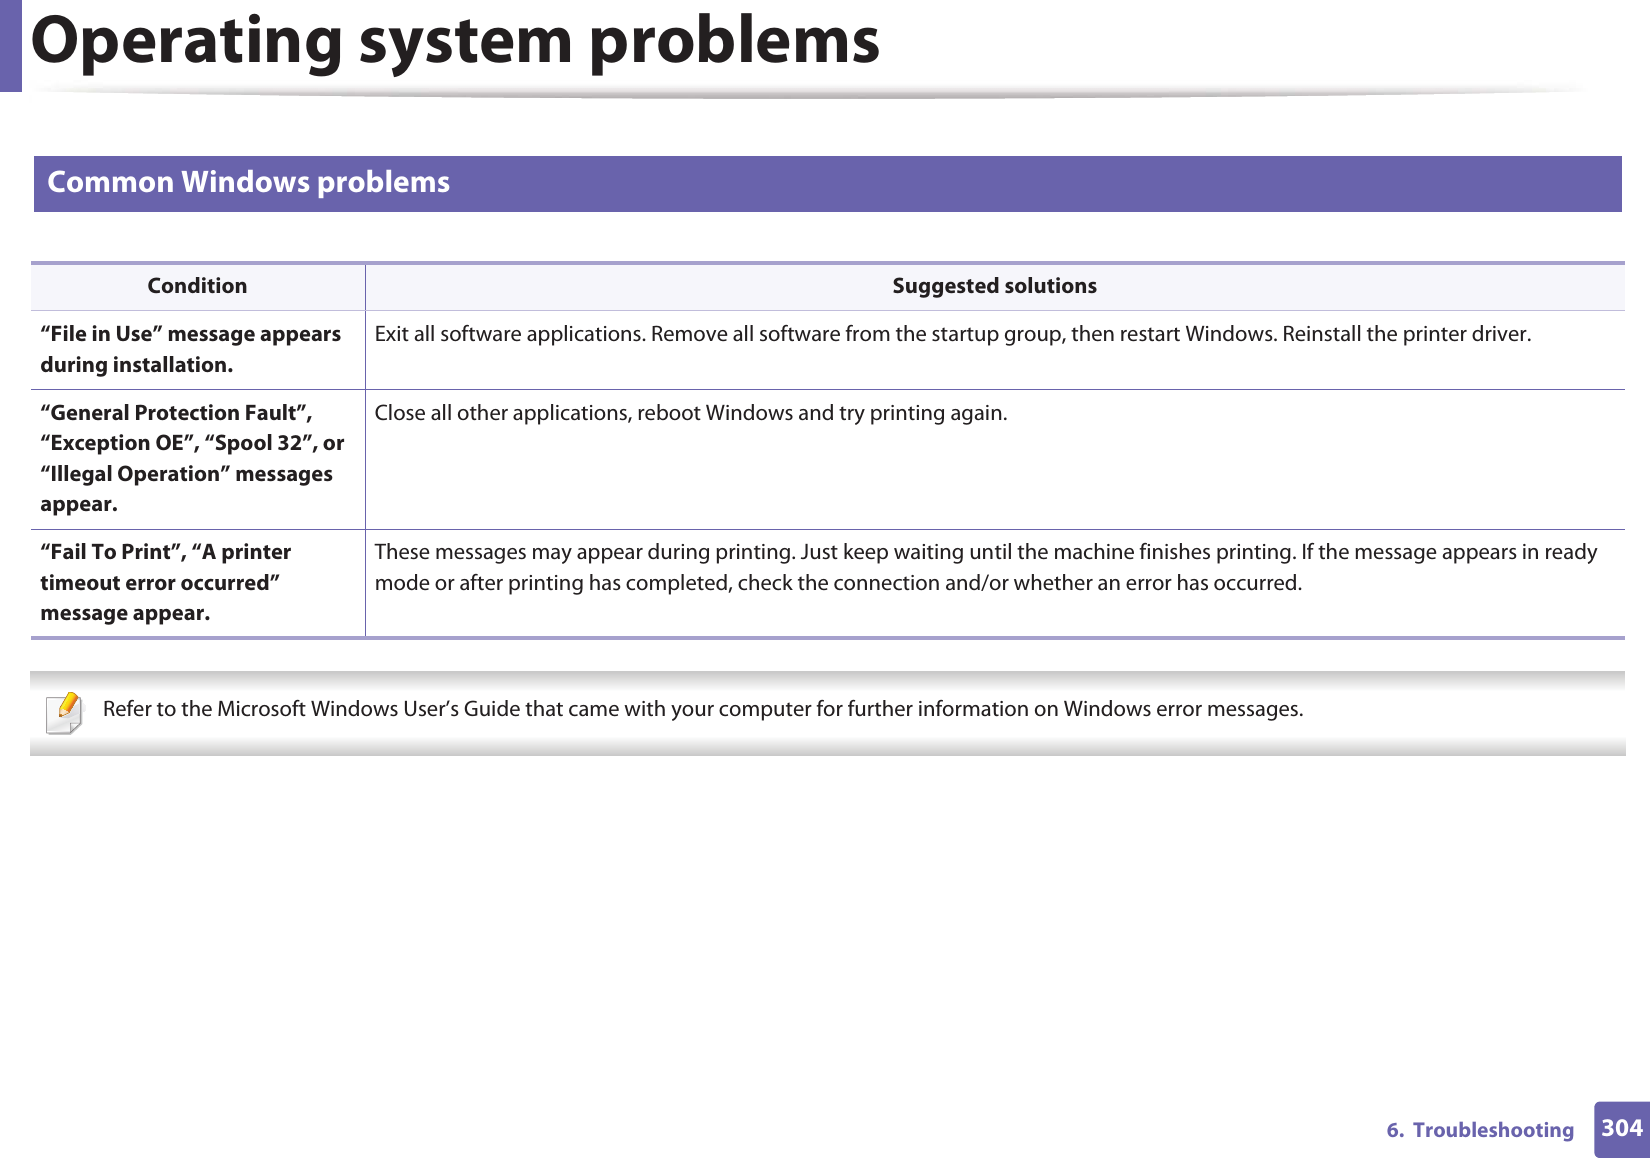
Samsung Electronics Co SCX3405FW Mono Laser Printer User Manual Egmont F english
Samsung Electronics Co Ltd Mono Laser Printer Egmont F english
UserManual.wiki
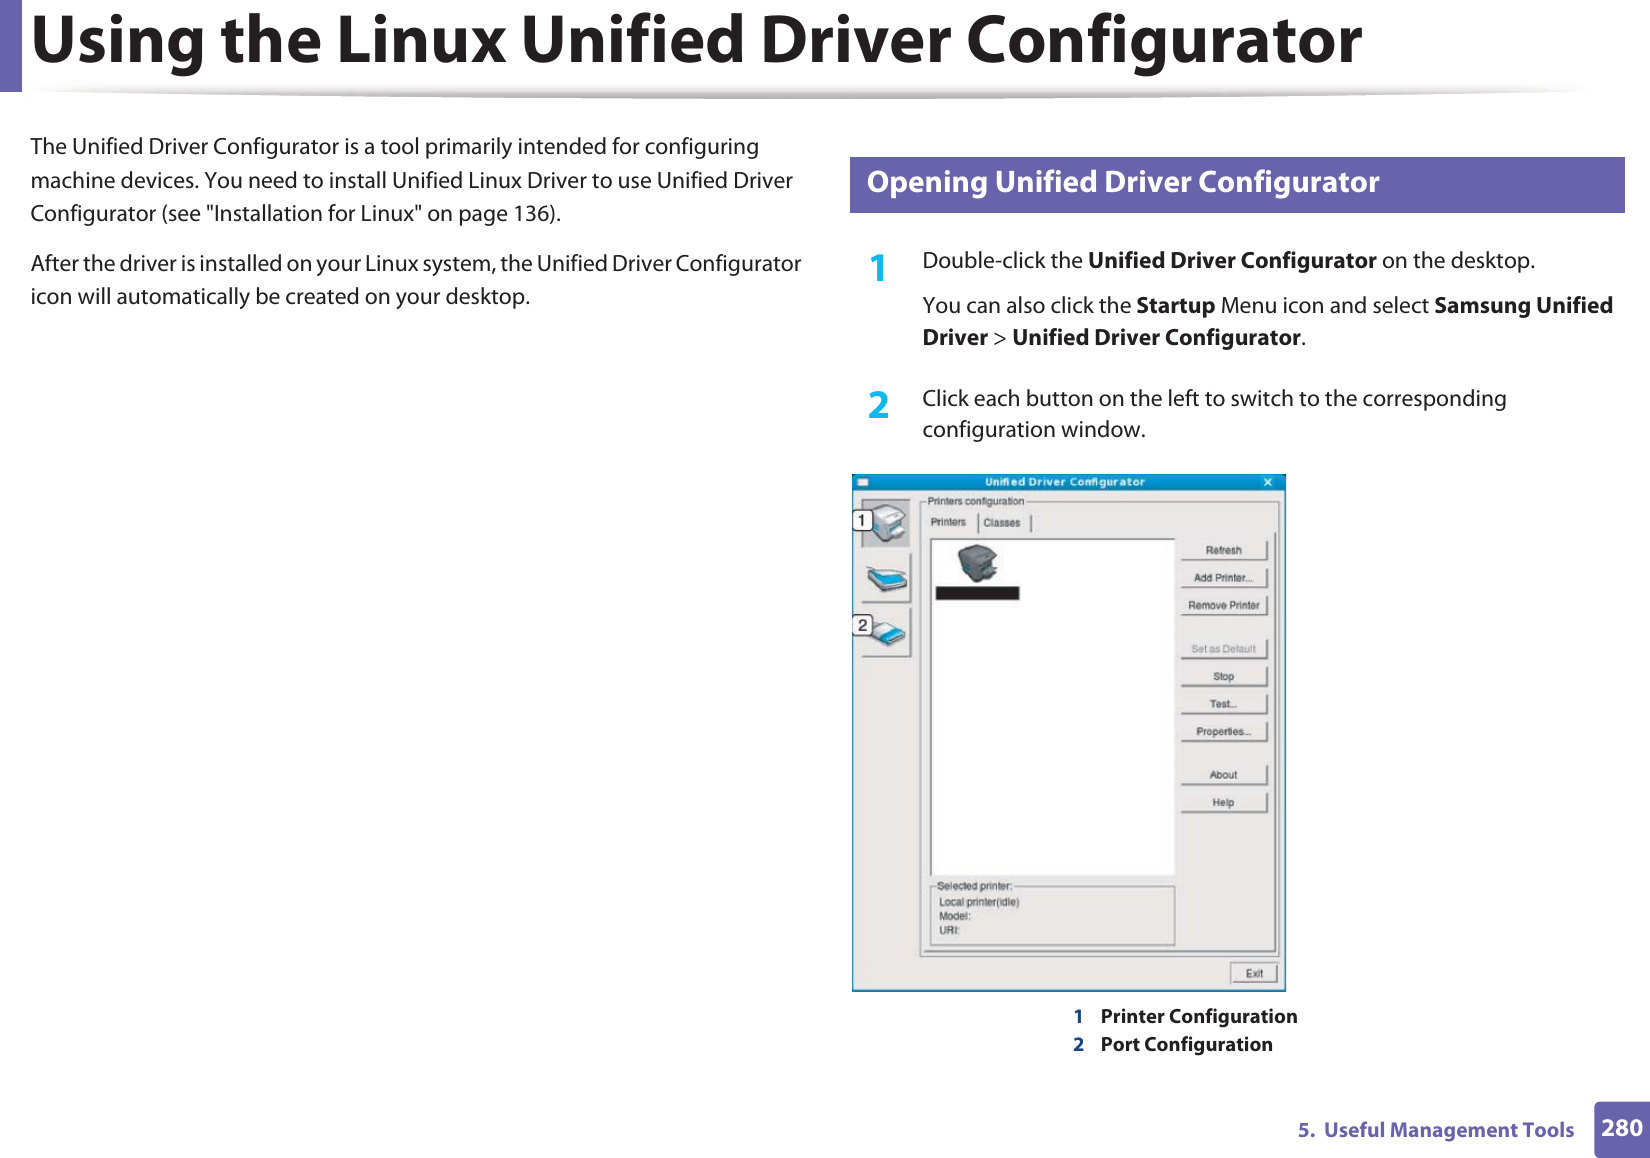
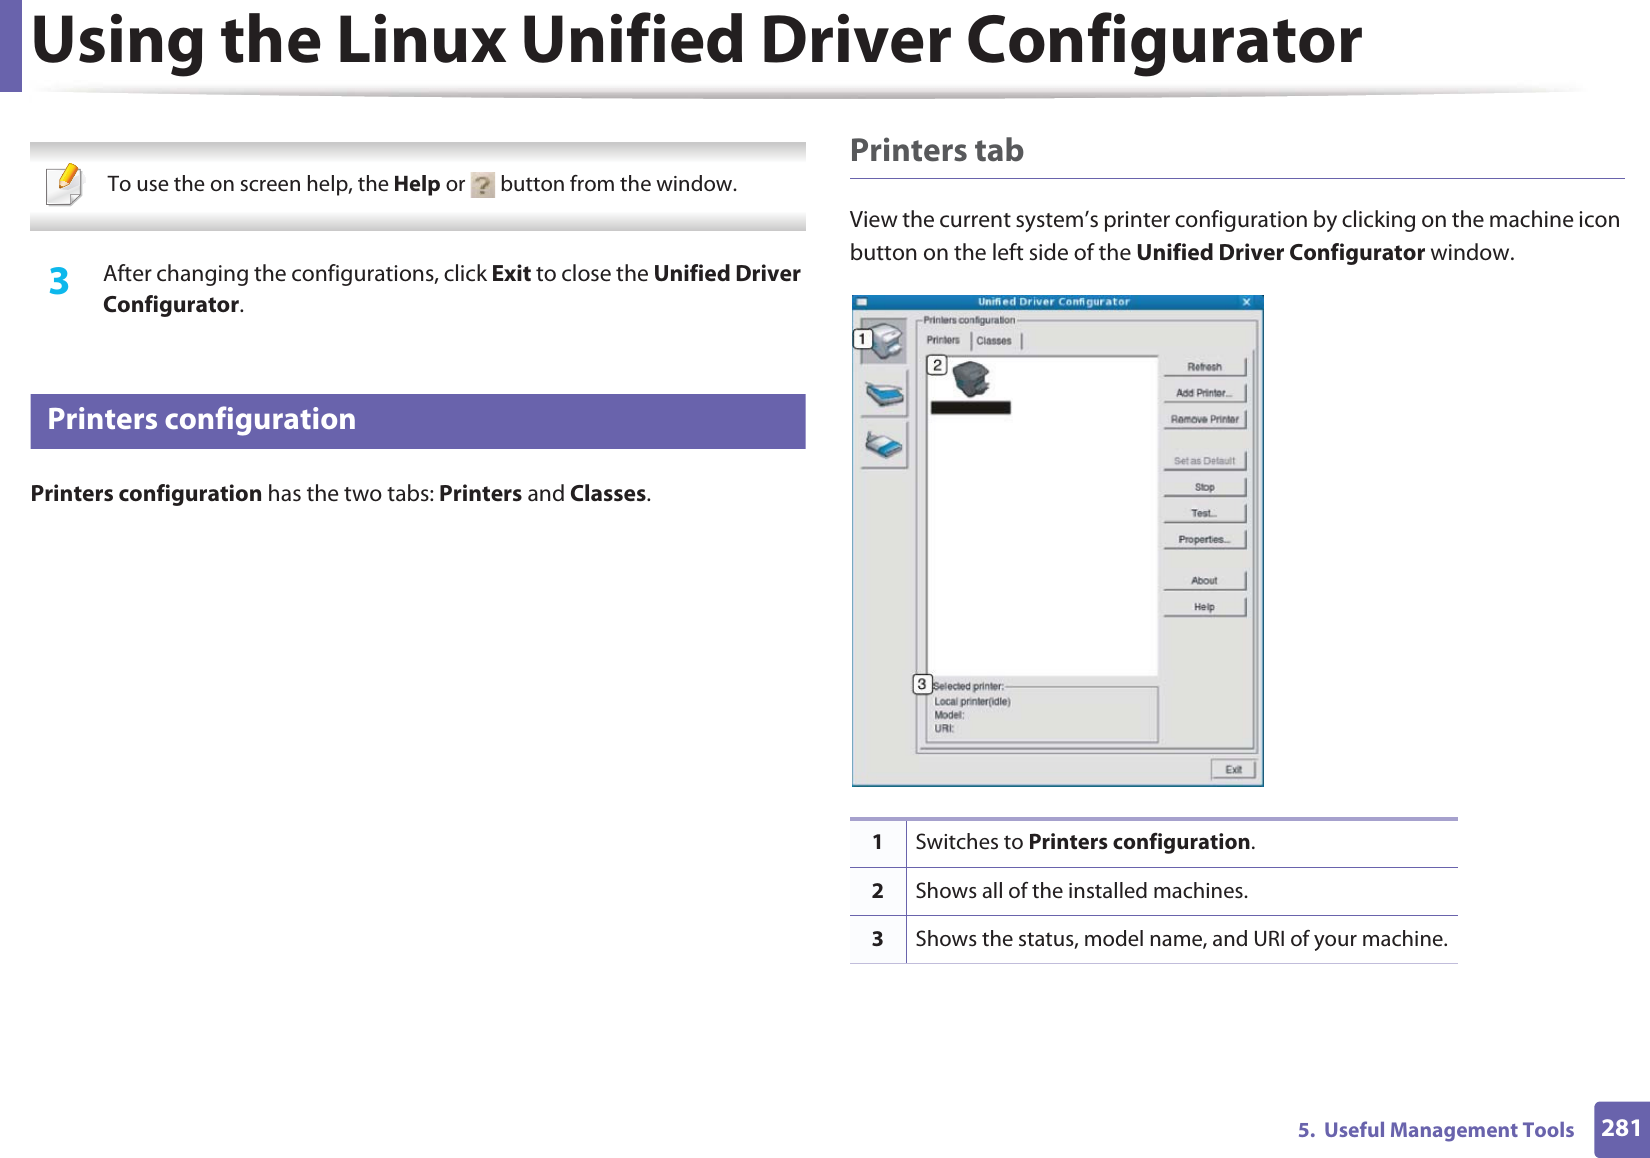
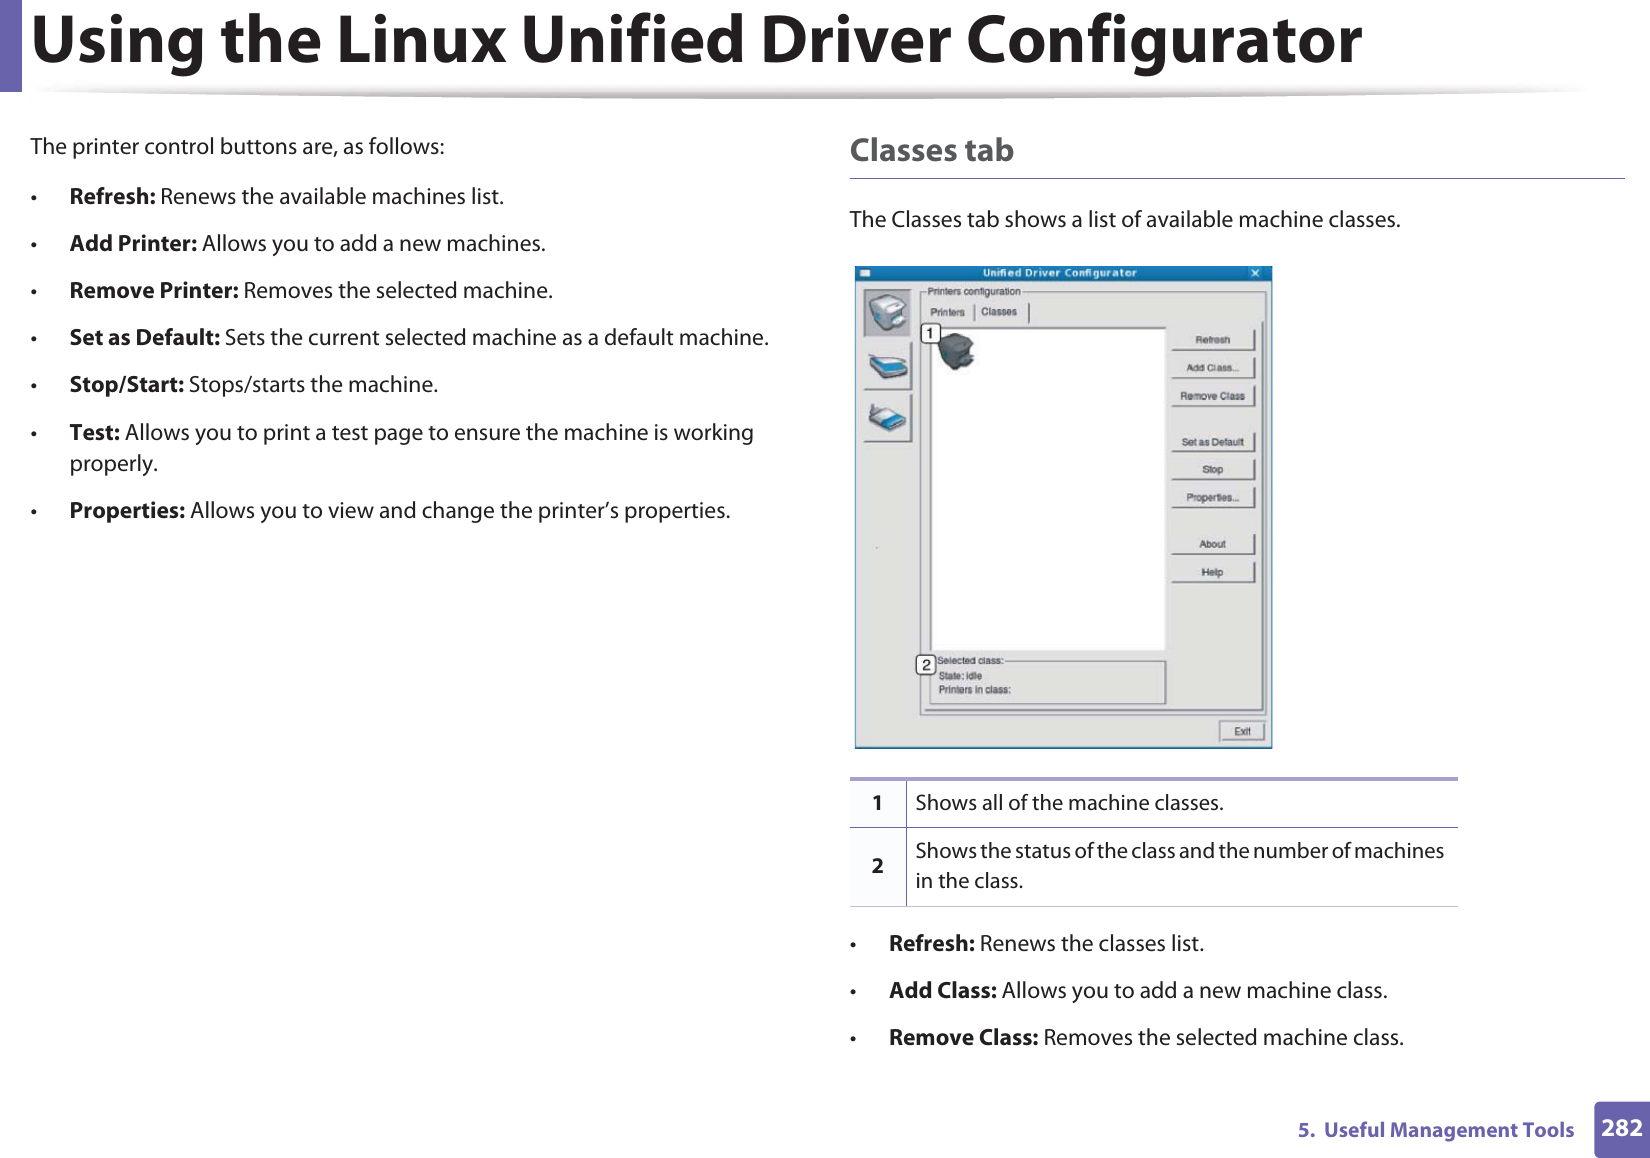
>
Samsung Electronics Co
>
SCX3405FW User Manual
>
Users Manual 2
Contents
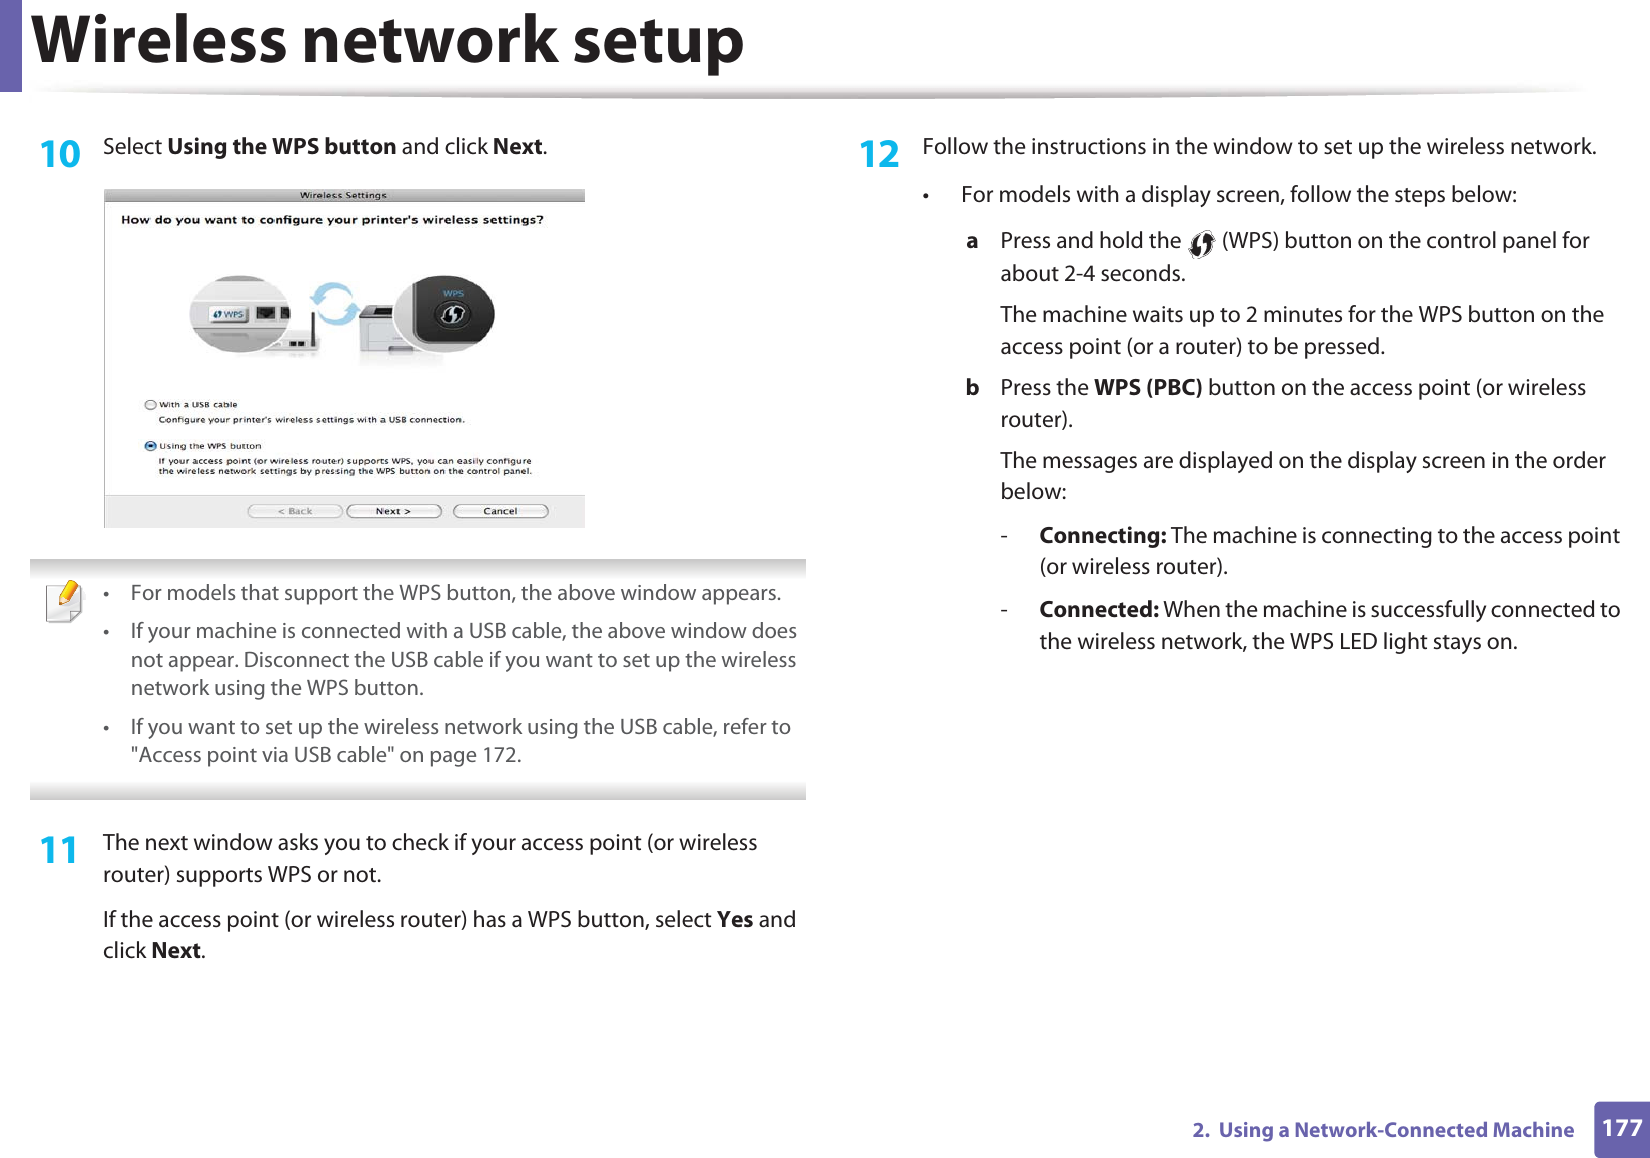
1.
Users Manual 1
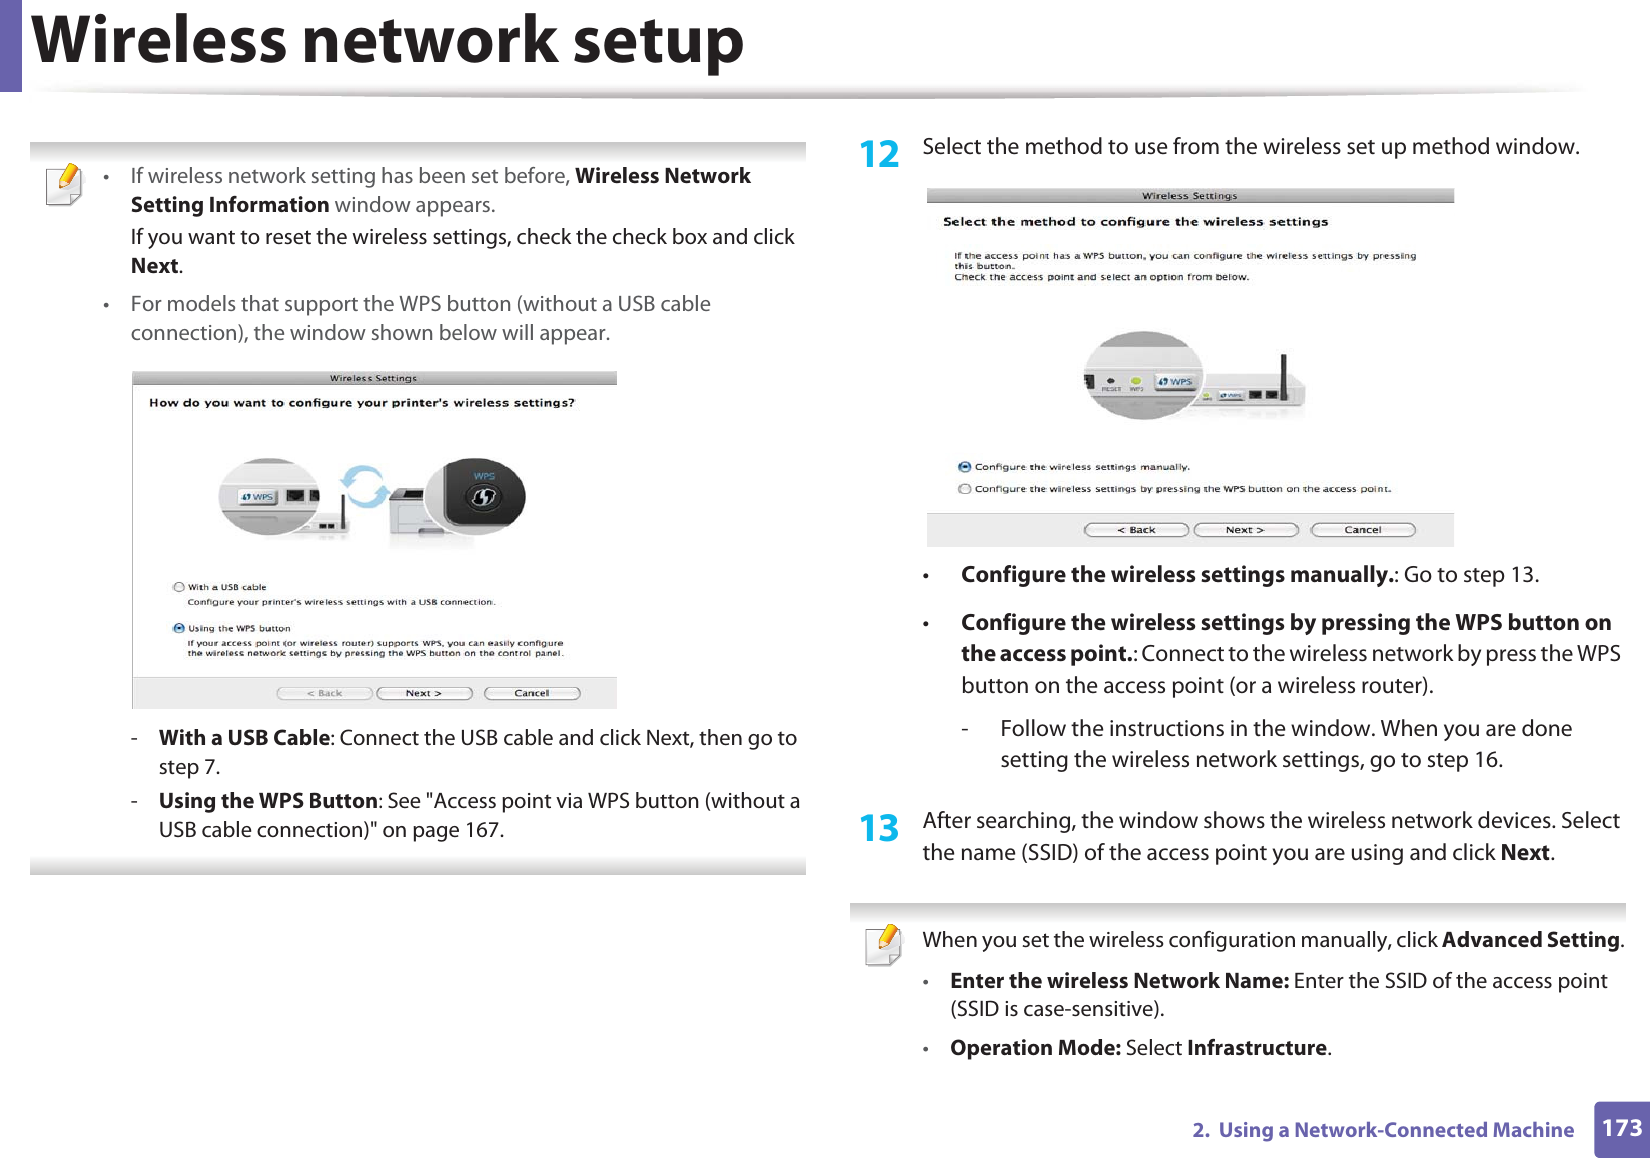
2.
Users Manual 2
Users Manual 2
Navigation menu
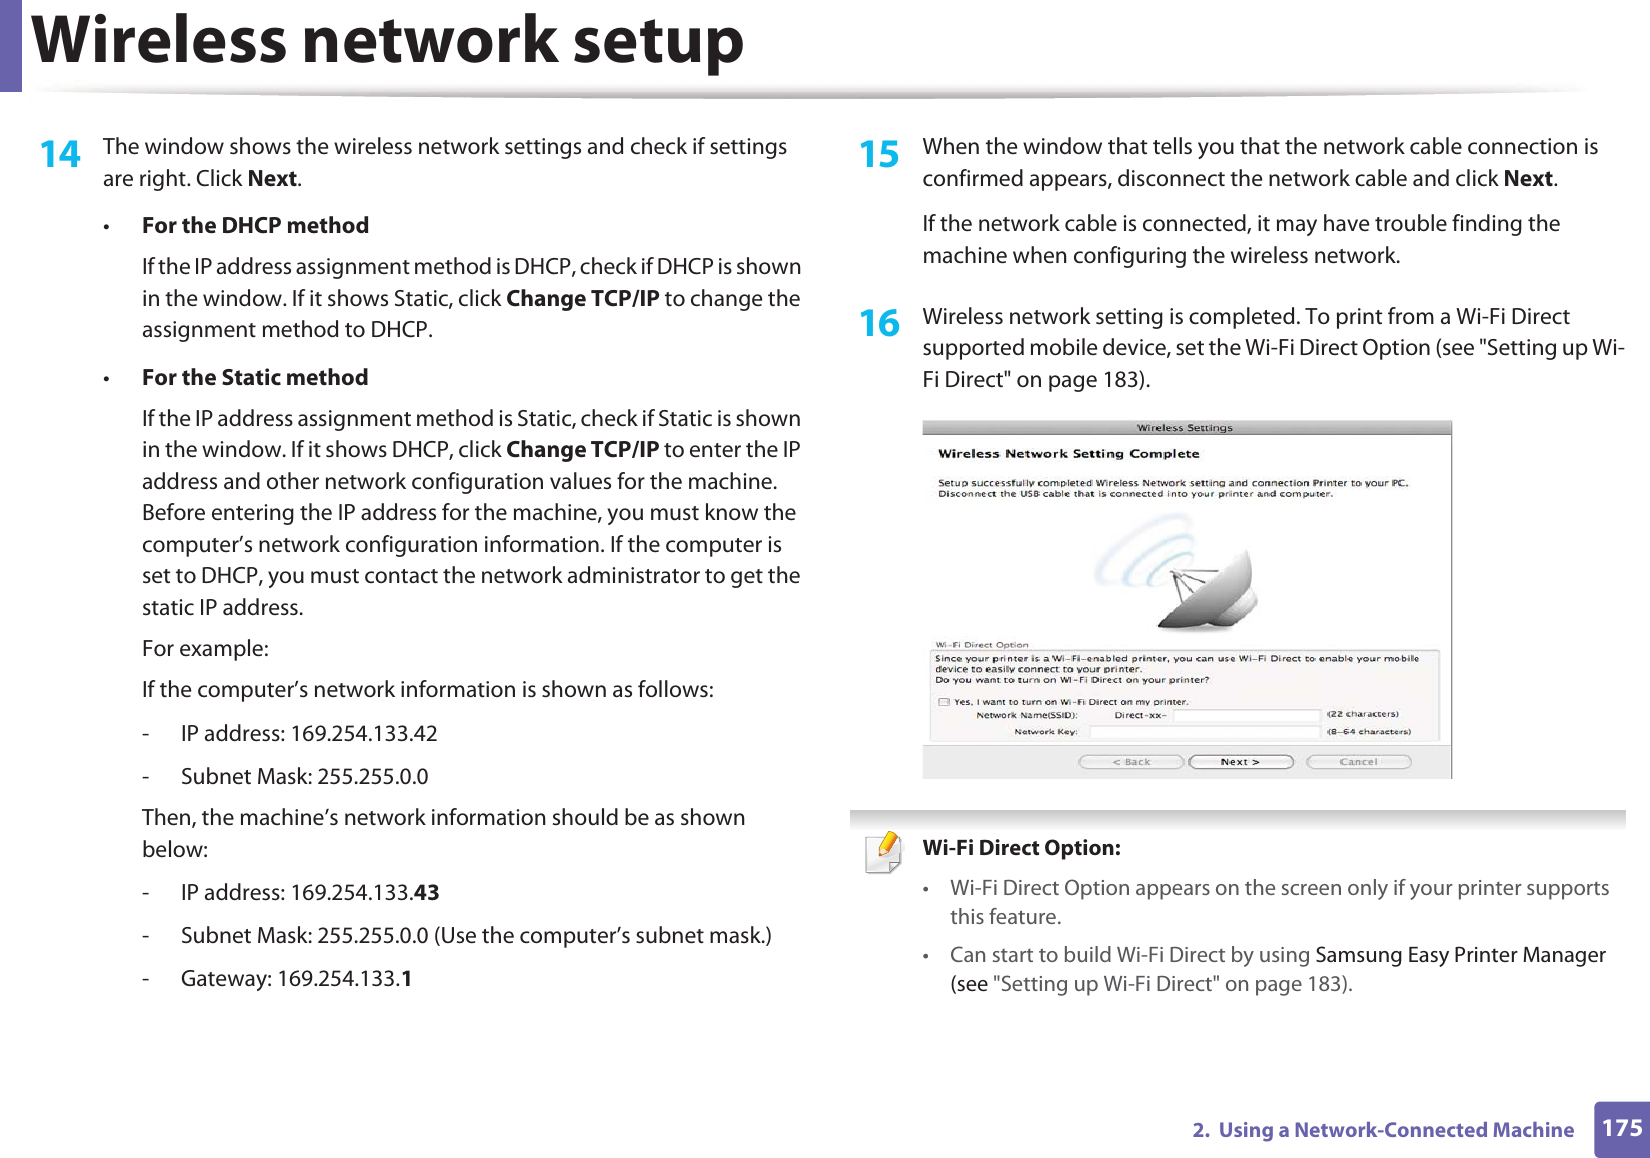
Upload a User Manual
Namespaces
Wiki Guide
HTML
PDF
Info
Views
User Manual
Discussion / Help
Navigation


# # = | ? " : { } < > ;(These symbols are available when you type for network authentication.)](https://usermanual.wiki/Samsung-Electronics-Co/SCX3405FW.Users-Manual-2/User-Guide-1552114-Page-62.png)