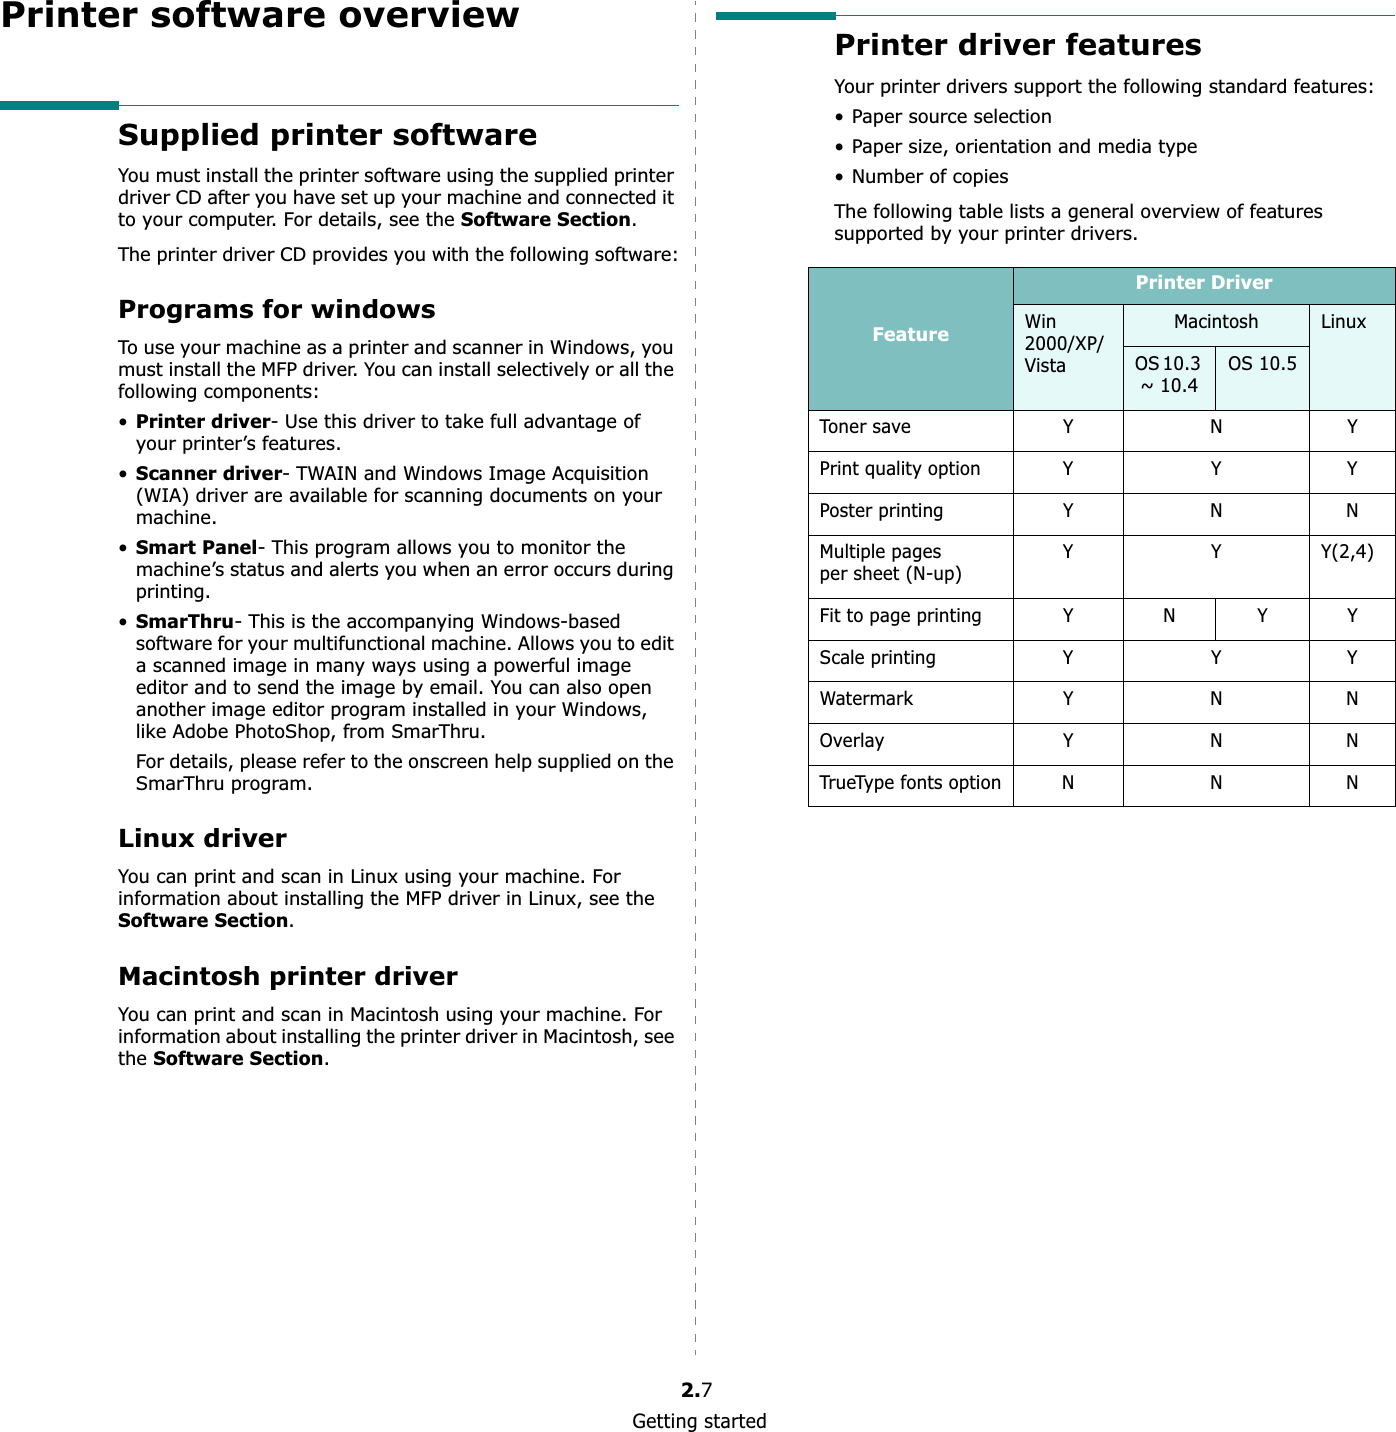
Samsung Electronics Co SCX4300 Multi Function Laser Printer User Manual 4300 EN
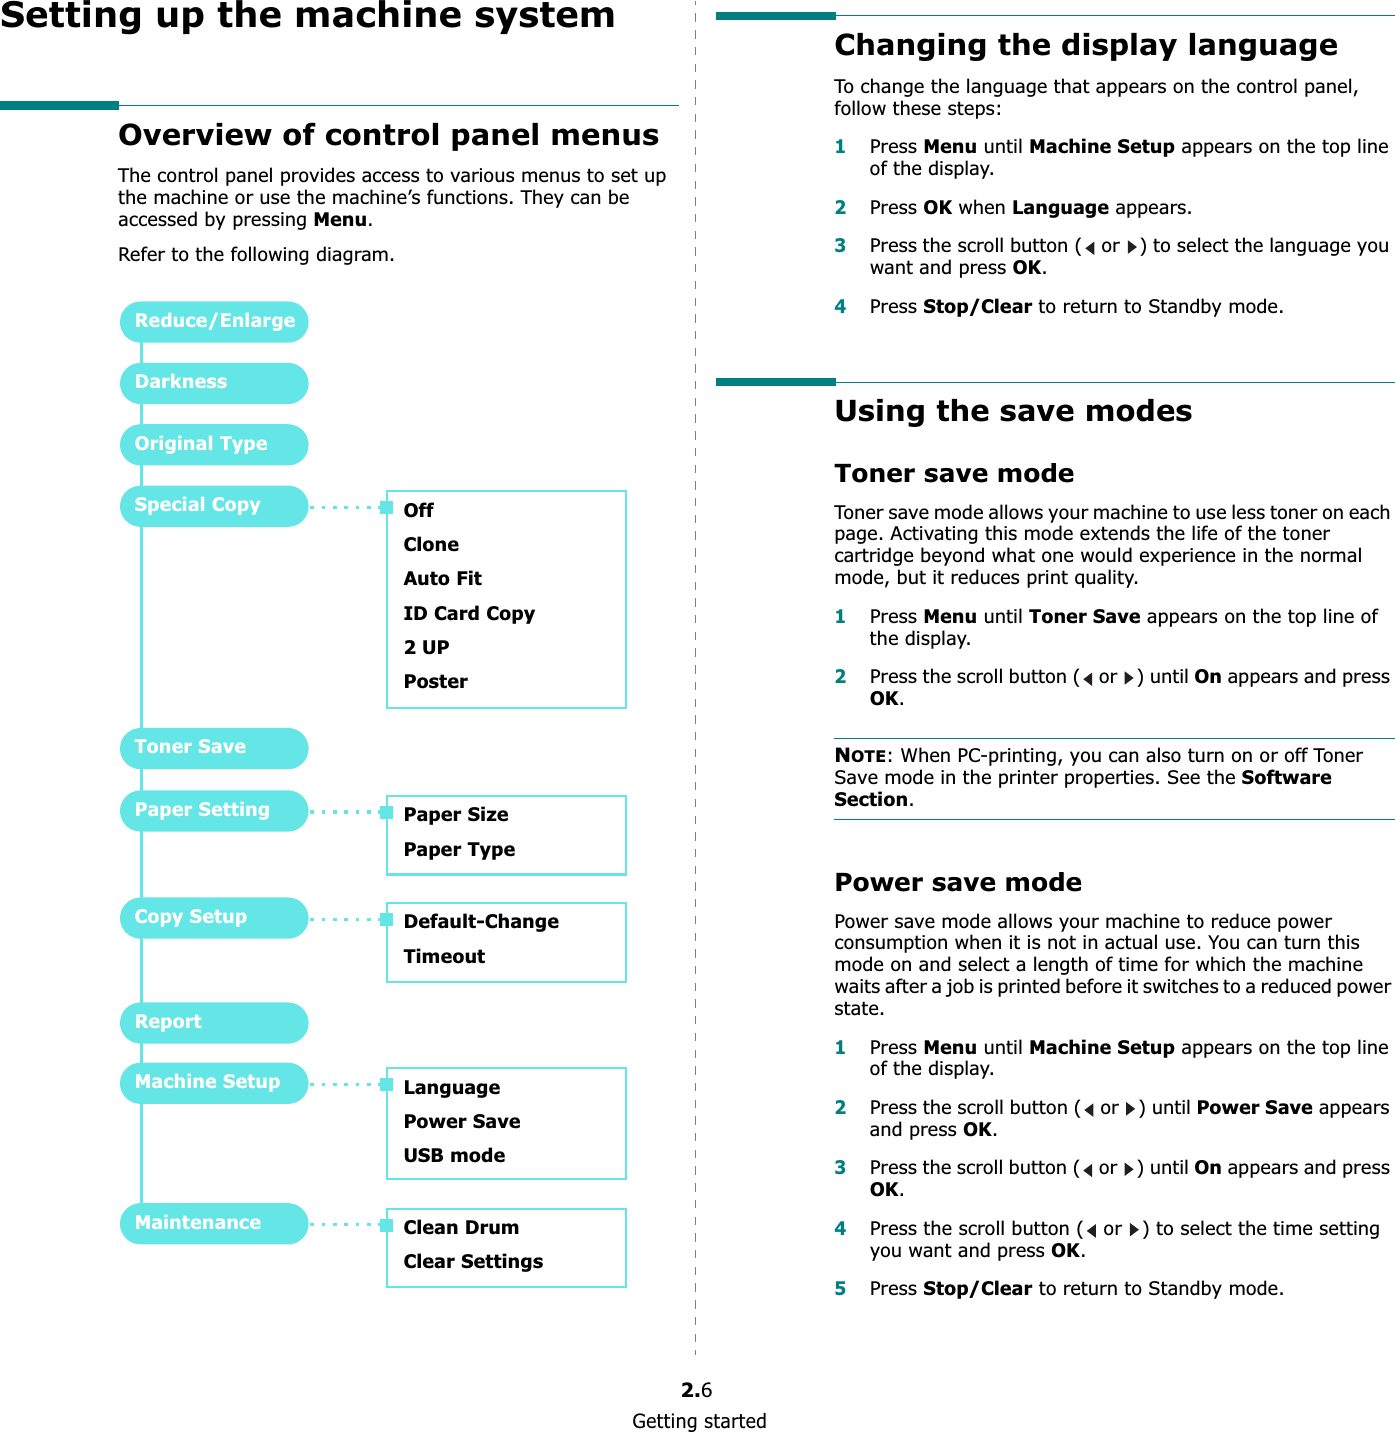
Samsung Electronics Co Ltd Multi Function Laser Printer 4300 EN
UserManual.wiki
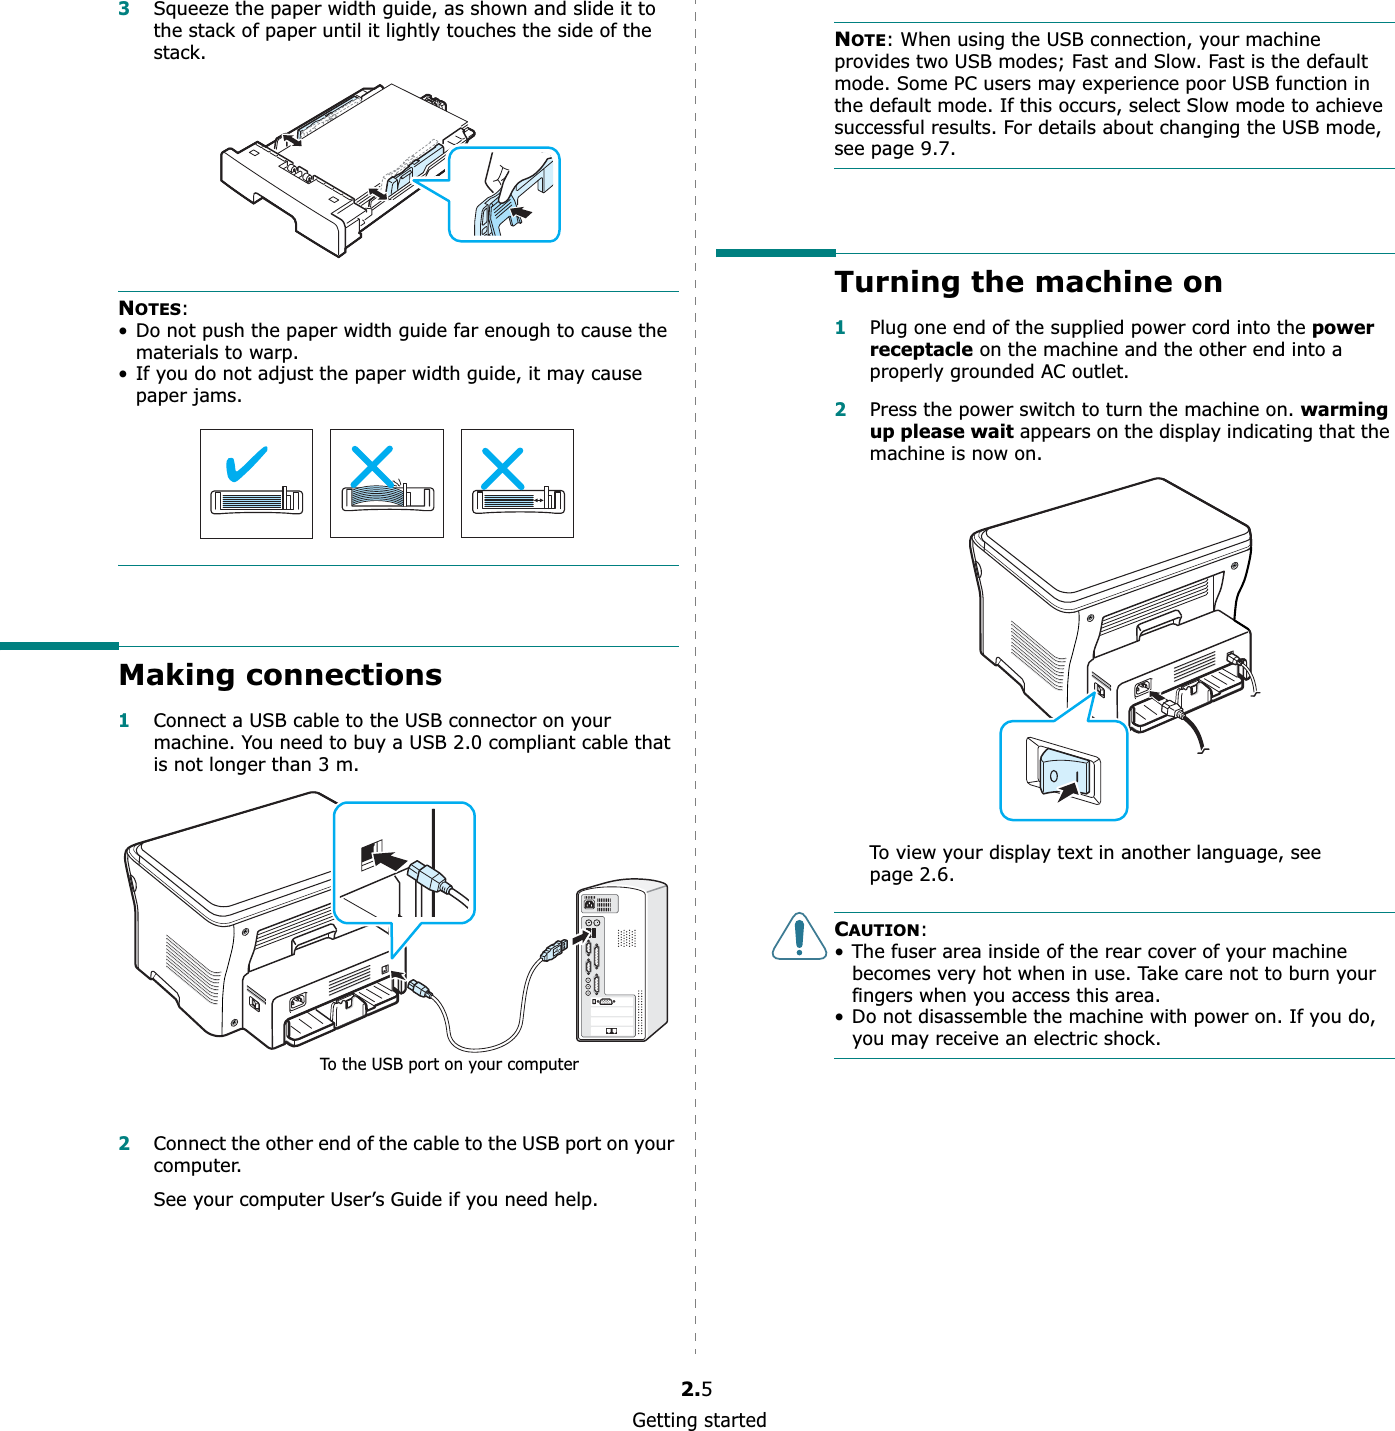
>
Samsung Electronics Co
>
SCX4300 User Manual
Users Manual
Navigation menu
Upload a User Manual
Namespaces
Wiki Guide
HTML
PDF
Info
Views
User Manual
Discussion / Help
Navigation
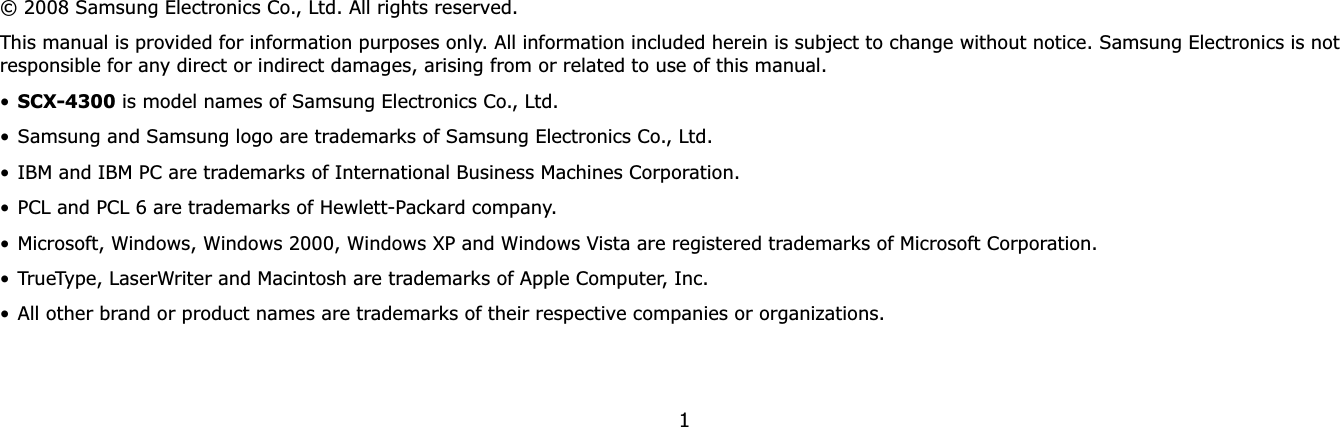
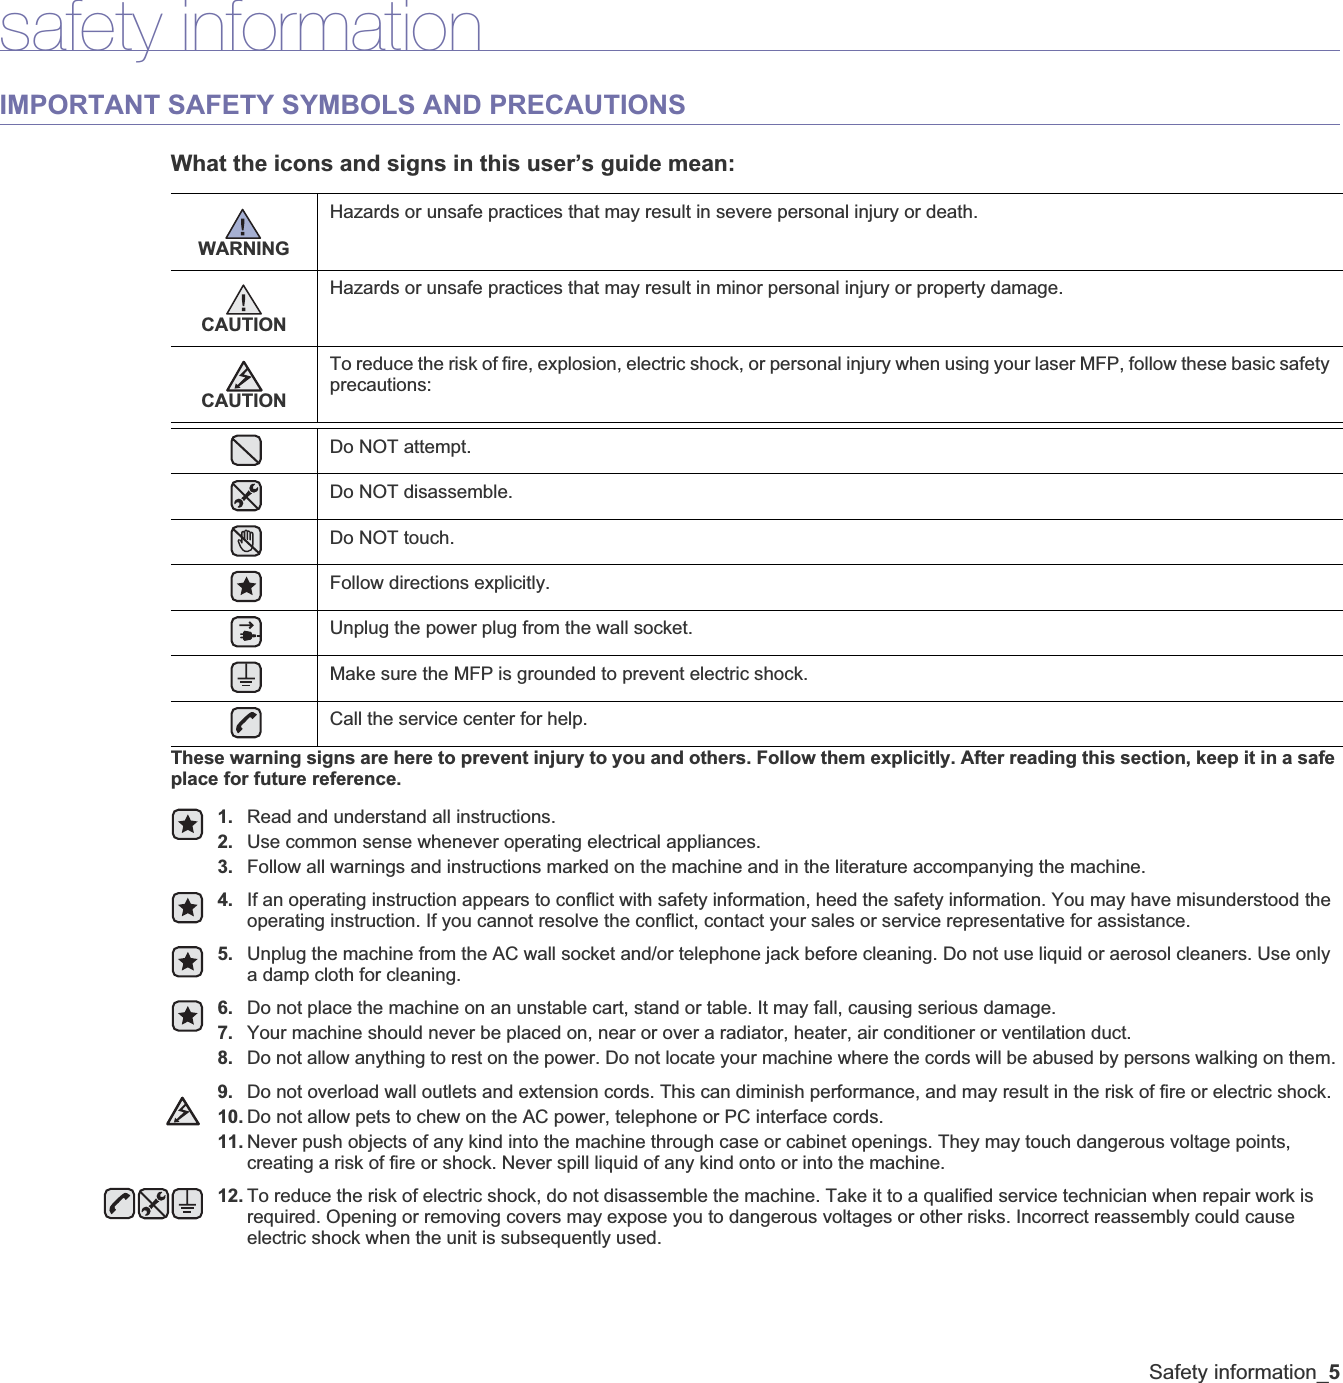


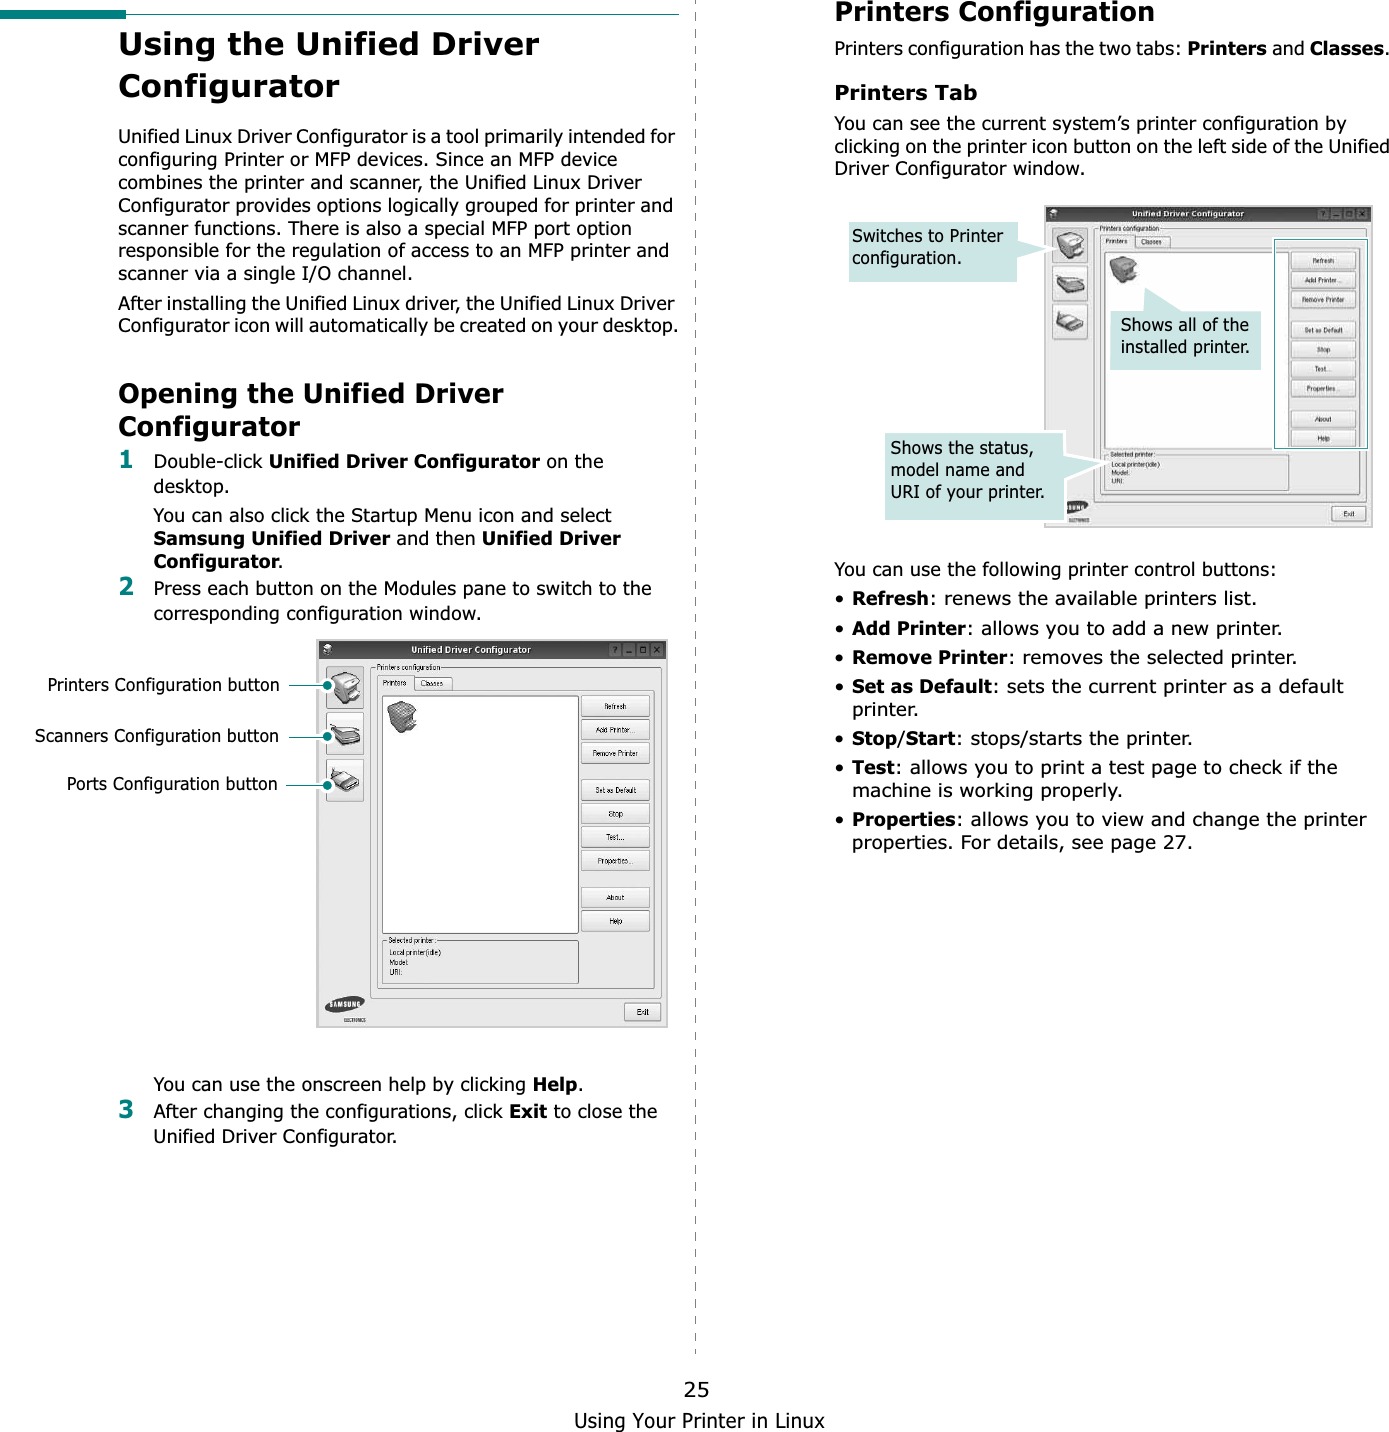
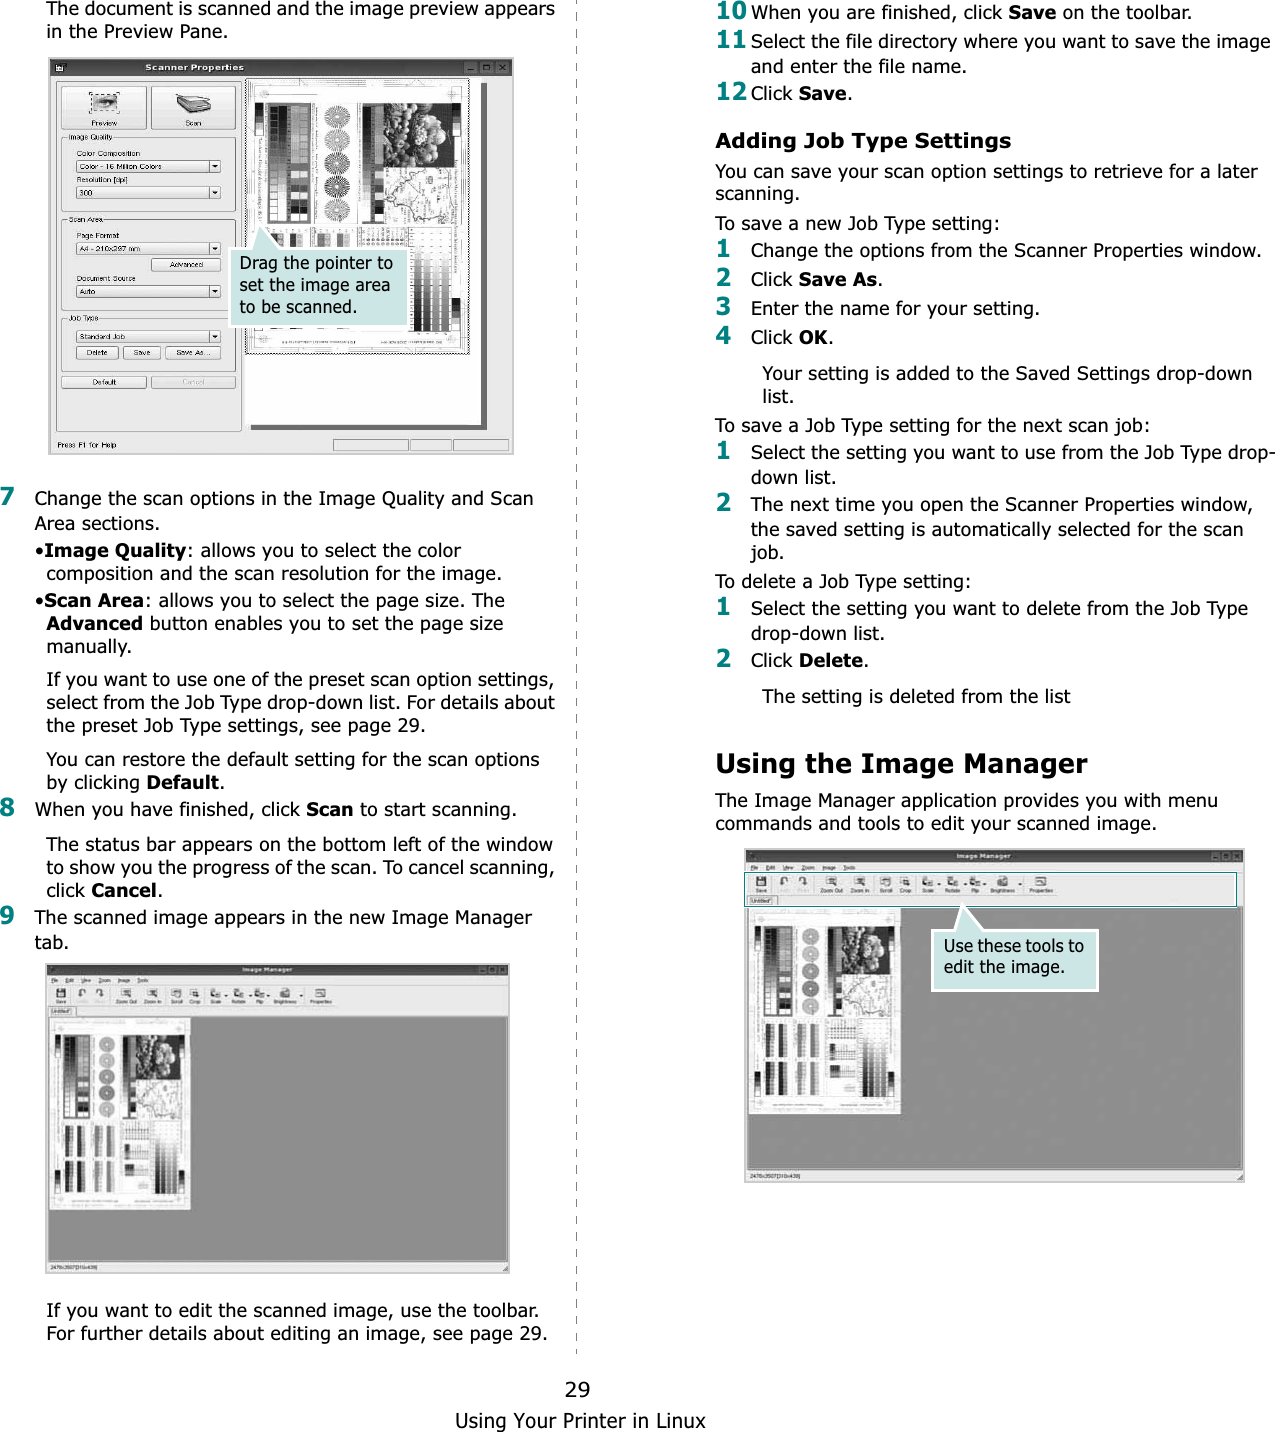
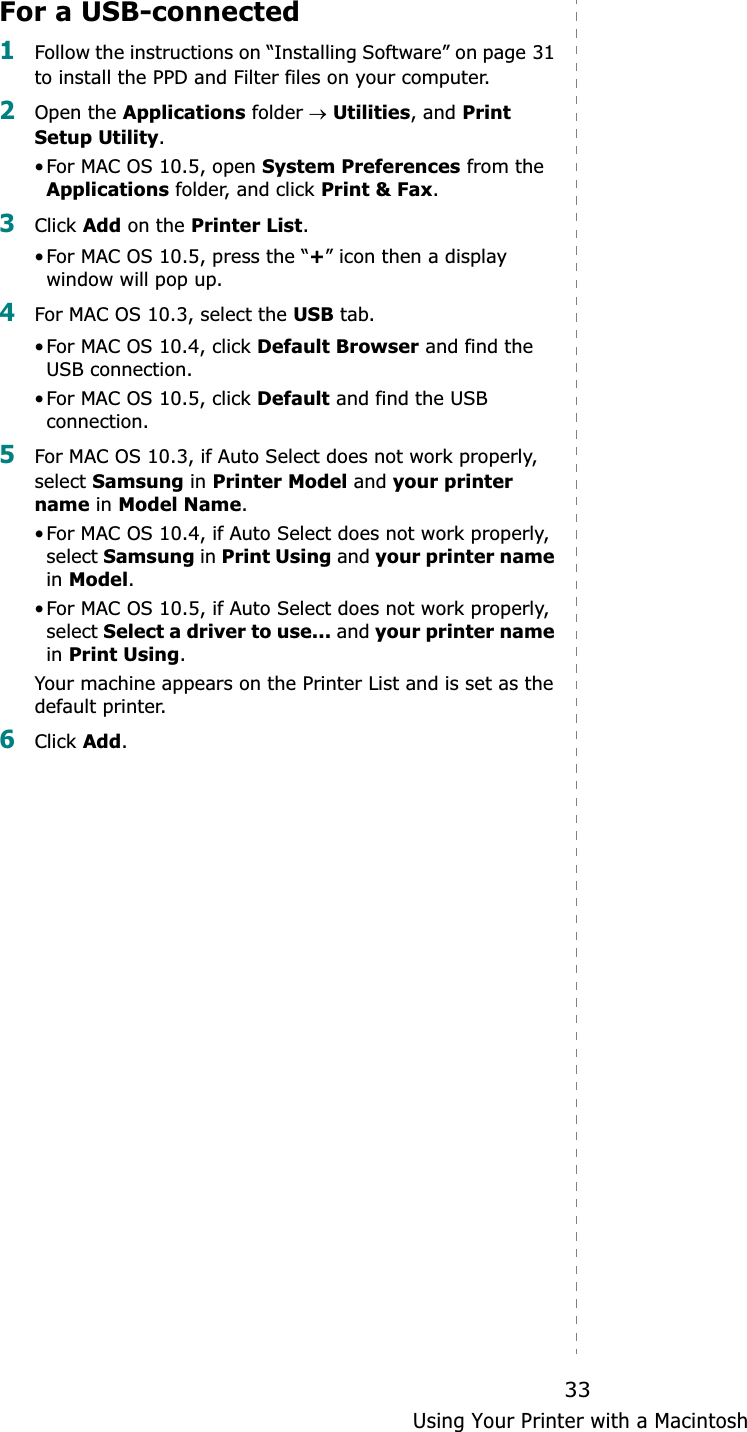
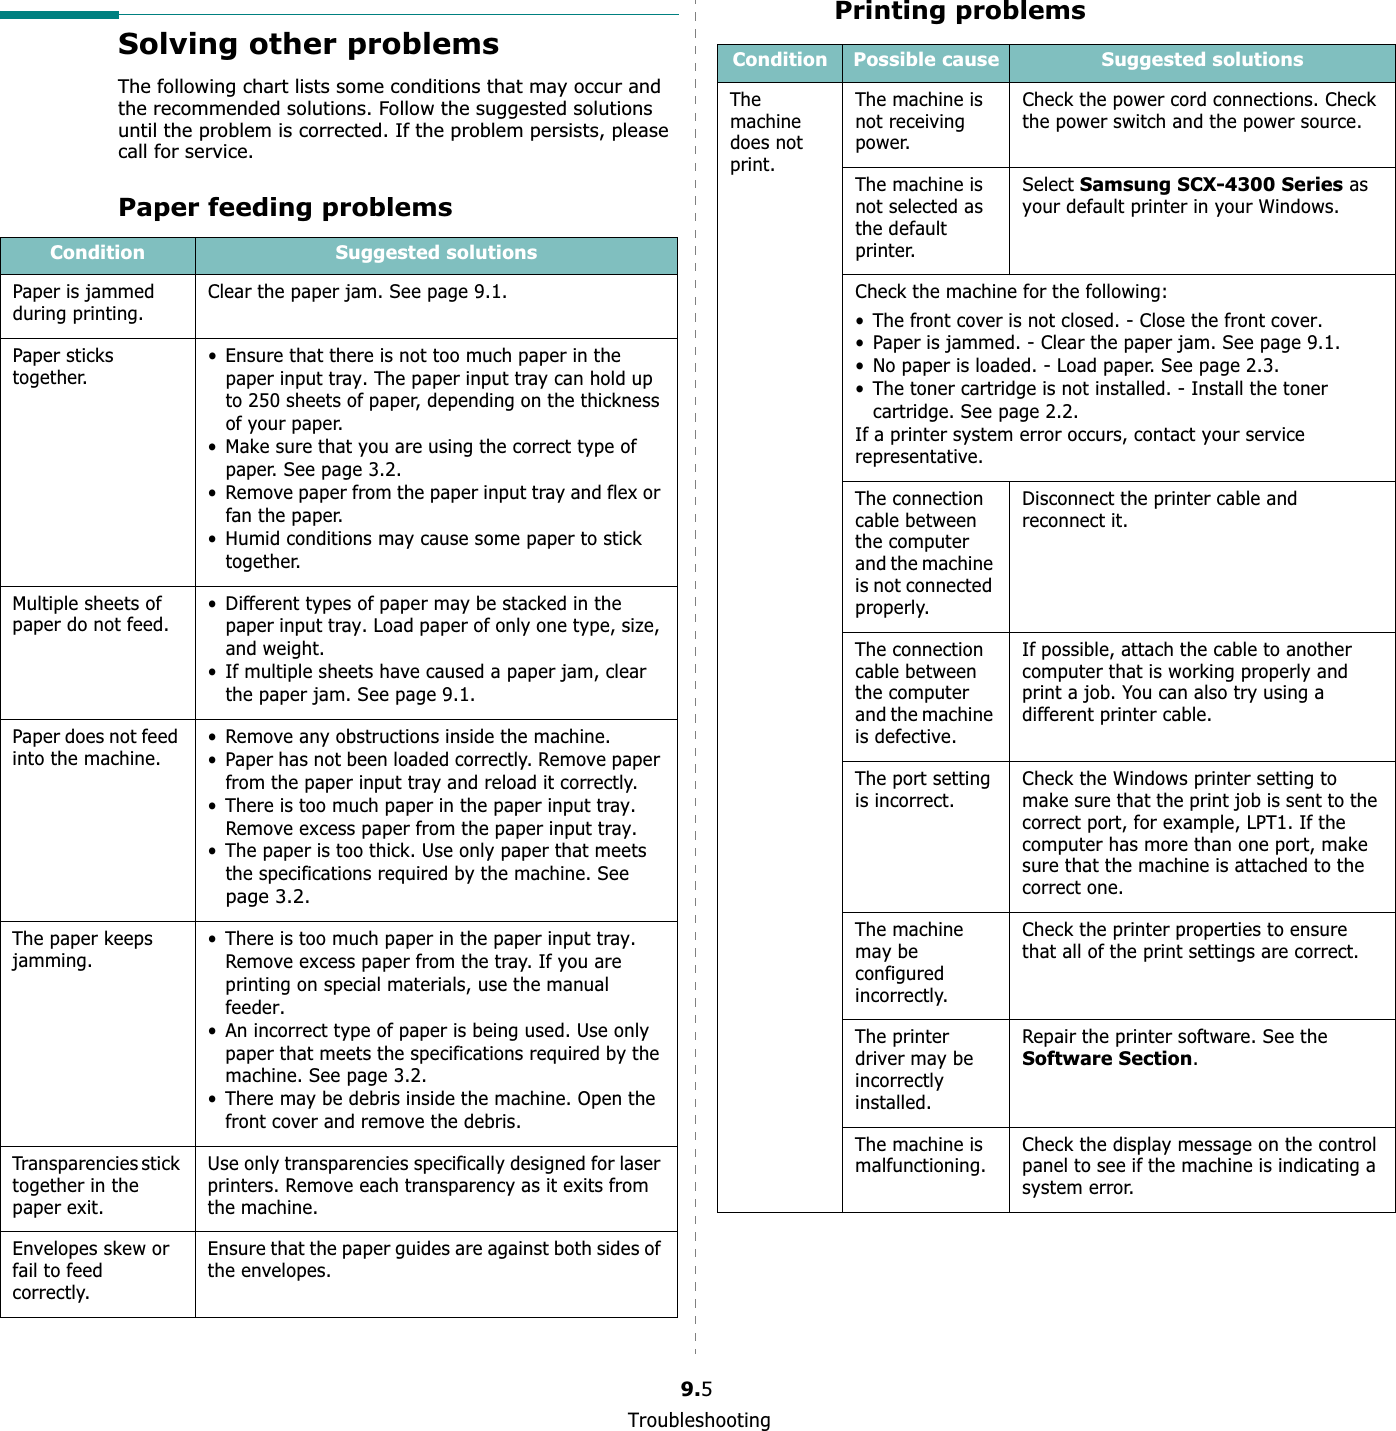
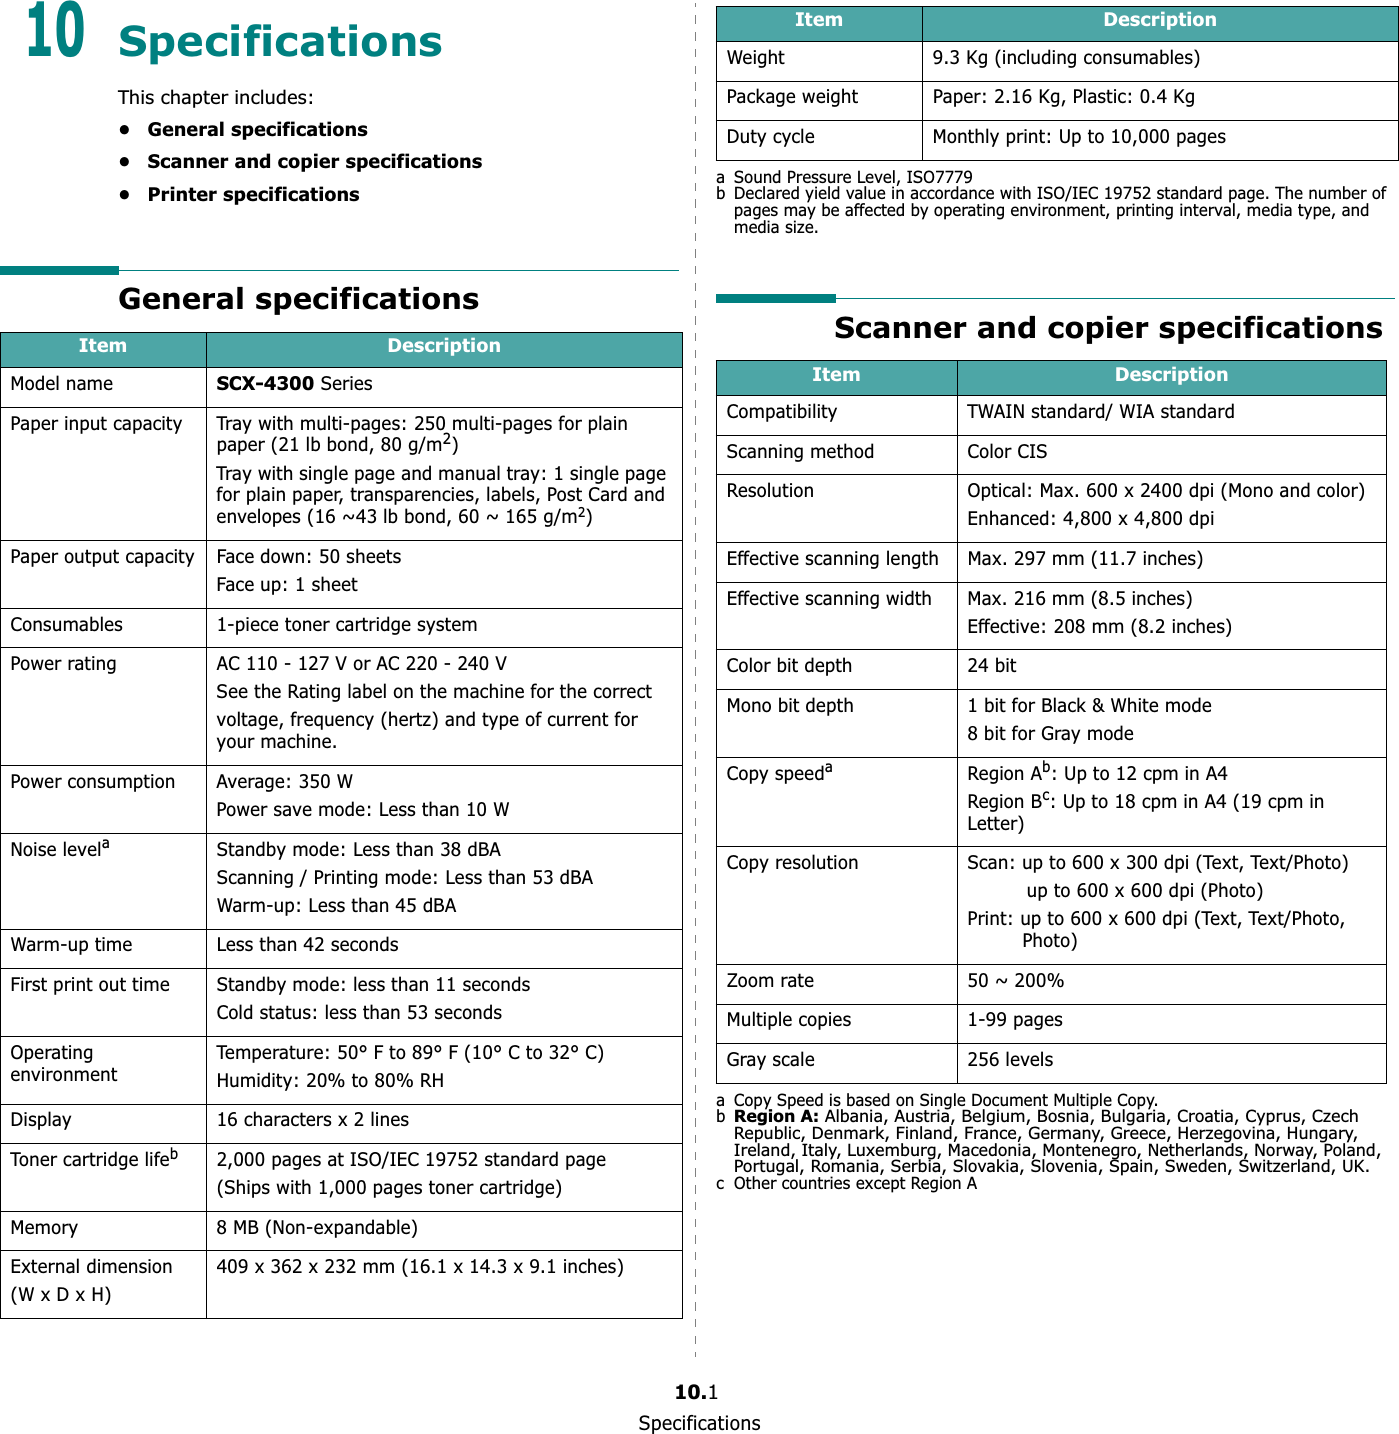
![Troubleshooting9.19TroubleshootingThis chapter gives helpful information for what to do if you encounter an error.This chapter includes:• Clearing paper jams• Understanding the Status LED• Understanding display messages• Solving other problemsClearing paper jamsWhen a paper jam occurs, Paper Jam appears on the display. Refer to the table below to locate and clear the paper jam.To avoid tearing the paper, pull out the jammed paper gently and slowly. Follow the instructions in the following sections to clear the jam. In the paper input tray1Open and close the front cover. The jammed paper automatically exits the machine.If the paper does not exit, continue to step 2.2Pull the paper input tray out. Message Location of Jam Go to[Paper Jam 0]Open/CloseDoorIn the paper input tray below andpage 9.1[Paper Jam 1]Open/CloseDoorIn the fuser area or around the toner cartridgeIn the manual feederpage 9.2[Paper Jam 2]Check InsideIn the paper exit area page 9.23Remove the jammed paper by gently pulling it straight out.If there is any resistance and the paper does not move when you pull, or if you cannot see the paper in this area, check the fuser area around the toner cartridge. See page 9.2. 4Insert the paper input tray into the machine until it snaps into place.5Open and close the front cover to resume printing.In the manual feeder1If the paper is not feeding properly, pull the paper out of the machine.2To resume printing, open and close the front cover.](https://usermanual.wiki/Samsung-Electronics-Co/SCX4300/User-Guide-890495-Page-40.png)

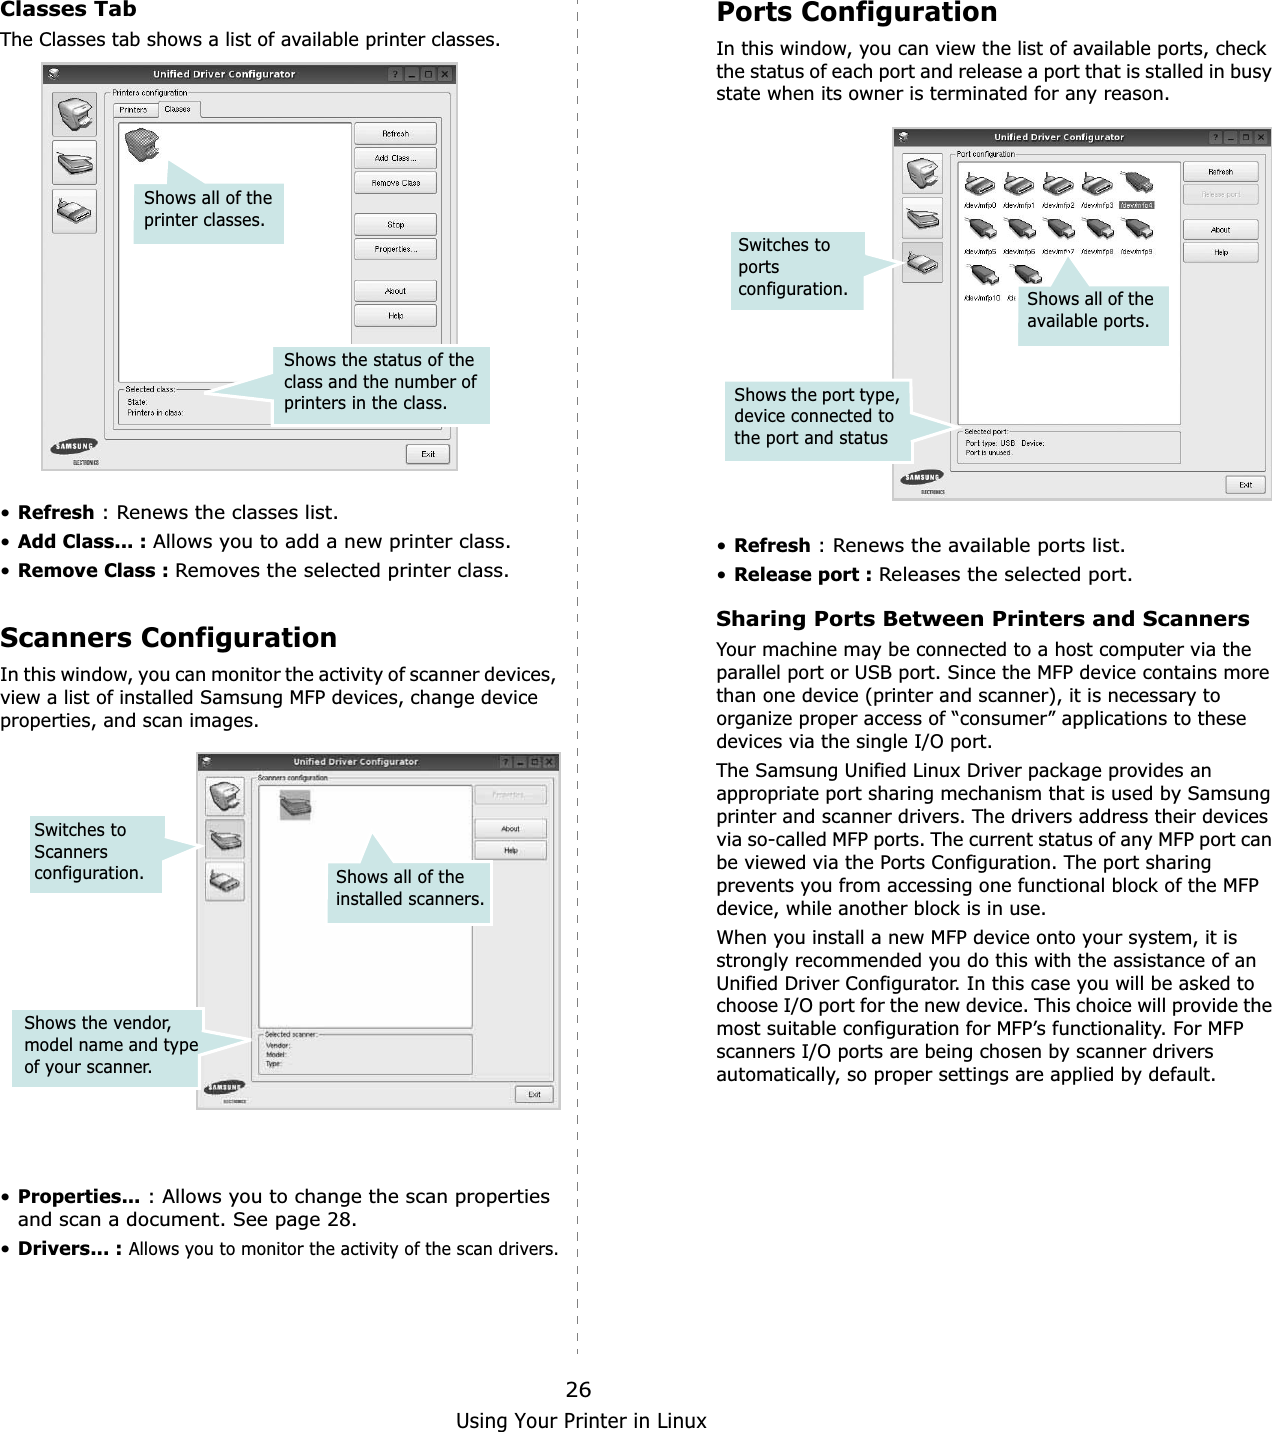
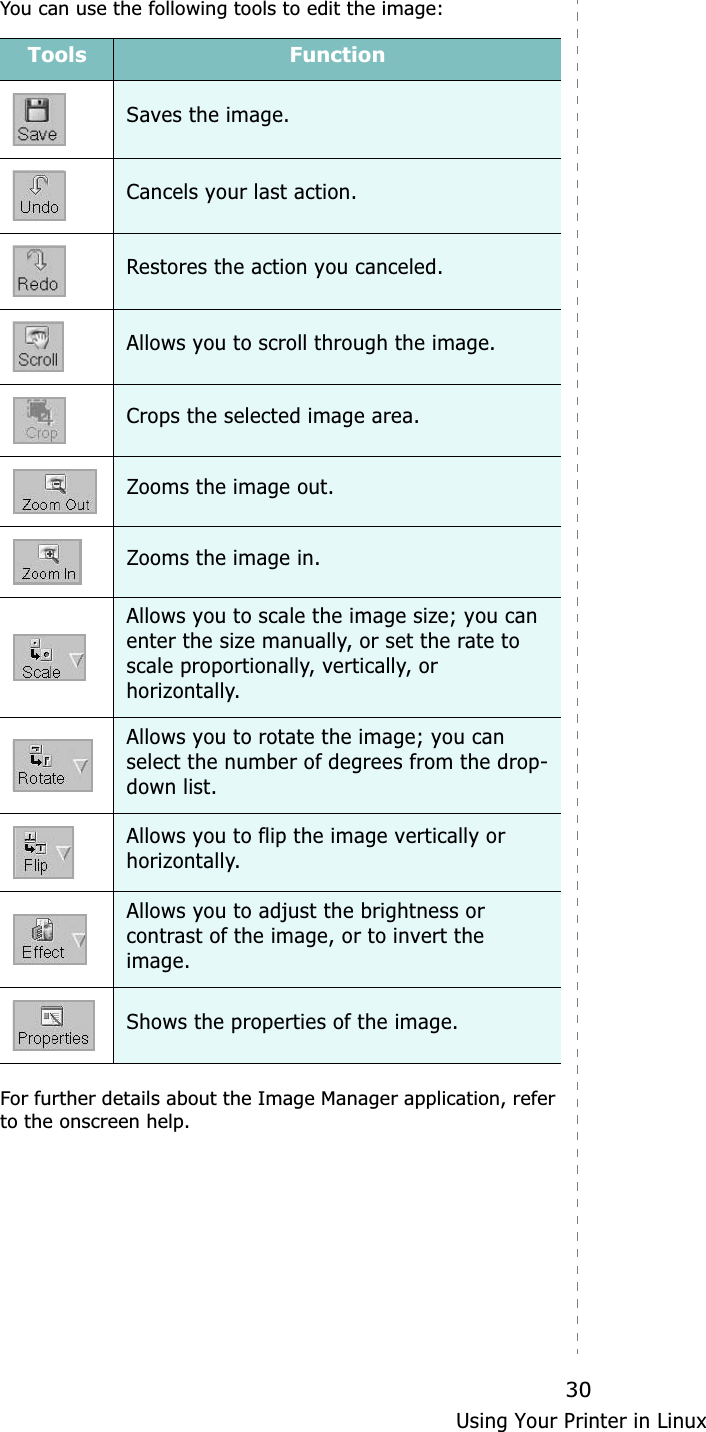
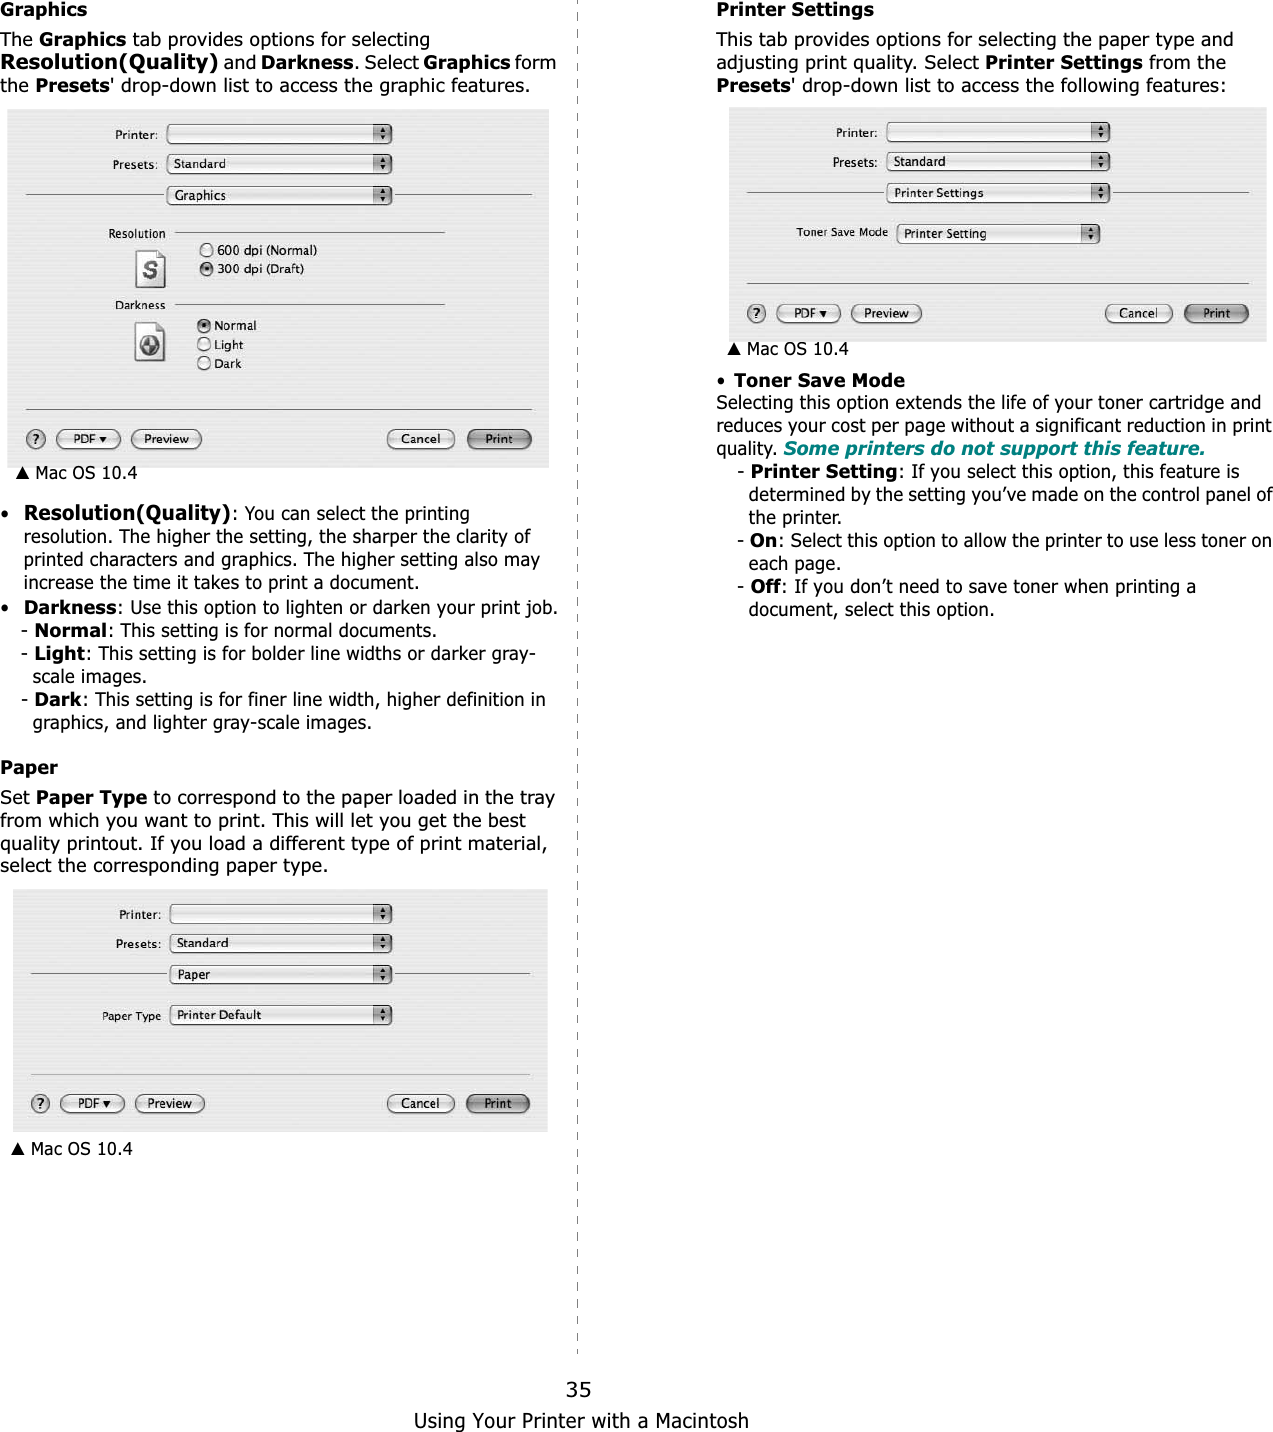
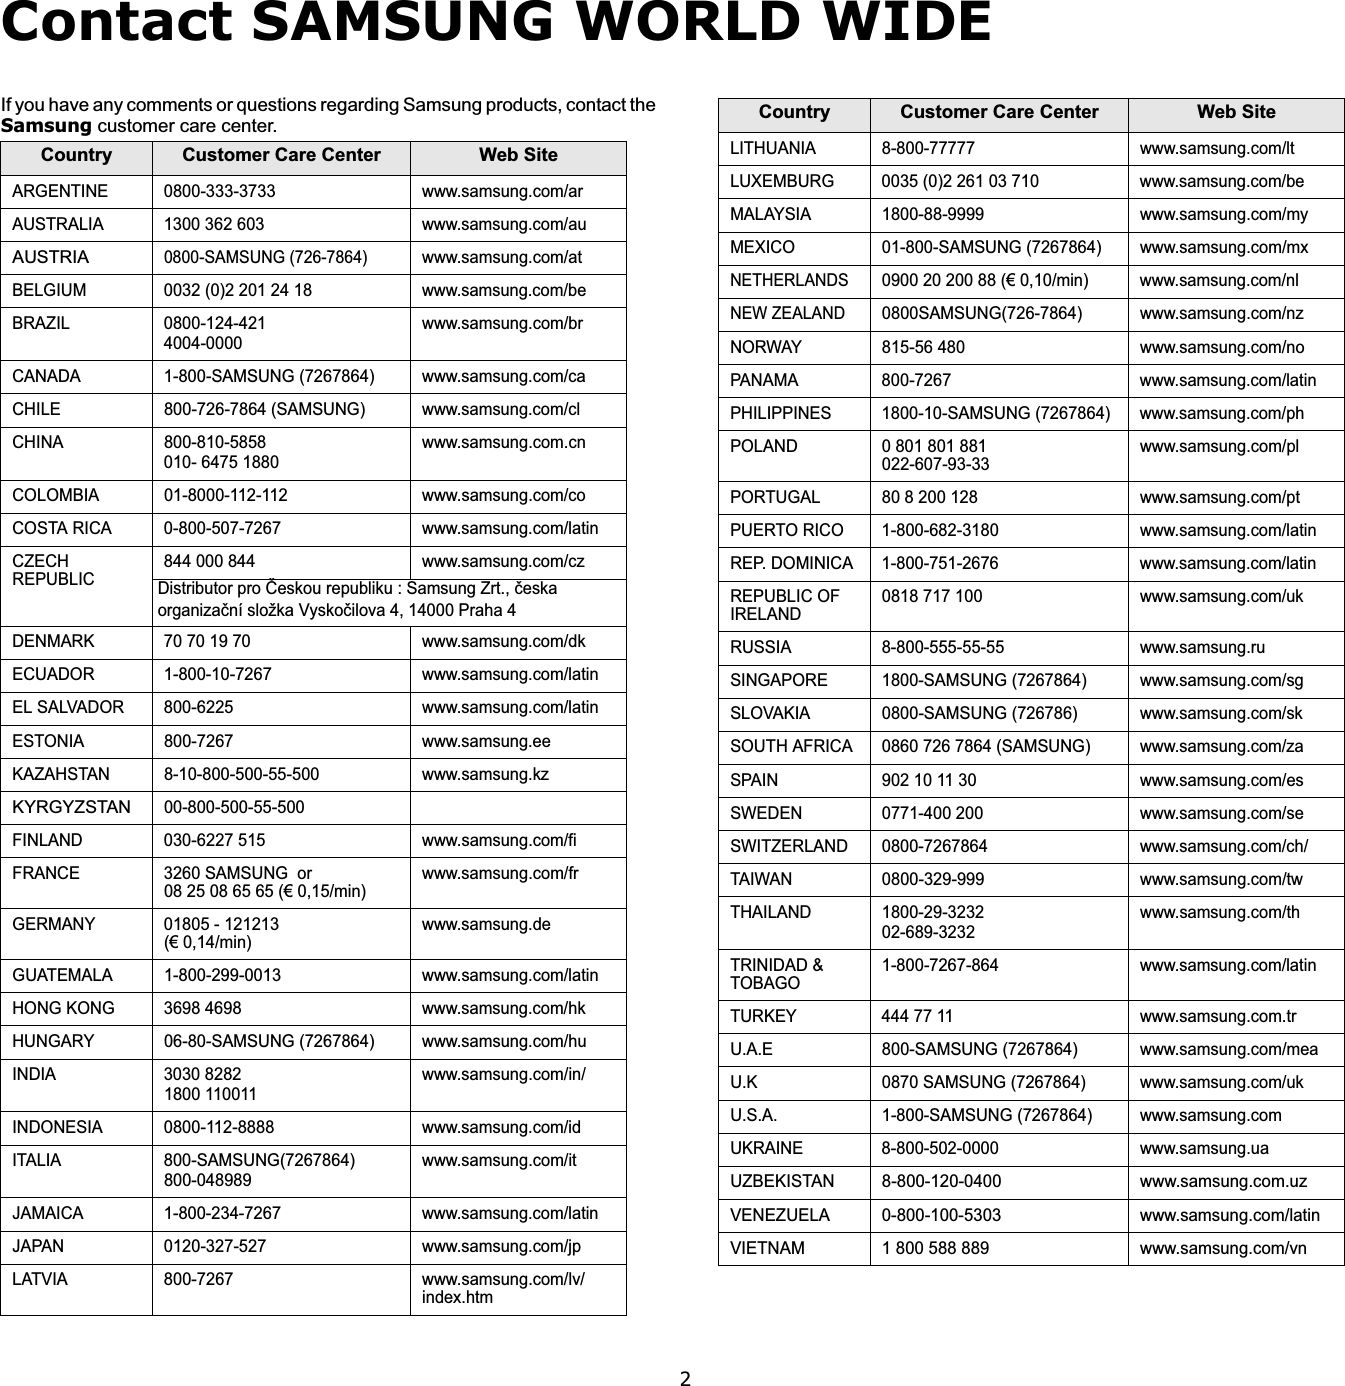
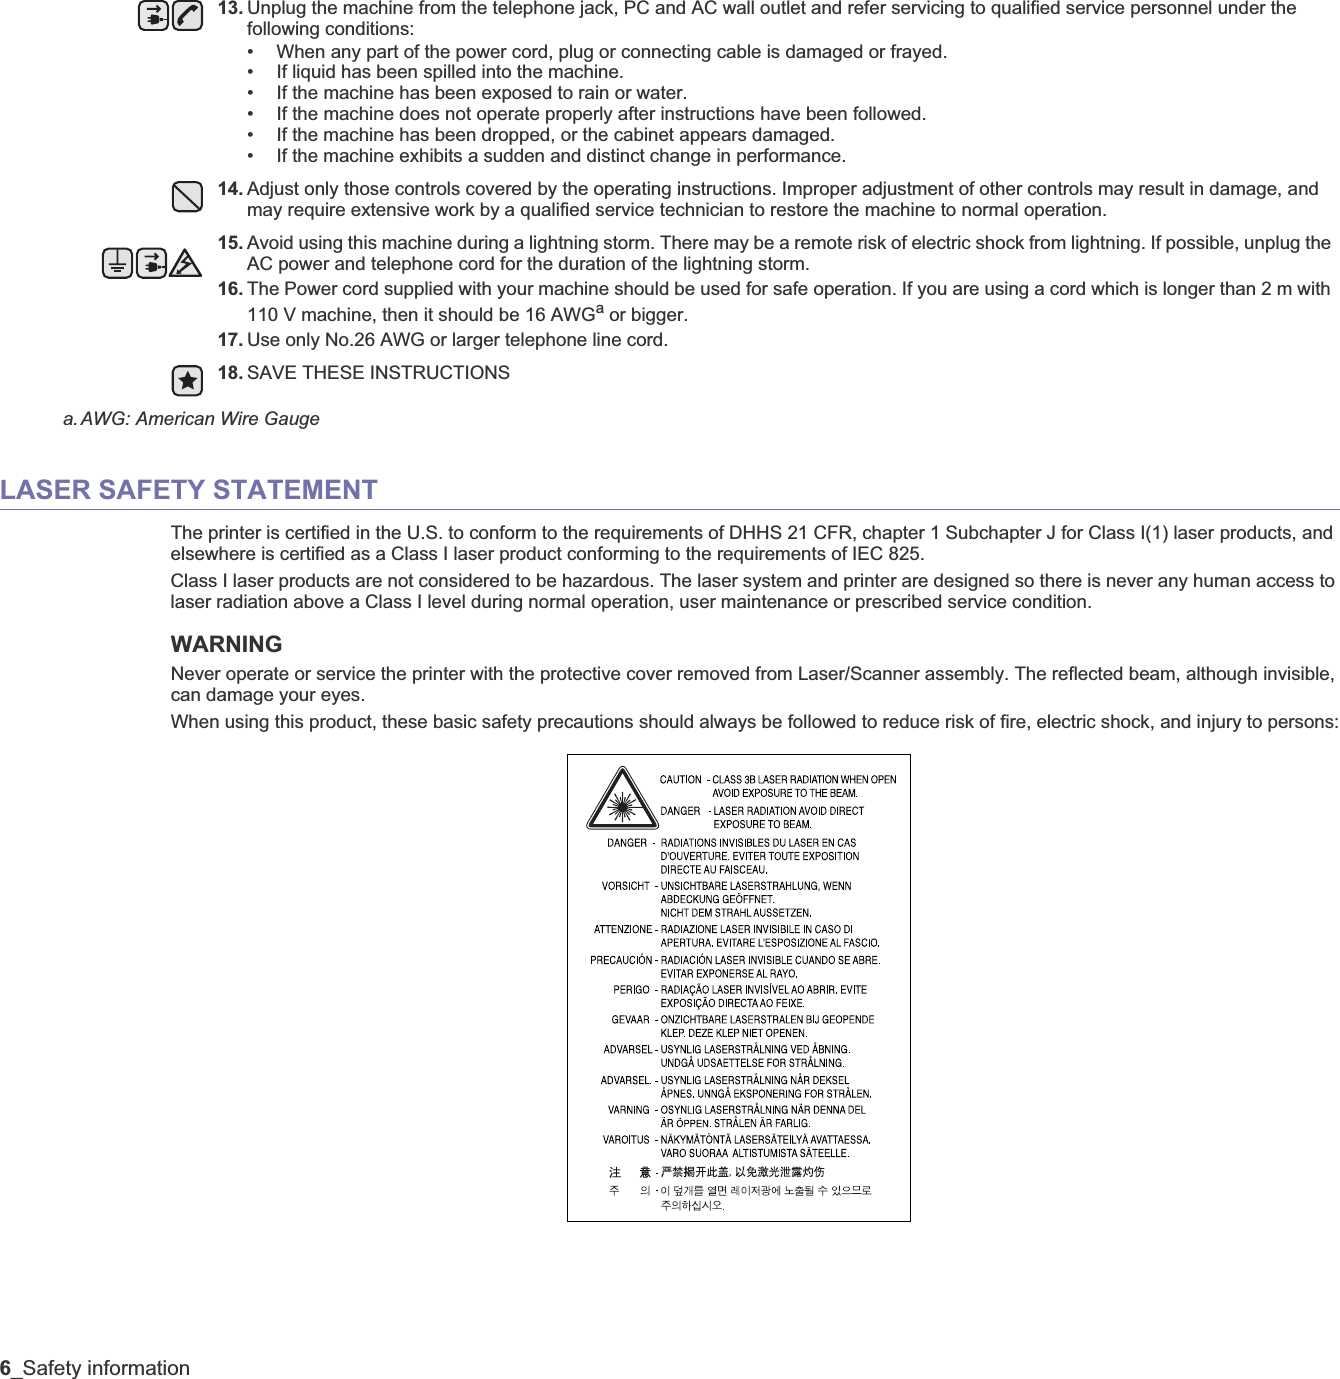
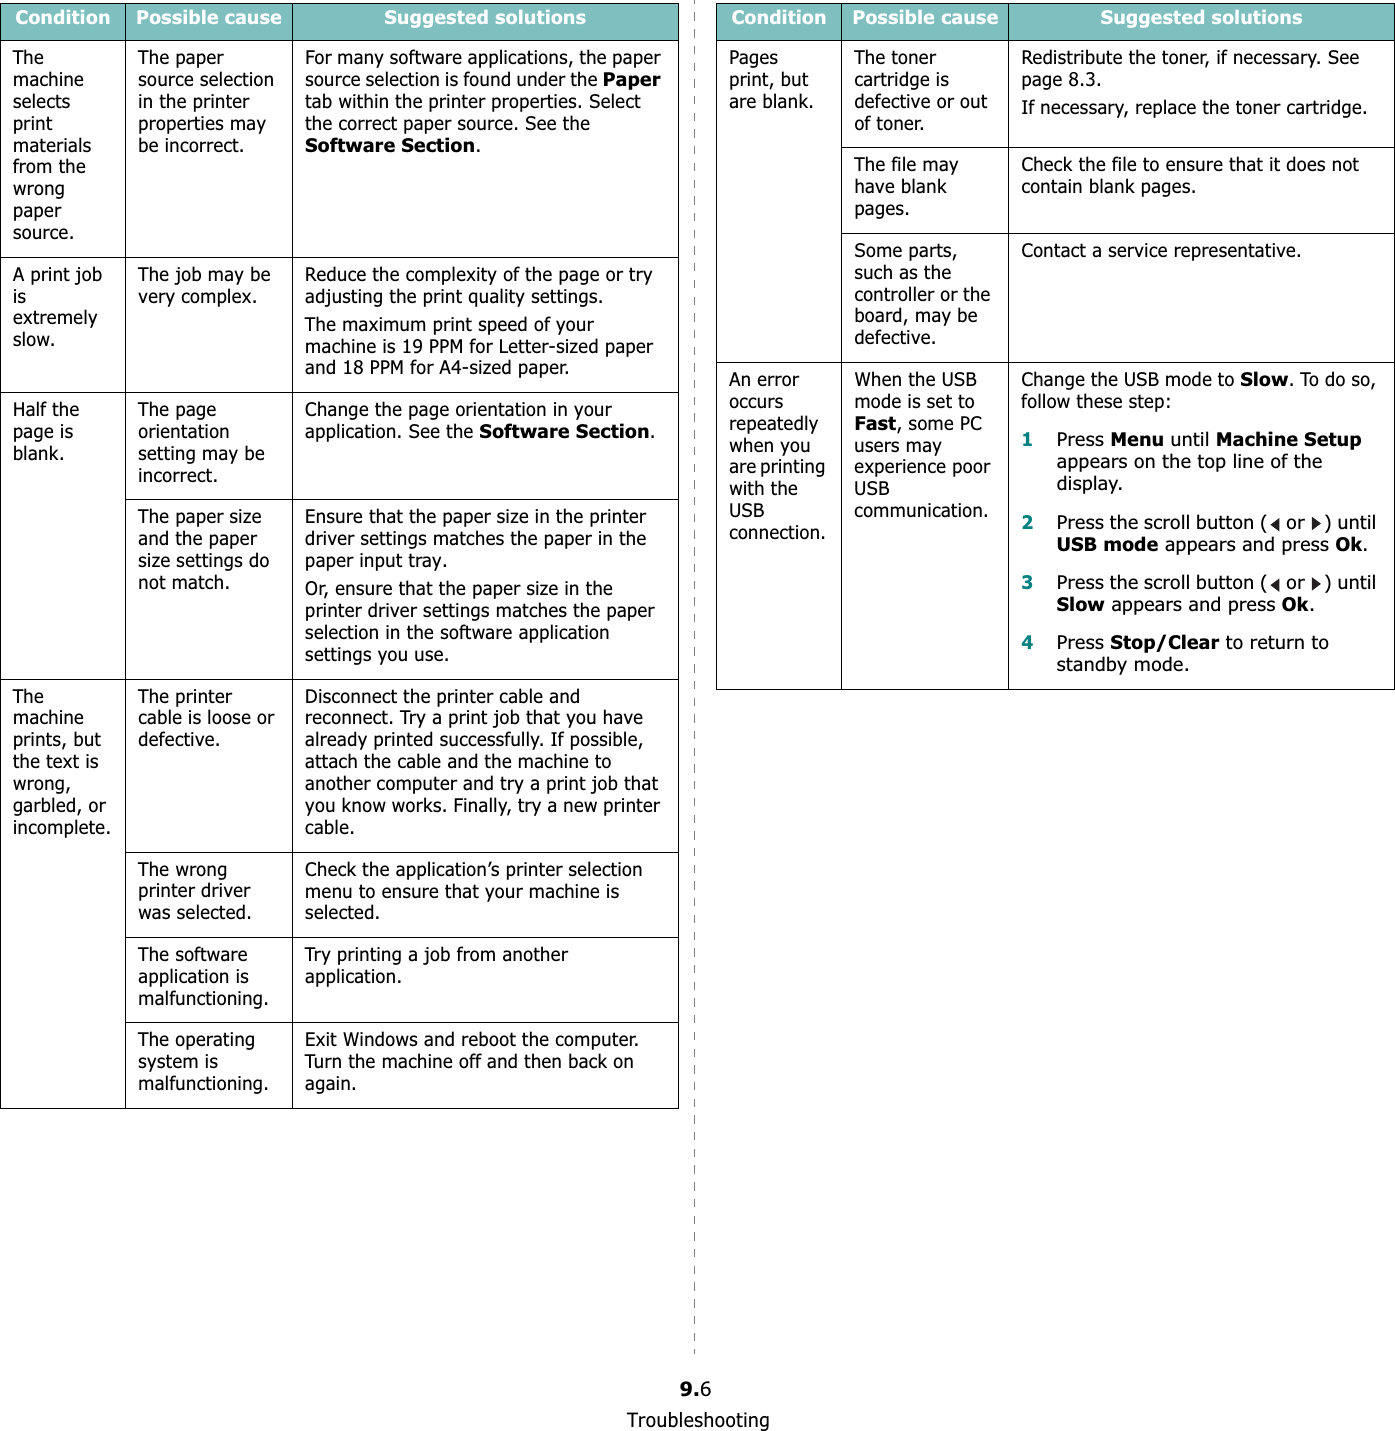
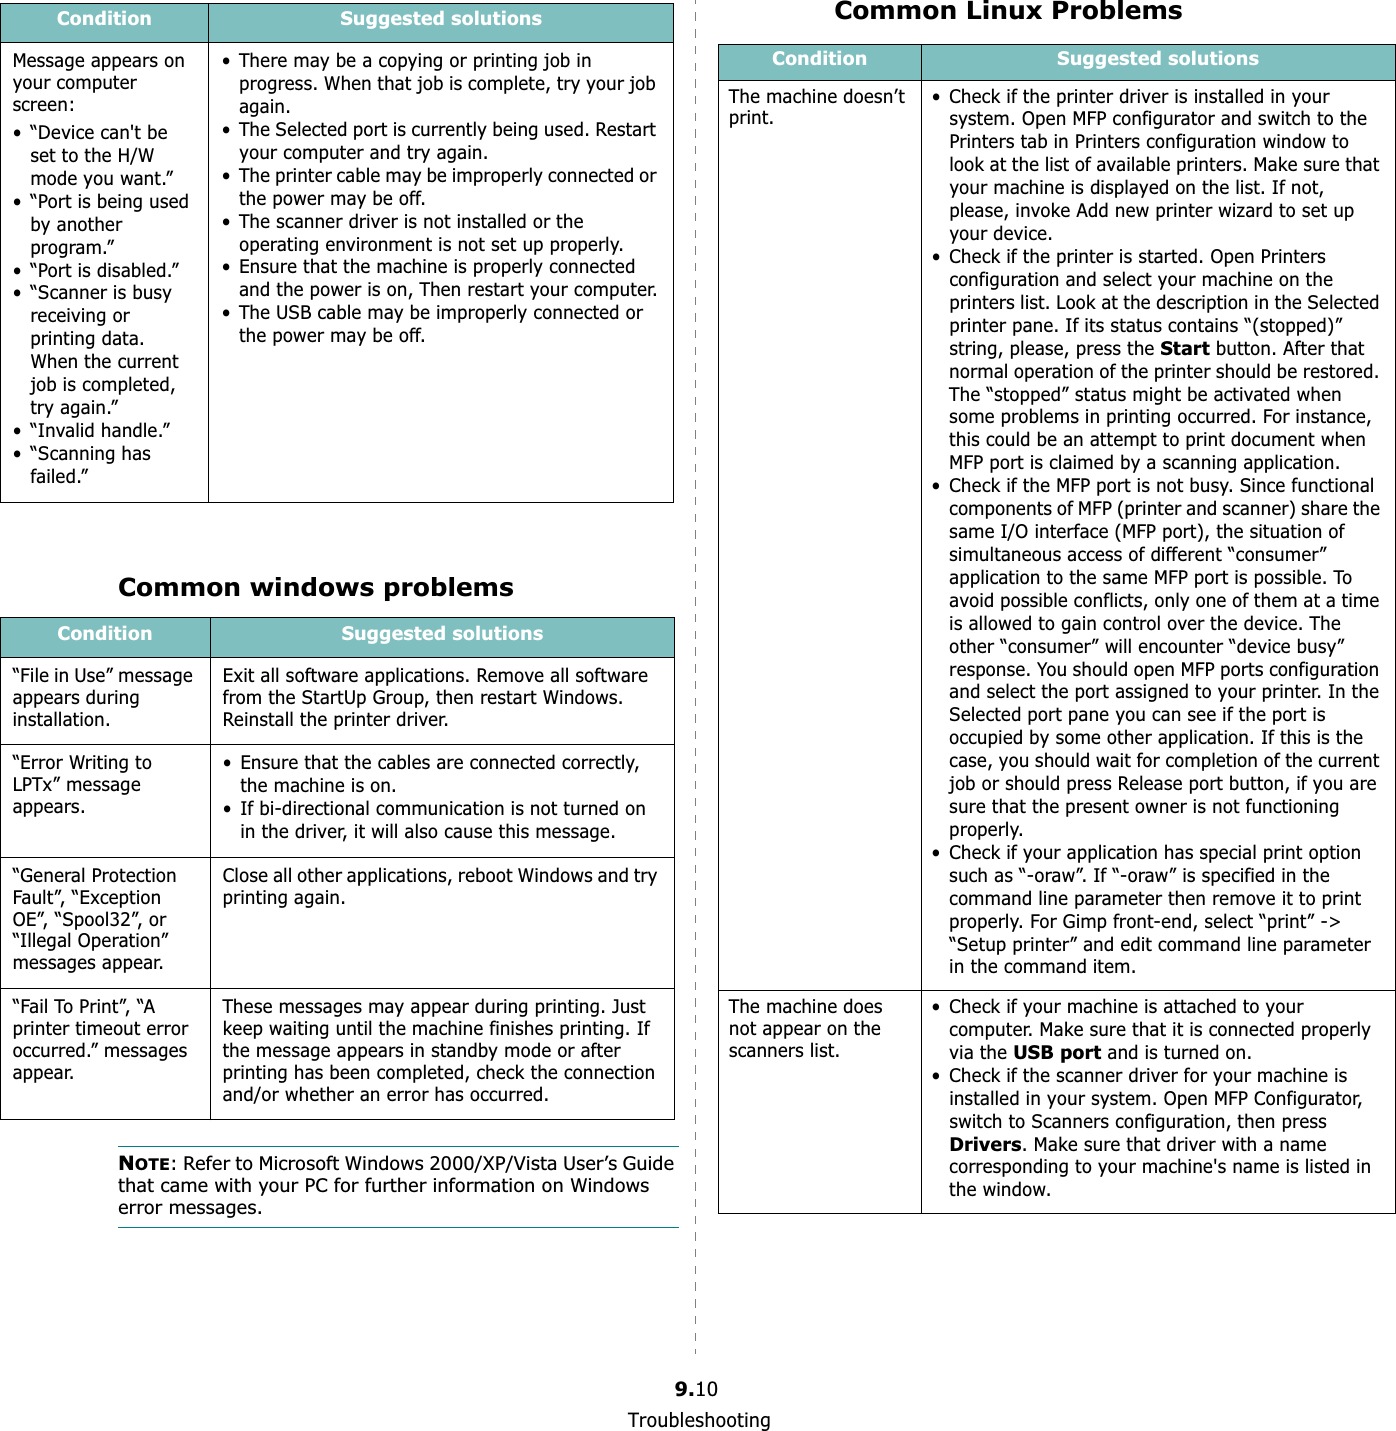
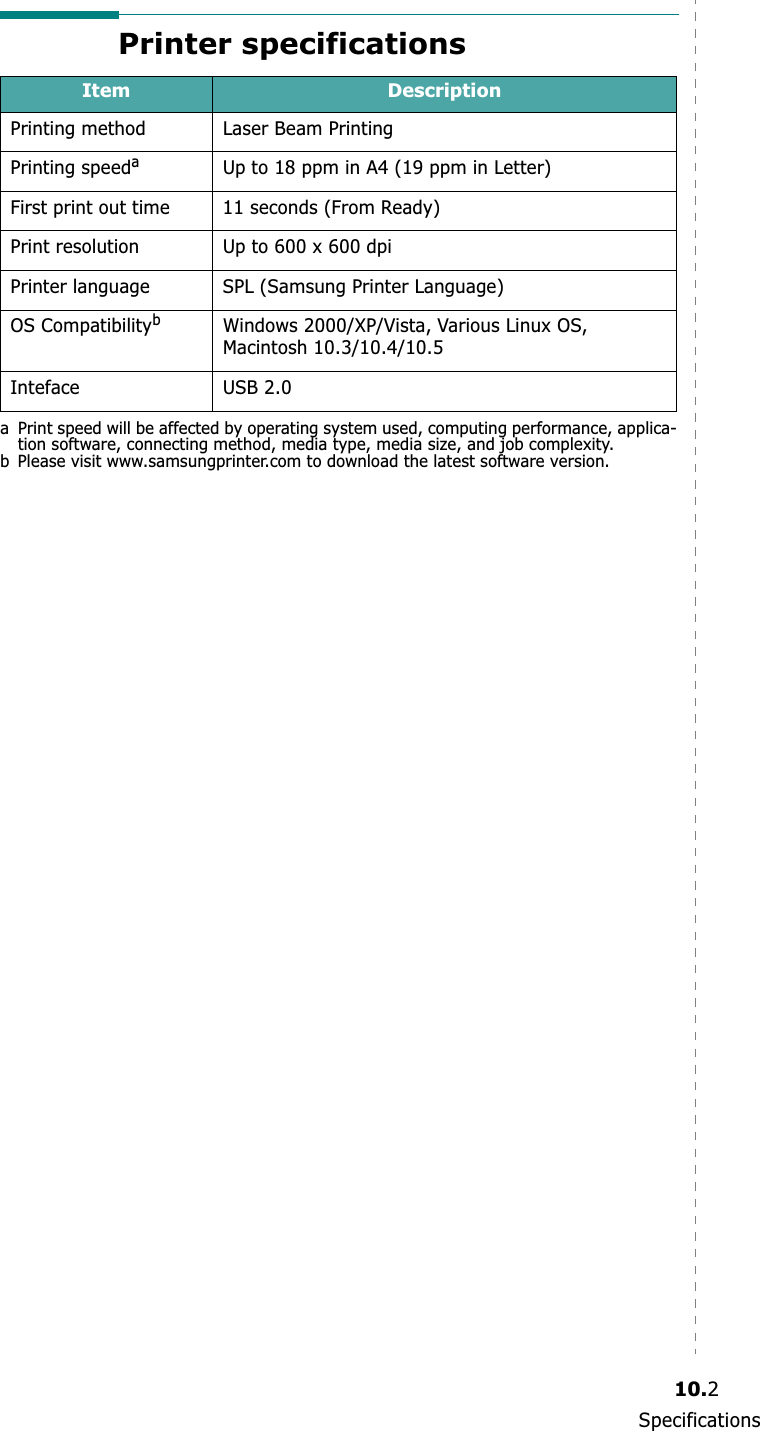
![Troubleshooting9.4Understanding display messagesMessages appear on the Smart Panel program window or the control panel display to indicate the machine’s status or errors. Refer to the tables below to understand the messages’ meaning and correct the problem if necessary. Messages and their meanings are listed in alphabetical order.NOTE: When you call for service, it is very convenient to tell the service representative the display message.Display Meaning Suggested solutions[LSU Error]A problem has occurred in the LSU (Laser Scanning Unit).Unplug the power cord and plug it back in. If the problem persists, please call for service.[No Paper]Add PaperThe paper in the paper input trayhas run out.Load paper in the paper input tray. See page 2.3.[Over Heat]There is a problem in the fuser unit.Unplug the power cord and plug it back in. If the problem persists, please call for service.[Paper Jam 0]Open/CloseDoorPaper has jammed in the feeding area of the paper input tray.Clear the jam. See page 9.1.[Paper Jam 1] Open/CloseDoorPaper has jammed in the fuser area or in the manual feeder.Clear the jam. See page 9.2.[Paper Jam 2]Check InsidePaper has jammed in the paper exit area.Clear the jam. See page 9.2.Door OpenThe front coverorrear cover is not securely latched.Close the cover until it locks into place.Hsync ErrorA problem has occurred in the LSU (Laser Scanning Unit).Unplug the power cord and plug it back in. If the problem persists, please call for service.Invalid TonerYou have used an unauthorized cartridge.You must use a Samsung approved cartridge.Jam 1 or Install Toner•The toner cartridge is not installed.•Paper has jammed in the fuser area or in the manual feeder.• Install the Samsung genuine toner cartridge designed for your machine. Otherwise reinstall toner cartridge at several times. See page 2.2.• Clean the paper jam. See page 9.1.Low Heat ErrorThere is a problem in the fuser unit.Unplug the power cord and plug it back in. If the problem persists, please call for service.NonSamsung Toner Replace TonerThe toner cartridge is not a Samsung-genuine cartridge. Replace the toner cartridge with a Samsung-genuine.Open Heat ErrorThere is a problem in the fuser unit.Unplug the power cord and plug it back in. If the problem persists, please call for service.Power FailurePower has turned off then on and the machine’s memory has not been back up.The job which you were trying to do before the power failure must be completely re-done.Scanner ErrorThere is a problem in the scanner unit.Unplug the power cord and plug it back in. If the problem persists, please call for service.Toner Empty Replace TonerThe toner cartridge has run out.Replace the toner cartridge with a new one. See page 8.4.TonerExhausted Replace TonerTo prevent serious pollution or breakdown of printer, the printer stops printing.Replace the toner cartridge with a new one. See page 8.4.Toner LowThe toner is almost empty.Take out the toner cartridge and gently shake it. By doing this, you can temporarily reestablish printing operations.Display Meaning Suggested solutions](https://usermanual.wiki/Samsung-Electronics-Co/SCX4300/User-Guide-890495-Page-43.png)

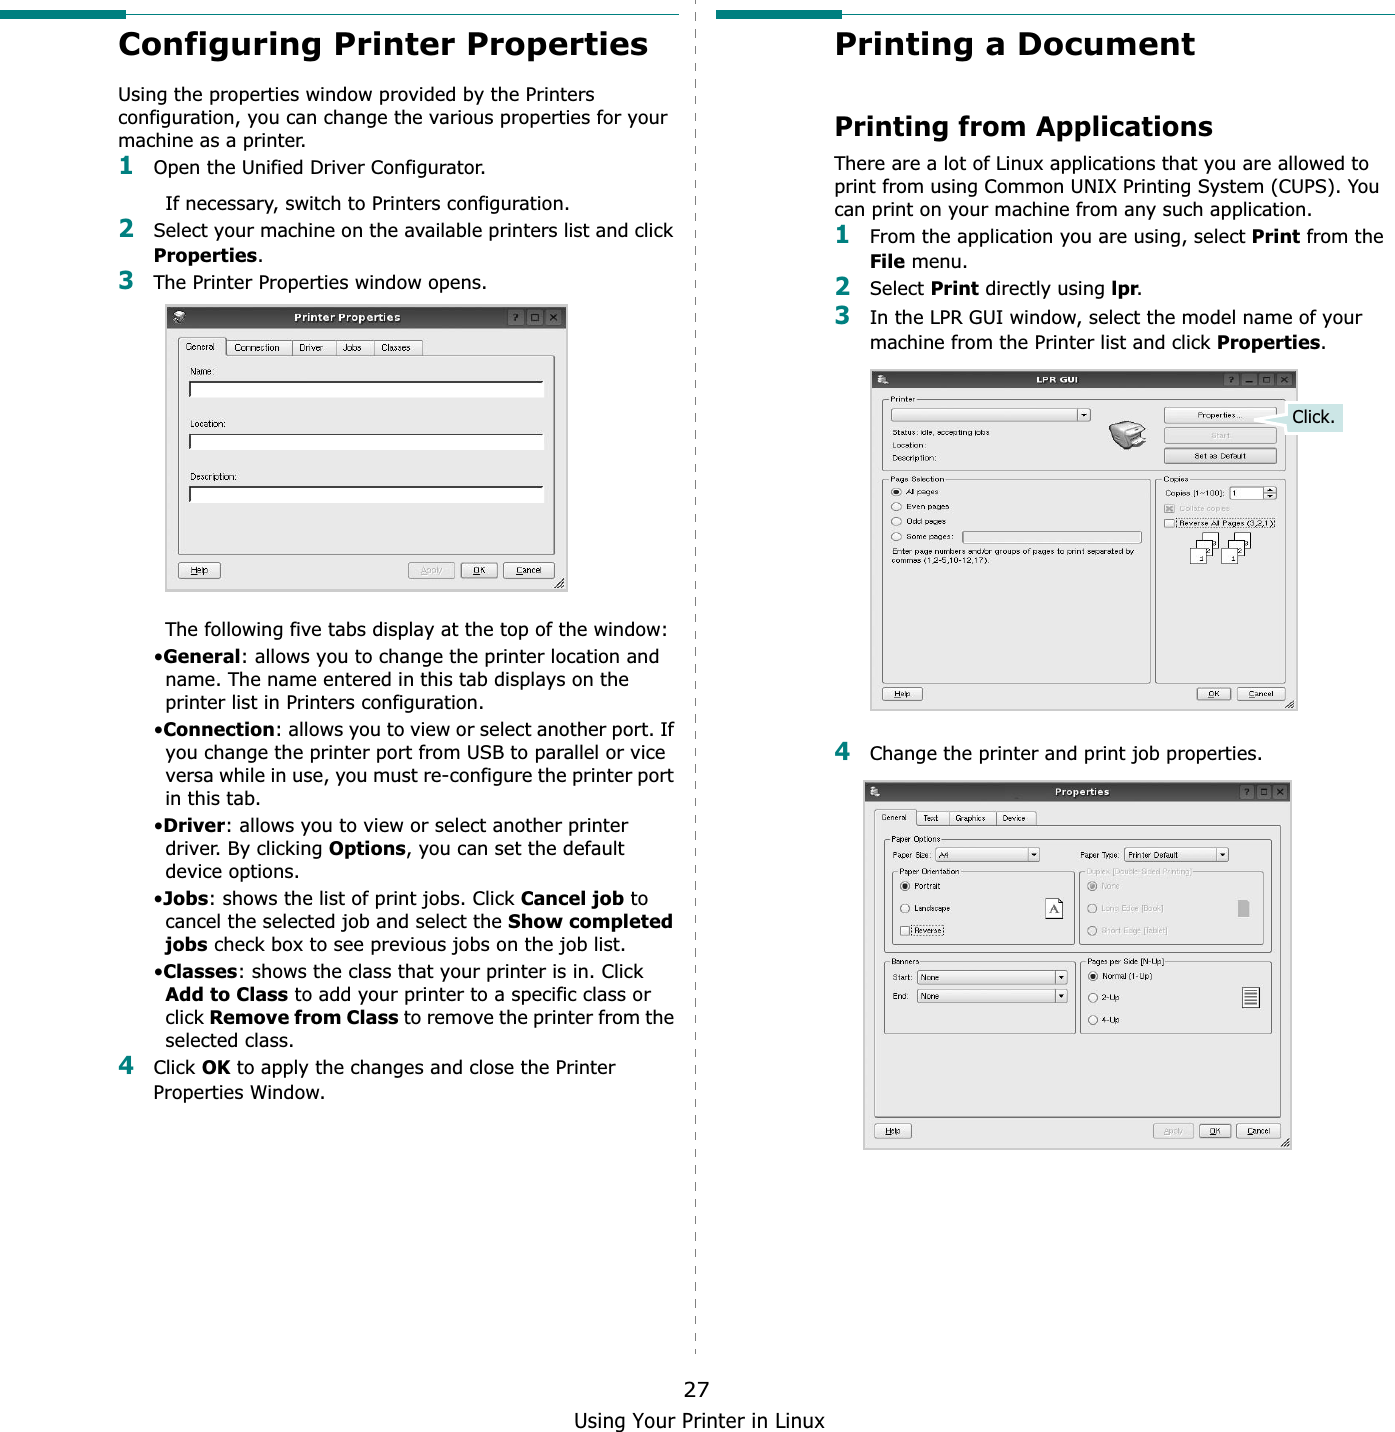
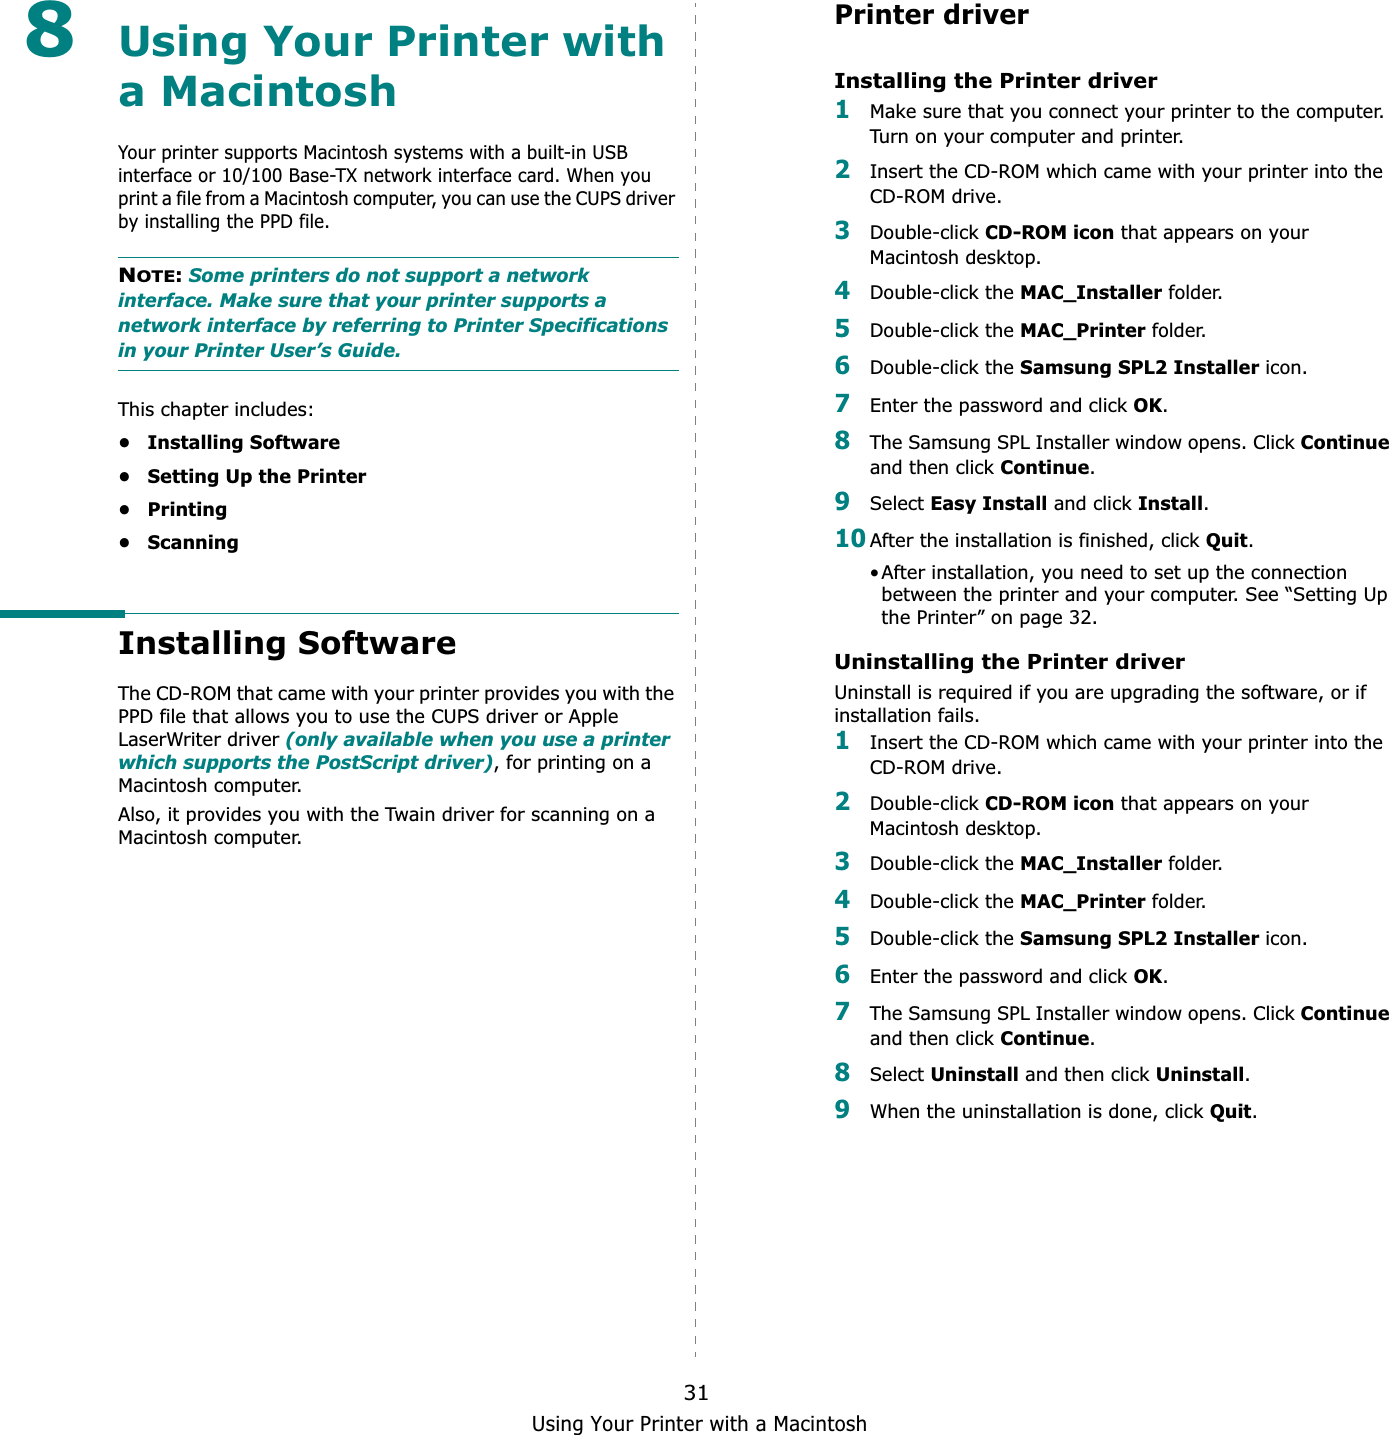
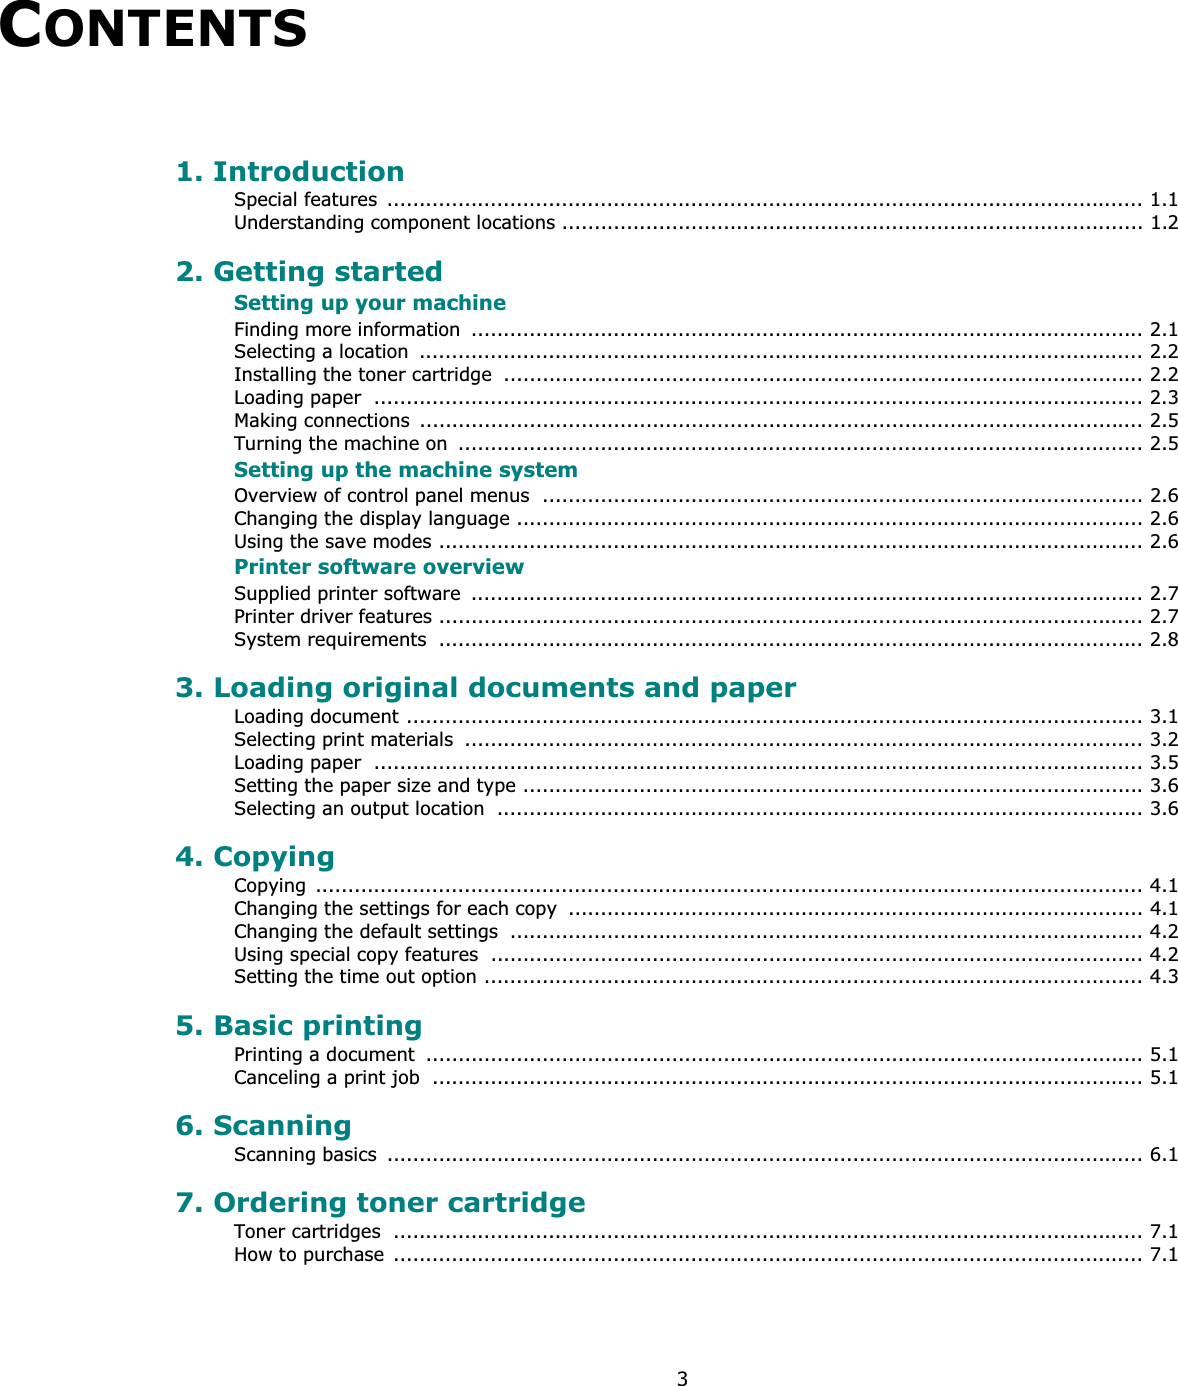
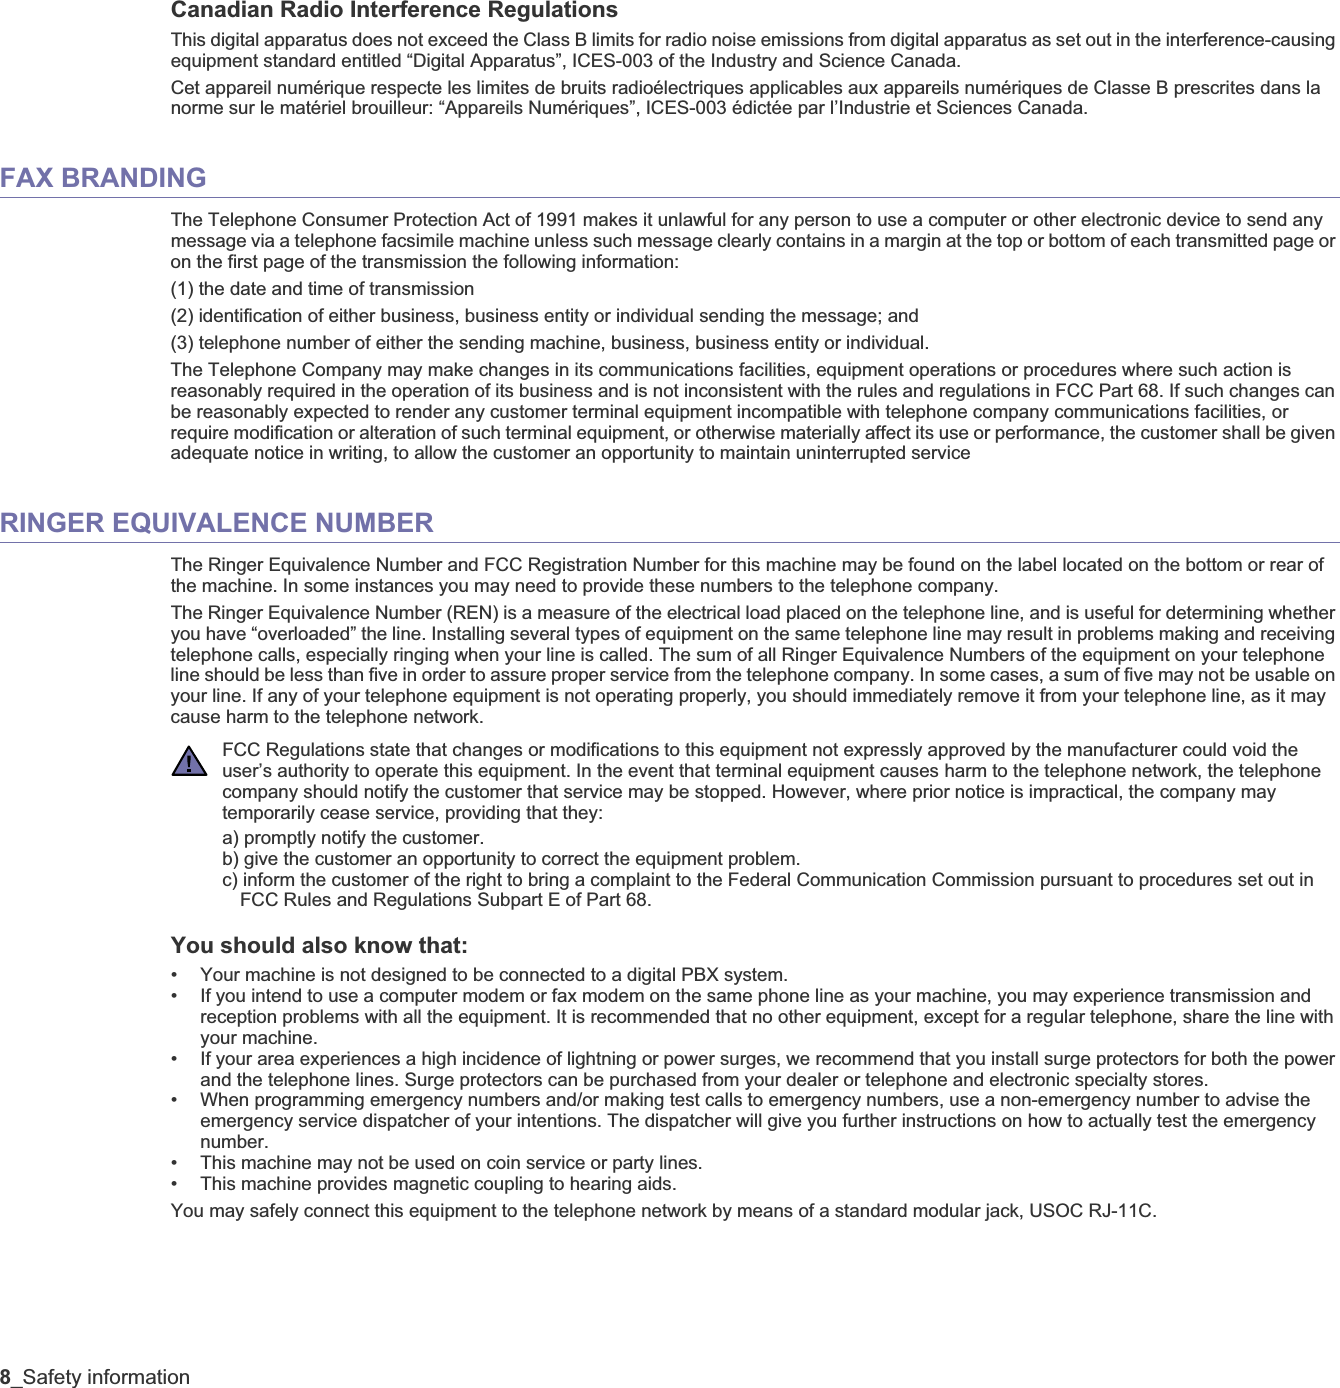
![Using Your Printer in Linux237Using Your Printer in LinuxYou can use your machine in a Linux environment. This chapter includes:• Getting Started• Installing the Unified Linux Driver• Using the Unified Driver Configurator• Configuring Printer Properties• Printing a Document• Scanning a DocumentGetting StartedThe supplied CD-ROM provides you with Samsung’s Unified Linux Driver package for using your machine with a Linux computer.Samsung’s Unified Linux Driver package contains printer and scanner drivers, providing the ability to print documents and scan images. The package also delivers powerful applications for configuring your machine and further processing of the scanned documents.After the driver is installed on your Linux system, the driver package allows you to monitor a number of machine devices via fast ECP parallel ports and USB simultaneously. The acquired documents can then be edited, printed on the same local or network machine devices, sent by e-mail, uploaded to an FTP site, or transferred to an external OCR system.The Unified Linux Driver package is supplied with a smart and flexible installation program. You don't need to search for additional components that might be necessary for the Unified Linux Driver software: all required packages will be carried onto your system and installed automatically; this is possible on a wide set of the most popular Linux clones.Installing the Unified Linux DriverInstalling the Unified Linux Driver1Make sure that you connect your machine to your computer. Turn both the computer and the machine on.2When the Administrator Login window appears, type in root in the Login field and enter the system password.NOTE: You must log in as a super user (root) to install the printer software. If you are not a super user, ask your system administrator.3Insert the printer software CD-ROM. The CD-ROM will automatically run.If the CD-ROM does not automatically run, click the icon at the bottom of the desktop. When the Terminal screen appears, type in:If the CD-ROM is secondary master and the location to mount is /mnt/cdrom,[root@localhost root]#mount -t iso9660 /dev/hdc /mnt/cdrom[root@localhost root]#cd /mnt/cdrom/Linux[root@localhost root]#./install.sh If you still failed to run the CD-ROM, type the followings in sequence:[root@localhost root]#umount/dev/hdc[root@localhost root]#mount -t iso9660 /dev/hdc /mnt/cdromNOTE: The installation program runs automatically if you have an autorun software package installed and configured.](https://usermanual.wiki/Samsung-Electronics-Co/SCX4300/User-Guide-890495-Page-79.png)
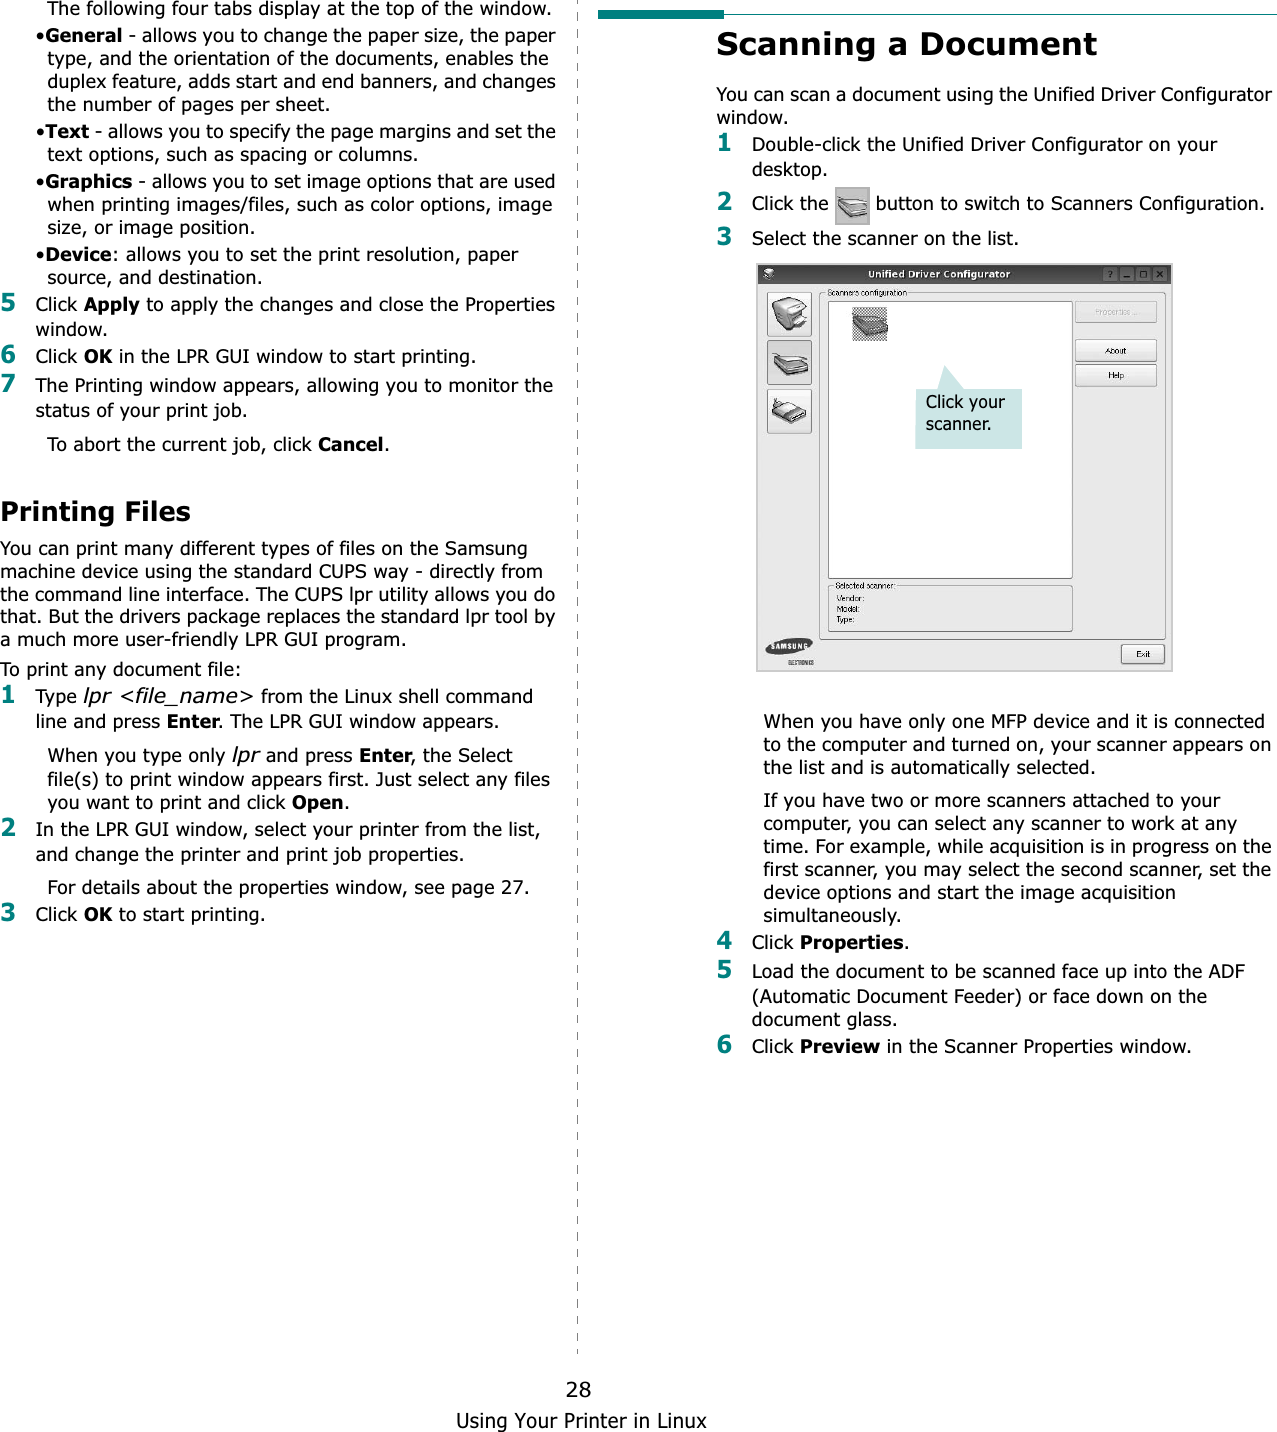
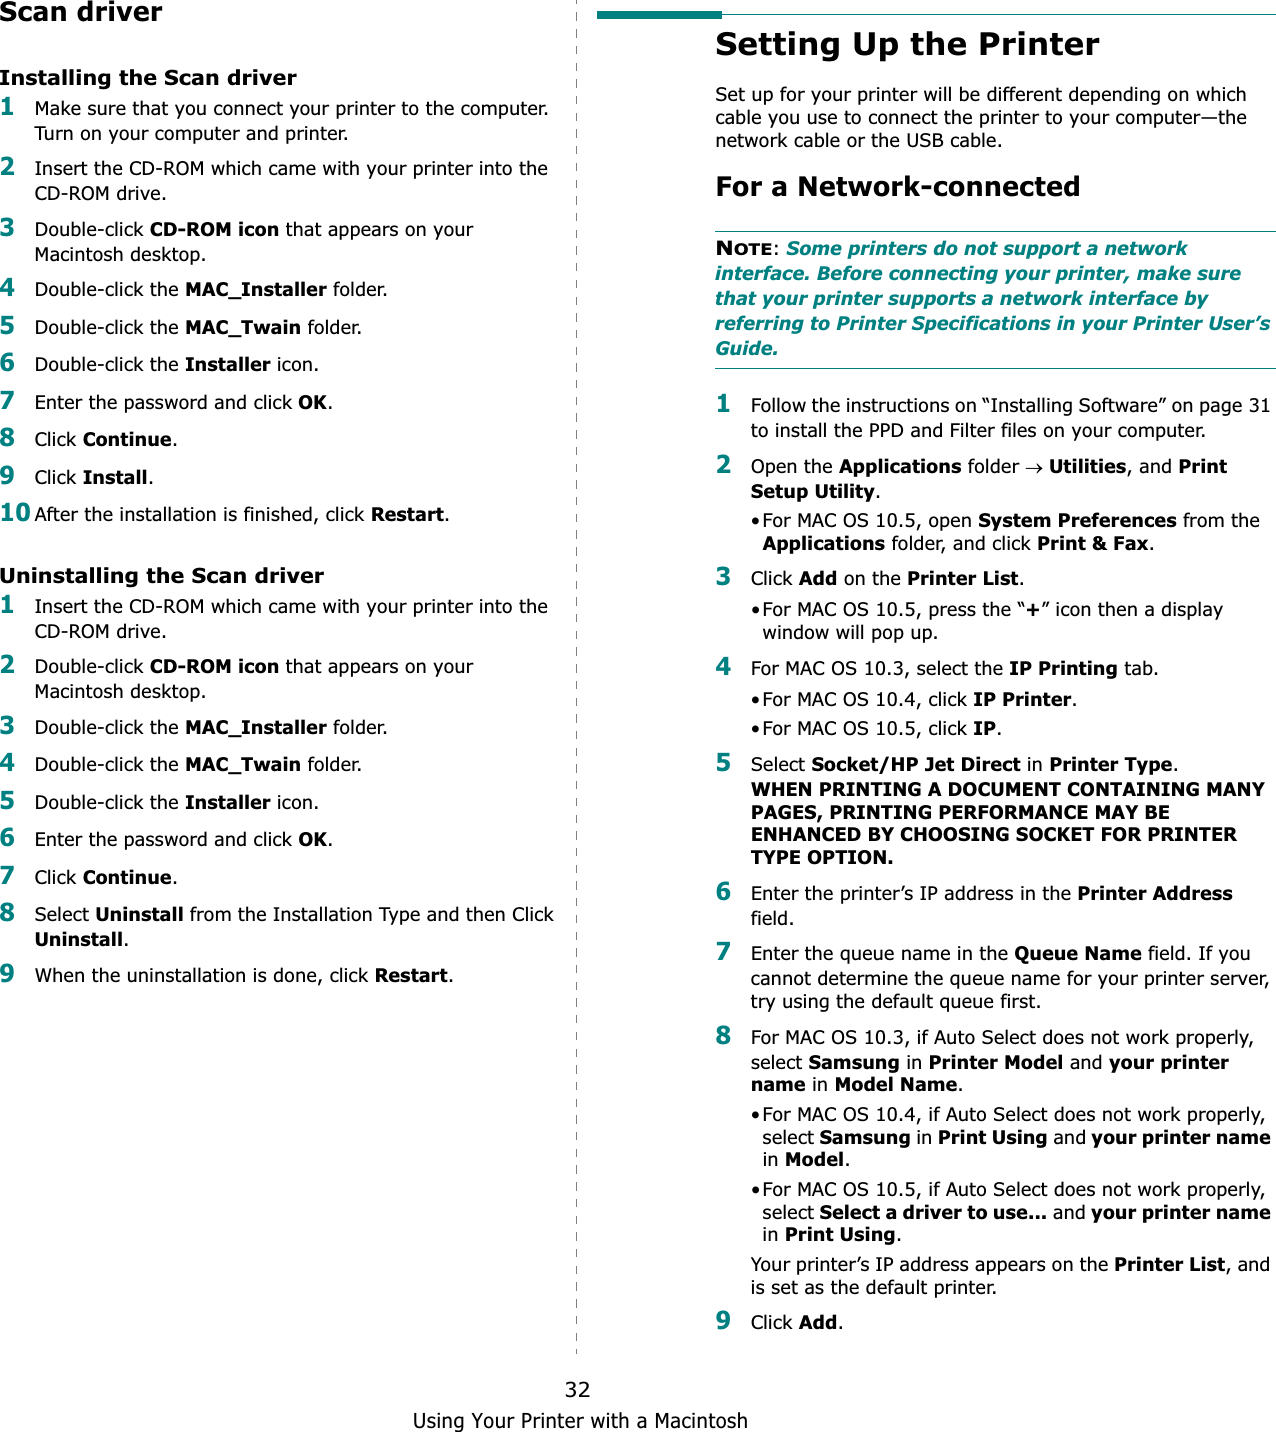
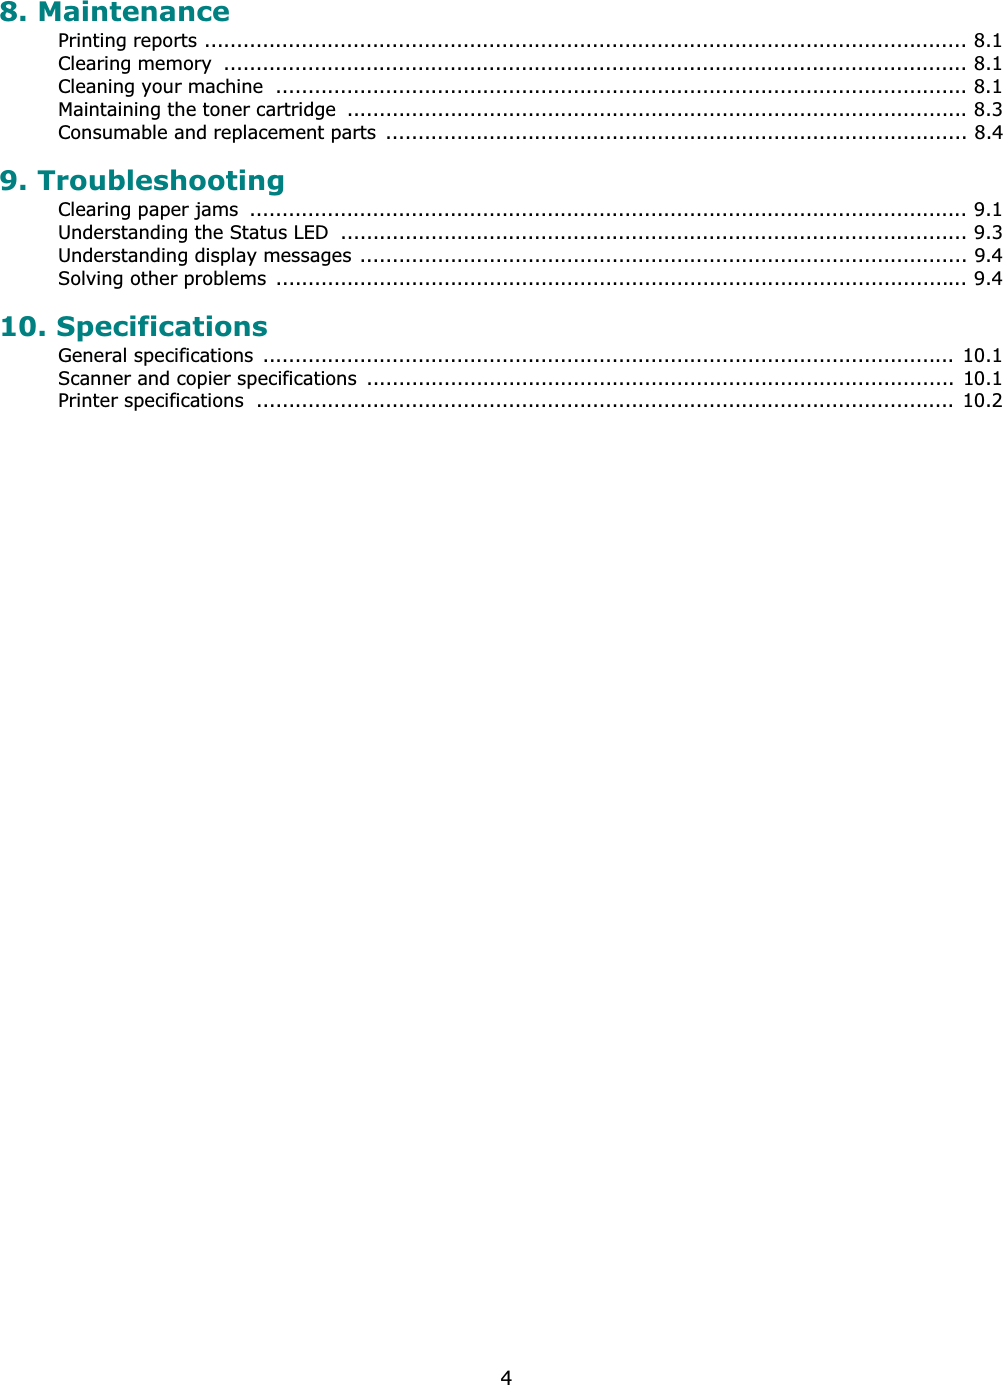
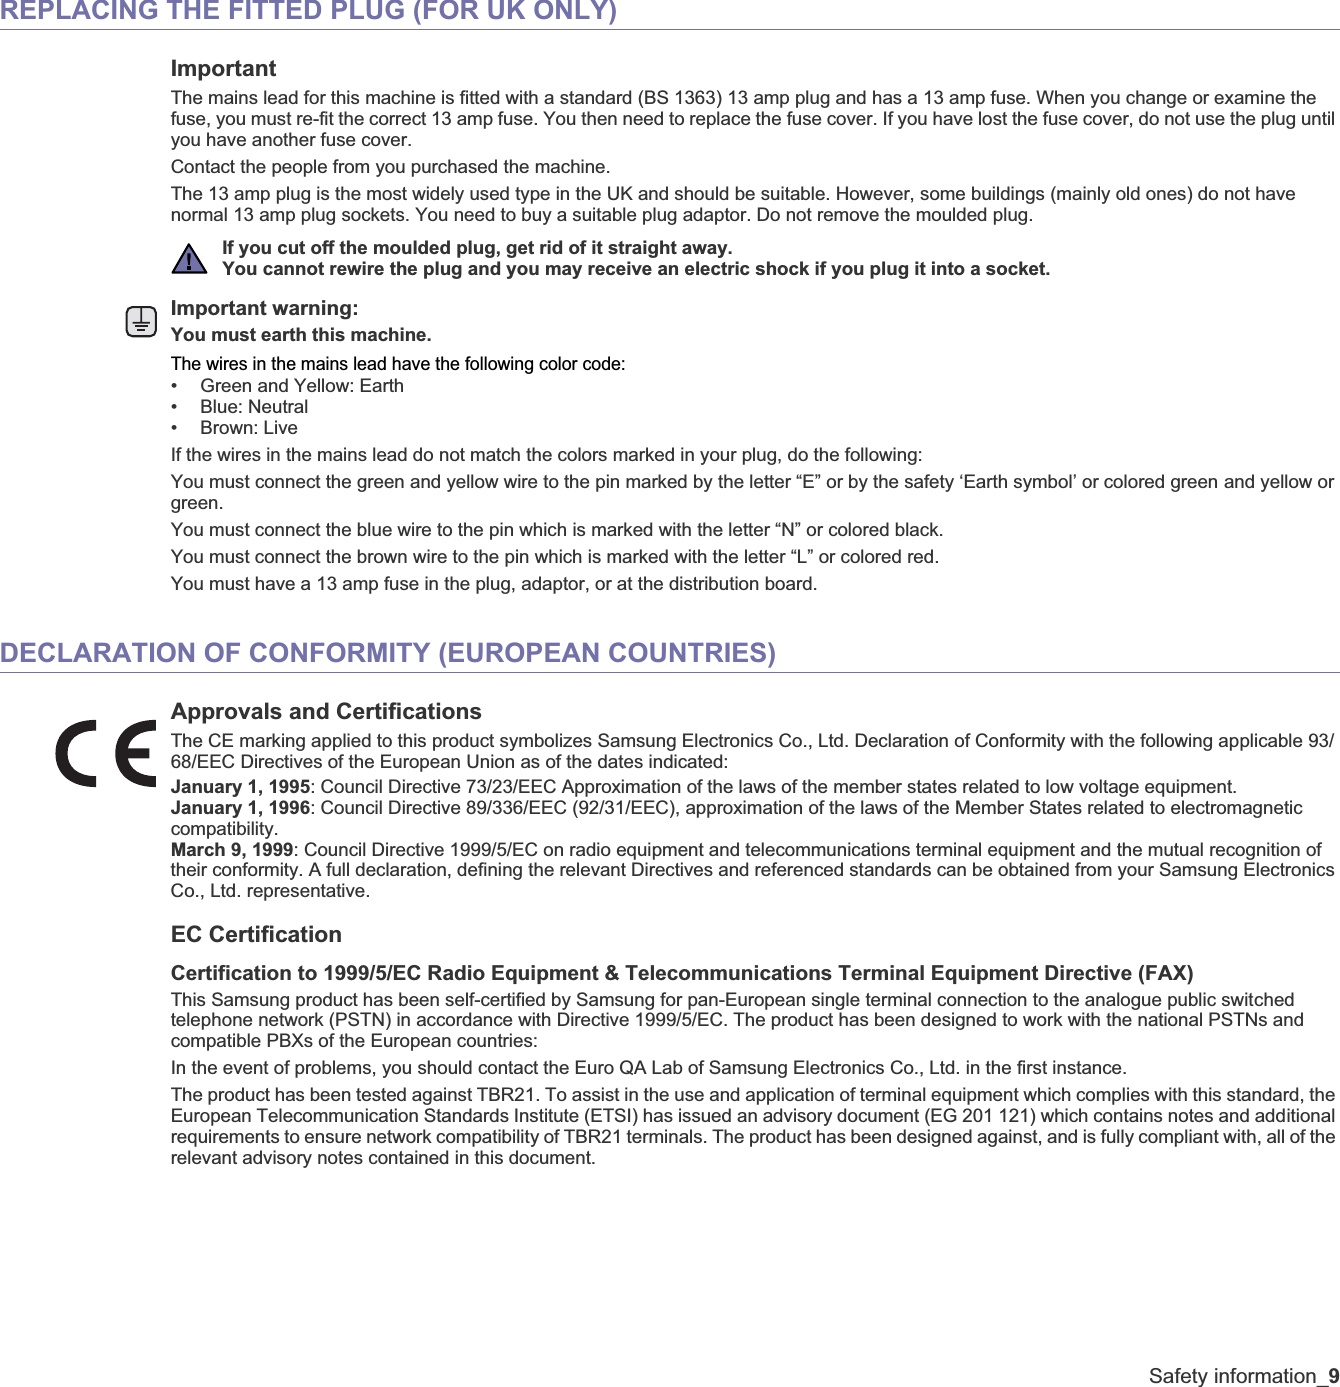
![Using Your Printer in Linux244When the welcome screen appears, click Next.5When the installation is complete, click Finish.The installation program has added the Unified Driver Configurator desktop icon and Samsung Unified Driver group to the system menu for your convenience. If you have any difficulties, consult the onscreen help that is available through your system menu or can otherwise be called from the driver package windows applications, such as Unified Driver Configurator or Image Manager.NOTE: Installing the driver in the text mode:• If you do not use the graphical interface or have failed the driver installation, you have to use the driver in the text mode.• Follow the step 1 to 3, then type [root@localhost Linux]# ./install.sh, than follow the instruction on the terminal screen. Then the installation completes.• When you wan to uninstall the driver, follow the installation instruction above, but type [root@localhost Linux]# ./uninstall.sh on the terminal screen.Uninstalling the Unified Linux Driver1When the Administrator Login window appears, type in root in the Login field and enter the system password.NOTE: You must log in as a super user (root) to install the printer software. If you are not a super user, ask your system administrator.2Insert the printer software CD-ROM. The CD-ROM will automatically run.If the CD-ROM does not automatically run, click the icon at the bottom of the desktop. When the Terminal screen appears, type in:If the CD-ROM is secondary master and the location to mount is /mnt/cdrom,[root@localhost root]#mount -t iso9660 /dev/hdc /mnt/cdrom[root@localhost root]#cd /mnt/cdrom/Linux[root@localhost root]#./uninstall.shNOTE: The installation program runs automatically if you have an autorun software package installed and configured.3Click Uninstall.4Click Next.5Click Finish.](https://usermanual.wiki/Samsung-Electronics-Co/SCX4300/User-Guide-890495-Page-80.png)