Samsung Electronics Co SGHA877 Cellular/PCS GSM/EDGE/WCDMA Phone with Bluetooth User Manual a867 User Guide
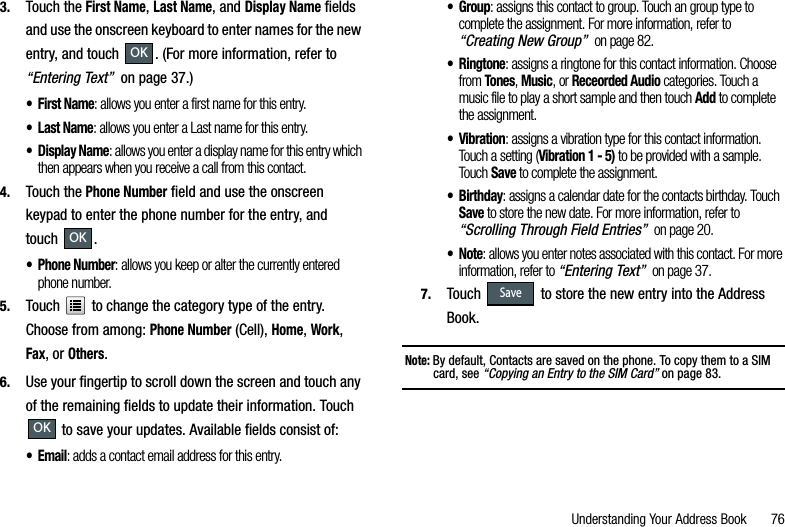
Samsung Electronics Co Ltd Cellular/PCS GSM/EDGE/WCDMA Phone with Bluetooth a867 User Guide
UserManual.wiki
>
Samsung Electronics Co
>
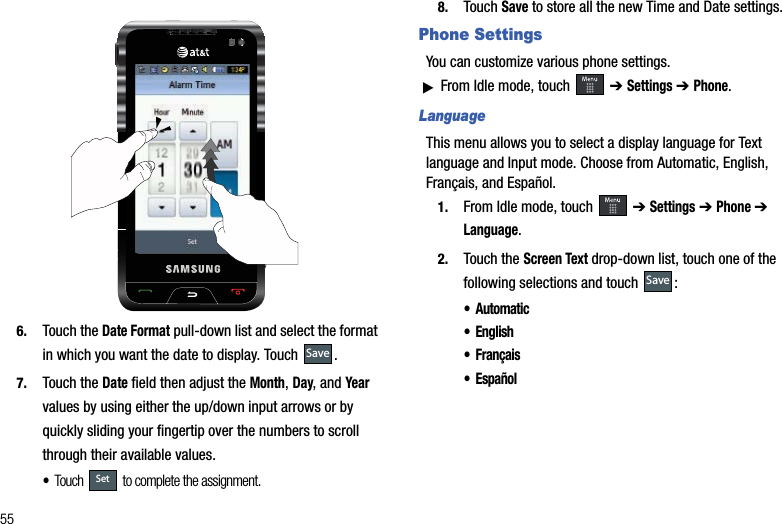
SGHA877 User Manual
Users Manual
Navigation menu
Upload a User Manual
Namespaces
Wiki Guide
HTML
PDF
Info
Views
User Manual
Discussion / Help
Navigation


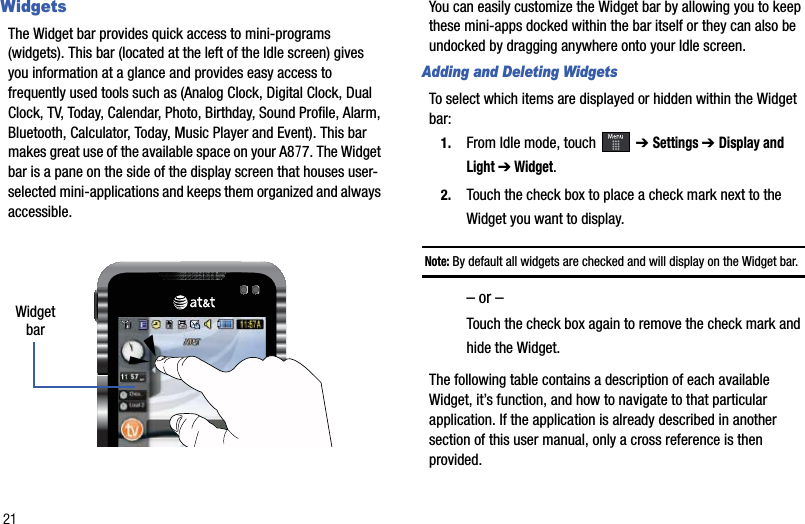
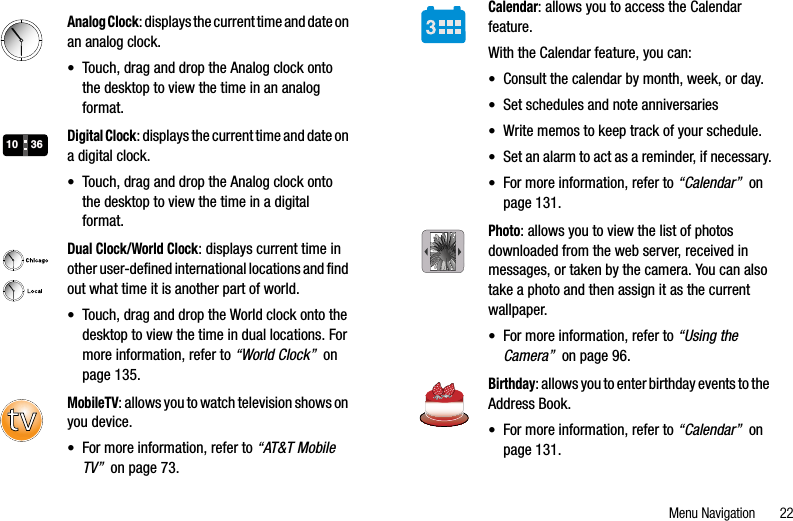
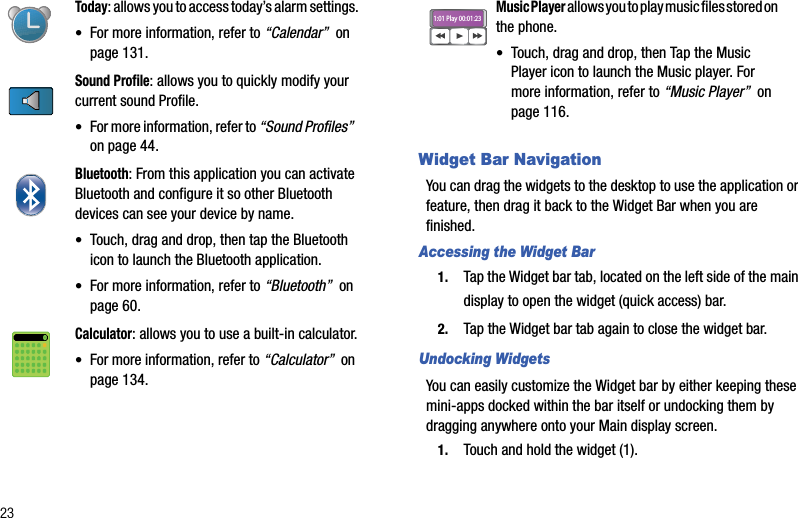
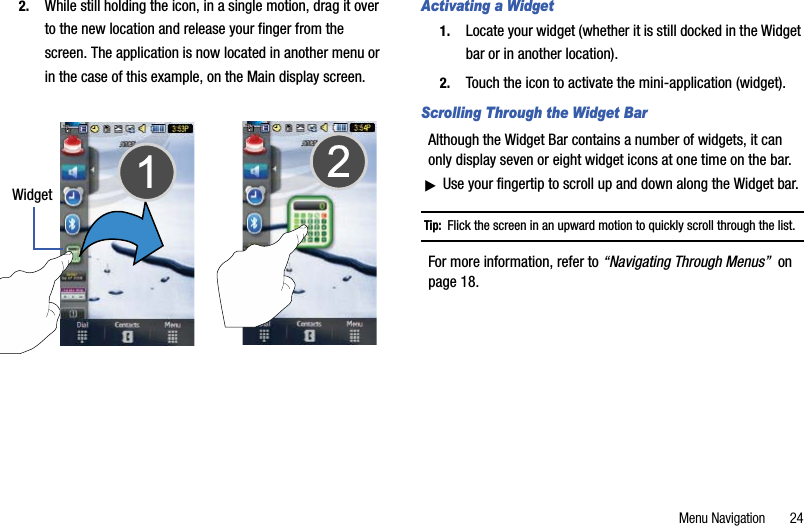


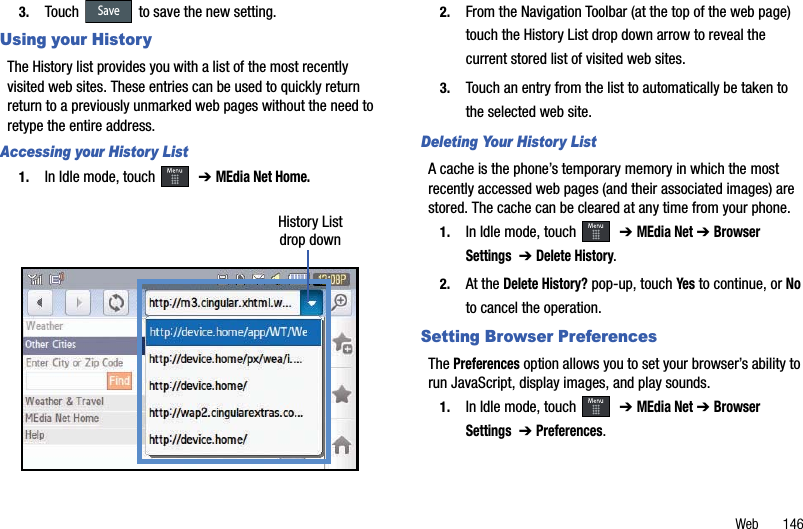
![Video Features 72Customizing CVUpdating the Favorites ListThe list of media providers which appear in the Favorites section of the CV homepage can be edited and changed by the user.1. In Idle mode, touch ➔ CV➔ Customize CV ➔ EditFavorites.2. Touch the Add to Favorites section of the page.3. Touch the radio box next to any of the available streaming media channels (not currently in your Favorites list [ex: Cartoon Network].) The Manage My Favorites section of the page then reflects these new additions.Adding a Video AlertWhen new media is available for upload to your phone (such as breaking news), you can set your phone to notify you of the new available content.1. In Idle mode, touch ➔ CV➔ Customize CV ➔ My Video Alerts ➔ Add to My Alerts.2. Touch the radio box next to any of the available alert services listed within the Add to My Alerts section of the page (ex: Breaking News).My PurchasesThe CV homepage can be used to shop for streaming multimedia content. The My Purchases section can help keep track of your purchase history and view any new resale products.1. In Idle mode, touch ➔ CV➔ Customize CV ➔My Purchases➔ Purchase History. This provides you with an on screen listing of your “to date” purchase history for media content. 2. Touch My Account. This provides you with an onscreen description of your account details. Parental ControlsYour phone can be configured to block both purchased and streamed media content. Before filtering, you must first establish a pin/password and a contact e-mail address. Once those have been established, you can the two available filter options: •Content Filters: let you restrict access to inappropriate content both on and outside of MEdia Net.•Purchase Blocker: lets you restrict the ability to buy ringtones, downloads, games, etc., from this phone.](https://usermanual.wiki/Samsung-Electronics-Co/SGHA877/User-Guide-1054602-Page-75.png)


![Health and safety information 22Potentially explosive environmentsSwitch off your phone when in any area with a potentially explosive atmosphere and obey all signs and instructions. Sparks in such areas could cause an explosion or fire resulting in bodily injury or even death.Users are advised to switch off the phone while at a refueling point (service station). Users are reminded of the need to observe restrictions on the use of radio equipment in fuel depots (fuel storage and distribution areas), chemical plants or where blasting operations are in progress.Areas with a potentially explosive atmosphere are often but not always clearly marked. They include the areas below deck on boats, chemical transfer or storage facilities, vehicles using liquefied petroleum gas (such as propane or butane), areas where the air contains chemicals or particles, such as grain, dust or metal powders, and any other area where you would normally be advised to turn off your vehicle engine.Emergency callsThis phone, like any wireless phone, operates using radio signals, wireless and landline networks as well as user-programmed functions, which cannot guarantee connection in all conditions. Therefore, you should never rely solely on any wireless phone for essential communications (medical emergencies, for example).Remember, to make or receive any calls the phone must be switched on and in a service area with adequate signal strength. Emergency calls may not be possible on all wireless phone networks or when certain network services and/or phone features are in use. Check with local service providers.To make an emergency call:If the phone is not on, switch it on.1.Key in the emergency number for your present location (for example, 911 or other official emergency number). Emergency numbers vary by location.2.Press [SEND].](https://usermanual.wiki/Samsung-Electronics-Co/SGHA877/User-Guide-1054602-Page-159.png)