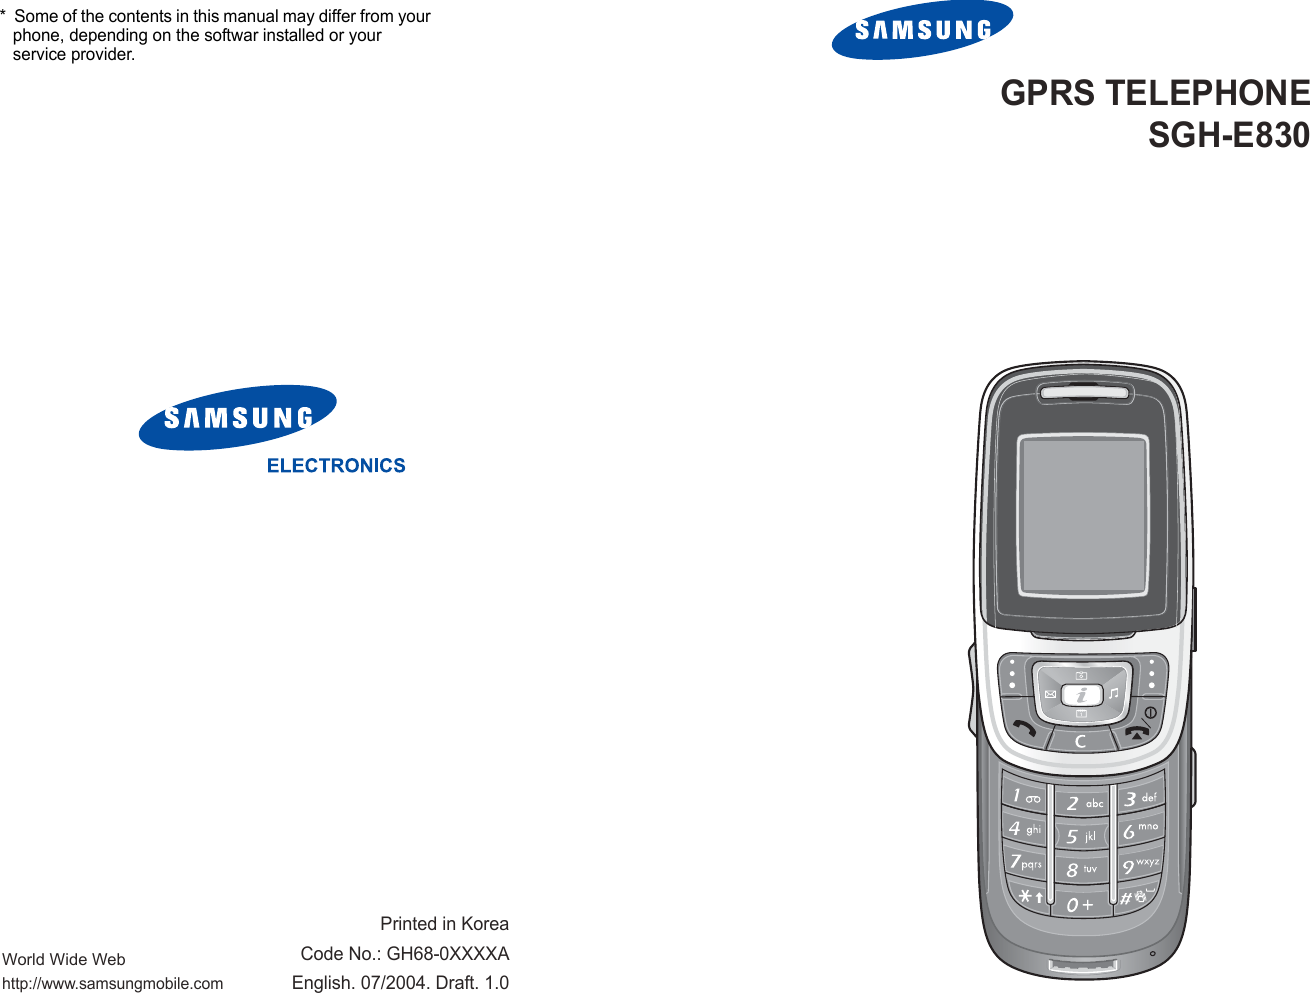
Samsung Electronics Co SGHE830 Single-Mode PCS GSM Phone User Manual

Samsung Electronics Co Ltd Single-Mode PCS GSM Phone Users Manual

Users Manual

World Wide Webhttp://www.samsungmobile.comPrinted in KoreaCode No.: GH68-0XXXXAEnglish. 07/2004. Draft. 1.0*  Some of the contents in this manual may differ from your phone, depending on the softwar installed or your service provider.GPRS TELEPHONESGH-E830
23ContentsImportant safety precautions ...................... 7Unpacking .................................................... 9Your phone ................................................ 10Phone layout...................................................... 10Display.............................................................. 13Backlight ........................................................... 16Camera............................................................. 16Built-in antenna ................................................. 17Getting started........................................... 18Inserting/Removing the SIM card ......................... 18Installing/Removing/Charging the battery.............. 19Switching the phone on or off............................... 23Selecting functions and options ............................ 24Locking or unlocking the keypad........................... 26Call functions ............................................. 27Making a call...................................................... 27Ending a call ...................................................... 30Answering a call ................................................. 30Rejecting a call................................................... 30Adjusting the volume .......................................... 31Accessing options during a call ............................. 31Using the ear-microphone.................................... 40Using the external speaker  ................................. 40Entering text .............................................. 41Changing the text input mode .............................. 42Using the t9 mode .............................................. 43Using the ABC mode ........................................... 45Using the symbolic mode..................................... 48Using the number mode ...................................... 48Using the menus ........................................ 49Accessing a menu function................................... 49List of menu functions ......................................... 50
Contents4Phonebook menu........................................ 56Find name ........................................................  56Add entry .........................................................  59Speed list  ........................................................  60Copy all to phone...............................................  62Send all via infrared ...........................................  63Delete all ..........................................................  65Own number .....................................................  66Group setting ....................................................  67Memory status ..................................................  68Service directory ...............................................  68SAT (SIM Application Toolkit)  ................... 69Call records ................................................ 70Missed calls.......................................................  70Received calls....................................................  70Dialled calls ......................................................  71Delete all ..........................................................  71Call time...........................................................  72Call costs..........................................................  72Network services........................................ 74Call diverting.....................................................  74Call barring .......................................................  76Call waiting .......................................................  79Network selection ..............................................  80Caller ID...........................................................  81Active line.........................................................  81Sound settings ........................................... 82Incoming calls ...................................................  82Messages..........................................................  83Power on/off .....................................................  84Connection tone ................................................  84Key tone...........................................................  85Minute minder ...................................................  85Quiet mode.......................................................  85Slider tone ........................................................  86Alerts on call .....................................................  86Contents5Messages ................................................... 87Short messages ................................................. 87Multimedia messages .......................................... 94Push messages ................................................  105Preset messages ..............................................  106Voice mail .......................................................  106Broadcast ........................................................  107Settings ..........................................................  109Memory status  ................................................  113Fun box ....................................................  114WWW services .................................................  114Media box........................................................  120JAVA world ......................................................  124Melody composer .............................................  128Organiser .................................................  129New memo ......................................................  129Calendar .........................................................  131To do list.........................................................  134Clock ..............................................................  135Alarm .............................................................  137Calculator........................................................  139Conversion ......................................................  140Timer..............................................................  141Stopwatch .......................................................  142Camera ....................................................  143Take photos.....................................................  143My photos .......................................................  149My albums.......................................................  149Delete all.........................................................  150Settings .........................................................  150Memory status .................................................  151Phone settings .........................................  152Display............................................................  152Greeting message.............................................  154Language ........................................................  154Security ..........................................................  155Auto redial.......................................................  158Slide down operation  .......................................  158
Contents6Active slide ......................................................  159Anykey answer.................................................  159Fax mode ........................................................  159Infrared activation ............................................  160Reset settings ..................................................  161Using ALS (Alternate Line Service) .......... 162Solving problems .....................................  164Access codes ............................................ 167Phone password ...............................................  167PIN.................................................................  167PIN2 ...............................................................  168PUK ................................................................  168PUK2 ..............................................................  168Call barring password........................................  169Health and safety information.................. 170Exposure to radio frequency (RF) signals .............  170For body operation ...........................................  172Precautions when using batteries........................  172Road safety .....................................................  174Operating environment .....................................  175Operating environment .....................................  176Electronic devices .............................................  176Potentially explosive environments .....................  178Emergency calls ...............................................  179Other important safety information .....................  180Care and maintenance ......................................  180Acknowledging special precautions and the FCC and in-dustry canada notice.........................................  182Appendix A: CERTIFICATION INFORMATION (SAR)  184Appendix B: Guide to Safe and Responsible Wireless Phone Use .......................................................  186Appendix C: Consumer Update on Wireless Phones 191STANDARD LIMITED WARRANTY.........................  201Glossary ................................................... 207Index ....................................................... 212Quick reference card ................................ 217
7Important safety precautionsRead these guidelines before using your wireless phone. Failure to comply with them may be dangerous or illegal. Road safety at all timesDo not use a hand-held phone while driving; park the vehicle first. Switching off when refuellingDo not use the phone at a refuelling point (service station) or near fuels or chemicals.Switching off in aircraftWireless phones can cause interference. Using them in aircraft is both illegal and dangerous.Switching off in hospitalsSwitch off your phone near medical equipment. Follow any regulations or rules in force.InterferenceAll wireless phones may be subject to interference, which could affect their performance.Special regulationsMeet any special regulations in force in any area and always switch off your phone whenever it is forbidden to use it, or when it may cause interference or danger (in a hospital for example).
Important safety precautions8Sensible useUse only in the normal position (held to the ear). Avoid unnecessary contact with the antenna when the phone is switched on, especially the phone is in service.Emergency callEnsure the phone is switched on and in service. Key in the emergency number for your present location, then press the   key. If certain features are in use, deactivate those features before you can make an emergency call. Give all the necessary information as accurately as possible. Do not cut off the call until given permission to do so.Water resistanceYour phone is not water-resistant. Keep it dry.Accessories and batteriesUse only Samsung-approved accessories and batteries. Qualified serviceOnly qualified service personnel may install or repair your phone.For more detailed safety information, see “Health and safety information” on page 170.CAUTIONRISK OF EXPLOSION IF BATTERY IS REPLACED BY AN INCORRECT TYPEDISPOSE OF USED BATTERIES ACCORDING TO THE INSTRUCTIONS9UnpackingYour package contains the following items:Note: The items supplied with your phone may be different depending on the country.In addition, you can obtain the following accessories for your phone from your local Samsung dealer:• Advanced handsfree car kit • Simple handsfree car kit • PC data link kit Phone Travel  a da p t erBattery Owner’s manualExternal speaker
10Your phonePhone layoutThe following illustrations show the main elements of your phone:EarpieceDisplaySoft key (right)WAP BrowserkeyAlphanumeric keysSoft key (left)Dial/Menuconfirmation keyMicrophoneCancel/Back/Correction keyNavigation keys(Up/Down/Left/Right)Volume keysEar-microphonejackSpecialfunction keysPower On/Off / Menu exit key IrDA portCameraCamera keyFlash(Reverse side)MirrorYour phone11h Key(s) Description (soft keys)Perform the functions indicated by the text above them, on the bottom line of the display.In Menu Mode, scroll through the menu options.In Idle Mode, the Left key enters the New SMS message writing screen, the Right key enters the Incoming call’s melody setting menu and the Down key enters the Camera menu. The Up key enters the Calendar menu, when pressed and held it switchs the phone to the capture mode. In Idle Mode, launches the WAP (Wireless Application Protocol) browser directly.Makes or answers a call.In Idle Mode, accesses the call log list. In Menu Mode, selects a menu function or stores information that you have entered, such as a name in the phone or SIM memory.Deletes characters from the display.When pressed and held in Idle Mode, quickly accesses the New memo screen.In Menu Mode, returns to previous menu.
Your phone12Ends a call. When pressed and held, switches the phone on or off. In Menu Mode, cancells your input and returns to Idle Mode. When pressed and held in Idle Mode, quickly accesses your voice mail server.Enter numbers, letters and some special characters.Used for various purposes in different functions.When pressed and held while entering a phone number, the   key enters a pause.When pressed and held in Idle Mode, the   key enters or exits the Quiet Mode.(on the left side of the phone) During a call, adjust the earpiece volume.In Idle Mode, adjust the key tone volume. In the capture mode, flip the picture horizontally by pressing the volume up key and vertically by pressing the volume down key. Key(s) Description (continued)Your phone13DisplayDisplay layoutThe display has three areas:(on the right side of the phone) When pressed and held, turns the camera capture mode on. In capture mode, works as a camera shutter.Area DescriptionFirst line Displays various icons. See page 14.Middle lines Display messages, instructions and any information that you enter, such as number to be dialled.Last line Shows the functions currently assigned to the two soft keys. Key(s) Description (continued)Menu        PhonebookIcons Tex t and  graphic areaSoft keys Indications
Your phone14IconsIcon Description Shows the received signal strength. The more the number of bars, the stronger the signal.Appears when a call is in progress.   Appears when you are out of a service area. When it displays, you cannot make or receive calls.Appears when you have new or unchecked voice messages. When your SIM card supports ALS (Alternate Line Service), this icon may appears like  , , .  Appears when you have new or unread messages.Appears when you have new or unchecked multimedia messages.Appears when you are retrieving a multimedia message.Appears when you are sending a multimedia message.Appears when you set the alarms to ring at a specified time.Appears when the IrDA port is active. For details, see page 160.Appears when you connect the phone to the computer by the IrDA port.Your phone15Appears when you are connected to the GPRS network.Appears when your SIM card supports the Call diverting status indication and the Call diverting feature is activated. When your SIM card supports ALS (Alternate Line Service), this icon may appears with the number 1, 2, or both. For example: , , . Appears when you are at the home zone. (May be shown only if your service provider supports this feature)Appears when your are at the office zone. (May be shown only if your service provider supports this feature)Appears when you set the alert type for incoming calls to Vibration or Vibration then melody. For further details, see page 83.Appears when the Quiet Mode is active.Shows the level of your battery. The more bars you see, the more power you have left.Icon Description (continued)
Your phone16Backlight The display and the keypad are illuminated by a backlight. When you press any key, the backlight illuminates. It turns off if you don’t press any key within a given period of time, depending on the Backlight menu option. For further details, see page 153.CameraThe camera embedded in your phone allows you to take a picture of people or events while on the move.For further details about using the Camera feature, see page 143.(Reverse side)Your phone17Built-in antennaYour phone has a built-in antenna. As with other mobile radio transmitting equipment, do not touch the antenna unnecessarily when the phone is switched on. Contact with the antenna affects call quality and may cause the phone to operate at a higher power level than needed.
18Getting startedInserting/Removing the SIM cardWhen you subscribe to a cellular network, you are provided with a SIM card loaded with your subscription details, such as your PIN, any optional services available and so on.• Keep all miniature SIM cards out of the reach of small children.• The SIM card and its data can be easily damaged by scratches or bending, so be careful when handling, inserting or removing the card.• When installing the SIM card, always make sure that the phone is switched off before you remove the battery.Inserting the SIM card1. If necessary, remove the battery by referring to page 19.2. Insert and slide the SIM card under the tab, ensuring that the notched corner is top left and the gold contacts of the card face into the phone.Getting started19Removing the SIM cardTo remove the SIM card, slide the card out of the holder, as shown.Installing/Removing/Charging the batteryYour phone is powered by a rechargeable Li-ion battery. Use only approved batteries and chargers. Ask your local Samsung dealer for further details.Note: You must fully charge the battery before using your phone for the first time. A discharged standard battery is fully recharged in approximately 130 minutes.Installing the battery1. Insert the teeth on the top of the battery into the corresponding slots on the phone.
Getting started202. Press the battery against the back of the phone until it clicks into place. Removing the battery1. Switch off the phone by pressing and holding the  key.2. To remove the battery, push the battery catch  and hold it in that position. Lift the battery away from the phone.Getting started21Charging the battery by using the travel adapterNote: The phone can be used while the battery is being charged, but this causes the battery to charge more slowly.1. Plug the connector of the travel adapter into the jack at the bottom of the phone. Check that the arrow on the connector is facing towards the front of the phone.2. Plug the adapter into a standard AC wall outlet.While charging, the battery icon at the top right-hand corner of the display repeatedly fills to show that the battery is charging.
Getting started223. When charging is finished, disconnect the adapter from the power outlet and from the phone by pressing the grey tabs on both sides of the connector and pulling the connector out.Low battery indicatorWhen the battery is weak and only a few minutes of talk time remain, the battery sensor informs you in the following ways: an empty battery icon flashes ( ), you hear a warning tone and a message repeats at regular intervals on the display. When the battery becomes too weak for the phone to operate, it switches off automatically.Getting started23Switching the phone on or offTo switch the phone on: 1. Hold down the   key until the phone switches on.2. If the phone asks for a PIN, enter the PIN and press the Ok soft key. For further details, see page 167.The phone searches for your network and the current date and time appear on the display. After finding it, you can make or receive a call.Note: To change the language, use the Language menu option. For further details, see page 154.To switch the phone off: Hold down the   key until the power-off animation displays.Menu     PhonebookService ProviderMon 21 Jun 0412:53
Getting started24Selecting functions and optionsYour phone offers a set of functions that allow you to customise your phone. These functions are arranged in menus and sub-menus, accessed via the two soft keys marked   and   Each menu and sub-menu allows you to view and alter the settings of a particular function. The roles of the soft keys vary according to the current context; the labels or icons on the bottom line of the display and just above the soft keys indicate their current roles.Example:  Menu   PhonebookService ProviderMon 21 Jun 0412:53Press the left soft key to access the menu functions.Press the right soft key to access the Phonebook feature.Getting started25To view various functions/options available or select the one is required:1. Press the appropriate soft key.In some functions, you may be asked for a password or PIN. Enter the required code and press the Ok soft key.2.To Press theselect the:• function displayed • option highlightedSelect soft key.view the next function or highlight the next option on a listDown key.move back to the previous function or option on a listUp key.move back up one level in the structure (or Back) soft key or C key.return to Idle Mode    key.
Getting started26Locking or unlocking the keypadYou can lock the soft keys, navigation keys, WAP brower key, volume keys and camera key to avoid pressing keys by accident. To lock the keys, slide the folder down. If you set the Stop operation option in the Slide down operation menu (see page 158), the phone locks the keys automatically when you slide the folder down.Otherwise, if you set the Continue operation option in the Slide down operation menu (see page 158), the confirming message appears on the display when you slide the folder down in the Idle Mode. In the message, you can lock the keys by pressing the Yes soft key. If you don't press the Yes or NO soft keys in the confirming message, the phone locks the keys after a little while.To unlock the keys, slide the folder up or press the Unlock soft key and then press the OK soft key again.27Call functionsMaking a callUsing the number keypadWhen the idle screen is displayed, enter the area code and phone number, and press the   key.Note: If you have set the Auto redial option to On, the number is redialled automatically up to ten times if the person you called does not answer or the line is busy. For further details, see page 158.Correcting the numberTo clear Press thethe last digit displayedC key.any other digit in the numberNavigation keys until the cursor (|) is immediately to the right of the digit to be cleared and press the C key. You can also insert a missing digit simply by pressing the appropriate key.the all digits displayedC key and hold it down for more than one second.
Call functions28Making an international call1. Press and hold the 0 key for the international prefix. The + character appears.2. Enter the country code, area code and phone number and press the   key.Making a call from phonebookYou can store the names and phone numbers called regularly in the SIM card and phone’s memory, which are jointly called the Phonebook. You then do not need to remember all your numbers; simply select the required name to recall the associated number. For further details about the Phonebook feature, see page 56.Using the call logsThe phone stores up to 20 calls dialled, received or missed chronologically. The last call is saved in the first position. If the same number occurs more than once, only the latest occurrence is saved.To recall any of these numbers:1. Press the   key in Idle Mode to access the Call log list. 2. Use the Up and Down keys to scroll through the list until the number you want highlights.The call logs are listed with the following icons:• : Dialled calls•  : Received calls• : Missed callsCall functions293. To dial the number, press the   key.To view each call record, see “Call records” on page 70..Viewing missed callsIf you have a subscription that includes the Caller Line Identification (CLI) feature and you are unable to answer a call for any reason, you can find out who was calling you so that you can call the person back. The number of missed calls displays on the idle screen immediately after a call was missed.To view the missed calls immediately:1. Press the Missed soft key.      The list of the missed calls displays.2. If necessary, scroll to the number you want by pressing the Up or Down key.3. To dial the number, press the   key.To use the missed call options, see “Missed calls” on page 70.Note: To clear the missed call notification on the display, press the   key. When you also have voice mails, short messages or multimedia messages and multi CBs, the right soft key indication changes in the following order: Missed, Connect, View, CB and Phonebook.
Call functions30Speed-dialling from PhonebookOnce you have stored numbers in the Phonebook, you can dial a number simply by pressing one or two keys. For further details, see page 60.Ending a callWhen you want to finish your call, briefly press the  key or slide the folder down.Answering a callWhen somebody calls you, the phone rings and displays the incoming call animation.If the caller can be identified, the caller’s phone number, or name if stored in your Phonebook, displays. To answer a call, press the   key or Accept soft key. Or, slide the folder up when the Active slide option is set to on.Note: You can answer a call while using the Phonebook or menu features. The current operation stops.Rejecting a callTo reject an incoming call, press the   key or Reject soft key. Or, slide the folder down.Call functions31Adjusting the volumeDuring a call, if you wish to adjust the earpiece volume, use the volume keys on the left side of the phone. When you hear a sound, such as ringtone, you can also adjust the earpiece volume. But it is not fixed.Note:  When the folder is slid down and a call comes in, you can mute the call ringer by pressing and holding one of the volume keys.Accessing options during a callYour phone provides a number of control functions that you can use during a call. Using the loudspeakerYou can speak and listen to the phone from a short distance without holding the phone to your ear. Turn on / off  the loudspeaker1. Press the Options soft key.2. Press the Up or Down key to highlight the Loud spk. on / Loud spk. off option. Press the Select soft key.CAUTIONS: Do not hold the phone near to your ear when you use the loudspeaker. Because the volume may be extremely loud.
Call functions32Switching the microphone off (Mute)You can temporarily switch your phone’s microphone off so that the other person cannot hear you.Example: You may wish to say something to another person in the room but do not want the calling person to hear you.1. Press the Options soft key.2. When Mute highlights, press the Select soft key.The Mute icon ( ) appears on the bottom line of the display and your correspondent can no longer hear you.To switch the microphone back on:1. Press the Options soft key.2. When Unmute highlights, press the Select soft key.The Mute icon disappears and your correspondent can hear you.Searching for a number in PhonebookYou can search for a number in your Phonebook during a call.1. Press the Options soft key.2. If necessary, press the Up or Down key to highlight the Phonebook option. Press the Select soft key.Call functions333. Select the Find name option and press the Select soft key.The Phonebook entries are listed.4. Enter the first a few letters of the name that you want to find.The Phonebook entries are listed starting with the first entry matching your input.Note: You can also scroll through the Phonebook from the beginning, by pressing the Up or Down key.5. To view the highlighted entry, press the Ok soft key.For further details about the Phonebook feature, see page 56.Muting/Sending key tonesYou can turn the key tones off or on during a call. When the Mute keys option is selected, your phone does not transmit the key tones. It allows you to press keys without hearing annoying key tones during a call.To communicate with answering machines or computerised telephone systems, the Send keys option must be selected.Sending DTMF tones You can send the DTMF(Dual Tone Multi-Frequency) tones of the number on the display during a call.This option is helpful for entering a password or account number when you call an automated system, like a banking service.
Call functions34To send the DTMF tones:1. When you are connected to the teleservice system, press the Options soft key.2. Press the Up or Down key to highlight the Send DTMF option. Press the Select soft key.3. Enter the number you want to send and press the OK soft key.The tones of the displayed number are sent.Using the message serviceYou can read or write a new message during a call.1. Press the Options soft key.2. Press the Up or Down key to highlight the Message option. Press the Select soft key.3. To read a received message, select the Inbox option, and then scroll to the message that you want to read.To write a new message, select the Create option.4. Press the Select soft key.For further details about the SMS feature, see page 87.Using the voiceclarity The voiceclarity feature makes received sound loud and clear during a call. It is useful when you are in a noisy place. Call functions35The phone turns on the voiceclarity feature automatically after a while when you are in a noisy place and the voiceclarity is set to on.Turn on / off  the voiceclarity1. Press the Options soft key.2. Press the Up or Down key to highlight the Voiceclarity on / Voiceclarity off option. Press the Select soft key.Note:  You cannot activate the voiceclarity when you use the loudspeaker and the handsfree car kit.Using the SAT (SIM Applicatioin Toolkit)If you use a SAT card that provides additional services, the SAT menu displays. For further details, see your SIM card instructions.Putting a call on holdYou can place the current call on hold whenever you want. You can make another call while you have a call in progress if this service is supported by the network. Of these two calls, one is active and the other is on hold and you can switch between the calls.To place a call on hold, simply press the Hold soft key. You can reactivate the call whenever you want by pressing the Retrieve soft key.To make a call while you have a call in progress: 1. Enter the phone number that you want to dial or look it up in the Phonebook.
Call functions362. Press the   key to dial the second call. The first call is automatically put on hold.Or alternatively:1. Put the current call on hold by pressing the Hold soft key.2. Make the second call in the normal way.To switch between the two calls, simply press the Swap soft key.The current call is placed on hold and the call on hold is reactivated so that you can continue conversing with the other person.To end the call on hold, press the Options soft key and select the End held call option.When you want to finish, end each call normally by pressing the   key. If you want to finish all calls at once, slide the folder down.Answering a second callYou can answer an incoming call while you have a call in progress, if this service is supported by the network and you have activated the Call waiting option (see page 79). You will be notified of an incoming call by a call waiting tone.To answer a call while you have another call in progress:1. Press the   key to answer the incoming call. The first call is automatically put on hold.2. To switch between the two calls, press the Swap soft key.Call functions373. To end the call on hold, press the Options soft key and select the End held call option.To end the current call, press the   key. The call on hold is continued.Transferring a callYou can transfer the current call to the call on hold if this service is supported by the network, so that the callers can talk to each other. You are disconnected from both of them. 1. During a call, answer or make a call in the normal way, and press the Options soft key. 2. Press the Up or Down key to select the Transfer option and press the Select soft key.The two people are connected to each other. Making a multi-party callA multi-party call feature is a network service that allows up to six people to take part simultaneously in a multi-party or conference call. For more information, contact your service provider.Setting up the multi-party call1. Call the first participant in the normal way.2. Call the second participant in the normal way. The first call is automatically put on hold.3. To join the first participant to the multi-party call, press the Options soft key and select the Join option. Press the Select soft key.
Call functions384. To add a new person to the multi-party call, call the person in the normal way. Then press the Options soft key and select the Join option. Press the Select soft key.You can add incoming callers by answering the call and selecting the Join option. Repeat as needed.Having a second call during a multi-party callTo answer a call when you have the multi-party call:1. Press the   key to answer the incoming call. The first call is automatically put on hold.2. To switch between the two calls, press the Swap soft key.3. To end the call on hold, press the Options soft key and select the End held multiparty option or End held call option. To end the current call, press the   key. The call on hold is continued.To make a call when you have the multi-party call: See “To make a call while you have a call in progress:” on page 35.To answer an incoming call when you have the multi-party call in progress and another call on hold:1. Press the Accept soft key.2. Select the End held option to end the call on hold. Or, select the End current option to end the call in progress. And then you can answer the new call.Call functions39Having a private conversation with one participant1. Press the Options soft key and select the Split option. Press the Select soft key.2. Press the Up or Down key to highlight a participant and press the Select soft key. Now you can talk privately with that person. The other participants can continue to converse with each other3. To return to the multi-party call, press the Options soft key and select the Join option.4. Press the Select soft key. All of the multi-party call participants can now hear each other.Removing one participant1. Press the Options soft key and select the Remove option.2. Press the Up or Down key to highlight a participant and press the Select soft key.The call ends with that participant, but you can continue to talk with the other participants.3. End the multi-party call by pressing the   key.
Call functions40Using the ear-microphoneWith the ear-microphone, you can make or answer a call without holding the phone. When you connect the ear-microphone to the jack at the right side of the phone, the button on the ear-microphone works as listed below: Using the external speaker With the external speaker, you can hear louder sounds.To use it, connect the external speaker to the jack at the right side of the phone.To Press redial the last call  the button twice in Idle Mode.answer a call  and hold the button when you receive the call.end a call  and hold the button when you have finished the call.41Entering textAt many times while you are using your phone, you need to enter text, such as when storing a name in the Phonebook, writing a new message, creating your personal greeting or scheduling events on your calendar.You are provided with the following text input modes:•T9 mode*This mode allows you to enter words with only one keystroke per letter. Each key on the keypad has more than one letter – when you press the 5 key once, J, K or L may be displayed. The T9 mode automatically compares your keystrokes with an internal linguistic dictionary to determine the correct word, thus requiring far fewer keystrokes than the traditional ABC mode.•ABC modeThis mode allows you to enter letters by pressing the key labelled with the required letter once, twice, three or four times until the letter displays.•Number modeThis mode allows you to enter numbers.•Symbolic modeThis mode allows you to enter special characters.*  is a registered trademark of Tegic Communications, Inc. and is licensed under U.S. Patent 5,818,437/ 5,953,541/ 6,011,554.
Entering text42Changing the text input modeWhen you are in a field that allows characters to beentered, you will see the text input mode indicator at the bottom of the display. Example: Entering a name in the PhonebookTo change to another text input mode:1. Press the right soft key indicating the current text input mode.2. Scroll to the mode you want to use by pressing the Up or Down key.The Language select option allows you to change the text input language.You can use the Add word option to add new words into the T9 dictionary. See page 44.Note: If you want to exit the menu without changing the mode, press the   soft key or  key.3. Press the Select soft key to confirm the highlighted text input mode.Enter nameOk 20 EngText input mode indicator: T9 English modeEntering text43Quickly changing the text input modeUsing the t9 modeTo type a word in the T9 mode:1. Start entering the word by pressing keys 2 to 9. Press each key only once for each letter.Example: To enter “hello” in the T9 mode, press the 4, 3, 5, 5, and 6 keys.T h e  w o r d  y o u  a r e  t y p i n g  a p p e a r s  o n  t h e  d i s p l a y.        It may change with each key that you press.2. Enter the whole word before editing or deleting any keystrokes.3. If the word is correct, start entering the next word. Otherwise, press the 0, Up or Down key repeatedly to display alternative word choices for the keys that you have pressed.Example: Both “of” and “me” have the sequence of 6 and 3. The phone displays the most commonly used choice first.4. Insert a space between words by pressing the  key.5. Continue entering the next word.To switch between the Press and hold theNumber and previous mode  key.Symbol and previous mode  key.ABC and T9 mode right soft key.
Entering text44If Spell appears above the left soft key while you are entering text, the word does not exist in the T9 dictionary. To type words not found in the T9 mode, change the text input mode to the ABC mode, or proceed as follows:1. Press the Spell soft key, or press the right soft key and select the Add word option. 2. Enter the word you want to add using the ABC mode (see page 45) and press the Ok soft key. The word is saved in the T9 dictionary and inserted in the input field. 3. Continue entering other words in the T9 mode.Smart punctuationTo enter periods, hyphens or apostrophes, press the 1 key. The T9 mode applies rules of grammar to insert the correct punctuation. Example: The 1 key is used twice to display two punctuation marks.Changing the caseTo change the case of the next letter(s) that you type, press the   key. There are three cases:• Lower Case (no indicator)• Initial Capital ( )• Capital Lock ( )                 l       e      t      ‘       s             e      a      t      .Entering text45Inserting a spaceTo insert a space between words, press the   key.Entering a number directlyTo enter a number, press and hold the number key.ScrollingTo move the cursor to the left, right, up or down within the text, press the navigation keys.Clearing letters and wordsTo clear the letter to the left of the cursor, press the C key. You can clear all of the letters on the display by pressing and holding the C key.Returning to the previous screenWhen the text input field is cleared, press and hold the C key to return to the previous screen.Using the ABC modeWhen typing in the ABC mode, press the key labelled with the required letter:- Once for the first letter- Twice for the second letter- And so onExample: To display the letter “C”, quickly press the 2 key three times. To display the letter “K”, press the 5 key twice. This method is called Multi-tap typing.
Entering text46Note: The cursor moves to the right when you press a different key. When entering the same letter twice or a different letter on the same key, just press the Right key or wait a few seconds for the cursor to move to the right automatically, and then enter the next letter. Refer to the table for more information about the characters available. The characters vary, depending on the text input language. You can select the language by setting one of the following options:•Language select; see page 42•Input mode; see page 154List of the characters available (Capital Lock mode in English)Key characters in the order displayed1 .     ,      -      ?     !     ‘     @    :     1 2 A    B     C     23 D    E     F      34 G    H     I      45 J     K     L     56 M   N     O     67 P    Q     R     S     78 T    U     V     89 W   X     Y     Z     900Entering text47Changing the caseTo change the case of the next letter(s) that you type, press the   key. There are three cases:• Lower Case (no indicator)• Initial Capital ( )•Capital Lock ( )Inserting a spaceTo insert a space between words, press the   key.Entering a number directlyTo enter a number, press and hold the number key.ScrollingTo move the cursor to the left, right, up or down within the text, press the navigation keys.Clearing letters and wordsTo clear the letter to the left of the cursor, press the C key. You can clear all of the letters on the display by pressing and holding the C key.Returning to the previous screenWhen the text input field is empty, press and hold the C key to return to the previous screen.
Entering text48Using the symbolic modeThe Symbolic mode enables you to enter symbols in your text. Using the number modeThe Number mode enables you to enter numbers in your text. Press the keys corresponding to the digits you want to enter.To Press thedisplay more symbols Up or Down key.enter a symbol corresponding number key.return to the previous text input mode with entered symbol(s)Ok soft key.return to the previous text input mode without entered symbol(s) soft key.49Using the menusThe phone offers a range of functions that allow you to tailor the phone to your needs. These functions are arranged in menus and sub-menus.Accessing a menu functionThe menus and sub-menus can be accessed by pressing the Menu or Phonebook soft key in Idle Mode, then scrolling with the navigation keys.1. In Idle Mode, press the Menu soft key to access the main menu or press the Phonebook soft key to access Phonebook menu. 2. Scroll through the menus using the navigation keys. And then press the Select soft if you access the main menu.  3. Find the sub-menu that you wish to use by scrolling with the Up or Down key. 4. Press the Select soft key to access the sub-menu.If the menu that you have selected contains further sub-menus, repeat steps 3 and 4.5. Scroll to the option you want to choose with the Up or Down key.6. Press the Select soft key to choose the setting.Note: You can return to the previous menu level by pressing the   soft key.You can also access the menus and sub-menus by quickly entering the corresponding menu number.
Using the menus50Example: Accessing the Voice mail menu.1. Press the Menu soft key.2. Press the 5 for Messages.3. Press the 5 for Voice mail.List of menu functionsVarious menus let you check or change your phone settings. The following list shows the menu structure.The numbers assigned to each menu option may not match the menu number on the phone. It depends on the services supported by your SIM card.Phonebook menu 1.  Phonebook (see page 56)1.  Find name2.  Add entry3.  Speed list4.  Copy all to phone5.  Send all via infrared6.  Delete all2.  Management (see page 66)1.  Own number2.  Group setting3.  Memory status3.  Services (see page 68)1.  Service directoryUsing the menus51Main menu 1.  SAT (SIM Application Toolkit)* (see page 69)2.  Call records (see page 70)1.  Missed calls2.  Received calls3.  Dialled calls4.  Delete all5.  Call time1.  Last call time2.  Total sent 3.  Total received4.  Reset timers6.  Call costs*1.  Last call cost2.  Total cost3.  Max cost4.  Reset counters5.  Set max cost6.  Price/Unit3.  Network services (see page 74)1.  Call diverting1.  Divert always2.  Busy3.  No reply4.  Unreachable5.  Cancel all2.  Call barring1.  All outgoing2.  International3.  International except to home4.  All incoming5.  Incoming while abroad6.  Cancel all7.  Change barring password*Shown only if it is supported by your SIM card.
Using the menus523.  Call waiting4.  Network selection5.  Caller ID6.  Active line*4.  Sound settings (see page 82)1.  Incoming calls1.  Default melodies2.  My sounds3.  Ring volume4.  Alert type2.  Messages1.  Short messages2.  Multimedia messages3.  Power on/off4.  Connection tone5.  Key tone6.  Minute minder7.  Quiet mode8.  Slider tone9.  Alerts on call5.  Messages (see page 87)1.  Short messages1.  Create2.  Inbox3.  Outbox4.  Delete all2.  Multimedia messages1.  Create2.  Inbox3.  Outbox4.  Draft5.  My folder6.  Delete all*Shown only if it is supported by your SIM card Using the menus533.  Push messages1.  Inbox2.  Setting3.  Delete all4.  Preset messages5.  Voice mail1.  Connect to voice mail2.  Voice server number6.  Broadcast1.  Read2.  Receive3.  Channel4.  Language7.  Settings1. Short messages2. Multimedia messages8.  Memory status1.  Short messages2.  Multimedia messages6.  Fun box (see page 114)1.  WWW services*1.  Home2.  Bookmark3.  Go to URL4.  Clear cache5.  Proxy settings6.  Current proxy2.  Media box1.  Photos2.  Images3.  Sounds4.  Delete all5.  Memory status3.  JAVA world1.  Downloads* May not be shown or supported by your network service    provider.
Using the menus542.  Internet settings3.  Memory status4.  Melody composer1.  Compose melody2.  Memory status7.  Organiser (see page 129)1.  New memo2.  Calendar3.  To do list4.  Clock1.  Set time2.  Set date3.  Set world time4.  Set format5.  Alarm6.  Calculator7.  Conversion1.  Currency2.  Length3.  Weight4.  Volume5.  Area6.  Temperature8.  Timer9.  Stopwatch8.  Camera (see page 143)1.  Take photos2.  My photos3.  My albums4.  Delete all5.  Settings6.  Memory statusUsing the menus559.  Phone settings (see page 152)1.  Display1.  Wallpaper2.  Skin3.  Backlight4.  LCD brightness2.  Greeting message3.  Language1.  Text language2.  Input mode4.  Security1.  PIN check2.  Change PIN3.  Phone lock4.  Change password5.  Privacy6.  SIM lock7.  FDN mode*8.  Change PIN2*5.  Auto redial6.  Slide down operation7.  Active slide8.  Anykey answer9.  Fax mode10.  Infrared activation11.  Reset settings1.  Sound settings2.  Phone settings3.  All settings* Shown only if it is supported by your SIM card.
56Phonebook menuPhonebook offers the following features:•Phonebook: allows you to find, create or set up the speed-dialling feature and manage Phonebook entries.•Management: allows you to create or remove your own number, set up caller groups and check the memory status.•Services: allows you to use the service directory depending on your SIM card.Find name  To search for a number in the phonebook, proceed as follows.1. Enter a letter(s) of the name that you want to find. The Phonebook entries are listed, highlighting the entry matching your input.2. If necessary, press the Up or Down key to scroll to the entry you want.3. Once you have found the entry, press the Ok soft key.4.To Press thedial the displayed number key.change the Phonebook entriesOptions soft key. For further details, see page 57.Phonebook menu57Changing the phone memory entriesScroll to the category that you want to edit by pressing the Left or Right key. Following categories are available and you can edit information of each category by pressing the Options soft key.Category Then Mobile Home Office Fax OtherSelect one of the following options. For details for these options, refer to the page 58.Edit numberChange nameSend message (shown if the category contains a number)Copy (shown if the category contains a number)Send via infrared (shown if the category contains a number)Delete entryE-Mail Enter or edit e-mail address.Note  Enter or edit the memo.Group  Set one of the groups or no group.Graphic  Set one of the images or no image.Alert  Set one of the melodies or not assign.
Phonebook menu58Changing the SIM memory entriesTo ch ange  th e SIM  me mo ry entry’s information, press the Options soft key.The following options are available:Edit numberThis option allows you to change the number. You can also add a new number if none has been stored for the selected category. Change nameThis option allows you to change the name of the entry. To clear the old name, press the C key. For more information about how to enter characters, see page 41.Send message This option allows you to send a message to the number. For more information about how to send a message, see page 89.Copy This option allows you to copy the entry from the phone’s memory to the SIM card, and vice versa.Send via infrared This option allows you to copy the entry from your phone to another device that has the IrDA port via infrared.Delete entryThis option allows you to delete the entry from Phonebook. To confirm the deletion, press the Yes soft key. Otherwise, press the No soft key.Phonebook menu59Add entry You can store phone numbers and the corresponding names in the memory of your SIM card. In addition, you can store up to 1000 names in the phone memory and each name can be associated with up to five numbers. 1. Enter the number you want to save.Notes:• If you make a mistake while entering a number, correct it using the C key. For further details, see page 27.• To insert a dialling pause for special phone services, such as banking by phone, hold down the   key. “P” is displayed to indicate the pause.2. When you are sure that the number is correct, press the Save soft key.3. Select the memory where the number is to be stored, either Phone or SIM, and press the Select soft key.Note: If you change phones, any numbers stored in your SIM card will automatically be available with the new phone, whereas any numbers stored in the phone’s memory must be stored again.4. If you select SIM in step 3, go to step 5. If you select Phone in step 3, choose a number type using the Up or Down key and press the Select soft key. 5. Enter the associated name. For information about how to enter characters, see page 41.
Phonebook menu606. When you are satisfied, press the Ok soft key.7. If you select Phone in step 3, go to step 8.If you select SIM in step 3, enter the location number and press the Ok soft key. 8. If you want to change the entry, use the options. for information about how to do it, see page 57.If you want to return to Idle Mode, press the   soft key or the   key.Storing a number in Idle modeAs soon as you start to enter a number, Save appears above the left soft key to allow you to store the number in the Phonebook.Continue the procedure from step 1 on page 59 to store the number.Speed list You can set up to eight speed-dial entries and then dial them easily whenever you want, simply by pressing the associated number key. Setting up speed-dial entries1. Press the Up or Down key to scroll to an empty location and press the Select soft key.2. When the Edit number option highlights, press the Select soft key. 3. Enter a phone number and press the Ok soft key. Or,Phonebook menu61To retrieve a number from your Phonebook, press the Phonebook soft key. Select an entry from the list and press the Ok soft key. Press the Ok soft key to save it.4. When you have finished, press the   soft key or the   key to exit.Editing the speed-dial entries1. Select the speed-dial entry you want to edit from the list and press the Select soft key.2. Select one of the following menu options by pressing the Up or Down key and press the Select soft key:• Edit number: allows you to change the number.• Change name: allows you to change the name of the entry.• Delete: allows you to clear the setting so that no number is assigned to the key.3. When you have finished, press the   soft key or the   key to exit.Using the speed-dial featureWhen the idle screen is displayed, press the number key, 2 to 9, assigned to the speed-dial entry and press the   key. You can also press and hold the number key.Note: The 1 key is reserved for your voice mail server number.
Phonebook menu62Dialling a number stored in the SIM cardOnce you have stored phone numbers in your SIM card, you can dial them easily whenever required.To dial a number stored in the SIM card:1. Enter the number of the SIM card location where the number you want to dial is stored.2. Press the   key.The display shows the name and number stored in that location.3. Press the Dial soft key or the   key.Copy all to phone You can copy all of the numbers stored in the SIM card to the phone’s memory.1. When a confirming message appears, press the Yes soft key to copy.The numbers in the SIM card are copied to the phone’s memory, labelled with Mobile by default.Otherwise, press the No soft key.2. When you have finished, press the   soft key or the   key to exit.Phonebook menu63Send all via infrared Via the infrared connection, you can send your Phonebook entries to another IrDA- compliant devices and vice versa.Note: This feature may not be available depending on the devices.Sending your phonebook1. Align the IrDA ports on both sides each other.2. Access the Send all via infrared menu option in the Phonebook menu and choose one of the following options and press the Select soft key:• All: allows you to send all of the entries, from the entry you choose to the end of the SIM card and Phone list.• SIM: allows you to send all of the entries, from the entry you choose to the end of the SIM card list.• Phone: allows you to send all of the entries, from the entry you choose to the end of the Phone list.3. When you select All and press the OK soft key, your phone displays all of the Phonebook entries.When you select SIM or Phone and press the OK soft key, all of the entries stored in the corresponding memory location are listed. 4. Scroll to the entry you want to send as beginning and press the OK soft key.Your phone begins sending the entry(ies).
Phonebook menu64Receiving phonebook from another device1. Align the IrDA ports on both sides each other.2. Access the Infrared activation menu (see page 160) and select On to activate the port.3. When your phone receives Phonebook data from the other device:If the other person sends you one entry, your phone displays the name and the phone number and you can specify whether or not you want to save it. Continue to step 4.If the person sends you the entries by All, SIM, Phone, you can select a memory location, SIM card or phone’s memory. Continue to step 5.4. Press the Save soft key to store the entry. You can also discard the entry by pressing the Cancel soft key.5. Press the SIM or Phone soft key. The entries are saved in the appropriate memory.IrDA portIrDA portPhonebook menu65Delete allYou can delete Phonebook entries selectively depending on the memory location, or all entries at once.1. Scroll to a desired memory selection and place a check mark ahead of it by pressing the Select soft key.Selecting All places check marks on all of the memories.2. If necessary, repeat step 1 to check another options.3. When you have finished checking, press the Ok soft key. 4. When a confirming message appears, press the Yes soft key to delete all of the entries in the memory(ies). Then enter the phone password and press the Ok soft key.The password is preset to “00000000” by default. To change it, see page 156.Otherwise, press the No soft key.
Phonebook menu66Own number To store your own phone number(s) with a name: 1. Scroll to an empty location by pressing the Up or Down key and press the Select soft key. 2. When Edit number highlights, press the Select soft key.3. Enter your number and press the Ok key.4. To assign a name, press the Down key to move to Change name and press the Select soft key.5. Enter a name and press the Ok soft key.6. When you have finished, press the   soft key or the   key to exit.To remove one of your numbers:1. Select the entry you want to delete from the Own number list and press the Select soft key.2. Scroll to Delete by pressing the Up or Down key and press the Select soft key.3. When a confirming message appears, press the Yes soft key to delete the number.Otherwise, press the No soft key.4. When you have finished, press the   soft key or the   key to exit.Phonebook menu67Group setting You can change the settings of the ten predefined caller groups.1. Select a caller group by pressing the Up or Down key and press the Select soft key.2. Scroll to a setting option by pressing the Up or Down key and press the Select soft key. The following options are available:• Melody: allows you to select a melody to sound when a call comes in from a member in the group. • Change name: allows you to change the name of the group; for further details about how to enter characters, see page 41.• View image: shows the image to display when a call comes in from a member in the group.3. Change the setting as required and press the Select soft key.4. Repeat steps 2 and 3 to change other options.When you have finished, press the   soft key or the   key to exit.
Phonebook menu68Memory status You can check how many names are stored in SIM card and phone’s memory. When you have finished, press the   soft key or the   key to exit.Service directory Note: This feature may not be available depending on your SIM card.The display shows the list of the numbers in the Service directory.If necessary, scroll to a number by pressing the Up or Down key and press the   key to dial the number.
69SAT (SIM Application Toolkit) If you use a SAT card that provides additional services, the SAT menu displays. For further details, see your SIM card instructions.Shown only if it is supported by your SIM card.
70Call recordsVia this menu, you can view the:• calls you missed, received or dialled.• cost of your calls.• length of your calls.Note: You can access the numbers in the three types of call records by pressing the  key in Idle Mode.Missed calls This option lets you view the last 20 unanswered calls if the caller line identification is available. The number, or name if available, displays together with the date and time when the call was missed.By pressing the Options soft key, you can also:• delete the current call record from the list.• delete all of the calls.• paste the number into Phonebook.Received calls This option lets you view the last 20 received calls if the caller line identification is available.The number, or name if available, displays together with the date and time when the call was received.Call records71By pressing the Options soft key, you can also:• delete the current call record from the list.• delete all of the calls.• paste the number into Phonebook.Dialled calls This option lets you view the last 20 dialled numbers.The number, or name if available, displays together with the date and time when the call was made.By pressing the Options soft key, you can also:• delete the current call record from the list.• delete all the calls.• paste the number into Phonebook.Delete all You can delete all of the numbers stored in each call record.When a confirming message appears, press the Yes soft key to confirm.Otherwise, press the No soft key.
Call records72Call time This option lets you view the timers for calls made and received. Notes:•  If your SIM card supports the ALS (Alternate Line Service) feature, you must first select the appropriate line.• The actual time invoiced for calls by your service provider may vary, depending on network features, rounding-off for billing purposes and others.The following timers are available:Last call time: the length of the last call.Total sent: the total length of all calls made since the timer was last reset.Total received: the total length of all calls received since the timer was last reset.Reset timers: the option used to reset the call timers. You need to enter the phone password and then press the Ok soft key.Call costs This feature lets you view the cost of calls. Notes: • This feature is not intended to be used for billing purposes.• AOC (Advice Of Charge) information may display in Idle Mode, depending on your SIM card or service provider.Call records73The following options are available:Last call cost: cost of the last call made.Total cost: total cost of all calls made since the cost counter was last reset. If the total cost exceeds the maximum cost set via the Set max cost option, you can no longer make any calls until you reset the counter.Max cost: maximum cost set via the Set max cost option.Reset counters: option used to reset the cost counter; you must first enter your PIN2 (see page 168) and then press the Ok soft key.Set max cost: option used to enter the maximum cost that you authorise for your calls; you must first enter your PIN2 (see page 168) and then press the Ok soft key.Price/Unit: option used to set the cost of one unit; this price per unit is applied when calculating the cost of your calls; you must first enter your PIN2 (see page 168) and then press the Ok soft key.
74Network servicesThese menu functions are network services.Please contact your service provider to check their availability and subscribe to them, if you wish.Call diverting Note: The call divert options may be different depending on your SIM card and those not supported by your network operator may not be shown.This network service enables incoming calls to be rerouted to the number that you specify.Example: You may wish to divert your business calls to a colleague while you are on holiday.Call diverting can be set up in the following ways:Divert always: all calls are diverted.Busy: calls are diverted if your phone is engaged on another call.No reply: calls are diverted if you do not answer the phone.Unreachable: calls are diverted if you are not in an area covered by your service provider.Cancel all: all call diverting options are deactivated.You can specify individual call diverting options for each of the following call types:• Voice calls only• Fax calls only (not available when line 2 is in use)Network services75• Data calls only (not available when line 2 is in use)Example: You can:• systematically divert fax calls to your office fax machine.• divert voice calls to your colleague if you are already using the phone.Setting call diverting options1. Select the type of call diverting by pressing the Up or Down key and then press the Select soft key.2. Select the type of calls to be diverted by pressing the Up or Down key and then press the Select soft key.3. Press the Activate soft key to confirm your settings.4. Enter the number to which the calls are to be diverted.To enter an international code, hold down the 0 key until the + sign displays. You can also select a number in Phonebook or the voice mail server number, by pressing the Options soft key, followed by Phonebook or Voice server.5. When you are satisfied, press the Ok soft key. The phone sends your settings to the network and displays the network’s acknowledgement.
Network services76Deactivating specific call diverting options1. Select the call diverting option to be deactivated.2. Select the type of calls to which this option applies.3. Press the Remove soft key.The phone sends your settings to the network  and displays the network’s acknowledgement.You can also deactivate all call diverting options by selecting the Cancel all option.Call barring The call barring network service allows you to restrict your calls.Call barring can be set up in the following ways:All outgoing: calls cannot be made.International: international calls cannot be made.International except to home: when abroad, calls can be made only to numbers within the current country and to your home country, that is the country where your home network provider is located.All incoming: calls cannot be received.Incoming while abroad: calls cannot be received when you are using your phone outside your home service area.Network services77Cancel all: all call barring options are deactivated; calls can be made and received normally.Change barring password: allows you to change barring password.You can specify individual call barring options for each of the following call types:• Voice calls only• Fax calls only (not available when line 2 is in use)• Data calls only (not available when line 2 is in use)Setting call barring options1. Select the type of call barring by pressing the Up or Down key and then press the Select soft key.2. Select the type of calls to be barred by pressing the Up or Down key and then press the Select soft key.3. Press the Activate soft key to confirm your settings.4. Enter your call barring password supplied by your service provider and press the Ok soft key.The phone sends your settings to the network and displays the network’s acknowledgement.
Network services78Deactivating specific call barring options1. Select the call barring option to be deactivated.2. Select the type of calls to which this option applies.3. Press the Deactivate soft key.4. Enter your call barring password supplied by your service provider.The phone sends your settings to the network and displays the network’s acknowledgement.You can also deactivate all call barring options by selecting the Cancel all option.Changing the barring passwordYou can set and change the call barring password obtained from your service provider. 1. Select Change barring password from the Call barring screen, and press the Select soft key.2. Enter the current password and press the Ok soft key.3. Enter a new password and press the Ok soft key.4. Enter the new password again to confirm it and press the Ok soft key.Network services79Call waiting This network service informs you when someone is trying to reach you during another call.You can specify individual call waiting options for each of the following call types:• Voice calls only• Fax calls only (not available when line 2 is in use)• Data calls only (not available when line 2 is in use)Activating the call waiting feature1. Select the type of calls to which the call waiting option is to be applied by pressing the Up or Down key and then press the Select soft key.2. Press the Activate soft key to confirm your settings.The phone sends your settings to the network and displays the network’s acknowledgement.Deactivating specific call waiting options1. Select the type of call to which the option applies.2. Press the Deactivate soft key.The phone sends your settings to the network and displays the network’s acknowledgement.You can also deactivate all call waiting options by selecting the Cancel all option.
Network services80Network selection The Network selection feature enables you to automatically or manually select the network used when roaming outside your home area.Note: You can select a network other than your home network only if it has a valid roaming agreement with your home network.To indicate to automatically or manually select the network when roaming:1. Press the Up or Down key until the appropriate option highlights and press the Select soft key.If you select Automatic, you are connected to the first available network when roaming.If you select Manual, the phone scans for the available networks. Go to step 2.2. Press the Up or Down key until the preferred network highlights and press the Select soft key.You are connected to that network when roaming.Network services81Caller ID You can prevent your phone number from being displayed on the phone of the person being called.Note: Some networks do not allow the user to change this setting.The following options are available:Default: the default setting provided by the network is used.Hide number: your number does not display on the other person’s phone.Send number: your number is sent each time you make a call.Active line Some SIM cards may be used with two subscriber numbers. This functions is available only if your SIM card supports it.This menu option allows you to select the line to be used to make calls. However, calls can be answered on both lines, regardless of the selected line.
82Sound settingsYou can use the Sound settings feature to customise various settings, such as the:• ringtone, volume and type for incoming calls or messages.• sounds made when your call is connected or when you press a key.• quiet mode which your phone switches to when you hold down the   key in the Idle Mode.Incoming calls This option allows you to set up the ringer for incoming calls. Notes: • You can quickly enter the Incoming calls menu by pressing the Right key in Idle mode.• If your SIM card supports the ALS (Alternate Line Service) feature, you must select the line you wish to change first.The following options are available:Each time you select a melody from the list, it plays the melody.Default melodies: allows you to select one of the predefined melodies.My sounds: allows you to select one of the sounds received from other sources, such as the WAP sites, the EasyStudio PC software or multimedia messages.Sound settings83Ring volume: allows you to adjust the ring volume. Use the Up and Down keys or the volume keys on the left side of the phone. The more bars you see, the louder the volume.Alert type: lets you specify how you are informed of any incoming calls. Melody: the phone rings using the melody selected via the Default melodies and My sounds option. See above. Vibration: the phone vibrates but does not ring. Vibration then melody: the phone first vibrates and then starts ringing.Messages This option allows you to set up the ringer for each incoming short message and multimedia message received.Short messages / Multimedia messages The following options are available:Tone: lets you choose from many different tones. Each time you select a tone from the list, the tone is played.Alert type: lets you specify how you are informed of any incoming messages. Silent: only the text notification appears; the phone neither rings nor vibrates.Ton e : the phone rings using the tone selected via the Tone option. See above.
Sound settings84Vibration: the phone vibrates but does not ring.Vibration then tone: the phone first vibrates and then starts ringing. Repetition: allows you to specify how often the phone informs you of a new message. You can choose either Once or Periodic.Power on/off This option allows you to select the melody that the phone sounds when you switch it on or off.You can choose either Classical or Future. To turn the sound off, select Off.Connection tone This menu option allows you to specify whether or not the phone beeps when the phone connects to the network. The following options are available:Off: the phone does not beep.On: the phone beeps when your call is accepted.Sound settings85Key tone This menu option allows you to select the tone that the keypad sounds when you press a key. To turn the sound off, select Off.To adjust the key tone volume, press the volume keys on the left side of the phone in Idle Mode.Minute minder This menu option allows you to specify whether or not the phone beeps every minute during a call to keep you informed of the length of your call.The following options are available:Off: the phone does not beep.On: the phone beeps every minute.Quiet mode When you hold the   key down in Idle Mode, the phone switches to the Quiet mode. You can specify whether the phone vibrates or mutes when in the Quiet mode. The following options are available:Vibration: the phone vibrates rather than rings in the Quiet mode. Mute: the phone mutes sounds in the Quiet mode.
Sound settings86Slider tone This menu allows you to select the slider tone that the phone sounds when you slide the folder up or down.To turn the sound off, select Off.Alerts on call This menu allows you to set the phone to all alerts while calling.To turn the alerts off, select Off.87MessagesThis menu allows you to create, send, read and save messages with the Short Message Service (SMS: text message), Enhanced Message Service (EMS: message including simple image, animation or melody) and Multimedia Message Service(MMS: message supporting the presentation of various media types, such as full colour images and polyphonic ring tones). Voice mails are also available. Note: This feature is only available if your service provider’s network supports it. Contact your service provider for more information.Short messages Short message service (SMS) allows you to send and receive short text messages to and from other GSM mobile phones. In addition, your phone supports the Enhanced Messaging Service (EMS), which enables you to make short messages consisting of simple pictures, melodies, animations and styled text all of which adds a new dimension to simple text messages. To send text messages by phone, you must obtain the number of the SMS centre from your service provider.Receiving a new messageWhen you receive a new message, the New message icon ( ) and a text notification showing the number of the message appear on the display. You also hear an alert, depending on the message sound setting; for further details, see page 83.
Messages88To read the new message(s) immediately, press the View soft key. The list of the messages appears.Note: To clear the new message notification on the display, press the   key. When you also have missed calls, voice mails, short messages or multimedia messages, and multi CBs, the right soft key indication changes in the following order: Missed, Connect, View, CB and Phonebook.Managing memoryInbox and Outbox share a given amount of memory in your phone or SIM card. When the message memory is full, the New message icon ( ) blinks and an error message displays. (It disappears when you press the  key, but it reappears if you don’t delete old messages.) In this case, you cannot receive any new messages. You must delete one or more old messages to get free memory for new messages using the Delete option within the Inbox or Outbox or the Delete all option; for further details, see page 93.Create Using this menu, you can write messages, containing text, images and melodies.1. Create a message.On the first line of the display, you see the number of remaining characters you can enter, the number of current message and the maximum messages you can create, and the font style you set in Text option. Note: For further information about how to enter characters, see page 41.Messages892. While entering your message, press the Options soft key to use the following options.• Send: allows you to send the message. Refer to the next step.• Text: allows you to format the text. Following text attributes can all be combined as required.         Text size: Small/Medium/Large          Text mode: Normal/Underscore/Strikethrough       Bold: Off/On          Italic: Off/On          Alignment: Left/Center/Right     • Add media: allows you to add pictures, animations and/or melodies to the message. Select a category; Add picture, Add animation or Add melody. You can then choose a factory-set object or an object that you have received from another source and stored in the Media box. See page 120.• Preset messages: allows you to add a preset message to your text. Select one of nine messages stored in the Preset messages menu option. See page 106.• Save message: allows you to save the message so that it can be sent later. You can read the message in the Outbox.3. When you have finished entering your message, choose Send from the options.4. Enter a destination number on the Address screen.You can search for a number in Phonebook by pressing the Phonebook soft key.
Messages90Note: To clear or clear all your input, press or press and hold the C key. When you have no input, press and hold the C key to move to the previous screen.To send the message to multiple destinations up to 5, press the Add soft key and repeat step 4.5. When you have finished entering the numbers, press the Ok soft key.6. If the Enter centre screen displays, enter the service number and press the Ok soft key.You can store the SMS service centre number. For details, see page 109.Note: When the phone fails to send the message; Press the Retry soft key to try again the transmission. Or, press the No soft key and the Save soft key to save the message or exit the menu by pressing the No soft key.Inbox Your phone receives incoming messages and saves them in the Inbox. SMS is usually saved in the SIM card, but if the SIM memory is full, the incoming messages will be saved in the phone’s memory.When the Inbox menu is selected, the list of messages received displays with the:• sender’s phone number, or name if stored in Phonebook.• message status;   for a read message,   for a message to read or   for an incomplete message.Messages91To view a message, scroll to it and press the Select soft key. The screen shows the:• date and time when the message was received.• memory where the message was stored;   for the SIM card or   for the phone’s memory.• message contents.You can scroll to the next or previous message by pressing the Left or Right key.To scroll through the message contents, press the Up or Down key. When you focus on an object that includes a melody, the melody is played.You can choose the following options by pressing the Options soft key:Delete: allows you to delete the message.Message reply: allows you to reply by sending a message. Call back: allows you to call the sender back.Cut address: extracts phone numbers, email addresses or URL addresses in the text, so that you can call the number or send a message to the number or save it in your Phonebook.Send: allows you to send the message to another person.Edit: allows you to edit the message.Extract media: you can save media (except the predefined EMS animations and sounds) from the message into Media box. You can use these items when writing a message; for further details, see page 89.
Messages92Transfer: allows you to transfer the message from the SIM card to the phone’s memory or vice versa. Outbox Outbox stores any messages that you have already sent or just saved without sending.When the Outbox menu option is selected, the list of messages you have sent or saved displays with the:• recipient’s phone number, or name if stored in Phonebook.• message status;   for a sent message or   for a message to send.To view a message, scroll to it and press the Select soft key. The screen shows the:• message status;   for a sent message or   for a message to send.• memory where the message was stored;   for the SIM card or   for the phone’s memory.• message contents.You can scroll to the next or previous message by pressing the Left or Right key.To scroll through the message, press the Up or Down key. You can choose the following options by pressing the Options soft key:Delete: allows you to delete the message.Cut address: extracts phone numbers, email addresses or URL addresses in the text, so that you can call the number or send a message to the number or save it in your Phonebook.Messages93Send: allows you to send the message to another person.Edit: allows you to edit the message.Transfer: allows you to transfer the message from the SIM card to the phone’s memory or vice versa. Delete all You can delete all messages stored in the SIM card and phone’s memory in this menu.1. Scroll to a message box and place a check mark ahead of it by pressing the Select soft key.Selecting All places check marks on all of the message boxes.2. If necessary, repeat step 1 to check another box.3. When you have finished checking, press the Ok soft key. 4. When a confirming message appears, press the Yes soft key to delete all of the messages in the box(es).Otherwise, press the No soft key.
Messages94Multimedia messages Multimedia message service (MMS) is a messaging service very similar to Short message service (SMS). It provides asynchronous delivery of personal multimedia messages from between phone and phone, phone and e-mail, phone and web(by URL).In addition to the familiar text content of text messages, multimedia messages can contain images, graphics, voice and sounds. An MMS message is a multimedia presentation in a single entry. It is not a text file with attachments.Using the MMS feature, your phone can receive multimedia messages. You can also send picture messages. This function is available only if it is supported by your service provider. Only phones that offer picture message features can receive and display picture messages.Retrieving a new messageWhen you are retrieving a message, the Retrieving icon ( ) appears on the display. When you finish retrieving a new message, the New message icon ( ) and a text notification showing the number of the message appear on the display. You also hear an alert, depending on the message sound setting; for further details, see page 83.To read the new message in Idle Mode, press the View soft key. And then you see the list in the Inbox. If you select a message, you can read it.Messages95Notes: • while retrieving a new message, you cannot  access WAP sites, and cannot also enter the Downloads menu (see page 124).• To clear the new message notification on the display, press the   key. When you also have missed calls, voice mails, short messages or multimedia messages, and multi CBs, the right soft key indication changes in the following order: Missed, Connect, View, CB and Phonebook.If Message reception was set to Manual (for details, see page 111), when the New message icon ( ) appears on the display, you have to retrieve messages in the Inbox. You select a message with the icon such as  , and in the Inbox. Then you can select retrieve or delete message by pressing the Opt. soft key.Managing memoryWhen the memory is full, the New message icon ( ) blinks and an error message displays. (It disappears when you press the  key, but it reappears if you don’t delete old messages.) In this case, you cannot receive any new messages. You must delete one or more old messages to get free memory for new messages using the Delete option within the Inbox, Outbox, Draft or My folder, or the Delete all option; for further details, see page 105.
Messages96Notes: • You can only receive up to 150 messages.• Multimedia message boxes, Camera, and Media box share a given amount of memory in your phone. You can also use the Delete or Delete all option to delete some sounds or images in Camera or Media box.CreateThis menu option allows you to create a new multimedia message and then send it to multiple destinations.1. Select one of the following items using the Up or Down key and press the Add soft key.Item How to add Subject 1. Enter a subject of your message. For details about entering characters, see page 41.2. Press the Ok soft key.Note: To return to previous screen while entering a subject, press and hold the C key.Picture To add a new picture;1. Select the Create new option.2. Take a photo using the camera feature. For details about the camera feature, see page 143.Messages97Picture(continued)3. Select one of pictures you want to add. The picture is displayed.4. Press the Add soft key.To add a picture in the Media box;1. Select one of the picture categories. The picture list of the category is displayed.2. Select one of pictures you want to add. The picture is displayed.3. Press the Add soft key.Sound To add a new sound;1. Select the Record new option.2. Press the Record soft key to start recording.3. Press the Stop soft key to stop recording.4. Press the Play soft key to replay the sound. Or, press the Add soft key to add it. Enter the sound’s name and press the Ok soft key. The sound is added to the message and saved in Media box automatically.Item How to add
Messages982.  Press the Opt. soft key to use the following options.                                                                              • Preview: shows your message as it will display on the recipient’s phone. To go back to the message screen, press the Edit soft key. To send the message, press the Send soft key and go to step 4.• Send: allows you to send the message to another person. Refer to the next steps.Sound(continued)To add a sound in the Media box;1. Select one of the sound categories. The sound list of the category is displayed. 2. Select one of the sounds you want to add.3. Press the Select soft key to add it.Message1. Enter a new message. Or you can enter a preset message.To enter a preset message;• Press the Opt. soft key and select the Preset messages. • Select one of the preset messages.2. Press the Opt. soft key and select the Done option to add the message.Note: To return to previous screen while entering a subject, press and hold the C key.Item How to add Messages99• Add page: allows you to add up to 10 pages. You can move to each page using the Left or Right key on the message screen.• Page timing: allows you to set how long one page of the received messages displays. After a specified time, the display automatically scrolls to the next page.• Text effect: allows you to set the colour, size and style of the message text.• Clear subject/picture/sound/message: allows you to delete the subject, image, sound or message by selected work.• Delete page: allows you to delete the current page.• Save message: saves the message in Draft (see page 103) or My folder (see page 104).Note: To go back to the edit screen, press the   soft key or the C key.3. When you finish creating the message, select Send from the options.4. Select an entry on the Send screen.If it is an empty entry, enter a destination as below.Number: to enter a destination number.Email: to enter e-mail address.Phonebook: to enter a destination from phonebook. After entering a destination, press the OK soft key.
Messages100If it is not an empty entry, do the following things.Edit address: to edit the selected address.Delete address: to delete the selected address.Note: To clear or clear all your input, press or press and hold the C key. When you have no input, press and hold the C key to move to the previous screen.5. To send the message to multiple destinations up to 20, repeat step 4.6. When you have finished entering the destinations, press the Send soft key.If you want to cancel a sending message or resend a message that you failed to send, go to the Outbox. Then select the message and the option in point. For further details, see page 102.Inbox Your phone receives incoming messages and saves them in the Inbox. When the Inbox menu is selected, the list of messages received displays with the:• message’s subject or No subject if the message had no subject.• sender’s phone number, or name if stored in the Phonebook.• message status;   for a retrieving message,  for a read message,   for a message to read,   for a read notification message and   for a notification message to read. Messages101Note:  The icon of message status can have various forms like  ,, as the priority that sender fixed (see page 110).To view a message except retrieving, scroll to it and press the Select soft key. To scroll through the message contents, press the Up or Down key. When the message has more than one page, you can press the Left or Right key to move through the pages or the pages are moved through as predefined page timer, which the sender sets, has elapsed.Notes: • Some types of sound or picture may not be able to play or display. • When the message has an attachment like video clips, the Attachment icon ( ) appears on the title line. You may not play the attachment. And you may also not extract it from the message.You can choose the following options by pressing the Opt. soft key:Delete: deletes the messageReplay: replays the message.Reply: replies to the sender by sending a message.Forward: forwards the message to another person.Call back: allows you to call the sender back.Cut media: extracts the picture or sound, so that you can set them as a wallpaper or ringtone or you can send them as a multimedia message.
Messages102Cut address: extracts phone numbers, email addresses or URL addresses in the text, so that you can call the number or send a message to the number or save it in your Phonebook.Properties: shows you detailed information about the message.Move to My folder: moves the message to the My folder for later use. Outbox Outbox stores messages that you sent, you failed to send and you cancelled sending.When the Outbox menu option is selected, the list of messages you have sent or saved displays with the:• message’s subject or No subject if the message had no subject.• recipient’s phone number, or name if stored in the Phonebook.• message status;   for a sending message,   for a sent message,   for a message that you failed to send or you cancelled sending,   for a delivery report. When a receiver retrieves a message you sent and the Delivery report option (see page 111) is set to on,   is changed into  .To view a message except sending, scroll to it and press the Select soft key. To cancel a sending message, scroll through and select the message by pressing the Up or Down key, and then press the Select soft key. Then the confirming message appears. In the message, you can cancel sending it by pressing the Yes soft key.Messages103To resend the message that you failed to send, scroll through and select the message by pressing the Up or Down key, and then press the Select soft key. Then press the Opt. soft key, and then select the Send option.To scroll through the message, press the Up or Down key. When the message has more than one page, you can press the Left or Right key to move through the pages or the pages are moved through as paging timing that sender fixed automatically.You can choose the following options by pressing the Opt. soft key:Delete: deletes the message.Replay: replays the message.Send: send the message.Properties: shows you detailed information about the message.Move to My folder: moves the message to the My folder for later use.Draft This message box stores messages that you save, interrupted messages by an incoming call, or messages while you create a new message.Note: Saves messages that are failed to send in the Outbox.To view a message, scroll to it and press the Select soft key.
Messages104You can choose the following options by pressing the Opt. soft key:Send: replies to the sender by sending a message.Replay: replays the message.Delete: deletes the message.Properties: shows you detailed information about the message.My folder You can move the messages stored in the Inbox or Outbox to the My folder by using the Move to My folder option. While making a new message, you can also save to My folder by using the Save message option.To view a message, scroll to it and press the Select soft key.You can choose the following options by pressing the Opt. soft key:Delete: deletes the message.Replay: replays the message.Send: send the message.Cut media: extracts the picture or sound, so that you can set them as a wallpaper or ringtone or you can send them as a multimedia message.Cut address: extracts phone numbers, email addresses or URL addresses in the text, so that you can call the number or send a message to the number or save it in your Phonebook.Properties: shows you detailed information about the message.Messages105Delete all This menu option allows you to delete all of the messages in each message box. You can also delete all of your messages at one time.1. Scroll to a message box and place a check mark ahead of it by pressing the Select soft key.Selecting All places check marks on all of the message boxes.2. If necessary, repeat step 1 to check another box.3. When you have finished checking, press the OK soft key. 4. When a confirming message appears, press the Yes soft key to delete all of the messages in the box(es).Otherwise, press the No soft key.Push messages This menu allows you to set to be received and read push messages.The following options are available:Inbox: Your phone receives push messages and saves them in the Inbox. And you can read push messages in the Inbox. Setting: This option allows you to set the push message receiving options.Always: always push message comes in.
Messages106Never: the push message never comes in.Optional: Only the push messages whose setting matches to the number in this option come in. The preset number is SMS service centre. You can also edit the number.Delete all: deletes all of the push messages.Preset messages Using this menu, you can preset up to nine messages that you use most frequently. When you access this menu, the preset message list displays. 1. Scroll to a message or an empty entry by pressing the Up or Down key. 2. Press the Select soft key and enter a new message or change the old message. For further details about entering characters, see page 41.3. Press the Ok soft key to save the message. Voice mail When you receive a voice mail, your phone displays the  icon and you hear an alert.Connect to voice mail • In Idle Mode, when you receive a new voice mail, press the Connect soft key to access your voice mail server and follow the instructions provided.Messages107• In Idle Mode, hold the 1 key down to access your voice mail server and follow the instructions provided.• Call your voice mail server number by accessing the Connect to voice mail menu and follow the instructions provided.Voice server number Before using the voice mail service, you must store the voice mail server number obtained from your service provider.When you select an entry, following options are available.Edit number: enter a voice mail server number or press the Phonebook soft key to enter a number from the Phonebook. And then press the Ok soft key.Change name: enter a server name and press the Ok soft key to save it.Delete: when the confirming message appears, press the Yes soft key. To cancel, press the No soft key. Broadcast This network service allows you to receive text messages on various topics, such as the weather or traffic. Messages are displayed immediately as they are received, provided that: • the phone is in Idle Mode. •the Receive option is set to On.
Messages108• the message channel is currently active on the channel list.When you get broadcast messages, you can see the messages in Idle Mode. If it is short you can see the display, otherwise, press the CB soft key to read the message.In the Broadcast menu option, the following options are available:Read: lets you read the received broadcast messages. Archive: shows the list of the messages you saved from the temporary list. Temp ora ry: shows the latest messages. These messages will be gone when the phone is switched off.If the message is long, press the UP or Down key. When you read a message, press the Options soft key to access following options:Cut number: shows the list of numbers included in the message.Save: (Temporary only) saves this message to Archive list.Delete: delete this message.Delete All: delete all message on the list.Receive: allows you to turn the reception of broadcast messages on or off.Channel: the check mark inside All check box indicates that the channel is enabled. Messages109To enable or disable this channel press the Select soft key, then select Enable or Disable.The Add channel option allows you to add a new channel to the channel list. Enter the appropriate channel code obtained from your service provider and a title for the channel.Language: selects a language you prefer. Then, You can get cell broadcast messages only in the language you selected.Settings Short messages Using this menu, you can set up default SMS information. The following options are available:Service centre: allows you to store or change the number of your SMS centre required when sending messages. You must obtain this number from your service provider.Validity period: allows you to set the length of time your messages are stored at the message centre while attempts are made to deliver them. Message type: allows you to set the message type to Text, Fax, Voice, ERMES, X400, or E-Mail. The network can convert the messages into the selected format.Reply path: allows the recipient of your SMS message to send you a reply via your message centre, if the service is provided by the network.
Messages110Delivery report: allows you to set on or off. When this function is set to on, the network informs you whether or not your message has been delivered.Character support: allows you to select the character set when editing and sending messages.GSM-alphabet: you can only send the message using GSM characters.Uni-code: you can send the message using Unicode characters, including GSM alphabets. And the maximum number of characters which can be entered in a message is reduced to half in length.Automatic: if you select Automatic, the phone selects the character set according as you use Unicode characters or not.Multimedia messages Using this menu, you can set up default settings for sending or receiving MMS message. The following options are available: Send settings: The following options are available:Priority: allows you to set the priority of message.Validity period: allows you to set the length of time your messages are stored at the message centre while attempts are made to deliver them. Delivery after: you can set the delay time before the phone sends your messages.Address hiding: when this option sets to On, your phone number does not display on the recipients phone.Messages111Delivery report: when this option sets to On, the network informs you whether or not your message has been delivered.Read reply: when this option sets to On, your recipient’s phone sends a reply to let you know when your message was read by her/him.Receive settings: the following options are available:Msg. reception: allows you to set how you receive a message. You can select one of Manual, Automatic and Reject.Anonymous reject: when this option sets to On, your phone rejects messages without a caller ID.Adverts reject: when this option sets to On, you can reject advertisements by service provider.Report allowed: when this option sets to Off, your phone does not send a reply to the recipient’s phone even if the sender asks for the read reply.MMS profiles: in this menu, you can configure MMS profile settings that are required when you send or receive multimedia messages. Current profile: allows you to select one profile to use currently.Profile setting: allows you to set up to five profiles.• Profile name: enter the name of the profile.• Server URL: enter the address of profile server.• GSM setting: allows you to change the proxy settings for the GSM network.    - Gateway: enter the IP address and IP port.
Messages112    - Data call type: select a network connection         type between ISDN and Analogue.    - Dial number: enter the server phone                     number.    - Login ID: enter the server login ID.    - Password: enter the server password.• GPRS setting: allows you to change the proxy settings for the GPRS network.    - Gateway: enter the IP address and IP port.    - APN: enter the access point name used for      the address of the GPRS network gateway.    - Login ID: enter the user ID required to      connect to GPRS network.    - Password: enter the password required to      connect to the GPRS network.• Bearer: select the bearer to be used for each type of network accesses.    - GPRS only: it only work in GPRS network.    - GSM only: it only works in GSM network.Messages113Memory status You can check the memory status for messages. Short messages You can check how many messages are stored in SIM card and phone’s memory. When you have finished, press the   soft key or the   key to exit.Multimedia messages Multimedia message boxes, Camera and Media box share a given amount of memory in your phone.The display shows the status of free and used memory.You can see the used memory status of multimedia message boxes, Camera and Media box by pressing the Left or Right key.
114Fun boxThe Fun box menu contains several fun options:• WWW services•Media box•JAVA world•Melody composerWWW services Your phone comes equipped with a WAP (Wireless Application Protocol) Browser, making it possible for you to access the Wireless Web.Each time you start the WAP Browser, the phone connects to the Wireless Web and the service indicator icon (  or  ) appears on the display to inform you that you are connected to the Wireless Web and will be billed accordingly. Rates vary according to your service option.The WAP Browser ends the network connection after a certain period of inactivity and automatically reconnects as necessary. For this reason, you may find that you are billed for several network connections within a single session. This is normal and is designed to minimise your bill.Home When you select this menu option, the phone connects to the network and loads the homepage of the Wireless Web service provider. Once connected, the homepage displays. The content depends on the service provider. Fun box115Note: To quickly launch the WAP browser from Idle Mode, press the   key.To scroll through the screen, use the Up and Down keys.To exit the browser, press the   key at any time. The phone returns to Idle Mode.Navigating the WAP browserEntering text in the WAP browserWhen you are prompted to enter text, the current text input mode appears above the right soft key.For further information on how to enter text, see page 41.To Press thescroll through and select browser itemsUp or Down key until the item you want highlights, and then press the   soft key.select a numbered itemcorresponding numeric key.return to the previous page (or Back) soft key or C key.return to the startup homepage key and select the Home browser option. For details, see page 116.
Fun box116Using the WAP browser menusThere are various menu options available when surfing the Wireless Web.To access the WAP Browser menu:1. Press the   key or scroll to the logo on the top left of all WAP pages and then press the   soft key.A list of options appears.2. Highlight the required option using the Up or Down key.3. Press the   soft key to select the option.4. If necessary, select the secondary option by pressing the Up or Down key and then press the  soft key.Note: The WAP Browser menus may vary, depending on your version of the browser.The following WAP Browser menus are available:Back: returns to the previous page.Home: takes you back at any time to the homepage of the Wireless Web service provider.Exit: exits the WAP browser.Reload: reloads the current page.Show URL: shows the URL address of the WAP page you are currently accessing.About...: shows browser information.Using the WAP browser optionsSeveral options are available when you are surfing the Wireless Web. To access these options, press the   key once connected to the Wireless Web.Fun box117Goto URL: allows you to manually enter the URL address of the site that you wish to access. Bookmark: allows you to use the Bookmark menu option. For details, see page 117.Messages: allows you to read or write an SMS message. For details, see page 87.Media box: allows you to use your Media box. For details, see page 120.Answering a call during a WAP connectionYou can receive an incoming call while you are navigating the WAP browser. Answer the call by pressing the   key or the Accept soft key, as you normally would. After ending the call, you can continue navigating on the WAP page you were previously accessing.Bookmark This menu option allows you to store the URL addresses of up to 15 of your favourite Web sites. To store a URL address:1. Select an empty location and press the Select soft key. 2. Enter the address and press the Ok soft key to save it.3. Enter the name of the bookmark and press the Ok soft key.For further information about how to enter text, see page 41.
Fun box118Once you have stored an address, the following options are available when you select it.Go: allows you to access the site directly.Edit: allows you to change the name and URL address of the bookmark.Delete: allows you to delete the bookmark.Go to URLThis menu option allows you to manually enter the URL address of the Web site that you wish to access.Enter the URL address and press the Ok soft key.For further information about how to enter text, see page 41.Clear cache This menu option allows you to clear the information stored in the cache, the phone’s temporary memory used to store the most recently accessed WAP pages.Proxy settings This menu option allows you to set up five proxy servers.Note: You do not need to change the browser settings in most cases. Change the settings only when your network provider asks you to.Fun box119For each proxy, the following options are available:Proxy name: enter the name of the HTTP proxy server.GSM setting: you can change the proxy settings for the GSM network.Gateway: enter the IP Address and IP PortData call type: select a network connection type; ISDN or Analogue.Dial number: enter the PPP server phone number. Login ID: enter the PPP server login ID.Password: enter the PPP server password.GPRS setting: you can change the proxy settings for the GPRS network.Gateway: enter the IP Address and IP Port.APN: enter the access point name used for the address of the GPRS network gateway.Login ID: enter the user ID required to connect to the GPRS network.Password: enter the password required to connect to the GPRS network.Home URL: you can change the address of your startup homepage. When the default homepage displays, you can delete it using the C key and enter your own choice. To enter any special characters, / for example, use the Symbolic mode; see page 48.Bearer: you can select the bearer to be used for each type of network accesses.
Fun box120GPRS first: your phone will search for the GPRS network first. If this service is not available, you can set the GSM service temporarily.GPRS only: the phone only works in GPRS networks.GSM only: the phone only works in GSM networks.Current proxy This menu option allows you to activate one of the proxies you set up to use the WAP connection.Media box This menu option stores various media items from other sources, such as the WAP sites, the EasyStudio PC software or multimedia messages. Photos  This option allows you to view the taken pictures.My photos: allow you to view the photos in my photos.My album1 / My album 2: allow you to view the photos in the selected album.When you view a photo, press the Options soft key to do the followings.Send: allows you to send it via a message.Rename: allows you to rename it.Delete: allows you to delete it.Fun box121Move to album: allows you to move it to one of the albums.Set as: allows you to set it as a wallpaper or a caller ID.Wallpaper: allows you to set it as a wallpaper.Caller ID: allows you to set it as a caller ID.Protection: allows you to protect it from deletion or not.Properties: allows you to view the detail information of the photo.Images This option allows you to view the images received from other sources, such as the WAP sites, the EasyStudio PC software or multimedia messages.When you view an image, press the Options soft key to send, rename, delete, set as a wallpaper or view the properties.For further details about these options, see the options of the Photos menu (see page 120).Sounds  This option allows you to listen to the recorded voices and the melodies received from other sources, such as the WAP sites, the EasyStudio PC software or multimedia messages.Voices: allow you to listen to the recorded voices.My sounds: allow you to listen to various melodies.When you select a sound, press the Options soft key to send, rename, delete, set as a ringtone (only in My sounds) or view the properties.
Fun box122For further details about these options, see the options of the Photos menu (see page 120).Delete all This option deletes all of the photos, images and sounds in the Media box. Photos1. Scroll to a box and place a check mark ahead it by pressing the Select soft key.Selecting All places check marks on all of the items. If you want to delete the protected photos and the caller ID photos, select the With protected photos option and the With caller ID photos option.2. If necessary, repeat step 1 to check another box.3. When you have finished checking, press the OK soft key. 4. When a confirming message appears, press the Yes soft key to delete all of the photos in the box(es).Otherwise, press the No soft key.ImagesWhen a confirming message appears, press the Yes soft key to delete all of the images.Otherwise, press the No soft key.Fun box123Sounds1. Scroll to a sound box and place a check mark ahead it by pressing the Select soft key.Selecting All places check marks on all of the boxes. 2. If necessary, repeat step 1 to check another box.3. When you have finished checking, press the Ok soft key. 4. When a confirming message appears, press the Yes soft key to delete all of the sounds in the box(es).Otherwise, press the No soft keyMemory status Media box, Camera and multimedia message boxes share a given amount of memory in your phone.The display shows the status of free and used memory.You can see the used memory status of Media box, Camera and multimedia message boxes by pressing the Left or Right key.
Fun box124JAVA world You can download MIDlets (Java applications running on mobile phones) from various sources using the WAP Browser and store them in your phone.DownloadsA list of Java games is displayed. In basic, two pre-loaded MIDlets (Java games) are provided. If the list of Java games is empty, a pop up message is displayed to invite to download a new game. To add MIDlets to the list, you can download MIDlets from the Web sites. SnowBallFightThe goal of this game is to challenge and defeat the snowball fight champions of four different teams.Accessing a gameAfter loading the game, press any key twice to go to the first menu screen. At the first menu screen, press  key to play a game, or press  key to access the main menu of this game.To Press thefind a game Up or Down key.run a gameLaunch soft key.view detail informationInfo soft key.delete the gameDelete soft key in the information display.Fun box125Play: allows you to start a new game or a saved game. Saved game allows you to continue the beginning of last stage you played.Instructions: shows you the explanation of control keys, offense items and defense items.Configuration: allows you to turn the sound, vibration on or off and select the game speed from 1 to 5.Quit: quits the game and returns to the downloads menu screen.Playing a gameMove the character along the street using the navigation key. If you have enough gold coins which you can earn while fighting to buy items, you can buy defense items at the drug store and offense items at the item shop. Move the character to the team of current stage and press   key to select it. When the snowball fight game starts, hit the rival kids with snowballs and avoid theirs. While fighting you can use items you have. If you raise enough mana, you can also use special attack. You should win all fights in four stages in order to challenge the champions of the snowball fight.Key Commands4/6 or Left/Right: move left or right2,5 or Up,  :control the distance at the first press and throw the snowball at the next press.8 or Down: use the special attack depending on your mana3: enters item mode to use your item, select the item you want to use by pressing 2, 5, Up or   key.
Fun box126Special attacksLevel 1: Aurora, all enemies are hit by a snowball.Level 2: Ice dragon, all enemies are hit by a snowball and frozen for 8 seconds.Level 3: Icicle storm, double powered snowball attack to all enemies and decreasing enemies’ attack accuracy for 10 seconds.BubbleSmileBubbleSmile is an arcade puzzle game.Accessing a gameAfter loading the game, you will see the following options, press   key to select one of them:Start game: allows you to start a new game with timed mode or skilled mode.• Timed mode: you have to achieve the best score before gauge disappear at the time bar. When you get the same coloured bubble together, gauge at the time bar increases.• Skilled mode: you have to make more then 4 bubbles disappear at once for the gauge at the skill bar increase. If 3 or none of bubbles disappear, then the gauge decreases.Continue: allows you to continue the last game you played. The menu is only available when a game has already been played.High score: shows you the high score table.How to play: shows you the instruction of this game.Option: allows you to set the sound on or offFun box127Playing a gameYour score goes up when you remove the bubbles. Only when more than 3 same coloured bubbles line up horizontally or diagonally, they disappear. To line up the bubbles, move the band rounding three bubbles to suitable place and rotate it. When the game is over, your score is ranked on the high score board if it is within third. Key Commands2, 4, 6, 8, or navigation key: move the band up, down, left or right1: rotate the bubbles in the band counterclockwise3: rotate the bubbles in the band clockwiseInternet settings This menu option allows you to set the information to connect the Java server. This information is provided by the network operator automatically, but you can change it manually.APN: enter the access point name used for the address of the GPRS network gateway.Login ID: enter the user ID required to connect to the GPRS network.Password: enter the password required to connect to the GPRS network.DNS settings: enter the DNS address. The DNS (Domain Name Server) address to connect the Java server is automatically set when making data call set up.
Fun box128Memory statusYou can check the free space for Java download.The display also shows the total memory and used memory. Melody composerCompose melodyMemory status
129OrganiserThe Organiser feature enables you to:• view the calendar and/or write a memo or to do list.• set the current date and time, and find out what time it is in various cities around the world.• set the alarm so that the phone rings at a specific time.• use your phone as a calculator, unit convertor, timer or stopwatch.New memo This menu option allows you to create a new memo.Note: You can also access this menu by holding down the C key in Idle Mode.1. Write your memo of up to 100 characters and press the Ok soft key.For further information about how to enter text, see page 41.2. Select the category of the memo to be saved and press the Select soft key.The following categories are available:• Scheduler: general schedule events, such as appointments or meetings.• To do list: tasks you need to do. They are   saved on the to do list.• Call: calls you need to make.
Organiser130• Anniversary: anniversaries to be remembered, such as wedding anniversaries, birthdays or other special days.Note: You can save up to 25 items to each category, so you can save 100 memos totally.3. Scroll to a date on the calendar by pressing the navigation keys. Press the Select soft key.4. If applicable depending on the category you selected, enter the event time and press the Ok soft key. 5. If you have selected the 12-hour time format (see page 136), select AM or PM by pressing the Up or Down key and then press the Select soft key.6. To set an alarm for the memo, press the Yes soft key. Otherwise, press the No soft key. The memo is saved immediately. Go to step 10.7. Enter the time for the alarm to sound and press the Ok soft key.8. If you have selected the 12-hour time format (see page 136), select AM or PM by pressing the Up or Down key and then press the Select soft key.9. Select an alarm tone and press the Select soft key. The memo is saved and then displays on the screen.Organiser13110. You can choose the following option by pressing the Options soft key:• Add: allows you to add a new memo on the day.• Delete: allows you to delete the memo.• Edit: allows you to edit the memo.• Move: allows you to move the memo to a different date.• Copy: allows you to copy the memo to a different date.11. When you have finished, press the   soft key or the   key to exit.Calendar The calendar helps you to keep track of schedule, calls that you need to make, tasks that you need to do and anniversaries. You can set the alarm to ring when the set date for a schedule is reached.Consulting the calendarTo Press themove to another day Left or Right key.move to another weekUp or Down key.move to the previous or next monthUp or Down key and hold it down move to the previous or next yearLeft or Right key and hold it down.
Organiser132The following options are available when you press the Options soft key on the Calendar display:Add memo: allows you to add a new memo on the day.Go to date: allows you to enter a particular date and then schedule an event on that date.View all: shows all of the events that you have scheduled. Delete day: deletes the scheduled event on the selected day. Delete all: deletes all of the events that you have scheduled.Creating a new memo1. Scroll to a date on the calendar, referring to page 131, and press the Select soft key.2. Write your memo and press the Ok soft key.For further information about how to enter characters, see page 41.3. Select the category of the memo to be saved and press the Select soft key. The following categories are available:• Scheduler: general schedule events, such as appointments or meetings.• To do list: tasks you need to do.• Call: calls you need to make.• Anniversary: anniversaries to be remembered, such as wedding anniversaries, birthdays or other special days.Organiser1334. Follow the procedure from step 4 on page 130 onwards to save the memo.Viewing your calendar memosA date that has a memo associated with it is highlighted in a box. If you select a date when events have already been scheduled, the number of memos of each type is shown at the bottom of the calendar.• : General schedule events•: To do list•: Calls• : Anniversaries Press the Select soft key to view the memos.If you have created more than one memo on the same day, you can scroll to the event you want to view by pressing the Left or Right key.The following options are available when you press the Options soft key:Add: allows you to add a new memo. For further information about how to add a memo, see page 129.Delete: allows you to delete the memo.Edit: allows you to edit the memo.Move: allows you to move the memo to a different date.Copy: allows you to copy the memo to a different date.
Organiser134To do list This menu allows you to view a list of tasks.To create a new memo of the To do list type:1. Write the memo about your task and press the Ok soft key.For more information about how to enter characters, see page 41.2. Scroll to a date on the calendar, referring to page 131, and press the Select soft key.3. Follow step 4 on page 130 onwards to save the memo.Once you have defined tasks, they are listed with a status mark (  for Done or   for Undo) within the To do list menu.To scroll to a specific task, press the Up or Down key and press the Select soft key. The task displays with the deadline, alarm setting, job details and status mark.You can scroll to the previous or next task by pressing the Left or Right key.The following options are available when you press the Options soft key:Add: allows you to add a new task. For details about adding To do list-type memos, see page 129.Mark: allows you to change the status mark.Edit: allows you to edit the contents of the task. Move: allows you to move the task to a different date.Organiser135Copy: allows you to copy the task to a different date.Delete: allows you to delete the task.Delete all: allows you to delete all of tasks from the list.Clock This option allows you to change the current time and date displayed. You can also check the current time for Greenwich Mean Time (GMT) and 22 major cities around the world.The following options are available:Set time: allows you to enter the current time. You can choose the time format in the Set format menu option; see page 136.Note: Before setting the time, you must specify your time zone in the Set world time menu option.Set date: allows you to enter the day, month and year. You can change the date format in the Set format menu option; see page 136.Set world time: allows you to check the current time in GMT and 22 major cities around the world. Scroll through the cities using the Left or Right key.The screen shows the:•city name.• current date and time.• time difference between the selected city and your city if you have set the local time (see below) or GMT (by default).
Organiser136To select your time zone:1. Select the city corresponding to your time zone by pressing the Left or Right key one or more times.The local date and time display.2. Press the Set soft key.4. When you have finished, press the   soft key or the   key to exit.Set format: allows you to change the time and date formats.Time format: 24 hours12 hoursDate format: DD/MM/YYYY (day/month/year)                    YYYY/MM/DD (year/month/day)3.To Selectupdate the current date/time with this new settingSet local.indicate that thetime zone iscurrently using the daylight saving timeSet DST. The   icon is shown next to the time difference.indicate that the time zone is no longer using the daylight saving timeRemove DST (only available when the   icon is shown next to the time difference).Organiser137Alarm This option allows you to set an alarm to ring at a specific time. You can set up to three alarms or set the phone to ring an alarm when it is switched off.To set an alarm:1. Select either Morning call, Alarm1 or Alarm2 by pressing the Up or Down key.The   icon means that no alarm is currently set. The   icon means that an alarm has already been set.2. Press the Select soft key.3. Press the Options soft key.4. Scroll to an option by pressing the Up or Down key and press the Select soft key. Change the setting, as needed.• Alarm day: place or remove a check mark on the day(s) of the week by pressing the Select soft key. If you want to set a daily alarm, select Everyday. If you want to set a temporary alarm, select Once alarm. When you press the Ok soft key after selecting, your phone asks you to enter the alarm time.• Alarm time: enter the time for the alarm to sound.• Alarm tone: select an alarm melody.• Remove alarm: deactivates the alarm.Note: The alert type of Alarm1 and 2 is affected by the alert type of incomming call. Moring call’s alert type is always melody.5. Repeat step 4 to change each setting.
Organiser1386. When you have finished, press the   soft key or the   key to exit.Once an alarm has been set, you can see the Alarm icon ( ) on the top line of the display. To stop the alarm when it rings, press any key.Note: When the Quiet mode is activated, the alarm tone doesn’t sound. But When you set an Morning call, it sounds the alarm tone even if the Quiet mode is activated.To set the alarm to ring even if your phone is switched off:1. Scroll to Auto power on the Alarm list and press the Select soft key. 2. If necessary, press the Up or Down key to select On.To turn the Auto power feature off, select Off.3. Press the Select soft key to save the setting.4. When you have finished, press the   soft key or the   key to exit.Once you have activated the auto power alarm, a check mark appears ahead of Auto power. If the phone is switched off at the specified alarm time, it automatically switches on and rings the alarm. It then automatically switches off again.To turn off an alarm:• Press the Confirm soft key.• When the mornig call’s alarm tone sounds, press any key or the Snooze soft key to stop the alarm for five minutes, after which it will resume. You can do this a maximum of five times.Organiser139The snooze alarm tone sounds while the phone is switched off and the Auto power is set to on, and the Quiet mode is activated. If you reset the moring call’s alarm time or deactivate the morning call’s alarm, the snooze alarm is cancelled.Calculator You can use the phone as a calculator. The calculator performs basic arithmetic functions, such as addition, subtraction, multiplication, division and remainder computation.To perform a calculation:1. Enter the first number using the number keys.Note: To erase any mistakes or clear the display, press the C key.2. Press the   key to enter a decimal point (.) or the   key to enter the appropriate arithmetic symbol: + (add), - (subtract),  (multiply), / (divide), % (remainder), ( or ).3. Enter the second figure.4. Repeat steps 2 and 3, if necessary.5. Press the Equal soft key to view the result. The result appears in the Answer box.Note: The result is rounded to six decimal places.6. When you have finished, press the   soft key or the   key to exit.
Organiser140Conversion This menu option allows you to convert from one type of unit to another.To c onv er t a va l ue:1. Scroll to the type of conversion to be performed from Currency, Length, Weight, Volume, Area and Temperature, and press the Select soft key.2. Enter the value to be converted and press the Down key to move to the From field. You can enter a decimal point (.) using the   key. And you can enter a minus (-) using the   key in Temperature.3. Select the original unit by pressing the Left or Right key and press the Down key to move to the To field. Refer to the table on the following page for the units available.4. Select the required unit by pressing the Left or Right key. 5. Press the Ok soft key or the   key to view the result. The result appears in the Answer box.6. When you have finished, press the   soft key or the   key to exit.Organiser141Units availableTimer Using the Timer feature, you can set the phone to sound an alarm after a certain time.1. Press the Set soft key.2. Enter the length of time you want to count down in hours and minutes and press the Ok soft key.3. Press the Start soft key to start counting down.Type UnitsCurrency EURO     DEM     ITLFRF       ESP     NLGATS       BEF     FIMPTE       GRD    IEPLUFLength mm     cm      mkm      in        ftyard    mileWeight g         kg       tongrain   oz        pound Volume cm3     m3         lin3       ft3      yd3gal Area cm2     m2      ain2       ft2      yd2acreTemperature °C       °F
Organiser142Even if you exit the Timer screen, the timer will continue running. After the specified time has expired, the phone informs you by playing a melody and displaying a text notification. To stop the timer melody when it rings, press any key.To stop the timer before the end, press the Stop soft key on the Timer screen.Notes: • The timer uses power from the battery consequently, the phone’s operating time is reduced.• When the Quiet mode is activated, there is no sound.Stopwatch The stopwatch can be used to measure times for various sports.Example: Running or swimming races Up to four stopwatches can be used.The precision of the stopwatch is one hundredth of a second. The maximum measurement time is 10 hours.1. To start the stopwatches, press the Ok soft key.2. When you wish to stop the first stopwatch, press the Ok soft key. Repeat this step for the other stopwatches.3. Press the Reset soft key to reset the watches.4. Press the C or   key to exit.143CameraUsing the camera module embedded in your phone, you can take pictures for people or events while on the move. Additionally, you can send photos to other people in a picture message or as an e-mail attachment. The camera produces JPEG pictures.CAUTIONS:• Do not take photos of people without their permission.• Do not take photos in a place where cameras are not allowed.• Do not take photos in a place where you may interfere with another person’s privacy.Take photos  This menu allows you to take a picture to send the photo as a picture message to other destinations. You can use the picture as a background and store it separately in My album folder.Taking a picture1. Slide the folder up.2. To access the Take photos menu directly, press the Down key in Idle Mode.  And then press the Select soft key when Take photos highlights.To take pictures immediately in Idle Mode, press and hold the Down key or the Camera (  ) key on the right side of the phone.The image to be captured appears on the display.
Camera144The icons on the top line of the display indicate the size, quality, flash type and current mode (shown if you select the multi-shop mode or night mode). 3. Adjust the image by aiming the camera to the subject. To Press theadjust the brightness of the pictureLeft or Right key.zoom in or out the pictureUp or Down key.flip the picture up and downvolume up keyreverse the picture like a mirror imagevolume down keyturn the viewfinder’s frame on or off1 keychange the picture size2 keychange the picture quality3 keyselect the mode4 keyselect the effect5 keygo to the Settings menu6 keyselect the frame7 keyselect the delay time8 keygo to the My photos menu 9 keyCamera145For more information about these functions, see “Using the camera options” on page 146.4. Press the   soft key or the Camera ( ) key on the right side of the phone to take a picture.The picture is automatically saved in the My photos (see page 149).When you press the Options soft key after taking a picture, the following options are available. Scroll the option you want by pressing the Up and Down keys and press the Select soft key:Send: allows you to send a multimedia message using the taken picture. For further details about sending multimedia messages, see page 94.Rename: allows you to rename the taken picture.switch the camera flash on or off (if you set the Manual option in the Flash light menu. See page 148, 151)0 key5.  To Press theuse the optionsOptions soft key. For details about the options, see below.delete the picture fileDelete soft key.return to the capture mode to take another picture.C key.turn the camera offand return to Idle Mode key. To Press the
Camera146Go to my photos: allows you to see the taken pictures in the My photos (see page 149).Set as: allows you to set it as a wallpaper or a caller ID.Wallpaper: allows you to set it as a wallpaper.Caller ID: allows you to set it as a caller ID.Protection: allows you to protect the taken picture from deletion or not.Properties: this option shows you information about the picture, such as name, size, date, resolution, protection type and format.Using the camera optionsWhen you press the   soft key in the capture mode, the following options are available for the current shot:Mode: You can take a picture in various modes. Once you change the mode, its indicator appears at the top left on the display.Normal shot: you can take a picture in the normal mode.Multi-shot: you can take action stills. Select speed and the number of pictures you want to take. When you press the   soft key or the Camera ( ) key on the right side of the phone, the phone automatically takes and saves the pictures successively as many times as you set. The Mobile (128*120) size will be set by default.Note: The zoom control bar and the brigthness control bar do not display when you use the multi-shot mode.Camera147Night mode: this option allows you to take a picture of the best quality when it is dark.Capture only: you can take pictures without review.Frame: this option allows you to use a frame on the picture. Press the navigation keys to find the frame format you want to use. You can preview the image with the frame format by using the Preview soft key. The Mobile (128*120) size will be set by default.Note: The zoom control bar and the brigthness control bar do not display when you use the frame.Effects: this option allows you to apply special effects to the picture. Press the Up or Down key to find the tone you want to use. Gray, Negative, Sepia, Emboss and Sketch are available. To deactivate the effect setting, select Off.Rotation: this option allows you to flip the image vertically or reverse it as a mirror image.Timer: you can select the delay time. When you press the capture key, the phone takes the picture after the specified time. When you exit the camera mode or select Off in the Timer menu, the timer is off.Settings: this option allows you to change the settings for taking a picture. And this option is synchronized with the Settings menu. See page 150.Photo size: sets the image size to one of VGA(640*480), QVGA(320*240), QQVGA(160*120) and Mobile(128*120). The selected image size displays on the capture screen.
Camera148Photo quality: allows you to select the image quality from Super fine, Fine, Normal, and Economy. The option you select appears on the top of the display.Shutter sound: allows you to select a sound when you press the shutter, the   soft key or the Camera ( ) key on the right side of the phone.Note: This sound setting is not applied to the multi-shot sound.Flash light: allows you to set the camera flash to use automatically or not.• Manual: to switch the camera flash on or off, you have to press the 0 key in the capture mode.• Automatic: when you press the shutter, the   soft key or the Camera ( ) key on the right side of the phone, the phone lights a flashlight. After a while the camera takes a picture and the flashlight go out.Default name: allows you to change the default prefix name of the picture.Help: this option shows you the functions of the navigation keys and the volume keys in the capture mode.Camera149My photos In this menu, you can review the pictures you have taken. My albums My Album allows you to store the pictures as your photo album. Select one of albums. It shows the pictures saved in the album. For details about viewing your pictures and using them, see page 149. To Press thescroll through the picturesnavigation keys.show the selected picture as an enlargementView soft key.go back to the multiple view modeMulti soft key.use the optionsOptions soft key. For details, see page 145.turn the camera offand return to Idle Mode key.
Camera150Delete all You can delete all the photos saved in each category.1. Scroll to a photo box and place a check mark ahead it by pressing the Select soft key.Selecting All places check marks on all of the photo boxes. If you want to delete the protected photos and the caller ID photos, select the With protected photos option and the With caller ID photos option.2. If necessary, repeat step 1 to check another box.3. When you have finished checking, press the OK soft key. 4. When a confirming message appears, press the Yes soft key to delete all of the photos in the box(es).Otherwise, press the No soft key.Settings This menu option allows you to change the default settings of the options for using the camera feature.The following options are available:Photo size: sets the image size to one of VGA(640*480), QVGA(320*240), QQVGA(160*120) and Mobile(128*120). The selected image size displays on the capture screen.Camera151Photo quality: allows you to select the image quality from Super fine, Fine, Normal, and Economy. The option you select appears on the top of the display.Shutter sound: allows you to select a sound when you press the shutter, the   soft key or the Camera ( ) key on the right side of the phone.Note: This sound setting is not applied to the Multi-shot sound.Flash light: allows you to set the camera flash to use automatically or not.Manual: to switch the camera flash on or off, you have to press the 0 key in the capture mode.Automatic: when you press the shutter, the   soft key or the Camera ( ) key on the right side of the phone, the phone lights a flashlight. After a while the camera takes a picture and the flashlight go out.Default name: allows you to change the default prefix name of the picture.Memory statusCamera, Media box and multimedia message boxes share a given amount of memory in your phone.The display shows the status of free and used memory.You can see the used memory status of Camera, Media box and multimedia message boxes by pressing the Left or Right key.
152Phone settingsMany different features of your phone can be customised to suit your preferences via thePhone settings menu.Display You can change the background image and the colour of the components on the display according to your preference and needs.WallpaperThis option allows you to change the background image to be displayed in Idle Mode. The following options are available:Animations: allows you to select one of the animations.Photos: allows you to select one of the photos taken by the camera.Images: allows you to select one of the images in the Images in the Media box menu that are downloaded from the WAP sites, the EasyStudio PC software or multimedia messages. Text position: allows you to select the position of the text displayed on the idle screen, such as the operator’s name, current date and time, and text notifications of missed calls or new messages. Choose either Top or Bottom. If you set this option to Off, your phone displays only the wallpaper image.Phone settings153Text style: allows you to set the style of the text displayed on the idle screen.Note: When you set the wallpaper image to Calendar, the Text position and Text style options don’t work.Skin You can change the colour setting of the display components, such as soft key indications area or the menu names and icons. Backlight You can specify how long the phone uses the backlight. Select how long the backlight remains on after the last key is pressed.LCD brightness This option allows you to adjust the brightness of the display screens to make them lighter or darker.1. Adjust the contrast by using the Up and Down keys or the volume keys on the left side of the phone.2. When you are satisfied, press the Ok soft key to save the selection.
Phone settings154Greeting message This menu option allows you to set a greeting message to be displayed briefly when the phone is switched on.When you access this menu, the current message displays. For further information on how to enter text, see page 41.Language You can select a different language for the display text and text input modes. The following options are available:Text language: allows you to change the language of the display text, such as menus, options or warning messages.Input mode: allows you to set the default language to be used in the text input mode.To Press theclear the existing messageC key and hold it down.enter a new messageappropriate alphanumeric keys.save your inputOk soft key.cancel your input and return to Idle Mode key.Phone settings155Security The security settings enable you to restrict the use of your phone to the people and types of calls of your choice.Various codes and passwords are used to protect the features of your phone. For more information, see page 167 -169.PIN check When the PIN Check feature is enabled, you must enter your PIN each time you switch the phone on. Consequently, any person who does not have your PIN cannot use your phone without your approval.Note: Before disabling the PIN Check feature, you must enter your PIN.The following options are available:Disable: the phone connects directly to the network when you switch it on.Enable: you must enter the PIN each time the phone is switched on.To change your PIN, see the Change PIN menu option below.Change PIN This feature allows you to change your current PIN to a new one, provided that the PIN check feature is enabled. You must enter the current PIN before you can specify a new one. Once you have entered a new PIN, you are asked to confirm it by entering it again.
Phone settings156Phone lock When the Phone lock feature is enabled, the phone is locked and you must enter the 8-digit phone password each time the phone is switched on.The password is preset to “00000000” at the factory. To change the phone password, see the Change password menu option below.Once the correct password has been entered, you can use the phone until you switch it off.The following options are available:Disable: you are not asked to enter the phone password when you switch the phone on.Enable: you are required to enter the phone password when you switch the phone on.Change password The Change password feature allows you to change your current phone password to a new one. You must enter the current password before you can specify a new one.The password is preset to “00000000” at the factory. Once you have entered a new password, you are asked to confirm it by entering it again.Privacy This feature allows you to lock or unlock the usage of the contents, such as multimedia messages, photos, images and sounds.To enable or disable the Privacy feature, you must enter your phone password.Phone settings157SIM lock To enable the SIM lock feature, you must enter a new four to eight digit SIM lock code, and confirm it by entering it again. The following options are available:Disable: you can use any other SIM cards with your phone.Enable: you must enter the SIM lock code to use another SIM card with your phone.To unlock the SIM, enter the SIM lock code.FDN mode The FDN (Fixed Dial Number) mode, if supported by your SIM card, allows you to restrict your outgoing calls to a limited set of phone numbers.The following options are available:Disable: you can phone any number.Enable: you can only call phone numbers stored in Phonebook. You must enter your PIN2.Note: Not all SIM cards have a PIN2. If your SIM card does not, this menu option is not displayed.To change your PIN2, see the Change PIN2 menu option below.Change PIN2 The Change PIN2 feature allows you to change your current PIN2 to a new one. You must enter the current PIN2 before you can specify a new one.
Phone settings158Once you have entered a new PIN2, you are asked to confirm it by entering it again.Note: Not all SIM cards have a PIN2. If your SIM card does not, this menu option is not displayed.Auto redial With the Auto redial function, the phone makes up to ten attempts to redial a phone number after an unsuccessful call.Note: The interval between two call attempts varies.The following options are available:Off: the number is not redialled.On: the number is redialled automatically.Slide down operation  You can select the phone’s action when you slide the folder down.Stop operation: when you slide the folder down, the phone stops the current operation and locks the keypad automatically.Continue operation: when you slide the folder down, the phone performs the current operation continuously. But the confirming message to lock the keypad appears on the display in the Idle Mode.Phone settings159Active slide You can answer incoming calls by sliding the folder up or not.Off: you have to press a key to answer a call, depending on the setting of the Anykey answer option. See below.On: you can simply slide the folder up to answer a call.Anykey answer You can answer incoming calls by pressing anykey or not.Off: you can only press   or the Accept soft key to answer incoming calls.On: you can press any key, except   and the Reject soft key to answer incoming calls.Fax mode You can use your phone as a modem for faxing when it is connected to computing devices. You need to purchase a data kit from your local Samsung dealer.
Phone settings160In this menu, you can enable the fax mode on your phone.The following options are available:Off: you can send or receive data calls.On: you can send or receive fax calls.In any case you can send or receive voice calls. After connecting the phone to your computing device using the data cable and set this menu to On. Your phone works as a fax modem.For further details about setting and faxing through the phone on your computer, see the computers user’s manual.Infrared activation In this menu, you can activate or deactivate the infrared port.The following options are available:Off: deactivates infrared feature on the phone.On: activates the infrared feature on the phone. The IrDA icon ( ) appears on the top line of the display. If there is no communication between your phone and the IrDA-compliant device within 1 minute of activating the feature, it is automatically deactivated. Phone settings161Reset settings This menu option allows you to reset your phone to its default configuration. You can reset the sound settings, phone settings or all of the settings together.1. Select one of the settings to reset by pressing the Select soft key.2. When a confirming message appears, press the Yes soft key to reset settings. Then enter the phone password and press the Ok soft key.The password is preset to “00000000” by default. To change it, see page 156.Otherwise, press the No soft key.
162Using ALS (Alternate Line Service)The ALS feature enables two lines to be associated with one SIM card. Consequently, you can make and receive calls on either line. If you subscribe to this network service, a few additional menu options enable you to set up this feature.Note: Please contact your service provider to check the availability of this feature and how to subscribe to ALS.Selecting a line You can select a line for each call via the Active line menu option. For further details, refer to page 81.Editing the line nameYou can edit the name of each line via the Own number menu option.When you edit the name of a line, this name replaces “Line 1” or “Line 2”, as applicable. For further details, refer to page 66.Setting the ring typeTo distinguish between incoming calls on the two lines, you can select a different ring tone for each line via the Incoming calls menu option. For further details, see page 82.Using ALS (Alternate Line Service)163Setting call diverting optionsYou can set up call diverting via the Call diverting menu option. This service reroutes incoming calls on the line of your choice to a specified number. For further details, see page 74.Viewing call informationYou can view call times and last call cost information for each line. For further details, see page 72.
164Solving problemsBefore contacting the after-sales service, perform the following simple checks. They may save you the time and expense of an unnecessary service call.When you switch your phone on, the following messages may appearNo SIM cardCheck that the SIM card is correctly installed.Phone locked Enter passwordThe Phone lock feature is enabled. You must enter the phone’s password before you can use the phone.Enter PIN• You are using your phone for the first time. You must enter the Personal Identification Number supplied with the SIM card.• The PIN check feature is enabled. Every time the phone is switched on, you must enter the PIN. To disable this feature, use the PIN check menu option. See page 155.Enter PUKThe PIN was entered wrongly three times in succession and the phone is now blocked. Enter the PUK supplied by your network operator.Solving problems165“No service” displays• The network connection was lost. You may be in a weak reception area (in a tunnel or surrounded by buildings). Move and try again.• You are trying to access an option for which you have not taken out a subscription with your service provider. Contact the service provider for further details.You have entered a number but it was not dialled• Have you pressed the   key?• Are you accessing the right cellular network?• You may have set an outgoing call barring option.Your correspondent cannot reach you• Is your phone switched on (the   key pressed for more than one second)?• Are you accessing the right cellular network?• You may have set an incoming call barring option.Your correspondent cannot hear you speaking• Have you switched off the microphone (Mute appears)?• Are you holding the phone close enough to your mouth? The microphone is located at the bottom of the phone.
Solving problems166The phone starts beeping and “Battery Low” flashes on the displayThe battery is insufficiently charged. Replace the battery and recharge it.The audio quality of the call is poor• Check the signal strength indicator on the display ( ); the number of bars indicates the signal strength from strong ( ) to weak ( ).• Try moving the phone slightly or moving closer to a window if you are in a building.No number is dialled when you recall a Phonebook entry• Check that the number has been stored correctly, by using the Phonebook search feature.• Re-store them, if necessary.If the above guidelines do not help you to solve the problem, take a note of:• the model and serial numbers of your phone•your warranty details• a clear description of the problemThen contact your local dealer or Samsung after-sales service.167Access codesThere are several access codes that are used by your phone and its SIM card. These codes help you protect the phone against unauthorised use.Some access codes can be changed using the Security menu option. See page 155 for further details.Phone passwordThe Phone lock feature (see page 156) uses the phone password to protect your phone against unauthorised use. The phone password is supplied with the phone and is preset to “00000000” at the factory. To change the password, use the Change password menu option. See page 156.PINThe PIN (Personal Identification Number) protects your SIM card against unauthorised use. It is usually supplied with the SIM card. When the PIN check feature is enabled (see page 155), you must enter the PIN each time you switch on the phone.If you key in an incorrect PIN three times in succession, key in the PUK and press the Ok soft key to unlock the phone. Key in a new PIN and press the Ok soft key. Key in the new PIN again and press the Ok soft key.
Access codes168PIN2The PIN2, supplied with some SIM cards, is required to access some functions, such as charging unit counters. These functions are only available if supported by your SIM card.If you key in an incorrect PIN2 three times in succession, key in the PUK2 and press the Ok soft key to unlock the phone. Key in a new PIN2 and press the Ok soft key. Key in the new PIN2 again and press the Ok soft key.PUKThe PUK (PIN Unblocking Key) is required to change a blocked PIN. The PUK may be supplied with the SIM card. If not, contact your local service provider.If you key in an incorrect PUK ten times in succession, the SIM card cannot be used anymore. Contact your service provider for a new card.You cannot change the PUK. If you lose the code, contact your service provider.PUK2The PUK2, supplied with some SIM cards, is required to change a blocked PIN2.If you key in an incorrect PUK2 ten times in succession, you cannot use the functions requiring the PIN2. Contact your service provider for a new card.Access codes169You cannot change the PUK2. If you lose the code, contact your service provider.Call barring passwordThe 4-digit call barring password is required when you use the Call barring function. You obtain the password from your service provider when you subscribe to this function. You can change this password using the Change barring password menu option. For further details, see page 78.
170Health and safety informationExposure to radio frequency (RF) signalsYour wireless phone is a radio transmitter and receiver. It is designed and manufactured not to exceed the emission limits for exposure to radio frequency (RF) energy set by the Federal Communications Commission (FCC) of the U.S. Government. These limits are part of comprehensive guidelines and establish permitted levels of RF energy for the general population. The guidelines are based on the safety standards that were developed by independent scientific organizations through periodic and through evaluation of scientific studies.The standards include a substantial safety margin designed to assure the safety of all persons, regardless of age and health.The exposure standard for wireless phones employs a unit of measurement known as Specific Absorption Rate (SAR). The SAR limit recommended by the FCC is 1.6W/kg.** In the U.S. and Canada, the SAR limit for mobile phones used by the public is 1.6 watts/kg (W/kg) averaged over one gram of tissue. The standard incorporates a substantial margin of safety to give additional protection for the public and to account for any variations in measurements.Health and safety information171SAR tests are conducted using standard operating positions specified by the FCC with the phone transmitting at its highest certified power level in all tested frequency bands. Although the SAR is determined at the highest certified power level, the actual SAR level of the phone while operating can be well below the maximum value. This is because the phone is designed to operate at multiple power levels so as to use only the power required to reach the network. In general, the closer you are to a wireless base station antenna, the lower the power output of the phone.Before a new model phone is available for sale to the public, it must be tested and certified to the FCC that it does not exceed the limit established by the government adopted requirement for safe exposure. The tests are performed in positions and locations (e.g., at the ear and worn on the body) as required by the FCC for each model. While there may be differences between the SAR levels of various phones and at various positions, they all meet the government requirement.The FCC has granted an Equipment Authorization for this model phone with all reported SAR levels evaluated as in compliance with the FCC RF exposure guidelines. SAR information on this model phone is on file with the FCC and can be found under the Display Grant section of http://www.fcc.gov/oet/fccid after searching on FCC ID printed in the label on the phone.FCC certification information for this model phone is attached separation paper.
Health and safety information172For body operationTo maintain compliance with FCC RF exposure require-         ments, use only belt-clips, holsters or similar accessories that maintain a 1.5 cm. separation distance between the user's body and the back of the phone, including the antenna.  The use of belt-clips, holsters and similar accessories should not contain metallic components in its assembly.  The use of accessories    that do not satisfy these requirements may not comply with FCC RF exposure requirements, and should be avoided.For more Information concerning exposure to radio frequency signals, see the following websites:Federal Communications Commission (FCC)http://www.fcc.govCellular Telecommunications Industry Association (CTIA):http://www.wow-com.comU.S.Food and Drug Administration (FDA)http://www.fda.gov/cdrh/consumerWorld Health Organization (WHO)http://www.who.int/peh-emf/enPrecautions when using batteries• Never use any charger or battery that is damaged in any way.• Use the battery only for its intended purpose.• If you use the phone near the network’s base station, it uses less power; talk and standby time are greatly affected by the signal strength on the cellular network and the parameters set by the network operator.Health and safety information173• Battery charging time depends on the remaining battery charge, the type of battery and the charger used. The battery can be charged and discharged hundreds of times, but it will gradually wear out. When the operation time (talk time and standby time) is noticeably shorter than normal, it is time to buy a new battery. • If left unused, a fully charged battery will discharge itself over time.• Use only Samsung-approved batteries and recharge your battery only with Samsung-approved chargers. When a charger is not in use, disconnect it from the power source. Do not leave the battery connected to a charger for more than a week, since overcharging may shorten its life.• Extreme temperatures will affect the charging capacity of your battery: it may require cooling or warming first.• Do not leave the battery in hot or cold places, such as in a car in summer or winter conditions, as you will reduce the capacity and lifetime of the battery. Always try to keep the battery at room temperature. A phone with a hot or cold battery may temporarily not work, even when the battery is fully charged. Li-ion batteries are particularly affected by temperatures below 0 °C (32 °F).• Do not short-circuit the battery. Accidental short-circuiting can occur when a metallic object (coin, clip or pen) causes a direct connection between the + and – terminals of the battery (metal strips on the battery), for example when you carry a spare battery in a pocket or bag. Short-circuiting the terminals may damage the battery or the object causing the short-circuiting.
Health and safety information174• Dispose of used batteries in accordance with local regulations. Always recycle. Do not dispose of batteries in a fire.Dispose of used batteries in accordance with local regulations. Always recycle. Do not dispose of batteries in a fire.Road safetyYour wireless phone gives you the powerful ability to communicate by voice, almost anywhere, anytime. But an important responsibility accompanies the benefits of wireless phones, one that every user must uphold.When driving a car, driving is your first responsibility. When using your wireless phone behind the wheel of a car, practice good common sense and remember the following tips:• Get to know your wireless phone and its features, such as speed dial and redial. If available, these features help you to place your call without taking your attention off the road.• When available, use a hands-free device. If possible, add an extra layer of convenience and safety to your wireless phone with one of the many hands-free accessories available today.• Position your wireless phone within easy reach. Be able to access your wireless phone without removing your eyes from the road. If you get an incoming call at an inconvenient time, let your voice mail answer it for you.• Let the person you are speaking with know you are driving; if necessary, suspend the call in heavy traffic or hazardous weather conditions. Rain, sleet, snow, ice and even heavy traffic can be hazardous.Health and safety information175• Do not take notes or look up phone numbers while driving. Jotting down a To Do list or flipping through your phonebook takes your attention away from your primary responsibility, driving safely.• Dial sensibly and assess the traffic; if possible, place calls when you are not moving or before pulling into traffic. Try to plan calls when your car will be stationary. If you need to make a call while moving, dial only a few numbers, check the road and your mirrors, then continue.• Do not engage in stressful or emotional conversations that may be distracting. Make the people to whom you are talking aware that you are driving and suspend conversations that have the potential to divert your attention from the road.• Use your wireless phone to call for help. Dial the emergency number in the case of fire, traffic accident or medical emergencies. Remember, it is a free call on your wireless phone!• Use your wireless phone to help others in emergencies. If you see a car accident, crime in progress or other serious emergency where lives are in danger, call the emergency number, as you would want others to do for you.• If you see a broken-down vehicle posing no serious hazard, a broken traffic signal, a minor traffic accident where no one appears injured, or a vehicle you know to be stolen, call roadside assistance or any other special non-emergency wireless number.
Health and safety information176Operating environmentRemember to follow any special regulations in force in any area and always switch your phone off whenever it is forbidden to use it, or when it may cause interference or danger.When connecting the phone or any accessory to another device, read its user’s guide for detailed safety instructions. Do not connect incompatible products.As with other mobile radio transmitting equipment, users are advised that for the satisfactory operation of the equipment and for the safety of personnel, it is recommended that the equipment should only be used in the normal operating position (held to your ear with the antenna pointing over your shoulder).Electronic devicesMost modern electronic equipment is shielded from radio frequency (RF) signals. However, certain electronic equipment may not be shielded against the RF signals from your wireless phone. Consult the manufacturer to discuss alternatives.PacemakersPacemaker manufacturers recommend that a minimum distance of 15 cm (6 inches) be maintained between a wireless phone and a pacemaker to avoid potential interference with the pacemaker. These recommendations are consistent with the independent research and recommendations of Wireless Technology Research.Health and safety information177PacemakersPacemaker manufacturers recommend that a minimum distance of 15 cm (6 inches) be maintained between a wireless phone and a pacemaker to avoid potential interference with the pacemaker. These recommendations are consistent with the independent research and recommendations of Wireless Technology Research.Persons with pacemakers:• should always keep the phone more than 15 cm (6 inches) from their pacemaker when the phone is switched on.• should not carry the phone in a breast pocket.• should use the ear opposite the pacemaker to minimize potential interference.If you have any reason to suspect that interference is taking place, switch your phone off immediately.Hearing aidsSome digital wireless phones may interfere with some hearing aids. In the event of such interference, you may wish to consult your hearing aid manufacturer to discuss alternatives.Other medical devicesIf you use any other personal medical devices, consult the manufacturer of your device to determine if it is adequately shielded from external RF energy. Your physician may be able to assist you in obtaining this information. Switch your phone off in health care facilities when any regulations posted in these areas instruct you to do so. Hospitals or health care facilities may be using equipment that could be sensitive to external RF energy.
Health and safety information178VehiclesRF signals may affect improperly installed or inadequately shielded electronic systems in motor vehicles. Check with the manufacturer or its representative regarding your vehicle. You should also consult the manufacturer of any equipment that has been added to your vehicle. You should also consult the manufacturer of any equipment that has been added to your vehicle.Posted facilitiesSwitch your phone off in any facility where posted notices require you to do so.Potentially explosive environmentsSwitch your phone off when in any area with a potentially explosive atmosphere and obey all signs and instructions. Sparks in such areas could cause an explosion or fire resulting in bodily injury or even death.Users are advised to switch the phone off while at a refueling point (service station). Users are reminded of the need to observe restrictions on the use of radio equipment in fuel depots (fuel storage and distribution areas), chemical plants or where blasting operations are in progress.Areas with a potentially explosive atmosphere are often but not always clearly marked. They include the areas below deck on boats, chemical transfer or storage facilities, vehicles using liquefied petroleum gas (such as propane or butane), areas where the air contains chemicals or particles, such as grain, dust or metal powders, and any other area where you would normally be advised to turn off your vehicle engine.Health and safety information179Emergency callsThis phone, like any wireless phone, operates using radio signals, wireless and landline networks as well as user-programmed functions, which cannot guarantee connection in all conditions. Therefore, you should never rely solely on any wireless phone for essential communications (medical emergencies, for example). Remember, to make or receive any calls the phone must be switched on and in a service area with adequate signal strength. Emergency calls may not be possible on all wireless phone networks or when certain network services and/or phone features are in use. Check with local service providers.To make an emergency call:1. If the phone is not on, switch it on.2. Key in the emergency number for your present location (for example, 911 or other official emergency number). Emergency numbers vary by location.3. Press the <Send> key.If certain features are in use (call barring, for example), you may first need to deactivate those features before you can make an emergency call. Consult this document and your local cellular service provider.When making an emergency call, remember to give all the necessary information as accurately as possible. Remember that your phone may be the only means of communication at the scene of an accident; do not cut off the call until given permission to do so.
Health and safety information180Other important safety information• Only qualified personnel should service the phone or install the phone in a vehicle. Faulty installation or service may be dangerous and may invalidate any warranty applicable to the device.• Check regularly that all wireless phone equipment in your vehicle is mounted and operating properly.• Do not store or carry flammable liquids, gases or explosive materials in the same compartment as the phone, its parts or accessories.• For vehicles equipped with an air bag, remember that an air bag inflates with great force. Do not place objects, including both installed or portable wireless equipment in the area over the air bag or in the air bag deployment area. If wireless equipment is improperly installed and the air bag inflates, serious injury could result.• Switch your phone off before boarding an aircraft. The use of wireless phones in aircraft is illegal and may be dangerous to the aircraft’s operation.• Failure to observe these instructions may lead to the suspension or denial of telephone services to the offender, or legal action, or both.Care and maintenanceYour phone is a product of superior design and craftsmanship and should be treated with care. The suggestions below will help you fulfill any warranty obligations and allow you to enjoy this product for many years:• Keep the phone and all its parts and accessories out of the reach of small children’s.Health and safety information181• Keep the phone dry. Precipitation, humidity and liquids contain minerals that will corrode electronic circuits.• Do not use the phone with a wet hand. Doing so may cause an electric shock to you or damage to the phone.• Do not use or store the phone in dusty, dirty areas, as its moving parts may be damaged.• Do not store the phone in hot areas. High temperatures can shorten the life of electronic devices, damage batteries, and warp or melt certain plastics.• Do not store the phone in cold areas. When the phone warms up to its normal operating temperature, moisture can form inside the phone, which may damage the phone’s electronic circuit boards.• Do not drop, knock or shake the phone. Rough handling can break internal circuit boards.• Do not use harsh chemicals, cleaning solvents or strong detergents to clean the phone. Wipe it with a soft cloth slightly dampened in a mild soap-and-water solution.• Do not paint the phone. Paint can clog the device’s moving parts and prevent proper operation.• Do not put the phone in or on heating devices, such as a microwave oven, a stove or a radiator. The phone may explode when overheated.• Use only the supplied or an approved replacement antenna. Unauthorized antennas or modified accessories may damage the phone and violate regulations governing radio devices.• If the phone, battery, charger or any accessory is not working properly, take it to your nearest qualified service facility. The personnel there will assist you, and if necessary, arrange for service.
Health and safety information182Acknowledging special precautions and the FCC and industry canada noticeCautionsModifications not expressly approved by the party responsible for compliance could void the user's authority to operate the equipment.FCC compliance informationThis device complies with Part 15 of FCC Rules. Operation is subject to the following two conditions:1. This device may not cause harmful interference, and2. This device must accept any interference received.Including interference that may cause undesired operation.Information to userThis equipment has been tested and found to comply with the limits for a Class B digital device, pursuant to part 15 of the FCC Rules. These limits are designed to provide reasonable protection against harmful interference in a residential installation.This equipment generates, uses and can radiate radio frequency energy and, if not installed and used in accordance with the instructions, may cause harmful interference to radio communications. However, there is no guarantee that interference will not occur in a particular installation.If this equipment does cause harmful interference to radio or television reception, which can be Health and safety information183determined by turning the equipment off and on, the user is encouraged to try to correct the interference by one or more of the following measures:• Reorient or relocate the receiving antenna.• Increase the separation between the equipment and receiver.• Connect the equipment into an outlet on a circuit different from that to which the receiver is connected.• Consult the dealer or an experienced radio/ TV technician for help.
Health and safety information184Appendix A: CERTIFICATION INFORMATION (SAR)THIS MODEL PHONE MEETS THE GOVERNMENT’S REQUIREMENTS FOR EXPOSURE TO RADIO WAVES.Your wireless phone is a radio transmitter and receiver. It is designed and manufactured not to exceed the emission limits for exposure to radio frequency (RF) energy set by the Federal Communications Commission of the U.S. Government. These limits are part of comprehensive guidelines and establish permitted levels of RF energy for the general population. The guidelines are based on safety standards that were developed by independent scientific organizations through periodic and thorough evaluation of scientific studies. The standards include a substantial safety margin designed to assure the safety of all persons, regardless of age and health.The exposure standard for wireless mobile phones employs a unit of measurement known as the Specific Absorption Rate (SAR). The SAR limit set by the FCC is 1.6 W/kg. SAR Tests are conducted using standard operating positions accepted by the FCC with the phone transmitting at its highest certified power level in all tested frequency bands. Although the SAR is determined at the highest certified power level, the actual SAR level of the phone while operating can be well below the maximum value. This is because the phone is designed to operate at multiple power levels so as to use only the power required to reach the network. In general, the closer you are to a wireless base station antenna, the lower the power output.Before a new model phone is available for sale to the public, it must be tested and certified to the FCC that it does not exceed the limit established by the Health and safety information185government adopted requirement for safe exposure. The tests are performed in positions and locations(e.g., at the ear and worn on the body) as required by the FCC for each model.The highest SAR values of this model phone as reported to FCC are Head: 1.44W/kg in GSM 1900.The FCC has granted an Equipment Authorization for this model phone with all reported SAR levelsevaluated as in compliance with the FCC RF exposure guidelines. SAR information on this model  phone is on file with the FCC and can be found  under the Display Grant section of http://www.fcc.gov/oet/fccid after searching on FCC IDA3LSGHE830. In the United States and Canada, the SAR limit for mobile phones used by the public is 1.6 watts/kilogram (W/kg) averaged over one gram of tissue. The standard incorporates a substantial ma gin of safety to give additional protection for the public and to account for any variations in measurements.
Health and safety information186Appendix B: Guide to Safe and Responsible Wireless Phone UseCellular Telecommunications & Internet Association“Safety is the most important call you will ever make.”A Guide to Safe and Responsible Wireless Phone UseTENS OF MILLIONS OF PEOPLE IN THE U.S. TODAY TAKE ADVANTAGE OF THE UNIQUE COMBINATION OF CONVENIENCE, SAFETY AND VALUE DELIVERED BY THE WIRELESS TELEPHONE. QUITE SIMPLY, THE WIRELESS PHONE GIVES PEOPLE THE POWERFUL ABILITY TO COMMUNICATE BY VOICE-ALMOST ANYWHERE, ANYTIME-WITH THE BOSS, WITH A CLIENT, WITH THE KIDS, WITH EMERGENCY PERSONNEL OR EVEN WITH THE POLICE. EACH YEAR, AMERICANS MAKE BILLIONS OF CALLS FROM THEIR WIRELESS PHONES, AND THE NUMBERS ARE RAPIDLY GROWING.But an important responsibility accompanies those benefits, one that every wireless phone user must uphold. When driving a car, driving is your first responsibility. A wireless phone can be an invaluable tool, but good judgment must be exercised at all times while driving a motor vehicle whether on the phone or not.The basic lessons are ones we all learned as teenagers. Driving requires alertness, caution and courtesy. It requires a heavy dose of basic common sense-keep your head up, keep your eyes on the road, check your mirrors frequently and watch out for other drivers. It requires obeying all traffic signs and signals and staying within the speed limit. It means using seat belts and requiring other passengers to do the same.Health and safety information187But with wireless phone use, driving safely means a little more. This brochure is a call to wireless phone users everywhere to make safety their first priority when behind the wheel of a car. Wireless telecommunications is keeping us in touch, simplifying our lives, protecting us in emergencies and providing opportunities to help others in need. When it comes to the use of wireless phones, safety is your most important call.Wireless Phone “Safety Tips”Below are safety tips to follow while driving and using a wireless phone which should be easy to remember:1. Get to know your wireless phone and its features such as speed dial and redial. Carefully read your instruction manual and learn to take advantage of valuable features most phones offer, including automatic redial and memory. Also, work to memorize the phone keypad so you can use the speed dial function without taking your attention off the road.2. When available, use a hands free device. A number of hands free wireless phone accessories are readily available today. Whether you choose an installed mounted device for your wireless phone or a speaker phone accessory, take advantage of these devices if available to you.3. Position your wireless phone within easy reach. Make sure you place your wireless phone within easy reach and where you can grab it without removing your eyes from the road. If you get an incoming call at an inconvenient time, if possible, let your voice mail answer it for you.
Health and safety information1884. Suspend conversations during hazardous driving conditions or situations. Let the person you are speaking with know you are driving; if necessary, suspend the call in heavy traffic or hazardous weather conditions. Rain, sleet, snow and ice can be hazardous, but so is heavy traffic. As a driver, your first responsibility is to pay attention to the road.5. Do not take notes or look up phone numbers while driving. If you are reading an address book or business card, or writing a “to do” list while driving a car, you are not watching where you are going. It’s common sense. Don’t get caught in a dangerous situation because you are reading or writing and not paying attention to the road or nearby vehicles.6. Dial sensibly and assess the traffic; if possible, place calls when you are not moving or before pulling into traffic. Try to plan your calls before you begin your trip or attempt to coincide your calls with times you may be stopped at a stop sign, red light or otherwise stationary. But if you need to dial while driving, follow this simple tip-dial only a few numbers, check the road and your mirrors, then continue.7. Do not engage in stressful or emotional conversations that may be distracting. Stressful or emotional conversations and driving do not mix-they are distracting and even dangerous when you are behind the wheel of a car. Make people you are talking with aware you are driving and if necessary, suspend conversations which have the potential to divert your attention from the road.Health and safety information1898. Use your wireless phone to call for help. Your wireless phone is one of the greatest tools you can own to protect yourself and your family in dangerous situations-with your phone at your side, help is only three numbers away. Dial 9-1-1 or other local emergency number in the case of fire, traffic accident, road hazard or medical emergency. Remember, it is a free call on your wireless phone!9. Use your wireless phone to help others in emergencies. Your wireless phone provides you a perfect opportunity to be a “Good Samaritan” in your community. If you see an auto accident, crime in progress or other serious emergency where lives are in danger, call 9-1-1 or other local emergency number, as you would want others to do for you.10.Call roadside assistance or a special wireless non emergency assistance number when necessary. Certain situations you encounter while driving may require attention, but are not urgent enough to merit a call for emergency services. But you still can use your wireless phone to lend a hand. If you see a broken-down vehicle posing no serious hazard, a broken traffic signal, a minor traffic accident where no one appears injured or a vehicle you know to be stolen, call roadside assistance or other special non-emergency wireless number.Careless, distracted individuals and people driving irresponsibly represent a hazard to everyone on the road. Since 1984, the Cellular Telecommunications Industry Association and the wireless industry have conducted educational outreach to inform wireless phone users of their responsibilities as safe drivers and good citizens. As we approach a new century,
Health and safety information190more and more of us will take advantage of the benefits of wireless telephones. And, as we take to the roads, we all have a responsibility to drive safely.“The wireless industry reminds you to use your phone safely when driving.”Cellular Telecommunications & Internet Association For more information, please call 1-888-901-SAFE. For updates: http://www.wow-com.com/consumer/issues/driving/articles.cfm?ID =85Health and safety information191Appendix C: Consumer Update on Wireless PhonesU.S. Food and Drug Administration1. What kinds of phones are the subject of this update?The term wireless phone refers here to hand-held wireless phones with built-in antennas, often called cell, mobile, or PCS phones. These types of wireless phones can expose the user to measurable radio frequency energy (RF) because of the short distance between the phone and the user s head. These RF exposures are limited by Federal Communications Commission safety guidelines that were developed with the advice of FDA and other federal health and safety agencies. When the phone is located at greater distances from the user, the exposure to RF is drastically lower because a person’s RF exposure decreases rapidly with increasing distance from the source. The so-called “cordless phones,” which have a base unit connected to the telephone wiring in a house, typically operate at far lower power levels, and thus produce RF exposures well within the FCC’s compliance limits.2. Do wireless phones pose a health hazard?The available scientific evidence does not show that any health problems are associated with using wireless phones. There is no proof, however, that wireless phones are absolutely safe. Wireless phones emit low levels of radio frequency energy (RF) in the microwave range while being used. They also emit very low levels of RF when in the stand-by mode.
Health and safety information192Whereas high levels of RF can produce health effects (by heating tissue), exposure to low level RF that does not produce heating effects causes no known adverse health effects. Many studies of low level RF exposures have not found any biological effects. Some studies have suggested that some biological effects may occur, but such findings have not been confirmed by additional research. In some cases, other researchers have had difficulty in reproducing those studies, or in determining the reasons for inconsistent results.3. What is FDA’s role concerning the safety of wireless phones?Under the law, FDA does not review the safety of radiation emitting consumer products such as wireless phones before they can be sold, as it does with new drugs or medical devices. However, the agency has authority to take action if wireless phones are shown to emit radio frequency energy (RF) at a level that is hazardous to the user. In such a case, FDA could require the manufacturers of wireless phones to notify users of the health hazard and to repair, replace or recall the phones so that the hazard no longer exists.Although the existing scientific data do not justify FDA regulatory actions, FDA has urged the wireless phone industry to take a number of steps, including the following:• Support needed research into possible biological effects of RF of the type emitted by wireless phones;• Design wireless phones in a way that minimizes any RF exposure to the user that is not necessary for device function; andHealth and safety information193• Cooperate in providing users of wireless phones with the best possible information on possible effects of wireless phone use on human healthFDA belongs to an interagency working group of the federal agencies that have responsibility for different aspects of RF safety to ensure coordinated efforts at the federal level. The following agencies belong to this working group:• National Institute for Occupational Safety and Health• Environmental Protection Agency Federal Communications Commission• Occupational Safety and Health Administration• National Telecommunications and Information Administration• The National Institutes of Health participates in some interagency working group activities, as well.FDA shares regulatory responsibilities for wireless phones with the Federal Communications Commission (FCC). All phones that are sold in the United States must comply with FCC safety guidelines that limit RF exposure. FCC relies on FDA and other health agencies for safety questions about wireless phones.FCC also regulates the base stations that the wireless phone networks rely upon. While these base stations operate at higher power than do the wireless phones themselves, the RF exposures that people get from these base stations are typically thousands of times lower than those they can get from wireless phones. Base stations are thus not the primary subject of the safety questions discussed in this document.
Health and safety information1944. What is FDA doing to find out more about the possible health effects of wireless phone RF?FDA is working with the U.S. National Toxicology Program and with groups of investigators around the world to ensure that high priority animal studies are conducted to address important questions about the effects of exposure to radio frequency energy (RF).FDA has been a leading participant in the World Health Organization International Electromagnetic Fields (EMF) Project since its inception in 1996. An influential result of this work has been the development of a detailed agenda of research needs that has driven the establishment of new research programs around the world. The Project has also helped develop a series of public information documents on EMF issues.FDA and the Cellular Telecommunications & Internet Association (CTIA) have a formal Cooperative Research and Development Agreement (CRADA) to do research on wireless phone safety. FDA provides the scientific oversight, obtaining input from experts in government, industry, and academic organizations. CTIA-funded research is conducted through contracts to independent investigators. The initial research will include both laboratory studies and studies of wireless phone users. The CRADA will also include a broad assessment of additional research needs in the context of the latest research developments around the world.5. What steps can I take to reduce my exposure to radio frequency energy from my wireless phone?If there is a risk from these products—and at this point we do not know that there is—it is probably very small. But if you are concerned about avoiding even potential risks, you can take a few simple Health and safety information195steps to minimize your exposure to radio frequency energy (RF). Since time is a key factor in how much exposure a person receives, reducing the amount of time spent using a wireless phone will reduce RF exposure.If you must conduct extended conversations by wireless phone every day, you could place more distance between your body and the source of the RF, since the exposure level drops off dramatically with distance. For example, you could use a headset and carry the wireless phone away from your body or use a wireless phone connected to a remote antennaAgain, the scientific data do not demonstrate that wireless phones are harmful. But if you are concerned about the RF exposure from these products, you can use measures like those described above to reduce your RF exposure from wireless phone use.6. What about children using wireless phones?The scientific evidence does not show a danger to users of wireless phones, including children and teenagers. If you want to take steps to lower exposure to radio frequency energy (RF), the measures described above would apply to children and teenagers using wireless phones. Reducing the time of wireless phone use and increasing the distance between the user and the RF source will reduce RF exposure.Some groups sponsored by other national governments have advised that children be discouraged from using wireless phones at all. For example, the government in the United Kingdom distributed leaflets containing such a recommendation in December 2000. They noted that no evidence exists that using a wireless phone causes brain tumors or other ill effects.
Health and safety information196Their recommendation to limit wireless phone use by children was strictly precautionary; it was not based on scientific evidence that any health hazard exists.7. Do hands-free kits for wireless phones reduce risks from exposure to RF emissions?Since there are no known risks from exposure to RF emissions from wireless phones, there is no reason to believe that hands-free kits reduce risks. Hands-free kits can be used with wireless phones for convenience and comfort. These systems reduce the absorption of RF energy in the head because the phone, which is the source of the RF emissions, will not be placed against the head. On the other hand, if the phone is mounted against the waist or other part of the body during use, then that part of the body will absorb more RF energy. Wireless phones marketed in the U.S. are required to meet safety requirements regardless of whether they are used against the head or against the body. Either configuration should result in compliance with the safety limit.8. Do wireless phone accessories that claim to shield the head from RF radiation work?Since there are no known risks from exposure to RF emissions from wireless phones, there is no reason to believe that accessories that claim to shield the head from those emissions reduce risks. Some products that claim to shield the user from RF absorption use special phone cases, while others involve nothing more than a metallic accessory attached to the phone. Studies have shown that these products generally do not work as advertised. Unlike “hand-free” kits, these so-called “shields” may interfere with proper operation of the phone.Health and safety information197The phone may be forced to boost its power to compensate, leading to an increase in RF absorption. In February 2002, the Federal trade Commission (FTC) charged two companies that sold devices that claimed to protect wireless phone users from radiation with making false and unsubstantiated claims. According to FTC, these defendants lacked a reasonable basis to substantiate their claim.9. What about wireless phone interference with medical equipment?Radio frequency energy (RF) from wireless phones can interact with some electronic devices. For this reason, FDA helped develop a detailed test method to measure electromagnetic interference (EMI) of implanted cardiac pacemakers and defibrillators from wireless telephones. This test method is now part of a standard sponsored by the Association for the Advancement of Medical instrumentation (AAMI). The final draft, a joint effort by FDA, medical device manufacturers, and many other groups, was completed in late 2000. This standard will allow manufacturers to ensure that cardiac pacemakers and defibrillators are safe from wireless phone EMI.FDA has tested hearing aids for interference from handheld wireless phones and helped develop a voluntary standard sponsored by the Institute of Electrical and Electronic Engineers (IEEE). This standard specifies test methods and performance requirements for hearing aids and wireless phones so that no interference occurs when a person uses a compatible phone and a compatible hearing aid at the same time. This standard was approved by the IEEE in 2000.
Health and safety information198FDA continues to monitor the use of wireless phones for possible interactions with other medical devices. Should harmful interference be found to occur, FDA will conduct testing to assess the interference and work to resolve the problem.10.What are the results of the research done already?The research done thus far has produced conflicting results, and many studies have suffered from flaws in their research methods. Animal experiments investigating the effects of radio frequency energy (RF) exposures characteristic of wireless phones have yielded conflicting results that often cannot be repeated in other laboratories. A few animal studies, however, have suggested that low levels of RF could accelerate the development of cancer in laboratory animals. However, many of the studies that showed increased tumor development used animals that had been genetically engineered or treated with cancer causing chemicals so as to be pre-disposed to develop cancer in the absence of RF exposure. Other studies exposed the animals to RF for up to 22 hours per day. These conditions are not similar to the conditions under which people use wireless phones, so we don t know with certainty what the results of such studies mean for human health.Three large epidemiology studies have been published since December 2000. Between them, the studies investigated any possible association between the use of wireless phones and primary brain cancer, gioma, meningioma, or acoustic neuroma, tumors of the brain or salivary gland, leukemia, or other cancers. None of the studies demonstrated the existence of any harmful health effects from wireless phone RF exposures. However, none of the studies can answer questions about Health and safety information199long-term exposures, since the average period of phone use in these studies was around three years.11.What research is needed to decide whether RF exposure from wireless phones poses a health risk?A combination of laboratory studies and epidemiological studies of people actually using wireless phones would provide some of the data that are needed. Lifetime animal exposure studies could be completed in a few years. However, very large numbers of animals would be needed to provide reliable proof of a cancer promoting effect if one exists. Epidemiological studies can provide data that is directly applicable to human populations, but 10 or more years follow-up may be needed to provide answers about some health effects, such as cancer. This is because the interval between the time of exposure to a cancer-causing agent and the time tumors develop - if they do - may be many, many years. The interpretation of epidemiological studies is hampered by difficulties in measuring actual RF exposure during day-to-day use of wireless phones. Many factors affect this measurement, such as the angle at which the phone is held, or which model of phone is used.12.Which other federal agencies have responsibilities related to potential RF health effects?Additional information on the safety of RF exposures from various sources can be obtained from the following organizations.FCC RF Safety Program:http://www.fcc.gov/oet/rfsafety/Environmental Protection Agency (EPA):http://www.epa.gov/radiation/
Health and safety information200Occupational Safety and Health Administration’s (OSHA):http://www.osha-slc.gov/SLTC/radiofrequencyradiation/index.htmlNational Institute for Occupational Safety and Health (NIOSH):http://www.cdc.gov/niosh/emfpg.htmlWorld health Organization (WHO):http://www.who.int/peh-emf/International Commission on Non-Ionizing Radiation Protection:http://www.icnirp.deNational Radiation Protection Board (UK):http://www.nrpb.org.ukUpdated 4/3/2002: US Food and Drug Administration http://www.fda.gov/cellphonesHealth and safety information201STANDARD LIMITED WARRANTYWhat is Covered and For How Long?  SAMSUNG TELECOMMUNICATIONS AMERICA, L.P. (SAMSUNG) warrants to the original purchaser ("Purchaser") that SAMSUNG’s Phones and accessories ("Products") are free from defects in material and workmanship under normal use and service for the period commencing upon the date of purchase and continuing for the following specified period of time after that date:Phone 1 YearBatteries 1 YearLeather Case/Pouch  90 Days Holster 90 DaysOther Phone Accessories 1 YearWhat is Not Covered?  This Limited Warranty is conditioned upon proper use of Product by Purchaser.  This Limited Warranty does not cover: (a) defects or damage resulting from accident, misuse, abuse, neglect, unusual physical, electrical or electromechanical stress, or modification of any part of Product, including antenna, or cosmetic damage; (b) equipment that has the serial number removed or made illegible; (c) any plastic surfaces or other externally exposed parts that are scratched or damaged due to normal use; (d) malfunctions resulting from the use of Product in conjunction with accessories, products, or ancillary/peripheral equipment not furnished or approved by SAMSUNG; (e) defects or damage from improper testing, operation, maintenance, installation, or adjustment; (f) installation, maintenance, and service of Product, or (g) Product used or purchased outside the United States or Canada.
Health and safety information202This Limited Warranty covers batteries only if battery capacity falls below 80% of rated capacity or the battery leaks, and this Limited Warranty does not cover any battery if (i) the battery has been charged by a battery charger not specified or approved by SAMSUNG for charging the battery, (ii) any of the seals on the battery are broken or show evidence of tampering, or (iii) the battery has been used in equipment other than the SAMSUNG phone for which it is specified.What are SAMSUNG’s Obligations?  During the applicable warranty period, SAMSUNG will repair or replace, at SAMSUNG’s sole option, without charge to Purchaser, any defective component part of Product.  To obtain service under this Limited Warranty, Purchaser must return Product to an authorized phone service facility in an adequate container for shipping, accompanied by Purchaser’s sales receipt or comparable substitute proof of sale showing the date of purchase, the serial number of Product and the sellers’ name and address.  To obtain assistance on where to deliver the Product, call Samsung Customer Care at 1-888-987-4357.  Upon receipt, SAMSUNG will promptly repair or replace the defective Product.  SAMSUNG may, at SAMSUNG’s sole option, use rebuilt, reconditioned, or new parts or components when repairing any Product or replace Product with a rebuilt, reconditioned or new Product. Repaired/replaced leather cases, pouches and holsters will be warranted for a period of ninety (90) days.  All other repaired/replaced Product will be warranted for a period equal to the remainder of the original Limited Warranty on the original Product or for 90 days, whichever is longer.  All replaced parts, components, boards and equipment shall become the property of SAMSUNG. Health and safety information203If SAMSUNG determines that any Product is not covered by this Limited Warranty, Purchaser must pay all parts, shipping, and labor charges for the repair or return of such Product.What Are the Limits On SAMSUNG’s Liability?  EXCEPT AS SET FORTH IN THE EXPRESS WARRANTY CONTAINED HEREIN, PURCHASER TAKES THE PRODUCT “AS IS,” AND SAMSUNG MAKES NO WARRANTY OR REPRESENTATION AND THERE ARE NO CONDITIONS, EXPRESS OR IMPLIED, STATUTORY OR OTHERWISE, OF ANY KIND WHATSOEVER WITH RESPECT TO THE PRODUCT, INCLUDING BUT NOT LIMITED TO:• THE MERCHANTABILITY OF THE PRODUCT OR ITS FITNESS FOR ANY PARTICULAR PURPOSE OR USE;• WARRANTIES OF TITLE OR NON-INFRINGEMENT;• DESIGN, CONDITION, QUALITY, OR PERFORMANCE OF THE PRODUCT;• THE WORKMANSHIP OF THE PRODUCT OR THE COMPONENTS CONTAINED THEREIN; OR• COMPLIANCE OF THE PRODUCT WITH THE REQUIREMENTS OF ANY LAW, RULE, SPECIFICATION OR CONTRACT PERTAINING THERETO.NOTHING CONTAINED IN THE INSTRUCTION MANUAL SHALL BE CONSTRUED TO CREATE AN EXPRESS WARRANTY OF ANY KIND WHATSOEVER WITH RESPECT TO THE PRODUCT.  ALL IMPLIED WARRANTIES AND CONDITIONS THAT MAY ARISE BY OPERATION OF LAW, INCLUDING IF APPLICABLE THE IMPLIED WARRANTIES OF MERCHANTABILITY AND FITNESS FOR A PARTICULAR PURPOSE, ARE HEREBY LIMITED TO THE SAME DURATION OF TIME AS THE EXPRESS WRITTEN WARRANTY STATED HEREIN.
Health and safety information204SOME STATES/PROVINCES DO NOT ALLOW LIMITATIONS ON HOW LONG AN IMPLIED WARRANTY LASTS, SO THE ABOVE LIMITATION MAY NOT APPLY TO YOU.  IN ADDITION, SAMSUNG SHALL NOT BE LIABLE FOR ANY DAMAGES OF ANY KIND RESULTING FROM THE PURCHASE, USE, OR MISUSE OF, OR INABILITY TO USE THE PRODUCT OR ARISING DIRECTLY OR INDIRECTLY FROM THE USE OR LOSS OF USE OF THE PRODUCT OR FROM THE BREACH OF THE EXPRESS WARRANTY, INCLUDING INCIDENTAL, SPECIAL, CONSEQUENTIAL OR SIMILAR DAMAGES, OR LOSS OF ANTICIPATED PROFITS OR BENEFITS, OR FOR DAMAGES ARISING FROM ANY TORT (INCLUDING NEGLIGENCE OR GROSS NEGLIGENCE) OR FAULT COMMITTED BY SAMSUNG, ITS AGENTS OR EMPLOYEES, OR FOR ANY BREACH OF CONTRACT OR FOR ANY CLAIM BROUGHT AGAINST PURCHASER BY ANY OTHER PARTY.  SOME STATES/PROVINCES DO NOT ALLOW THE EXCLUSION OR LIMITATION OF INCIDENTAL OR CONSEQUENTIAL DAMAGES, SO THE ABOVE LIMITATION OR EXCLUSION MAY NOT APPLY TO YOU.THIS WARRANTY GIVES YOU SPECIFIC LEGAL RIGHTS, AND YOU MAY ALSO HAVE OTHER RIGHTS, WHICH VARY FROM STATE TO STATE/PROVINCE TO PROVINCE.   THIS LIMITED WARRANTY SHALL NOT EXTEND TO ANYONE OTHER THAN THE ORIGINAL PURCHASER OF THIS PRODUCT AND STATES PURCHASER’S EXCLUSIVE REMEDY.  IF ANY PORTION OF THIS LIMITED WARRANTY IS HELD ILLEGAL OR UNENFORCEABLE BY REASON OF ANY LAW, SUCH PARTIAL ILLEGALITY OR UNENFORCEABILITY SHALL NOT AFFECT THE ENFORCEABILITY FOR THE REMAINDER OF THIS LIMITED WARRANTY WHICH PURCHASER ACKNOWLEDGES IS AND WILL ALWAYS BE CONSTRUED TO BE LIMITED BY ITS TERMS OR AS LIMITED AS THE LAW PERMITS.Health and safety information205THE PARTIES UNDERSTAND THAT THE PURCHASER MAY USE THIRD-PARTY SOFTWARE OR EQUIPMENT IN CONJUNCTION WITH THE PRODUCT.  SAMSUNG MAKES NO WARRANTIES OR REPRESENTATIONS AND THERE ARE NO CONDITIONS, EXPRESS OR IMPLIED, STATUTORY OR OTHERWISE, AS TO THE QUALITY, CAPABILITIES, OPERATIONS, PERFORMANCE OR SUITABILITY OF ANY THIRD-PARTY SOFTWARE OR EQUIPMENT, WHETHER SUCH THIRD-PARTY SOFTWARE OR EQUIPMENT IS INCLUDED WITH THE PRODUCT DISTRIBUTED BY SAMSUNG OR OTHERWISE, INCLUDING THE ABILITY TO INTEGRATE ANY SUCH SOFTWARE OR EQUIPMENT WITH THE PRODUCT.  THE QUALITY, CAPABILITIES, OPERATIONS, PERFORMANCE AND SUITABILITY OF ANY SUCH THIRD-PARTY SOFTWARE OR EQUIPMENT LIE SOLELY WITH THE PURCHASER AND THE DIRECT VENDOR, OWNER OR SUPPLIER OF SUCH THIRD-PARTY SOFTWARE OR EQUIPMENT, AS THE CASE MAY BE.This Limited Warranty allocates risk of Product failure between Purchaser and SAMSUNG, and SAMSUNG’s Product pricing reflects this allocation of risk and the limitations of liability contained in this Limited Warranty. The agents, employees, distributors, and dealers of SAMSUNG are not authorized to make modifications to this Limited Warranty, or make additional warranties binding on SAMSUNG.  Accordingly, additional statements such as dealer advertising or presentation, whether oral or written, do not constitute warranties by SAMSUNG and should not be relied upon.
Health and safety information206Samsung Telecommunications America, L.P.1301 East Lookout DriveRichardson, Texas 75082Phone: 1-800-SAMSUNGPhone: 1-888-987-HELP (4357) ©2004 Samsung Telecommunications America. All rights reserved.No reproduction in whole or in part allowed without prior written approval.Specifications and availability subject to change without notice. [080802]207GlossaryTo help you understand the main technical terms and abbreviations used in this booklet and take full advantage of the features of your mobile phone, here are a few definitions.ALS (Alternate Line Service)Capability of associating two lines with one SIM card. With this service, you can make and receive calls on either line, as required.Call barringAbility to restrict outgoing and incoming calls.Call divertingAbility to reroute calls to another number.Call holdingAbility to put one call on standby while answering or making another call; you can then switch between the two calls, as required.Call waitingAbility to inform users that they have an incoming call when engaged on another call.CLI (Caller Line Identification) servicesServices allowing subscribers to view or block the telephone numbers of callers.
Glossary208EMS (Enhanced Message Service)Network service sending and receiving messages that include images, sounds and animations to and from another user without having to speak to the correspondent.GPRS (General Packet Radio Service)New non-voice value-added service that allows information to be sent and received across a mobile telephone network. GPRS guaranties continuous connection to the Internet for mobile phone and computer users. It is based on the Global System for Mobile Communication (GSM) circuit-switched cellular phone connections and the Short Message Service (SMS).GSM (Global System for Mobile communication)International standard for cellular communication, guaranteeing compatibility between the various network operators. GSM covers most European countries and many other parts of the world.IrDA (Infrared Data Association)A standard defined by the IrDA consortium. It specifies a way to wirelessly transfer data via infrared radiation. The IrDA specifications include standards for both the physical devices and the protocols they use to communicate with each other.MMS (Multimedia Message Service)A message service for the mobile environment, standardized by the WAP Forum and the 3rd Generation Partnership Program (3GPP). Glossary209For phone users, MMS is similar to Short Message Service (SMS)-it provides automatic, immediate delivery of user-created content from phone to phone. The message addressing used is primarily phone numbers, thus the traffic goes from phone to phone. MMS also provides support for e-mail addressing, so that messages can also be sent by e-mail. In addition to the text content of SMS, MMS messages can contain still images, voice or audio clips, and later also video clips and presentation information.Multiparty callingAbility to establish a conference call involving up to five additional parties.PIN (Personal Identification Number)Security code that protects the phone/SIM against unauthorised use. The PIN is supplied by the service provider with the SIM card. It may be a four to eight-digit number and can be changed, as required.PUK (PIN Unblocking Key)Security code used to unlock the phone when an incorrect PIN has been entered three times in succession. The eight-digit number is supplied by the service provider with the SIM card.RoamingUse of your phone when you are outside your home area (when travelling for example).
Glossary210SDN (Service Dialling Numbers)Telephone numbers supplied by your network provider and giving access to special services, such as voice mail, directory inquiries, customer support and emergency services.SIM (Subscriber Identification Module)Card containing a chip with all the information required to operate the phone (network and memory information, as well as the subscriber’s personal data). The SIM card fits into a small slot on the back of the phone and is protected by the battery.SMS (Short Message Service)Network service sending and receiving messages to and from another subscriber without having to speak to the correspondent. The message created or received can be displayed, received, edited or sent.Soft keysTwo keys marked   and   on the phone, the purpose of which:• varies according to the function that you are currently using• is indicated on the bottom line of the display just above the corresponding keyVoice mailComputerised answering service that automatically answers your calls when you are not available, plays a greeting (optionally in your own voice) and records a message.Glossary211
212IndexAABC mode • 41, 45Access codes • 167Accessories • 9Active lineselect • 81service, use • 162Alarm, set • 137Alert type • 83ALS • 162Autopower alarm • 138Bbackground image, set • 152Backlight • 16Barringcalls • 76Batterycharging • 21installing • 19low battery indicator • 22removing • 20Battery precautions • 172Broadcast • 107Browser, WAP • 114CCalculator • 139Calendar • 131Callergroups • 67ID • 81Callsalert type • 83answering • 30a second call • 36barring • 76costs • 72dialled • 71diverting • 74ending • 30holding • 35international • 28log • 28making • 27missed • 29, 70multi-party • 37received • 70records • 70redialling • 28automatically • 158rejecting • 30ring tone • 82searching for a number in phonebook • 56times • 72waiting • 36, 79Card, SIMdialling numbers • 62inserting • 18locking • 157removing • 19Care • 179Charactersentering • 41Clock • 135Conference calls • 37Connection tone • 84Conversion, unit • 140Cost of calls • 72DDate, set • 135Dialled calls • 71Dialling • 27SIM card numbers • 62Displaybrightness • 153icons • 14language • 154DTMF tones, send • 33EEar-microphone • 40Earpiece volume • 31External speaker • 40Index213FFDN mode • 157Fixed Dial Number mode • 157Fun box • 114Functions, select • 24GGreeting message • 154Group settings • 67IIcons • 14Inbox • 90Input modechanging • 42language, set • 154International calls • 28Internet • 114KKey tonestype, select • 85volume • 31Keyslocation • 10LLanguage, set • 154LCDbrightness • 153icons • 14settings • 152Length of calls • 72, 85Lettersentering • 41Lockingphone • 156SIM card • 157Low battery indicator • 22MMedia box • 120Memory status, phonebook • 68Memosmaking • 129, 132viewing • 133Menulist • 50scrolling • 49MessagesMMS • 94SMS • 87Messages • 87alert types • 83broadcast • 107deleting • 93, 105greeting • 154inbox • 90outbox • 92preset • 106reading • 90ring tone • 83voice mail • 106writing • 88Microphone, mute • 32Minute minder • 85Missed calls • 29, 70Multi-party callsmaking • 37private conversation • 39removing a participant • 39NNamesentering • 41searching/dialling • 56storing • 59Network selection • 80Network services • 74Numberscorrecting • 27FDN • 157mode • 41, 48
Index214speed-dial • 60storing • 59OOptions, select • 24Organiser • 129Outbox • 92, 102PPasswordbarring • 78, 169phone • 156, 167Personal Identification Number • 167Phonelayout • 10settings • 152switching on/off • 23Phonebook • 56copying numbers • 58deleting numbers • 58editing numbers • 58erasing numbers • 58memory status • 68sending SMS • 58storing numbers/names • 59PIN • 167changing • 155checking • 155PIN2 • 168changing • 157Power on/off tone • 84Preset messages • 106Problem, solve • 164PUK • 168PUK2 • 168QQuiet mode • 85RReceived calls • 70Rediallingautomatically • 158Reset settings • 161Ringerincoming calls • 82messages • 83SSafetyelectronic devices • 174precautions • 7Second call, answer• 36Security settings • 155Service directory, dial • 68Settingsalarm • 137date • 135display • 152network • 74phone • 152reset • 161security • 155sound • 82text language • 154time • 135SIM carddialling numbers • 62inserting • 18locking • 157removing • 19SMS • 87Soft keys, use • 24, 25Sound settings • 82Speed-dialling • 60Stopwatch • 142Switching on/offmicrophone • 32phone • 23Symbolic mode • 41, 48TT9 mode • 41, 43Textentering • 41input modes • 41Index215language • 154Timesetting • 135world • 135Timer • 141To do list • 134Toneconnection • 84keypad • 85message • 83power on/off • 84Travel adapter • 21VVoiceclarity • 34Volumecall ringer • 83earpiece • 31keys • 31WWaiting call • 36, 79WAP Browser • 114World time • 135WWW Services • 114
216
217Access the menu functions➀ Press the Menu soft key      in Idle Mode.➁ Scroll with the navigation keys through the main menus until you reach the required menu. And then press the Select soft key.➂ Scroll with the Up or Down key through the list of options until the required option is selected.➃ Press the Select soft keyto confirm.Each of the two soft keys (  and  ) performs the function indicated by the text above them, on the bottom line on the display.Switch on/offPress and hold the   key.Make a call➀ Enter the number.➁ Press the   key.End a call Press the   key.Answer a callPress the   key.Adjust the volumePress the volume keys on the left side of the phone.SGH-E830 GPRS telephone Quick reference card
218Redial the last numberPress the   key twice.Speed-dialIn Idle Mode, hold down the appropriate key (2 to 9). Or, press the key and the  key.Dial a number in your SIM cardEnter the SIM location, press the   key, and press the  key. Listen to your voice mailPress and hold the 1 key.Store numbers in  Phonebook➀ Enter the number.➁ Press the Save soft    key.➂ Select the memory    type and press the Select soft key.➃ If you select Phone, select the number type and press the Select soft key.➄ Enter the name and press the Ok soft key.➅ If you select SIM, enter the location number and press the Ok soft key.Search for a number in Phonebook➀ Press the Phonebook    soft key in Idle Mode.➁ Select Find name.➂ Enter a name. ➃ Press the Ok soft key.➄ Press the Left or Right ke y, if nece ssary.➅ Press the   key to dial.R&TTE

Navigation menu