Samsung Electronics Co SGHF406 Cellular/PCS GSM/EDGE/WCDMA Phone with Bluetooth User Manual F406
Samsung Electronics Co Ltd Cellular/PCS GSM/EDGE/WCDMA Phone with Bluetooth F406
UserManual.wiki
>
Samsung Electronics Co
>
SGHF406 User Manual
Users Manual
Navigation menu
Upload a User Manual
Namespaces
Wiki Guide
HTML
PDF
Info
Views
User Manual
Discussion / Help
Navigation


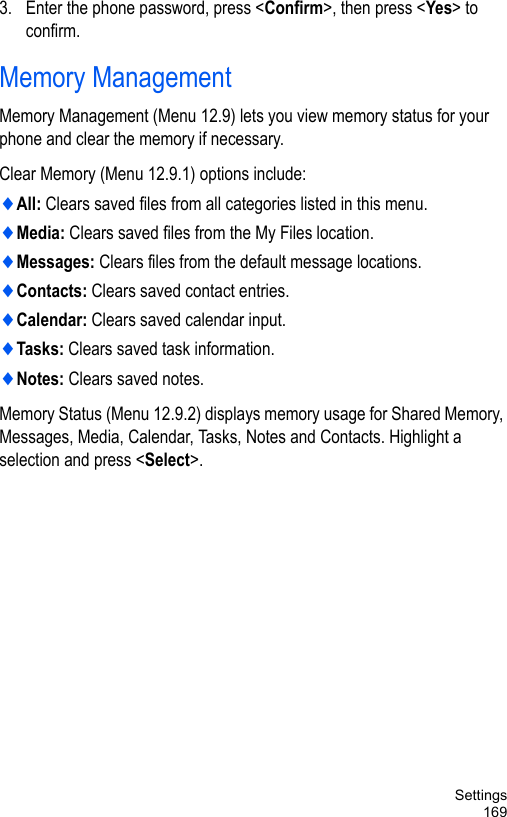
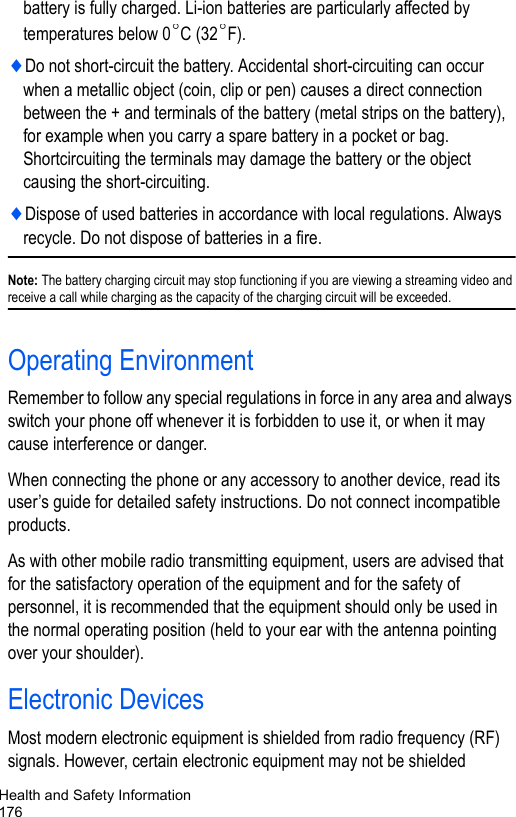
![Using This Manual1Using This ManualThis user manual has been specially designed to guide you through the functions and features of your phone. To get started quickly, refer to Your Phone, Getting Started and Call Functions. Instructional IconsBefore you start, familiarize yourself with the following visual aids:→Followed by — the order of options or menus you must select to perform a step, for example: Select Messages → Create New Message → Text Message means you should select Messages from the menu, followed by Create New Message. [ ] Square brackets — phone keys, for example [] represents the Power On/Power Off/End key.< > Angled brackets — phone keys that control different functions at different times (“soft keys”), for example <Back> represents the Back soft key, as indicated at the bottom of the screen.](https://usermanual.wiki/Samsung-Electronics-Co/SGHF406/User-Guide-999669-Page-9.png)

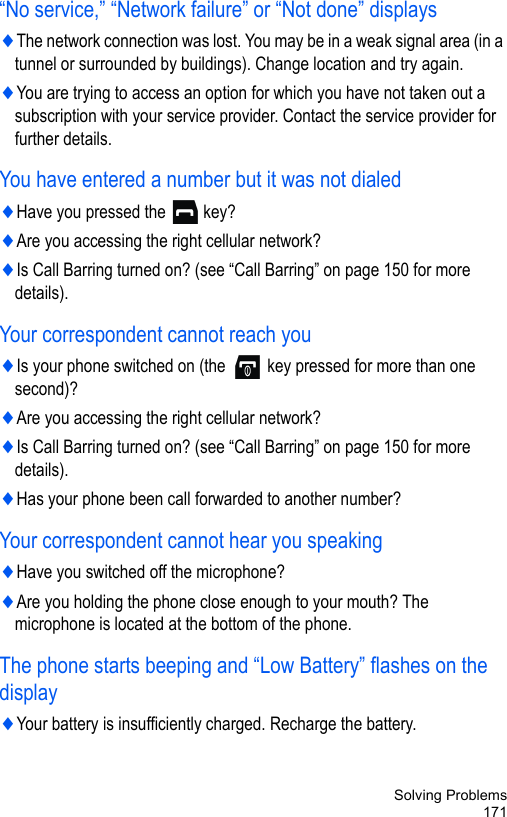
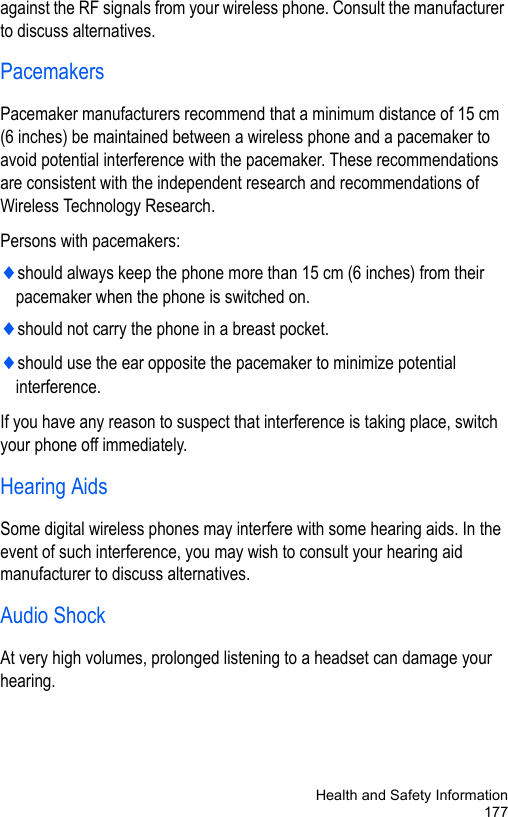
![Important Safety Precautions3Sensible UseUse the phone only in the normal position (held to the ear). Emergency CallEnsure the phone is switched on and in service. Key in the emergency number for your present location, then press [ ]. You must deactivate any unnecessary features before you can make an emergency call. Give all the necessary information as accurately as possible. Do not end the call until given permission to do so.Water ResistanceYour phone is not water-resistant. Keep it dry. Accessories and BatteriesUse only Samsung-approved accessories and batteries. Use of any unauthorized accessories could damage your phone and may be dangerous. Qualified ServiceOnly qualified service personnel may repair your phone.For more detailed safety information, see “Health and Safety Information” on page 173.](https://usermanual.wiki/Samsung-Electronics-Co/SGHF406/User-Guide-999669-Page-11.png)
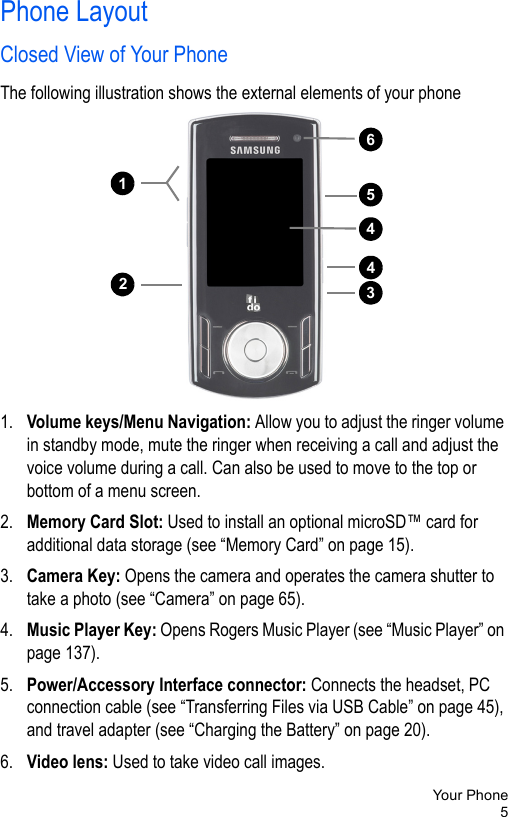
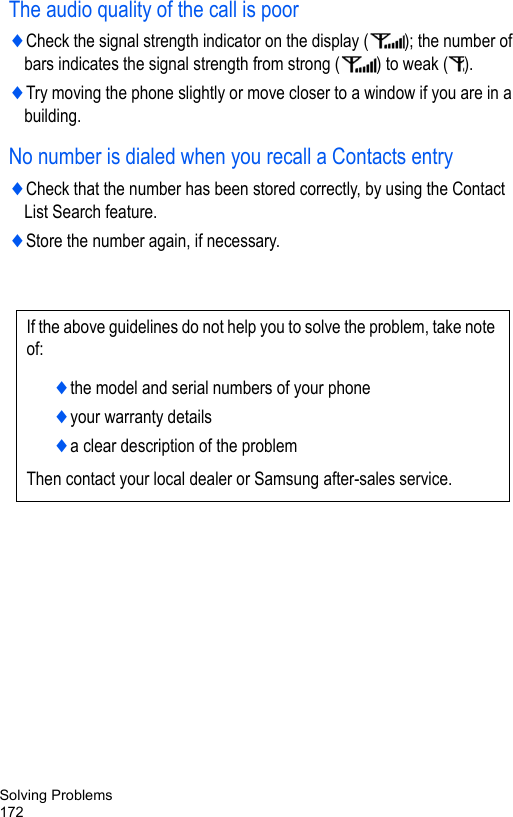
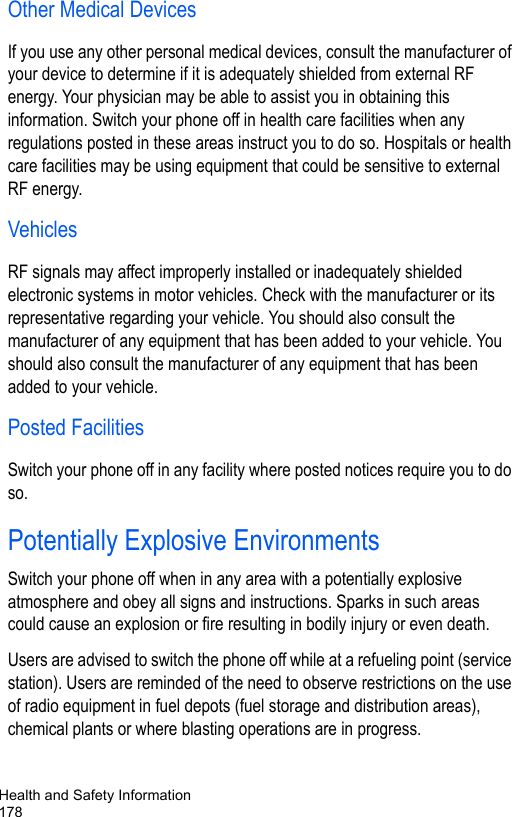
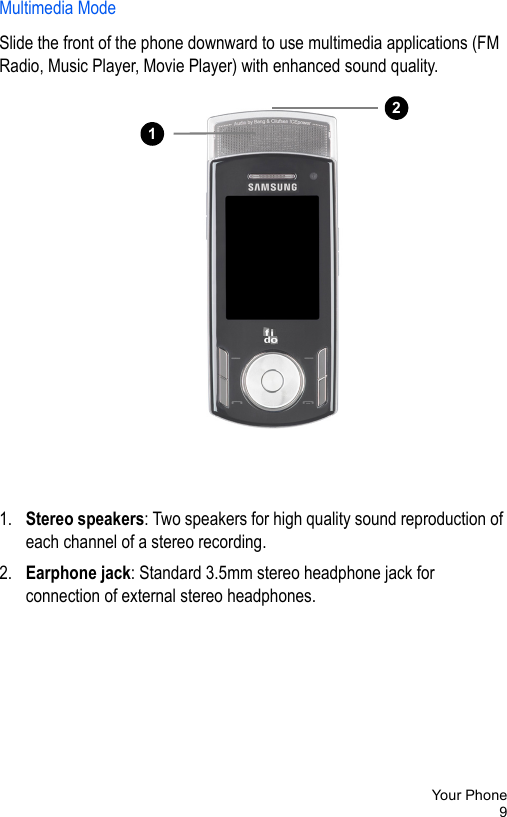
![Your Phone7voice volume during a call. Can also be used to move to the top or bottom of a menu screen. 4. Send key: Allows you to make or answer a call. In Idle mode, press the key once to access the Call History screen. Press and hold the key to redial the most recent call.5. Voice Mail key: Press and hold to automatically dial your voice mail.6. Alphanumeric keypad: Use these keys to enter numbers, letters, and some special characters.7. Special Function keys: The [ ] key enters the [*] character for calling features, such as a pause between numbers. In text entry mode, press to change the character input type. The [ ] key enters the pound [#] character for calling features. In text entry mode, press to enter a space between characters. Press and hold to activate and deactivate Silent mode.8. Microphone: Sensor that converts sound into an electrical signal during phone calls and voice recordings.9. Cancel/Clear/Quick Connect key: Deletes characters from the display when you are in text entry mode. When in a main menu, press to return to the previous menu. When in the Calendar, press to display Month view. In Idle mode, press and hold to activate the Quick Connect method of Wi-Fi connection.10. Power On/Power Off/End key: Ends a call. Press and hold for two seconds to power your phone on or off. While in a menu, it returns the phone to standby mode and cancels any input. Rejects an incoming call.11. Right soft key: Performs the function indicated by text on the display directly above the key (see “Soft Keys” on page 12).12. OK (Select) key: Allows you to accept a choice when navigating through a menu.](https://usermanual.wiki/Samsung-Electronics-Co/SGHF406/User-Guide-999669-Page-15.png)

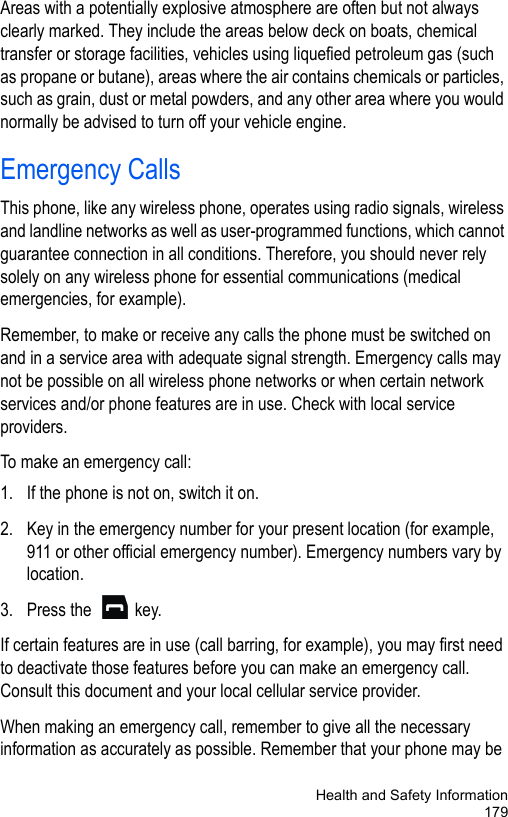
![Your Phone13Clear KeyThe Clear key [ ] is used to erase or clear numbers, text, or symbols from the display. You can also use it to return to a previous menu.♦If you enter an incorrect character, press to backspace and delete the character.♦To erase an entire sentence, press and hold.♦To back up one menu level, press briefly.End KeyThe End key [ ] is used to turn your phone on and off, disconnect calls, and return to the standby mode. ♦Press and hold to turn on your phone.♦Briefly press once to disconnect a call.♦Press to return to standby mode from a menu.Send KeyThe Send key [ ] is used to answer calls, dial calls, and to recall the last number(s) dialed, received, or missed.♦Press once to answer a call.♦Enter a number and press to make a call.♦In standby mode, briefly press to display a list of all recent calls.♦Press twice in standby mode to call the most recent number.♦Press to pick up a waiting call.](https://usermanual.wiki/Samsung-Electronics-Co/SGHF406/User-Guide-999669-Page-21.png)
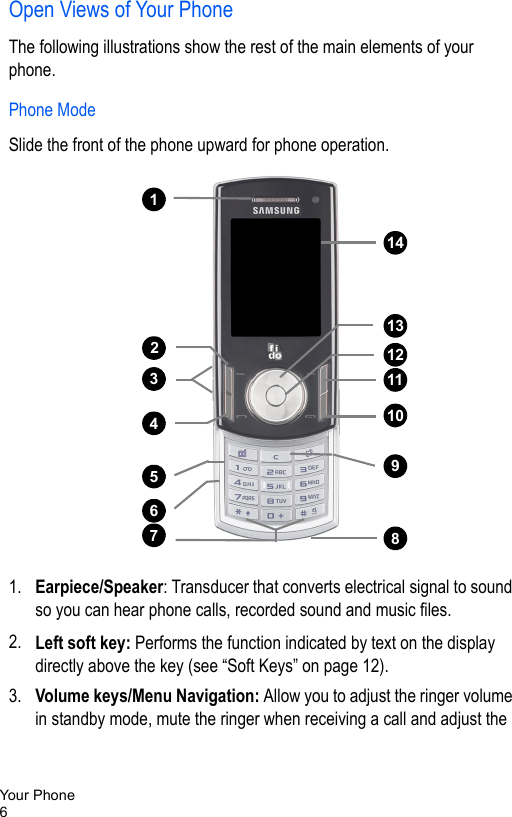
![Your Phone14Speakerphone KeyDuring a call, press [ ] to enable the speakerphone. Use the volume keys (on the left side of the phone) to adjust the volume.Multitasking MenuThe Multitasking key opens an application-switch window that allows you to select from a group of commonly used applications without having to exit from a currently active application. The menu icon choices are as follows:When the application-switch window is open, scroll to the application you want to open using the navigation keys, or press the Multitasking key repeatedly. When you have highlighted the application you want, press <Select> or [ ] to launch that application. Press <Back> to return to the previous screen. End all? returns the phone to Idle mode.Call icon: Allows you to make a voice call while using the handset for other tasks. If Music Player is active, it is muted during the call.Messages icon: Allows you to send a text or picture message while using the handset for other tasks.Internet icon: Allows you to launch the Internet browser while using the handset for other tasks.Media Player icon: Allows you to launch the Media Player while using the handset for other tasks. If an incoming call is received or you make a call, the Media Player is muted.Games and Apps icon: Allows you launch games or other applications while using the handset for other tasks.End all? icon: Allows you to cancel multitasking and return the handset to single task usage.](https://usermanual.wiki/Samsung-Electronics-Co/SGHF406/User-Guide-999669-Page-22.png)
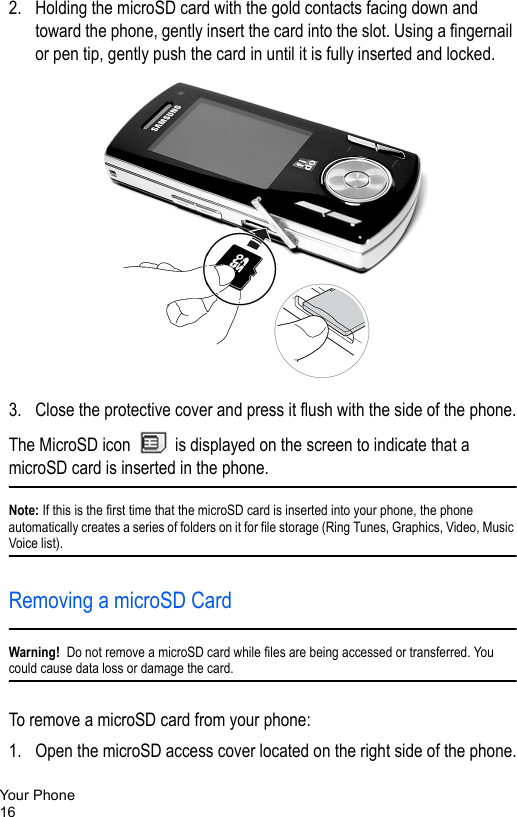
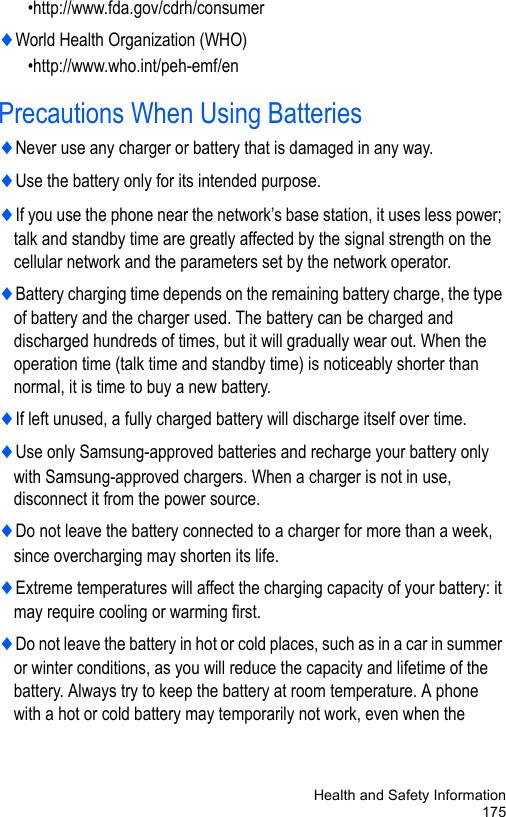
![Your Phone172. Use a fingernail or pen tip to press and release the microSD card. The card ejects part way out to allow removal. Pull the microSD card out of the phone.3. Close the protective cover and press it flush with the side of the phone.Using a microSD AdapterMicroSD adapters allow use of microSD cards in SD-compatible devices, including PC card readers.To insert a microSD card into a microSD adapter, hold the card with the label side facing up and the gold contacts toward the adapter. Gently insert the card into the adapter and slide it into the adapter until it is fully inserted.To remove a microSD card from a microSD adapter, grasp the front edge of the microSD card and gently pull it out of the adapter.Formatting a microSD CardIf you need to reformat a microSD card:1. Insert the card into the slot (see above).2. From the Idle screen, select [ ] → Media.3. Press the right navigation key so that On Card and the SD card icon are displayed.4. Press <Options> and select Memory Card Settings → Format.5. If there is any data on the card you are prompted to confirm the loss of data on the memory card. Press <Yes> if you agree. The card is formatted.](https://usermanual.wiki/Samsung-Electronics-Co/SGHF406/User-Guide-999669-Page-25.png)
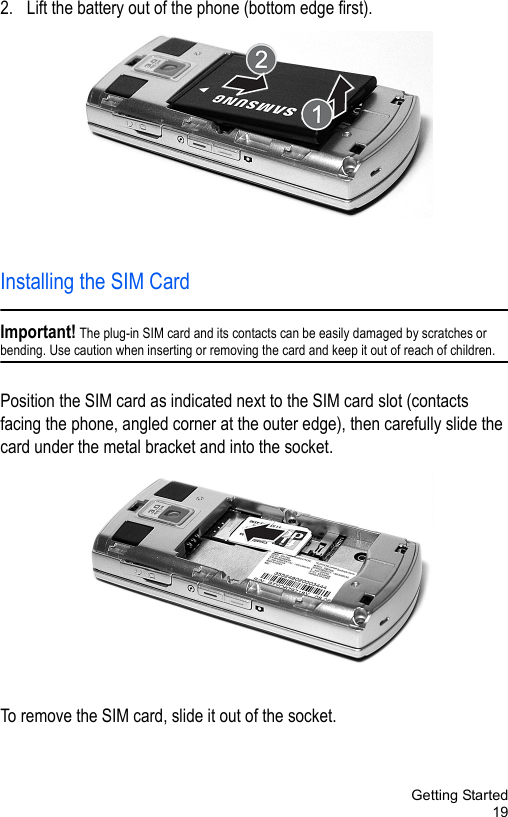
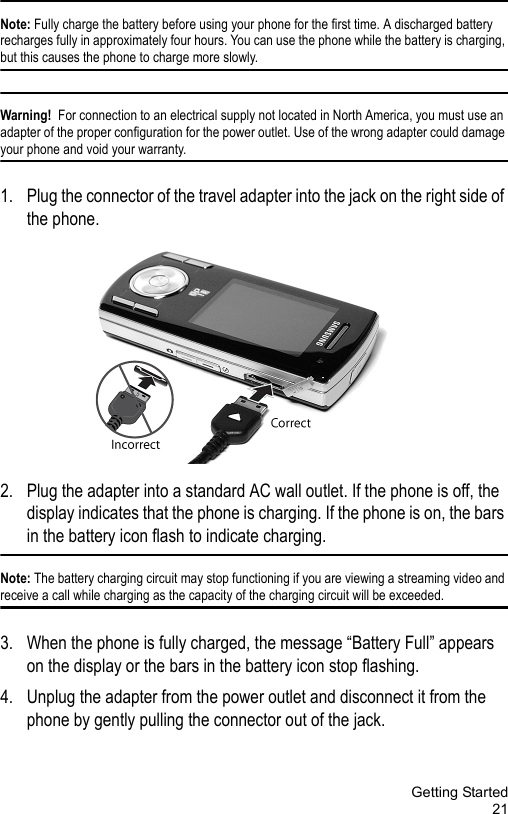
![Getting Started18Getting StartedSIM CardWhen you subscribe to a cellular network, you receive a plug-in SIM (Subscriber Identity Module) card loaded with your subscription details, such as your PIN, and optional services you have selected.Activating Your PhoneActivating your phone requires several steps: inserting the SIM card, charging the battery, and turning the phone on.Removing the BatteryNote: To avoid damage, unplug the travel adapter before removing the battery from the phone.If necessary, power-off the phone by pressing [ ] until the power-off image displays.1. Slide the battery cover off of the phone (in the direction of the arrow).](https://usermanual.wiki/Samsung-Electronics-Co/SGHF406/User-Guide-999669-Page-26.png)
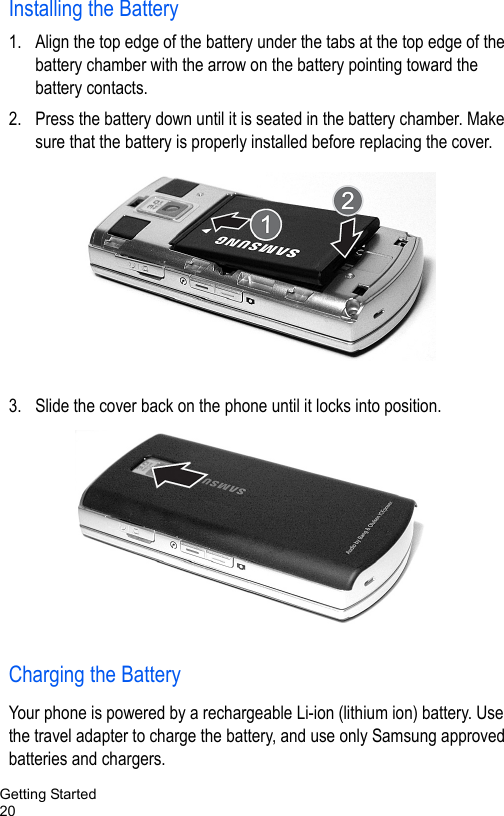
![Getting Started22Note: To avoid damaging the phone, you must unplug the adapter before removing the battery from the phone.Note: The phone is also charged when connected to the USB port of a PC using the USB cable. Low Battery IndicationWhen only a few minutes of talk time remain, a warning tone sounds, the “Low Battery” message appears on the display and the empty battery icon flashes. The backlight dims to conserve the remaining battery power. When the battery level becomes too low, the phone automatically turns off. Recharge the battery to restore phone operation.Switching the Phone On and OffTo switch the phone on:1. Press and hold [ ] until the phone switches on.2. If prompted, enter the password and press <OK> or [ ]. For further details, see the Security option in “Set Phone” on page 145.3. If prompted, enter the PIN and press <OK> or [ ]. For further details, see the Check PIN Code section in “Set Phone” on page 145.The phone searches for your network and, after finding it, the Idle screen appears on the display. You can now make and receive calls.The default display language setting is Automatic, which is dependent on the setting in your SIM. For further details or to change the language, see the Language section in “Set Phone” on page 145.To switch the phone off, press and hold [ ] until the power-off image is displayed.](https://usermanual.wiki/Samsung-Electronics-Co/SGHF406/User-Guide-999669-Page-30.png)
![Call Functions23Call FunctionsMaking a CallFrom the Idle screen, enter the phone number (with area code, if necessary), then press [ ].Note: When you activate the Auto Redial option, the phone automatically redials up to ten times when the call is not answered or someone is already on the phone. For carriers that automatically divert unanswered calls to voice mail, the Auto redial feature will not provide useful service. See the Auto Redial section in “Voice Call” on page 149 for further details.Making an International Call1. Press and hold [ ]. The + character appears.2. Enter the country code, area code and phone number, then press [ ].Correcting an Entered NumberTo correct one or more digits in a dialed number:♦To clear the last digit displayed, press [ ].♦To clear a different digit in the number, press the Left or Right navigation key until the cursor is immediately to the right of the digit to be cleared, then press [ ].♦To enter a missing digit, press the Left or Right navigation key until the cursor is in position and enter the digit. ♦To clear the whole display, press and hold [ ]. Ending a CallWhen you want to end your call, briefly press [ ] or close the phone.](https://usermanual.wiki/Samsung-Electronics-Co/SGHF406/User-Guide-999669-Page-31.png)
![Call Functions24Redialing a Recent Number All incoming, outgoing and missed calls are listed in the Call History menu. If the number or caller is listed in your Contact List, the name associated with the number also displays. To redial a number:1. From the Idle Screen, press the Left navigation key or select [ ] → Call History to access the Call History menu. 2. Scroll to the required option (All Calls, Missed Calls, Calls Made, or Calls Received) and press <Select> or [ ].3. Highlight the number you want to call.4. Press [ ] to dial the number.Making a Call from the Contacts ListYou can store phone numbers that you use regularly in the SIM card or the phone’s memory. These entries are collectively grouped in the Contacts menu (see “Contacts” on page 113 for more information).Answering a CallWhen a call is received, the phone rings and, if possible, displays the caller’s phone number. If the number is associated with an entry in your Contact List, the contact’s Display Name is displayed. If your phone service includes “call display” and the caller can be identified, the caller’s name is displayed. To answer a call:1. Press [ ], press <Accept> or open the phone.If the Any Key option in the Call Answer menu is activated, you can press any key to answer a call except [ ] and <Reject>. See the Call Answer section in “General” on page 147 for more information.](https://usermanual.wiki/Samsung-Electronics-Co/SGHF406/User-Guide-999669-Page-32.png)
![Call Functions252. End the call by pressing [ ].Note: You can answer a call while using the Contact list or menu features. After ending the call, the phone returns to the menu screen you were using.Missed CallsWhenever you miss a call, the name and number of the caller are displayed in a pop-up message on the Idle screen. Whenever you miss two or more calls, the number of calls missed are displayed in a pop-up message on the Idle screen.To view a list of missed calls, press <View>.To see details of a caller, press the Up or Down navigation key to scroll to the call. To call a number, scroll to the number and press [ ].To access the Missed Calls list from the Idle screen, select Call History → Missed Calls.Viewing the Details of Missed CallsTo view the details of a missed call:1. Open the Missed Calls list (see above).2. Scroll to the call you want to view and press [ ] or press <Options> and select Details.Calling Back a Missed CallTo call back a missed call number:1. Open the Missed Calls list (see above).2. Scroll to the call you want to return, press <Options> and select Voice Call or Video Call.](https://usermanual.wiki/Samsung-Electronics-Co/SGHF406/User-Guide-999669-Page-33.png)
![Call Functions26Sending a Message to a Missed CallTo send a message to a missed call number:1. Open the Missed Calls list (see above).2. Scroll to the call you want to return, press <Options> and select Send Message.For more information on sending messages, see “Messages” on page 89.Deleting Missed CallsTo delete one or more records of missed calls:1. Open the Missed Calls list (see above).2. If you want to delete one call, highlight the number you wish to delete and press <Options>. If you want to delete all calls, press <Options>.3. Select <Delete>.4. To delete one call, select Selected. To delete all calls, select All. Press <Yes> to confirm the deletion.Silent ProfileThe Silent sound profile prevents the phone from making any sounds. There are two choices for silent call alerts, Mute (the phone gives only visual indication when a call is received) or Vibration (the phone vibrates and provides visual indication). For instructions on selecting sound profiles, see “Set Sound Profiles” on page 140. Your phone also provides a quick method for entering the Silent profile:♦From the Idle screen, press and hold [ ] until the “Silent Profile on” message and the Silent Mode icon display.♦To return to the previous sound profile, press and hold [ ] until a screen message indicates the return to the previous sound profile and the Silent Mode icon disappears.](https://usermanual.wiki/Samsung-Electronics-Co/SGHF406/User-Guide-999669-Page-34.png)
![Video Calling27Video CallingVideo calling allows you to transmit photos and live video from your camera phone to another video calling-capable handset, as well as receive photos and live video from that handset. Both phones must be located within a 3G Network coverage area.Note: Your phone must be equipped with an HSDPA SIM card and your network must support video calling for this feature to work. Consult your service provider for more details.Making a Video CallTo make a video call from the Idle screen:1. Enter the area code and phone number.2. Press [ ].Your phone switches to video calling mode and initiates the call. During the video call, your phone can transmit photos or videos from your camera and receive photos or videos from the other phone.3. To end the call, briefly press [ ] or close the phone.Note: You can also make a video call by pressing [ ], entering the phone number and pressing [ ] again.To make a video call to one of your Contacts:1. From the Idle screen, press [ ] and select Contacts.2. Highlight the desired contact and press [ ] or press <Options> and select Video Call.](https://usermanual.wiki/Samsung-Electronics-Co/SGHF406/User-Guide-999669-Page-35.png)
![Video Calling28Your phone switches to video calling mode. During the video call, your phone can transmit photos or videos from your camera and receive photos or videos from the other phone during the conversation.3. To end your call, briefly press [ ] or close the phone.Receiving a Video CallWhen somebody places a video call to you, the phone rings and displays the incoming Video Call image. When the caller can be identified, the caller’s phone number or name stored in your Contact list is displayed. To answer a video call:1. If necessary, open the phone.2. Press [ ] or <Accept> to answer the incoming video call.Your phone switches to video calling mode. During the video call, your phone can transmit photos or videos from your camera and receive photos or videos from the other phone during the conversation (see below).3. To end the call, briefly press [ ] or close the phone.Options During a Video CallYour phone provides a number of features that you can use during a video call. The main options can be accessed using the on-screen menu bar.To access any of the following features, press the left or right navigation keys to highlight the desired option. The current setting is shown above the menu bar. To change the setting, press [ ], highlight a new selection and press <Select> or [ ].](https://usermanual.wiki/Samsung-Electronics-Co/SGHF406/User-Guide-999669-Page-36.png)
![Video Calling29♦Loudspeaker: Switches between Normal (for holding the phone to your ear) and Speaker On (loudspeaker). The other phone’s sound is not affected.♦Outgoing Image: Controls the image or video that is displayed on the other phone. You can select between:•Show Me: Displays your current camera view (either Internal or External).•Default Image: Shows the default picture on the other phone. Your camera is no longer transmitting video.•Freeze Me: Takes a photo using your camera and transmits that photo to the other phone. To update the photo, select Show Me again, followed by Freeze Me.•My Image: Transmits a preselected image stored in your phone’s memory. To select the image, see “Graphics” on page 64.♦Mute: Press [ ] to check/uncheck one or more of the following:•All: Mutes both the microphone and keypad tones.•My Voice: Mutes your microphone so that the other caller cannot hear you. •Keypad Tones: Mutes your keypad tones so that the other caller cannot hear them.♦Capture Image: Lets you save a still image on your phone.♦Front/Rear Camera: Allows you to switch the view you are transmitting between the front and rear cameras. Speaker Outgoing Mute Capture Front/ Viewing Brightness On/Normal Image Image Rear Style Camera](https://usermanual.wiki/Samsung-Electronics-Co/SGHF406/User-Guide-999669-Page-37.png)
![Video Calling30♦Viewing Style: Switches the view on your display between:•Full screen view of receiving image•Full screen view of my receiving image with picture-in-picture view of transmitting image•Full screen view of my transmitting image•Full screen view of my transmitting image with picture-in-picture view of receiving image♦Brightness: Allows you to change the brightness of your display. Press the left or right navigation key to adjust the brightness and press [ ] to save the new setting.You can also press <Options> during a video call to access a wider range of options.♦Normal/Speaker On: Switches between Normal speaker volume and Loudspeaker. The other caller’s sound is not affected.♦Outgoing Image: Controls the image or video that is displayed on the other phone (see above).♦Mute/Unmute: Controls the muting of microphone and keypad tones (see above).♦Front/Rear Camera: Allows you to switch the view you are transmitting between the front and rear cameras.♦Capture Image: Lets you save a still image on your phone.♦Display Options: Select this option to choose one of the following:•Brightness: Allows you to change the brightness of your display. Press the left or right navigation key to adjust the brightness and press [ ] to save the new setting.•Effects: Lets you add a Black & White or Sepia effect to the transmitted image.•Video Quality: Allows you to optimize the transmitted video quality for Normal, Best for Image or Best for Motion.](https://usermanual.wiki/Samsung-Electronics-Co/SGHF406/User-Guide-999669-Page-38.png)
![Options During a Call34Put a Call on HoldYou can place the current call on hold at any time. You can also make another call while you have a call in progress if your network supports this service.To put a call on hold:1. While on a call, press <Options> and select Hold. The call is placed on hold.2. You can reactivate the call by pressing <Resume>.To make a call while you have a call in progress:1. While on a call, press <Options> and select New Call.2. Enter the new number and press [ ] to dial the second call.3. To switch between the two calls, changing the one on hold to active and placing the other on hold, press <Options> and select Swap.4. To finish, end each call by pressing [ ].Switching the Microphone Off (Mute)You can temporarily switch your phone’s microphone off so that the other person on the call cannot hear you. For example, you might wish to speak to another person in the room without the person on the call hearing you.To switch the microphone off, press <Mute>. The soft key indicator changes to Unmute and the person on the call can no longer hear you.To switch the microphone back on, press <Unmute>. The other person on the call can hear you again.](https://usermanual.wiki/Samsung-Electronics-Co/SGHF406/User-Guide-999669-Page-42.png)
![Options During a Call35Using the SpeakerphoneThe speakerphone lets people near the phone participate in a call by broadcasting the voice or voices of those on the other end of the line and using the microphone to capture the voices of everyone near the phone. To use the speakerphone function during a call, press [ ]. Use the volume keys to adjust the volume. To turn off the speakerphone function during a call, press [ ].Muting or Sending Key TonesThis option allow you to turn the key tones off or on. If you press <Options> and select Mute Keypad Tone, your phone does not transmit the DTMF (Dual Tone Multi-Frequency) tones produced by the numeric keys during a call. This allows you to use the keypad without hearing annoying key tones.Note: To communicate with answering machines or computerized telephone systems, the Send Keypad Tone option must be selected.Making a Multi-party CallMulti-party calling is a network service that allows up to six people to take part simultaneously in a multi-party or “conference” call.Note: Please contact your service provider to determine if multi-party calling is supported.To set up the multi-party call:1. Call the first participant in the normal manner (see “Making a Call” on page 23).2. To call another participant, press <Options> and select New Call. Enter the new number and press [ ] to dial the second call.](https://usermanual.wiki/Samsung-Electronics-Co/SGHF406/User-Guide-999669-Page-43.png)
![Options During a Call363. To add this person to the call, press <Options> and select Join. All call participants are listed on the screen.4. To continue adding people to the call, repeat steps 2 and 3 above. You can also add incoming callers by answering the call, pressing <Options>, and selecting Join.To have a private conversation with one participant:1. Press <Options> and select Split.2. Select the number of the person you wish to talk with.3. You can now talk privately to that person. The other participants can still converse with each other.4. To return to the multi-party call, press <Options> and select Join.5. All the call participants can now hear each other.To remove a participant: 1. Press <Options> and select End.2. Highlight Select Participant and press <Select> or [ ]. 3. Highlight a participant you wish to drop and press to place a check mark beside that participant. Repeat this step as necessary.4. When you are finished, press the Drop soft key.The calls to the removed participant(s) are ended but you can continue to talk to the others.To end the call: When you want to end a multi-party call, press [ ].Sending a Sequence of DTMF TonesYou can choose to send DTMF tones after entering the entire number you need to send rather than as you press the numeric keys. This option is](https://usermanual.wiki/Samsung-Electronics-Co/SGHF406/User-Guide-999669-Page-44.png)
![Options During a Call37helpful for entering a password or an account number when you call an automated system, like a banking service.To send DTMF tones:1. Press <Options> and select Send DTMF.2. Enter the numbers you want to send and press <OK> or [ ].Searching for a Number in ContactsYou can search for a number in the Contacts list during a call.1. Press <Options> and select Contacts.2. Begin entering the letters of the name. As you type, the first entry that matches the entered letters is highlighted. To select a different contact, scroll up or down until the entry you want is highlighted.3. Press [ ] to open the contact information.For further information on using the Contact list feature, see “Contacts” on page 113.Call WaitingCall Waiting lets you answer an incoming call while you have a call in progress, if your network supports this service and you have set the Call Waiting-Voice Call option to Activate. For information on changing Call Waiting settings see “Call Waiting” on page 151.To answer a call while you have a call in progress:1. Press [ ] or <Accept> to answer the incoming call. The first call is automatically put on hold.2. To switch between the two calls, press <Options> and select Swap.3. To end the current call, press [ ].](https://usermanual.wiki/Samsung-Electronics-Co/SGHF406/User-Guide-999669-Page-45.png)

![Entering Text41Entering TextThis section explains the various text input modes for entering characters into your phone. It also describes how to use the T9 predictive text entry system to reduce the number of key strokes required for entering text.Your phone has the following text input modes:♦Alphabet modes (ABC, abc, Abc): Let you enter letters by pressing a letter key multiple times until the desired character displays. You can select all upper case, all lower case, or initial capital format.♦T9 Input modes (T9EAb, T9EAB, T9Eab): Let you enter words with one keystroke per letter by comparing keystrokes to a linguistic dictionary to determine the word.♦Number mode: Allows you to enter series of numbers.♦Symbol mode: Allows you to enter symbols and special characters.Changing the Text Input ModeWhen you are in a field that allows characters to be entered, you will see the text input mode indicator near the top right corner of the display.To change the text input mode:♦Press and hold [ ] to switch between T9 and Alphabet modes.♦Press [ ] to cycle between Initial Capital , Upper Case , Lower Case and Numeric entry modes.♦To access the Symbol mode, press and hold [ ].♦You can also access any of the input modes by pressing <Options> and selecting Input Method. Select the desired input method and case, then press <Select> or [ ].AbcABC abc 123SYM](https://usermanual.wiki/Samsung-Electronics-Co/SGHF406/User-Guide-999669-Page-49.png)
![Entering Text42Using T9 ModeT9 is a predictive text input mode based on a built-in dictionary that allows you to key in characters using a single keystroke. Your phone selects the most likely word based on your keystroke combinations.To enter a word in T9 mode:1. Start entering a word by pressing the numeric keys. Press each key only once for each letter. Example: To enter “HELLO”, press [], [], [], [] and [].As you type, the characters on the screen change as the built-in dictionary matches your keystrokes to commonly used words. Enter all letters in the word without editing or deleting the keystrokes.2.If the word displayed is not correct, press [ ] to display an alternative choice. Continue until the correct word displays or no choices remain, at which time you can add the word to the phone’s dictionary (see below). 3. Press [ ] to insert a space then start entering the next word.To add a new word to the T9 dictionary:1. When you press [ ] on the last alternative word available, the left soft key changes to Spell. Press <Spell> and enter the word you want.♦To shift case, use [ ] to toggle between Initial Capital, Upper Case, Lower Case and Numeric modes.♦You can move the cursor using the Left and Right navigation keys.♦To delete letters, press []. Press and hold [] to clear the display.2. Press <Add>. The word is added to the T9 dictionary and becomes the first word for the associated key presses.](https://usermanual.wiki/Samsung-Electronics-Co/SGHF406/User-Guide-999669-Page-50.png)
![Entering Text43Using Alphabet ModeIn Alphabet mode you use the 0 to 9 keys to enter your text. 1. Press the key labeled with the letter you want:♦ Once to enter the first letter on the key♦ Twice in quick succession for the second letter♦ Three times in quick succession for the third letter♦ Four times in quick succession for the fourth letter2. Select additional letters in the same way.Note: The cursor moves to the right when you press a different key. To enter the same letter twice or a different letter on the same key, wait for the cursor to move to the right.The following table shows the characters available for each key:♦To shift the case, press [ ]. . , ' - ? ! @ : / 1A B C 2 a b c 2D E F 3 d e f 3G H I 4 g h i 4J K L 5 j k l 5M N O 6 m n o 6P Q R S 7 p q r s 7T U V 8 t u v 8W X Y Z 9 w x y z 9+ = < > € £ $ % & ¥ ¤ 0Space](https://usermanual.wiki/Samsung-Electronics-Co/SGHF406/User-Guide-999669-Page-51.png)
![Entering Text44♦Move the cursor using the left and right navigation keys. ♦To delete letters, press [ ]. ♦To clear the display, press and hold [ ].Using Number ModeNumber mode lets you enter numbers into a text message. Press the keypad keys corresponding to the digits you want to enter. Using Symbol ModeSymbol mode lets you insert symbols and punctuation marks into text. Press and hold [ ] to access Symbol mode. To Press the select a symbol group navigation keysselect a symbol corresponding number key adjacent to the symbolclear an entry []insert the symbol(s) into yourmessage <OK>cancel your input and return to the previous mode <Cancel>](https://usermanual.wiki/Samsung-Electronics-Co/SGHF406/User-Guide-999669-Page-52.png)
![Transferring Files45Transferring Files You can transfer pictures, video clips and other files between your phone and a personal computer in several ways, including:♦using a USB cable♦using Bluetooth♦using a microSD card readerTransferring Files via USB CableNote: The default method for USB file transfer is Mass Storage mode (see below). To select a different method, see “Select USB Mode” on page 161.Using Mass Storage ModeYou can transfer files between a microSD card in your phone and a PC using a USB cable and Microsoft Windows using the following procedure.Note: Your phone’s USB Setting must be set to Mass Storage or Ask on Connection (see “Select USB Mode” on page 161). 1. Connect the USB cable to a USB port on your PC and to your phone.♦USB Mode set to Ask on Connection: the Ask on Connection window appears on the phone. Highlight Mass Storage and press <Select> or [ ]. “Connected” appears on the phone display.♦USB Mode set to Mass Storage: “Connected” appears on the phone display.2. Open My Computer on the PC. The list of contents will include a “Removable Disk” with the name of the microSD card in your phone.](https://usermanual.wiki/Samsung-Electronics-Co/SGHF406/User-Guide-999669-Page-53.png)
![Transferring Files463. Double click the disk icon to view the contents of the card. You can drag and drop files between the computer and the folders on the card. Using PC StudioFile transfer between your phone and a PC using Samsung’s PC Studio 3 software (included with your phone) requires a PC with available USB port, installation of PC Studio 3 on the PC, and a USB cable. Note: For more information on Samsung PC Studio 3, consult the online help provided with the PC Studio 3 software.Note: Your phone’s USB Setting must be set to PC Studio or Ask on Connection to use PC Studio 3 (see “Select USB Mode” on page 161). 1. Start the PC Studio 3 software. Note: The first time you start the PC Studio 3 software, a connection wizard appears that leads you through the process of setting up your phone connection. Do not plug the USB cable into a USB port on your PC until instructed to do so by the software.2. Connect the USB cable to a USB port on your PC and to your phone. ♦USB Mode set to Ask on Connection: the Ask on Connection window appears on the phone. Highlight PC Studio and press <Select> or [ ]. The status message at the bottom right of the PC Studio screen changes from Not Connected to SGH-F406 Connected. ♦USB Mode set to PC Studio: The status message at the bottom right of the PC Studio screen changes from Not Connected to SGH-F406 Connected. 3. In the PC Studio program, select Phone Explorer. The Phone Explorer window appears. It displays the folders on your phone at the top left of](https://usermanual.wiki/Samsung-Electronics-Co/SGHF406/User-Guide-999669-Page-54.png)
![Transferring Files491. Connect the USB cable to a USB port on your PC and to your phone.♦USB Mode set to Ask on Connection: the Ask on Connection window appears on the phone. Highlight Media Player and press <Select> or [ ]. “Connected” appears on the display.♦USB Mode set to Media Player: “Connected” appears on the display.2. Open Windows Media Player on the PC and click the Sync tab. The device area at the right side of the screen will list your phone (SGH-F406 - Phone) and, if present, the card in your phone (SGH-F406 - Card). Click Next Device to change devices.3. Drag and drop the files you want to transfer to the Sync List at the right side of the screen. 4. Click the Start Sync button to download the selected music to your phone or memory card. “Synchronizing” is displayed in Windows Media Player while file transfer is in progress.Note: Do not unplug the USB connector from the phone or PC while files are being transferred.5. When file transfer is complete, unplug the USB connector from the phone.](https://usermanual.wiki/Samsung-Electronics-Co/SGHF406/User-Guide-999669-Page-57.png)
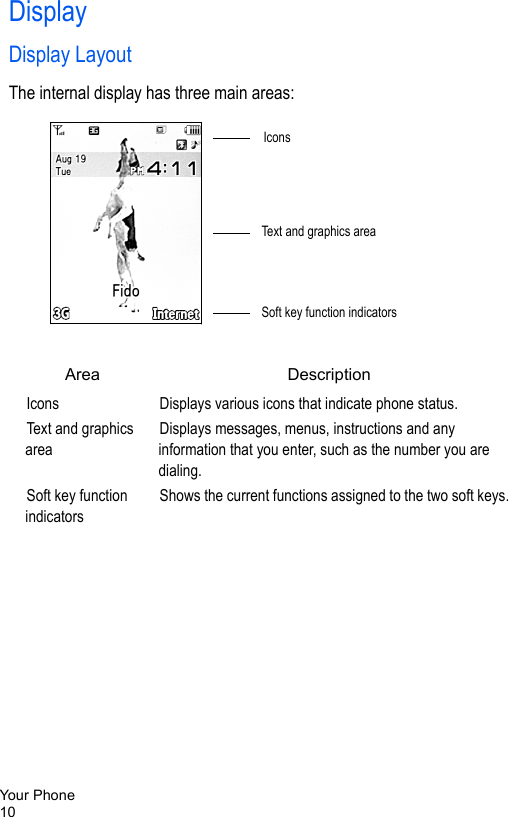
![Menus51MenusThis section explains the menu navigation for your phone. It also includes an outline of all the available menus associated with your phone. Some menu options are controlled by the SIM provided by your service provider.Menu NavigationThe navigation keys on your phone allow you to scroll through menus quickly and easily. The scroll bar at the right of the menu keeps track of your position in the menu at all times.♦To access menus from the Idle screen, press [ ]. ♦To navigate through a menu, press the up or down navigation key. Press the Volume keys (located on the left side of your phone) to move to the top or bottom of the displayed list.♦As you navigate through a menu, menu options are highlighted. To select the highlighted item, press <Select> or [ ]. You can also select numbered options by pressing the corresponding keypad number. Note: When you access a list of options, your phone highlights the current option. If, there are only two options, however, such as On/Off or Enable/Disable, your phone highlights the option that is not currently active.♦If Pop Up List Menu is set to On (see “Set Display” on page 142), submenus display below a highlighted menu item. Press either the right navigation key or [ ] to access the submenu.♦To return to the previous level, press <Back> or [].♦To exit the menu and return to the Idle screen, press [ ].](https://usermanual.wiki/Samsung-Electronics-Co/SGHF406/User-Guide-999669-Page-59.png)
![Media54MediaThe Media menu (Menu 2) enables you to:♦Manage your media files (audio, graphics, videos, other files) ♦Use the audio recorder ♦Use the Media Player♦Take photos and video clipsMedia files are organized in a series of folders. You can also create additional folders or sub-folders to further organize your files.Note: If you have inserted a microSD memory card in your phone, you can scroll right or left while in the Media menus to view similar folders, and the files they contain, in the memory card.MusicIn this folder, you can access music files you have downloaded to your phone or microSD card, play them using the phone’s music player or send them to a Bluetooth headset.1. From the Idle screen, press [ ] and select Media → Music. 2. To play a music file on the phone, scroll to the file and press [ ] or press <Options> and select Play. To transfer To transfer the sound to a Bluetooth headset, press <Options> and select Transfer to Bluetooth Stereo Headset. Music OptionsThe following options are available when you press <Options> with a music file highlighted. The availability of some of these options depends on the highlighted (selected) file:♦Play: Plays the currently selected music file on the phone.](https://usermanual.wiki/Samsung-Electronics-Co/SGHF406/User-Guide-999669-Page-62.png)
![Media56•Properties: Displays all the properties of the currently selected file.♦Sort by: Lets you arrange all your files by Date, Type, Name, or Size.♦Bluetooth Visibility: Allows the selected music file or multiple files to be shared or released for use with another Bluetooth device. ♦Lock/Unlock: Allows you to lock the file so it can not be deleted. Files must be unlocked before they can be deleted.♦Properties: Display all the properties of the currently selected file (Title, Size, Format, Duration, Artist, Album, Genre, Forwarding, Created, Location.Ring TunesIn this folder you can download ring tunes using the Internet browser and manage your ring tunes. Note: If you have inserted a microSD memory card in your phone, you can scroll right or left while in the Media menus to view similar folders, and the files they contain, in the memory card.Get New Ring TunesThis option allows you to download ring tunes from your service provider. 1. From the Idle screen, press [ ] and select Media → Ring Tunes →Get New Ring Tunes. The browser launches and opens the Get Music & Tones screen. 2. Follow the on-screen options to select and download a file.Press <Options> to access browser options (see “Using the Internet Browser” on page 108).](https://usermanual.wiki/Samsung-Electronics-Co/SGHF406/User-Guide-999669-Page-64.png)
![Media57Ring Tunes OptionsThe following options are available when you press <Options> with a ring tune highlighted. The availability of some of these options depends on the highlighted (selected) file:♦Play: Plays the currently selected ring tune.♦Send via: Lets you send the selected file to a recipient via Message or via Bluetooth to another Bluetooth device.♦Set as: Lets you set the selected ring tune as your Voice Call Ring Tune, Video Call Ring Tune, Caller Ring Tune or Alarm Tone. To use the tune as an alarm sound, select an alarm option (Wake-up alarm, Alarm 1 -4). Program the alarm options (see “Alarms” on page 127) then press <Save> or [ ] to confirm the choice.♦Move: Lets you move the file to another location on the phone or to a memory card.♦Copy: Lets you copy the file to another location on the phone or to a memory card.♦Delete: Lets you delete the Selected file or Multiple files.♦Rename: Lets you change the name of the selected file.♦Create Folder: Lets you create a subfolder. ♦Sort by: Lets you arrange files by Date, Type, Name, or Size.♦Bluetooth Visibility: Allows the selected media file or multiple files to be shared or released for use with another Bluetooth device. ♦Lock/Unlock: Allows you to lock the file so it can not be deleted. Files must be unlocked before they can be deleted.♦Properties: Displays all the properties of the currently selected file.](https://usermanual.wiki/Samsung-Electronics-Co/SGHF406/User-Guide-999669-Page-65.png)
![Media58Picture AlbumThis folder contains your collections of provided and downloaded pictures as well as those taken with your phone’s internal camera. You can also download pictures and select a picture to be displayed as wallpaper. Get New GraphicsThe Get New Graphics option allows you to download images from your service provider.1. From the Idle screen, press [ ] and select Media → Picture Album → Get New Graphics. The browser launches and opens the Images screen. 2. Follow the on-screen options to select and download a file.Picture FilesTo open a picture file:1. From the Idle screen, press [ ] and select Media → Picture Album. Highlight the picture you want to view and press [ ] or press <Options> and select View. Picture File OptionsThe following options are available when you press <Options> with a picture file highlighted. The availability of some of these options depends on the type of file:♦View: Displays the image.♦Send: Lets you send the selected file to a recipient via Message, via Bluetooth to another Bluetooth device, or to an Online Album.♦Set as: allows you to set the photo as wallpaper or assign it to a Caller ID.](https://usermanual.wiki/Samsung-Electronics-Co/SGHF406/User-Guide-999669-Page-66.png)
![Media59♦Move: Lets you move one or more files from the phone to a microSD memory card if one is inserted. Highlight the location you want to move the file(s) to and press [ ].♦Copy: Lets you place a copy of one or more files in another location in the phone or a microSD memory card if one is inserted.♦Delete: Lets you delete the Selected file, Multiple files or All files.♦Rename: Lets you change the name of the selected file. ♦Take Photo: Switches your phone to Camera mode. ♦Create Folder: Lets you create a subfolder. After you create a folder, you can highlight it and access the following additional options by pressing <Options>:•Open: Opens the selected folder or subfolder.•Take Photo: Switches your phone to Camera mode.•Create Folder: Lets you create a subfolder. •Move Folder: Lets you move the folder to a new location.•Copy Folder: Lets you copy the folder to another location.•Delete Folder: Deletes the selected folder or subfolder.•Rename Folder: Lets you rename the selected folder or subfolder.•Sort by: Lets you arrange all your files by Date, Type, Name, or Size.•Bluetooth Visibility: Allows the media file to be shared or released for the use with another Bluetooth device. •Memory Card Settings: Lets you view memory card details, format or rename the card, and enable/disable Bluetooth visibility.•Properties: Displays all the properties of the currently selected file.♦Sort by: Lets you arrange files by Date, Type, Name, or Size.♦Bluetooth Visibility: Allows the selected media file or multiple files to be shared or released for use with another Bluetooth device. ♦Print via: Lets you print the file via USB or Bluetooth connection to a printer or computer.](https://usermanual.wiki/Samsung-Electronics-Co/SGHF406/User-Guide-999669-Page-67.png)
![Media60♦Lock/Unlock: Lets you lock the file to prevent accidental deletion and unlock it when necessary.♦Properties: Display all the properties of the currently selected file.Picture OptionsThe following options are available when you press <Options> with a picture file open:♦Zoom: Lets you zoom in on a portion of the picture. Press <+> to zoom in, press <-> to zoom out, and use the navigation keys to move the image window. Press [ ] to exit.♦Send: Allows you to send the picture in a Message, via Bluetooth or to an Online Album.♦Set as:•Wallpaper: Sets the picture as your wallpaper for the idle screen.•Caller ID: Sets the picture as caller ID image for a Contacts entry.♦Delete: Deletes the picture.♦Rename: Lets you specify a different name for the file.♦Edit: Opens the Image Editor. Press <Options> to access the following editing and sharing tools:•Save as: Lets you specify a unique name for the picture file. Otherwise, pictures are named using the default naming convention (to change the default format see Default Name in the previous section).•Effects: Allows you to allows you to apply a Black and White, Sepia, Negative, Milky, Lighting, Crayon Pastel, Oil Paint, Blur, Despeckle or Sharpen effect to the picture. •Partial Effects: Lets you apply a Partial Blur effect or perform Redeye Repair inside an area. Select the effect you want to apply. Use the navigation keys to move the area box to the area of the screen where you want to apply the effect. Press <Options> and select Size to change the size of the selected area, Shape to select a different shape for the selection area, Blur or Repair to apply the effect.](https://usermanual.wiki/Samsung-Electronics-Co/SGHF406/User-Guide-999669-Page-68.png)
![Media61•Adjust: Lets you adjust Brightness, Contrast and Colour settings. Use the left and right navigation keys to move the adjustment slider.•Transform: Lets you Resize, Rotate or Flip the picture. Use the up and down navigation keys to make a selection and press [ ] or <Select>.•Crop: Lets you crop a portion of the picture. Use the navigation keys to move the area box to the area of the screen where you want to apply the effect. Press <Options> and select Size to change the size of the selected area, Shape to select a different shape for the selection area, Crop to apply the effect.•Insert: Lets you add a Frame, Clipart, Emoticon or Text to the picture. After entering text, press <Options> to change Size, Rotate, Font size or Color. •Send: Allows you to send the picture in a Message, via Bluetooth or to an Online Album.•Set as: Allows you to set the picture as your Wallpaper for the idle screen or as Caller ID image for a Contacts entry.•Print via: Lets you print the file via USB or Bluetooth connection to a printer or computer.♦Bluetooth Visibility: Allows the file to be shared or released for use with another Bluetooth device.♦Slide show: Consecutively displays all images in the folder. ♦Print via: Lets you print the file via USB or Bluetooth connection to a printer or computer.♦Lock/Unlock: Lets you lock the file to prevent accidental deletion and unlock it when necessary.♦Properties: Displays the properties of the currently selected file.](https://usermanual.wiki/Samsung-Electronics-Co/SGHF406/User-Guide-999669-Page-69.png)
![Media62VideoIn this folder, you can access the videos you have taken using the built in camcorder (see “Camera” on page 65), as well as videos downloaded from the Web or received in picture messages.Get New VideosThe Get New Videos option allows you to download videos from your service provider.1. From the Idle screen, press [ ] and select Media → Video → Get New Videos. The browser launches and opens the TV/Video screen. 2. Follow the on-screen options to select and download a file.Video FilesTo play a video file:1. From the Idle screen, press [ ] and select Media → Video. 2. Highlight the video clip you want to view and press [ ] or press <Options> and select Play. Video files are played by the Movie Player (see “Movie Player” on page 138 for more information). Video File OptionsThe following options are available when you press <Options> with a video file highlighted. The availability of some of these options depends on the highlighted (selected) file:♦Play: Plays the currently selected video.♦Send: Lets you send the selected file to a recipient via Message, via Bluetooth to another Bluetooth device, or to an Online Album.](https://usermanual.wiki/Samsung-Electronics-Co/SGHF406/User-Guide-999669-Page-70.png)
![Media63♦Move: Lets you move one or more files to another location in the phone or a microSD memory card if one is inserted. Highlight the location you want to move the file(s) to and press [ ].♦Copy: Lets you place a copy of one or more files in another location in the phone or a microSD memory card if one is inserted.♦Delete: Lets you delete the Selected file, Multiple files or all files.♦Rename: Lets you change the name of the selected file. ♦Record Video: Switches your phone to Camcorder mode.♦Create Folder: Lets you create a subfolder. After you create a folder, you can highlight it and access the following additional options by pressing <Options>:•Open: Opens the selected folder or subfolder.•Record Video: Switches your phone to Camcorder mode.•Create Folder: Lets you create a subfolder. •Move Folder: Lets you move the folder to a new location.•Copy Folder: Lets you copy the folder to another location.•Delete Folder: Deletes the selected folder or subfolder.•Rename Folder: Lets you rename the selected folder or subfolder.•Sort by: Lets you arrange all your files by Date, Type, Name, or Size.•Bluetooth Visibility: Allows the media file to be shared or released for the use with another Bluetooth device. •Memory Card Settings: Lets you view memory card details, format or rename the card, and enable/disable Bluetooth visibility.•Properties: Displays the properties of the currently selected file.♦Sort by: Lets you arrange files by Date, Type, Name, or Size.♦Bluetooth Visibility: Allows the Selected media file or Multiple files to be shared or released for use with another Bluetooth device. ♦Lock/Unlock: Lets you lock the file and unlock it when necessary. Locking files prevents accidental deletion.♦Properties: Display all the properties of the currently selected file.](https://usermanual.wiki/Samsung-Electronics-Co/SGHF406/User-Guide-999669-Page-71.png)
![Media64Voice NotesThis folder contains the audio files that you create with the built in recorder. This is the default save location for recorded audio files. To access the Record Audio function, see “Record Audio” on page 75.Voice Notes OptionsThe following options are available when you press <Options> with a Voice Notes file highlighted:♦Play: Plays the currently selected audio file.♦Send via Messages: Lets you send the selected file to a recipient in a message.♦Set as: Lets you use the recording as an alarm tone. Select an alarm option (Wake-up alarm, Alarm 1 -4). Program the alarm options (see “Alarms” on page 127) then press <Save> or [ ] to confirm the choice.♦Move: Lets you move one or more files to another location in the phone or a microSD memory card if one is inserted. Highlight the location you want to move the file(s) to and press [ ].♦Copy: Lets you place a copy of one or more files in another location in the phone or a microSD memory card if one is inserted.♦Delete: Lets you delete the Selected file, Multiple files or All files.♦Rename: Lets you change the name of the selected file. ♦Record Audio: Opens the audio recorder (see “Record Audio” on page 75).♦Create Folder: Lets you create a subfolder. After you create a folder, you can highlight it and access the following additional options by pressing <Options>:•Open: Opens the selected folder or subfolder.•Record Audio: Lets you use the Record Audio function to record an audio clip using your phone’s microphone.](https://usermanual.wiki/Samsung-Electronics-Co/SGHF406/User-Guide-999669-Page-72.png)
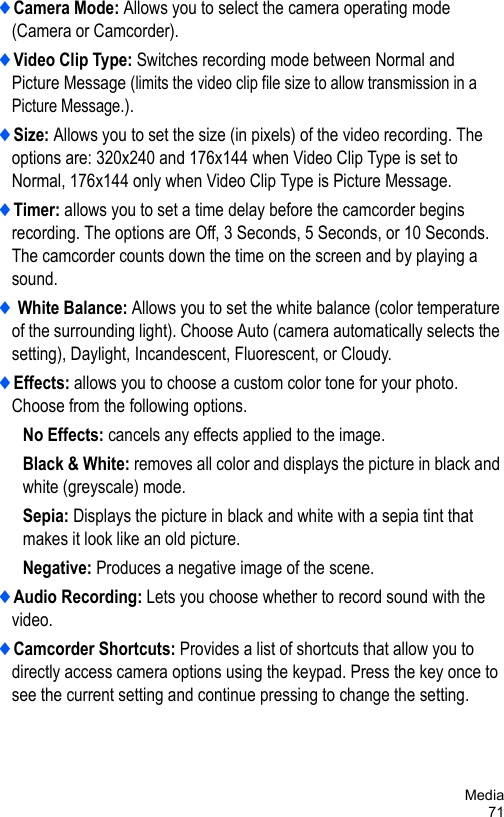
![Media66Taking PhotosYour camera produces picture files in JPEG format.To take a picture:1. From the Idle screen, press [ ], select Media →Media Applications → Camera, and turn the camera 90 counter-clockwise. The camera opens in either Camera or Camcorder mode (indicated by the icon on the top left corner of the screen), depending the mode last used. To change the shooting mode, press or press < > and select Camera. Note: You can also access the camera from the Idle screen by pressing and holding [ ].2. Adjust the image by aiming the camera at the subject and framing the picture you want to take on the screen. ♦Press < > to configure settings or apply effects. For more information, see “Camera Options in Capture Mode” below.♦You can change the brightness using the left and right navigation keys. ♦You can change the Viewfinder Mode using the Up navigation key. Press the key to cycle between No Icons, Icons, and Guidelines.♦You can change the Timer setting using the Down navigation key (see below). 3. Press [ ] (on the top of the phone) to take the picture.Camera Options in Capture ModeCamera options are accessed using the < > key. Use the left and right navigation keys to scroll to individual options, then the up and down navigation keys to make a selection. Press [ ] to confirm a new selection.The options associated with the < > key are:](https://usermanual.wiki/Samsung-Electronics-Co/SGHF406/User-Guide-999669-Page-74.png)
![Media701. From the Idle screen, press [ ], select Media →Media Applications → Camera, and turn the camera 90 counter-clockwise. The camera opens in either Camera or Camcorder mode (indicated by the icon on the top left corner of the screen), depending the mode last used. To change the shooting mode, press or press < > and select Camcorder. 2. Aim the camera lens at the subject and frame the starting point for the video on the screen. ♦Press < > to configure settings or apply effects. For more information, see “Camcorder Options in Capture Mode” below.♦You can change the brightness using the left and right navigation keys. ♦You can change the Viewfinder Mode using the Up navigation key. Press the key to cycle between No Icons, Icons, and Guidelines.♦You can change the Timer setting using the Down navigation key (see below). 3. Press [ ] (on the top of the phone) to start recording. Press [ ] to pause recording and again to restart. 4. When you are finished, press [ ] or < > to stop recording.The video clip is saved in the Videos folder. You can preview it by pressing [ ]. Press < > to return to the recording screen or access various options by pressing < >. For more information on menu options, see “Camcorder Options After Recording a Video” on page 72.Camcorder Options in Record ModeCamcorder options are accessed using the < > key. Use the left and right navigation keys to scroll to individual options, then the up and down navigation keys to make a selection. Press [ ] to confirm a new selection.The options associated with the < > key are:](https://usermanual.wiki/Samsung-Electronics-Co/SGHF406/User-Guide-999669-Page-78.png)
![Media72♦Keypad shortcuts include:Camcorder Options After Recording a VideoWhen you press < > after saving a video, the following options are available:♦Record Video: returns to the active camcorder screen so you can take another video.♦Send: Allows you to send the video in a message or to an online album.♦Delete: Deletes the video clip.Media PlayerThe media player lets you access and play music files saved on the phone or a microSD memory card.To access music files and playlists:1. From the Idle screen, press [ ], select Media →Media Applications → Media Player.2. The Media Player Library provides the following choices:•Now Playing: displays details of a song currently playing or paused.•All Music: Displays a list of all songs currently available on the phone and the microSD memory card (if inserted).•Artists: Displays a list of all artists performing the available songs. To view a list of the available albums by an artist, highlight the name and press [ ]. To view a list of the available songs on an album, toggles between Camera and Camcorder Modechanges the Recording Mode changes the Timer settingchanges the Viewfinder Mode](https://usermanual.wiki/Samsung-Electronics-Co/SGHF406/User-Guide-999669-Page-80.png)
![Media73highlight the name and press [ ]. To play a song, highlight the title and press [ ].•Albums: Displays a list of all albums currently available on the phone or an inserted microSD card. To view a list of the songs on an album, highlight the name and press the key. To play a song, highlight the title and press the key.•Playlists: shows Recently played playlists, Most played playlists, and a list of saved playlists. It also allows you to create a new playlist.•Genres: Lists the available music by genre.Playing a Music FileWhile viewing Media Player files, as described above, highlight the file you want to play and press [ ] to launch the Media player and play the file. While an audio file is playing, the left and right navigation keys operate as Last Track/Next Track controls and [ ] as Pause control. Before or after a file is played, you can press <Options> for additional options (see below).Media Player OptionsWhen you open the Media Player and highlight a music file, the following options are available by pressing <Options>:♦Add to Playlist: Lets you add the selected file, multiple files or all files to a new or existing playlist.♦Send via: Lets you send the selected file to a recipient in a Message, via Bluetooth to another Bluetooth device or to an Online Album.♦Delete: Lets you delete the selected file, multiple files or all files. ♦Properties: Displays the properties of the selected file (Title, Size, Format, Duration, Artist, Album, Genre, Forwarding, Created, Location).](https://usermanual.wiki/Samsung-Electronics-Co/SGHF406/User-Guide-999669-Page-81.png)
![Media74When you select a music file, the following options are available by pressing <Options>:♦Pause/Resume: Allows you to stop and restart the currently playing music selection.♦Transfer to Bluetooth Stereo Headset: Selects whether to play the selected file through the phone’s speakers or Bluetooth stereo headphones (see below).♦Hide Player: Displays or hides the on-screen playback controller image.♦Shuffle: Plays all files in random order. ♦Loop: Allows you to play the current selection or all music files in a continuous loop.♦Add to Playlist: Lets you add the selected file to a new or existing playlist.♦Send via: Lets you send the selected file to a recipient in a message or via Bluetooth to another Bluetooth device.♦Equalizer: Allows you to set music player’s tonal balance to optimize it for Normal, Rock, Pop, Dance, Classic or Jazz music.♦Delete: Lets you delete the selected file, multiple files or all files. ♦Properties: Displays the properties of the selected file (Title, Size, Format, Duration, Artist, Album, Genre, Forwarding, Created, Location).Play Music Through a Stereo Bluetooth DeviceYour phone supports the Stereo Bluetooth profile (A2DP) that will play back music in stereo on a stereo Bluetooth headset. Your phone must be paired to a stereo Bluetooth device (see “Bluetooth” on page 155 for instructions). To play music through a paired stereo Bluetooth headset, during playback press <Options>, highlight Transfer to Bluetooth Stereo Headset and press <Select> or [ ].](https://usermanual.wiki/Samsung-Electronics-Co/SGHF406/User-Guide-999669-Page-82.png)
![Media75Record AudioRecord Audio allows you to record audio clips such as voice memos and send audio clips to other people.To create an audio recording:1. From the Idle screen, press [ ] and select Media → Media Applications →Record Audio.2. To begin recording, press [ ].3. To pause the recording, press [ ]. To stop recording and save the file press <Stop>.4. To play back the recording, press [ ].Using Record Audio OptionsBefore recording, you can access various options by pressing <Options>. To execute an option, select it and press <Select> or [ ]. The following options are available:♦Record: Immediately begins recording an audio clip.♦Go to Voice Notes: Takes you to the Voice Note folder where recorded audio clips are stored.♦Record Audio Settings: Allows you to select the Default Name and maximum Recording Time (1 Minute, 2 Minutes, 3 Minutes, 4 Minutes, 5 Minutes, 60 Minutes or Limit for MMS).After saving a recorded file you can access various options by pressing <Options>. To execute an option, highlight it and press <Select> or [ ]. The following options are available:♦Play: Plays back the recorded file.♦Record: Immediately begins recording an audio clip.♦Go to Voice Notes: Takes you to the Voice Notes folder, which contains audio files that you have created using the built-in recorder.](https://usermanual.wiki/Samsung-Electronics-Co/SGHF406/User-Guide-999669-Page-83.png)
![Media76♦Record Audio Settings: Allows you to select the Default Name and maximum Recording Time (1 Minute, 2 Minutes, 3 Minutes, 4 Minutes, 5 Minutes, 60 Minutes or Limit for MMS).♦Send via Messages: Lets you send the selected file to a recipient in a picture message.♦Set as: Lets you use the recording as an alarm tone. Select an alarm option (Wake-up alarm, Alarm 1 -4). Program the alarm options (see “Alarms” on page 127) then press <Save> or [ ] to confirm the choice.♦Delete: Lets you delete the selected file or multiple files.♦Rename: Lets you specify a unique name for the audio file. Otherwise, the default naming convention is used. Note that you can also change the default naming convention (see “Record Audio Settings” on page 167).♦Lock/Unlock: Locking prevents the file from being accidentally deleted. A locked file must be unlocked before it can be deleted.♦Properties: Display the properties of the currently selected media file (Size, Format, Duration, Forwarding, Created, Location).Other FilesThis folder provides a location where you can store other types of files on your phone, such as spreadsheets, text files and presentations. You can send these files to others by message or Bluetooth. You can also move or copy files to your memory card.To open the Other Files folder:1. From the Idle screen, press [ ] and select Media → Other Files. If there is a memory card in your phone, you can access files stored in your phone or on the card using the to switch between On phone and On card.While in the Other Files folder, press <Options> to access the following options (availability depends on the type of file currently highlighted):](https://usermanual.wiki/Samsung-Electronics-Co/SGHF406/User-Guide-999669-Page-84.png)
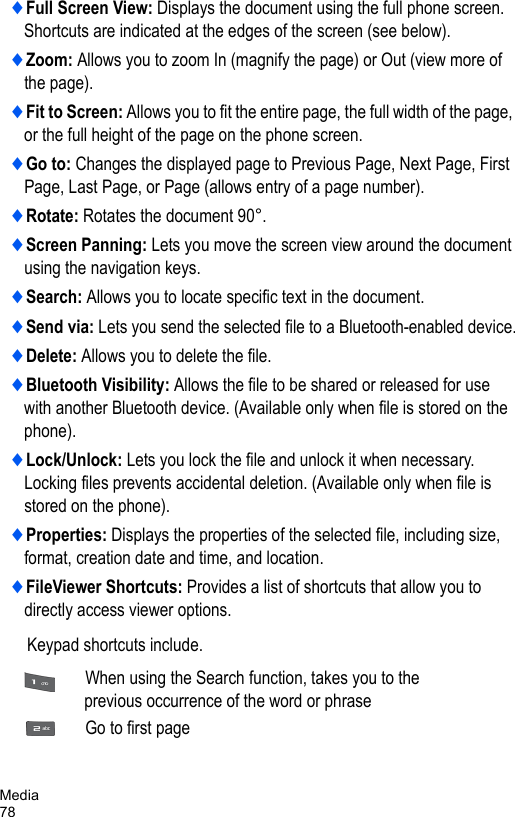
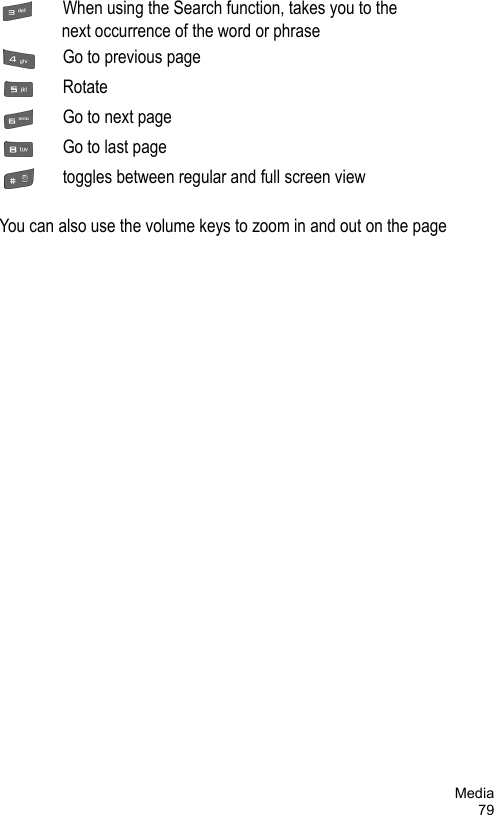
![Media77♦View: Lets you view the contents of the selected file.♦Send via Bluetooth: Lets you send the selected file to a Bluetooth-enabled device.♦Move: Lets you move one or more files to another location in the phone or a microSD memory card if one is inserted. Highlight the location you want to move the file(s) to and press [ ].♦Copy: Lets you copy one or more files to another location in the phone or a microSD memory card if one is inserted. Highlight the location you want to copy the file(s) to and press [ ].♦Delete: Lets you delete the selected file or multiple files.♦Rename: Lets you change the name of the selected file.♦Create Folder: Lets you create a sub-folder.♦Sort by: Lets you arrange files by Date, Type, Name, or Size.♦Properties: displays all the properties of the currently selected file.Memory StatusThe Memory Status menu allows you to view the memory usage and available space in your phone and on an inserted microSD card. It displays the total memory used and available as well as the memory usage for each storage folder. Use the left or right navigation key to toggle between On Phone and On Card.Document Viewer Your phone includes the NetFront Document Viewer that enables full viewing of Microsoft Office documents (Word, Excel®, and PowerPoint®), PDF files and text files with selectable zooming and rotation features. To view a file, highlight it and press [ ] or <Options>, highlight View and press the Select soft key or the key.While viewing a file, the following options are available:](https://usermanual.wiki/Samsung-Electronics-Co/SGHF406/User-Guide-999669-Page-85.png)
![Games & Apps80Games & AppsUsing the Games & Apps menu (Menu 3) you can play games already stored on your phone, as well as download games and other applications from your service provider.GamesGet New GamesThis selection allows you to download games from your service provider. 1. From the Idle screen, press [ ] and select Games & Apps → Get New Games. The browser launches and opens the Games screen. 2. Follow the on-screen options to select and download a file.Press <Options> to access browser options (see “Using the Internet Browser” on page 108).Game OptionsWhen a game is highlighted in the Games & Apps screen, you can access the following options by pressing <Options>:♦Start: Starts the game.♦Delete: Lets you delete the selected game or multiple games.♦Rename: Lets you rename the selected game.♦Lock/Unlock: Allows you to lock the file so it can not be deleted. Files must be unlocked before they can be deleted.♦Connections: Allows you to view and change network settings (APN, Login ID, Password and Proxy).♦Properties: displays the properties of the selected game, including Size, Version, Supplier, Creation Date and Time, Description and Location.](https://usermanual.wiki/Samsung-Electronics-Co/SGHF406/User-Guide-999669-Page-88.png)
![Games & Apps81♦Play a GameTo play a game:1. From the Idle screen, press [ ] and select Games & Apps.2. Scroll to the game you want to play and press [ ] or <Options> and select <Start>.3. The game’s welcome screen displays information about the game. Follow the on-screen instructions to play the game.Game ControlsGet New ApplicationsThis selection allows you to download applications from your service provider. 1. From the Idle screen, press [ ] and select Games & Apps → Get New Applications. 2. Follow the on-screen options to select and download a file.Downloaded applications are added to the Games and Apps menu.Press <Options> to access browser options (see “Using the Internet Browser” on page 108).While playing a game, to Press theadjust the sound volume Volume keysexit the game keyhighlight an option in a list Navigation keysselect an option key](https://usermanual.wiki/Samsung-Electronics-Co/SGHF406/User-Guide-999669-Page-89.png)
![Call History82Call HistoryIn this menu (Menu 4), you can:♦View details of calls you missed, received or dialed♦Add phone numbers from your call history to Speed Dial♦View the length of calls made and receivedWhile in any of the call lists, press <Options> to access the following functions:♦Details: View call details (phone number, date and time of call).♦Voice Call: Makes a voice call to the highlighted number.♦Video Call: Makes a video call to the highlighted number.♦Save to Contacts: Saves the number to Contacts, either on your SIM card or in the phone.♦Send Message: Lets you send a message to the caller.♦Delete: Lets you delete the selected call or all calls from the list.♦Add to Reject List: Adds the phone number the selected call was made from to the Reject List. To view and configure your reject list, see “My Business Card” on page 120.All Calls This menu (Menu 4.1) lets you view a list of calls made and received, including missed calls. Icons at the left of each listing indicate whether the call was made ( ), received ( ) or missed ( ). 1. From the Idle screen, press [ ] and select Call History → All Calls. 2. Scroll through the list and press [ ] or press <Options> and select Details to view call details, including number, time and date.Note: You can access the most recent numbers in All Calls by pressing [ ] in Idle mode.](https://usermanual.wiki/Samsung-Electronics-Co/SGHF406/User-Guide-999669-Page-90.png)
![Call History83Missed Calls This menu (Menu 4.2) lets you view a list of calls you received but did not answer. 1. From the Idle screen, press [ ] and select Call History → Missed Calls. 2. Scroll through the list and press [ ] or press <Options> and select Details to view call details. The number is displayed along with the time and date when the call was made.Calls MadeThis menu (Menu 4.3) lets you view a list of the numbers you dialed.1. From the Idle screen, press [ ] and select Call History → Calls Made. 2. Scroll through the list and press [ ] or press <Options> and select Details to view call details. The number is displayed along with the time, date and duration of the call.Calls ReceivedThis menu (Menu 4.4) lets you view a list of calls you answered.1. From the Idle screen, press [ ] and select Call History → Calls Received. 2. Scroll through the list and press [ ] or press <Options> and select Details to view call details. The number is displayed along with the time, date and duration of the call.](https://usermanual.wiki/Samsung-Electronics-Co/SGHF406/User-Guide-999669-Page-91.png)
![Call History84Speed Dial ListUsing Speed Dial (Menu 4.5), you can assign up to seven phone numbers from your Contact List to number keys 3 to 9 and dial them whenever you want simply by pressing and holding the associated number key.Note: Speed dial keys 1 and 2 are reserved for retrieving Voice Mail and Video Mail.To add a speed dial entry:1. From the Idle screen, press [ ] and select Call History → Speed Dial List. A virtual representation of your keypad appears onscreen with existing speed dial entries shown within their associated key.2. Highlight the keypad number you want to associate with a speed dial number, press <Options> and select Add.3. Select either Contacts or FDN Contacts to choose an entry (Fixed Dial Number mode, if enabled, restricts outgoing calls to phone numbers stored in the FDN List).4. Choose an entry from the list and press [ ] or <Select>. The virtual keypad reappears with the new speed dial entry appearing in its associated key.When an existing Speed Dial entry is highlighted, the following options are available by pressing <Options>:♦View: Allows you to view the number assigned to the key.♦Change: Allows you to assign a different number to the key.♦Voice Call: Dials the selected speed dial number to start a voice call.♦Video Call: Dials the selected speed dial number to start a video call.♦Remove: Allows you to clear the setting so that no number is assigned to the key. Press <Yes> to confirm number removal.](https://usermanual.wiki/Samsung-Electronics-Co/SGHF406/User-Guide-999669-Page-92.png)
![Call History85Using Speed DialFrom Idle mode, you can speed-dial the numbers assigned to numeric keys 3 to 9 by pressing and holding the key until the phone begins dialing. Delete AllThis menu (Menu 4.6) allows you to delete all of the records in one or more call record types.1. From the Idle screen, press [ ] and select Call History → Delete All.2. Highlight the type(s) of records you want to delete and press [ ] to enter a check mark in the selection box at the left side.3. Press <Delete> and when a message displays asking you to confirm the deletion, press <Yes> to confirm.Voice Call TimeThis menu (Menu 4.7) lets you view timers for voice calls you made and received. Note: The actual time invoiced for calls by your service provider may vary, depending on network features, rounding-off for billing purposes, etc.From the Idle screen, press[ ] and select Call History → Voice Call Time.The following timers are available:♦Last Voice Call Time: Length of the last voice call.♦Total Sent: Total length of all voice calls made from this phone.♦Total Received: Total length of all voice calls received on this phone.To reset Last Voice Call Time, press <Reset>. Enter the phone password and press <Confirm> or [ ].](https://usermanual.wiki/Samsung-Electronics-Co/SGHF406/User-Guide-999669-Page-93.png)
![Call History86Note: Total times can not be reset.Video Call TimeThis menu (Menu 4.8) lets you view timers for video calls you made and received. Note: The actual time invoiced for calls by your service provider may vary, depending on network features, rounding-off for billing purposes, etc.From the Idle screen, press [ ] and select Call History → Video Call Time.The following timers are available:♦Last Video Call Time: Length of the last video call.♦Total Sent: Total length of all video calls made from this phone.♦Total Received: Total length of all video calls received on this phone.To reset Last Voice Call Time, press <Reset>. Enter the phone password and press <Confirm> or [ ] .Note: Total times can not be reset.](https://usermanual.wiki/Samsung-Electronics-Co/SGHF406/User-Guide-999669-Page-94.png)
![Messages89MessagesFrom the Messages menu (Menu 6), you can send and receive a range of different message types from your mobile phone, including:♦Instant Message: Fido IM (Instant Messenger) lets you send and receive instant messages using Windows Live and Yahoo! communities.♦MobileMail: Lets you send and receive email messages.♦Text Message: Short Message Service (SMS) allows you to exchange text messages with other text messaging-capable phones. ♦Picture Message: Multimedia Messaging Service (MMS) allows you to exchange messages containing text and graphics, video and audio attachments with other MMS capable phones. You can also send messages to email addresses.♦Broadcast Messages: messages received from your service provider containing information related to a specific area (cell). You can also use your phone to access Voice Mail (recorded voice) messages.Fido IMInstant Messaging or IM (Menu 6.1) is a way of sending short, simple messages that are delivered immediately to other users. To use this feature, you must be subscribed to a message service. For further details, contact your service provider.Sign InYou phone must be signed in to an IM service in order to send and receive instant messages.To sign in to your instant messaging account:1. From the Idle screen, press [ ] and select Messages → Fido IM.](https://usermanual.wiki/Samsung-Electronics-Co/SGHF406/User-Guide-999669-Page-97.png)
![Messages902. Choose the IM service you want to access (Windows Live or Yahoo!) and press [ ] or <Save>. 3. Choose Sign In and enter or change the required information (varies depending on the IM community you are accessing). If you want to save your password in the phone and enable Automatic Sign-In when the phone is switched on, highlight each item and press [ ] to place a check mark in the associated selection box. Note: Saving your password can pose a security risk if your phone is lost or stollen.4. Press <Options> and select Sign In.Sending an Instant MessageAfter you sign in, follow the on-screen instructions to read, reply to, compose, and send messages, and to manage your IM account. Use the Options menu to perform tasks such as adding and blocking contacts or configuring your display name.Sign OutTo sign out of your instant messaging account, highlight Sign Out on the Fido IM screen and press <Select> or [ ]. Saved ConversationsThis menu lists all saved IM conversations.SettingsThe following settings are available in the Settings menu.](https://usermanual.wiki/Samsung-Electronics-Co/SGHF406/User-Guide-999669-Page-98.png)
![Messages91Choose Your CommunityTo change to a different IM service, select Messages → Fido IM → Settings → Choose Your Community. Choose the IM service you want to access (Windows Live or Yahoo!) and press [ ] or <Save>.Community Setting♦Favorite IDs: Opens a list of favorite IDs (Email address and password).♦Automatic Sign In: Select On or Off.♦Power On Sign In: Select On or Off.♦Sound Settings: Lets you choose sound settings for Receive Message, Contact Alert, and System Message (Melody, Vibration, Vibration then Melody, or Mute); and set Repetition (Once or Repeat) and Message Tone.Profile SettingThe FidoWAP network profile is selected. Press <Options> and select Edit to make any required changes to the Fido WAP settings. HelpSee the help screens for more information on accounts, signing in, sending IM, etc.MobileMailMobileMail (Menu 6.2) lets you check your email and send email to any email address. Recipients can access your emails from email-equipped phones or from their computers. The messages you create can contain text, photos, videos and voice attachments.Your phone allows selection of three online email services: Rogers Yahoo! Mail, Yahoo! Mail or Windows Live Hotmail.](https://usermanual.wiki/Samsung-Electronics-Co/SGHF406/User-Guide-999669-Page-99.png)
![Messages92Follow the online instructions shown on your display screen after you launch one of these service.Note: This online service is provided and maintained by Fido and requires paid subscription. It is not specific to your phone. Contact your service provider or consult the insert provided with your phone for additional information.Create New MessageUse the Create New Message menu (Menu 6.3) to compose new text (SMS) and picture (MMS) messages and send them to other messaging-capable phones.Create and Send a Text MessageNote: When creating a text (SMS) message, adding elements such as a subject line or image, sound or video files automatically changes the message type to Picture (MMS).To create and send a text message: 1. From the Idle screen, press [ ] and select Messages → Create New Message.2. Enter the recipient’s mobile phone number in the address box. ♦You can enter additional recipients by pressing the Right navigation key to move the cursor to the right of the semicolon (;).♦You can also press <Options> and select Add Recipient to add recipients from your Recent log or your Contacts or Group lists.•Recent Log: allows you to choose from a list of recent calls. Highlight a required entry and press [] to place a check mark next to the entry. Use the same procedure to select any additional recipients. When you have selected all required entries, press <Add> to add the recipients to the address box.](https://usermanual.wiki/Samsung-Electronics-Co/SGHF406/User-Guide-999669-Page-100.png)
![Messages93•Contacts: allows you to insert recipients from your Contacts list. To find a specific name, begin entering the letters of the name. As you type, the first Contacts entry matching your input is highlighted. To select a different entry, press the Up or Down navigation key until the entry you want is highlighted. Press [] to place a check mark next to the entry. Use the same procedure to select any additional recipients. When you have selected all entries, press <Done> to add the recipients to the address box.•Groups: allows you to insert Group members from your Contacts list. Highlight a Group and press [] or <Select> to open the Group. Use the Up and Down Navigation keys to highlight a name and press [] to place a check mark next to the entry. Use the same procedure to select any additional recipients. When you have finished, press <Done> to add the recipients to the address box.3. Type your message in the message window. The number in the bottom right corner of the screen displays the number of characters still available. For further information on entering characters, see “Entering Text” on page 41.While you are composing your text message, press <Options> to select any of the following:♦Send: Sends the message.♦Text Selection On/Off: When Text selection is on, you can use the navigation keys to highlight text then press [ ] to access Cut, Copy, Paste, and Remove features. When Text selection is off, you can move the cursor without highlighting text.♦Add Item: Lets you add an Image, Sound or Video to the message. Note: this converts the message to picture message (MMS) format.♦Create Item: Lets you take a picture or record a sound or video file to be sent in the message (Note: this changes the message to a picture message). For information on the camera, audio recorder or camcorder, see “Media Applications” on page 65.](https://usermanual.wiki/Samsung-Electronics-Co/SGHF406/User-Guide-999669-Page-101.png)
![Messages95♦Sending Options: Lets you configure default message settings. For information, see “Messages Settings” on page 112.♦Save to Drafts: Saves the message to the Drafts folder.♦Save as Template: Saves the message as a template in the Templates folder.4. When you finish entering your message, press <Options> or [ ] and select Send. Your phone sends the text message to all numbers listed.Create and Send a Picture MessageUse the following procedures to compose and send new messages with graphics, video or audio attachments. 1. From the Idle screen, press [ ] and select Messages → Create New Message.2. Enter the recipient’s mobile phone number in the address box. ♦You can enter additional recipients by pressing the Right navigation key to move the cursor to the right of the semicolon (;).♦You can also press <Options> and select Add Recipient to add recipients from your Recent log or your Contacts or Group lists.•Recent Log: allows you to choose from a list of recent calls. Highlight a required entry and press [] to place a check mark next to the entry. Use the same procedure to select any additional recipients. When you have selected all required entries, press <Add> to add the recipients to the address box.•Contacts: allows you to insert recipients from your Contacts list. To find a specific name, begin entering the letters of the name. As you type, the first Contacts entry matching your input is highlighted. To select a different entry, press the Up or Down navigation key until the entry you want is highlighted. Press [] to place a check mark next to the entry. Use the same procedure to select any additional recipients.](https://usermanual.wiki/Samsung-Electronics-Co/SGHF406/User-Guide-999669-Page-103.png)
![Messages96When you have selected all entries, press <Done> to add the recipients to the address box.•Groups: allows you to insert Group members from your Contacts list. Highlight a Group and press [] or <Select> to open the Group. Use the Up and Down Navigation keys to highlight a name and press [] to place a check mark next to the entry. Use the same procedure to select any additional recipients. When you have finished, press <Done> to add the recipients to the address box.3. Highlight the message window, press <Options>, select Change to Picture Message and press <Yes> to confirm the change.4. To add a subject to the message, press <Options> and select Add Subject. Enter the required text then press the Down navigation key to return to the message screen.5. Type your message. The number in the bottom-right corner of the screen displays the number of characters still available. For further information on entering characters, see “Entering Text” on page 44.While you are composing your message, press <Options> to select any of the following:♦Send: Sends the message.♦Preview: Allows you to preview the message before sending.♦Text Selection On/Off: When Text selection is on, you can use the navigation keys to highlight text then press [ ] to access Cut, Copy, Paste, and Remove features. When Text selection is off, you can move the cursor without highlighting text.♦Add Item: Opens the Media menu to allow the addition of image, sound, or video files to the message. For information on using the Media menu, see “Media” on page 54.♦Create Item: Lets you take a picture or record a sound or video file to be sent in the message (Note: this changes the message to a](https://usermanual.wiki/Samsung-Electronics-Co/SGHF406/User-Guide-999669-Page-104.png)
![Messages98Report, Request Read Report, and Keep a Copy). For information, see “Messages Settings” on page 112.♦Save to Drafts: Saves the message to the Drafts folder.♦Save as Template: Saves the message to the Template folder to allow use in the future when creating similar messages. 6.When you are finished entering your message, press <Options> or [] and select Send. Your phone sends the text message to all numbers listed.Message FoldersAll incoming and outgoing text and picture messages are saved in a series of folders on your phone.♦Inbox (Menu 6.4): Stores received messages.♦Sent (Menu 6.5): Stores messages you have sent successfully.♦Outbox (Menu 6.6): Temporarily stores messages and emails your phone is attempting to send. It also stores messages that you have created and configured to be sent some time in the future. Messages are moved to the Sent folder after they are successfully sent.♦Drafts (Menu 6.7): Stores unsent messages you have manually saved as drafts. You can access these drafts and send them at a later time.♦My Folder (Menu 6.8): provides a customizable storage area for messages. You can create subfolders here and manually move messages into them from other folders. This is useful, for example, if you want to store personal messages and business messages separately.♦Templates (Menu 6.9): Accesses message files saved as templates. For information, see “Templates” on page 100.Note: If the phone’s memory is full, an error message displays and you cannot receive any new messages. Use the Delete option to delete unnecessary messages in each message box.](https://usermanual.wiki/Samsung-Electronics-Co/SGHF406/User-Guide-999669-Page-106.png)
![Messages99View MessagesTo view a message stored in one of the message folders:1. From the Idle screen, press [ ] and select Messages → message folder (Inbox, Sent, Outbox, or Drafts). The corresponding message list opens. 2. To open a message in the list, scroll to the message and press [ ] or press <Options> and select View.Message Folder OptionsWhile viewing a message list or a message, you can press <Options> to access a series of options (not all options are available in each menu):♦View: Allows you to view the selected message.♦Play: Plays a sound or video file received with a message.♦Edit: Lets you edit a draft message.♦Reply: Allows you to reply to the selected message.♦Reply to All: Allows you to reply to the sender and other recipients of a message.♦Send: Allows you to send an unsent message.♦Send Again: Resends the selected message.♦Forward: Allows you to forward the message to someone.♦Voice Call: Makes a voice call to the message’s originating number.♦Video Call: Makes a video call to the message’s originating number.♦Preview: Previews multimedia files attached to the message.♦Delete: Allows you to delete the selected message or multiple messages.♦Move to Phone/Move to SIM: If a message is stored in the SIM card, this option transfers it to the phone’s memory. If a message is stored in the phone’s memory, it is transferred to the SIM card.](https://usermanual.wiki/Samsung-Electronics-Co/SGHF406/User-Guide-999669-Page-107.png)
![Messages100♦Move to My Folder: Lets you move messages to the My Folder storage area.♦Sort by: Allows you to sort messages by Date, Read/Unread, Sender, Type, Size or Subject.♦Save to Contacts: Lets you add the sender of the selected message to your phone or SIM card address book.♦Save as Template: Saves the message to the Template folder to be used in the future when creating similar messages. ♦Mark as Read: Lets you tag unread messages in your Inbox as having been read.♦Properties: Provides message details, including Date, To, Size, and Priority.♦Print via Bluetooth: Allows you to print received messages to a Bluetooth-enabled printer.♦Lock/Unlock: Prevents the message from being deleted.TemplatesTemplates let you save and reuse commonly used content for text and picture messages. For further details on sending messages, see “Messages” on page 89.Create a TemplateTo create a text template:1. From the Idle screen, press [ ] and select Messages → Templates.2. Highlight Text Templates or Picture Message Templates and press <Select> or [ ].](https://usermanual.wiki/Samsung-Electronics-Co/SGHF406/User-Guide-999669-Page-108.png)
![Messages1013. Press <Options> and select Add New to open a blank template (if the folder is empty, press <Add New>). Enter the text you want to save as a template. While the template screen is open, you can also press <Options> to access the following options:♦Save as Template: Saves the template file and adds it to the list of templates.♦Preview: Allows you to preview the message before sending.♦Text Selection On/Off: When Text selection is on, you can use the navigation keys to highlight text then press [ ] to access Cut, Copy, Paste, and Remove features. When Text selection is off, you can move the cursor without highlighting text.♦Add Item: Opens the Media menu to allow the addition of image, sound, or video files to the message. For information on using the Media menu, see “Media” on page 54.♦Create Item: Lets you take a picture or record a sound or video file to be sent in the message (Note: this changes the message to a picture message). For information on the camera, audio recorder or camcorder, see “Media Applications” on page 72. ♦Insert: Allows you to insert text from a Text Template, a Text Emoticon, contact information from Contacts, or a bookmarked URL from Bookmarks.♦Add/Delete Page: Adds or Deletes a page to/from the message. Pages are delineated by a dotted line in the message text box. The current page is indicated in the bottom-left corner of the screen.♦Input Language: Allows you to temporarily change the input language used to create your message between English and Français (French). ♦Input Method: Allows you to change the input method for adding text, numbers and symbols to your message. For more information, see “Changing the Text Input Mode” on page 44.](https://usermanual.wiki/Samsung-Electronics-Co/SGHF406/User-Guide-999669-Page-109.png)
![Messages102♦Edit Style: Allows you to change text and page styles, including background color, font color, font style, etc.♦Add Attachment: Lets you attach various kinds of information, including a File; a Business Card; Appointment, Anniversary, Private, Holiday, Important, Tasks, and Notes information from your calendar; or a Bookmark.4. To save the template, press [ ] or press <Options> and select Save as Template.Use a TemplateTo access templates:1. From the Idle screen, press [ ] and select Messages → Templates.2. Highlight Text Templates or Picture Message Templates and press <Select> or [ ].3. Scroll to a template and press [ ] to enter the text directly into a new text message or <Options> to access the following options:♦View: Lets you preview the content of the template (picture message only).♦Send: Allows you to compose a message with the template content inserted into the body of the message. For further details on sending messages, see “Messages” on page 97.♦Add New: Lets you create a new template.♦Edit: Allows you to edit the template text. ♦Delete: Allows you to delete the selected template or all templates. Press <Yes> to confirm the deletion.](https://usermanual.wiki/Samsung-Electronics-Co/SGHF406/User-Guide-999669-Page-110.png)
![Messages103Voice MailThese menus allows you to access your voice mailbox, if your account supports this service. Note: Voice mail is a network feature. Please contact your service provider for further details.Configure Voice MailBefore using your phone’s Voice Mail feature, you must have a valid voice/video server number configured in your phone. If your service provider has not configured the number for you already or you need to change the number, use the following procedure to enter the voice server number obtained from your service provider. 1. From the Idle screen, press [ ] and select Messages → Voice Mail → Voice Mail Number.2. Press <Edit>. If you want to identify the server by a name other than “Voice/Video Mail Number”, enter the new name in the box below Name. Enter the server number in the box below Voice/Video Mail Number.3. Press [ ] or <Save> to save the number in your phone. Listen to Voice MailTo listen to your voice mail messages:1. From the Idle screen, press [ ] and select Messages → Voice Mail → Connect to Voice Mail. Your phone connects to the mail server.2. Follow the recorded instructions to listen to your messages.Note: You can also automatically dial voice mail directly from the Idle screen by pressing and holding []](https://usermanual.wiki/Samsung-Electronics-Co/SGHF406/User-Guide-999669-Page-111.png)
![Messages104Video MailThese menus allows you to access your video mailbox, if your account supports this service. Note: Voice mail is a network feature. Please contact your service provider for further details.Configure Video MailBefore using your phone’s Video Mail feature, you must have a valid voice/video server number configured in your phone. If your service provider has not configured the number for you already or you need to change the number, use the following procedure to enter the voice server number obtained from your service provider. 1. From the Idle screen, press [ ] and select Messages → Video Mail → Video Mail Number.2. Press <Edit>. If you want to identify the server by a name other than “Voice/Video Mail Number”, enter the new name in the box below Name. Enter the server number in the box below Voice/Video Mail Number.3. Press [ ] or <Save> to save the number in your phone. Listen to Video MailTo listen to your video mail messages:1. From the Idle screen, press [ ] and select Messages → Video Mail → Connect to Video Mail. Your phone connects to the mail server.2. Follow the recorded instructions to listen to your messages.Note: You can also automatically dial video mail directly from the Idle screen by pressing and holding []](https://usermanual.wiki/Samsung-Electronics-Co/SGHF406/User-Guide-999669-Page-112.png)
![Messages105Delete AllUse this menu to delete groups of messages:1. From the Idle screen, press [ ] and select Messages → Delete All. 2. Use the navigation keys to move through the list of folders and press [ ] to check or uncheck categories of messages.3. When you have finished making selections, Press <Delete> → <Yes> to delete messages in all checked categories. If any messages are locked, a message appears asking whether to delete locked messages; press [ ] to check or uncheck the selection box, as required. Messages SettingsThis menu lets you configure various options for using text and picture messaging services. To access the Messages Settings menu:1. From the Idle screen, press [ ] and select Messages → Messages Settings. For details on the various messages settings, see “Message Settings” on page 162.Memory StatusThe Memory Status menu allows you to view the usage and available memory in your phone and on your SIM card. It displays the total memory used and available as well as the memory usage for each storage folder. Use the left or right navigation key to toggle between Text Message, Picture Message and Push Message.To access the Memory Status menu:1. From the Idle screen, press [ ] and select Messages → Memory Status.](https://usermanual.wiki/Samsung-Electronics-Co/SGHF406/User-Guide-999669-Page-113.png)

![Internet108InternetThis menu selection (Menu 7) opens the Internet Browser and automatically accesses the Fido home page. You can also view other Internet sites, view sites saved as Bookmarks, create Bookmarks, clear your cache or manage cookies.Accessing an Internet SiteThere are three ways to access an Internet site:♦Select a link on the screen♦Enter the Web address directly on the phone screen (see Go to URL in “Browser Options” on page 109).♦Select a bookmark in the Bookmarks list (see “Bookmarks” on page 110).Using the Internet BrowserWhile using the Internet Browser, the following navigational controls are available:To Pr es s t hescroll through and select browser itemsup or down navigation keys until the item is highlighted, then press [ ] to confirm select a numbered item corresponding numeric keyreturn to the previous page press <Options> and select Go → Backward, or press [ ]return to the startup home pagepress <Options> and select Go to Homepage](https://usermanual.wiki/Samsung-Electronics-Co/SGHF406/User-Guide-999669-Page-116.png)
![Internet109Entering Text in the Internet BrowserWhen you are prompted to enter text, the current text input mode is indicated at the upper right side of the screen. See “Entering Text” on page 41 for more information.Browser OptionsWhile using the Browser, press <Options> to access the following functions:♦Go to URL: Opens a page where you can enter a URL and access the associated Internet site. Press [ ] to activate the URL entry area. Enter the address of the site you wish to access. Press the Down navigation key to highlight Submit, then press [ ] to open the Web page.♦Go: Lets you navigate through pages in your browsing history, either Forward (next sequenced web page) or Backward (previously visited web page).♦Reload: Reloads the current page.♦Desktop/Smart-Fit View: Changes the display mode of the browser.♦Page Size: Lets you change the page size of the displayed web page by zooming using the Left and Right navigation keys.♦Go to Homepage: Takes you back to the homepage of the Wireless Web service provider.♦Add to Bookmarks: Adds the current page to your Bookmarks list. exit the browser press []To Pre ss t he](https://usermanual.wiki/Samsung-Electronics-Co/SGHF406/User-Guide-999669-Page-117.png)
![Internet111Go to Bookmarks1. With the browser open, press <Options> and select View Bookmarks.2. Scroll to the bookmark you want to access and press [ ] or press <Options> and select Go to. While in the View Bookmarks menu, press <Options> for the following choices:♦Go to: Accesses the bookmarked page.♦Edit Bookmarks: Lets you edit the title and/or URL of the selected bookmark.♦Add Bookmarks: Lets you directly enter a title and URL for a bookmark and save the bookmark.♦Send URL via: Send the URL of the current page via a text message or Bluetooth.♦Copy URL to Message: Copies the URL into the body of a message.♦Save to Media: Saves the URL to the Other Files folder in the Media menu.♦Delete: Removes the bookmark or all bookmarks. Store a BookmarkUse the following procedure to store the URL of a page you are viewing in your Bookmarks list.1. With the Browser open and displaying the page, press <Options> and select Add to Bookmarks. The message “Bookmark Saved” displays to confirm that the bookmark was successfully stored.Edit a BookmarkUse the following procedure to edit the name or URL of a Bookmark stored in your Bookmarks list:](https://usermanual.wiki/Samsung-Electronics-Co/SGHF406/User-Guide-999669-Page-119.png)
![Internet1121. With the browser open, press <Options> and select View Bookmarks.2. Choose the Bookmark you want to change, press <Options> and select Edit Bookmarks.3. Change the Title and URL as required. 4. Press [ ] or <Save> to save the changes.Deleting BookmarksUse the following procedure to delete a bookmark from your list:1. With the browser open, press <Options> and select View Bookmarks.2. Choose the Bookmark you want to delete.3. Press <Options> and select Delete → Selected.4. Press <Yes> or [ ] to confirm the deletion.To delete all bookmarks: 1. With the browser open, press <Options> and select View Bookmarks.2. Press <Options> and select Delete → All.3. Press <Yes> or [ ] to confirm the deletion.](https://usermanual.wiki/Samsung-Electronics-Co/SGHF406/User-Guide-999669-Page-120.png)
![Contacts113ContactsThe Contacts menu (Menu 8) is used to manage your contact list. You can store names and phone numbers in both your SIM card and your phone’s memory, which are physically separate but both used to create the contact list. You can also create contact groups, an FDN list, and speed dial numbers.Note: When you change phones, numbers stored in your SIM card memory are automatically available with the new phone, whereas numbers stored in the phone’s memory must be re-entered or transferred using a data kit accessory. However, contacts stored on the phone may include additional details that can not be stored on the SIM card.Find Contact Information by NameTo view the stored information for a contact:1. From the Idle screen, press [ ] and select Contacts. 2. Begin entering the letters of the name. As you type, the first entry matching your input is highlighted. To select a different entry, scroll through the list until the entry you want is highlighted.3. Press [ ] to dial the number or [ ] to view the contact information.Contact List OptionsWhile accessing the Contact List, press <Options> to use any of the following options:♦View: Lets you view the information for the highlighted contact.♦Add New Contact: Allows you to create a new contact. See “Find Contact Information by Name” on page 113 for more information.♦Voice Call: Allows you to place a call to the highlighted contact.♦Video Call: Allows you to initiate a video call to the highlighted contact.](https://usermanual.wiki/Samsung-Electronics-Co/SGHF406/User-Guide-999669-Page-121.png)
![Contacts115♦Print via Bluetooth: Allows you send the selected contact entry information to a Bluetooth-enabled printer.♦Contacts Settings: Accesses the settings menu. For more information, see “Contact Settings” on page 167.♦Memory Status: Allows you to view the amount of memory allocated and available for the following categories: Phone, USIM, Additional No.1, Additional No.2, Email, and FDN.Add New ContactUse the following procedures to store a new contact to your phone or SIM card.Note: The default mode for saving contacts saves to your SIM Card. To set it to Phone or Ask on Saving, see “Contact Settings” on page 167.Storing a Number in the Phone’s Memory1. Enter the phone number you want to store directly on the Idle screen. 2. Press <Options> and select Save to Contacts. 3. If the saving mode is set to Ask on Saving, the Save to screen appears. Highlight Phone and press <Select> or [ ].4. Select New if this is a new contact or Update if you want to change an existing contact, then press <Select> or [ ]. The Add New Contact screen opens.Note: You can also access the Add New Contact screen from the Contacts menu. Press <Options> and select Add New Contact.](https://usermanual.wiki/Samsung-Electronics-Co/SGHF406/User-Guide-999669-Page-123.png)
![Contacts1165. Using the Up and Down navigation keys, highlight the type of number you have entered (Mobile, Landline, Fax, Video Call, etc.) and press [].6. In the Add New Contact screen, enter the information you want to save for this contact. The following fields are available for input:♦First Name: For recording the contact’s first name.♦Last Name: For recording the contact’s last name.♦Display Name: The name that appears when you receive a call from this contact.♦Phone Number: Allows entry of a phone number or, if you already entered a number, it appears here. To change the number type (Mobile, Landline, Fax, etc.) press <Options> and use the Left and Right navigation keys to select the type and corresponding icon.♦Phone Number 2: Allows you to enter an additional number for this contact. To change the number type (Mobile, Landline, Fax, etc.) press <Options> and use the Left and Right navigation keys to select the type and corresponding icon.♦E-Mail: For recording an e-mail address.♦Group: Lets you assign this contact to group. Press [ ] to open the Groups screen. Highlight a group and press <Select> or [ ].♦Caller ID: Lets you choose a graphic Caller ID for this contact. Highlight the Graphic ID icon and press [ ] to open the Media menu and select a graphic. For information on using the Media menu, see “Media” on page 54. ♦Ring Tune: Allows you to choose a ring tune that plays when this contact calls. Highlight the Ring Tune icon and press [ ] to open the Media menu. Highlight Ring Tunes and press <Select> or [ ]. For information on selecting a ring tune, see “Ring Tunes” on page 56.](https://usermanual.wiki/Samsung-Electronics-Co/SGHF406/User-Guide-999669-Page-124.png)
![Contacts117♦Instant Messaging: Allows you to assign an Instant Message profile to this entry.♦Notes: Lets you add any other information you wish to record with this contact.Note: You can change any number type designation (Mobile, Home, Office, Fax, Other). Press <Options> and select Change Type. Highlight the required type and press <Select> or [ ].For information on text and numeric entry, see “Entering Text” on page 41.7. To save the information, press [ ] or press <Options> and select Save. Storing a Number in the SIM Card 1. Enter the phone number you want to store directly on the Idle screen. 2. Press <Options> and select Save to Contacts. 3. If the saving mode is set to Ask on Saving, the Save to screen appears. Highlight SIM Card and press <Select> or [ ].4. Select New if this is a new contact, Update if you want to change an existing contact, then press <Select> or [ ]. The Add New Contact screen opens.Note: You can also access the Add New Contact screen from the Contacts menu. Press <Options> and select Add New Contact. 5. Enter the information you want to save for this contact. The following fields are available for input:♦Name: For recording the contact’s name.♦Phone Number: Allows entry of a phone number or, if you already entered a number, it appears here.](https://usermanual.wiki/Samsung-Electronics-Co/SGHF406/User-Guide-999669-Page-125.png)
![Contacts118• To change the number type (Mobile, Landline, Fax, etc.) press <Options> and select Enter Name of Number. Highlight the type of number (Work, Home, Mobile, Fax or Other) and press []. • To add a new number type, change the name assigned to any of the existing icons, or delete a number type, press <Options>. ♦Group: Allows you to assign this contact to group. Press [ ] to open the Groups screen. Choose from Business, Family, Friends, Other, Services or a group you have created. Press <Select> or [].♦Location: Allows you to assign a location on your SIM for the contact being entered. The default is the next available SIM location.6. To save the information, press [ ] or press <Options> and select Save. The phone displays a screen that lists the details of your new entry onto the SIM.GroupUsing groups you can organize your contacts into lists such as Family, Office and Friends. You can also assign a unique Caller ID or ring tune to members of the group.Note: Only contacts that are stored on the phone can be added to groups.Adding Contacts to a Group1. From the Idle screen, press [ ] and select Contacts.2. Press the left or right navigation key to select the Groups tab.3. Using the Up and Down navigation keys, scroll to the group that you wish to add the contact(s) to and press [ ].4. Press <Options> and select Add Member. The Contacts list opens.](https://usermanual.wiki/Samsung-Electronics-Co/SGHF406/User-Guide-999669-Page-126.png)
![Contacts1195. Using the Up and Down navigation keys, scroll to each name to be added to the Group and press [ ] to place a check mark in the selection box beside the name.To find a specific name, begin entering the letters of the name. As you type, the first Contact List entry matching your input is highlighted. To select a different entry than the one that is highlighted, press the Up or Down navigation key until the entry you want is highlighted.When you are finished selecting names, press <Add>. The selected contacts are added to the group.Group OptionsFrom the Group screen, you can access the following options for each group by highlighting the group name and pressing <Options>:♦View: Opens the group list.♦Create Group: allows you to create a new group and save it to your phone or, if your SIM card allows Group storage, to your card.♦Send Message: Allows you to send a message to group members.♦Delete: Allows you to delete the selected group.Note: Deleting a group does not delete individual Contact entries.♦Rename: Lets you change the name of the selected group.♦Group Settings: Allows you to change the Picture and the Ring Tune associated with the group.Creating a New Group1. From the Idle screen, press [ ] and select Contacts.2. Press the Left or Right navigation key to select the Groups tab.](https://usermanual.wiki/Samsung-Electronics-Co/SGHF406/User-Guide-999669-Page-127.png)
![Contacts1203. Press <Options> and select Create Group. If your SIM card allows Group storage, highlight the desired memory location (Phone or SIM). Press <Select> or [ ].4. Enter the name of the new group and press <Save>.My Business CardThis menu option lets you create a Business Card file containing your contact information that can be sent to others for addition to their contact list.1. From the Idle screen, press [ ] and select Contacts.2. Press <Options> and select My Business Card.3. Enter the information you want to save for your Business Card. The following fields are available for input:♦First Name: For recording your first name♦Last Name: For recording your last name♦Display Name: For recording your display name♦Mobile: For recording a mobile phone number♦Landline: For recording a fixed phone number♦Email: For recording an e-mail address♦Caller ID: For recording your Caller ID information ♦Notes: For adding any other informationFor information on text and numeric entry, see “Entering Text” on page 41.To change the type of phone number field in a specific location, press <Options> and select Change Type. Scroll to the required field type and press <Select>.4. When you are finished entering information, press <Options> and select Save.](https://usermanual.wiki/Samsung-Electronics-Co/SGHF406/User-Guide-999669-Page-128.png)
![Too l s121ToolsThis menu (Menu 9) enables you to:♦Listen to FM radio♦View a calendar and organize your schedule♦Set alarms that ring at a specific time, such as to remind you of an appointment♦Use the phone as a calculator for basic mathematical equations or currency exchange operations♦Use a timer or stopwatch♦View times in different parts of the worldFM RadioThe built-in FM radio (Menu 9.1) lets you listen to broadcast radio stations in your area. You can also automatically find stations in your area and save your favorite stations.Note: The FM radio uses the headset wire as the radio antenna, so the headset must be connected for the radio to work properly. To use the FM radio:1. Plug the headset connector into the headset jack on the right side of the phone. 1. From the Idle screen, press [ ] and select Tools → FM Radio.2. To turn the radio on, press [ ] or press <Options> and select FM Radio On.3. To manually select a station, press the left and right navigation keys or turn the scroll wheel until the desired frequency is indicated on the screen.](https://usermanual.wiki/Samsung-Electronics-Co/SGHF406/User-Guide-999669-Page-129.png)
![Tools122To cycle through the list of stored favorites, press the up and down navigation keys.4. To turn the radio off, press [ ], disconnect the headset or press <Options> and select FM Radio Off. While using the FM radio, the following options are available by pressing <Options>:♦FM Radio On/Off: Turns the radio on and off.♦Earphone On/Speaker On: Selects whether sound is played through the headset or the phone’s speaker.♦Self-tuning: Automatically locates and saves frequencies of radio stations in your area. ♦Add to Favourites: Lets you add the currently playing radio station to your list of favourites.♦Open Favourites: Displays the list of stored favourites. While the list is open, the following options are available by pressing <Options>.• Listen: Plays the selected radio station.• Self-tuning: Automatically saves available radio stations.• Add: Lets you enter and save a favourite frequency.• Edit: Lets you change the frequency of the selected favourite.• Remove: Lets you delete the Selected favourite, Multiple favourites or All favourites.• Set as alarm: Lets you use the selected radio station as an alarm tone (for more information on setting alarms, see “Alarms” on page 127). • Programme reminder: Lets you set up to three alarms to remind you to listen to radio programs. Choose a reminder (1, 2 or 3) and press [] or <Select> to open the settings screen. Set Frequency, Date, Time and Tone as required then press [ ] or press <Options> and select <Save>.](https://usermanual.wiki/Samsung-Electronics-Co/SGHF406/User-Guide-999669-Page-130.png)
![Too l s123When a reminder sounds, press <Listen> to turn the radio on tuned to the specified station.♦Settings: Lets you turn Background Playing on and off. When Background Playing is on, the radio continues playing while the phone is used for other tasks. Note: While the radio is playing, the frequency of the FM station is shown on the idle screen and the navigation keys tune the radio. To turn the radio off, press and <Yes> to confirm. CalendarUsing the Calendar feature (Menu 9.2), you can view any month, week or day. You can also create Appointment, Anniversary, Holiday, Important and Private events on any day. To view the Calendar:1. From the Idle screen, press [ ] and select Tools → Calendar. The calendar opens in Month, week or day view, depending on the Default View setting (see “Calendar Options” on page 124).In Month view, the current date is highlighted by a box around the number. Use the navigation keys to move to other dates. Appointments are indicated by a blue arrow at the lower right corner of the date, Anniversaries by a yellow arrow at the upper right, Holidays by changing the number to yellow text, Important events by a red arrow at the upper left corner and Private events by a green arrow at the lower left corner.Note: You can also move to the previous or next month by pressing the Volume keys on the left side of the phone.Week view provides a grid with the days of the week across and daytime hours arranged vertically. Use the navigation keys to move to specific days and times. The same arrow indicators as in Month view appear on the initial indicating the day and colored rectangles indicate the time slots where](https://usermanual.wiki/Samsung-Electronics-Co/SGHF406/User-Guide-999669-Page-131.png)
![Tools124events are scheduled. To view the events on a specific day, use the navigation keys to highlight the day and press [ ].Day view provides a list of the events associated with the chosen day, the scheduled time for each and icons indicating the type of event, alarm indicator, etc.To Change the ViewWhile in any of the Calendar views, press <Options> and select View by. Choose the view you want and press <Select> or [ ].Calendar OptionsWhile using the Calendar, press <Options> to access the Calendar options (not all options are available in each view):♦View: Opens the Day view for the selected day.♦View Mode: Lets you change the view to one of the other options.♦Create: Used to create a new event (Appointment, Anniversary, Miscellaneous or Task).♦Go to: Lets you directly select the current day or a specific date.♦Event List: Displays a list of specific type of event (Appointment, Anniversary, Holiday, Important or Private).♦Delete: Lets you delete events for the selected day, all events in a specific time period, all events in the selected month, all previous events or all events.♦Settings: Allows you to select the calendar Starting Day (whether weeks start on Sunday or Monday) and Default View (whether the current month, week or day is displayed when the calendar is opened).♦Missed Alarm Event: Provides a list of events with alarm time that has passed. Press <Options> to view details of an entry, delete an event or delete all missed alarm events.](https://usermanual.wiki/Samsung-Electronics-Co/SGHF406/User-Guide-999669-Page-132.png)
![Tools126♦Alarm (before): Allows you to set an alarm to remind you of this event and set the length of time before the event that the alarm should sound (number of minutes, hours, or days).♦Alarm Time: Allows you to set the time of day that the alarm will sound.♦Alarm Tone: Press < > to open the Media menu and select Ring Tunes. To play any of the available tones, highlight the name and press < >, then press Back to return to the menu. Highlight the tone you wish to use and press the Options soft key, highlight Select and press the Select soft key or the key.♦Repeat: allows you to repeat the same event on a daily, weekly or monthly basis.♦Every: Lets you specify a multiplier for the Repeat setting, for example if Repeat is set to Weekly and you enter 3 in this box, the events repeats every 3 weeks. ♦Except Weekends: Lets you exclude weekends.♦Until: Lets you specify when to stop the event.4. When you have finished, press [ ] or press <Options> and select Save. The entry is indicated on the calendar by a colored arrow at a corner of the date. Event OptionsThe following options display when you press <Options> while setting an event.♦Birthday from Contacts: Lets you import information from Contacts (anniversary only).♦Save: Saves the event in the corresponding event list.♦Input Method: Allows you to select the text input method (see “Changing the Text Input Mode” on page 41).](https://usermanual.wiki/Samsung-Electronics-Co/SGHF406/User-Guide-999669-Page-134.png)
![Too l s127♦Input Language: Toggles the input language between English and Français (French).Viewing a Calendar EntryTo view the details for a day, highlight the day in the calendar view and press [ ]. To view the details of an entry, highlight it and press [ ] or <Options> and select View. AlarmsThis menu (Menu 9.3) allows you to:♦Set up to ten alarms to ring at a specific time♦Set the phone to switch on automatically and play the alarm when switched offSet an Alarm1. From the Idle screen, press [ ] and select Tools → Alarms. 2. Highlight an alarm and press [ ] or press <Options> and select Select. 3. For all alarms except Wake-up Alarm, you can change the alarm name by selecting Alarm Name and editing the content of the text box. 4. If the Alarm is Off, choose Alarm Activation and press the Right navigation key to set it to On.5. Choose Alarm Time. Set a time for the alarm to sound using the numeric keypad. To change the AM/PM setting, highlight AM/PM and use the right navigation key to toggle the setting.Note: Your phone is preset to a 12-hour format. To change the time format, see “Set Time & Date” on page 144.](https://usermanual.wiki/Samsung-Electronics-Co/SGHF406/User-Guide-999669-Page-135.png)
![Tools1286. Choose Alarm Type and press [ ]. Choose Melody, Increasing Melody, Vibration, Vibration then Melody, Vibration & Melody, or Vibration & Increasing Melody and press <OK> or [ ].7. Choose Alarm Tone and press [ ]. Choose Sounds to open the Media menu and select a tone from the Ring Tunes folder. Choose FM Radio to open the Set FM Radio screen and choose a preset FM station.8. Choose the Alarm Volume graphic. Press the left and right navigation keys to adjust the volume level. 9. Choose the Recurrence panel. Press [ ] to open the selection menu. The menu choices are:♦Every day: The alarm sounds each day at the Alarm Time.♦Once only: The alarm sounds the first time the Alarm Time occurs.♦Individual days: The alarm sounds at the Alarm Time only on the selected day(s). For each selection you want to make, highlight it and press [ ] to put a check mark in the selection box. When you are finished, press <OK>. 10. To change the Snooze setting, use the left and right navigation keys to toggle the setting (Off, 1 Min, 3 Min, 5 Min, 7 Min, 10 Min). Choose Repeat and set number of times to repeat the alarm (1, 2, 3, 5, 10). 11. Press [ ] or <Save> to save the settings.Note: The Alarm icon appears in the Icon area on the Idle screen to show that an alarm has been set.Note: To stop the alarm when it rings, open the phone and press any key. To use the snooze function to delay the alarm, press <Snooze>.](https://usermanual.wiki/Samsung-Electronics-Co/SGHF406/User-Guide-999669-Page-136.png)
![Too l s129Adding and Deleting AlarmsThe default alarm display shows Wake-up Alarm (intended for use as an “alarm clock”), task alarms Alarm 1 to Alarm 4, and Auto Power-up (lets you choose whether the alarm rings when the phone is turned off).♦You can add up to six additional alarms by pressing <Options> and selecting Create Alarm.♦To rename an alarm, choose the alarm, press [ ], enter the new name in the Alarm Name box and press [ ]. ♦To delete any of the alarms you have added, choose the alarm, press <Options>, choose Delete, press <Select> or [ ], and press <Yes> to confirm the deletion. CalculatorWith this feature (Menu 9.4), you can use the phone as a calculator with basic arithmetic operators (addition, subtraction, multiplication, division) and numerous math functions. To use the calculator:1. From the Idle screen, press [ ] and select Media →Tools → Calculator. 2. Enter the equation you want to solve.♦Enter numbers using the numeric keys.♦As shown in the diagram on the lower part of the screen, enter basic operators (+, -, × or ÷) using the navigation keys, decimal point and brackets using the left soft key.♦To enter math functions, press <Options>, choose a function on the list and press [ ] or <Select>.♦To make corrections, use the [ ] and [ ] keys to move left and right in the equation you have entered and press [ ] to delete the character immediately to the left of the cursor.3. To view the result, press [ ].](https://usermanual.wiki/Samsung-Electronics-Co/SGHF406/User-Guide-999669-Page-137.png)
![Tools130World ClockWorld Clock (Menu 9.5) allows you to view the time of day in two other parts of the world and graphically depicts the position of these time zones relative to the one you are in. Your current time zone is shown on the map by a blue and white vertical line (see “Set Time & Date” on page 144 for information on setting your time zone).To use World Time:1. From the Idle screen, press [ ] and select Tools → World Clock. 2. Use the left and right navigation keys to scroll to a time zone. The selection box lists one or more well-known cities within the zone and the current time within that zone. The location of the zone is indicated on the map by a blue and white vertical line.To toggle the application of Daylight Savings Time to the selected time zone, press <Set DST> or [ ]. DST On is indicated by an icon at the right side of the scrolling date and time bar.StopwatchThe Stopwatch (Menu 9.6) allows you to time an event and measure up to 50 sub-intervals, such as lap times. To use the stopwatch:1. From the Idle screen, press [ ] and select Tools → Stopwatch. 2. Press [ ] to start the stopwatch. You can measure sub-intervals by pressing [ ].3. Press <Stop> to stop the count.4. Press <Reset> to erase the recorded times.](https://usermanual.wiki/Samsung-Electronics-Co/SGHF406/User-Guide-999669-Page-138.png)
![Too l s131TasksThe Task function (Menu 9.7) lets you create a list of tasks to be completed or “to-do list”. When a task has been completed, you can check it off as done. Entering New Tasks1. From the Idle screen, press [ ] and select Tools →Tasks.2. Press <Options> and select Create. 3. In the Title text box, give the task a name.4. In the Details text box, describe the task. The entry can be up to 100 characters long.5. Highlight Start Date. Using the numeric keypad, enter the start date.6. Highlight Due Date. Using the numeric keypad, enter the due date.7. To enable a warning alarm for a task, highlight Alarm and press [ ] to enable the alarm. Similarly, highlight Alarm Date and use the numeric keypad to set the date you want the alarm to occur, then highlight Alarm Time and set the alarm time. Select Alarm Tone, press [ ] to open the Media menu and select Ring Tunes. To play any of the available tones, highlight the name and press [ ], then press Back to return to the menu. Highlight the tone you wish to use. press <Options> and select Select. Highlight Priority and use the left and right navigation keys to set a level (1, 2 or 3).8. Press [ ] or press <Options> and select Save.To View Tasks1. From the Idle screen, press [ ] and select Tools →Tasks. Icons at the right side of the screen indicate the priority level and when an alarm is set.](https://usermanual.wiki/Samsung-Electronics-Co/SGHF406/User-Guide-999669-Page-139.png)
![Tools1322. To view the details of a specific task, press [ ] or <Options> and select View.To Mark a Task as Completed1. Select the task in the task list.2. Press the Options soft key and highlight Done. Press the Select soft key or the key. A check mark is placed in the box at the left side of the task.Task OptionsFrom the Tasks menu, you can access the following options by pressing <Options>:♦View: Lets you view the details of the highlighted task.♦Create: Lets you create new tasks.♦Send via: Allows you to send the highlighted task as a message or to a compatible Bluetooth device.♦Done/Not Done: Lets you indicate if a task is done or not.♦Sort by: Lets you sort tasks by Done, Due Date or Priority status.♦Delete: Lets you delete the selected file, multiple files or those marked as done.♦Save to Media: Saves the task details to the Other Files folder.♦Print via Bluetooth: Lets you print the task details using a Bluetooth-enabled printer.♦Missed Alarm Event: Lists the scheduled task entries that you have missed.♦Memory Status: Shows the number of tasks in your phone and space left. The maximum number of tasks is 20.](https://usermanual.wiki/Samsung-Electronics-Co/SGHF406/User-Guide-999669-Page-140.png)
![Too l s133NotesNotes lets you create and save text files up to 100 characters that can be viewed later. You can also send a note to someone else via Bluetooth. To create and save a note: 1. From the Idle screen, press [ ] and select Tools → Notes. A list of existing notes is displayed.2. Press <Options> and select Create. 3. Type your note in the message window. For further information on entering characters, see “Entering Text” on page 41. The remaining number of character spaces is indicated at the upper left side of the display.4. To save the note, press [ ] or press <Options> and select Save. From the Notes screen, you can access the following options by pressing <Options>: ♦View: Allows you to view the contents of a note.♦Create: Allows you to create a new note.♦Send via: Allows you to send the note to someone else in a message or via Bluetooth.♦Delete: Allows you to delete the selected note or multiple notes.♦Save to Media: Saves the task details to the Other Files folder.♦Print via Bluetooth: Lets you print the task details with a Bluetooth-enabled device.♦Memory Status: Shows the number of notes in your phone and space left. The maximum number of notes is 20.Tip CalculatorThe tip calculator (Menu 9.9) calculates the tip on a meal or service and splits the bill between the number of people paying. To use the calculator:](https://usermanual.wiki/Samsung-Electronics-Co/SGHF406/User-Guide-999669-Page-141.png)
![Tools1341. From the Idle screen, press [ ] and select Tools → Tip Calculator. 2. Using the numeric keypad and the key (to enter the decimal point), enter the total amount of the bill in Bill.3. If you want a tip percentage other than the default 15%, choose Tip (%) and enter the new value.4. If more than one person is paying, choose # paying and enter the number.The total amount of the tip is shown in Tip ($) and the amount each person pays in You pay.ConverterUsing the Converter (Menu 9.10), you can determine many unit conversions.1. From the Idle screen, press [ ] and select Tools → Converter. 2. Select the conversion type required (Currency, Length, Weight, Volume, Area or Temperature) and press <Select> or [ ]. 3. Use the left and right navigation keys to select the original unit type.4. Choose the amount field and enter the amount to convert. Use the key to insert a decimal.5. Use the up and down navigation keys to move to the second Unit field and the right and left navigation keys to select the final unit type.6. The converted value is displayed below the final unit type.♦To reverse the direction of the conversion, press <Options> and select Reverse.♦To change the amount to be converted, scroll to the amount field and enter the new value using the numeric keypad. ♦To perform a different conversion, press <Back> to return to the Converter menu.](https://usermanual.wiki/Samsung-Electronics-Co/SGHF406/User-Guide-999669-Page-142.png)
![Too l s135♦To change the preset currency conversion rates, press <Options> and select View Rate. Use the left and right navigation keys to select the base rate to use. Use the up and down navigation keys to select the value to be changed. Press [ ], change the value as required using the keypad, and press <Save> or [ ]. TimerThe Timer (Menu 9.11)) allows you to count down from a preset time to zero. A series of tones plays when the time reaches zero.To start the timer:1. From the Idle screen, press [ ] and select Tools → Timer. 2. Press <Set>.3. Using the numeric keys, enter the number of hours, minutes and seconds that you wish to count down, then press <OK>. 4. Press [ ] to start the timer. To pause the countdown, press [ ].When the count reaches 0, an alarm sounds and Time Out displays on the screen. Press <OK> to cancel the alarm and message.](https://usermanual.wiki/Samsung-Electronics-Co/SGHF406/User-Guide-999669-Page-143.png)
![Music Player137Music PlayerThis menu (Menu 11) accesses the Java-powered Rogers Music Player, which lets you play music you have downloaded from your service provider or loaded from your PC to your phone or Micro SD memory card.1. From the Idle screen, press [ ] and select Music Player. Rogers Music Player loads.2. Use the navigation keys corresponding to the screen icons to access the Search, Download, Library and Settings menus. Press [ ] to play.3. Press <Options> to access additional music player functions, including online Help.Note: This online service is provided and maintained by Rogers. It is not specific to your phone. Contact your service provider or consult the insert provided with your phone for additional information.SearchDownloadLibrarySettingsPlay](https://usermanual.wiki/Samsung-Electronics-Co/SGHF406/User-Guide-999669-Page-145.png)
![Movie Player138Movie PlayerVideo clips taken using the camcorder, downloaded from the Internet or transferred from a PC are stored in the Video folder, which can be accessed from the Media menu or by selecting Movie Player in the Multimedia Launcher. If you open the Video folder from the Media menu, you can play a video by highlighting the file and pressing [ ] or pressing <Options> and selecting Play. The Movie Player opens and plays the selected file. If you open the Video folder by selecting Movie Player in the Multimedia Launcher, you can play a video by highlighting the file and pressing [ ] or pressing <Select>. The Movie Player opens and plays the selected file. When using the movie player, the following controls are available: The following options are available while a video is playing or paused by pressing <Options>:♦Pause/Resume: Stops and restarts video play.♦Stop: Stops video play and closes the file. To P r e s sStart the player (Play) [ ] Stop the player (Pause) [ ] Open the next video file Right navigation keyOpen the previous video file Left navigation keyIncrease the sound volume Up navigation key or upper volume key Decrease the sound volume Down navigation key or lower volume key](https://usermanual.wiki/Samsung-Electronics-Co/SGHF406/User-Guide-999669-Page-146.png)
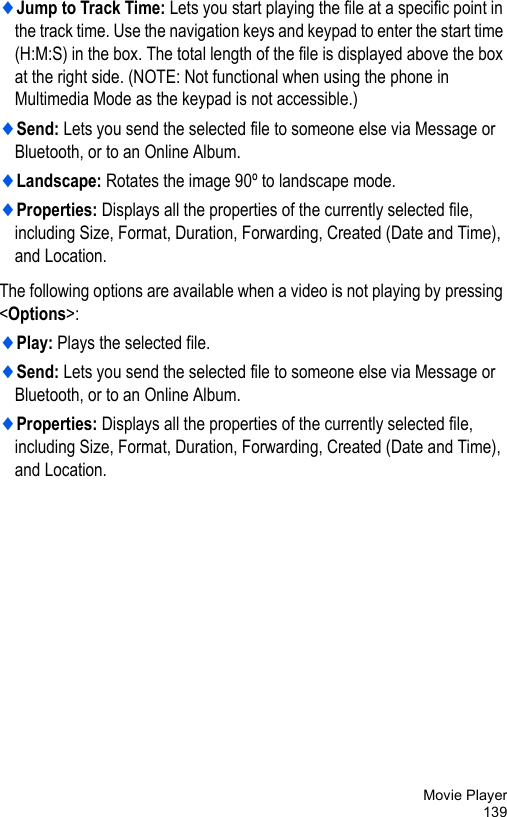
![Settings140SettingsThis menu (Menu 12) lets you customize numerous phone settings to suit your preferences.Set Sound ProfilesSound profiles (Menu 12.1) are groups of customized sound settings that make your phone behave differently in various situations. For example, you may want your incoming call ring tune to play loudly when you are outdoors. Your phone includes the following profiles: ♦Normal: For use in situations that do not require special sound settings.♦Silent: For situations where you do not want your phone to use audible sounds.♦Driving: For use while driving.♦Outdoor: For use outdoors or in loud environments where it may be difficult to hear alert tones.Selecting a ProfileTo select a profile:1. In Idle mode, press [ ] and select Settings → Set Sound Profiles.2. Choose a profile and press <Save>. A message appears confirming that the profile has been changed.Note: You can turn the Silent profile on from the Idle screen by pressing and holding [ ]. The phone displays the message “Silent profile on”. Press and hold this key again to return to the previous mode.](https://usermanual.wiki/Samsung-Electronics-Co/SGHF406/User-Guide-999669-Page-148.png)
![Settings141Viewing and Changing Profile Settings To view or change the settings for a profile, open the Set Sound Profiles screen (see above), choose the profile you want to change and press [ ].Each profile is divided into three setting categories you can scroll to using the left and right navigation keys.♦Call: Lets you specify the way the phone alerts you to incoming voice and video calls. For example, you can choose to be alerted by a melody or by a melody and vibration. You can also specify ring tunes and set audio volume.♦Message: Lets you specify the manner in which the phone alerts you to incoming messages, the message alert tone and the frequency of alert reminders.♦Phone: Lets you specify the sounds made by the phone when you press a key or turn the phone on or off.To see all options for a specific setting, choose it and press [ ].To change the setting, use the navigation keys to choose another setting and press <OK> or [ ].To save changes made to the profile settings, press <Options> and select Save.Call Settings♦Call Alert Type: Specifies how you want to be alerted to incoming calls (various combinations of melody and vibration).♦Voice Call Ring Tune: Lets you select a ring tune for incoming voice calls from the Ring Tunes folders.♦Video Call Ring Tune: Lets you select a ring tune for incoming video calls from the Ring Tunes folders.♦Ring Tunes Volume: Lets you specify the volume for the selected ring tunes (level 1 to 7).](https://usermanual.wiki/Samsung-Electronics-Co/SGHF406/User-Guide-999669-Page-149.png)
![Settings142Message Settings♦Message Alert Type: Lets you specify how you want to be alerted to incoming messages (Melody, Vibration, Vibration & Melody, Mute).♦Message Alert Tone: Lets you specify an alert tone for incoming text messages. You can select Use Effect Tone, which provides a choice of four preset tones, or Use My Alert Tone, which allows selection of a tone from the Ring Tunes folder.♦Message Alert Repetition: Lets you specify whether the message alert tone is used to notify you of a new message only once or periodically until you open the message.♦Message Tone Volume: Lets you specify the volume for the selected alert tone (level 1 to 7).Phone Settings♦Keypad Tone: Lets you specify the tone played when you press a button on the keypad (Beep or Xylophone).♦Power On Type: Lets you specify the phone response when you turn the it on (Melody, Vibration, Vibration & Melody, or Mute).♦Power Off Type: Lets you specify the phone response when you turn it off (Melody, Vibration, Vibration & Melody, or Mute).♦Phone Sound Volume: Lets you specify the volume for the power on/off tones (level 0 to 7).Set DisplayIn this menu, you can change various settings for the display or backlight. To change display settings:1. In Idle mode, press [ ] and select Settings → Set Display.2. The following options are available. Use the navigation keys, <Select> and [ ] to change selections, <Save> or [ ] to confirm changes.](https://usermanual.wiki/Samsung-Electronics-Co/SGHF406/User-Guide-999669-Page-150.png)
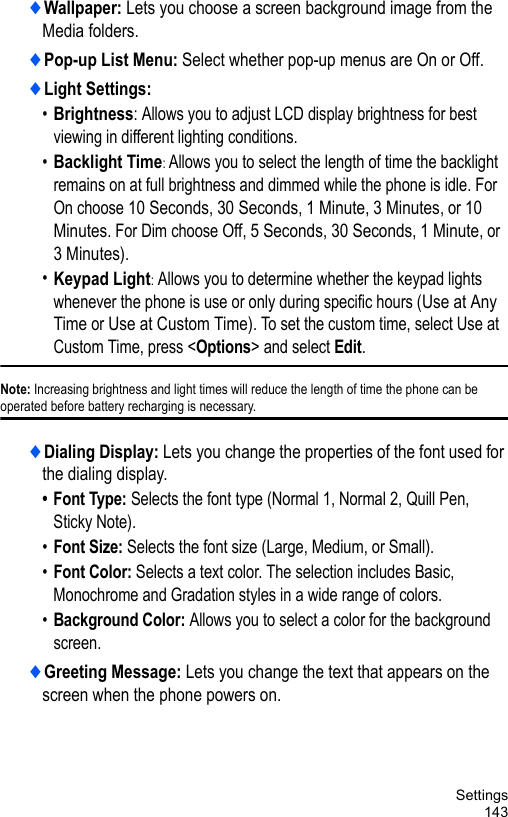
![Settings144Set Time & DateUse this menu (Menu 12.3) to configure the settings for the time and date display.To modify Time & Date settings:1. In Idle mode, press [ ] and select Settings → Set Time & Date.2. Change settings as required (see below).3. To save changes, press <Save>. The following settings are available:♦Time Zone Updating: Lets you specify how the time zone information is updated (Automatic, Prompt first or Manual only).If Manual Only is selected, the following options are enabled:• Home Zone: Lets you specify your location relative to Greenwich Mean Time. Press [ ] then scroll left or right to indicate your time zone. You can also enable or disable Daylight saving, as appropriate. Press <OK>.• Time: Lets you change the time setting. Scroll left or right to choose the number you want to modify and then enter a new number using the keypad. To switch between AM and PM, highlight the indicator and press the right navigation key.• Date: Lets you change the date setting using the keypad. Scroll left or right to choose the number you want to modify and then enter a new number using the keypad.• Time Format: Lets you specify the time format you prefer (12 hour or 24 hour clock). Scroll left or right to select.• Date Format: Lets you specify the date format you prefer. Scroll left or right to choose a format.The choices are DD/MM/YYYY, MM/DD/YYYY, YYYY/DD/MM, YYYY/MM/DD.](https://usermanual.wiki/Samsung-Electronics-Co/SGHF406/User-Guide-999669-Page-152.png)
![Settings145Set PhoneUse this menu (Menu 12.4) to configure phone settings related to the user interface language, shortcuts, security, Airplane Mode, network settings and slide settings. You can also check the phone number of the phone. To access phone settings:1. In Idle mode, press [ ] and select Settings → Set Phone.2. Change settings as required (see below). 3. To save changes, press <Save>.The following options are available:♦Language: Lets you specify the language used for user interface text that is displayed on the screen, as well as for the T9 text input dictionary.•Screen text: You can select Automatic, English or Français (French). If you select Automatic, the language setting is read from the SIM card in the phone.•Input T9: You can select English or Français (French) as the language used in T9 input mode. For more information, see “Using T9 Mode” on page 42.♦Shortcuts: Lets you change the applications assigned to the navigation keys for quick access. To select a new application for a key, press the key and then press [ ] or press <Options> and select Change. Choose the application you want to assign to the key and press [ ] or <Save>.♦Own Number: shows you the number(s) assigned to the SIM card in your phone.♦Security: The Security feature allows you to restrict the use of your phone by others and the types of calls that can be made using various codes and passwords. The following options are available.•Lock Phone: When the phone lock is enabled, the phone password must be entered each time the phone is switched on. The phone](https://usermanual.wiki/Samsung-Electronics-Co/SGHF406/User-Guide-999669-Page-153.png)
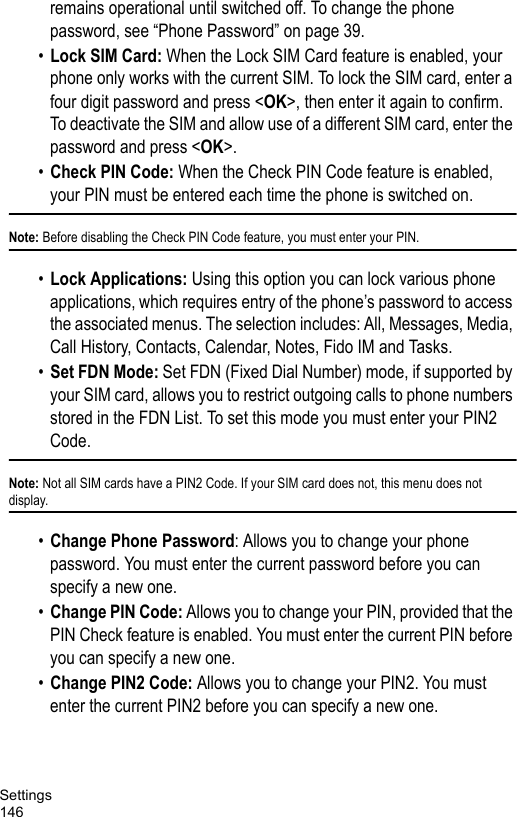
![Settings147Note: Not all SIM cards have a PIN2. If your SIM card does not, this menu does not display.♦Airplane Mode: For locations where you are not permitted to send or receive calls or access online information, this operating mode lets you use all other phone functions. When it is on, “Airplane Mode” is displayed on the Idle screen.♦Slide Settings: This option allows you to set whether sliding the phone open accepts a call and sliding it closed stops the current operation (Stop Operation) or allows it to continue (Continue Operation).Set CallsCall settings (Menu 12.5) let you configure the actions taken by the phone when you dial and receive calls.To access call settings:1. In Idle mode, press [ ] and select Settings → Set Calls.2. To change a setting, choose another setting and press <Save>. The following options are available:GeneralThis menu (Menu 12.5.1) lets you configure high-level features that specify how calls are handled. Use the navigation keys to choose the feature, if necessary press [ ] to enable (check) or disable (uncheck) the option, then press <Save>.♦Show My Number: Lets you specify how your ID is handled when you initiate an outgoing call.•By Network: You are identified to the recipient using the default network information.](https://usermanual.wiki/Samsung-Electronics-Co/SGHF406/User-Guide-999669-Page-155.png)
![Settings148•Send: Your phone number and name are sent to the recipient.•Hide: Your identification is hidden from the recipient.♦Auto Reject: Lets you automatically reject calls from a specified list of contacts. For details on how to enable this feature, see Enable and Configure Auto Reject below.♦Call Answer: Provides a choice of methods for answering a call on your phone (Send Key, Any Key).♦Auto Reply: Lets you enable and configure auto reply. Use the left and right navigation keys to enable (On) and disable (Off). If you select On, highlight the Reply to send area and type the message you want sent as an automatic reply.♦Call Status Tones: Lets you activate alert tones that sound during a call. Scroll to the options you want to change and press [ ] to enable (check) or disable (uncheck). •Call Connect Tone: Sounds a tone when a call connection is successful.•Minute Minder: Sounds a tone after each minute of a call.•Call End Tone: Sounds a tone when a call connection is terminated.When you are finished, press <Save> to save the selection.♦Alerts on Call: Lets you specify whether you want to be alerted by a tone when a message is received or the time for an alarm is reached while you are on a call. Select either On or Off and press <Save> or [ ] to save the selection.Enable and Configure Auto RejectTo turn on and configure Auto Reject:1. In Idle mode, press [ ] and select Settings → Set Calls → General → Auto Reject.2. Select Activation and use the left or right navigation key to select On.](https://usermanual.wiki/Samsung-Electronics-Co/SGHF406/User-Guide-999669-Page-156.png)
![Settings1493. Select Reject List and press [ ] to view the current list. If this is the first time you have accessed this feature, the only item on the list is the default, Unknown. If you have already created an Auto Reject List and do not need to add entries to it, proceed to step 5. Otherwise, press <Options> and select Create.4. Enter the number of the caller you want to add to the Reject List. To do this, you can:• Type the number into the edit box • Press <Search> and select either Call History (to view a list of recent calls) or Contacts (to view your Contacts list). In Call History, scroll to the number you want to add to the Reject List and press <Select>. In Contacts, scroll to the number you want to add to the Reject List, press <Options> and select Select. 5. Scroll through the numbers in the Auto Reject List and press [ ] to place a check mark next to those callers you want to automatically reject. To change or remove an entry, press <Options> and select Edit or Delete.When you have finished your selections, press <Options> and select Save.Voice CallThis menu (Menu 12.5.2) lets you configure the default settings for voice call features.Call ForwardingCall forwarding lets you reroute incoming calls to another number or to your voicemail. Availability of the various options depends on your service provider. Contact your provider for more details on enabling this feature.To set call forwarding options:](https://usermanual.wiki/Samsung-Electronics-Co/SGHF406/User-Guide-999669-Page-157.png)
![Settings1501. In Idle mode, press [ ] and select Settings → Set Calls → Voice Call → Call Forwarding.2. Choose the option you want to modify and press <Select> or [ ]. The following options are available:♦Always: Lets you forward all voice calls and/or data calls. ♦Busy: Forwards calls when you are on another phone call.♦No Reply: Forwards calls when your phone is not answered. In addition to setting the Forward to number, you can also change the length of time the phone waits for a reply before forwarding the call (5, 10, 15, 20, 25 or 30 Seconds).♦Unreachable: Forwards calls when you are not in an area covered by your service provider or when your phone is switched off.♦Cancel All: Deactivates call forwarding.The current status of the option is displayed. If the option is activated, the number to which the calls are forwarded is also displayed.3. If you are activating call forwarding, enter the destination phone number in the Forward To box or press <Options> and select Contacts to select a number from your Contacts list. 4. To change the setting, press <Options> and select Activate or Deactivate. The phone sends your settings to the network and the network’s acknowledgement is displayed.Call Barring Call Barring allows you to restrict outgoing calls from being made with your phone. You can bar all outgoing calls or calls to international phone numbers. Contact your service provider for more details on enabling this feature.To configure call barring options:](https://usermanual.wiki/Samsung-Electronics-Co/SGHF406/User-Guide-999669-Page-158.png)
![Settings1511. In Idle mode, press [ ] and select Settings → Set Calls → Voice Call → Call Barring. The following choices are presented:♦All Outgoing Calls: Bars this phone from making outgoing calls.♦Outgoing International Calls: Bars this phone from making calls to international numbers.♦Cancel All: Cancels all settings and deactivates Call Barring.2. Use the navigation keys to choose the setting you want to change and press [ ] or press <Options> and select Select. 3. To change the setting, press <Options> and select Activate or Deactivate. The phone sends your settings to the network and the network’s acknowledgement is displayed.Changing the Password for Call BarringThe Call Barring password is the same for both voice and video calls. To change the Call Barring password:1. From the Call Barring screen, press <Options> and select Change Password.2. Type the current password into the Old box.Type the new password into the New box and enter it again in the Confirm box. 3. Press <Confirm>.Call WaitingCall Waiting informs you when someone is trying to reach you while you are on another call. To set Call waiting options:1. In Idle mode, press [ ] and select Settings → Set Calls → Voice Call → Call Waiting. The screen informs you whether call waiting is activated or deactivated.](https://usermanual.wiki/Samsung-Electronics-Co/SGHF406/User-Guide-999669-Page-159.png)
![Settings1522. To change call waiting status, press <Options>, choose Activate or Deactivate and press <Select> or [ ].Auto Redial Auto Redial lets you configure your phone to automatically redial the last dialed number if the connection is lost or the call was unable to connect. To enable or disable Auto Redial:1. In Idle mode, press [ ] and select Settings → Set Calls → Voice Call → Auto Redial.2. Choose On or Off and press <Save> or [].Note: For carriers that automatically divert unanswered calls to voice mail, the Auto redial feature will not provide useful service.Video Call This menu (Menu 12.5.3) lets you configure the default setting for video call options.♦Select My Image: Select an image that you want to appear on the recipient’s or caller’s hand set during a call. For more information, see “Select My Image” on page 153.♦Show My Image: Chooses whether or not to display the selected image on the recipient’s or caller’s hand set during a call.♦Use Call Fail Options: Specify how the phone handles connection problems during video call initialization. For more information, see “Use Call Fail Options” on page 154.♦Call Forwarding: Reroute incoming video calls to another phone number. For more information, see “Call Forwarding” on page 154.♦Call Barring: Restrict different types of calls from being made or received with your phone. For more information, see “Call Barring” on page 154.](https://usermanual.wiki/Samsung-Electronics-Co/SGHF406/User-Guide-999669-Page-160.png)
![Settings153♦Auto Redial: Configure your phone to automatically redial the last dialed number if the call connection is lost or if the call was unable to connect. For more information, see “Auto Redial” on page 154.Select My ImageDuring a video call, you can opt to display a still image on the recipient’s or caller’s hand set instead of a video. You can select an image that you have taken with the built-in camera or an image file that you have downloaded. For information on changing the outgoing visual during a video call, see “Options During a Video Call” on page 39. To set an image:1. In Idle mode, press [ ] and select Settings → Set Calls → Video Call → Select My Image.2. Press <Options>, highlight one of the following options and press <Select> or [ ]:♦Get from Media: Lets you access files stored on the phone.♦Get from Camera: Lets you take a picture.♦Use Preset Image: Uses the default picture preset in the phone.3. Do one of the following, depending on your choice in the previous step:♦If you chose Get from Media, open the folder that contains the image you want to use, highlight the file and press [ ] or <Select>. A preview is displayed. Press [ ] or <Options> and select Save.♦If you chose Get from Camera, take a picture by aiming the camera and pressing [ . Press [ ] again to accept the picture and see a preview. Press [ ] or <Options> and select Save. ♦If you chose Use Preset Image, a preview is displayed. Press <Back> to return to the menu.](https://usermanual.wiki/Samsung-Electronics-Co/SGHF406/User-Guide-999669-Page-161.png)
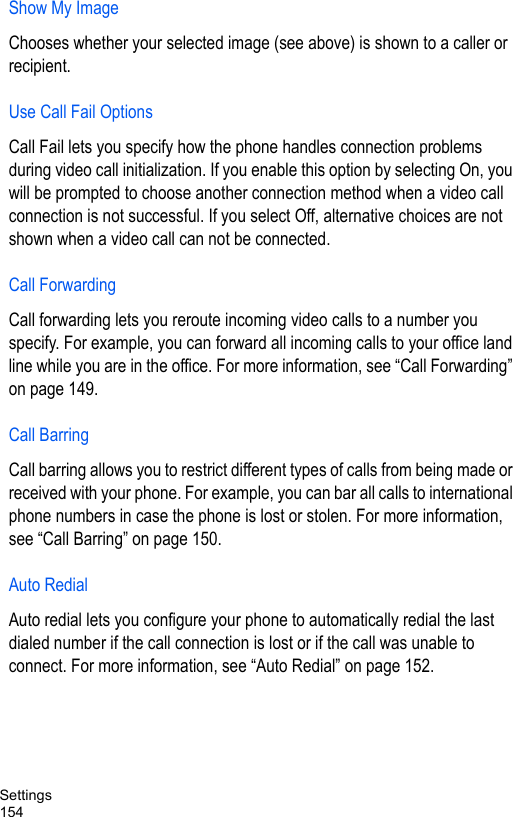
![Settings155Set ConnectivityThe Set Connectivity menu (Menu 12.6) lets you manage the settings associated with Bluetooth and USB connections.BluetoothBluetooth is a short-range wireless communications technology capable of exchanging information over short distances.ActivationTo turn Bluetooth on or off: 1. From the Idle screen, press [ ] and select Settings → Set Connectivity → Bluetooth → Activation. Choose Off or On, as required, then press [ ] or <Select>.Note: To save battery life, turn Bluetooth off when it is not required. Also turn it off in situations where use is prohibited, such as on airplanes.My DevicesThis function provides a list of Bluetooth devices within range of your phone and lets you pair the phone with one or more devices.To search for Bluetooth devices:1. From the Idle screen, press [ ] and select Settings → Set Connectivity → Bluetooth → My Devices.2. Choose Search For New Device and press <Select> or [ ].After searching, your phone displays a list of available devices. The color of the icon indicates the status of the device:♦Grey for unpaired devices♦Blue for paired devices♦Red for devices that are currently connected to your phone](https://usermanual.wiki/Samsung-Electronics-Co/SGHF406/User-Guide-999669-Page-163.png)
![Settings156To connect to a Bluetooth Device:1. Find Bluetooth devices within range (see above). On the device list, highlight the device you want to connect to and press <Select> or [ ]. 2. Enter the Bluetooth PIN for the device and press <OK>. If connecting to a Bluetooth wireless device, consult the device’s user manual for the assigned PIN. If connecting to another phone, enter the same PIN on both phones. If you are unable to pair with the device a message appears in the display. Press <Yes> to retry.My Phone’s VisibilityThis option allows you to turn your phone’s visibility to other Bluetooth devices On or Off. When Bluetooth visibility is turned on, your phone wirelessly transmits its name and status. This is useful if you are attempting to connect to additional Bluetooth devices, but it can pose a security risk and facilitate unauthorized connection so should be used with a Bluetooth security option. For more information, see “Secure Mode” below.My Phone’s NameThis option displays the name given to your phone for Bluetooth purposes. When your phone’s Bluetooth visibility is turned on, it identifies itself using the name that appears in this text field.To change the phone name:1. Press and hold [ ] to erase the previous name.2. Use the keypad to enter a new name.3. Press [ ] or <Save> to save the new name.Note: The default name for your phone is SGH-F406, the model code.](https://usermanual.wiki/Samsung-Electronics-Co/SGHF406/User-Guide-999669-Page-164.png)
![Settings157Secure ModeWhen Bluetooth visibility is turned on, your phone wirelessly transmits its name and status. This transmission can pose a security risk and allow unauthorized connection to your phone. When Secure Mode is turned on, however, the phone prompts you to allow or deny access whenever another Bluetooth-enabled device tries to access your phone. To change the Secure Mode setting, choose a selection and press <Save> or [ ].Remote SIM ModeThis option allows you to enable access to your SIM card via Bluetooth.Bluetooth ServicesThe Bluetooth specification is a protocol that describes how the short-range wireless technology works, while profiles describe the services supported by individual devices. Profiles reduce the chance that different devices will not work together.The following service profiles are available: ♦Headset: The remote Bluetooth headset enables outgoing and incoming calls.♦Handsfree: The remote Bluetooth car kit enables outgoing and incoming calls.♦Bluetooth Stereo Headset: The remote Bluetooth stereo headset lets you listen to music.♦Serial Port: The remote Bluetooth device acts as a virtual serial port. ♦Dial Up: The remote Bluetooth device enables Internet access through a phone modem.♦Basic Printing: The phone is configured to use Bluetooth technology to enable basic printing. This is useful to print received text messages or contact information.](https://usermanual.wiki/Samsung-Electronics-Co/SGHF406/User-Guide-999669-Page-165.png)
![Settings1595. If necessary, enter the Bluetooth PIN code needed for pairing and press <OK> or [ ].Receiving Data via BluetoothTo receive data via Bluetooth, your phone’s Bluetooth feature must be active. If an unauthorized Bluetooth device sends data to your phone, the phone displays a confirmation message. To receive data, press <Yes>.Network SelectionNetwork selection (Menu 12.6.2) lets you configure the phone to automatically select the network used when roaming outside of your home area or allow manual selection.Note: You can select a network other than your home network only if there is a valid roaming agreement between them.To change your network selection:1. In the Network selection menu, highlight Automatic to connect to the first available network when roaming or Manual to have the phone scan for available networks. Press <Select> or [ ].2. If you selected Manual, the phone displays a list of available networks. Highlight the network you want and press <Select> or [ ]. Your phone connects to the selected network.ConnectionsThe Connections menu (Menu 12.6.3) let you view the profiles containing the settings for connecting your phone to the network (Fido WAP, Fido MMS, Fido GPRS). These settings are used for the Internet browser, Instant Messaging (IM) and sending picture messages.](https://usermanual.wiki/Samsung-Electronics-Co/SGHF406/User-Guide-999669-Page-167.png)
![Settings162♦Mass Storage: The PC recognizes a microSD card in your phone as a storage drive, allowing you to transfer files to and from the card. The card name appears in the list of disk drives in My Computer on the PC.Choose a connection method and press [ ] or <Save>.Set ApplicationsThe Set Applications menu (Menu 12.7) provides convenient access to settings for Messages, Browser, Camera, Player, VOD, Record Audio, Calendar and Contacts.Message SettingsMessage settings (Menu 12.7.1) let you configure the default settings for the following messaging features:♦Text Message: Lets you configure the text delivery parameters used when sending a text message.♦Sending Options: Lets you set the following parameters:•Network Selection: Select either the CS or PS domain.•Character Support: Select GSM alphabet, Unicode, or Automatic.•Reply Path: Allows the recipient of your message to send you a reply message using your message center, if your network supports this service.•Delivery Report: Provides a delivery report after sending a message.•Keep a Copy: Stores a copy of the messages you send in the Sent folder.♦Text Message Center Settings: Lets you set the default method of text message transmission used by the Text Message Center. Press the Options soft key, highlight Edit and press the Select soft key or the key to access the following parameters:•Center Address: Specifies the phone number of the Text Message Center.](https://usermanual.wiki/Samsung-Electronics-Co/SGHF406/User-Guide-999669-Page-170.png)

![Settings165Create.This option is not available if you selected All Channels in the previous option.•Language: Allows you to select your preferred language for display of cell broadcast messages. The choices are All, English or Français (French).♦Voice/Video Mail Number:• Specifies the phone number of the server that stores messages.♦Push Message•Receiving Option: Enable or disable push message reception.• Service Loading: Specify how you want the phone to handle the loading of this service (Always, Prompt or Never).Browser SettingsBrowser settings (Menu 12.7.2) let you select the connection profile used when connecting to the Internet and make changes to Profile Settings. To change Profile Settings, highlight a profile, press <Options> and select Edit. Make changes to the Profile Settings as required (Profile Name, Home URL, Proxy Use, GPRS Settings).Camera SettingsCamera settings (Menu 12.7.3) let you set the default preferences for camera functionality. Scroll left and right to view the settings within each option tab (General, Camera, Camcorder). Use the up and down navigation keys to scroll to individual options, then the left and right navigation keys to make a selection. When you are finished, press [ ] or <Save> to save the changes.♦General• Shutter Sound: Lets you select the shutter sound that indicates a picture has been taken. The sounds are previewed as you scroll through the options.](https://usermanual.wiki/Samsung-Electronics-Co/SGHF406/User-Guide-999669-Page-173.png)
![Settings168♦Save New Contacts to: Specifies the default save location for contact information (Phone Memory, SIM Memory or Always Ask).♦View Contacts from: Specifies which contact list you view by default.♦Own Number: Shows you the number assigned to the SIM in your phone. ♦Service Number: Shows the list of Service Dialing Numbers (SDN) assigned by your service provider. These numbers can include emergency numbers, directory enquiries and voice mail numbers.♦Memory Status: Allows you to view the amount of memory allocated and available in categories (Phone, SIM Card and SIM Card FDN).Reset SettingsThis menu (Menu 12.8) allows you to reset some or all of your phone settings to their default value. To reset phone settings: 1. Select one or more of the following reset options by highlighting it and pressing []:♦All: Resets all configuration options listed in this menu to their default values.♦Sound Profile Settings: Resets Sound Profile options to their default values. For more information on Profiles, see “Set Sound Profiles” on page 140.♦Display Settings: Resets only display options to their default values. For more information on Display settings, see “Set Display” on page 142.♦Phone Settings: Resets only phone options to their default values. For more information on Phone settings, see “Set Phone” on page 145.♦Alarms: Clears alarm settings. For more information, see “Alarms” on page 127.2. Press <OK>.](https://usermanual.wiki/Samsung-Electronics-Co/SGHF406/User-Guide-999669-Page-176.png)