Samsung Electronics Co SGHI537 Portable Handset with Multi-band WCDMA/GSM/EDGE/LTE, WLAN, Bluetooth and RFID User Manual i537 J Active
Samsung Electronics Co Ltd Portable Handset with Multi-band WCDMA/GSM/EDGE/LTE, WLAN, Bluetooth and RFID i537 J Active
Users Manual

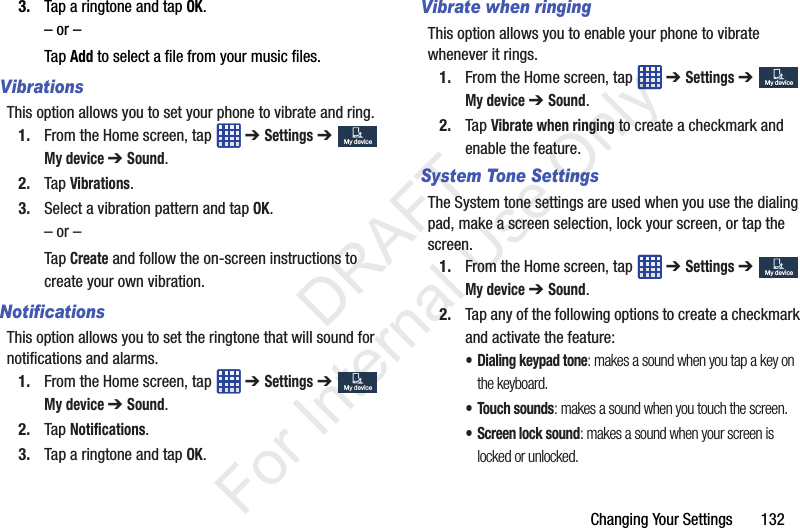
![DEVICES AND APPLICATIONS TESTED WITH SAFE™ DEVICES. IN NO EVENT SHALL THE SAMSUNG ENTITIES BE LIABLE FOR ANY DIRECT, INDIRECT, INCIDENTAL, PUNITIVE, OR CONSEQUENTIAL DAMAGES OF ANY KIND WHATSOEVER WITH RESPECT TO INFORMATION TECHNOLOGY SECURITY PROTECTION, SAFE™ DEVICES OR APPLICATIONS TESTED WITH SAFE™ DEVICES. In addition, information technology security protection will be affected by features or functionality associated with, among other things the e-mail platform, master data management, and virtual private network solutions selected by the software provider, solution provider or user. Choice of an e-mail, master data management, and virtual private network solution is at the sole discretion of the software provider, solution provider or user and any associated effect on information technology security protection is solely the responsibility of the software provider, solution provider or user. For complete statement of limited warranty, please refer to www.samsung.com/us/safe, available on the web and where Samsung smartphone and Galaxy Tab™ devices are sold. [101212] Samsung Telecommunications America (STA), LLCHeadquarters:1301 E. Lookout DriveRichardson, TX 75082Customer Care Center:1000 Klein Rd.Plano, TX 75074Toll Free Tel: 1.888.987.HELP (4357) DRAFT For Internal Use Only](https://usermanual.wiki/Samsung-Electronics-Co/SGHI537/User-Guide-1977828-Page-4.png)
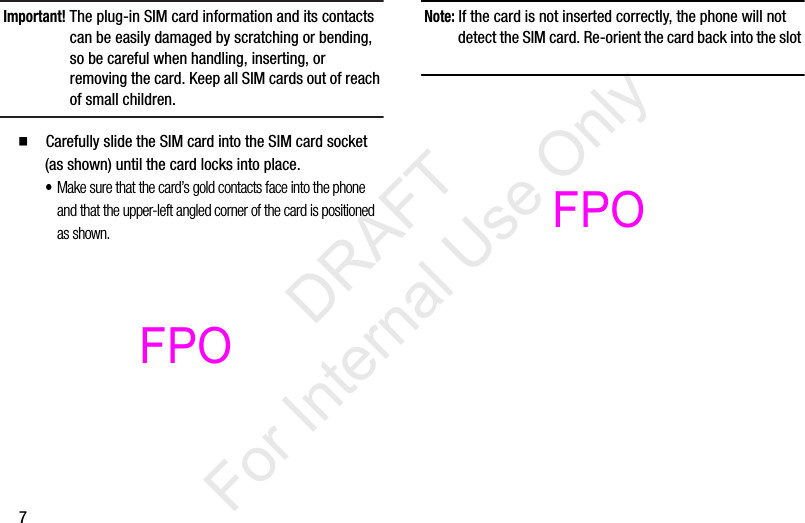
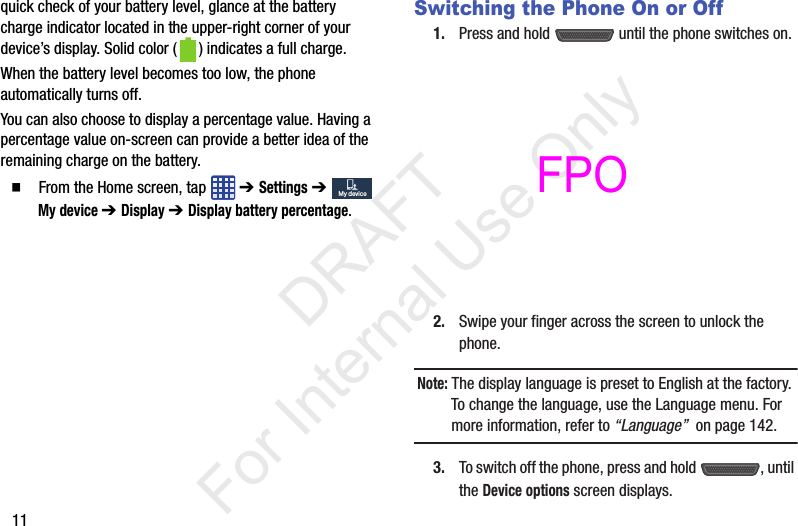

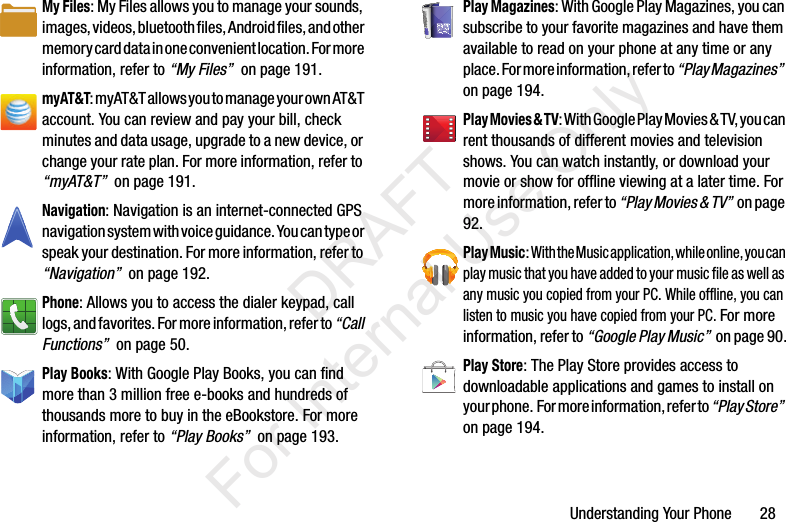


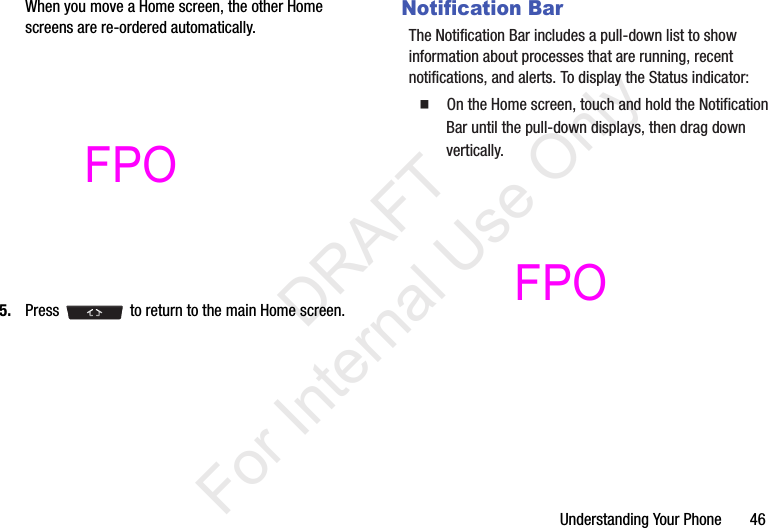


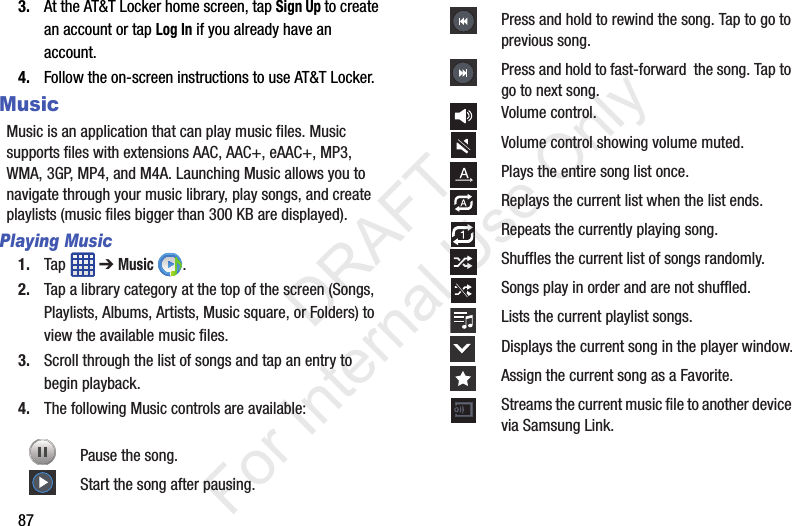
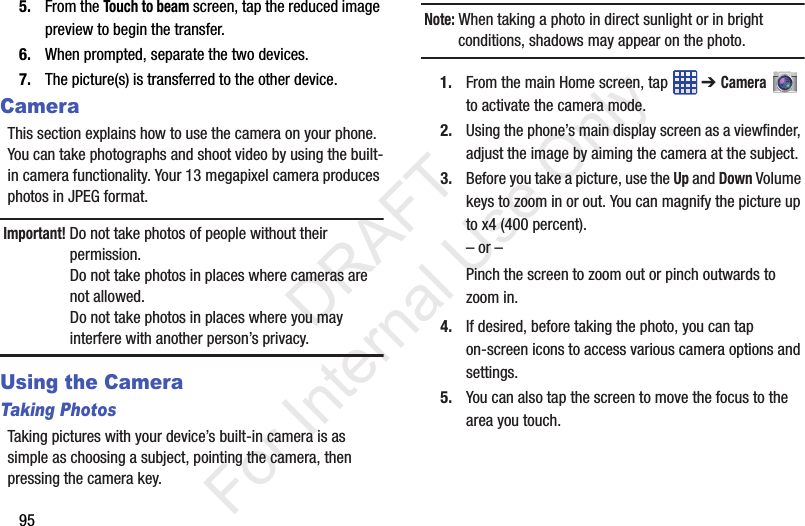

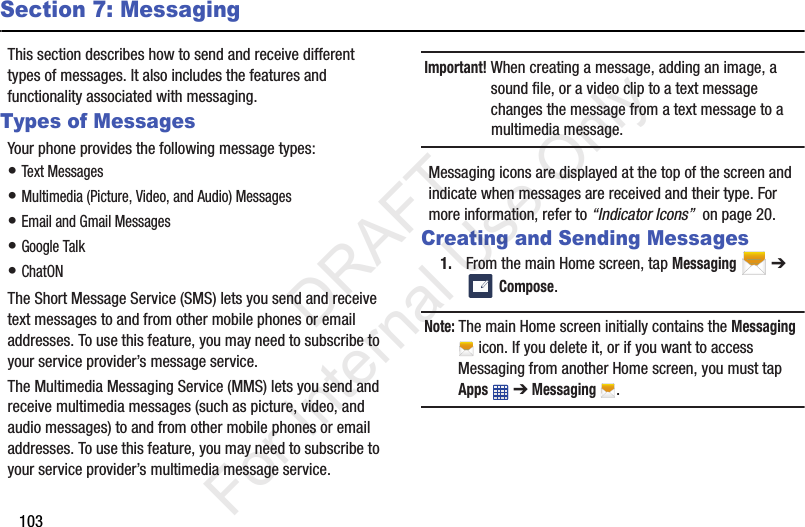

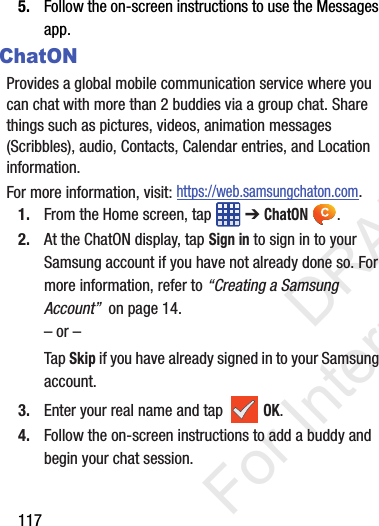
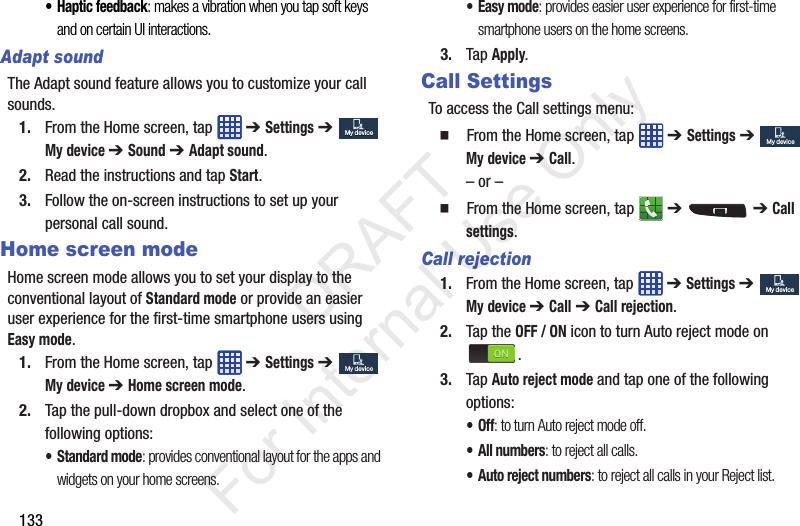

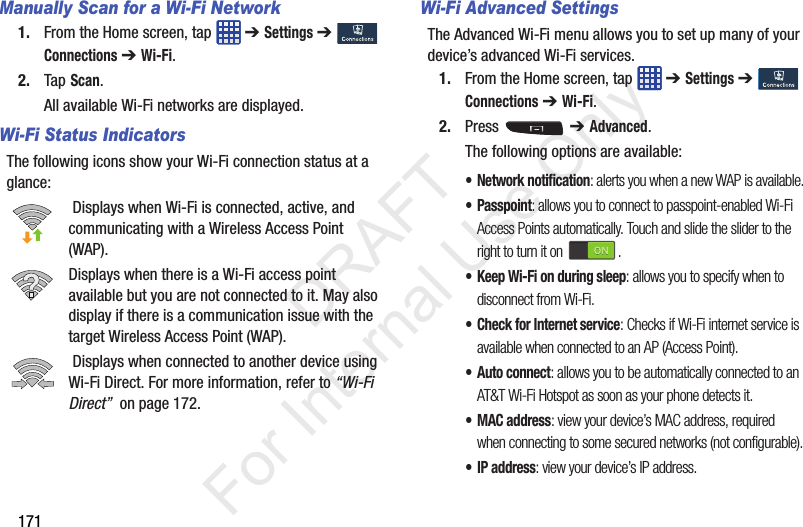
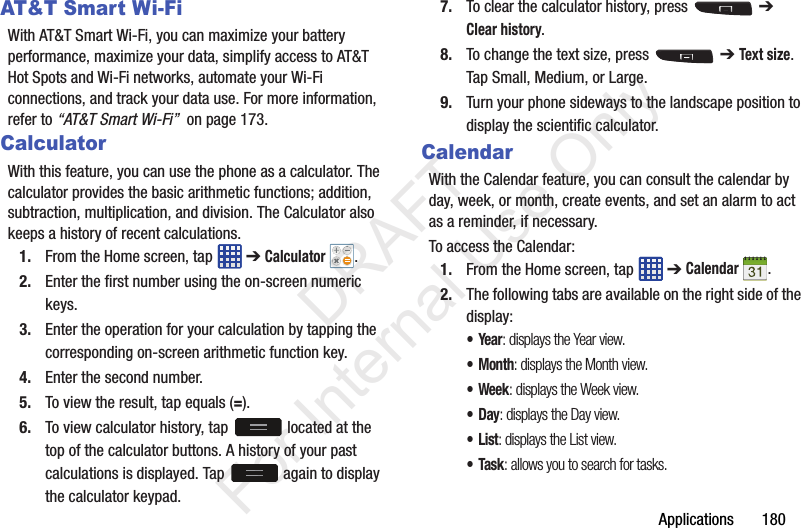
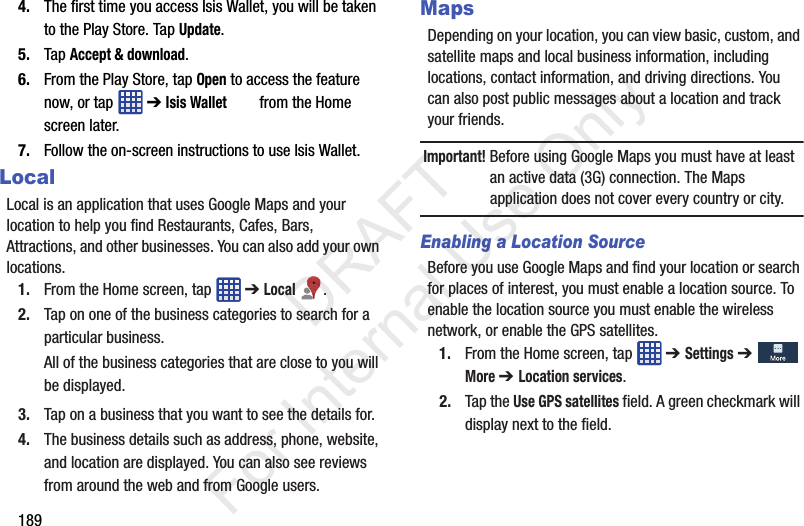
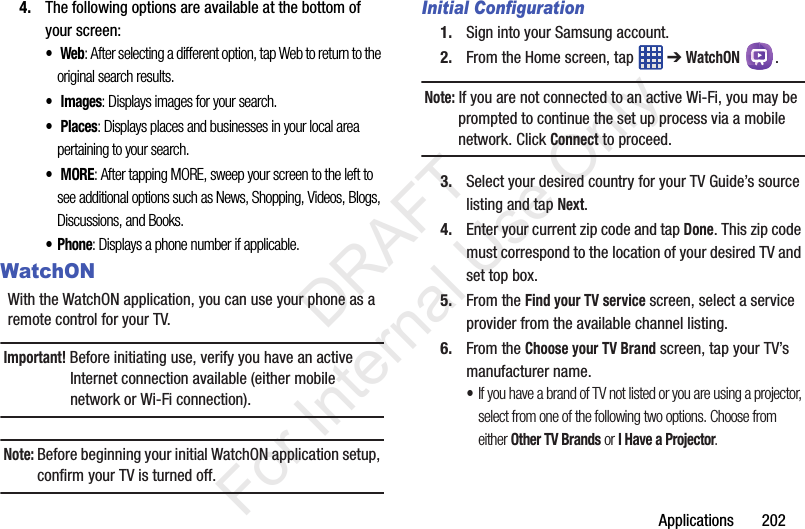
![143Samsung Keyboard settingsFrom this menu you can set Samsung keyboard options.1. From the Home screen, tap ➔ Settings ➔ My device ➔ Language and input.2. Tap the icon next to Samsung keyboard.• Portrait keyboard types allows you to choose a keyboard configuration (Qwerty [default] or 3x4 Keyboard).• Input languages sets the input language. Tap a language from the available list. The keyboard is updated to the selected language.•Predictive text enables predictive text entry mode. This must be enabled to gain access to the advanced settings. Touch and hold to access the advanced settings. Touch and slide the slider to the right to turn it on .• SwiftKey Flow allows you to type words by swiping between on-screen keys. • Cursor control allows you to move the cursor by sliding your finger across the keyboard.• Handwriting enables the device to recognize on-screen handwriting and convert it to text. • Advanced displays the following advanced options:–Auto capitalization automatically capitalizes the first letter of the first word in each sentence (standard English style). –Auto spacing automatically inserts spaces between words.–Auto-punctuate automatically inserts a full stop in a sentence by tapping the space bar twice when using the on-screen QWERTY keyboard. –Character preview provides an automatic preview of the current character selection within the text string. This is helpful when multiple characters are available within one key.–Key-tap vibration enables vibration feedback when you tap an on-screen key.–Key-tap sound enables auditory feedback when you tap an on-screen key.•Help launches a brief on-screen tutorial covering the main concepts related to the Samsung keyboard.• Reset settings resets the keyboard settings back to their original configuration.My deviceMy device DRAFT For Internal Use Only](https://usermanual.wiki/Samsung-Electronics-Co/SGHI537/User-Guide-1977828-Page-150.png)


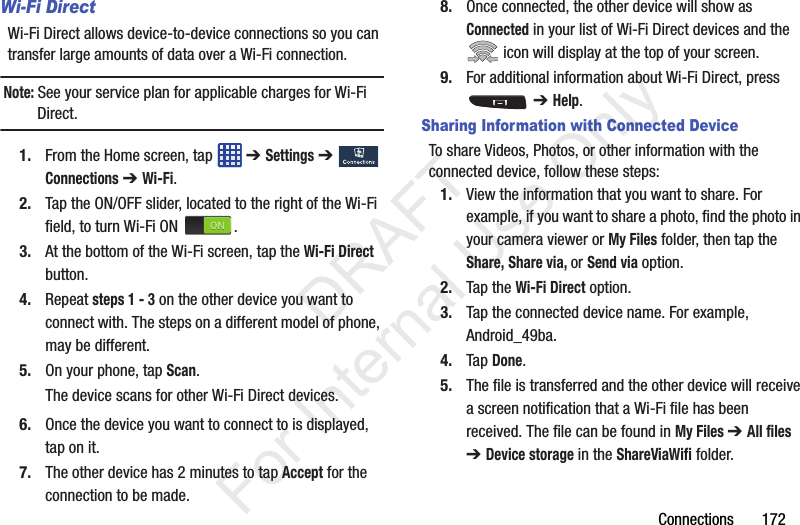
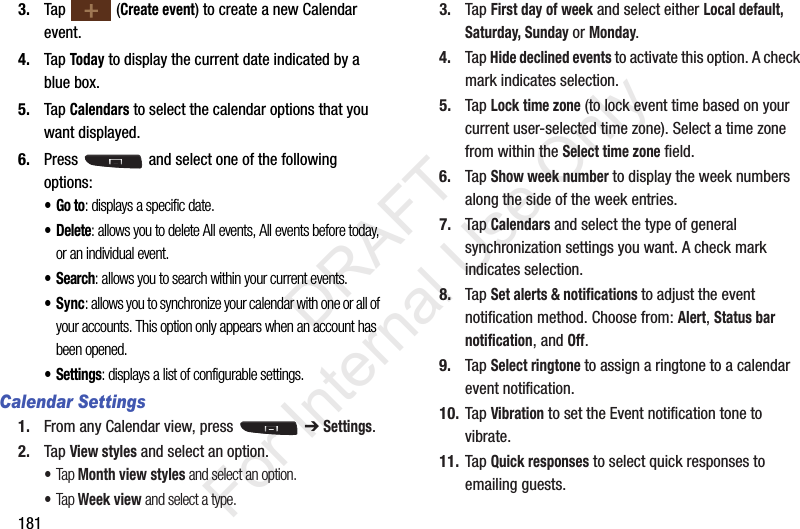

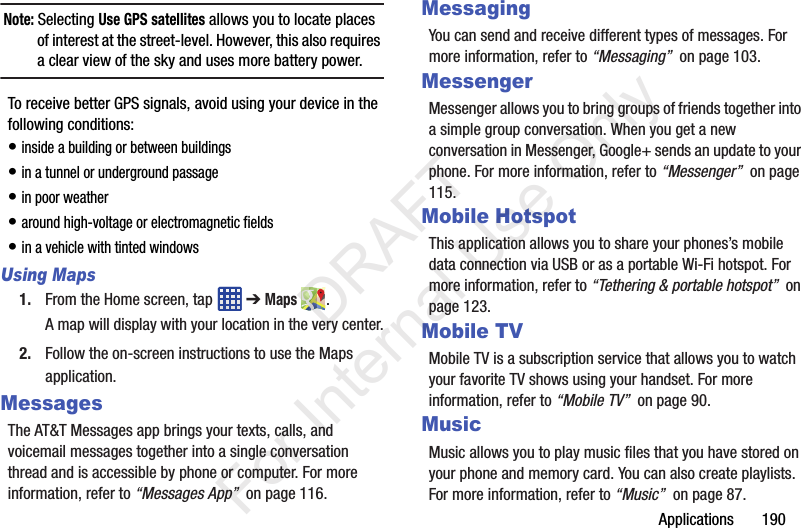


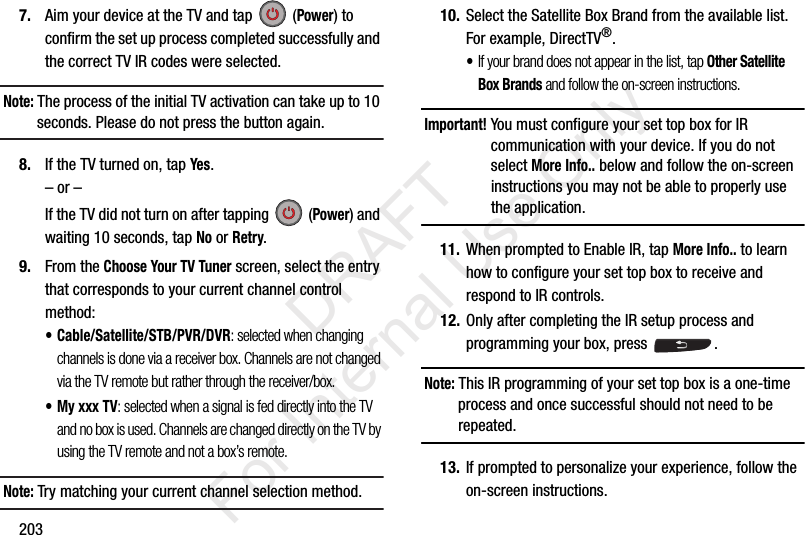
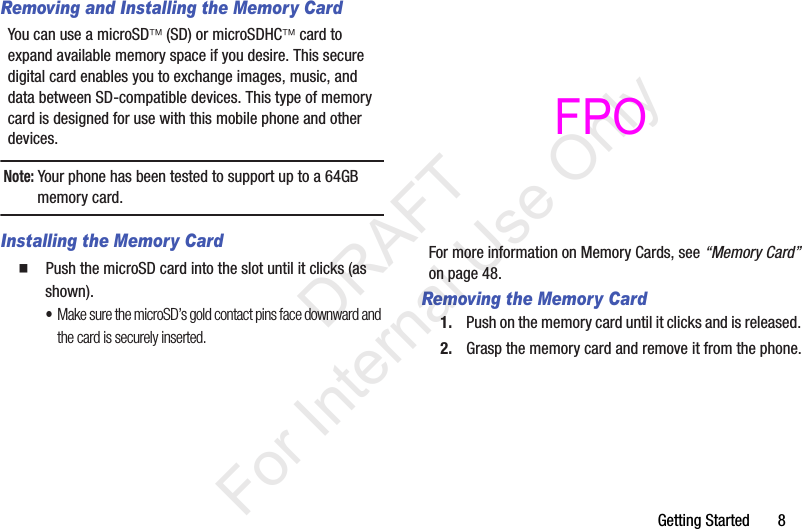
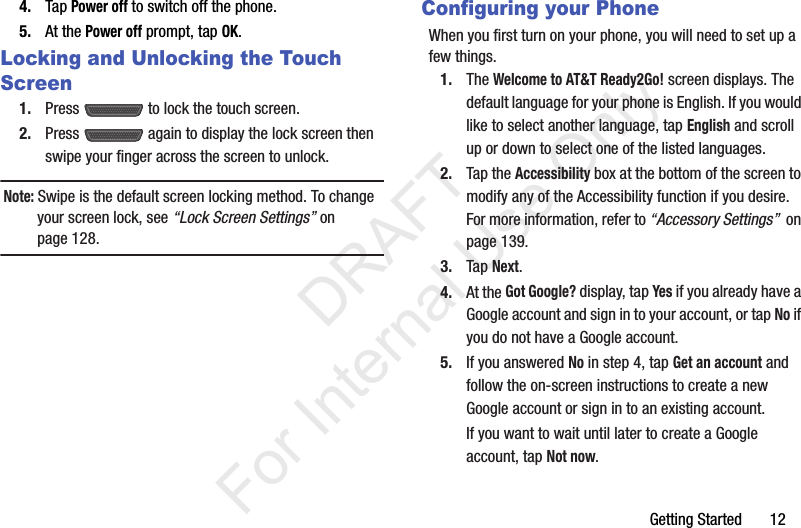
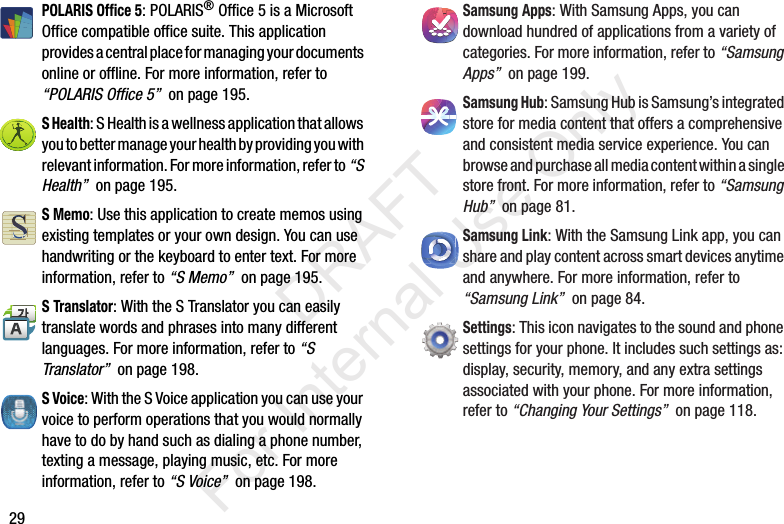
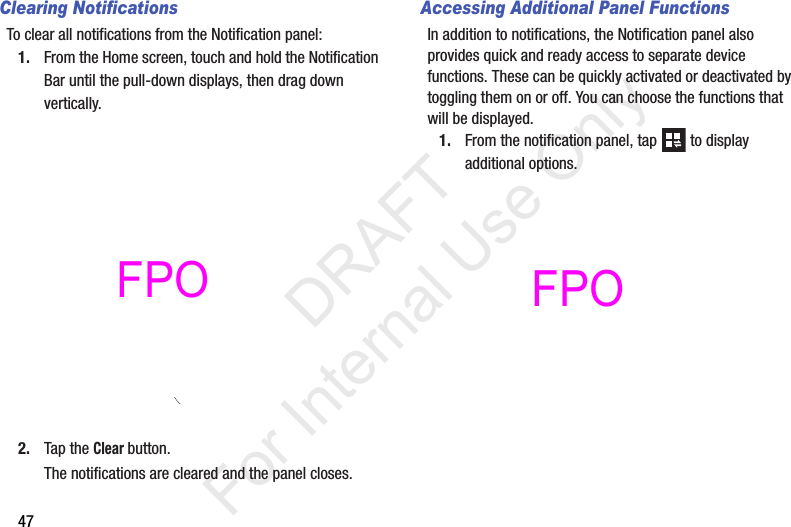
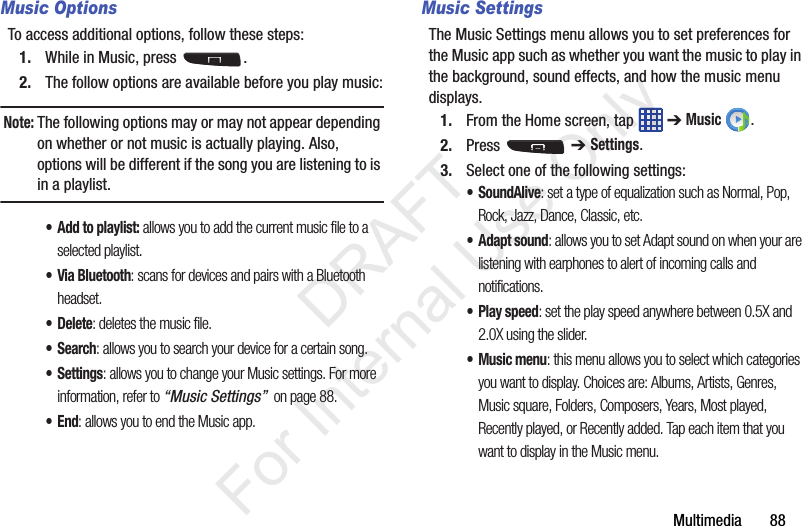
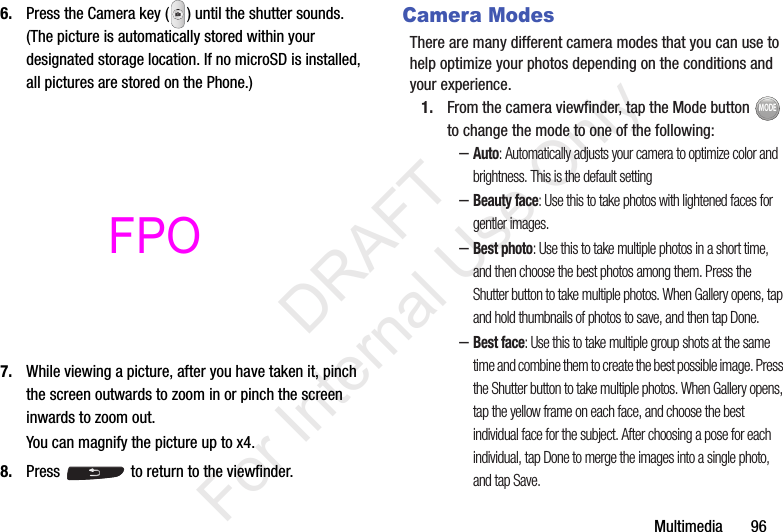
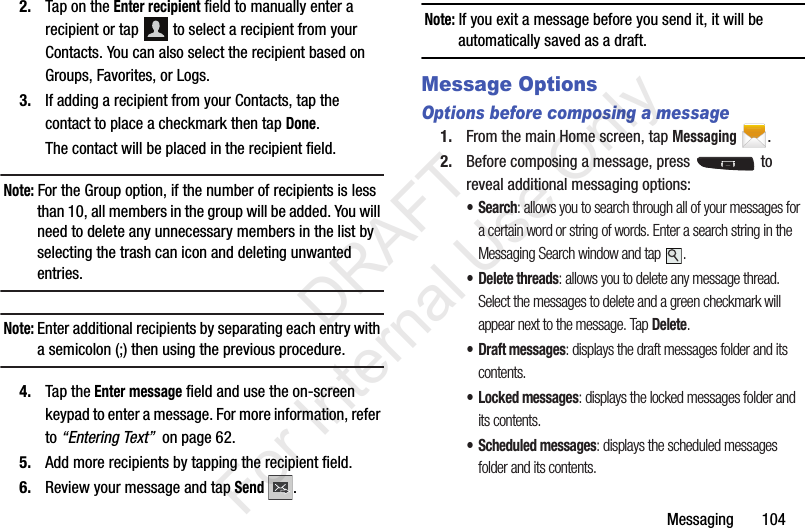
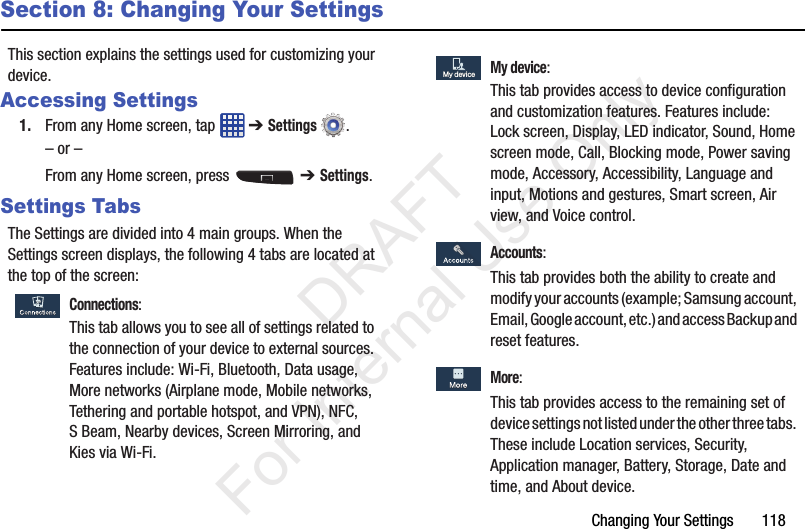
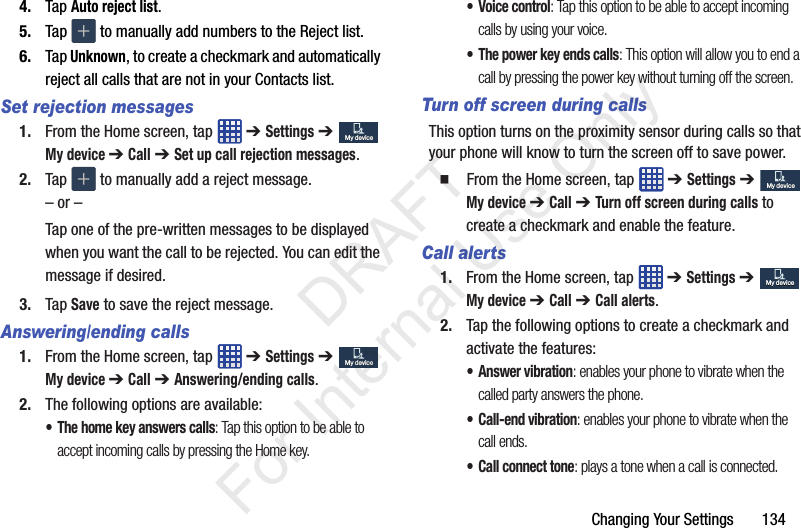
![Applications 204Using WatchONTo change channels:1. Sign into your Samsung account. 2. From the Home screen, tap ➔ WatchON .3. From the top of the main screen, tap (Remote Control). This launches an on-screen set of remote control tabs. Choose from one of the following:• Easy remote: provides the most common used control features. Scroll down to view additional functions.• [Set top box]: displays customized control specific to your configured set top box. Ex: satellite dish remote control functions.•TV: provides access to control functions specific to your TV.4. From the top of the main screen tap (Select Room) to choose from different receivers/boxes in different rooms. (Example: Living Room box, Bedroom box, etc.).5. Press to return to the main menu.Locating your favorite programming:1. Sign into your Samsung account. 2. From the Home screen, tap ➔ WatchON .3. From the main screen Tap (Combined View) to reveal available media categories. 4. Select an available category.– or –Tap Guide to display on your TV an on-screen listing of available set top box shows. For additional information on the WatchON application, press and then select Help.WatchOn Settings1. From the Home screen, tap ➔ WatchON .2. Press and then select an available on-screen option:•Change Room: allows you to select a previously configured room.•Settings: provides access to the Samsung WatchOn settings menu.•Help: displays on-screen help information.• About: displays on-screen information about the application. DRAFT For Internal Use Only](https://usermanual.wiki/Samsung-Electronics-Co/SGHI537/User-Guide-1977828-Page-211.png)


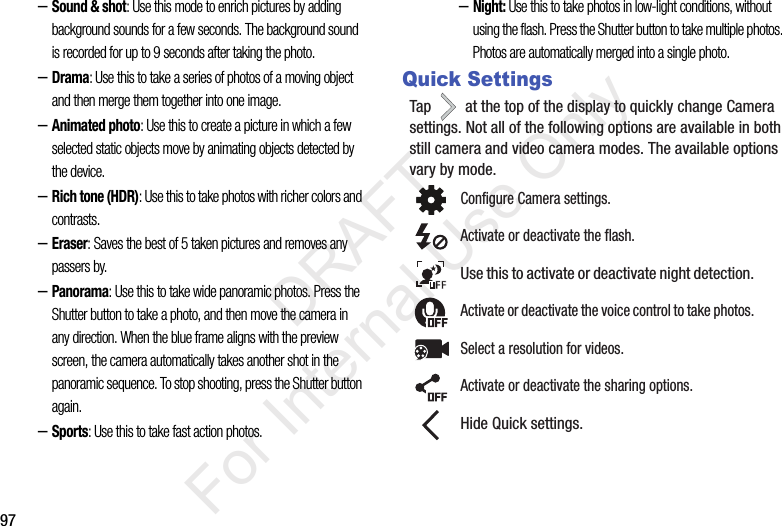
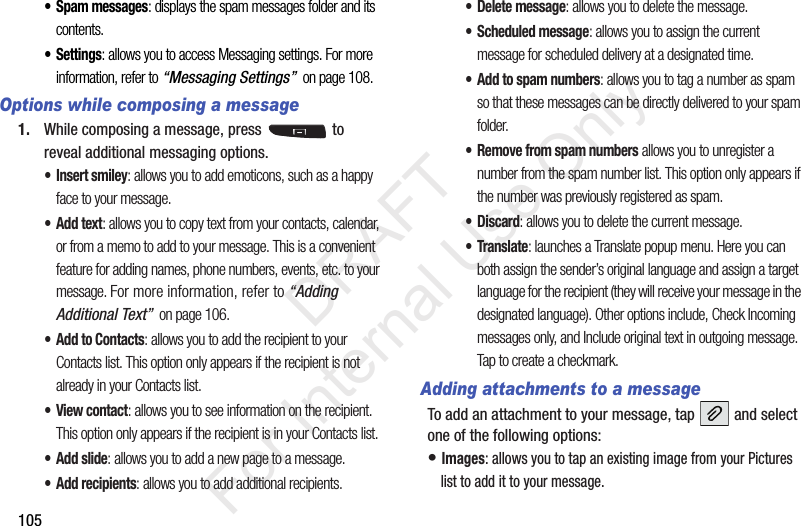
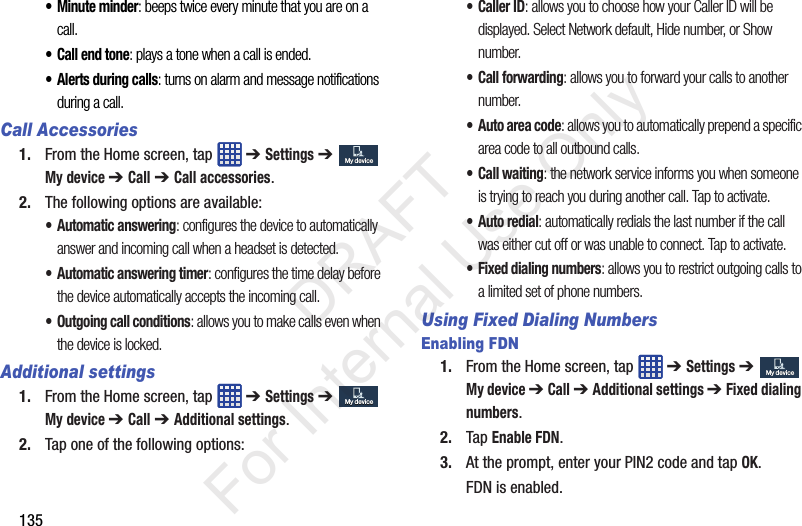
![215The FCC SAR limit incorporates a substantial margin of safety to give additional protection to the public and to account for any variations in measurements.SAR tests are conducted using standard operating positions accepted by the FCC with the phone transmitting at its highest certified power level in all tested frequency bands. Although the SAR is determined at the highest certified power level, the actual SAR level of the phone while operating can be well below the maximum reported value. This is because the phone is designed to operate at multiple power levels so as to use only the power required to reach the network. In general, the closer you are to a wireless base station antenna, the lower the power output of the phone.Before a new model phone is available for sale to the public, it must be tested and certified to the FCC that it does not exceed the SAR limit established by the FCC. Tests for each model phone are performed in positions and locations (e.g. at the ear and worn on the body) as required by the FCC. For body-worn operation, this phone has been tested and meets FCC RF exposure guidelines when used with an accessory that contains no metal and that positions the mobile device a minimum of 1.0 cm from the body.Use of other accessories may not ensure compliance with FCC RF exposure guidelines. The FCC has granted an Equipment Authorization for this mobile device with all reported SAR levels evaluated as in compliance with the FCC RF exposure guidelines. This [mobile phone/tablet/device] has a FCC ID number: A3LSGHI537 [Model Number: SGH-i537] and the specific SAR levels for this [mobile phone/tablet/device] can be found at the following FCC website:http://www.fcc.gov/oet/ea/.The SAR information for this device can also be found on Samsung’s website: http://www.samsung.com/sar. SAR information on this and other model phones can be accessed online on the FCC's website through http://transition.fcc.gov/oet/rfsafety/sar.html. To find information that pertains to a particular model phone, this site uses the phone FCC ID number which is usually printed somewhere on the case of the phone. Sometimes it may be necessary to remove the battery pack to find the number. Once you have the FCC ID number for a particular phone, follow the instructions on the website and it should provide values for typical or maximum SAR for a particular phone. Additional SAR information can also be obtained at http://www.fcc.gov/encyclopedia/specific-absorption-rate-sar-cellular-telephones. DRAFT For Internal Use Only](https://usermanual.wiki/Samsung-Electronics-Co/SGHI537/User-Guide-1977828-Page-222.png)


![231• Check regularly that all wireless mobile device equipment in your vehicle is mounted and operating properly.• When using a headset in dry environments, static electricity can build up in the headset and cause a small quick static electrical shock. To minimize the risk of electrostatic discharge from the headset avoid using the headset in extremely dry environments or touch a grounded unpainted metal object to discharge static electricity before inserting the headset.• Do not store or carry flammable liquids, gases, or explosive materials in the same compartment as the mobile device, its parts, or accessories.• For vehicles equipped with an air bag, remember that an air bag inflates with great force. Do not place objects, including installed or portable wireless equipment near or in the area over the air bag or in the air bag deployment area. If wireless equipment is improperly installed and the air bag inflates, serious injury could result.• Switch your mobile device off before boarding an aircraft. The use of wireless mobile devices in aircraft is illegal and may be dangerous to the aircraft's operation. Check with appropriate authorities before using any function of a mobile device while on an aircraft.• Failure to observe these instructions may lead to the suspension or denial of cell phone services to the offender, or legal action, or both.• While using your device, leave some lights on in the room and do not hold the screen too close to your eyes.• Seizures or blackouts can occur when you are exposed to flashing lights while watching videos or playing games for extended periods. If you feel any discomfort, stop using the device immediately.• Reduce risk of repetitive motion injuries. When you repetitively perform actions, such as pressing keys, drawing characters on a touch screen with your fingers, or playing games, you may experience occasional discomfort in your hands, neck, shoulders, or other parts of your body. When using your device for extended periods, hold the device with a relaxed grip, press the keys lightly, and take frequent breaks. If you continue to have discomfort during or after such use, stop use and see a physician.• If your device has a camera flash or light, do not use the flash or light close to the eyes of people or pets. [122011] DRAFT For Internal Use Only](https://usermanual.wiki/Samsung-Electronics-Co/SGHI537/User-Guide-1977828-Page-238.png)
![237Samsung Telecommunications America, LLC1301 E. Lookout DriveRichardson, Texas 75082Phone: 1-800-SAMSUNGPhone: 1-888-987-HELP (4357)©2012 Samsung Telecommunications America, LLC. All rights reserved.No reproduction in whole or in part allowed without prior written approval. Specifications and availability subject to change without notice. [111611]End User License Agreement for SoftwareIMPORTANT. READ CAREFULLY: This End User License Agreement ("EULA") is a legal agreement between you (either an individual or a single entity) and Samsung Electronics Co., Ltd. ("Samsung Electronics Co.") for software, owned by Samsung Electronics Co. and its affiliated companies and its third party suppliers and licensors, that accompanies this EULA, which includes computer software and may include associated media, printed materials, "online" or electronic documentation ("Software"). Samsung Electronics Co. is a separate company from the company that provides the limited warranty for this mobile device, Samsung Telecommunications America, LLC.This device requires the use of preloaded software in its normal operation. BY USING THE DEVICE OR ITS PRELOADED SOFTWARE, YOU ACCEPT THE TERMS OF THIS EULA. IF YOU DO NOT ACCEPT THESE TERMS, DO NOT USE THE DEVICE OR THE SOFTWARE. INSTEAD, RETURN THE DEVICE TO THE RETAILER FOR A REFUND OR CREDIT. 1. GRANT OF LICENSE. Samsung Electronics Co. grants you the following rights provided that you comply with all terms and conditions of this EULA: You may install, use, access, display and run one copy of the Software on the local hard disk(s) or other permanent storage media of one computer and use the Software on a single computer or a mobile device at a time, and you may not make the Software available over a network where it could be used by multiple computers at the same time. You may make one copy of the Software in machine readable form for backup purposes only; provided that the backup copy must include all copyright or other proprietary notices contained on the original. DRAFT For Internal Use Only](https://usermanual.wiki/Samsung-Electronics-Co/SGHI537/User-Guide-1977828-Page-244.png)

![Warranty Information 244date of the first consumer purchaser's purchase of the device and providing the same information. These are the only two forms of notice that will be effective to opt out of this dispute resolution procedure. Opting out of this dispute resolution procedure will not affect your use of the device or its preloaded Software, and you will continue to enjoy the benefits of this license.16. ENTIRE AGREEMENT; SEVERABILITY. This EULA is the entire agreement between you and Samsung Electronics Co. relating to the Software and supersedes all prior or contemporaneous oral or written communications, proposals and representations with respect to the Software or any other subject matter covered by this EULA. If any provision of this EULA is held to be void, invalid, unenforceable or illegal, the other provisions shall continue in full force and effect. [101212] DRAFT For Internal Use Only](https://usermanual.wiki/Samsung-Electronics-Co/SGHI537/User-Guide-1977828-Page-251.png)