Samsung Electronics Co SGHL878E PCS GSM/EDGE Phone with Bluetooth User Manual L878E
Samsung Electronics Co Ltd PCS GSM/EDGE Phone with Bluetooth L878E
UserManual.wiki
>
Samsung Electronics Co
>
SGHL878E User Manual
Users Manual
Navigation menu
Upload a User Manual
Namespaces
Wiki Guide
HTML
PDF
Info
Views
User Manual
Discussion / Help
Navigation

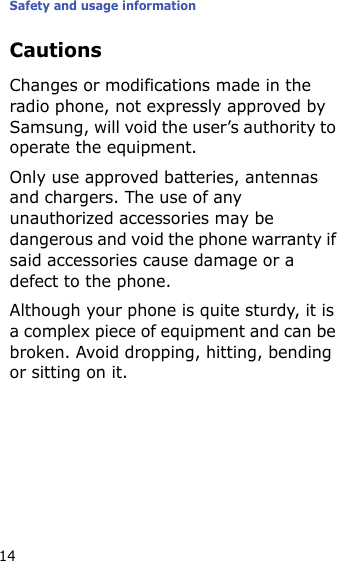
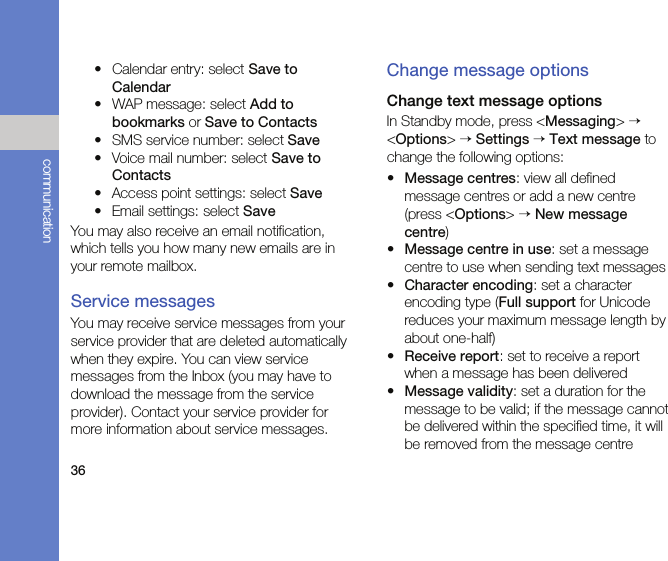
![iiiusing this manualCopyrights and trademarksRights to all technologies and products that comprise this device are the property of their respective owners:→Followed by—the order of options or menus you must select to perform a step; for example: Press [ ] → Media → Music plyr. (represents [ ], followed by Media, followed by Music plyr.)[] Square brackets—device keys; for example: [ ] (represents the End/Power key).<> Angled brackets—softkeys that control different functions at each screen; for example: <OK> (represents the OK softkey).• This product includes software licensed from Symbian Ltd. © 1998-2008. Symbian and Symbian OS are trademarks of Symbian Ltd.• Java™ is a trademark of Sun Microsystems, Inc.• Bluetooth® is a registered trademark of the Bluetooth SIG, Inc. worldwide— Bluetooth QD ID: B0XXXXX.](https://usermanual.wiki/Samsung-Electronics-Co/SGHL878E/User-Guide-1006976-Page-4.png)


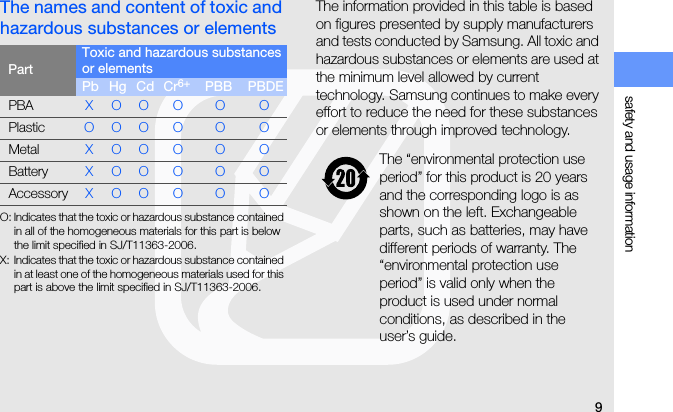

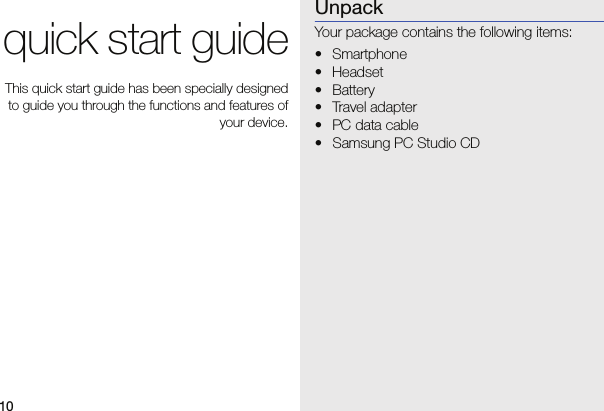
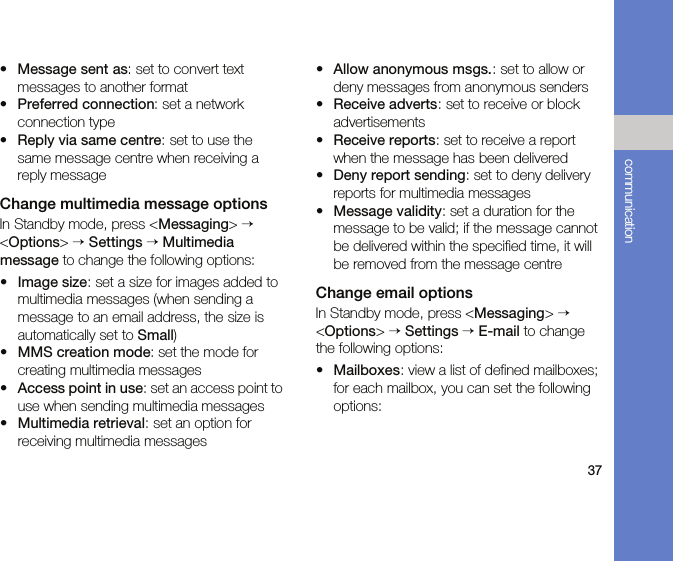
![12quick start guideKeysKey FunctionPerform actions indicated at the bottom of the displayOpen the main menu; Show all active applications (press and hold)Move through lists or menus; Move the cursor up, down, left, or rightConfirm your selectionOpen the defined application or bookmarkMake or answer a call; In Standby mode, access call logsTurn the device on or off (press and hold for three seconds); Access the Quick Menu (press and hold for two seconds); End a call; Exit an applicationDisplay a list of input modesDeleteOpen the defined application or bookmarkEnter numbers and characters; In Standby mode, press and hold [1] to access voice mailEnter an international call prefix or pause; Display a list of symbols Key Function](https://usermanual.wiki/Samsung-Electronics-Co/SGHL878E/User-Guide-1006976-Page-22.png)
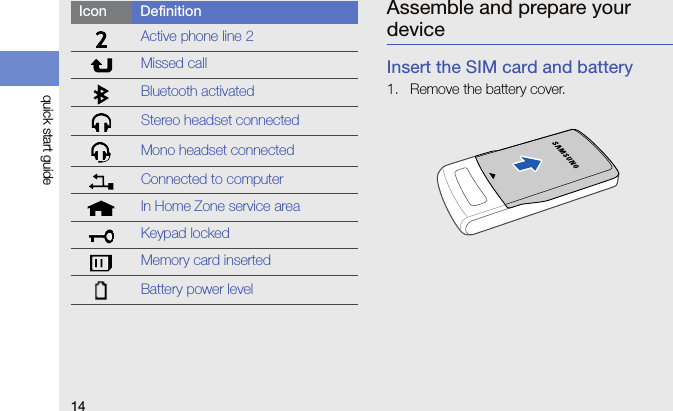

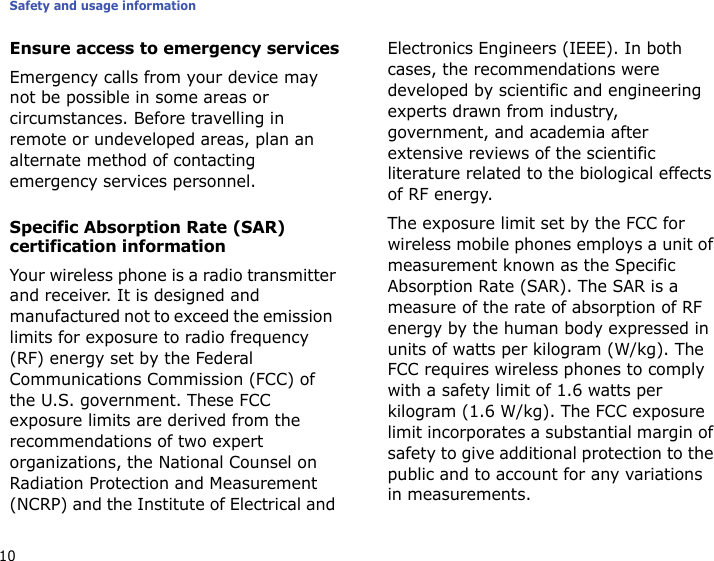
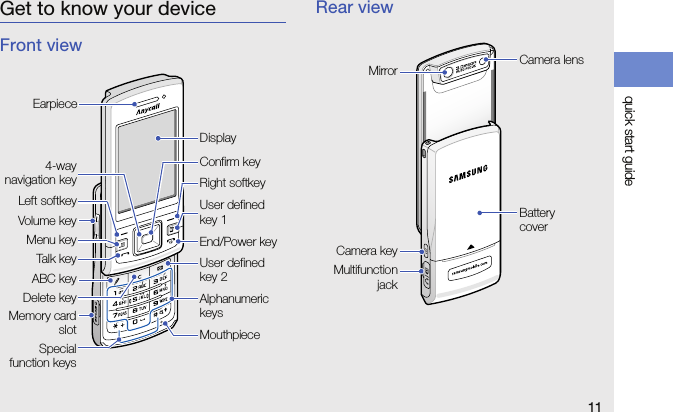
![17quick start guide2. Insert a memory card into the memory card slot with the label facing up.3. Push the memory card into the memory card slot until it locks (clicks) in place.4. Close the cover to the memory card slot.Follow these steps when removing a memory card.Carefully follow the steps below when removing a memory card to avoid data loss or damage to the memory card.1 Press and hold [ ] for two seconds and select Remove memory card.2 Press <Yes> to confirm.3 Open the cover to the memory card slot and gently push the memory card in until it disengages (clicks) from the device.4 Pull the memory card out of the memory card slot.5 Press <OK>.If you must reboot the device to finish installing an application, do not remove the memory card until the reboot is complete. Otherwise, your application files may be corrupted or erased.](https://usermanual.wiki/Samsung-Electronics-Co/SGHL878E/User-Guide-1006976-Page-27.png)
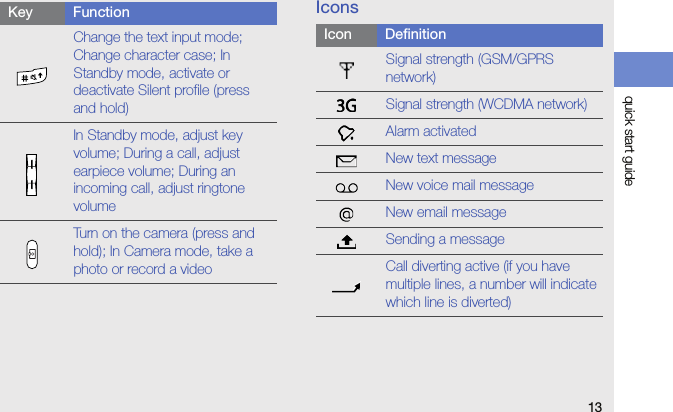
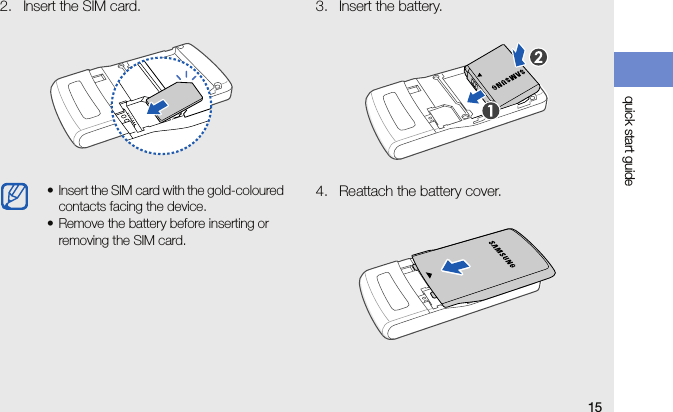
![18quick start guideTurn on your device for the first time1. Press and hold [ ] to turn on your device. 2. Follow the onscreen instructions to set the region, current time, and the date. Your device will automatically connect to the cellular network.Unlock the external keysWhen you close your device, it automatically locks the external keys. To unlock the keys, press <Unlock> and then press the Confirm key.Use basic call functionsMake a call1. In Standby mode, enter an area code and phone number.2. Press [ ] to dial the number.3. To end the call, press [ ].Answer a call1. When a call comes in, press [].2. To end the call, press [ ].](https://usermanual.wiki/Samsung-Electronics-Co/SGHL878E/User-Guide-1006976-Page-28.png)
![19quick start guideEnter textChange the text input modePress [ ] to switch between the following text input modes:• - Pinyin mode• - Stroke mode•Abc - Predictive mode (initial capital)•abc - Predictive mode (lower case)•Abc - Normal mode (initial capital)•abc - Normal mode (lower case)To access symbols, press [ ].To access numbers, press and hold [ ].To use Pinyin and Stroke mode, press <Options> → Writing language → .Enter text in Pinyin modePinyin is a system to enter Chinese words by spelling them phonetically (how they sound) using the Latin alphabet.1. Press the appropriate alphanumeric keys to enter pinyins.2. Scroll left or right to select a pinyin.3. Press the Confirm key. A number appears by each character.4. Scroll up or down to select a character.5. Press an alphanumeric key to enter the corresponding character.6. When you are finished, press <Cancel>.](https://usermanual.wiki/Samsung-Electronics-Co/SGHL878E/User-Guide-1006976-Page-29.png)
![20quick start guideEnter text in Stroke modeStroke mode allows you to enter individual Chinese strokes, in written order, from top to bottom, and from left to right.1. Press [1] through [5] to enter strokes.Press [6] when you are unsure which stroke to enter. This will insert a placeholder.2. Scroll to select a character. A number appears by each character.3. Press an alphanumeric key to enter the corresponding character.4. When you are finished, press <Cancel>.Enter text in Predictive modeIn Predictive mode, your device attempts to predict the word you are entering to save you time and keystrokes.To enter a word in Predictive mode,1. Press each alphanumeric key one time only for each letter needed.2. Type the complete word before confirming that the device has predicted it properly. The device will actively attempt to predict words, so the correct word may not appear until you have entered it completely.3. If the device shows the correct word, press [0] to confirm the word.4. If the device shows an incorrect word, press [ ] to view other words that match your entry, or add a word to the dictionary (see the next section).Add a word to the dictionaryWhen using Predictive mode, you can add new words to the dictionary.1. Press <Spell>.2. Enter the word in normal mode and press <OK> to confirm.](https://usermanual.wiki/Samsung-Electronics-Co/SGHL878E/User-Guide-1006976-Page-30.png)
![21quick start guideCustomise your deviceYour device includes preset profiles that control ringtones, key tones, and alerts and themes that control skins, wallpaper, and menu layouts. You can activate profiles for different situations, personalise profiles, apply themes, and download new themes from the web.Activate a profile1. In Standby mode, press [ ] → Profiles.2. Scroll to a profile and press <Options> → Activate.Personalise a profile1. In Standby mode, press [ ] → Profiles.2. Scroll to a profile.3. Press <Options> → Personalise.4. Change the settings as desired.5. When you are finished personalising the profile, press <Back>.Apply a theme1. In Standby mode, press [ ] → Tools → Themes.2. Scroll to a category and press the Confirm key:•General - choose a skin for your display.•Menu view - choose a layout of the display.•Standby - choose shortcuts for Standby mode.•Wallpaper - choose a background image for Standby mode.•Call image - choose an image for incoming calls.3. Scroll to a theme or image and press the Confirm key.In Standby mode, the current profile is shown at the top of the display (except for the General profile). To quickly change profiles, press and hold [ ] for two seconds and select a different profile.](https://usermanual.wiki/Samsung-Electronics-Co/SGHL878E/User-Guide-1006976-Page-31.png)
![22communicationYour device allows you to send and receive manytypes of calls and messages over cellular networksand the internet.CallsLearn to use your device's call functions. For basic call functions, see "Use basic call functions" X p. 18Call an international number1. Press [ ] twice to insert the + character (this replaces the international access code).2. Enter the complete number you want to dial (country code, area code, and phone number), and then press [ ] to dial.3. To end the call, press [ ].Make a call from the contact list1. In Standby mode, press [ ] → Contacts to open your contact list.2. Scroll to a contact or search by entering the first few letters of the contact's name.](https://usermanual.wiki/Samsung-Electronics-Co/SGHL878E/User-Guide-1006976-Page-32.png)
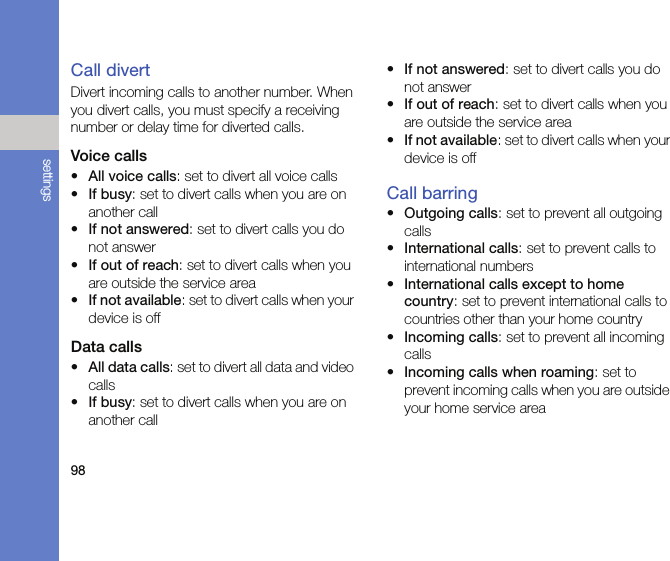
![23communication3. Press [ ] to call the default number for the contact.Insert a pauseWhen calling automated systems, you can insert a pause between the device number and another set of numbers.To insert a pause, press [ ] to select the type of pause:•p (automatic pause)-press [ ] three times to insert an automatic pause. The device will pause for two seconds, then automatically transmit the numbers after the pause.•w (manual pause)-press [ ] four times to insert a manual pause. After the pause, you must press [ ] to transmit the remaining numbers.View and return missed callsYour device will show missed calls on the display.To return a missed call,1. Press the Confirm key.2. Scroll to a missed call.3. Press [ ] to dial.Call a recently dialled number1. In Standby mode, press [ ] to display a list of recent numbers.2. Scroll to a number and press [ ].Divert callsYour service provider or network may or may not support this feature. To divert your incoming calls to another number,1. In Standby mode, press [ ] → Settings → Phone → Call divert.You can also press the Confirm key to open the contact information and select a different number or call type (e.g., video).](https://usermanual.wiki/Samsung-Electronics-Co/SGHL878E/User-Guide-1006976-Page-33.png)
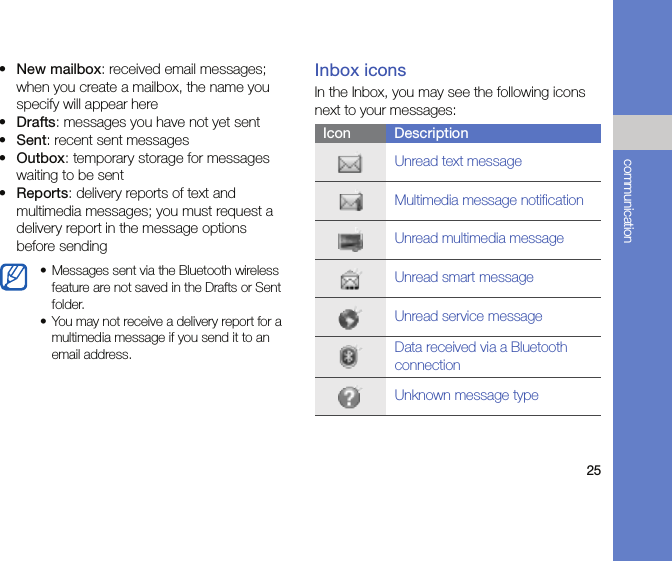
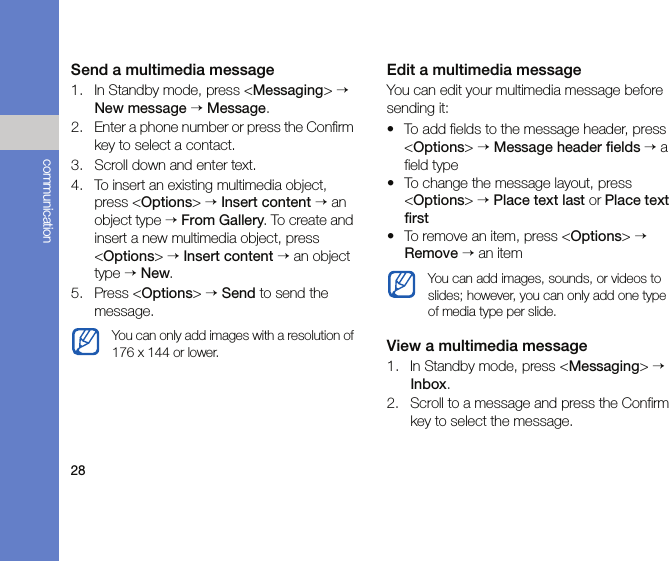
![24communication2. Scroll to a call type and press the Confirm key.3. Scroll to a diverting type and press <Options> → Activate.4. For voice calls, scroll to a diverting location (mailbox or other number) and press the Confirm key.5. Enter a phone number and press <OK> (if necessary).Bar (block) callsTo activate this function, you need a barring password from your service provider. To bar incoming calls from a specific number,1. In Standby mode, press [ ] → Settings → Phone → Call barring.2. Scroll to a barring type and press <Options> → Activate.3. Enter the barring password and press <OK>.MessagesLearn to use messaging functions. For instructions on entering text, see "Enter text" X p. 19. For an explanation of options, see "Change message options" X p. 36Message foldersWhen you open Messaging, you will see the New message function and a list of folders:•Inbox: received messaging, except email and cell broadcast messages•My folders: message templates and saved messagesIf you enter the incorrect barring password three times, the device will lock. Contact your service provider.](https://usermanual.wiki/Samsung-Electronics-Co/SGHL878E/User-Guide-1006976-Page-34.png)

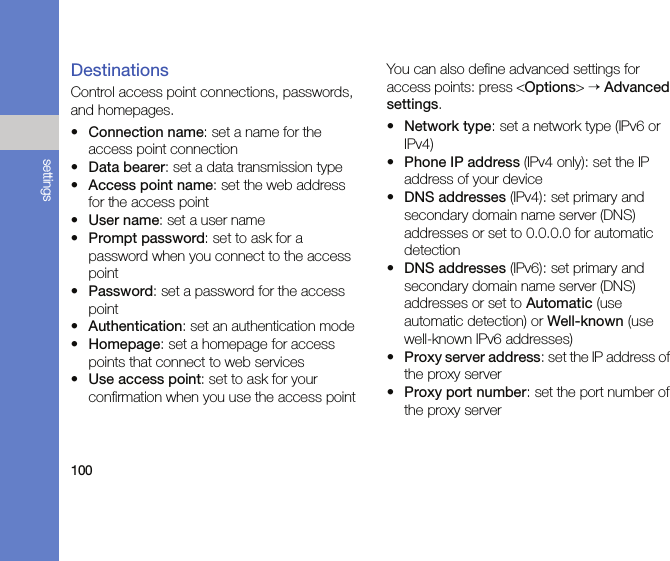
![27communicationRetrieve messages from a SIM cardIf you have text messages stored on a SIM card, you must copy them to the device before you can view them.1. In Standby mode, press <Messaging> → <Options> → SIM messages.2. Press <Options> → Mark/Unmark → Mark (to select one) or Mark all (to select all).3. Press <Options> → Copy → Inbox or a folder.You can now view the messages from the folder on your device.Multimedia messagesBefore you can send multimedia messages, you must define an access point.Set an access pointYour service provider may supply access point settings via a smart message. To automatically set an access point using a smart message, see "Save smart message data or settings to your device" X p. 35To manually set an access point,1. In Standby mode, press [ ] → Settings → Connection → Destinations → MMS.2. Select an existing access point or press <Options> → New access point.3. Set access point options according to the instructions provided by your service provider.](https://usermanual.wiki/Samsung-Electronics-Co/SGHL878E/User-Guide-1006976-Page-37.png)
![29communicationListen to voice mailIf your voice mail number is preset by your service provider, you can press and hold [1] to access your voice mail.If the voice mail number is not preset or if you need to change the voice mail number,1. In Standby mode, press [ ] → Tools → Call mlbox. → <Options> → Change number.2. Select <No> to enter the voice mail number manually.3. Enter the voice mail number provided by your service provider.4. Press <OK>.5. Select a location to save the voice mail number.You can now access your voice mail from Standby mode by pressing and holding [1].Email messagesBefore you send or receive email messages, you must create a mailbox.Create a mailbox1. In Standby mode, press <Messaging> → <Options> → Settings → E-mail → Mailboxes.2. Press the Confirm key to start the mailbox setup wizard and follow the onscreen instructions.The new mailbox will automatically appear in Messaging. To change the current mailbox, return to email settings and switch the "Mailbox in use" to another mailbox.If you use the POP3 protocol, the mailbox will not update automatically when you are online. You must disconnect and then reconnect to view new messages.](https://usermanual.wiki/Samsung-Electronics-Co/SGHL878E/User-Guide-1006976-Page-39.png)
![32communicationInstant messagesYou can send and receive instant messages (IM) if your service provider supports this feature.Log in to the IM server1. In Standby mode, press [ ] → Connect. → IM.2. If the device does not attempt to log in automatically, press <Options> → Log in.3. Enter your user ID and password, and then press <OK>.4. To log out, press <Options> → Log out.Start a conversation1. In Standby mode, press [ ] → Connect. → IM.2. Press <Options> → New conversation → Enter user ID or Select from contacts.3. Enter a user ID or select a contact from your contact list.4. During a conversation, press <Options> to access the following:•Insert smiley: use one of the preset smileys•Send image: send an image to an IM contact•Blocking options → Add to blocked list: block messages from an IM contact5. To end the conversation, press <Options> → End conversation.Accept an invitationWhen you receive an IM invitation, press <Show> to accept the invitation. If you have multiple invitations at once, press <Show>, scroll to an invitation, and press <OK>.](https://usermanual.wiki/Samsung-Electronics-Co/SGHL878E/User-Guide-1006976-Page-42.png)

![40communicationLogLearn to view log information about calls, packet data, and other communication events.Recent callsYou can view and erase logs of recently missed calls, received calls, or dialled numbers.View recent call logsTo view recently missed calls, received calls, or dialled numbers,1. In Standby mode, press [ ] → Log → Recent calls.2. Scroll to a call type and press the Confirm key.Erase recent call logsYou can erase all recent call logs at once, erase a single call log, or delete a single number from a log. To erase all recent call logs,1. In Standby mode, press [ ] → Log → Recent calls.2. Press <Options> → Clear recent calls.3. Press <Yes> to confirm.To erase a single call log,1. In Standby mode, press [ ] → Log → Recent calls → a call type.2. Press <Options> → Clear list.3. Press <Yes> to confirm.To erase a single number from a log,1. In Standby mode, press [ ] → Log → Recent calls → a call type.2. Scroll to a number and press [C], or press <Options> → Delete.3. Press <Yes> to confirm.To call a number from a call log, scroll to the number and press [ ].](https://usermanual.wiki/Samsung-Electronics-Co/SGHL878E/User-Guide-1006976-Page-50.png)
![41communicationCall durationTo view the durations of your last call, dialled number, received call, or all calls, in Standby mode, press [ ] → Log → Call duration.To reset the call timers, 1. In Standby mode, press [ ] → Log → Call duration.2. Press <Options> → Clear timers.3. Enter the lock code (the default lock code is 00000000), and then press <OK>.Packet dataTo view the amount of sent or received packet data, in Standby mode, press [ ] → Log → Packet data.To reset the packet data counters,1. In Standby mode, press [ ] → Log → Packet data.2. Press <Options> → Clear counters.3. Enter the lock code (the default lock code is 00000000), and then press <OK>.Communication logYou can view communication details and filter logs with the communication log.View the communication log1. In Standby mode, press [ ] → Log.2. Scroll right to switch to the communication log.Filter log events1. In Standby mode, press [ ] → Log.2. Scroll right to switch to the communication log.3. Press <Options> → Filter.4. Scroll to a filter type and press the Confirm key.Some events, such as a text message split into multiple parts, will appear as one communication event.](https://usermanual.wiki/Samsung-Electronics-Co/SGHL878E/User-Guide-1006976-Page-51.png)
![42communicationErase the communication logTo permanently erase all of the log contents,1. In Standby mode, press [ ] → Log.2. Scroll right to switch to the communication log.3. Press <Options> → Clear log.4. Press <Yes> to confirm.Log durationYou can change the length of time that communication events are stored in the logs. After that time, events are automatically erased to free up memory.To set a log duration,1. In Standby mode, press [ ] → Log.2. Press <Options> → Settings.3. Press <Options> → Change.4. Scroll to a duration and press the Confirm key.If you select No log, no communication events will be stored in the log.](https://usermanual.wiki/Samsung-Electronics-Co/SGHL878E/User-Guide-1006976-Page-52.png)
![43mediaLearn to use the media applications on your device:Music player, Camera, Gallery, Video Editor,Viewer & Editor, Radio, RealPlayer, and Recorder.Music playerWith Music player, you can play mp3, aac, or wma music files.Add files to your deviceYou can add music files to your device by downloading them from the internet or transferring them from a PC via PC Studio (see PC Studio help) or a microSD memory card.Add files to the music libraryTo automatically add files to the music library,1. Add music files to your device.2. In Standby mode, press [ ] → Media → Music plyr. → <Options> → Music library.3. Press <Options> → Update Music library.Play music files1. In Standby mode, press [ ] → Media → Music plyr. → <Options> → Music library.2. Select a playlist.](https://usermanual.wiki/Samsung-Electronics-Co/SGHL878E/User-Guide-1006976-Page-53.png)
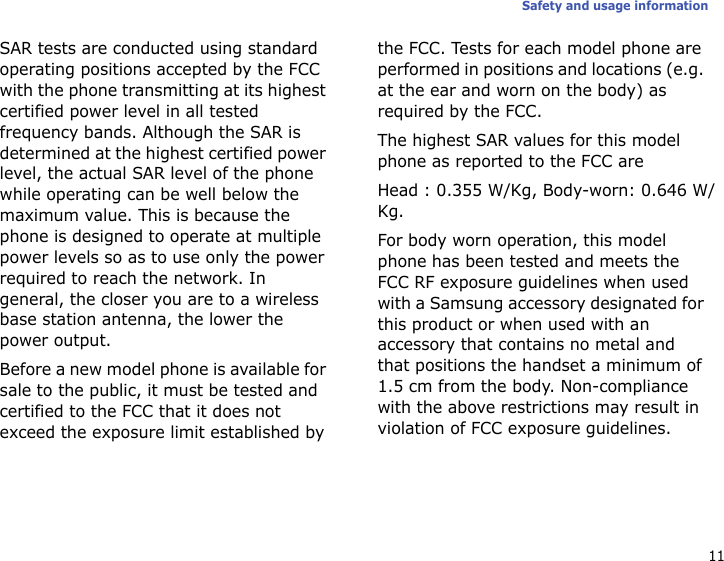
![44media3. Scroll to a file and press the Confirm key.4. Use the following keys during playback:You can also access the following options:• To play tracks in random, press <Options> → Shuffle play → On.• To play a track or all tracks repeatedly, press <Options> → Repeat → One or All.• To close the music player, leaving music still in the background, press <Options> → Play in background.Create a playlistTo create a custom playlist,1. In Standby mode, press [ ] → Media → plyr.2. Press <Options> → Music library → Playlists.3. Press <Options> → New playlist → a memory location (if necessary).4. Enter a name for the playlist and press the Confirm key.5. Scroll to a track and press <Options> → Select to add the track to the playlist.Key FunctionConfirm Pause or resume playbackNavigation (Left)Restart playbacks; Skip backward (press within 3 seconds); Scan backward (press and hold)Navigation (Right)Skip forward; Scan forward (press and hold)Navigation (Up) Return to the playlistNavigation (Down) Stop playbackVolume Adjust the volume up or down](https://usermanual.wiki/Samsung-Electronics-Co/SGHL878E/User-Guide-1006976-Page-54.png)
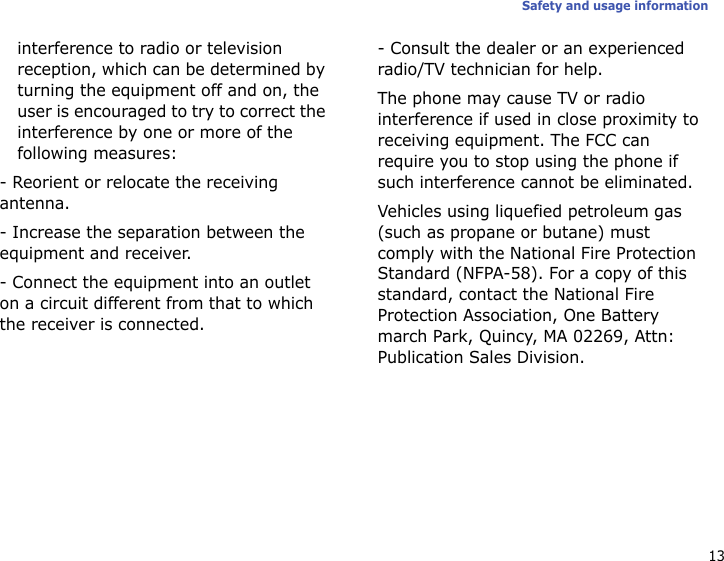
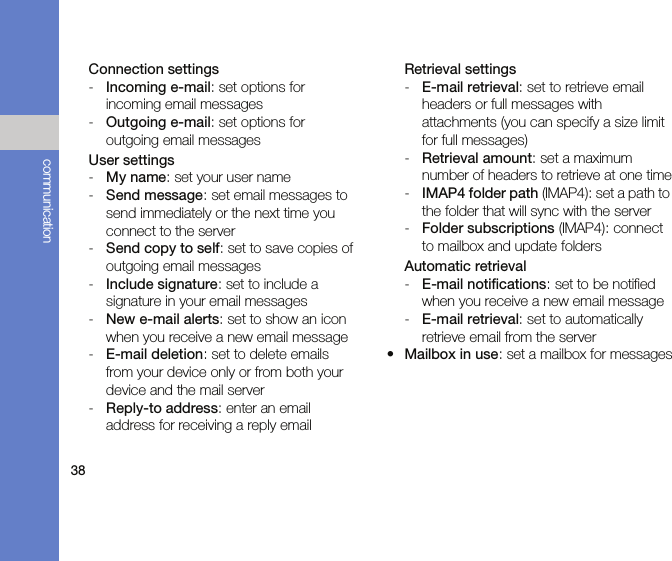
![45mediaCameraYour device allows you to take digital photos (jpg format) or record videos (mp4 format).Capture a photo1. Press and hold [ ] to turn on the camera.2. Rotate the device 90° anti-clockwise (to the left).3. Aim the lens at the subject and make any adjustments (see "Use the keypad in Camera mode").4. Press [ ] or the Confirm key to capture the image.Use the keypad in Camera modeKey FunctionNavigation (Up/Down) Zoom in or outNavigation (Right) Switch to Camcorder mode1Switch between Burst mode and Normal mode2Turn on or off Night mode3Change the memory where the photo is saved4Adjust the brightness5Adjust the contrast6Change the white balance mode7Change the colour tone8Set the time delay before taking a photoSee adjustment shortcuts0Change the camera settings (see "Camera", X p. 104)Hide or show the icons on the screenKey Function](https://usermanual.wiki/Samsung-Electronics-Co/SGHL878E/User-Guide-1006976-Page-55.png)
![46mediaView a photo1. In Standby mode, press [ ] → Media → Gallery → Images.2. Scroll to an image and press the Confirm key.Record a video1. Press and hold [ ] to turn on the camera.2. Rotate the device 90° anti-clockwise (to the left).3. Press <Options> → Video mode to record a video.4. Aim the lens at the subject and make any adjustments (see "Use the keypad in Camcorder mode").5. Press [ ] or the Confirm key to begin recording.6. Press <Stop> or [ ] to stop recording.Use the keypad in Camcorder modeKey FunctionNavigation (Up/Down) Zoom in or outNavigation (Left) Switch to Camera mode1Mute or unmute the audio3Change the memory where the video is saved4Adjust the brightness5Adjust the contrast6Change the white balance mode7Change the colour toneSee adjustment shortcuts0Change the camera settings (see "Camera", X p. 104)Hide or show the icons on the screen](https://usermanual.wiki/Samsung-Electronics-Co/SGHL878E/User-Guide-1006976-Page-56.png)
![47mediaPlay a video1. In Standby mode, press [ ] → Media → Gallery → Video clips.2. Scroll to a video and press the Confirm key.GalleryYou can manage all your media files and streaming internet links from Gallery.Open a media file1. In Standby mode, press [ ] → Media → Gallery.Your media files are automatically organised by file type.2. Scroll to a media folder and press the Confirm key.3. Scroll to a media file and press the Confirm key.Add a streaming internet link to Gallery1. In Standby mode, press [ ] → Media → Gallery → Streaming links.2. Press <Options> → New link → a memory location (if necessary).3. Enter a name and web address and press the Confirm key.Play streaming content from the internet1. In Standby mode, press [ ] → Media → Gallery → Streaming links.2. Scroll to a link and press the Confirm key.RealPlayer will launch and ask if you want to connect to the wireless web.3. Press <Yes>.](https://usermanual.wiki/Samsung-Electronics-Co/SGHL878E/User-Guide-1006976-Page-57.png)
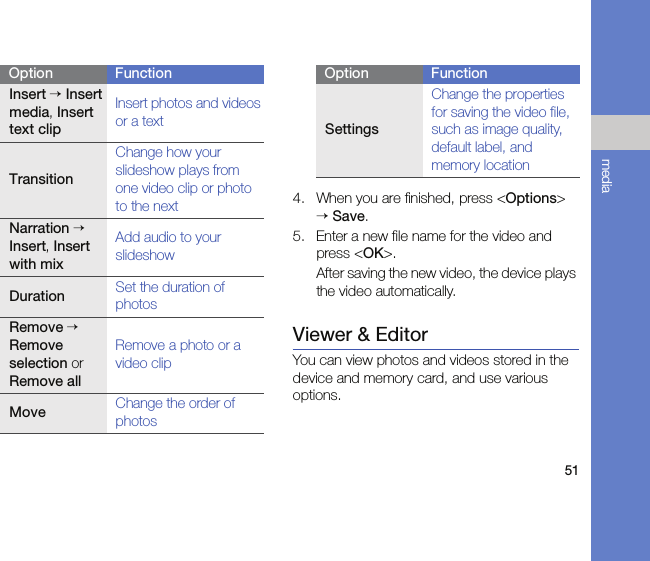
![48mediaVideo EditorWith Video Editor, you can edit or make videos by combining photos or videos.Crop a video1. In Standby mode, press [ ] → Media → Video Editor → Edit video.2. Select a video file.3. Press <Options> → Play.4. Mark the beginning and end of the new video:• Press <Options> → Set start at the point where you want the new video to begin.• Press <Options> → Set end at the point where you want the new video to end.5. Press <Options> → Settings and change the properties for saving the video file, such as image quality, name prefix, and memory location.6. When you are finished, press <Back> → <Options> → Save.7. Enter a new file name for the video and press <OK>.After saving the new video, the device plays the video automatically.Insert text1. In Standby mode, press [ ] → Media → Video Editor → Edit video.2. Select a video file.3. Press <Options> → Add subtitle.4. Press <Options> → Play.5. Press the Confirm key at the point where you want the text to be displayed.6. Enter a text to insert.7. Press the Confirm key and relocate the text. To change the font size or colour for the text, press <Options> → an option.8. When you are finished, press <Done>.](https://usermanual.wiki/Samsung-Electronics-Co/SGHL878E/User-Guide-1006976-Page-58.png)
![49media9. Press the Confirm key at the point where you want the text to be disappeared.10. Press <Options> → Settings and change the properties for saving the video file, such as image quality, name prefix, and storage location.11. When you are finished, press <Back> → <Options> → Save.12. Enter a new file name for the video and press <OK>.After saving the new video, the device plays the video automatically.Add audio to a video1. In Standby mode, press [ ] → Media → Video Editor → Edit video.2. Select a video file.3. Press <Options> → Audio and choose one of the following options:•Audio dubbing: Add one of the sounds you have saved.•Live dubbing: Add audio by recording a new sound.4. Press <Options> → Play.5. Press the Confirm key, and select a sound or start recording at the point where you want to add a sound.6. Press the Confirm key at the point where you want to stop adding the sound.7. Press <Options> → Settings and change the properties for saving the video file, such as image quality, name prefix, and storage location.8. When you are finished, press <Back> → <Options> → Save.9. Enter a new file name for the video and press <OK>.After saving the new video, the device plays the video automatically.](https://usermanual.wiki/Samsung-Electronics-Co/SGHL878E/User-Guide-1006976-Page-59.png)
![50mediaMake a slideshowYou can combine photos to make a slideshow with your favourite photos.1. In Standby mode, press [ ] → Media → Video Editor → Movie maker.2. Select the photos you want and press <Done>.3. Select a sound.4. While viewing photos, press <Options> to use the following options:5. When you are finished, press <Options> → Save.6. Enter a new file name for the video and press <OK>.After saving the new video, the device plays the video automatically.Make a storyboardYou can combine photos and videos to make a storyboard.1. In Standby mode, press [ ] → Media → Video Editor → Storyboard.2. Select the photos and videos you want and press <Done>.3. While viewing the storyboard, press <Options> to use the following options:Option FunctionCustomizeChange the setting for playing the slideshowModify → Photos or MusicChange the photos or the soundSettingsChange the properties for saving the video file, such as image quality, default label, and memory locationOption FunctionEffectChange the colour tone or apply a special effectPreviewPreview the slideshow](https://usermanual.wiki/Samsung-Electronics-Co/SGHL878E/User-Guide-1006976-Page-60.png)
![52mediaView a photo or video1. In Standby mode, press [ ] → Media → Viewer & Editor.2. Scroll to a photo or video and press the Confirm key.View a slideshow1. In Standby mode, press [ ] → Media → Viewer & Editor.2. Scroll to a photo and press <Options> → Slideshow.Edit photosEdit photos and apply fun effects.Transform a photo1. In Standby mode, press [ ] → Media → Viewer & Editor.2. Scroll to a photo and press <Options> → Edit.3. Rotate the device 90 anti-clockwise (to the left).4. Select Rotate & flip.5. Scroll to a rotate or flip option and press the Confirm key.6. When you are finished, press <Done> → <Options> → Save.Crop a photo1. In Standby mode, press [ ] → Media → Viewer & Editor.2. Scroll to a photo and press <Options> → Edit.3. Rotate the device 90° anti-clockwise (to the left).4. Scroll down to Crop and select it.5. Using the navigation key and the Confirm key, resize the rectangle over the area you want to crop and press <Done>.6. When you are finished, press <Options> → Save.](https://usermanual.wiki/Samsung-Electronics-Co/SGHL878E/User-Guide-1006976-Page-62.png)
![53mediaResize a photo1. In Standby mode, press [ ] → Media → Viewer & Editor.2. Scroll to a photo and press <Options> → Edit.3. Rotate the device 90° anti-clockwise (to the left).4. Scroll down to Resize and select it.5. Using the navigation key, select a size.6. When you are finished, press <Done> → <Options> → Save.Adjust a photo1. In Standby mode, press [ ] → Media → Viewer & Editor.2. Scroll to a photo and press <Options> → Edit.3. Rotate the device 90 anti-clockwise (to the left).4. Scroll down to Brightness & contrast, Auto enhancement, or Color and select it.5. Using the navigation key, adjust the photo as desired and press <Done>.6. When you are finished, press <Options> → Save.Apply effects to a photo1. In Standby mode, press [ ] → Media → Viewer & Editor.2. Scroll to a photo and press <Options> → Edit.3. Rotate the device 90 anti-clockwise (to the left).4. Scroll down to Effect and select it.5. Using the navigation key, scroll to an effect to apply and press <Done>.6. When you are finished, press <Options> → Save.](https://usermanual.wiki/Samsung-Electronics-Co/SGHL878E/User-Guide-1006976-Page-63.png)
![54mediaInsert a visual feature1. In Standby mode, press [ ] → Media → Viewer & Editor.2. Scroll to a photo and press <Options> → Edit.3. Rotate the device 90° anti-clockwise (to the left).4. Scroll down to Frame, Add clipart, Add text, or Add emoticon and select it.5. Scroll to a visual feature (frame, clip art, or emoticon), or enter the text to add and press <Done>, <OK>, or <Select>.6. Using the navigation key, relocate the visual feature and press <Options> → Done (if necessary).To resize or rotate the visual feature, or change the font size or colour for the text, press <Options> → an option.7. When you are finished, press <Options> → Save.RadioYou can listen to your favourite stations with the FM radio.Listen to the FM radio1. Plug a headset into the multifunction jack.2. In Standby mode, press [ ] → Media → Radio. 3. Scroll left or right to scan through available radio stations.4. Use the following options:• To access a radio station by manually entering a frequency, press <Options> → Manual tuning.• To adjust the volume level, press the volume key.• To switch sound output to the speaker, press <Options> → Activate loudspeaker.](https://usermanual.wiki/Samsung-Electronics-Co/SGHL878E/User-Guide-1006976-Page-64.png)
![55media• To get information transmitted from FM radio broadcasts, press <Options> → RDS → RT, AF, or All.• To access other functions while listening to the radio, press <Options> → Play in background. Set up your favourite radio station listOnce you have set up a station list, you can access the stations by scrolling up or down from the radio screen.Save radio stations by automatic tuning1. From the radio screen, press <Options> → Stations to access the station list.2. Press <Options> → Auto-save stations.3. Press <Yes> to confirm (this will replace any existing stations).4. When you are finished, press <Back>.Save a radio station manually1. From the radio screen, scroll to the radio station you want.2. Press <Options> → Save station.3. Select an empty location. 4. Enter a station name and press <OK>.RealPlayer®Your device includes RealPlayer for viewing many types of media files and streaming content from the internet. RealPlayer supports files with the following extensions: 3gp, mp4, rm, ram, ra, and rv.Play a media file in RealPlayer1. In Standby mode, press [ ] → Media → RealPlayer → Video clips or Recently played.2. Locate a media file and press the Confirm key.](https://usermanual.wiki/Samsung-Electronics-Co/SGHL878E/User-Guide-1006976-Page-65.png)
![56mediaPlay streaming web content with RealPlayerWhen you open a link to streaming web content via your web browser, RealPlayer will buffer and play the content (see "Browse a web page" X p. 66). You can then use the softkeys and volume key to control options for the streaming content.RecorderYou can use Recorder to record and play back voice memos and sound clips.Record a voice clip1. In Standby mode, press [ ] → Media → Recorder.2. Press the Confirm key to begin the recording.3. When you are finished recording, press <Stop>.The voice clip is automatically saved.Play a voice clip1. In Standby mode, press [ ] → Media → Recorder.2. Press <Options> → Go to Gallery.3. Scroll to a voice clip and press the Confirm key.Playback begins automatically.PC StudioPC Studio, which is included on the PC Studio CD-ROM, is a Windows-based program that allows you to manage your personal information and sync files to your device. For more information, install the program and refer to the PC Studio help.](https://usermanual.wiki/Samsung-Electronics-Co/SGHL878E/User-Guide-1006976-Page-66.png)
![58personalproductivityLearn to manage contacts, schedule calendarevents, Adobe Reader and create notes.ContactsLearn to use contact cards and groups to store personal information, such as names, phone numbers, and addresses.Create a new contact cardYou can store contact cards in your device's memory or on a SIM card.Create a new contact card in the device's memory1. In Standby mode, press [ ] → Contacts.2. Press <Options> → New contact.3. Enter contact information.4. When you are finished entering information, press <Done> to save the contact card.To insert additional information fields, press <Options> → Add detail → a detail type.](https://usermanual.wiki/Samsung-Electronics-Co/SGHL878E/User-Guide-1006976-Page-68.png)
![59personal productivityCreate a new contact card on a SIM card1. In Standby mode, press [ ] → Contacts → <Options> → Settings → Contacts to display → SIM memory → <OK> → Default saving memory → SIM memory → <Back>.2. Press <Options> → New contact.3. Enter contact information.4. When you are finished entering information, press <Done> to save the contact card.Search for a contact card1. In Standby mode, press [ ] → Contacts.2. Enter the first few characters of the contact name in the search box.The contact cards are listed, highlighting the name that most closely matches your input.3. Scroll to a contact and press the Confirm key to open it.Copy contact cardsTo copy contact cards from one memory location to another, 1. In Standby mode, press [ ] → Contacts.2. Scroll to a contact and press <Options> → Copy → Phone memory or SIM memory.Set a default number or addressSome contact cards may include more than one number or address. To assign a single number or address as the default,1. In Standby mode, press [ ] → Contacts.2. Scroll to a contact and press the Confirm key.3. Press <Options> → Defaults.4. Scroll to a default type and press the Confirm key.](https://usermanual.wiki/Samsung-Electronics-Co/SGHL878E/User-Guide-1006976-Page-69.png)
![60personal productivity5. Scroll to a number or address and press the Confirm key.6. When you are finished, press <Back>.Assign a speed dial number to a contact cardYou can assign speed dial numbers to up to eight contact cards stored in the device’s memory ([2] through [9]); [1] is reserved as a speed dial number for your voice mail. To assign a speed dial number,1. In Standby mode, press [ ] → Contacts.2. Scroll to a contact and press the Confirm key.3. Scroll to a phone number and press <Options> → Assign speed dial.4. Scroll to a speed dial number and press the Confirm key. 5. Press <Yes> (if necessary).Assign a ringtone to a contact card or groupYou can assign a ringtone to any contact card or group. 1. In Standby mode, press [ ] → Contacts.2. Scroll to a contact and press the Confirm key.Or, scroll right to switch to the group list and scroll to a group.3. Press <Options> → Ringing tone.4. Scroll to a ringtone and press the Confirm key.For an individual contact, your device will use the ringtone that was assigned last to the contact card. For example, if you assign a ringtone to a group and then assign another ringtone to a contact card within that group, the device will use the ringtone assigned to the contact card when that contact calls.](https://usermanual.wiki/Samsung-Electronics-Co/SGHL878E/User-Guide-1006976-Page-70.png)
![61personal productivityCreate a contact groupYou can create groups of contacts and send messages to the entire group.1. In Standby mode, press [ ] → Contacts.2. Scroll right to switch to the group list.3. Press <Options> → New group.4. Press <Yes>.5. Enter a name and press the Confirm key.6. Scroll to your new group and press the Confirm key to open it.7. Press <Options> → Add members.8. Scroll to each contact you want to add and press the Confirm key.9. When you are finished selecting contacts, press <OK> to save them to the group.10. Press <Yes> (if necessary).Synchronise your contactsTo synchronise your contacts by using the current sync profile,1. In Standby mode, press [ ] → Contacts.2. Scroll to a contact and press <Options> → Synchronisation → Start.3. Scroll to a sync profile or device and press the Confirm key.To change sync profiles or settings, see "Synchronise your device" X p. 74](https://usermanual.wiki/Samsung-Electronics-Co/SGHL878E/User-Guide-1006976-Page-71.png)
![62personal productivityCalendarUse the calendar to keep track of appointments, birthdays, or other events.Create a calendar event1. In Standby mode, press [ ] → Organiser → Calendar.2. Scroll to a date and press <Options> → New entry → an event type:•Meeting: a reminder at a specific date and time•Memo: general text•Anniversary: an annual reminder of a special date•To-do: a note about a particular task3. Complete the fields and adjust the settings for your event.4. When you are finished, press <Done> to save your entry.Change the calendar view1. In Standby mode, press [ ] → Organiser → Calendar.2. Press <Options> → a view type.Stop an event alarmIf you set an alarm for a calendar event, the alarm will sound for one minute at the specified time. To stop the alarm, press <Stop>.In the Synchronisation field, you can specify whether an event is Private (seen only by you), Public (seen by anyone with access to your data after you sync), or None (not synchronised).](https://usermanual.wiki/Samsung-Electronics-Co/SGHL878E/User-Guide-1006976-Page-72.png)
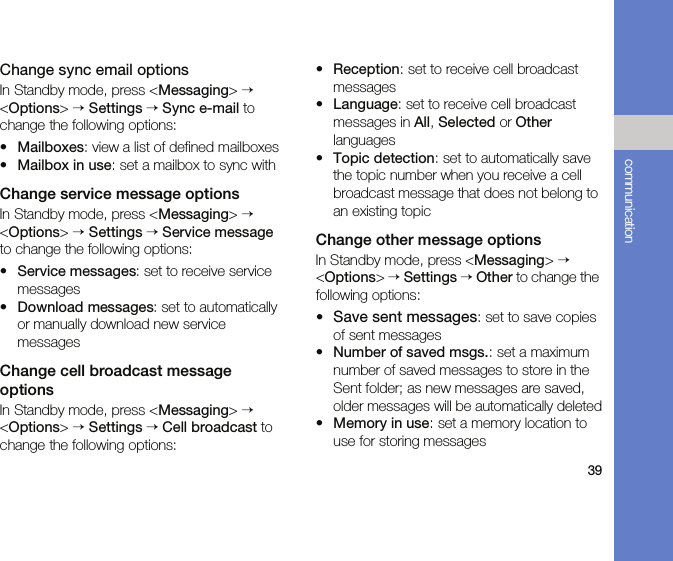
![63personal productivityChange calendar optionsFrom any calendar view, press <Options> → Settings to change the following options:•Calendar alarm tone: set a personalised alarm tone•Alarm snooze time: set a snooze duration for calendar alarms•Default view: set the view that is shown when you open the calendar•Week starts on: set a day to show first in week view•Week view title: set the title of the week view to a week number or dateAdobe® Reader®With Adobe Reader, you can open and view PDF documents. 1. In Standby mode, press [ ] → Organiser → Adobe PDF.2. Press <Options> → Browse for file → a memory location.3. Scroll to a file and press the Confirm key.4. While viewing a document, press <Options> to use the following options:Option DescriptionZoomMagnify part of a documentFindSearch for textViewUse the full display for viewing or rotating the documentGo toSkip to another page](https://usermanual.wiki/Samsung-Electronics-Co/SGHL878E/User-Guide-1006976-Page-73.png)
![64personal productivityNotesWith Notes, you can create text notes and synchronise them with other devices.Create a note1. In Standby mode, press [ ] → Organiser → Notes.2. Press <Options> → New note to create a new note.3. Enter text.4. When you are finished entering text, press <Done> to save the note.Synchronise notes with other devices1. In Standby mode, press [ ] → Organiser → Notes.2. Scroll to a note and press <Options> → Synchronisation → Start.3. Scroll to a sync profile or device and press the Confirm key.To change sync profiles or settings, see "Synchronise your device" X p. 74](https://usermanual.wiki/Samsung-Electronics-Co/SGHL878E/User-Guide-1006976-Page-74.png)

![66webBrowse a web page1. In Standby mode, press [ ] → Web.2. While browsing a web page, press and hold the Confirm key to display or hide the toolbar:3. To close the web connection, press <Close>.While browsing, press <Options> to access the following:•Go to web address: move to the entered web page•Bookmarks: open the bookmark list•Save as bookmark: create a new bookmark for the current page•Rotate screen: toggle between portrait and landscape viewsIcon DescriptionFrequently used linksPage overviewReloadFind• If your device shows "Not enough memory," close other running applications to free up the system memory, and then restart the browser.• The device will show a security indicator ( ) whenever you have established an encrypted connection.](https://usermanual.wiki/Samsung-Electronics-Co/SGHL878E/User-Guide-1006976-Page-76.png)
![67web•Navigation options: view screenshots of pages you have visited recently or reload the current page•Zooming options: zoom in or out on a web page•Window: block all pop-ups while browsing the wireless web, or allow the pop-ups to display on the browser•Clear privacy data: delete data transmitted while browsing the wireless web, such as cookies, data in the cache, history, and form or password data•Tools: save pages for viewing offline, send a web page, or view information about a web page•Find: search for text on a web page•Settings: change the browser settingsChange browser settingsFrom the browser, press <Options> → Settings to access the following:•General: set access point, homepage, history, security, and Java options•Page: set options for loading and displaying web content•Privacy: set bookmark and cookie options•Web feeds: set the page to update automaticallyAdd a bookmark1. In Standby mode, press [ ] → Web.2. Press <Options> → Bookmarks → <Options> → Bookmark manager → Add bookmark.3. Enter the bookmark name, address, and access point, as well as a user name and password if desired.4. Press <Options> → Save.](https://usermanual.wiki/Samsung-Electronics-Co/SGHL878E/User-Guide-1006976-Page-77.png)
![68webUse a bookmarkWhile browsing, you can also access bookmarks (see "Add a bookmark" X p. 67). Press <Options> → Bookmarks to access the following:Save a web page and view it offlineWhen you save a web page, you can view a copy of it offline without connecting to the web. The saved copy will not update automatically, so you must reconnect to the web periodically to retrieve the current version. Save a web page1. Use your browser to access the web page (see "Browse a web page" X p. 66).2. Press <Options> → Tools → Save page.The web page is saved to bookmarks.View a saved web page1. In Standby mode, press [ ] → Web.2. Press <Options> → Bookmarks → Saved pages.Icon DescriptionHomepage (Start page)Folder of automatic bookmarksFolder you have createdDefault folderWeb feed folderBookmark](https://usermanual.wiki/Samsung-Electronics-Co/SGHL878E/User-Guide-1006976-Page-78.png)
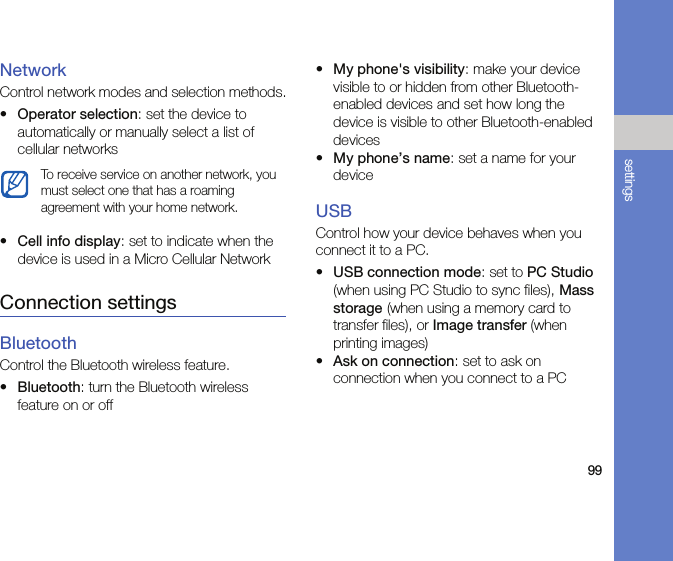
![70connectivityLearn to transfer data to and from your device viathe Bluetooth wireless feature or the PC data cable.Use the Bluetooth wireless featureYou can connect with other Bluetooth-enabled wireless devices over a distance of 10 metres (30 feet). Walls or other obstacles between devices may block or impair the wireless connection.Turn on the Bluetooth wireless feature1. In Standby mode, press [ ] → Connect. → Bluetooth.2. Edit your device’s name and press <OK> (if necessary).3. Scroll to Bluetooth and press the Confirm key.4. To make your device visible to others, scroll to My phone's visibility and press the Confirm key.5. Select a visibility option and press the Confirm key.](https://usermanual.wiki/Samsung-Electronics-Co/SGHL878E/User-Guide-1006976-Page-80.png)
![71connectivitySearch for and pair with a Bluetooth-enabled device1. In Standby mode, press [ ] → Connect. → Bluetooth.2. Scroll right to open the paired device list.3. Press <Options> → New paired device.Your device searches for and displays the list of Bluetooth-enabled devices:4. Scroll to a device and press the Confirm key.5. Enter a Bluetooth passcode and press the Confirm key.6. To allow the device to send and receive data without confirmation, press <Yes>. Otherwise, press <No> to require confirmation.Change paired device optionsFrom the paired device list, press <Options> to access the following:•New paired device: search for another Bluetooth-enabled device•Connect to audio device/Disconnect: connect to or disconnect from the paired audio deviceIcon Device typeMobile phonePCHands-free car kitHeadset or audio deviceUnknown deviceTo pair with another Bluetooth-enabled device, both devices must use the same passcode. Headsets or hands-free car kits may use a fixed passcode, such as 0000.](https://usermanual.wiki/Samsung-Electronics-Co/SGHL878E/User-Guide-1006976-Page-81.png)
![72connectivity•Assign short name: set a short name for a paired device•Set as authorised/Set as unauthorised: set to allow another device to connect automatically or require permission•Block: block the connection with the device•Delete: remove a device from the list•Delete all: remove all devices from the list•Exit: close the paired device listSend data via the Bluetooth wireless feature1. Select a file or item to send.2. Press <Options> → Send → Via Bluetooth.3. Scroll to a paired device and press the Confirm key.4. Enter a passcode and press <OK> (if necessary).Receive data via the Bluetooth wireless feature1. When another device attempts to access yours, press <Yes> to permit the connection.2. Press <Yes> again to confirm that you are willing to receive data from the device (if necessary).Print dataTo print your image, message, contact information, and calendar item with the Bluetooth wireless feature,1. In Standby mode, press [ ] → Installat. → Print OTG → an item type → an item.Accepted items are placed in the Inbox folder. The icon indicates messages received via Bluetooth.](https://usermanual.wiki/Samsung-Electronics-Co/SGHL878E/User-Guide-1006976-Page-82.png)
![73connectivity2. Press <Options> → Print.Your device searches for and displays the list of Bluetooth-enabled devices automatically.3. Select More devices (if necessary).4. Scroll to a printer and press the Confirm key.5. Press <Yes> (if necessary).Connect via USBSet a default action for your USB connectionTo set your device to perform a default action when you connect the device to a PC with the PC data cable,1. In Standby mode, press [ ] → Connect. → USB → USB connection mode.2. Set the default USB mode (PC Studio, Mass storage, or Image transfer).Use PC Studio1. Change the USB connection to PC Studio.2. Connect your device to a PC with the PC data cable.3. Run PC Studio and manage personal data and media files.Refer to the PC Studio help for more information.You can also set your device to Ask on connection, instead of using a default USB mode. If you use this setting, your device will prompt you to choose the USB mode every time you connect to a PC.](https://usermanual.wiki/Samsung-Electronics-Co/SGHL878E/User-Guide-1006976-Page-83.png)
![74connectivityCopy files to a memory card1. Insert a memory card into the device.2. Change the USB connection to Mass storage. 3. Connect your device to a PC with the PC data cable.4. Select Open folder to view files when a pop-up window appears on your PC.5. Copy files from the PC to the memory card.6. When you are finished, disconnect the device from the PC.Print images1. Change the USB connection to Image transfer.2. Connect your device to a compatible printer with the PC data cable.3. In Idle mode, press [ ] → Media → Gallery → Images → an image.4. Press <Options> → Print → PictBridge.5. Set printing options.6. Press the Confirm key to print the image.Synchronise your deviceLearn to synchronise the data on your device with data on a PC or other wireless device.Create a new sync profileYour device includes a sync profile for PC Studio. To create a new sync profile,1. In Standby mode, press [ ] → Connect. → Sync.2. Press <Options> → New sync profile.3. Press the Confirm key to start the sync profile wizard and follow the onscreen instructions.](https://usermanual.wiki/Samsung-Electronics-Co/SGHL878E/User-Guide-1006976-Page-84.png)
![75connectivitySynchronise data1. Connect your device to another Bluetooth-enabled wireless device (see "Search for and pair with a Bluetooth-enabled device" X p. 71).2. In Standby mode, press [ ] → Connect. → Sync.3. Press <Options> → Synchronise.4. Scroll to a device and press the Confirm key (if necessary).Your device displays a progress metre at the bottom of the screen.After synchronisation is complete, you can press <Options> → View log to view a list of data that was changed.](https://usermanual.wiki/Samsung-Electronics-Co/SGHL878E/User-Guide-1006976-Page-85.png)
![76additionalprogramsLearn to use Calculator, Clock, Converter, GPSdata, Landmarks, and Dictionary.Calculator1. In Standby mode, press [ ] → Organiser → Calculator.2. Use the alphanumeric keys and the navigation key to perform basic mathematical operations.3. When performing calculations, press <Options> to access the following:•Last result: insert the result from the last calculation•Memory: save, recall, or clear the calculator’s temporary memory•Clear screen: clear all calculations on the screenPress [ ] to insert a decimal. Press [C] to clear a result. Press [ ] to switch functions.](https://usermanual.wiki/Samsung-Electronics-Co/SGHL878E/User-Guide-1006976-Page-86.png)
![77additional programsClockYou can adjust clock settings, set alarms, and create a world clock.Change clock settings1. In Standby mode, press [ ] → Organiser → Clock.2. Press <Options> → Settings (see "Date and time" X p. 94).Set a new alarm1. In Standby mode, press [ ] → Organiser → Clock.2. Scroll right to the alarms view.3. Press <Options> → New alarm.4. Set alarm details.5. Press <Done>.Stop an alarmWhen an alarm sounds, press <Stop> to end the alarm or <Snooze> to repeat the alarm after a specified time. You can delay the alarm (snooze) up to five times.Create a world clockWith a world clock, you can monitor the time in another city or country.To create a world clock,1. In Standby mode, press [ ] → Organiser → Clock.2. Scroll right to the world clock view.3. Press <Options> → Add location.4. Scroll to a region and press the Confirm key, or enter the first few letters of the region name to search the list.Your current profile setting will not affect the volume of a clock alarm.](https://usermanual.wiki/Samsung-Electronics-Co/SGHL878E/User-Guide-1006976-Page-87.png)
![78additional programs5. Scroll to a city and press the Confirm key (if necessary).6. Repeat steps 3-5 to add more regions or cities (if necessary).7. When you are finished adding regions or cities, press <Exit>.ConverterWith Converter, you can convert measurements or currencies from one unit to another. To convert currencies, you must first set a base currency and exchange rate.Add currencies and exchange ratesTo set a base currency,1. In Standby mode, press [ ] → Organiser → Converter.2. Scroll right until the type shows Currency (if necessary).3. Press <Options> → Currency rates.4. Scroll to a currency and press <Options> → Rename currency.5. Enter the name of the base currency and press the Confirm key.6. Press <Options> → Set as base currency.7. Press the Confirm key to confirm.To add other currencies and exchange rates,1. Repeat steps 1-4 above.2. Enter the name of a new currency and press the Confirm key.3. Scroll to the new currency and enter the exchange rate.4. Press <Options> → Save.The value of the base currency is always 1. You must enter exchange rates for other currencies as they relate to one unit of the base currency. Exchange rates change often. To ensure an accurate conversion, you must enter a current exchange rate.](https://usermanual.wiki/Samsung-Electronics-Co/SGHL878E/User-Guide-1006976-Page-88.png)
![79additional programsConvert currencies1. In Standby mode, press [ ] → Organiser → Converter.2. Scroll right until the type shows Currency (if necessary).3. Scroll down to Unit and scroll right to select a currency to convert.4. Scroll down to Amount and enter the amount to convert.5. Scroll down to Unit and scroll right to select a currency to convert to.The device displays the conversion result.Convert measurements1. In Standby mode, press [ ] → Organiser → Converter.2. Scroll right to change the type of measurement.3. Scroll down to Unit and scroll right to change the base unit (if necessary).4. Scroll down to Amount and enter the base amount.5. Scroll down to Unit and scroll right to change the conversion unit (if necessary).The device displays the conversion result.GPS dataYou can view GPS data to help you navigate, show your position, or monitor trip details. Before you can use GPS data, you must activate a positioning method via a Bluetooth wireless connection or a wireless network connection.Activate a positioning method1. In Standby mode, press [ ] → Tools → GPS data.2. Press <Options> → Positioning settings → Positioning methods.](https://usermanual.wiki/Samsung-Electronics-Co/SGHL878E/User-Guide-1006976-Page-89.png)
![80additional programs3. Scroll to a positioning method (Bluetooth GPS, or Network based) and press <Options> → Enable.Navigate with GPS data1. In Standby mode, press [ ] → Tools → GPS data → Navigation.2. Press <Options> → Set destination → Coordinates.3. Enter the latitude and longitude of your destination and press the Confirm key.Your device will display the direction of your destination, your current speed, and the duration of your trip.4. To stop the GPS navigation, press <Options> → Stop navigation.View your current positionIn Standby mode, press [ ] → Tools → GPS data → Position.Monitor trip details1. In Standby mode, press [ ] → Tools → GPS data → Trip distance.2. Press <Options> → Start.3. Your device will track trip details, including distance, time, and speed.4. To stop monitoring trip details, press <Options> → Stop.If you enable Bluetooth GPS, you must pair with a Bluetooth-enabled device (see "Search for and pair with a Bluetooth-enabled device" X p. 71). Once you activate a positioning method, your device will attempt to open that connection when you launch GPS data.](https://usermanual.wiki/Samsung-Electronics-Co/SGHL878E/User-Guide-1006976-Page-90.png)
![81additional programsLandmarksWith Landmarks, you can save your current location or manually enter new locations. 1. In Standby mode, press [ ] → Tools → Landmarks.2. Press <Options> → New landmark → Current position or Enter manually.3. Enter details about the landmark (if necessary).4. When you are finished entering landmark information, press <Done>.DictionaryWith Dictionary, you can look up words of various language. The dictionary is available depending on your region.Look up words1. In Standby mode, press [ ] → Organiser → Dictionary.2. Enter an English word and press the Confirm key.Change the dictionary1. In Standby mode, press [ ] → Organiser → Dictionary → <Options> → Change Dictionary...2. Select a dictionary.To add your current location automatically, your device must have an active connection.](https://usermanual.wiki/Samsung-Electronics-Co/SGHL878E/User-Guide-1006976-Page-91.png)
![82additional programsChange dictionary optionsIn Standby mode, press [ ] → Organiser → Dictionary → <Options> → Settings → Display to access the following:•Font Size: set the size of the text on the display•Font Theme: set the type of the text on the display•Contents View: set to view the contents fully or briefly](https://usermanual.wiki/Samsung-Electronics-Co/SGHL878E/User-Guide-1006976-Page-92.png)
![83managersLearn to manage teams, files, applications, deviceconfigurations, licences, and connections.Team managerWith Team manager, you can make a team with members and send a message to them at the same time.Make a new team1. In Standby mode, press [ ] → Organiser → Team Manager.2. Press <Options> → New Team.3. Enter team details.4. When you are finished, press <OK>.Add members to a team1. In Standby mode, press [ ] → Organiser → Team Manager → a team.2. Press <Options> → Add New Member.3. Select contacts and press <OK>.](https://usermanual.wiki/Samsung-Electronics-Co/SGHL878E/User-Guide-1006976-Page-93.png)
![84managersSend a message to members1. In Standby mode, press [ ] → Organiser → Team Manager.2. Scroll to a team.3. Press <Options> → Create message → a message type.4. Select a number for a contact (if necessary).5. Enter the message text.6. Press <Options> → Send to send the message.Make a multiparty call (conference call)1. In Standby mode, press [ ] → Organiser → Team Manager.2. Scroll to a team.3. Press <Options> → Voice conference.4. Select contacts and press <OK>.5. Press <Options> → Call.Send an appointment to members1. In Standby mode, press [ ] → Organiser → Team Manager.2. Scroll to a team.3. Press <Options> → Set appointment.4. Enter appointment details.5. When you are finished, press <Done>.6. Select a number for a contact (if necessary).7. Enter the message text.8. Press <Options> → Send to send the message.](https://usermanual.wiki/Samsung-Electronics-Co/SGHL878E/User-Guide-1006976-Page-94.png)
![85managersFile managerWith File manager, you can search for and organise your files or folders.Search for a file or folder1. In Standby mode, press [ ] → Organiser → File mgr.2. Press <Options> → Find.3. Scroll to a memory type and press the Confirm key.4. Select a desired folder and enter text in the search field and press the Confirm key.5. To open a file or folder from the search results, scroll to the file or folder and press the Confirm key.Create a new folder1. In Standby mode, press [ ] → Organiser → File mgr. → a memory type.2. Press <Options> → Organise → New folder.3. Enter a folder name and press the Confirm key.Move a file to a folder1. In Standby mode, press [ ] → Organiser → File mgr. → a memory type.2. Scroll to a file or folder and press <Options> → Organise → Move to folder → a memory type.3. Scroll to a folder and press the Confirm key.4. Scroll to a subfolder and press the Confirm key (if necessary).5. Press the Confirm key.](https://usermanual.wiki/Samsung-Electronics-Co/SGHL878E/User-Guide-1006976-Page-95.png)
![86managersFormat a memory card1. Insert a memory card (see "Insert a memory card (optional)" X p. 16).2. In Standby mode, press [ ] → Organiser → File mgr. → the inserted memory card.3. Press <Options> → Memory card options → Format.4. Press <Yes> to confirm.Protect a memory card with a password1. In Standby mode, press [ ] → Organiser → File mgr. → the inserted memory card.2. Press <Options> → Memory card password → Set.3. Enter and confirm a password (up to 8 characters).4. Press the Confirm key.5. To remove the password, press <Options> → Memory card password → Remove.6. Press <Yes>.7. Enter the password and press the Confirm key.View memory detailsYou can view the used and available memory on your device and memory card,1. In Standby mode, press [ ] → Organiser → File mgr. → a memory type.2. Press <Options> → Details → Memory or Memory card.Your device supports FAT16 or FAT32 file systems.Devices that do not support this feature, such as PCs, cannot read the card while the password protection is active. Remove the password protection from the card to use it with those devices.](https://usermanual.wiki/Samsung-Electronics-Co/SGHL878E/User-Guide-1006976-Page-96.png)
![87managersZipYou can create and manage zip archives saved in your phone’s memory or the memory card.Create a new archive1. In Standby mode, press [ ] → Organiser → zip.2. Press <Options> → New archive.3. Enter a name for the archive and press <OK>.4. Press <Options> → Add to archive → a file.Extract a file to another folder1. In Standby mode, press [ ] → Organiser → zip.2. Scroll to an archive and press the Confirm key.3. Scroll to a file and press <Options> → Extract → a memory type. 4. Select a folder to extract the file.Application managerYour device supports applications made for the Symbian OS and the Java platform, Micro Edition (J2ME™). Your device will not support applications made for other operating systems or Java platforms (including PersonalJava™). To download applications to your device, see "Download files from the web" X p. 69Install a new application1. In Standby mode, press [ ] → Installat. → App. mgr. → Installation files.2. Scroll to an application and press <Options> → Install.](https://usermanual.wiki/Samsung-Electronics-Co/SGHL878E/User-Guide-1006976-Page-97.png)
![88managers3. Follow any onscreen instructions.Change installation optionsIn Standby mode, press [ ] → Installat. → App. mgr. → <Options> → Settings to access the following:•Software installation: set to allow or block installations•Online certificate check: set to check for online certificates when installing applications•Default web address: set a default web address for checking online certificatesRemove an application1. In Standby mode, press [ ] → Installations → App. mgr. → Installed apps.2. Scroll to an application and press <Options> → Uninstall.3. Press <Yes> to confirm.Device managerThis feature is network-dependent and may not be available from your service provider. If available, Device manager allows your service provider to assist you with device configurations. Before you can start a configuration session, you must define a server profile.The application manager automatically tries to verify an application's digital signatures and certificates during installation and will show a warning if the application does not meet normal security requirements. To protect your device and your data, do not install applications that do not have valid digital signatures or certificates.](https://usermanual.wiki/Samsung-Electronics-Co/SGHL878E/User-Guide-1006976-Page-98.png)
![89managersDefine a server profile1. In Standby mode, press [ ] → Tools → Dev. mgr.2. Press <Options> → Server profiles.3. Press <Options> → New server profile.4. Set the following server options according to the instructions provided by your service provider:•Server name: set a name for this profile•Server ID: set the ID of the remote server•Server password: set the password that must be used by the device manager to sync your device•Access point: set an access point•Host address: set the web address of the host server•Port: set a port to use for the device manager•User name: set a user name for this profile•Password: set a user password for this profile•Allow configuration: set to allow the server to configure your device•Auto-accept all requests: set to automatically accept new configuration requests•Network authentication: set to require network authentication5. When you are finished setting the options, press <Back>.Start a configuration session1. In Standby mode, press [ ] → Tools → Dev. mgr.2. Press <Options> → Server profiles.3. Scroll to a server profile and press <Options> → Start configuration.4. Press <Yes> to confirm.5. Scroll to an access point and press the Confirm key (if necessary).](https://usermanual.wiki/Samsung-Electronics-Co/SGHL878E/User-Guide-1006976-Page-99.png)
![90managersLicence managerWhen you download digital content, you may need to purchase a licence from the website that allows you to access the file.View licences1. In Standby mode, press [ ] → Tools → Licences.2. Scroll to a folder and press the Confirm key:•Valid licences: all valid licences•Invalid licences: expired licences•Not in use: licences of media files that are no longer stored on the device3. Scroll to a licence and press the Confirm key.Restore an expired licenceWhen your licence expires, you must purchase additional rights to use the media file. To restore an expired licence,1. In Standby mode, press [ ] → Tools → Licences.2. Scroll to Invalid licences and press the Confirm key.3. Scroll to a licence and press <Options> → Get new licence.4. Press <Yes> to confirm.5. Follow the onscreen instructions.](https://usermanual.wiki/Samsung-Electronics-Co/SGHL878E/User-Guide-1006976-Page-100.png)
![91managersConnection managerWith Connection manager, you can view the details of data connections and close open connections.View connection details1. In Standby mode, press [ ] → Connect. → Conn. mgr.2. Scroll to a connection and press <Options> → Details to access the following:•Name: the current access point or modem (if using a dial-up connection)•Bearer: the type of data connection•Status: the connection status•Total: the total amount of data received and sent•Received: the amount of data received•Sent: the amount of data sent•Duration: the length of time the connection has been open•Speed: the current upload and download speeds•Access pt.: the name of the access point in use•Shared: the number of applications using the same connectionClose an open connection1. In Standby mode, press [ ] → Connect. → Conn. mgr.2. Scroll to a connection and press <Options> → Disconnect.3. Press <Yes> to confirm.](https://usermanual.wiki/Samsung-Electronics-Co/SGHL878E/User-Guide-1006976-Page-101.png)
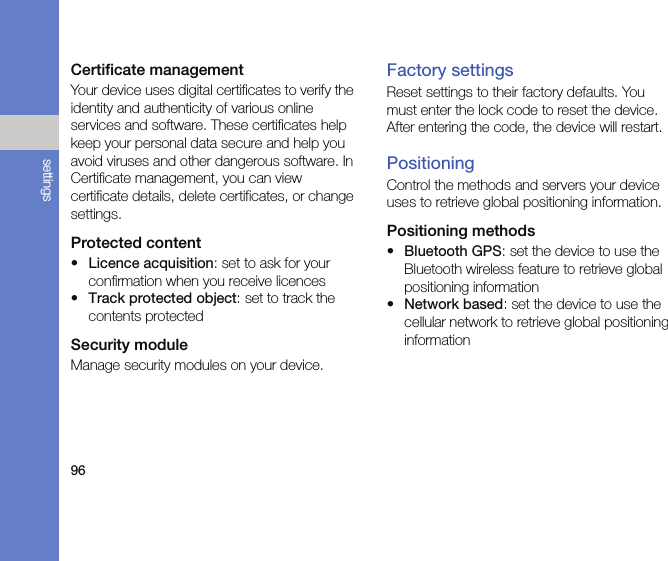
![92settingsLearn about your device settings. To access your device settings, 1. In Standby mode, press [ ] → Settings.2. Scroll to a category (General, Phone, Connection, or Applications) and press the Confirm key.General settingsPersonalisationControl the appearance and behavior of your display, Standby mode, tones, and language (for Themes settings, see "Apply a theme" X p. 21).You can also access some settings from other menus: press <Options> → Settings.](https://usermanual.wiki/Samsung-Electronics-Co/SGHL878E/User-Guide-1006976-Page-102.png)
![93settingsAdditional keys•User defined key 1: set the default function for [ ].•User defined key 2: set the default function for [ ].Display•Auto brightness: turn the auto brightness on or off•Brightness: adjust the brightness level of the screen•Font size: set the size of the text on the display•Welcome note/logo: set a text note or image that shows when you turn on the device•Light time-out: set the delay before the backlight dims•Dim time: set the delay before the dimmed backlight turns offStandby mode•Shortcuts: set the softkey and application shortcuts for Standby mode•Standby theme: set to show application shortcuts in Standby modeTo n e s•Ringing tone: set a ringtone for incoming voice calls•Ringing type: set a ring type•Ringing volume: set the volume for ringtones and message alerts•Message alert tone: set a tone for incoming text or multimedia messages•E-mail alert tone: set a tone for incoming email messages•Calendar alarm tone: set a tone for calendar events•Clock alarm tone: set a tone for a clock alarm](https://usermanual.wiki/Samsung-Electronics-Co/SGHL878E/User-Guide-1006976-Page-103.png)
![94settings•Vibrating alert: set a vibrating alert for incoming calls and messages•Keypad tones: set the volume for keypad tones•Warning tones: set the device to sound a warning tone (e.g., when the battery is low)Language•Phone language: set a display language (for all menus and applications)•Writing language: set a language for writing messages (for all text editors and dictionaries)•Predictive text: turn Predictive text on or off (for all text editors)•Default input: set a default input mode (available only if Writing language is set to ).Date and timeControl the appearance and behavior of the date, time, and alarms.•Time: set the current time (press [C] to switch between am and pm)•Time zone: set the time zone•Date: set the current date•Date format: set a date format•Date separator: set a date separator•Time format: set a time format•Time separator: set a time separator•Clock type: set a clock type for the display•Clock alarm tone: set a tone for a clock alarm•Alarm snooze time: set the delay for alarms to repeat•Workdays: set the days of the week to sound alarms•Automatic time update: set the network to automatically update the time and date](https://usermanual.wiki/Samsung-Electronics-Co/SGHL878E/User-Guide-1006976-Page-104.png)
![97settingsPositioning server•Positioning server use: set an operation mode for the global positioning server•Access point: set an access point for the global positioning server•Server address: set a web address for the global positioning serverNotation preferences•Measurement system: set a system•Coordinate format: set a coordinate formatPhone settingsCallControl how your device handles calls with caller ID, call waiting, speed dial, and other call settings.•Send my caller ID: set to send your caller ID based on your preferences or network settings•Call waiting: set to alert you of an incoming call while you are on a call•Reject call with message: set to send a text message to callers you reject•Message text: set the message to send to rejected callers•Automatic redial: set to automatically redial an unconnected call•Show call duration: set to show the length of a call•Summary after call: set to show a summary after a call•Speed dialling: set to allow speed dialling•Anykey answer: set to answer a call when you press any key (except [ ], and the volume key, [ ] and [ ]).•Side volume key: set the volume key to mute the ringer or reject calls when pressed during an incoming call•Slide up: set to answer a call when you open the device](https://usermanual.wiki/Samsung-Electronics-Co/SGHL878E/User-Guide-1006976-Page-107.png)
![atroubleshootingWhile using your device, the following messages may appear:Message Try this to solve the problem:Insert SIM cardEnsure that the SIM card is installed correctly.Lock codeThe autolock feature is enabled. To use the device, you must enter the code. To disable the autolock feature,1. In Standby mode, press [] → Settings → General → Security → Phone and SIM card.2. Set the phone autolock period to None.PIN codeWhen using the device for the first time or when the PIN requirement feature is enabled, you must enter the PIN supplied with the SIM card. To disable the PIN requirement feature,1. In Standby mode, press [] → Settings → General → Security → Phone and SIM card.2. Set the PIN code request to Off.Message Try this to solve the problem:](https://usermanual.wiki/Samsung-Electronics-Co/SGHL878E/User-Guide-1006976-Page-116.png)
![btroubleshootingYour device does not show a signal (no bars next to the network icon)• If you just turned on the device, wait about 2 minutes for your device to find the network and receive a signal.• You may not be able to receive a signal in tunnels or elevators. Move to an open area.• You may be between service areas. You should receive a signal when you enter a service area.You forgot a security code, PIN, or PUKThe default lock code is 00000000. If you forget or lose this or another code, contact the seller or your service provider.Your display shows white linesThe display may show white lines if you have turned the device on after a long period of disuse or if you removed the battery without first turning off the device. The display should correct itself in a short time.You enter a number, but the call is not dialled• Ensure that you have pressed [ ].• Ensure that you have accessed the right cellular network.• Ensure that you have not set call barring for the phone number.X attempts remaining. Enter PUK codeYour SIM card is blocked, usually as a result of entering your PIN incorrectly several times. You must enter the PUK supplied by your service provider.Message Try this to solve the problem:](https://usermanual.wiki/Samsung-Electronics-Co/SGHL878E/User-Guide-1006976-Page-117.png)
![dtroubleshootingYour device prompts you to delete some dataThe available memory is low. Move your data to a memory card or delete old items from applications.An application is frozen (will not respond)1. Press and hold [ ] to open the application list.2. Scroll to the application that is frozen and press [C] and then <Yes>.3. Launch the application again.You cannot find a Bluetooth-enabled device• Ensure that both devices have activated the Bluetooth wireless feature.• Ensure that the distance between the devices is not more than 10 metres and that they are not separated by walls or other obstacles.• Ensure that each device's visibility is not set to Hidden.• Ensure that both devices are compatible with Bluetooth wireless technology.](https://usermanual.wiki/Samsung-Electronics-Co/SGHL878E/User-Guide-1006976-Page-119.png)