Samsung Electronics Co SGHR225 PCS-Cellular phone User Manual 0 R210 KO GB
Samsung Electronics Co Ltd PCS-Cellular phone 0 R210 KO GB
UserManual.wiki
>
Samsung Electronics Co
>
SGHR225 User Manual
Manual
Navigation menu
Upload a User Manual
Namespaces
Wiki Guide
HTML
PDF
Info
Views
User Manual
Discussion / Help
Navigation


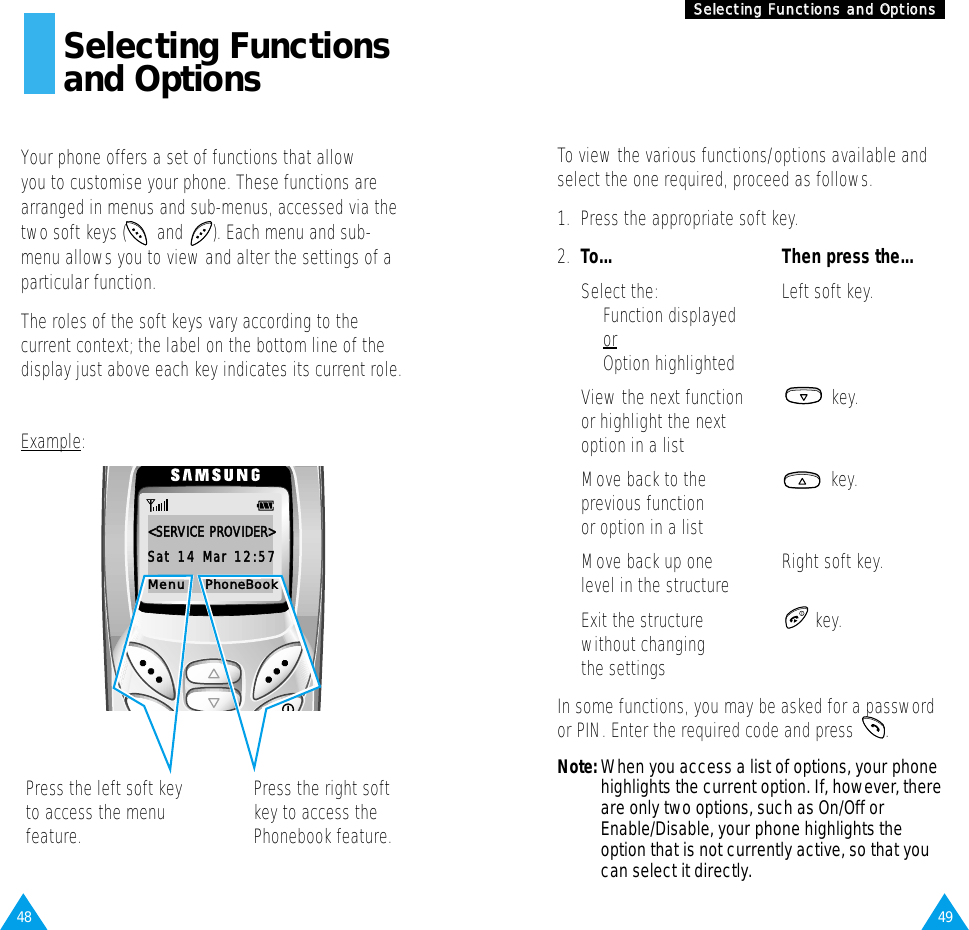
![47PPhhoonneebbooookk46PPhhoonneebbooookkSearching for and Dialling a Number inthe Phonebook1. When the idle screen is displayed, press thePhoneBook soft key. 2. If your SIM card provides Service Dialling Number(SDN) and Information Number services, you willsee the following screen. 5. To... Then press the...View the View soft key.highlighted entrySelect a or key one or more different entry times until the required entry ishighlighted.Look for a name Key labelled with the required starting with a letter.different letter6. Once you have found the required entry, pressto dial the number.Dialling a Number using the ServiceDirectory or Information NumbersNote: The Service Dir. and Information Numbersoptions may not be available, depending on yourSIM card.When the idle screen is displayed, press thePhoneBook soft key. You will see the screenillustrated on page 46.Service Dir.: enables you to view the Service Directoryand make calls from it.Information Numbers: enables you to see theInformation Numbers in a tree structure and makea call.3. Press the OK soft key when Find Entry ishighlighted.4. Enter the start of the name that you wish to findand press the Find soft key.Note: You can also scroll through the phonebookfrom the beginning, by pressing the Findsoft key directly.The phonebook entries are listed, starting withthe first entry matching your input. This entry isalso highlighted.1.[[Find Entry ]]2. Service Dir.3. Information NumbersOOKK](https://usermanual.wiki/Samsung-Electronics-Co/SGHR225/User-Guide-188770-Page-25.png)
![51SSeelleeccttiinngg FFuunnccttiioonnss aanndd OOppttiioonnss50SSeelleeccttiinngg FFuunnccttiioonnss aanndd OOppttiioonnssExample: Selecting an Alert Type1. When the idle screen is displayed, press theMenu soft key to enter the menu facility.2. Scroll through the menus until you reach theTones menu, by pressing .3. To select the Tones menu, press the Select softkey and press until you reach the AlertType.<<SSEERRVVIICCEE PPRROOVVIIDDEERR>>SSaatt 1144 MMaarr 1122::5577Menu PhoneBookTonesSSeelleecctt 33 Alert TypeMelodySSeelleecctt 33..444. To select the Alert Type menu, press the Selectsoft key. The current setting is highlighted.5. Scroll through the list of alert types until theappropriate one is highlighted, by pressing or . 6. Press the Select soft key to confirm yourselection.7. Press the key to exit the menu structure.11 LLiigghhtt oonnllyy 22[[MMeellooddyy]]33 VViibbrraattiioonnSSeelleecctt Current setting](https://usermanual.wiki/Samsung-Electronics-Co/SGHR225/User-Guide-188770-Page-27.png)