Samsung Electronics Co SGHT339 Cellular/PCS GSM/EDGE Phone with WLAN and BT User Manual t339
Samsung Electronics Co Ltd Cellular/PCS GSM/EDGE Phone with WLAN and BT t339
UserManual.wiki
>
Samsung Electronics Co
>
SGHT339 User Manual
Users Manual
Navigation menu
Upload a User Manual
Namespaces
Wiki Guide
HTML
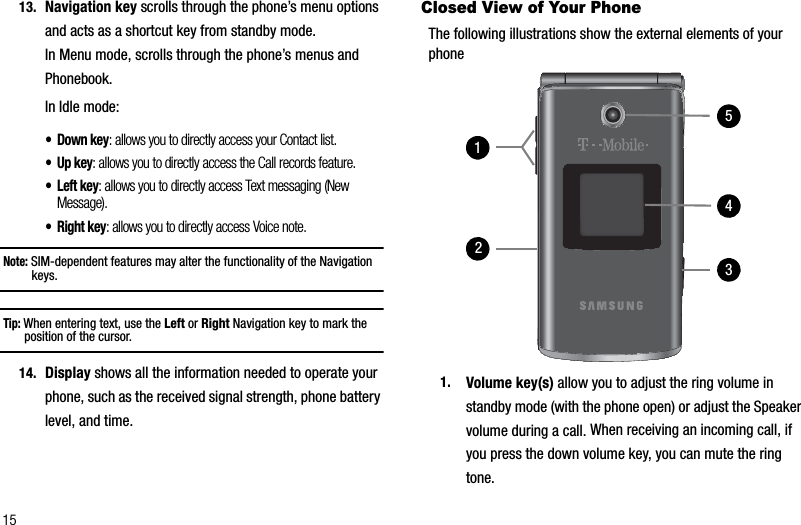
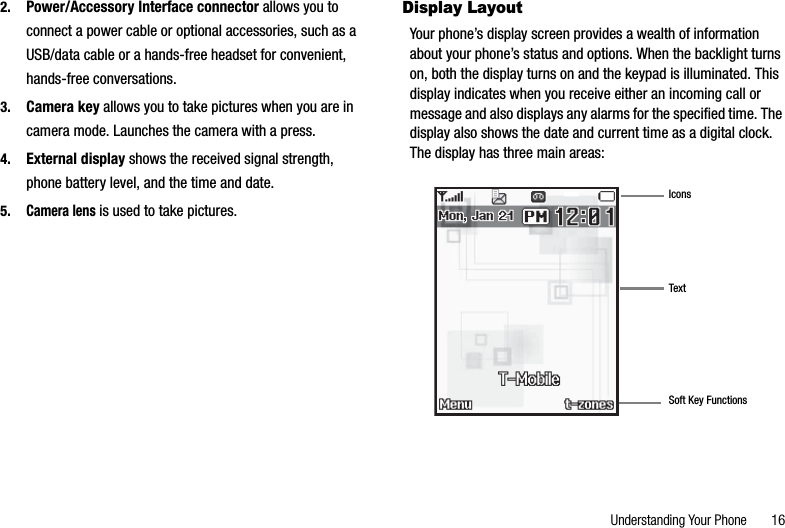
PDF
Info
Views
User Manual
Discussion / Help
Navigation


![Understanding Your Phonebook 583. Highlight the Edit option and press the Select soft key or the key.4. To edit the Caller group name, modify the text in the Nametext box.5. To change the image associated with the Caller group, highlight Picture ID and press the key.The following options are available:• Take picture: allows you to take a picture with your camera.• Photos: allows you to choose a photo from Photos folder.• Downloaded images: allows you to choose a photo from your Downloaded images folder.•Icons: allows you to choose from pre-defined icons.6. To change the ringtone associated with the Caller group, highlight Ringtone and press the key.The following options are available:• Default melodies: allows you to choose between 10 different melodies.• Voice list: allows you to assign a voice clip to this group.• Sounds: allows you to choose a sound from your Sounds folder.•Music: allows you to choose a music file from your Music folder.7. Press the Save soft key when you are finished. Your Caller group settings save.8. Press the key to return to the Idle screen.Block List1. In Idle mode, press Menu ➔Phonebook ➔Block list and press the Select soft key or the key.2. The first time you add to the block list, Highlight [Add to block list] and press the OK soft key.After the initial add to block list, press Options➔Add newand press the Right Navigation key.3. Select a block criteria from one the following categories:• Number: blocks a specific number.• Contacts: blocks selected contact entries.• Recent contacts: blocks selected numbers which are selected from the recent calls list.• Unknown numbers: blocks incoming calls from unknown numbers.• FDN contacts: blocks selected FDN contact entries.4. Press the Save soft key to add the information to your block list.](https://usermanual.wiki/Samsung-Electronics-Co/SGHT339/User-Guide-924503-Page-60.png)