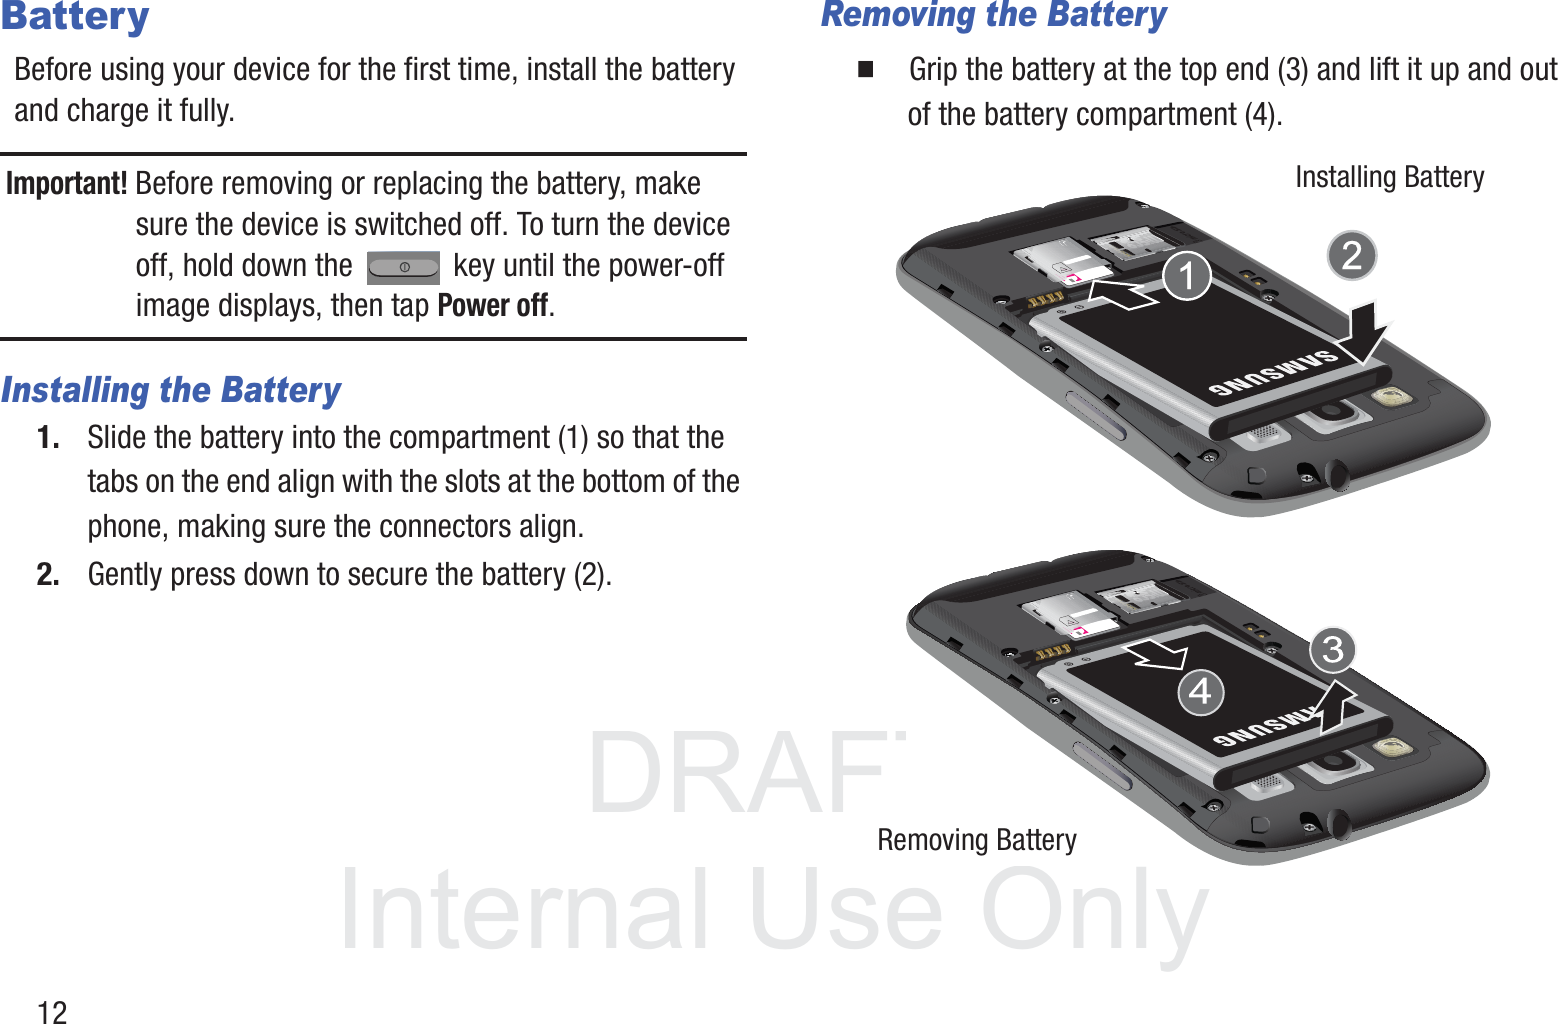
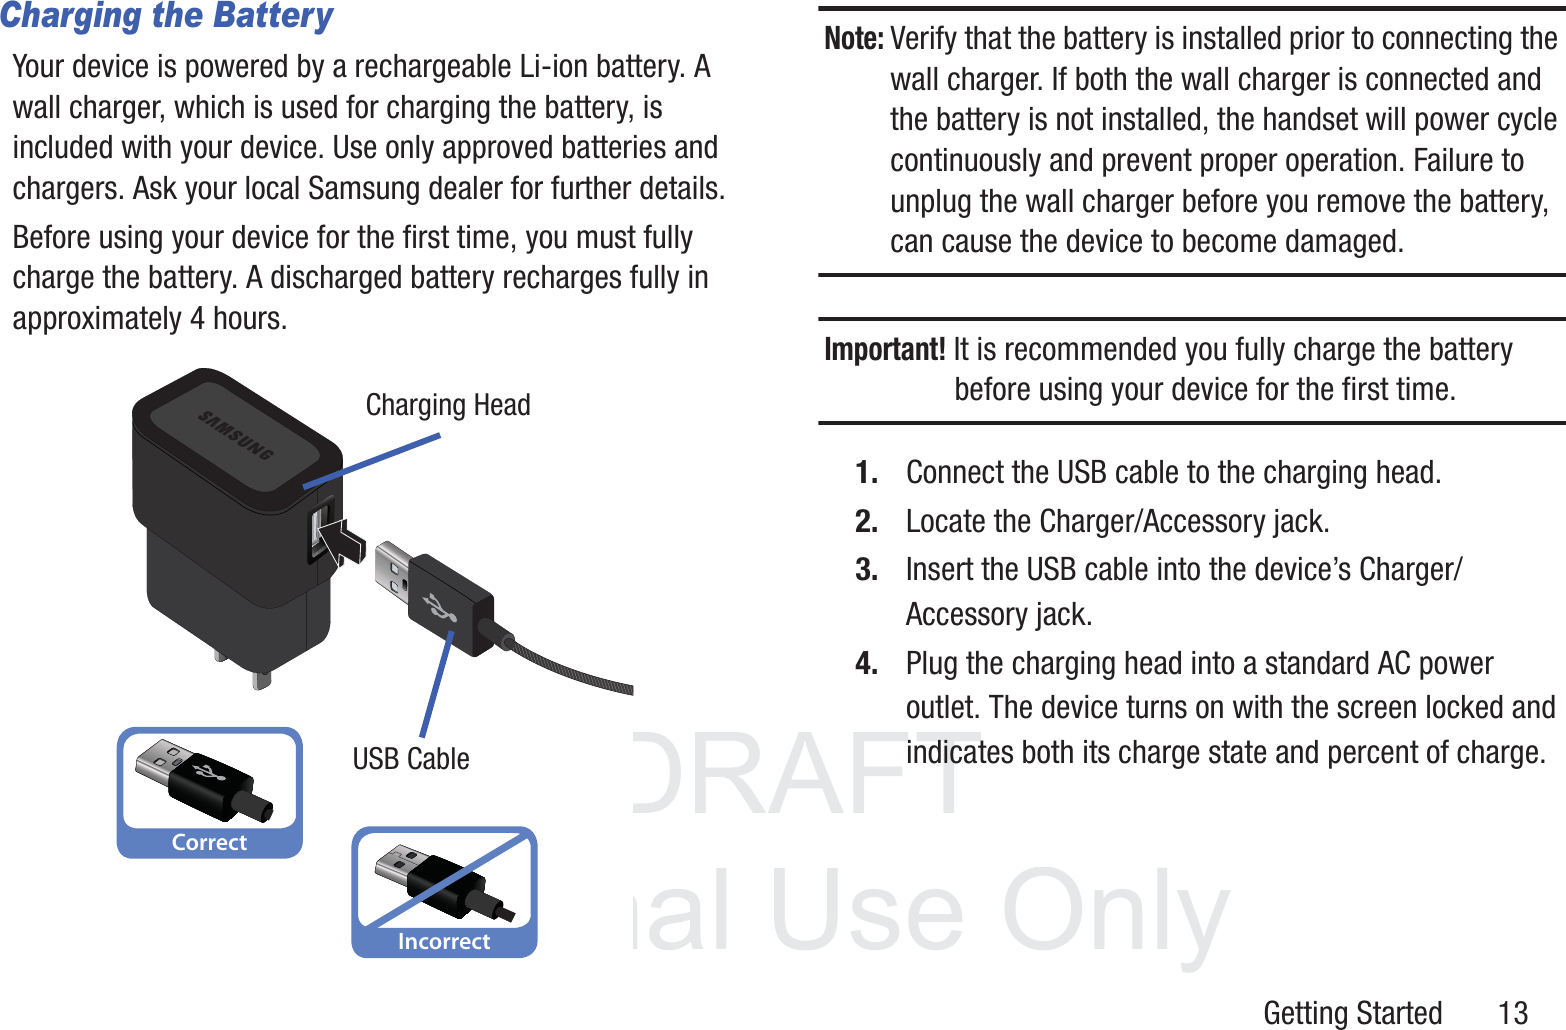
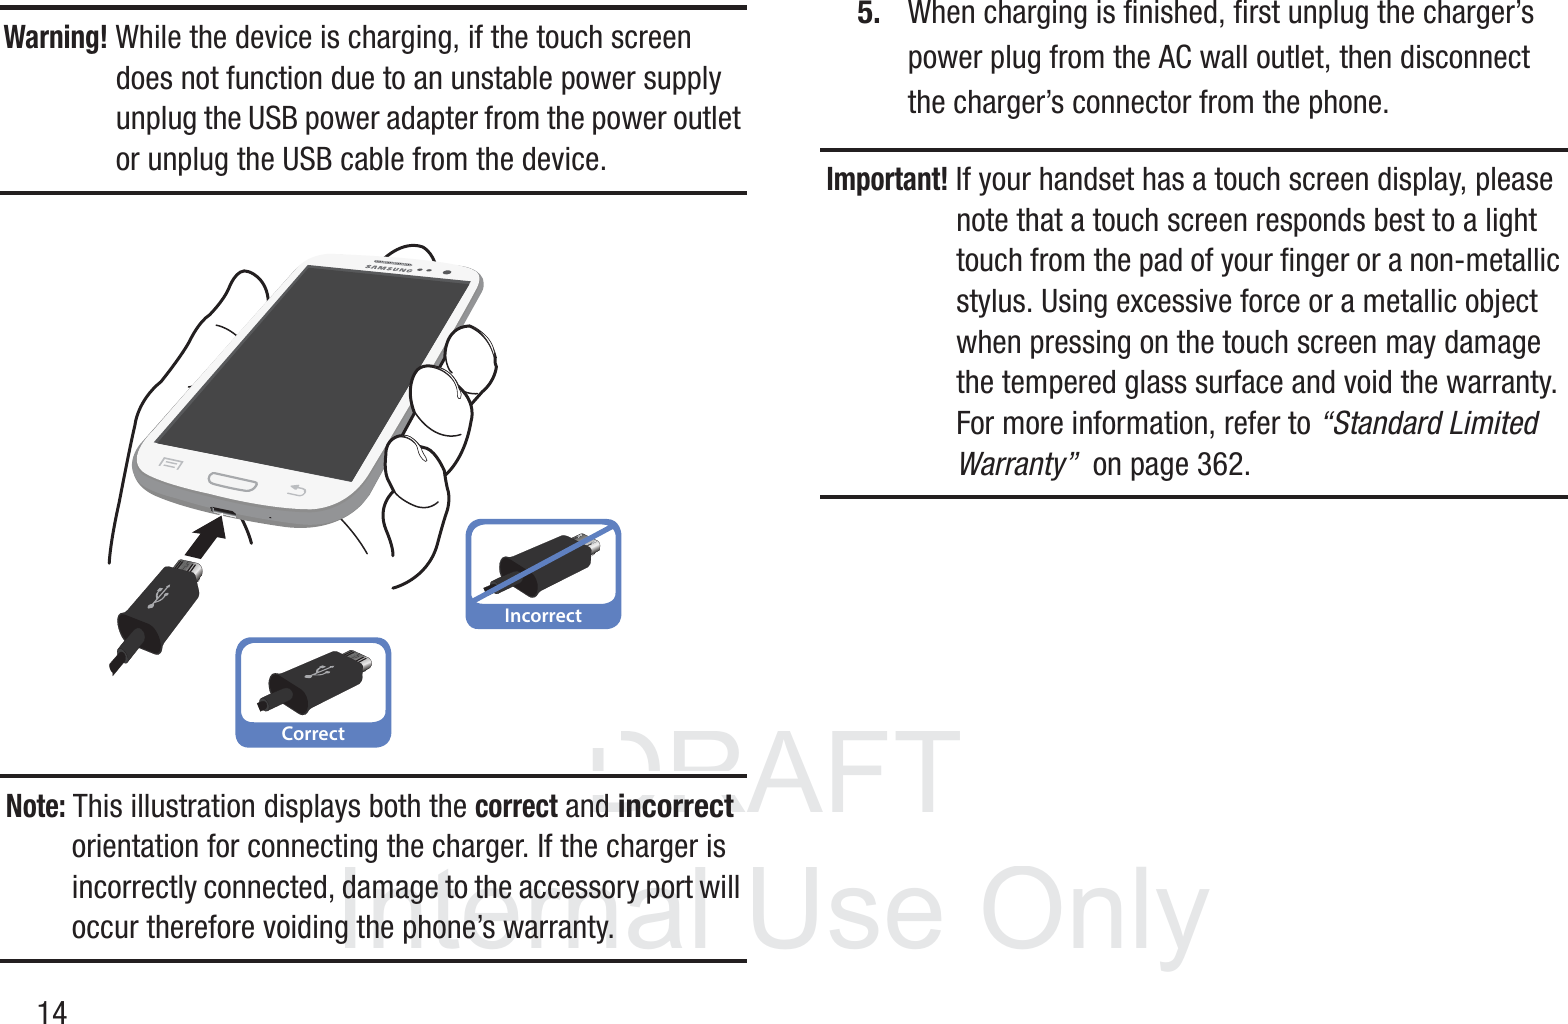
Samsung Electronics Co SGHT999L Portable Handset with Multi-band WCDMA/GSM/EDGE/LTE, WLAN, RFID and Bluetooth User Manual T Mobile SGH T999L
Samsung Electronics Co Ltd Portable Handset with Multi-band WCDMA/GSM/EDGE/LTE, WLAN, RFID and Bluetooth T Mobile SGH T999L
Contents
- 1. Users Manual 1
- 2. Users Manual 2
- 3. Users Manual 3
- 4. Health/Safety/Warranty Guide
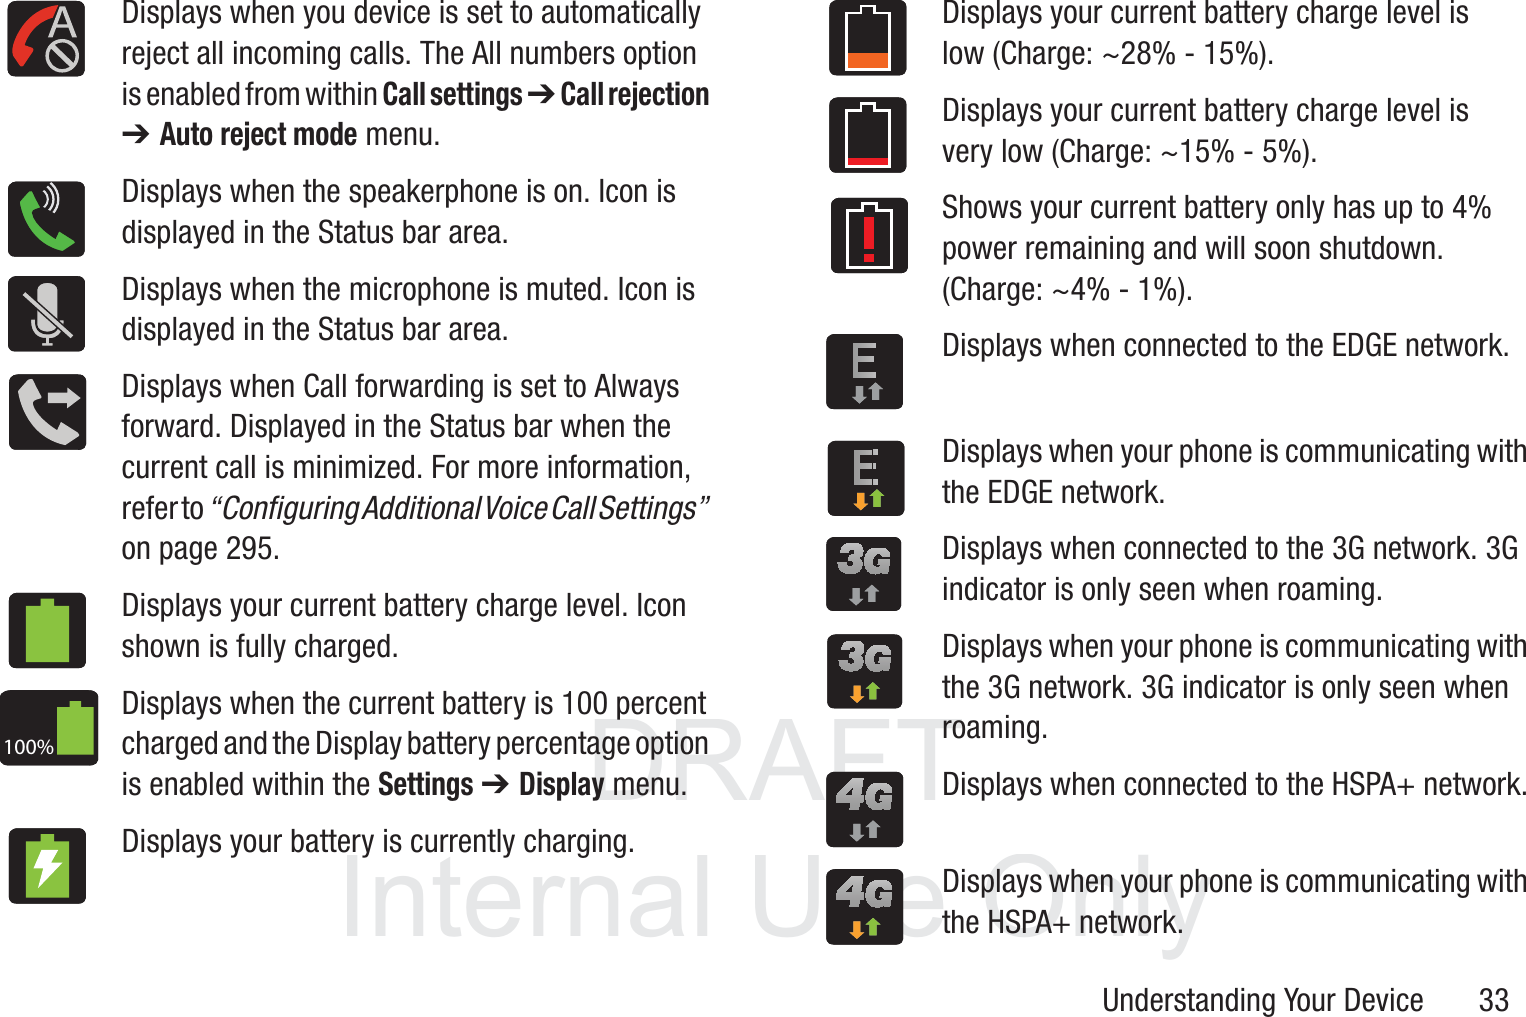
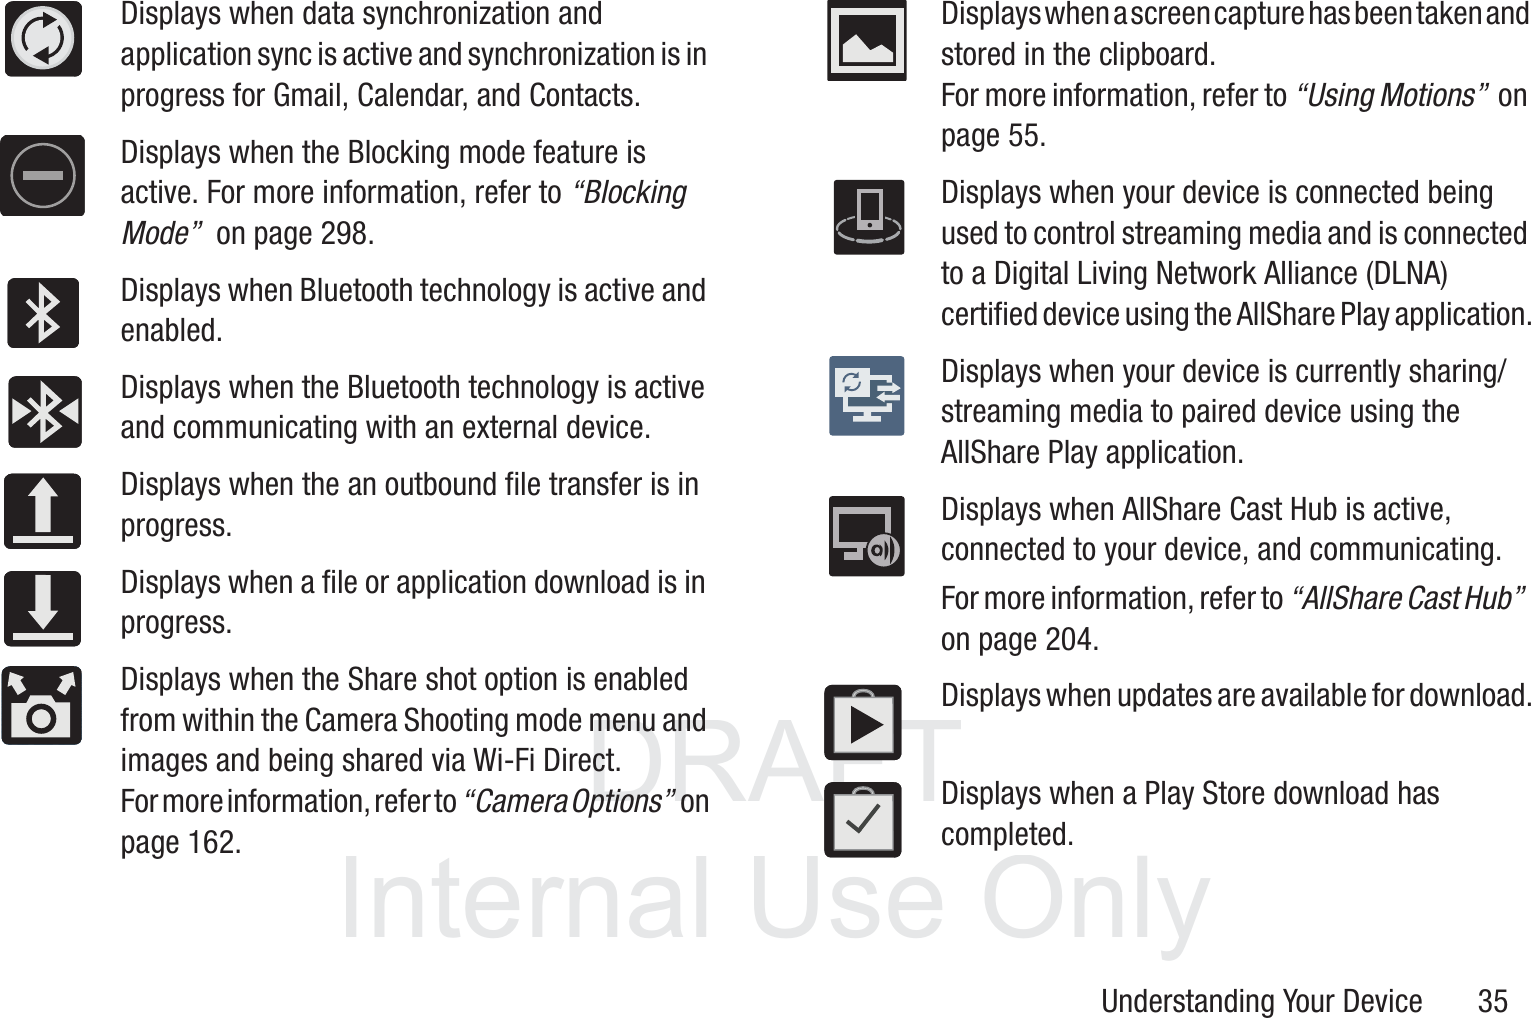
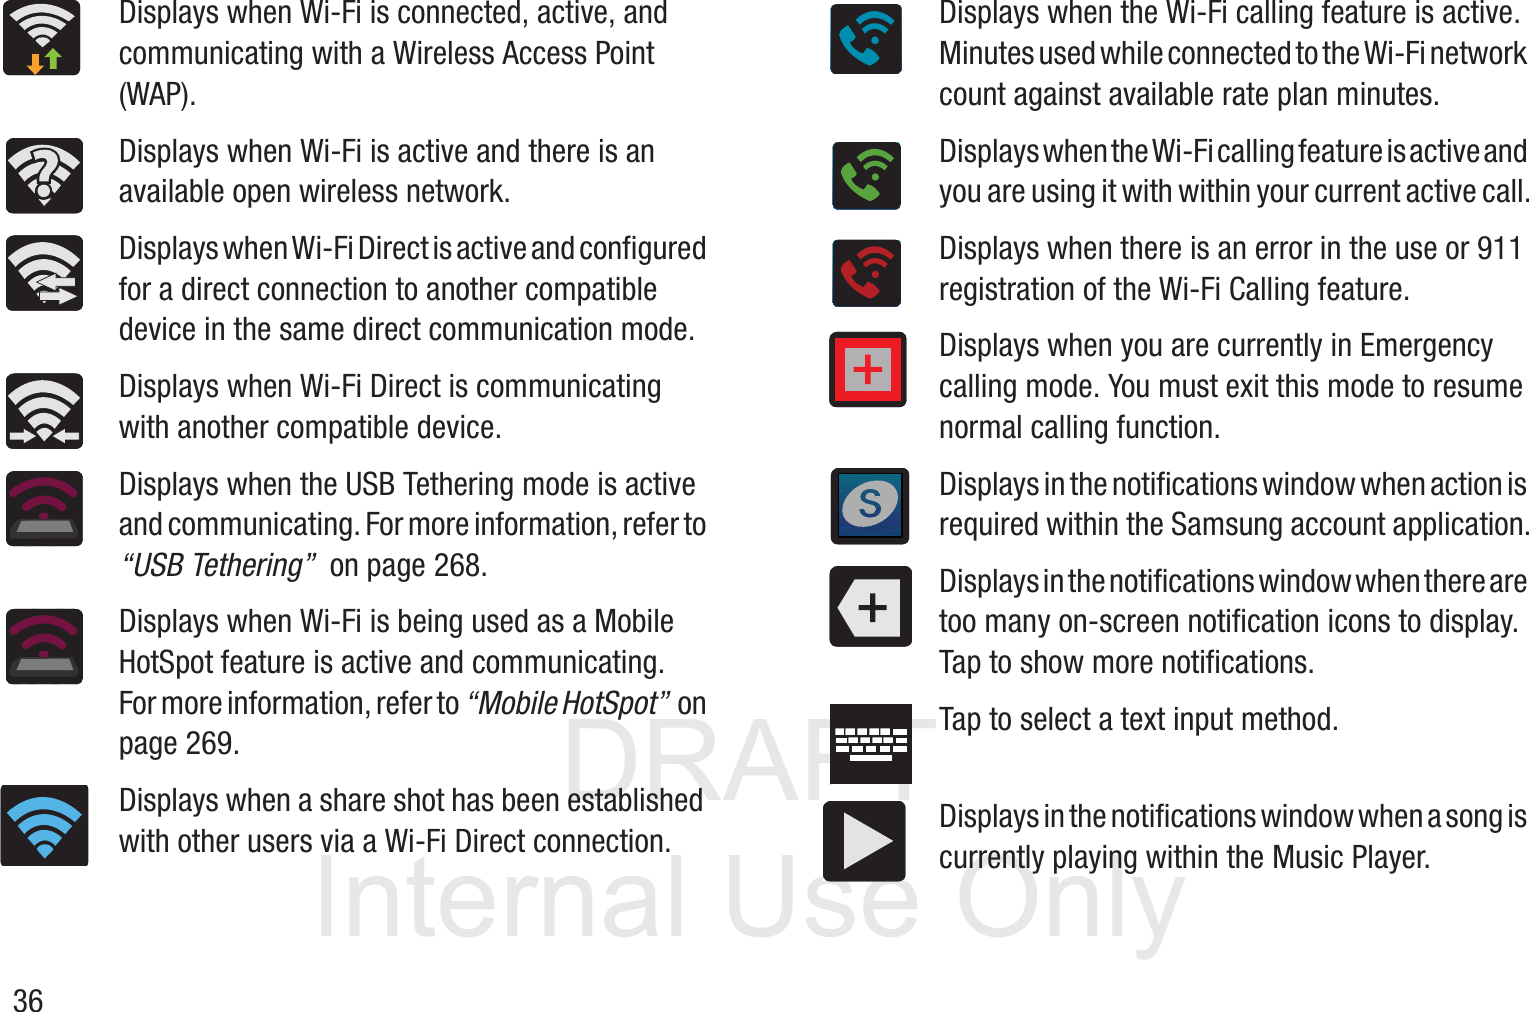
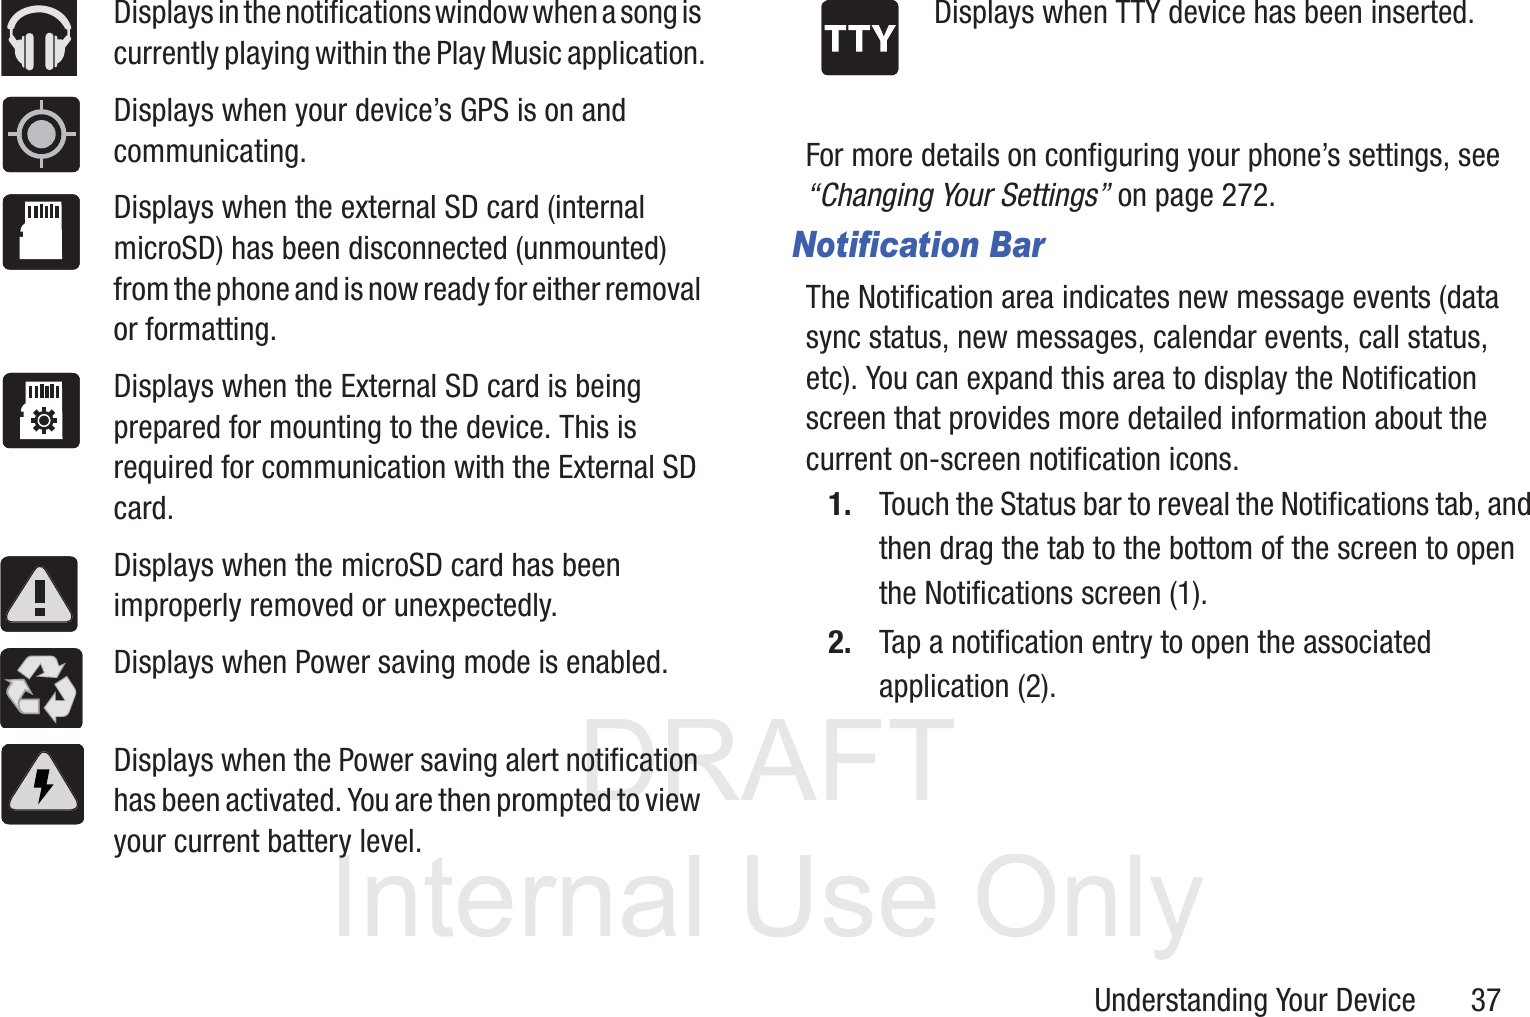
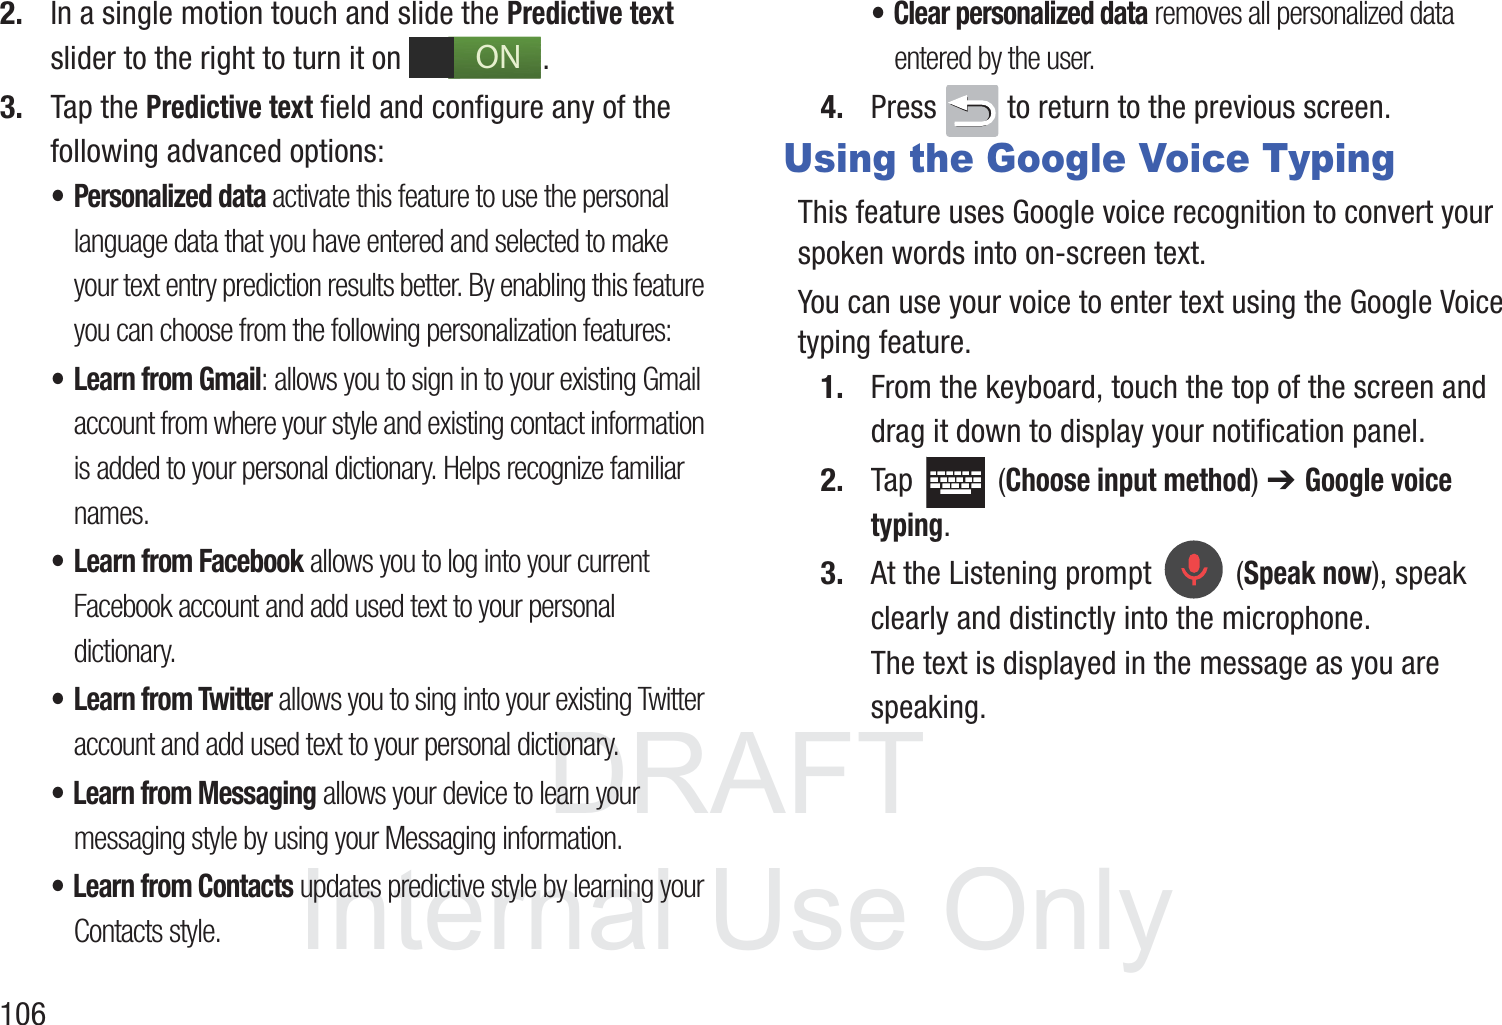
Users Manual 1
![DRAFT InternalUse Onlyaddition, information technology security protection will be affected by features or functionality associated with, among other things the e-mail platform, master data management, and virtual private network solutions selected by the software provider, solution provider or user. Choice of an e-mail, master data management, and virtual private network solution is at the sole discretion of the software provider, solution provider or user and any associated effect on information technology security protection is solely the responsibility of the software provider, solution provider or user. For complete statement of limited warranty, please refer to www.samsung.com/us/safe, available on the web and where Samsung smartphone and Galaxy Tab™ devices are sold. [101212] Samsung Telecommunications America (STA), LLC©2013 Samsung Telecommunications America, LLC. Samsung is a registered trademark of Samsung Electronics Co., Ltd.Headquarters:1301 E. Lookout DriveRichardson, TX 75082Customer Care Center:1000 Klein Rd.Plano, TX 75074Toll Free Tel: 1.888.987.HELP (4357)Internet Address: http://www.samsung.com](https://usermanual.wiki/Samsung-Electronics-Co/SGHT999L.Users-Manual-1/User-Guide-1910674-Page-4.png)


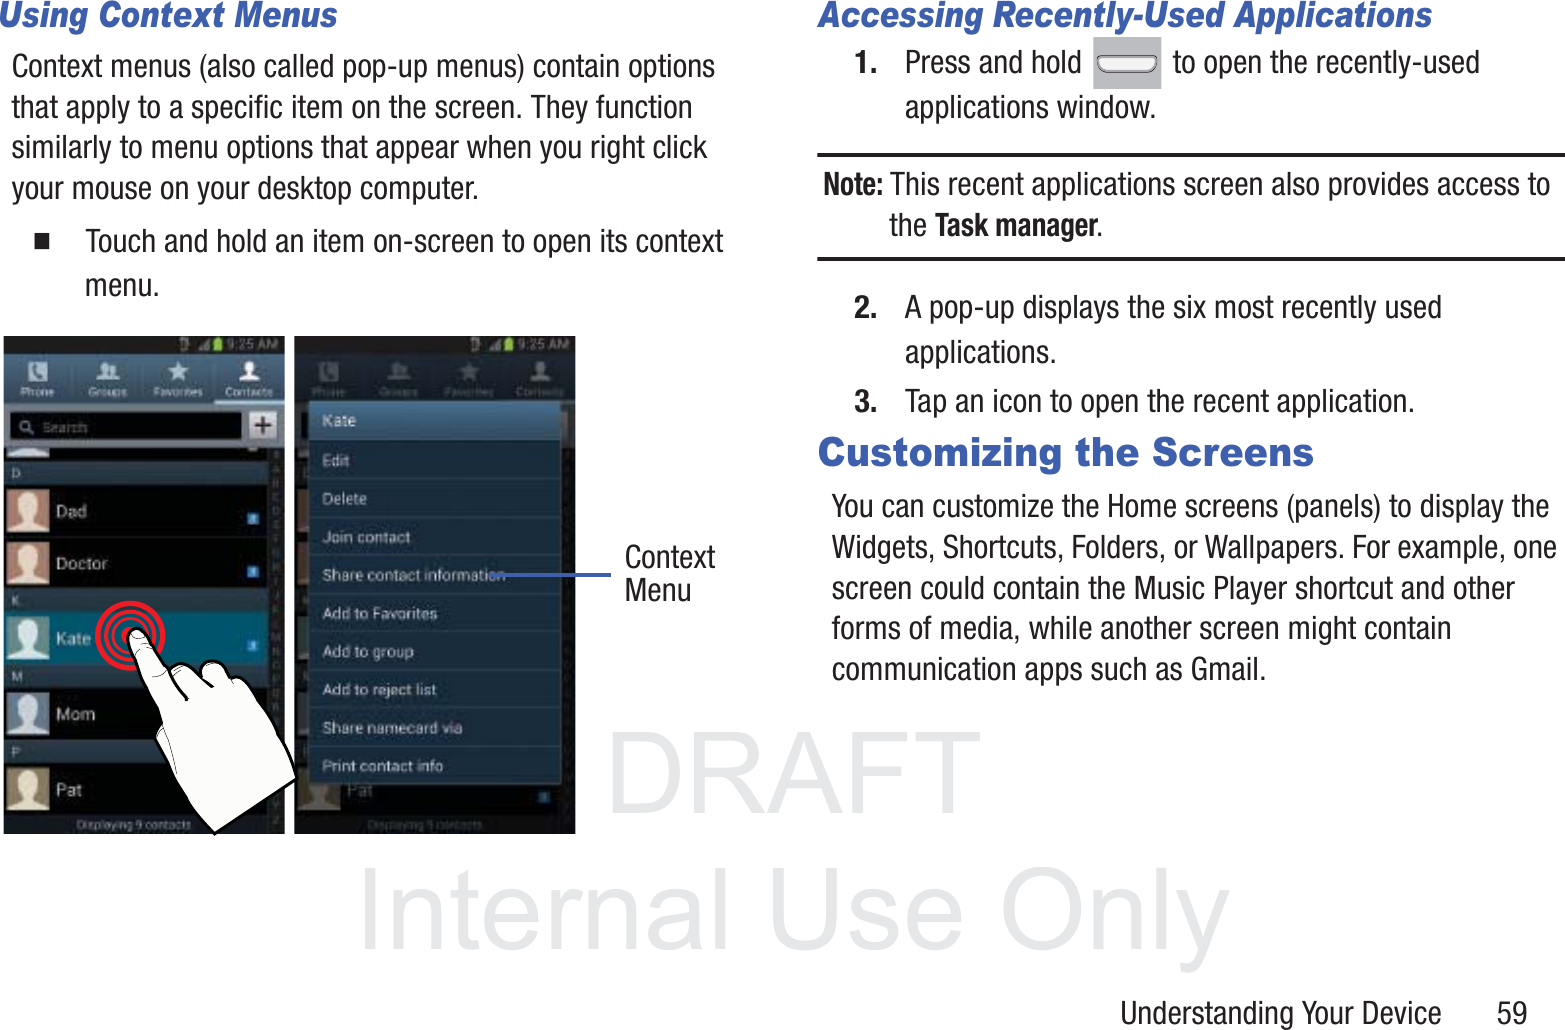

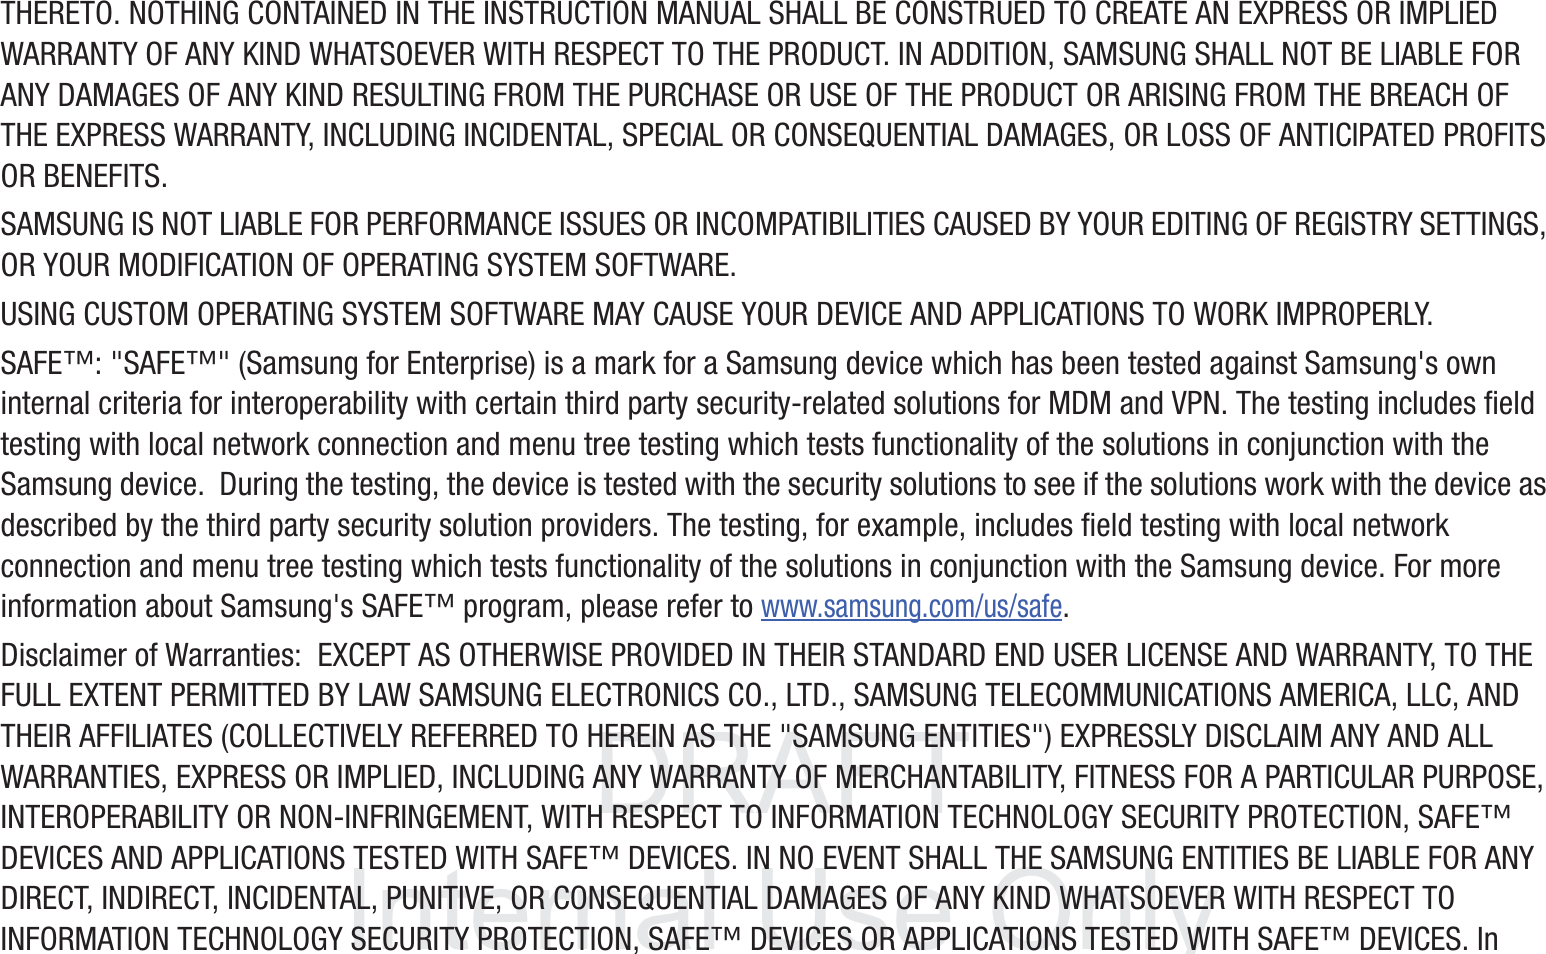
![DRAFT InternalUse Only92• Add to reject list press to add the current phone number to an automatic rejection list. Similar to a block list, the selected caller will be blocked from making an incoming calls to your phone.• Touch and hold an entry to display the entry-specific context menu:• Call [Number] to redial the current phone number. • Send message allows you to create a new text message to the selected entry.• Copy to dialing screen to make alterations to the current phone number prior to redial. • Add to Contacts to save the number if it is not already in your Contacts.• View contact to view the information for the currently stored Contacts entry.• Send number to send the current Contacts entry information to an external recipient.• Add to reject list to add the current phone number to an automatic rejection list. Similar to a block list, the selected caller will be blocked from making an incoming calls to your phone.•Delete to delete the entry from the Logs list.Altering Numbers from the Logs ListIf you need to make a call from the Logs screen and you need to alter the number prior to dialing, you can add the appropriate prefix by prepending the number.1. From the Home screen, tap ➔ .2. Touch and hold an entry to access the entry-specific context menu.3. Tap Copy to dialing screen.4. Edit the number using the on-screen keypad or delete digits by pressing to erase the numbers.5. Tap once the number has been changed.LogsLogs](https://usermanual.wiki/Samsung-Electronics-Co/SGHT999L.Users-Manual-1/User-Guide-1910674-Page-98.png)
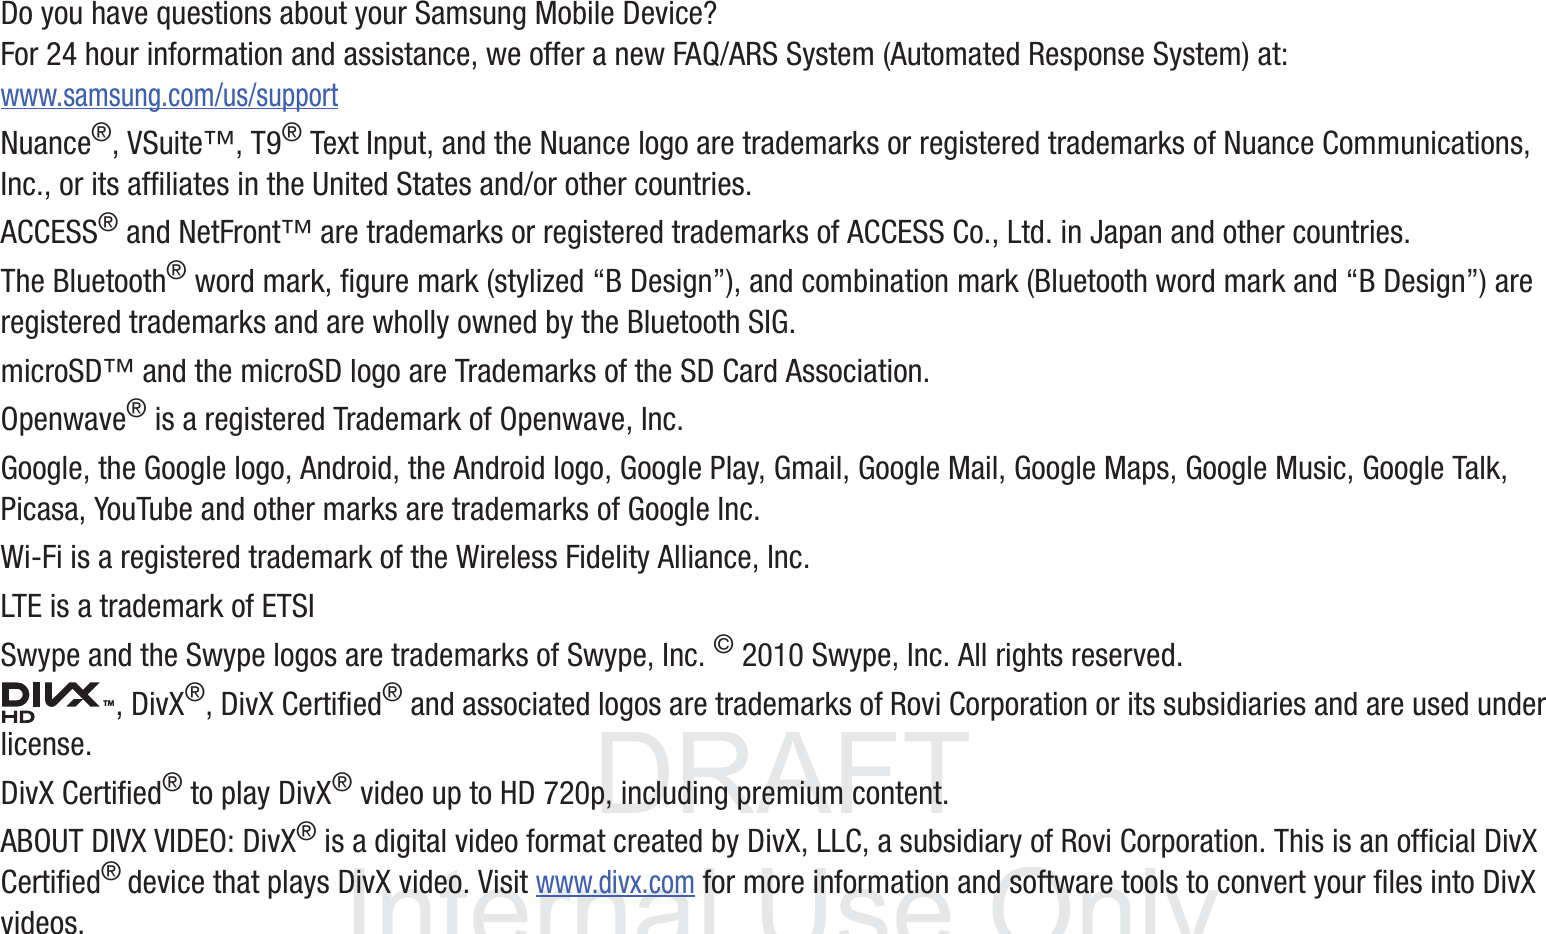
![DRAFT InternalUse Only104Using Symbol/Numeric ModeUse the Symbol/Numeric Mode to add numbers, symbols, or emoticons. While in this mode, the text mode key displays .1. From a screen where you can enter text, tap the text input field to reveal the on-screen keyboard. Rotate the phone counterclockwise to a landscape orientation, if desired.2. Tap to configure the keyboard for Symbol mode. Once in this mode, the text input type shows . 3. Tap a number, symbol, or emoticon character.4. Tap to return to ABC mode.To enter symbols:1. Tap to configure the keyboard for Symbol mode.2. Tap the appropriate symbol key.– or –Tap button to cycle through additional pages.•The first number on this key indicates which page (1, 2, or 3) of additional characters is active.Samsung Keyboard Settings1. From the Home screen, press and then tap Settings ➔ Language and input ➔ (adjacent to the Samsung keyboard field).– or –From within an active text entry screen, touch and hold (Input Methods), drag across the icons, and select (Settings) to reveal the Samsung keyboard settings screen.2. Set any of the following options:• Portrait keyboard types allows you to choose a keyboard configuration (Qwerty keyboard [default] or 3x4 keyboard).• Input language sets the input language. Tap a language from the available list. The keyboard is updated to the selected language.• Predictive text enables predictive text entry mode. This must be enabled to gain access to the advanced settings. Touch and hold to access the advanced settings.ABC123SymABCABC123Sym1/3](https://usermanual.wiki/Samsung-Electronics-Co/SGHT999L.Users-Manual-1/User-Guide-1910674-Page-110.png)


![DRAFT InternalUse OnlyMessages 149Setting Up a Microsoft Exchange Email account1. From the Home screen, tap ➔ (Email).2. If you already have other email account setup:•Open an existing email account, press and then tap Settings ➔ (Add new account). – or –Enter your Email address and Password information. • Email address: your Outlook work email address.• Password: typically your network access password (case-sensitive).3. Tap Send email from this account by default, to make this your default email account for outbound emails.4. Tap Show password to display the password as you enter it in the associated field.Note: If selected, the Manual setup button changes to read Microsoft Exchange ActiveSync. If activated, skip to step 6.5. Tap Next. Consult your Network or IT Administrator for further details and support.6. Tap Microsoft Exchange ActiveSync (from the add new email account screen).Note: If prompted with an on-screen notification that the connection that the “Setup could not finish”, tap Edit details to continue with a manual update of necessary information.7. When prompted to provide additional detailed information within the Exchange server settings screen, enter an updated Domain, and confirm your user name and Password information.Important! Remember to manually place the cursor in the correct spot and enter a Domain name before the “[Domain]\[user name]” entry. Most servers only provide a username.8. Update or re-enter your Exchange server information within the appropriate field. This field can often be populated with incorrect or out of date information provided by your server.](https://usermanual.wiki/Samsung-Electronics-Co/SGHT999L.Users-Manual-1/User-Guide-1910674-Page-155.png)