Samsung Electronics Co SGHZX10 Dual-Band Dual-Mode GSM/ WCDMA Phone User Manual C0CCB8A7BEF8C0BD31
Samsung Electronics Co Ltd Dual-Band Dual-Mode GSM/ WCDMA Phone C0CCB8A7BEF8C0BD31
Contents
- 1. Users Manual Part I
- 2. Users Manual Part II
Users Manual Part I


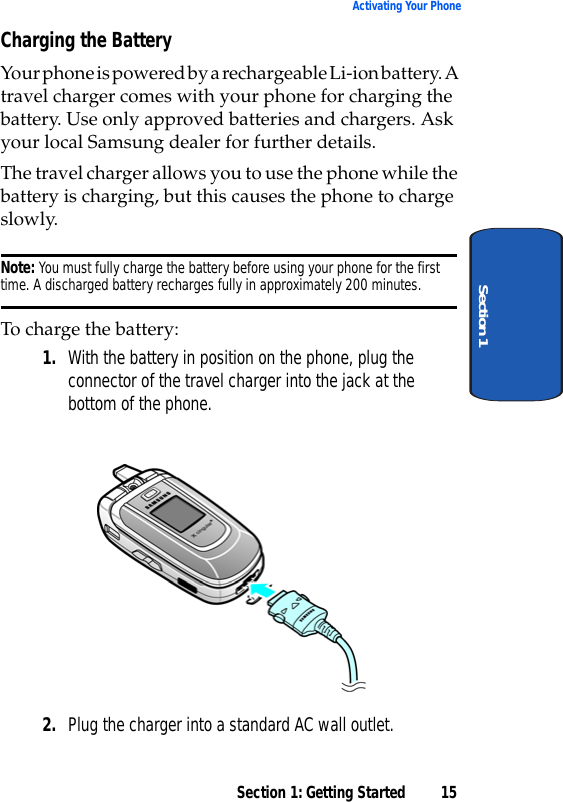

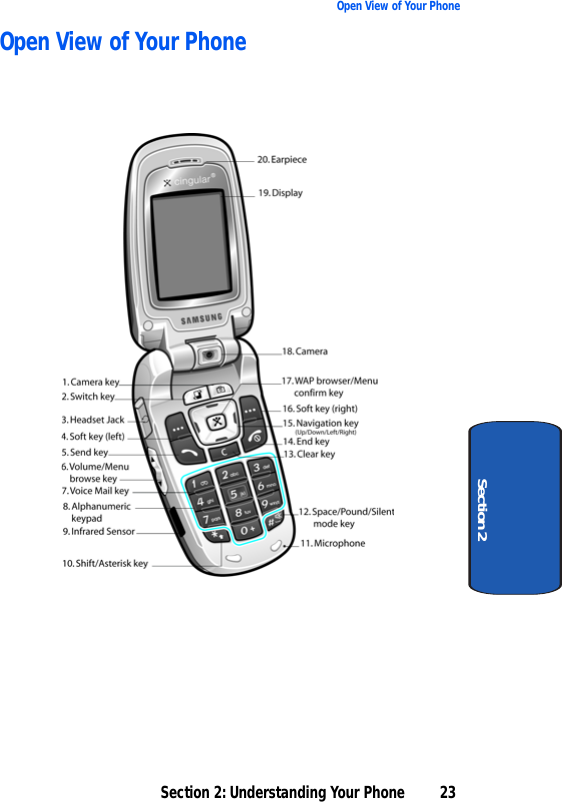
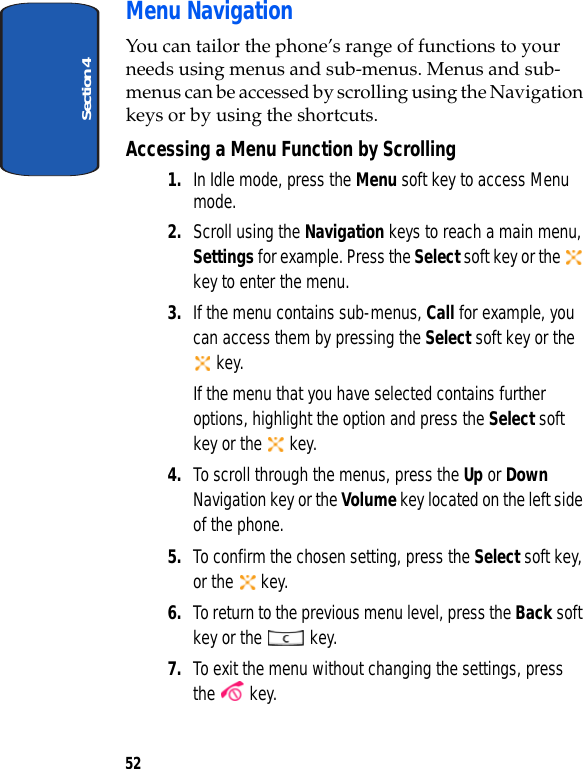
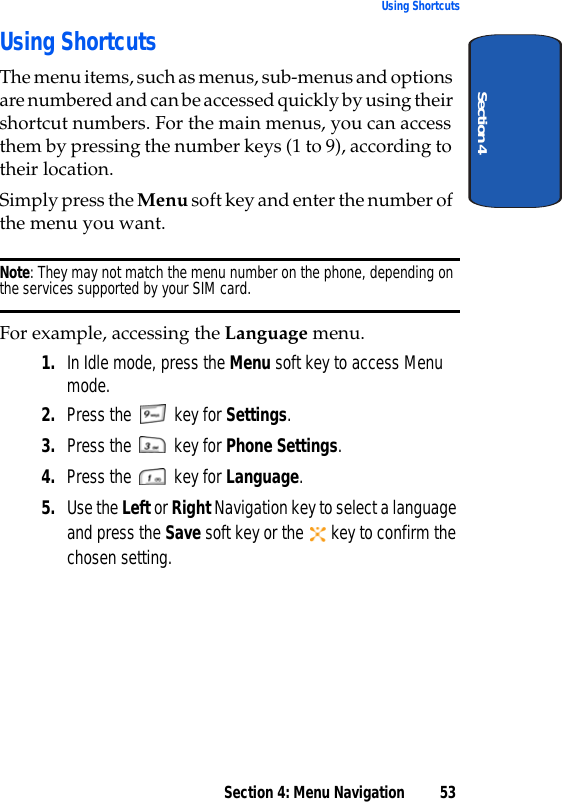
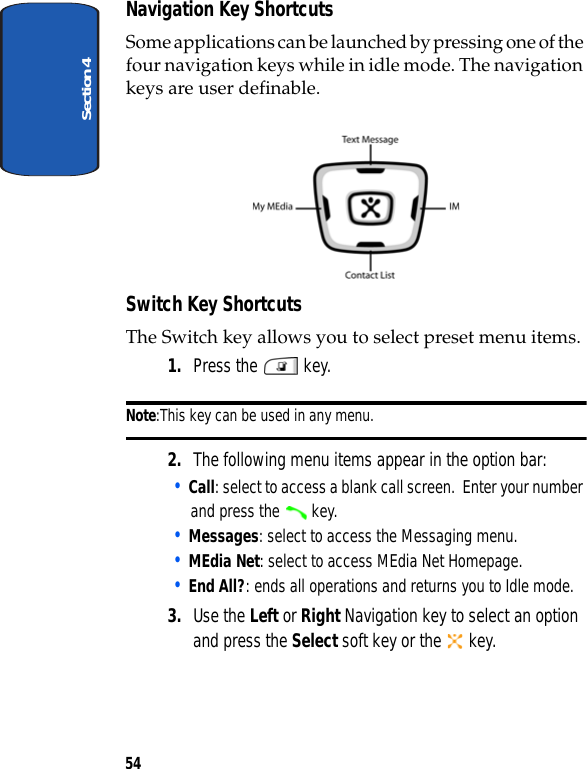
![Section 2: Understanding Your Phone 25Open View of Your PhoneSection 210.Shift/Asterisk key: Enters the asterisk character for calling features. In text entry mode, press to change the character input type.11. Space/Pound/Silent mode key: Enters the [#] character for calling features. In text entry mode, press to enter a space. In idle mode, press and hold to activate Silent mode feature.12.Microphone: The microphone allows the other caller to hear you clearly when you are speaking to them. It is also used to record audio during a video recording.13.Clear key: Deletes characters from the display when you are in text entry mode. When in a menu, press to return to the previous menu.14.End key: Ends a call. Press and hold this key for a few seconds to turn your phone on or off. While in the main menu, it returns the phone to idle mode and cancels your input. When you receive an incoming call, press to reject the call.15.Navigation key: This key allows you to scroll through the phone menu options and provides a shortcut to phone functions from idle mode.16. Soft key (right): Performs the functions indicated by the screen text on the bottom of the display.17.WAP Browser/Menu confirm key: Press to launch WAP Browser. Pressing the key when navigating through a menu accepts the highlighted choice menu. Press in camera mode to take a photo.](https://usermanual.wiki/Samsung-Electronics-Co/SGHZX10.Users-Manual-Part-I/User-Guide-594596-Page-25.png)