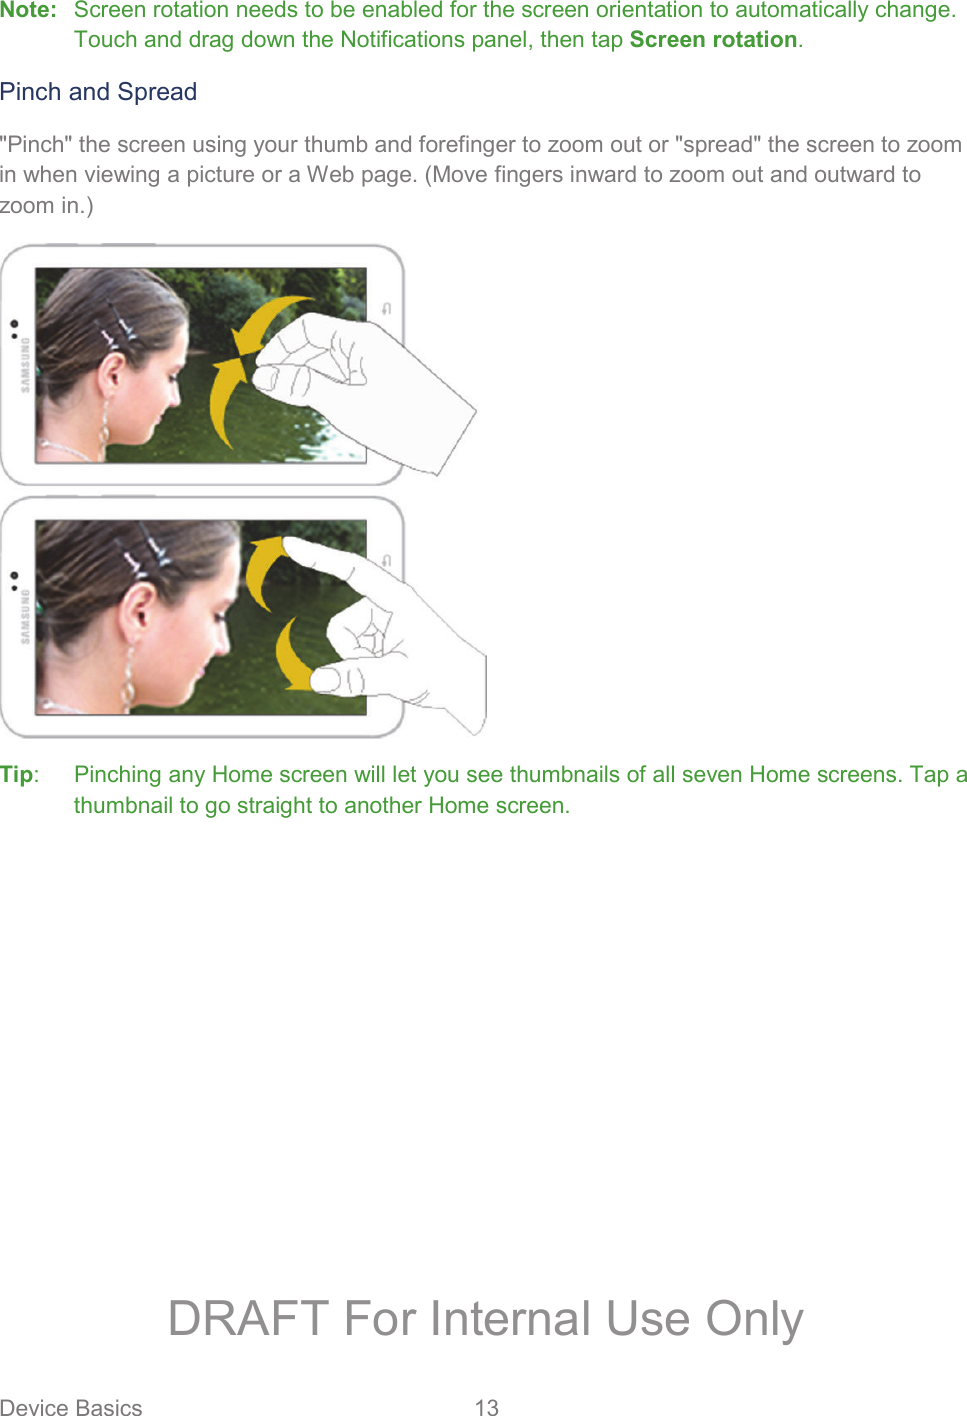
Samsung Electronics Co SMT217S Portable Tablet PC with Multi-band CDMA, LTE, WLAN and Bluetooth User Manual Sprint LT02 UM ME2 062013 D1
Samsung Electronics Co Ltd Portable Tablet PC with Multi-band CDMA, LTE, WLAN and Bluetooth Sprint LT02 UM ME2 062013 D1
Contents
- 1. Users Manual
- 2. Safety Guide Manual
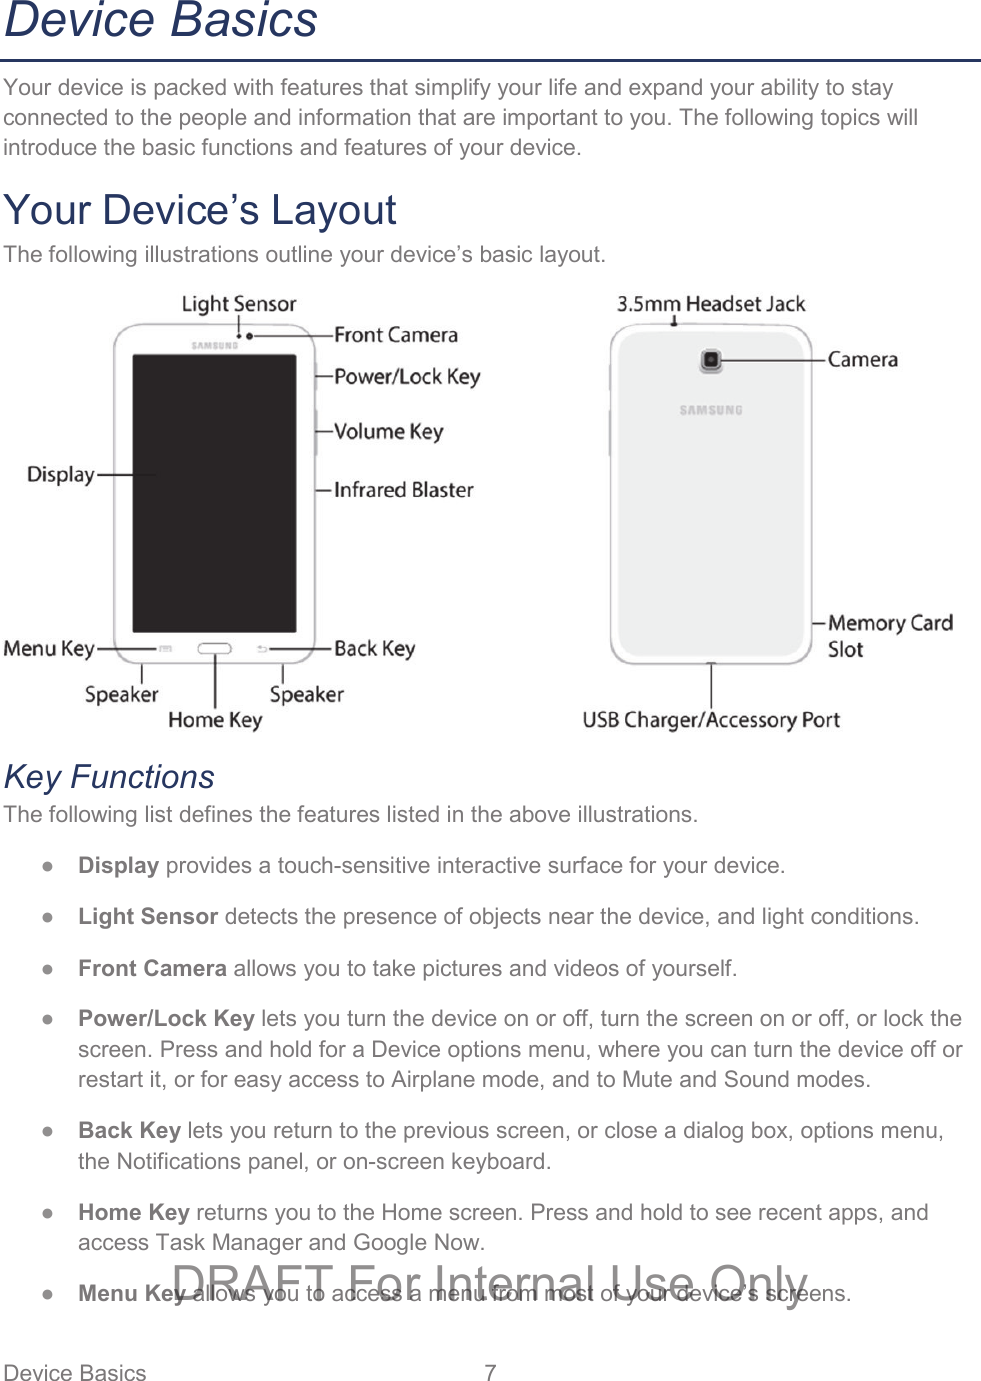
Users Manual
![User Guide ©2013 Sprint. Sprint and the logo are trademarks of Sprint. Other marks are trademarks of their respective owners. [Sprint UG template version 12c] SPH-LT02_JB_ME2_TN_070113_D3 FPODRAFT For Internal Use Only](https://usermanual.wiki/Samsung-Electronics-Co/SMT217S.Users-Manual/User-Guide-2050676-Page-1.png)