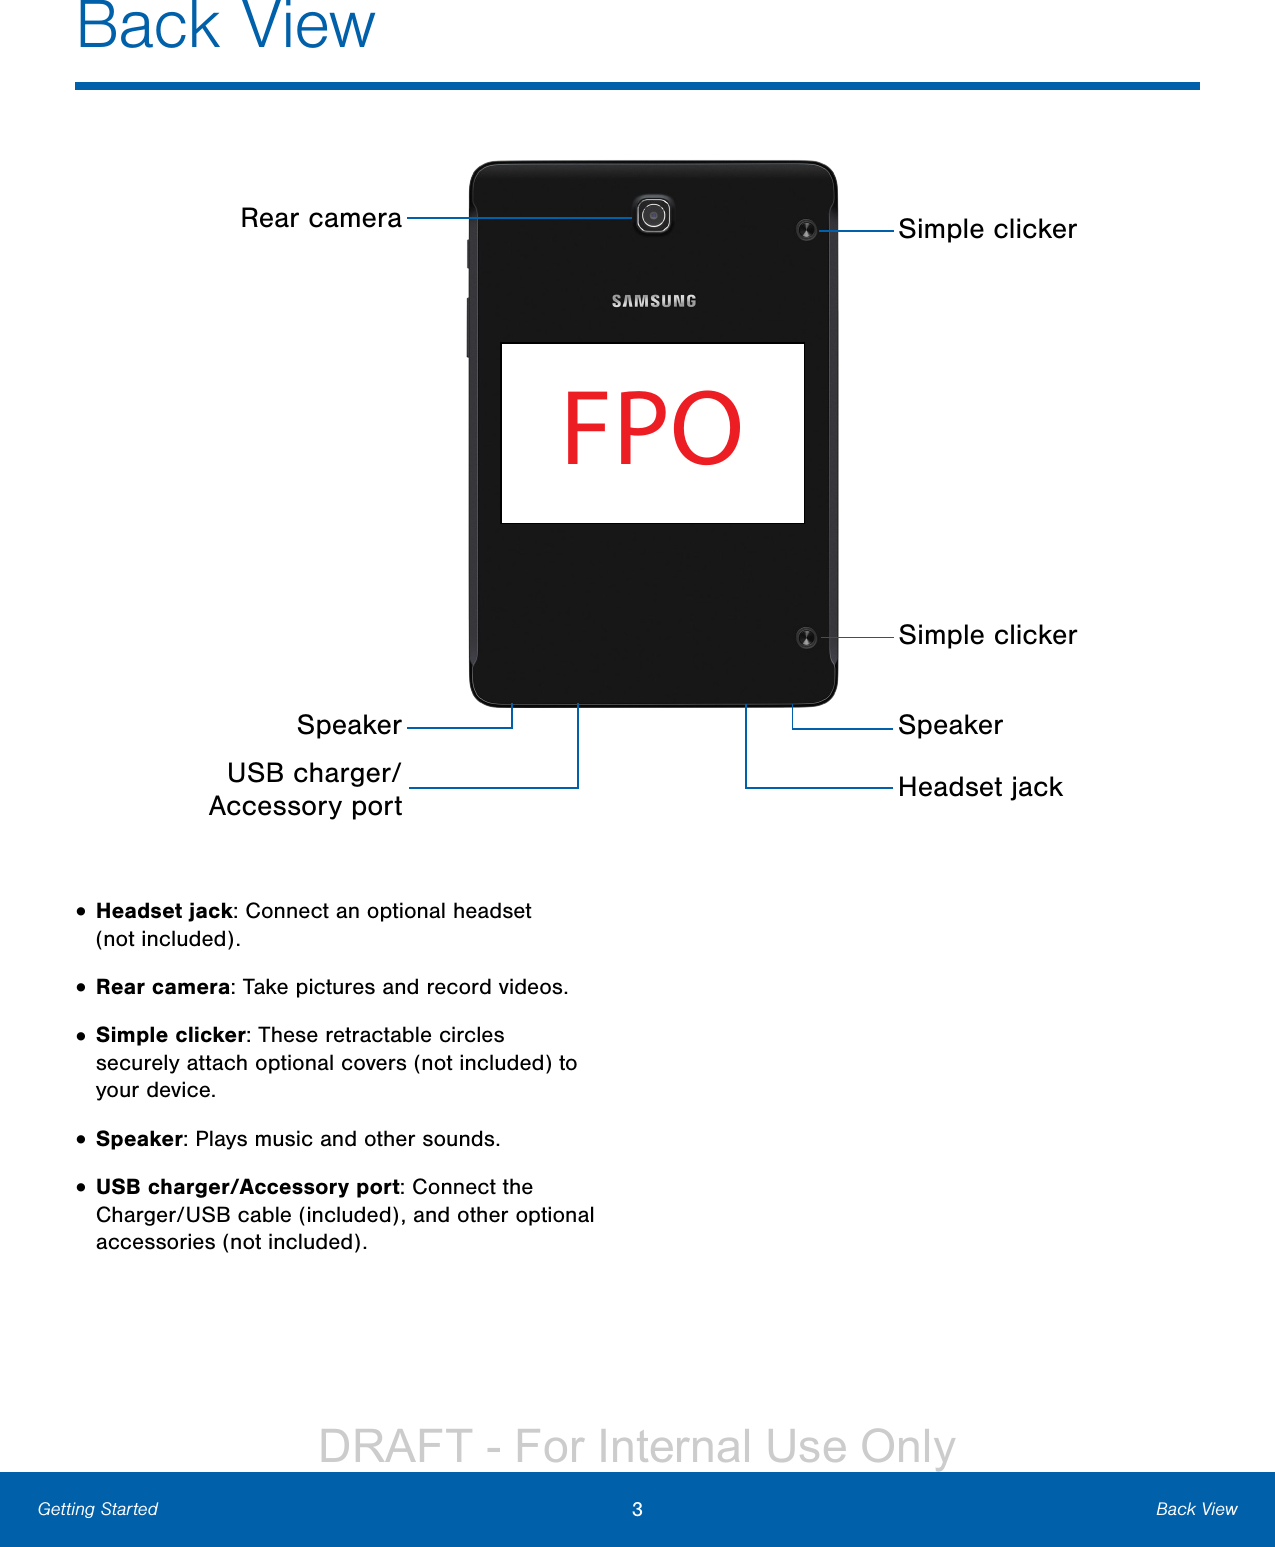
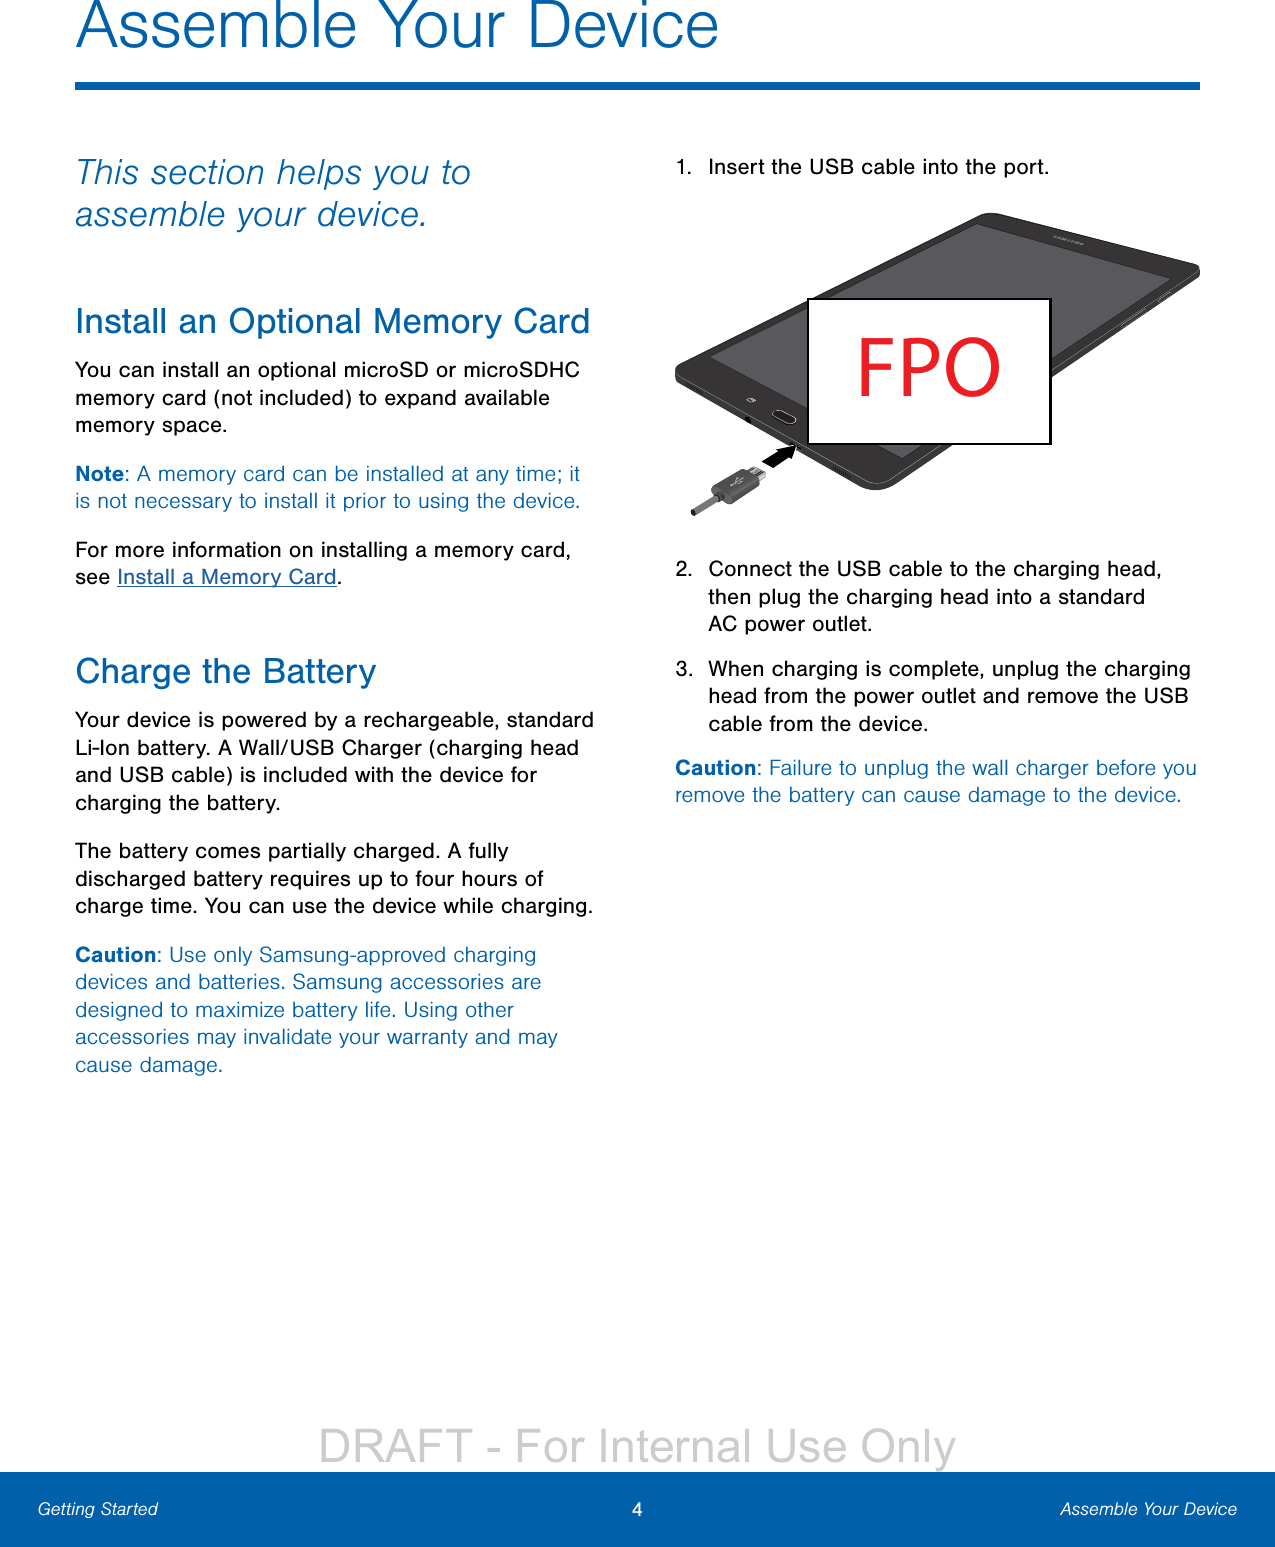
Samsung Electronics Co SMT560NU Portable Tablet with Bluetooth, WLAN and ANT+ User Manual 1
Samsung Electronics Co Ltd Portable Tablet with Bluetooth, WLAN and ANT+ Users Manual 1
UserManual.wiki
>
Samsung Electronics Co
>
SMT560NU User Manual
>
Users Manual 1
Contents
1.
Users Manual 1
2.
Users Manual 2
Users Manual 1
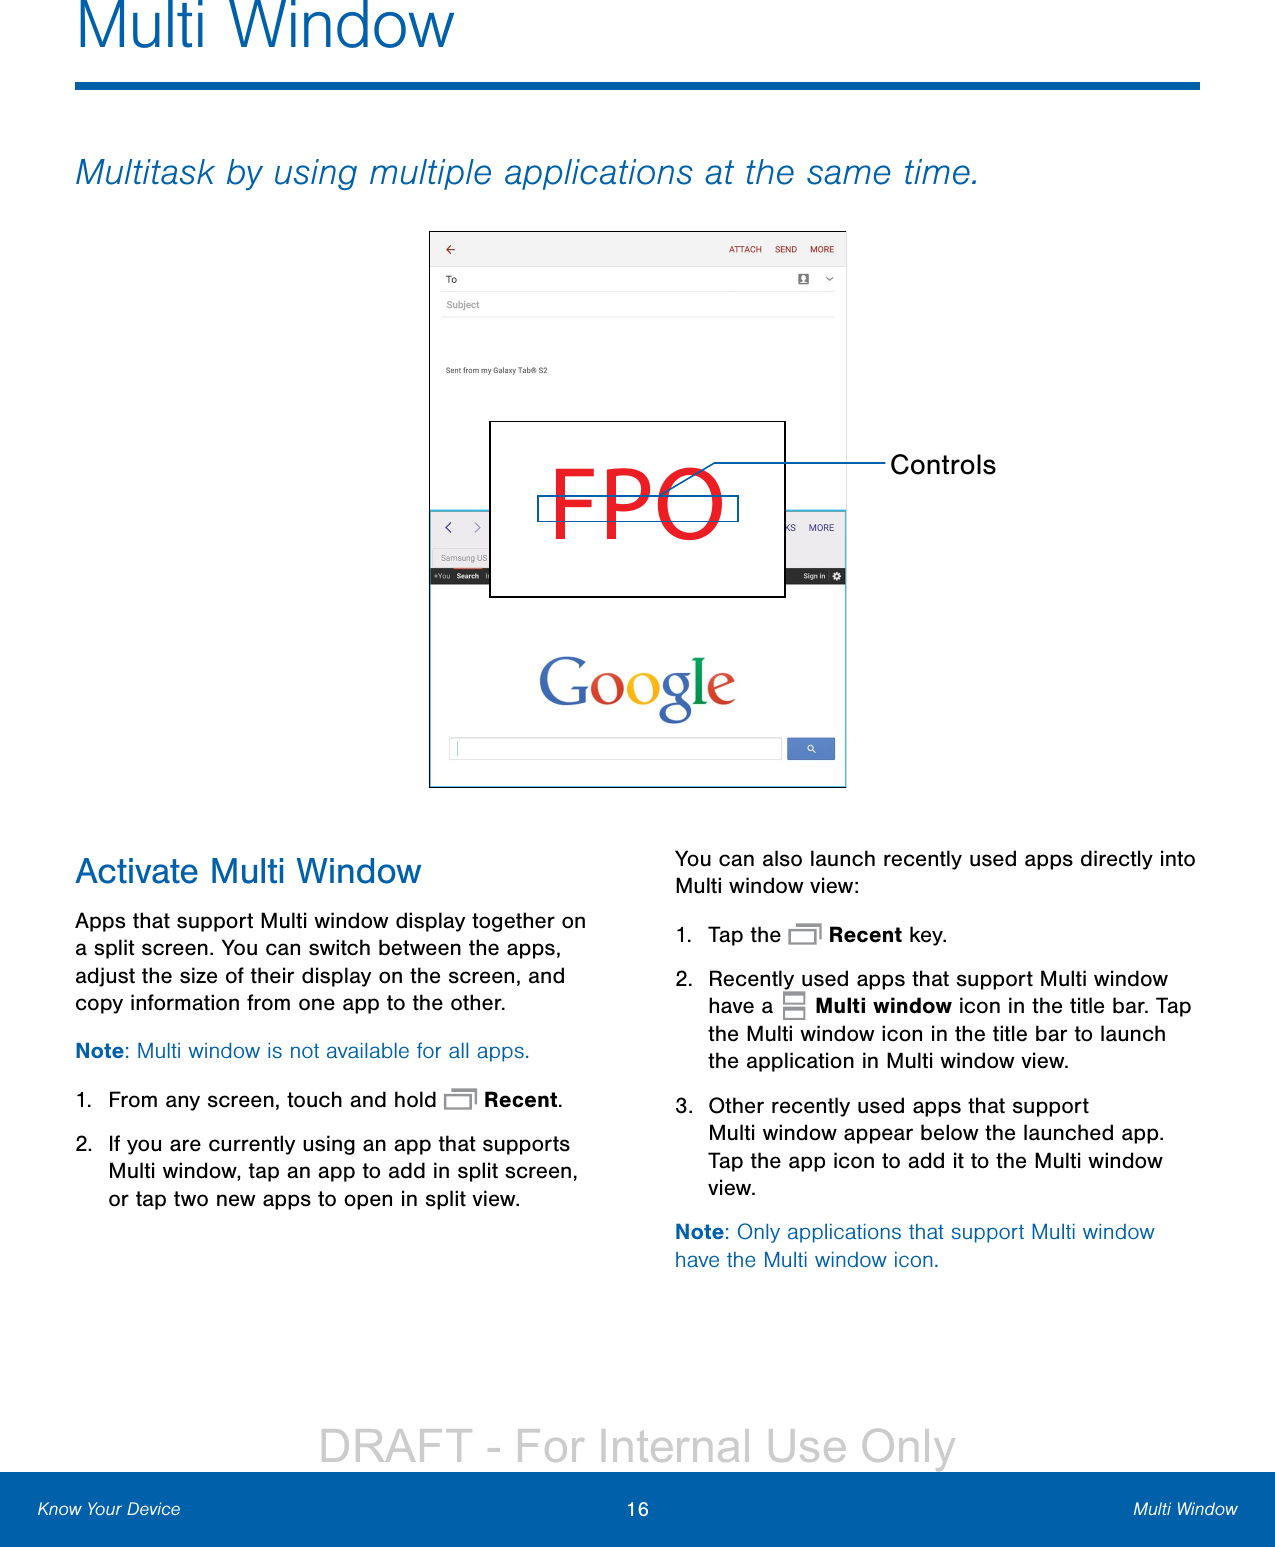
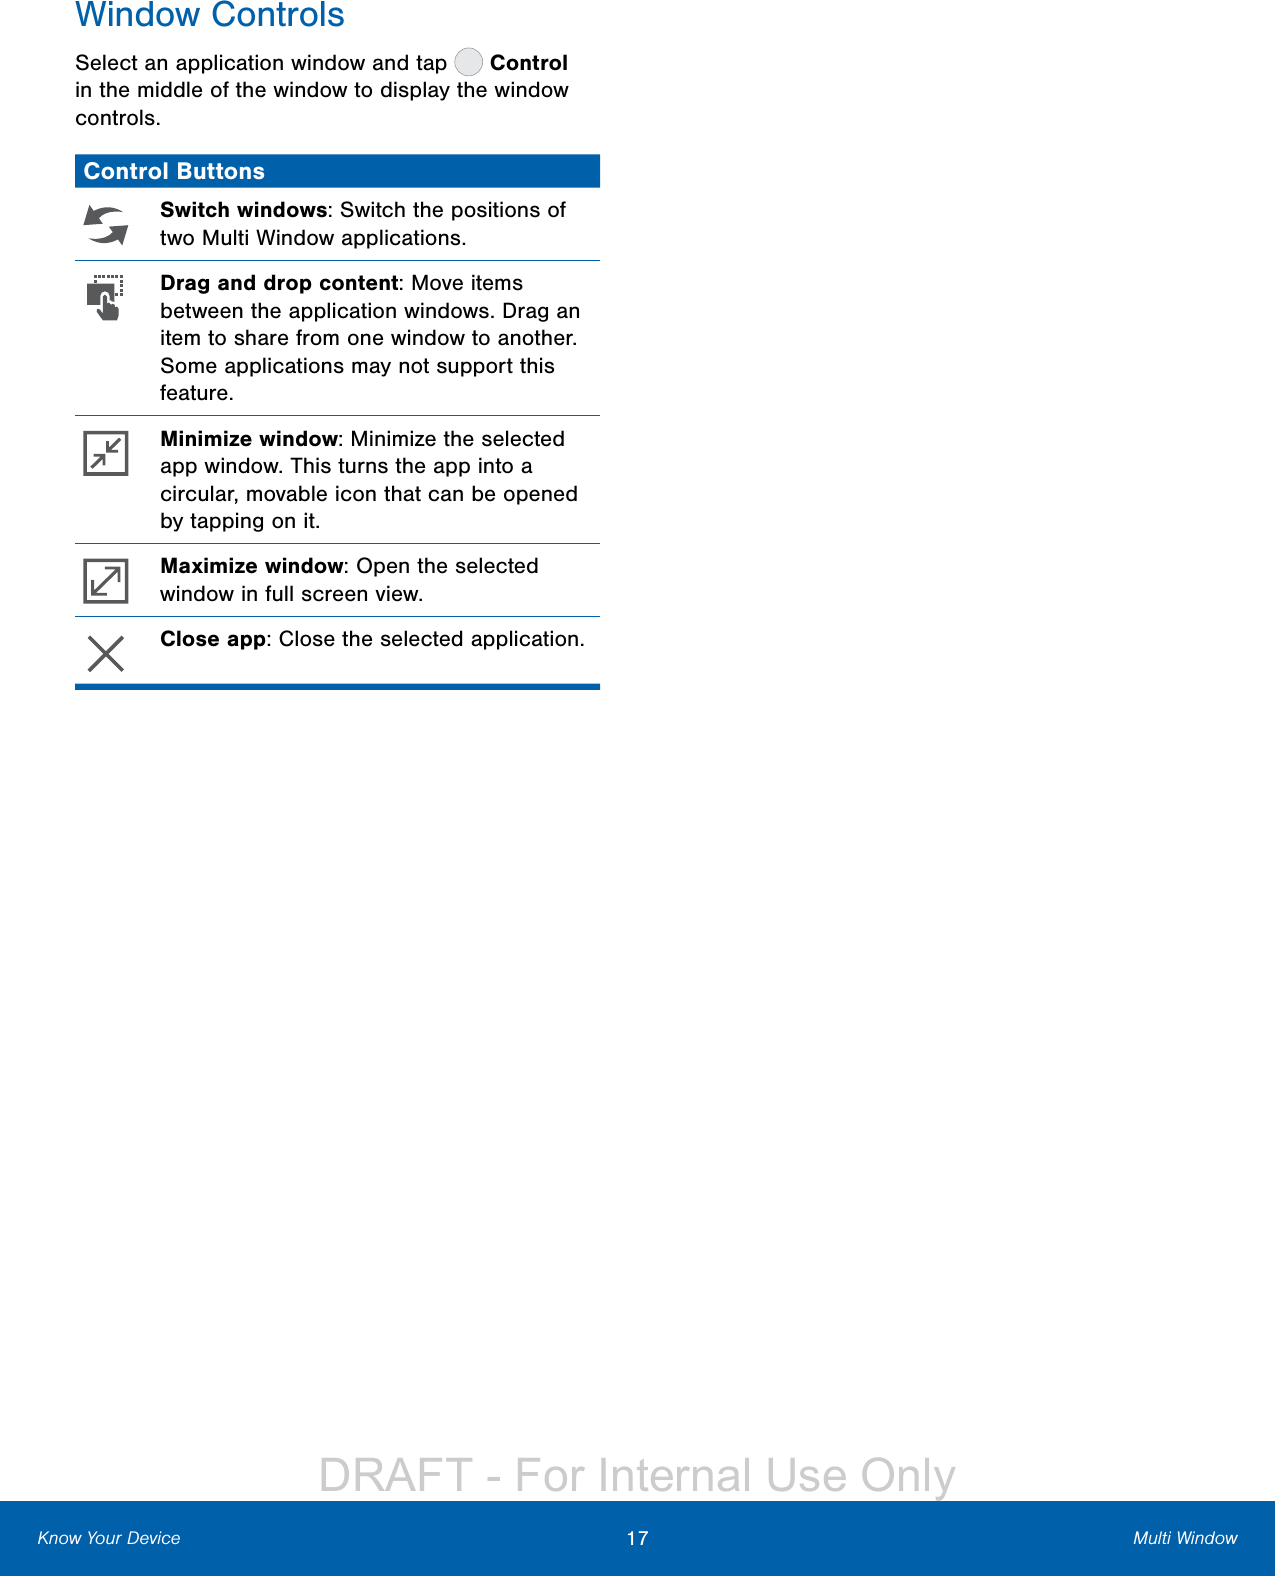
Navigation menu
Upload a User Manual
Namespaces
Wiki Guide
HTML
PDF
Info
Views
User Manual
Discussion / Help
Navigation
![iiLegal NoticesSamsung Knox™Samsung Knox is Samsung’s security platform and is a mark for a Samsung device tested for security with enterprise use in mind. Additional licensing fee may be required. For more information about Knox, please refer to: samsung.com/us/knox. [030115]Samsung Electronics America (SEA), IncAddress:85 Challenger Road Ridgefield Park, New Jersey 07660Phone: 1-800-SAMSUNG (726-7864)Internet Address:samsung.com©2015 Samsung Electronics America, Inc. Samsung and Galaxy Tab are registered trademarks of SamsungElectronics Co., Ltd.Screen images are simulated. Appearances of the device may vary.Do you have questions about your Samsung Mobile Device? For 24 hour information and assistance, we offer a new FAQ/ARS System (Automated Response System) at: samsung.com/us/support.The actual available capacity of the internal memory is less than the specified capacity because the operating system and default applications occupy part of the memory. The available capacity may change when you upgrade the device.Nuance®, VSuite™, T9® Text Input, and the Nuance logo are trademarks or registered trademarks of Nuance Communications, Inc., or its affiliates in the United States and/or other countries.The Bluetooth® word mark, figure mark (stylized “BDesign”), and combination mark (Bluetooth word mark and “B Design”) are registered trademarks and are wholly owned by the Bluetooth SIG.microSD™ and the microSD logo are Trademarks of the SD Card Association.Google, the Google logo, Android, the Android logo, Google Play, Gmail, Google Mail, Google Maps, Google Music, Google Now, Chrome, Google Hangouts, Picasa, Play Newsstand, YouTube, and other marks are trademarks of Google Inc.Wi-Fi is a registered trademark of the Wireless Fidelity Alliance, Inc.Microsoft is a registered trademark of the Microsoft Corporation.Legal InformationImportant legal information can be accessed in writing on the mobile device or at samsung.com. Read this information before using your mobile device.Samsung Limited Warranty - This product is covered under the applicable Samsung Limited Warranty. Full written terms and detailed information about the warranty and obtaining service are available on the device at: Settings > About device > LegalInformation > Samsung legal or at samsung.com.The online version of the Health/Safety and Warranty guide for your device can be found at:English samsung.com/us/Legal/Tablet-HSGuideSpanish samsung.com/us/Legal/Tablet-HSGuide-SPLocation of Legal Information on the device:•Health and Safety InformationSettings > About device > Legal information >Samsung legal > Health and Safety•WarrantySettings > About device > Legal information >Samsung legal > Warranty•EULASettings > About device > Legal information >Samsung legal > End User License AgreementDRAFT - For Internal Use Only](https://usermanual.wiki/Samsung-Electronics-Co/SMT560NU.Users-Manual-1/User-Guide-2717953-Page-3.png)


![38 EmailApplicationsUse the Email app to view and manage all your email accounts in one application.To access Email: ►From a Home screen, tap Apps > Email.Configure Email AccountsYou can configure Email for most accounts in just a few steps.1. From a Home screen, tap Apps > Email.2. Follow the onscreen instructions to set up your email account.– or –For additional accounts, tap MORE > Settings > Add account.The device communicates with the appropriate server to set up your account and synchronize your email. When complete, your email appears in the Inbox for the account.Note: To configure email account settings at any time, tap MORE > Settings. Tap the email account to manage to display its settings.Manage Multiple Email AccountsYou can view email you receive for all accounts on the Combined view screen or you can view email accounts individually.1. From a Home screen, tap Apps > Email.2. Tap the drop down menu at the top left of the screen to view the current account mailbox.3. Tap on the account name to view:• Combined inbox: View all email in a combined inbox.• [Account Name]: View email for only one email account.Delete Email AccountsTo delete an Email account:1. From a Home screen, tap Apps > Email.2. Tap MORE > Settings.3. Tap the account you want to remove.4. Tap REMOVE. Confirm by tapping REMOVE on the prompt.Email SettingsThese settings allow you to modify settings associated with using the Email app.1. From a Home screen, tap Apps > Email.2. Tap MORE > Settings.3. Tap an option and follow the onscreen instructions.EmailDRAFT - For Internal Use Only](https://usermanual.wiki/Samsung-Electronics-Co/SMT560NU.Users-Manual-1/User-Guide-2717953-Page-42.png)


![80 AccountsSettingsAccountsSet up and manage accounts, including your Google Account, Samsung account, email, and social networking accounts.Depending on the account, you can choose to synchronize your calendar, contacts, and other types of content.Add an Account1. From a Home screen, tap Apps > Settings.2. Tap Accounts > Add account.3. Tap one of the account types.4. Follow the prompts to enter your credentials and set up the account.Synchronize Accounts1. From a Home screen, tap Apps > Settings.2. Tap Accounts > [Account type].3. Tap an account to view the sync settings for thataccount.4. Tap individual data items to sync.5. Tap MORE > Sync all or Sync now to synchronize the account.Note: Sync options and the location of the sync command differ depending on the account type.Account SettingsEach account has its own set of settings. In addition, you can configure common settings for all accounts of the same type.Note: Account settings and available features vary between account types and service providers. Contact your service provider for more information on your account’s settings.1. From a Home screen, tap Apps > Settings.2. Tap Accounts > [Account type].• Tap an account to configure that account’s sync settings.• Tap other available options for the account.Delete an Account1. From a Home screen, tap Apps > Settings.2. Tap Accounts > [Account type].3. Tap the account and then tap MORE > Removeaccount.DRAFT - For Internal Use Only](https://usermanual.wiki/Samsung-Electronics-Co/SMT560NU.Users-Manual-1/User-Guide-2717953-Page-84.png)