Samsung Electronics Co SPHA660 Tri-Mode Dual-Band Analog/ PCS Phone (AMPS/CDMA) User Manual
Samsung Electronics Co Ltd Tri-Mode Dual-Band Analog/ PCS Phone (AMPS/CDMA) Users Manual
UserManual.wiki
>
Samsung Electronics Co
>
SPHA660 User Manual
>
Users Manual
Contents
1.
Users Manual
2.
Users Manual per CRN 9364
Users Manual
Navigation menu
Upload a User Manual
Namespaces
Wiki Guide
HTML
PDF
Info
Views
User Manual
Discussion / Help
Navigation
![User’s Guide Vision enabled PCS PhoneModel [SPH-A660]](https://usermanual.wiki/Samsung-Electronics-Co/SPHA660.Users-Manual/User-Guide-348265-Page-1.png)
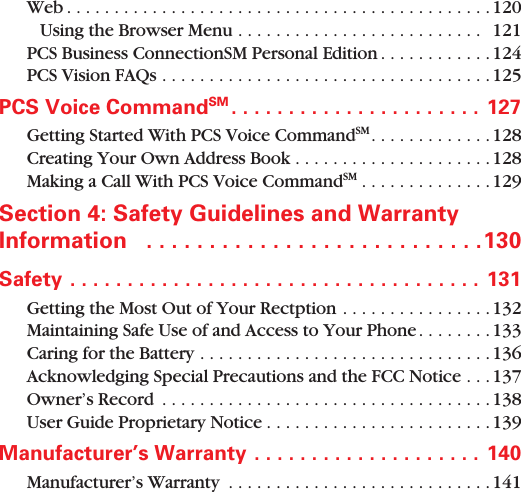


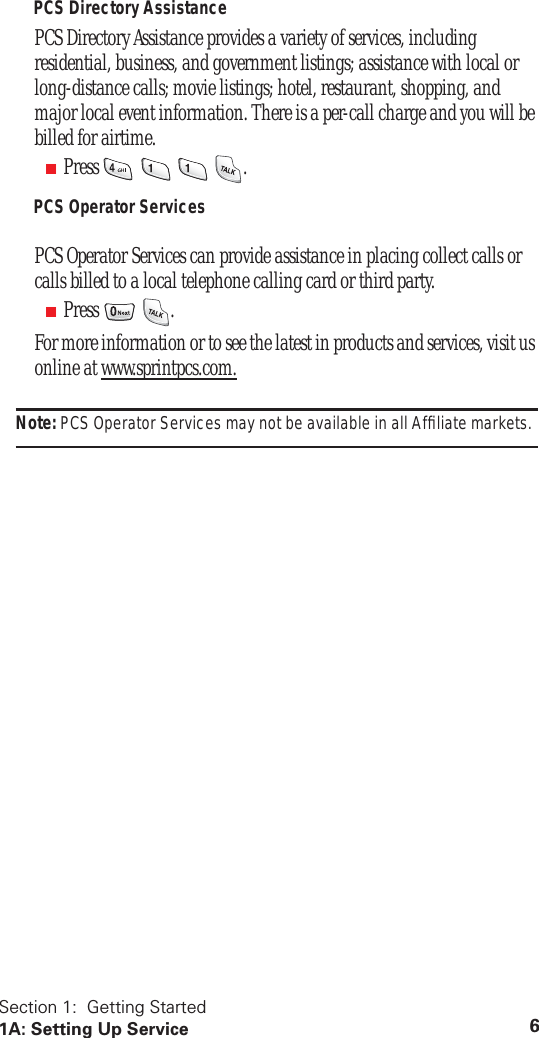
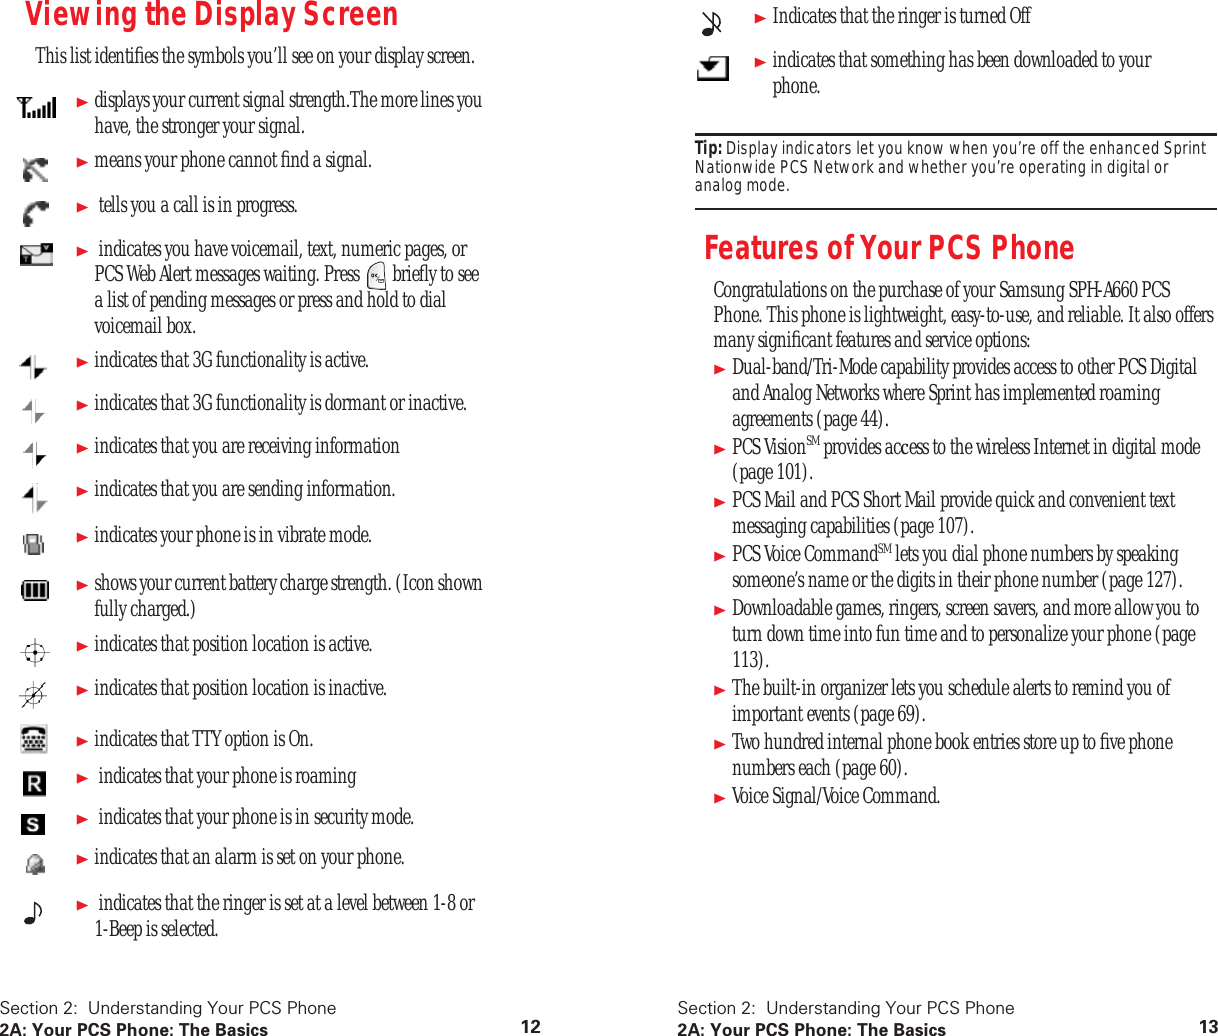
![Section 2: Understanding Your PCS Phone 2A: Your PCS Phone: The Basics 10 Key Functions 1. Speaker : The speaker allows you to hear the other caller and the different ring tones and sounds offered by your phone. 2. Signal Strength Indicator : This icon represents the signal strength by displaying bars. The more bars displayed, the better the signal strength. 3. Display Screen : The display screen displays all the information needed to operate your phone. 4. Headset Jack : (located on the left side of the phone.) Allows you to plug in an optional headset for safe and convenient hands-free conversations. 5. OK/Voicemail Key : Pressing when navigating through a menu accepts the highlighted choice in the menu. Pressing for two seconds automatically dials your voicemail 6. Navigation Key : This key allows you to scroll through the phone menu options, and provides a shortcut to phone functions from Standby Mode. 7. Volume Keys : Allows you to adjust the call ringer volume in Standby mode (with the flip open) or adjust the voice volume during a call. The volume keys can also be used to scroll up or down to navigate through the different menu options. To mute the ringer during an incoming call, press the Volume Key up or down. 8. TALK : Place or receive a call. In Standby mode, press the key once to access the Outgoing call log. If you press and hold the key down you will initiate Voice Recognition feature. 9. Numeric Keypad : Use these keys to enter numbers, letters, and characters. 10. Shift/Asterisk : Enters the asterisk [*] character for calling features. In text entry mode, press to change the character input type. 11. Accessory Interface Connector : This connector is used to connect any available accessory cables to your phone. 12. Power Interface Connector : The power interface connector is used to plug in the charging accessories. Section 2: Understanding Your PCS Phone 2A: Your PCS Phone: The Basics 11 13. Microphone : The Microphone allows the other caller to hear you clearly when you are speaking to them. 14. Space/Pound : Enters the pound [#] character for calling features. In text entry mode, press to enter a space. 15. BACK : Deletes characters from the display. When in a menu, press to return to the previous menu. This key also allows you to return to the previous screen in the PCS Wireless Web browser. 16. END : Ends a call. Press and hold this key for a few seconds to turn your phone On or Off. While in the main menu, it returns the phone to Standby mode and cancels your input. 17. MENU Key : Displays the first level or Main Menu of options. Press again to view the next menu page. 18. Ringer Indicator : This icon indicates that a ringer is set. 19. Battery Indicator : The battery indicator displays the amount of remaining battery charge currently available in your phone. When all bars are displayed in the battery icon, the phone’s battery is fully charged. When they are not displayed, the phone’s battery is completely discharged or empty. 20. Position Location : This icon indicates that the position location is active.](https://usermanual.wiki/Samsung-Electronics-Co/SPHA660.Users-Manual/User-Guide-348265-Page-13.png)
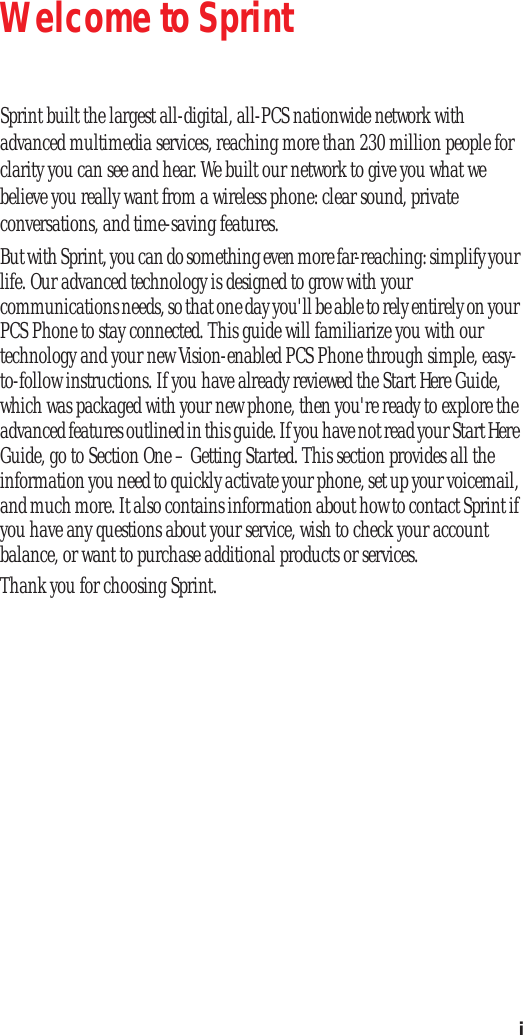
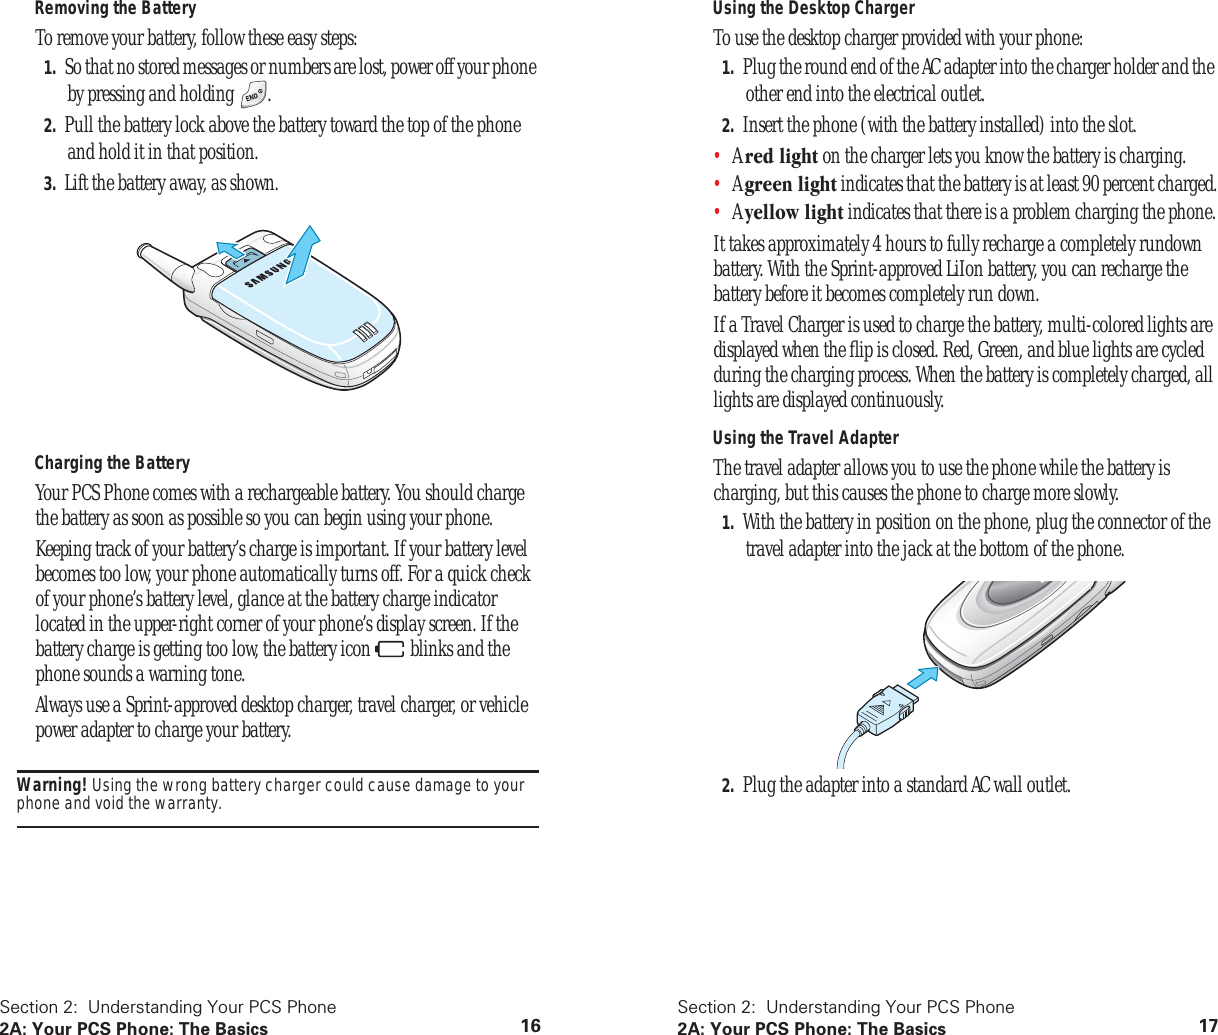
![Section 2: Understanding Your PCS Phone2A: Your PCS Phone: The Basics 14Turning Your Phone ON and OFFTurning Your Phone ON■Press for approximately two seconds to turn your phone On.Once your phone is ON, it displays “Searching for Service” or “Entering PCS Service” which indicates that your phone is searching for a signal. When your phone finds a signal, it automatically enters Standby mode – the phone’s idle state. At this point, you are ready to begin making and receiving calls.If your phone is unable to find a signal after 15 minutes of searching, a Power Save feature is automatically activated. When a signal is found, your phone automatically returns to Standby mode.In Power Save mode, your phone searches for a signal periodically without your intervention. You can also initiate a search for PCS Service by pressing any key (when your phone is turned ON).Tip: The Power Save feature helps to conserve your battery power when you are in an area where there is no signal.Turning Your Phone OFF■Press for two seconds until you see the powering down animation on the display screen.Your screen remains blank while your phone is off (unless the battery is charging).Section 2: Understanding Your PCS Phone2A: Your PCS Phone: The Basics 15Using the BatteryBattery CapacityYour PCS Phone is equipped with a Lithium Ion (LiIon) battery. It allows you to recharge your battery before it is fully drained. The battery provides approximately [xx] hours of continuous digital talk time ([xx] hours in analog) or approximately [xx] hours of continuous digital standby time ([xx] hours in analog).When the battery reaches [xx]% of its capacity, the battery icon blinks. When there are approximately two minutes of talk time left, the phone sounds an audible alert and then powers down.Note: Long backlight settings, searching for service, vibrate mode, and browser use affect the battery’s talk and standby times.Tip: Be sure to watch your phone’s battery level indicator and charge the battery before it runs out of power.Installing the BatteryYour PCS Phone comes with a LiIon battery. Follow these steps to install it:1. Place the battery so that the tabs on the end align with the slots at the bottom of the phone.2. Press the battery down until it clicks into place. Make sure that the battery is properly installed before switching the phone on.](https://usermanual.wiki/Samsung-Electronics-Co/SPHA660.Users-Manual/User-Guide-348265-Page-15.png)

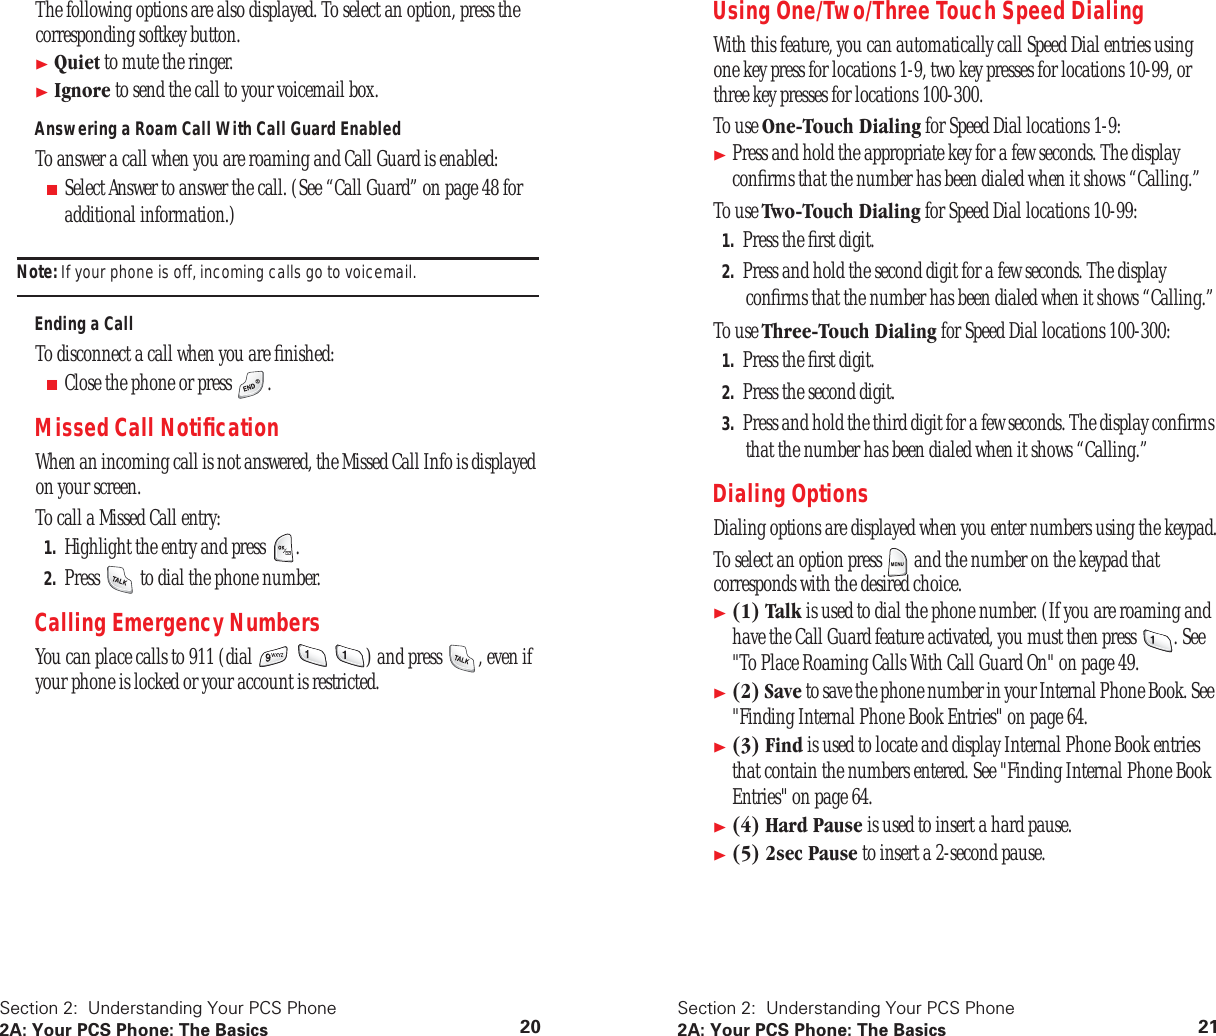


![Section 3: Using PCS Service Features3B: PCS VisionSM 1165. If applicable, a prompt will display the days remaining on the game license and ask if you want to continue. Select Yes.6. Follow the onscreen instructions to play the game. When you are finished, select Exit (or Quit) or press .7. A prompt will display: “Really terminate this application?” Select Yes to exit or No to cancel.RingersTip: For complete instructions on downloading, see “Downloading Games, Ringers, and Screen Savers” on page 113.Downloading RingersTo download an available ringer to your phone:1. Press for Main Menu.2. Press for Downloads.3. Highlight Ringers and press .4. Highlight Get New and press . The browser will launch and take you to the Ringers download menu.5. Use your navigation key to highlight and select a ringer you wish to download. (For more information on navigating the Web, see “Navigating the Web” on page 105.)6. From the item information page, select Buy. If you have not previously purchased an item, you will be prompted to enter your account password and create your purchasing profile.7. A confirmation page will notify you that the ringer has been purchased and is stored in the My Vault folder. To download the ringer, select Download.8. From the Download screen, select Next (right softkey) to download the ringer. When the Completed screen appears, the ringer has been successfully downloaded to your phone. Note: You may store [xx] downloaded ringers on your phone. Additional downloads will be stored in your personal vault.Section 3: Using PCS Service Features3B: PCS VisionSM 117Assigning Downloaded RingersDownloaded ringers may be assigned directly from the Downloads menu and are also available through the Settings menu.To assign a downloaded ringer through the Settings menu, see “Selecting Ringer Types for Voice Calls” on page 27 or “Selecting Ringer Types for Messages” on page 27.To assign a downloaded ringer from the Downloads menu:1. Press for Main Menu.2. Press for Downloads.3. Highlight Ringers and press .4. Highlight a ringer and press to play the ringer. (Select Stop (left softkey) to stop the playback.)5. Select Assign (right softkey) and select the call type for which you would like to assign the ringer: Caller ID, No Caller ID, or Roaming.Note: You may assign a ringer to more than one type of call.Purchasing RingersYou can purchase ringers directly from your phone by following the instructions on page xx or through www.sprintpcs.com.Note: Your personal vault saves items for up to 90 days. Once an item has been downloaded to your phone, you may keep the file for as long as you like.](https://usermanual.wiki/Samsung-Electronics-Co/SPHA660.Users-Manual/User-Guide-348265-Page-70.png)
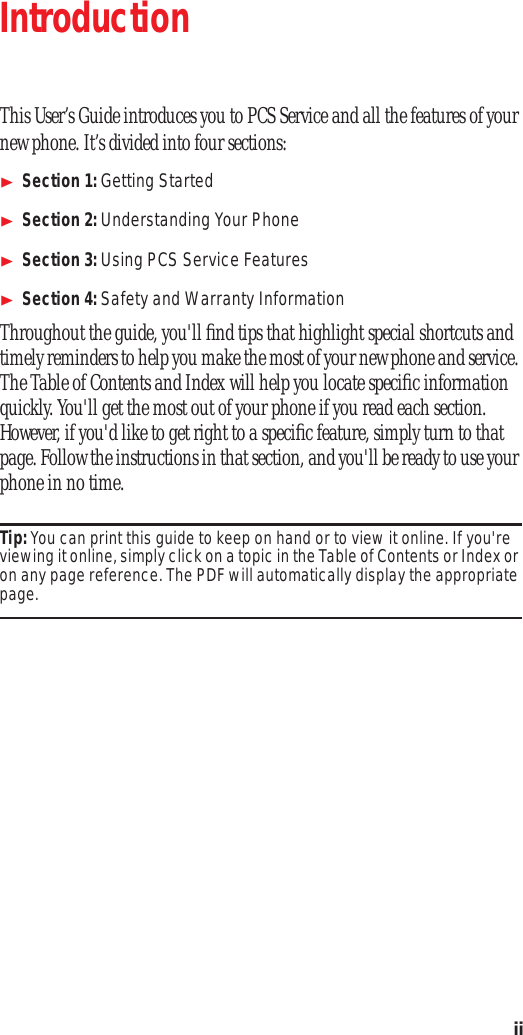
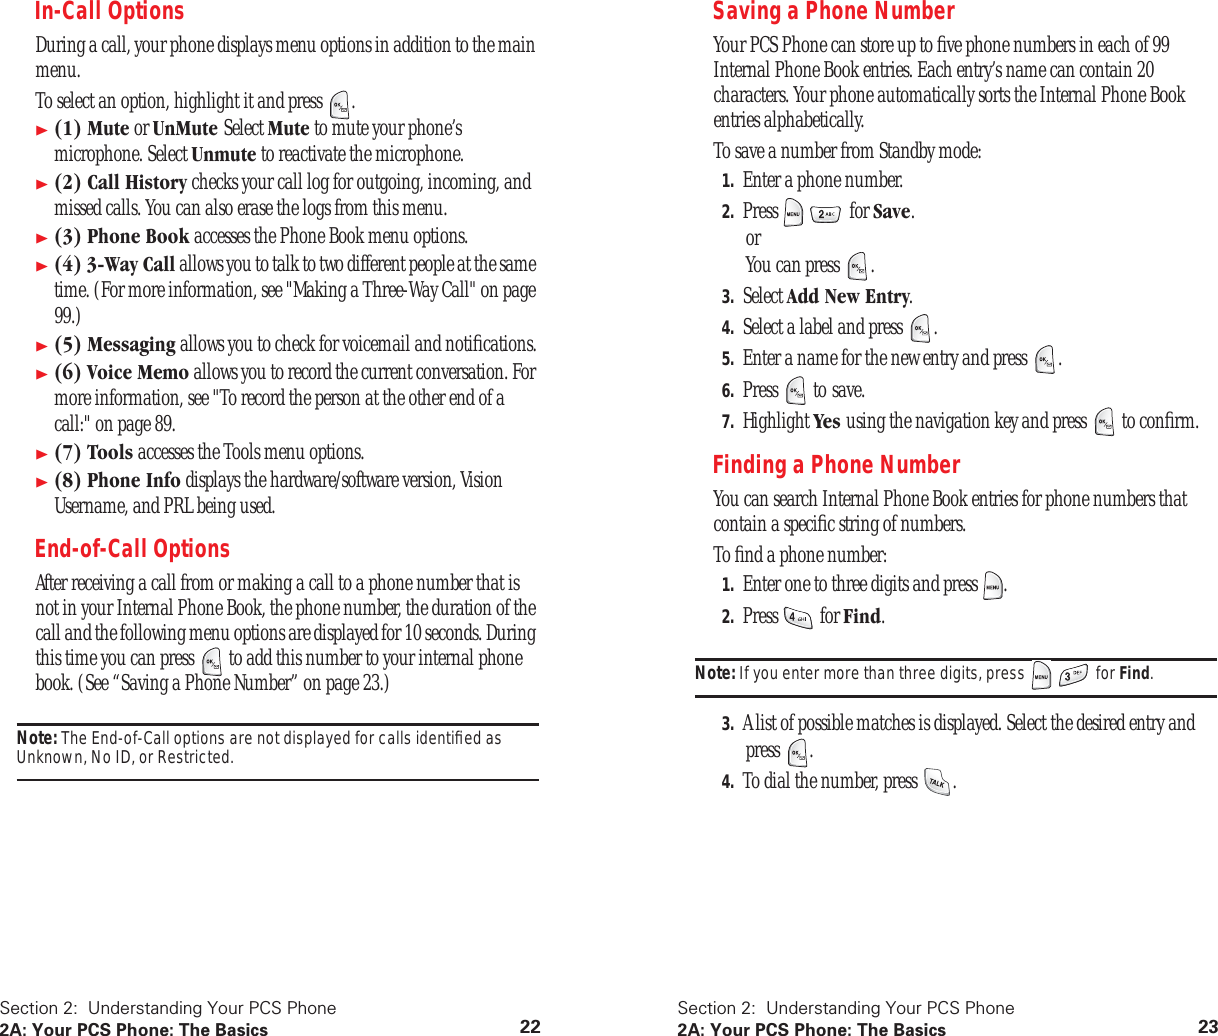
![Section 4: Safety Guidelines and Warranty Information4A: Safety 138Specific Absorption Rates (SAR) for Wireless PhonesThe SAR is a value that corresponds to the relative amount of RF energy absorbed in the head of a user of a wireless handset.The SAR value of a phone is the result of an extensive testing, measuring and calculation process. It does not represent how much RF the phone emits. All phone models are tested at their highest value in strict laboratory settings. But when in operation, the SAR of a phone can be substantially less than the level reported to the FCC. This is because of a variety of factors including its proximity to a base station antenna, phone design and other factors. What is important to remember is that each phone meets strict federal guidelines. Variations in SARs do not represent a variation in safety.All phones must meet the federal standard, which incorporates a substantial margin of safety. As stated above, variations in SAR values between different model phones do not mean variations in safety. SAR values at or below the federal standard of 1.6 W/kg are considered safe for use by the public.The highest reported SAR values of the [SPH-A660] are:AMPS mode (Part 22) - Head: 1.32 W/kg; Body-worn: 0.55 W/kgPCS mode (Part 24) - Head: 0.74 W/kg; Body-worn: 0.22 W/kgFCC Radiofrequency EmissionThis phone meets the FCC Radiofrequency Emission Guidelines. FCC ID number: A3LSPHA660. More information on the phone's SAR can be found from the following FCC Web site: http://www.fcc.gov/oet/fccid.Owner’s RecordThe model number, regulatory number and serial number are located on a nameplate inside the battery compartment. Record the serial number in the space provided below. This will be helpful if you need to contact us about your phone in the future.Model: PCS Phone [model xx]Serial No.:Section 4: Safety Guidelines and Warranty Information4A: Safety 139User Guide Proprietary NoticeCDMA Technology is licensed by QUALCOMM Incorporated under one or more of the following patents:4,901,307 5,109,390 5,267,262 5,416,7975,506,865 5,544,196 5,657,420 5,101,5015,267,261 5,414,796 5,504,773 5,535,2395,600,754 5,778,338 5,228,054 5,337,3385,710,784 5,056,109 5,568,483 5,659,5695,490,165 5,511,073T9 Text Input is licensed by Tegic Communications and is covered by U.S. Pat. 5,818,437, U.S. Pat. 5,953,541, U.S. Pat. 6,011,554 and other patents pending.](https://usermanual.wiki/Samsung-Electronics-Co/SPHA660.Users-Manual/User-Guide-348265-Page-82.png)