Samsung Electronics Co SPHL900 Cellular/ PCS CDMA/ GSM/ EDGE/ WCDMA Phone with LTE, WLAN, Bluetooth and RFID User Manual SPH L900 UG LEL LH 0915 F7
Samsung Electronics Co Ltd Cellular/ PCS CDMA/ GSM/ EDGE/ WCDMA Phone with LTE, WLAN, Bluetooth and RFID SPH L900 UG LEL LH 0915 F7
Users Manual

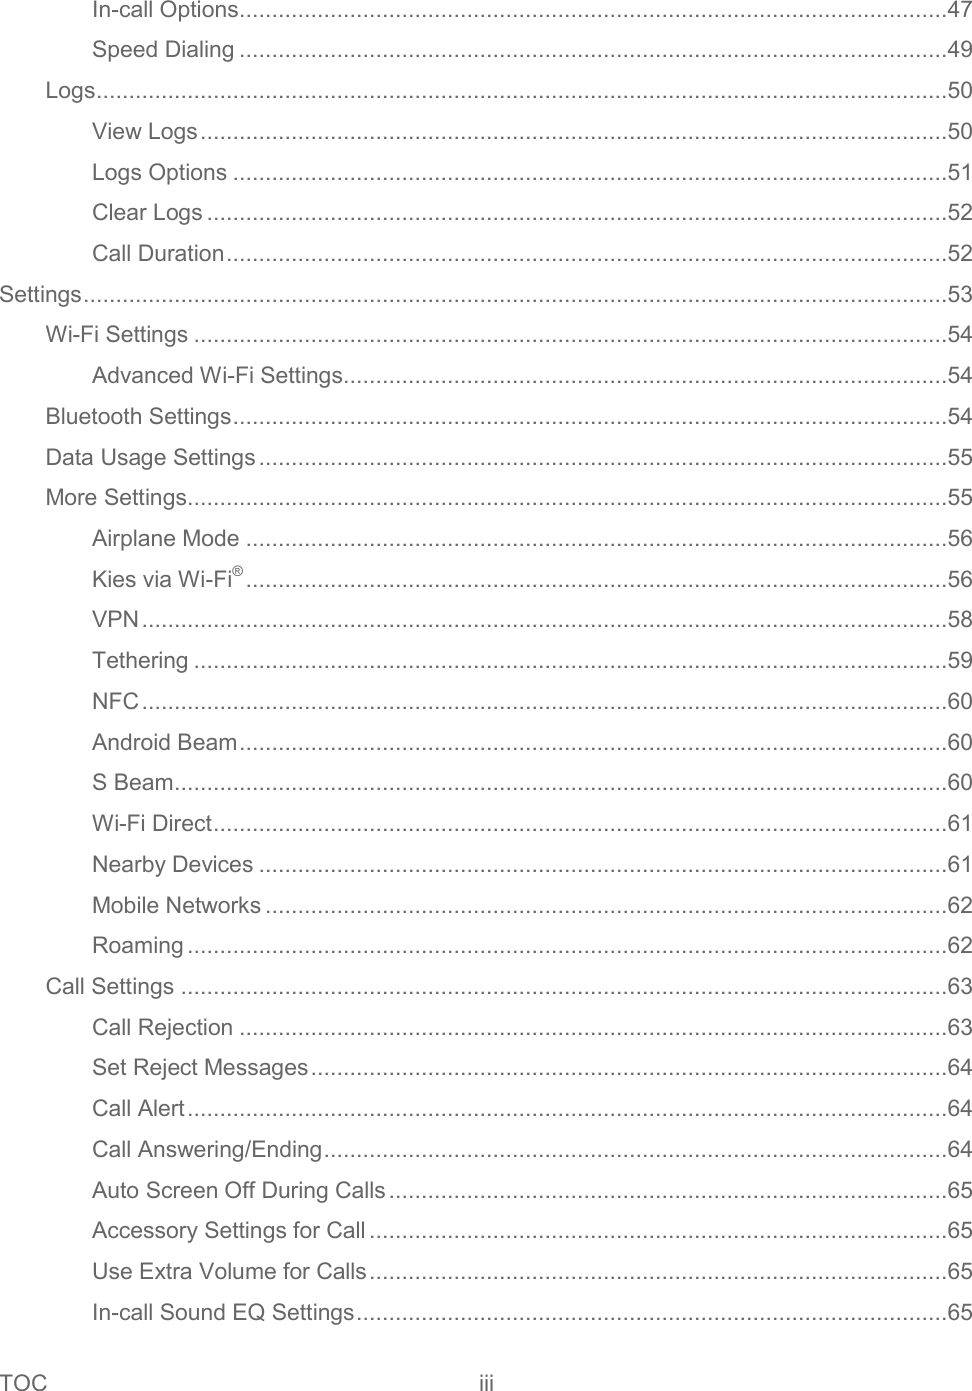

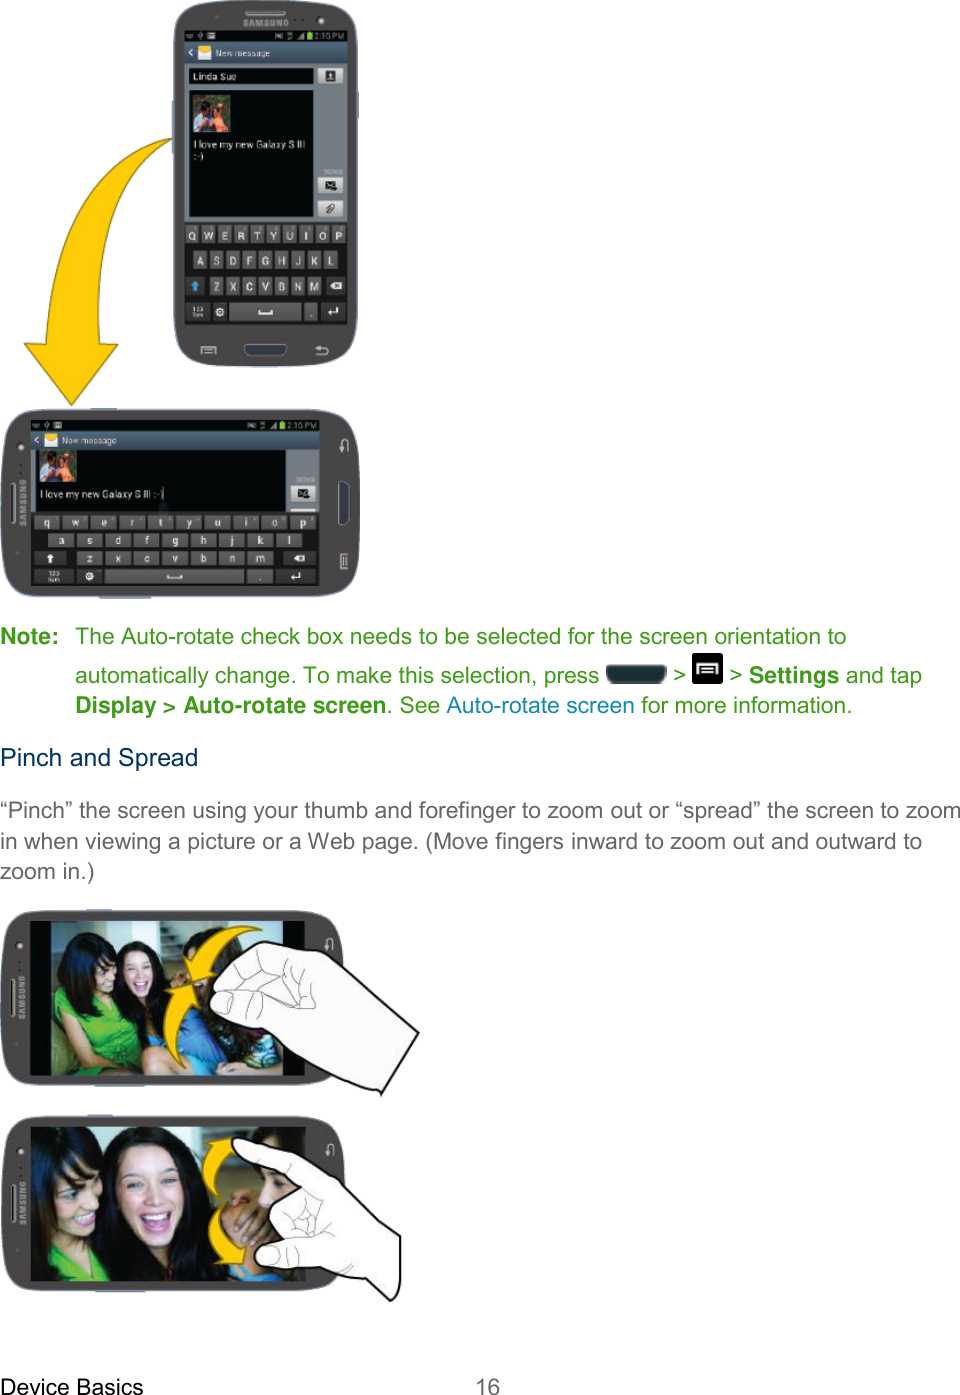


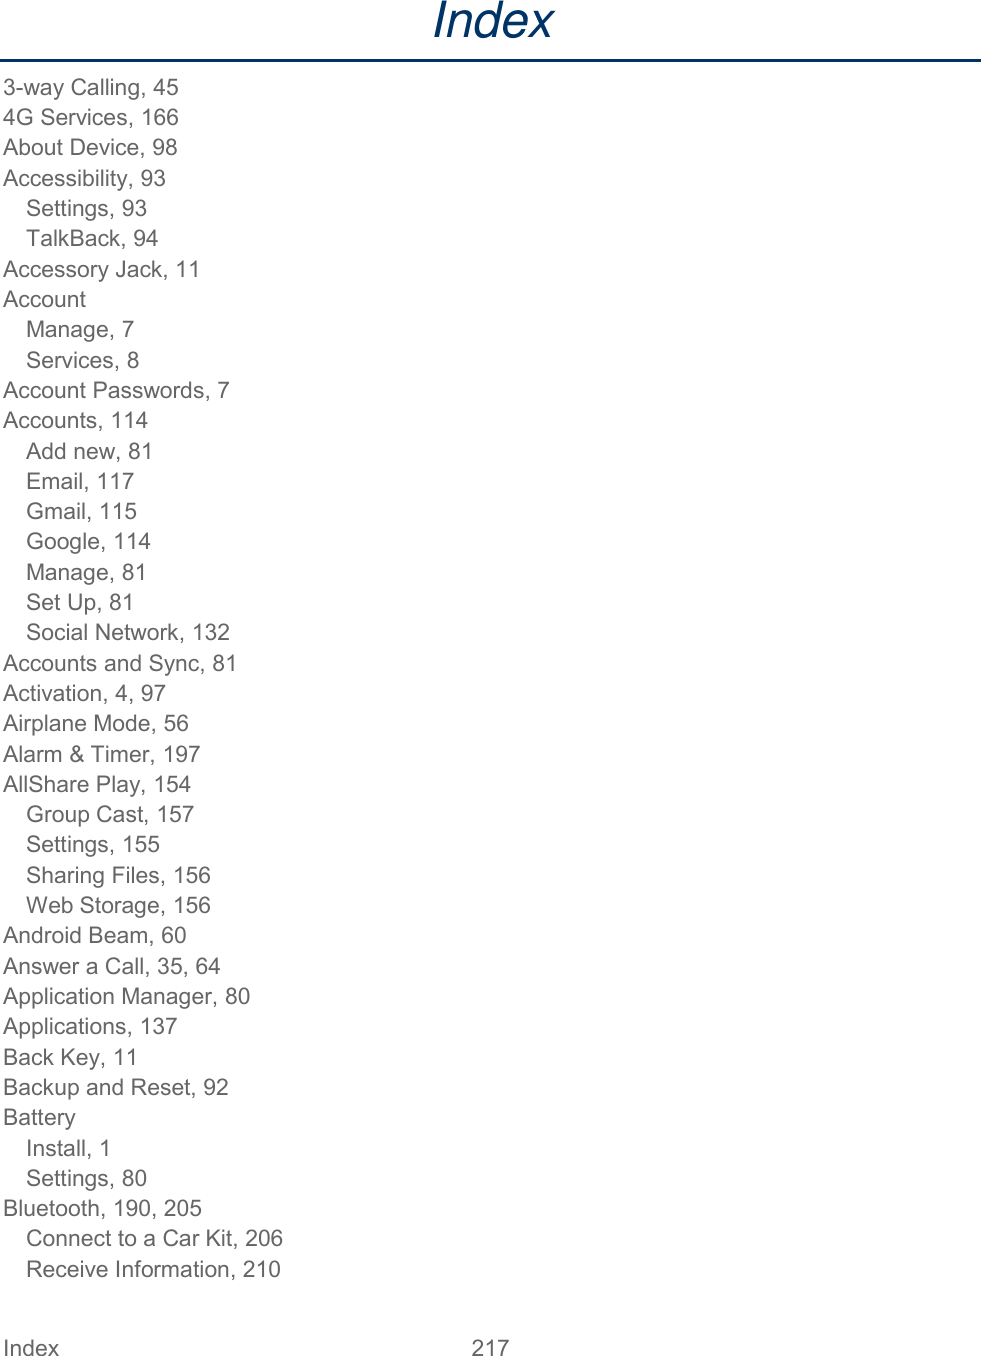
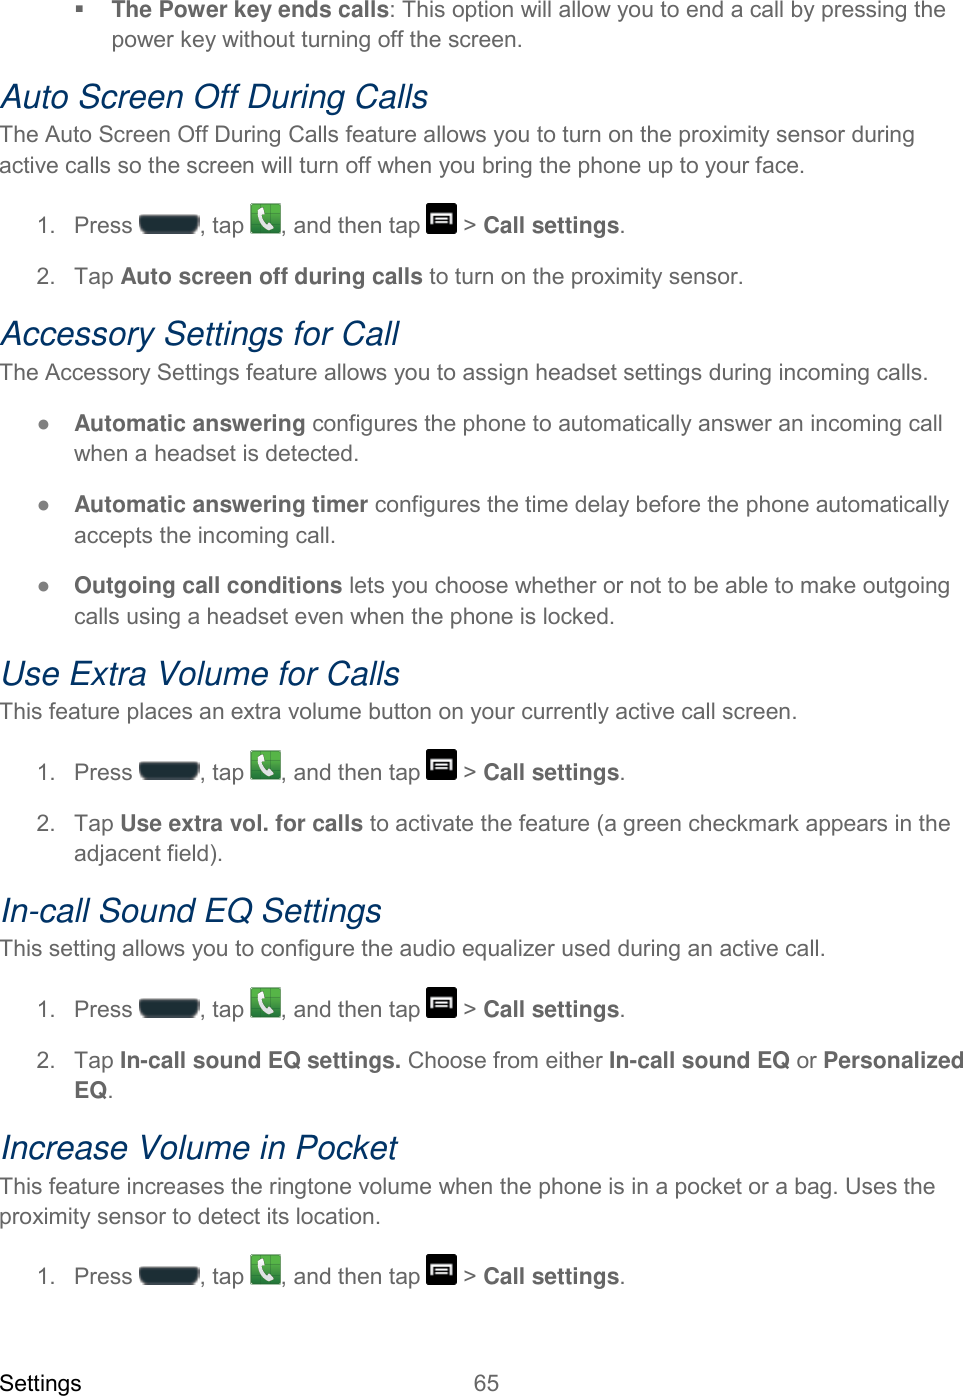
![Device Basics 26 - or - Tap to cycle through additional pages. The first number on this key indicates which page (1, 2, or 3) of additional characters is active. Text Entry Options You can set your phone's text entry options through the main settings menu or through the options menu on your keyboard display. 1. Press and tap > Settings > Language and input > (adjacent to the Samsung keyboard field) - or - From within an active text entry screen, tap from the bottom of the screen to reveal the Samsung keyboard settings screen. 2. Set any of the following options: Portrait keyboard types allows you to choose a keyboard configuration (Qwerty [default] or 3x4 keyboard). Input language sets the input language. Tap a language from the available list. The keyboard is updated to the selected language. Predictive text enables predictive text entry mode. This must be enabled to gain access to the advanced settings. Tap the ON/OFF slider to turn Predictive text on, and then tap Predictive text to access the advanced settings T9 Trace allows you to type words by swiping or tracing between onscreen keys. Handwriting enables the phone to recognize onscreen handwriting and convert it to text. Voice input activates the Voice input feature. This feature uses Google’s networked speech recognition application to convert voice input to text. Auto capitalization automatically capitalizes the first letter of the first word in each sentence (standard English style). Auto-punctuate automatically inserts a period at the end of a sentence when you tap the space bar twice while using the onscreen QWERTY keyboard. Character preview provides an automatic preview of the current character selection within the text string. This is helpful when multiple characters are available within one key.](https://usermanual.wiki/Samsung-Electronics-Co/SPHL900/User-Guide-1793466-Page-39.png)
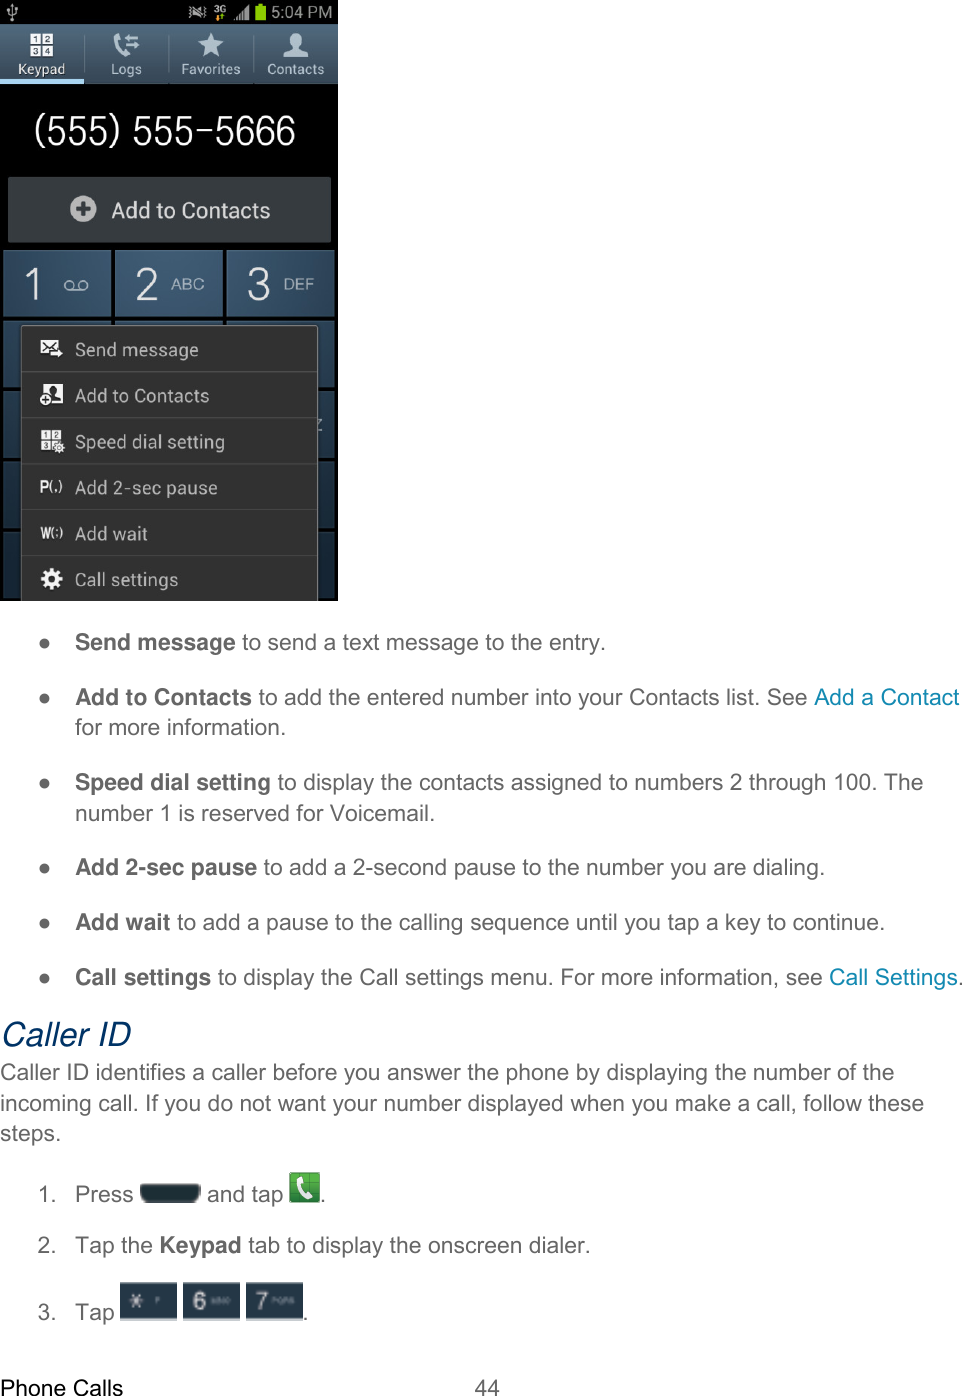
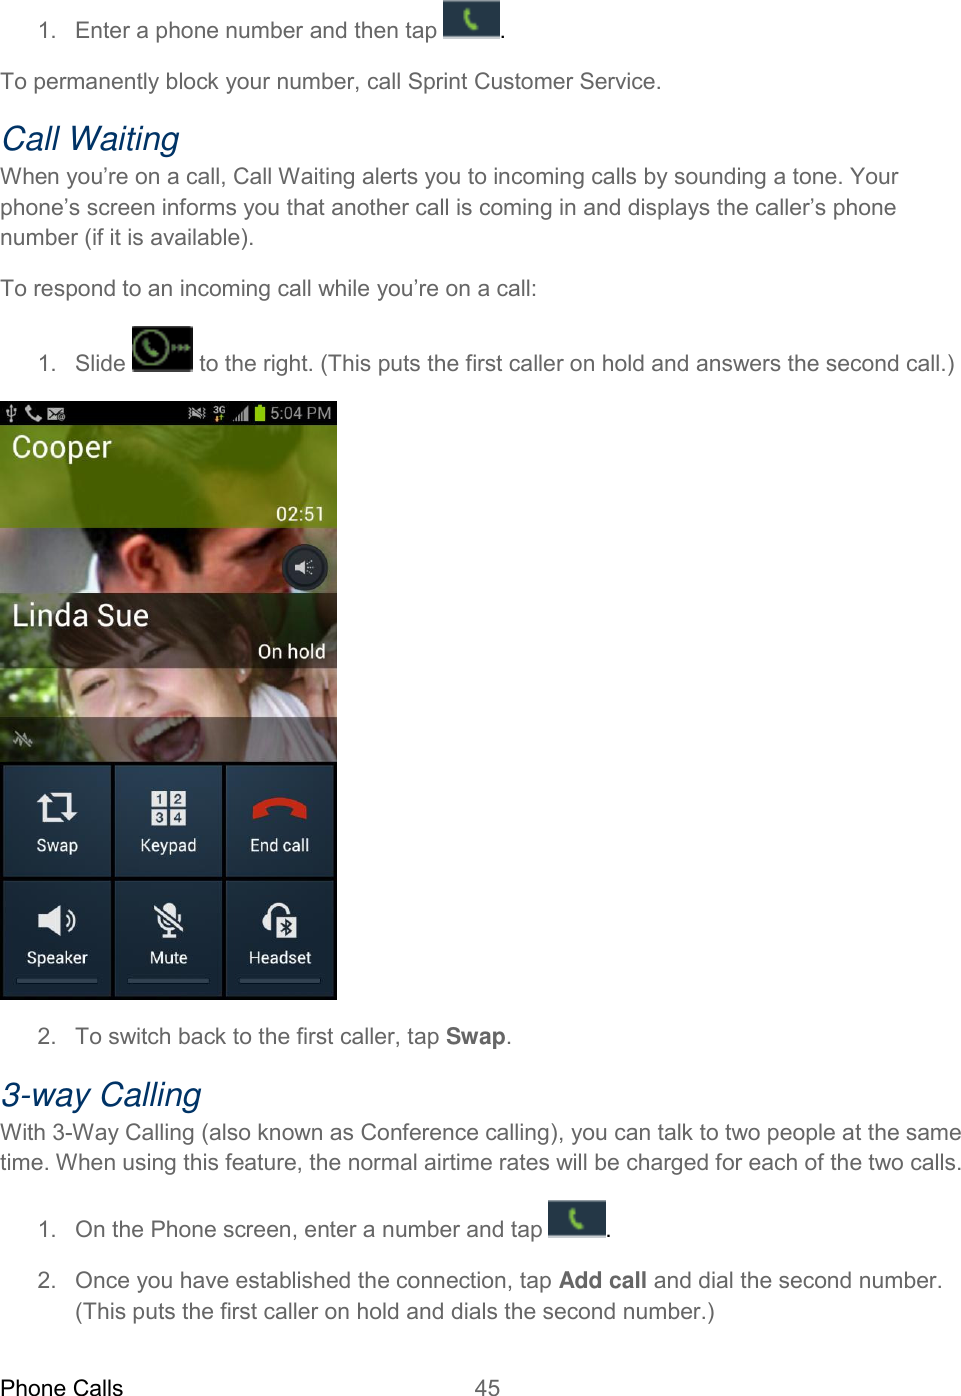

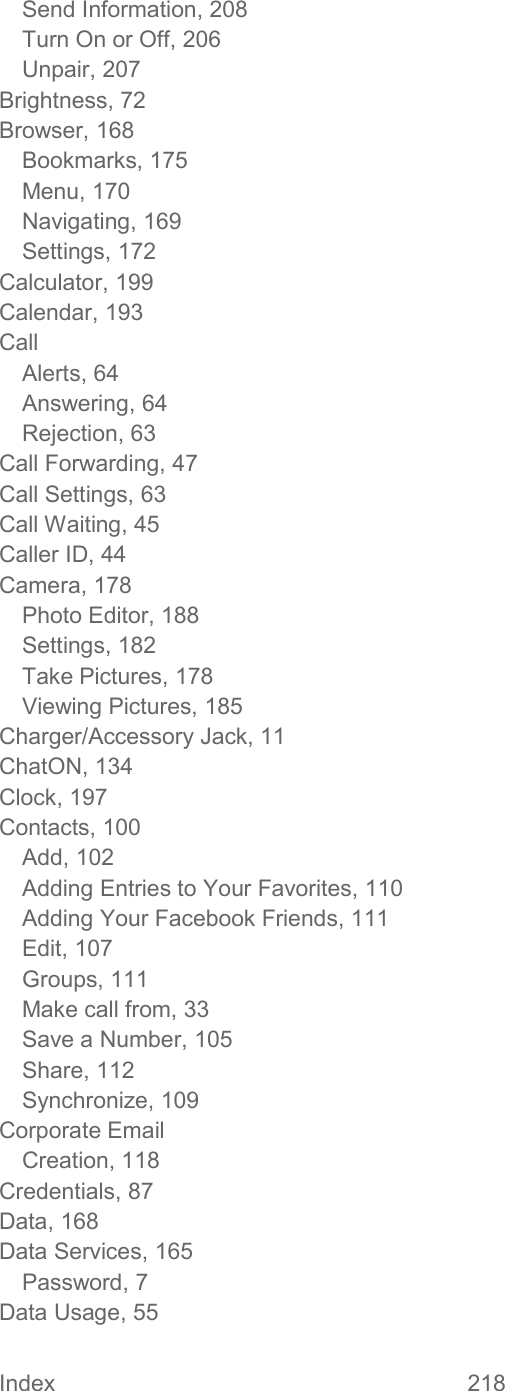
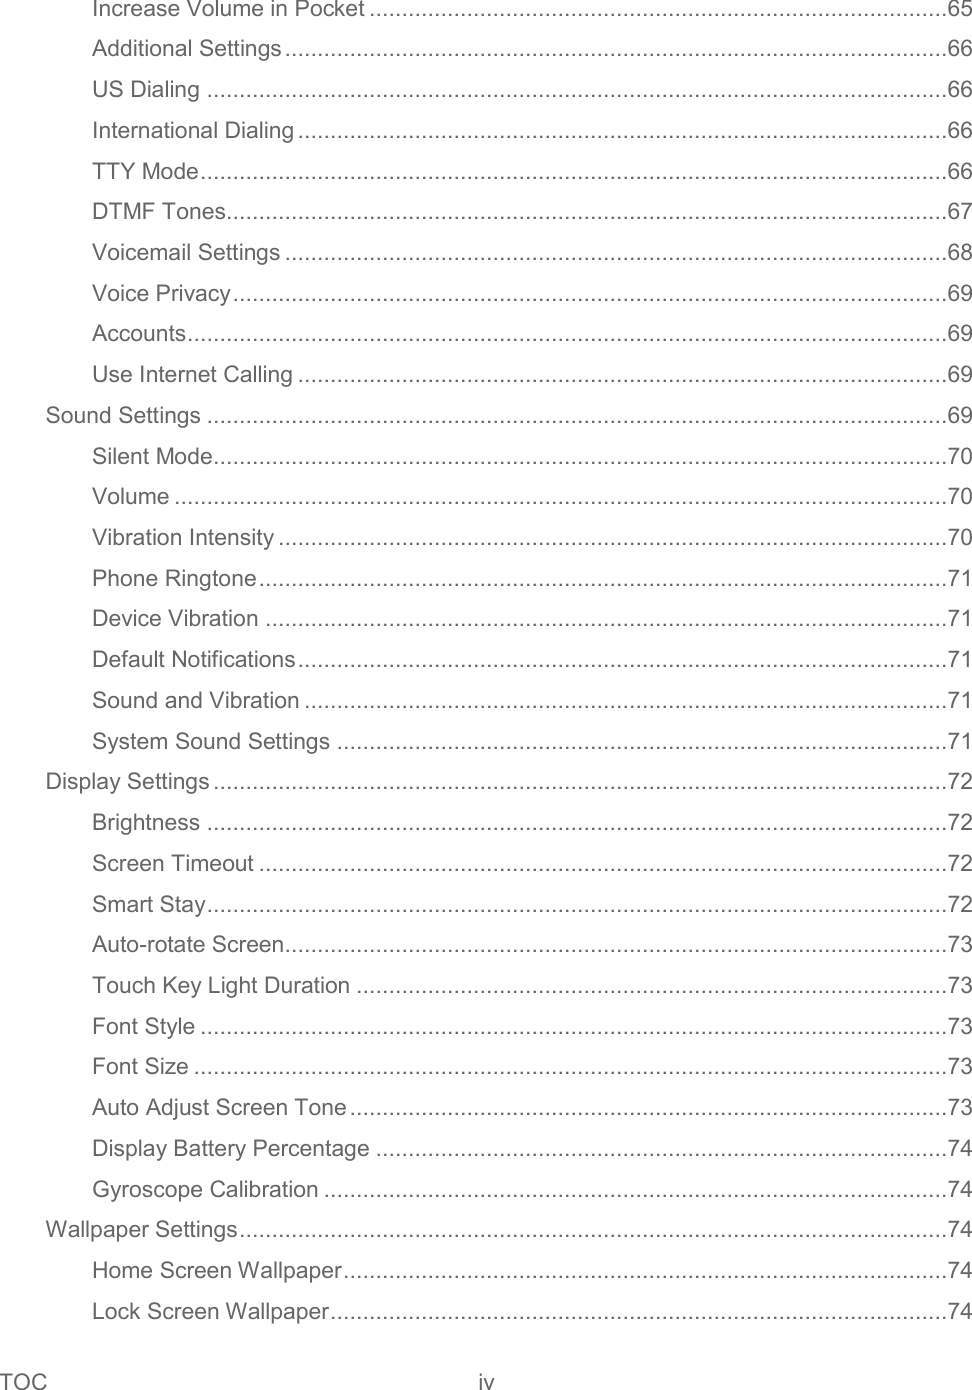
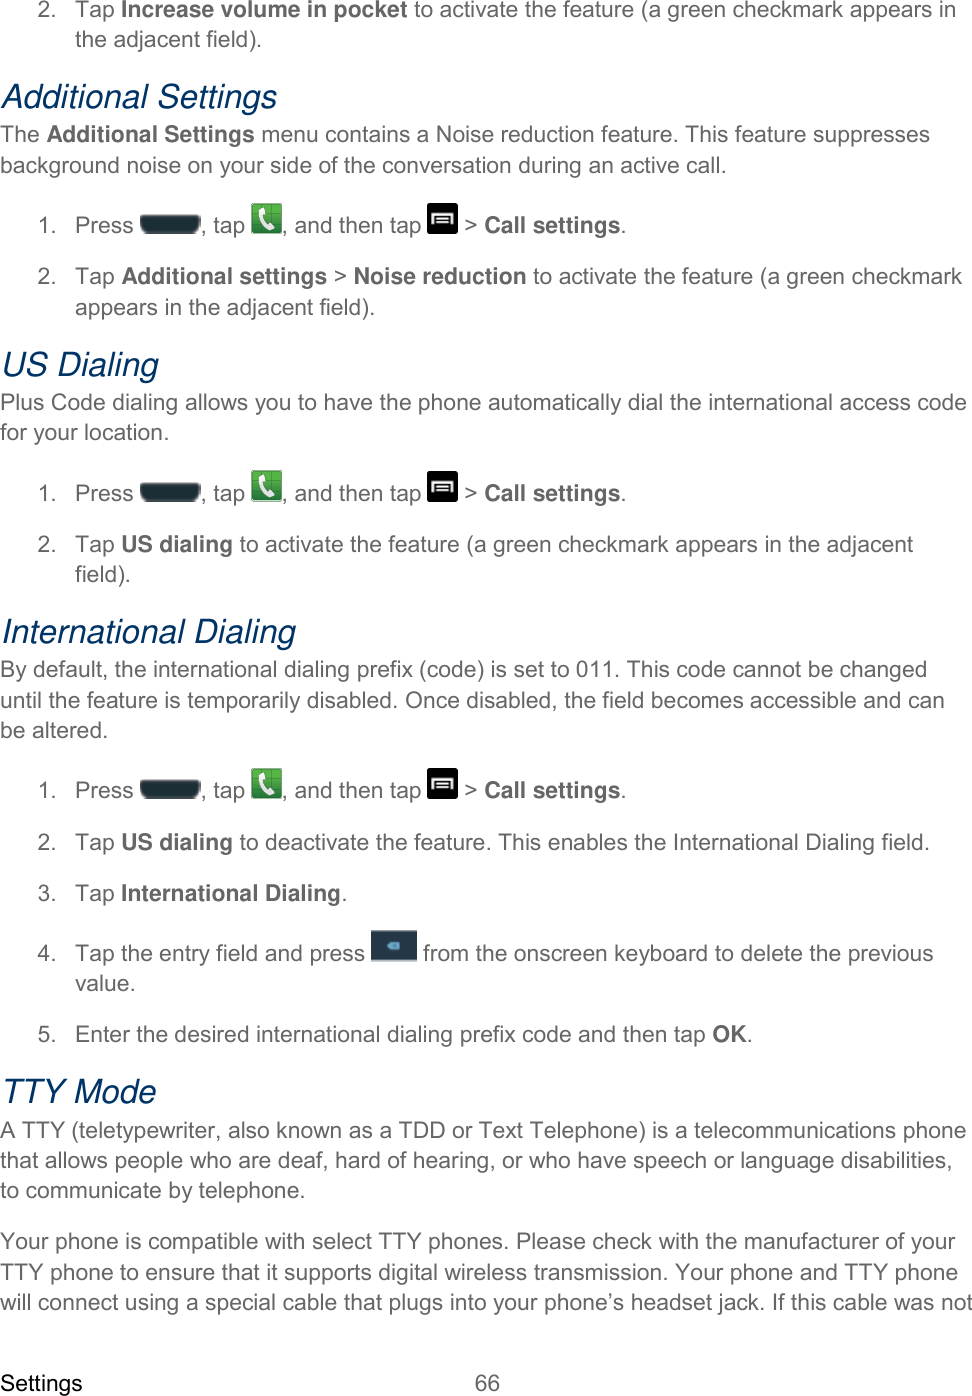
![Phone Calls 51 To change the Logs view, tap > View by. Tap All calls, Missed calls, Dialed calls, Received calls, or Rejected calls to filter the list. Logs Options The following procedures will guide you through accessing and understanding your call log options. ● To make a call from Logs, see Call from Logs. For additional options: 1. Press and tap . 2. Tap the Logs tab to display the Logs list. 3. Touch and hold a listing to display the options list. Call [number] Send message Edit number before call Send number Add to Contacts/View contact](https://usermanual.wiki/Samsung-Electronics-Co/SPHL900/User-Guide-1793466-Page-64.png)
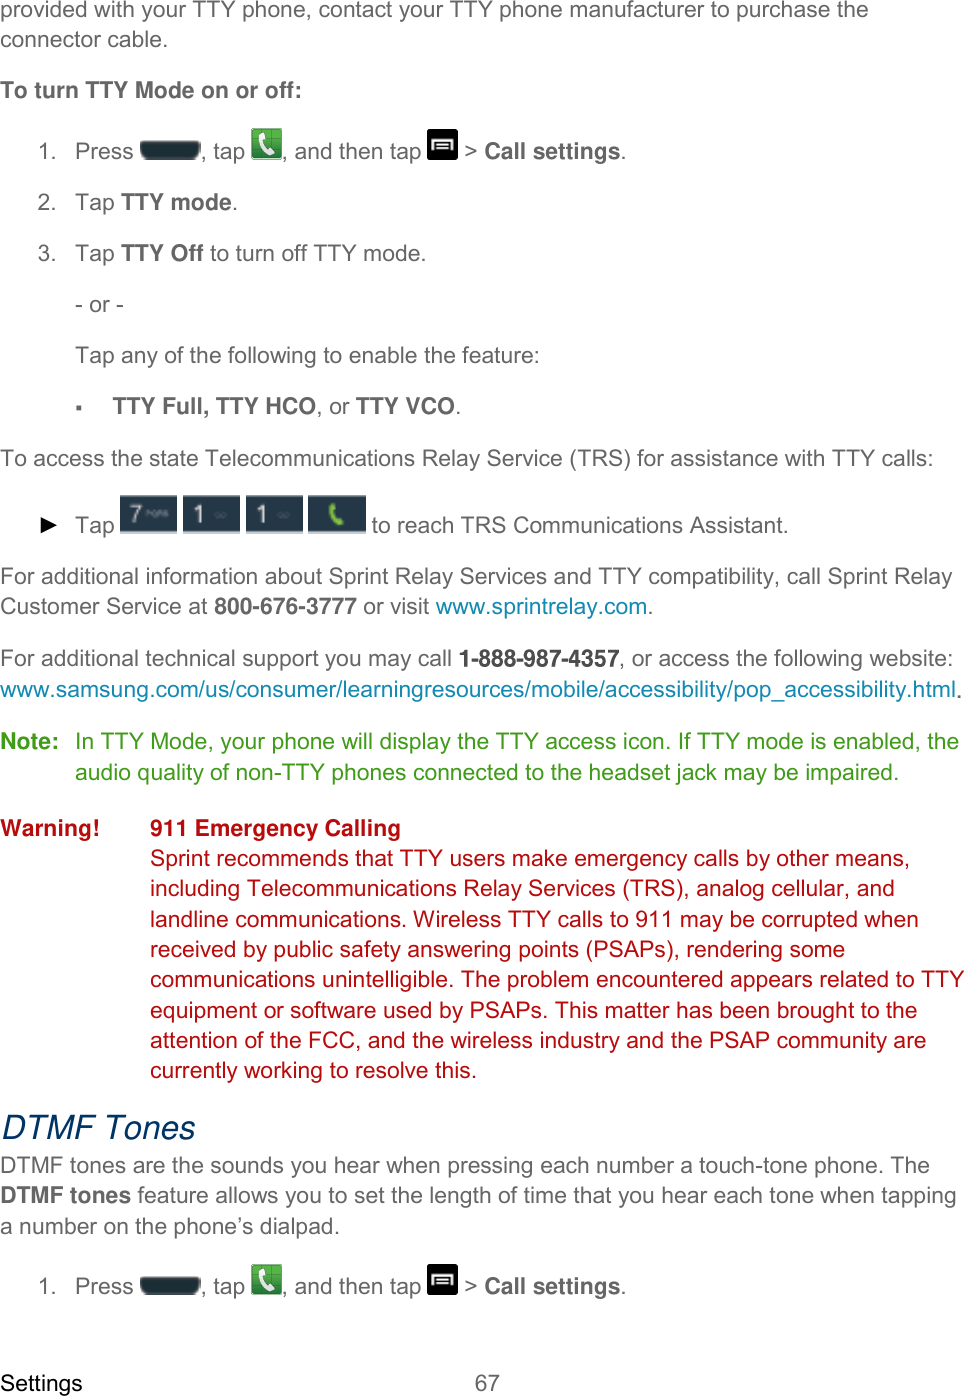

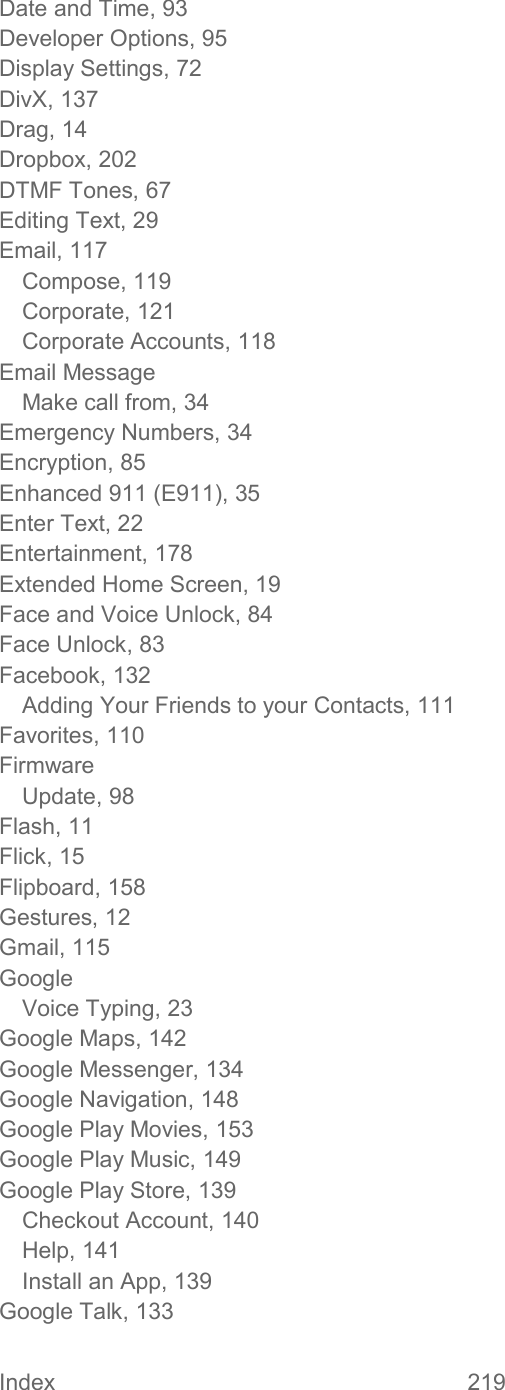
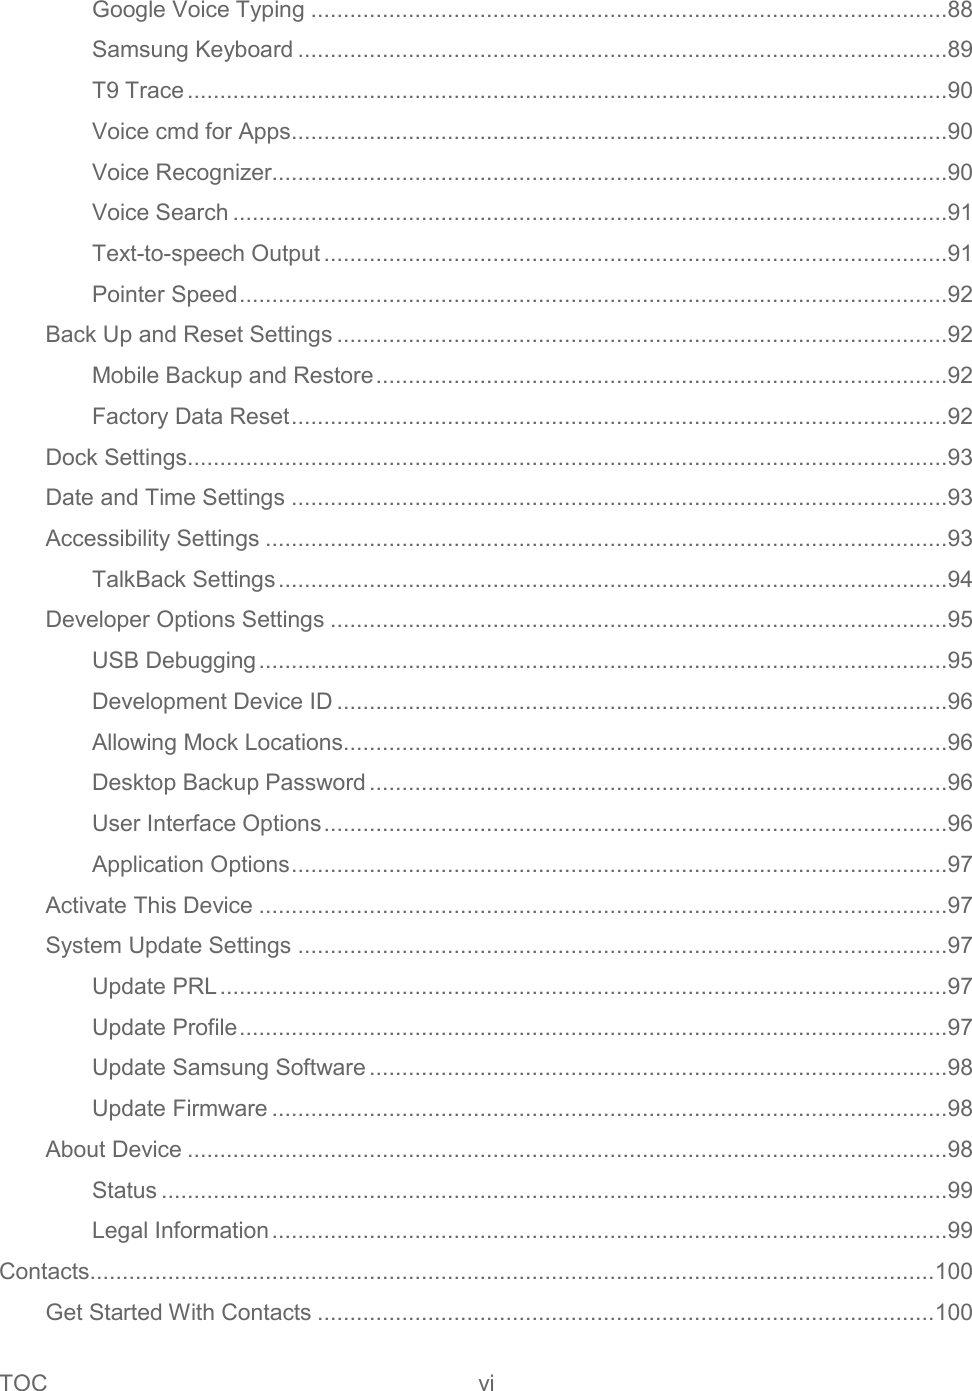
![Contacts 108 4. Tap an onscreen image to prepare it for use. 5. Touch and drag along the sides of the blue border box to begin cropping the desired area, tap Done, and then tap Save to assign selected picture. Assign a New Picture to a Contact Below are procedures for adding a picture to a contact through taking a new photo. 1. Press and tap . 2. Tap a contact to display it and then tap > Edit. Tip: You can also touch and hold the contact and then tap Edit. 3. Tap or the currently assigned picture, and then tap Take picture. 4. Tap until the shutter sounds. See Take Pictures for more information. 5. Touch and drag along the sides of the blue border box to begin cropping the desired area. 6. Tap Done to assign the picture. Tap Save to save the contact. Assign a Ringtone to a Contact You can assign a special ringtone to individual contacts for more personalization. 1. Press and tap . 2. Tap a contact to display it. 3. Tap Ringtones and choose from the following: Default Ringtones • When you tap a ringtone, you will hear a sample. Go to My Files • You can assign a ringtone from your music library by selecting Go to My Files > [music folder]. 4. Tap OK to assign the ringtone.](https://usermanual.wiki/Samsung-Electronics-Co/SPHL900/User-Guide-1793466-Page-121.png)


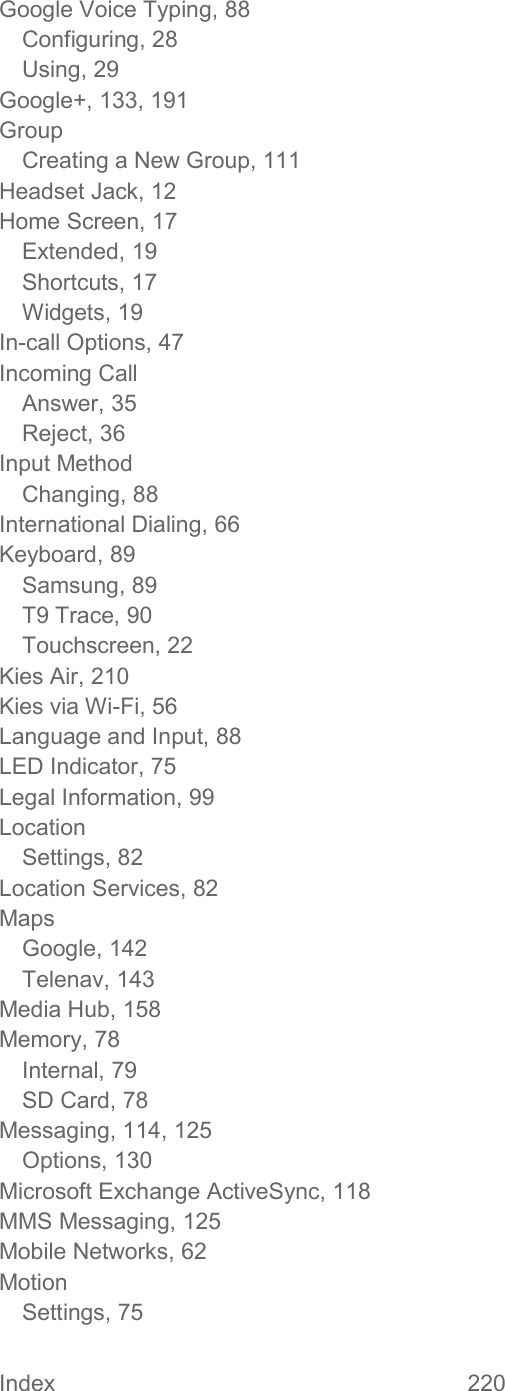
![Web and Data 138 If you try to play DivX VOD content not authorized for your device, the message "Authorization Error" will be displayed and your content will not play.] Learn more at www.divx.com/vod. Important! DivX VOD content is protected by a DivX DRM (Digital Rights Management) system that restricts playback to only registered DivX Certified devices. Locating Your VOD Registration Number Follow these procedures to locate your VOD registration number. 1. Press > and tap Settings > About device > Legal information > License settings > DivX® VOD > Register. 2. Write down your Registration code. 3. Tap OK. Register Your DivX Device for VOD Playback of Purchased Movies To play purchased DivX movies on your Samsung Galaxy NOTE II phone, you will first need to complete a one-time registration using both your phone and your computer. 1. Write down the DivX registration code that appears onscreen. Copy this 8 or 10-digit number down. 2. Verify you have the latest DivX software running on your computer. Download the free player (for your computer) from www.divx.com/. 3. Open the DivX Player on your computer and from within the VOD menu and tap Register a DivX Certified Device... You are prompted to log in or create a DivX account if your account information has not already been saved in DivX Player. 4. Follow the instructions in DivX Player to enter the registration code from step 2 and create a phone nickname (for example, "Kate”). 5. Choose a location on your computer to download the DivX registration video with the same title as your phone nickname (for example, Kate.divx). 6. Follow the onscreen instructions to download the file and initiate the transfer process. 7. Connect your Samsung Galaxy NOTE II to the computer via USB and transfer this video. 8. From the Registration screen (Transfer), select USB (the phone) as the target destination for the registration video (created in step 6) and tap Start. 9. Press > and tap (My files).](https://usermanual.wiki/Samsung-Electronics-Co/SPHL900/User-Guide-1793466-Page-151.png)


![Web and Data 177 1. Press and tap > > Configure. 2. Configure the Router name (SSID), device visibility (Hide my device), Security [Open, WPA PSK, or WPA2 PSK], Password, password visibility (Show password), and advanced options (including Broadcast channel and Maximum connections). 3. Tap Save to store the new hotspot settings.](https://usermanual.wiki/Samsung-Electronics-Co/SPHL900/User-Guide-1793466-Page-190.png)


![Tools and Calendar 194 2. Double-tap a day to which you would like to add an event to reveal the Add event/Add task screen. 3. Assign the new calendar event to a current account by tapping the Calendar field and then selecting an account. For this example we are choosing a Corporate account. My calendars are calendar entries that are stored locally on the phone and not part of an email account. Google/Gmail are calendar entries that are synchronized between your phone and your online Google account. Corporate are calendar entries that are synchronized between your phone and either an Exchange Server or available from within Microsoft® Outlook®. Note: Some of the previous options appear when compatible email accounts (such as Outlook) have been created and synced. 4. Tap the Tap to enter title field and enter a title for the event. 5. Select a From/To time for the event by tapping the corresponding fields, and adjusting the month, day, and year. Tap Set when finished. 6. Select a time for the event by tapping the time field and then adjusting the hour and minute. Tap the AM or PM column to change the value. Tap Set when finished. 7. Select a Time zone. 8. Tap the All day field to assign this as an all day event. If assigned as an all day event, the time fields are removed as options. 9. Select a recurrence cycle for the event by tapping the Repeat field. One-time event, Daily, Every weekday (Mon~Fri), Weekly (every [day]), Monthly (every [number] [day]), Monthly (on day [number]), or Yearly (on [month] [day]). 10. Enter a location for the event in the Location field or tap to select the location on the a map. 11. Enter a description for the event in the Description field. 12. Select an alarm time by tapping the Reminders field. Select an interval or tap Customize to enter your own reminder time.](https://usermanual.wiki/Samsung-Electronics-Co/SPHL900/User-Guide-1793466-Page-207.png)

![Tools and Calendar 209 Photos and videos (in Gallery). On the Albums tab, tap an album, and then tap > Bluetooth. Tip: If your phone remembers Bluetooth as a previous selection within the Camera or Gallery, you can tap (to the right of the icon). Calendar event. In the Calendar’s Day view, Agenda view, or Week view, tap the event and then tap > Send via > Bluetooth. Music track. This feature is available through the Music Player. With the track displayed on the Now playing screen, tap > Share music via > Bluetooth. Voice recording. On the main Voice Recorder screen, touch and hold a recording and then tap Share > Bluetooth. 4. If you are prompted to turn on Bluetooth, tap Yes. 5. Tap the name of the receiving device. 6. If prompted, accept the connection on the receiving phone, and enter the same passcode on both your phone and the other device, or confirm the auto-generated passcode. 7. On the receiving device, accept the file. The location where the information is saved depends on the type of information and the receiving device: ● If you send a calendar event or contact, it is normally added directly to the corresponding application on the receiving device. For example, if you send a calendar event to a compatible phone, the event is shown in that phone’s calendar application. ● If you send another file type to a Windows computer, it is normally saved in the Bluetooth Exchange folder within your personal document folders. On Windows XP, the path may be: C:\Documents and Settings\[your username]\ My Documents\Bluetooth Exchange. On Windows Vista, the path may be: C:\Users\[your username]\Documents. ● If you send a file to another device, the saved location may depend on the file type. For example, if you send an image file to another wireless phone, it may be saved in a folder named “Images.”](https://usermanual.wiki/Samsung-Electronics-Co/SPHL900/User-Guide-1793466-Page-222.png)
![Tools and Calendar 211 Tip: Before beginning, it is recommended that you update the Java application running on your machine. 1. Sign onto the same Wi-Fi network from your phone and from your PC. 2. Press > and tap > (Kies Air) 3. From the Kies air homescreen, tap Start. 4. If prompted, select a network. Choose from either Wi-Fi or Portable Wi-Fi hotspot. 5. Write down the onscreen URL address. Important! Both your phone and your computer must be connected to the same Wireless Access Point (WAP). 6. From your computer, enter the URL in your Web browser. 7. If prompted, an Access Request prompt is displayed on your device. Tap Allow to permit connection between the computer and device. Note: You may be prompted to run a Java plugin for a TransferManagerApplet. Click Run. 8. Tap the Remember for today checkbox if you will be using Kies air with the same PC later. 9. From your PC, a security warning may be displayed asking if you want to run this application. Click Run to continue. 10. On your PC, the Kies air screen displays. On your phone, appears at the top of your screen. 11. Follow the onscreen instructions to view and share information between your phone and PC. 12. Click a link from the left navigation pane to access one of several device file categories such as: [Device Name] - provides an overview of all the main categories. Photos/Videos/Music Ringtones Bookmarks Messages/Call Log/Contacts File Explorer](https://usermanual.wiki/Samsung-Electronics-Co/SPHL900/User-Guide-1793466-Page-224.png)