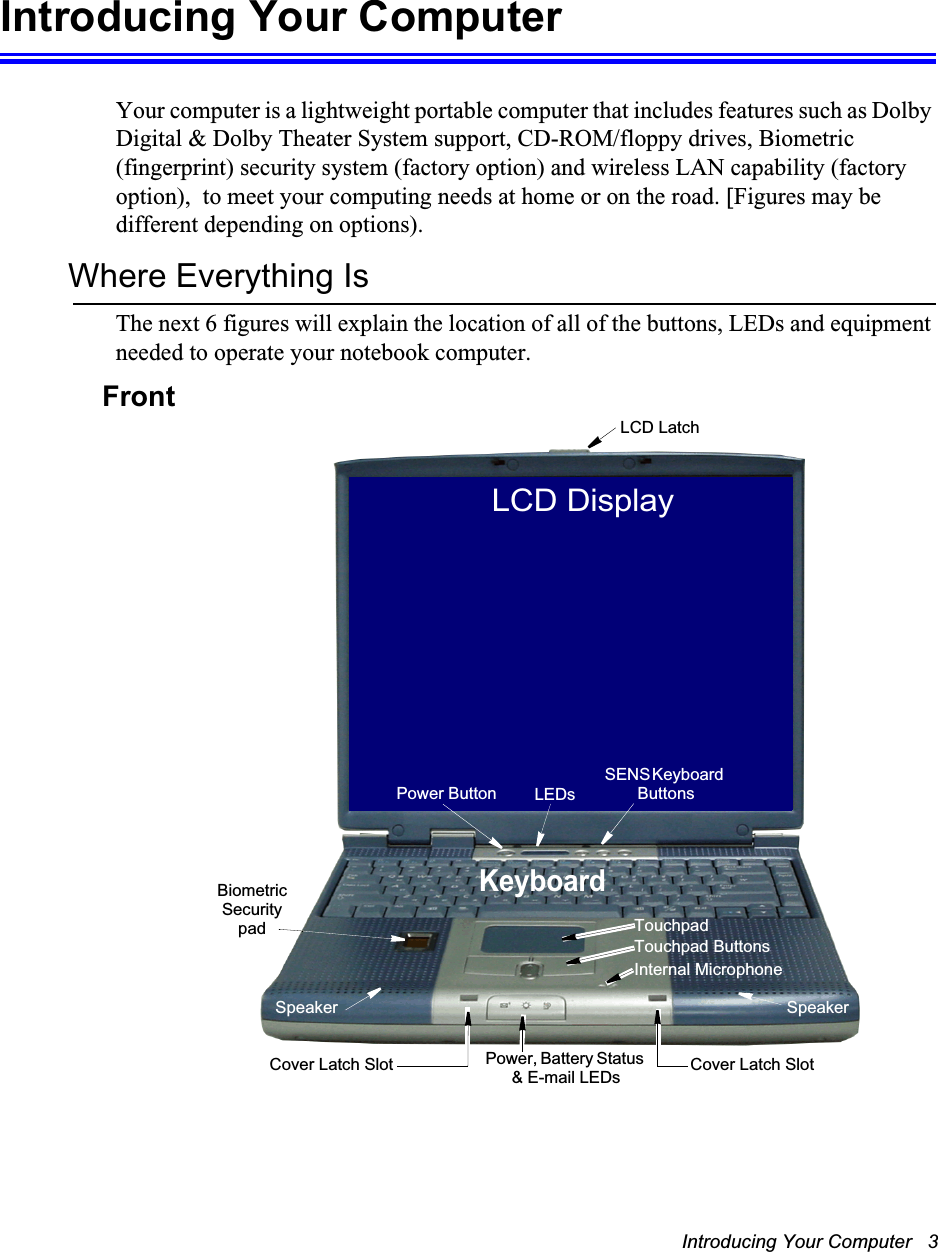
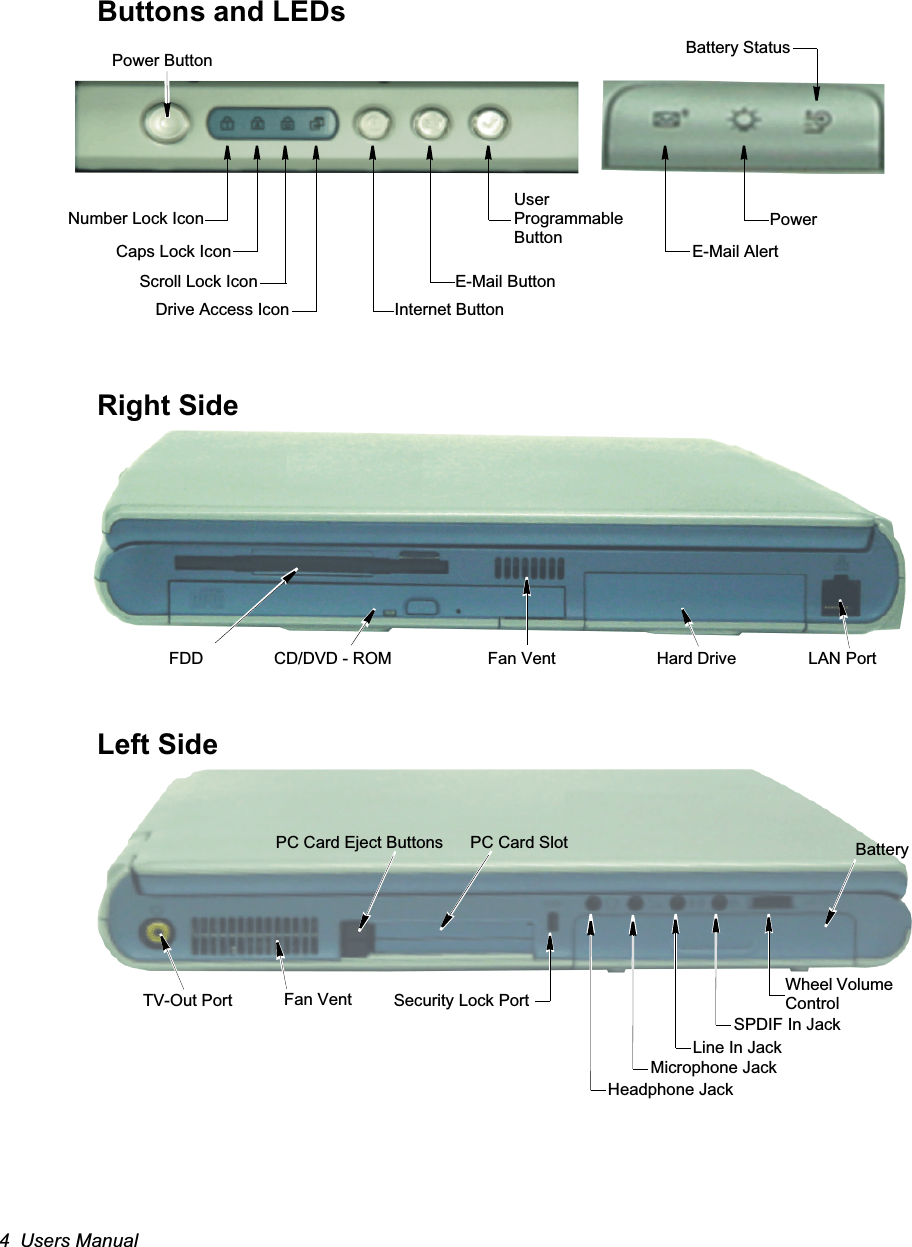
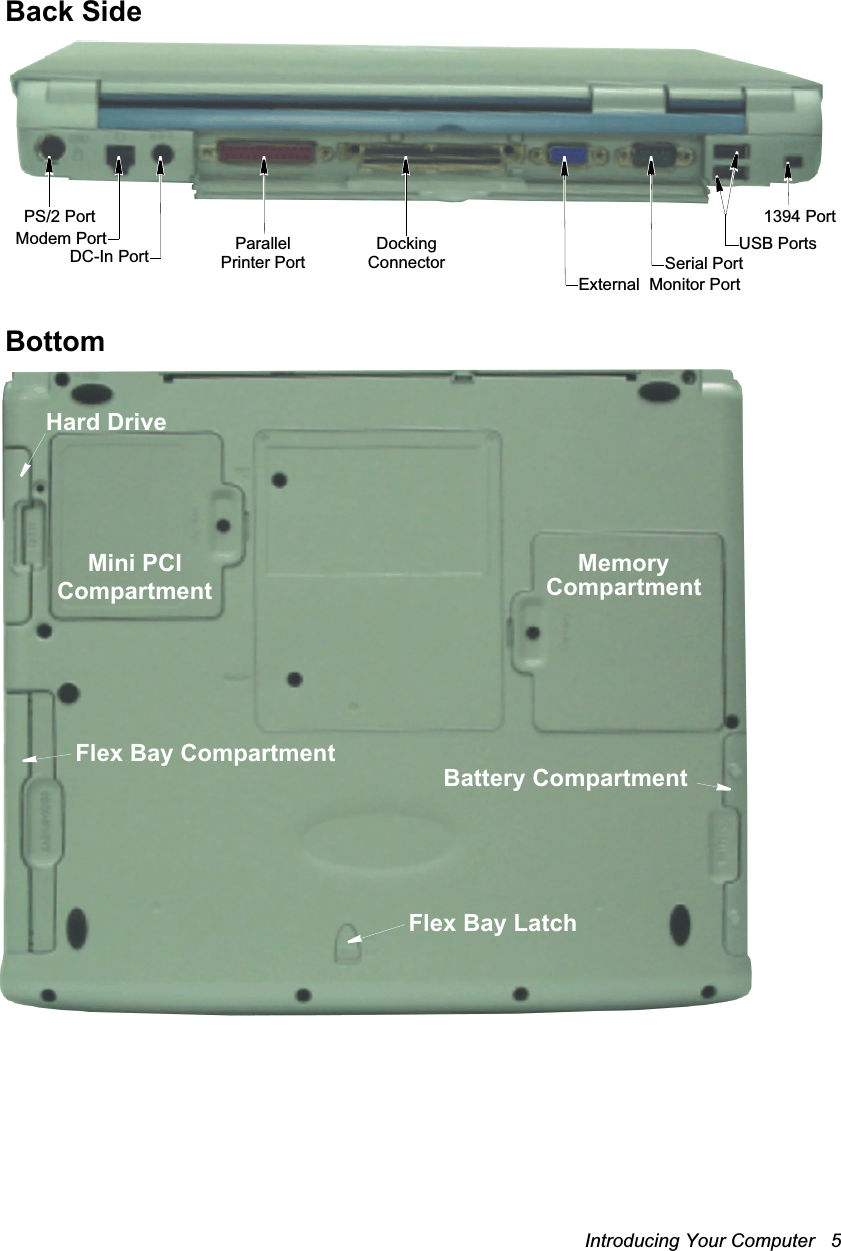
Samsung Electronics Co ST10 Notebook Computer User Manual Manual pp 1 to 44
Samsung Electronics Co Ltd Notebook Computer Manual pp 1 to 44
UserManual.wiki
>
Samsung Electronics Co
>
ST10 User Manual
>
Manual pp 1 to 44
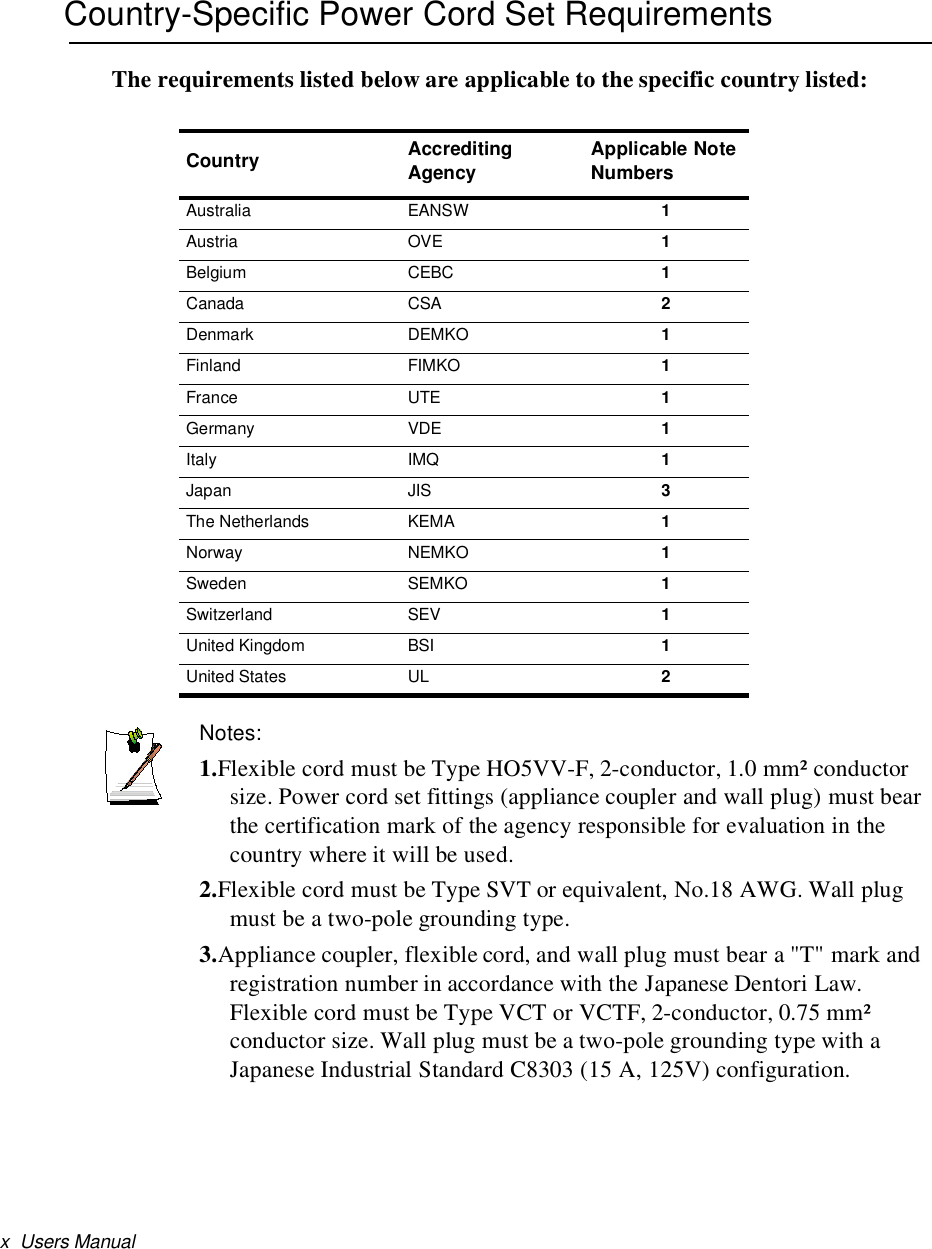
Contents
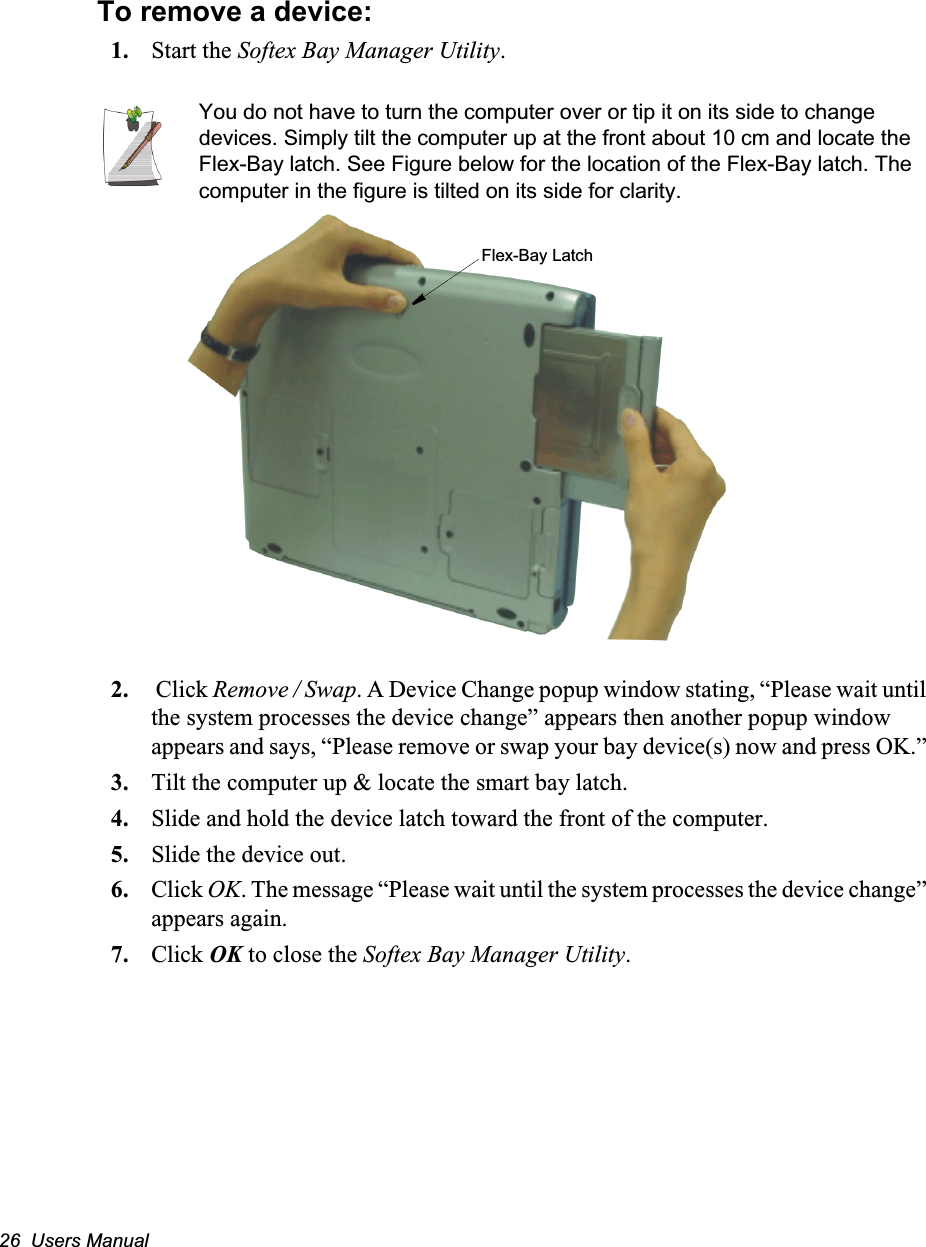
1.
Manual pp 1 to 44
2.
Manual pp 45 to 88
Manual pp 1 to 44
Navigation menu
Upload a User Manual
Namespaces
Wiki Guide
HTML
PDF
Info
Views
User Manual
Discussion / Help
Navigation


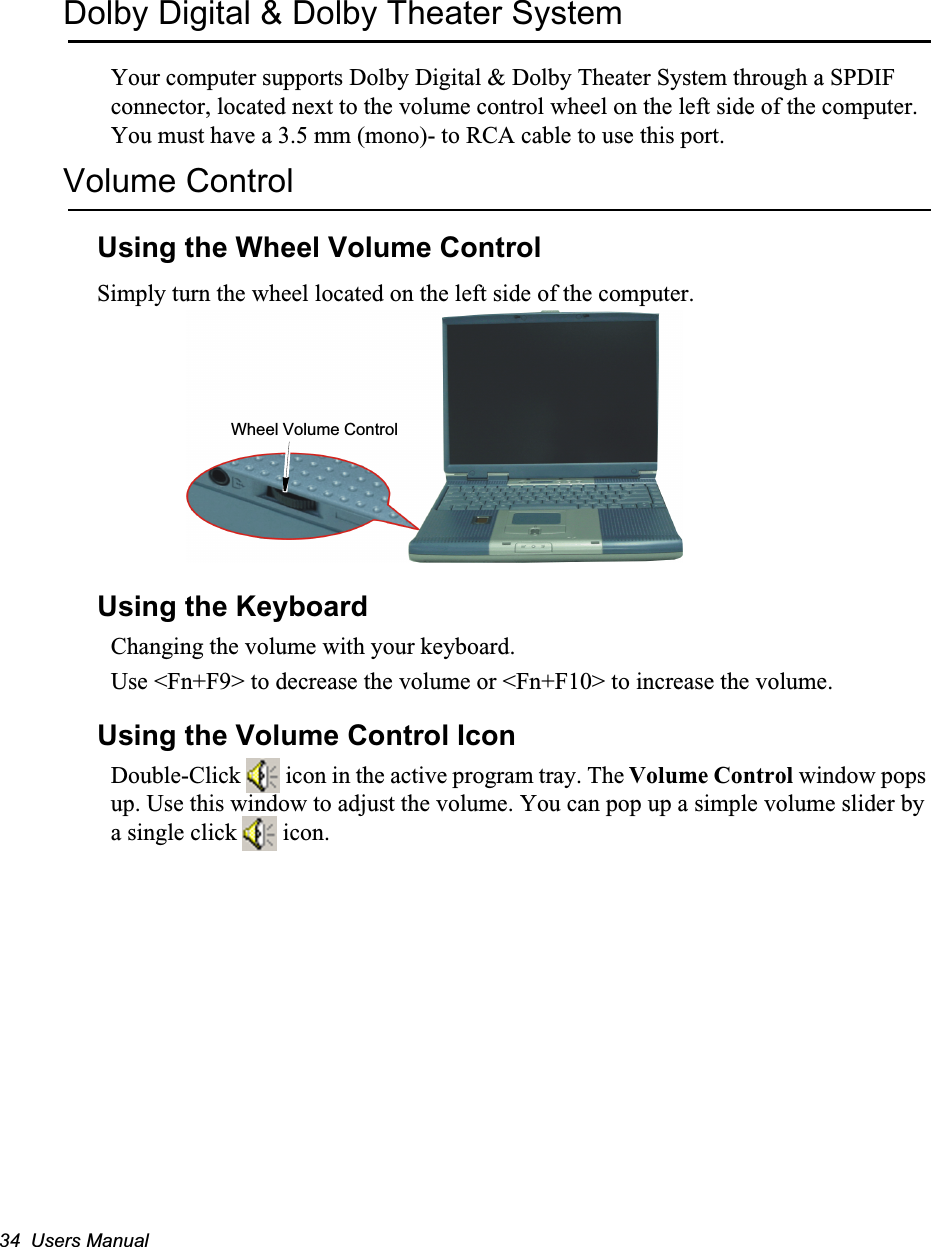
![Connecting to the Internet 21Connecting to the InternetThis section explains how to connect you to the internet. For details on how to establish the connection contact the Internet Service Provider [ISP] or system administrator [SysAdmin].Using the ModemInstall the Modem cable by simply plugging the cable into the slot in the back of the computer.1. Contact your Internet Service Provider to obtain information or CD required to make the connection in your area.2. After the cable is connected create a “Dialup” connection by clicking Start > Settings > Network and Dial-Up Connections.3. Double-Click icon to pop up the connection wizard.4. Follow the instructions in provided in the Make New Connection wizard.Modem Cable (Minimum 26 AWG)](https://usermanual.wiki/Samsung-Electronics-Co/ST10.Manual-pp-1-to-44/User-Guide-229214-Page-31.png)